
nitrojunkie
-
Posts
108 -
Joined
-
Last visited
Content Type
Profiles
Forums
Events
Gallery
Posts posted by nitrojunkie
-
-
Hey man look at like this for the questions.The only dumb or stupid question is the one you don't ask.We all have things to offer and that is why you are here to help curve the learning curve to your benefit.Ask away that why we are all here to learn and share.I make sanding blocks and buy sanding blocks.I bought a set a few years ago at a wood working shop that are shaped some have arcs cut into them giving a rounded sanding surface some are angled some have arches cut into them and they have flat surfaces too.I make em out of balsa wood,Plastic,popsicle sticks, tooth picks etc.You can get inexpensive sanding sticks at a Beauty supply shop on the fingernail isle.It can sometimes be a one stop shop.sanding stuff,Body fabricating supplies "acrylic nail tips" and paint "nail polish".
-
I built mine also.My father in law built the cabinet from some scrap Melamine so it is sealed pretty well on the sides the back is plywood that I need to spray with some white urethane to seal it up.For the fan I used a 110 volt Brushless machine cabinet fan that I got from Mouser electronics wired it up to a dimmer switch to controll the air speed and added a bright white flourecent light.Less than $150.Works pretty good.
-
Yeah an Airflow would be pretty cool.I'm hoping that if I keep watering my VW someday it might grow up and be an Airflow

-
I use automotive paints and clear mostly.But I have also used lacquer.For the ultimate shine you have to polish the finish out.I am using Meguiar's PlastX for a polishing compound right now and it is good stuff.It is made for polishing out headlamp covers on cars.I use it with Flannel from Wally World.
-
Thanks for the replies. I have heard of doing water colors made with food coloring. I just may do this as I could paint some cars and stuff for fun and practice and learn as I do. My question however on this is will the water harm the airbrush. I know this may be a silly question, but everyone recomends a inline water trap/evaporator as to not allow water into the air brush. I would assume however this would be water into the trigger area from the air flow and the water to spray with only enters the front of the gun? Thanks. Jody
The water will not hurt the airbrush it is made of brass that has been chromed as far as the outside of the body all internal parts should be raw brass.You don't want to put any fluid into the air inlet on any spray gun be it an airbrush or full size gun as it will eventually cause either corrosion or a scale may develop resulting in FOD in your finishes injected with the air supply.Basically if paint goes through it you can clean it with water or solvents depending on what you are spraying the rest needs to stay dry other than a dampened cloth wipe down of the body.Good luck with your new tool.
-
The first thing you want to do is take it apart and clean it very good.There is no telling what you may find in it left from the manufacturing process not to mention the possibility of machining fluids left in it.Then put it all back together and start practicing with some water or paint on a scrap piece of plastic .What you want to master is fluid control while maintaining air at all times.Air is controlled by pressing the trigger down fluid is controlled by pulling the trigger back.Just practice a little while and it will come to you.Then you'll wonder how you got along without it for so long.
-
What is your budget? Will you be using spray cans or an airbrush.What are you building?
-
i've been curious for awile on how you guys go about building a chassis for these 1/24 scale slots. are there sites on how to build them? and what do you use to weld a frame? never done one an i wouldn't mind trying. thanks!
Chassis are built from piano wire and brass and are usually soldered together using silver solder.You need a good hot soldering iron and liquid acid flux.For drag racing info go to DRS website. Drag Race Specialties. For road racing BSCRA should be a help.
-
I have tried close to six times to make some header collectors and I just can't get them to to the right shape around the pipes!!!!!!! Does anyone know how to do this without wanting to kill the cat or kids????? I have tried the shrinkwrap and its just not convincing enough to waste my time on, and I have seen people use metal for the collectors, but I can't seem to track them down, so I beg for your help now........ PLEASE HELP ME.
What are your headers made of?If they are solder I would try using aluminum tubing that will fit around all of the header tubes snugly. Cut the tubing to the desired length and install them on the headers.Take a small flat bladed screw driver and gently push the outer tube into the crevaces to seal them to the header tubesthis will make the collector fit the individual tubes while leaving the end that needs the flange round.The other method would involve alot of cutting sanding and soldering and you would have to use brass and then paint.
Here is a method using plastic.I found this from a search.http://www.briansmodelcars.com/tutorials/tutorial/43
-
I was there.This is a very good show.I will be back next year.Thanks to the SCMA for putting on such an enjoyable show.
-
-
Straightline modeler has some metal tips.Also do a search for Roger "Rice man" Lee. He is a fantastic metal modeler.
-
I can handle this better than I handled the SUV but then they quit being Porsches when water started flowing through their veins.This is of course my personal opinion.
-
Not to overstep any boundries but if you look close the compressor is sitting under the table.If I were to guess,the air compressor is being used as a vacuum pump also.As long as the lid id off of the chamber air will flow into the compressor as usual provided the regulator is adjusted for full flow.When you want to use it as a vacuum chamber just add the top and presto.A very good idea and can be done fairly inexpensive.
-
Make sure you don't forget the bag of lime that should accompany the body to its final resting place.
-
I know some resin kit or conversions exist, but...
a plastic Porsche 550 RS kit
a plastic Bentely Speed 8
a plastic Peugeot 908
a Pangini Zonda
I'll second this request the top 2 especially.I'd love a 550 RS and The Speed 8 and I'll add a Plastic Aston Martin Vanquish in race trim.
-
Heres Modelmaster/Jimmy Flinstones version.
-
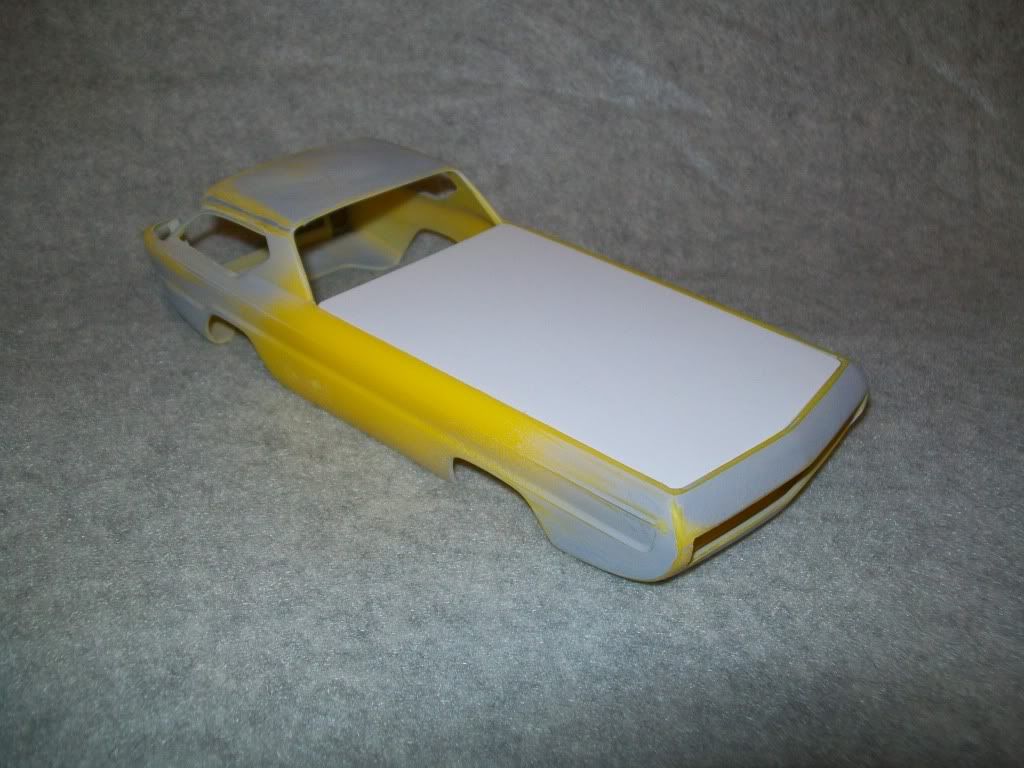
wow that yellow is BRIGHT!!!
better seal it good or it might creep back out on ya!
Yeah it is bright.I will seal it.
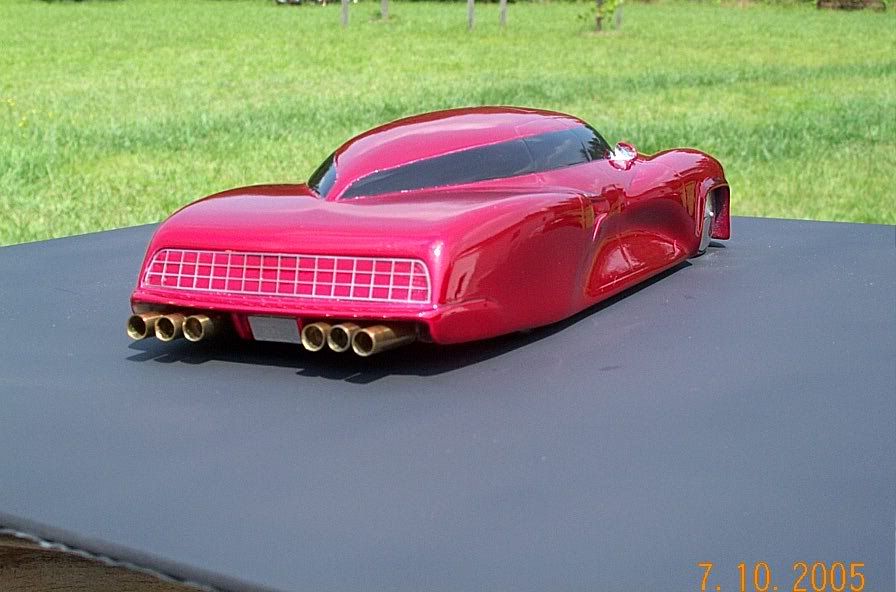
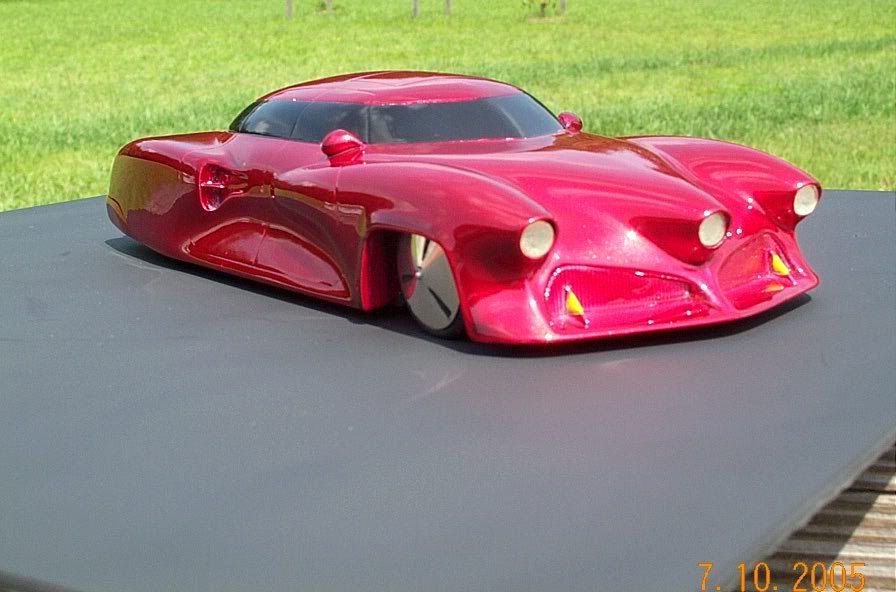
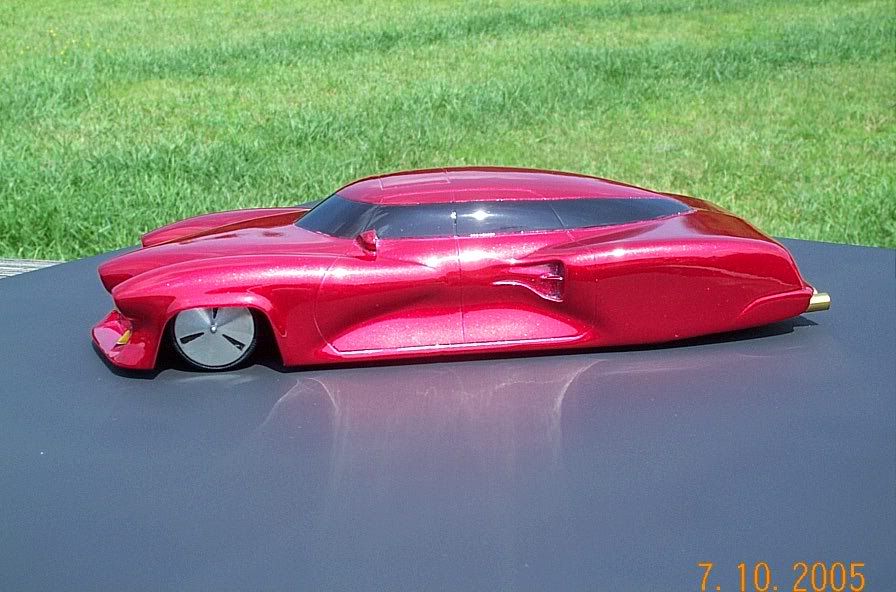
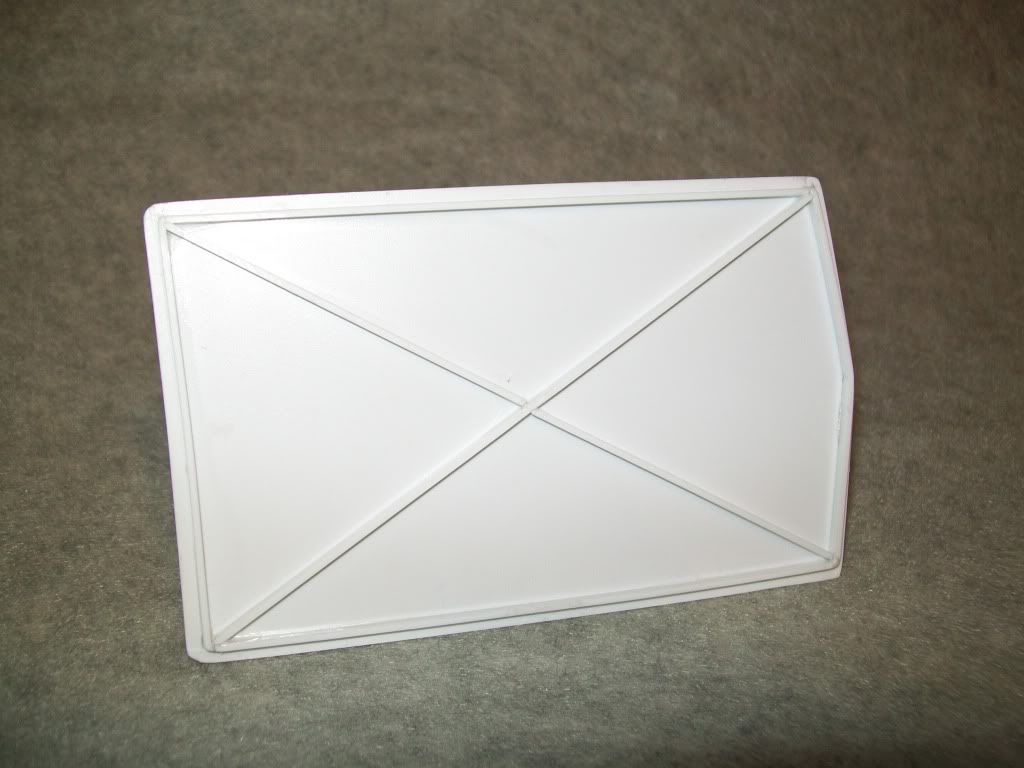
Here are a few more pics taken this morning.The Tonneau cover has been fabbed up fitted and is ready for primer and paint.
I have installed the front Valance and rear Rollpan and filled the seams along with eliminating the mold seams along the roof line and the rest of the body now for final primer and sealing.Ineed to mock up the suspension and see how much it needs to be lowered.
-
I use Ambroid,Tamiya liquid,the modelmasters in the plastic container and 15 min,30min or 60min epoxies depending on what I am gluing and how much time I need to glue it.Been using epoxy on glass pieces lately.
-
That looks great.The BMF detailing on the interior is awsome very realistic,the detailing on the wheels is excellent also.Keep up the good work.
-
Thanks for the compliments.Not sure about the fastest convertible may be though.The kit is good although I would have liked a seperate engine instead of what you get kind of a pain to paint.The design on the glass is great they just snap in.The doors work pretty good too.Generally a good kit for the money.Again thanks for the compliments.
-
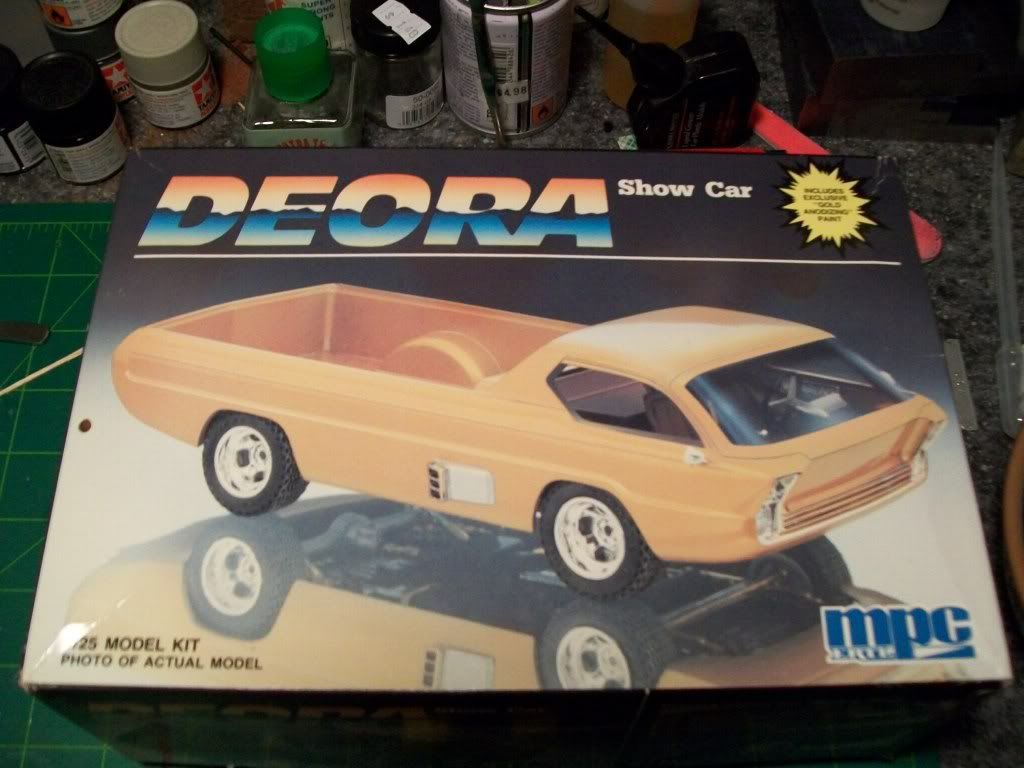
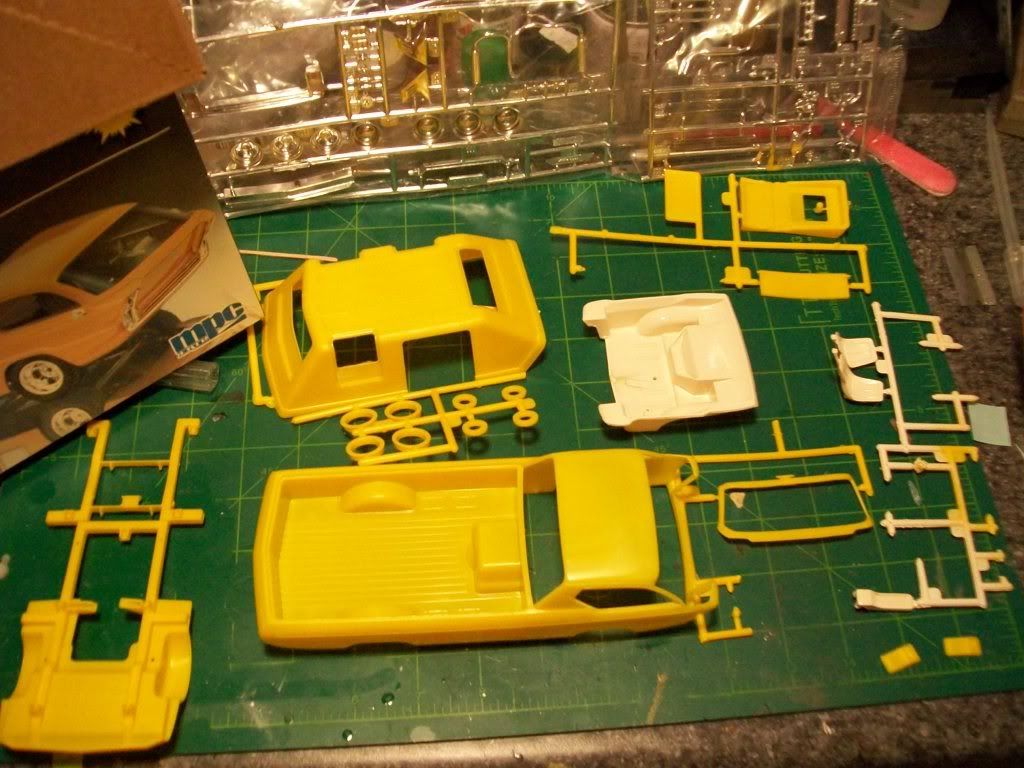
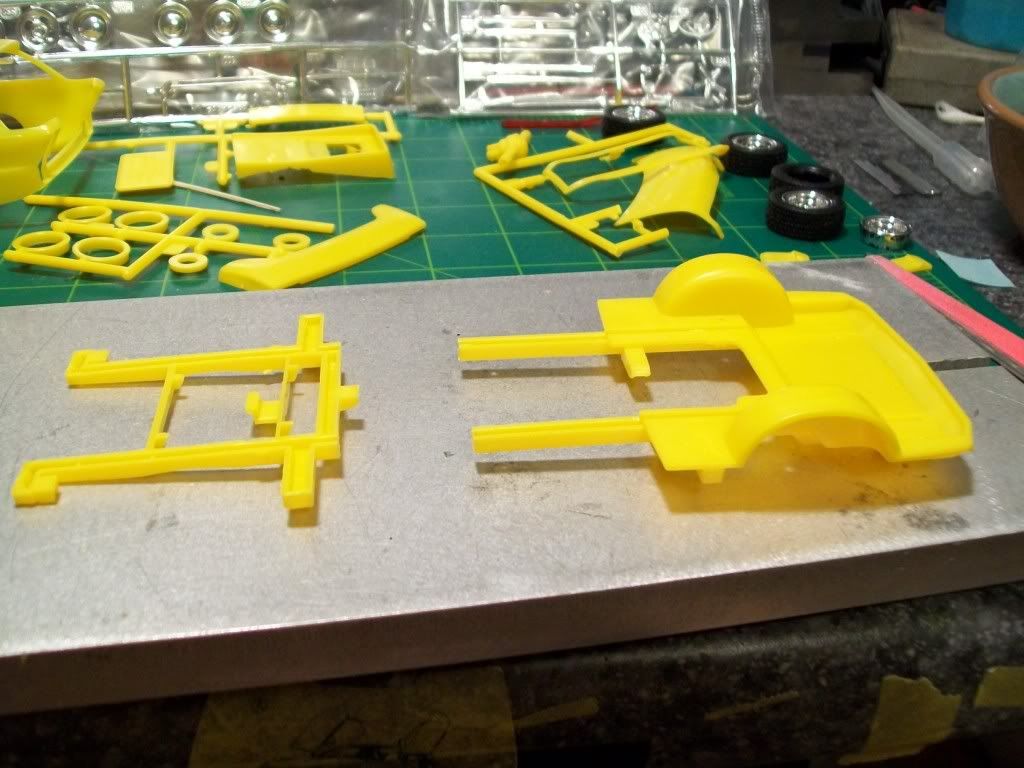
Here is a kit I built as a kid.Ive had two of these for a long time one is still factory sealed and I plan on keeping that way for now.Any way here is the plan.I will not put an engine in it so it will be a curbside slammer only with full interior and I am going to add a tonneau cover and a pair of wooden longboards.I will paint it with PPG Base coat it will be Aztec/Inca Gold Pearl as the truck was painted originally if I'm not mistaken and will be cleared with urethane clear.Bare metal foil where needed and flocking for carpet.Thinking about some sort of artwork for the Tonneau cover but undecided for now since the surf boards for the most part will keep it covered.The chassis will be cut to allow for assembly after the body is assembled to allow for seamless joints at the roll pan and valance.The kit supplied tires will not be used,they look terrible but have a nice set of BFG TA's that look much better.Will post something every couple of days on the progress I hope.Here is the start.
-
I have always loved these cars.The styling while a bit odd really grabbed me at an early age you got a killer deal.Somebody needs to offer them in kit form they are true European classics.
-
The cups I use are not effected by solvents.I have let pure lacquer thinner sit in em till it has evaporated with no ill effect to the cup.They even hold Acetone well.


airbrush question
in Tips, Tricks, and Tutorials
Posted
I have to agree with lonewolf invest in good equipment first and foremost.Secondly I would use lacquers minimum for most body painting and acrylics for everything else.I use very little to no enamels.When mixing paint the main thing to remember is if you get it too thin you can always add paint back to the mixture to thicken it up if needed.I use automotive paints my self and I have started playing with lacquer as a clear for a cost savings.I use mostly House of Kolor base coats and Kandies.My airbrush of choice is an IWATA Eclipse HP-CS.