Dan Cooper
-
Posts
24 -
Joined
-
Last visited
Dan Cooper's Achievements
MCM Regular (3/6)
-
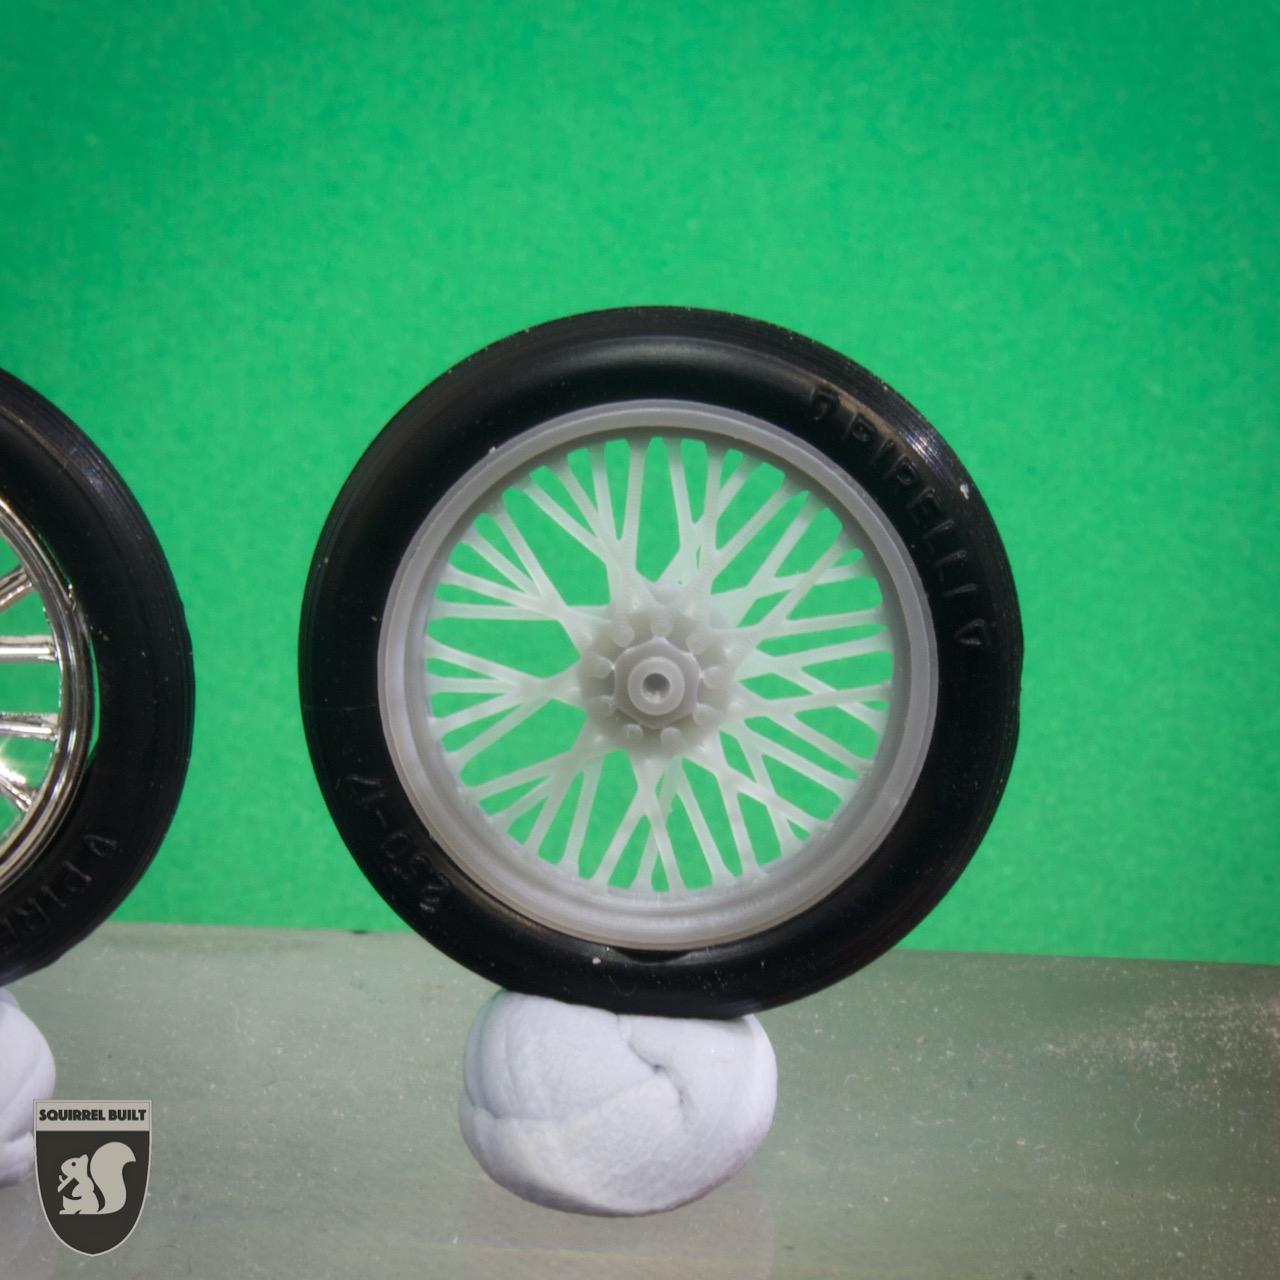
I am starting a new project that I got as a gift for Christmas. It's the Ramcharger FED. I much enjoyed building my first FED in eons last year but was disappointed with the wire wheels from the old kit. I have been casting about trying different ways th make wire wheels without success. I then thought to see if I could get my 3D printer to make some acceptable wheels. My ambitions are modest. Just something better than the kit. I know I can't get fine enough spokes to look better than real wire or photo etch but I can't seem to get those methods to work. With this in mind I fired up the computer and had at a design after carefully measuring the kit parts. I used Fusion 360 and this is what I have got working at the moment ( WIP) . I've managed to get the design into my Elegoo Mars printer and printed a test piece. So far the wheel fits the tyre but needs some work on getting the supports just right to print reliably. ( To be honest I'm over the moon with how well it fits the tyre.) I can now start to think about some subtle tweaks to make it look a touch better. It's not as good as a hand laced wheel but I think it is a step in the right direction. Please let me know what you think and any suggestions would be appreciated. Thanks for looking in. Dan

-
Excellent looking build. So clean and sharp Inspirational stuff, thank you for sharing.
-
Don Nicholson's 1965 Comet Cyclone
Dan Cooper replied to ModelcarJR's topic in WIP: Drag Racing Models
That motor looks super John. What brand of wired distributor did you use? It looks so neat and tidy. I'm looking forward to your progress. How is the kit? I've never seen one before but it looks great and I really love the subject. Is it worth tracking down? Dan -
69 Mr.Norms Super Charger Funny car
Dan Cooper replied to booboo60's topic in WIP: Drag Racing Models
Wow, that came out looking flash. Thanks for sharing. Those engine bay details look amazing. Well done. -
ROYAL CANADIAN 1/16 SCALE TOP FUEL DRAGSTER
Dan Cooper replied to Ian McLaren's topic in WIP: Drag Racing Models
This is such a cool project. Your mad skills are wonderful to watch. Enjoying your build immensely and lots to learn from. Thank you for taking the time to share your craftsmanship and knowledge. Much appreciated. -
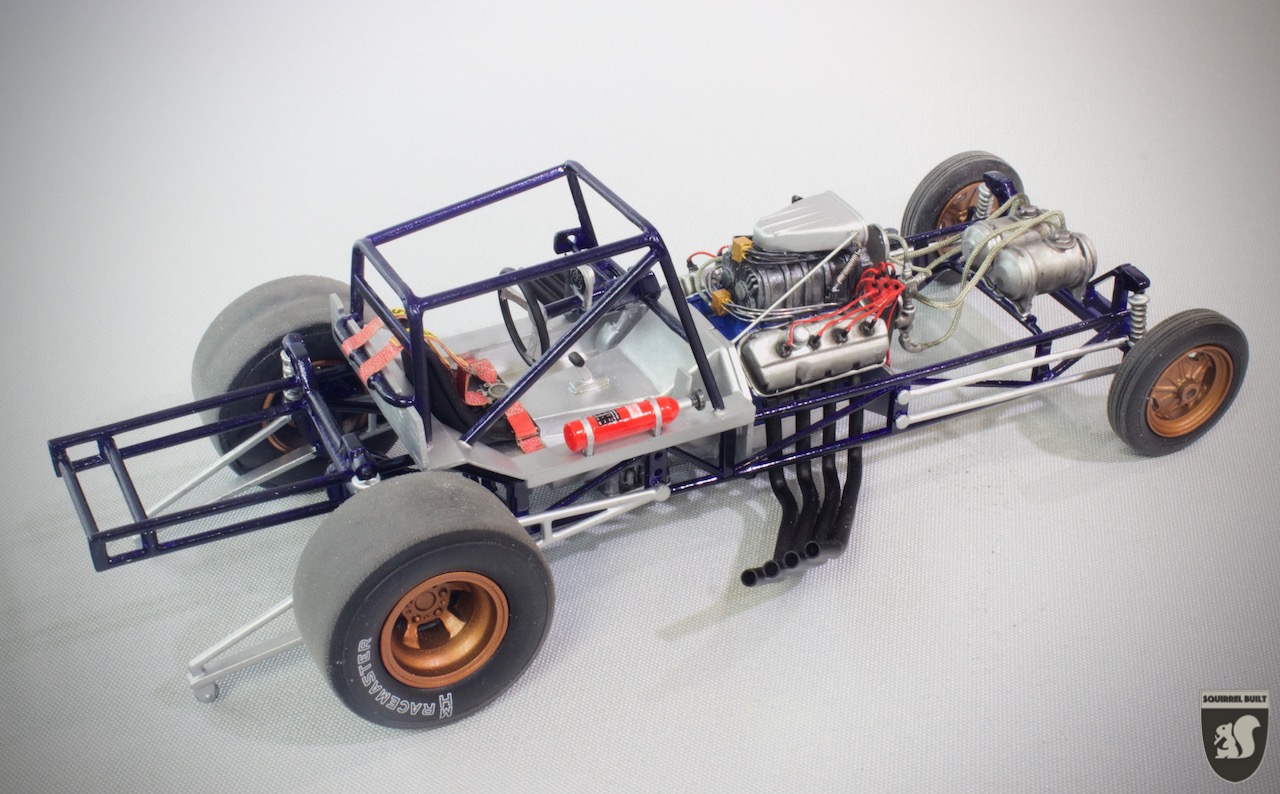
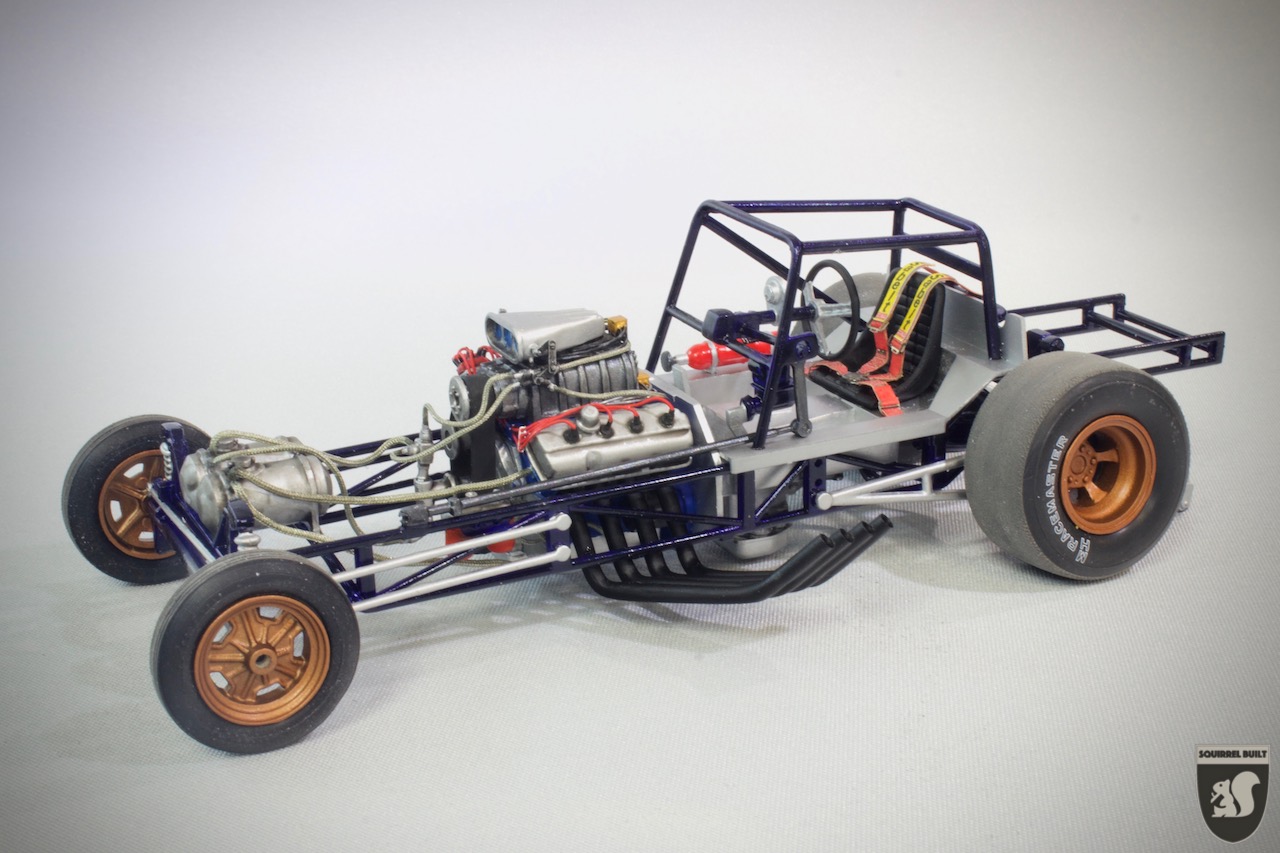
Progress; Just about done with the chassis. Now it's on to the body! Thanks for all the great comments. I'm happy folk like her so far. Dan
-
Thanks Vi, I'm glad you like my little efforts. As for the barrel valve and throttle linkages. They are all just bits of Evergreen styrene rod, strip and brass wire. I just try and break the part down into the simplest shape and then glue little bits together until I get something that looks close. The Optvisor helps with being able to see close up and doing each part in lots of small steps / subassemblies to let it dry helps. The Fuel lines are 0.15 lead fly tying wire for the injectors( As are the spark plug wires) and little drilled blocks of 2mm square Evergreen strip. The braided line is from Top studio ( 0.6mm) IHTH.
-
Thank you Marcos - Not too sure what you mean as I add my photos from the box at the bottom of the posting then hit return twice to get the curser to drop to below the last photo and then keep typing away. If you are referring to my little Squirrel Built logo I add that in when I'm post processing my photos. I hope that helps.
-
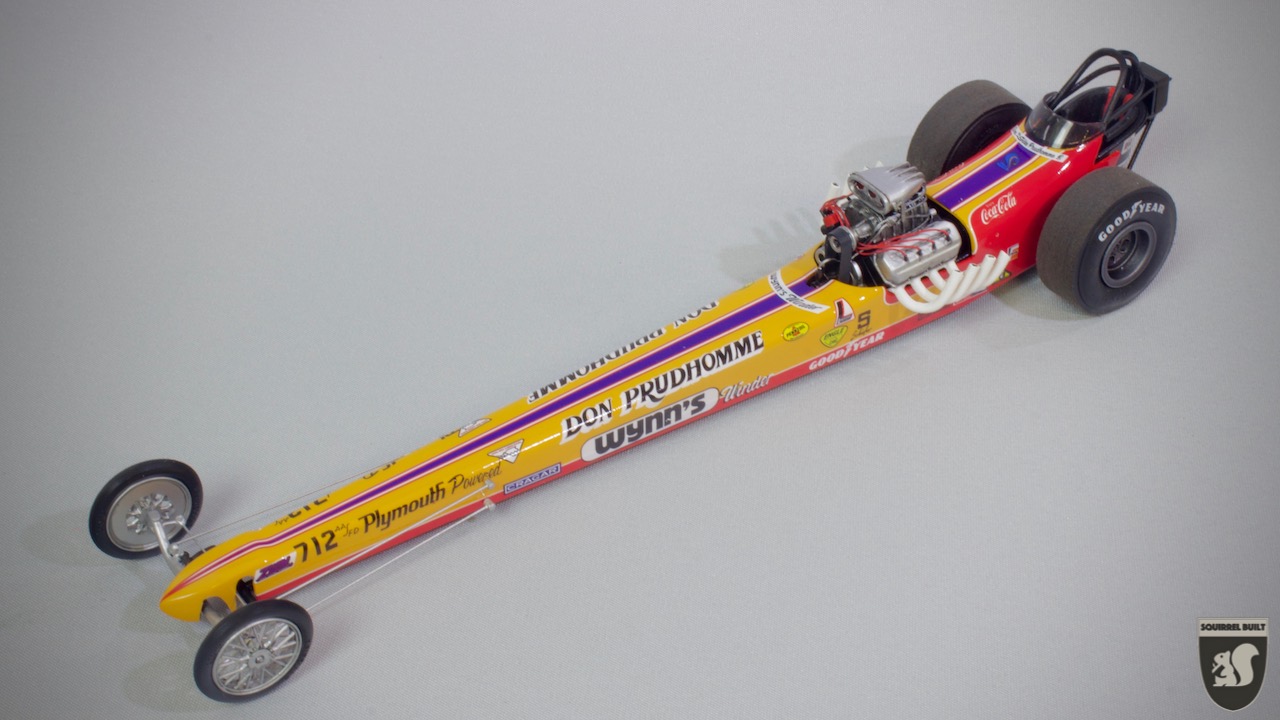
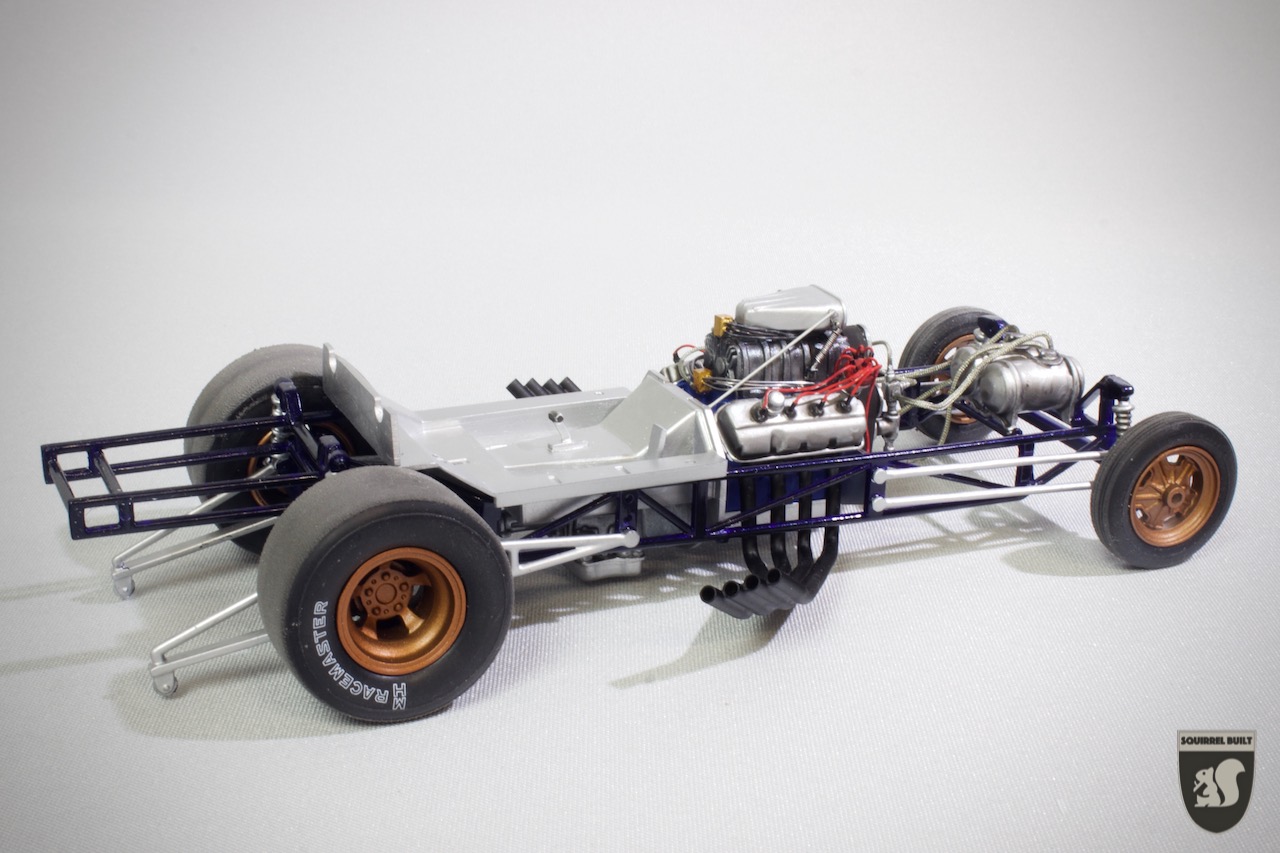
I worked a bit more on this one today and I'm calling it done. I may in the future go back and add the steering linkage but it's just a bridge too far right now. ( Come to think of it I'd like to try lacing some wire wheels too) At some point you have to just say, " The next one will be better but this one is done." Final pics; I pretty pleased, it came out much better than I had any right to assume. I learned a lot and had a lot of fun. Enough to start the Candies & Hughes Funny car. Great to try something new and different. Many thanks to those who looked in and left a comment or two. Thanks! I hope you like her. Dan
-
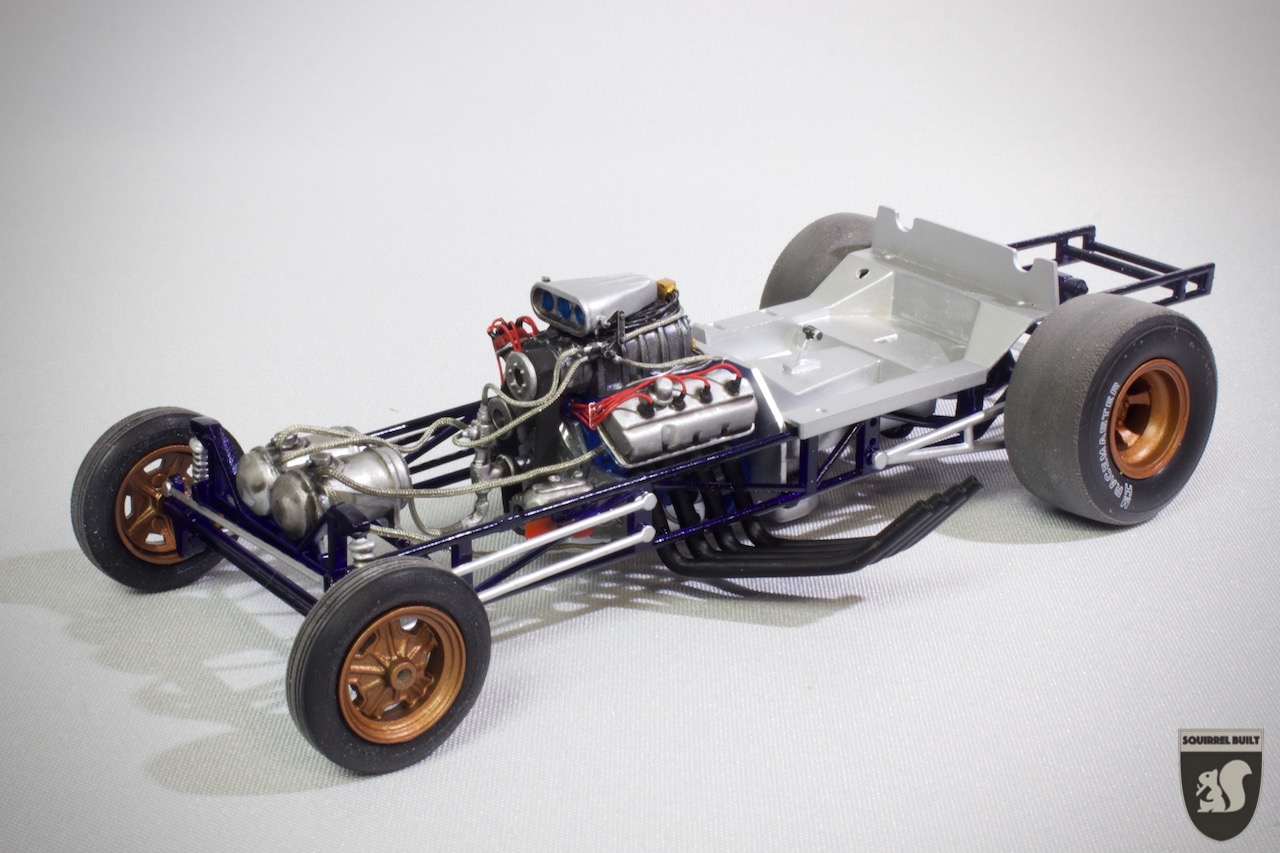
Thank you gentlemen for your kind comments. I'm glad you like my little efforts. One thing I note from looking at other work is that I need to work on keeping everything clean and tidy. I don't know how some of you guys build such super sharp models. For me the dents and paint muck ups seem to pile up one upon another. Progress; I couldn't get the exhaust pipes to stay round so I cut some brass tube and soldered four bits together and grafted them on to the ends. Not perfect but learned enough that I can do it better next time. The plumbing is all in but I'm not super happy with it( I'm sure I could do better next time). Once again learned more about what not to do rather than what to do. I can't imagine using the tiny hose fittings as even without them my nerves are shot to pieces. I had ordered some seat bets but the ones that came were, for me, unworkable so I have some others on order to see if they are better/easier. A few more bits to do on the chassis but it's time to address the elephant in the room and tackle the body work. So far so good and I'm looking to do mid 70's funny car next. Anyone have a suggestion for a good kit to try? Preferably one that you can still get a hold of. Thanks for looking in and your comments and encouragement are most appreciated. Dan
-
I worked hard to finish the motor today. First time using the braided fuel lines, much to learn but I think it looks okay. A pity it will hide under the body but good practice. I tried adding a few more details and I'm calling this one done. Progress; Lots of room to improve on the next one. Thanks for looking in. Dan
-
Progress; A bunch of lead wire, some plastic scraps and some vinyl fly tying tubing and the basic wirings done. I have some braided fuel line coming in the post so we'll see what I can make with that. More painting to do, but I think it's okay. Need to buckle up and just finish the body so I won't be waiting ages once the chassis is finished. Thanks for looking in. Dan
-
Progress; All the main chassis subassemblies are in their base colour. Now I can have a play with the detail painting and a little bit of wiring. I still need to do the rest of the work on the body. and then see if I can get all the bits to fit together. Still having fun and I think it looks okay, well all the four wheel touch the ground. Thanks for looking in.
-
Thanks Rusty and Marcos I have been looking for intel on how to add better wiring and plumbing. I have found this old post by Daniel Himmel which has been a lot of help. ( and shown I need to change some stuff on my kit ) It might help others too. Plumbing information for early funny cars Dan
-
Thank you gentlemen for all your great comments and encouragement. It's super to have the feedback. I have spent the last week slowly adding more decals, only one side left to do and making a start on the chassis. Now I might be a bit rough in building things but I have to say there isn't much in the way of clear drawings or attachment points for all these chassis parts. I now know that I have messed up the front axle assembly ( It's too far back and I don't think it's alined properly in the vertical plane.) and getting the motor to fit is going to be a nightmare as there doesn't seem to be any alinement pins/slots/tabs for any of the motor bulkheads. The cross members have some to let you get the basic rails alined but that's it. This isn't helped by the instructions being frustratingly vague and a little misleading. I'm not sure how I'm going to proceed as I think the wheelbase on my build is a bit short and I have no idea if I can get the motor to pop through the windscreen in the correct place and angle. I may have to stretch the frame rails to get the wheel base right and not worry too much as the model will always have the body on. Better everything looks right from the outside. I think the best thing is to get the body finished and clear coated so I can make the chassis fit it rather than fuss with it in it's current state. More pictures this weekend when I have a bit more time to sort it out.