AlbertD
-
Posts
91 -
Joined
-
Last visited
Content Type
Profiles
Forums
Events
Gallery
Everything posted by AlbertD
-
Thanks for the kind words everyone.
-
Great build. Your paintwork is fantastic.
-
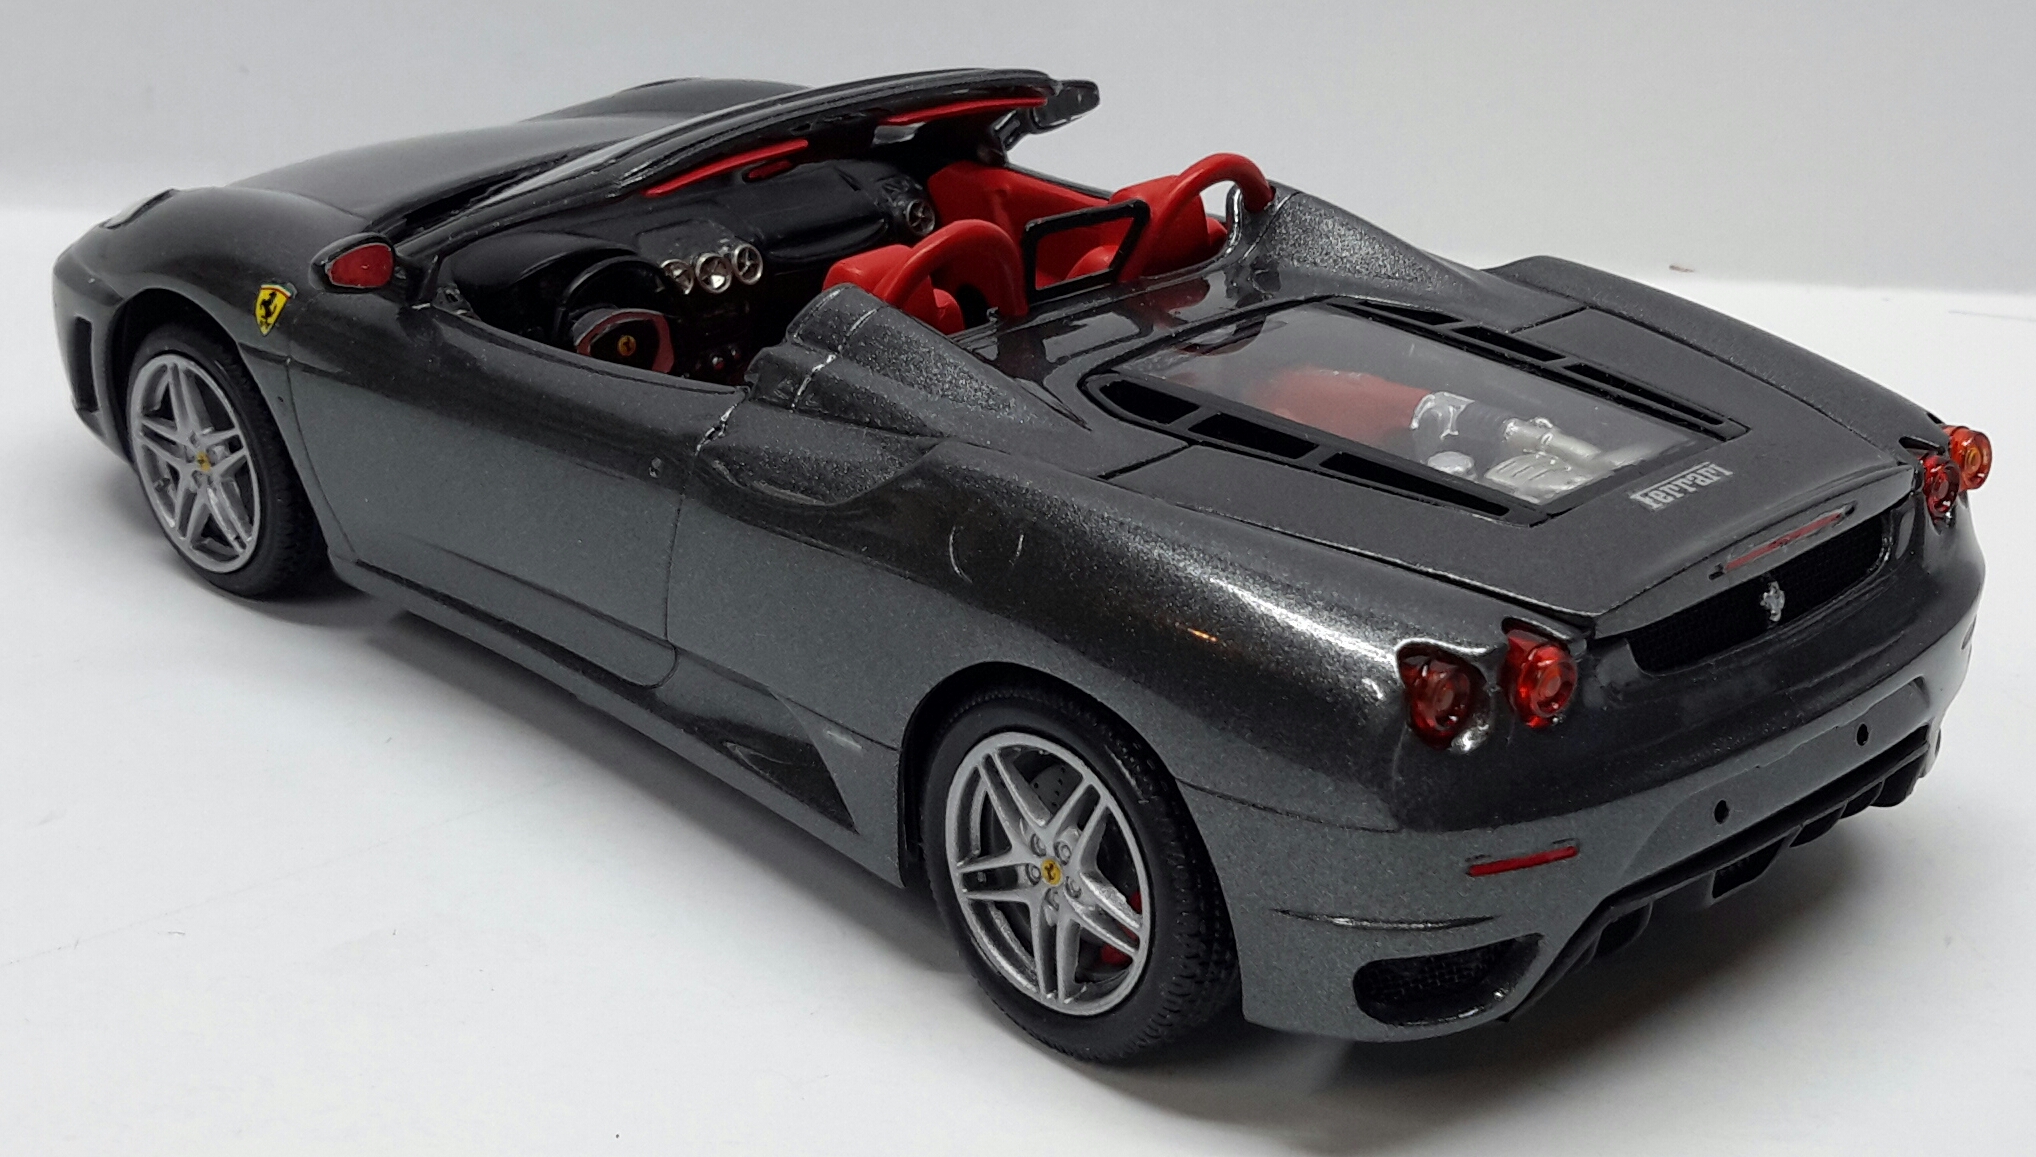
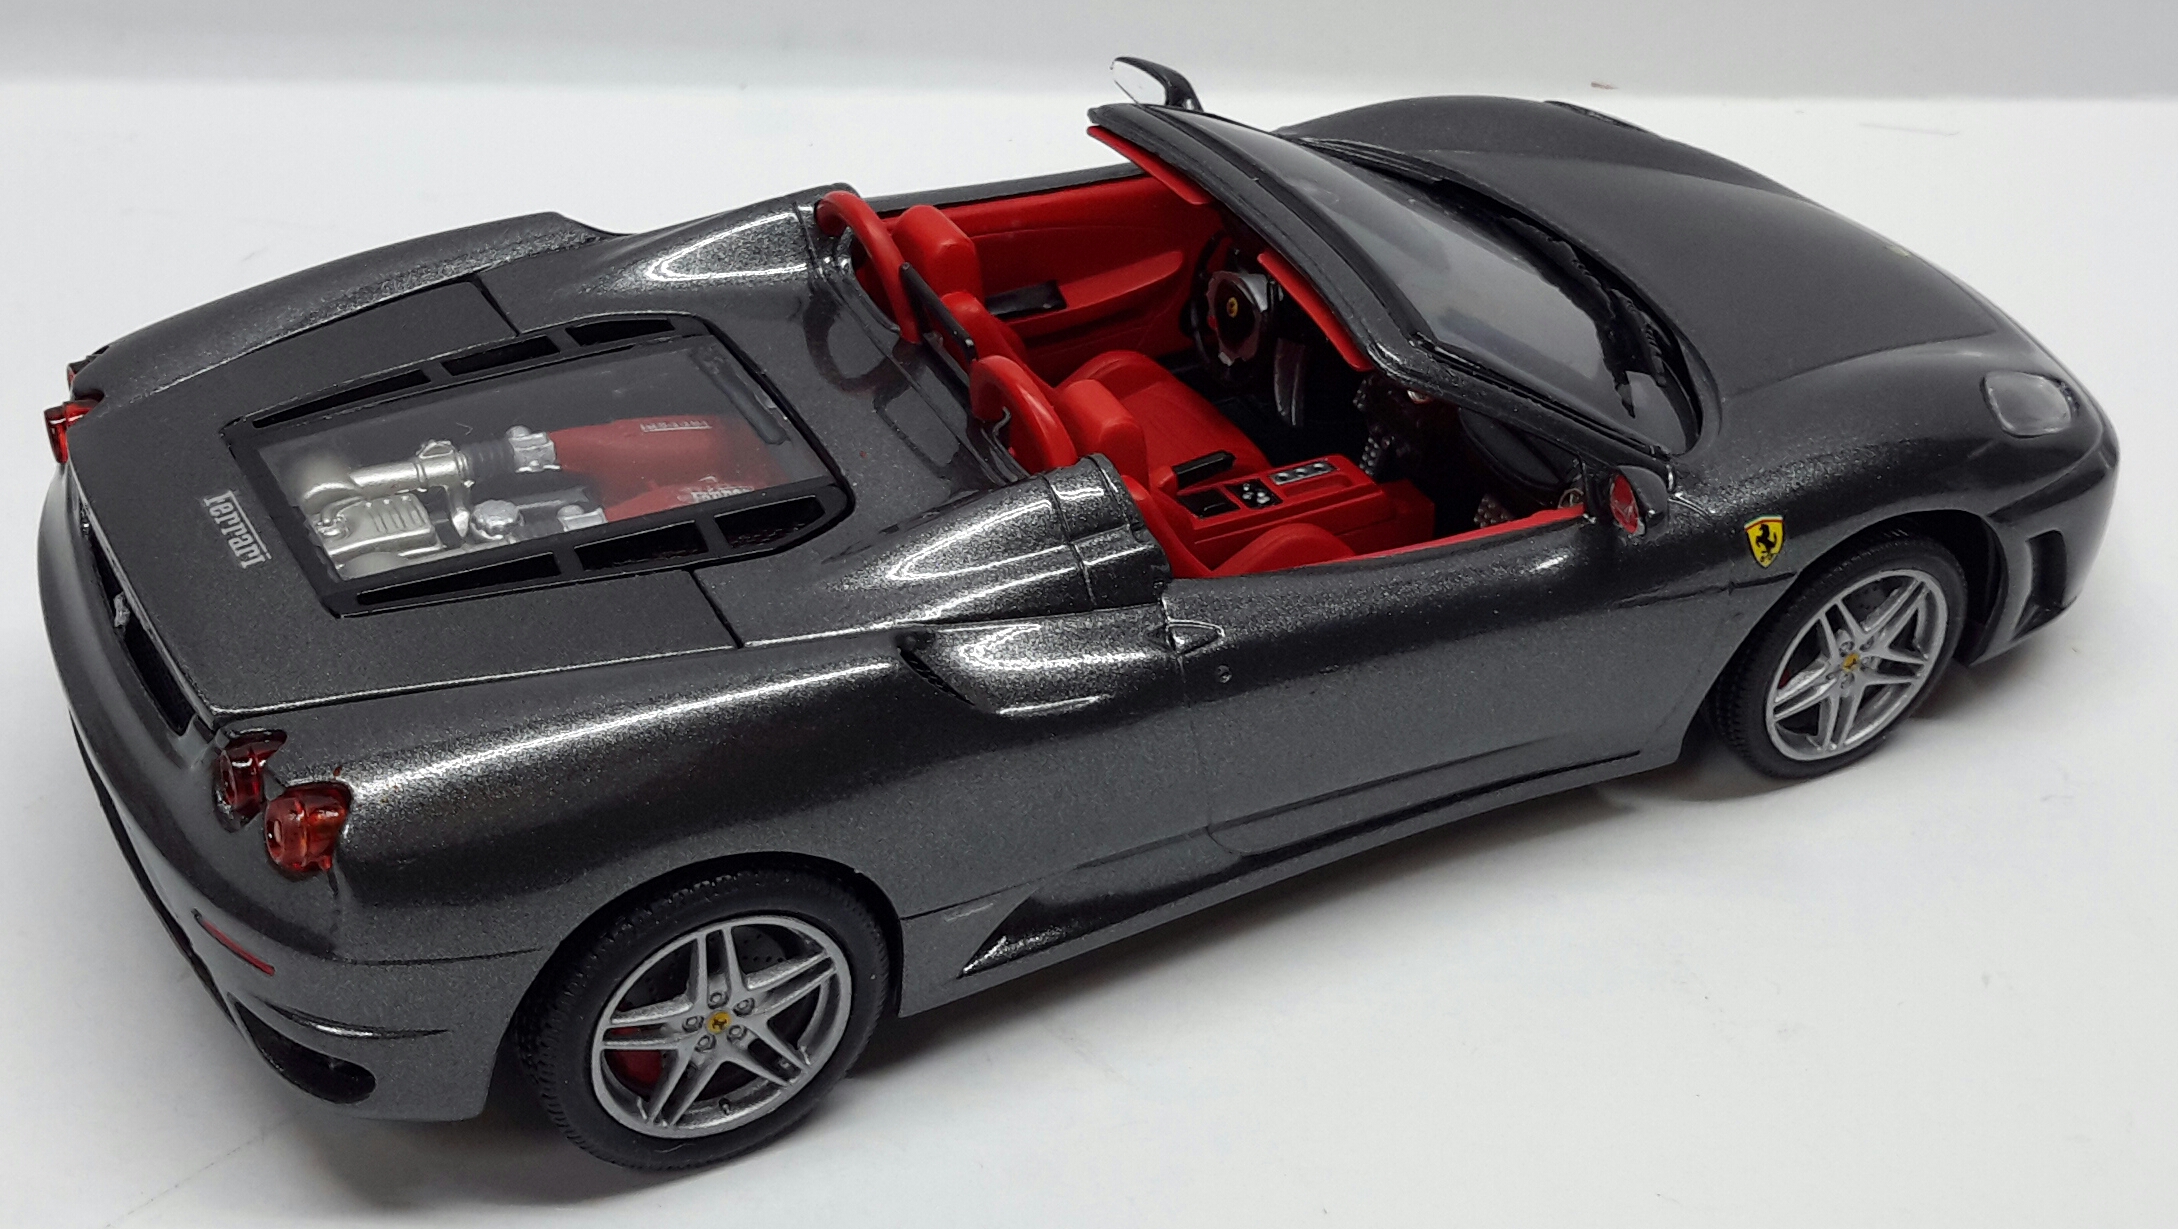
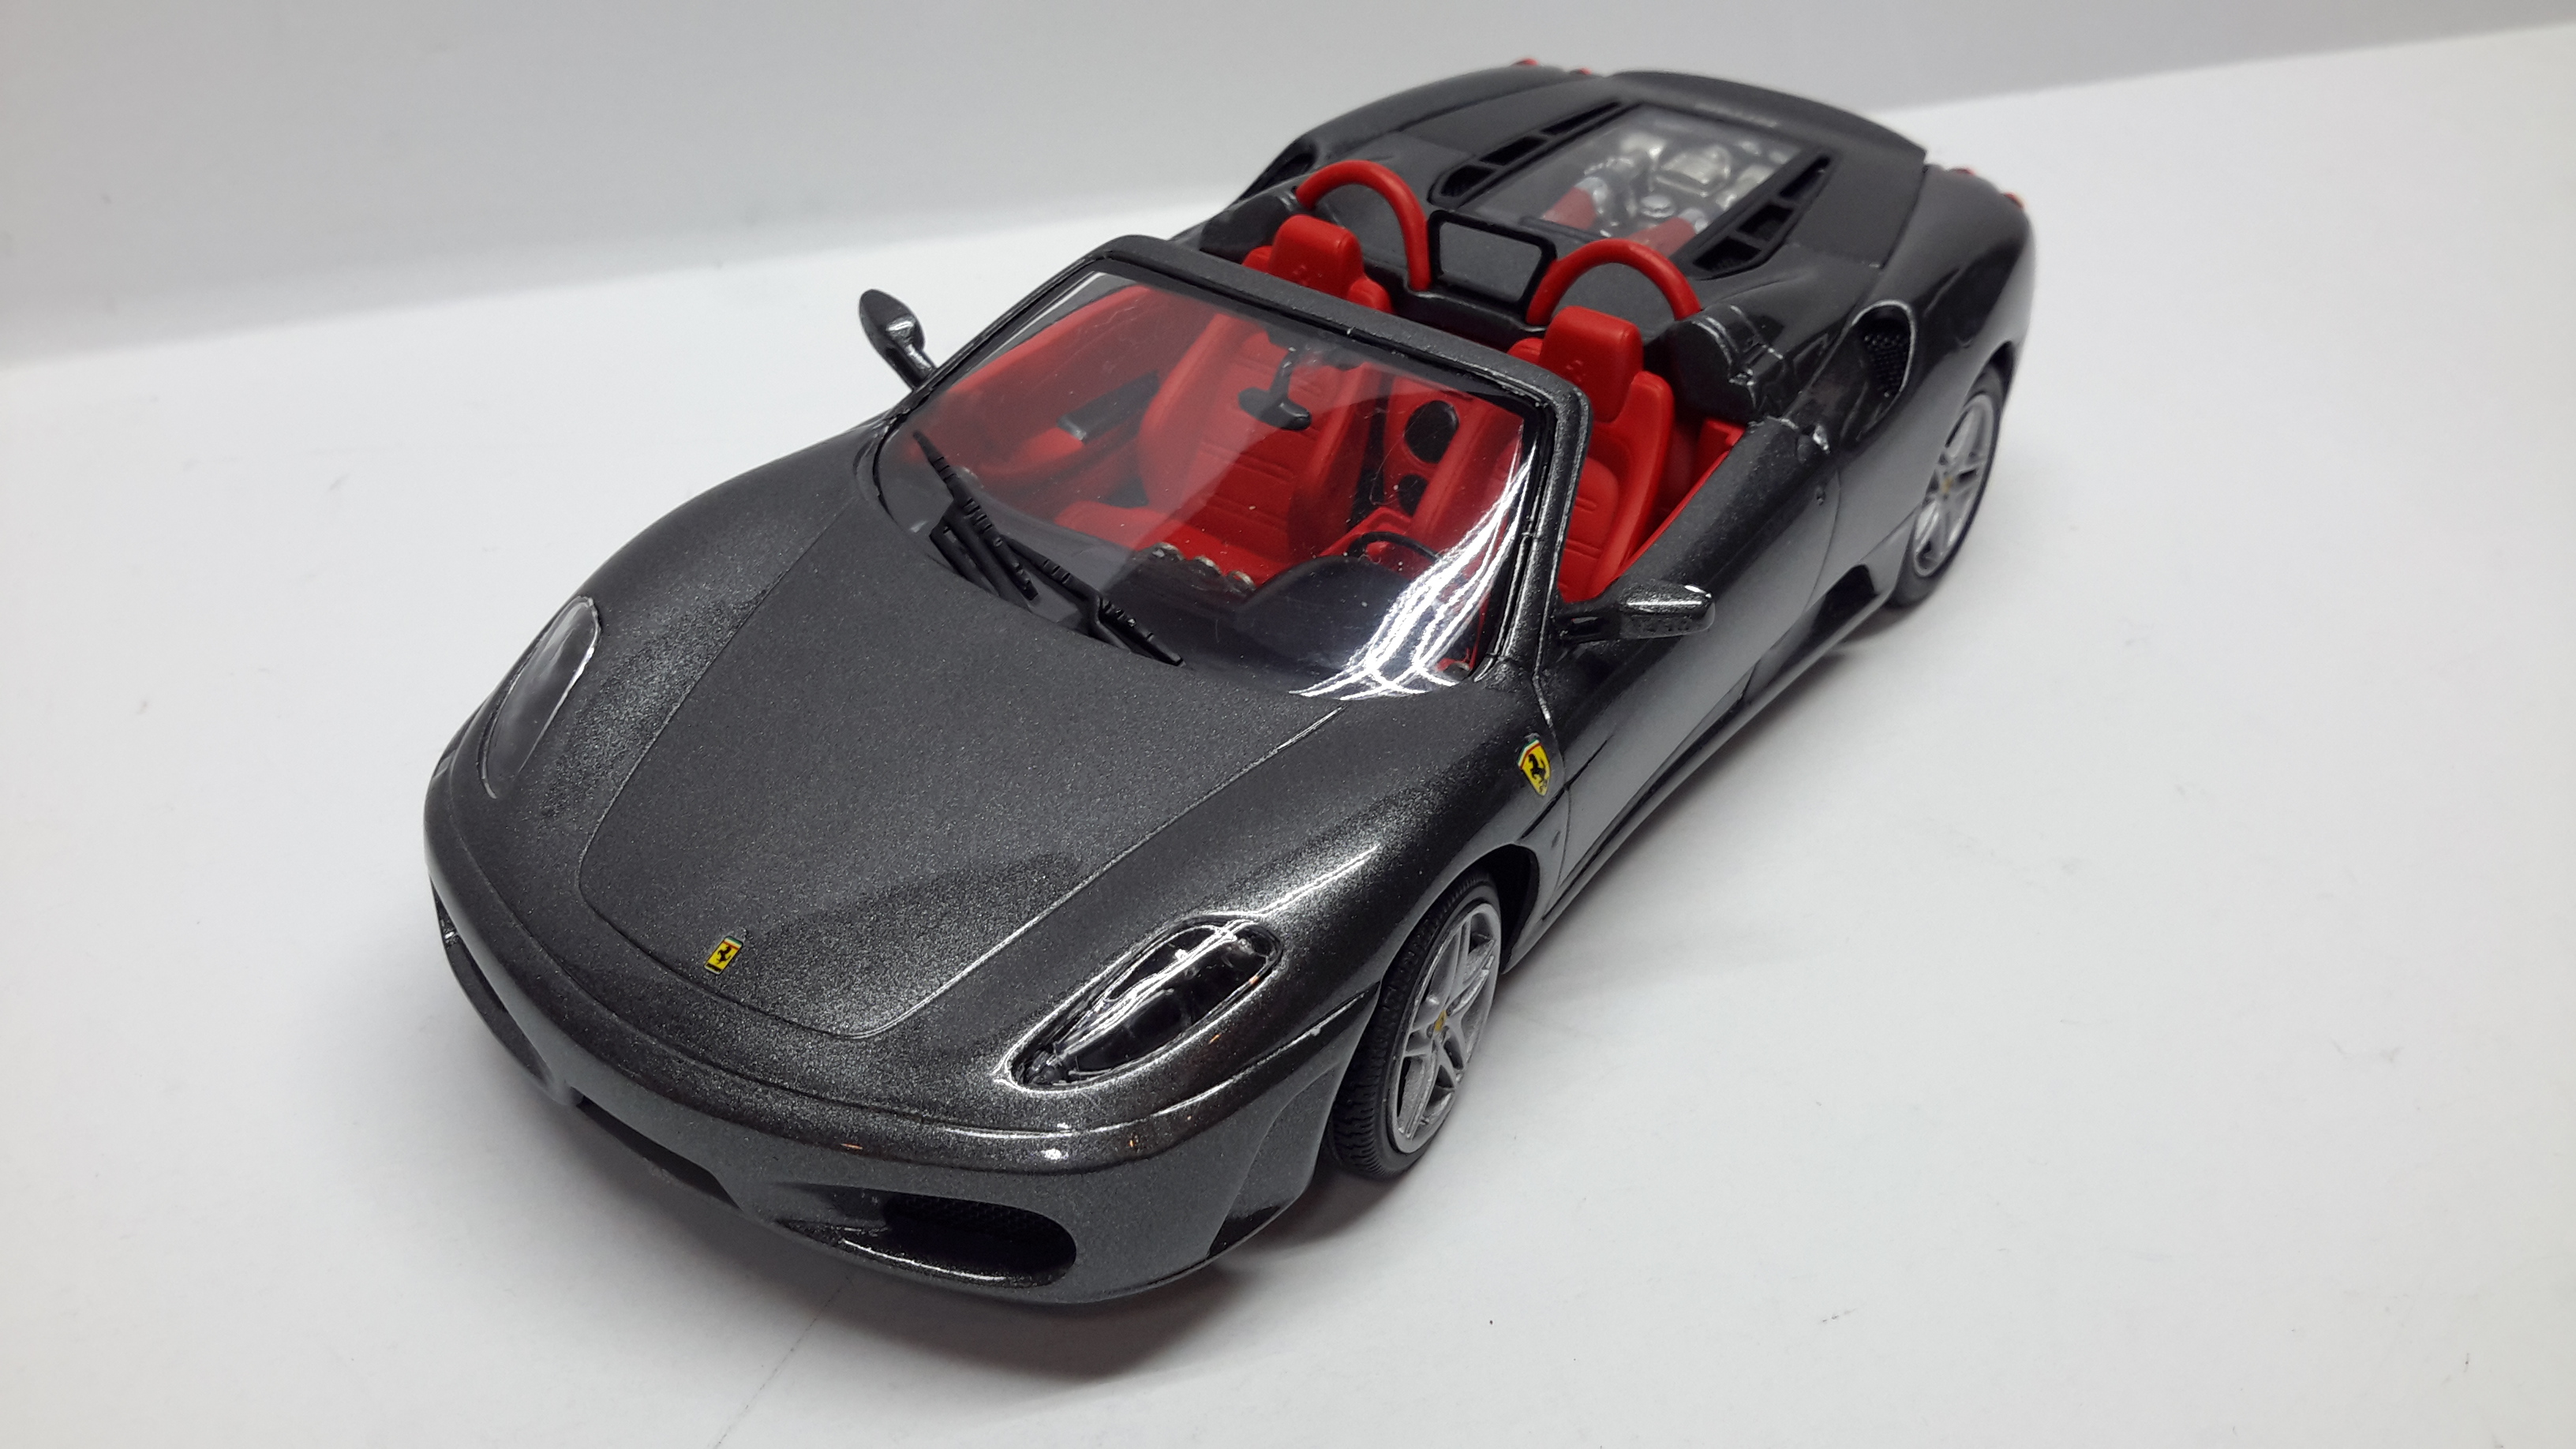
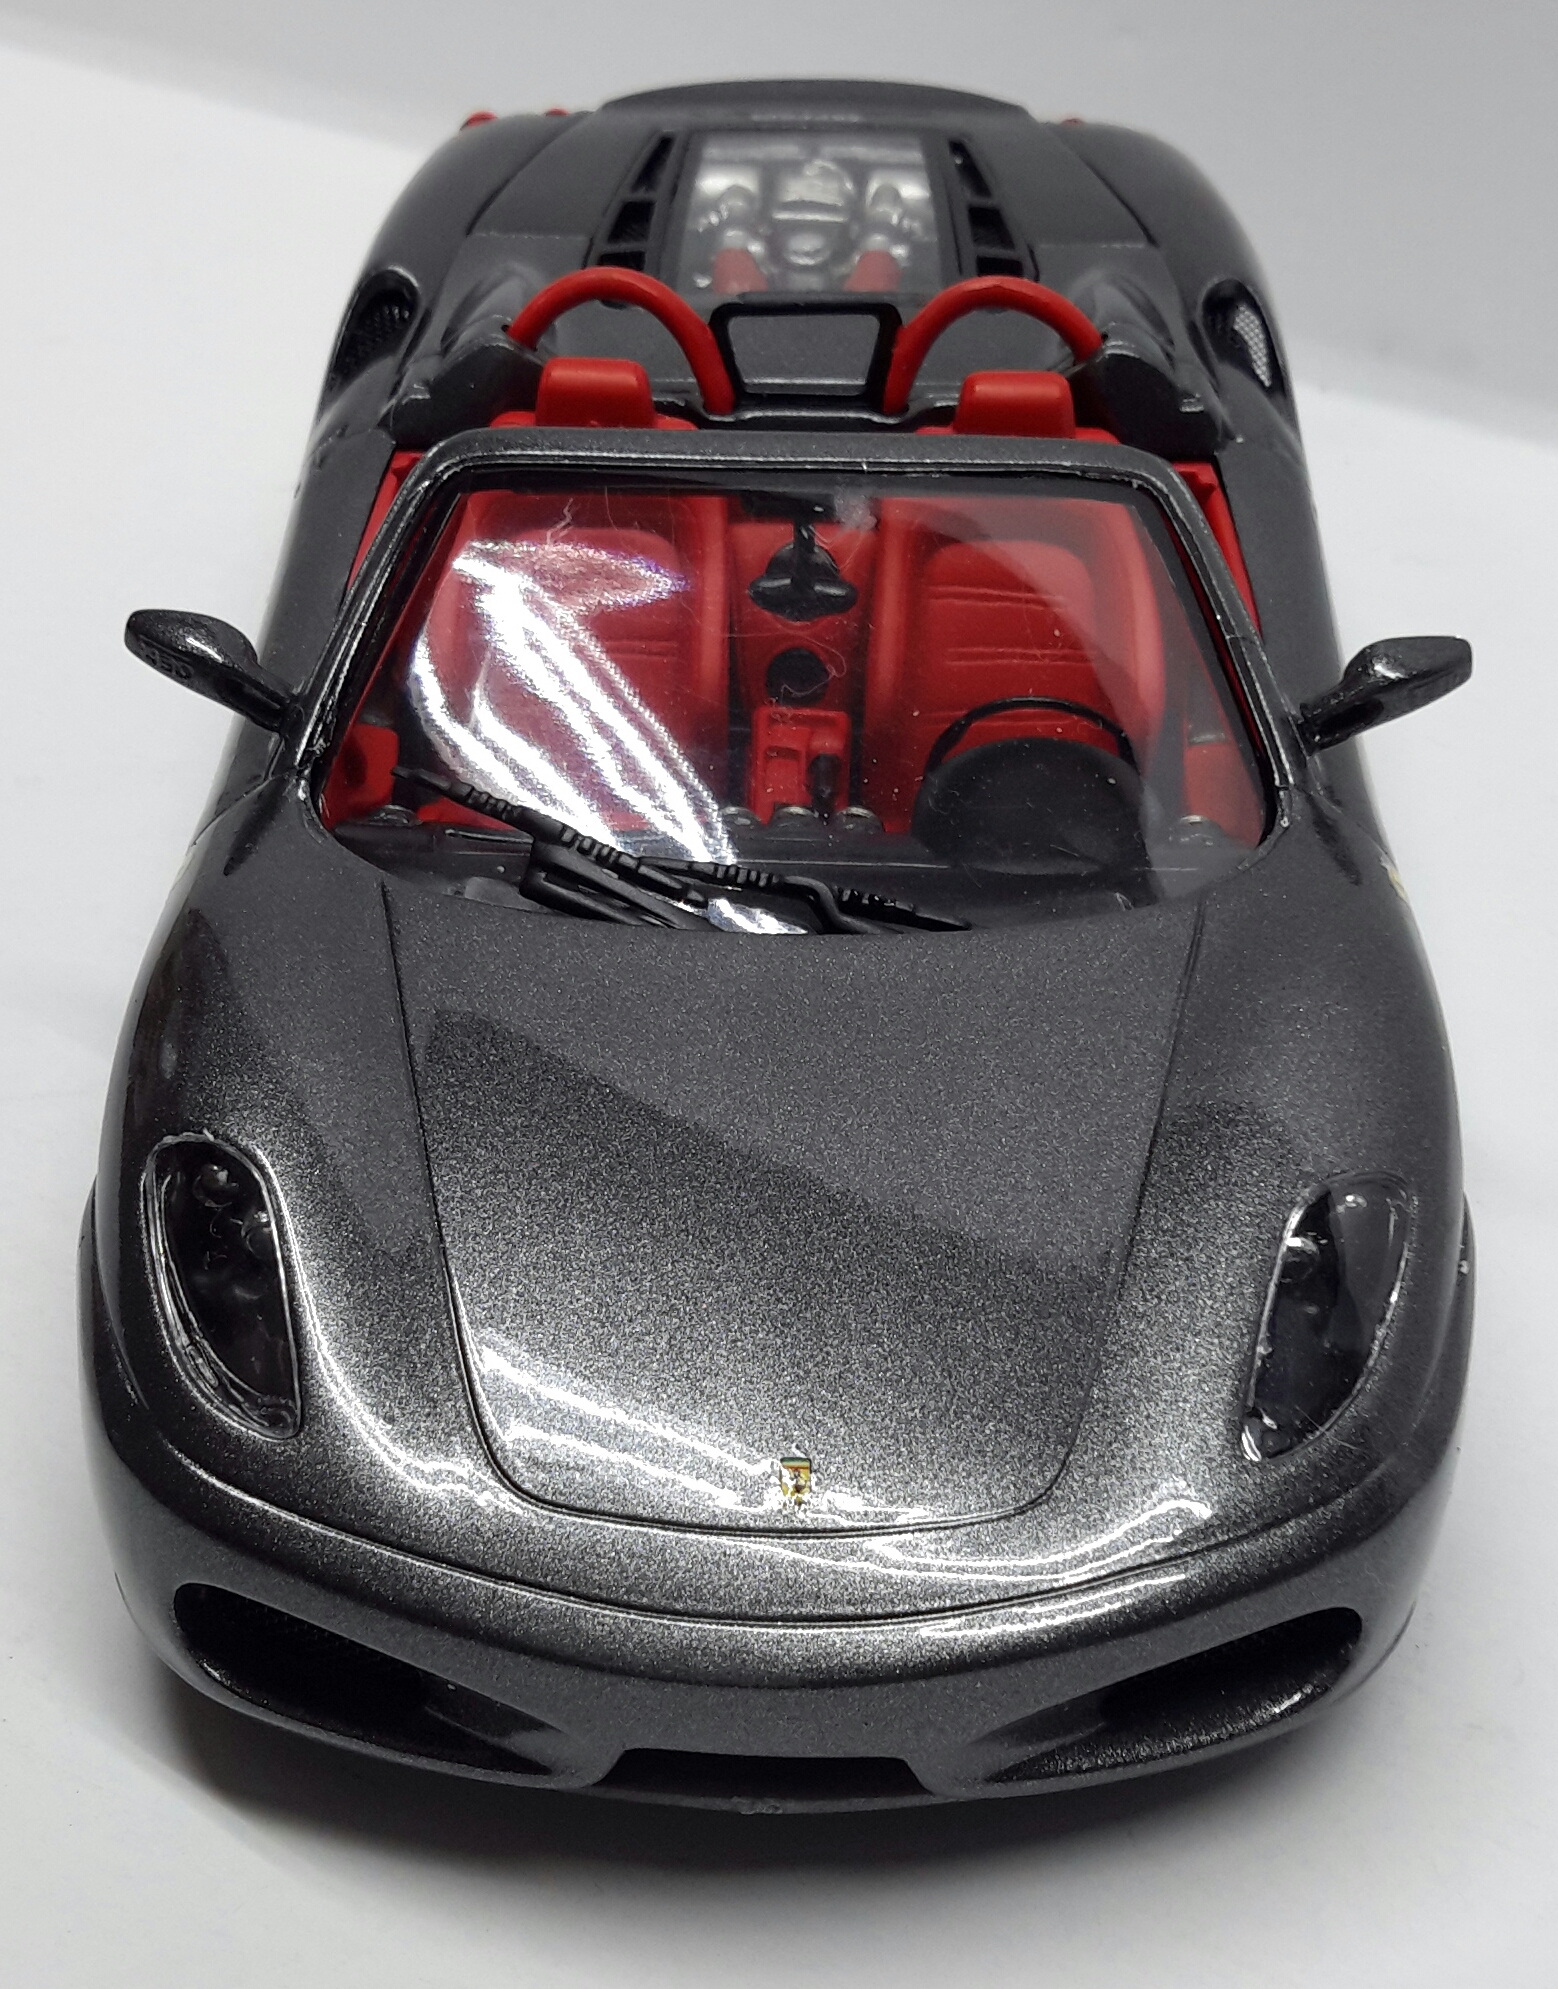
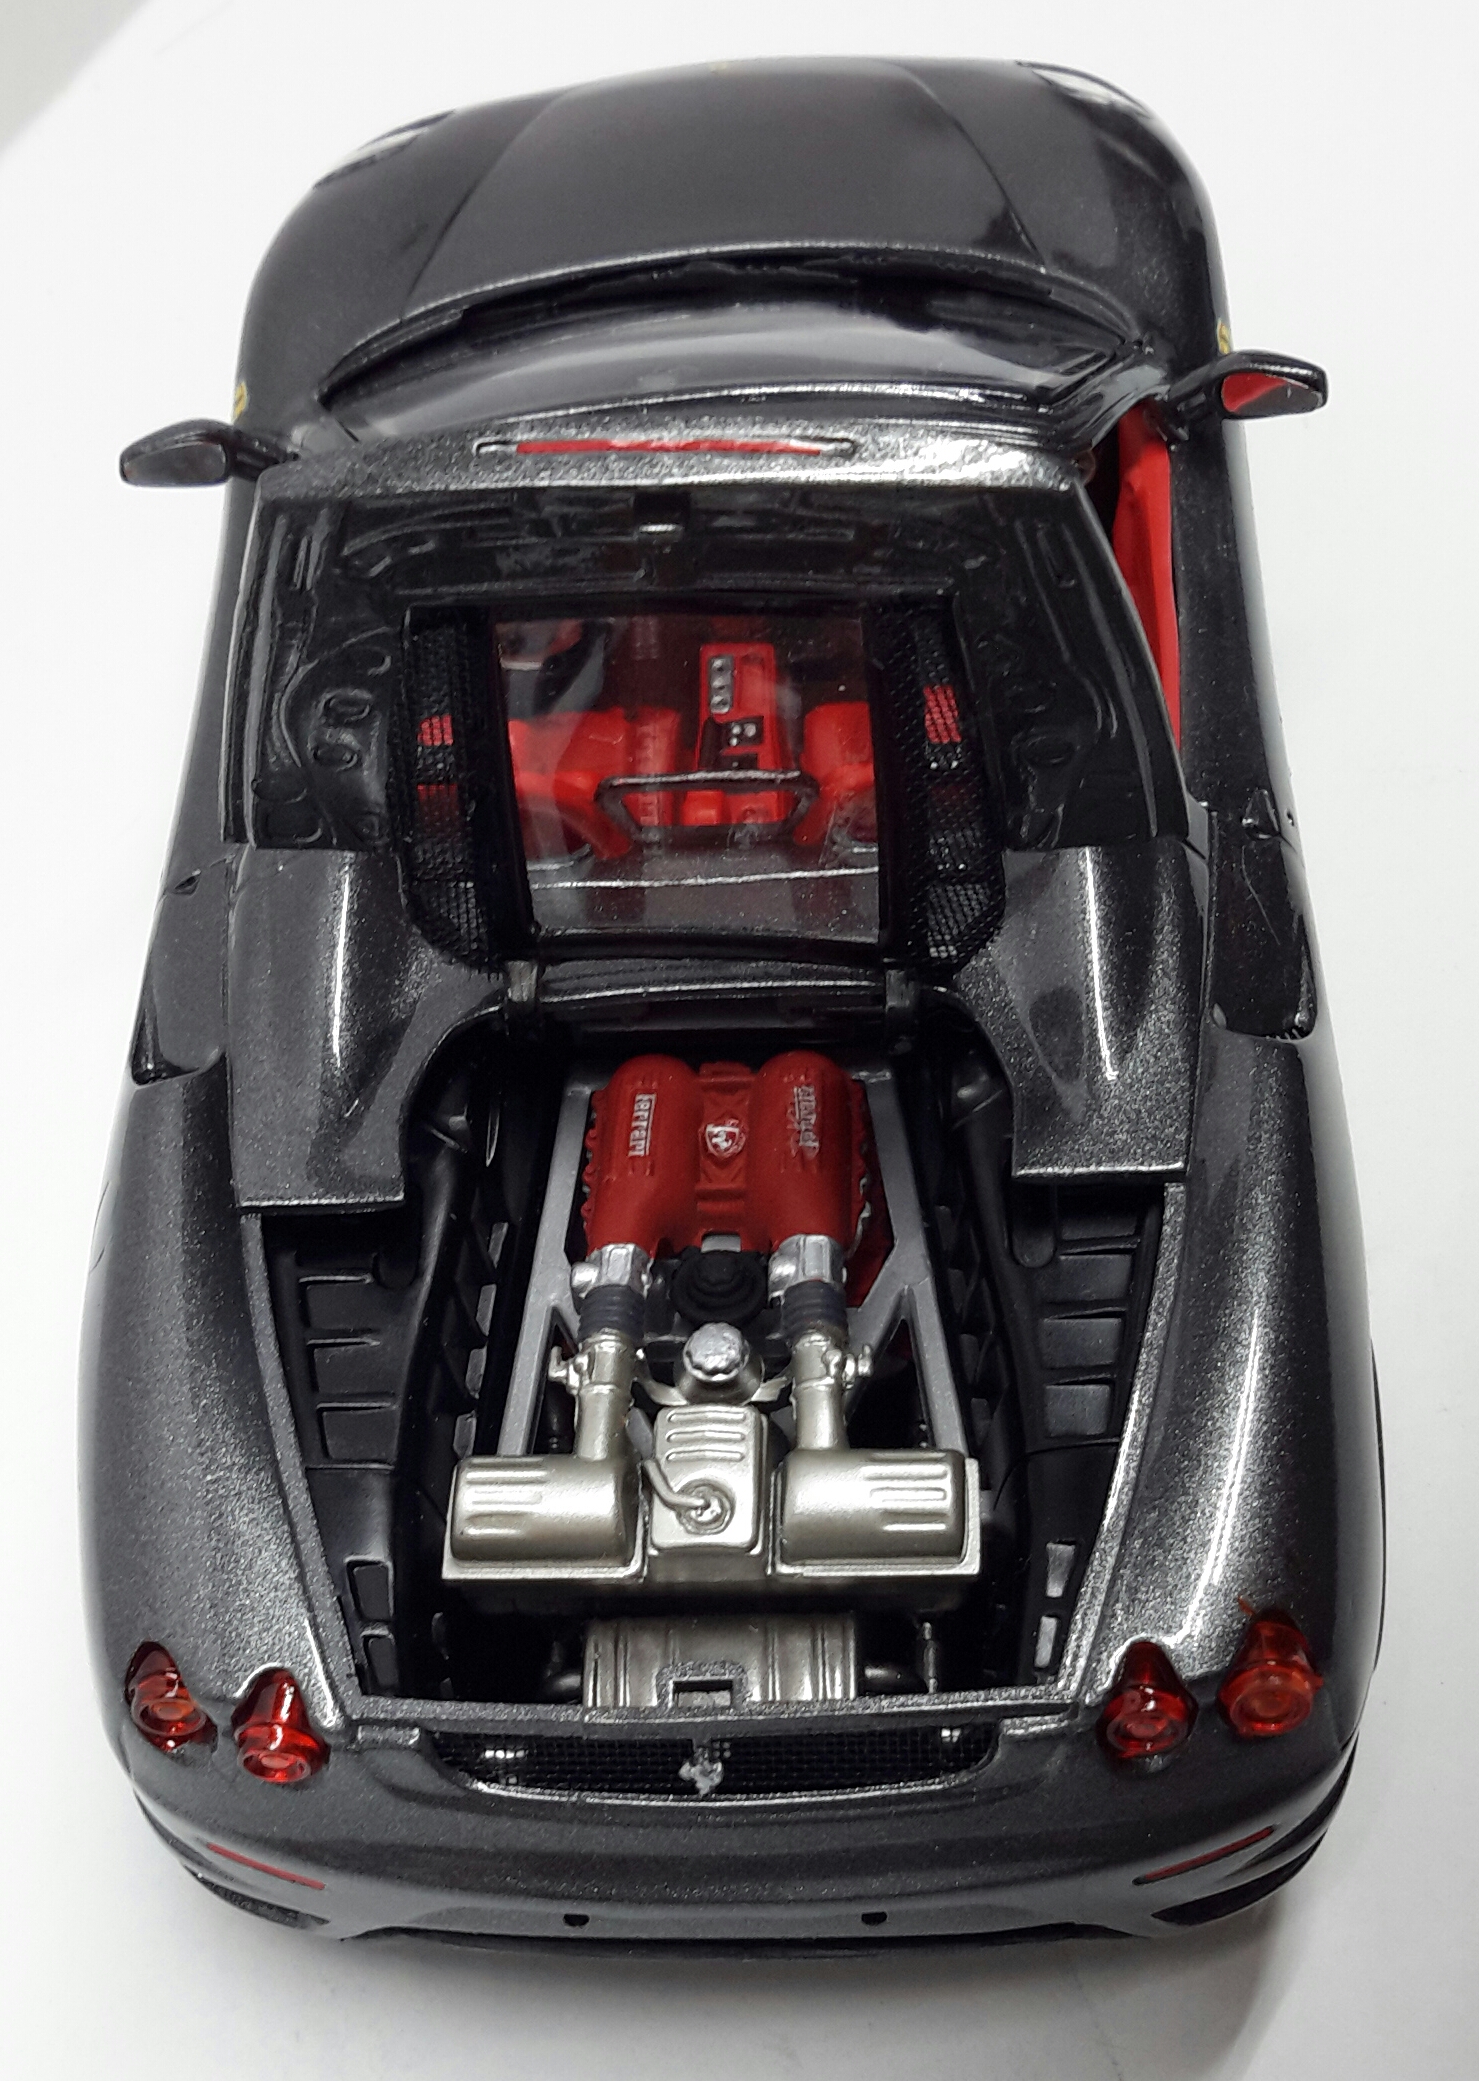
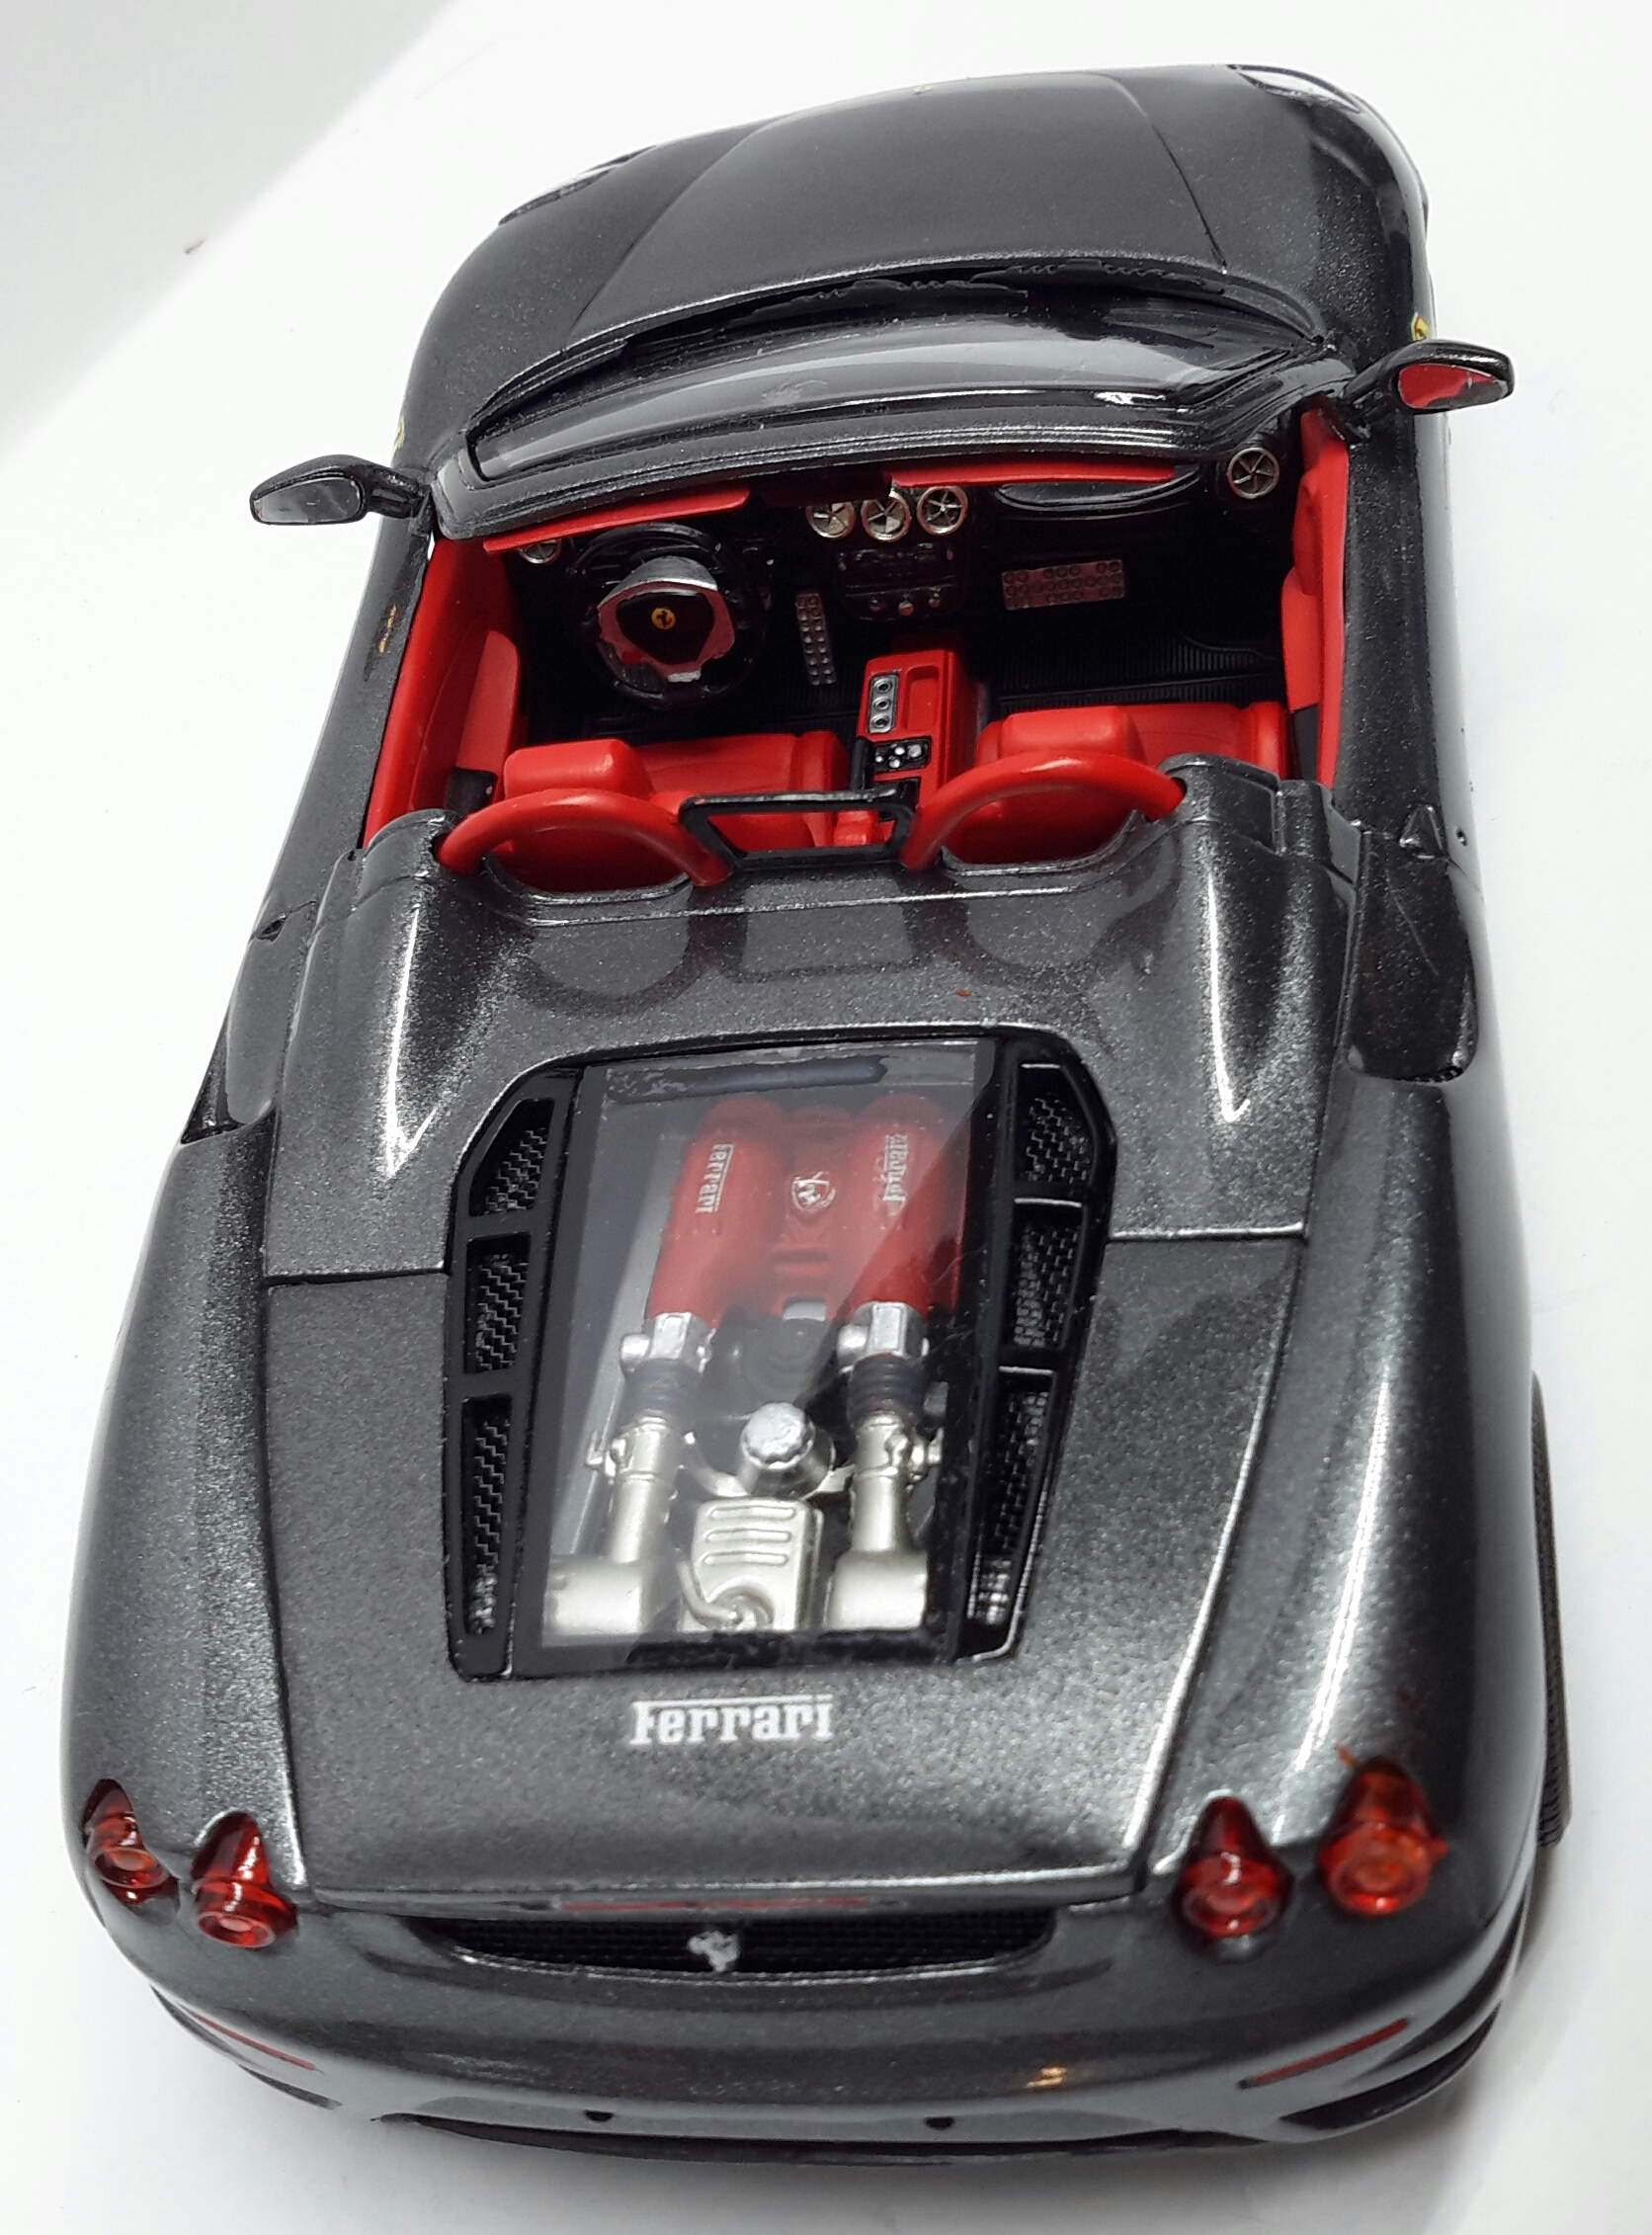
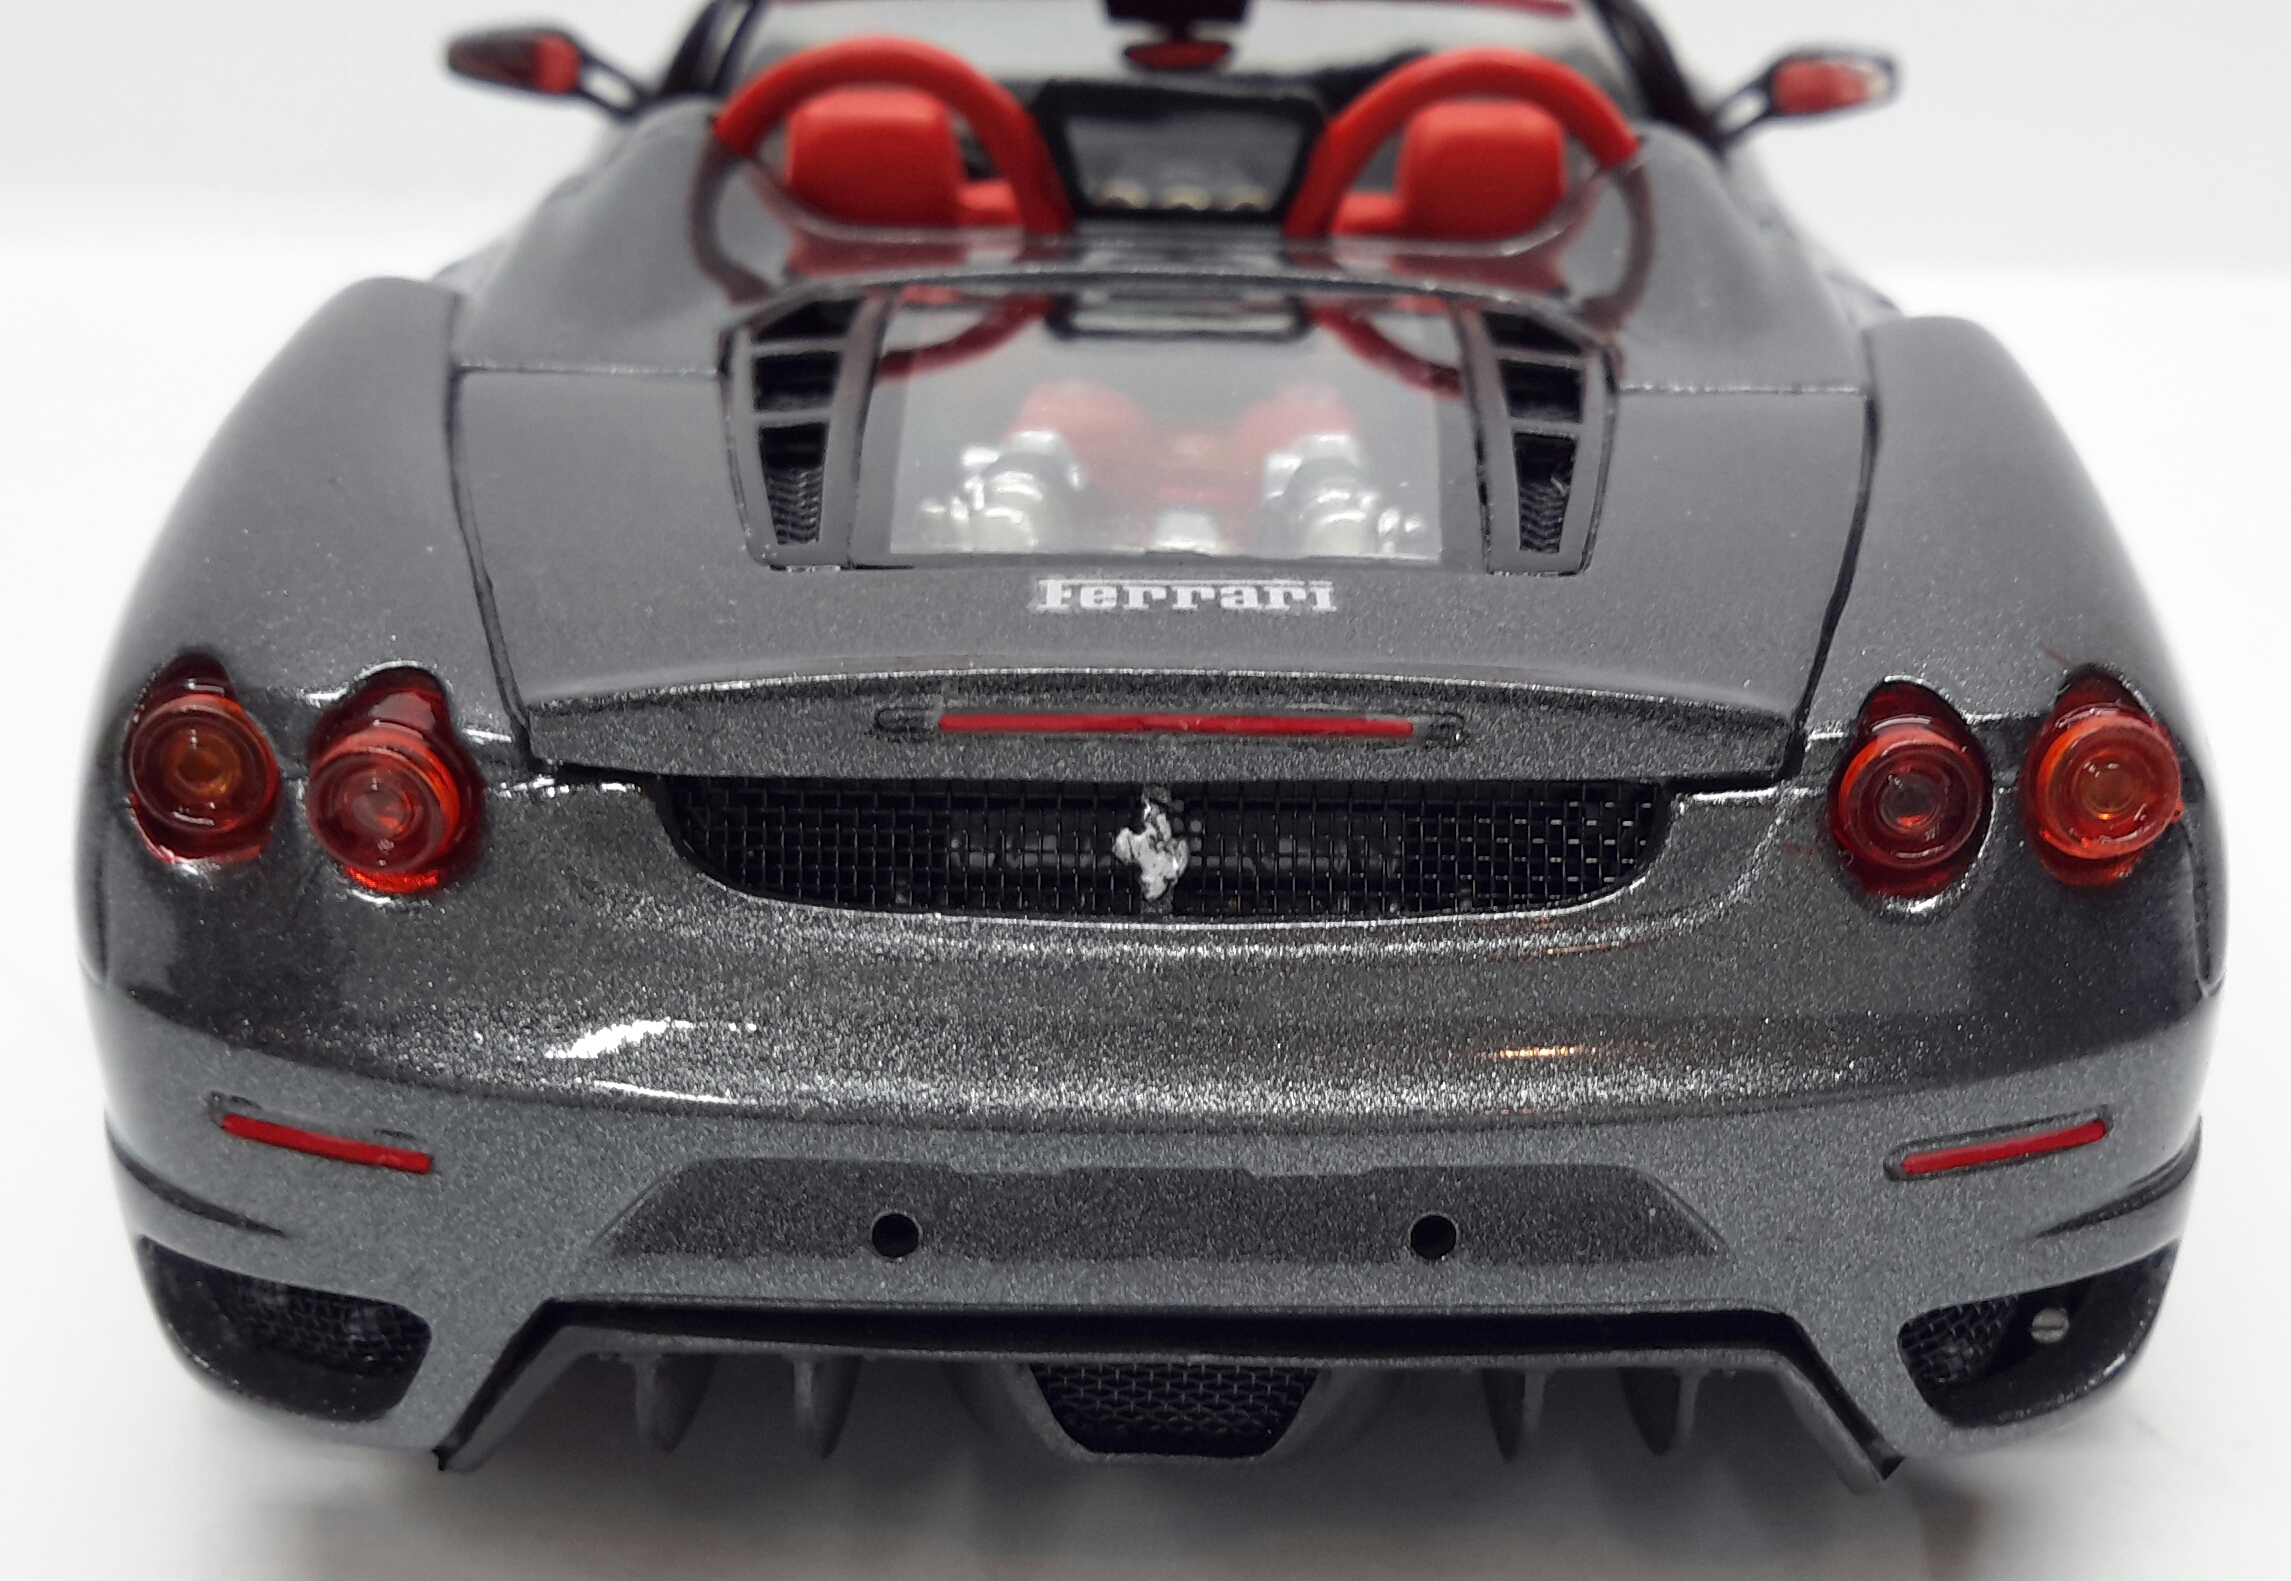
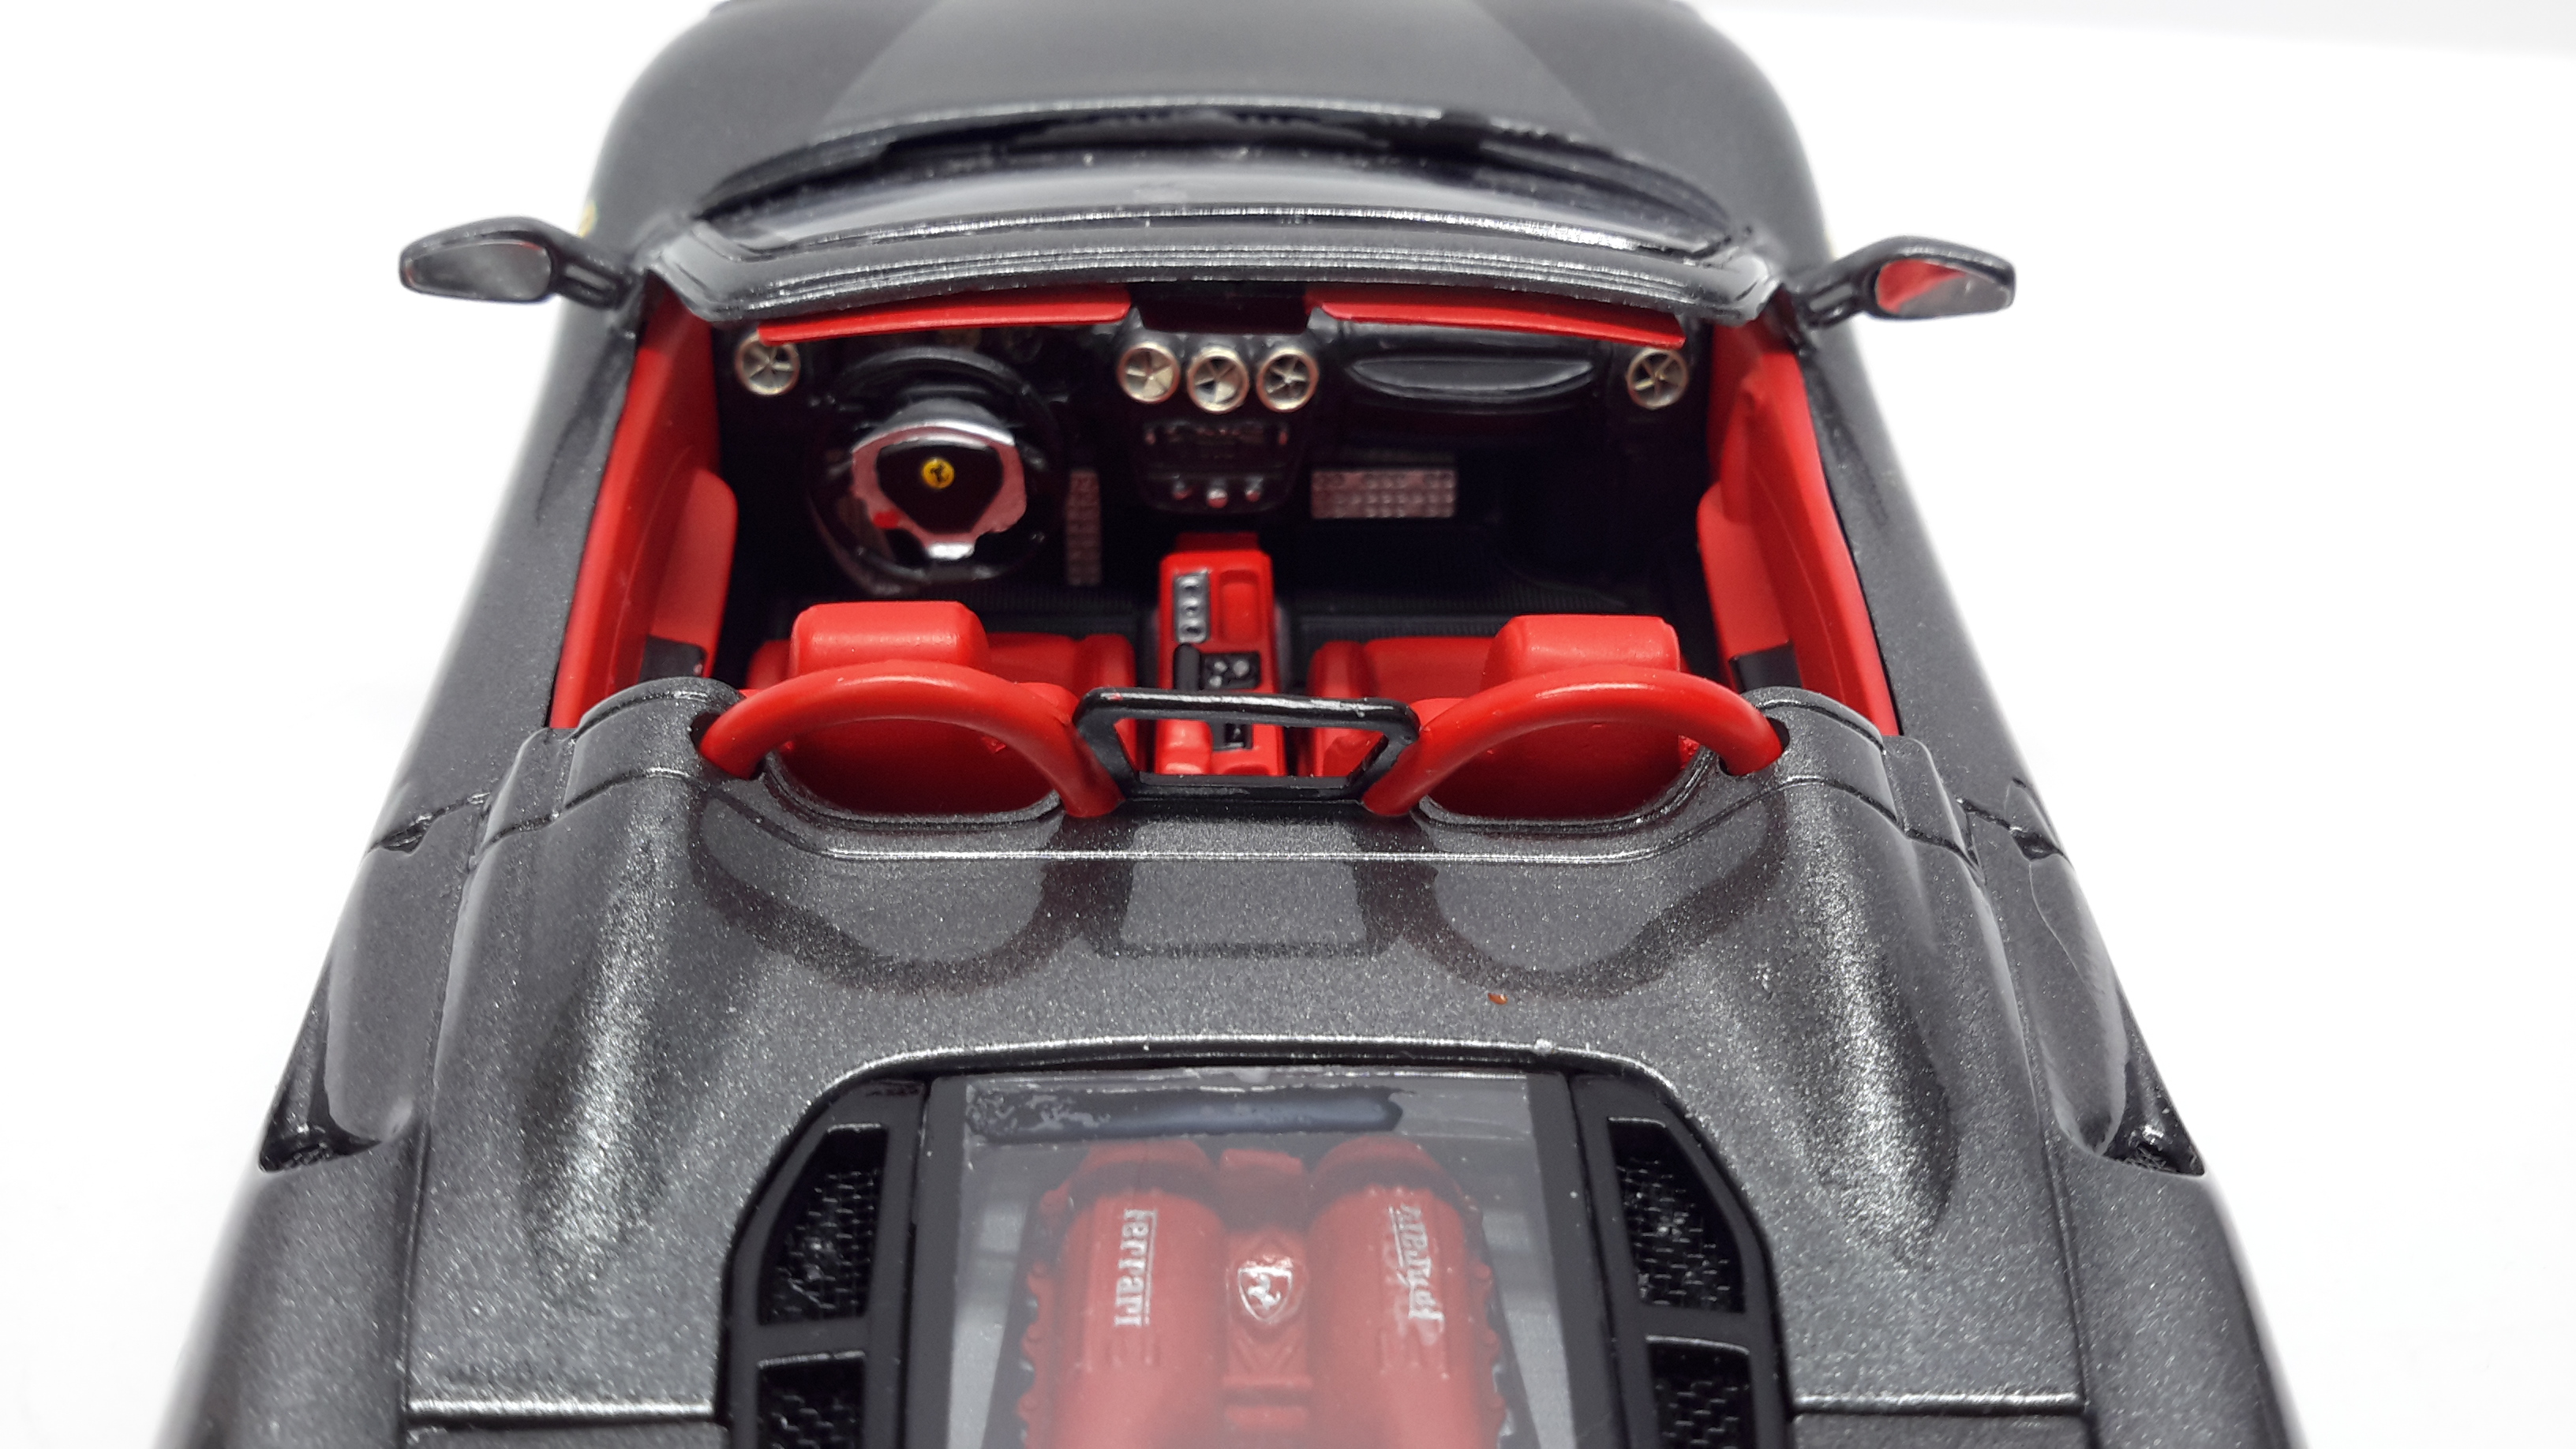
I picked this old kit up off ebay for $15.00. It went together pretty well. The only downside of the kit were the mold seams on the body. They gave me a bunch of trouble. I would think I got them sanded out and they would show back up after primer or I would prime then get ready to paint and catch the light just right and there they were again. The body is painted in Gravity Ferrari Grigio Silverstone and clearcoated with MRP 2K. The seats are Splash Upholstery Red which I loved using. I will be using these interior paints whenever I can. I'll definitely try another one of these inexpensive Revell Ferrari's. They are not bad kits for under 20 bucks.

-
Iwata HP-C Plus airbrush issues
AlbertD replied to AlbertD's topic in Model Building Questions and Answers
Thanks Bill. It was that seal part 1-145-1 and the plunger 1-175-1 that I cleaned and lubed. I should probably replace the rubber part sooner than later. I think I have a pack of replacement parts in terms drawer. -
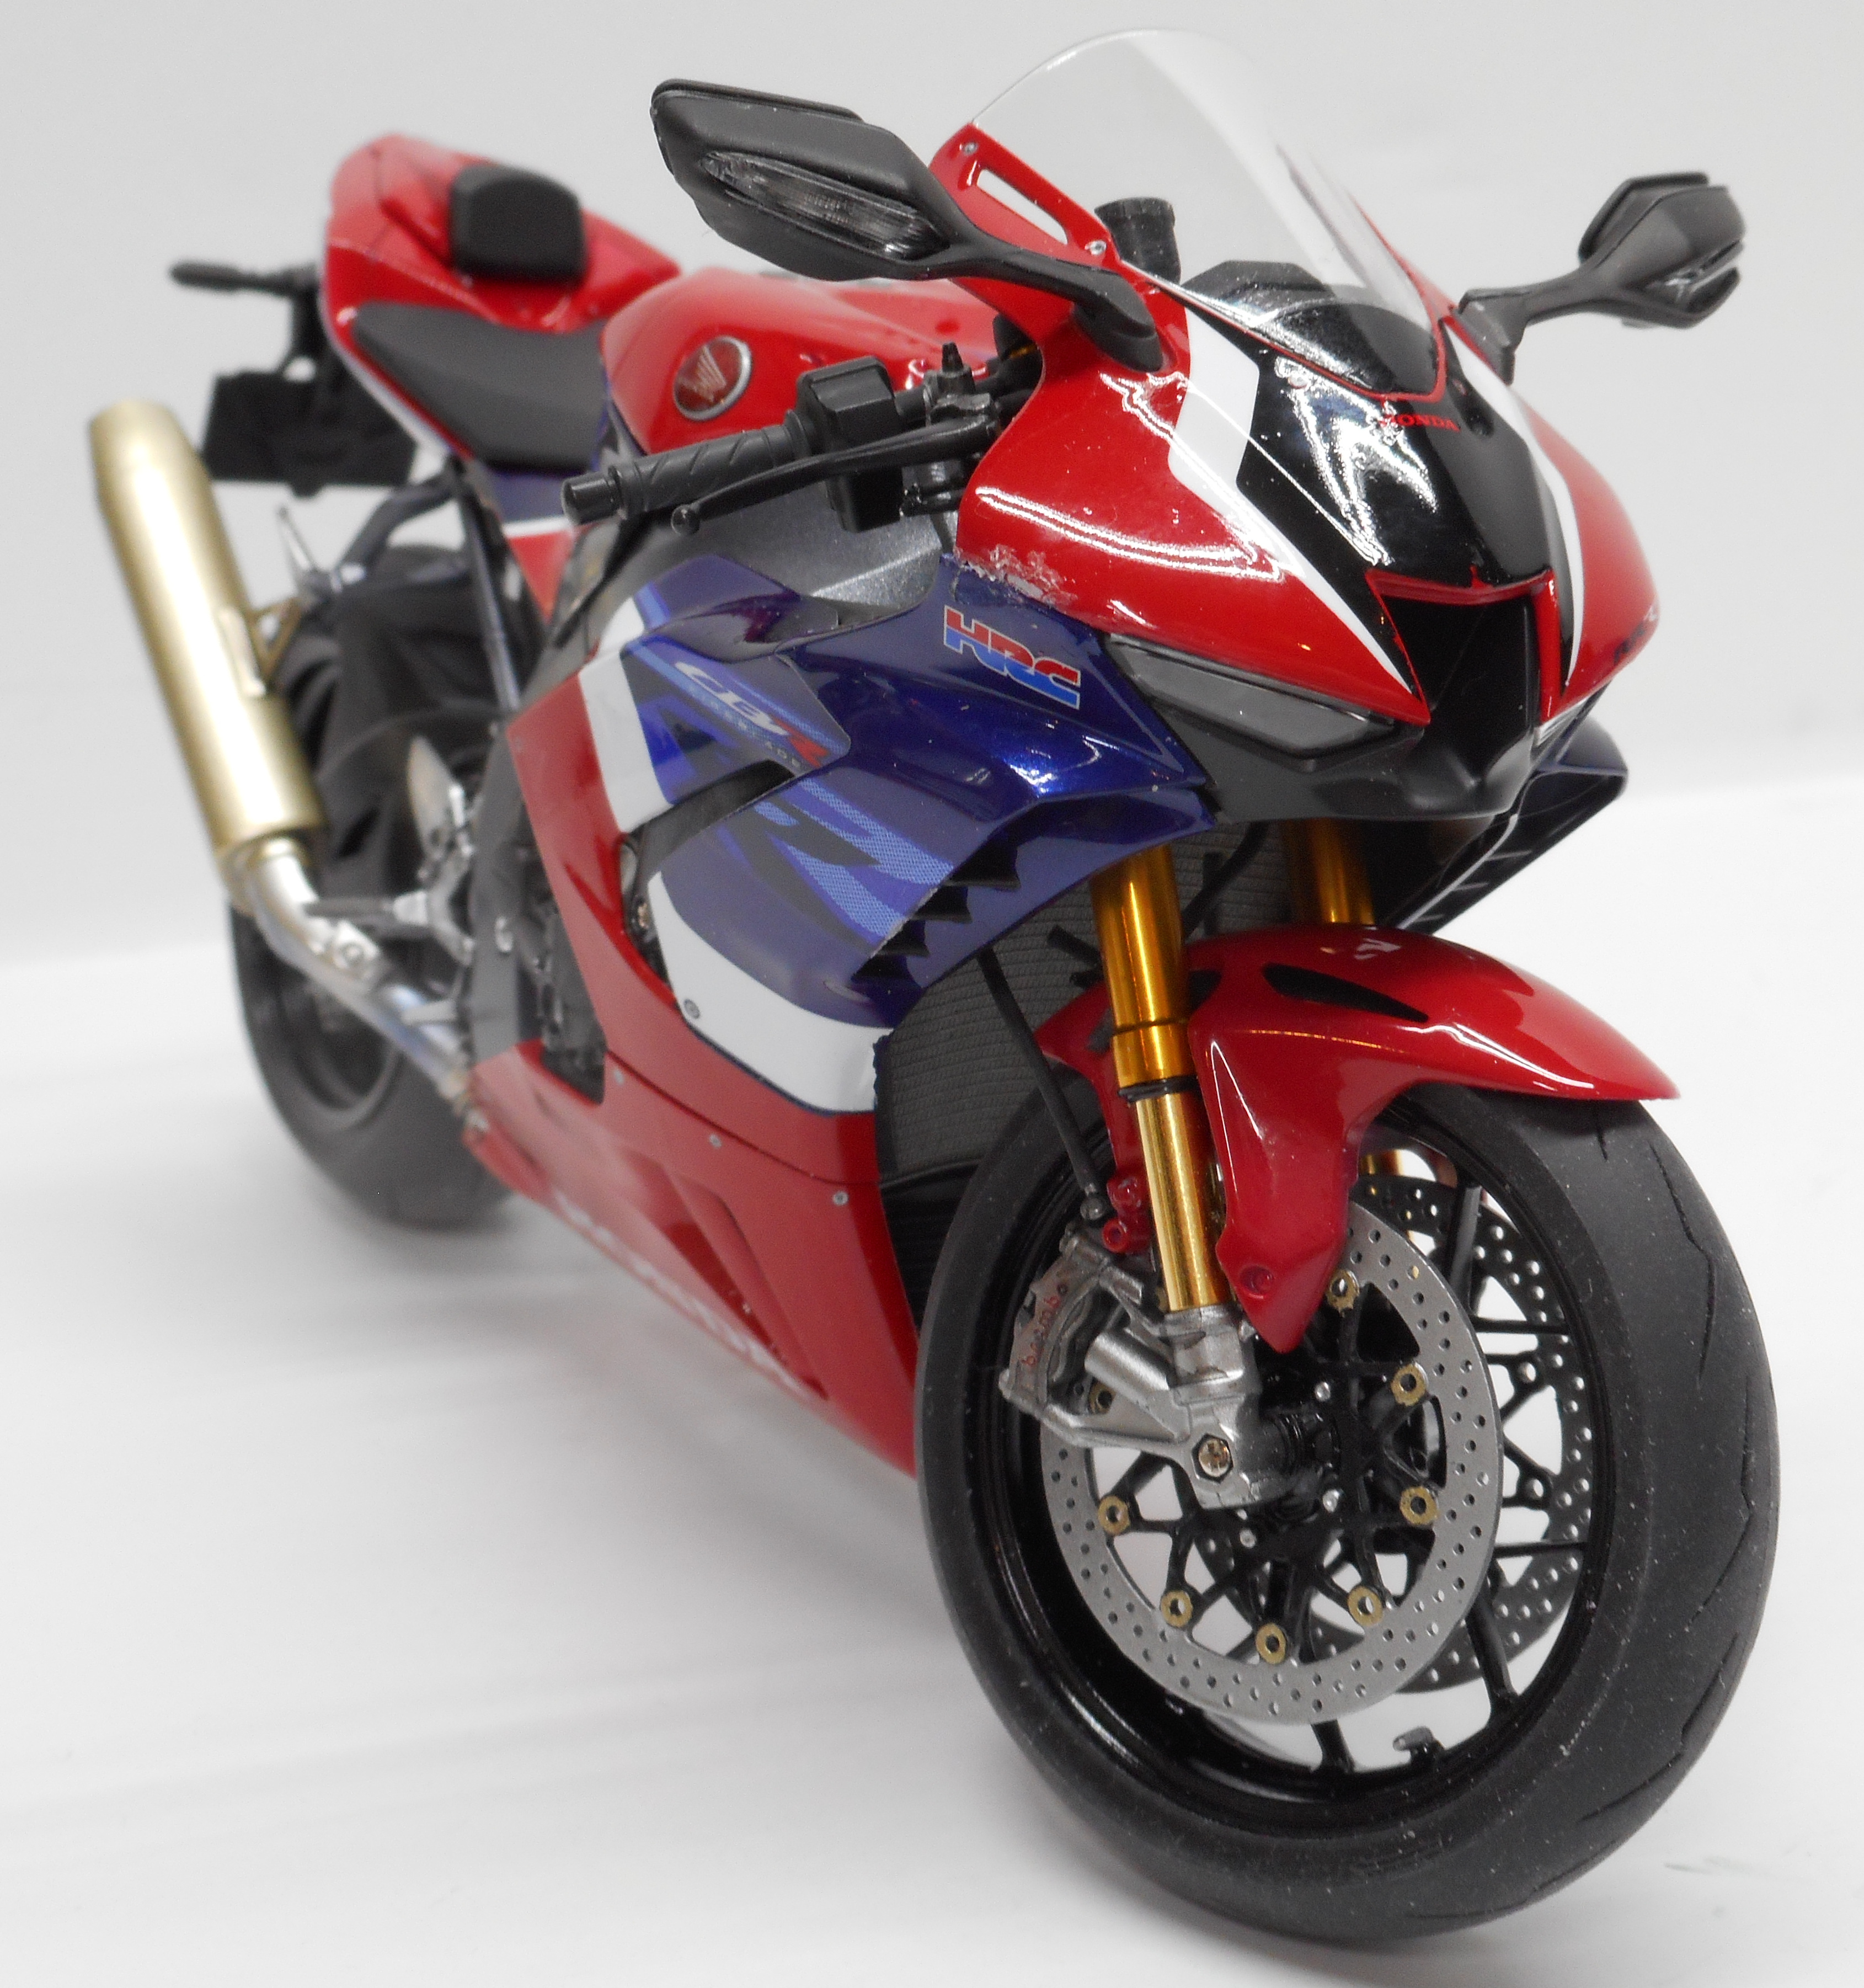
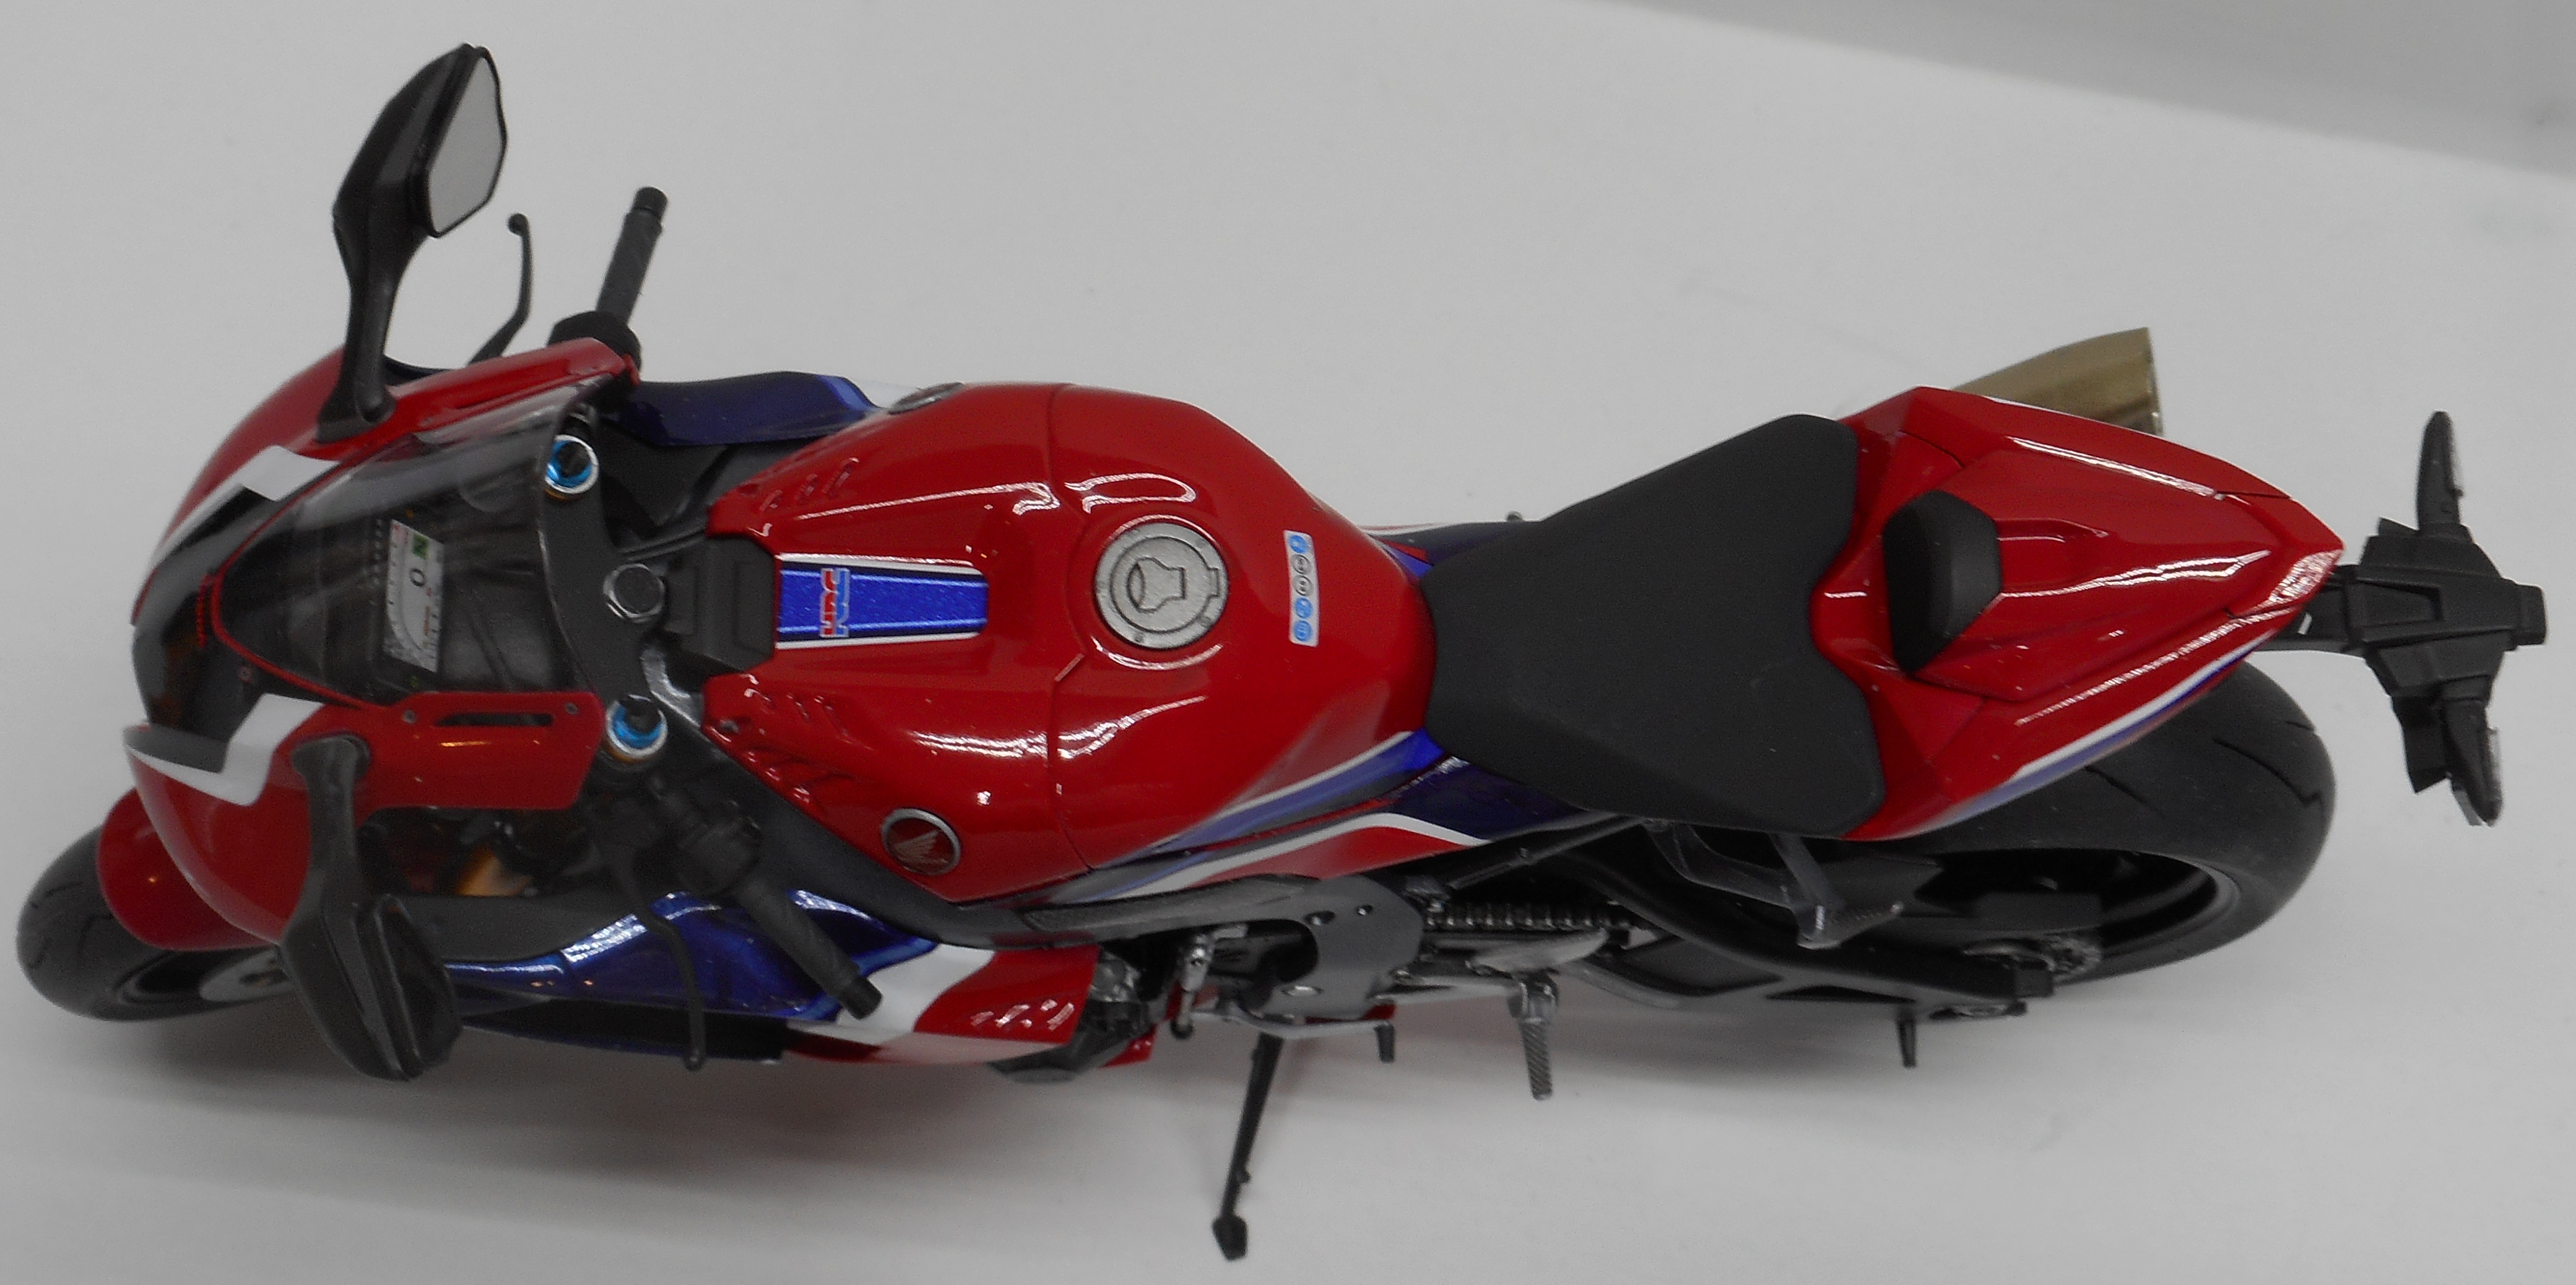
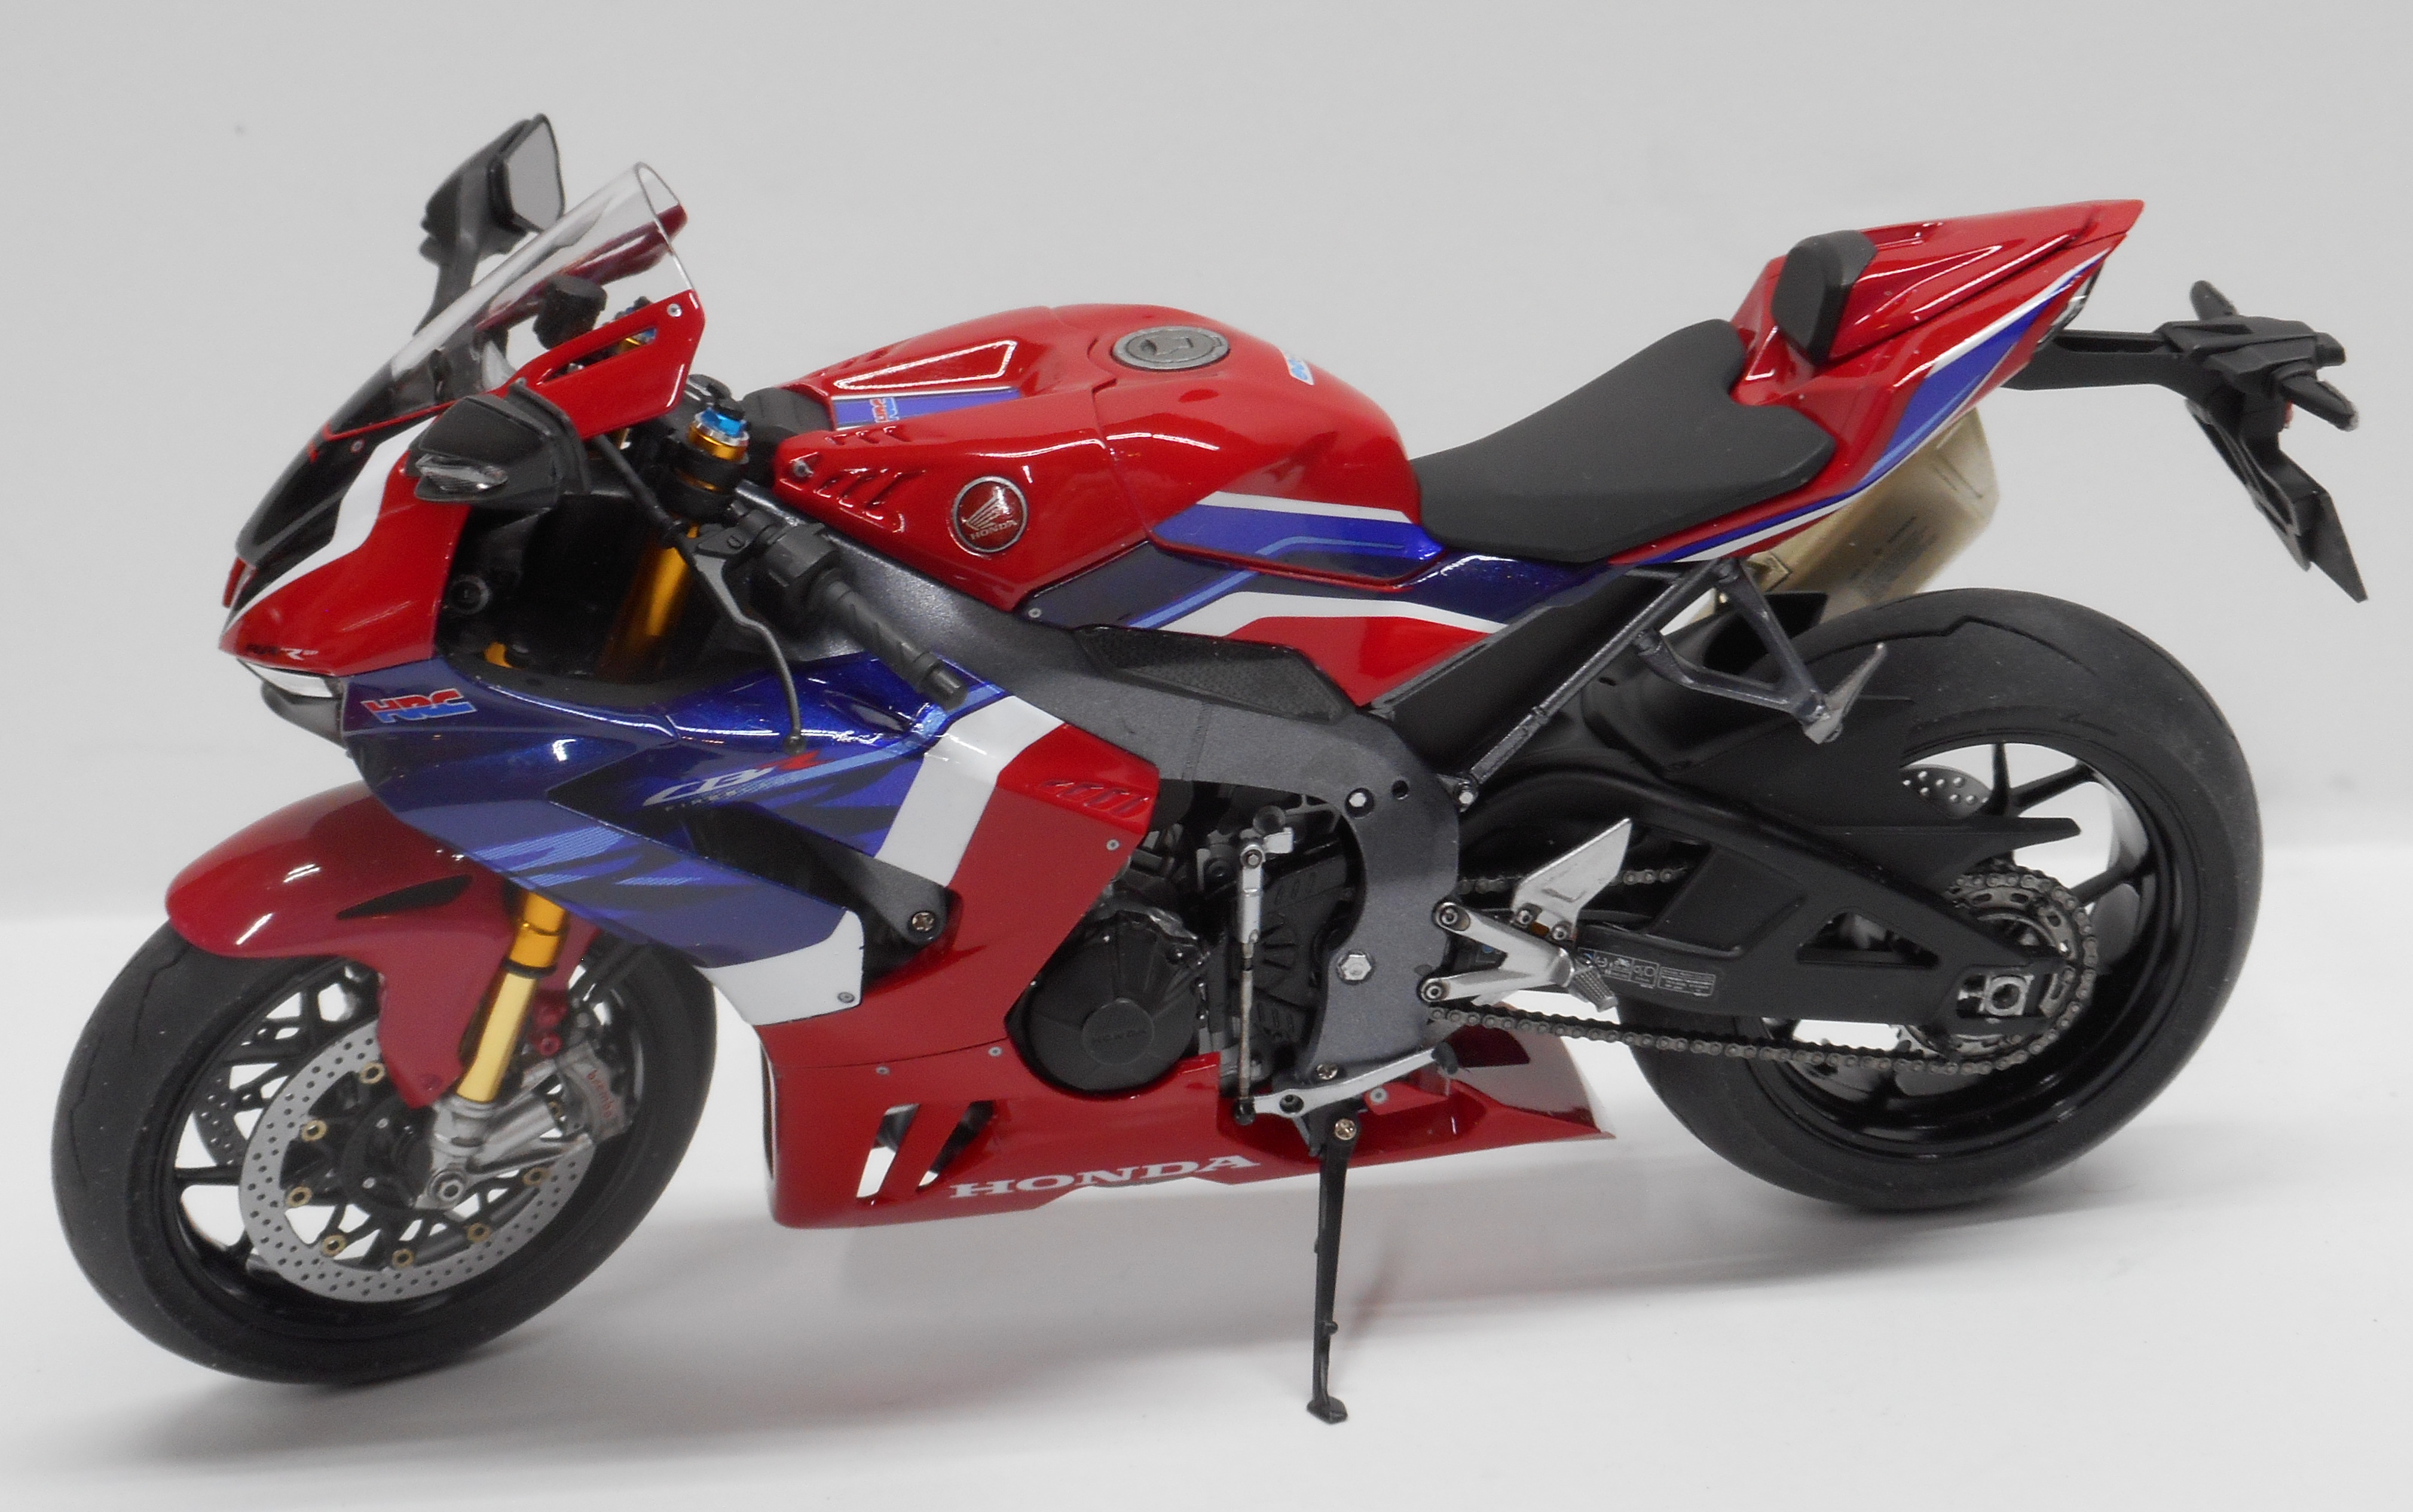
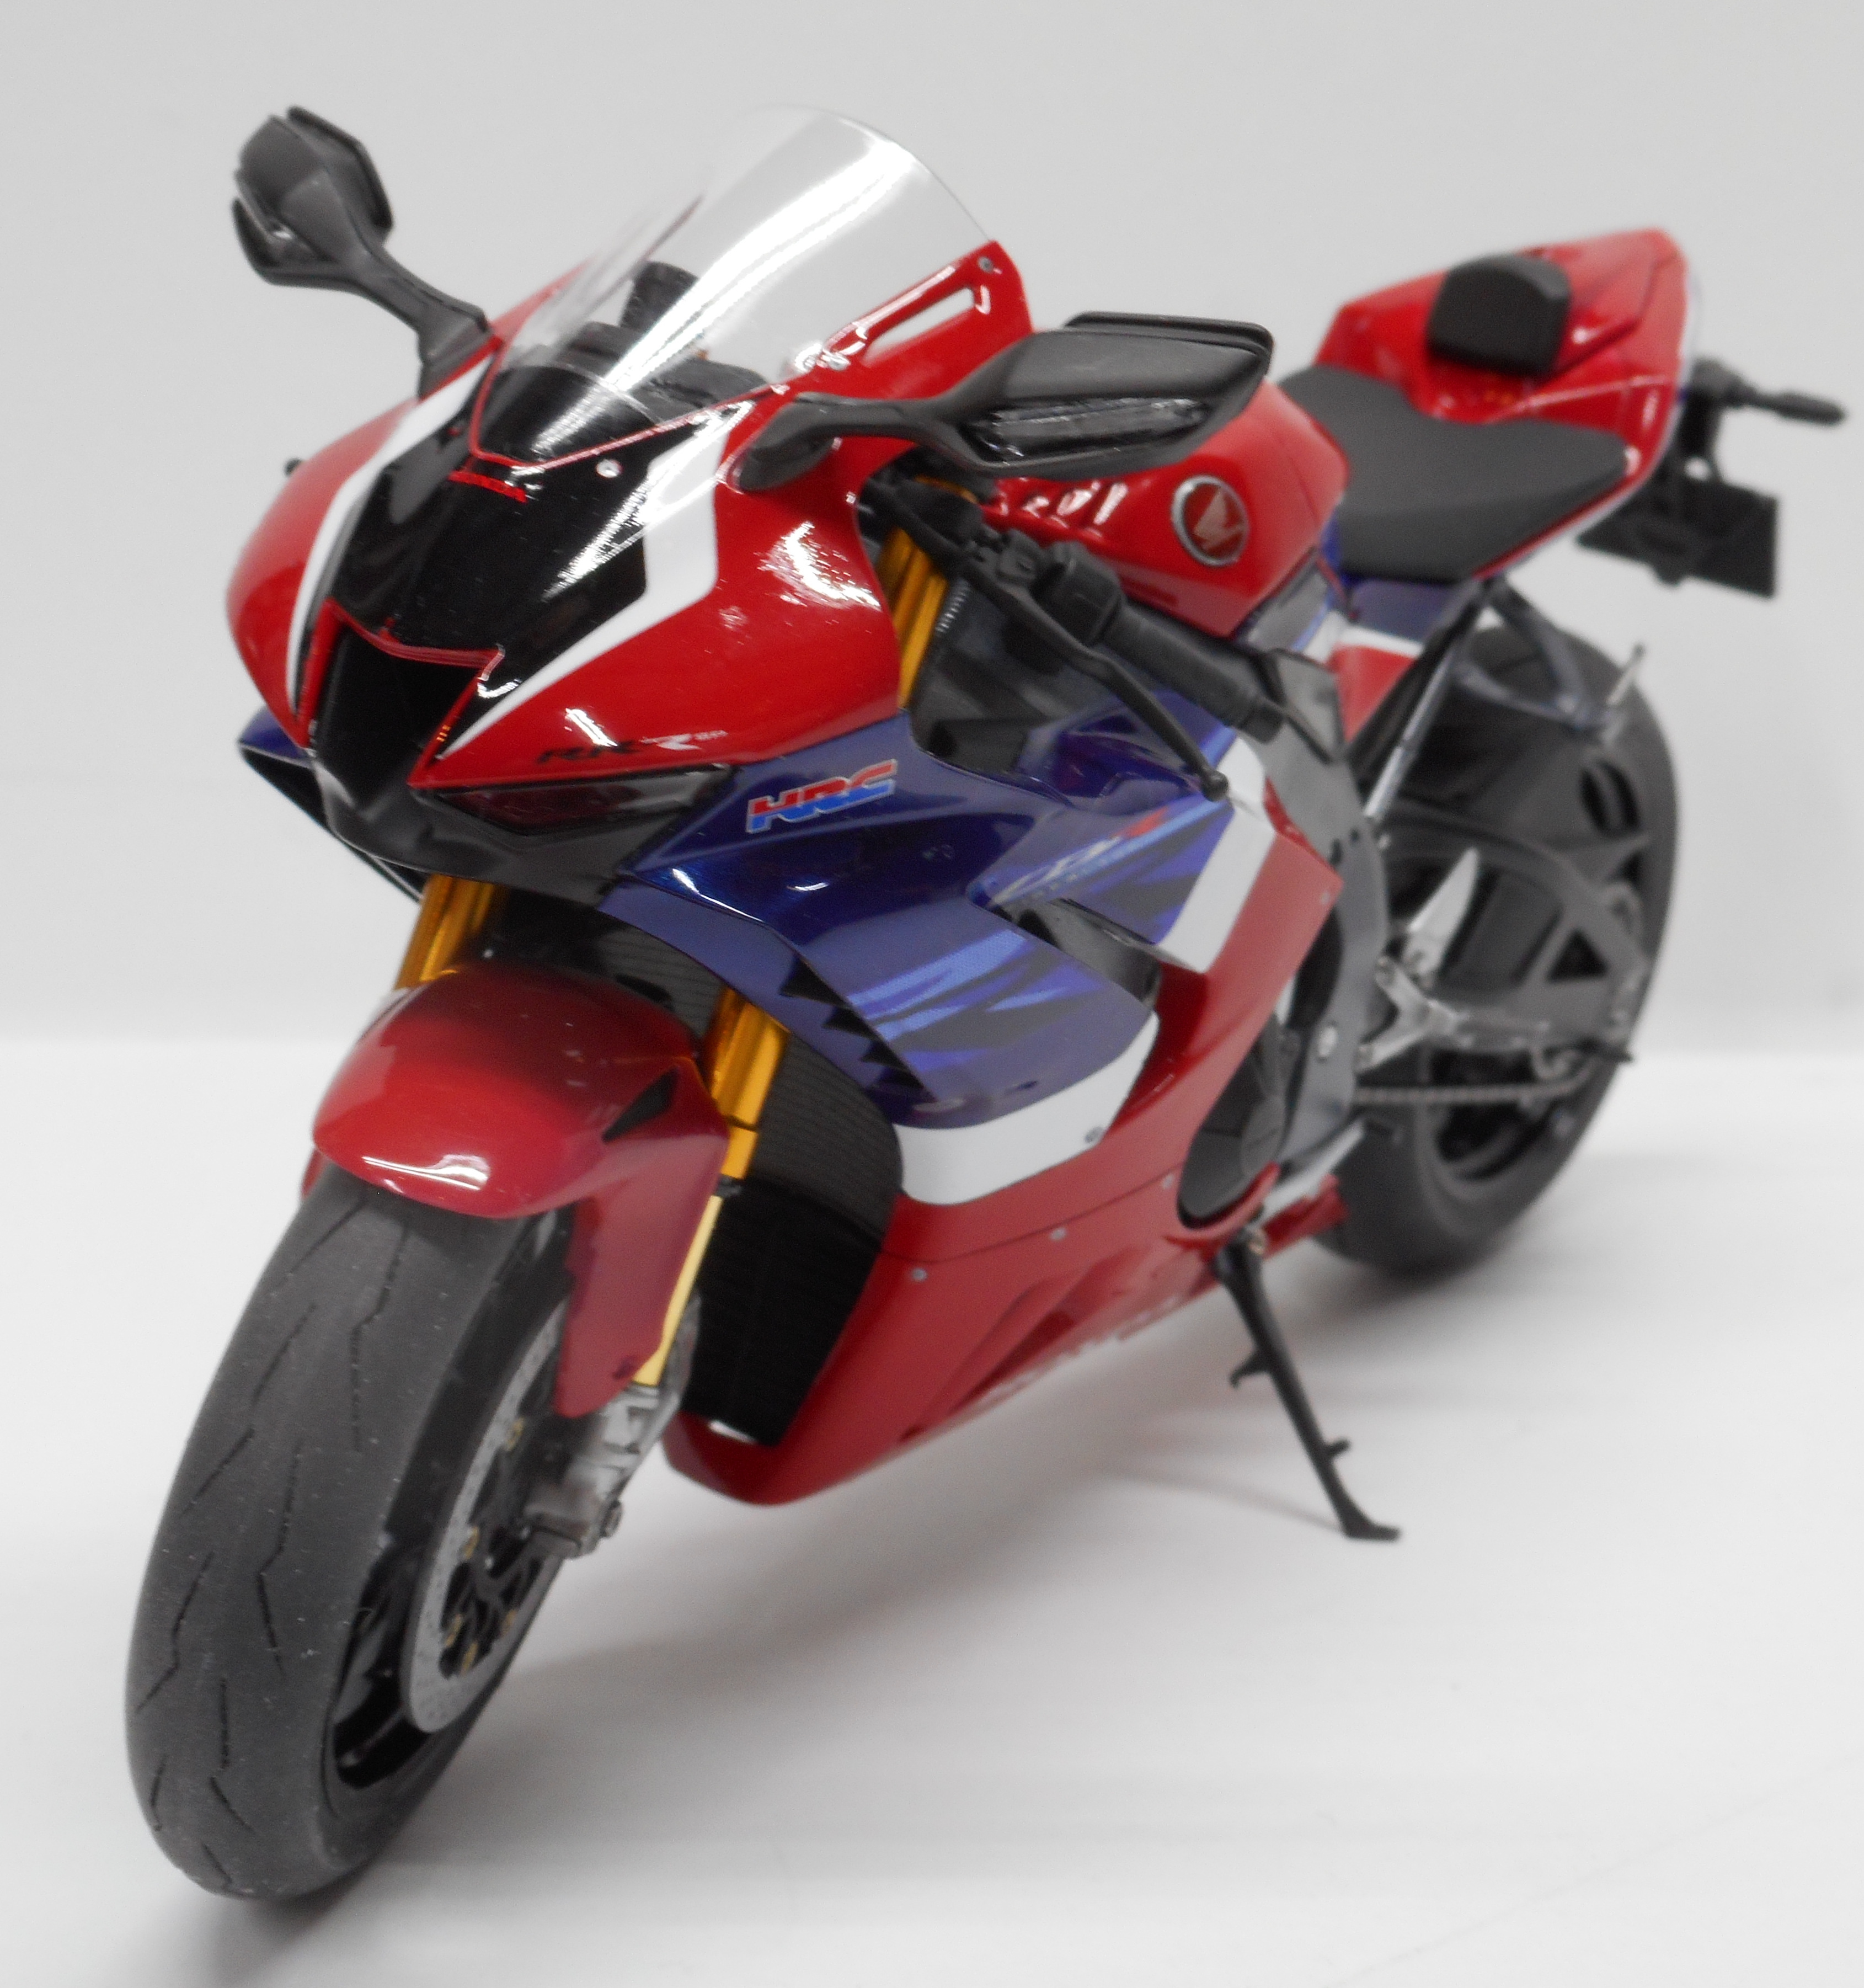
This was my first shot at motorcycle modeling. The kit went together great. I had some issues with the 2K clear coat that you can see in the first picture. All my fault of course. The paints were Tamiya lacquer and the clear was MRP 2K gloss which is as idiot proof as anything I have used. I will be building more bikes for sure.
-
Iwata HP-C Plus airbrush issues
AlbertD replied to AlbertD's topic in Model Building Questions and Answers
Problem solved. I removed the little plunger under the trigger and cleaned the rubber seal and plunger with IPA then lubed it with AB lube and it works like new. It had to be something that simple. -
When I lift my finger off the trigger the air runs on. I have taken the air valve apart to make sure there was no paint inside but all looked good. The only thing I can think of is maybe the spring has weakened. I may take it apart again and see if I can stretch the spring a mm or 2 and see if that helps. Otherwise I may just get a new air valve. Can you guys think of anything else?
-
Pink Monogram 1959 Cadillac Eldorado Convertible
AlbertD replied to lghtngyello03's topic in Model Cars
What a beautiful land yaught. My uncle had one of these with a hard top when I was a kid and it was like riding on a cloud. It was built like a Sherman Tank and probably got about the same milage. Of course in the Italian neighborhood he lived in it had to be black. -
Thanks everyone. I've been learning a bunch from you guys just reading through posts.
-
Thank you all for the kind words. I didn't know black was supposed to be a challenge until I finished this one. It all went very smooth with no issue at all. No sanding between coats and just a bit of real car wax after the 2K set for 3 days.
-
Just finished up my second car model yesterday. I still have plenty to learn but I am loving car models. The airplanes are fun but the cars are just a blast and I'm looking forward to my skills improving and learning to add more detail. This one is OTB using Splash Sublime Green and MRP 2K Gloss clear.
-
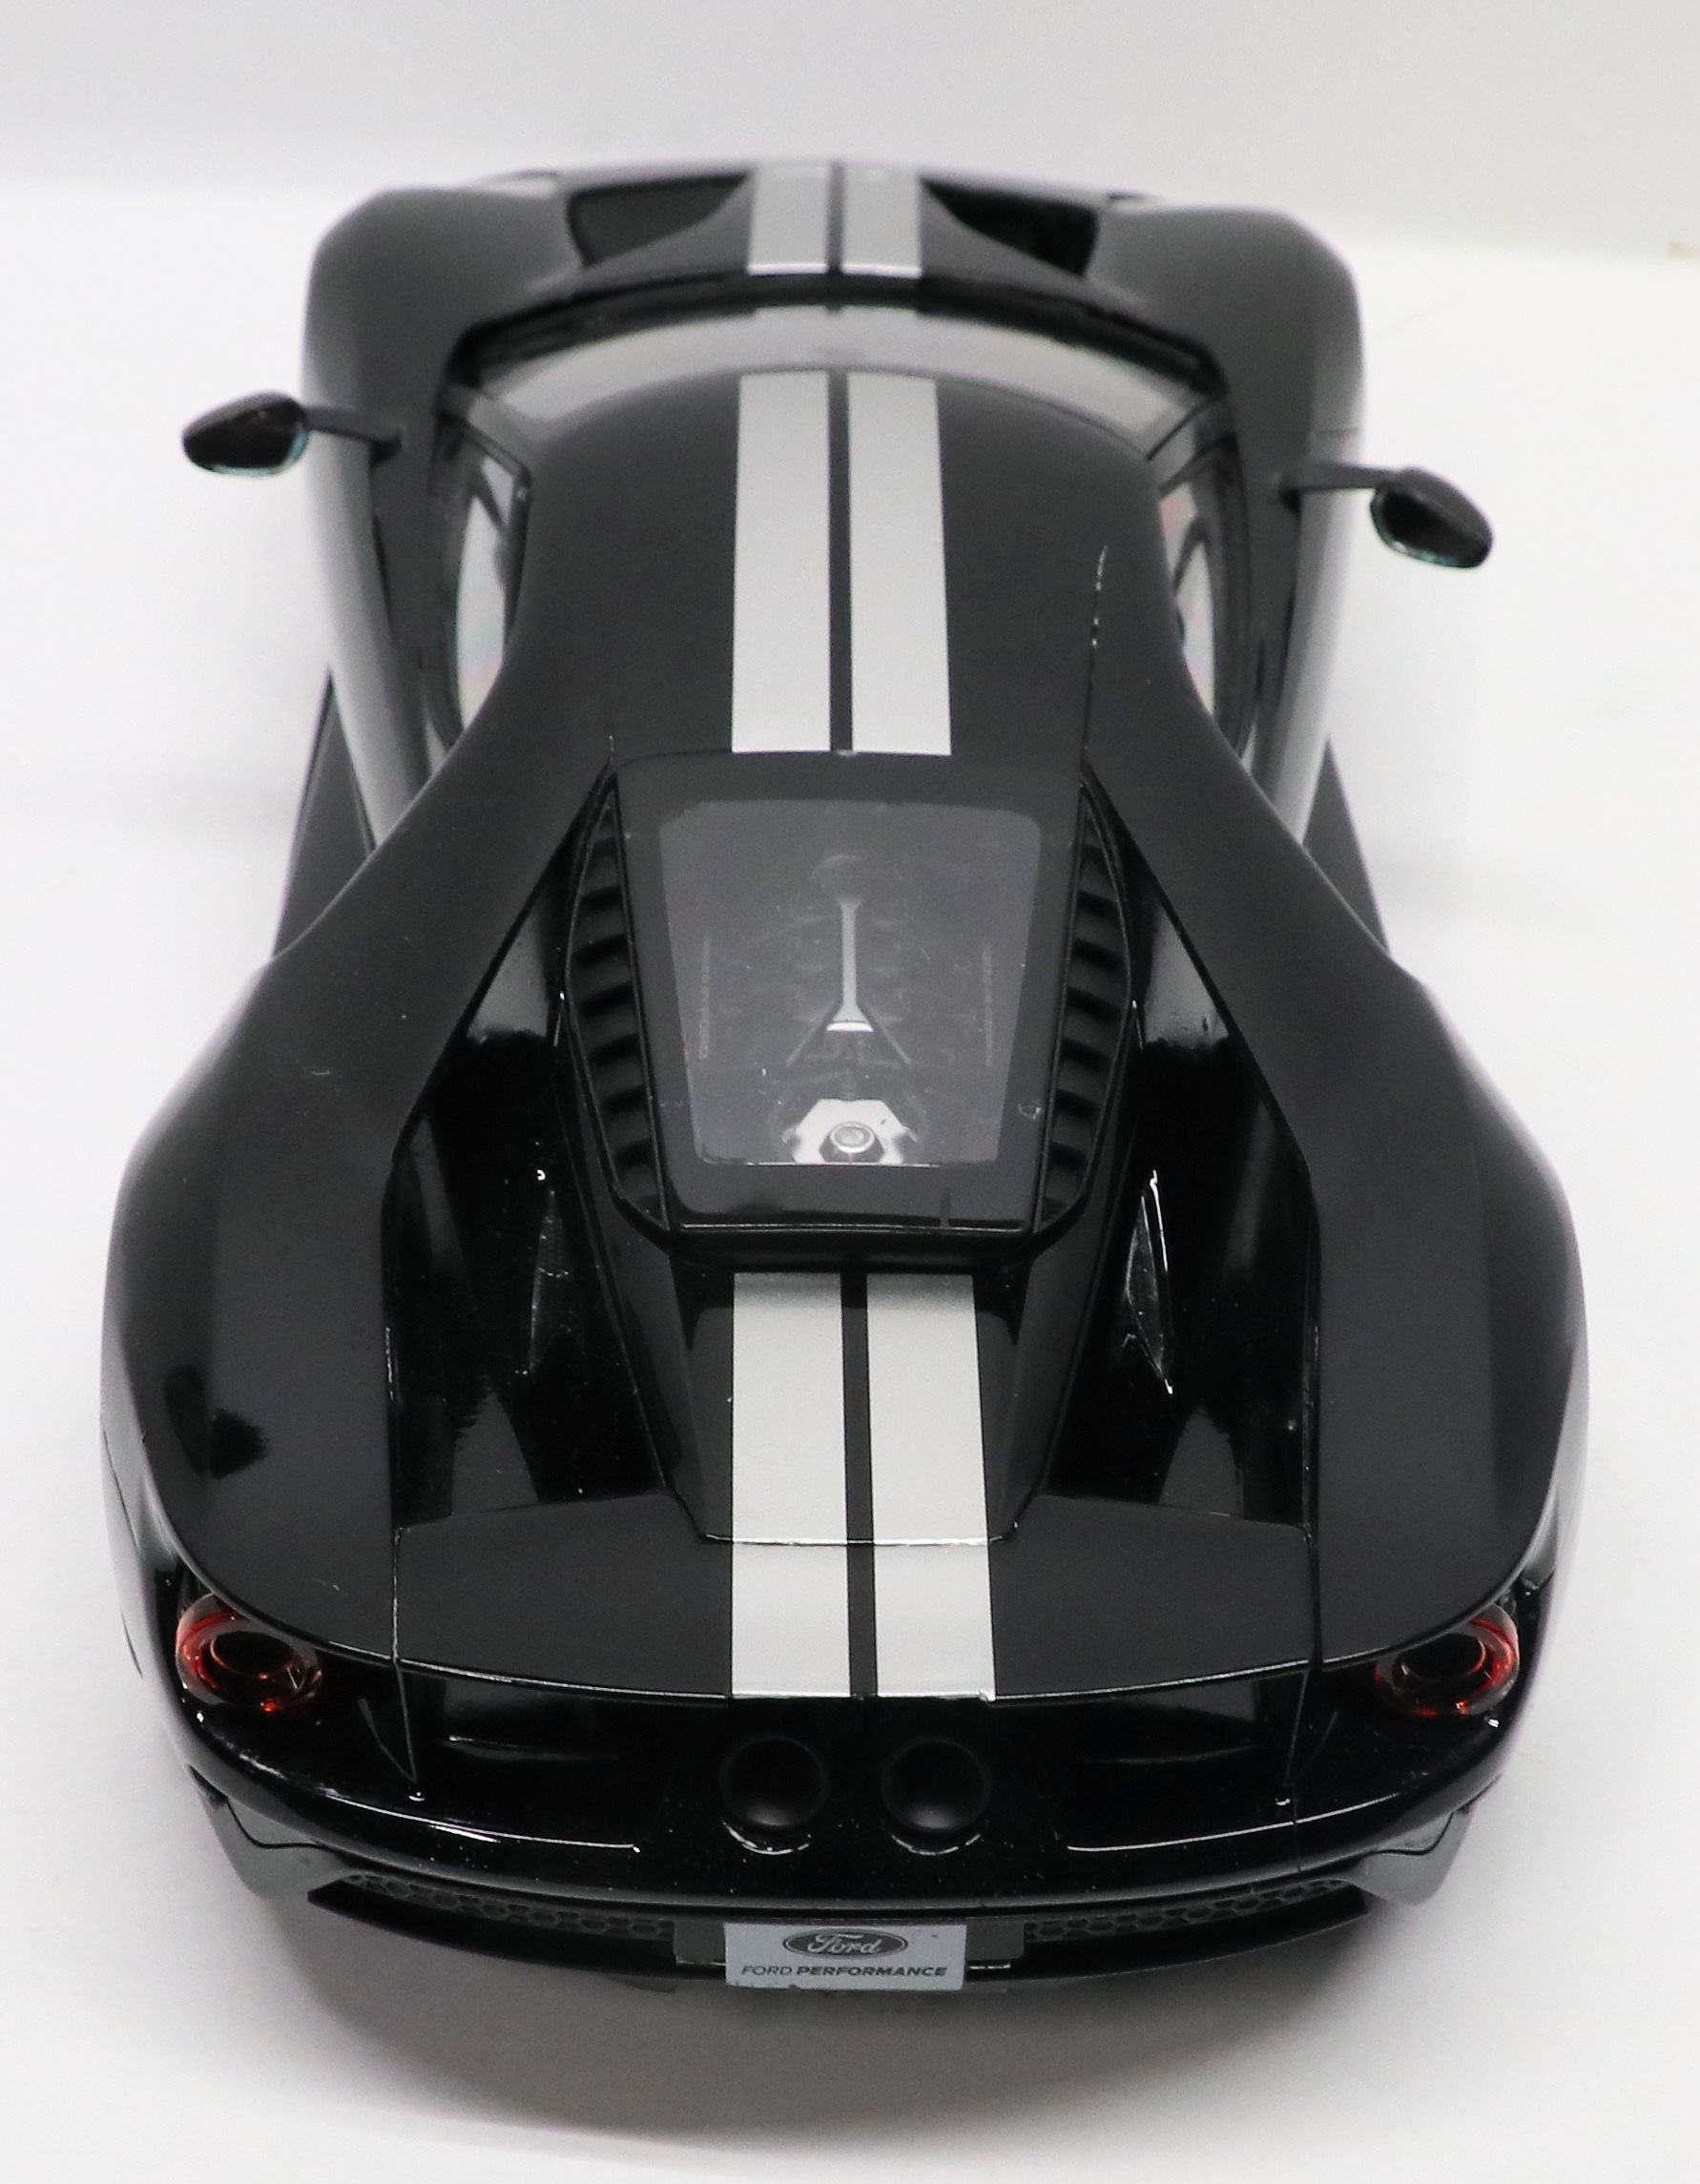
This was built OTB and painted with MRP Super Gloss Black and MRP 2K Clear Gloss. This is my first try at car modeling but I have been building aircraft for a few a couple of years. First time doing a gloss finish and I think it came out pretty decently. Thanks for looking and please feel free to point out anything that would help me improve my work.
-
Very nice. The color is perfect for this car.
-
Thanks to the original poster and all who replied. The information is very useful and I'll sure give it a try.
-
I'm doing a color change on a dicast for a friend who owns a real one which is easy enough. I was able to take it all apart with no problems at all and just need to do some sanding, priming and painting. All I need now is to find some decals for the logos. I've looked at every source I could think of and can't find any. As it stands I'm going to give making my own decals a shot for the first time but I would rather just buy some. Can you guys recommend a source?
-
I'm new to model cars too and just tried BMF for the first time on a 70 Charger. I didn't use the tape method and it turned out okay but not great. I figured it was good for a first try so I was happy with it. My problem is the knife drifting. I find that the less pressure the better. It doesn't seem to take much pressure to make a clean cut and less chance of drift. I also put the foil right on the Splash paint and clear coated over it thinking it would give me a better edge to guide the blade.
-
Aoshima 1/24th scale Pagani Zonda C12
AlbertD replied to Justin Porter's topic in Car Kit News & Reviews
That's a very attractive car. I'll sure pick one up. I even like the color. -
EMI McLaren F1 GTR
AlbertD replied to chris coller's topic in Other Racing: Road Racing, Salt Flat Racers
Beautiful build in every way. I have this kit too and am looking forward to giving it a go. Do the doors open and close and if so was it difficult to make them work? -
Mask floor mats and center console for flocking?
AlbertD replied to AlbertD's topic in Model Building Questions and Answers
Thanks Steve, I followed your advice and it worked great. I'm very happy with the results. -
I'm building a Revell 1970 Dodge Charger with molded in floor mats and would like to flock the floor pan. Will the flocking peel up when I remove the tape? How do you guys suggest I do this? Thanks, Al
-
EMI McLaren F1 GTR
AlbertD replied to chris coller's topic in Other Racing: Road Racing, Salt Flat Racers
Beautiful build. -
Once I get it worked out I'll do that. I don't know if it will work out but we will see.
-
I hope you guys don't mind if I jump in with another interior related question. I come from airplane modeling and used pre-shading on panel lines or low corners in the cockpit and such to enhance the depth. Have you guys ever tried this technique on the seats or other interior parts? I was thinking of shading the folds and highlighting the high points and see how it looks.
-
That's a cool 442. My brother had one just like it when I was a kid. He bought it brand new and used to love to scare the heck out of me in it.
-
I didn't even know PE keyhole existed until you guys mentioned them. This is only my second car model coming from aircraft. I've used plenty of PE on airplanes though. I'll pick some up and see what else is out there.