Plasticated Guy
-
Posts
70 -
Joined
-
Last visited
Content Type
Profiles
Forums
Events
Gallery
Everything posted by Plasticated Guy
-
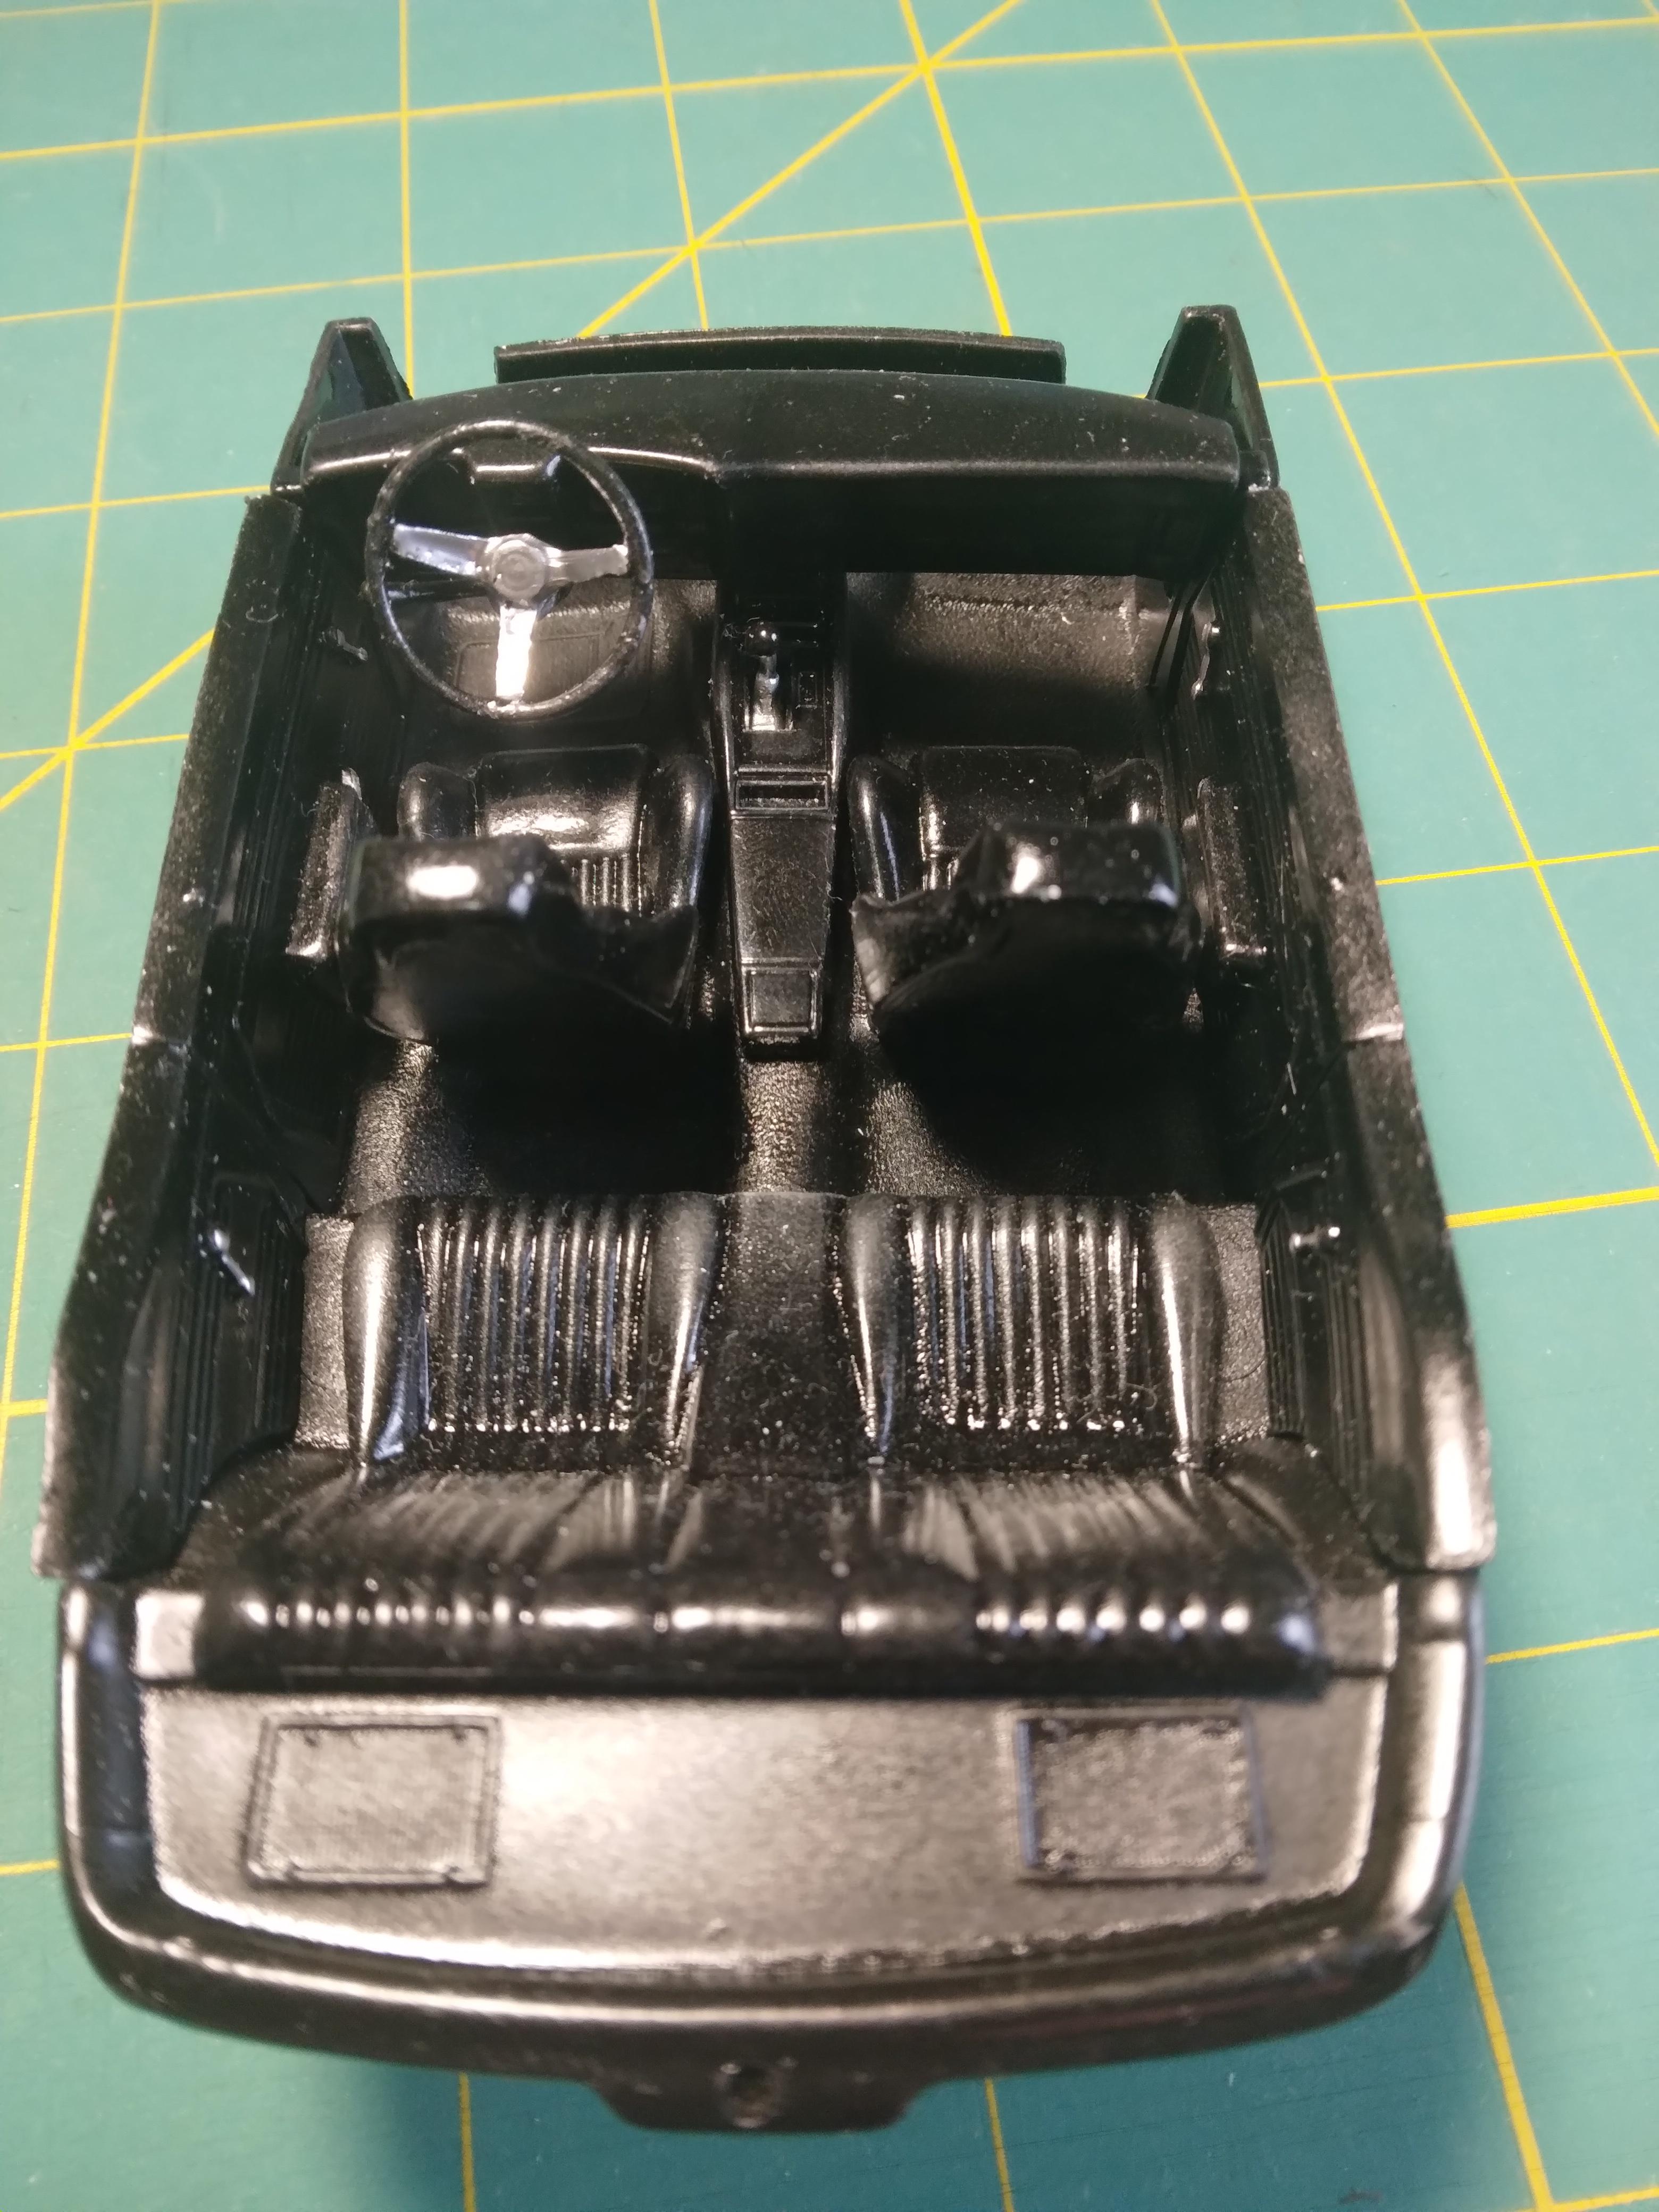
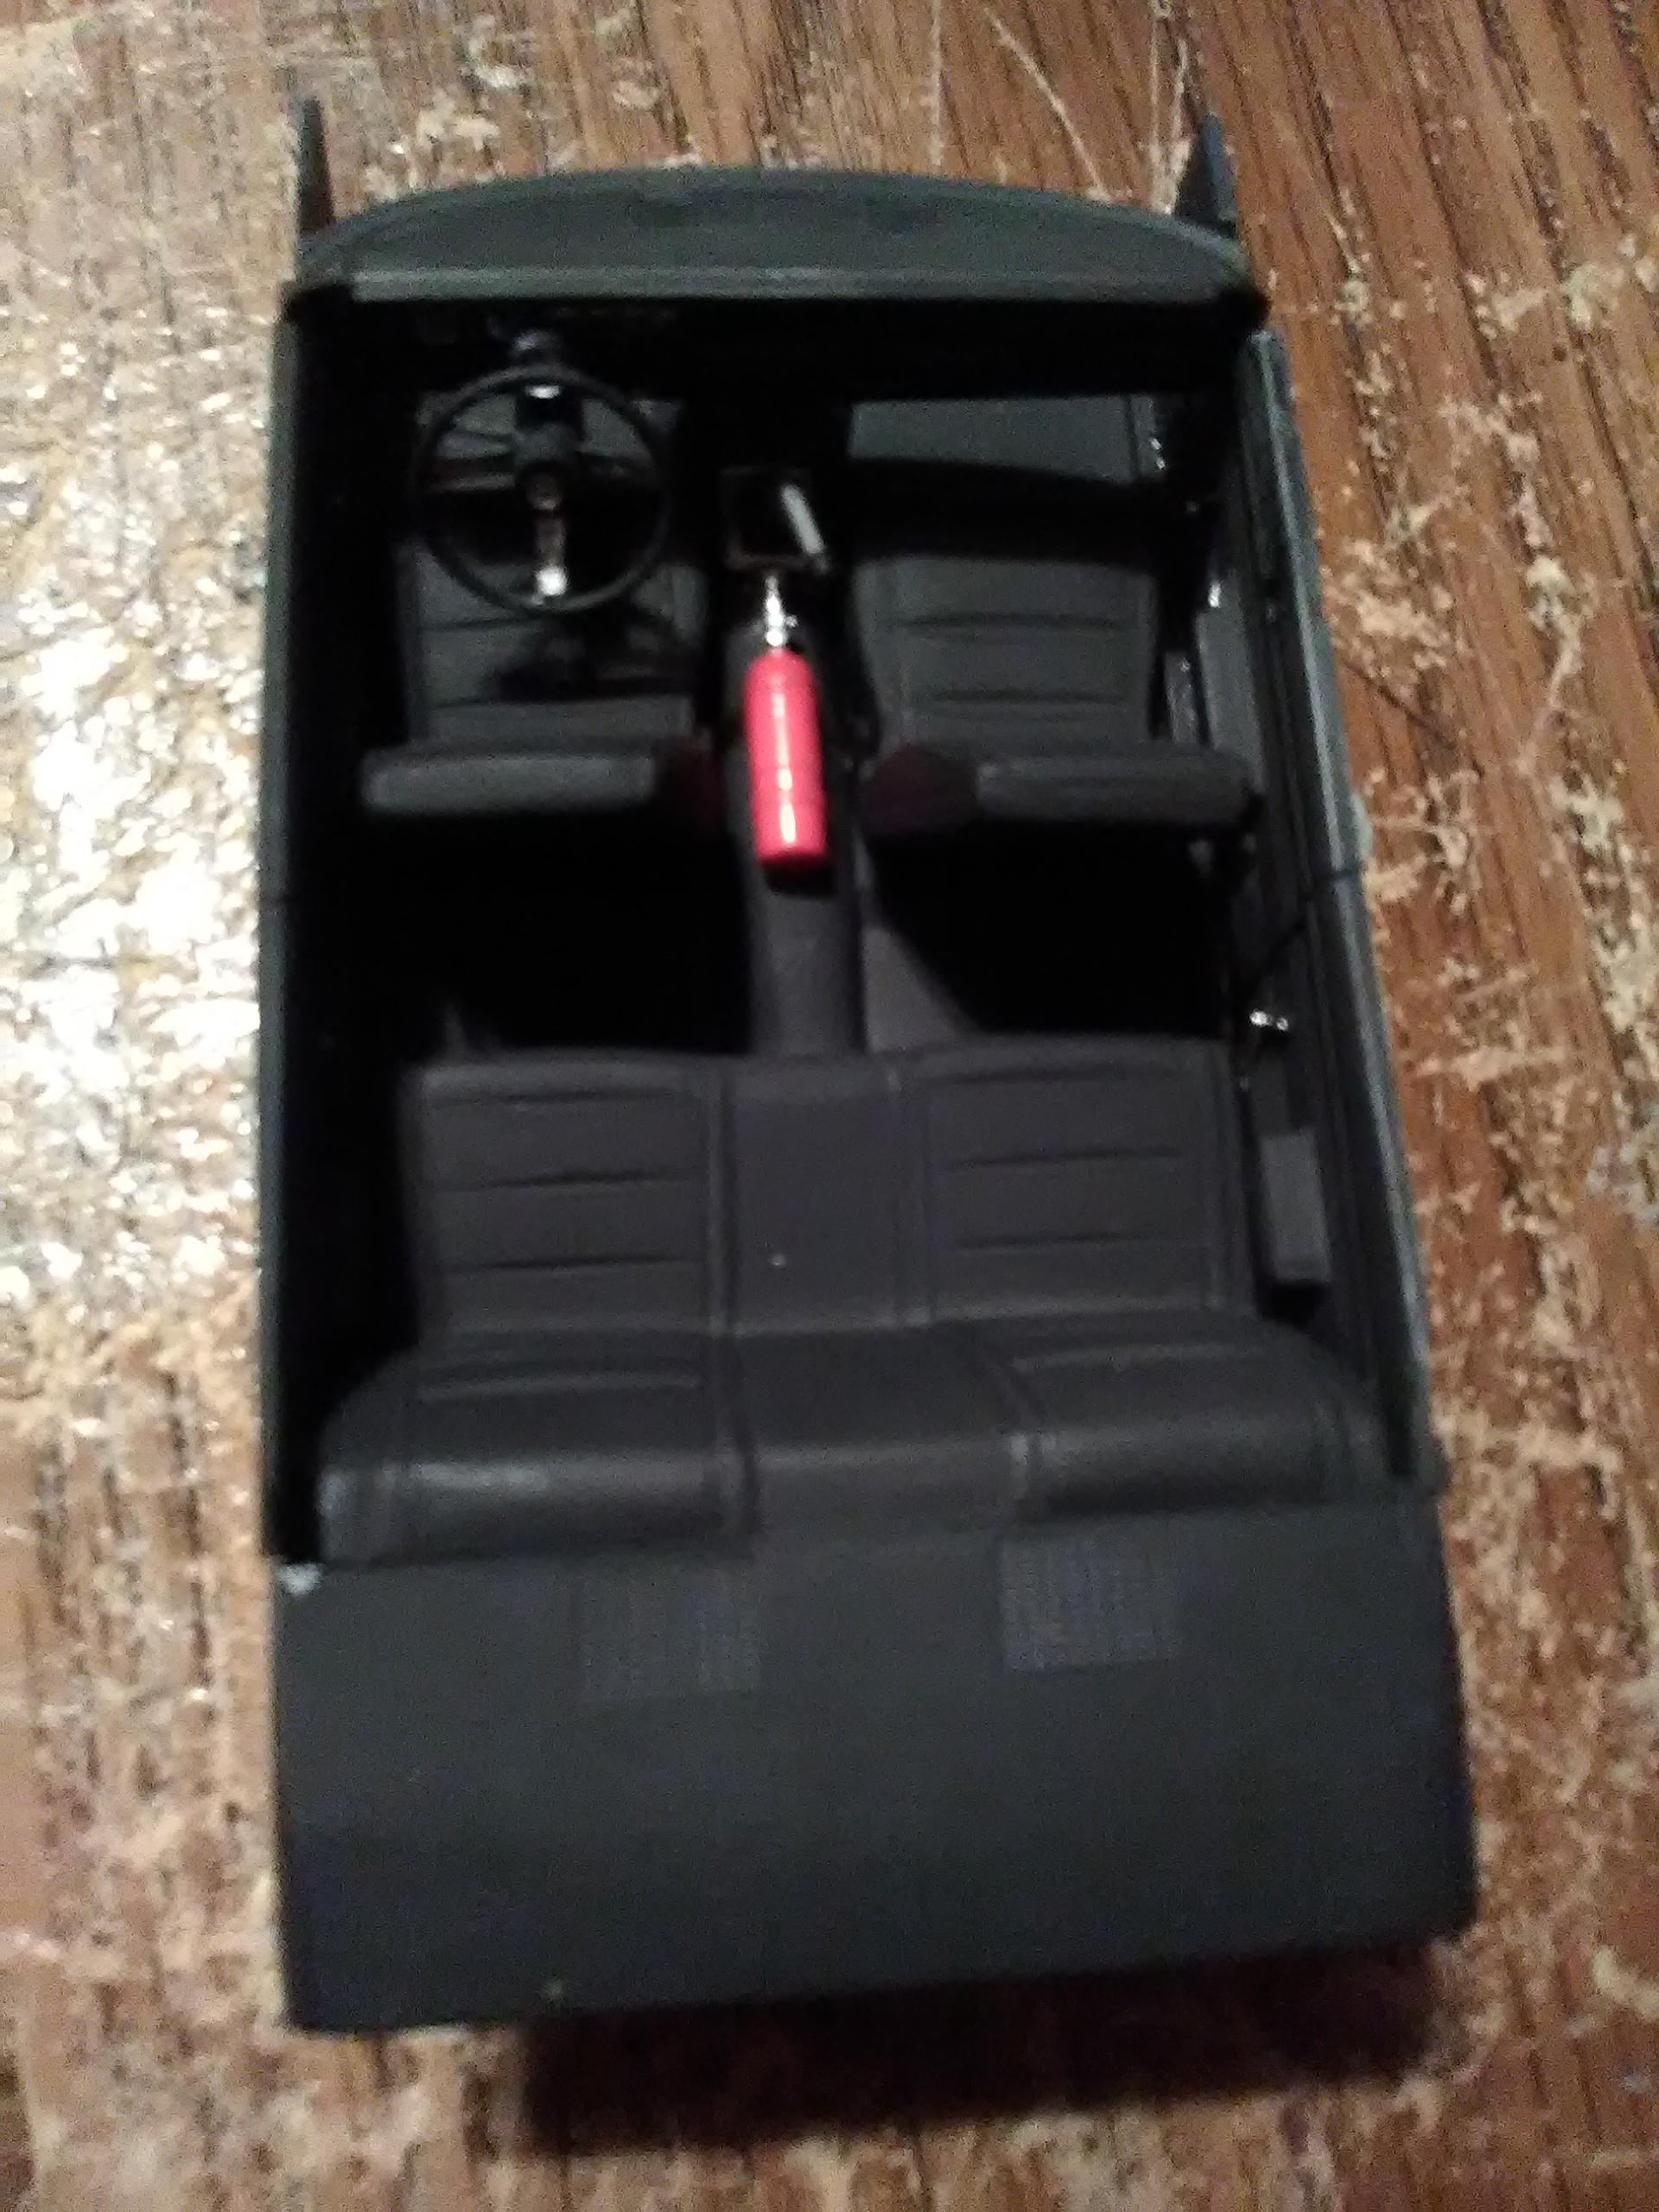
And here is the finished interior. The seats are from the Firebird and the floor is flat black, the seats, door panels, and dashboard are satin black, and the console is gloss black. The rear seat needed little modification to fit. Just bodywork and final assembly to go.

-
It's a Revell 1969 Camaro RS. Here's a link to my first attempt at this.
-
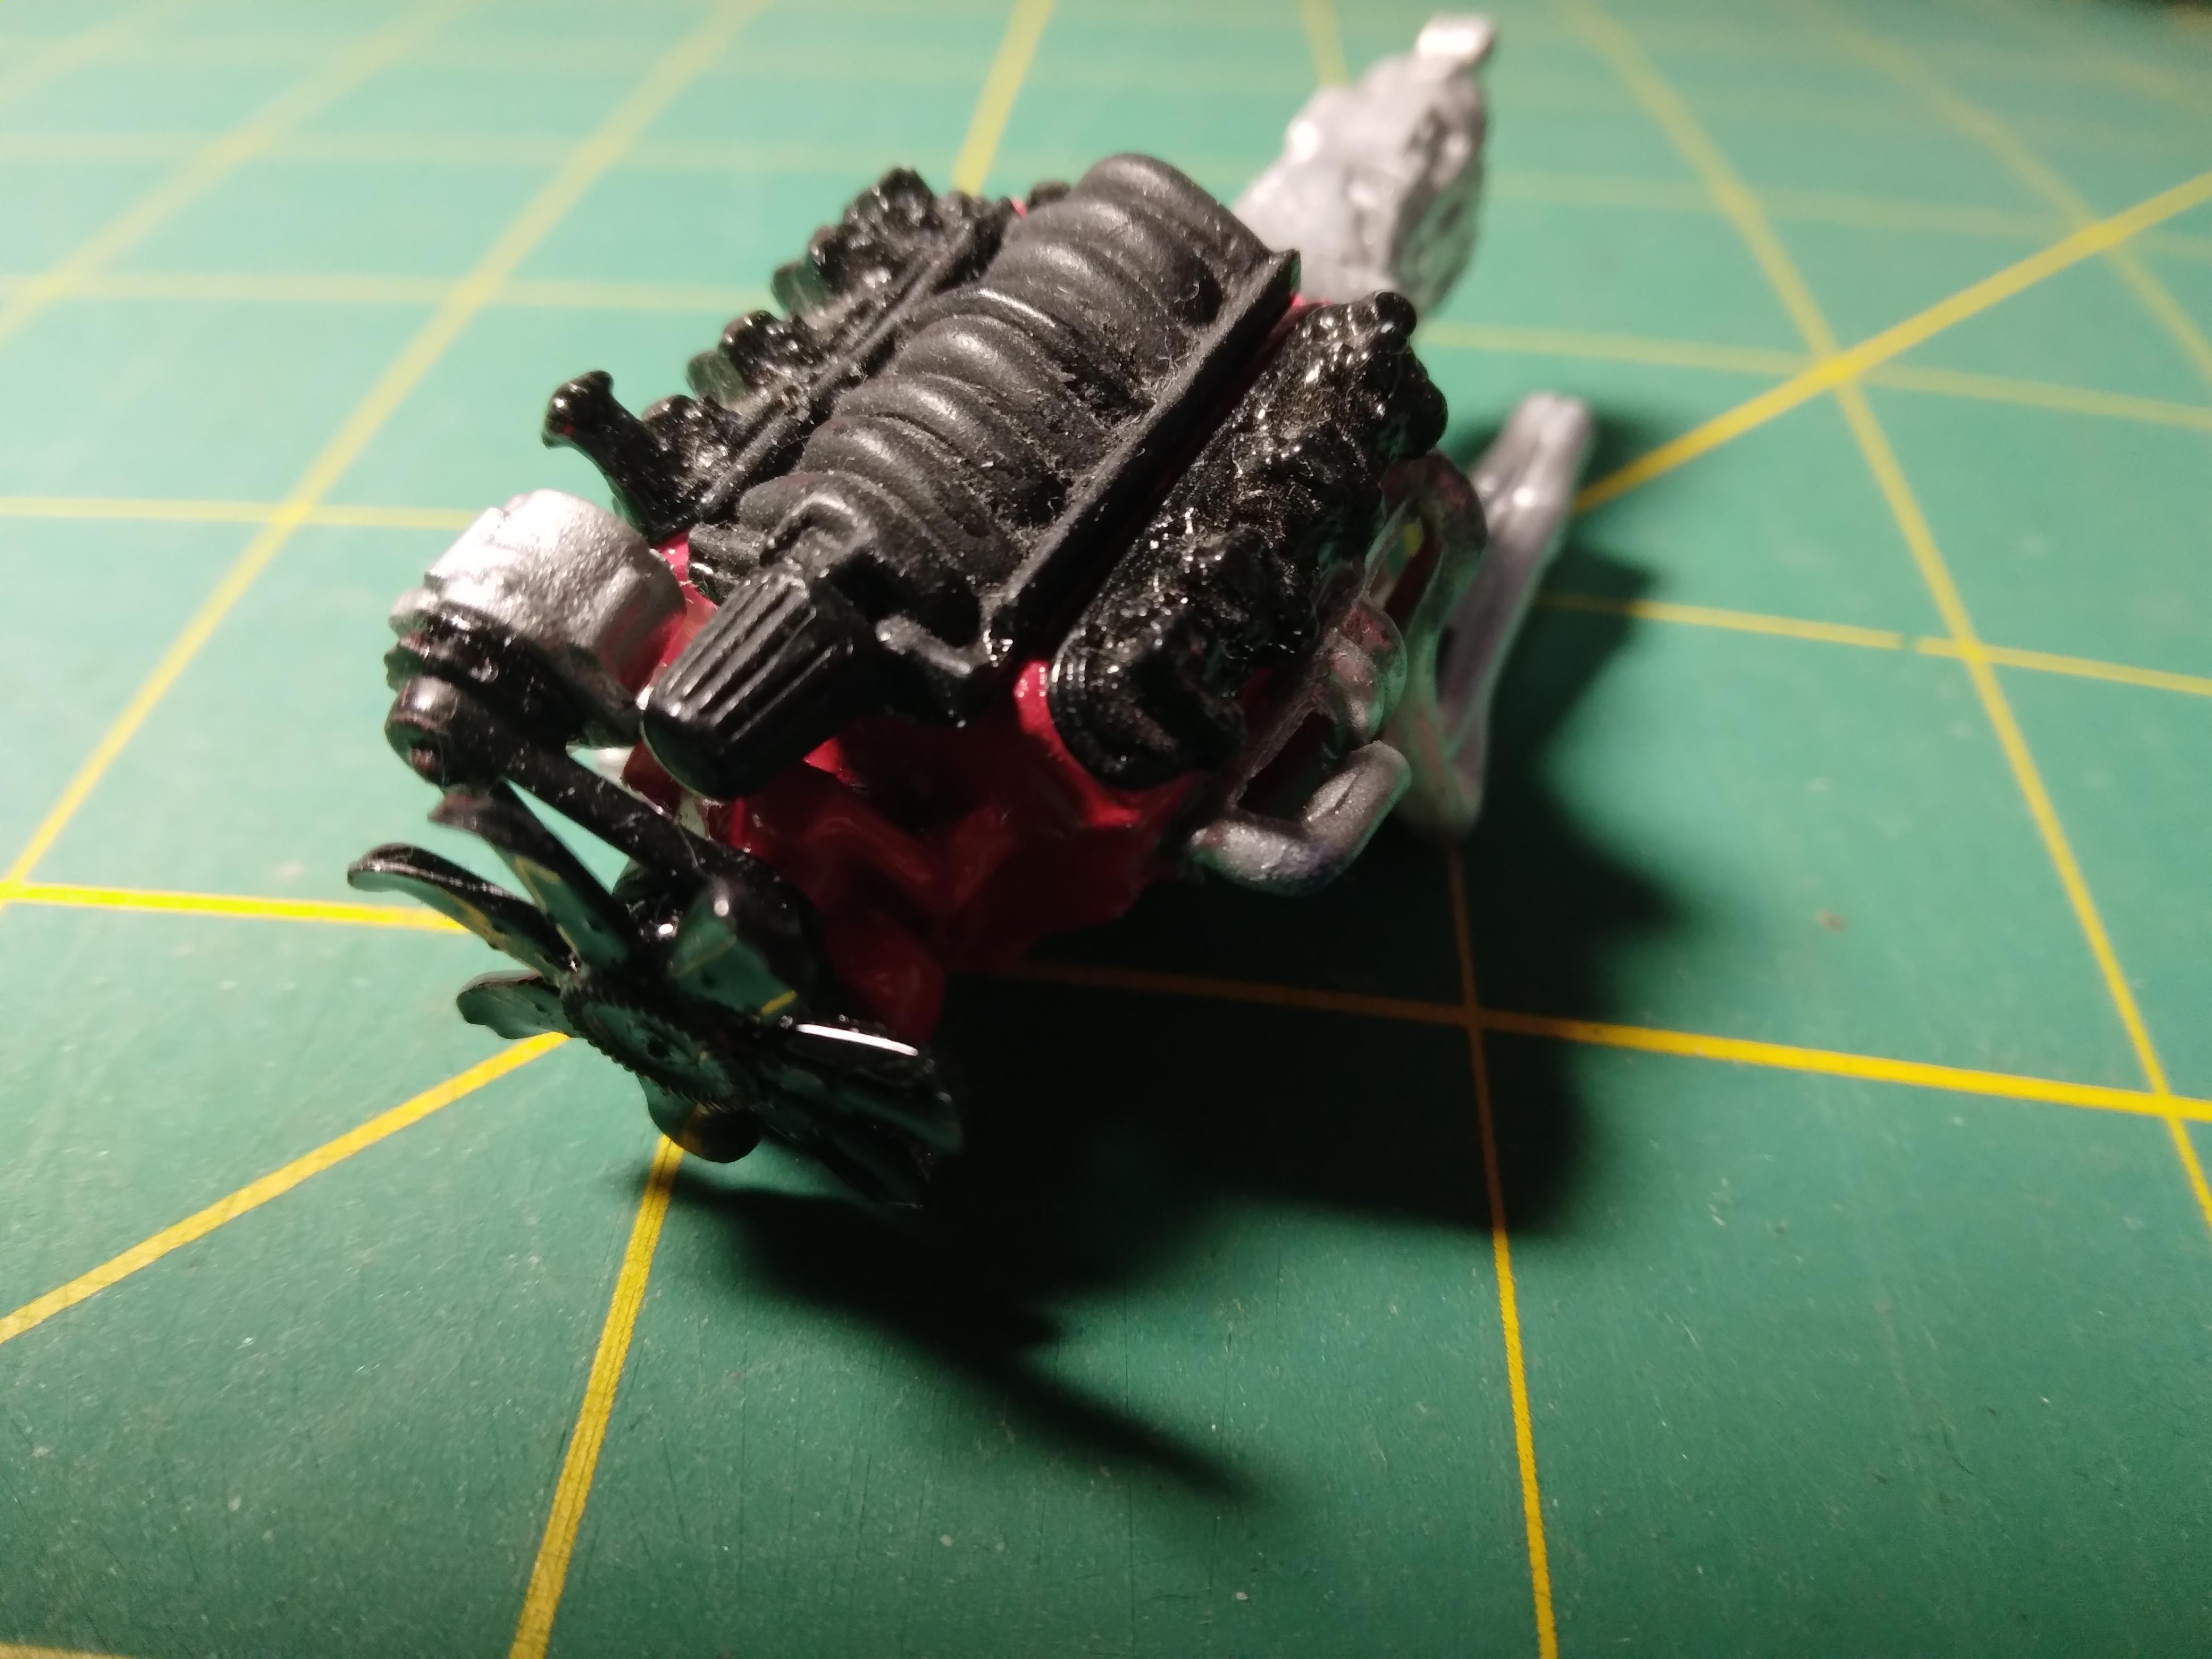
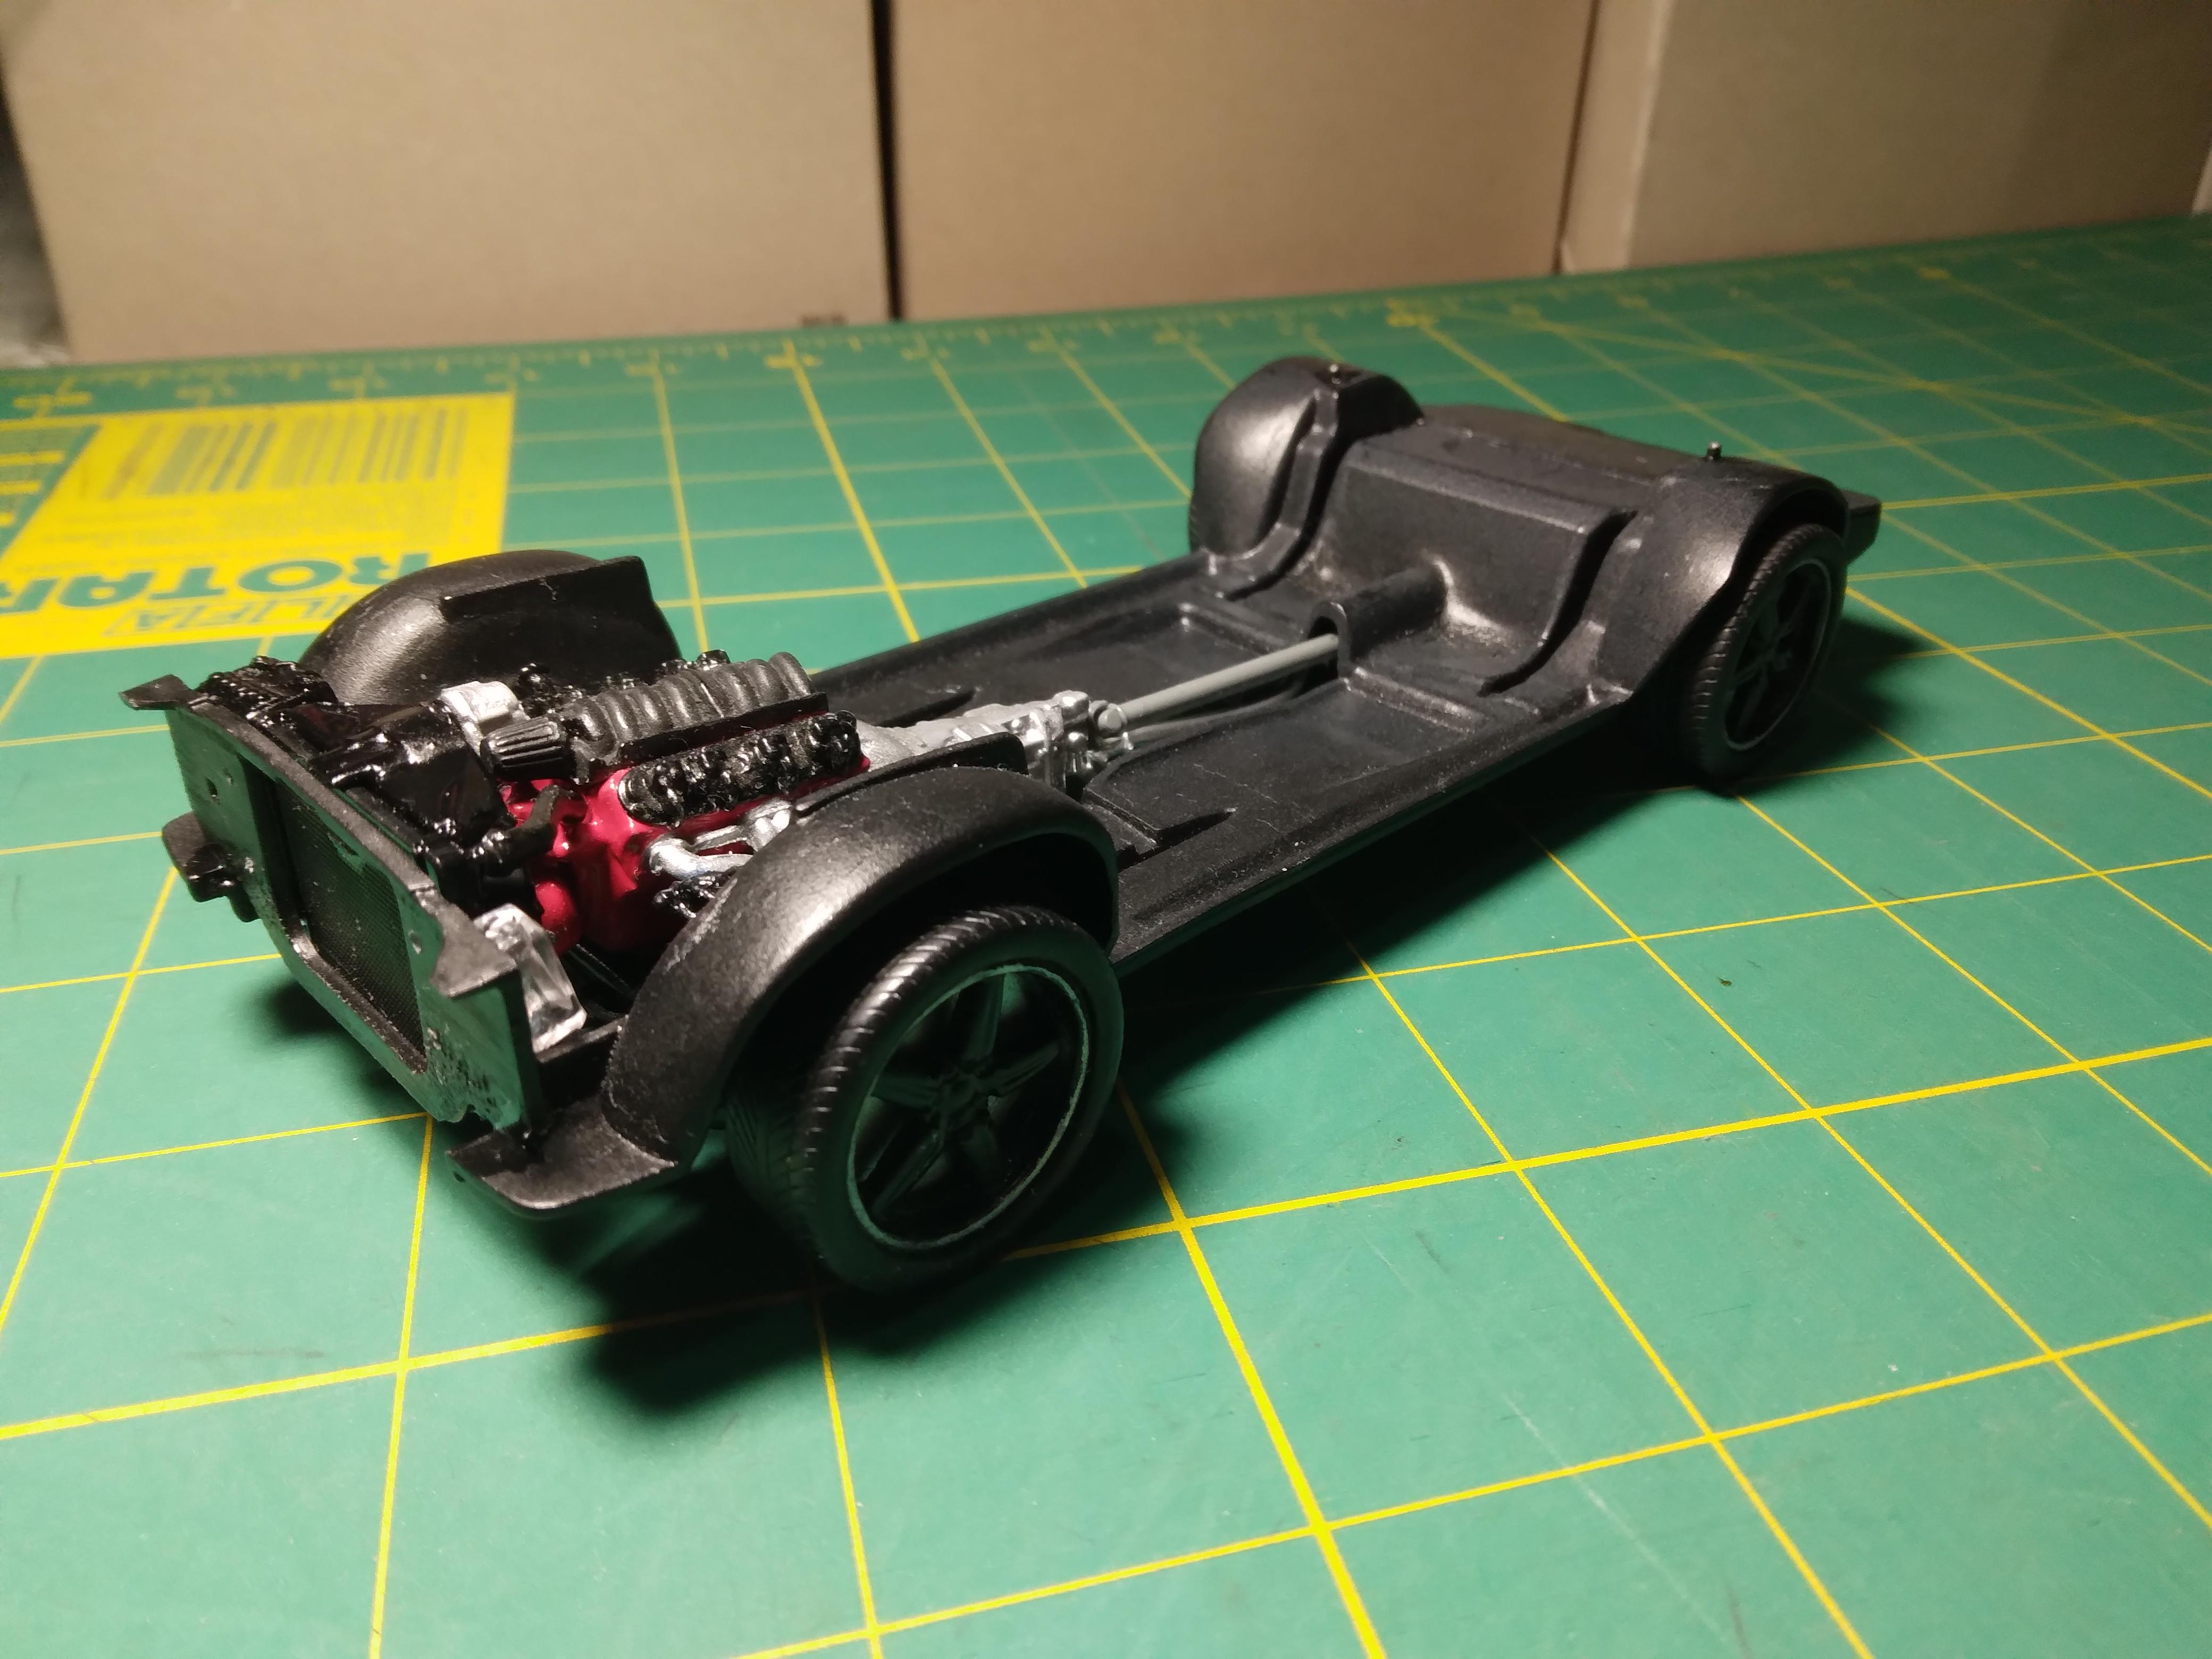
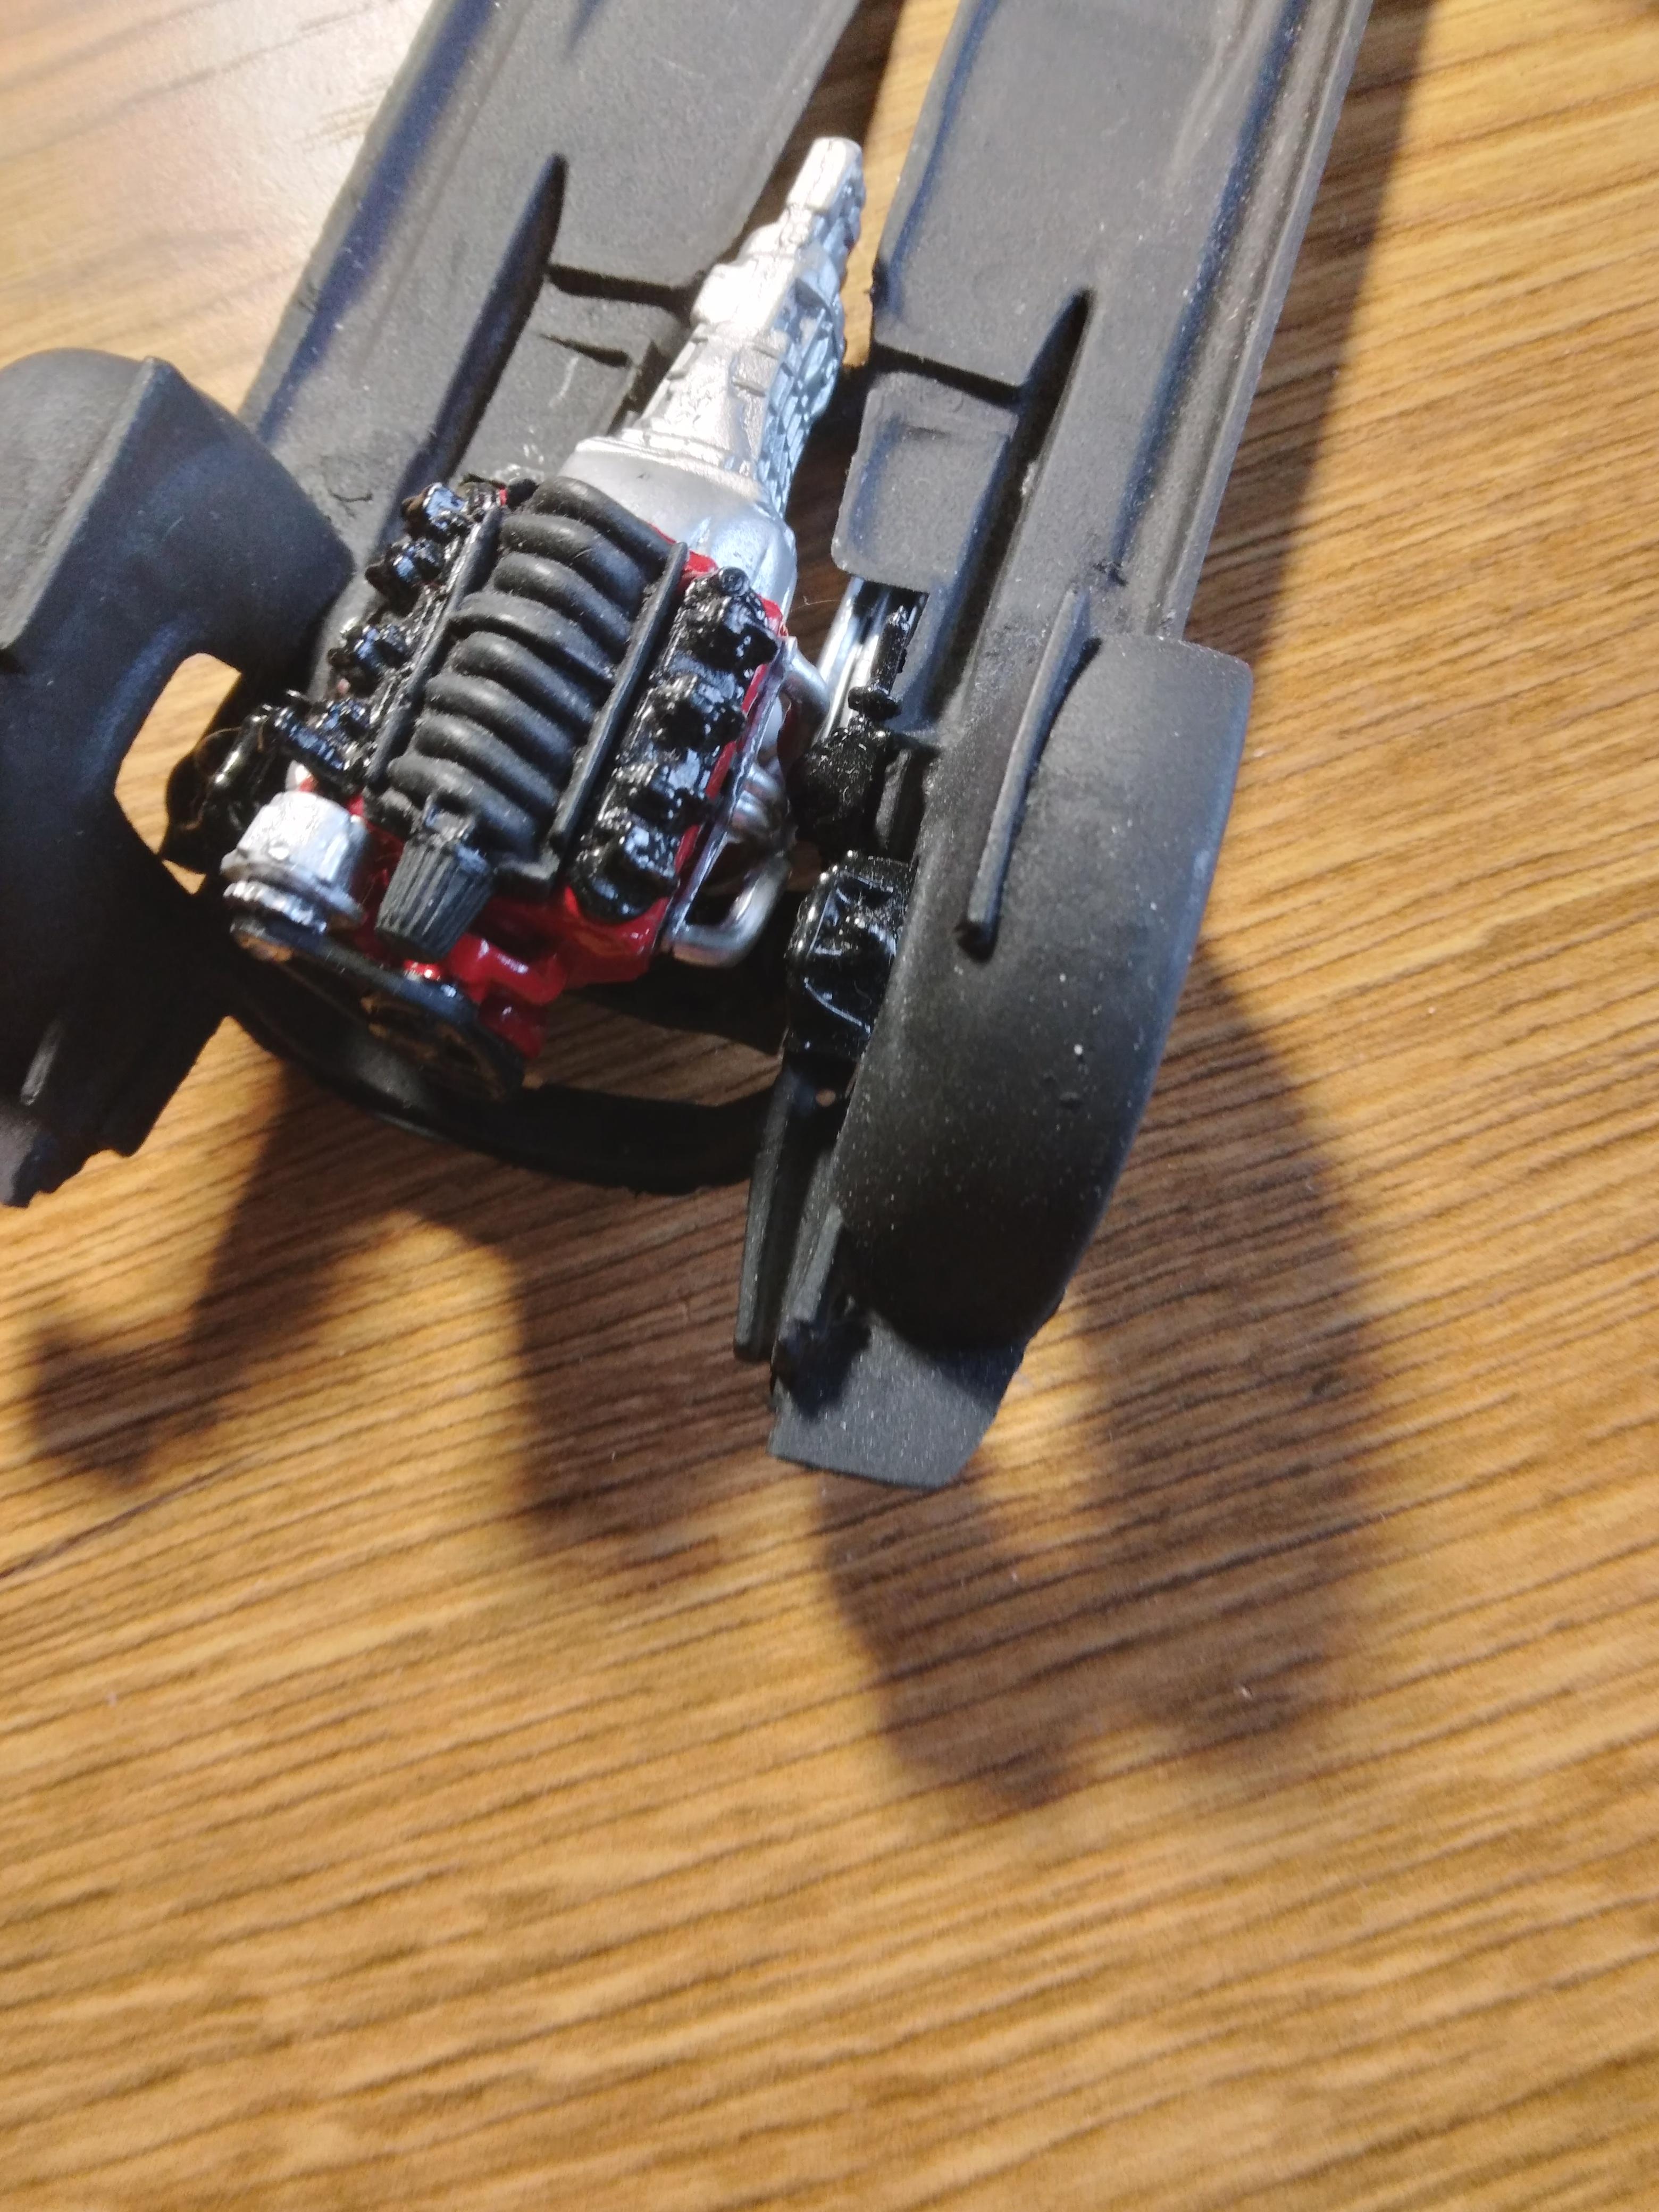
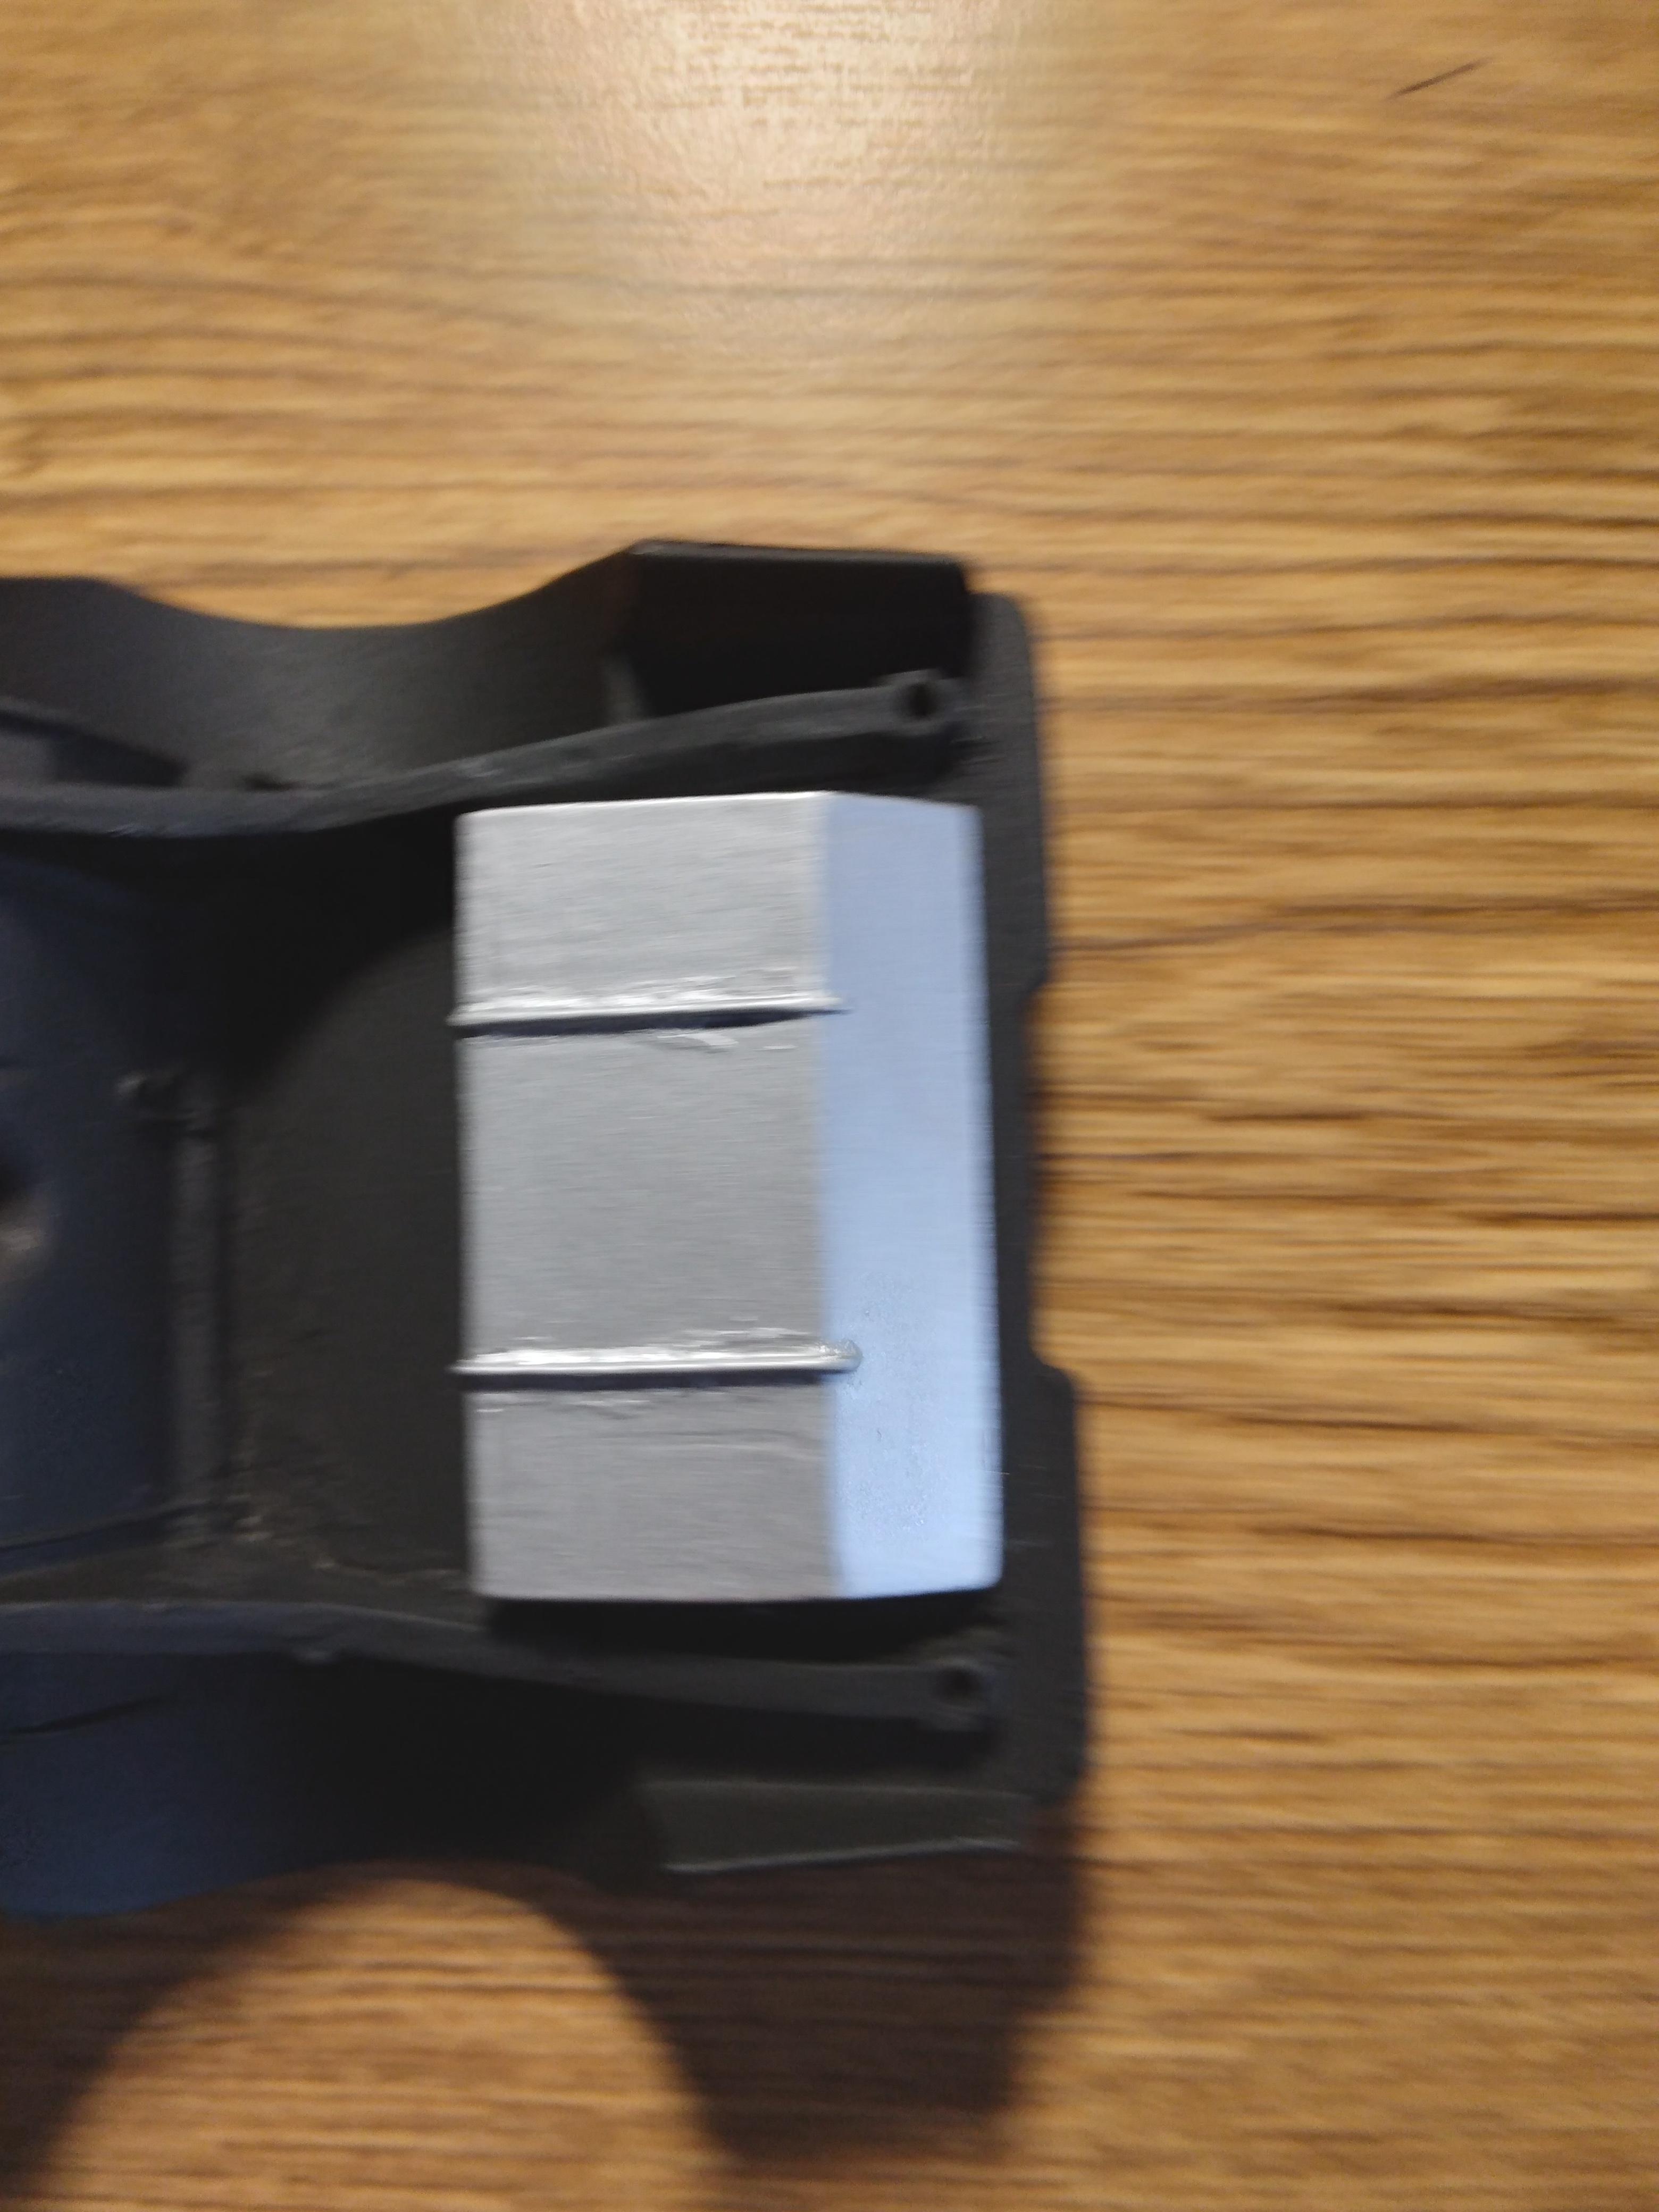
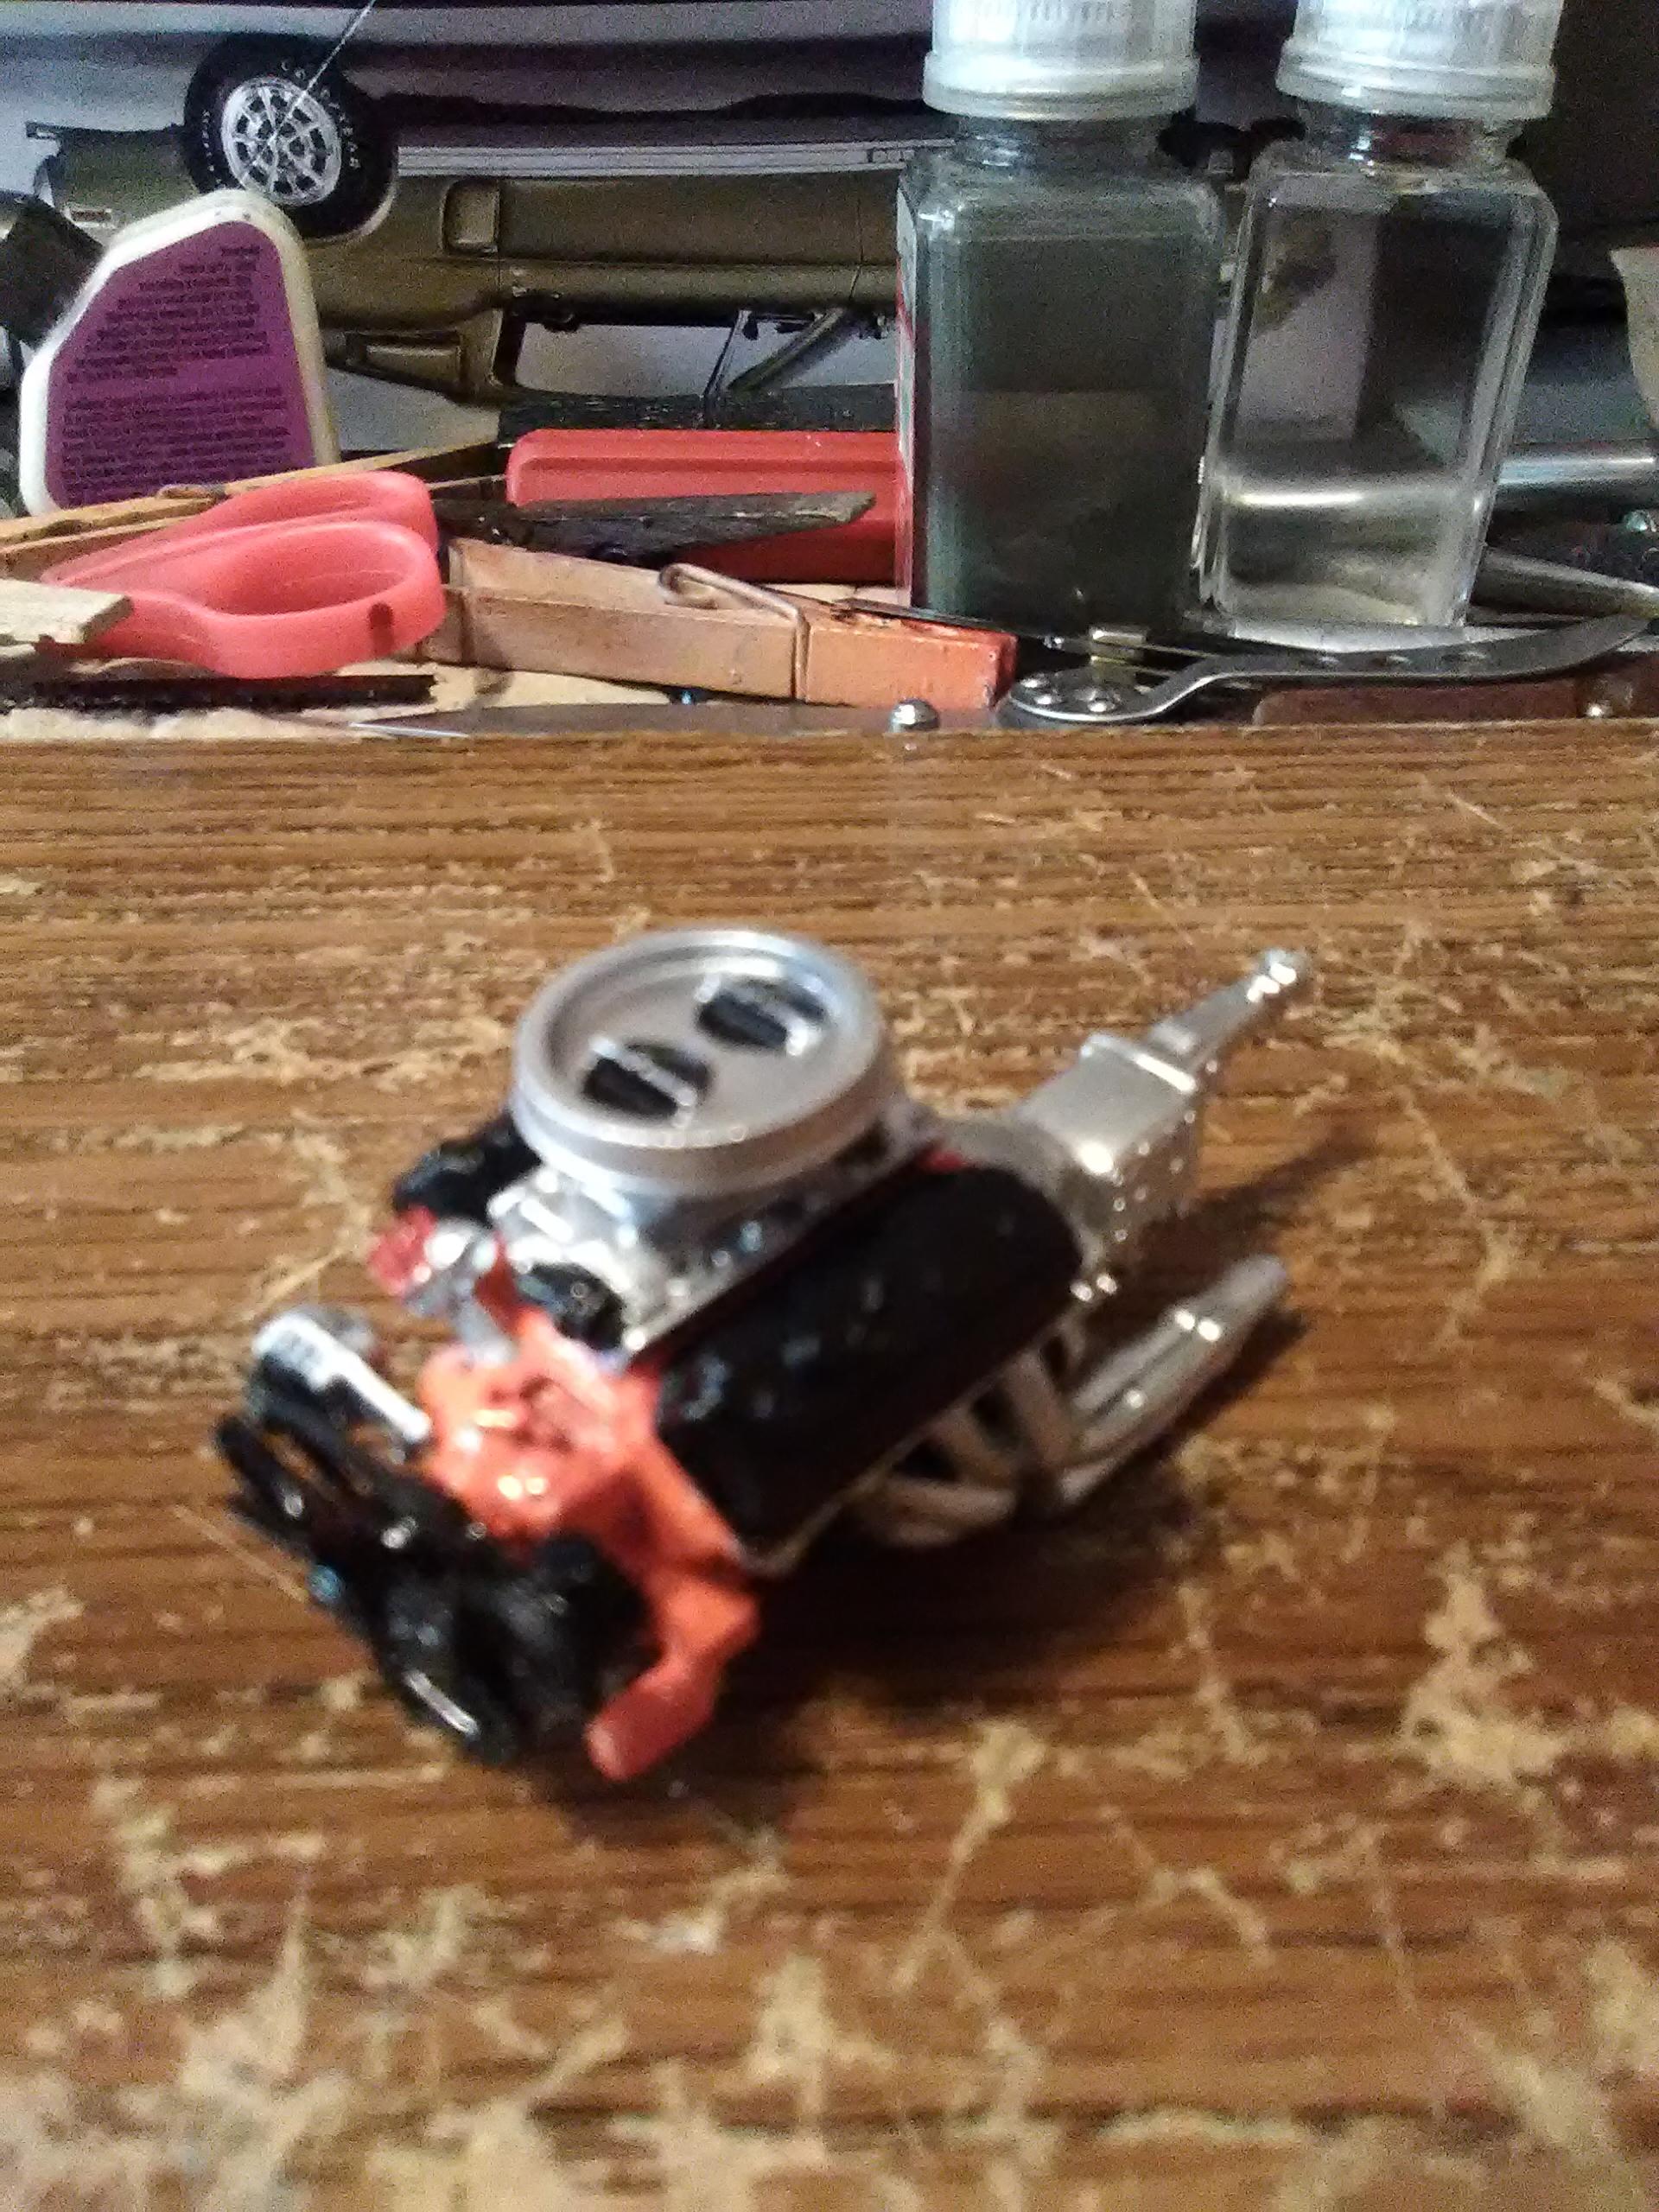
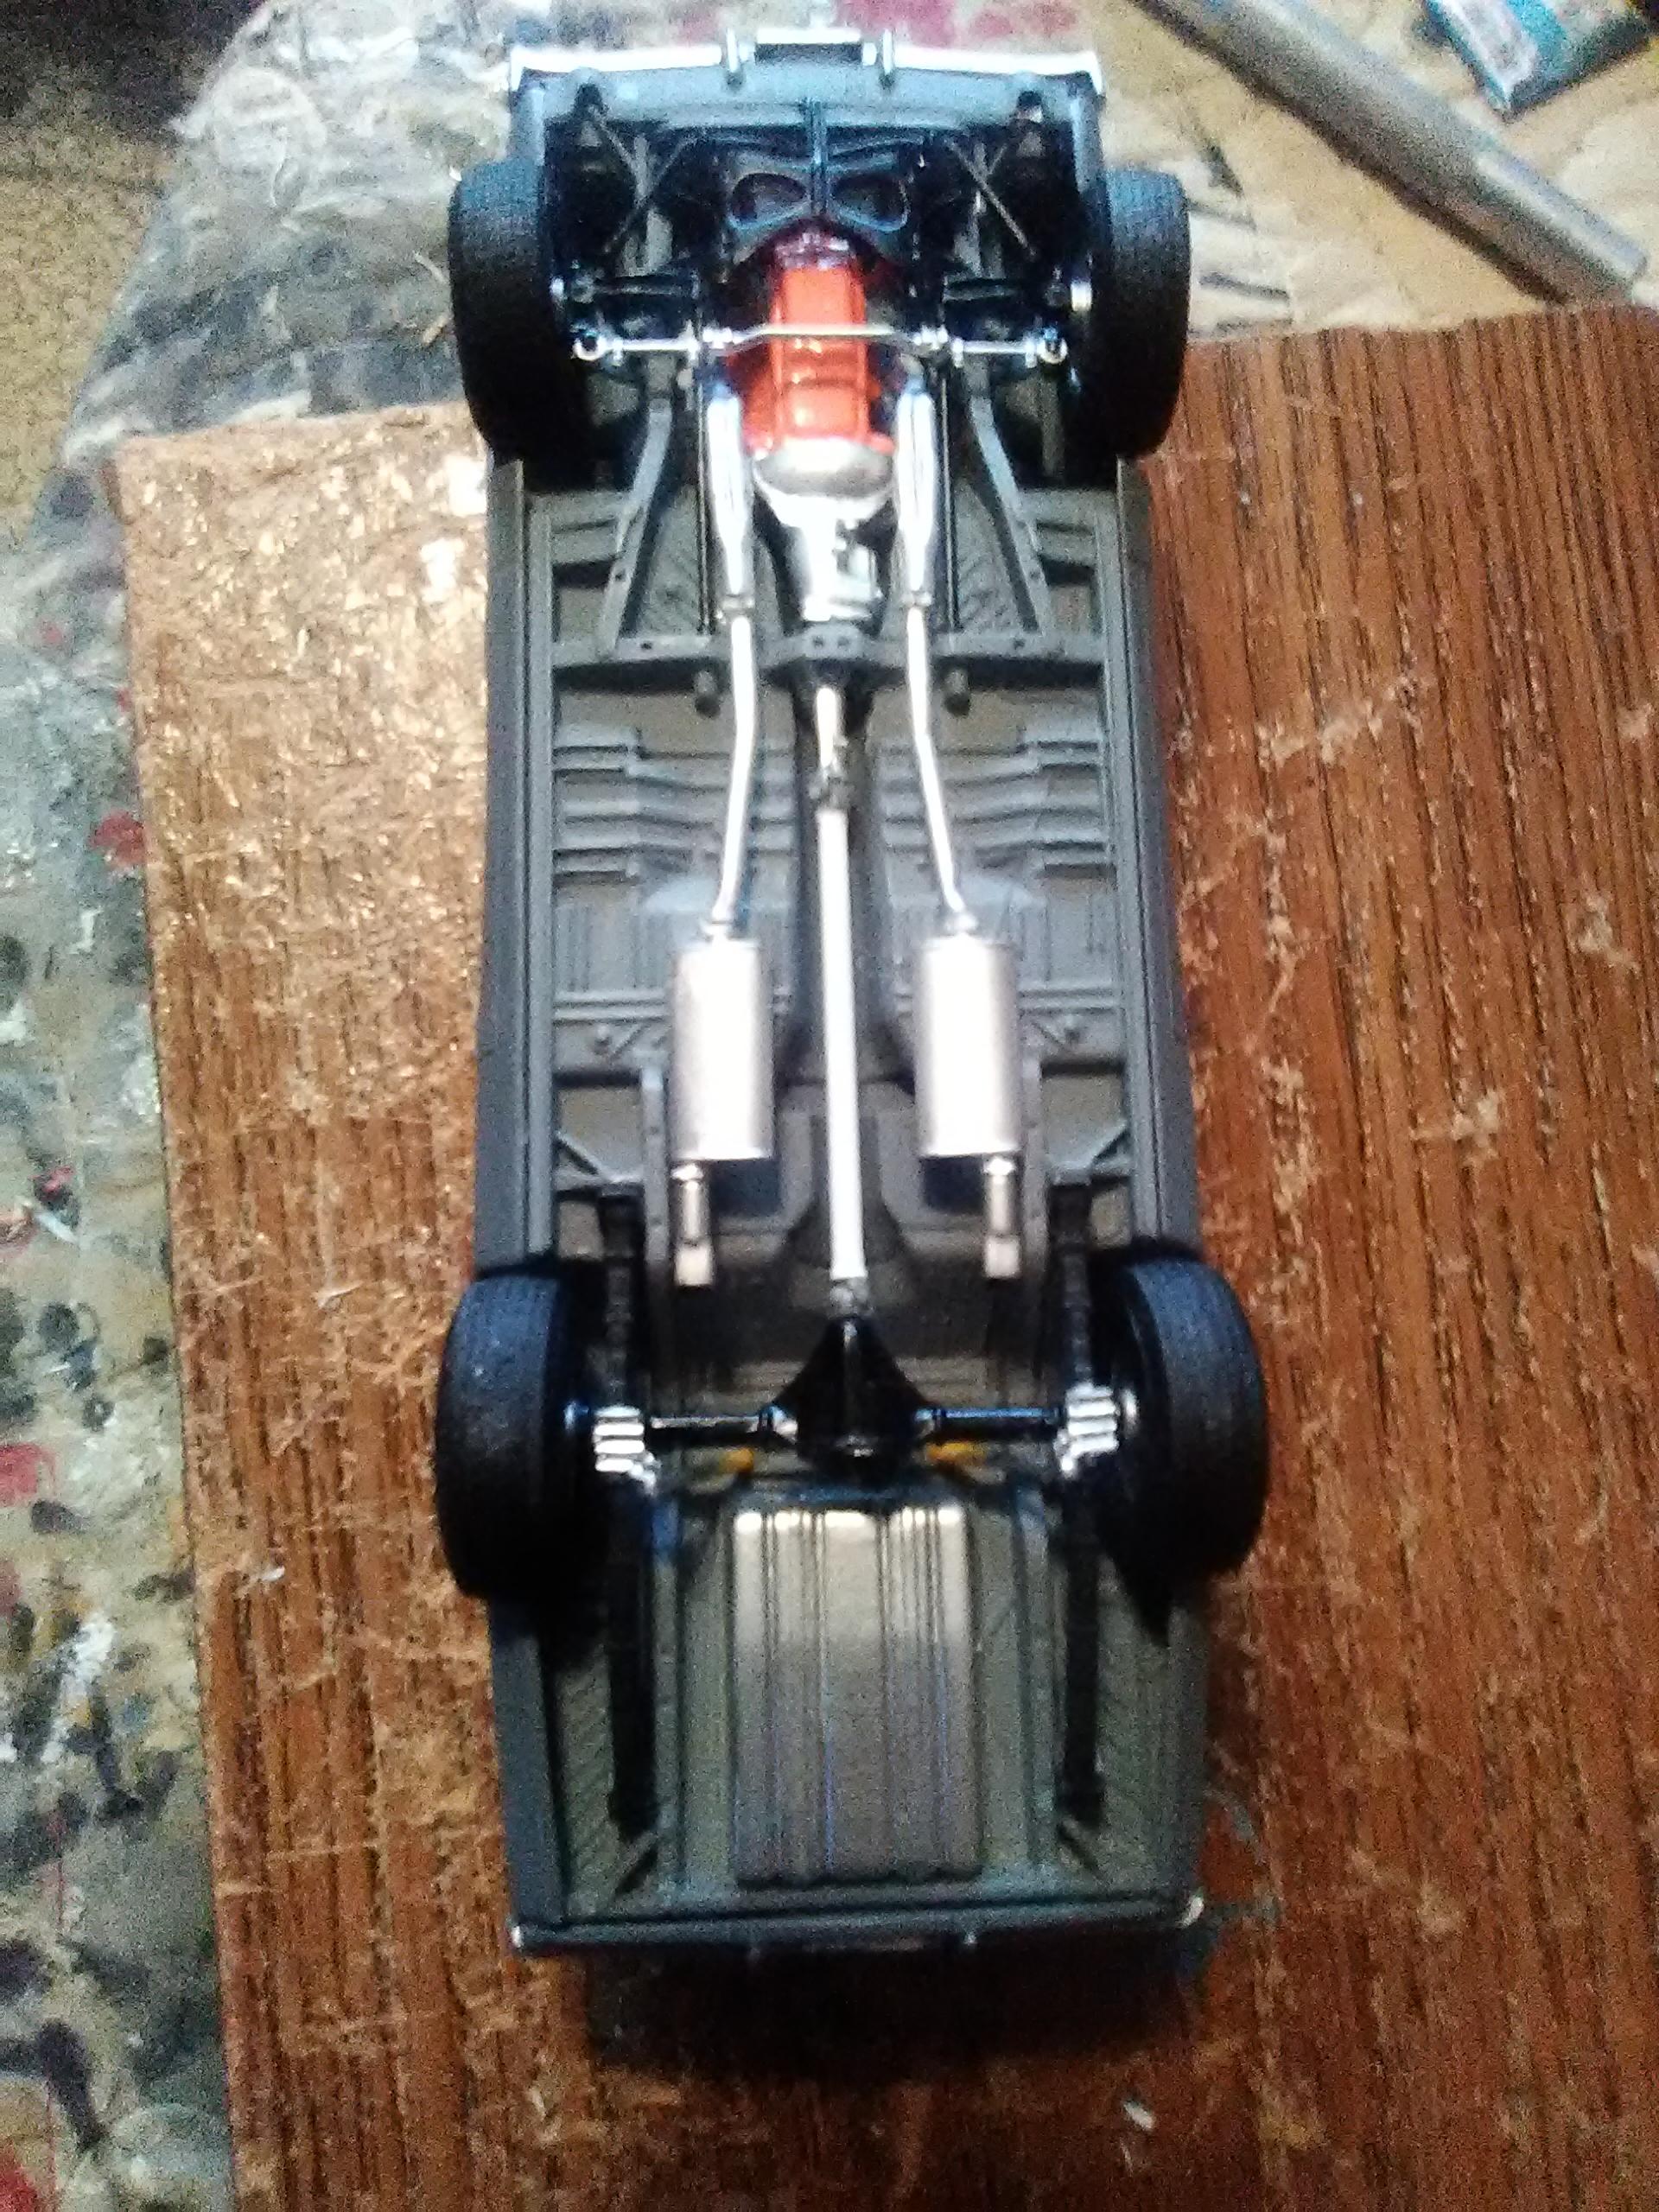
Hello, all! I haven't been here for a while due to both work and working on multiple builds. I had to restart this Camaro because of a few problems of my own doing. First off, when I installed the engine I forgot to put in the upper control arms. And as for the electric fan, after I had stripped of the paint and was cleaning off the purple stuff, something broke off it that I couldn't replace. So it got tossed. After a trip to Hobby Lobby for a new Camaro, the build recommenced. The engine is the new block with the standard fan. The chassis is done and went together okay. Here's a side view showing what could be the rake.? As can be seen from this underside view, the exhaust didn't quite line up with the headers. I don't know if that's the way it fit on these RS versions, or if I'm just lucky that way.? The quick fix I did sort of works. Next, the interior. I've also got a few other projects closer to completion. Stay tuned, my friends!
-
AMT 1967 Impala custom bodywork
Plasticated Guy replied to Plasticated Guy's topic in Model Building Questions and Answers
Jim, it was pretty minor but sometimes your mind grinds to a halt when you find out when it happens and you're not sure why. LOL. Anyway, I used some 100 grit sandpaper along with Patrick's suggestion of using tape and I was able to reshape the line. Thanks much again to all who replied with their ideas and I will use them on future builds. -
AMT 1967 Impala custom bodywork
Plasticated Guy replied to Plasticated Guy's topic in Model Building Questions and Answers
Thanks much for the info. I also found this. https://www.admcars.com/1967-chevrolet-impala-dark-blue-ss-396-4-speed-c-835.htm I don't know if it was how the car was looking or if the photographer was trying different angles, but it doesn't look like there is any belt line. If the techniques described above don't work out in my favor, I'll probably go this route. -
AMT 1967 Impala custom bodywork
Plasticated Guy replied to Plasticated Guy's topic in Model Building Questions and Answers
No. This was where the 427 emblems were molded on the front fenders. The top peaks are fine. It was the belt line. -
Hello, all. I've been doing some bodywork on this car and I decided to shave some of the trim along the lower section as well as the emblems on the trunk lid and fenders. The problem is that when I was sanding off one of the fender emblems I might have flubbed up the upper character line. It doesn't seem like I can reshape it and I don't want to get another model. I'm thinking of smoothing out this line. Has anyone else have this happen or seen it either in scale or on full-size cars? I've looked for pictures but no luck. Every Impala with custom bodywork I've seen has had that character line
-
Thanks for the kind words, gentlemen. Peter, I came up with the name after looking through synonyms for black. I had once considered the word onyx, but nocturnal kept sticking in my head.
-
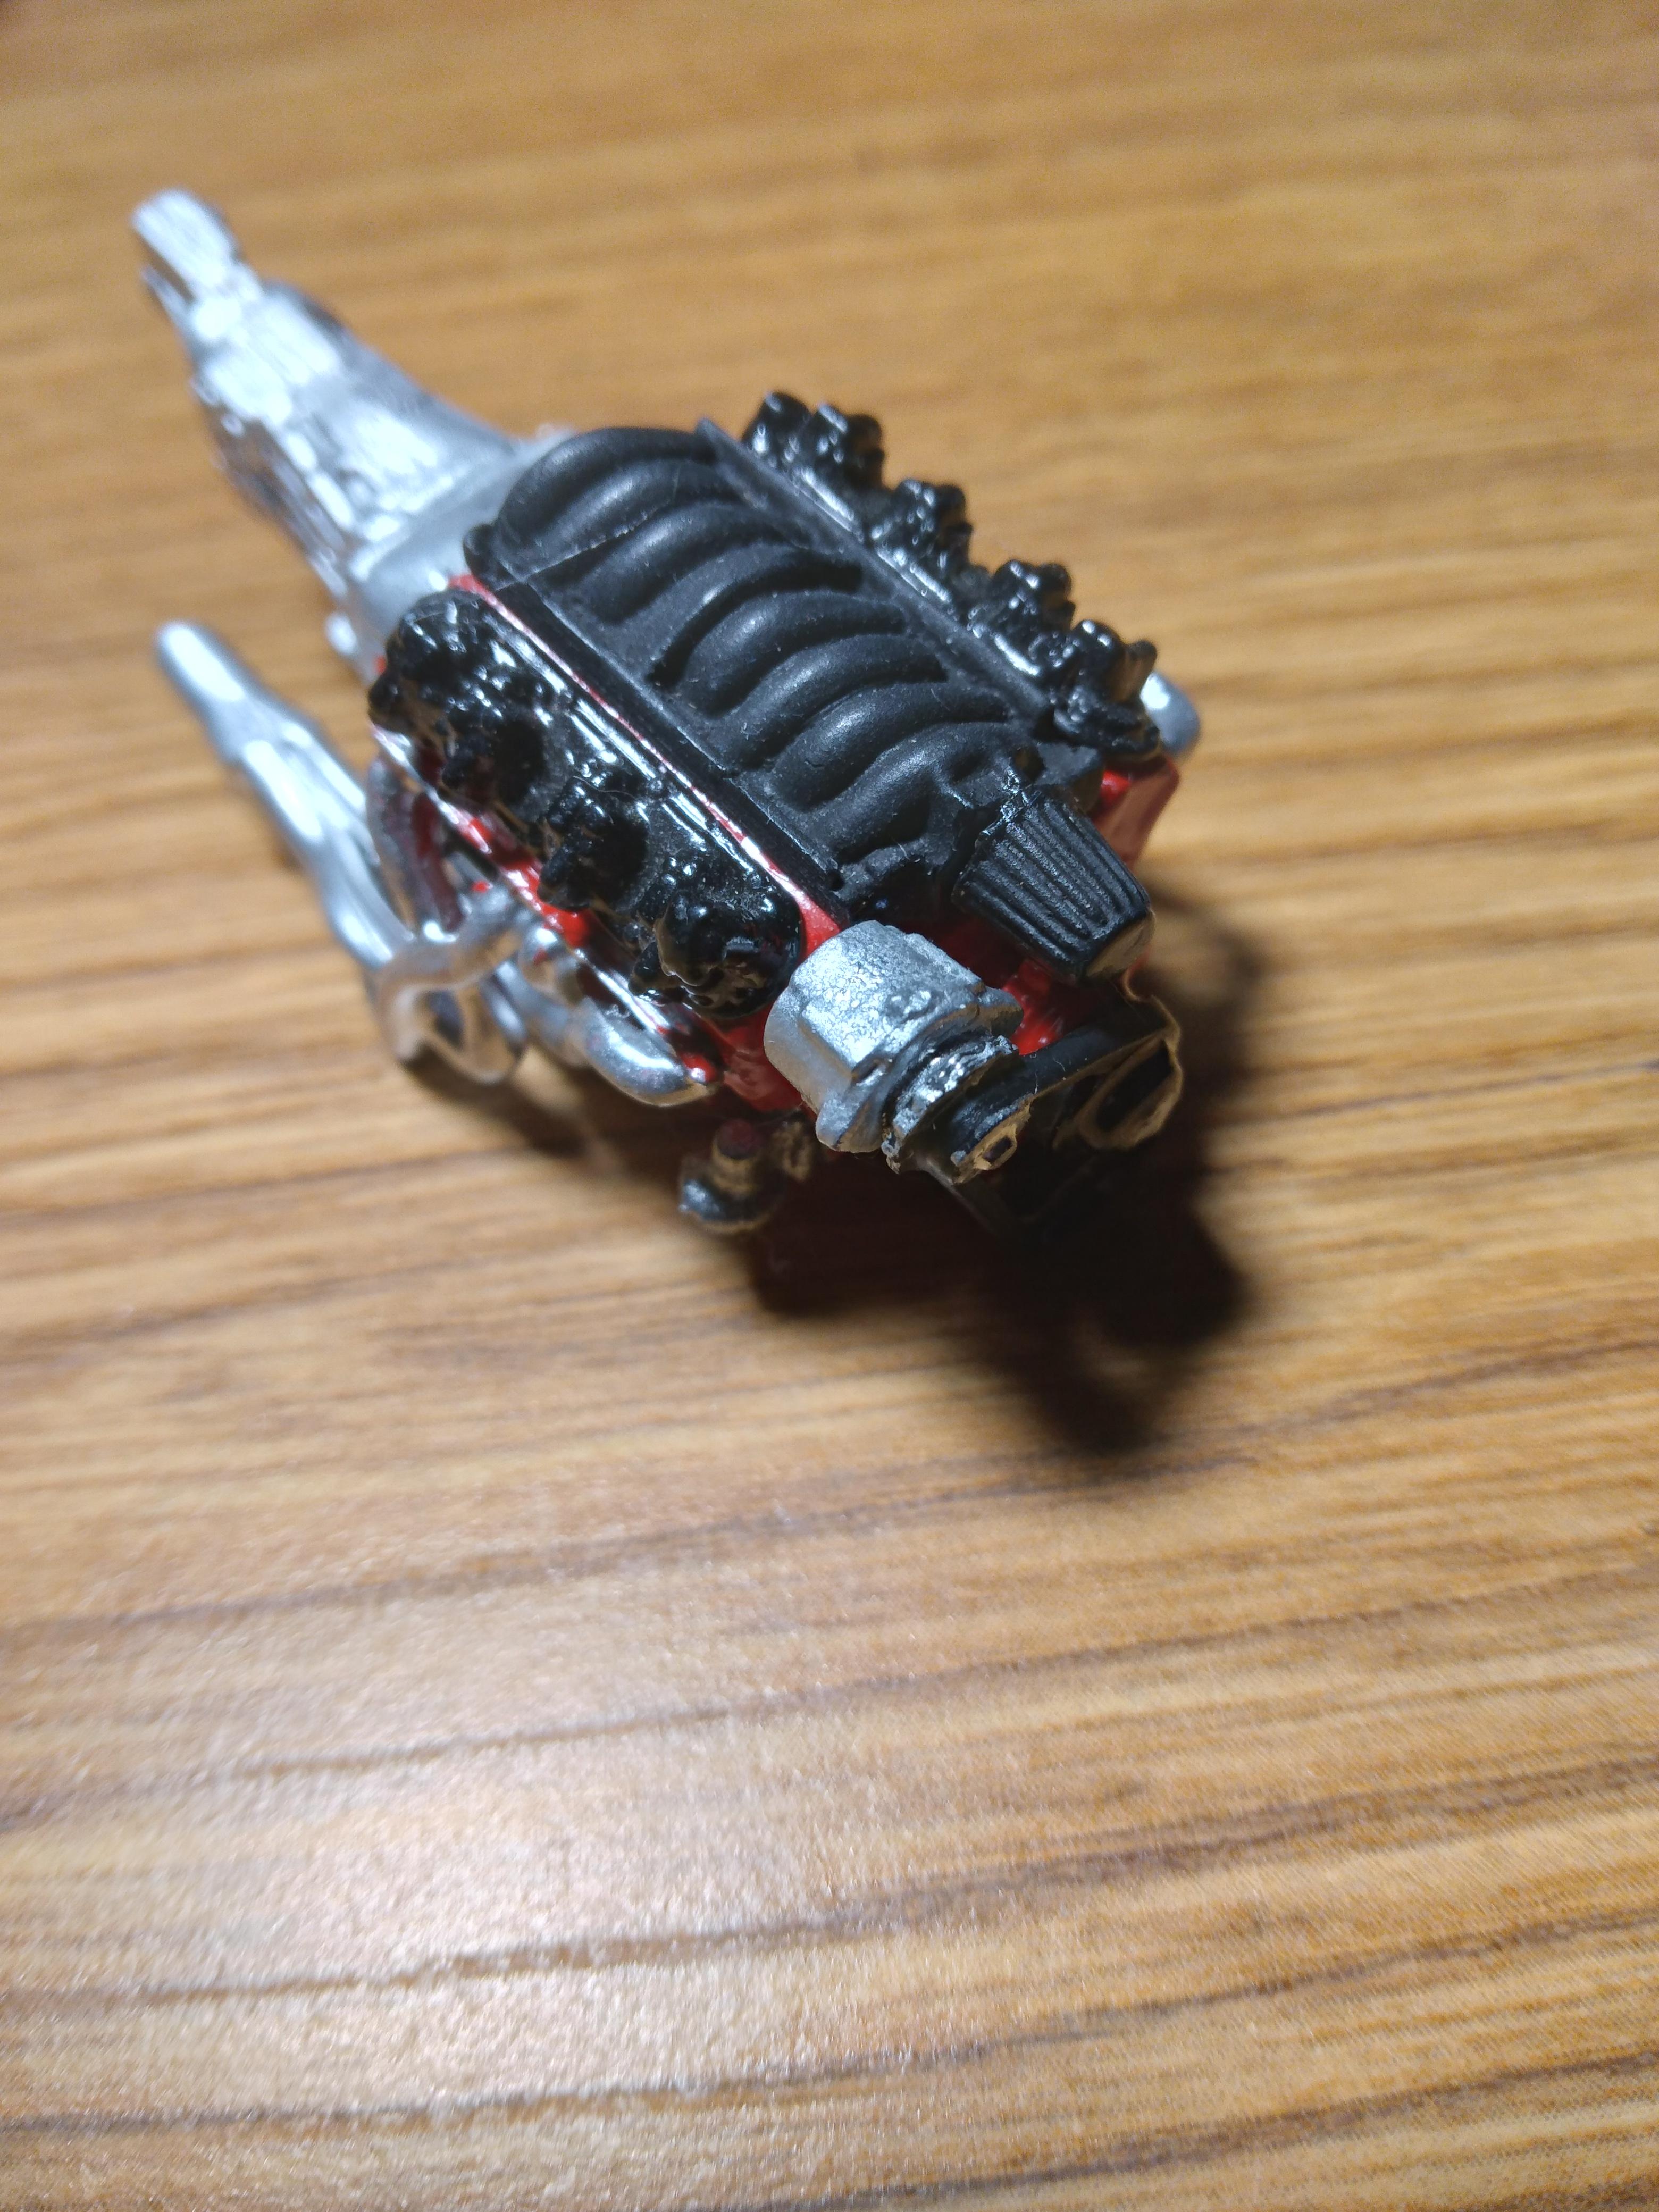
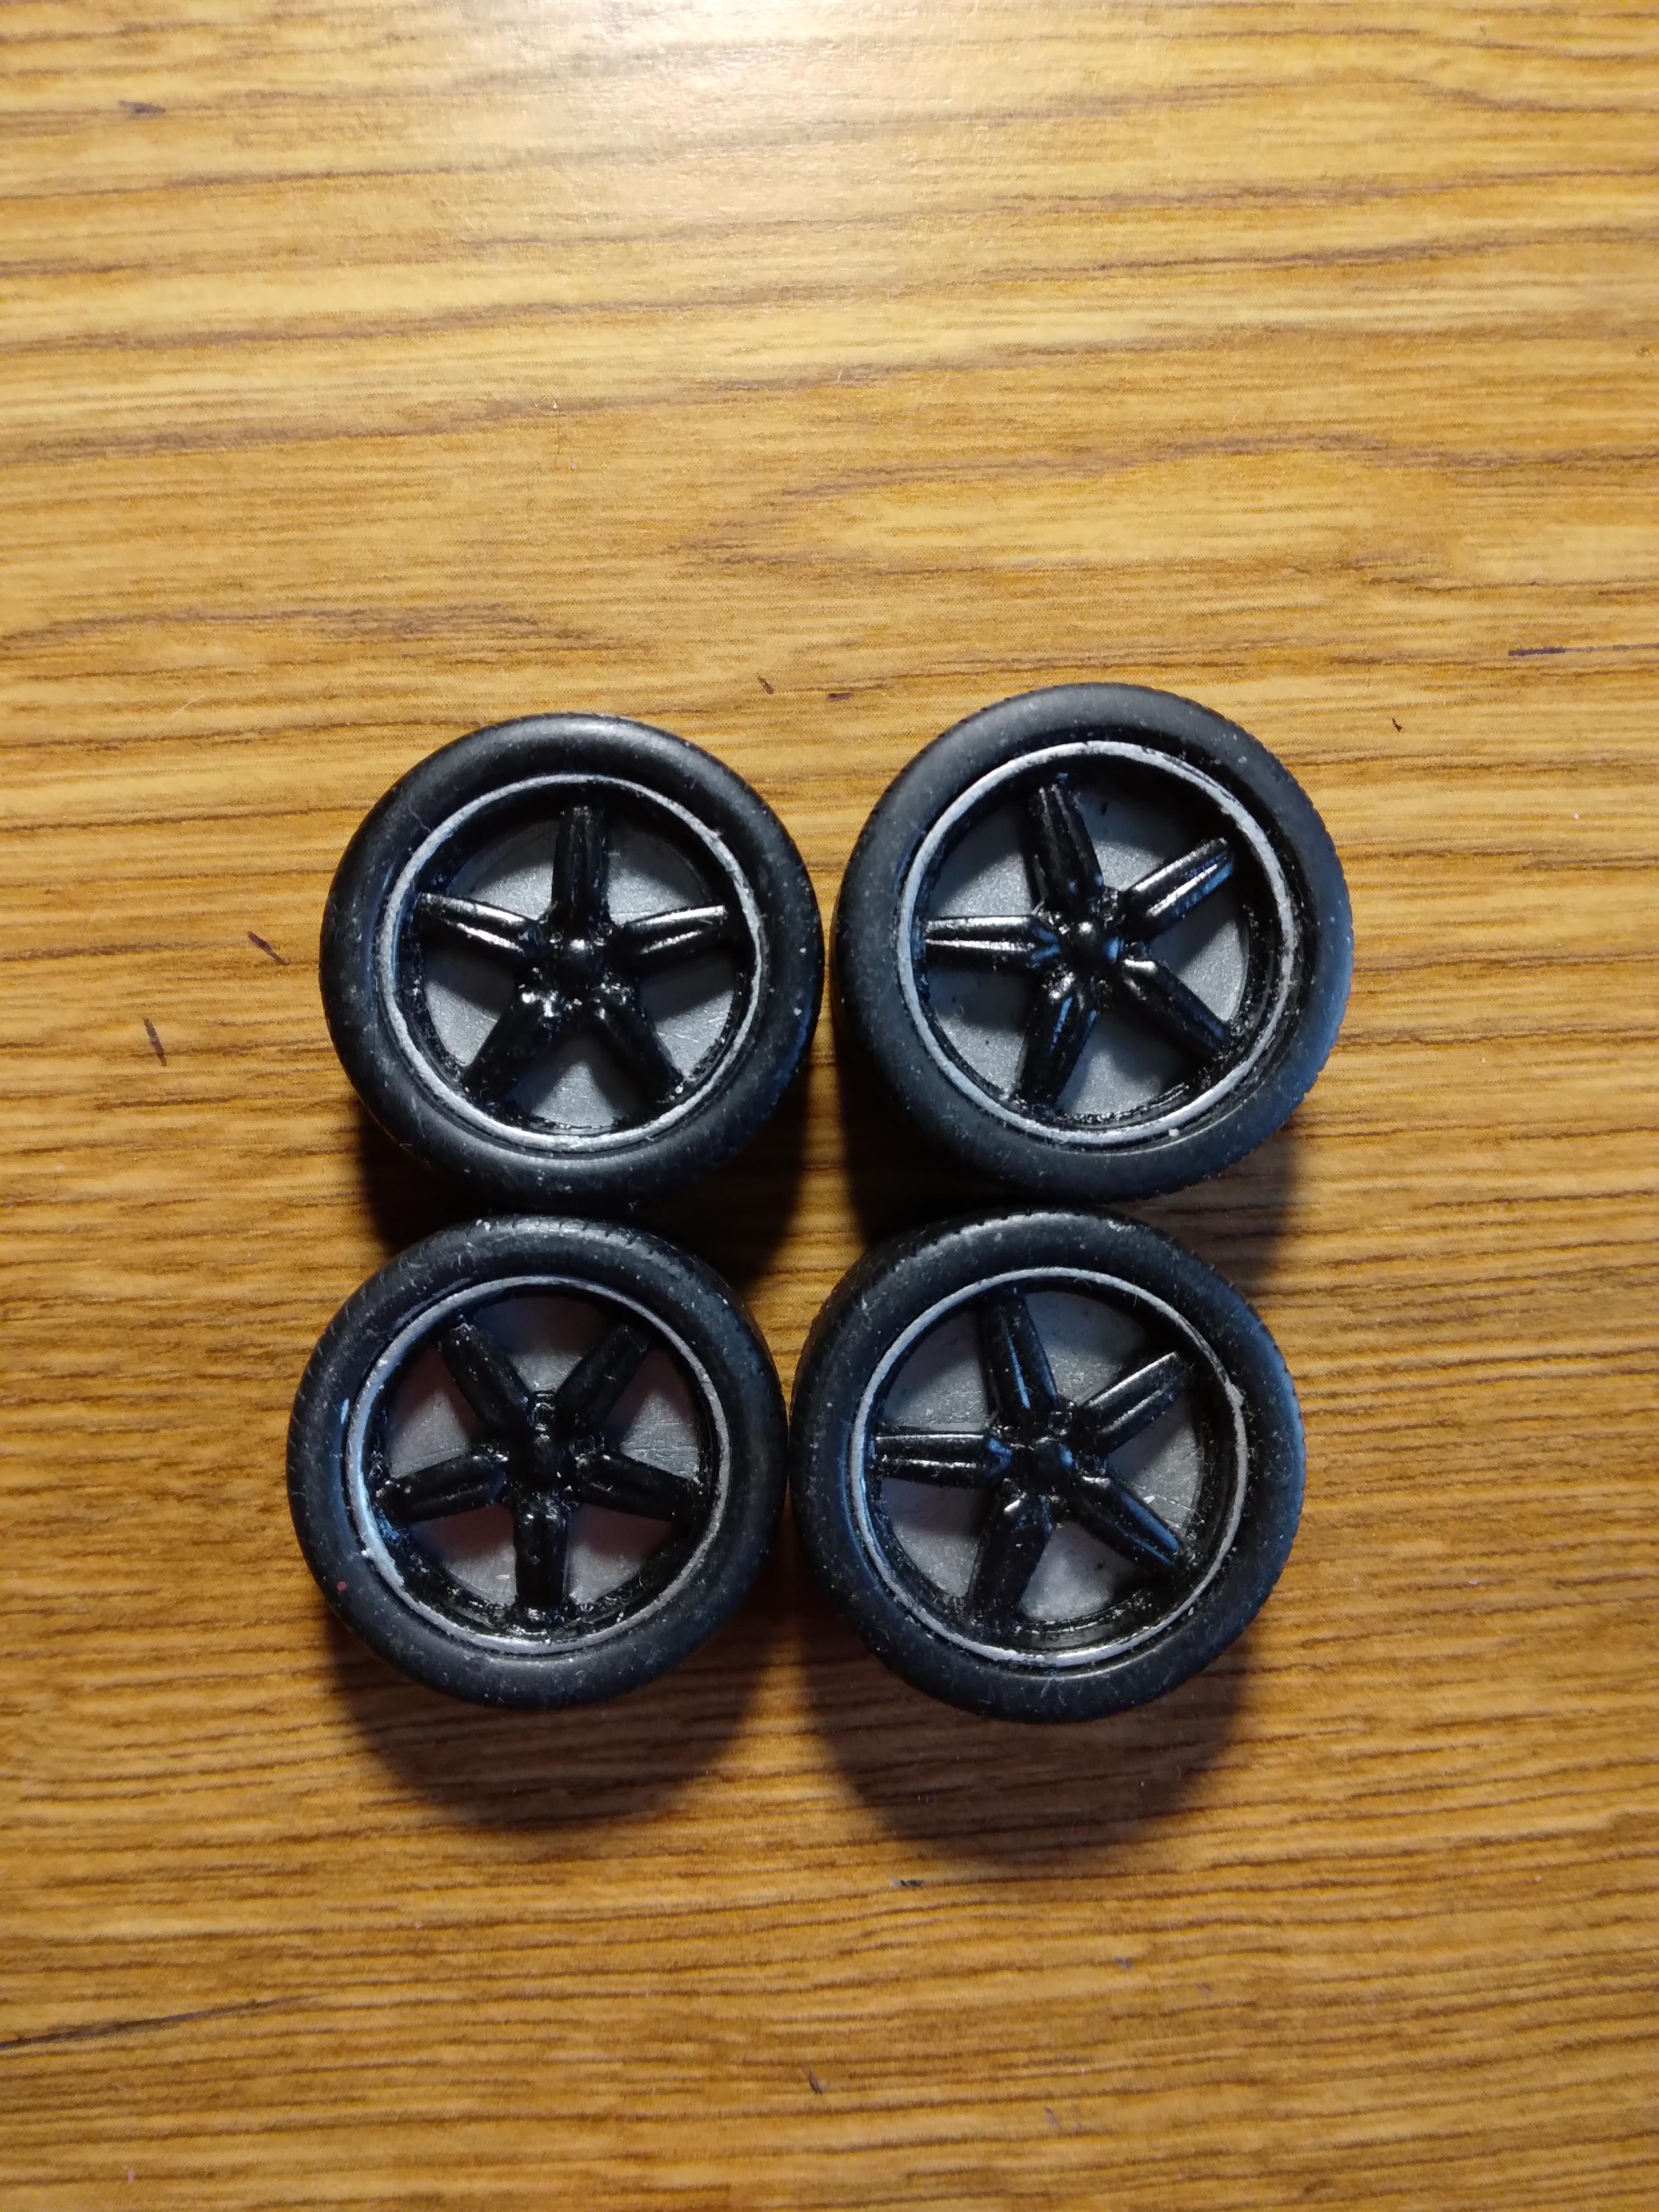
Hello, all. This is my 1969 Camaro that I have dubbed Nocturnus. I started with Revell's '69 Z/28 and I'll be adding parts from Revell's 1998 Firebird and my parts box. The engine is the 302c.i with the transmission, valve covers, and intake manifold from the Firebird. The air filter is from the parts box. And it fit into the chassis with a slight alignment hitch. But that was straightened out. The fuel tank came from a Revell 80's Nascar chassis and was trimmed to fit. The radiator, core, battery, and washer bottle are box-stock. The fan came from the parts bin. I might use the fan shroud to hide the ejector marks since I couldn't figure out a way to remove them. The wheels and tires are the custom versions that came with the Firebird. The license plate is from the acme.com license plate maker site. I'm building this as a mild custom/pro-tourer. The front and rear suspension will be stock. The exhaust will also be stock but I'll have to do a slight modification so it will clear the fuel tank. I found out it's a little longer. The interior will be stock with the front and rear seats from the Firebird. The body will have some of the trim shaved off and it's going to get the "murdered-out" black treatment. Thanks for taking a look and there will be more to come.
-
Considering buying an airbrush
Plasticated Guy replied to Plasticated Guy's topic in Model Building Questions and Answers
I plan on checking out the sticky thread as well as any other threads that might help. I also checked out what was available at Hobby Lobby. It looked like mostly the Iwata brand was there, so I'll see what can be done. Thanks again for the info. -
Hi, Martin. I built the 1998 Daytona 500 version of Dale's car and when I watched the race (it was my 20th birthday, by the way ?), I had the "rabbit ears" style antenna. Because of the not-so-good reception, the box art of the model, and the dozens of pictures of the inside of the real car being red, I painted mine the same way. I found out a few years later that on certain races in the schedule that the inside was gray. I decided to leave mine as is. ?
-
I have been using rattle cans for painting for quite a long time. I have toyed with the idea of getting an airbrush. Are there any tips here or anywhere else? I'm going into this completely green and any help is appreciated.
-
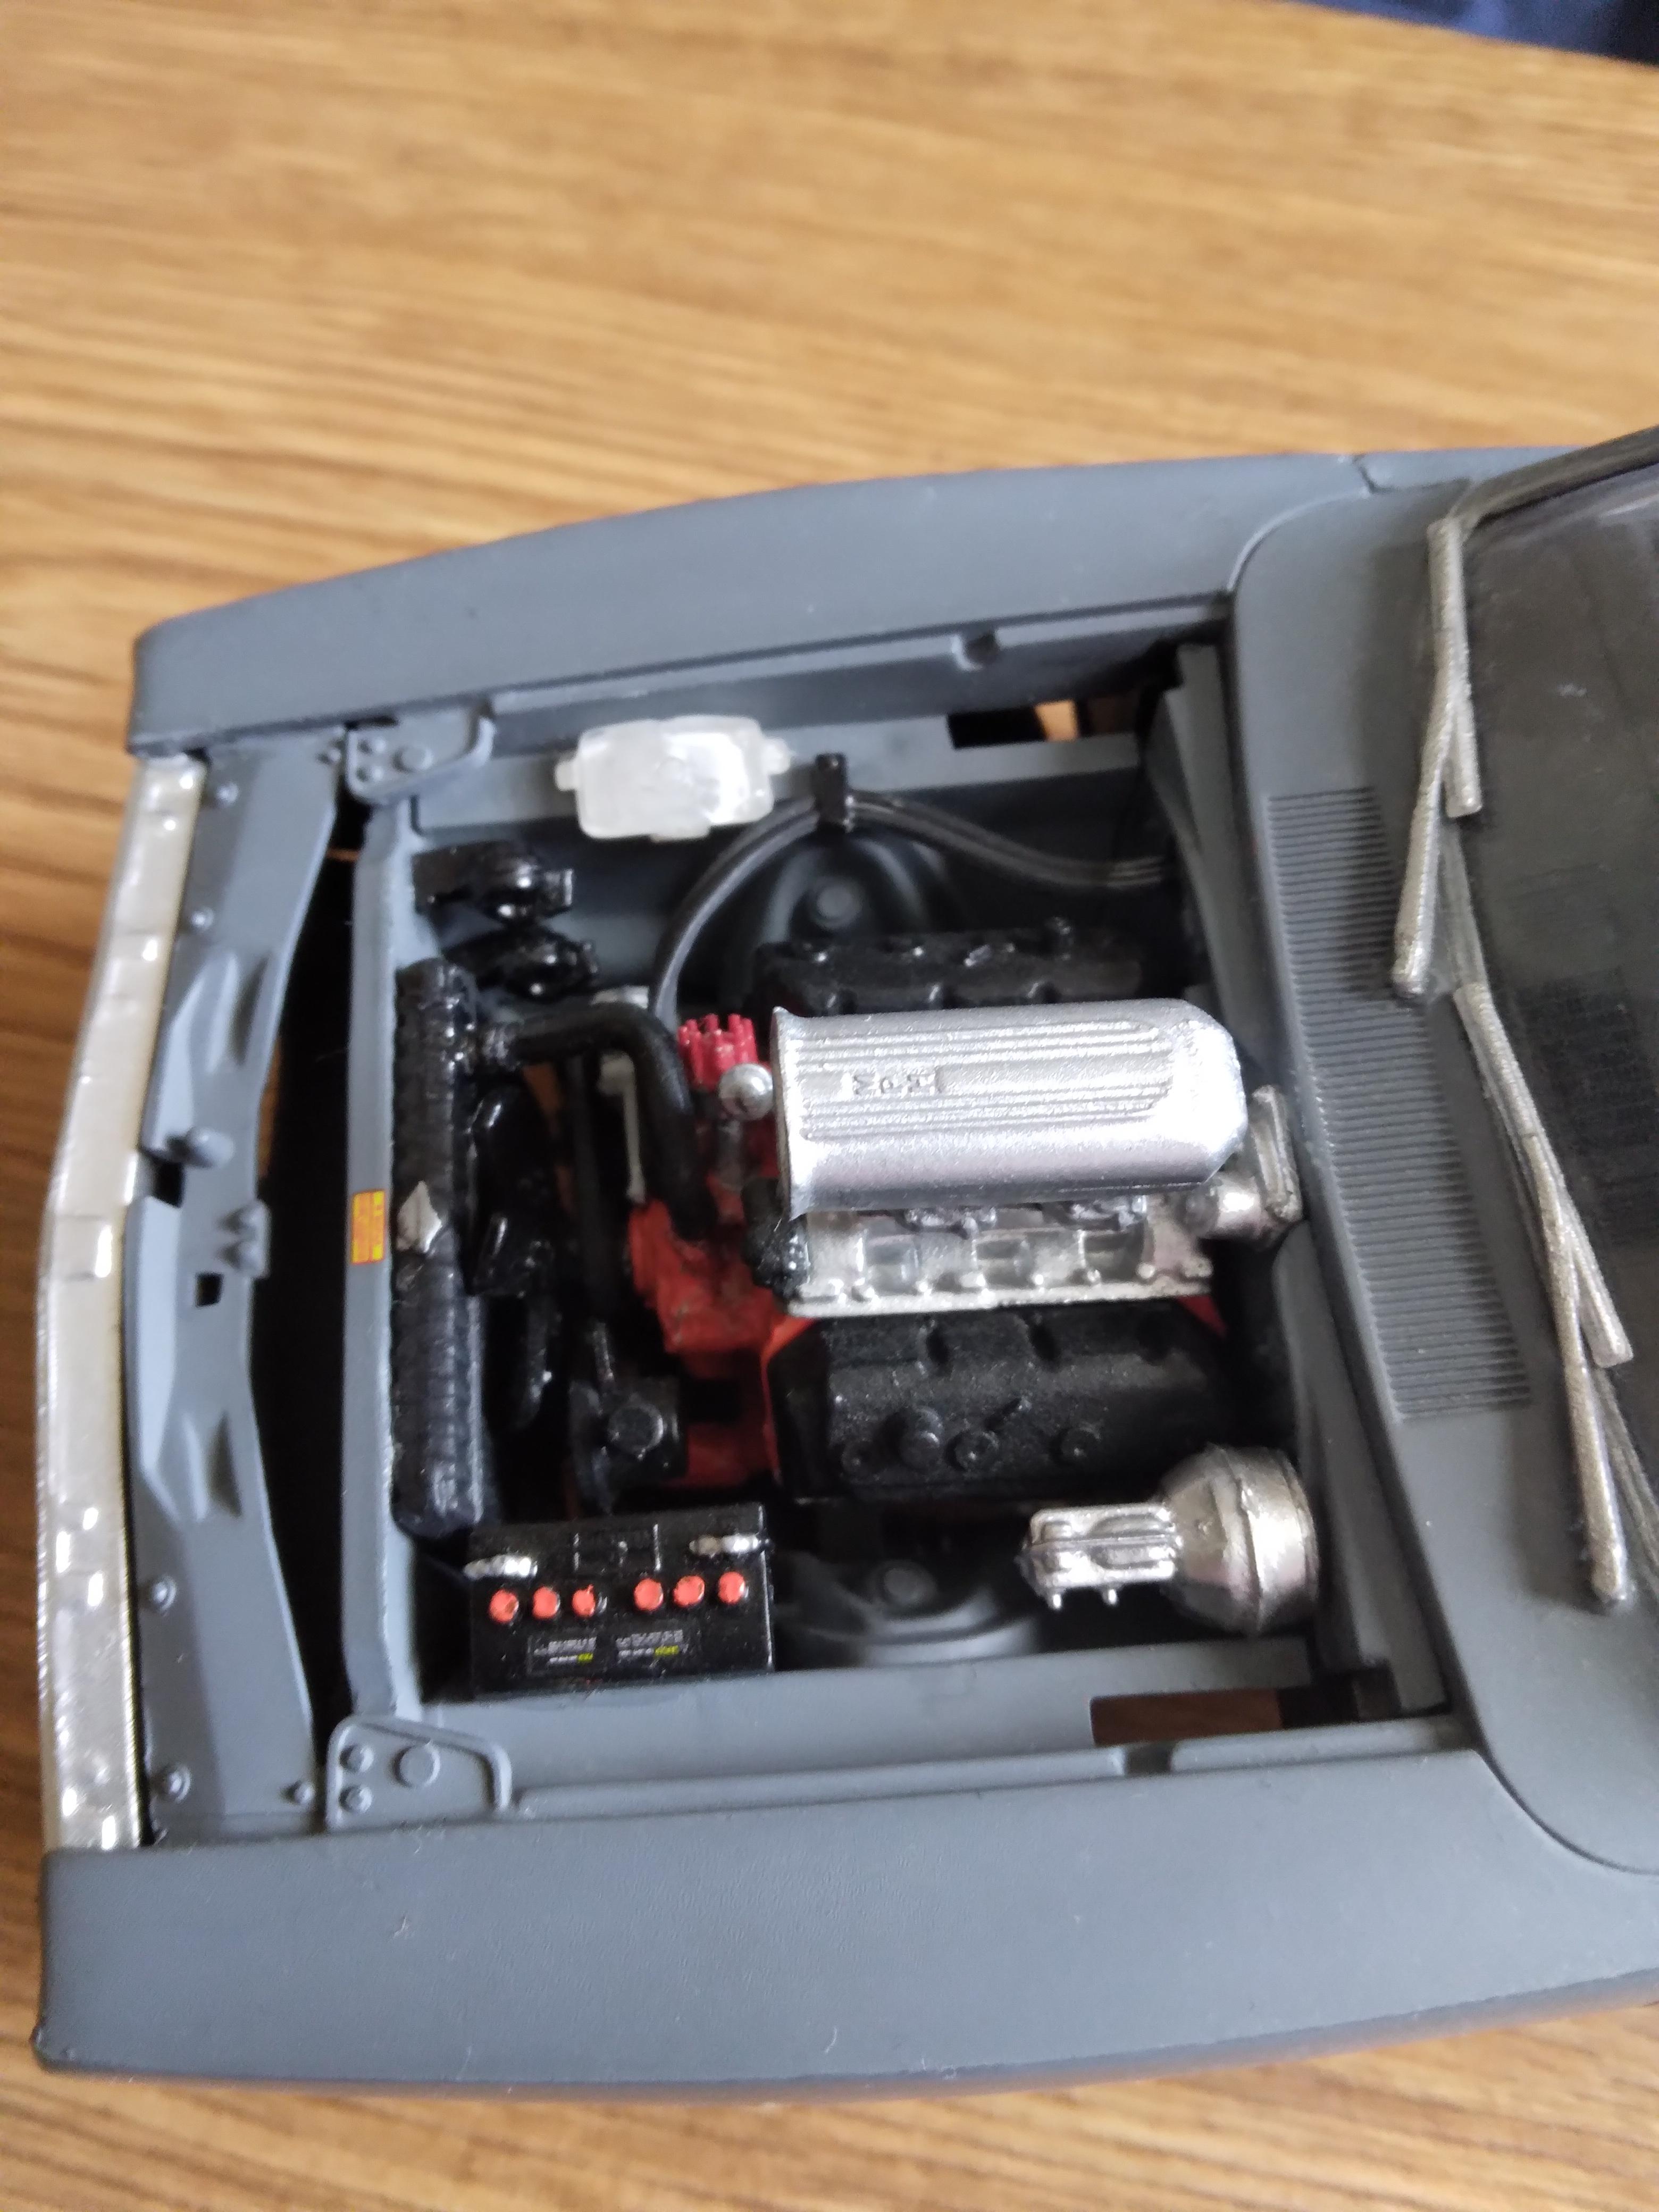
Thanks, Rusty and Gareth. I noticed that I didn't include a shot of the engine bay, so here you go. The wiper motor had to be sanded down to fit but everything else went okay.
-
Thanks, guys. I kept to the Roadkill philosophy of using whatever parts I had and executing ideas on the fly. I also kept things under the top.
-
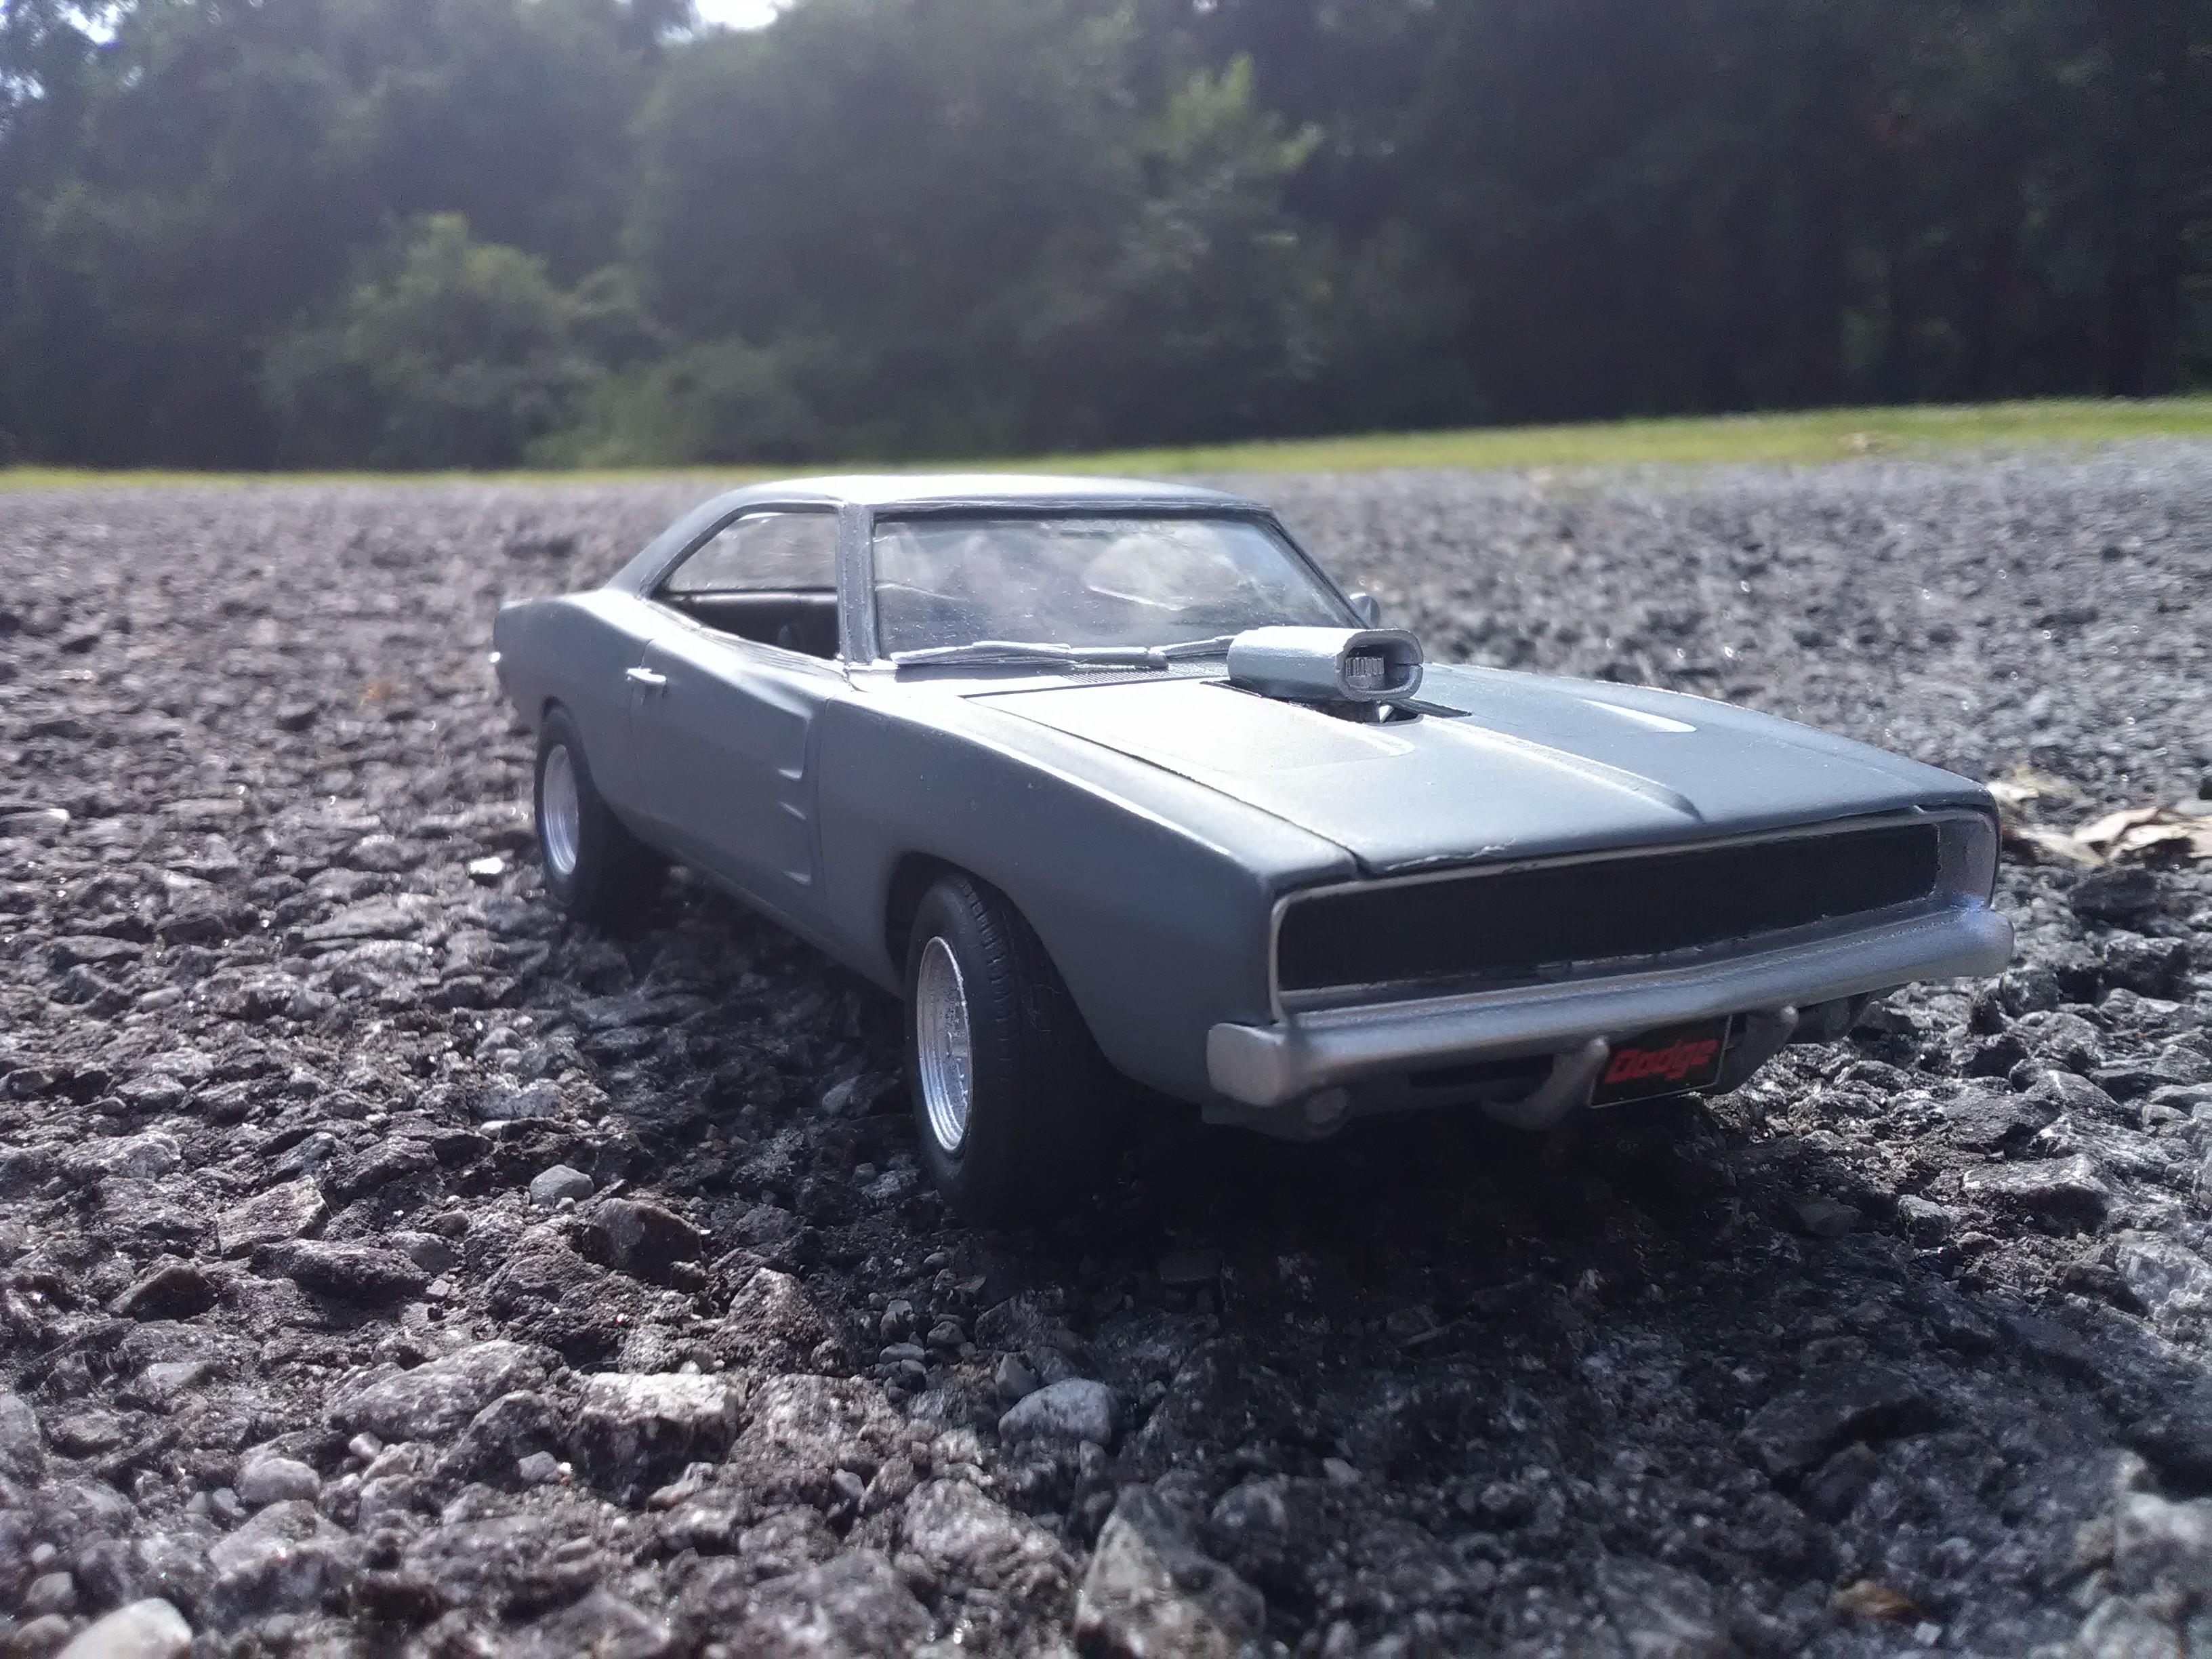
While most areas have the normal seasons of fall, winter, spring, and summer, around here it's almost winter, winter, still winter, and construction.? At the moment it's still winter with rain and occasionally snow coming down so I can't do much progress on the cars. However, I want to show you this 1968 Charger I built a few years ago. The engine is the 440 with the Hemi heads and dual-carb setup. The heads fit fine but some work was needed get the manifold in place. I was going use the original air cleaner but I swapped it when I found out that the hood scop wouldn't fit at all. The interior was further customized by tossing out the center console and adding a NASCAR-style shifter and fire extinguisher. The wheels are centerline with the big-n-little radial gt tires. The rear end was raised and the exhaust was shortened ahead of the axle. The main color is Krylon primer gray and all of the bright work was de-chromed and sprayed Krylon silver. This was done for fun and the inspiration came from Roadkill's General Mayhem Charger and Crusher Camaro when it had its' 80's makeover, and the name was going to be given to General Mayhem at one point so that's why I dubbed it to this car.? The outside pictures were taken at Giant City Park. Hopefully I'll be able to post some progress when the weather starts to clear.?
-
Hello from Southern Illinois
Plasticated Guy replied to Plasticated Guy's topic in Welcome! Introduce Yourself
Hi, Carl, and thanks. A.J., I was a volunteer firefighter for 4 years with Alto Pass. Those hairy areas would be worse when I would get a call in the middle of the night. ? But the back roads are great for walking. I do one mile and it feels like two. -
Hello from Southern Illinois
Plasticated Guy replied to Plasticated Guy's topic in Welcome! Introduce Yourself
Thanks much, Gary, and hello Rusty. -
Hello from Southern Illinois
Plasticated Guy replied to Plasticated Guy's topic in Welcome! Introduce Yourself
Hi, A.J., and thanks. And thanks to Bob for the welcoming and your service. And I sure will, Tom. -
Hello from Southern Illinois
Plasticated Guy replied to Plasticated Guy's topic in Welcome! Introduce Yourself
Thanks much, Pappy. -
Hello, everyone. The name is Mike aka Plasticated Guy. I come from the country town of Cobden and I'm pleased to be a part of this forum. I was on the Scale Auto forum until it shut down. I usually build 1/24 and 1/25 scale, but I'll go for larger or smaller scale if the subject matter grabs my interest.. My other interests include walking/hiking and I enjoy watching vintage NASCAR, ARCA, and currently Superstar Racing Experience. I shall look forward to sharing my projects on here.