Wolf
-
Posts
128 -
Joined
-
Last visited
Recent Profile Visitors
549 profile views


Wolf's Achievements
MCM Friend (4/6)
-
Thanks Geoff, I love that era as well. I just wish the kit had a lot more injection moulded styrene. Much easier to work with and a lot lighter. For a 1/12th scale kit it weighs 7.4 oz and was difficult to handle at the end. Cheers, Wolf
-
Thank-you Chris. Much appreciated and I’m glad you like it. Cheers, Wolf
-
Thank-you Larry. I appreciate your comment. Cheers, Wolf
-
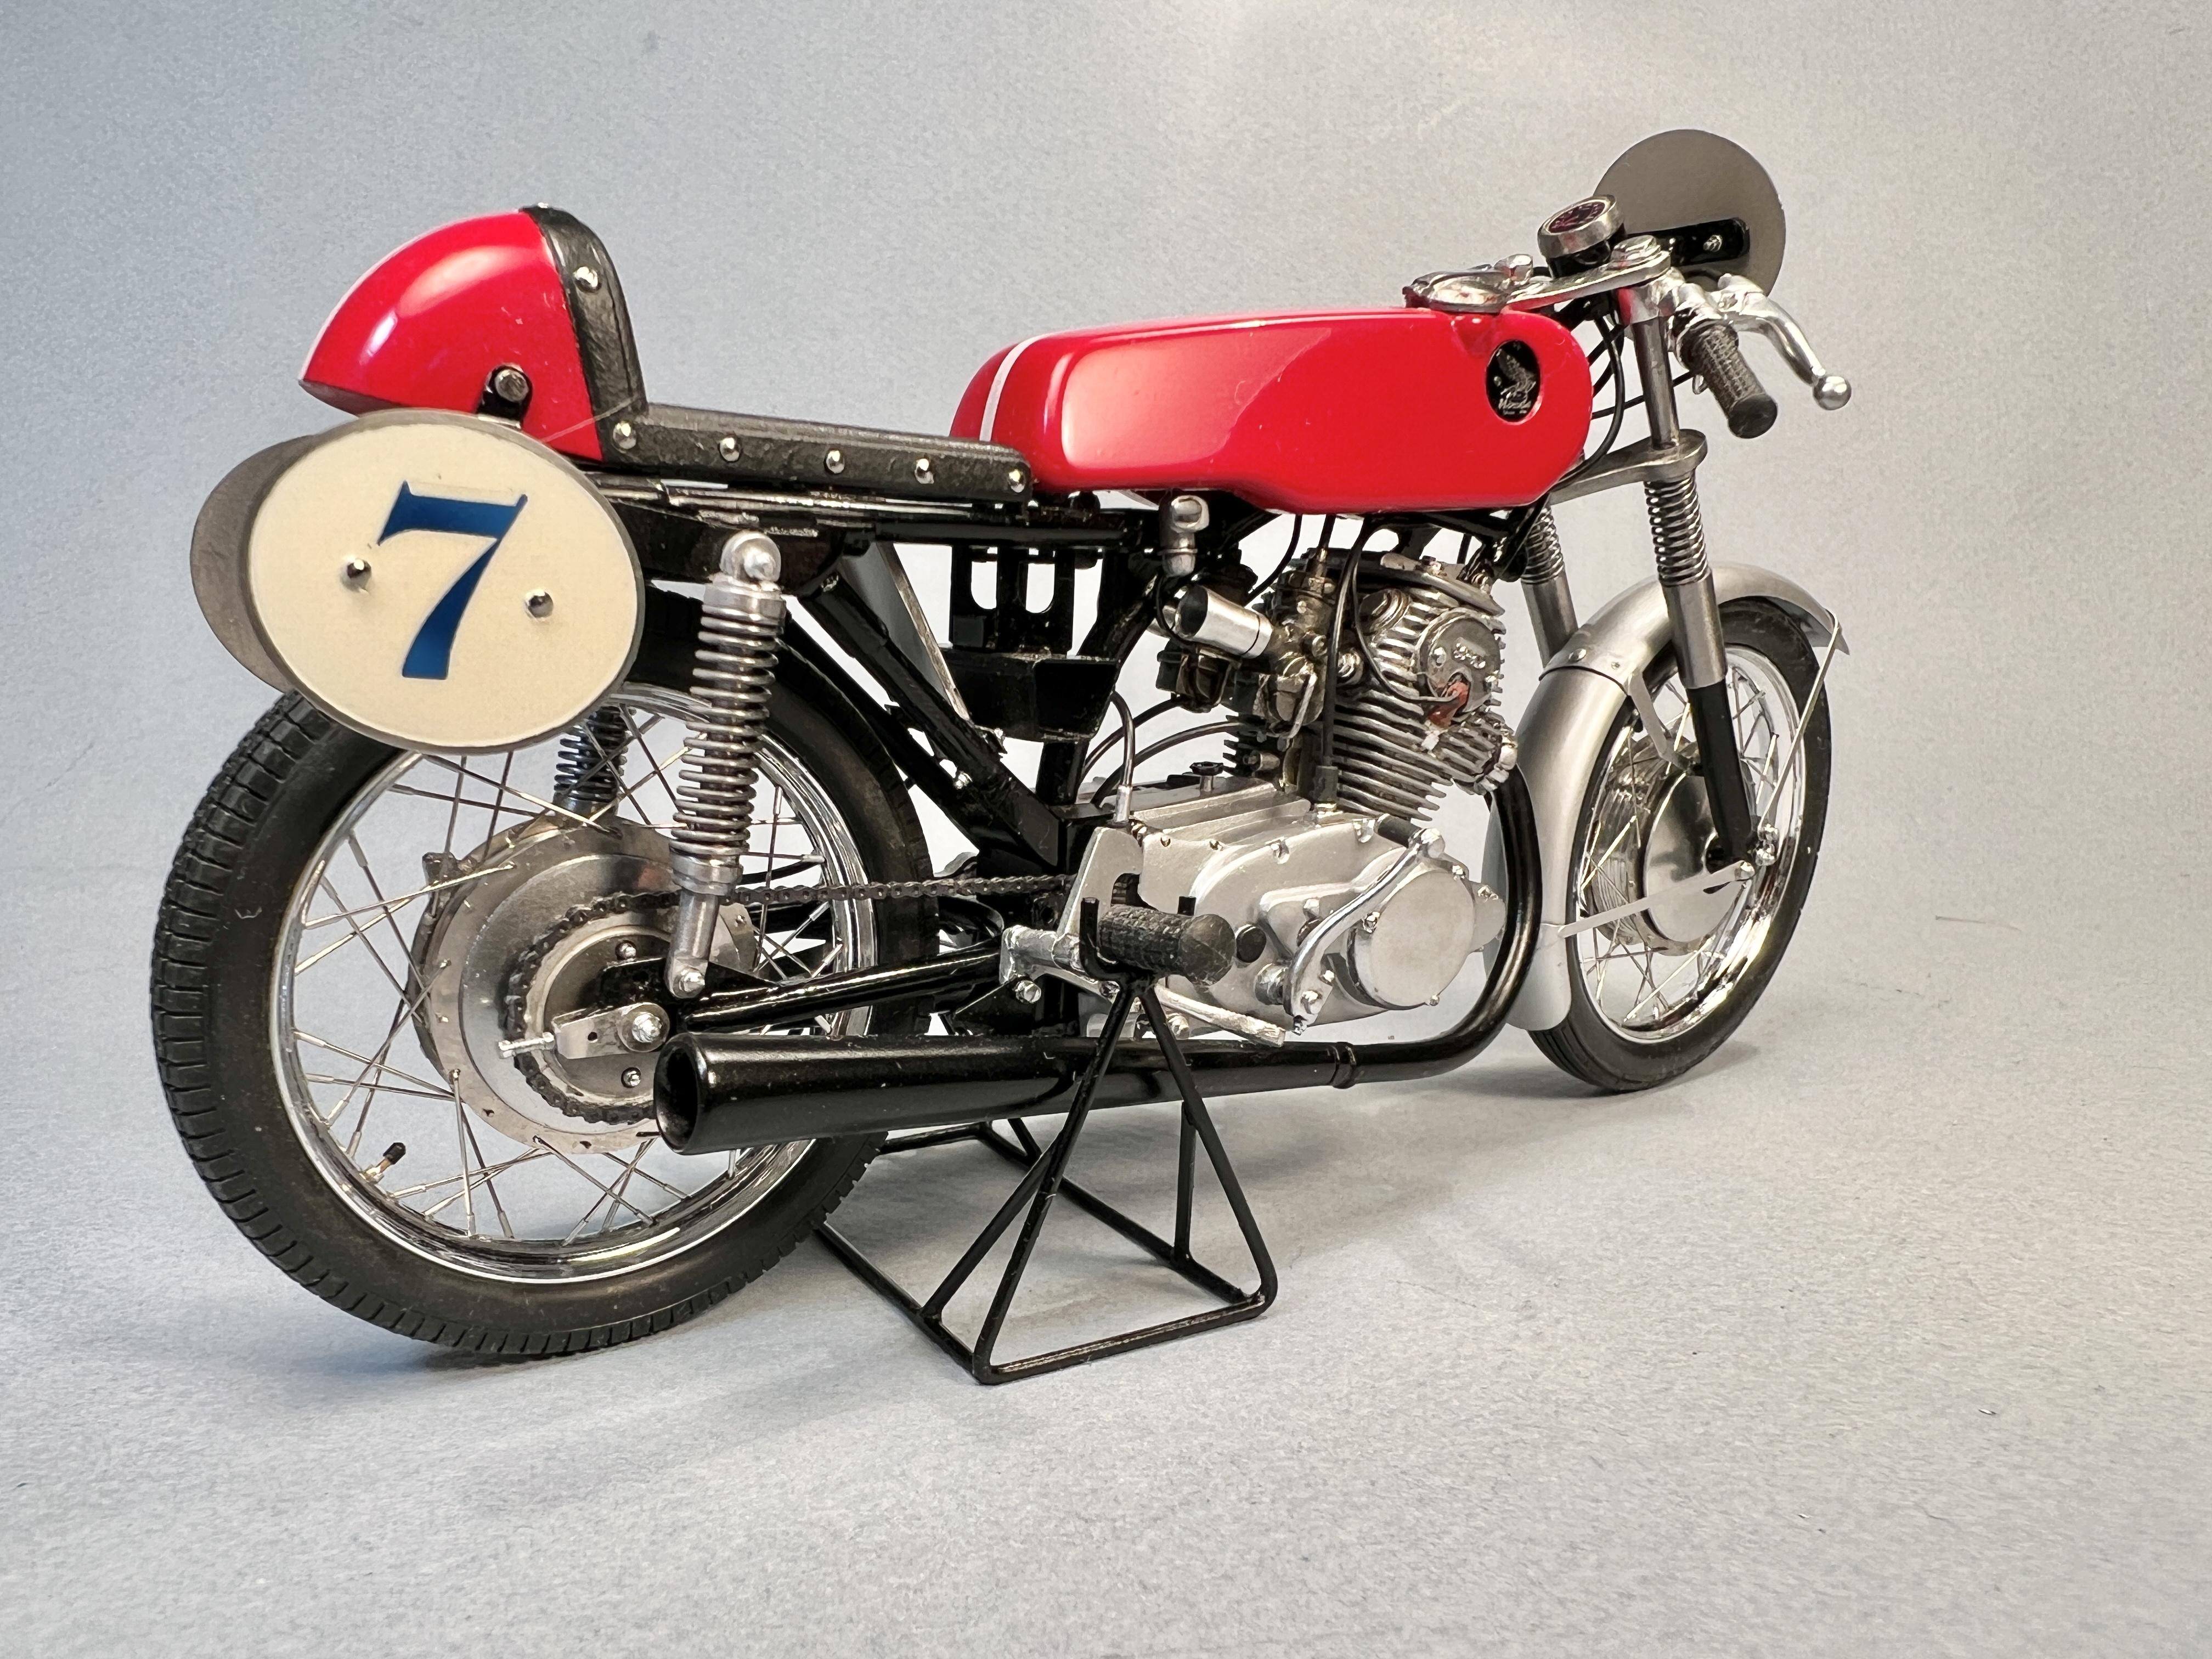
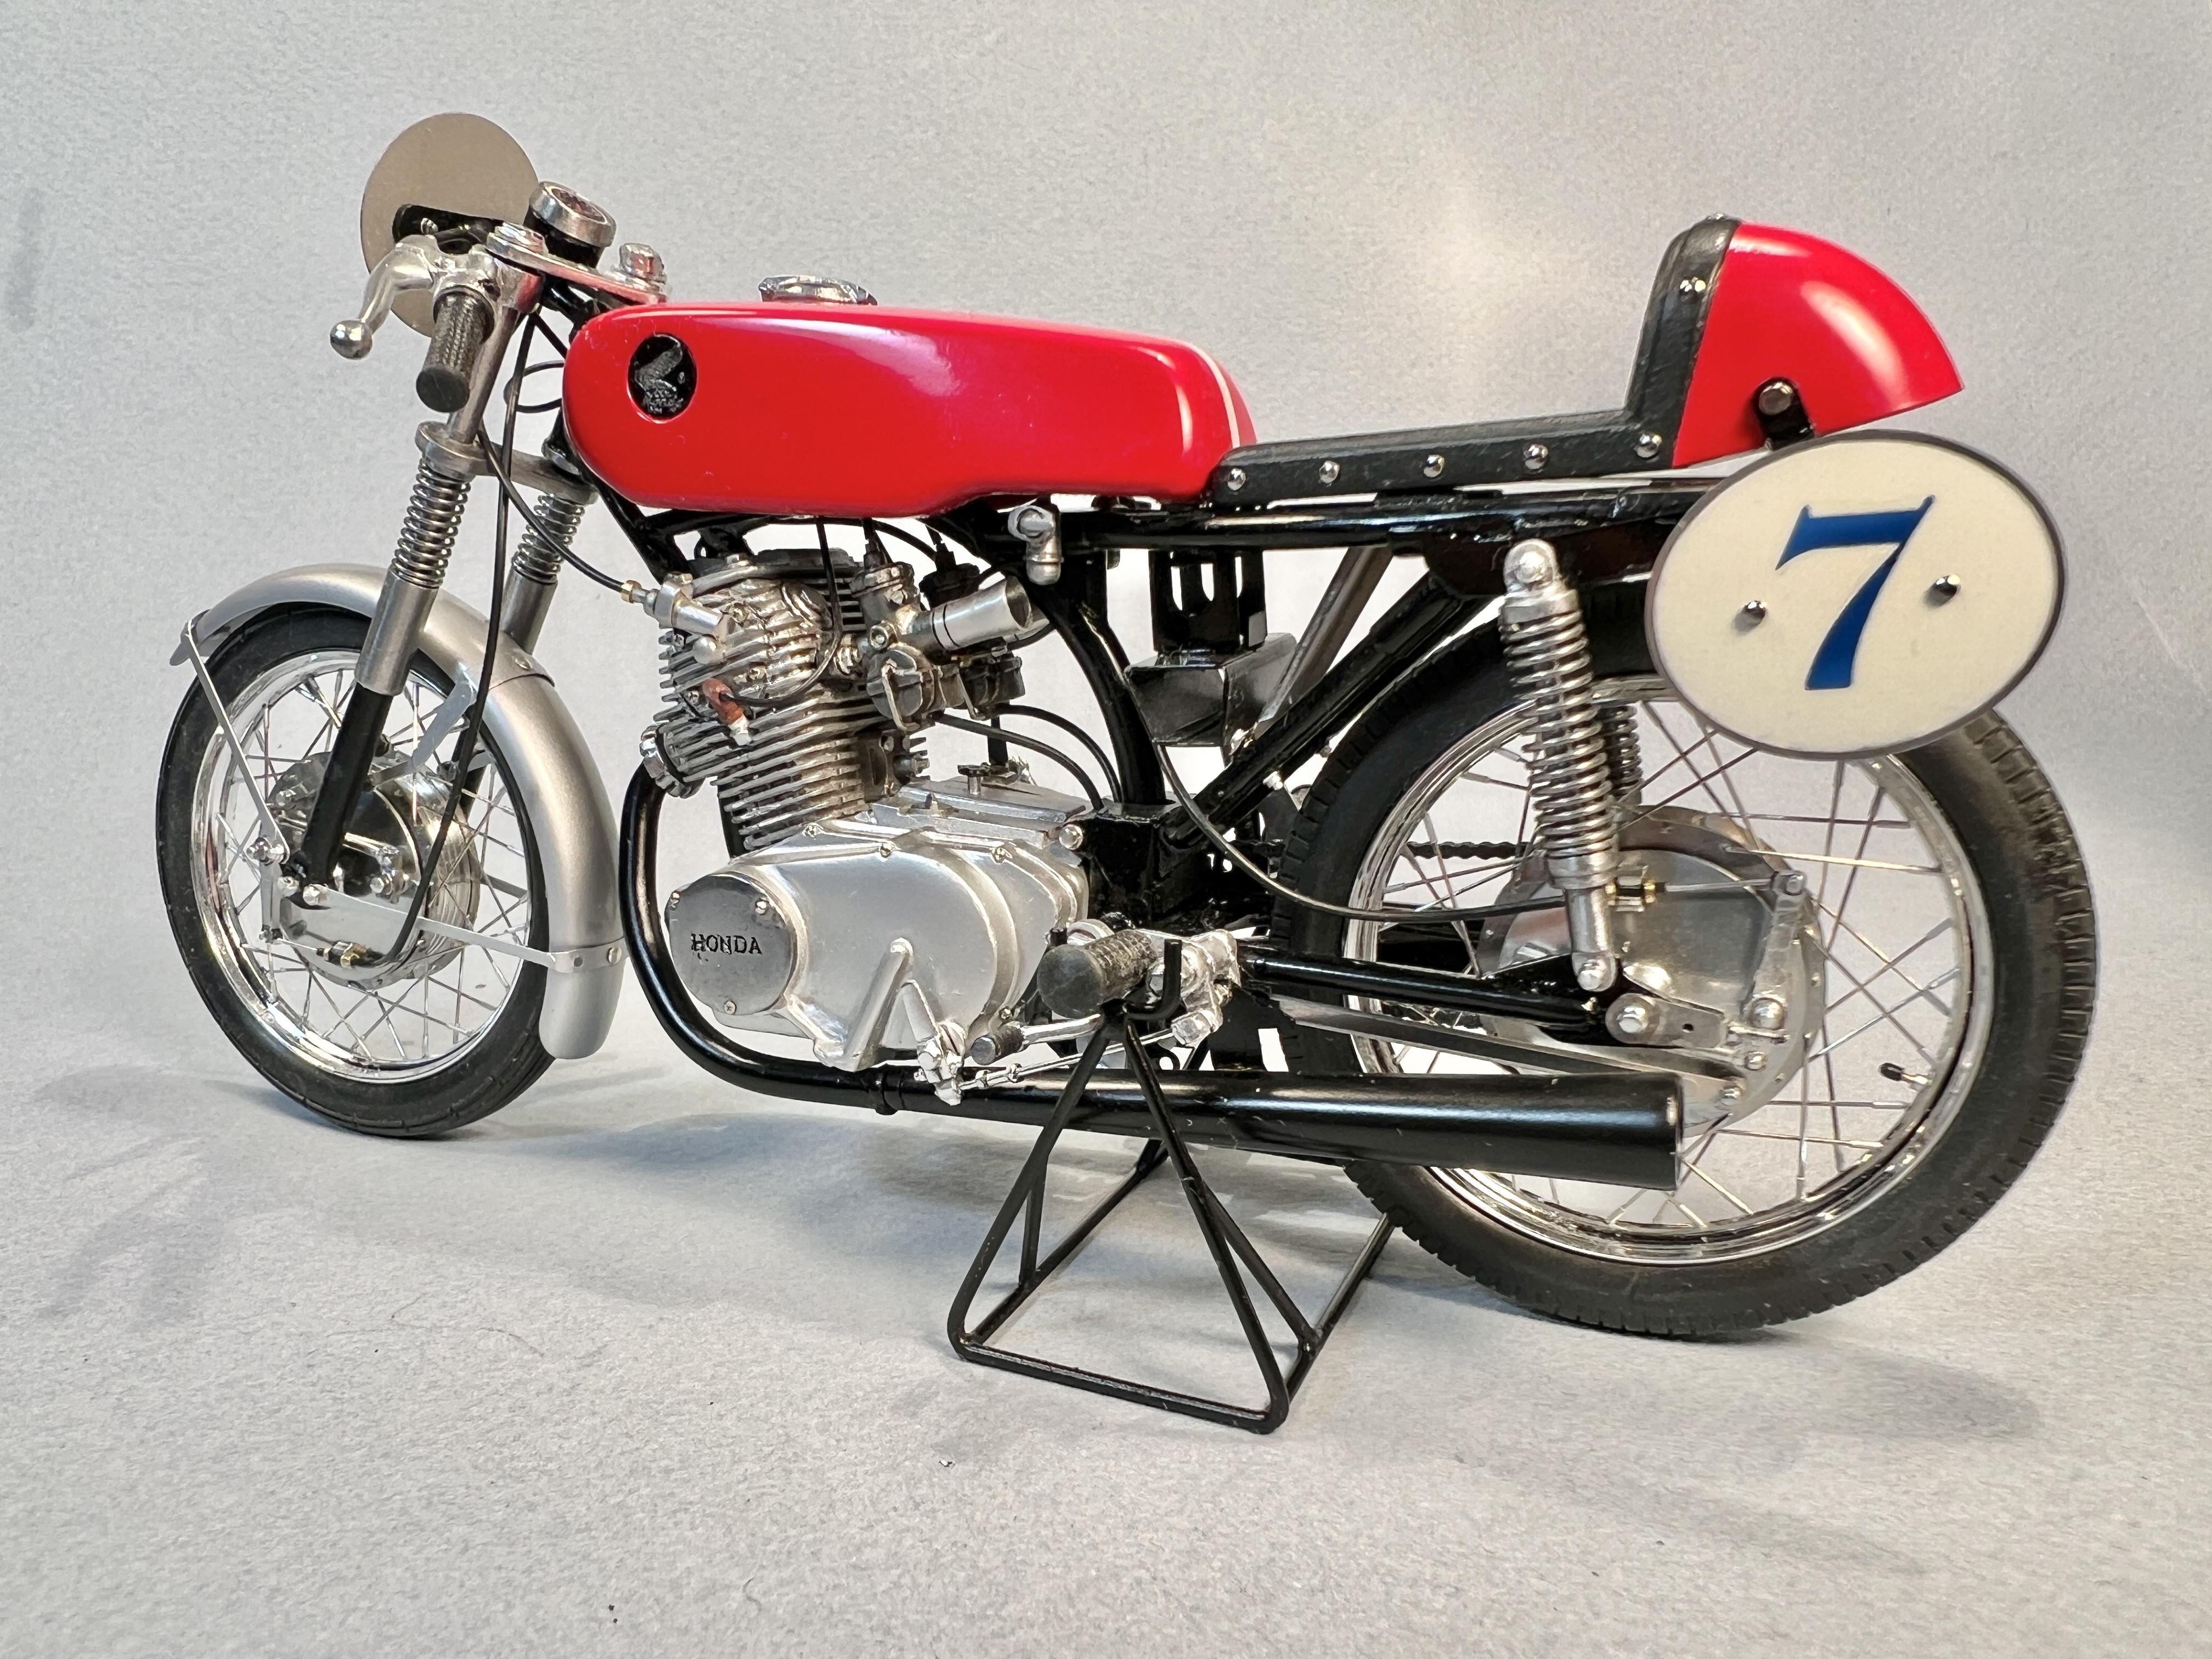
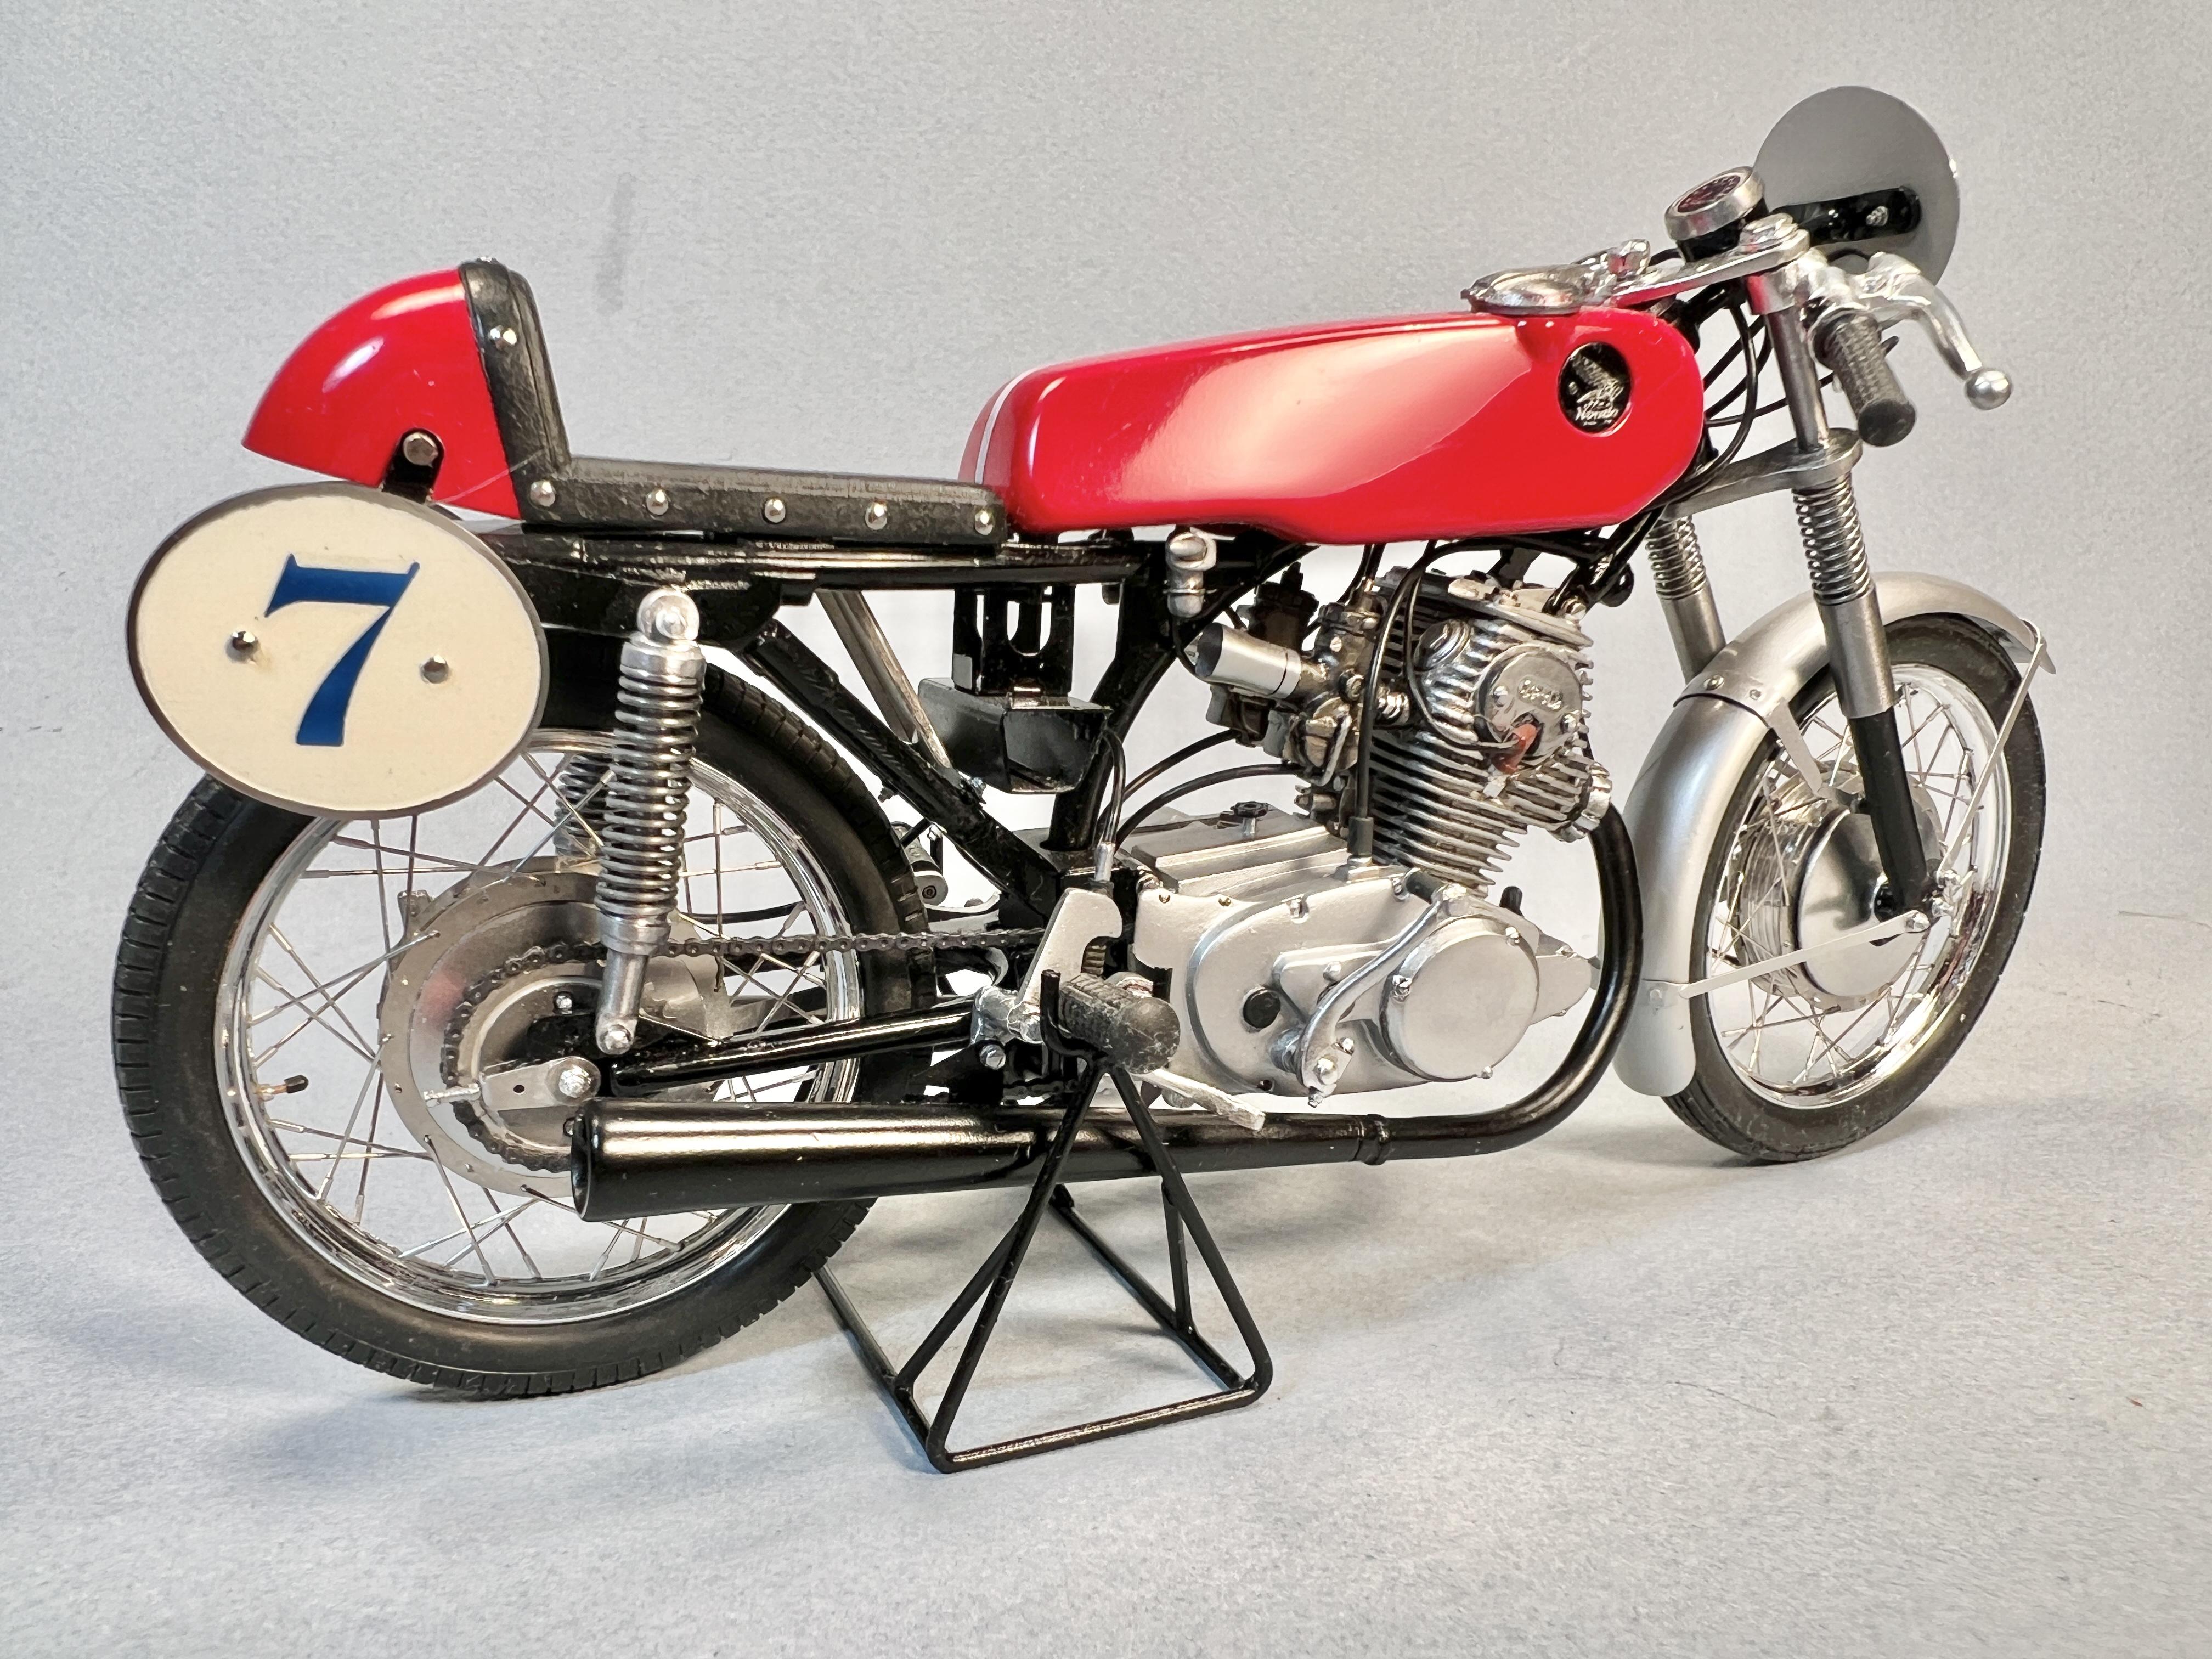
Just completed this build. Certainly not the easiest build as the kit is 90% white metal with the remaining parts in styrene (fuel tank, seat, and front fender) and photo etch. Lots of metal rods and wire for the spokes as well. Many parts were modified to enhance their detail and lots of scratch building details was necessary to build an accurate representation. For example the carbs were heavily reworked and the intake trumpets were scratch built to replace the horrible kit items. Top Studio detail parts were used throughout as well. Thinking far ahead in the instructions is mandatory as all parts had to be dry fitted well in advance to ensure they’d fit when the time came to add them to the assemblies. The #7 decals came from the spares box as no decals come with the kit. In the end I’m happy with the results but I think I’m getting too old to have to deal with all the wailing and knashing of teeth so the next bike will be another Tamiya offering. The last photo shows my previous Honda bike build alongside the Clubman as a size comparison. Cheers, Wolf

-
Congratulations on two beautiful builds! I agree with you that Gunze’s Hi-Tech kits are not the easiest to build as I just finished their 1/12th Honda CB72 Clubman kit that I received last Christmas. Lots of work involved in cleaning up the white metal parts and some were replaced with scratch built alternatives as their castings were quite rough. Nice models when finished if you can persevere through to the finish. Cheers, Wolf (who’ll likely stick to Tamiya’s 1/12th bike kits)
-
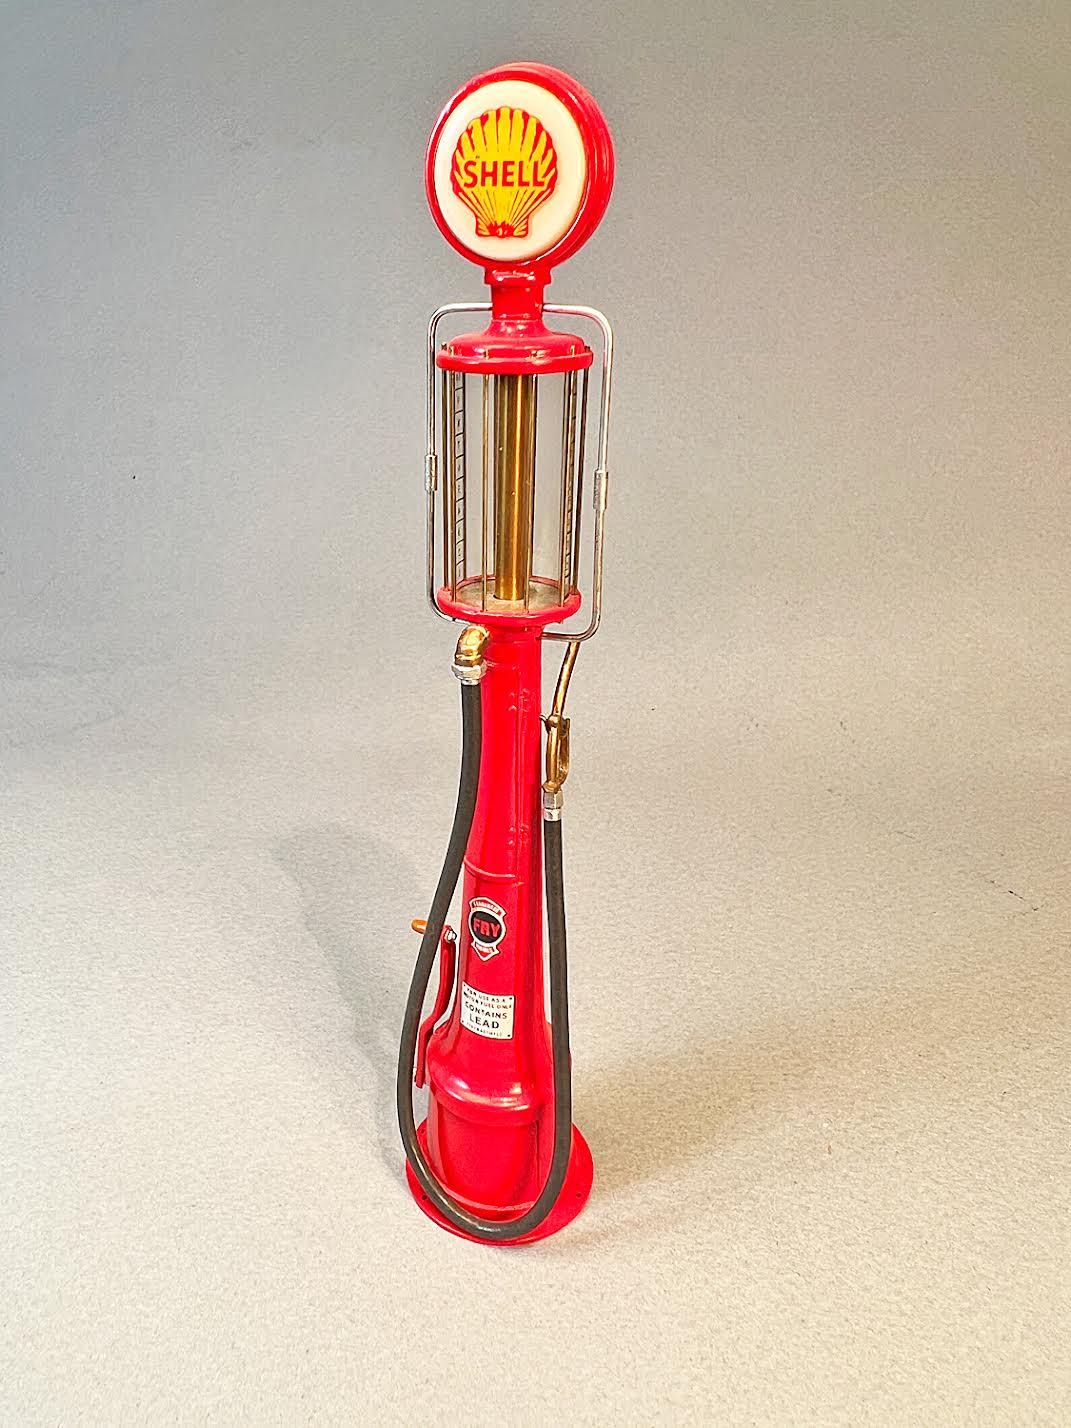
Shell gravity feed gas pump.
Wolf replied to Wolf's topic in All The Rest: Motorcycles, Aviation, Military, Sci-Fi, Figures
Thanks Chris! Cheers, Wolf -
Very cool indeed! I wish I had one of those. I have a neighbour that could use a good stun from time to time. Cheers, Wolf
-
Shell gravity feed gas pump.
Wolf replied to Wolf's topic in All The Rest: Motorcycles, Aviation, Military, Sci-Fi, Figures
Thanks Warren. Yeah, the made a number of models of these old pumps. Lots of different logos too like Texaco, Phillips 66, and more. You could even wire ‘em up so the globe on top could illuminate. Thank-you Jim. Like I said, I wish I had bought more of these. It’ll look good with a couple of my Johan ‘32 Cadillacs sitting beside it. I imagine those ol’ V-16s were a bit thirsty. -
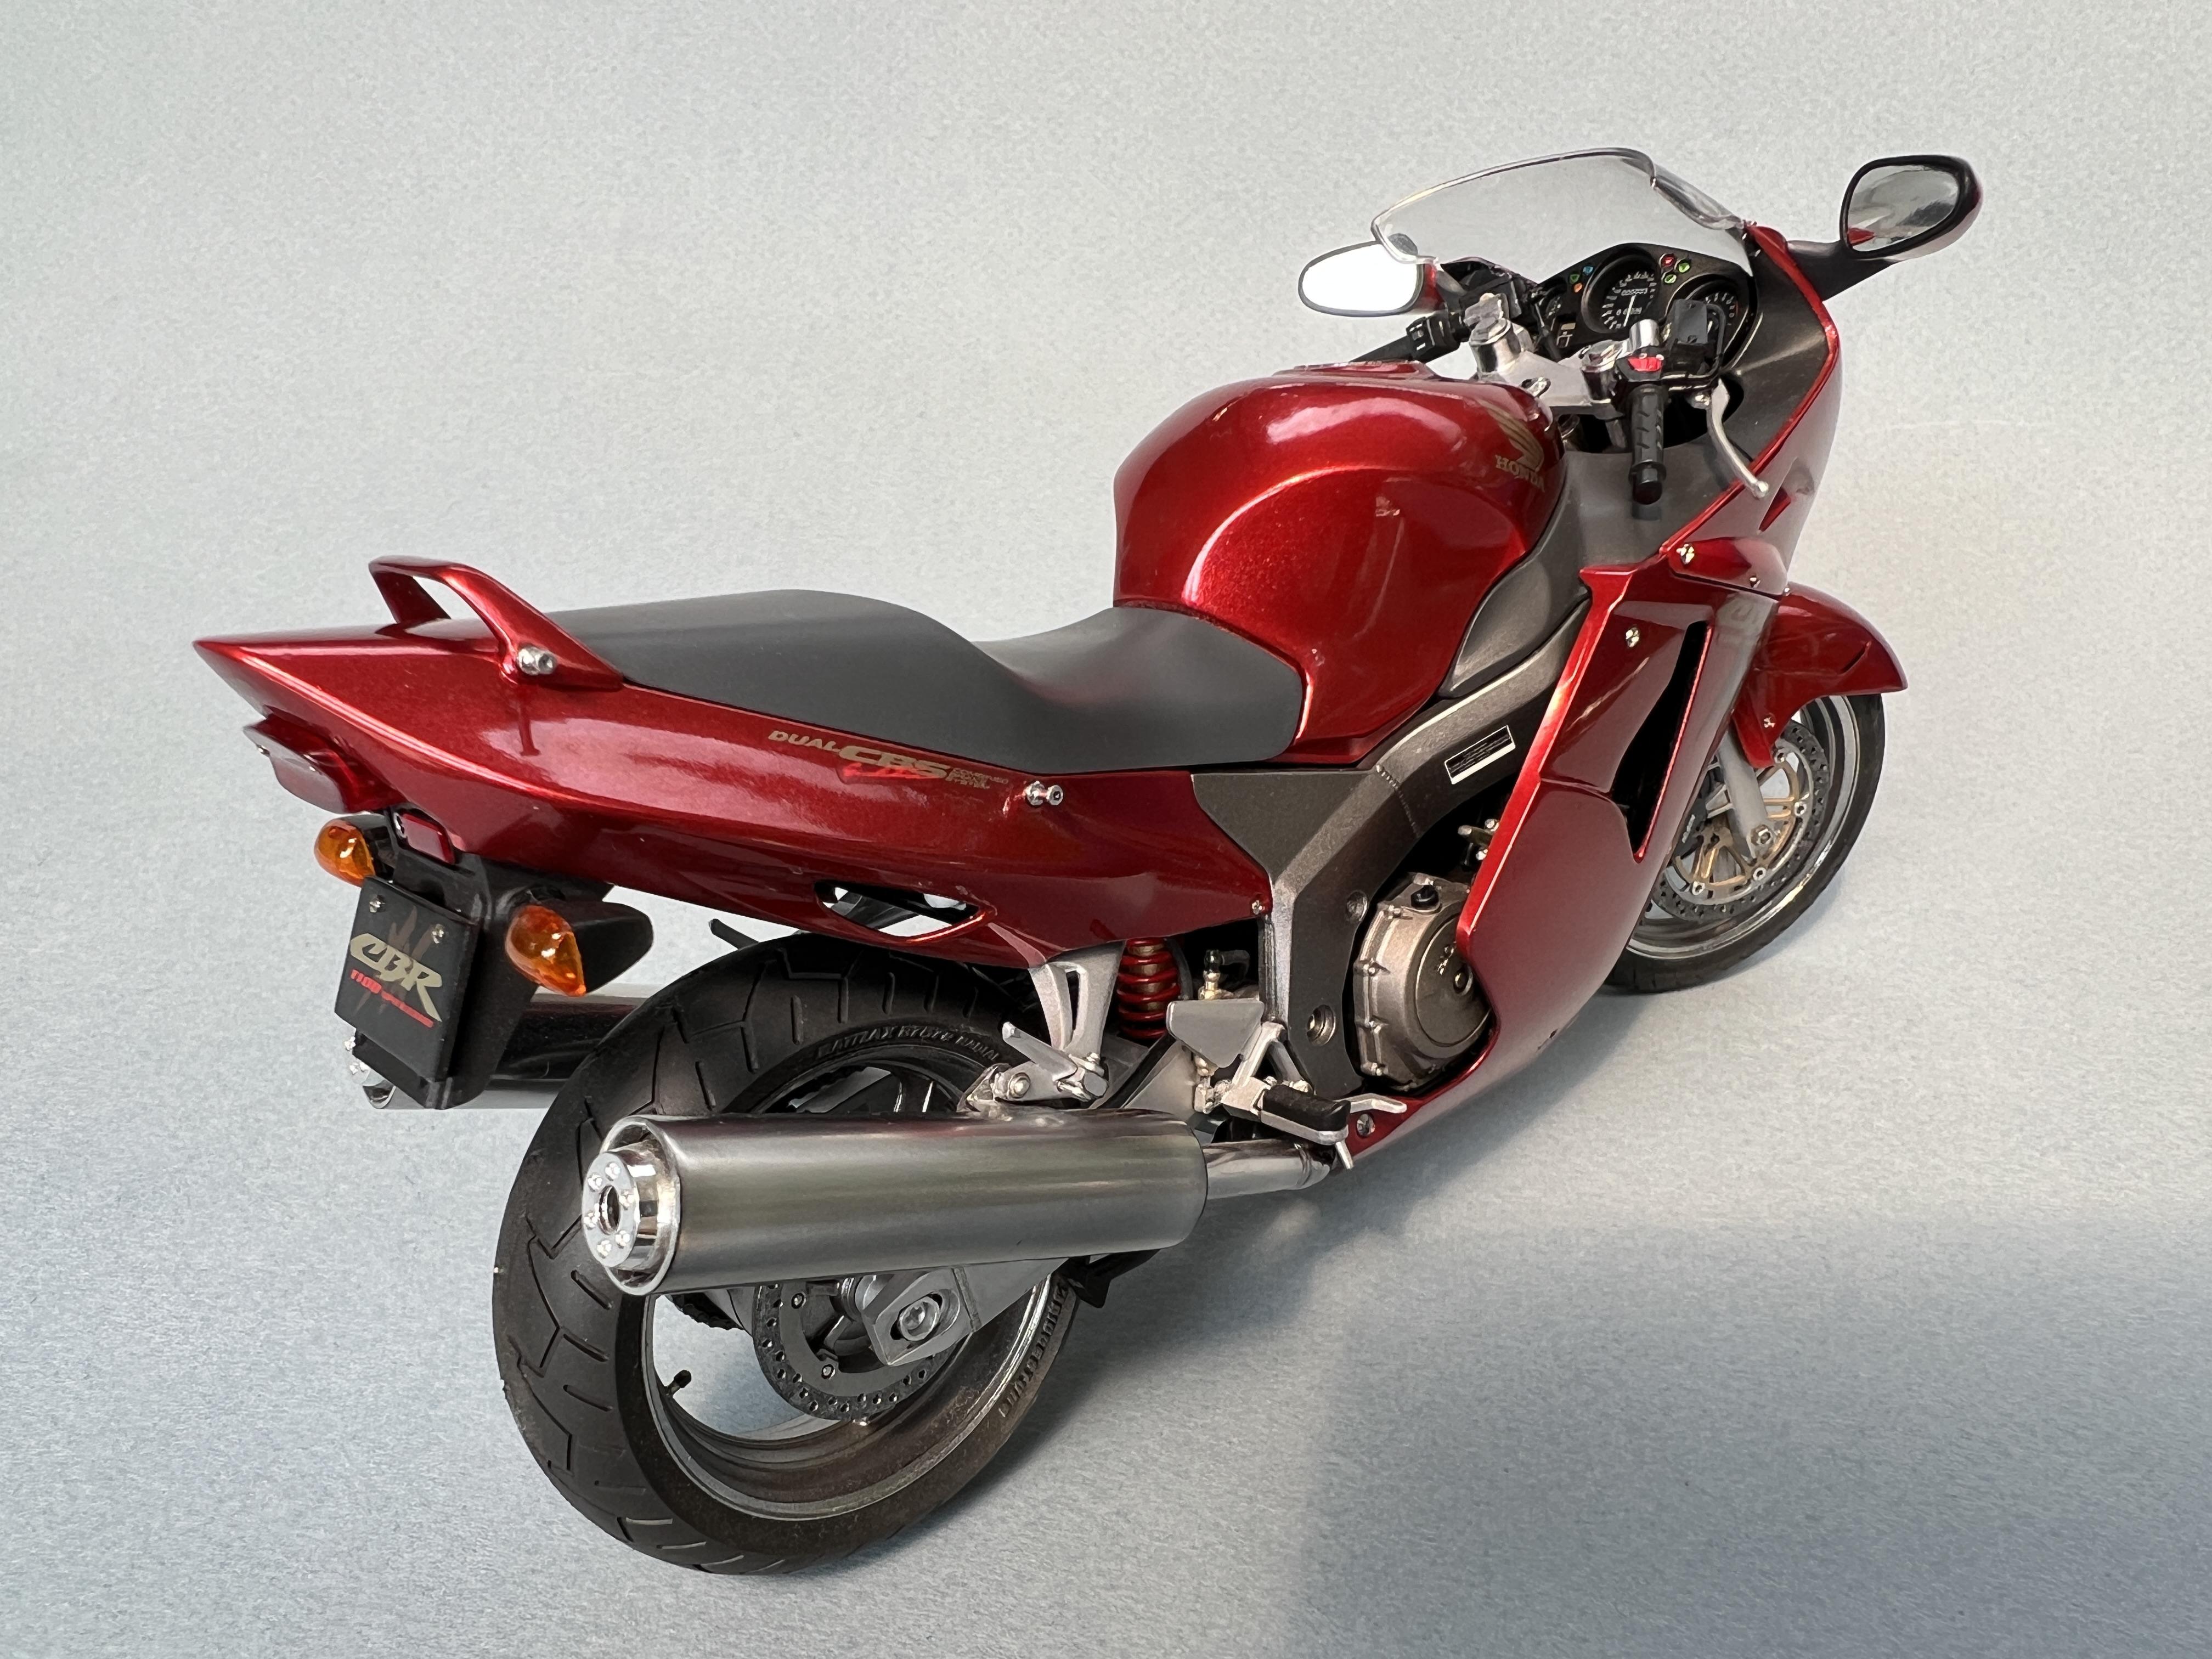
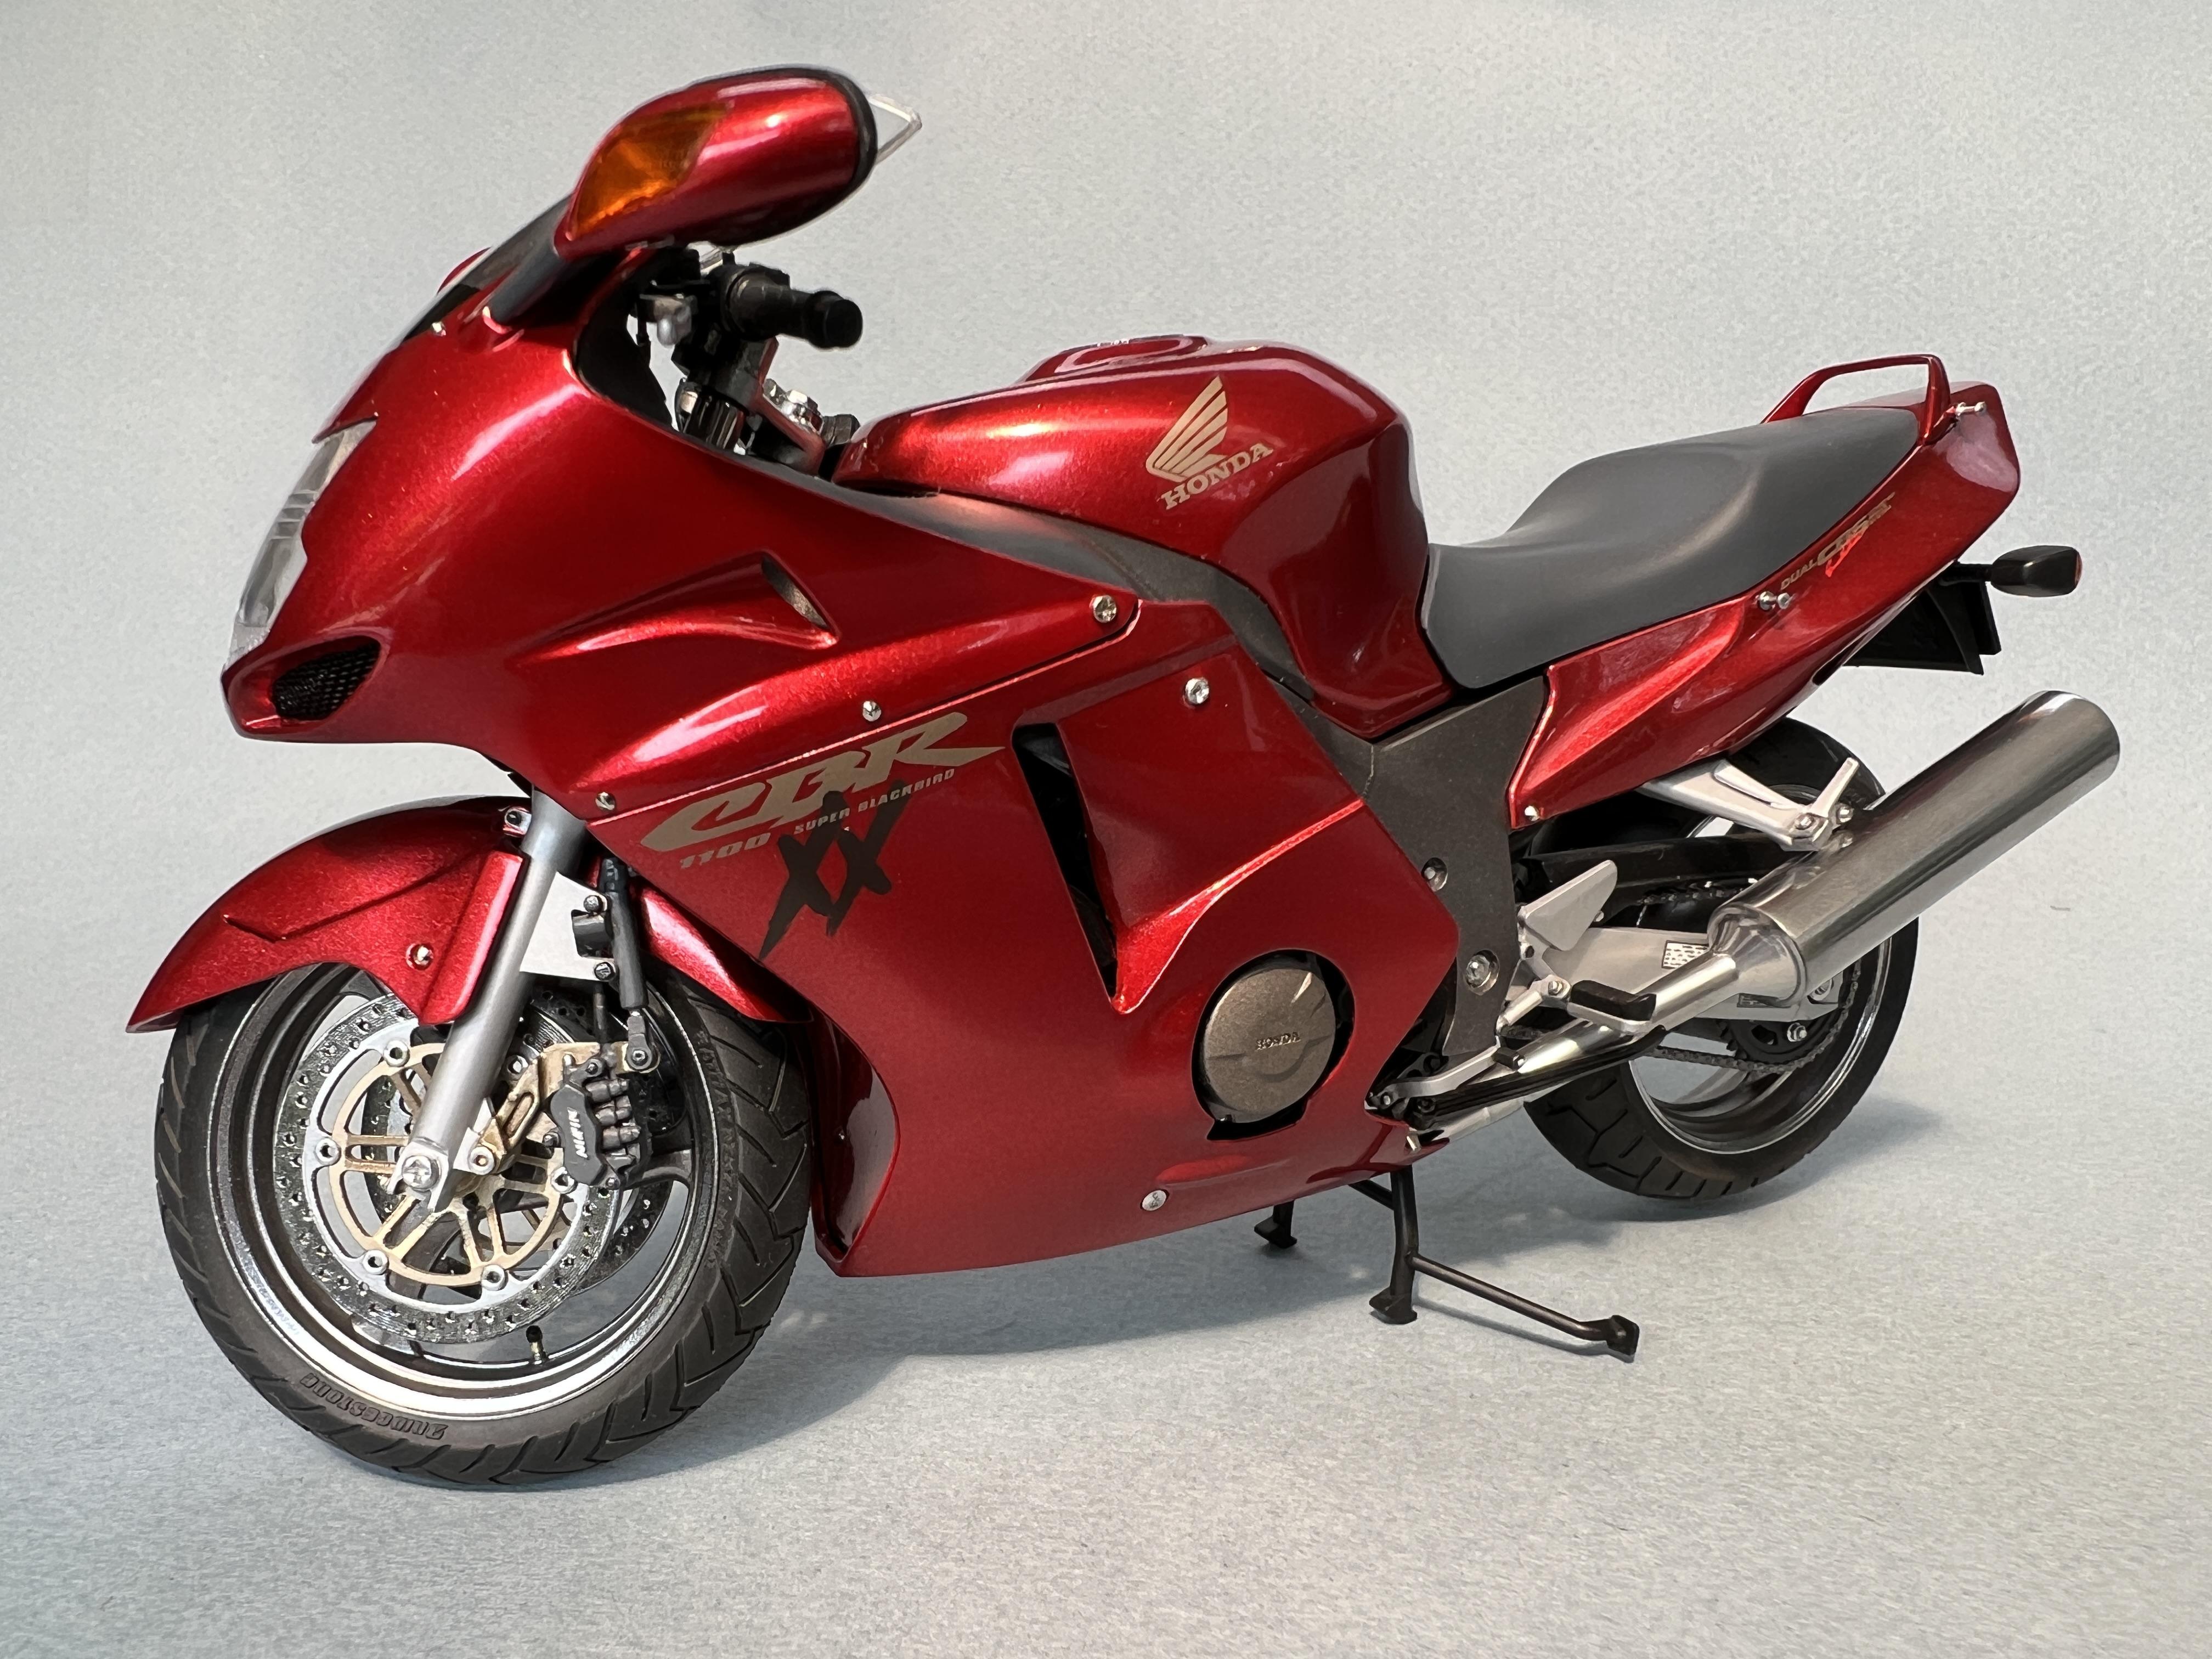
Thanks Jay. The color is Tamiya’s spray lacquer Pure Metallic Red.
-
Something a little different. This is R&D Unique’s 1930s Shell gas pump. You used the handle on the side of the pump to pump gas up into the glass cylinder which showed how much fuel you were going to purchase. Gravity did the rest when you pulled the handle on the nozzle at the end of the hose. The silver conduits from the pump body to the top contained the wiring to illuminate the globe. I really wish I had bought more of these multi media kits.
-
Thank-you Bruce. Much appreciated. Vielen Dank Mathias!
-
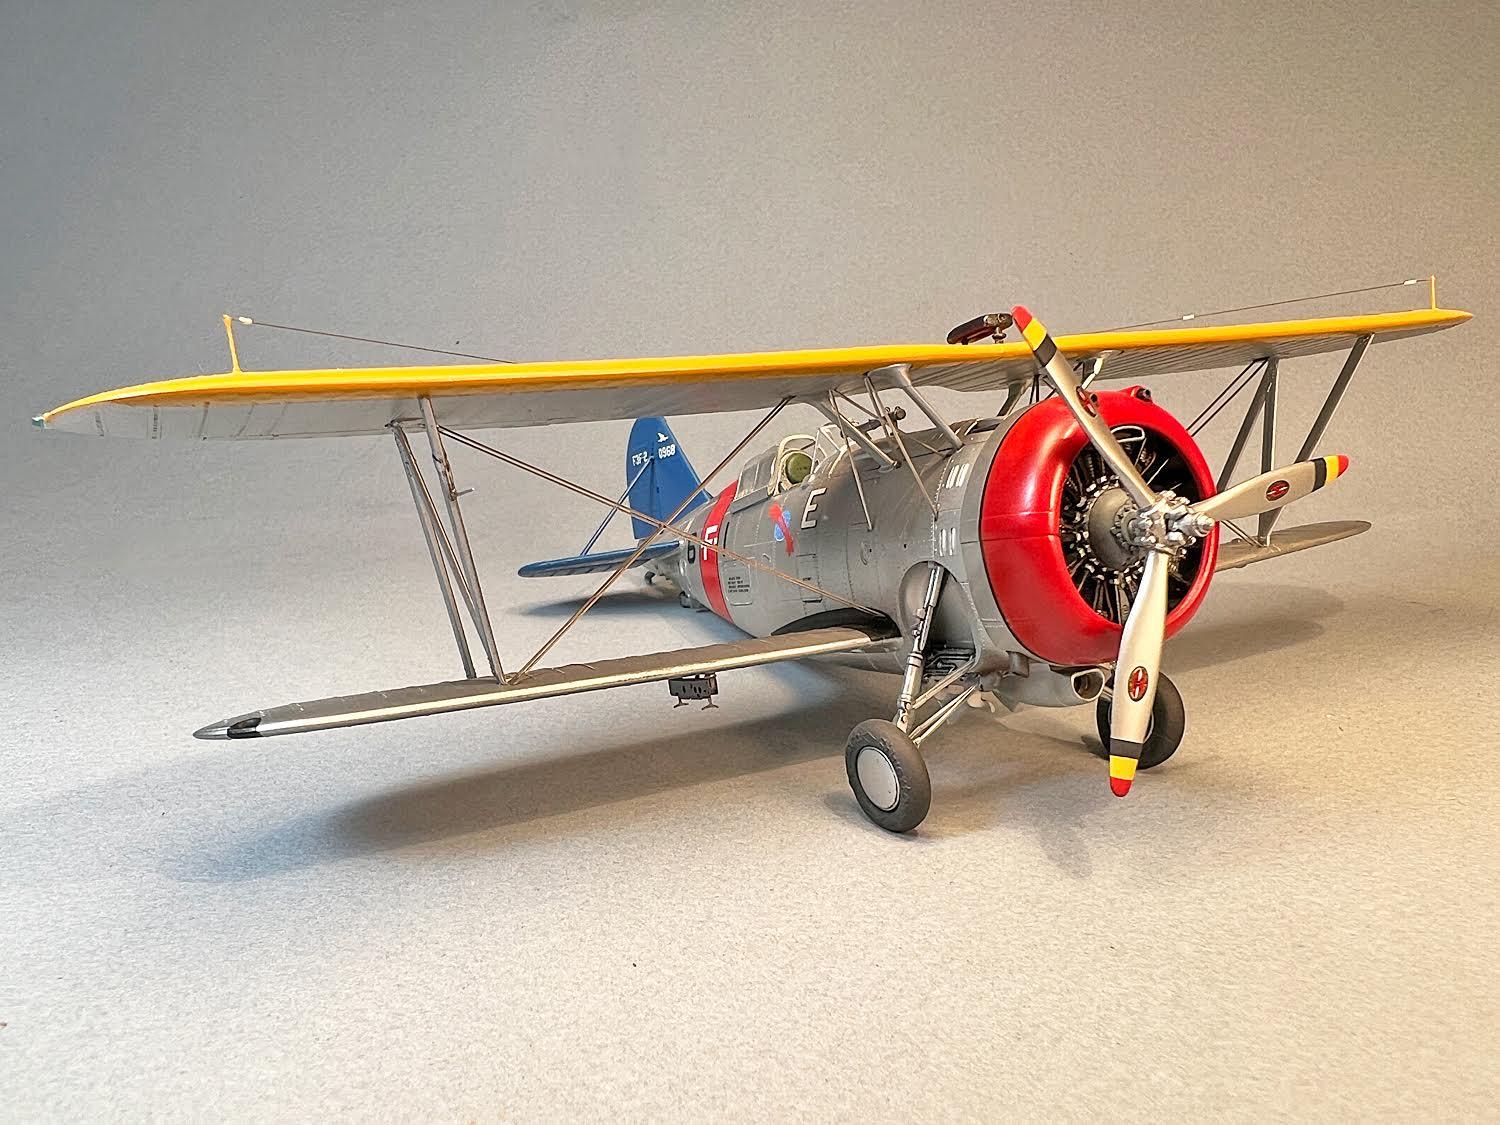
1/48 Grumman F3F-2
Wolf replied to SpikeSchumacher's topic in All The Rest: Motorcycles, Aviation, Military, Sci-Fi, Figures
Jetz muss ich sagen “Ausgezeichnett”! I built this same kit when it was first released by Accurate Miniatures. I found it to be an excellent kit although I did have to fettle around with the photo etch rigging to get it as straight as possible. It’s not perfect but it’s close. I hope you don’t mind me showing you a photo of mine in your thread. If so, please let me know, I’ll delete it. Cheers, Wolf
-
A few months in the making but finally done. I hope you like the end result. Cheers, Wolf
-
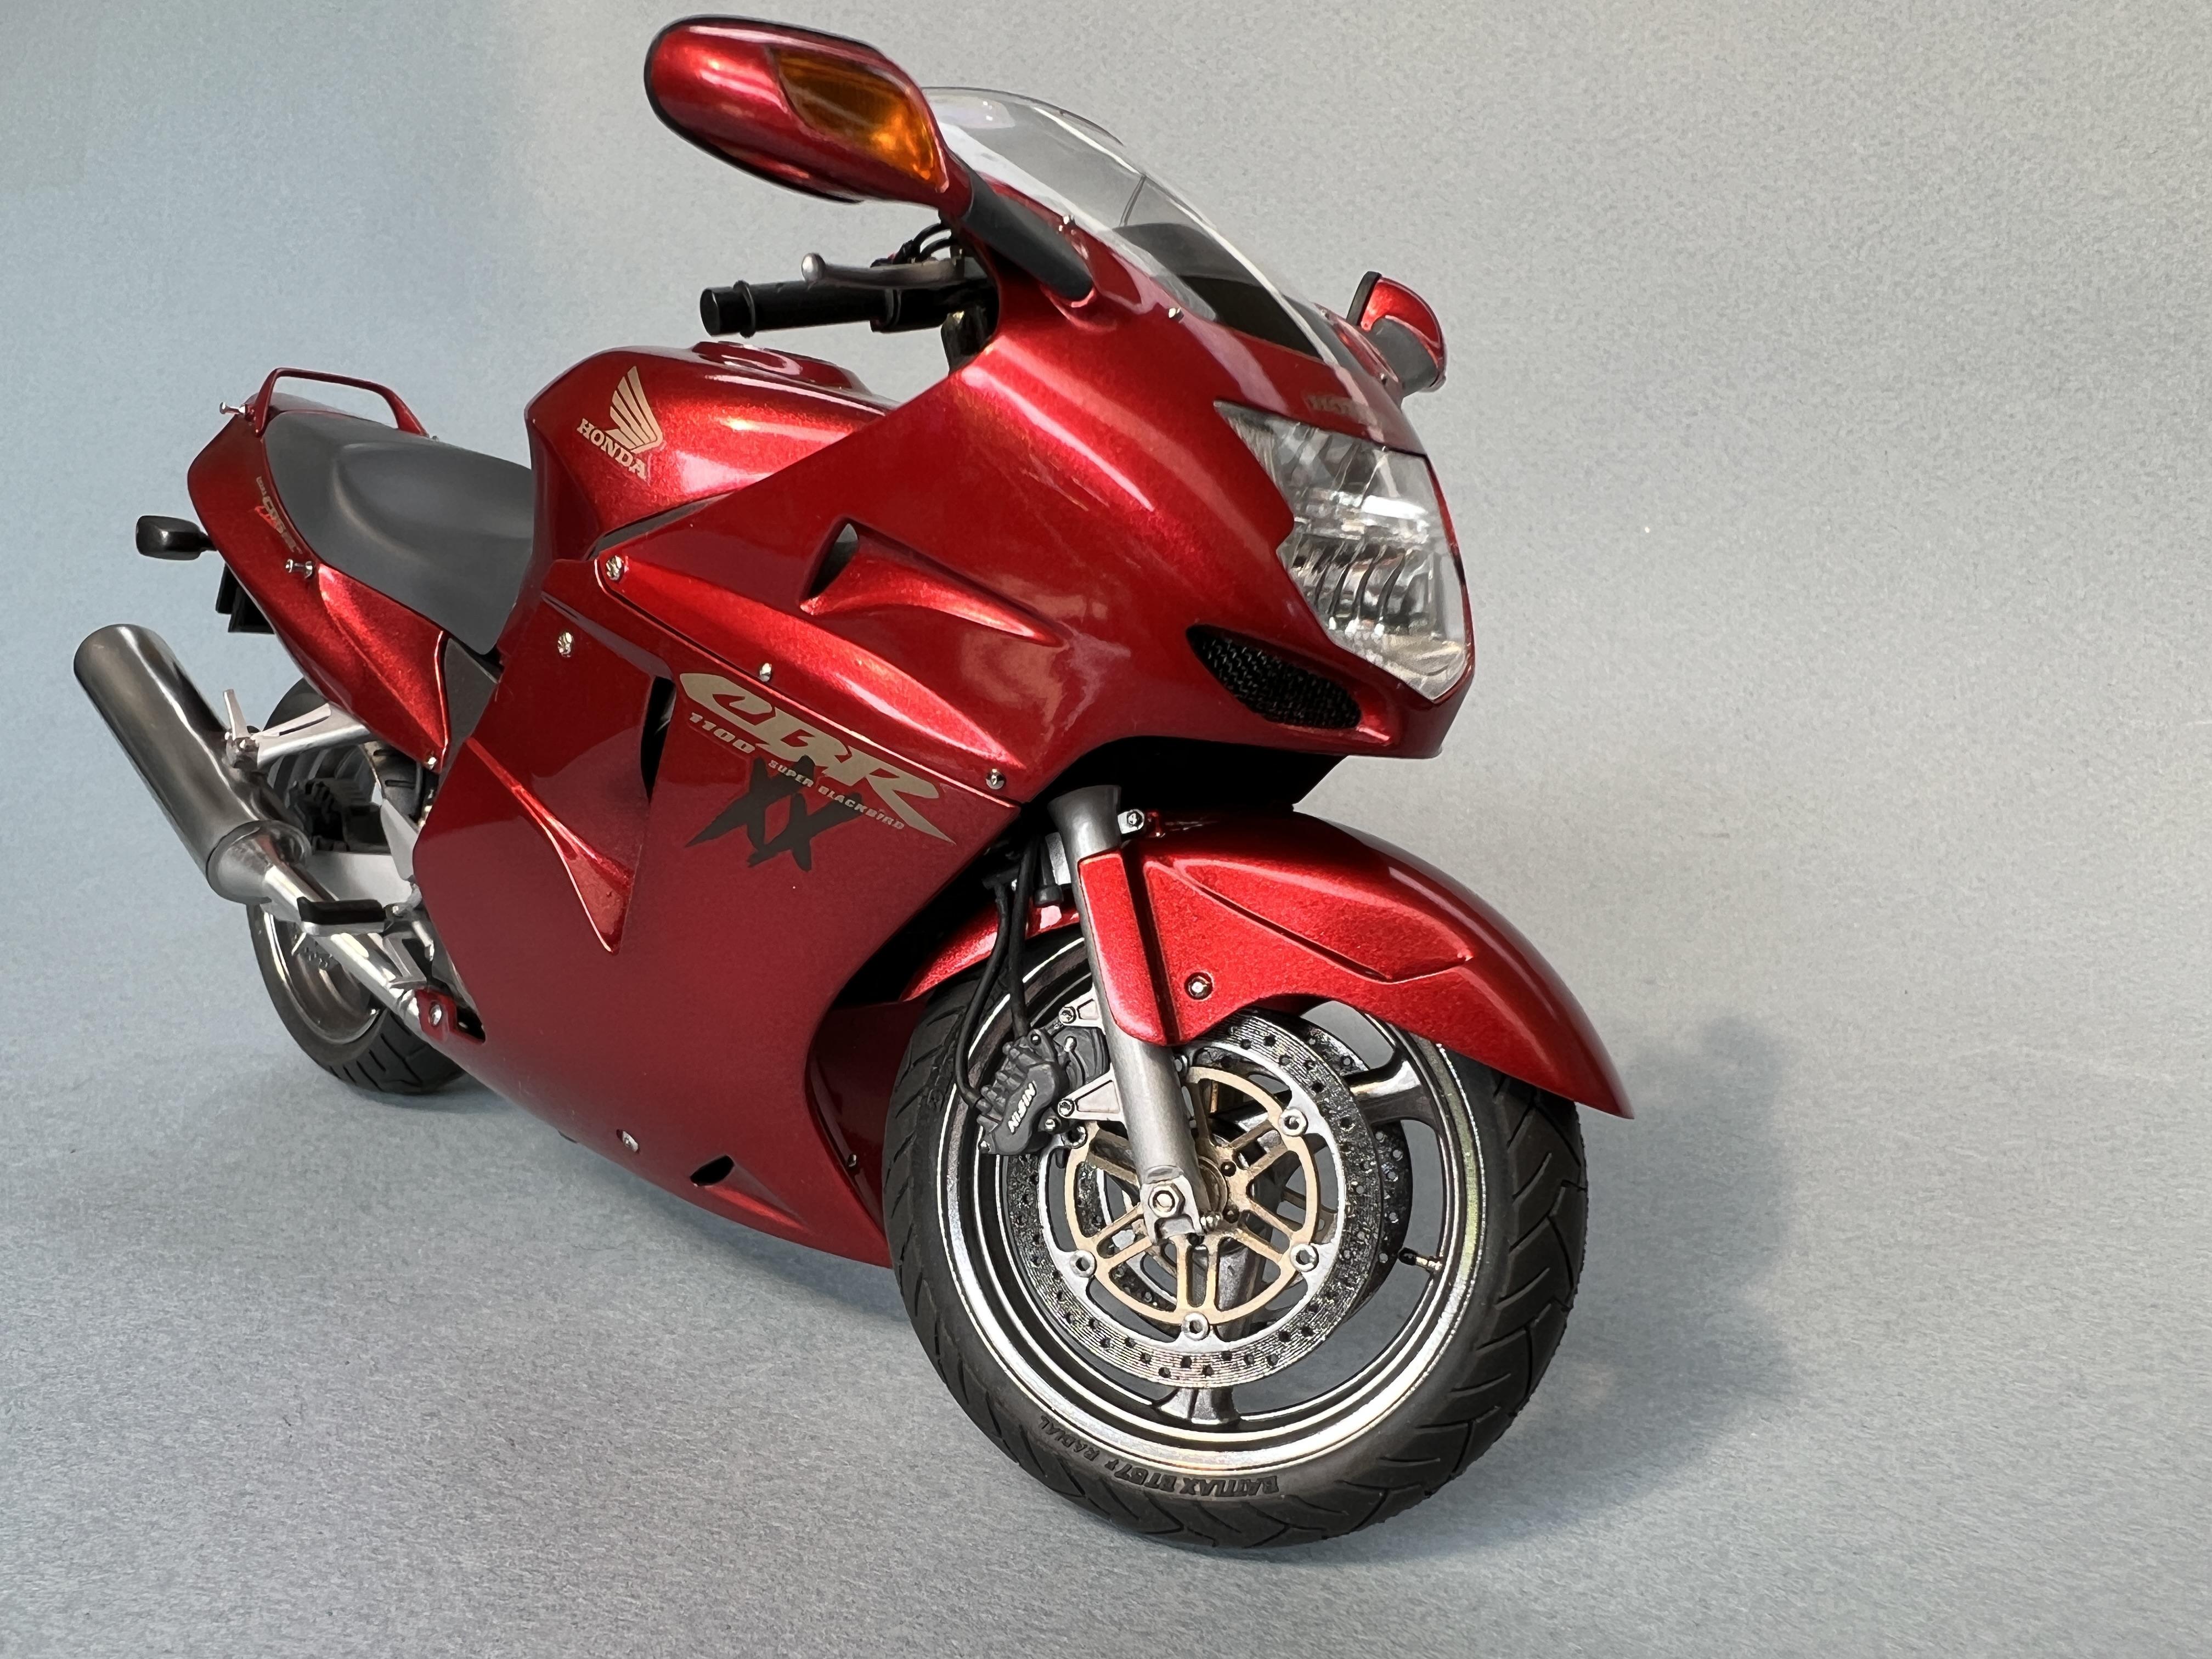
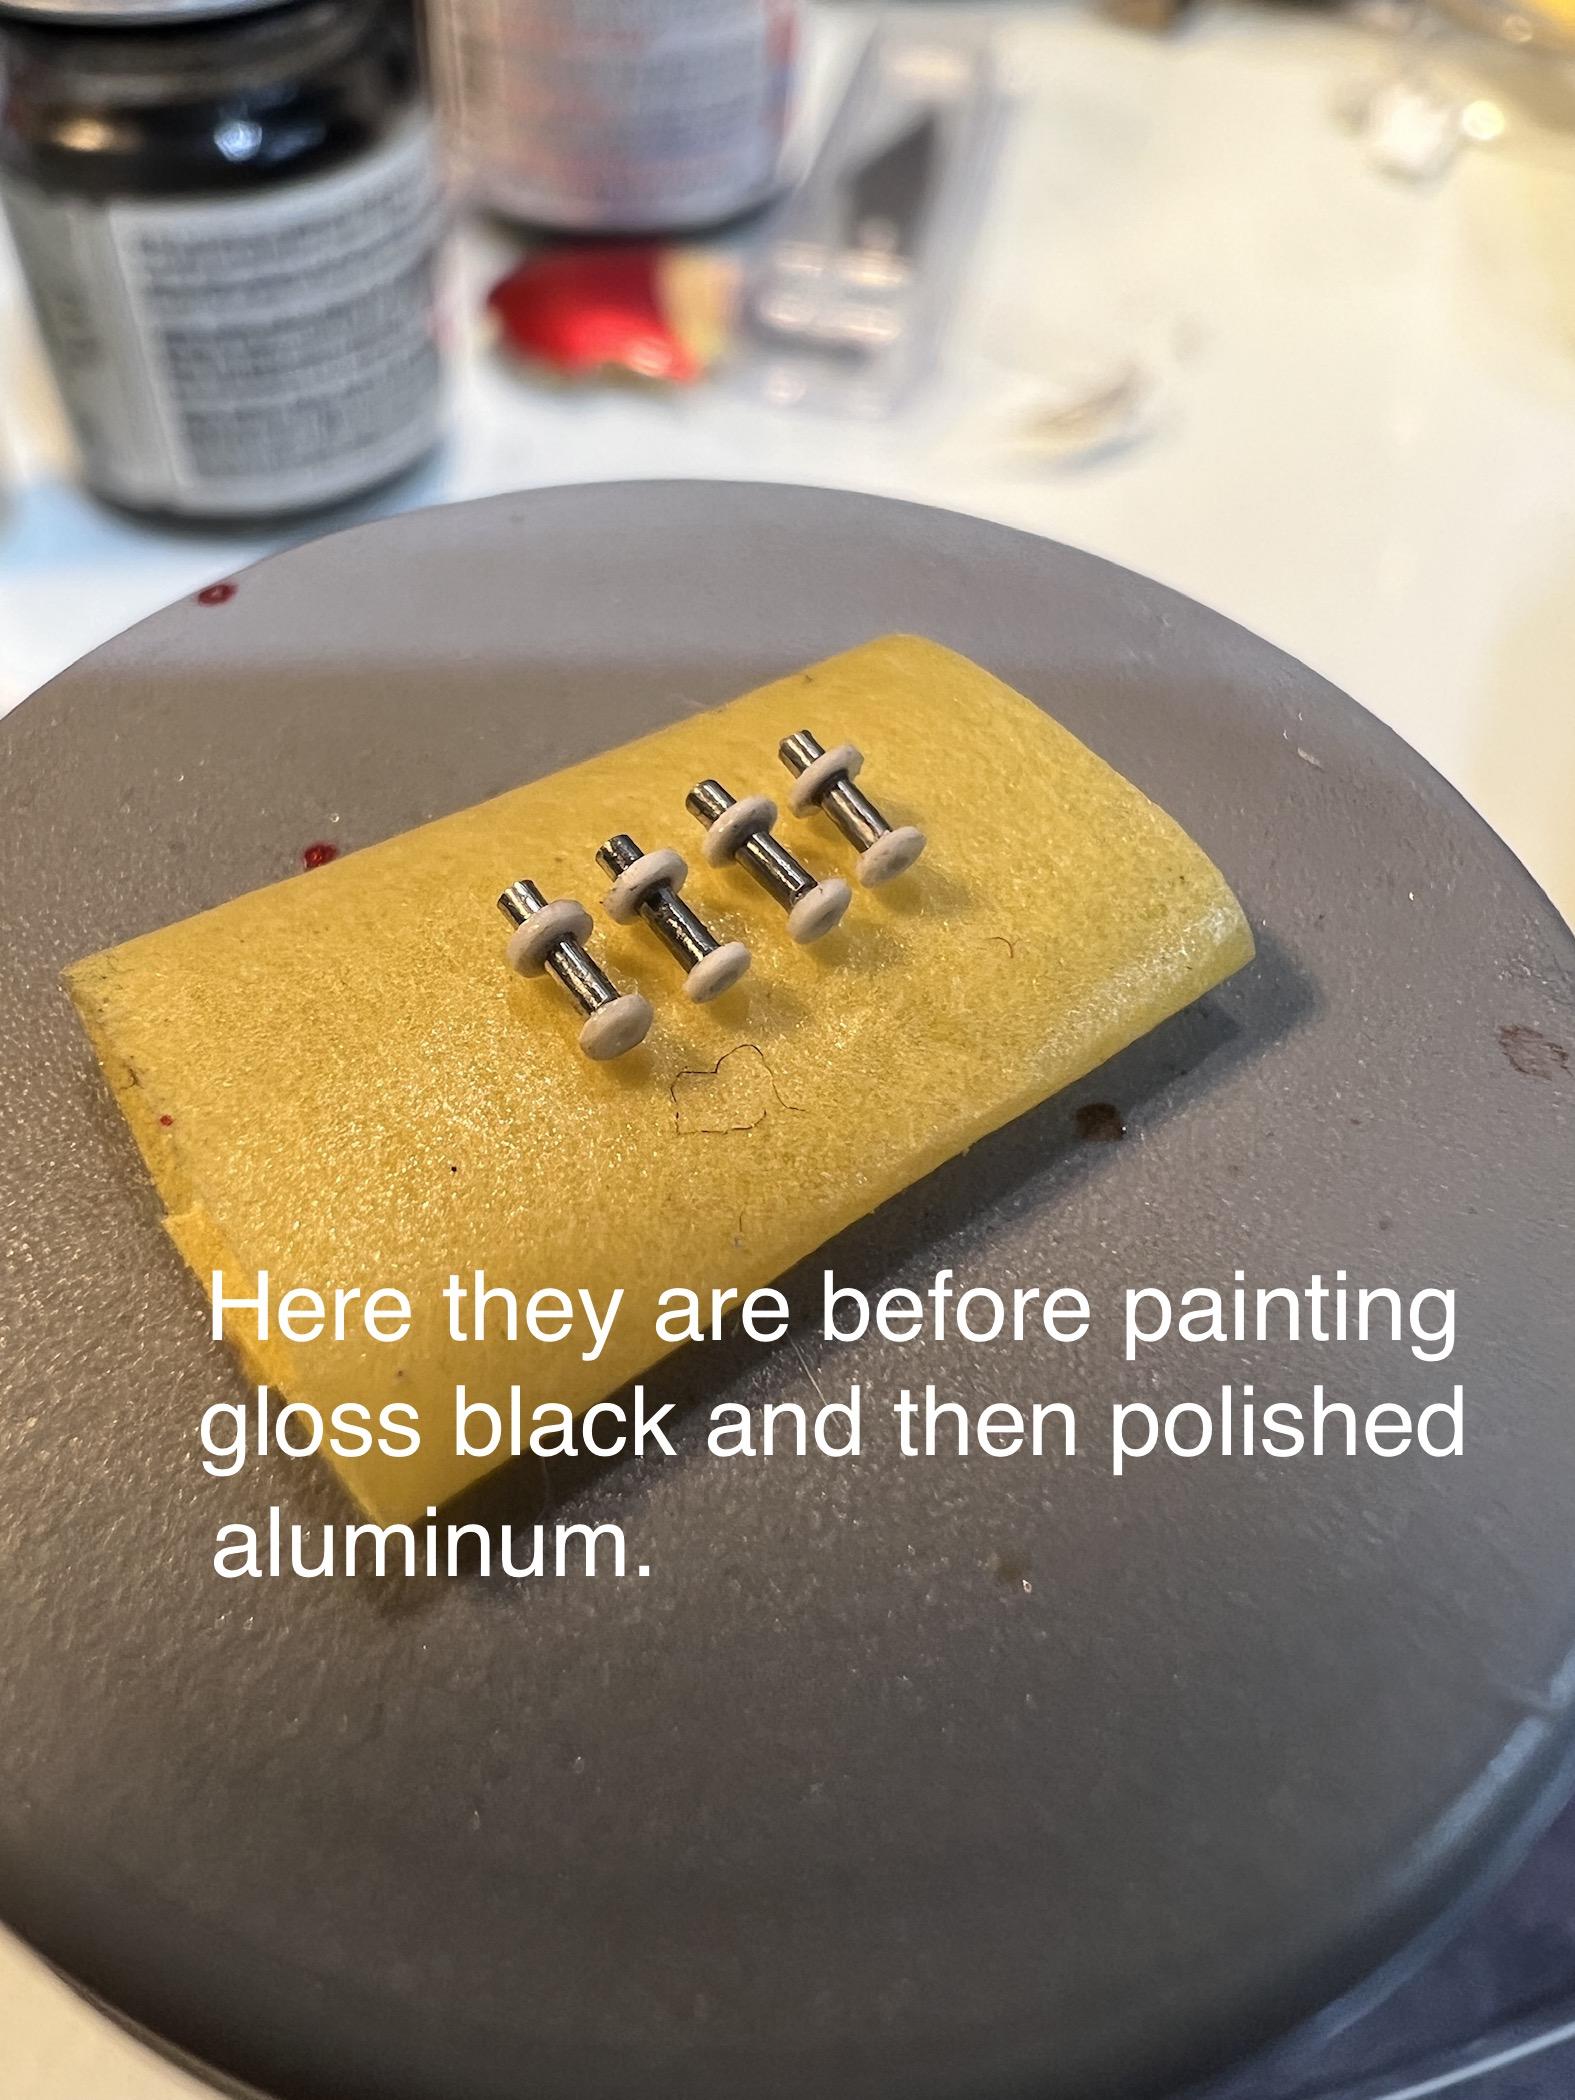
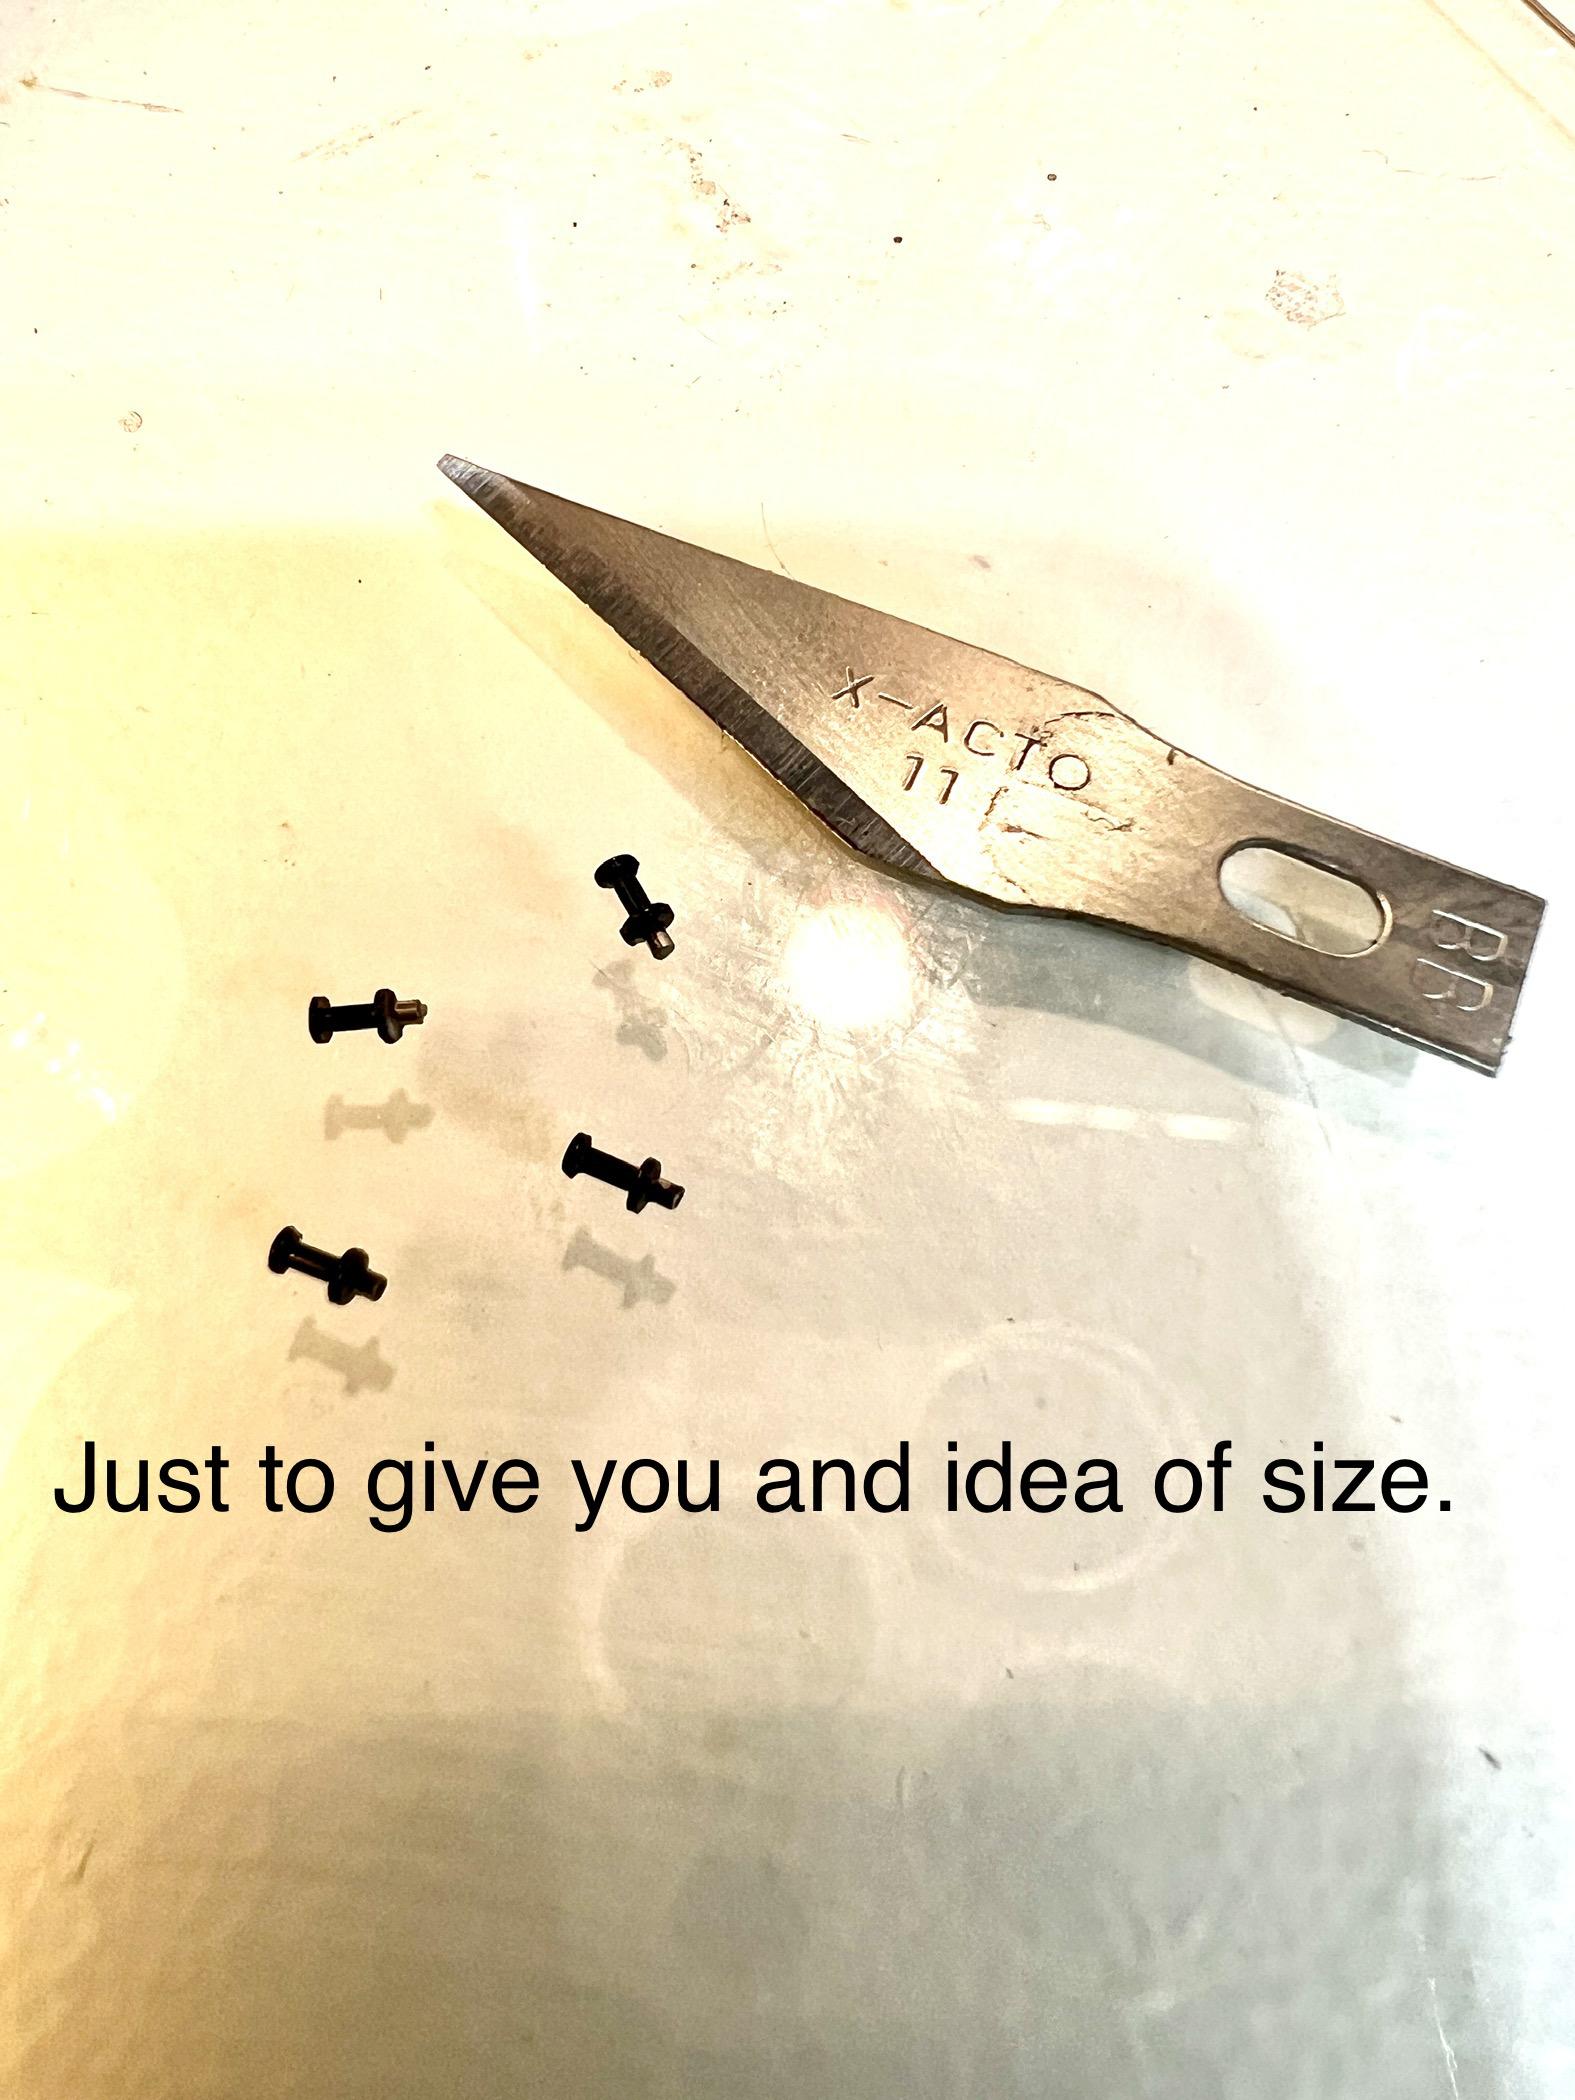
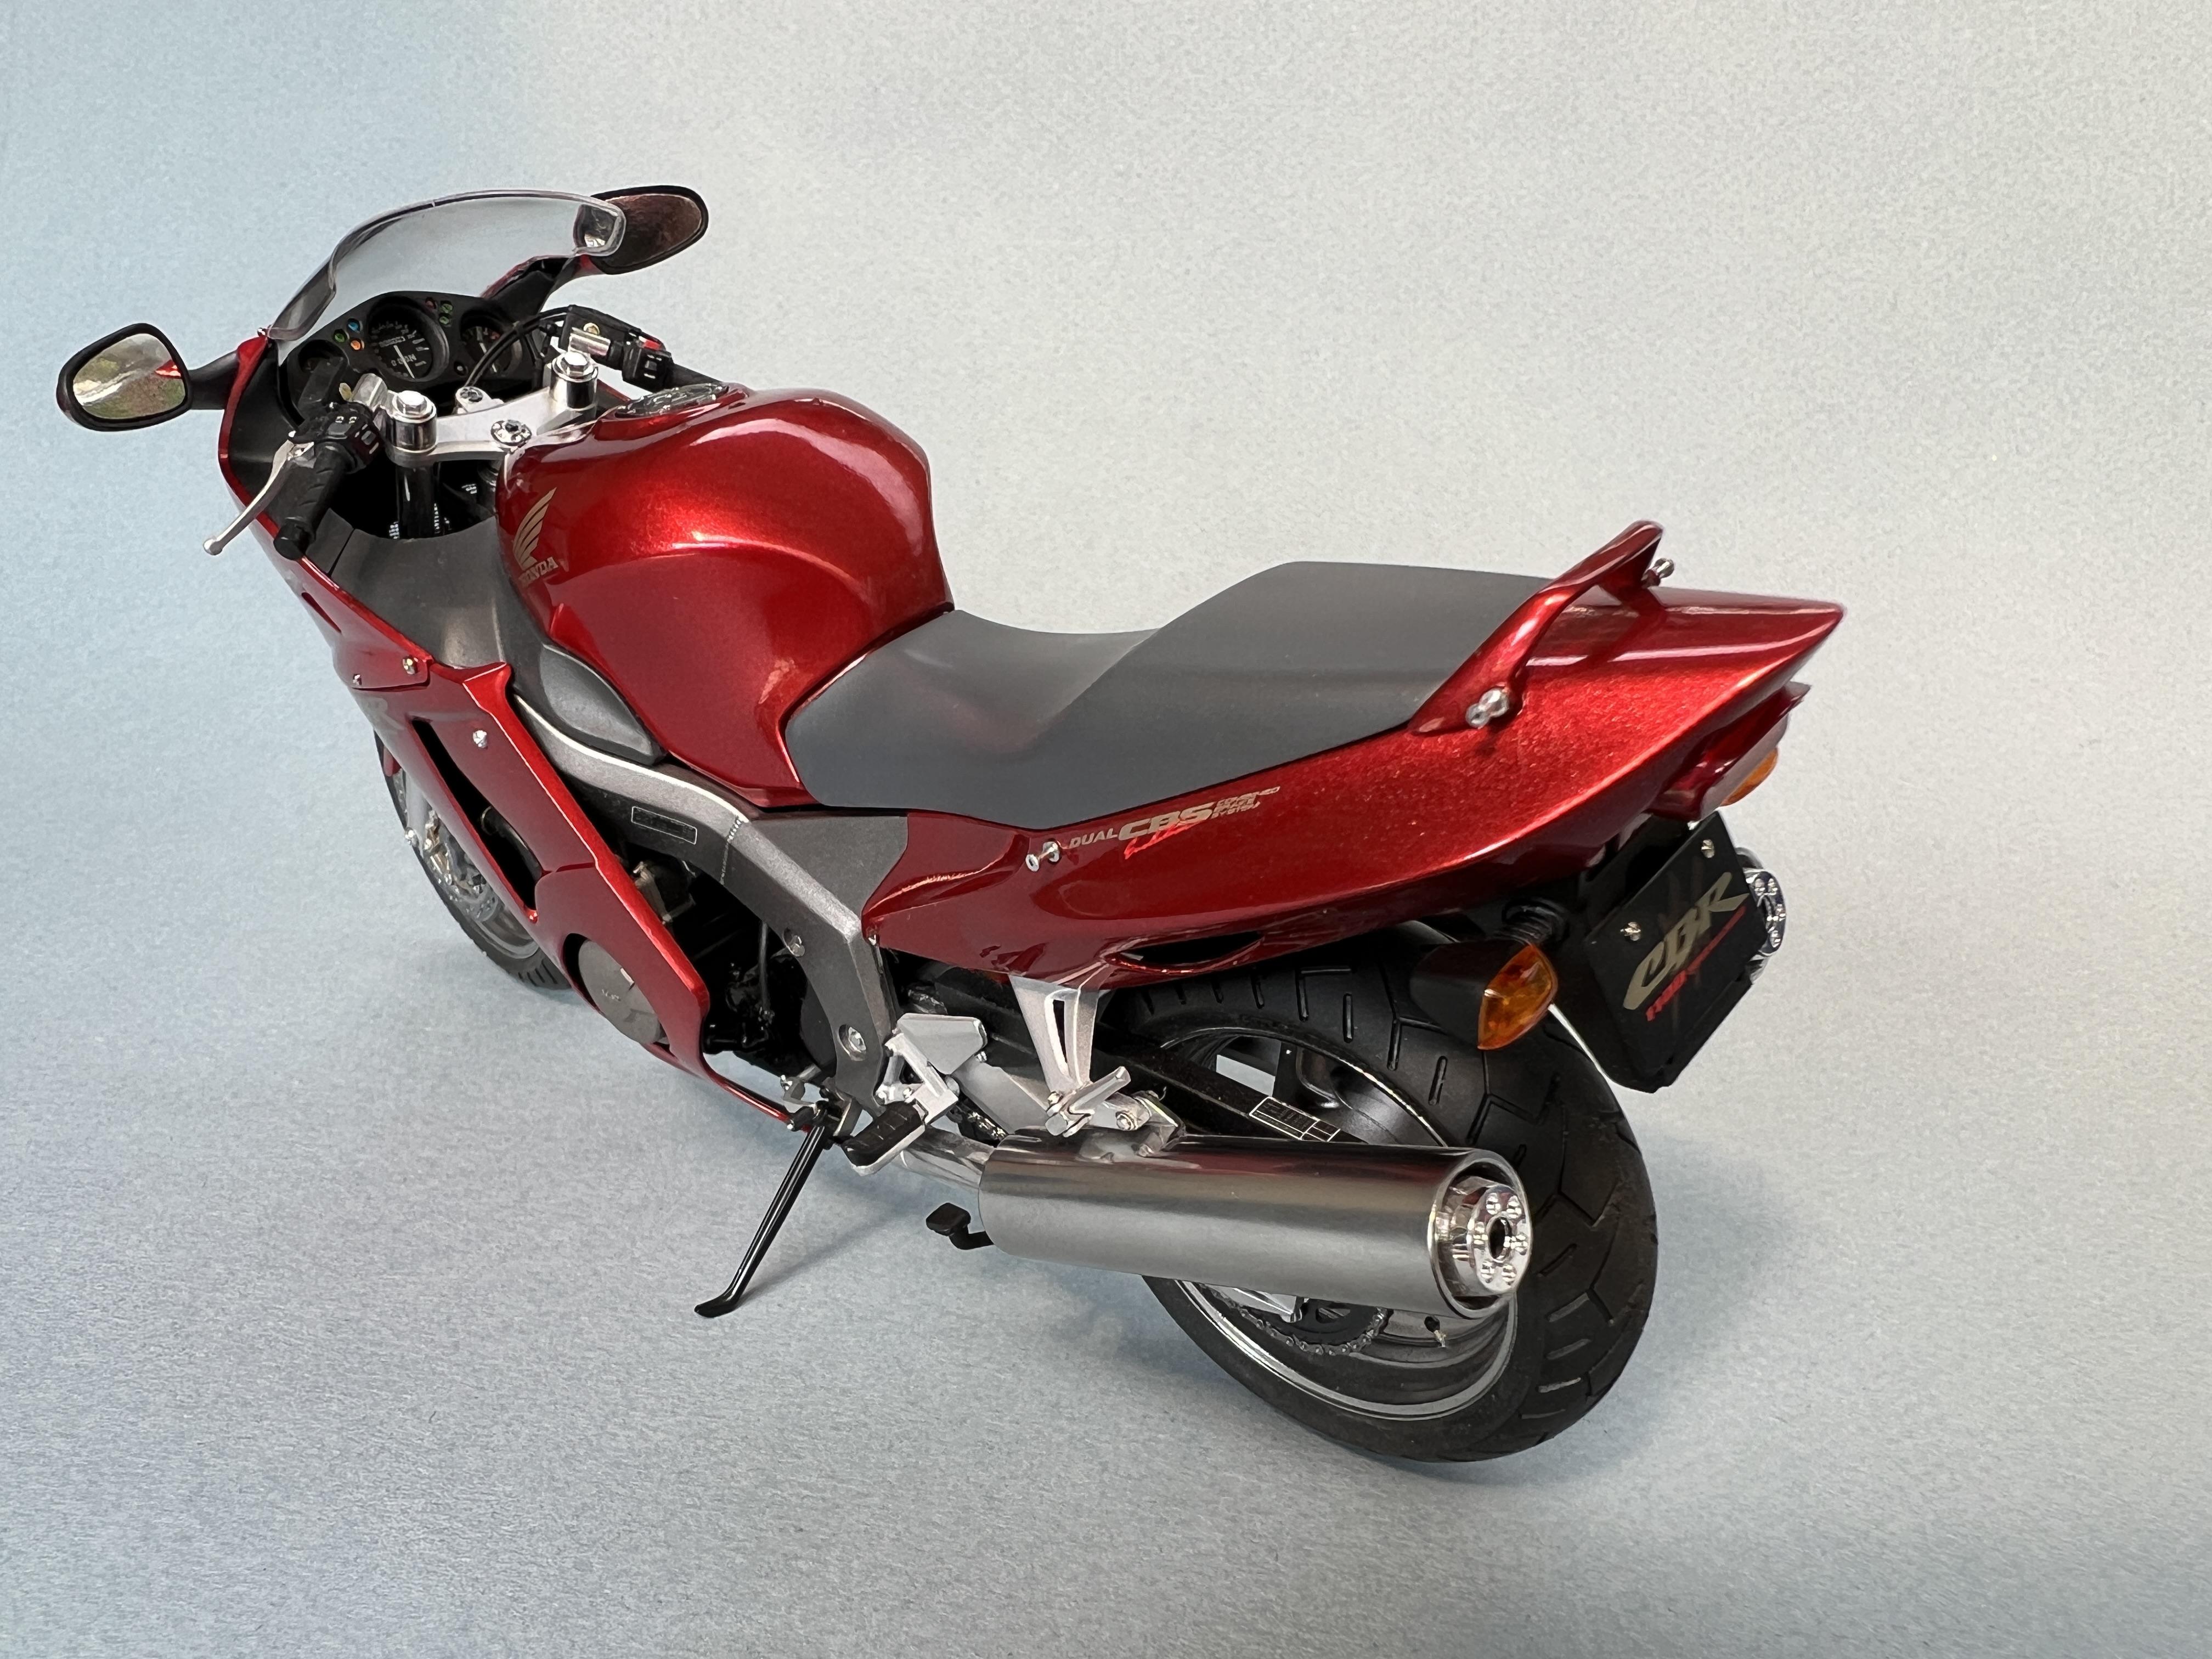
She’s done! The last bits to add, which weren’t included in the kit but visible in all the photos I’ve seen of the bike, are the four small pegs that extend from the bodywork to allow the rider to strap down any extra baggage he might need to carry along. Simple little items really but proved to be a bear to make as they are so small. I tried to find photo etch washers for the base and ends of each one but couldn’t find anything suitable. I wound up making them by punching out eight small styrene discs with the inside ones a larger diameter for the base end. I drilled out the centres to accommodate short lengths of stainless tubing which was much easier said than done but I eventually got 4 assemblies exactly the same. These were then painted in gloss black lacquer followed by Alclad II Polished Aluminum. I used 5 minute epoxy to secure them as it gave me lots of time to ensure proper alignment. All in all I’m quite pleased with the way the model turned out and I’m sure there’ll be a few more 1/12th Tamiya bikes on the bench in the future. Thanks for following along. …..and here they are mounted on the bike. I’ll have more photos posted in “Under Glass” shortly. Cheers, Wolf
-
They say that beauty is in the eye of the beholder and to my eye the front bumper and valance modifications are indeed beautiful. Well done Greg! With regards to the wheels and tires I personally think the stock wheels, hubcaps, and white wall tires give the Nomad such a classic look. That said I’m sure you’re going to use something that will look just right. Cheers, Wolf