White Rabbit
-
Posts
302 -
Joined
-
Last visited
Content Type
Profiles
Forums
Events
Gallery
Everything posted by White Rabbit
-
Any idea on theme for the 2026 Cannonball
White Rabbit replied to Wagonmaster110's topic in Community Builds
How about combining a current or previously owned vehicle with run-what-you-brung? That is, the owned car is just the basis for the build; after that, it's pure Cannonball open modifications (within the spirit of the Run, of course). This keeps the build open to many interpretations: a replica, restoration, or full dream build. -
2025 Cannonball Run - 50 years since the 1975 run.
White Rabbit replied to Mattilacken's topic in Community Builds
grok-video-9c55de90-b1e9-43fe-ad84-673a9b0a3f61.mp4 So, I thought I'd try AI image to video. Why not? Last year's entry driving west through the desert. grok-video-e41e2dcc-d2e6-4e28-82c1-017917a7cf39.mp4 -
Any idea on theme for the 2026 Cannonball
White Rabbit replied to Wagonmaster110's topic in Community Builds
Hello all! A few ideas: Cannonball Run, 1980s edition. The last official Run took place in 1979; but what would it have looked like if continued into the '80s? Run-What-You Brung Part 2. As Yates so famously, (or infamously), stated: "The only rule: there are no rules." "Work" Vehicles. Entries disguised as work vehicles but prepared for the Run. -
2025 Cannonball Run - 50 years since the 1975 run.
White Rabbit replied to Mattilacken's topic in Community Builds
Thank you, Anton! -
2025 Cannonball Run - 50 years since the 1975 run.
White Rabbit replied to Mattilacken's topic in Community Builds
Thank you, Mike! -
cannonball 2025 Cannonball Run - Finished builds thread
White Rabbit replied to Mattilacken's topic in Community Builds
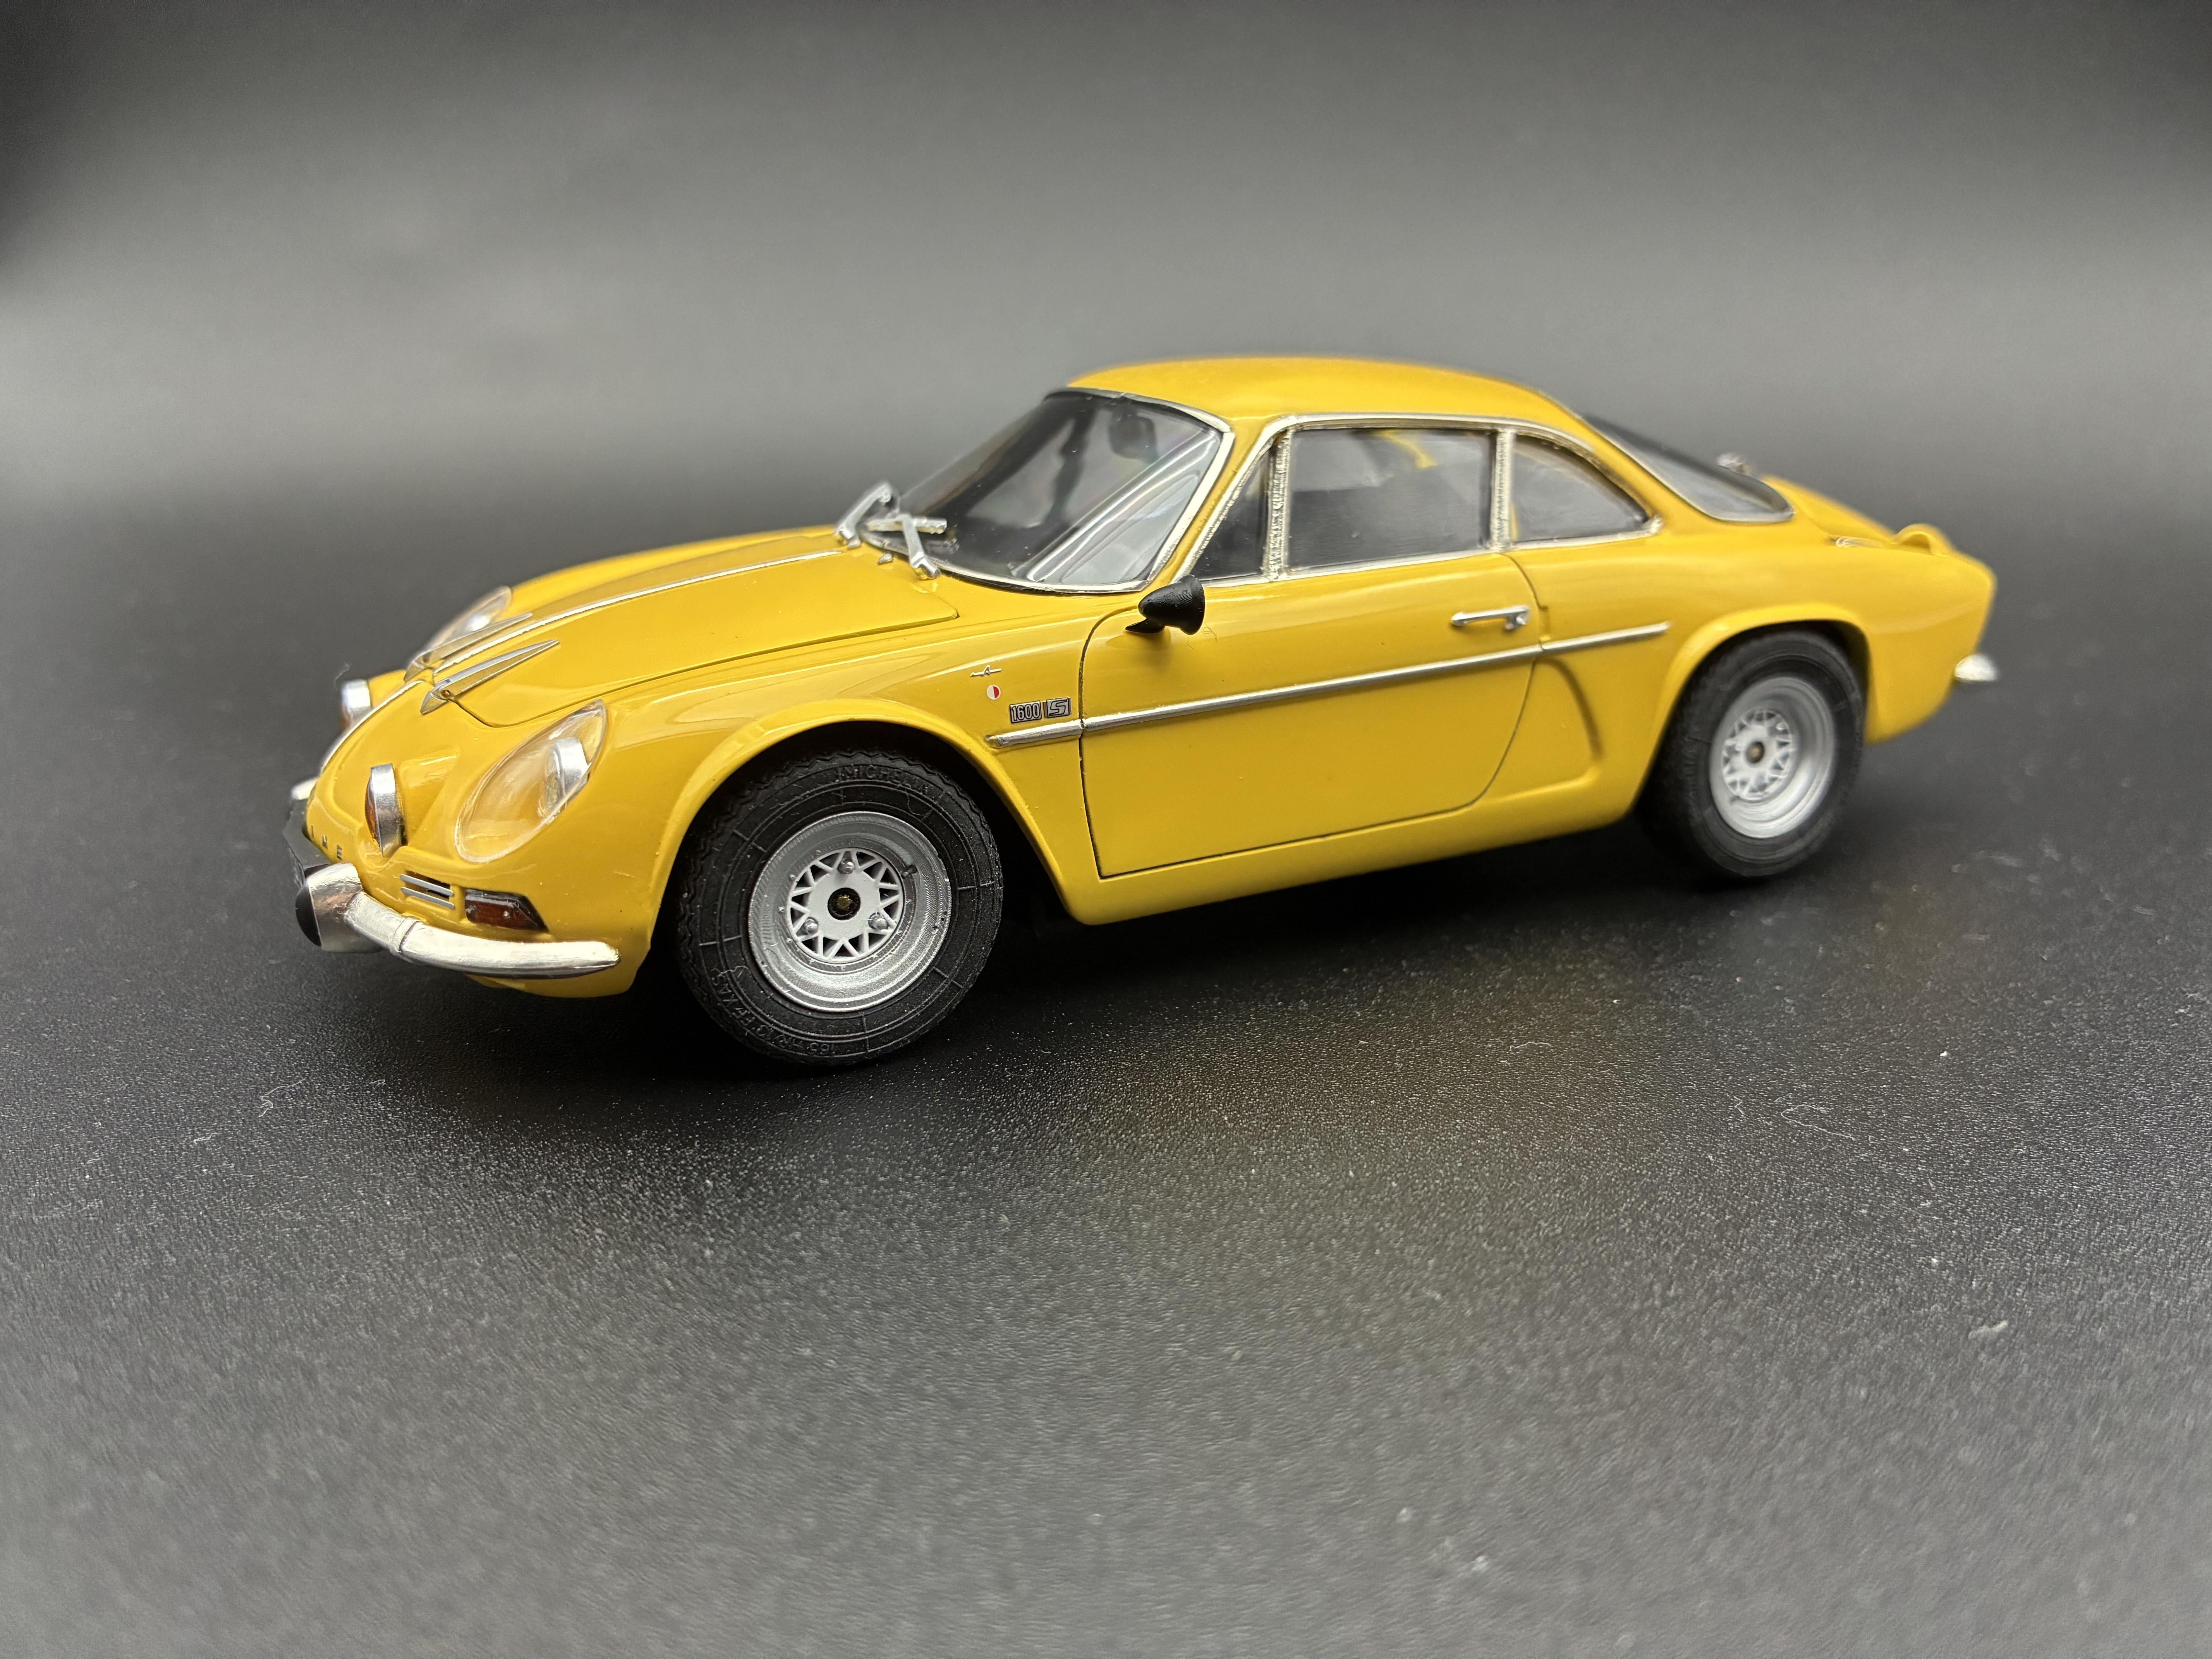
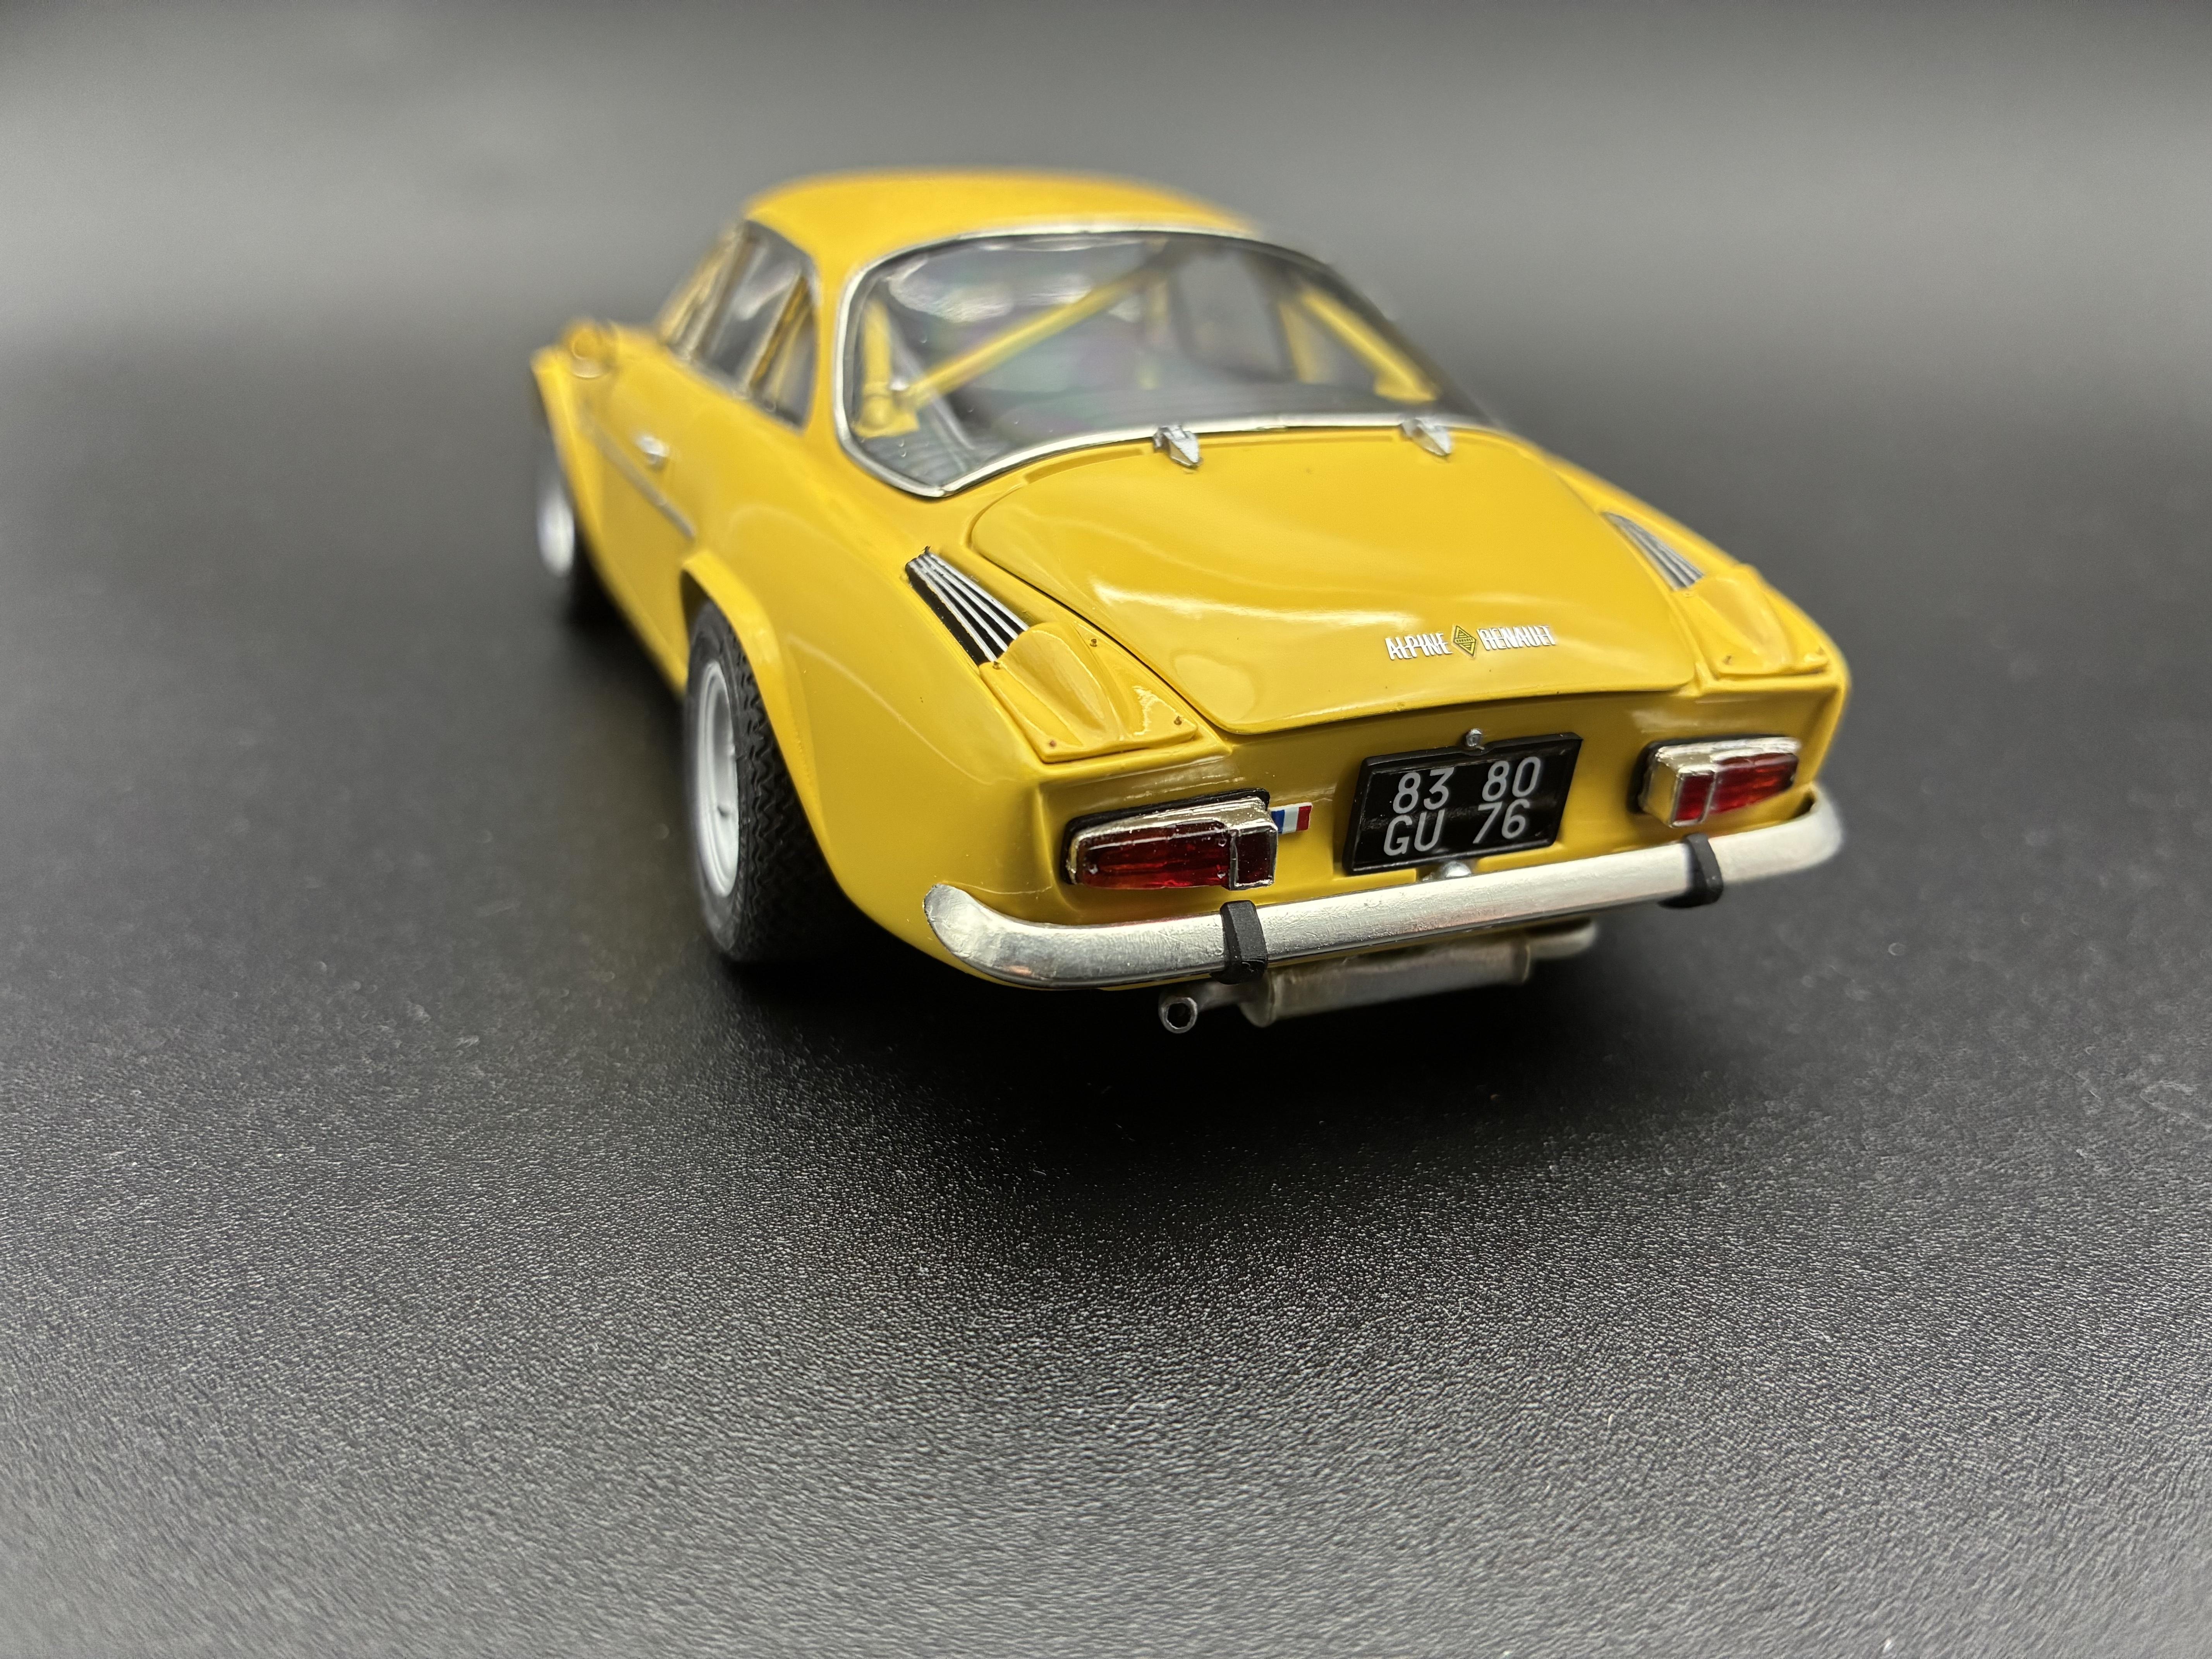
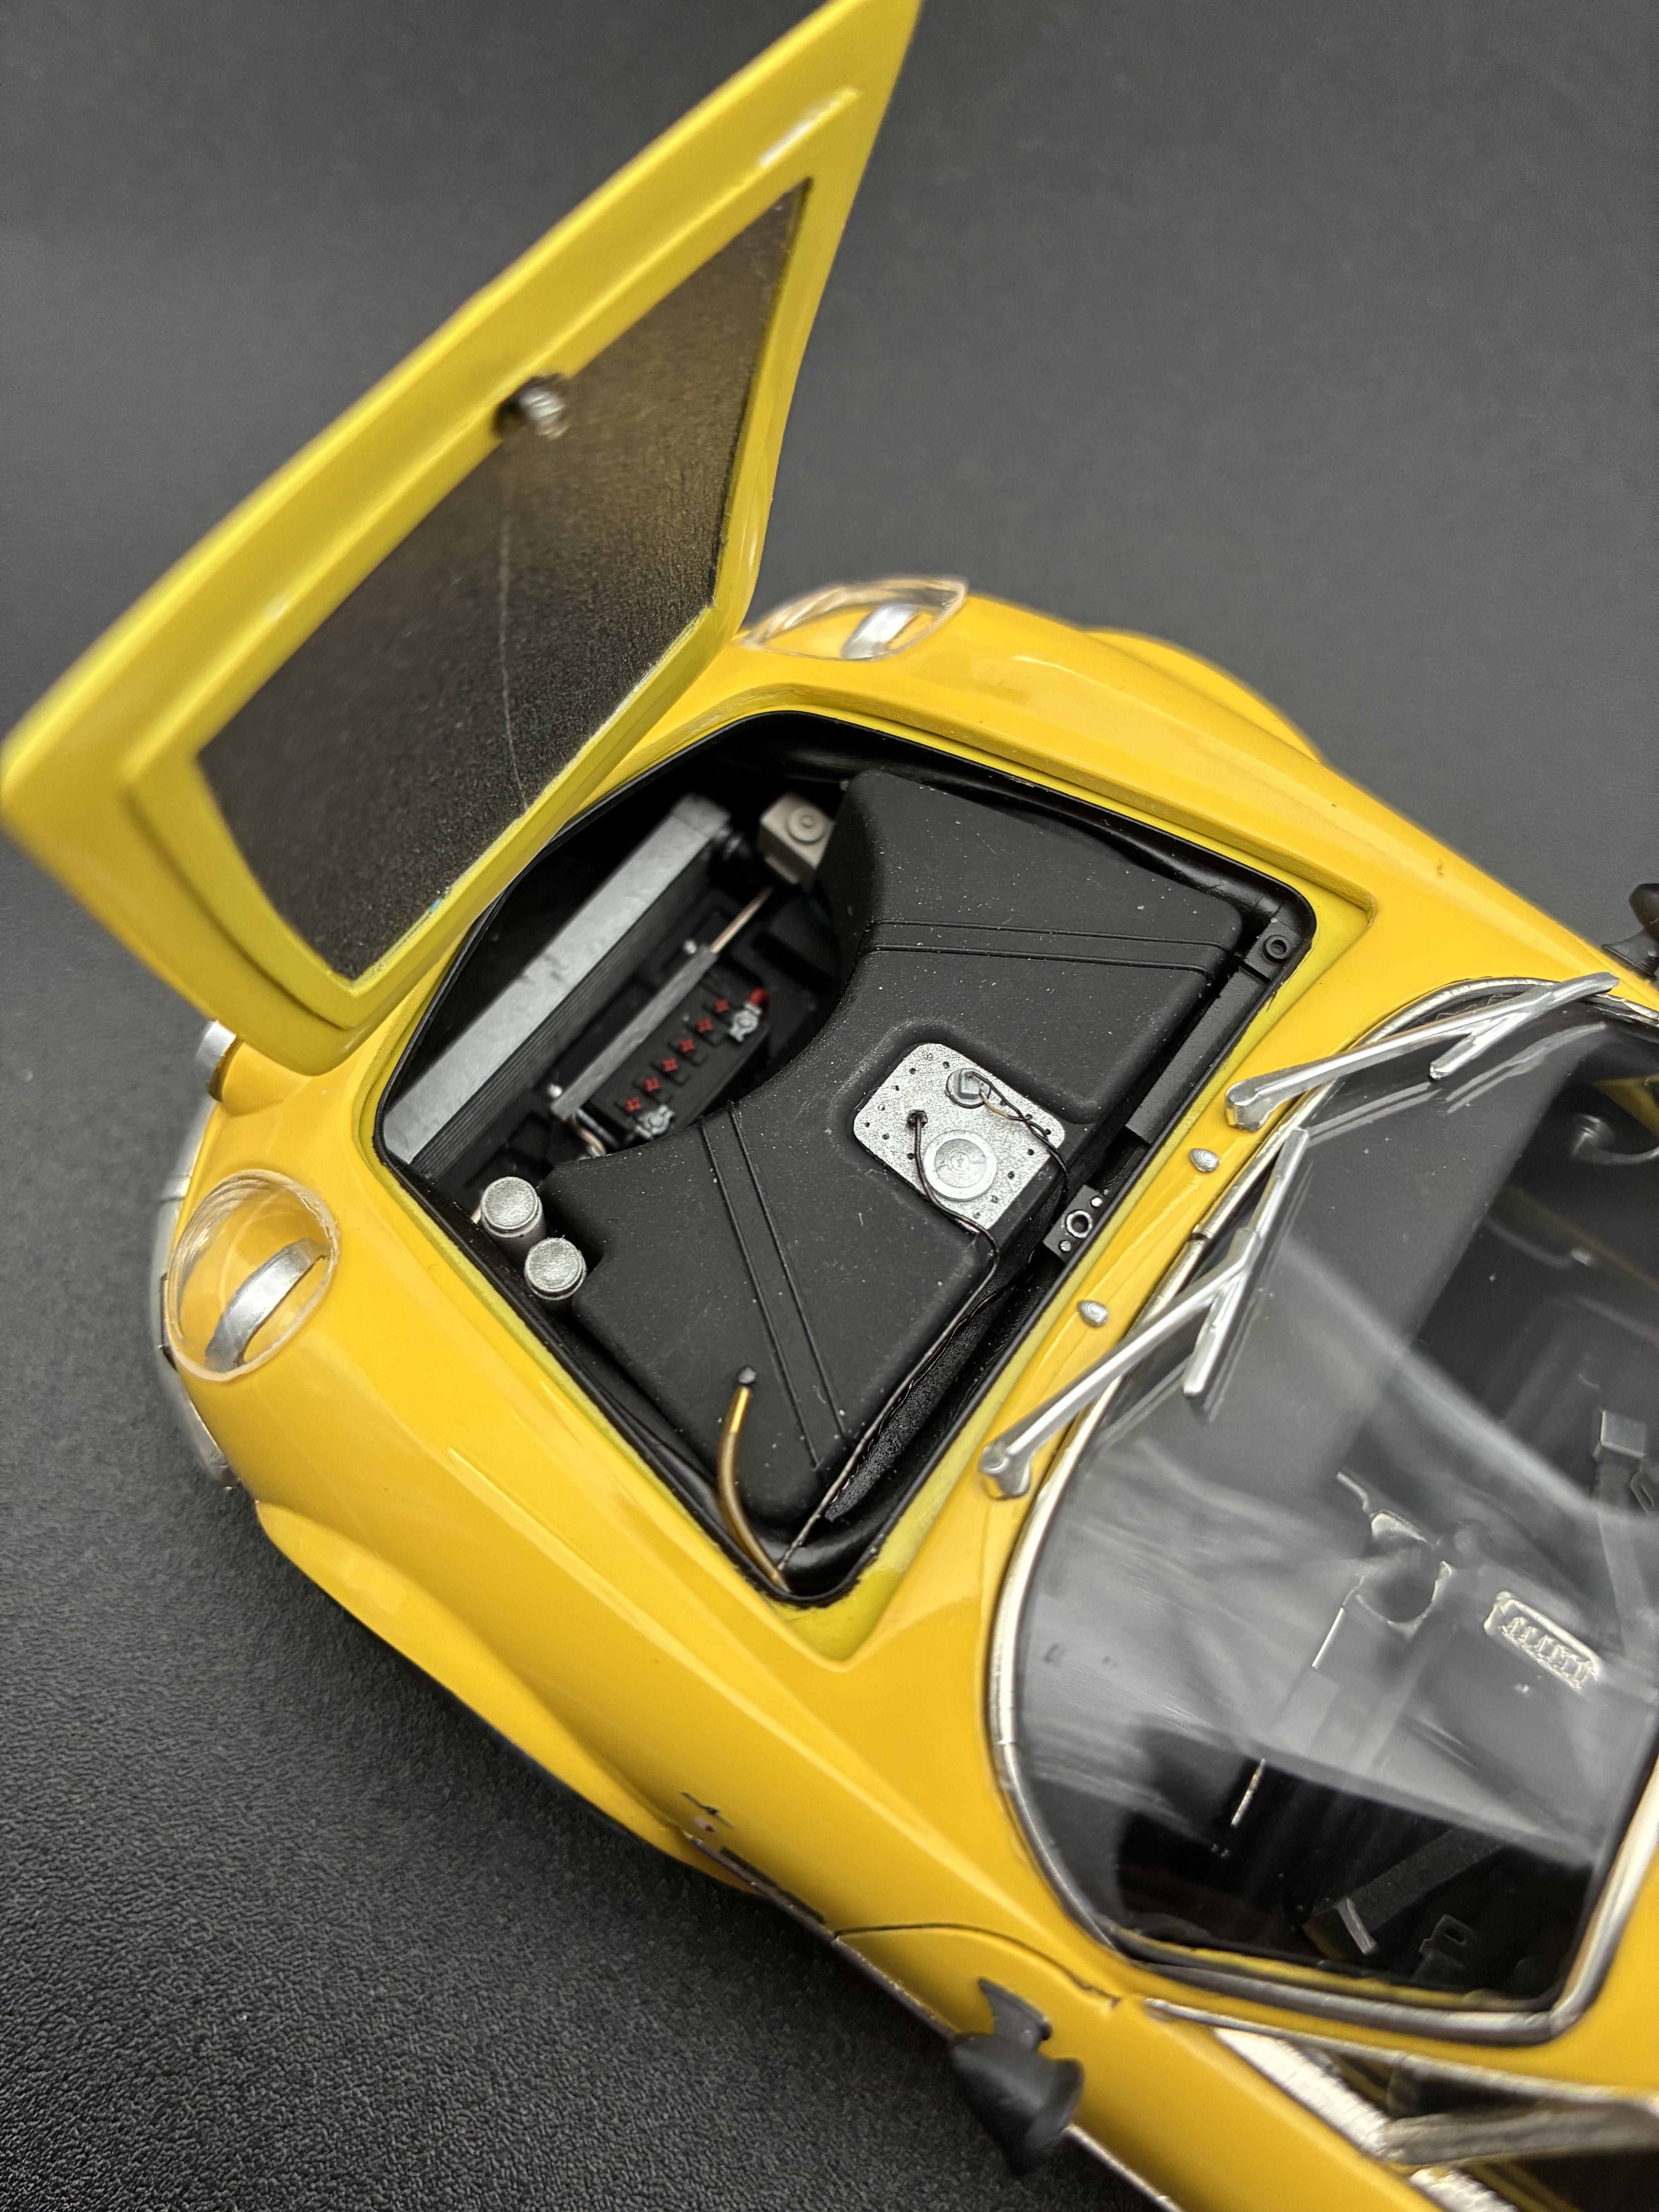
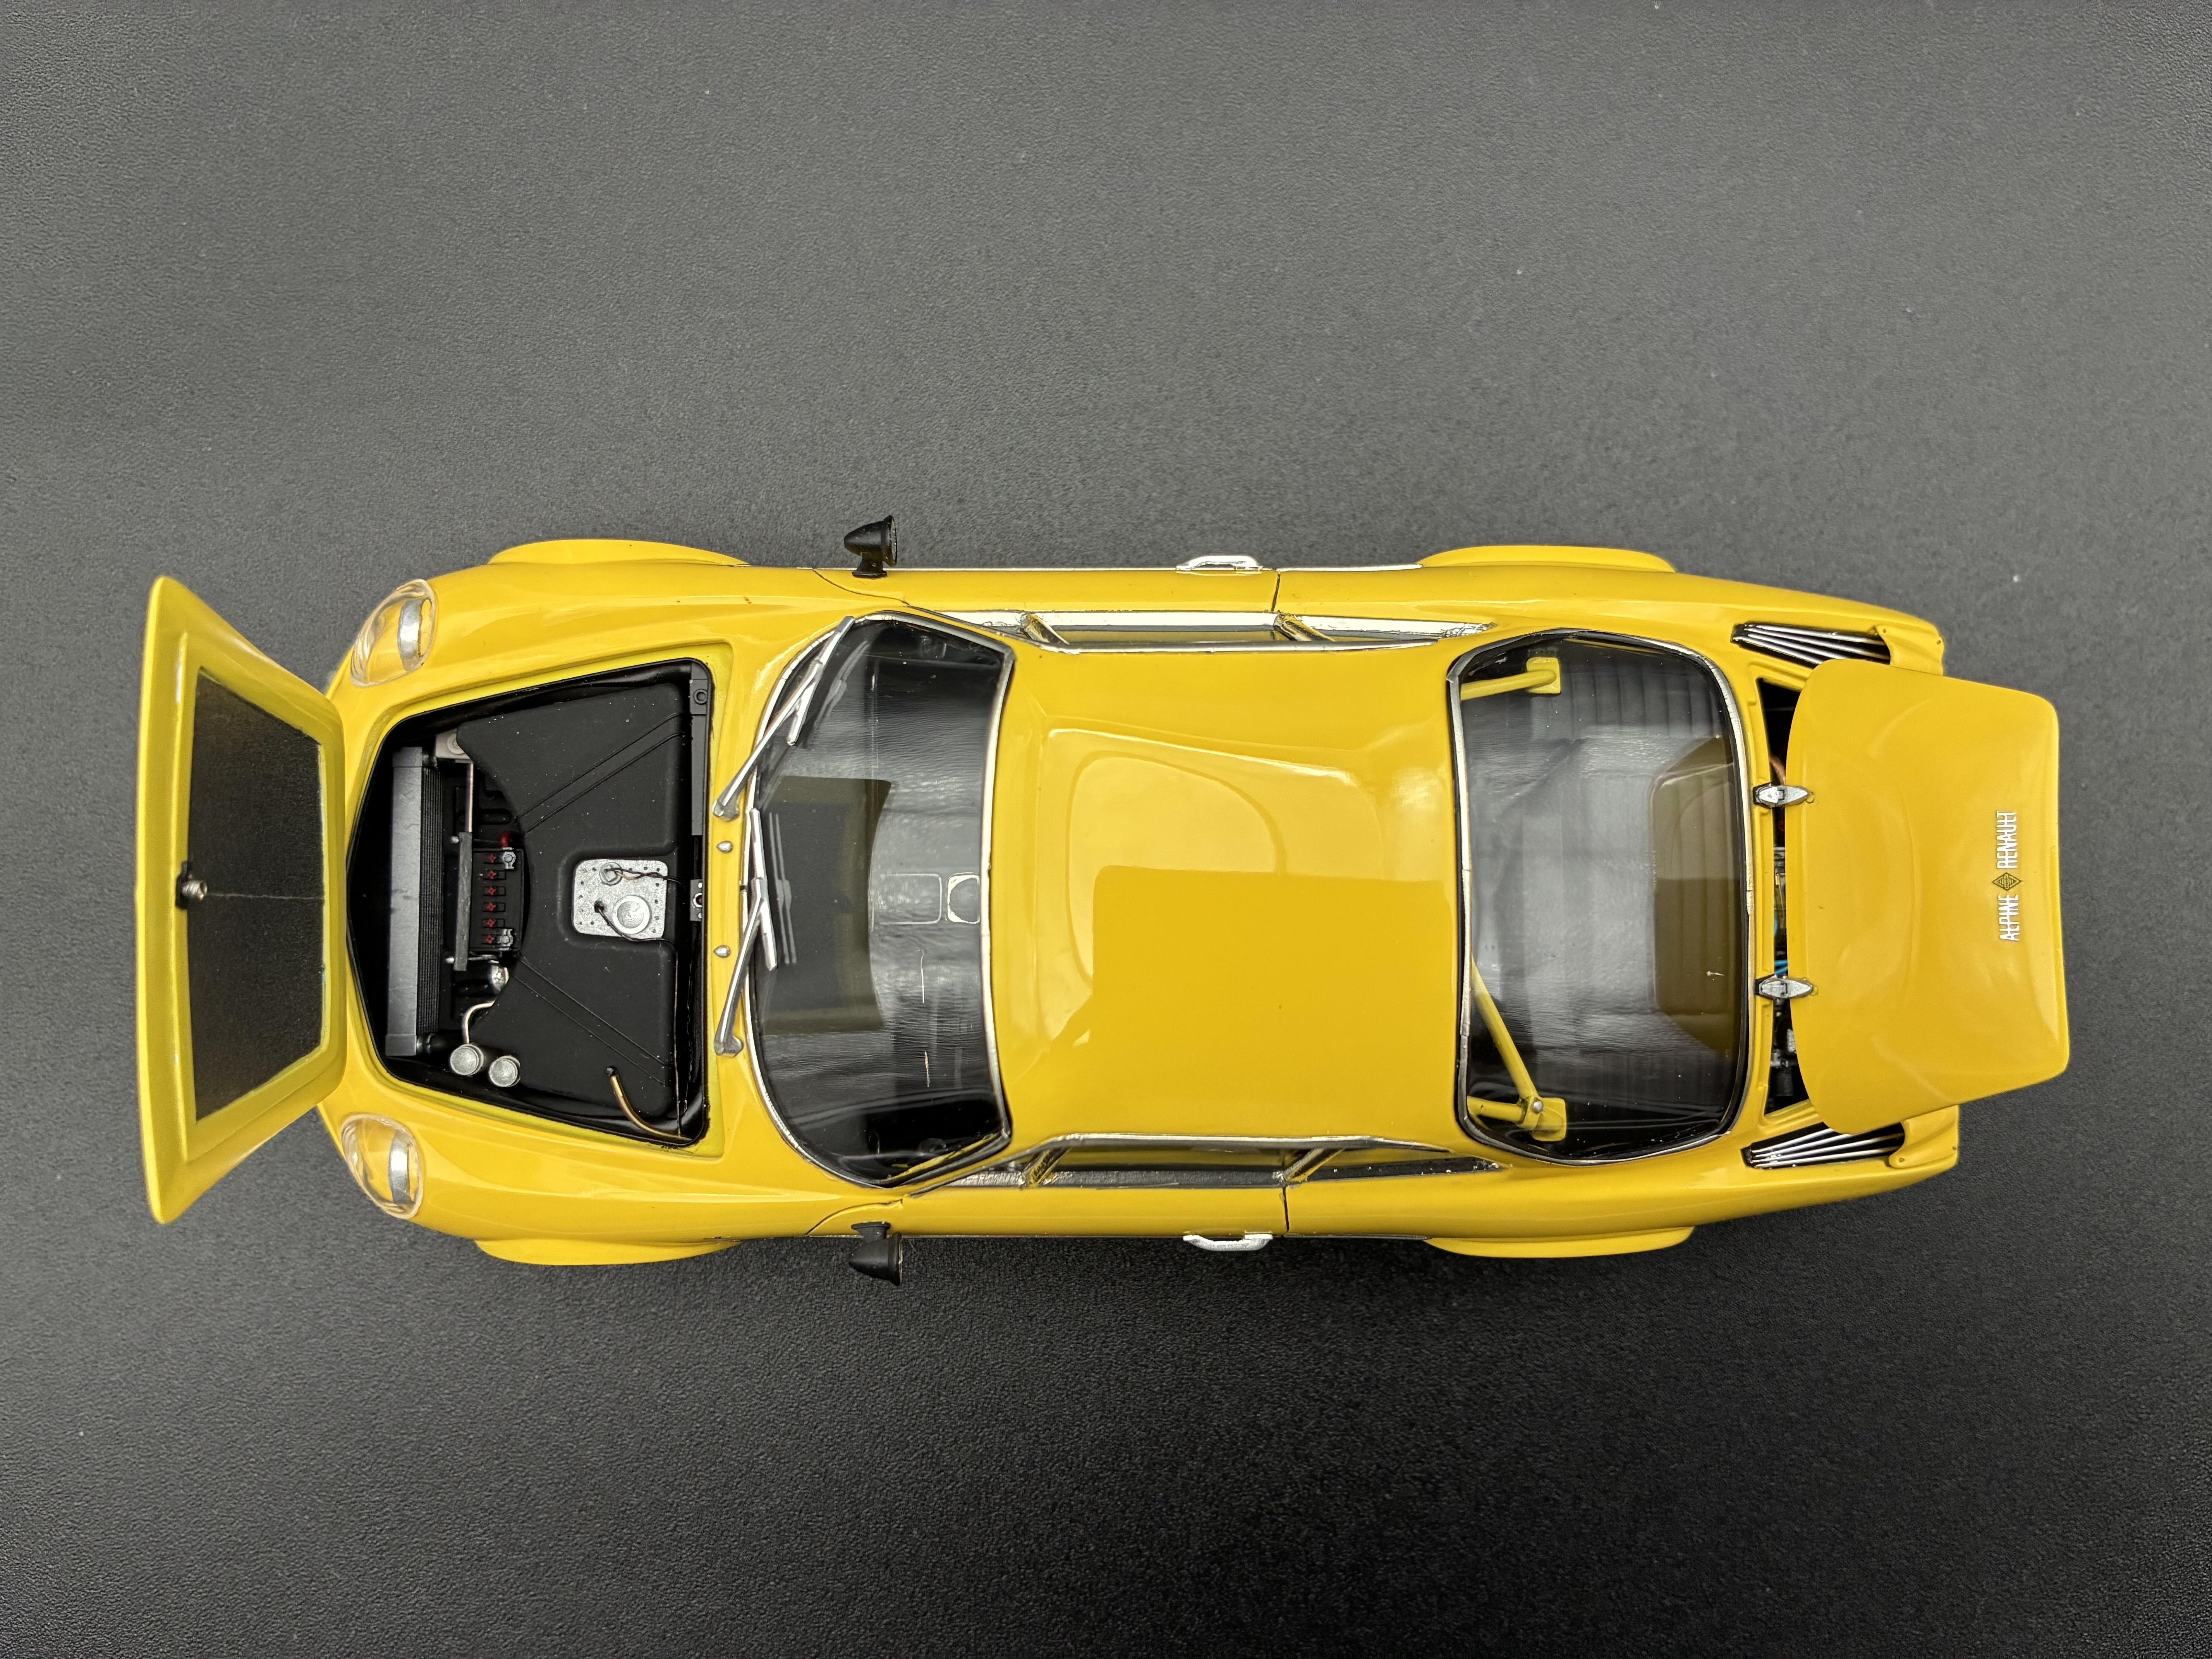
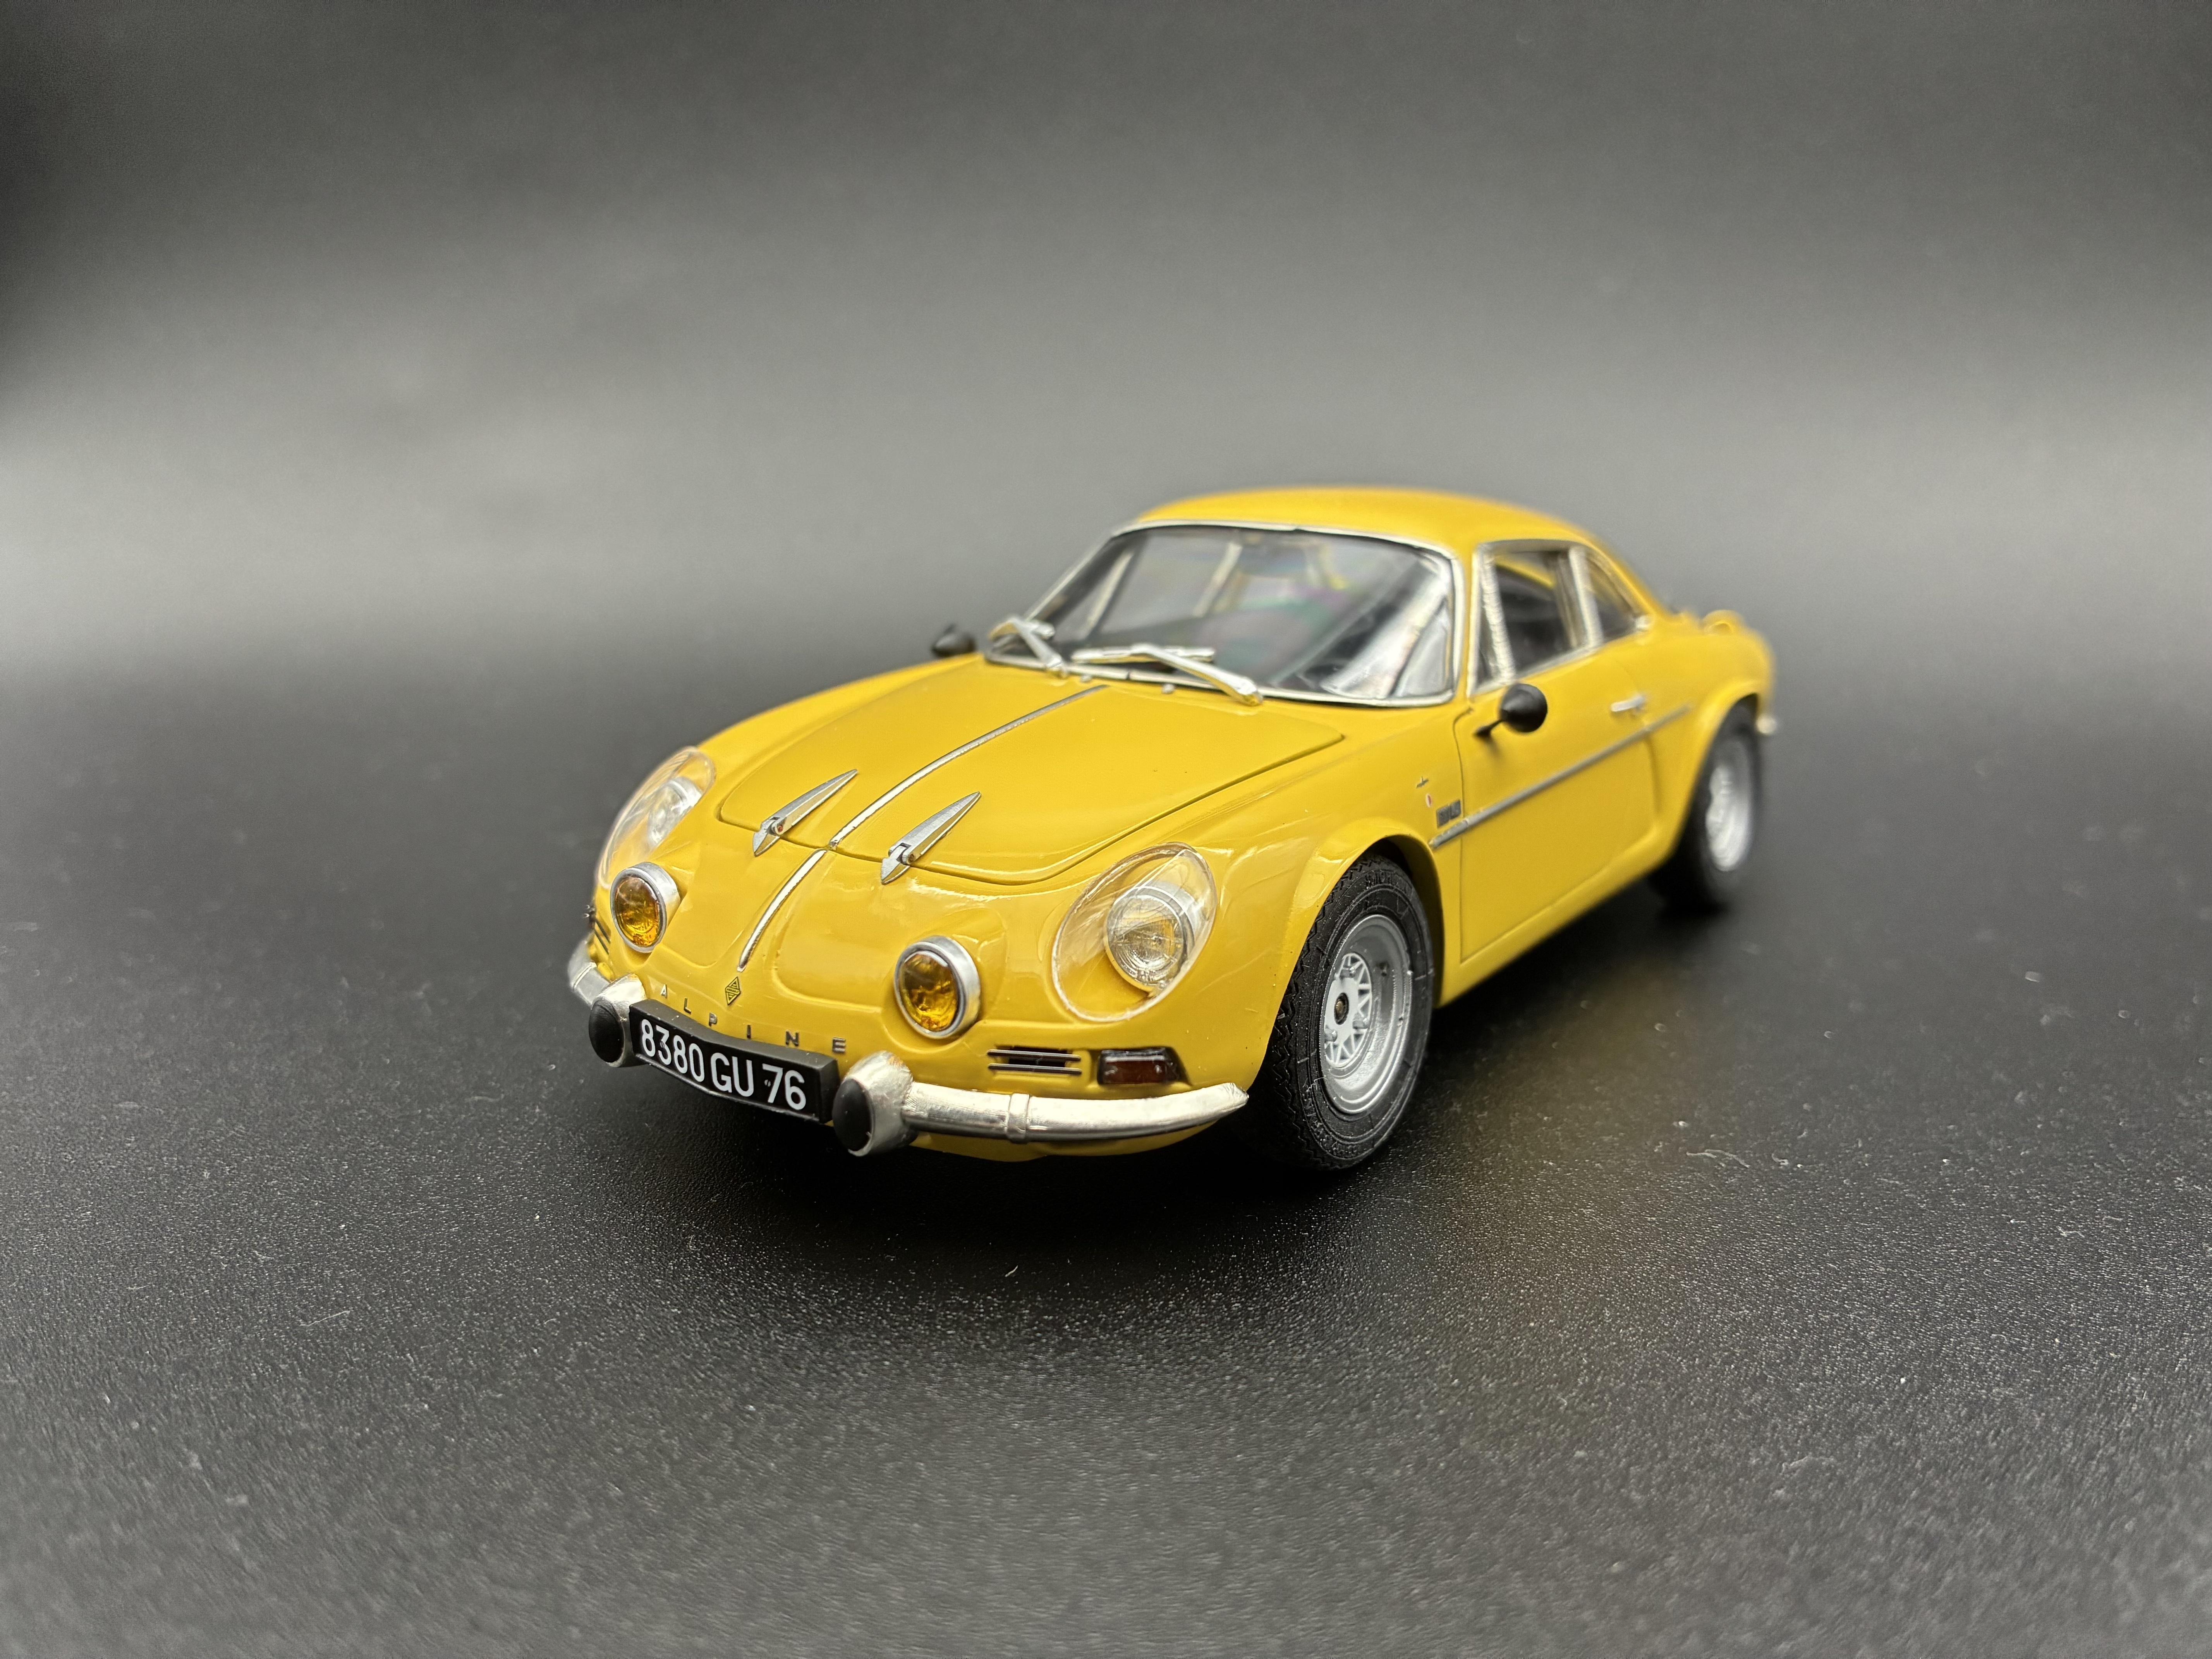
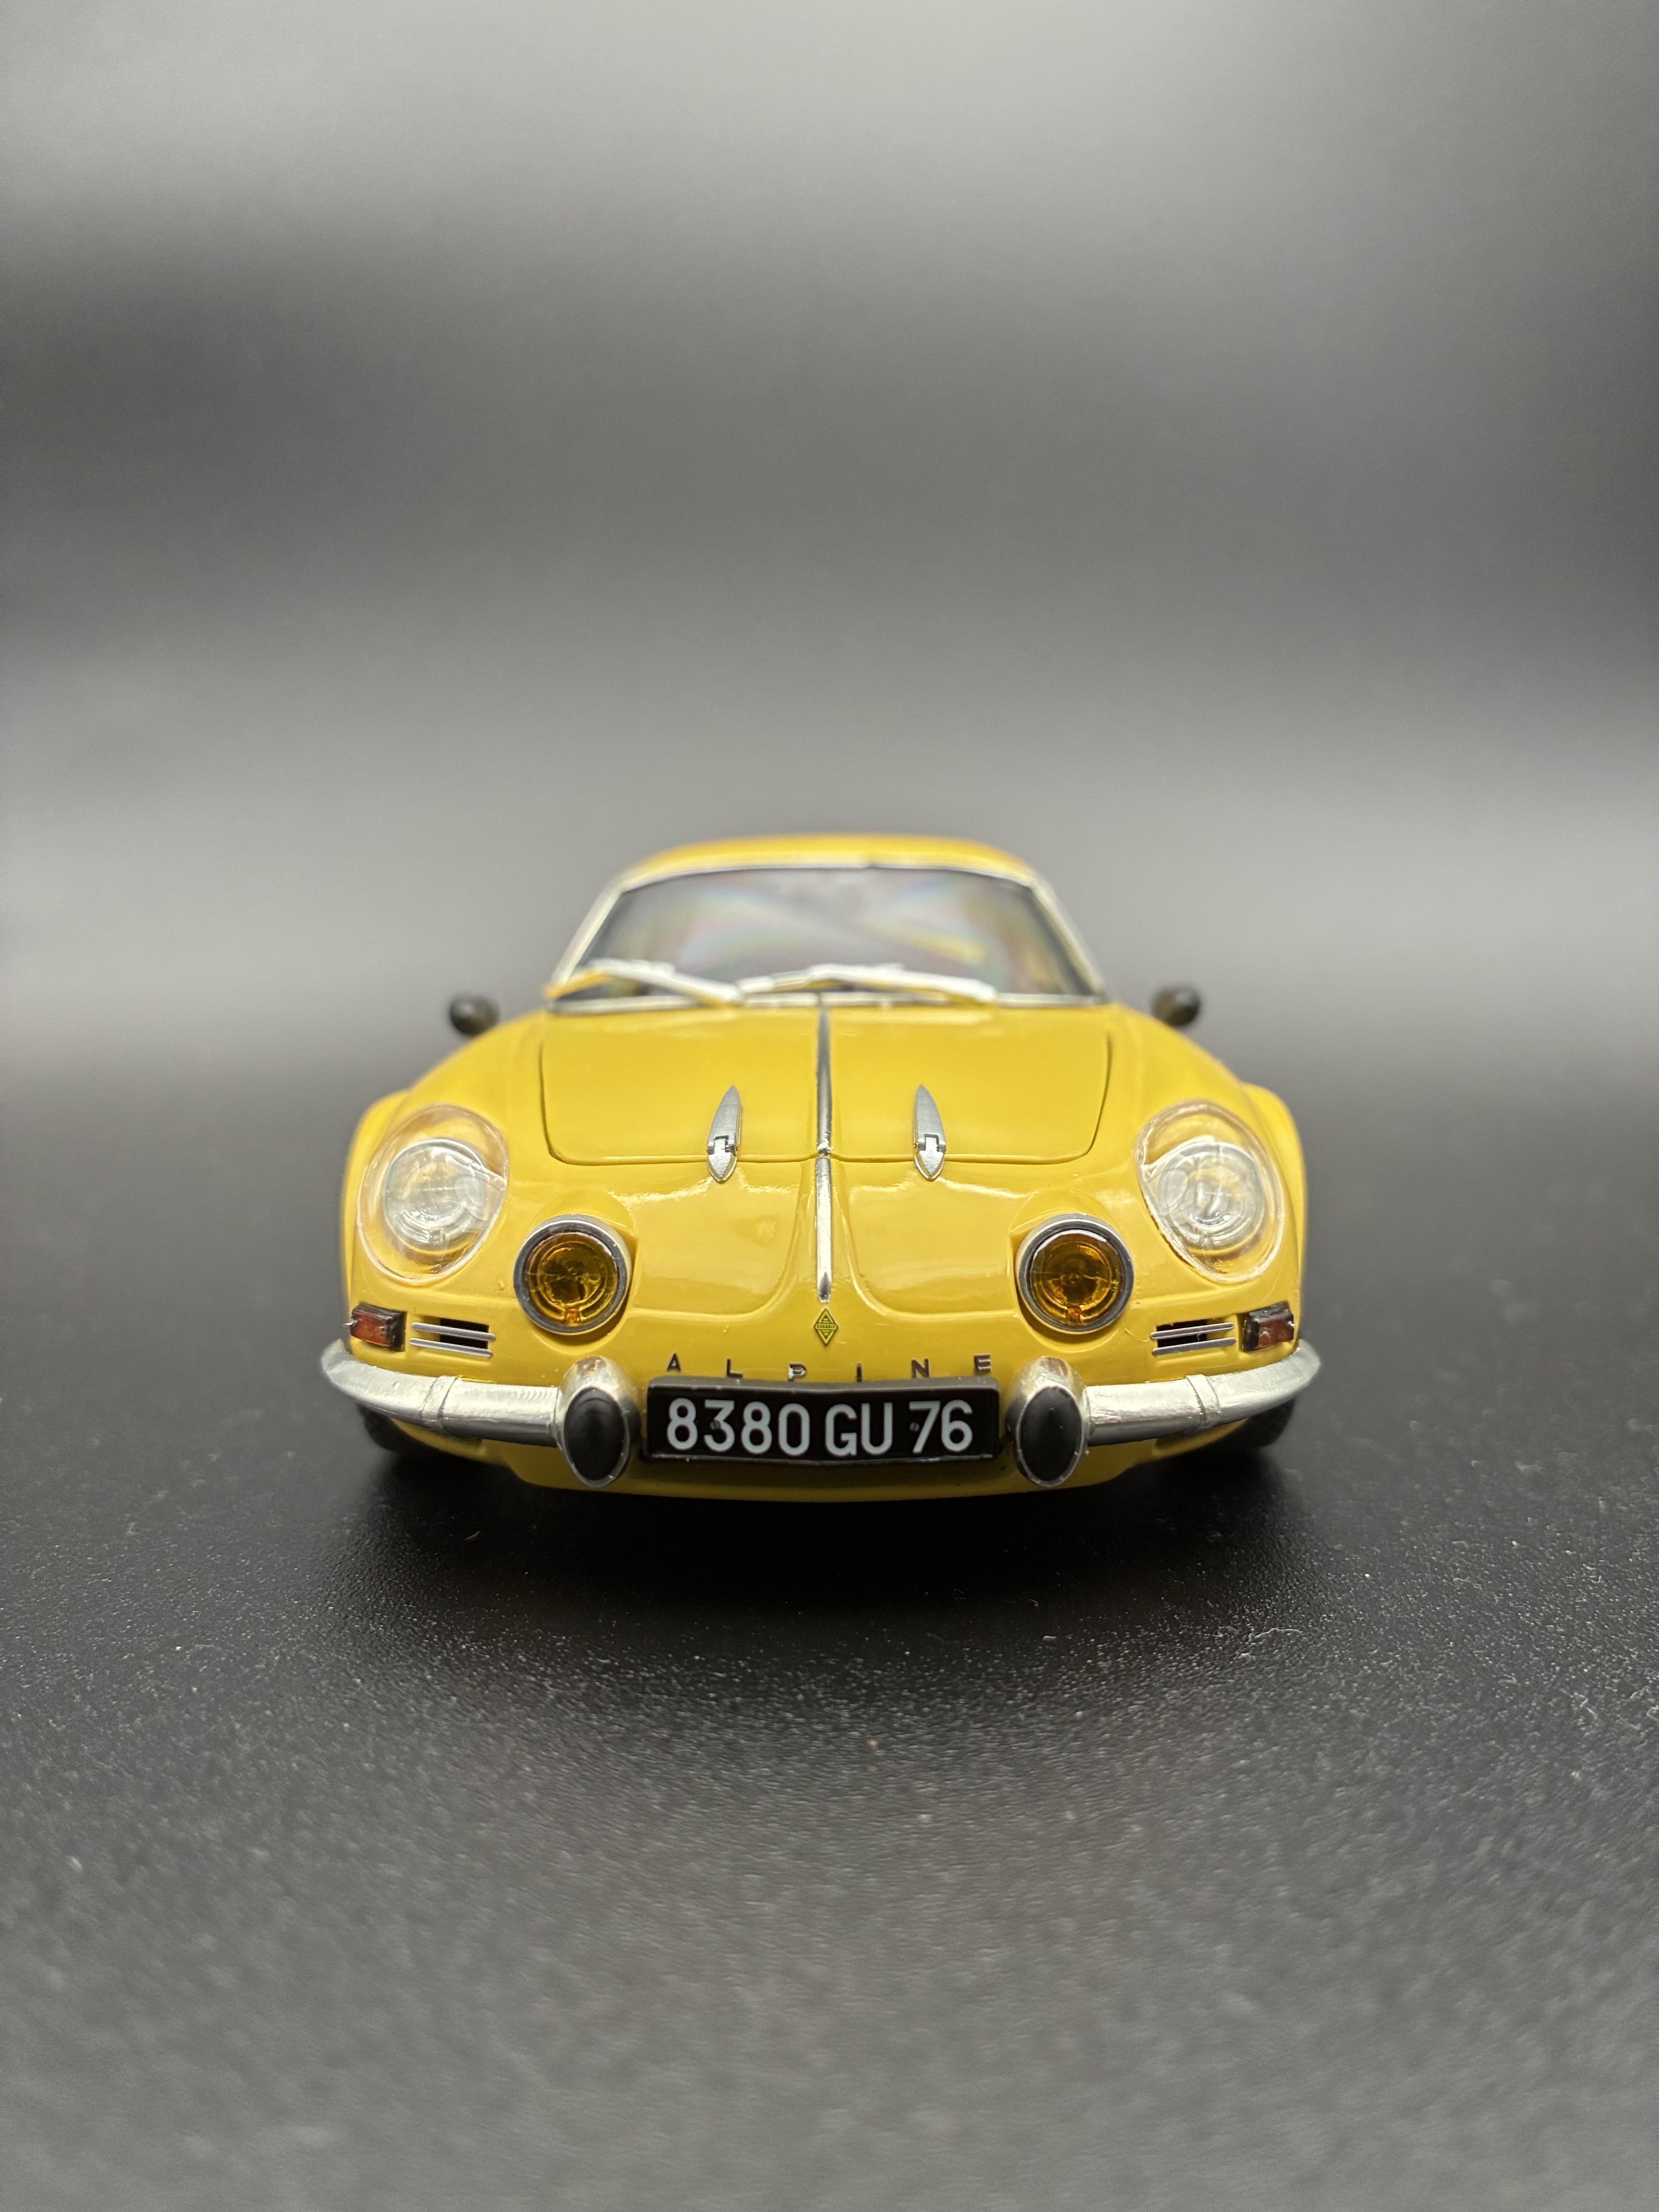
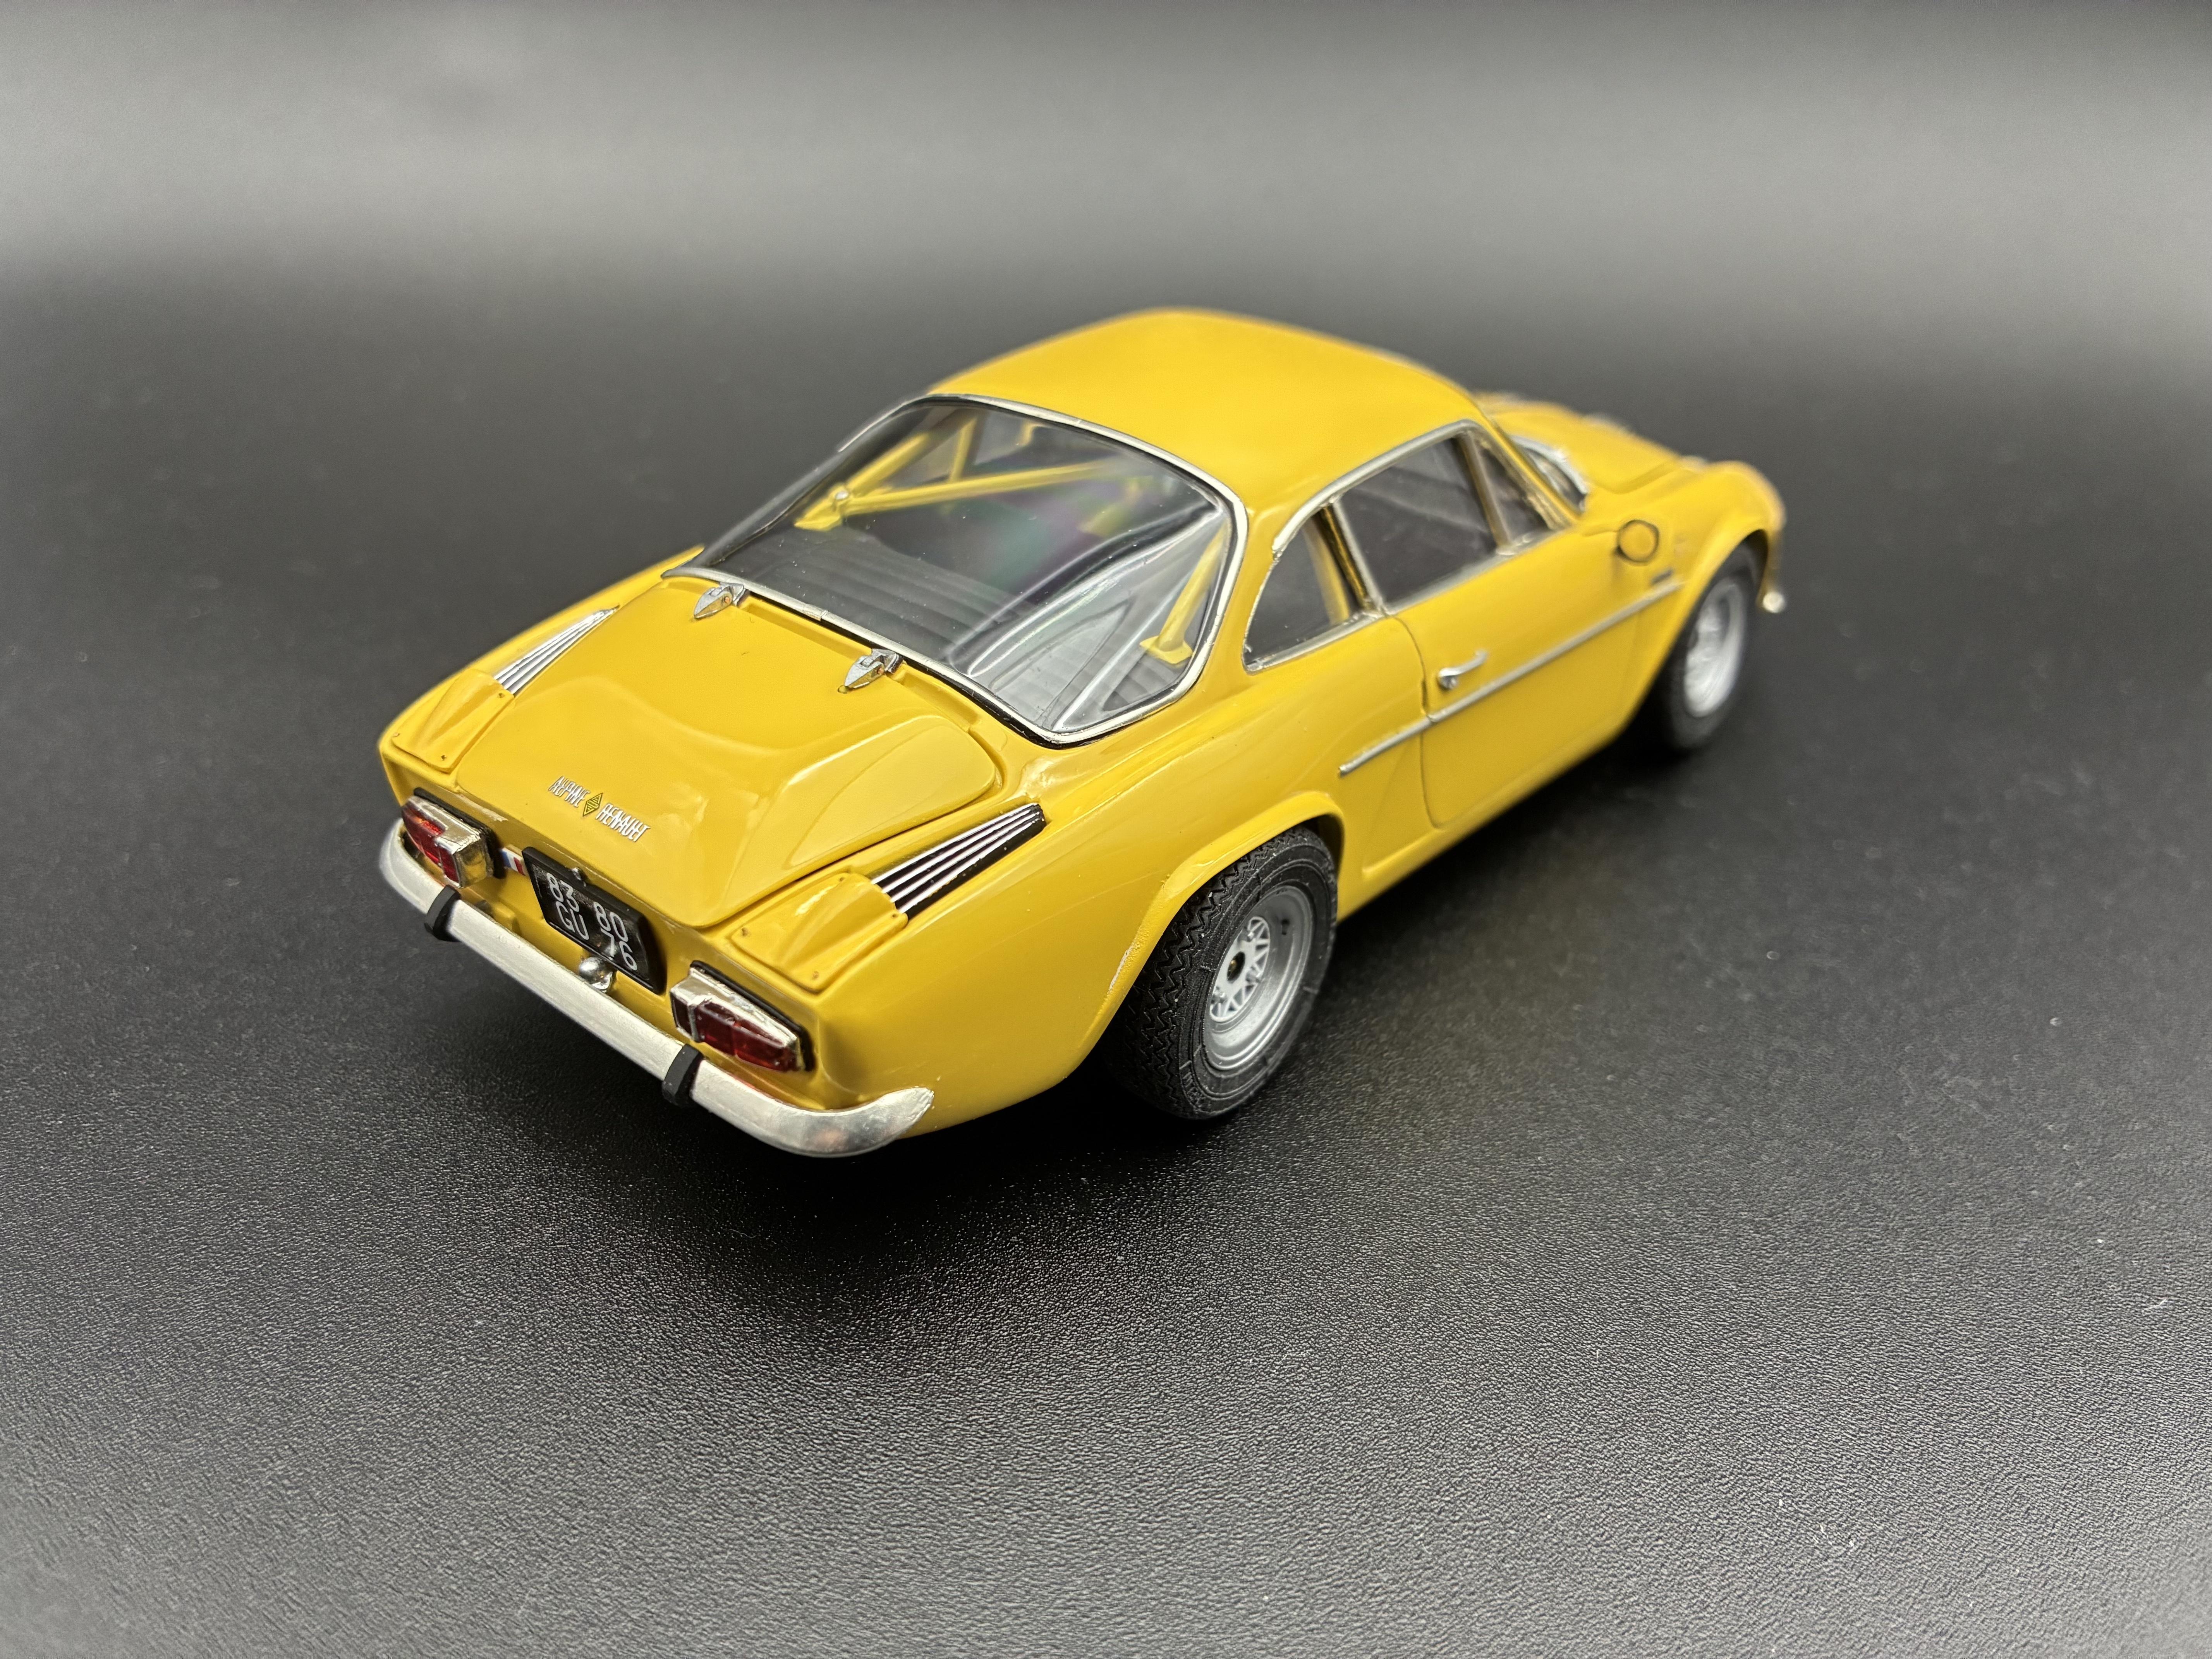
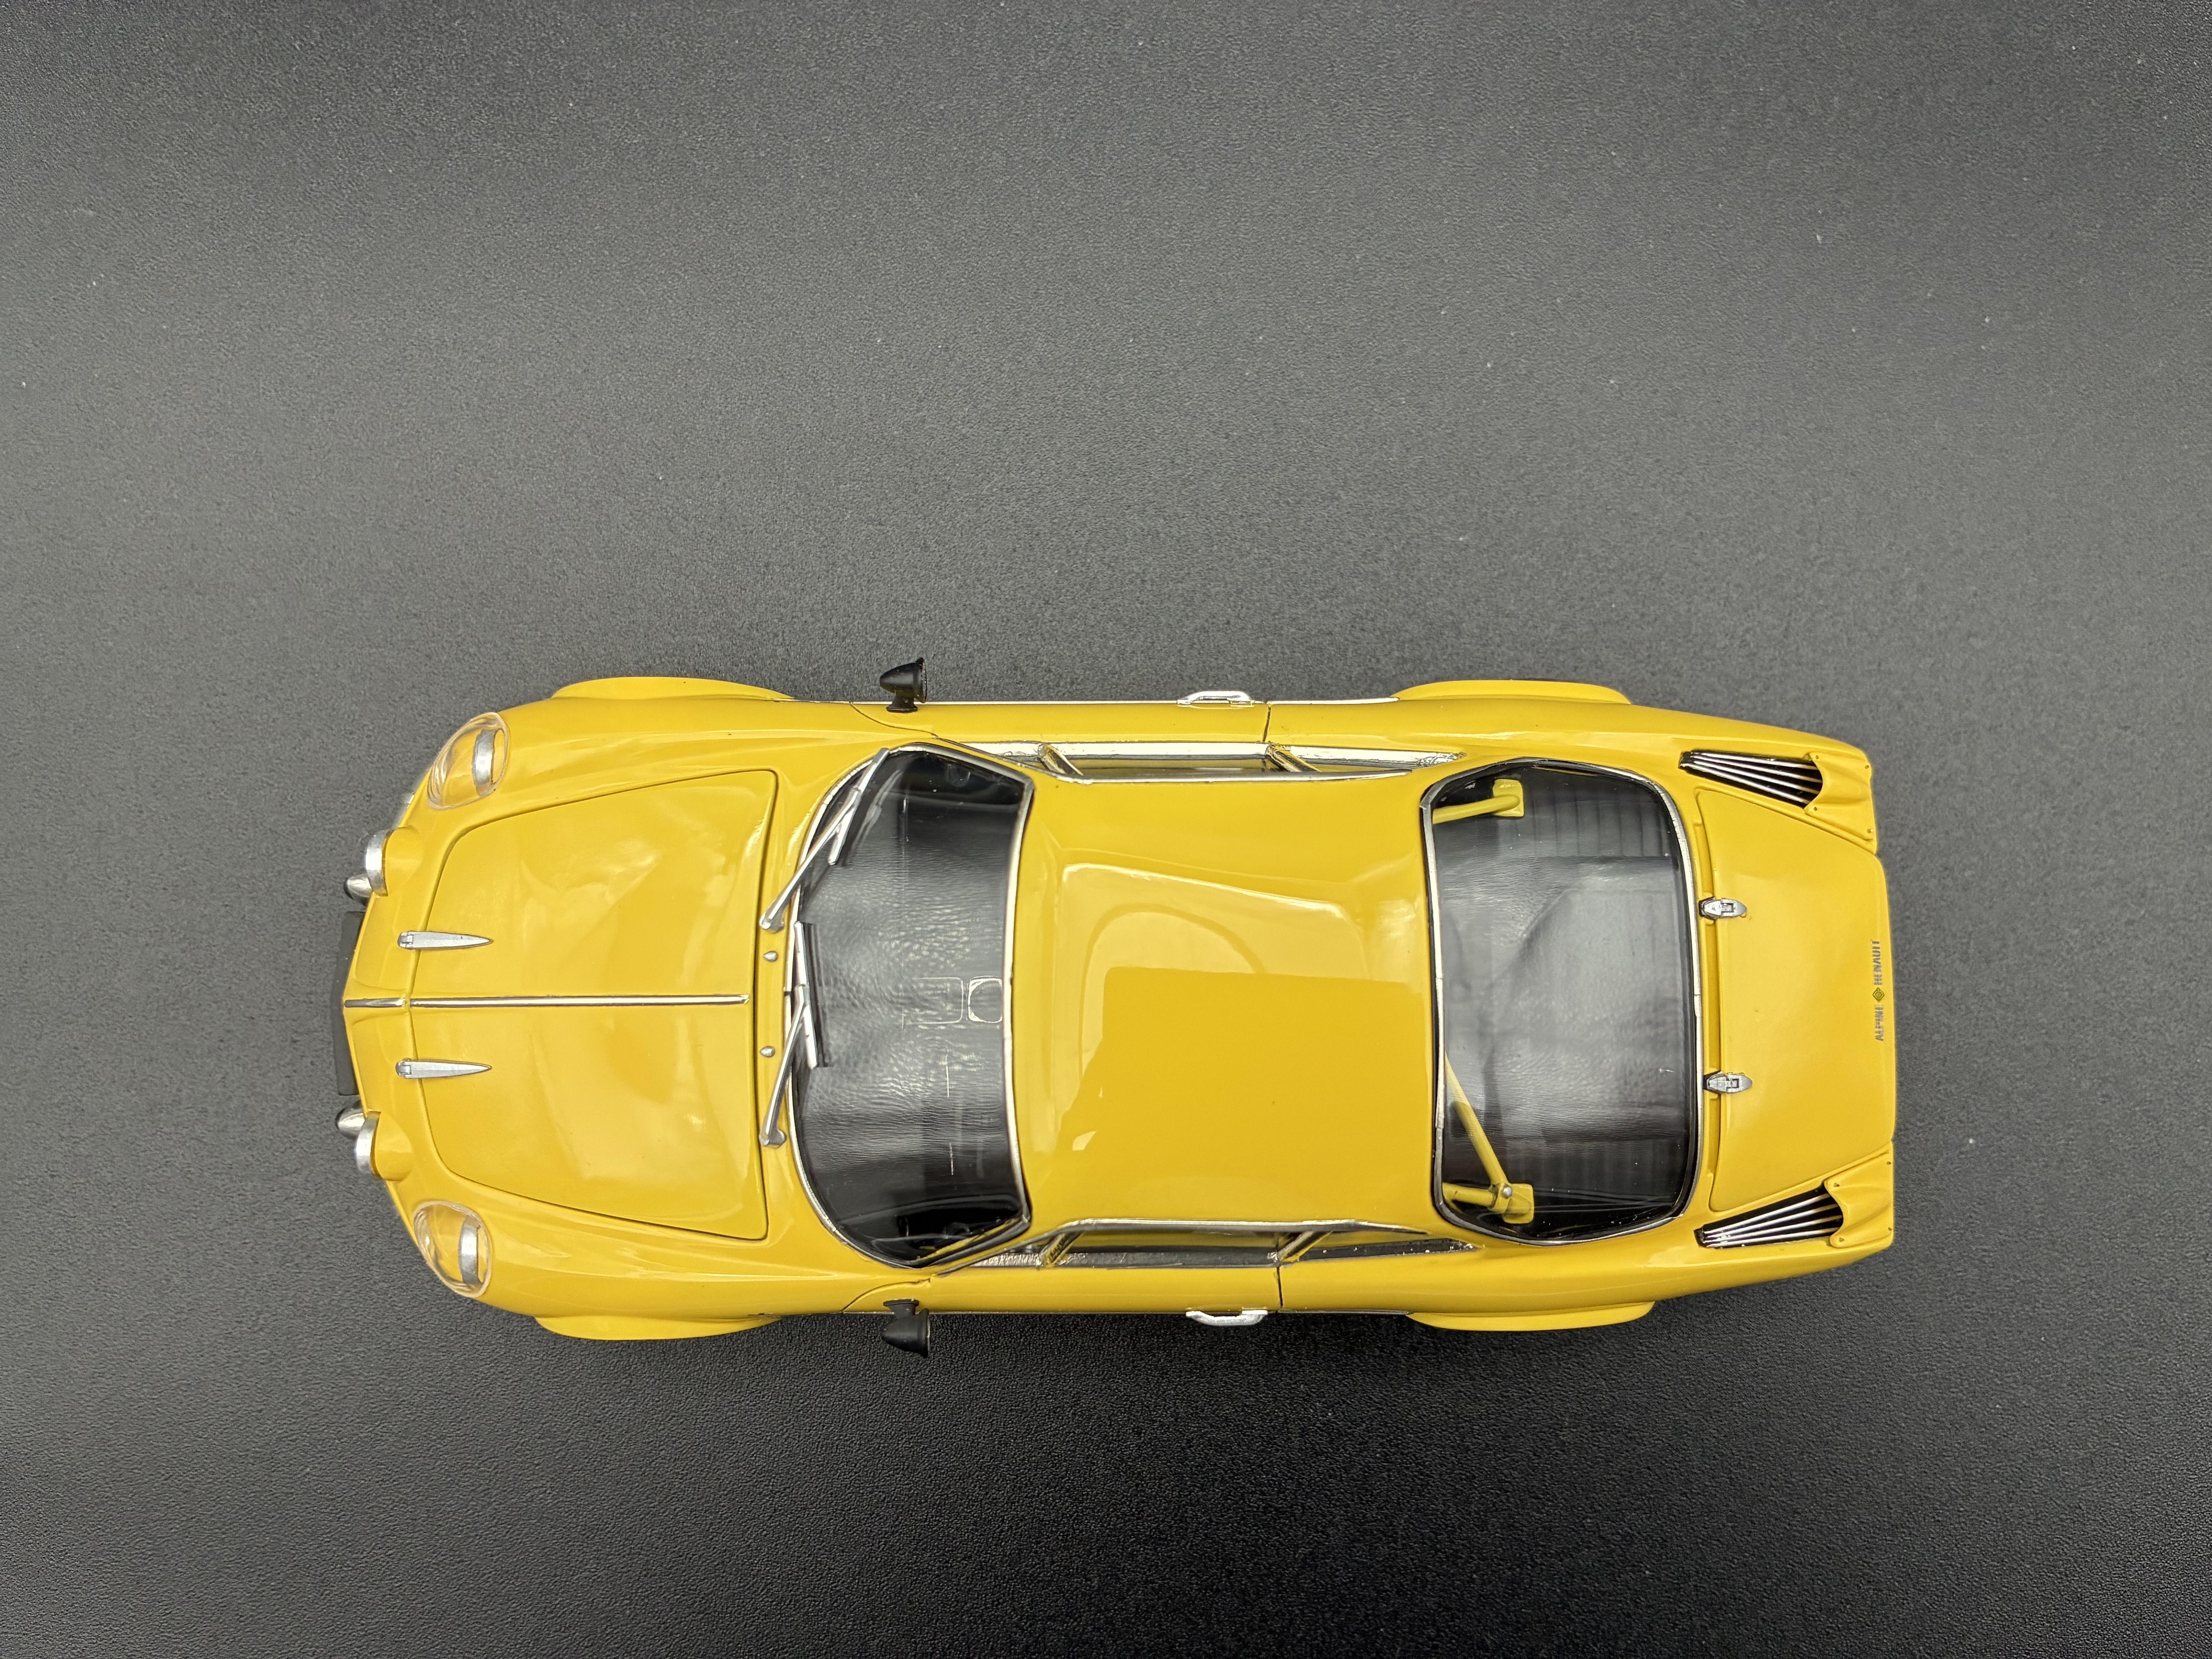
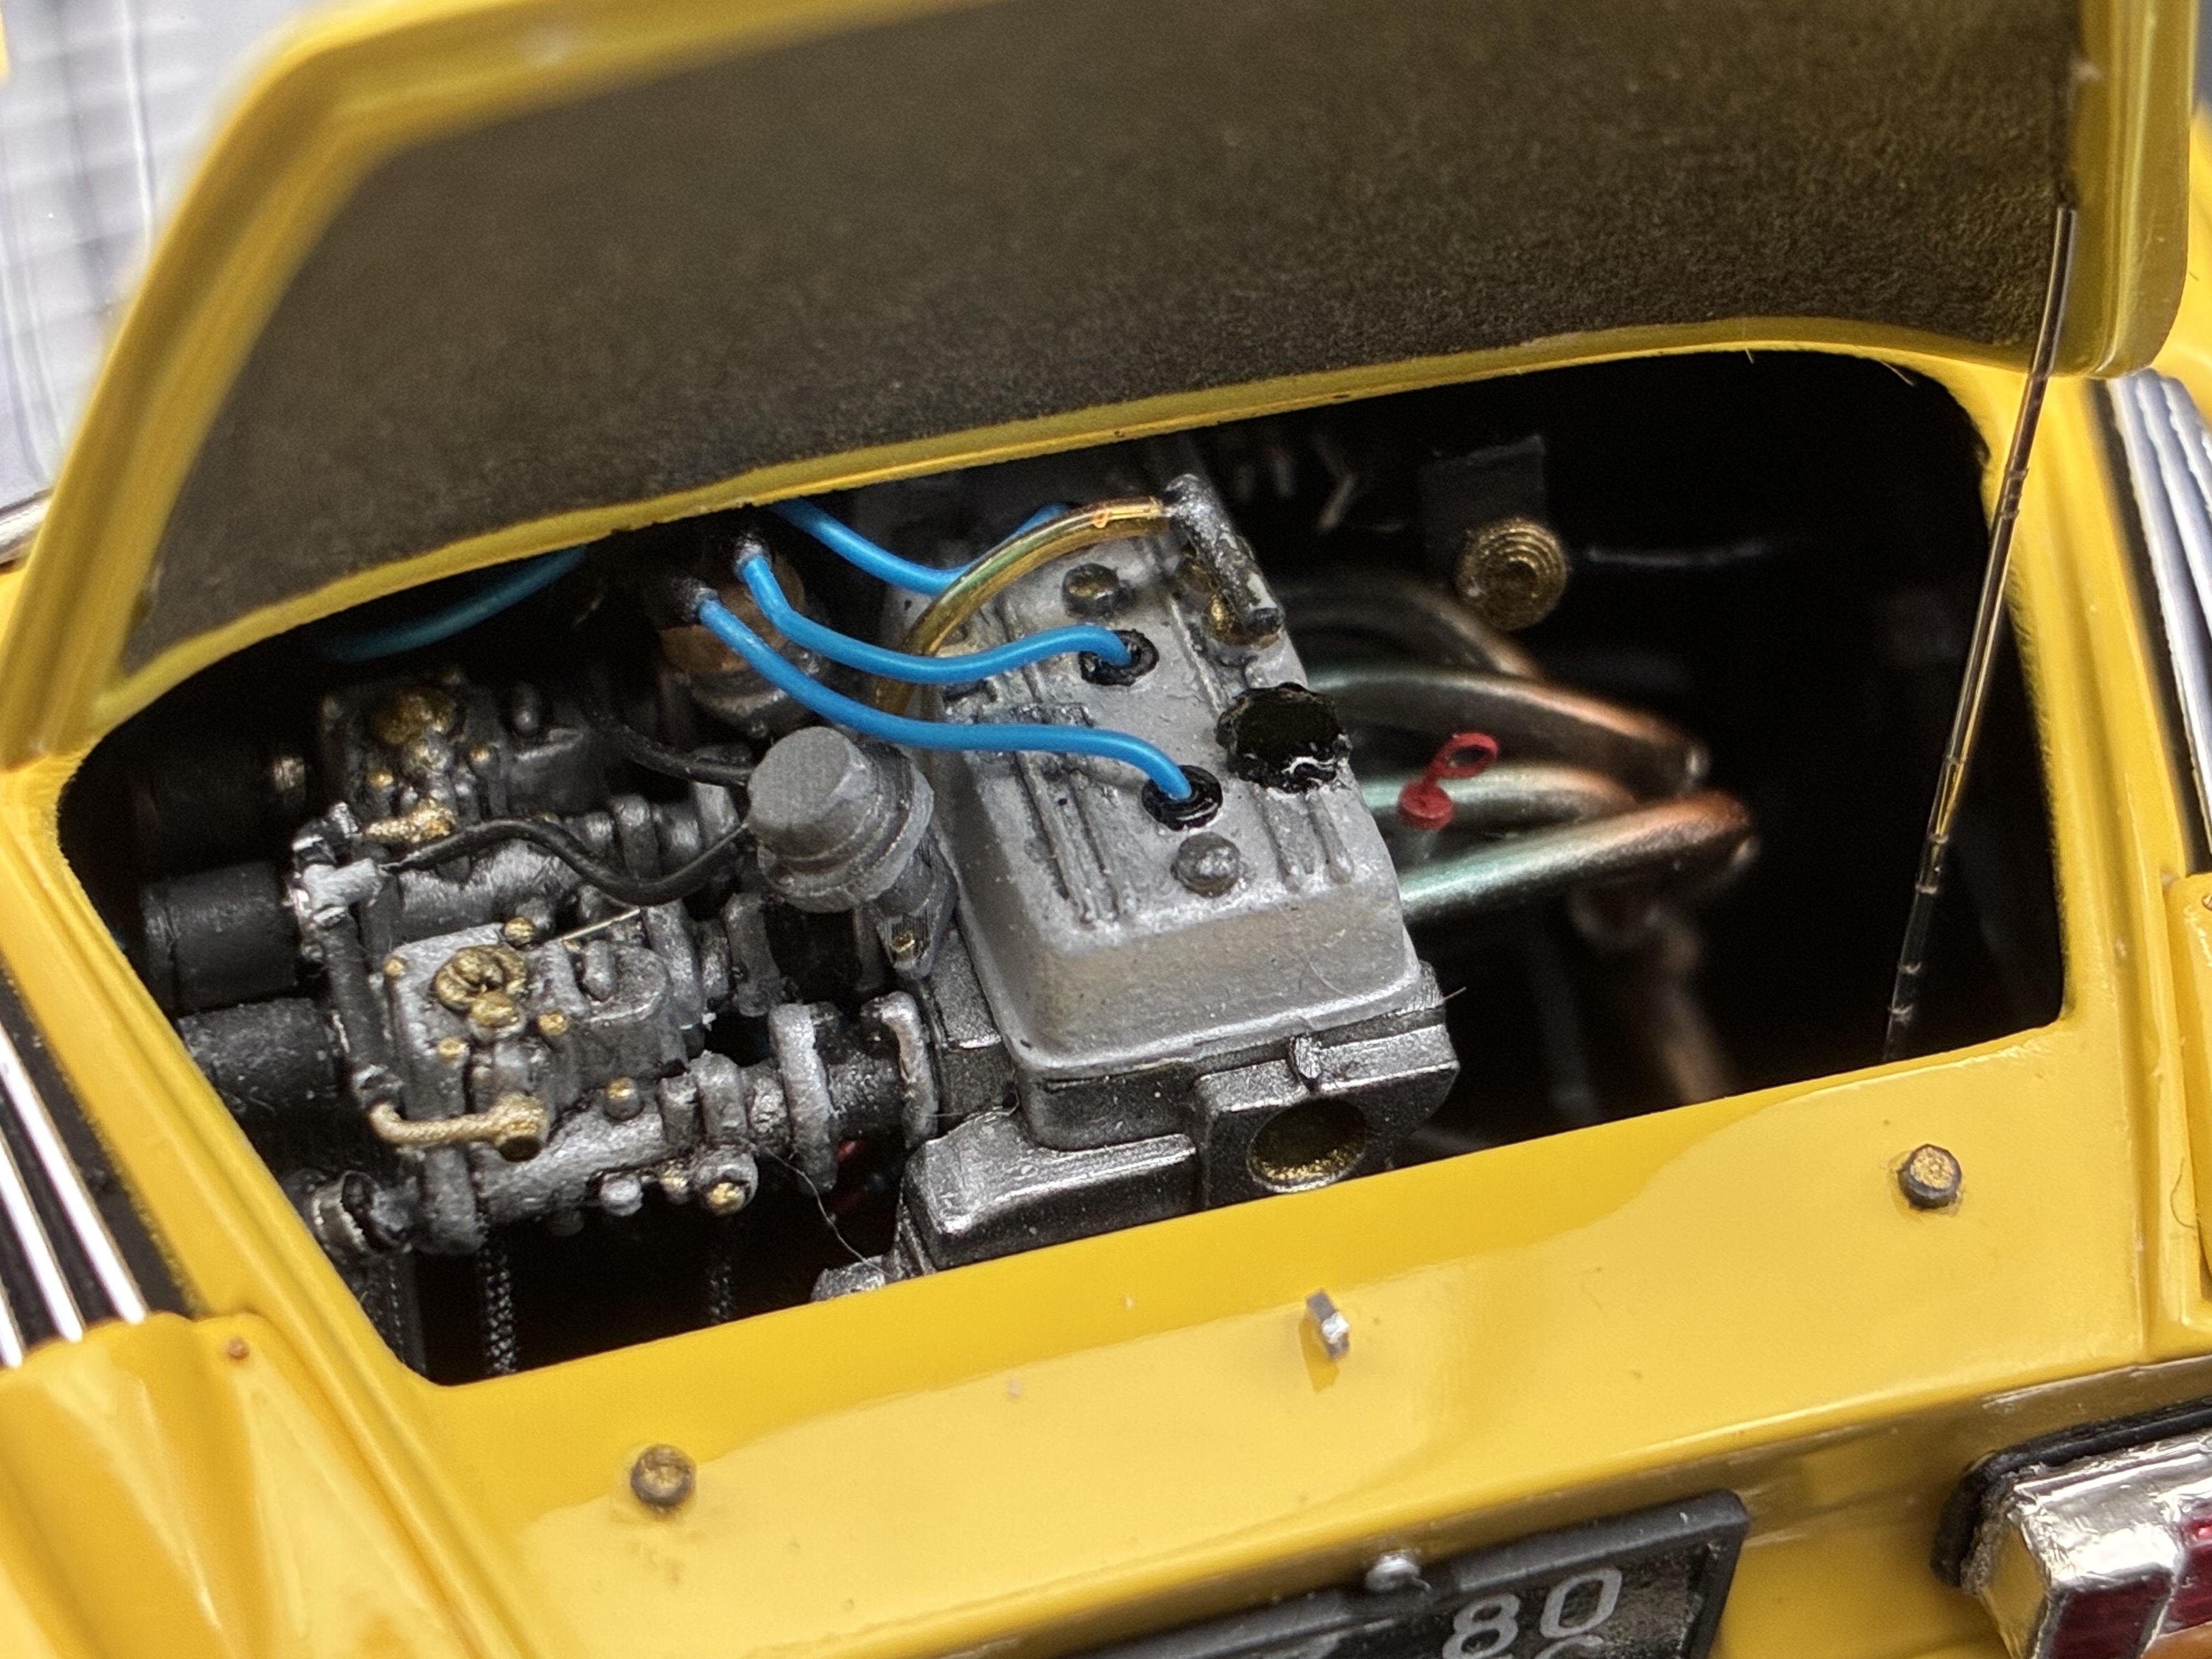
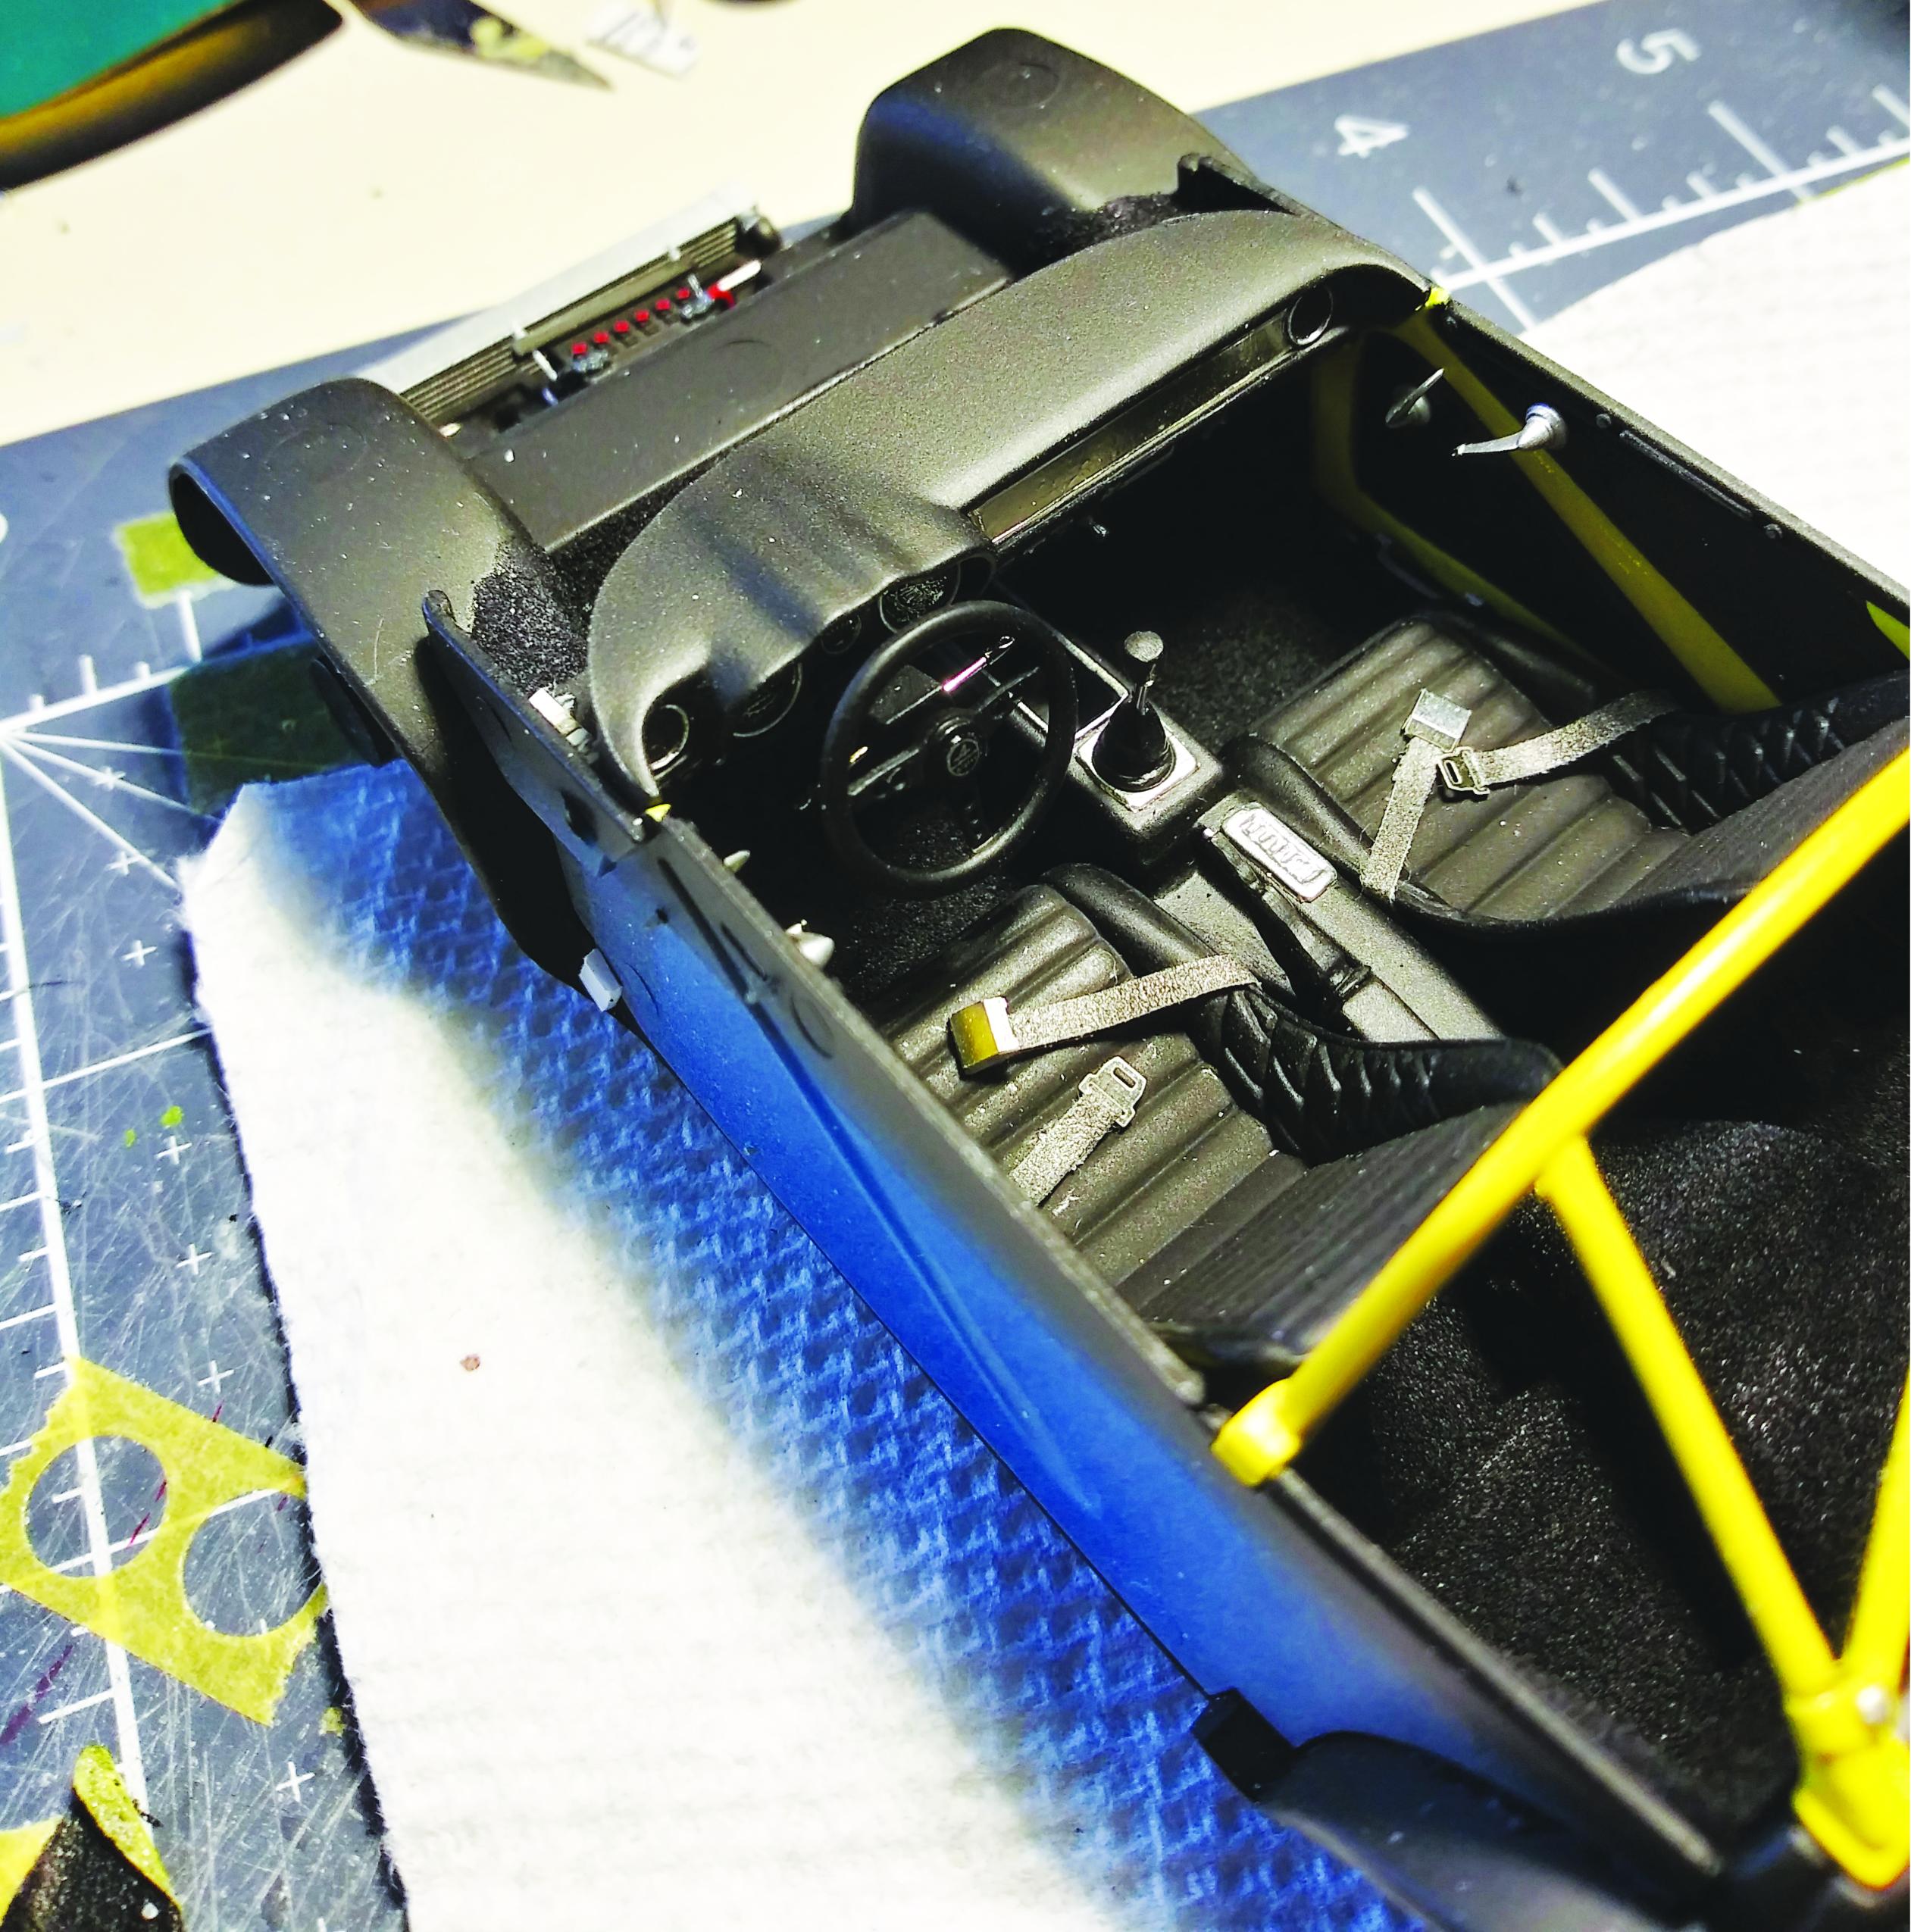
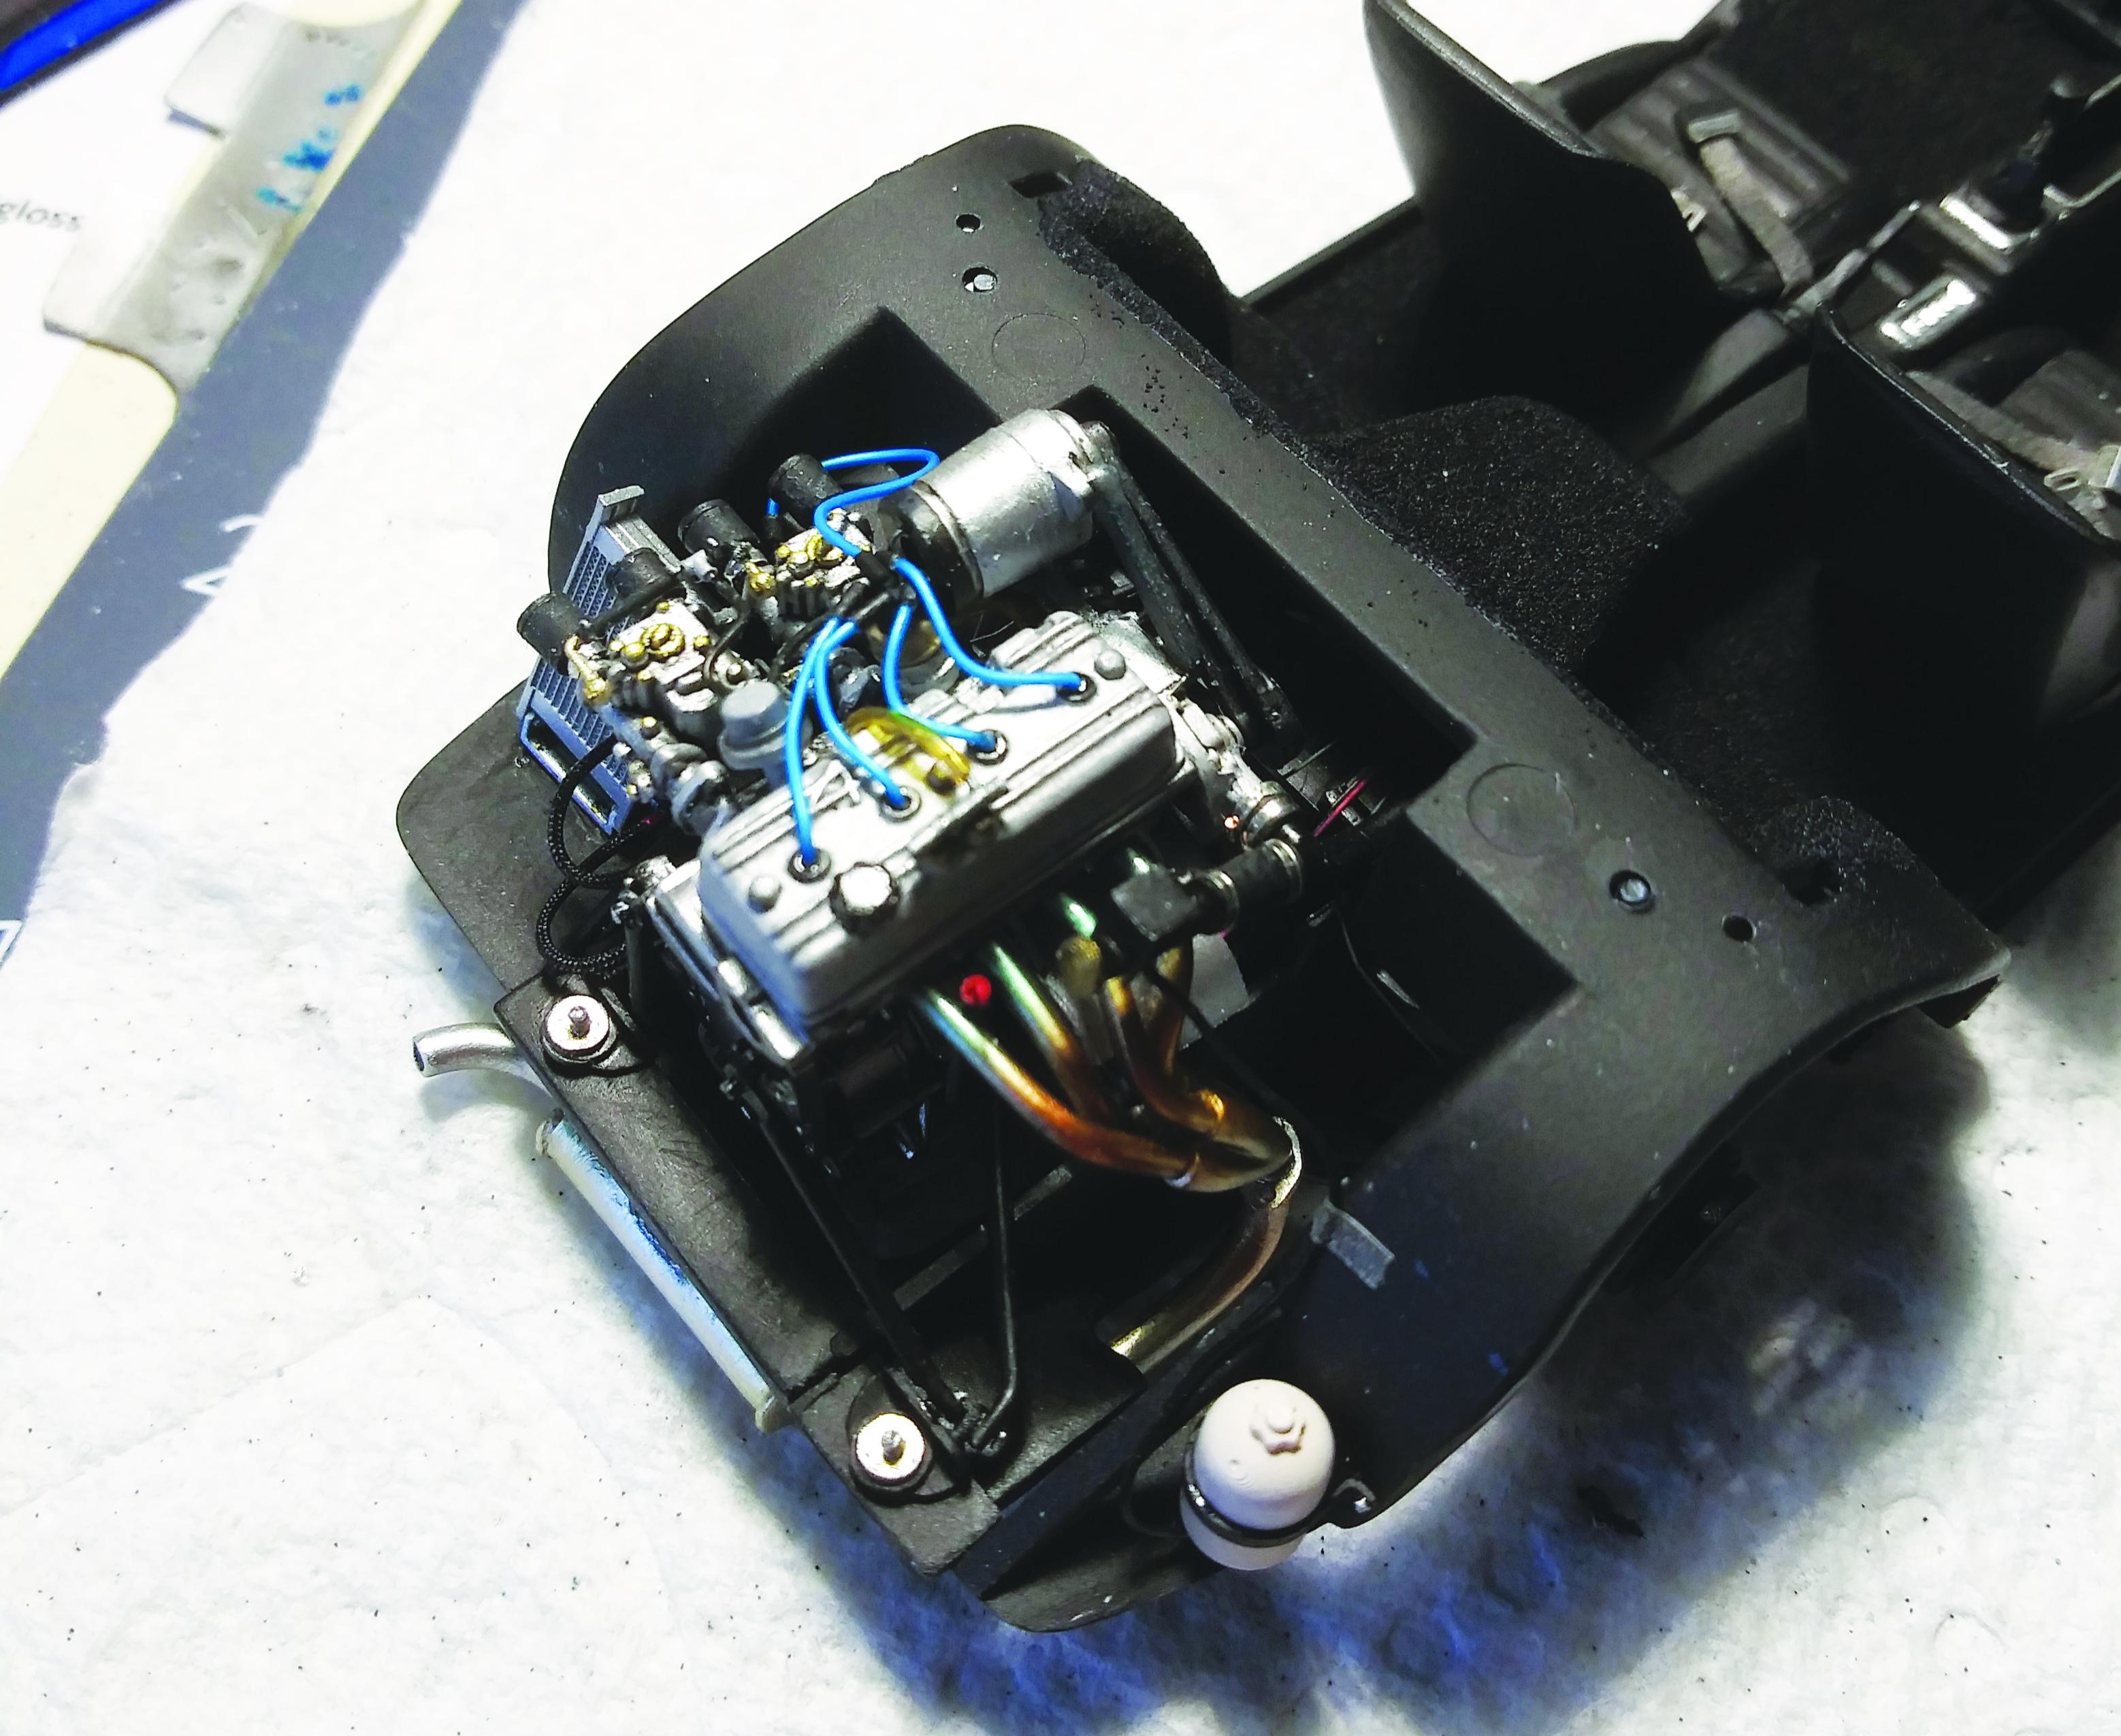
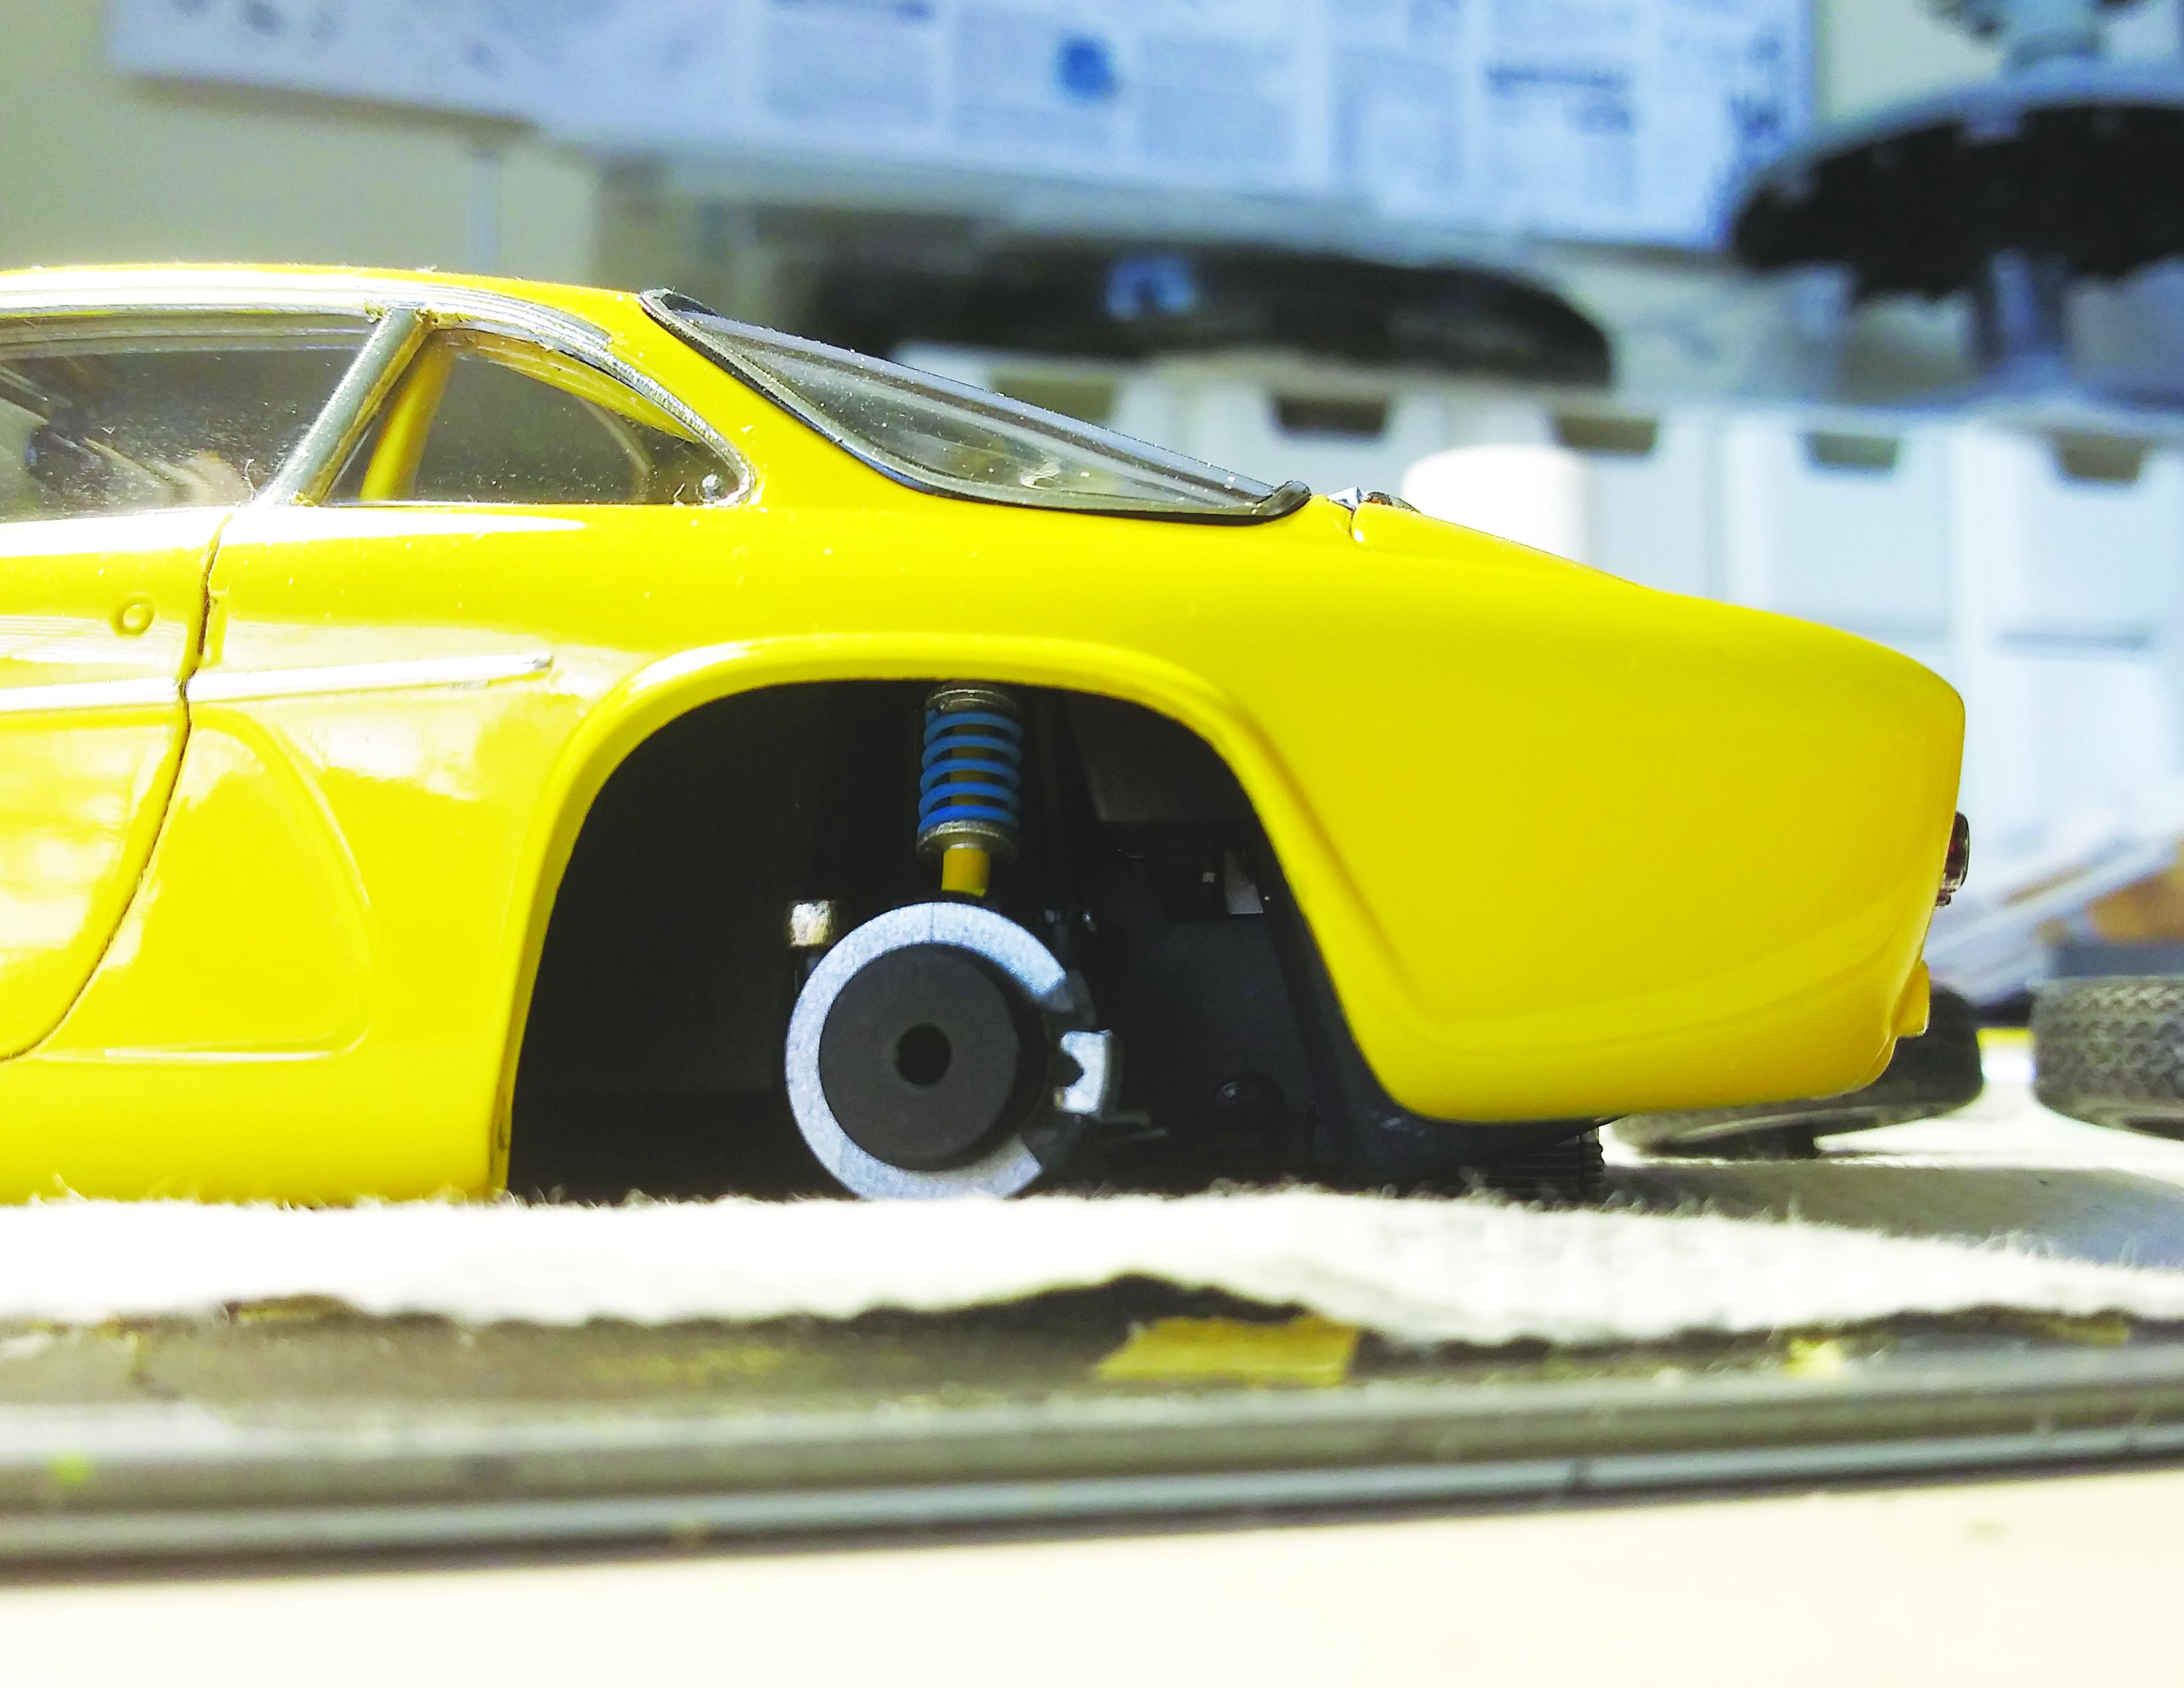
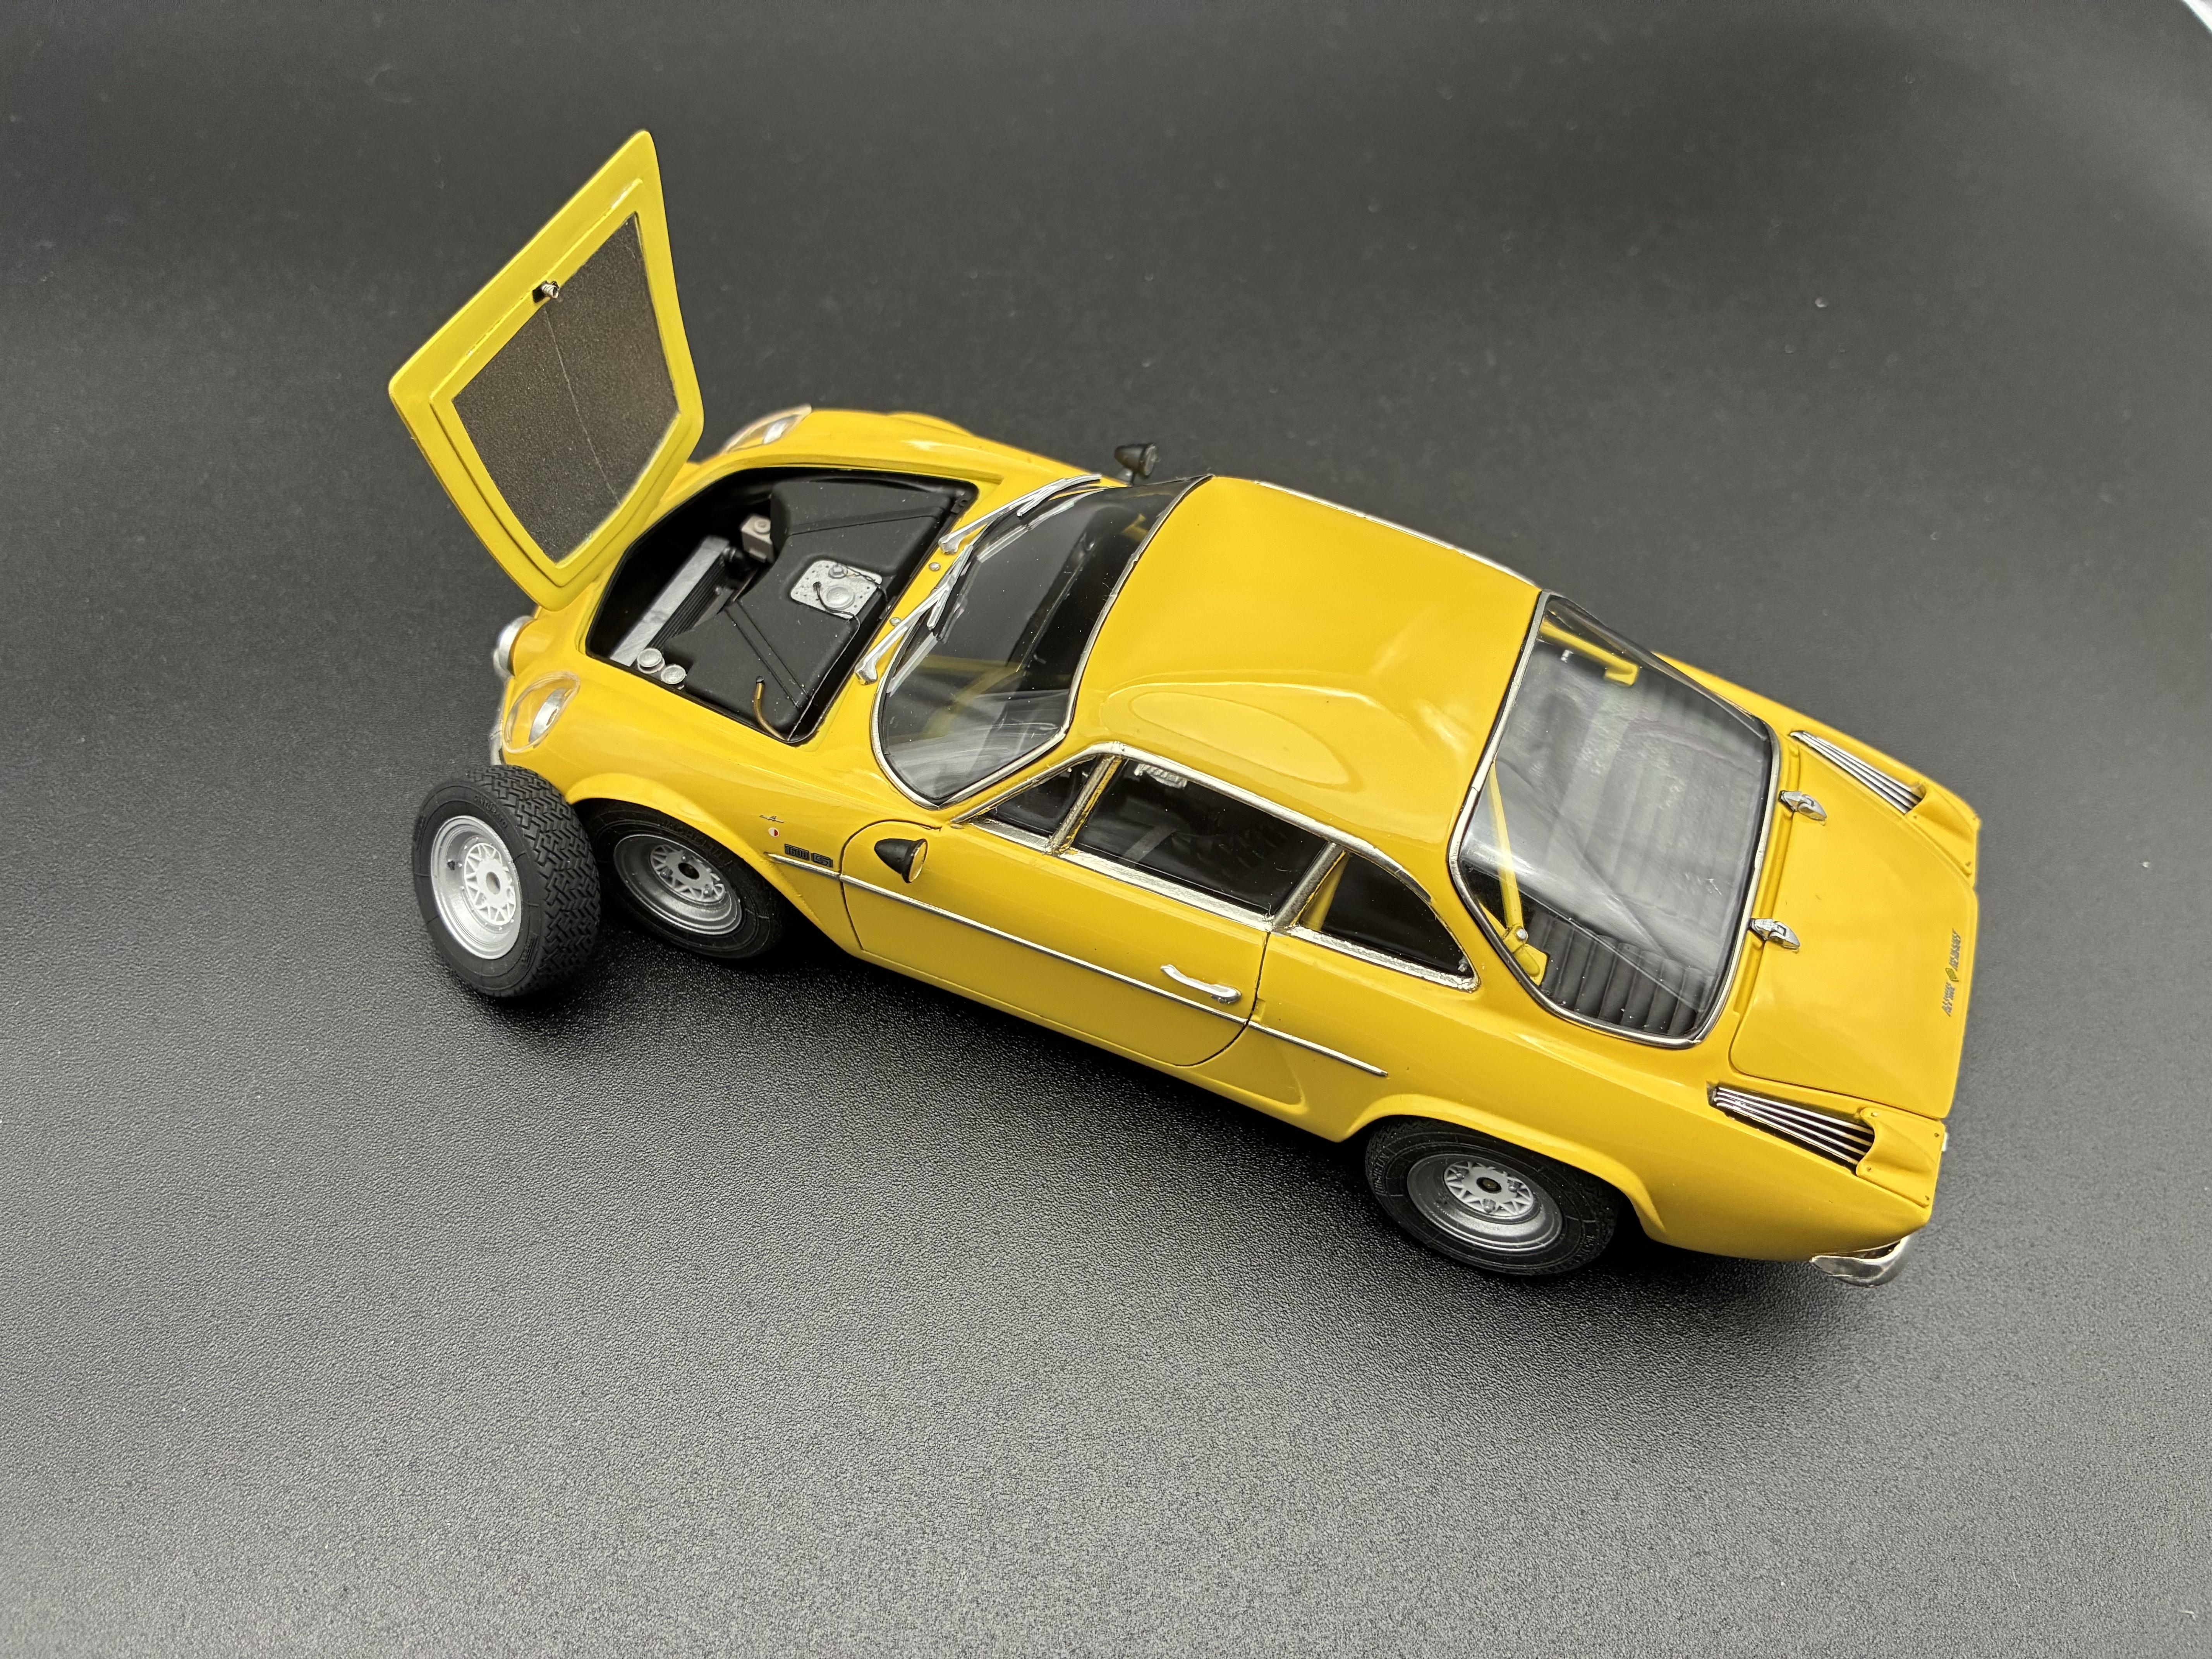
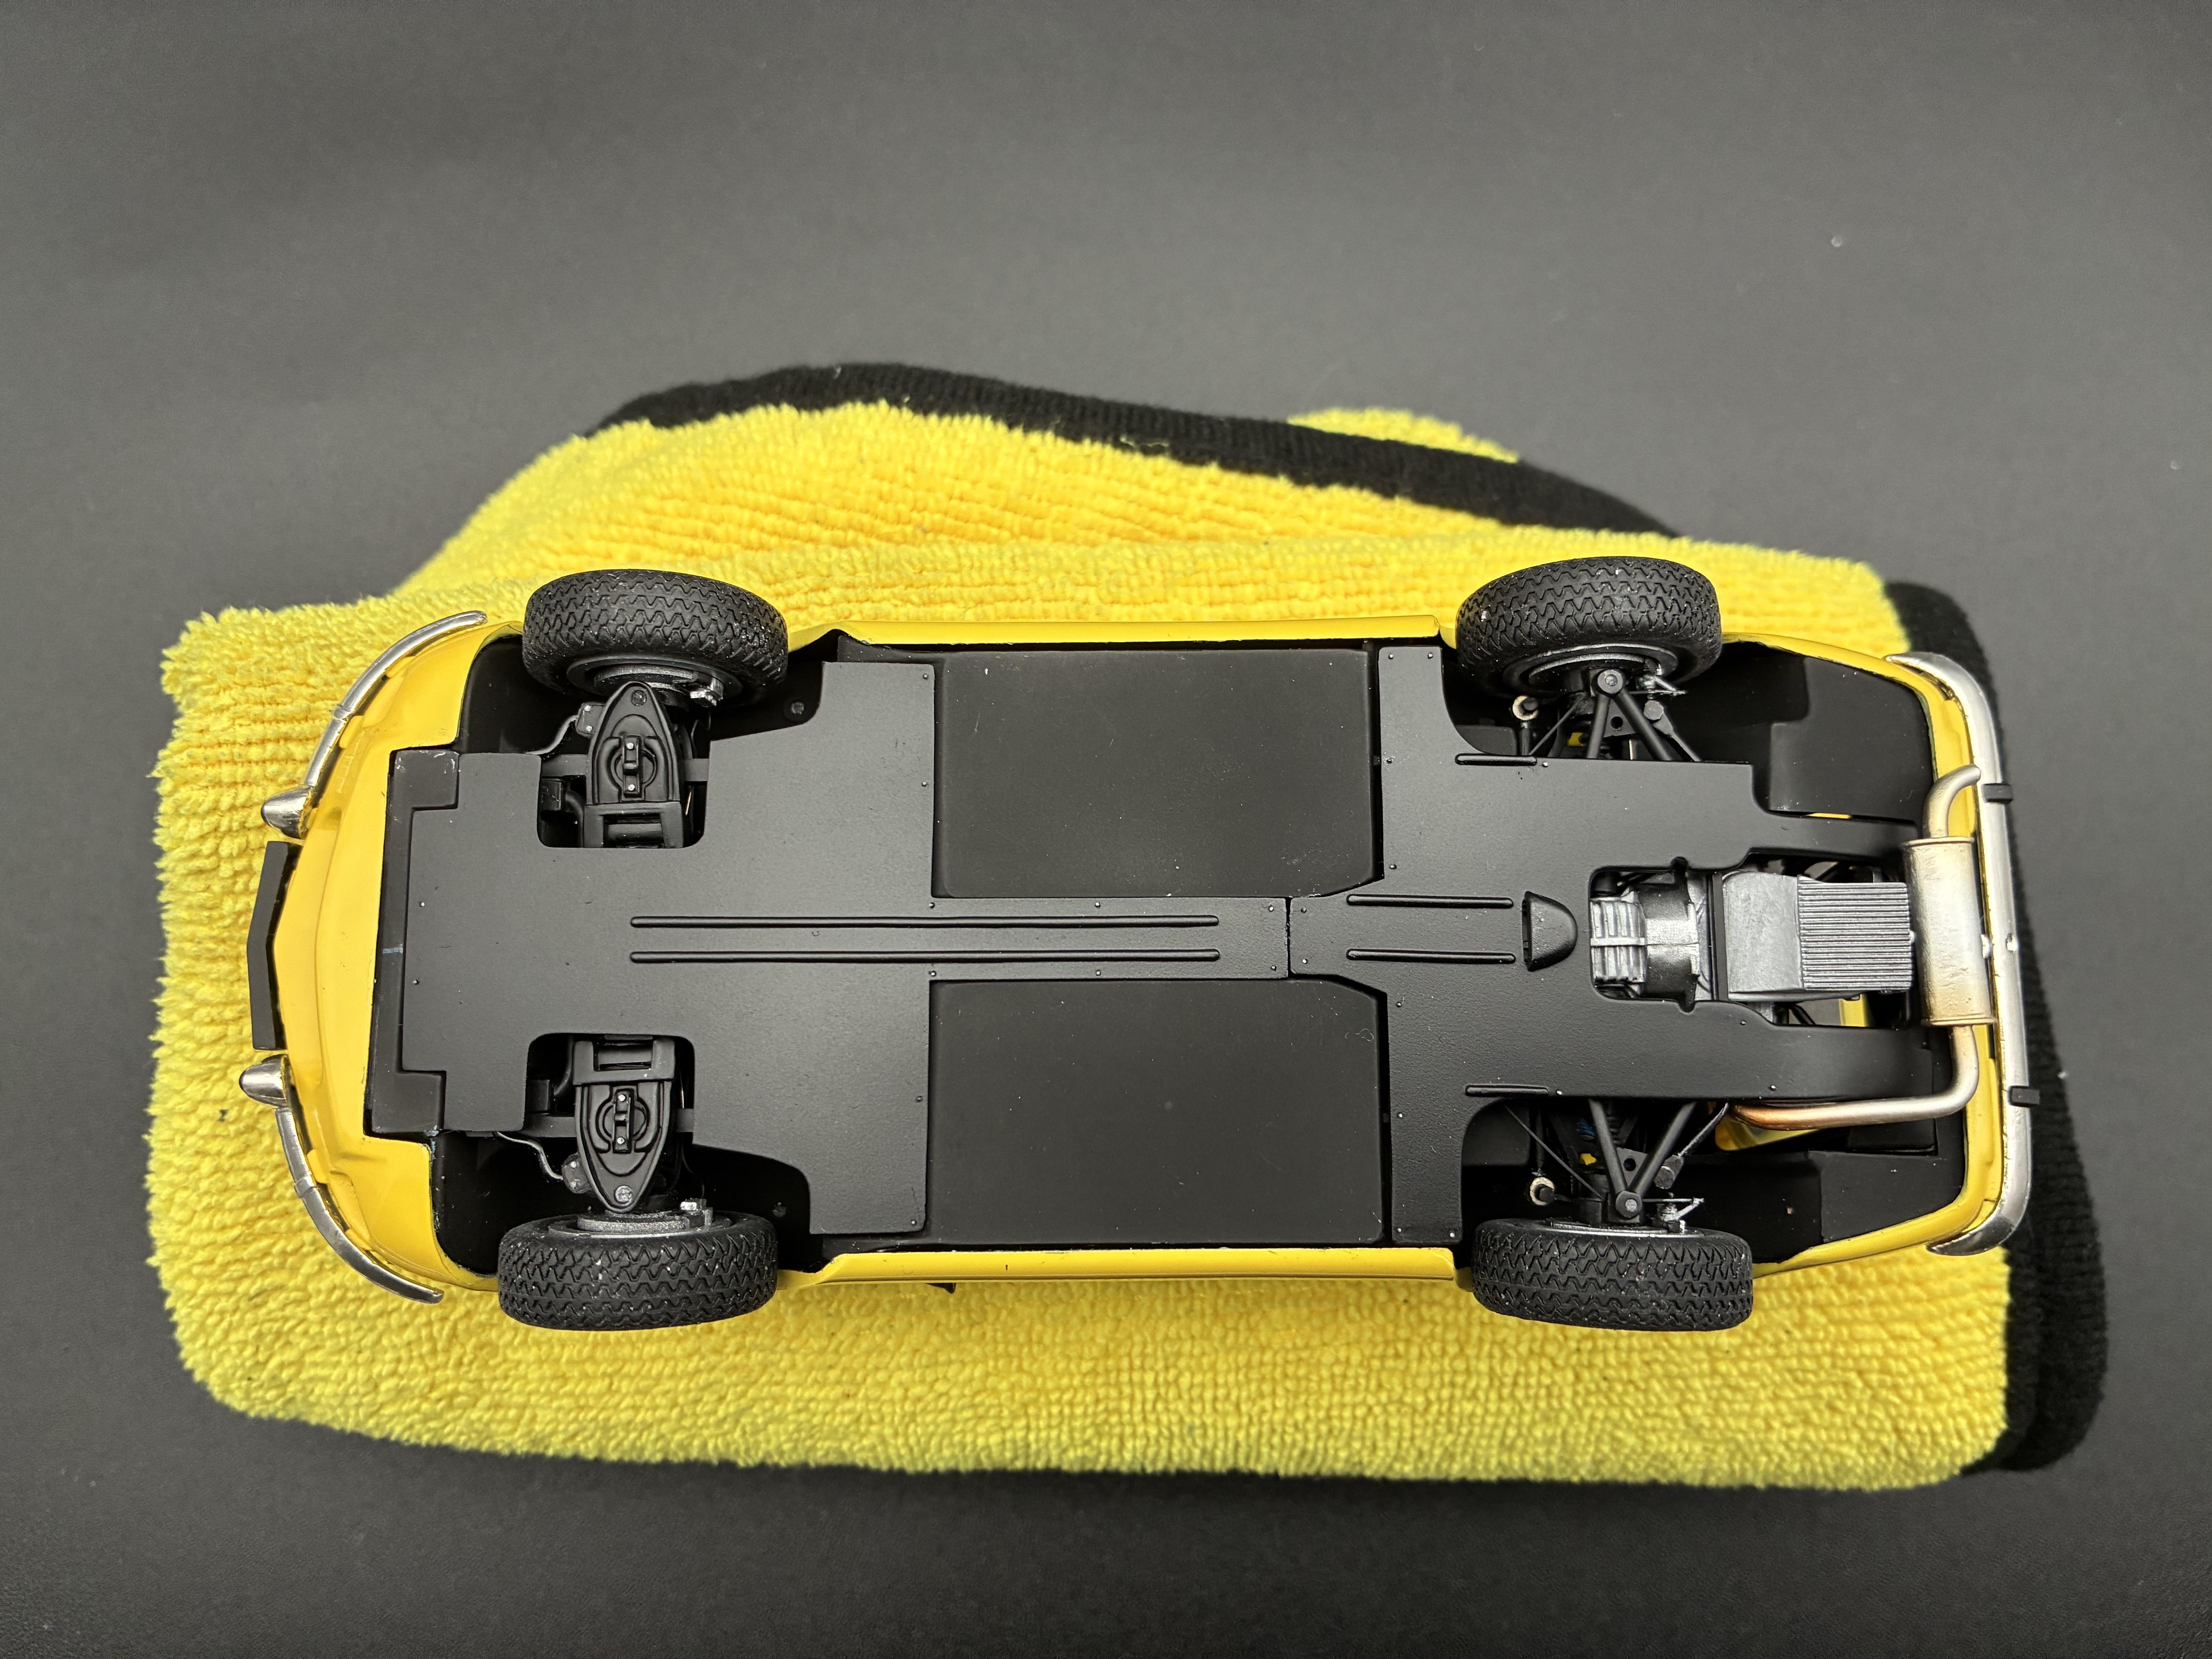
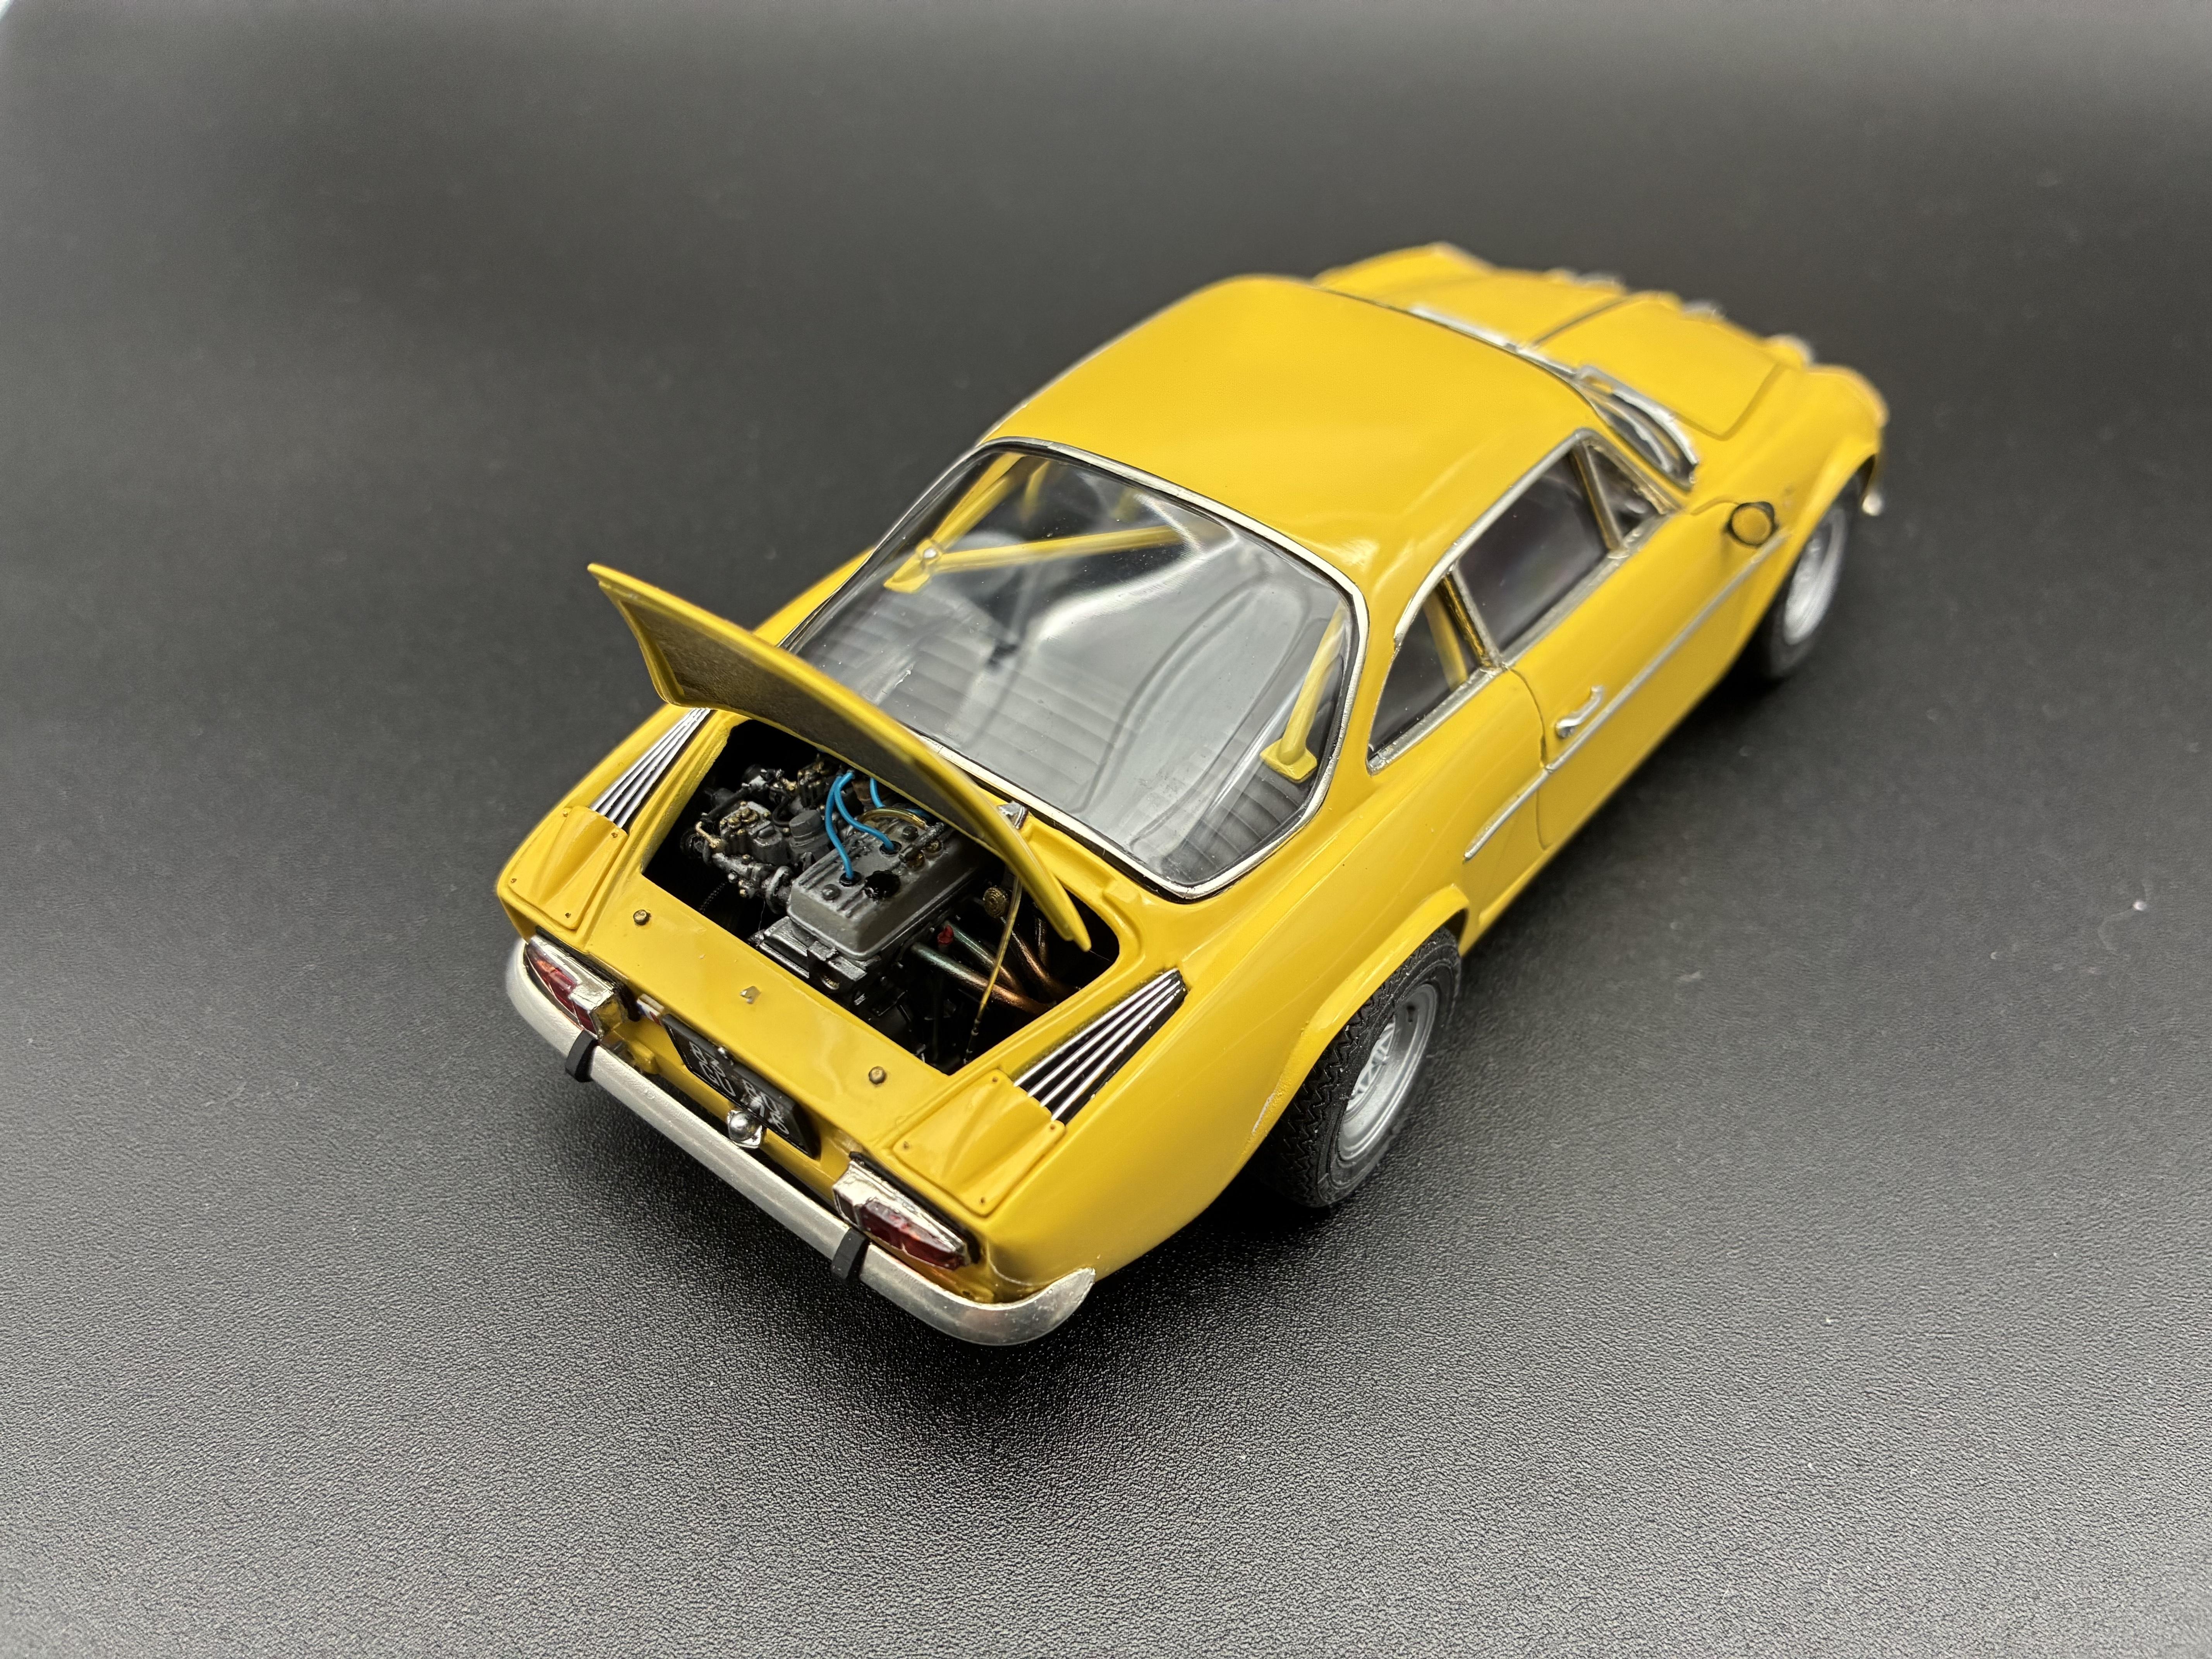
1971 Alpine A110S My entry for this year’s Cannonball is the Alpine A110S. It’s a quirky rear-engined car with a solid racing heritage. The kit itself is of the Monte Carlo Rally winner; that is, the full race version. However, I returned the car to a street legal version, which required less modifications than would be expected. These included removal of the large driving lights, complete front bumpers, full length rear bumper, filters on the engine intake horns, front fuel tank and spare tire, standard lap belts, full interior switch gear and handles, and removal of the rally computer. The kit itself is what is expected from Tamiya with good parts fit and detail. I then focused on adding additional detail and correcting one surprising inaccuracy: the brakes. The calipers are actually molded incorrectly on the rotors where the piston side is facing the wheel. Furthermore, the brake rotor hat is incorrect and does not fully extend to the lugs; that is, the lugs have nothing to bolt to. Therefore, to correct this, I modeled and printed new brake assemblies that are accurate front and rear. With the brakes corrected, it was a matter of adding additional detail and accuracy. I opened the frunk and installed USCP’s detail set that included fuel tank, battery, radiator, and spare tire, among other small details. I also added their interior detail set with separate door handles, window cranks, and switchgear. Finally, their operational frunk and hood hinge set was added. Various engine parts, such as the fuel pump, fuel lines, and (missing) distributor, were modeled and printed; as were the Madin 1C wheels. Additionally, some parts were scratch-built such as the engine bracing and mounts, coolant filler neck, and some engine detail. Finally, wiring and plumbing were added throughout. Paint is Gravity Colors Renault Jaune Tournesol (Sunflower Yellow) and 1K Clear that was wet sanded and polished. Other paint is Tamiya and Vallejo. The bumpers and trim are bare metal foil. I chose to use the French license plates as I don’t believe that the car was available in the US at that time. So, the idea is that the car owner imported it just for the race and would ship it back to France afterwards. In the end it was an overall enjoyable build of an interesting subject. Additional photos: CBR Main Build
-
2025 Cannonball Run - 50 years since the 1975 run.
White Rabbit replied to Mattilacken's topic in Community Builds
The Alpine is complete! In-Progress Detail
-
2025 Cannonball Run - 50 years since the 1975 run.
White Rabbit replied to Mattilacken's topic in Community Builds
Hello Cannonballers! As you know, this year is the 50th anniversary of the 1975 running of the Cannonball that was won by Jack May and Rick Cline. Jack May had bought the Dino new and kept the car all these decades in original and unrestored condition. But, as it's said, "All good things...", and the car was sold on August 16th at Mecum Monterey for "an undisclosed amount." Though, Hagerty estimates the value above $680,000. The link will take you to the full Car and Driver article: Cannonball Dino This link is to Mecum: Mecum Dino -
2025 Cannonball Run - 50 years since the 1975 run.
White Rabbit replied to Mattilacken's topic in Community Builds
Thank you, Oliver! -
2025 Cannonball Run - 50 years since the 1975 run.
White Rabbit replied to Mattilacken's topic in Community Builds
1971 Cadillac Coupe DeVille vs 1971 Renault Alpine (both 1/24 scale) The Cadillac is intended to represent the 1972 Cannonball winner. I just need to make updated front and rear bumpers to reflect the 1972 model year.
-
2025 Cannonball Run - 50 years since the 1975 run.
White Rabbit replied to Mattilacken's topic in Community Builds
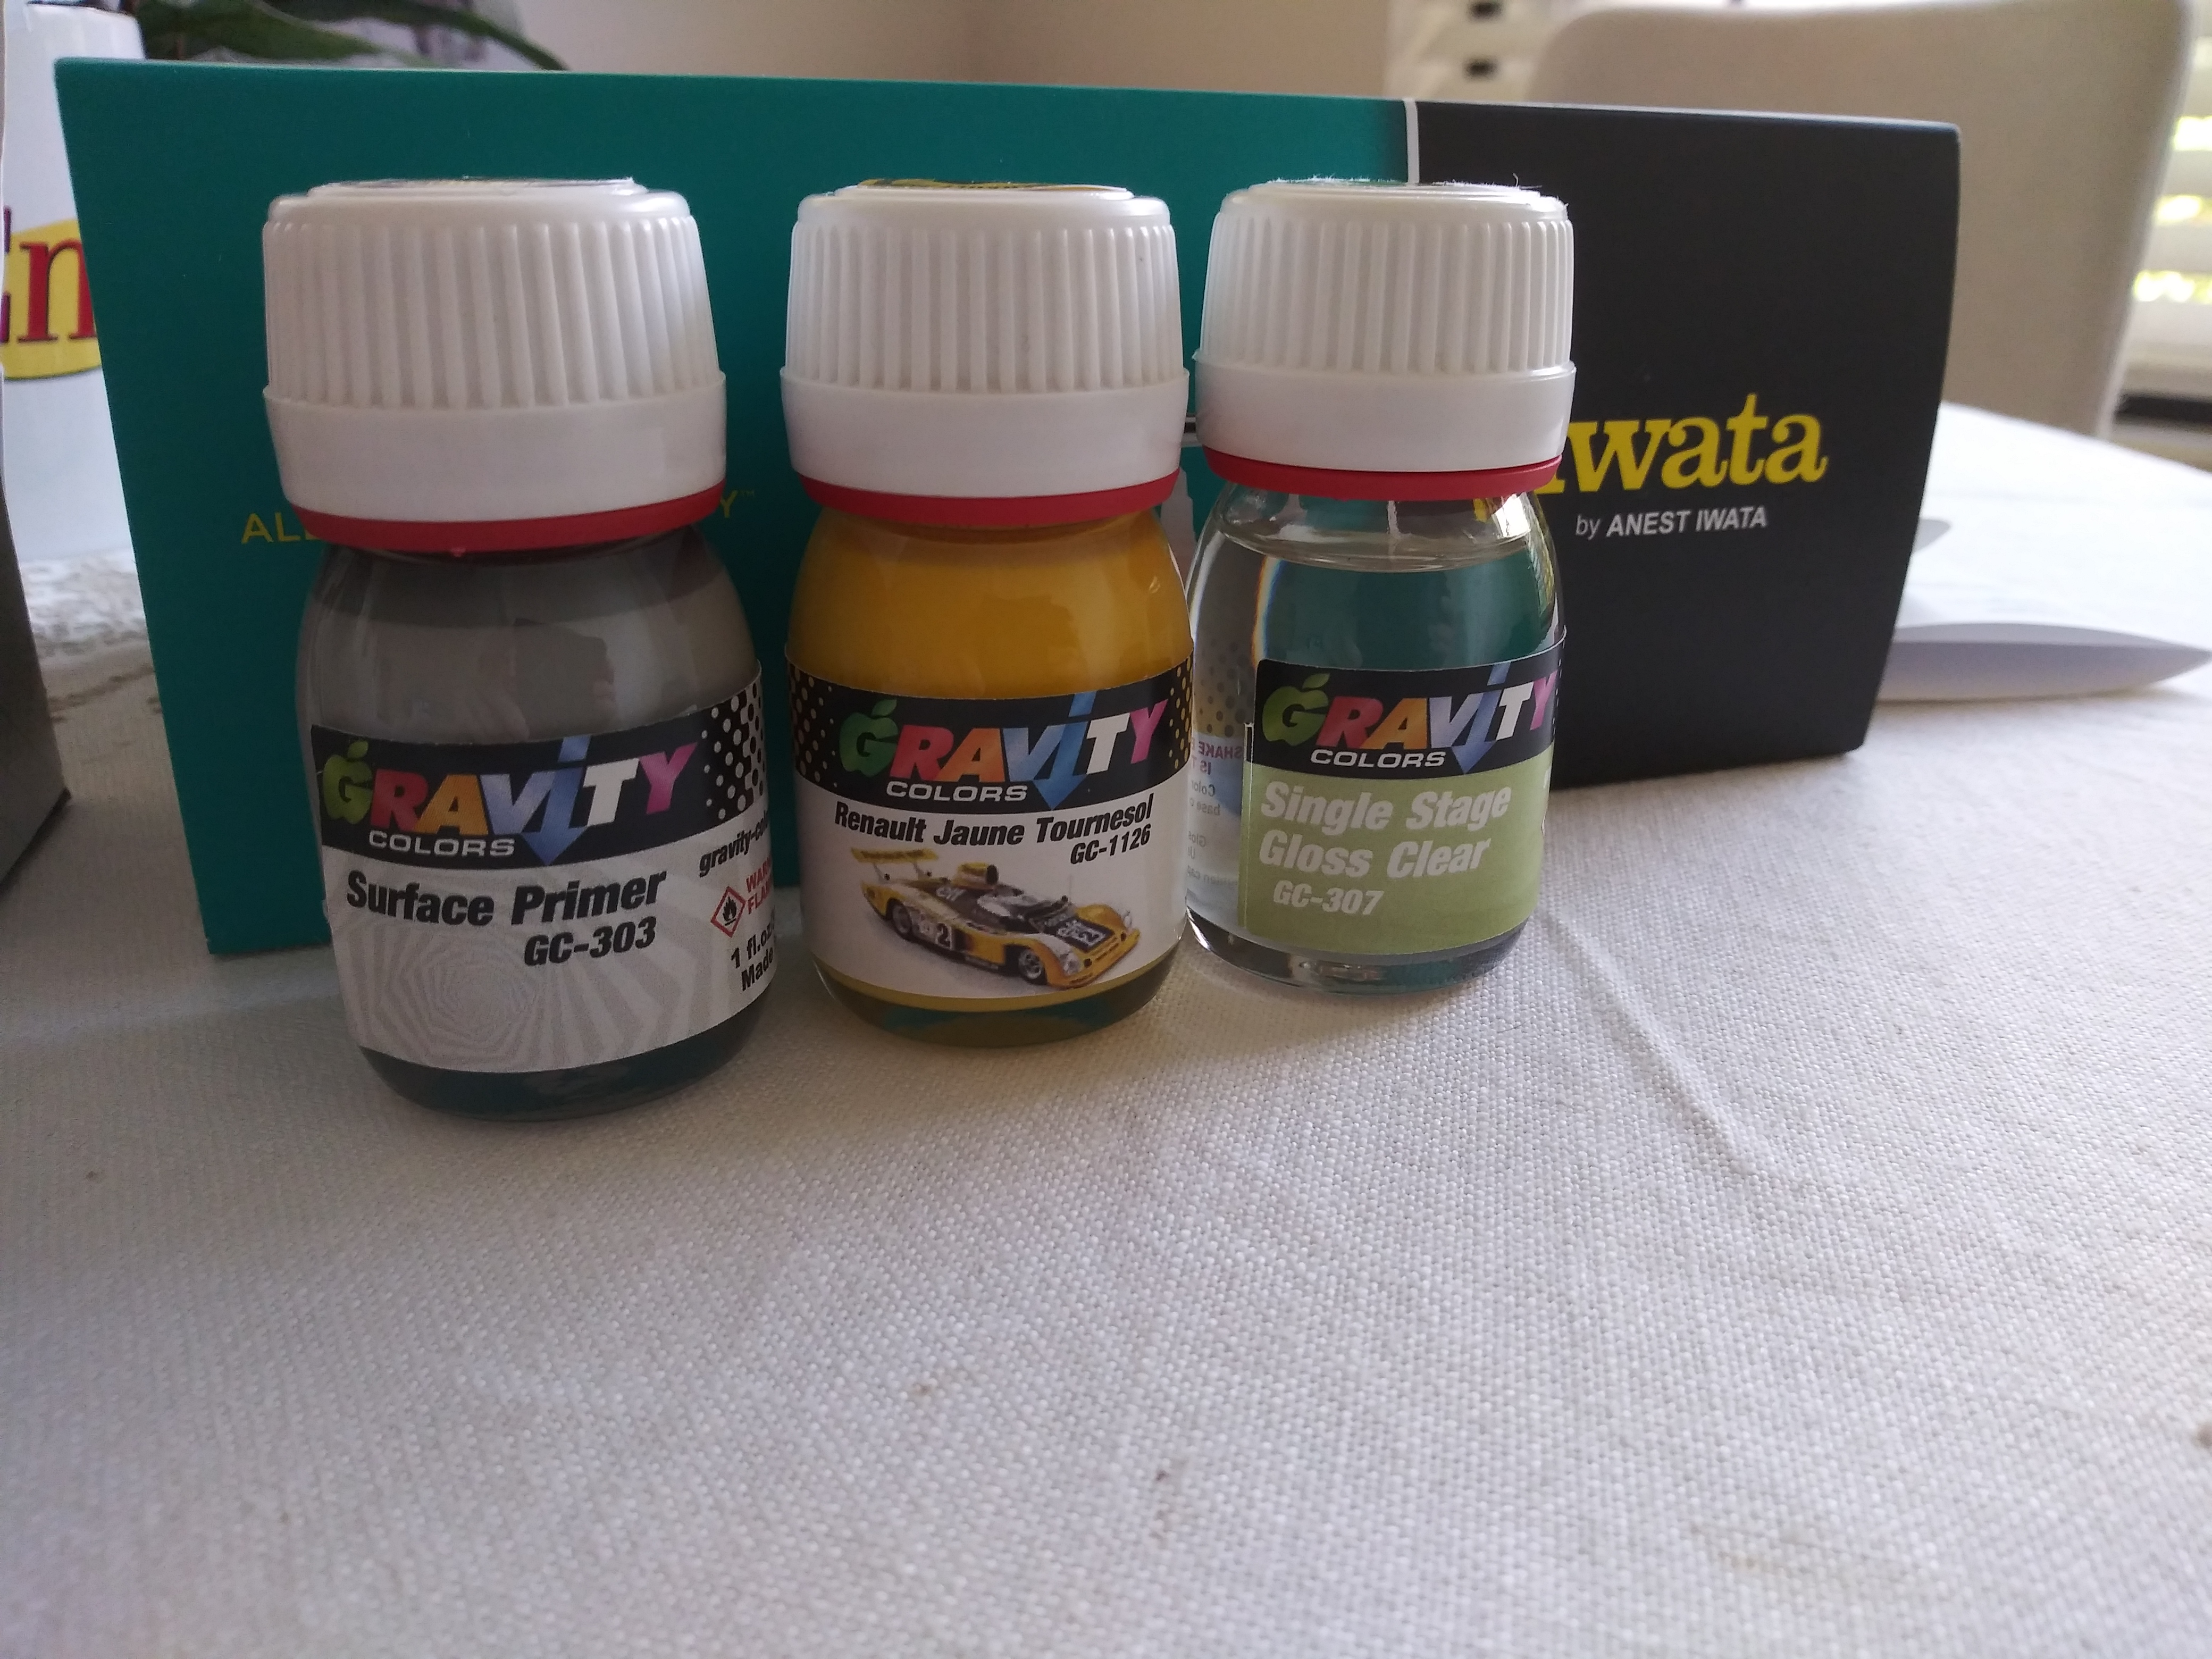
I just received some paint from Gravity Colors: Light Grey Primer, Gloss Clear, and Renault Jaune Tournesol (Sunflower Yellow). This will be my first time airbrushing a body. Until now, I've airbrushed all the other parts, so I thought it was time to go for it.
-
2025 Cannonball Run - 50 years since the 1975 run.
White Rabbit replied to Mattilacken's topic in Community Builds
Thank you. Printing such small parts is a challenge, and I'm definitely not a print expert; so for my settings, I just use factory settings on the printer (Elgoo Saturn 3 8k) for Elgoo's 8k resin. Typically, I'll set-up the part on the build plate at 45° or even 0°, depending on the design of the part. At times, I'll print the same part, such as a tire valve stem, at both angles to find which is best. If they all print successfully, then I have them in stock for future builds already. -
2025 Cannonball Run - 50 years since the 1975 run.
White Rabbit replied to Mattilacken's topic in Community Builds
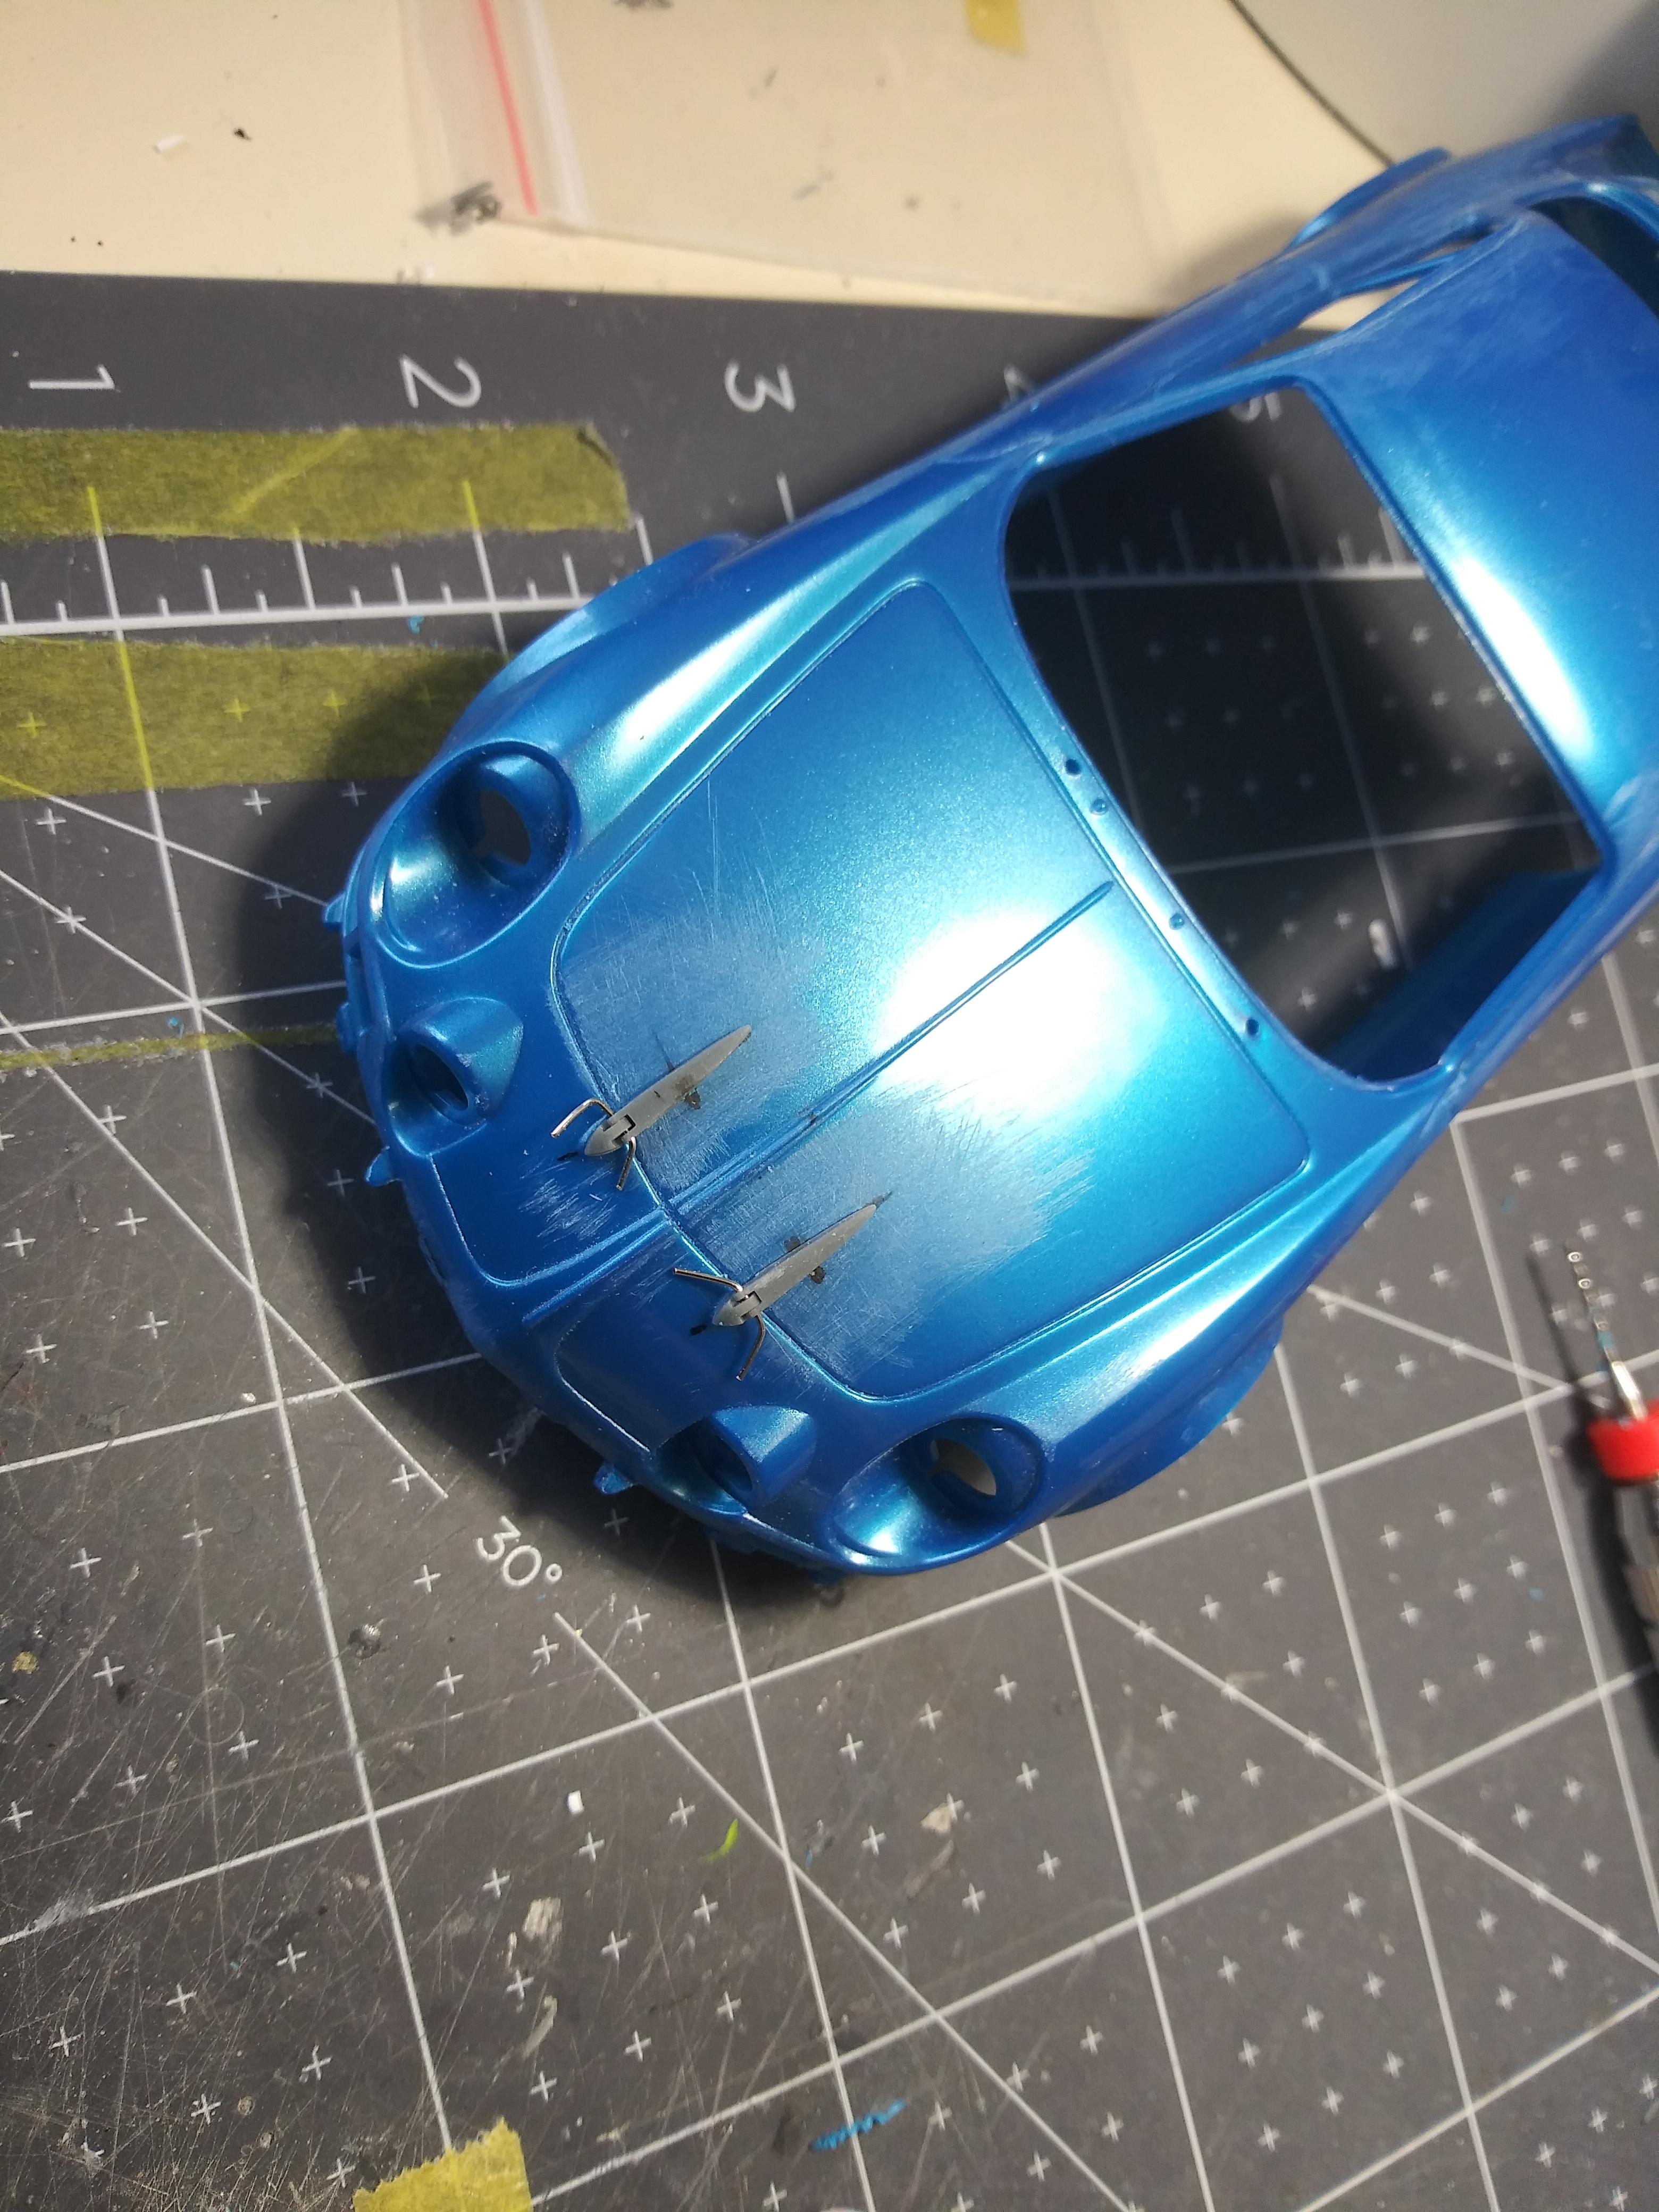
Nearly done with the 3D work. I had made the rims to be compatible with the stock tires, (which they are), but, I decided to challenge myself to model the tires as well. Michelin XAS 165HR 13. I also removed the windscreen washer nozzles on the body and modeled separate units.
-
2025 Cannonball Run - 50 years since the 1975 run.
White Rabbit replied to Mattilacken's topic in Community Builds
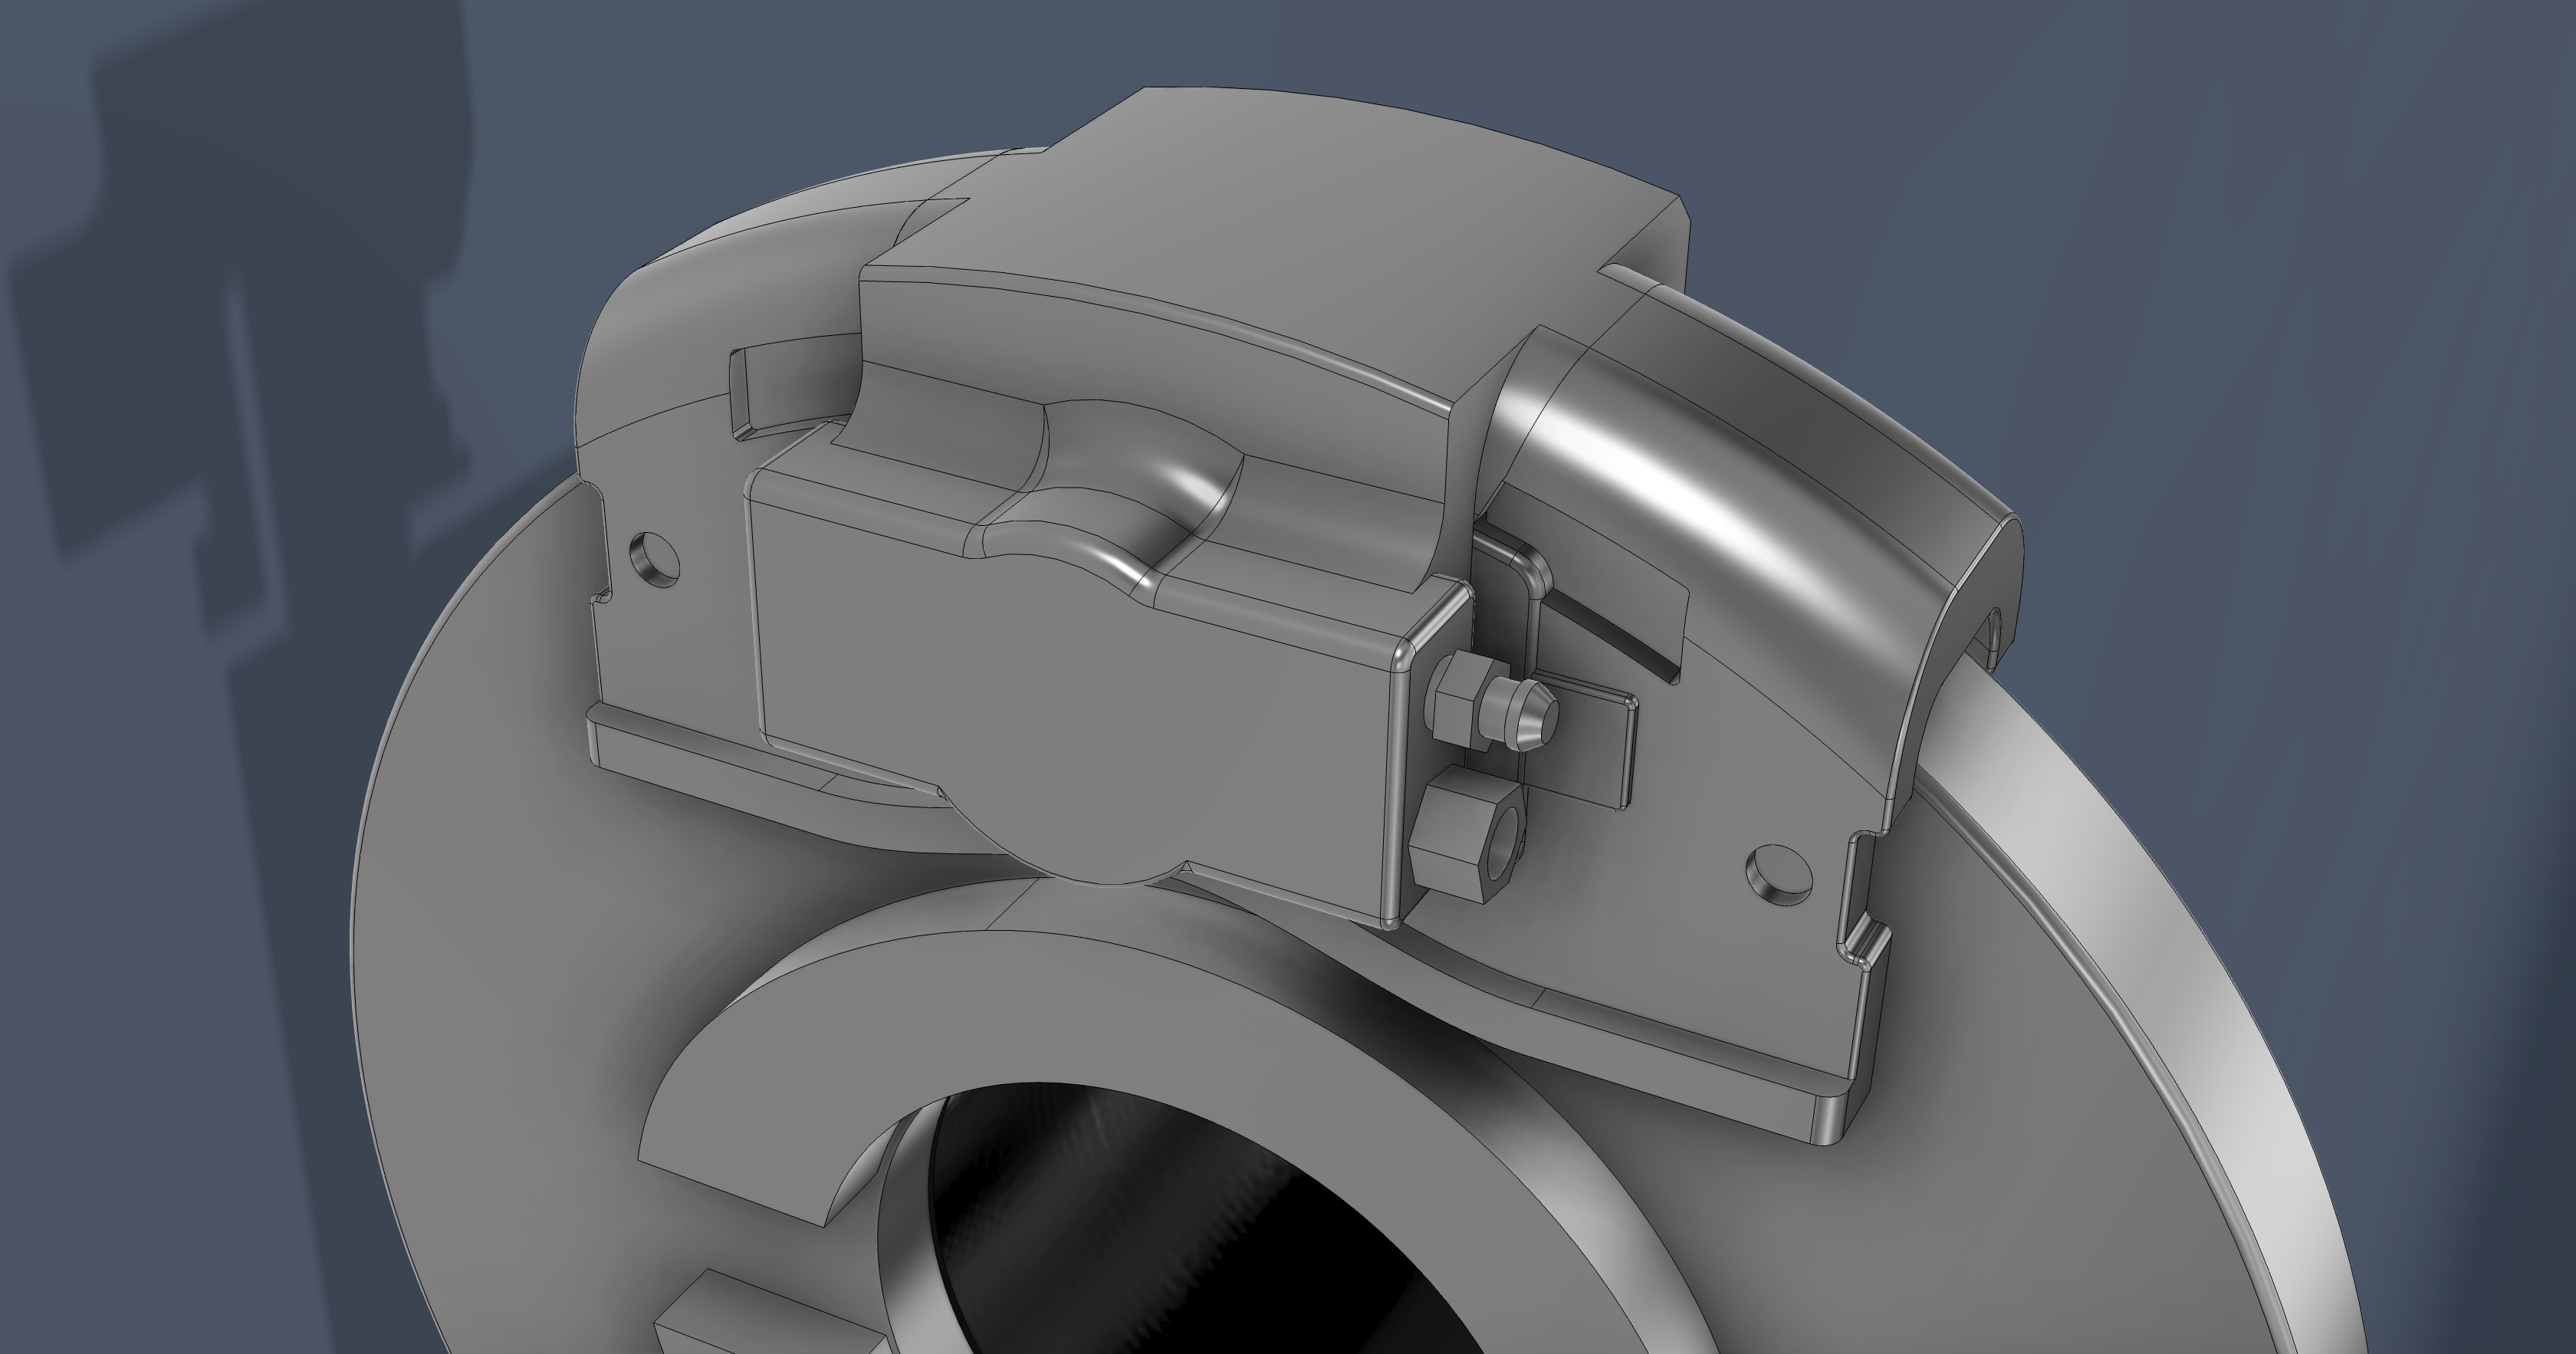
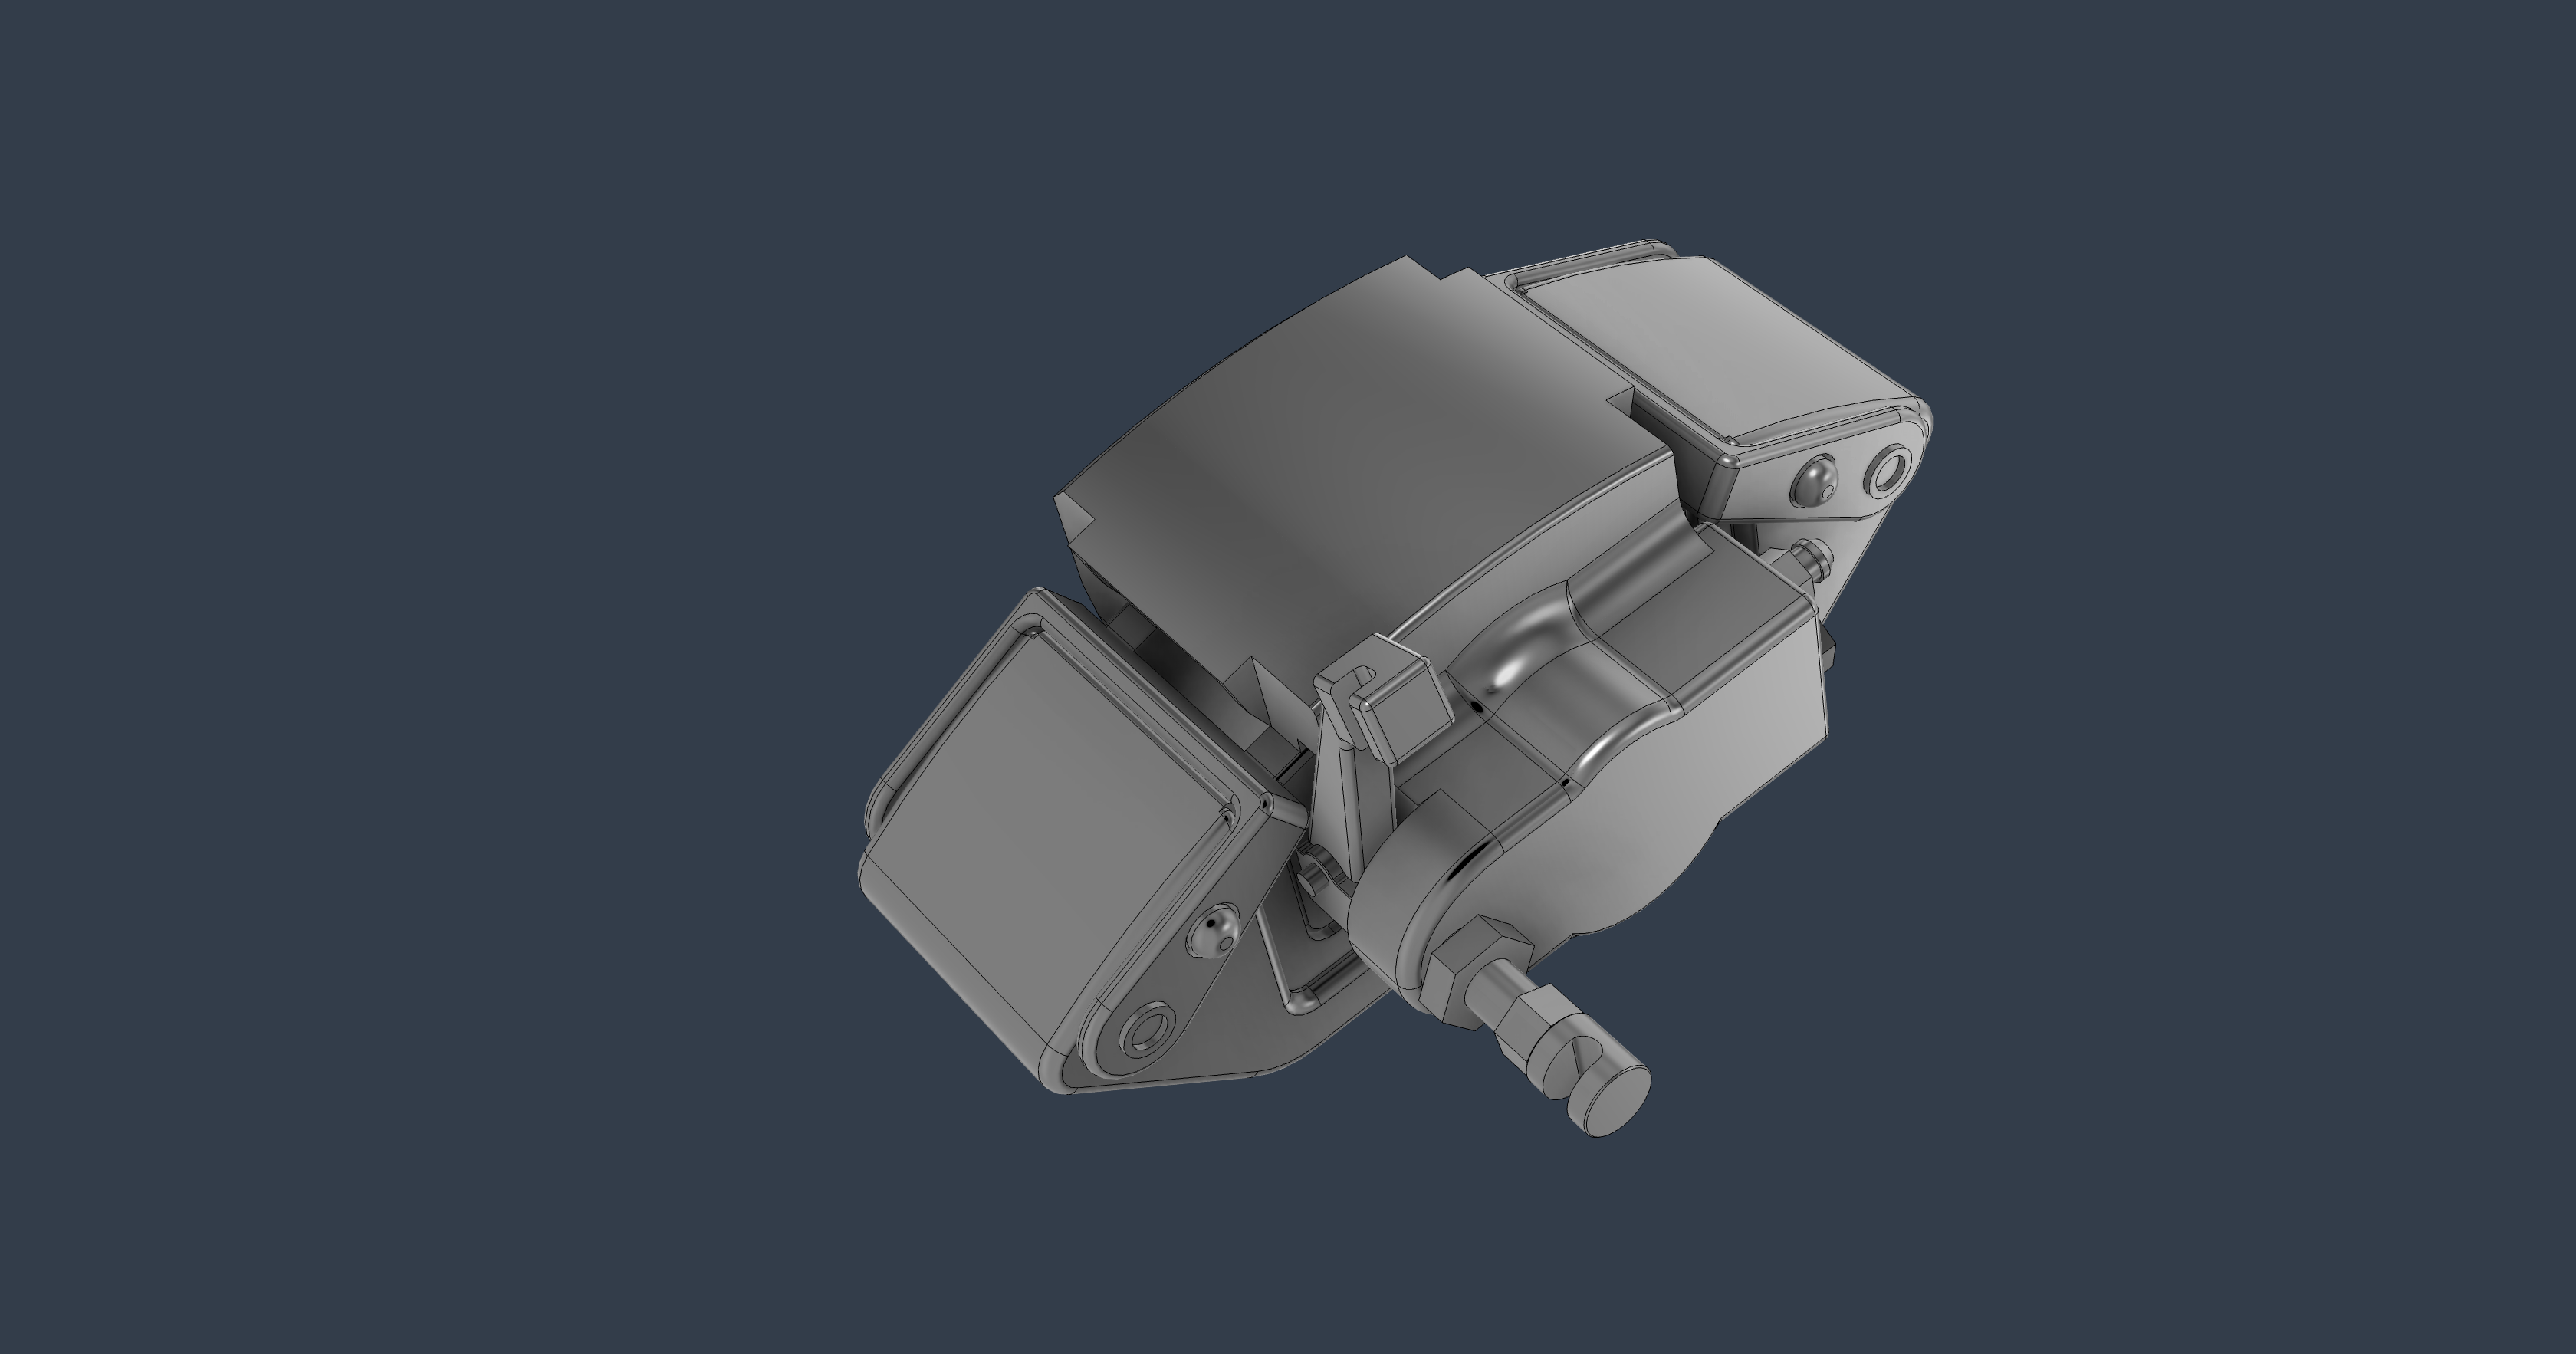
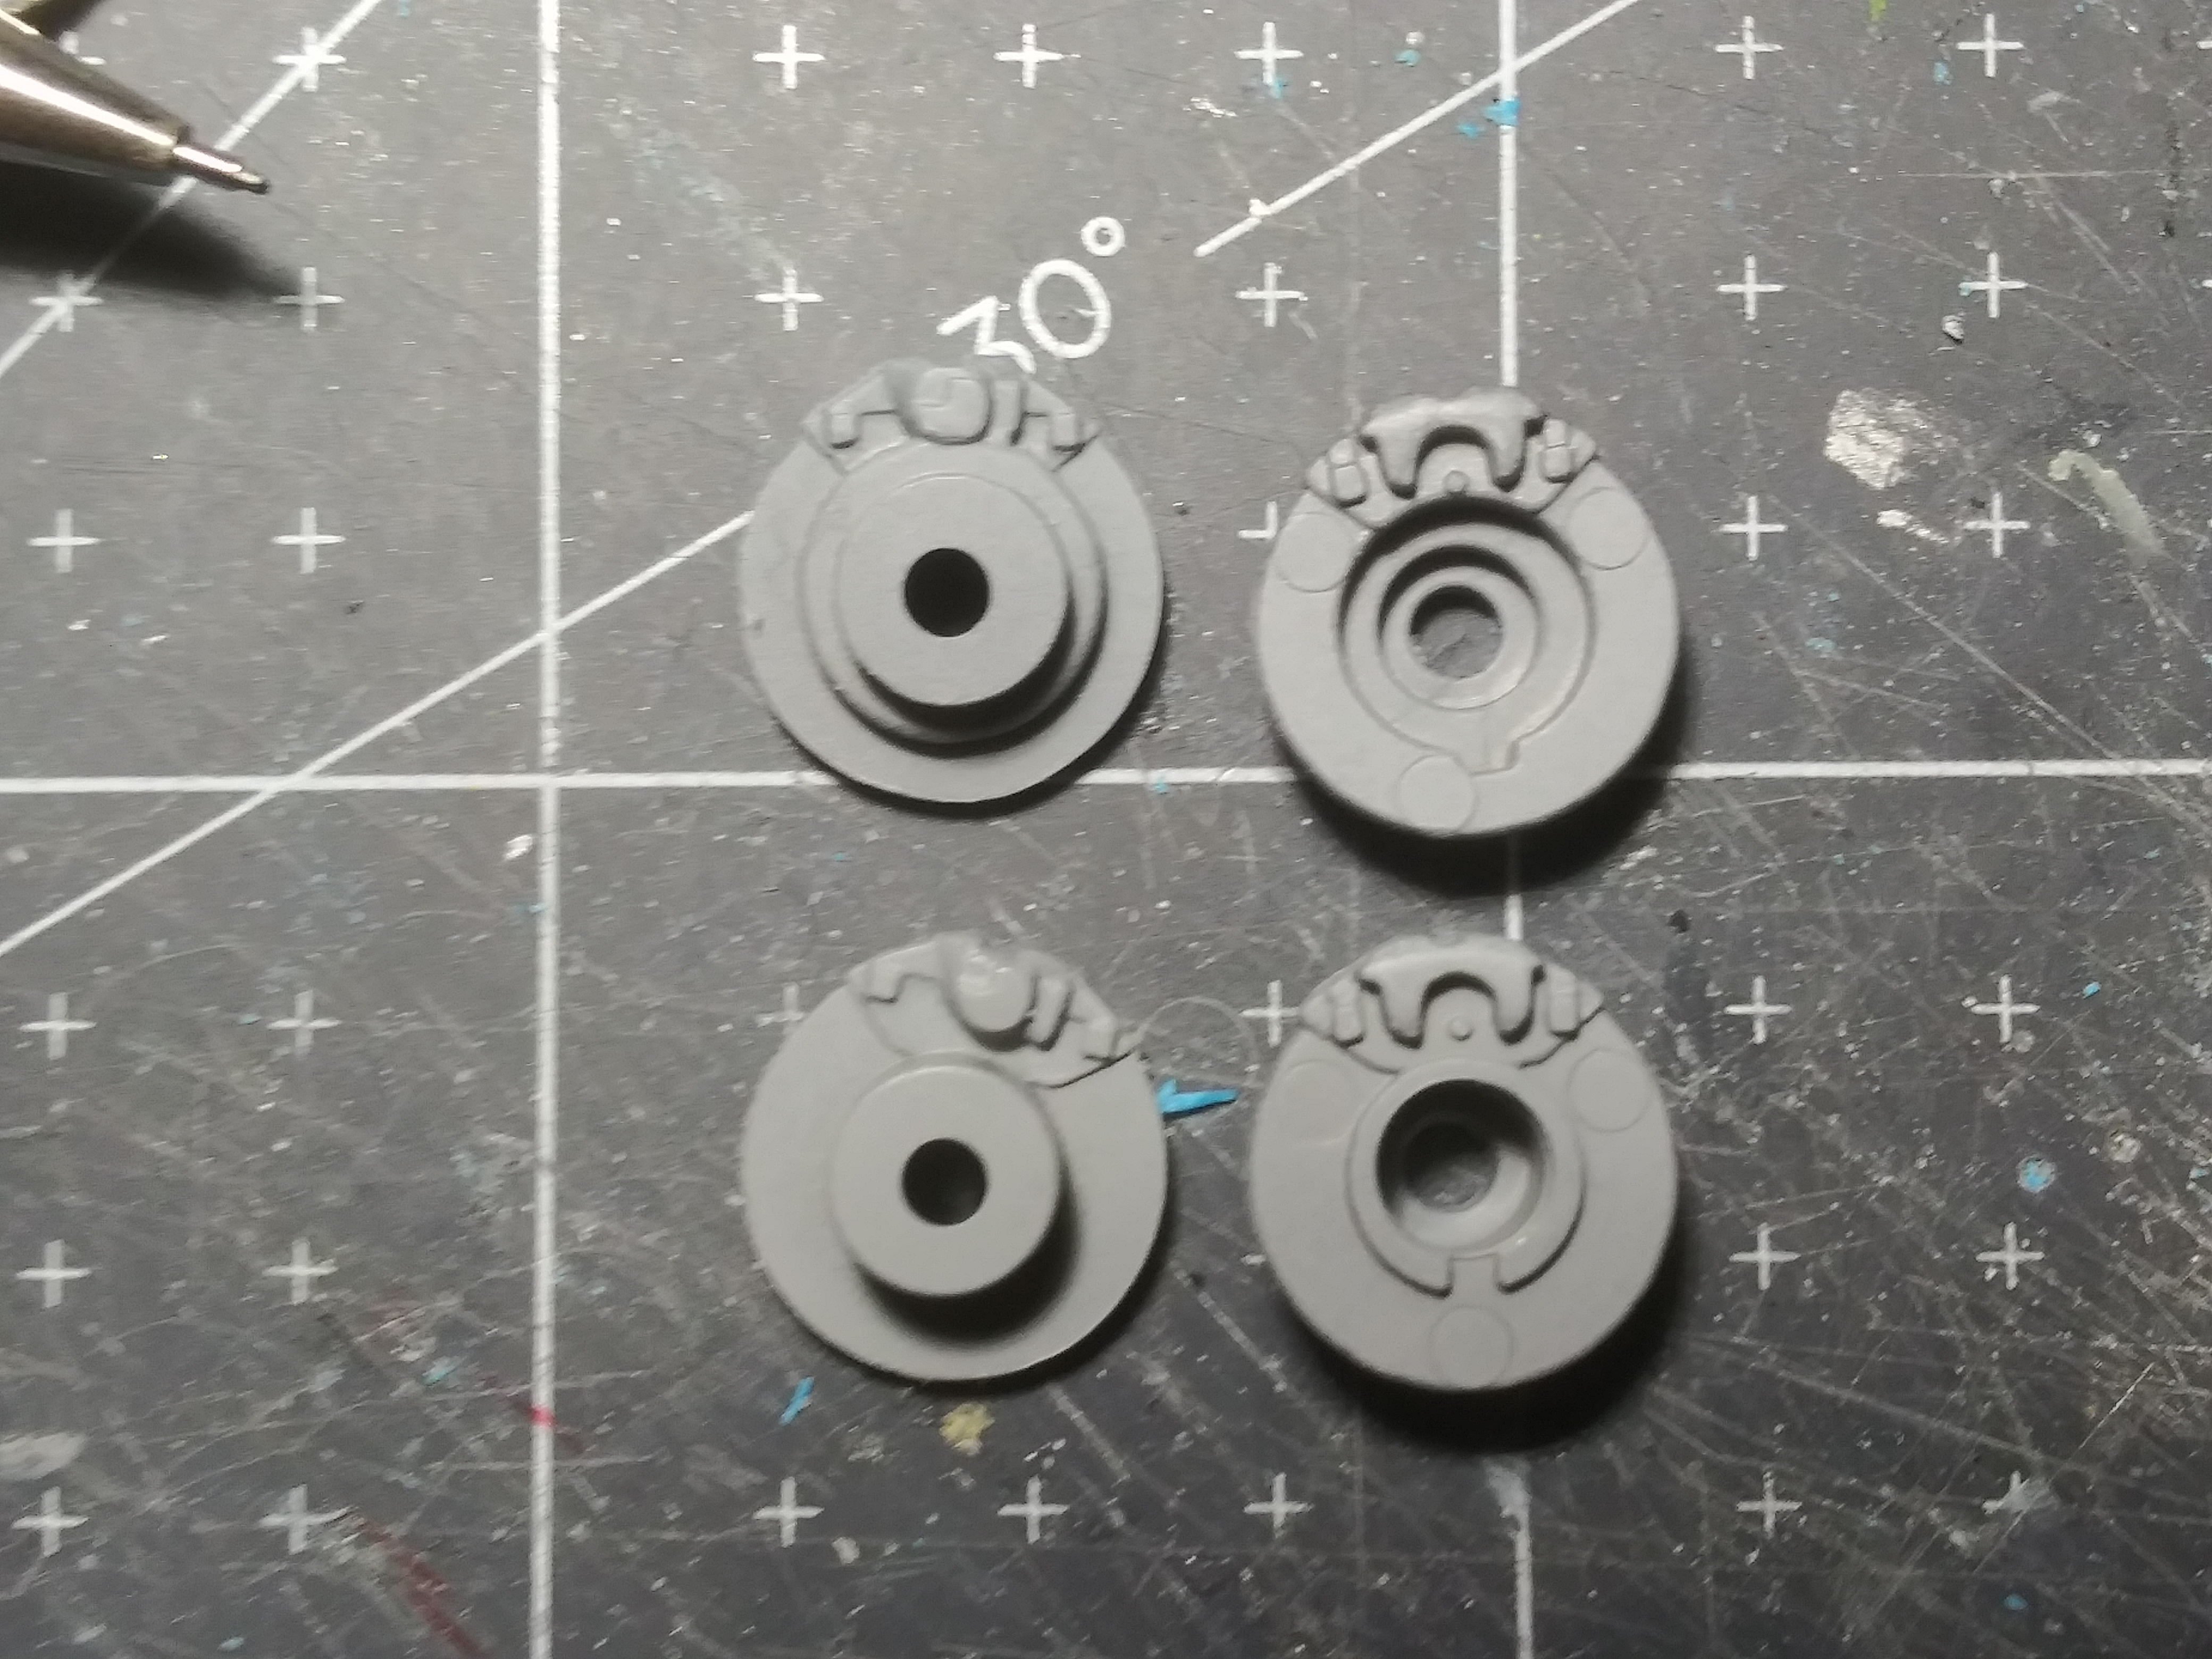
Everyone's builds are looking great! We're definitely going to have tough vote this year! As for the Alpine, I've been working primarily on parts prep. and 3d. Since the brake calipers were molded backwards, I took the opportunity to build more accurate calipers. The calipers will be separate pieces from the rotors; while the rotors themselves will be made in two pieces as well to facilitate painting. Since I was in the neighborhood, I also modeled a more accurate rear-mount oil cooler.
-
2025 Cannonball Run - 50 years since the 1975 run.
White Rabbit replied to Mattilacken's topic in Community Builds
Thank you for the responses. I did more research and does indeed seem that the they are molded backwards. The calipers themselves are correct, but just on the wrong sides.
-
2025 Cannonball Run - 50 years since the 1975 run.
White Rabbit replied to Mattilacken's topic in Community Builds
Thanks. I hadn't planned on modeling new brakes for the kit, but it seems necessary now. I'll use this opportunity to make something more accurate and multi-piece for ease of painting. -
2025 Cannonball Run - 50 years since the 1975 run.
White Rabbit replied to Mattilacken's topic in Community Builds
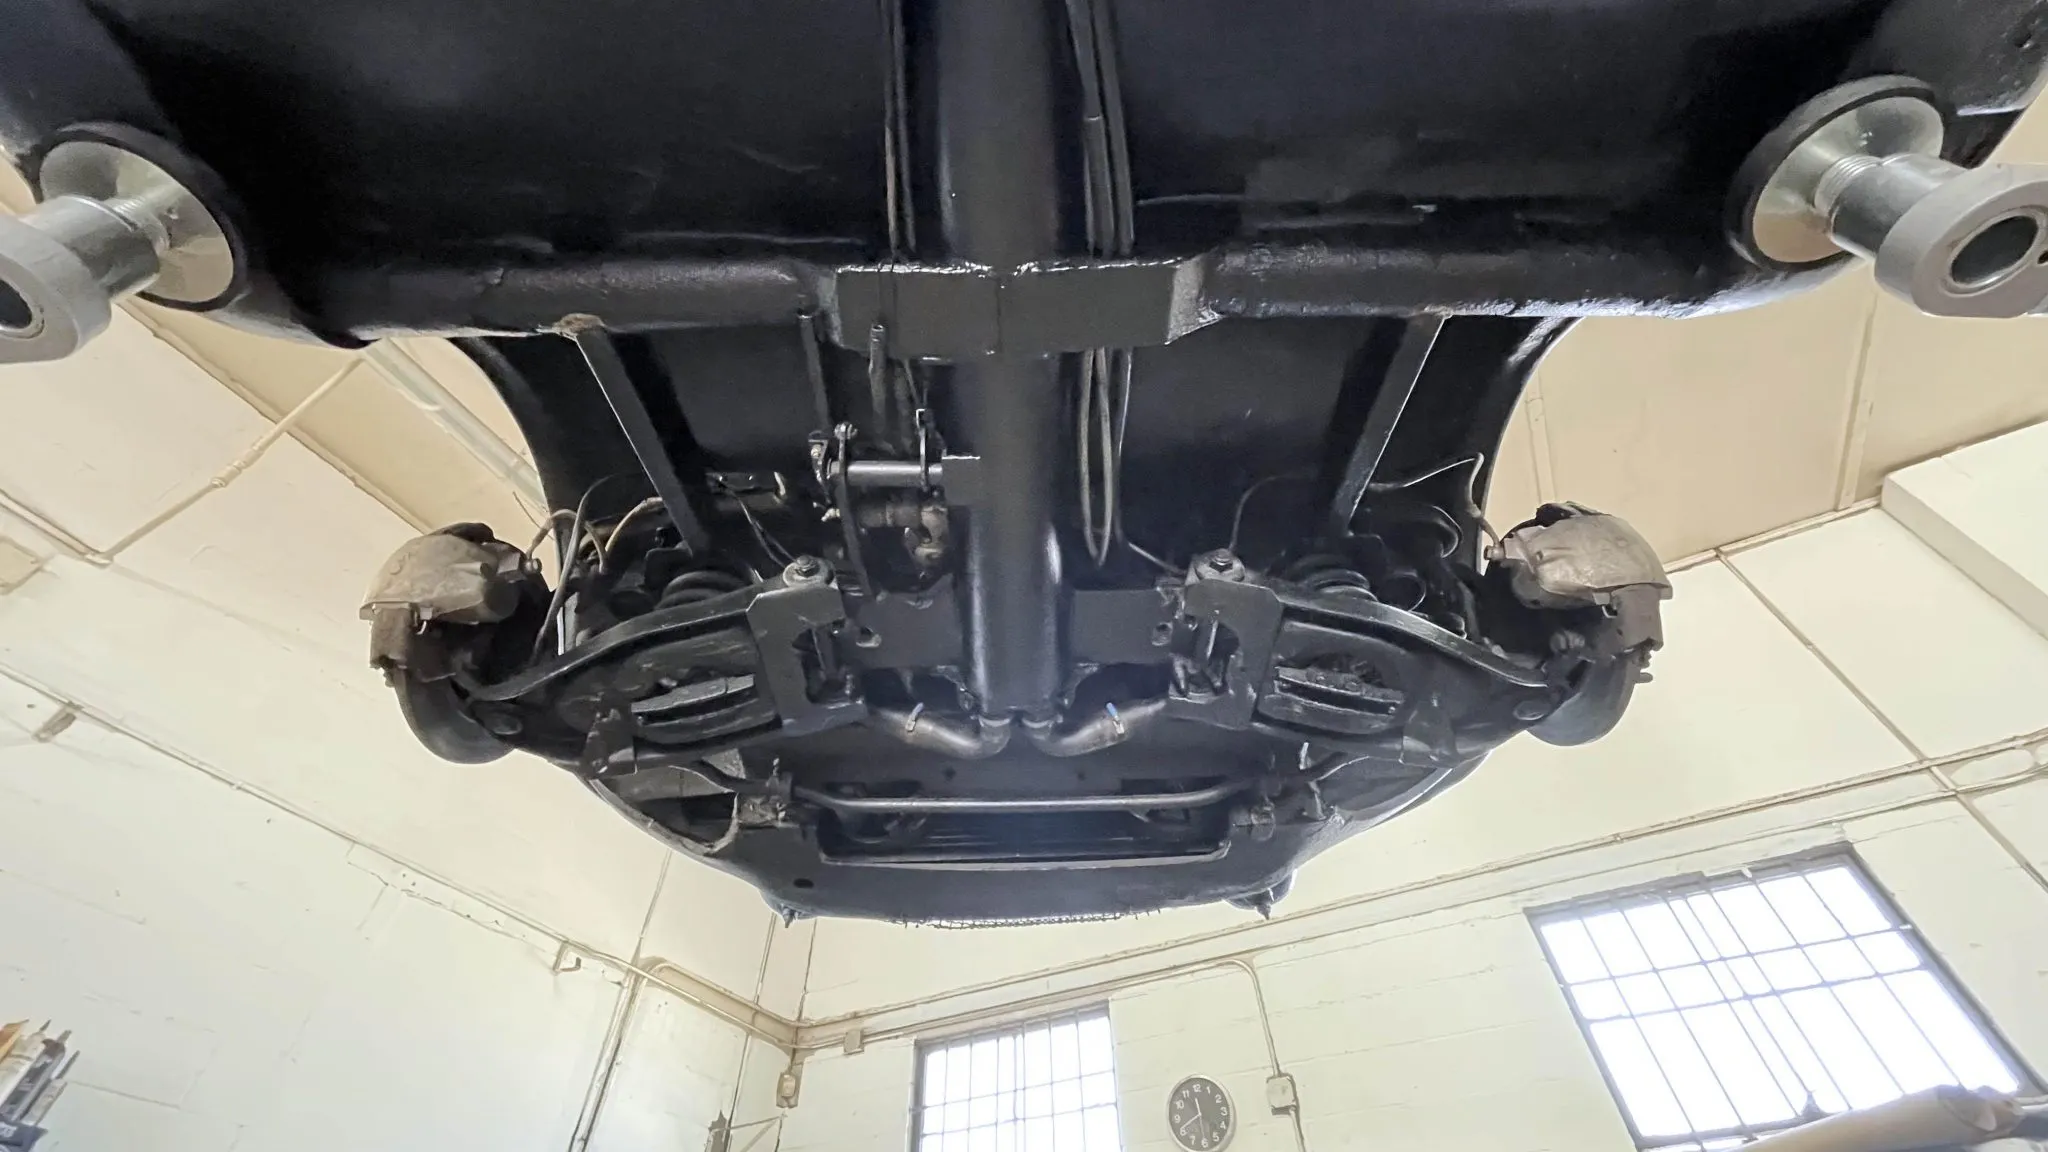
Well...this is unexpected. It seems, and please correct me if I'm wrong, that the brake calipers were molded on the wrong sides of the rotors with the piston side out and the pad side in.
-
2025 Cannonball Run - 50 years since the 1975 run.
White Rabbit replied to Mattilacken's topic in Community Builds
Thank you! It's my first time using their products; and I have to so say that I'm impressed. The prints are clean and precise and fit very well. -
2025 Cannonball Run - 50 years since the 1975 run.
White Rabbit replied to Mattilacken's topic in Community Builds
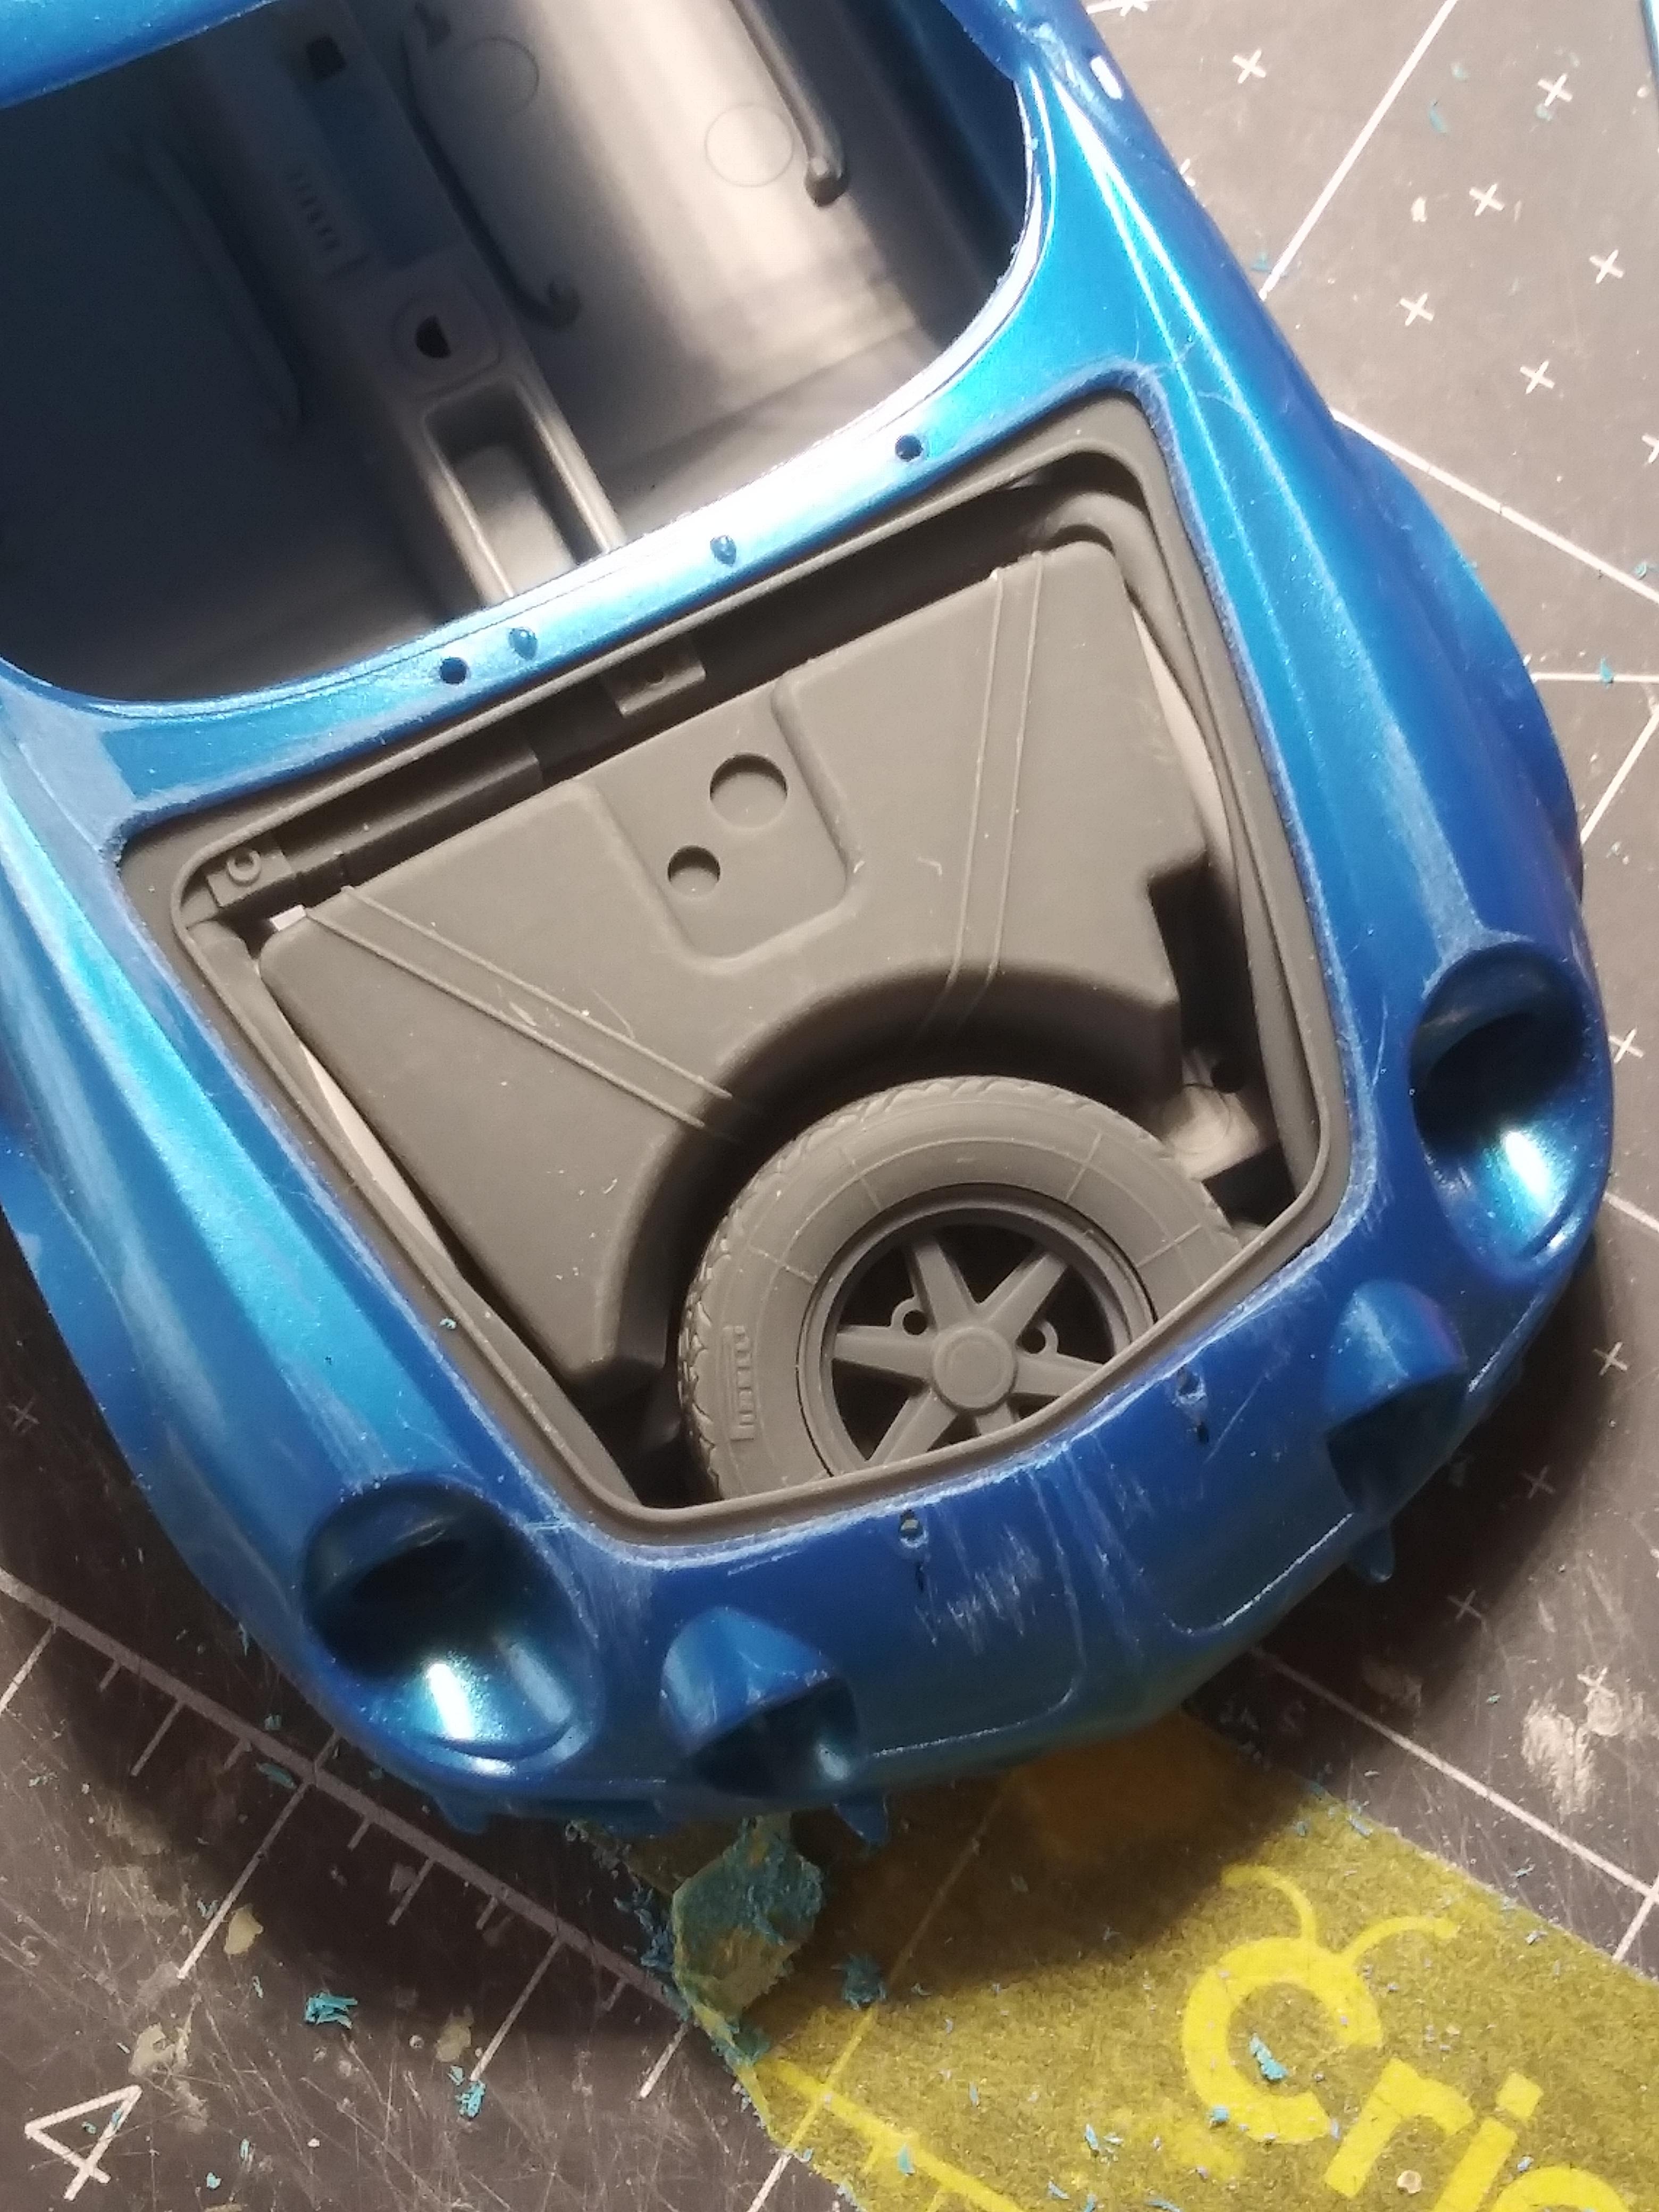
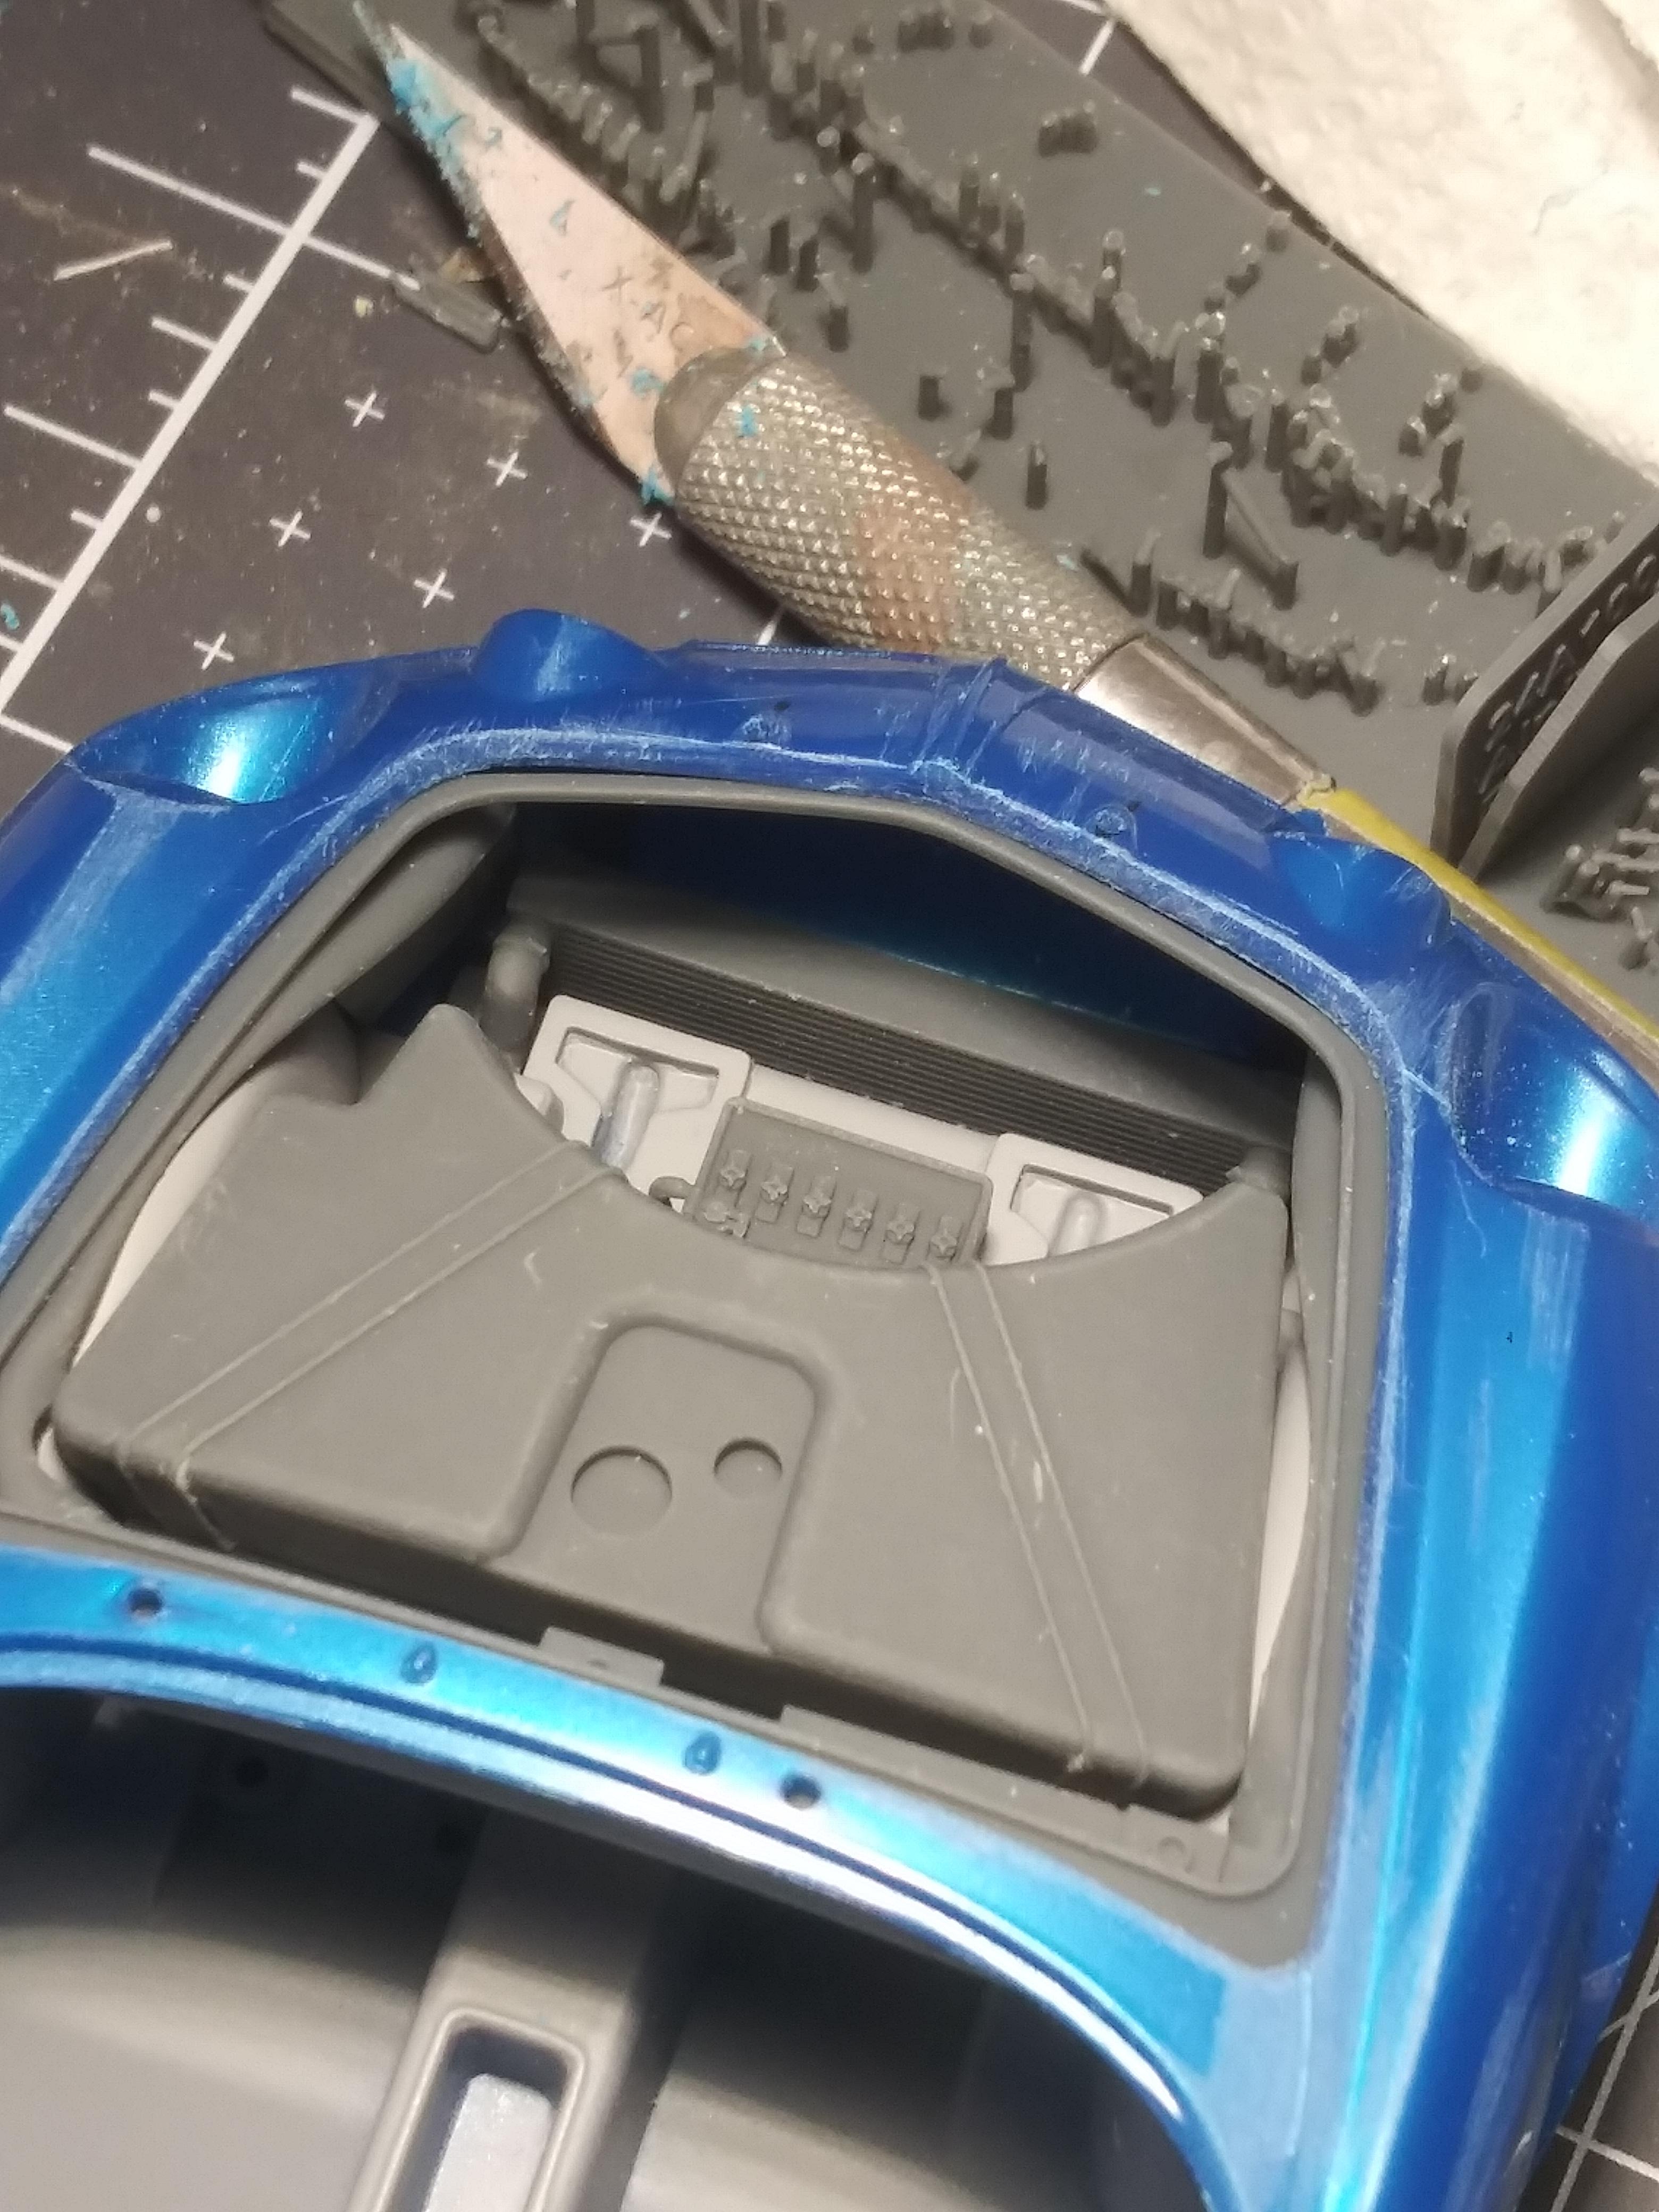
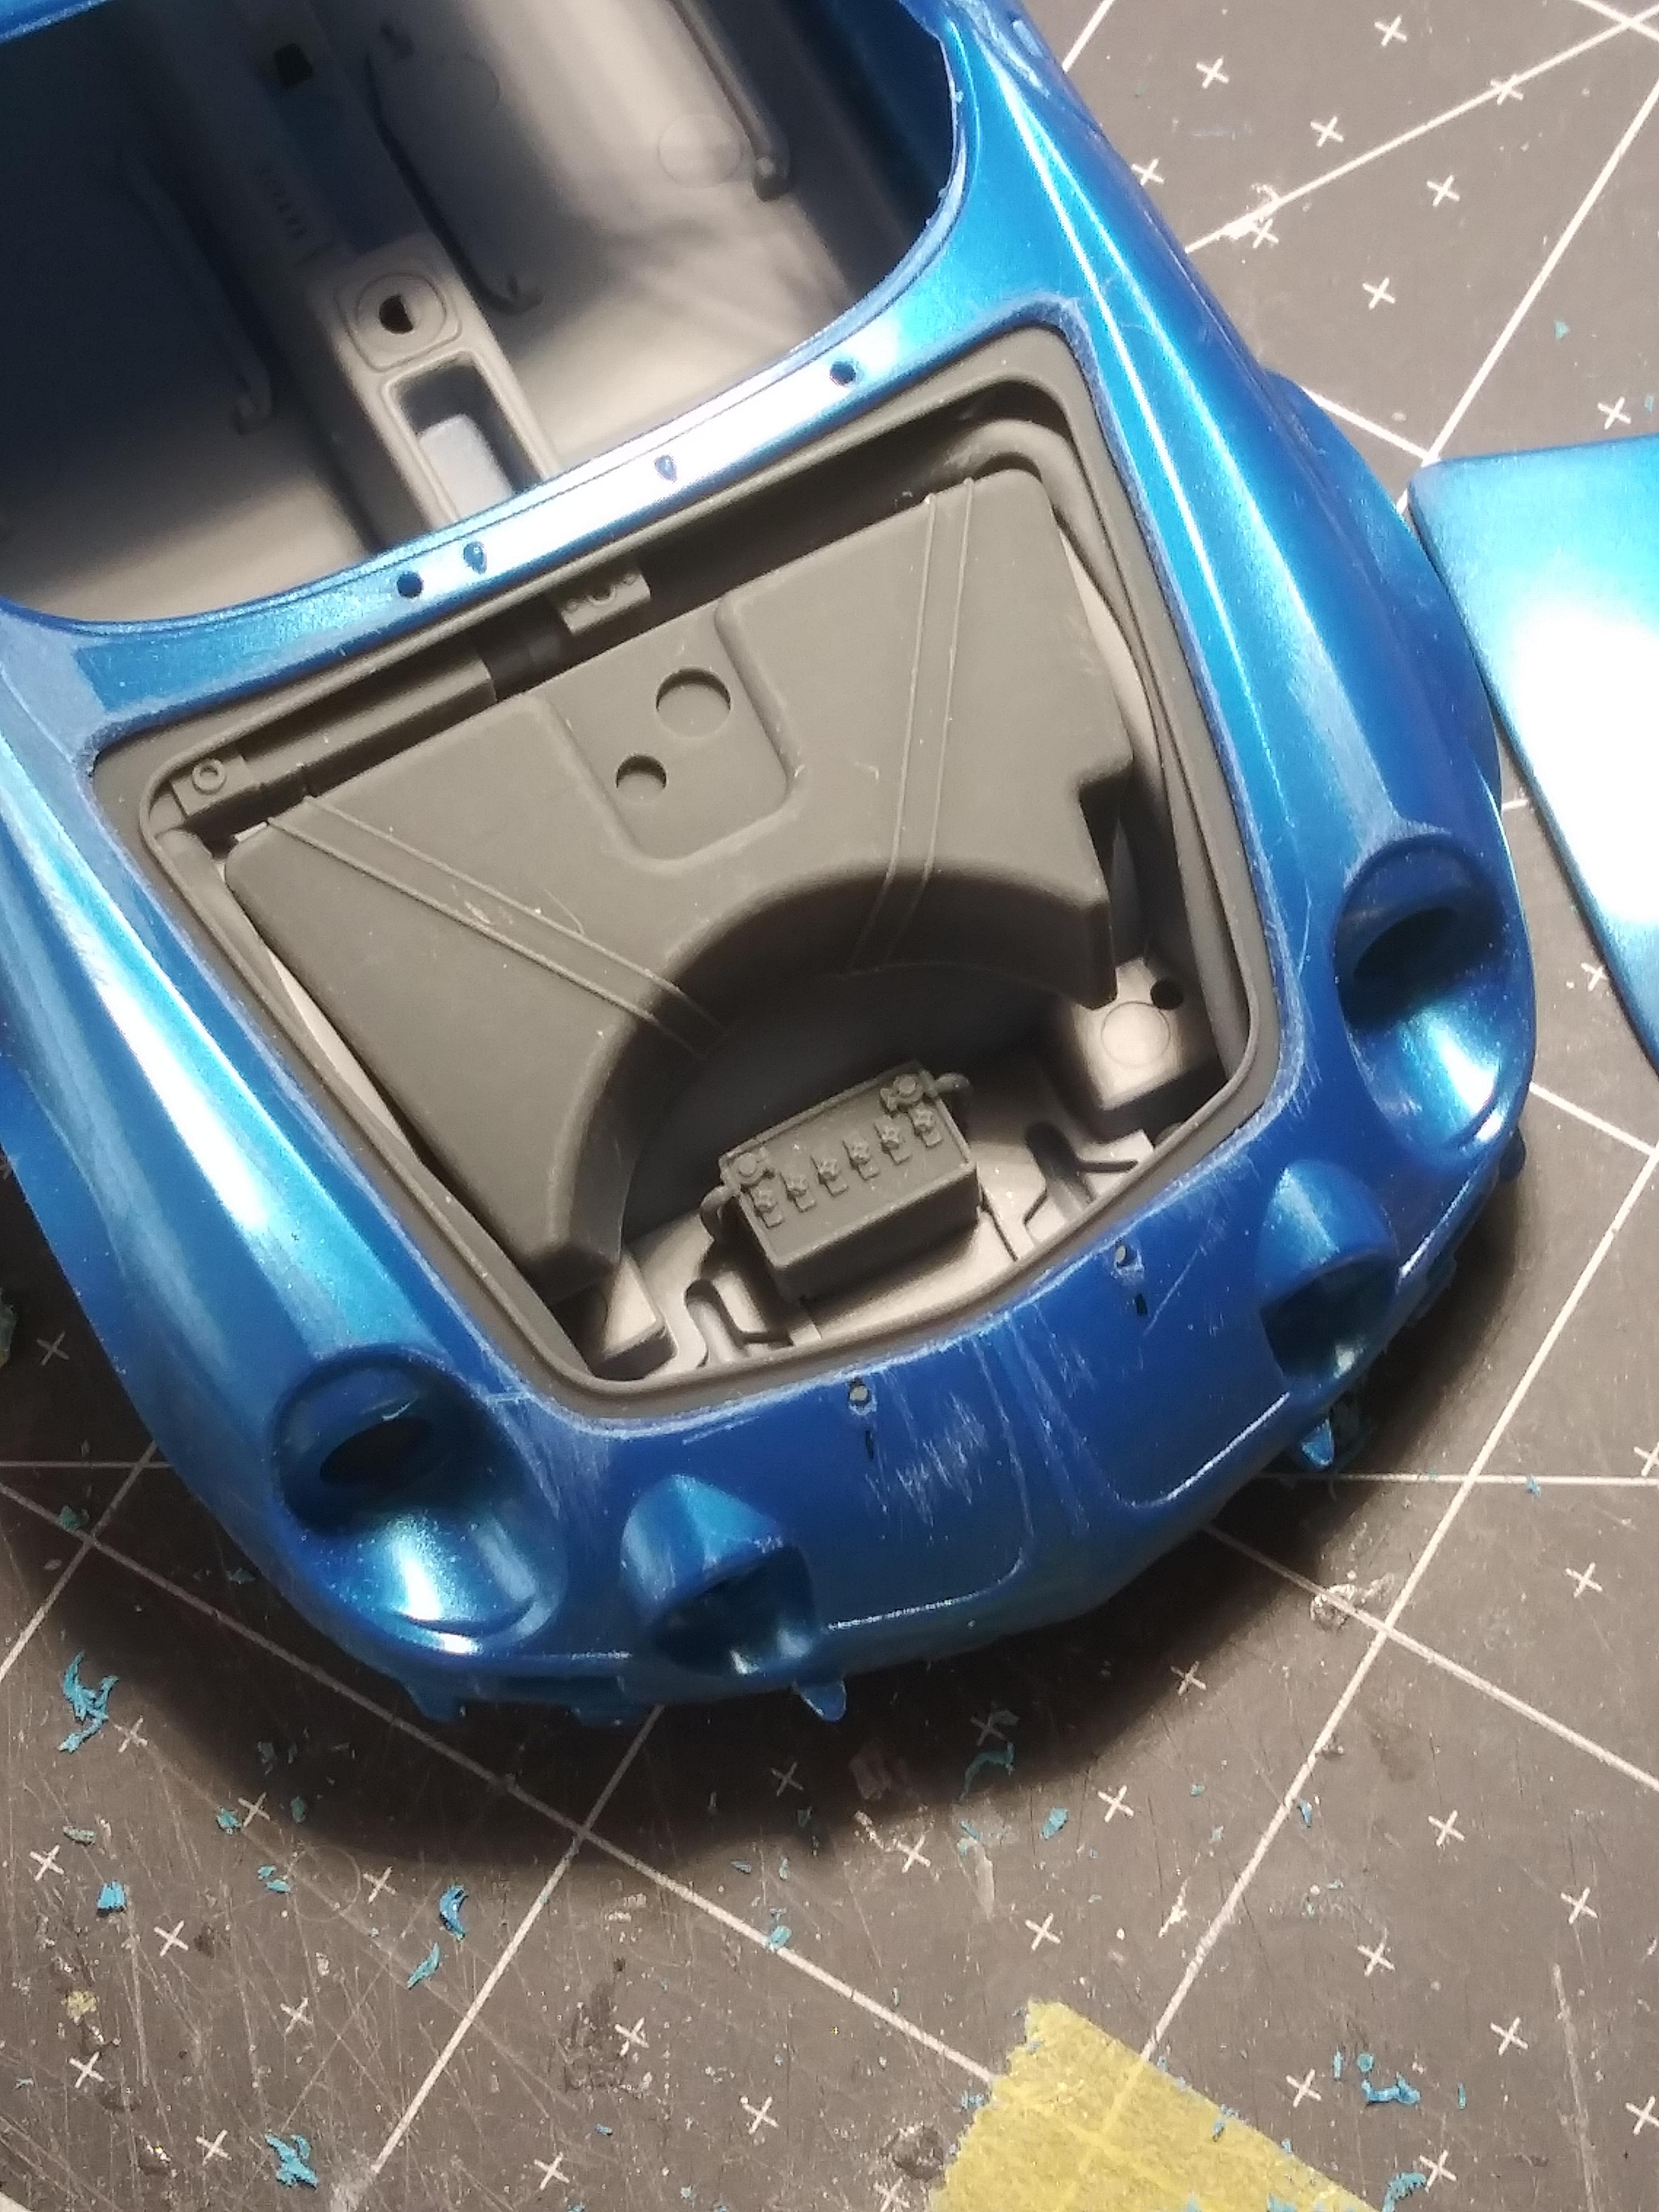
The focus today was on getting the front hinges in place, opening the trunk, and test fitting the USCP trunk detail (radiator, battery, fuel tank, spare tire, and inner structure. Indeed, the parts fit perfectly in the chassis and body. However, and this is mentioned in the kit's notes, the trunk is too thick and now requires slimming by about .25-.5mm.
-
2025 Cannonball Run - 50 years since the 1975 run.
White Rabbit replied to Mattilacken's topic in Community Builds
I received the USCP detail kits and went straight into the working hinges. Each hinge is composed of three pieces and holes are drilled to pin them into place. The rear hinges have been mocked into place (ignore the extra long wire). Next is the front...
-
2025 Cannonball Run - 50 years since the 1975 run.
White Rabbit replied to Mattilacken's topic in Community Builds
I've made some progress on the engine, primarily with the mounts. The kit engine mounts to two tabs on the side and pin on the transmission. However, I found that the 1:1 car had bracing linked to mounts on the chassis. Below is the mock-up of the braces.
-
2025 Cannonball Run - 50 years since the 1975 run.
White Rabbit replied to Mattilacken's topic in Community Builds
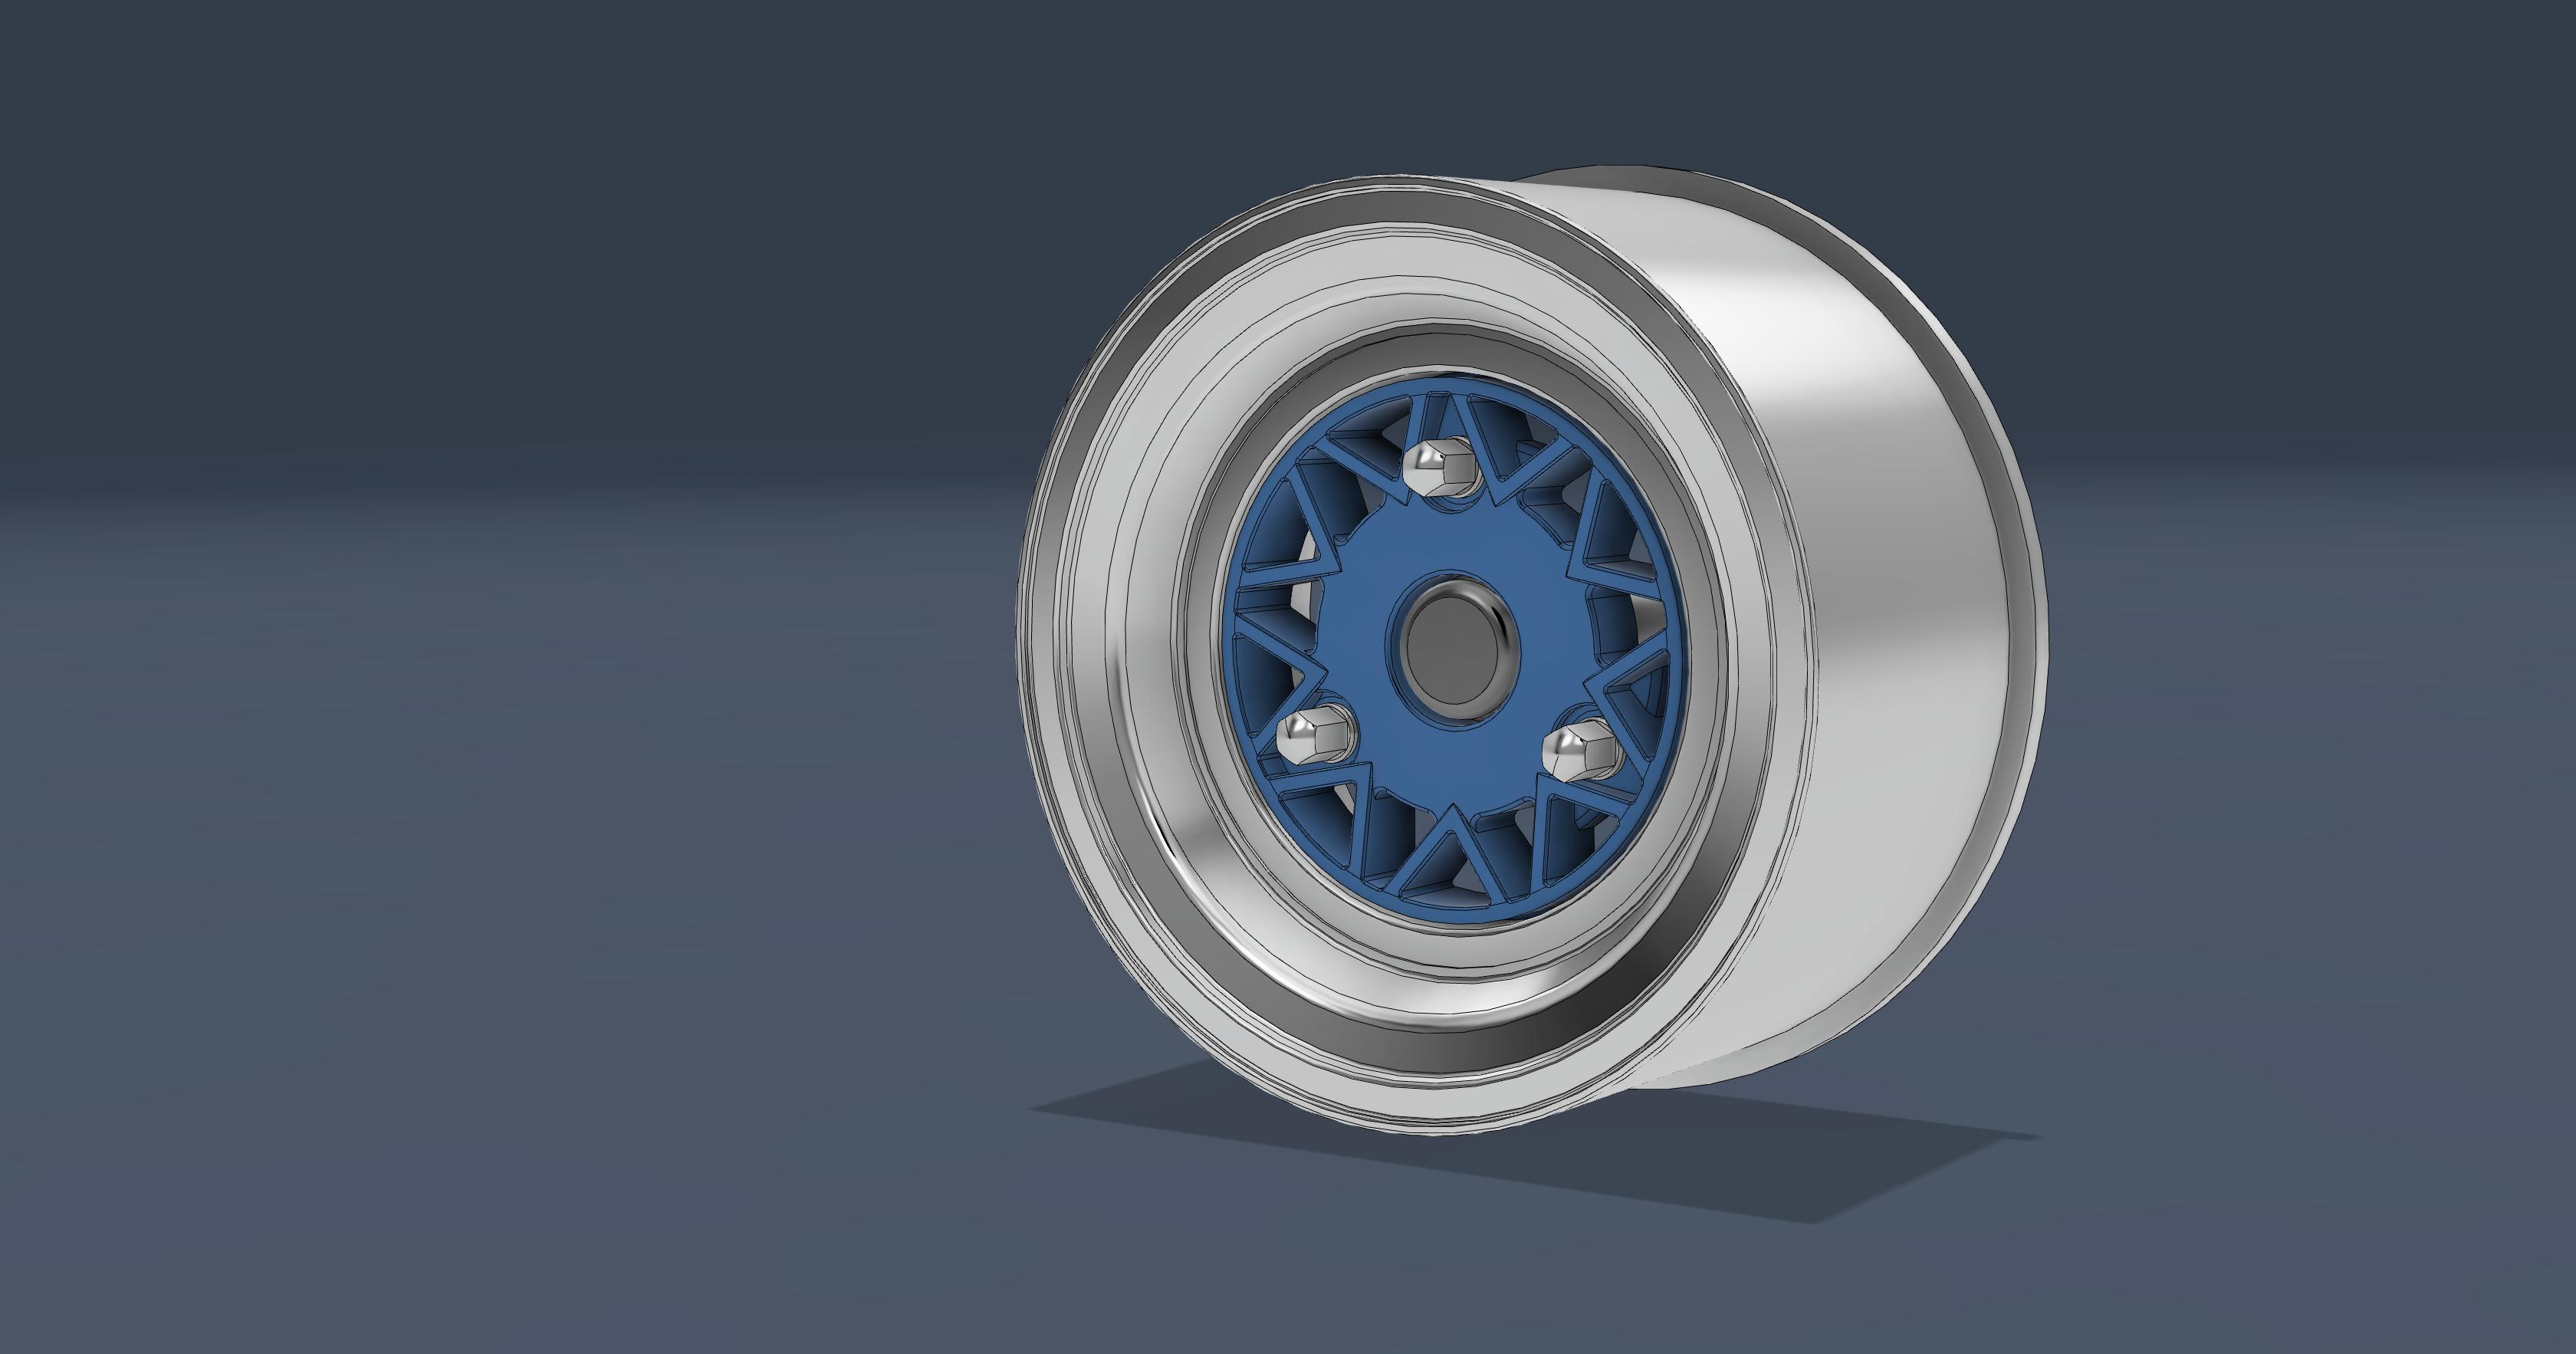
Now that I've completed the project I was working on, a second gen NSX (with a Cannonball connection that I'll be posting in the coming days), I've begun work on the Alpine. First, the wheels. The wheels (still in-progress) are the French Madin 1C in the stock 13" size. I'm planning on using the kit tires as they are nicely detailed.
-
2025 Cannonball Run - 50 years since the 1975 run.
White Rabbit replied to Mattilacken's topic in Community Builds
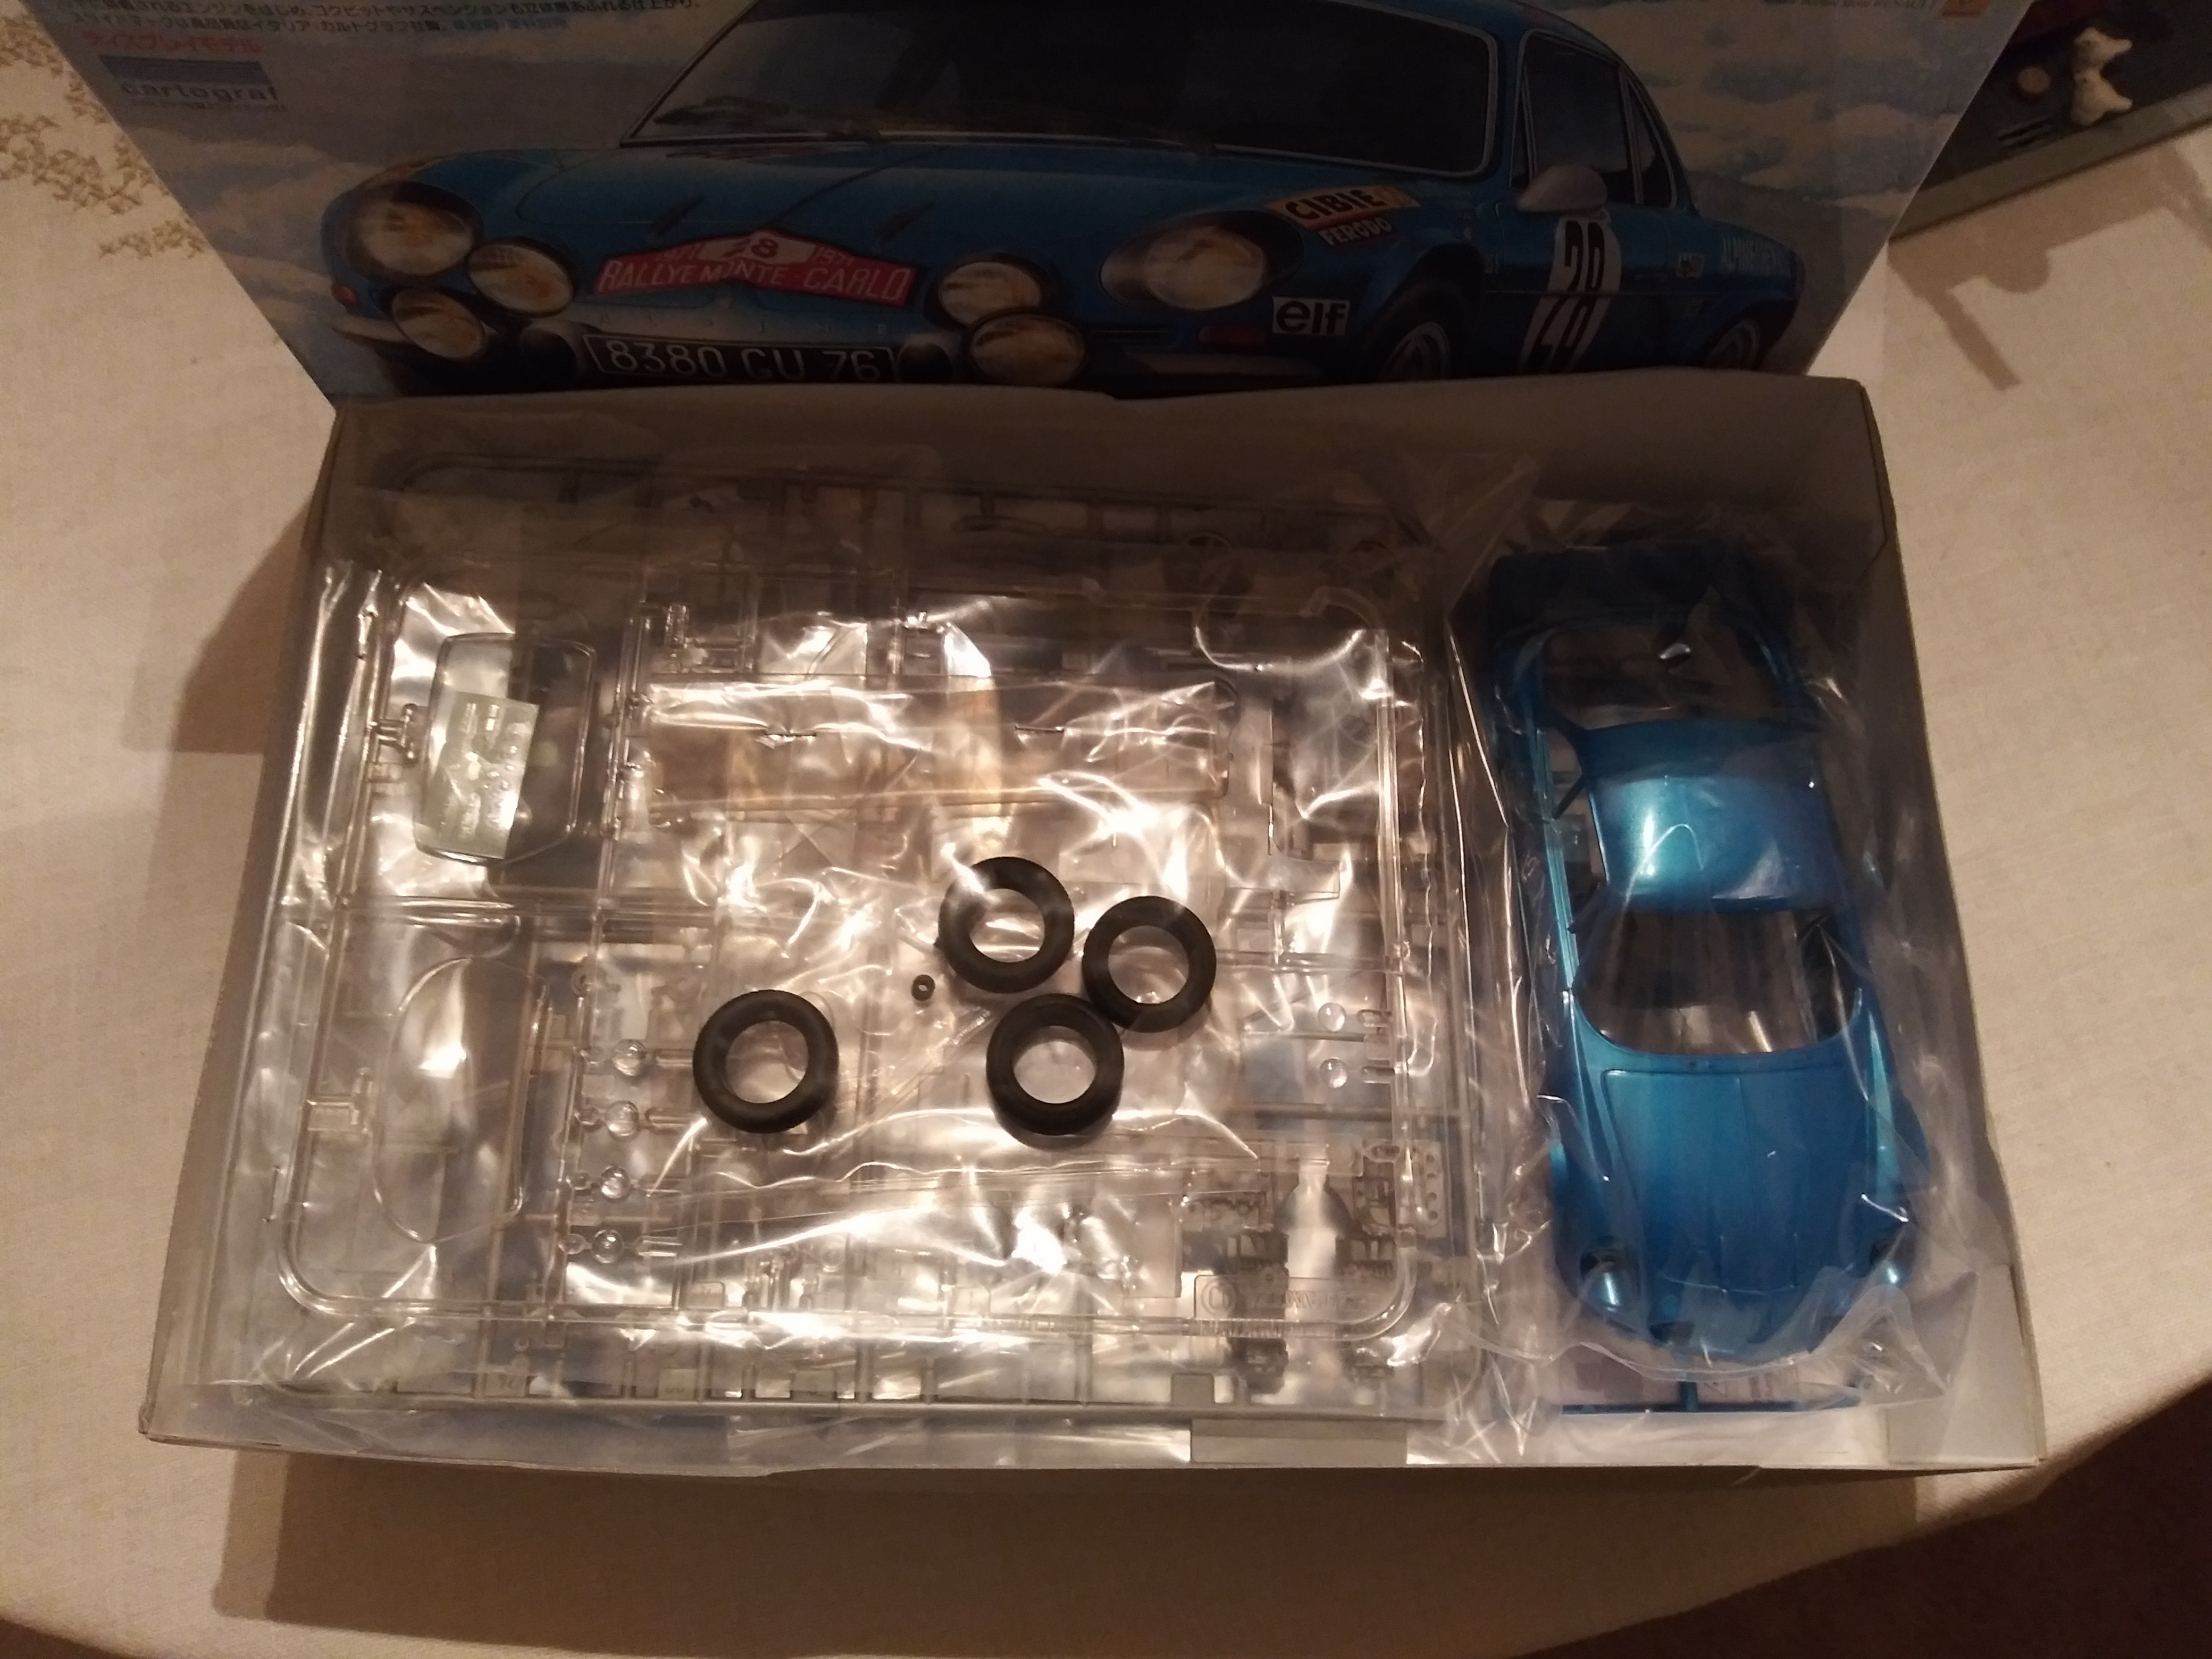
The Alpine has arrived!
-
2025 Cannonball Run - 50 years since the 1975 run.
White Rabbit replied to Mattilacken's topic in Community Builds
Very nice! I like the yellow; it suits the car well. Thank you for the tip on the trunk. -
2025 Cannonball Run - 50 years since the 1975 run.
White Rabbit replied to Mattilacken's topic in Community Builds
I'm glad to know that it's a good kit. I've been wanting to build it since I saw the detail-up kits by USCP. Now, I just need to decide on the color... Do you have a link to your Alpine build? It would be great to see it.