Jürgen M.
-
Posts
1,922 -
Joined
-
Last visited
Content Type
Profiles
Forums
Events
Gallery
Everything posted by Jürgen M.
-
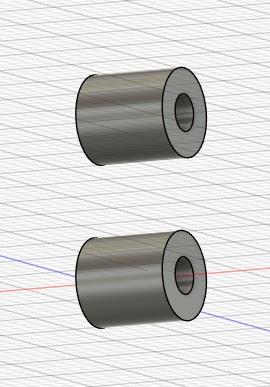
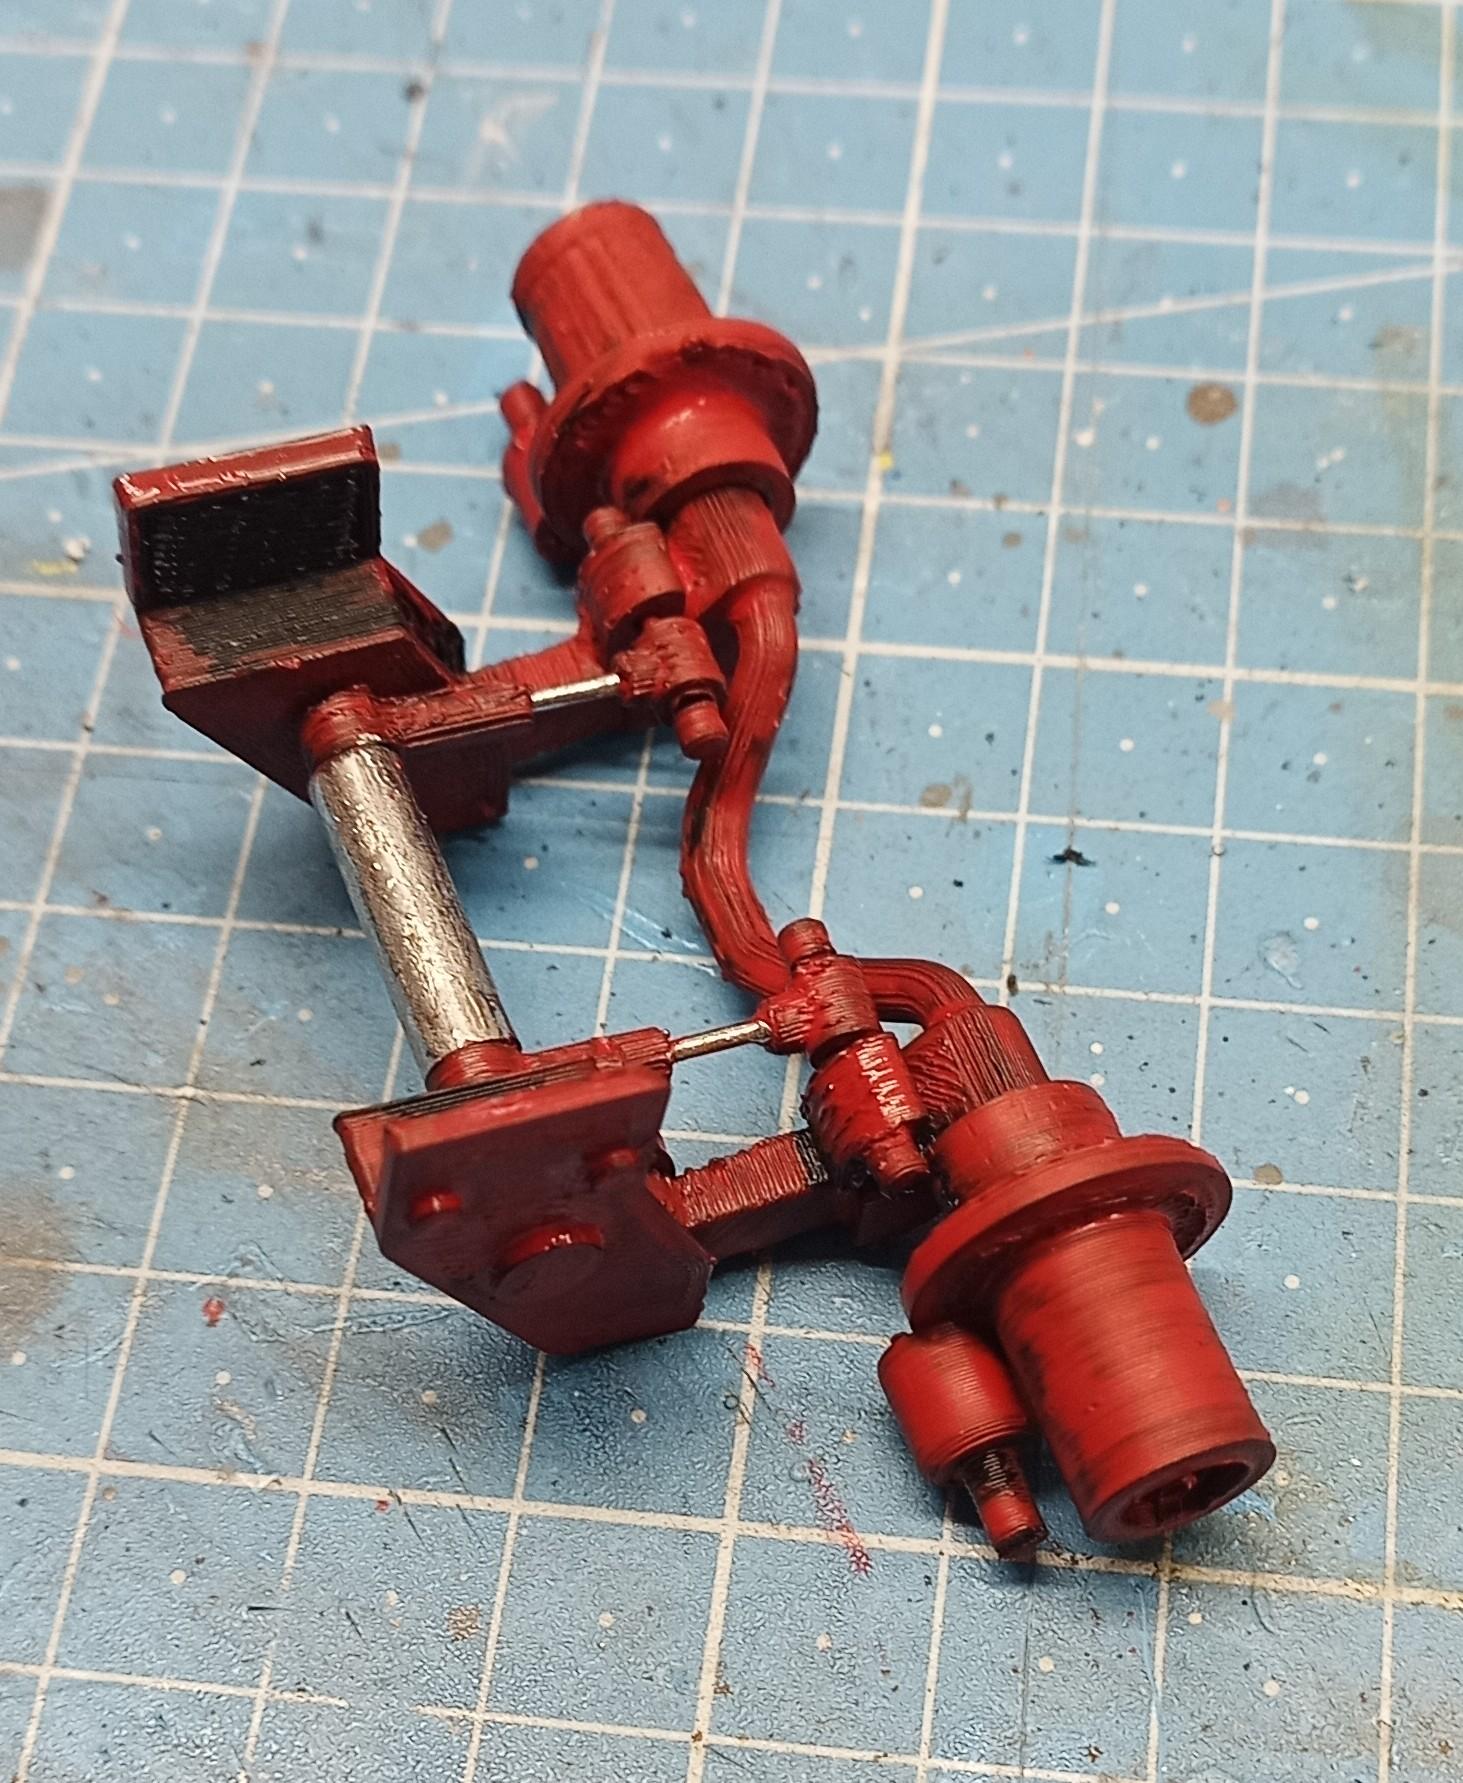
 I had an idea which I immediately turned into reality and it worked: I made two sockets (printed) ... (I forgot to take pictures of the parts so I'm showing the drawings) These sockets go into the ends of the tag axle. Then I made hubs ... ...and put little brass rod pieces through them with the wheels in between! The rims are from a formerly knocked down Volvo F12 Globetrotter from Italeri. The tires are old AMT ones! Now you can see the lift function of the axle:
-
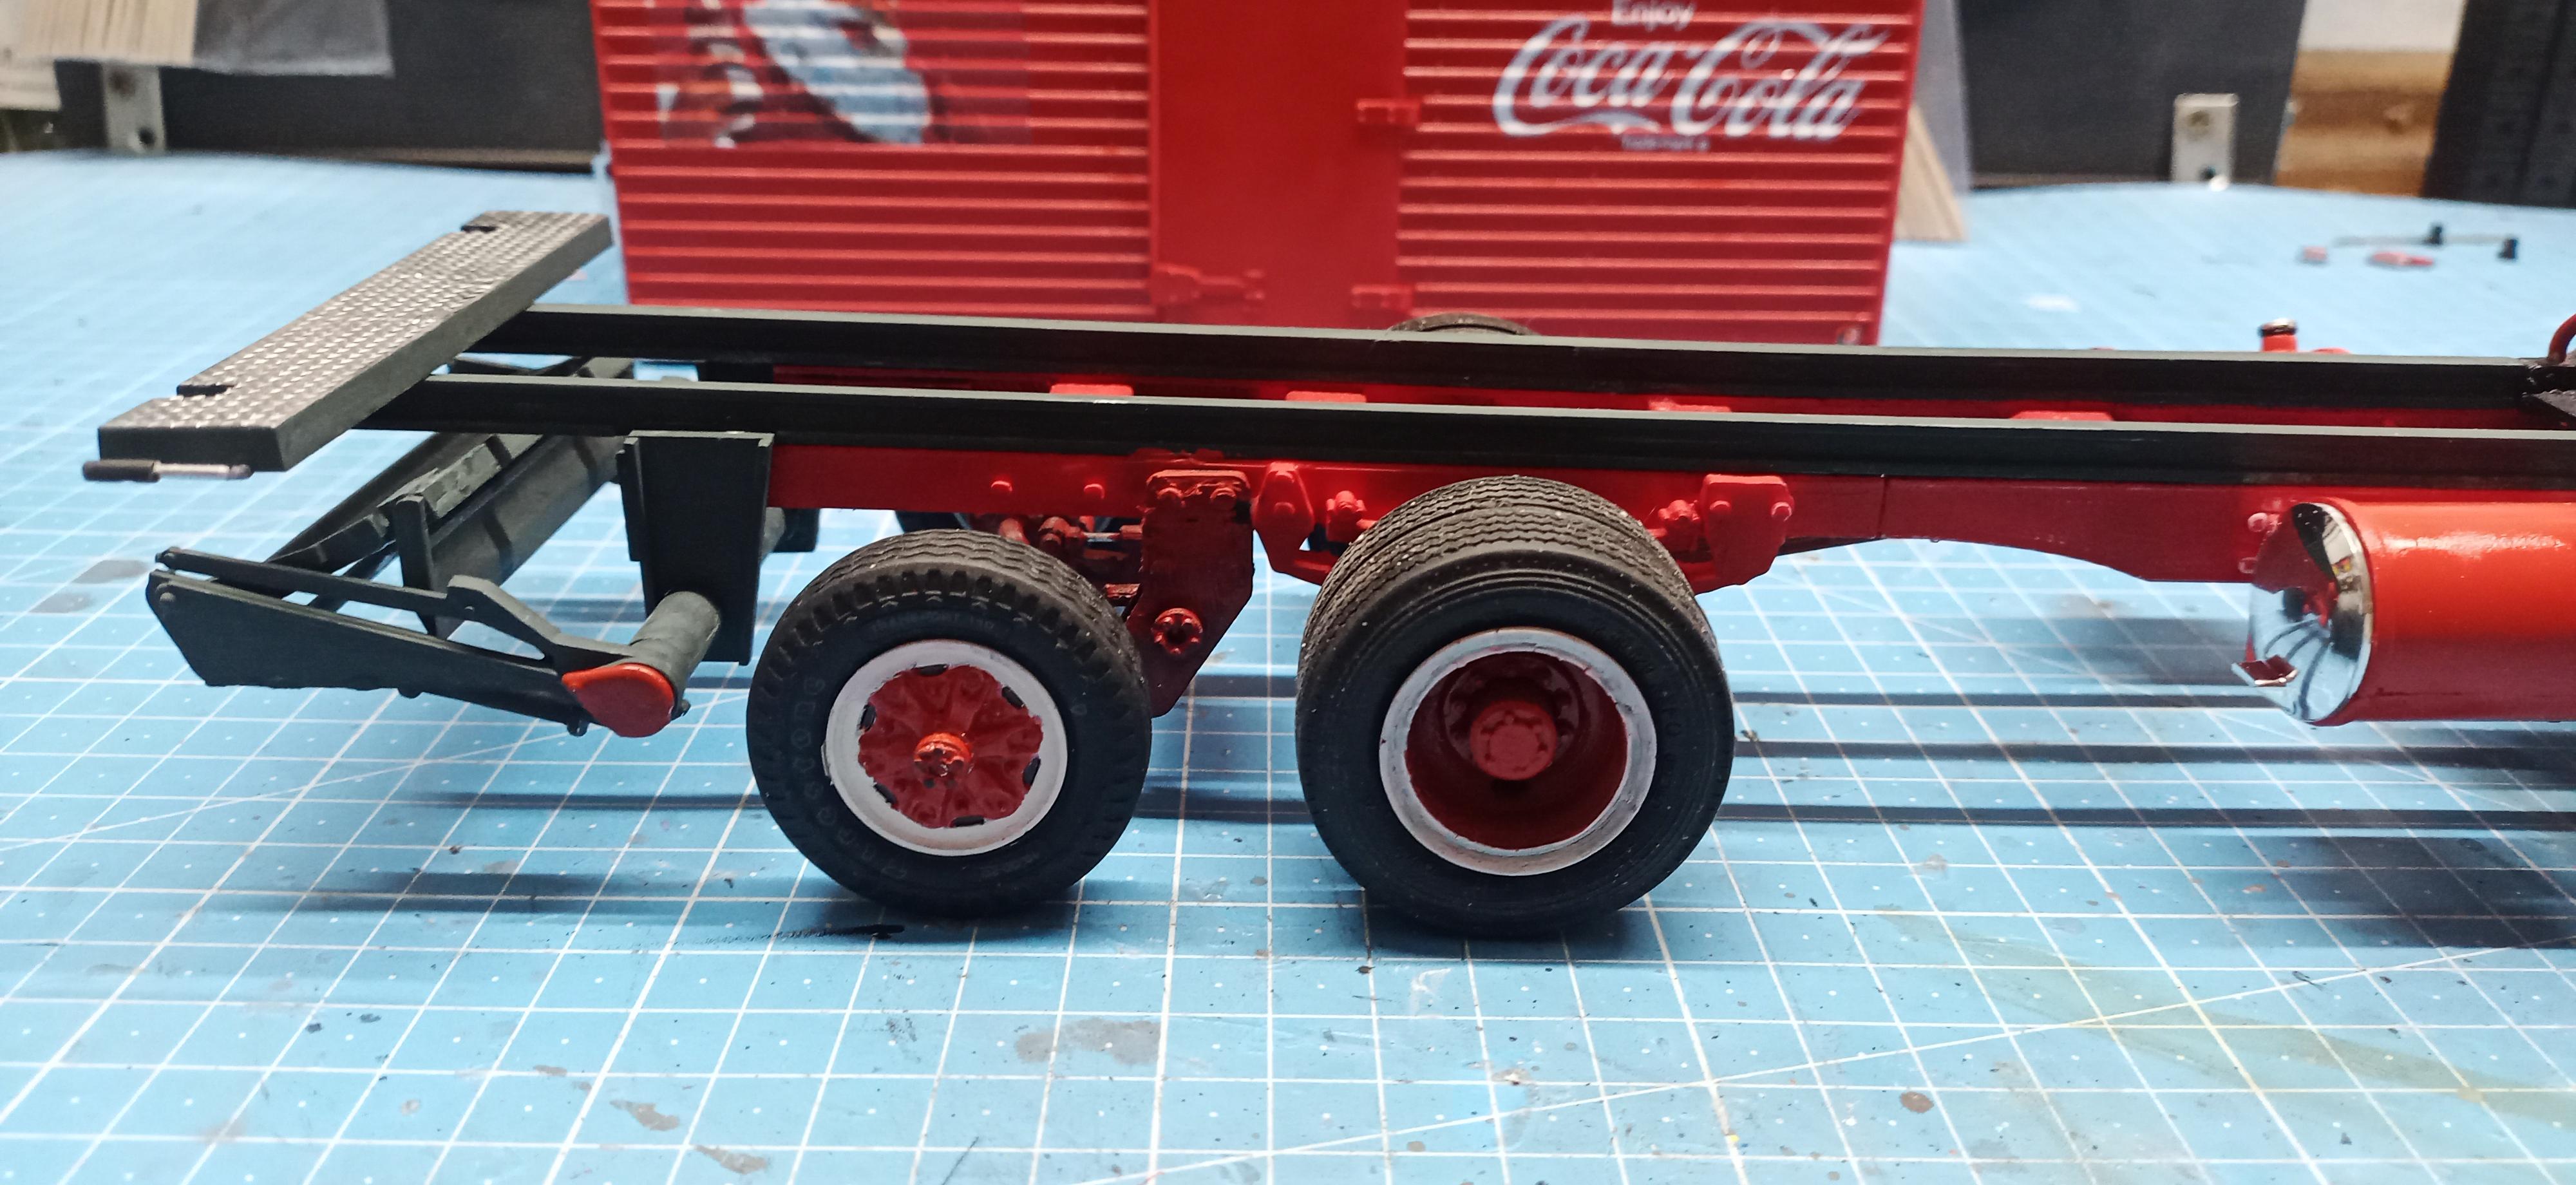
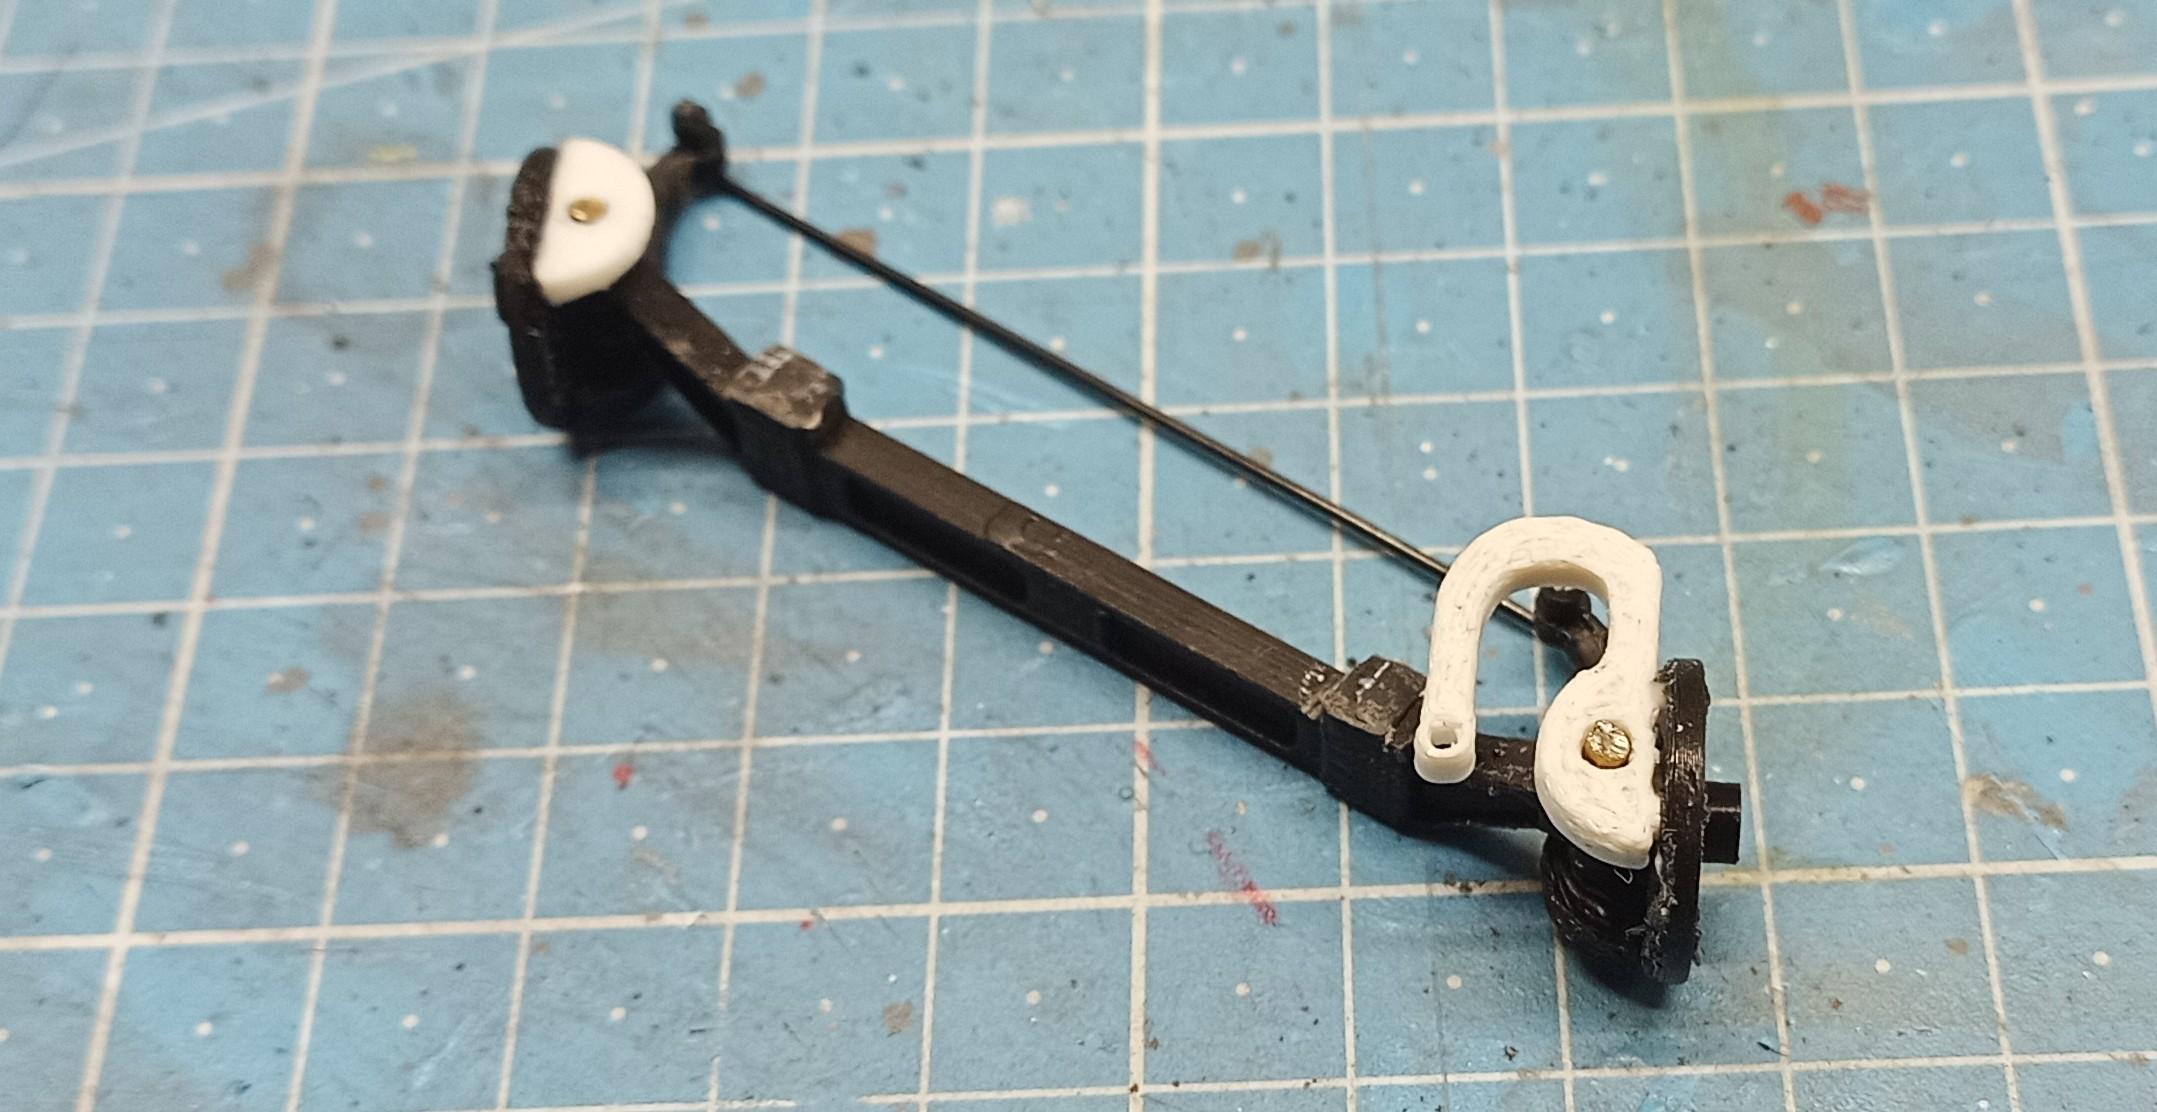
Tag axle is painted ... ...and fits in perfectly: Now the wheels have to be attached. Needs a bit of brain now to make an attachment that let's them turn too. Since the rims are different than the ones I used on the Louisville I can't take over the brake drums.
-
That's only partially so Gary! Otherwise I would have just designed and printed the C800 cab. It's quite complex though. More than I had expected. Now I'm waiting Just like you! 😊 But yes, I must admit, concerning most parts you're right. But looking at your builds I would say it's always worth waiting. You make fabulous builds in quality and detail far ahead of mine. I really enjoy watching and learning!
-
Kenworth C500
Jürgen M. replied to Gary Chastain's topic in WIP: Model Trucks: Big Rigs and Heavy Equipment
I know the feeling! I'm waiting for the Ford cab till probably Monday in a week at least. 😱 -
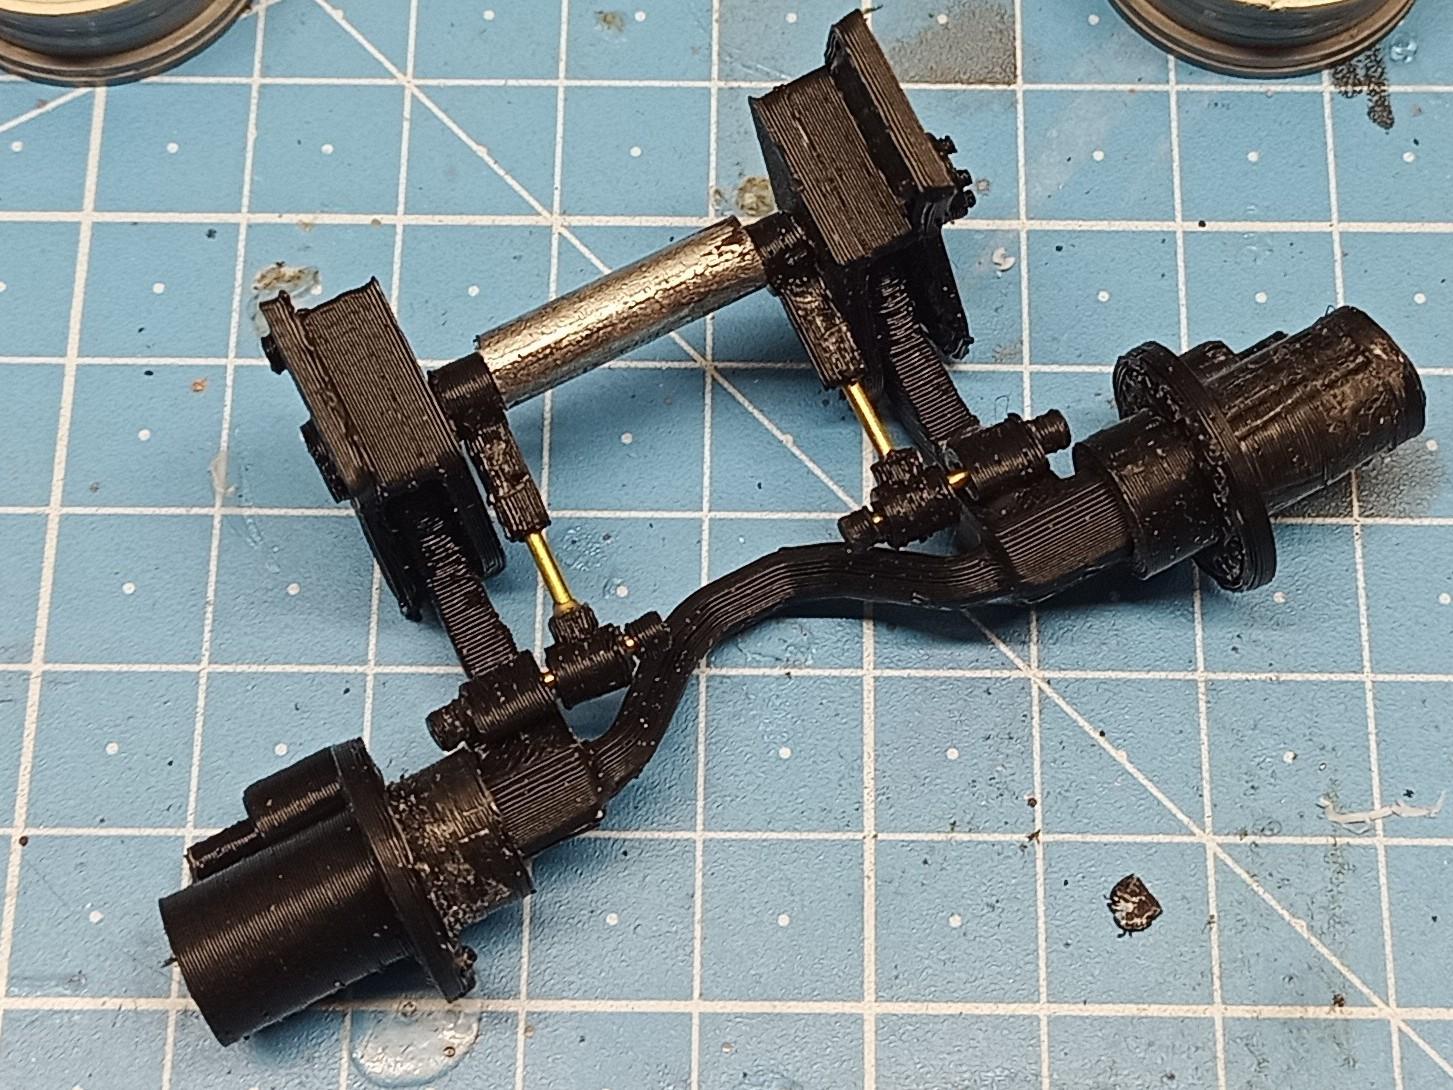
The tag axle is assembled: I printed the parts last night! Assembly was easy and quick since I have done it before, not long ago. Now it has to be painted and attached to the chassis.
-
Thanks guys for your honest opinion. I wasn't sure if trucks like this one even had tag axles! On the other hand I built a tri-drive Superliner. Never was built that way I think. And I'll have something to do till the cab arrives!
-
Actually I was thinking of adding a tag axle here too. I noticed that I located the drive axle a bit far to the front. It's only a little bit off the middle of the box. Of course the weight of the cab and engine would keep the real thing from tipping but it does look a bit 'risky'! Since I have enough time till the cab arrives I might print a tag axle just to see how it looks!
-
Thanks Jeff! Actually they're Italeri 1/24 truck tires. I like them cause they're a bit flexible concerning rim size and they look good. Hope the cab gets here soon. As far as I know it was shipped out of Illinois this morning!
-
Here's a mock-up of the box on the chassis. According to tracking the cab will arrive sometime between 14 and 22 Dec. Means there will be a longer break! 😢
-
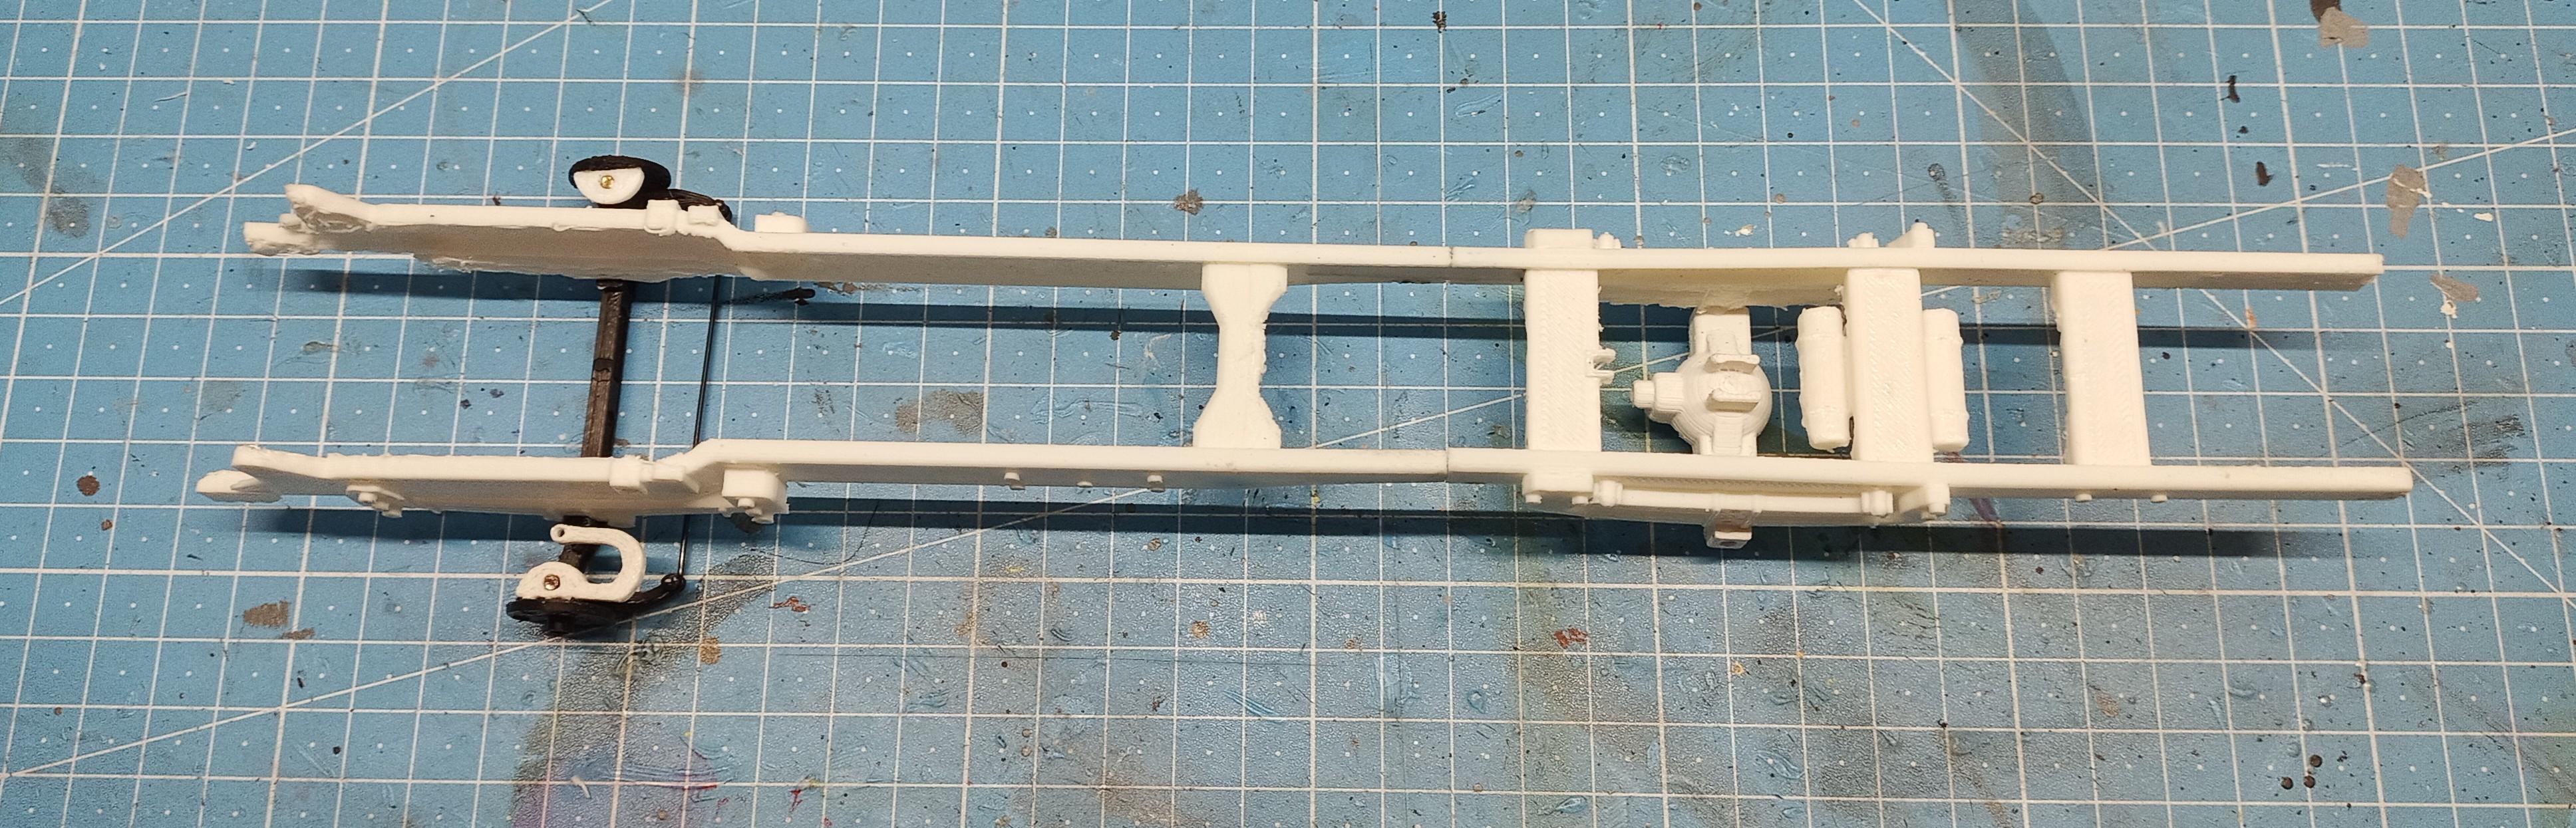
Did some work on the chassis ...and on the box
-
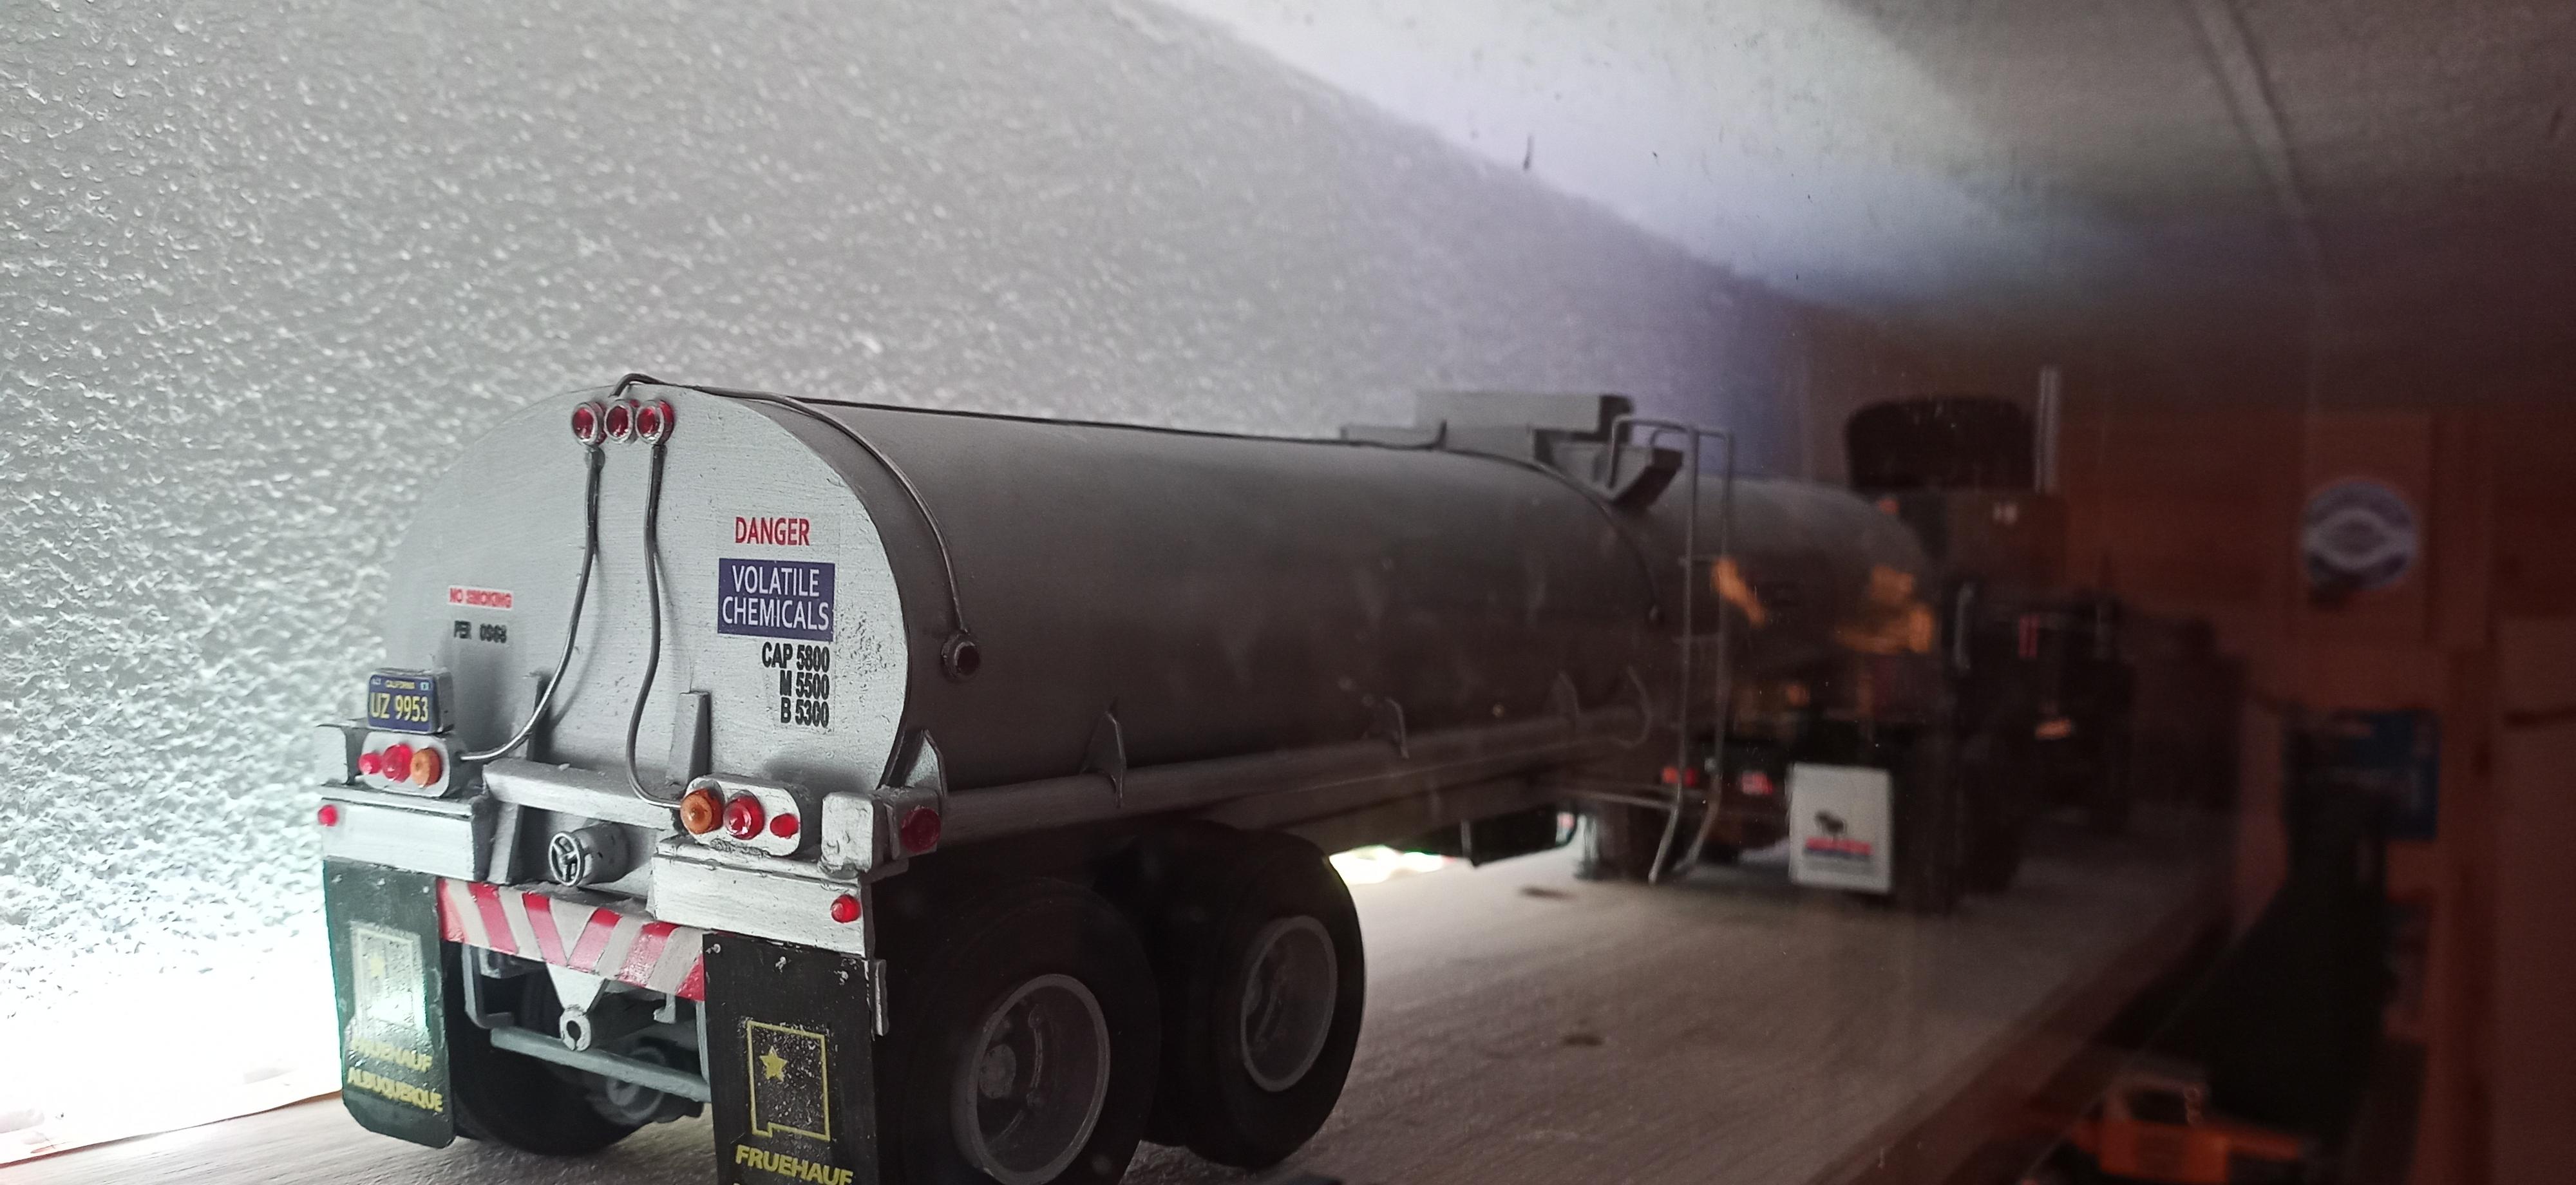
Sometimes things show up twice, sometimes not at all. I'm not sure what I'm doing wrong. Anyway, the fifth wheel of the R.D. Mack was put all the way in the back to make the trailer and the rig look longer.
-
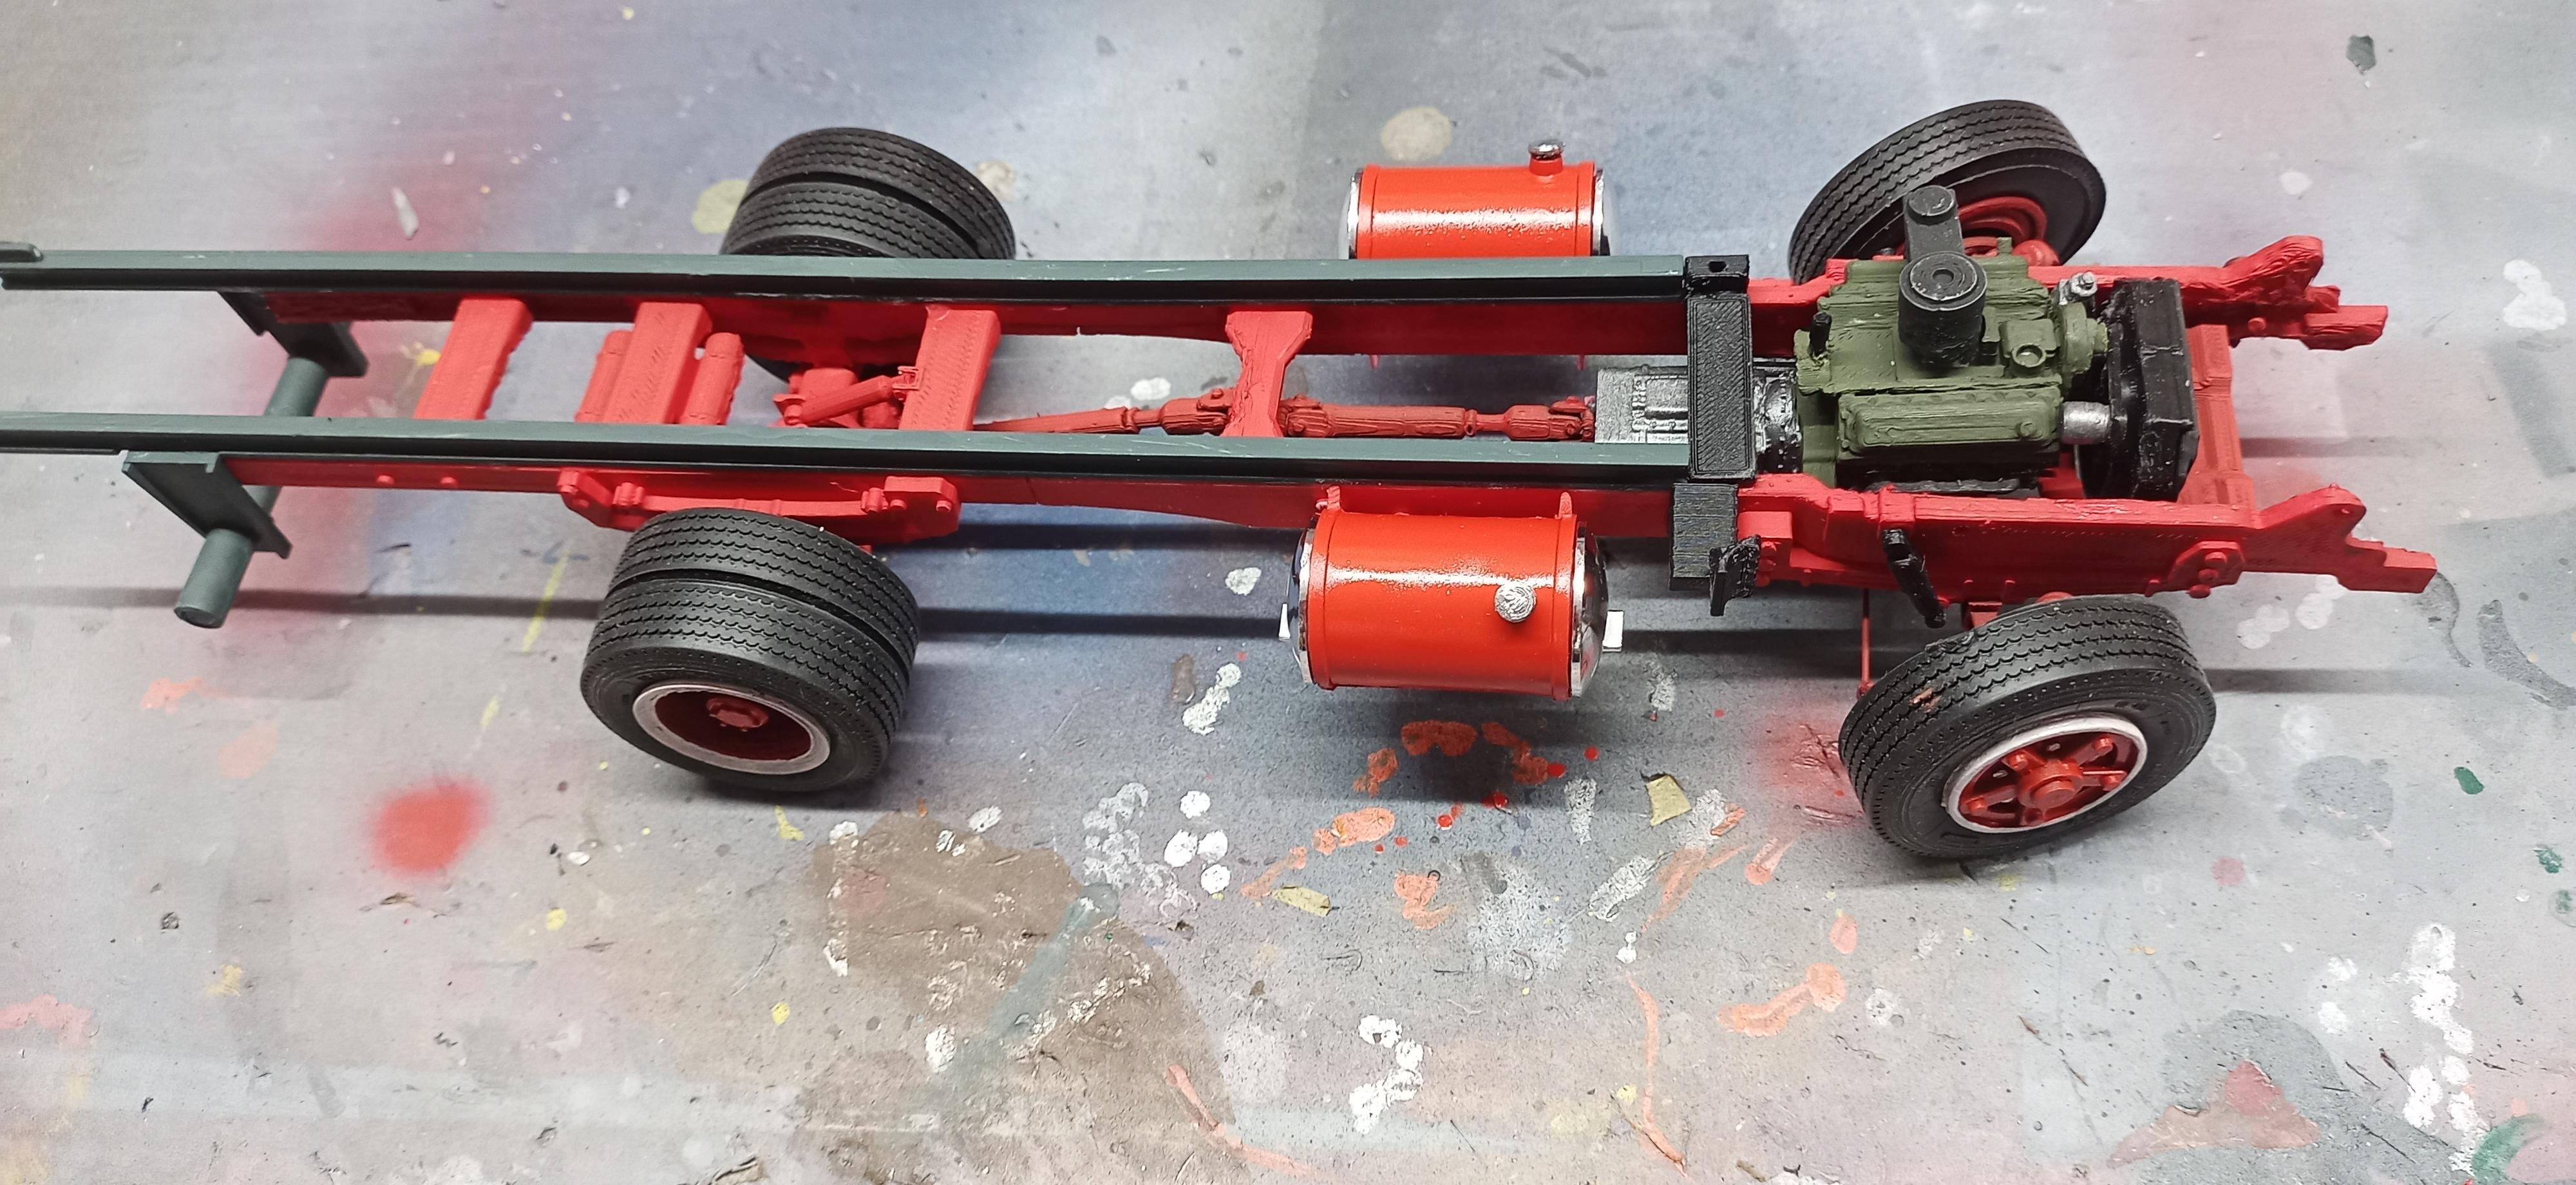
Made some progress on the chassis: I used the Louisville fuel tanks. The steering gear is a bit different than the original but it works: VID_20251202_211658.mp4 And the holiday feeling is coming up!
-
No, because the trailer was so short, it looked weird with the huge Mack. They put the fifth wheel all they way in the back to make the rig look longer!
-
Ford LS Rescue truck
Jürgen M. replied to gotnitro?'s topic in WIP: Model Trucks: Big Rigs and Heavy Equipment
Looks really nice! Precise and clean work. You don't see many rescue vehicles here. Cool build! -
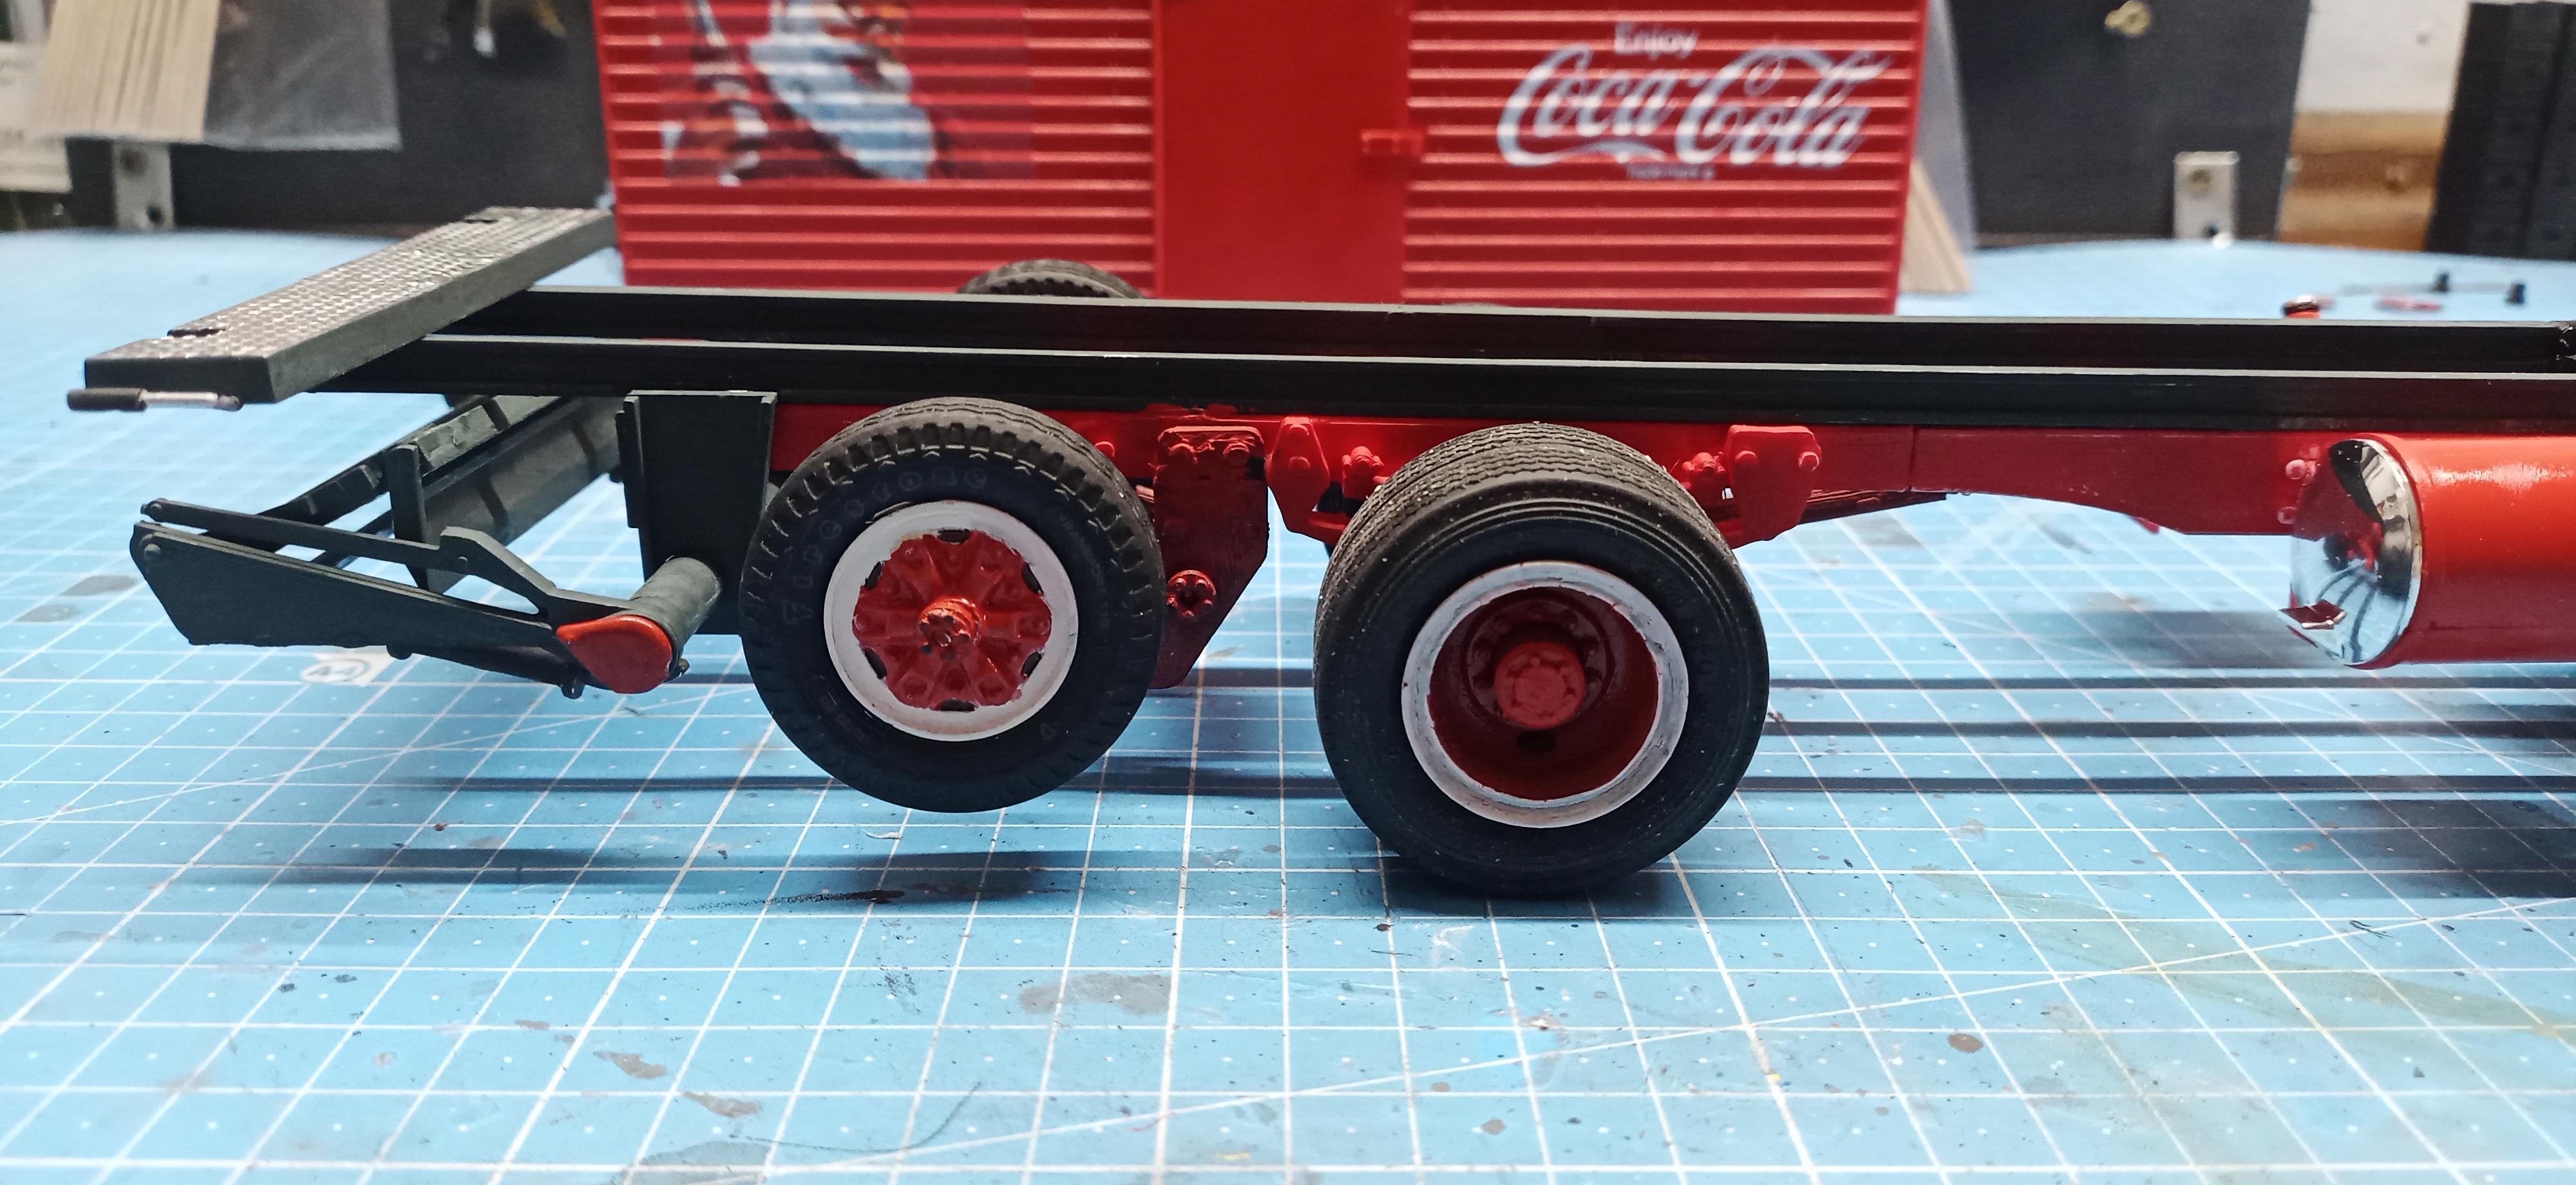
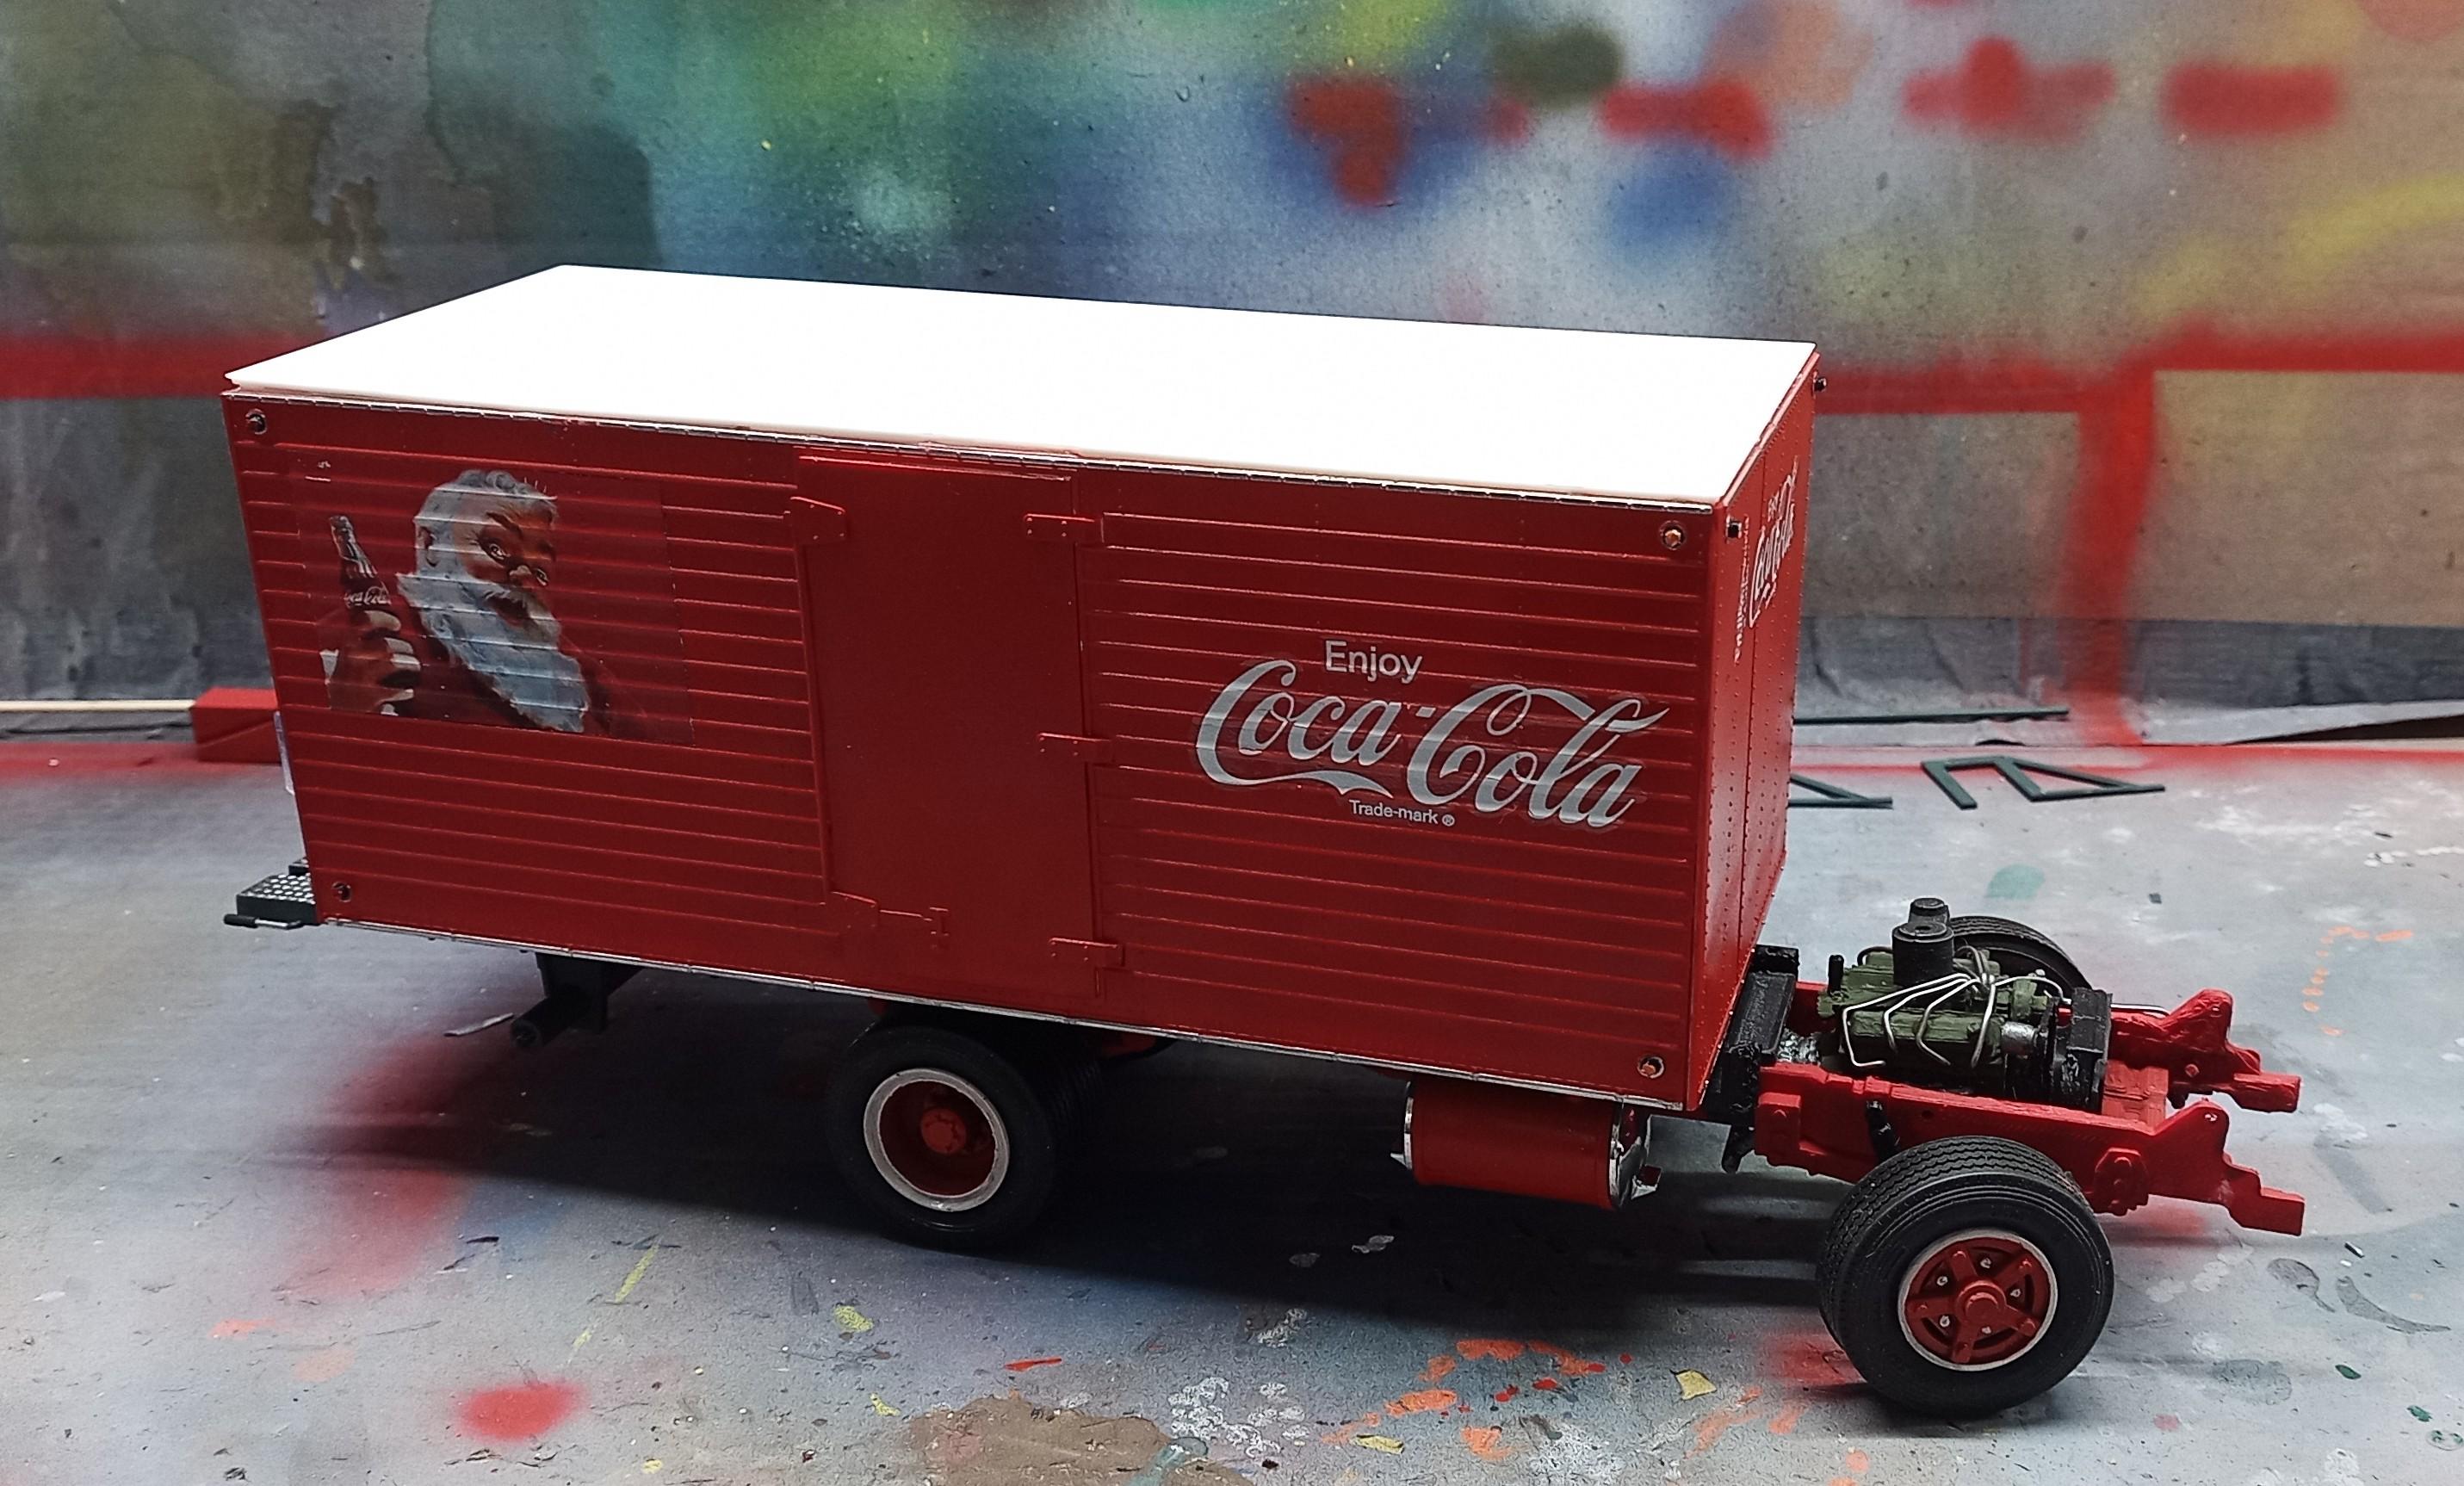
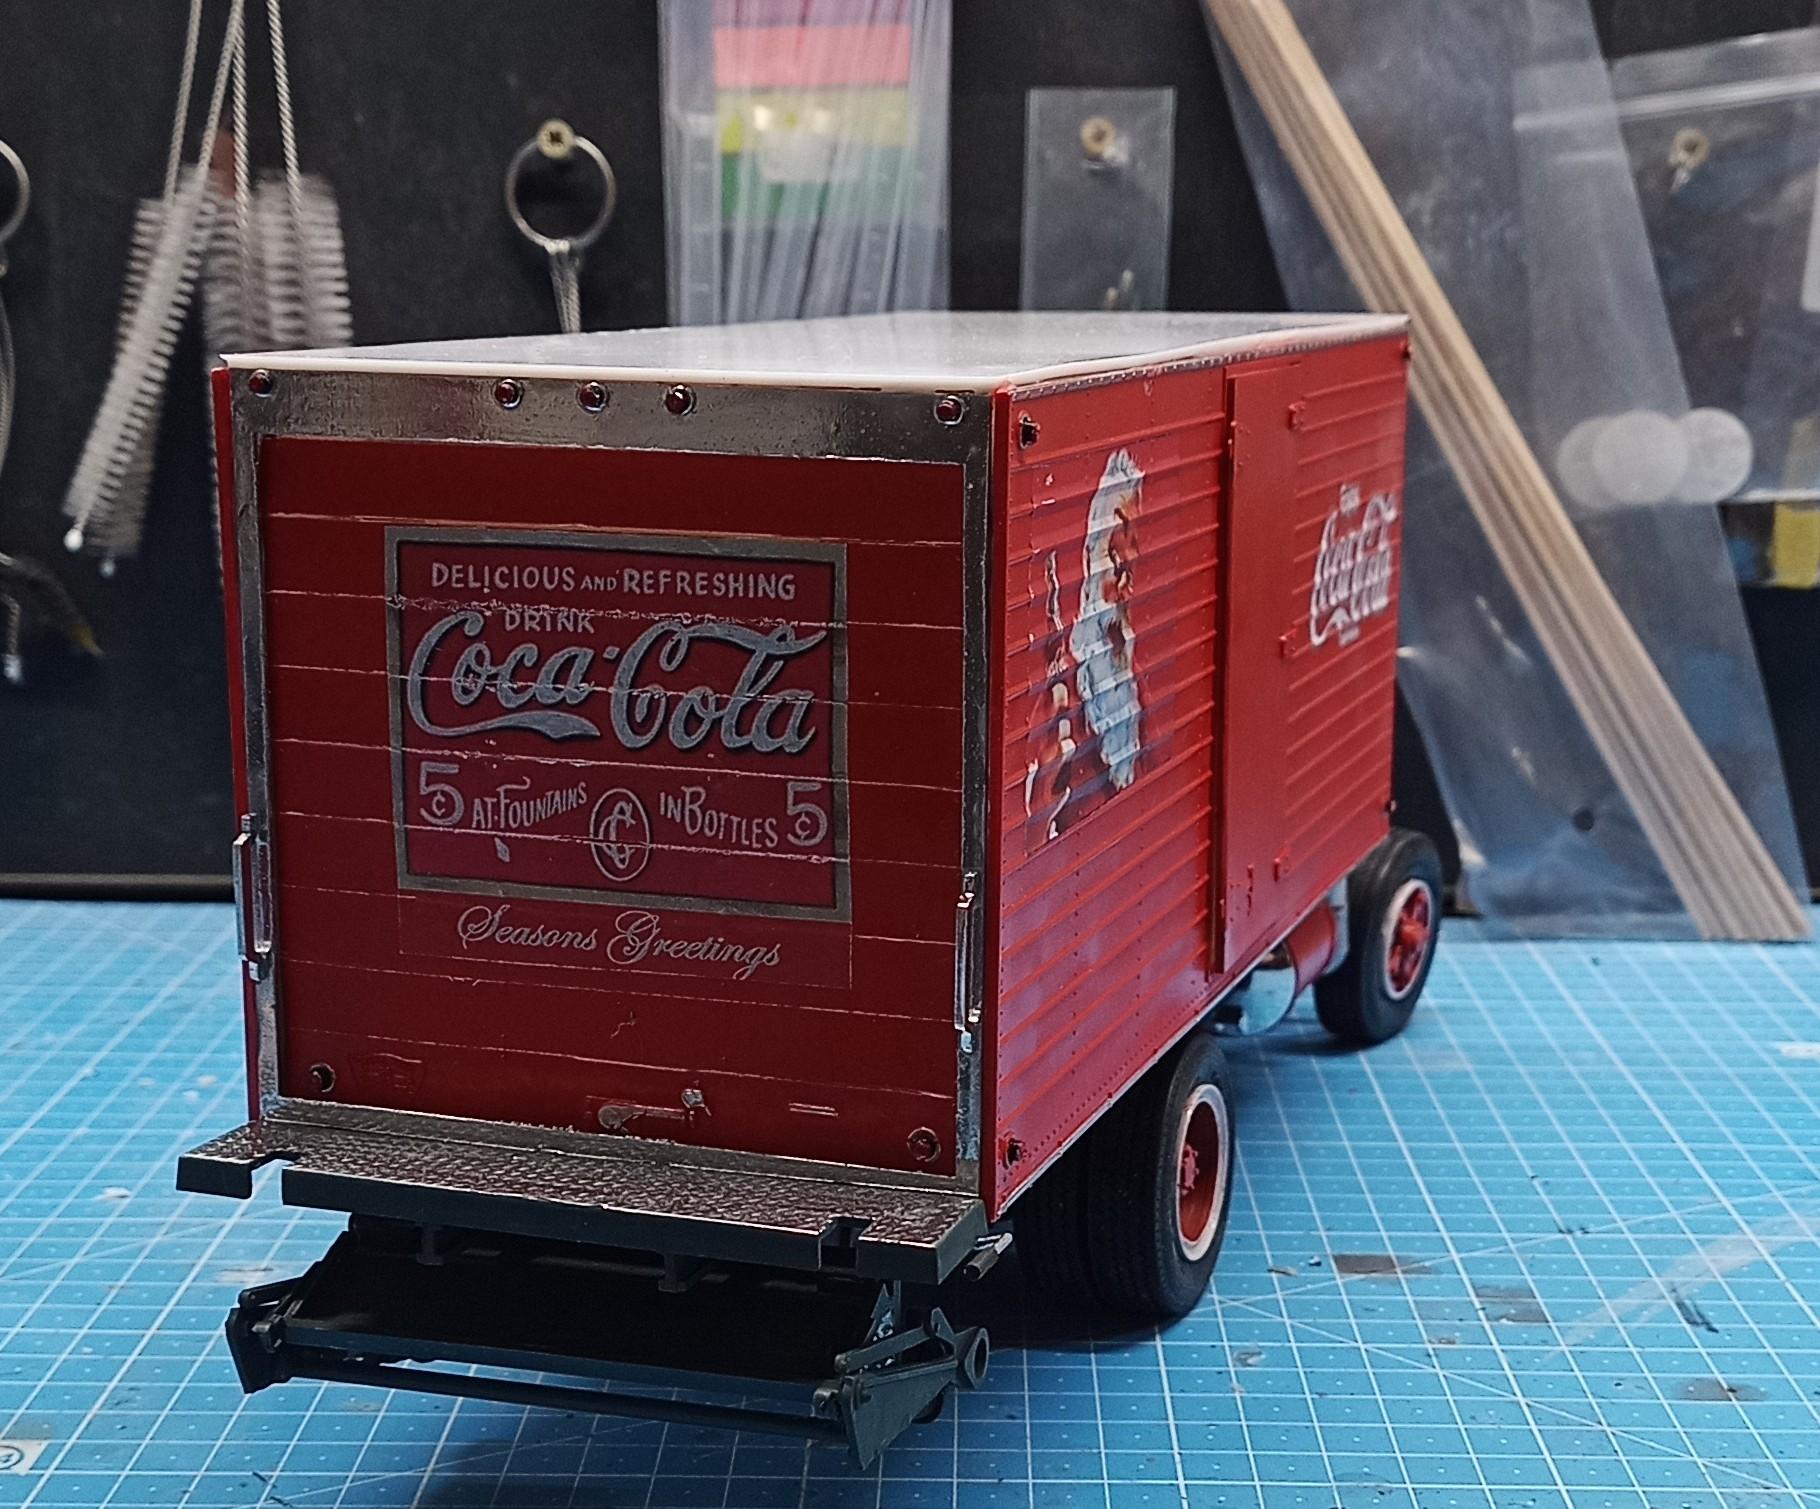
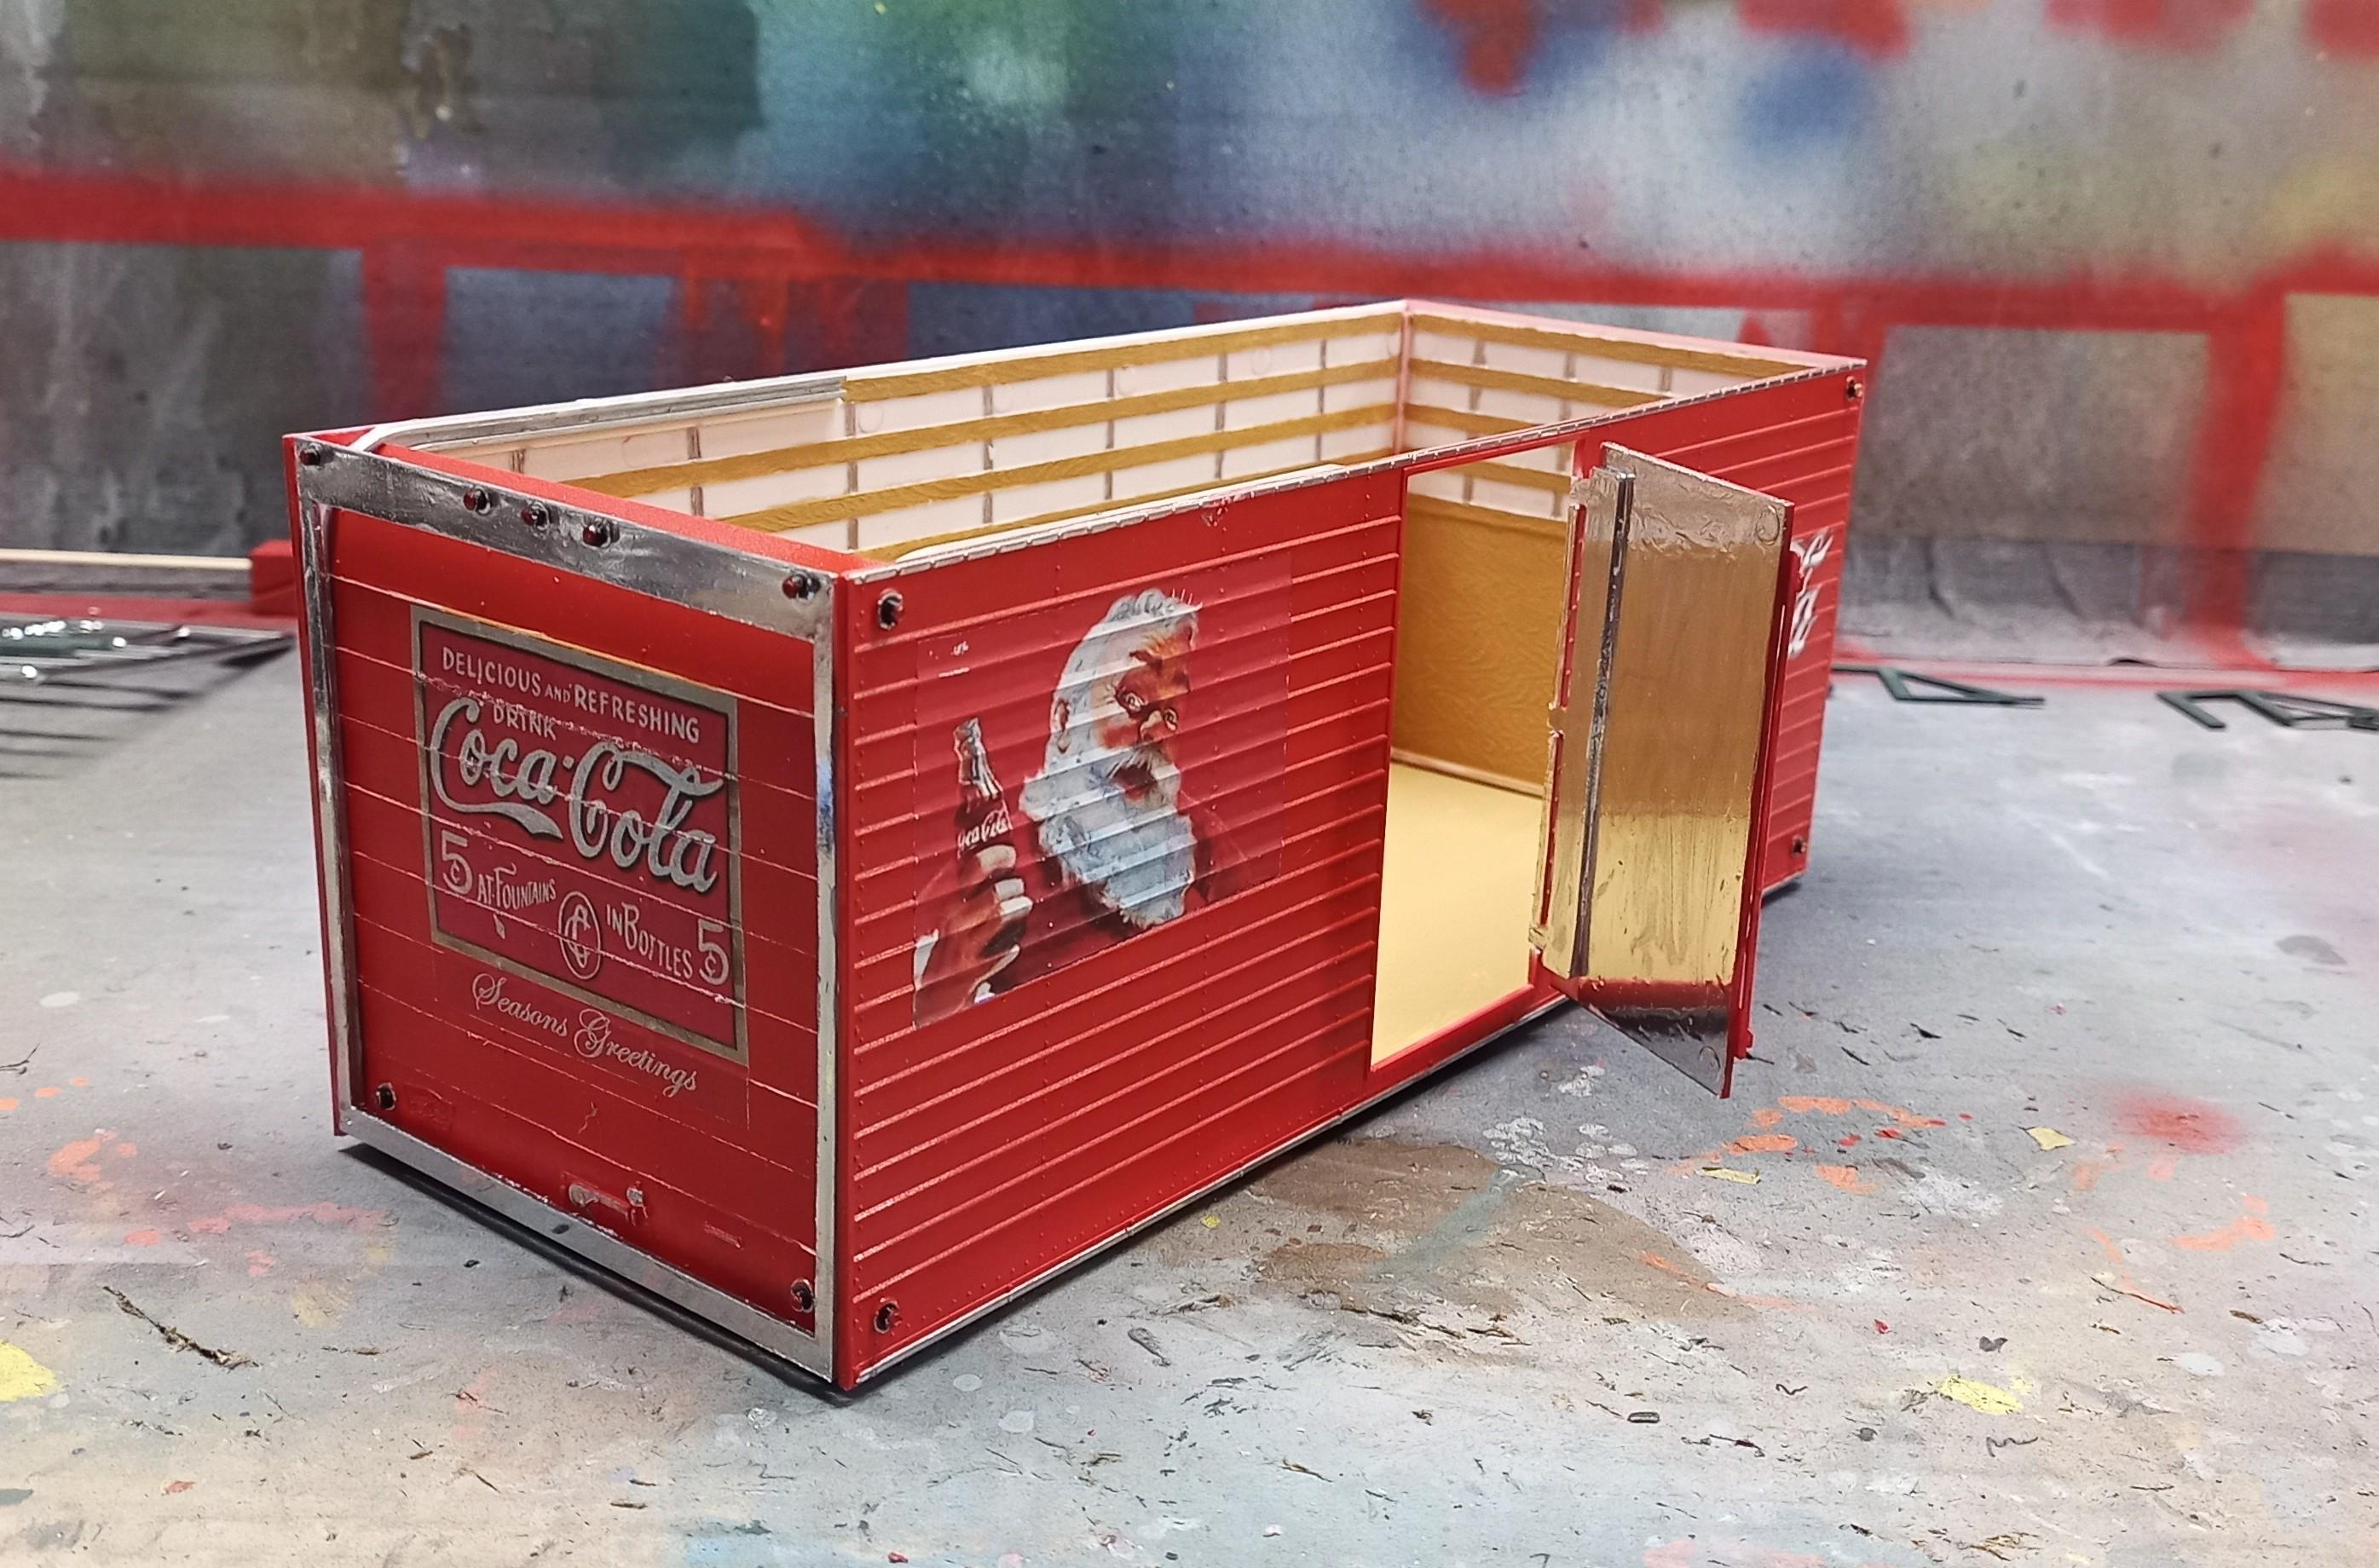
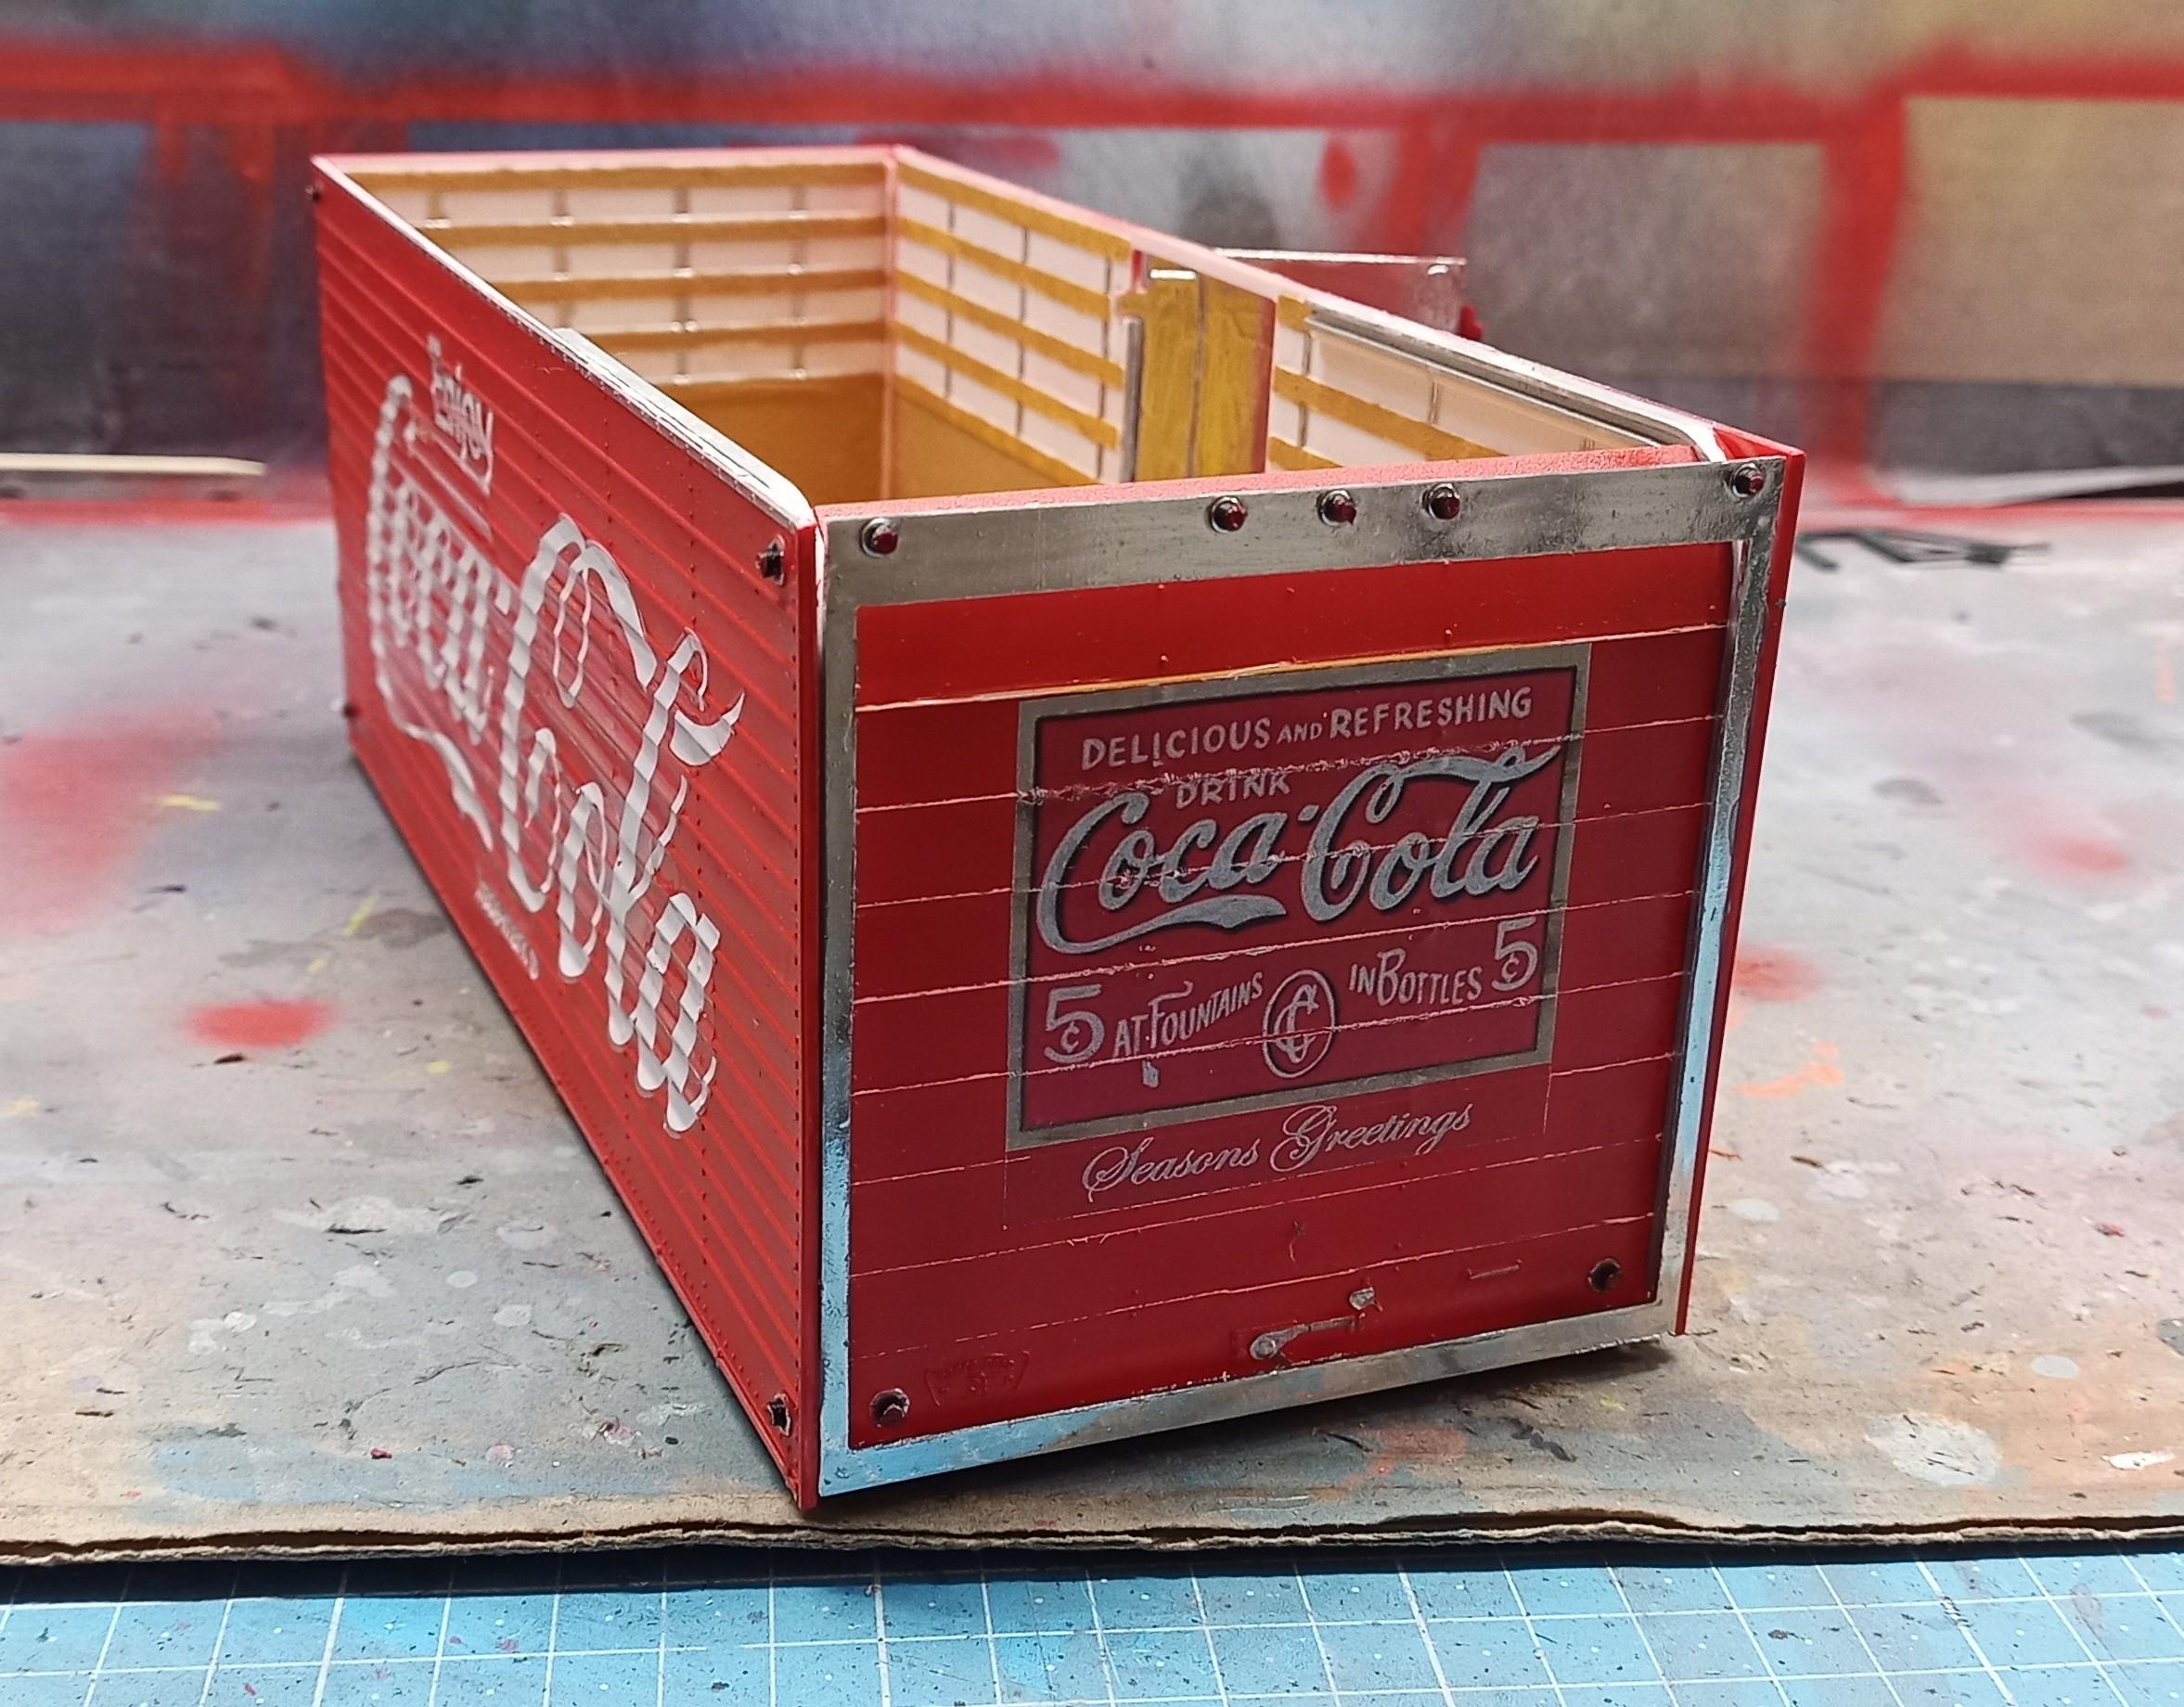
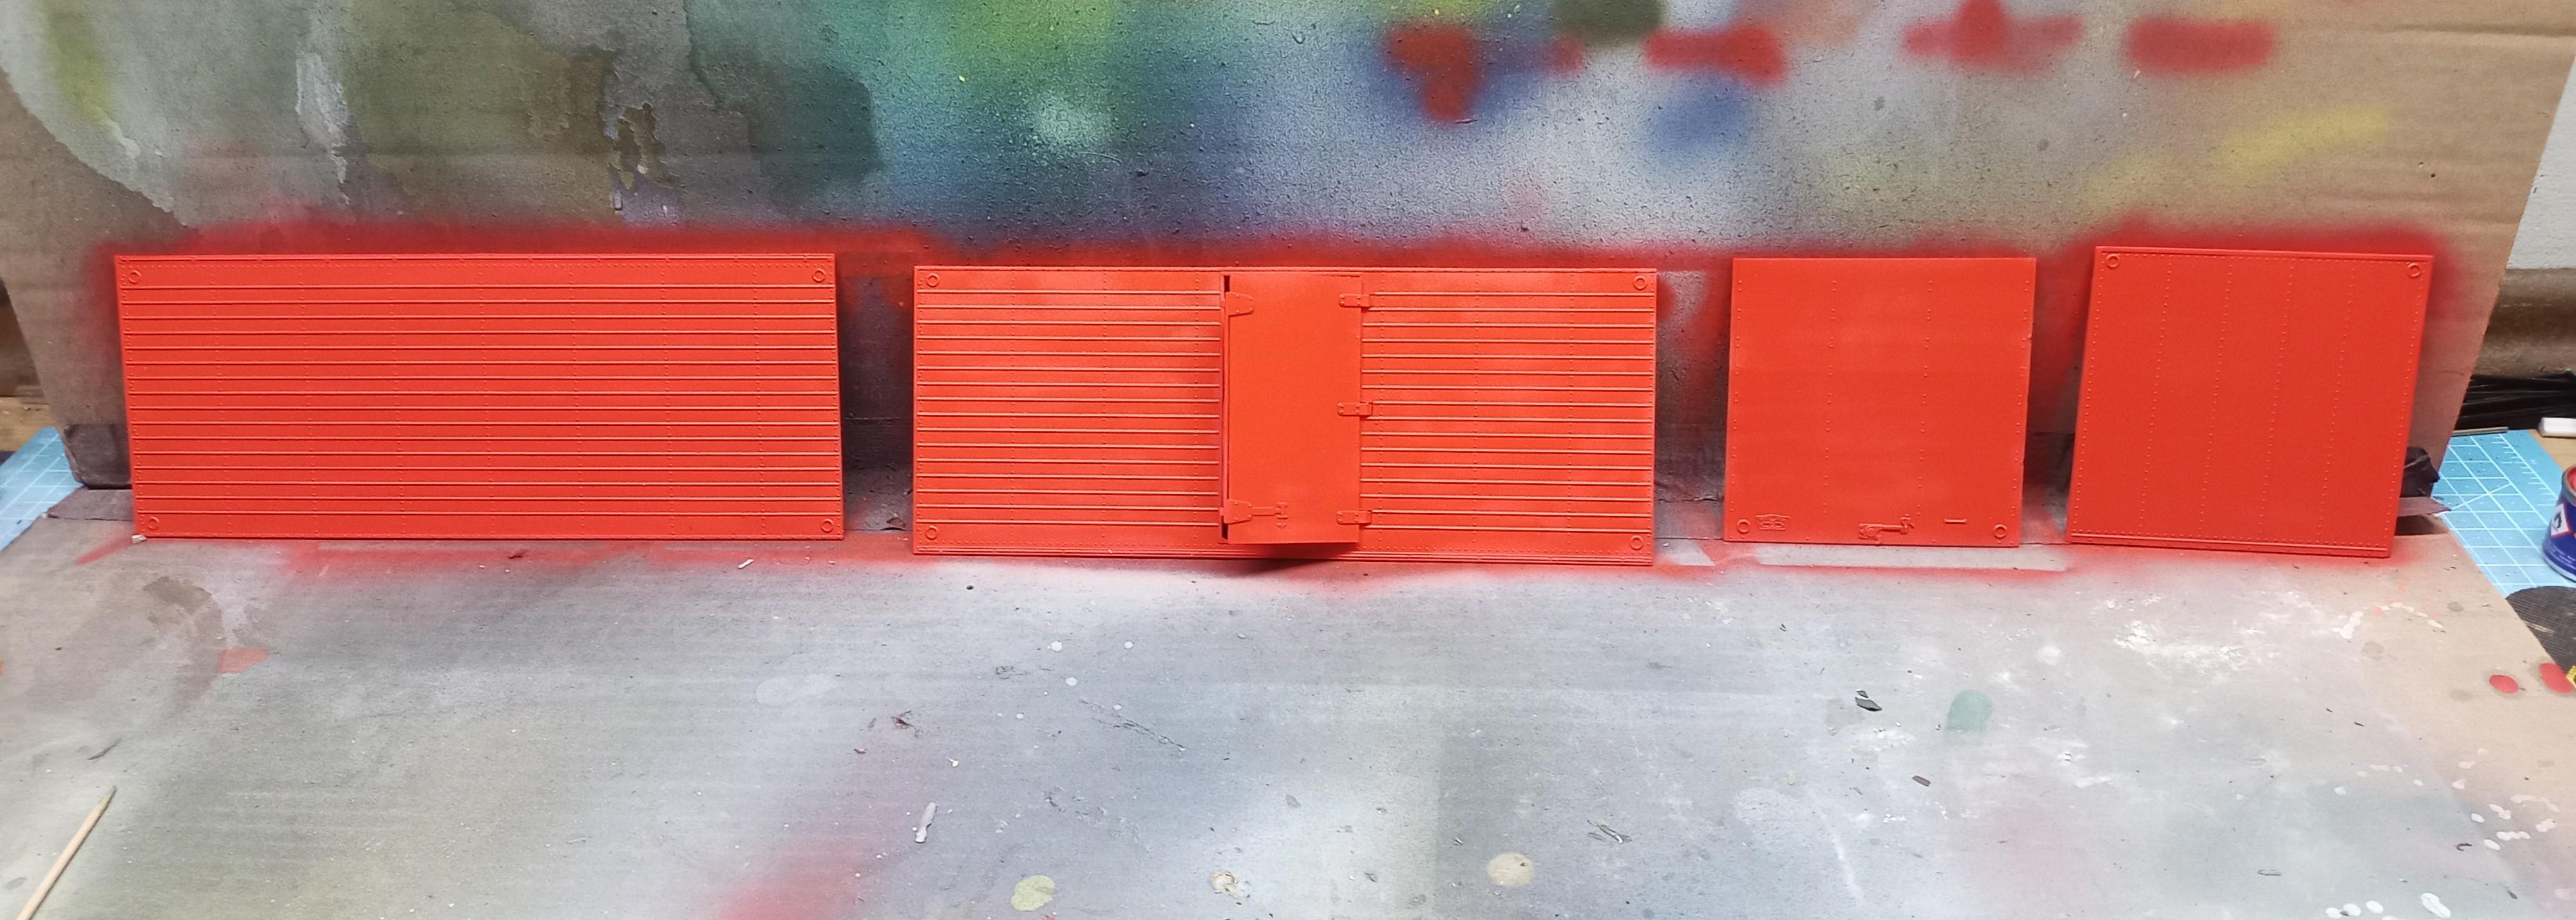
Mocked-up the wheels ...and painted the box parts: Still need to paint the outlines and the lift gate.
-
By the way, I decided to make it a holiday edition after all! 🧑🎄
-
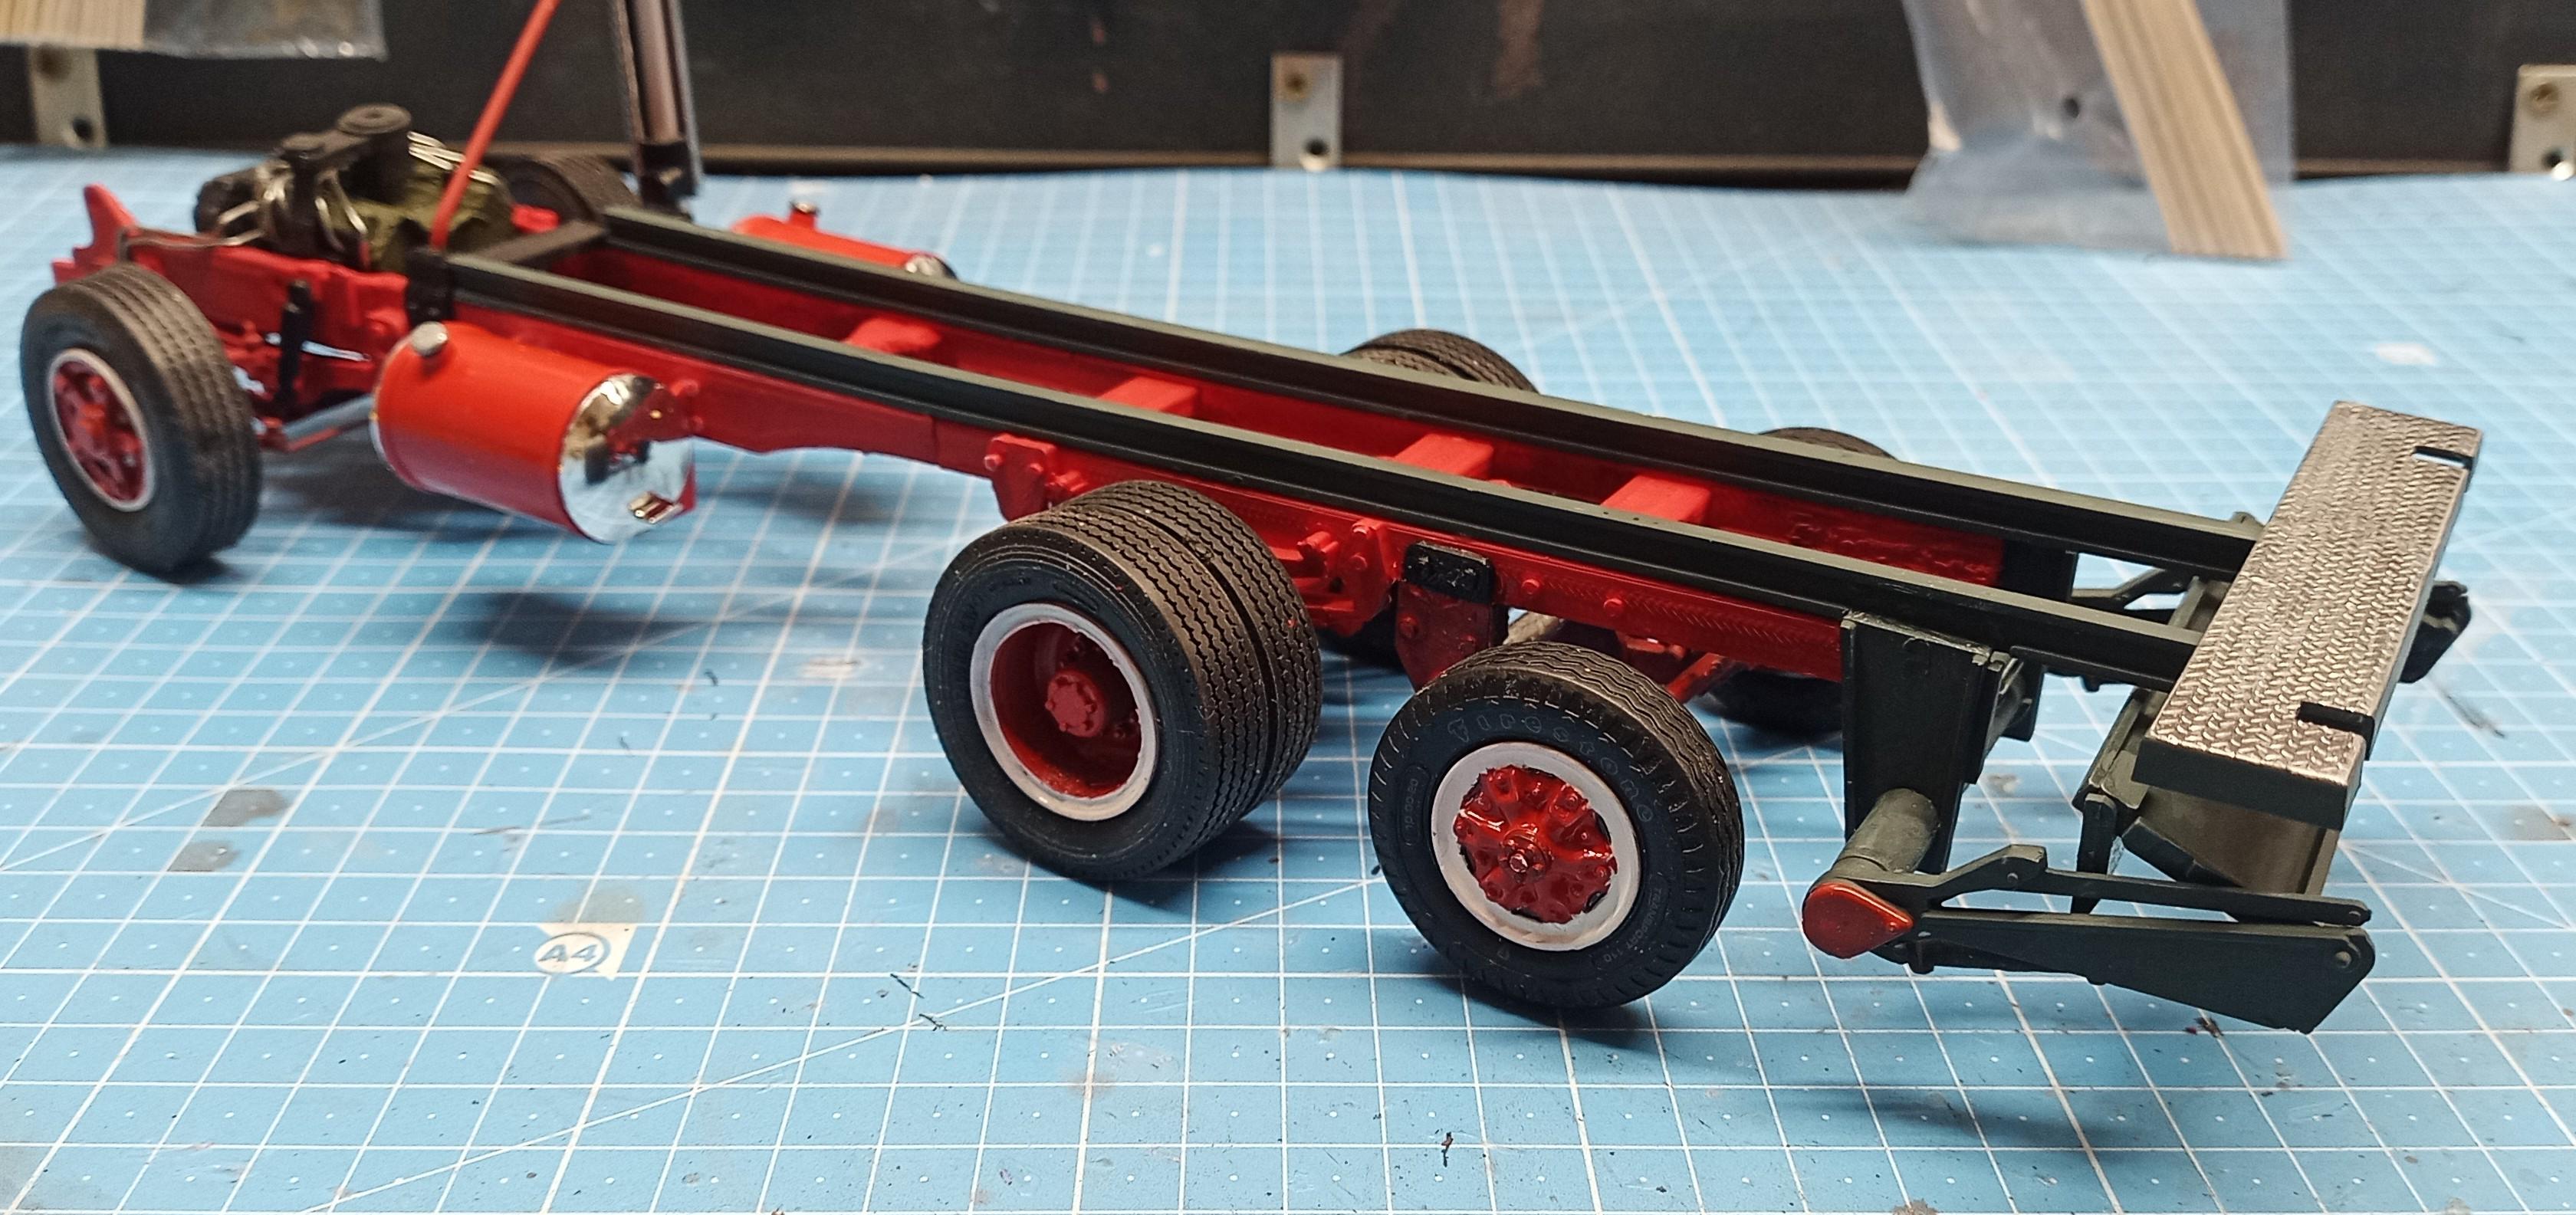
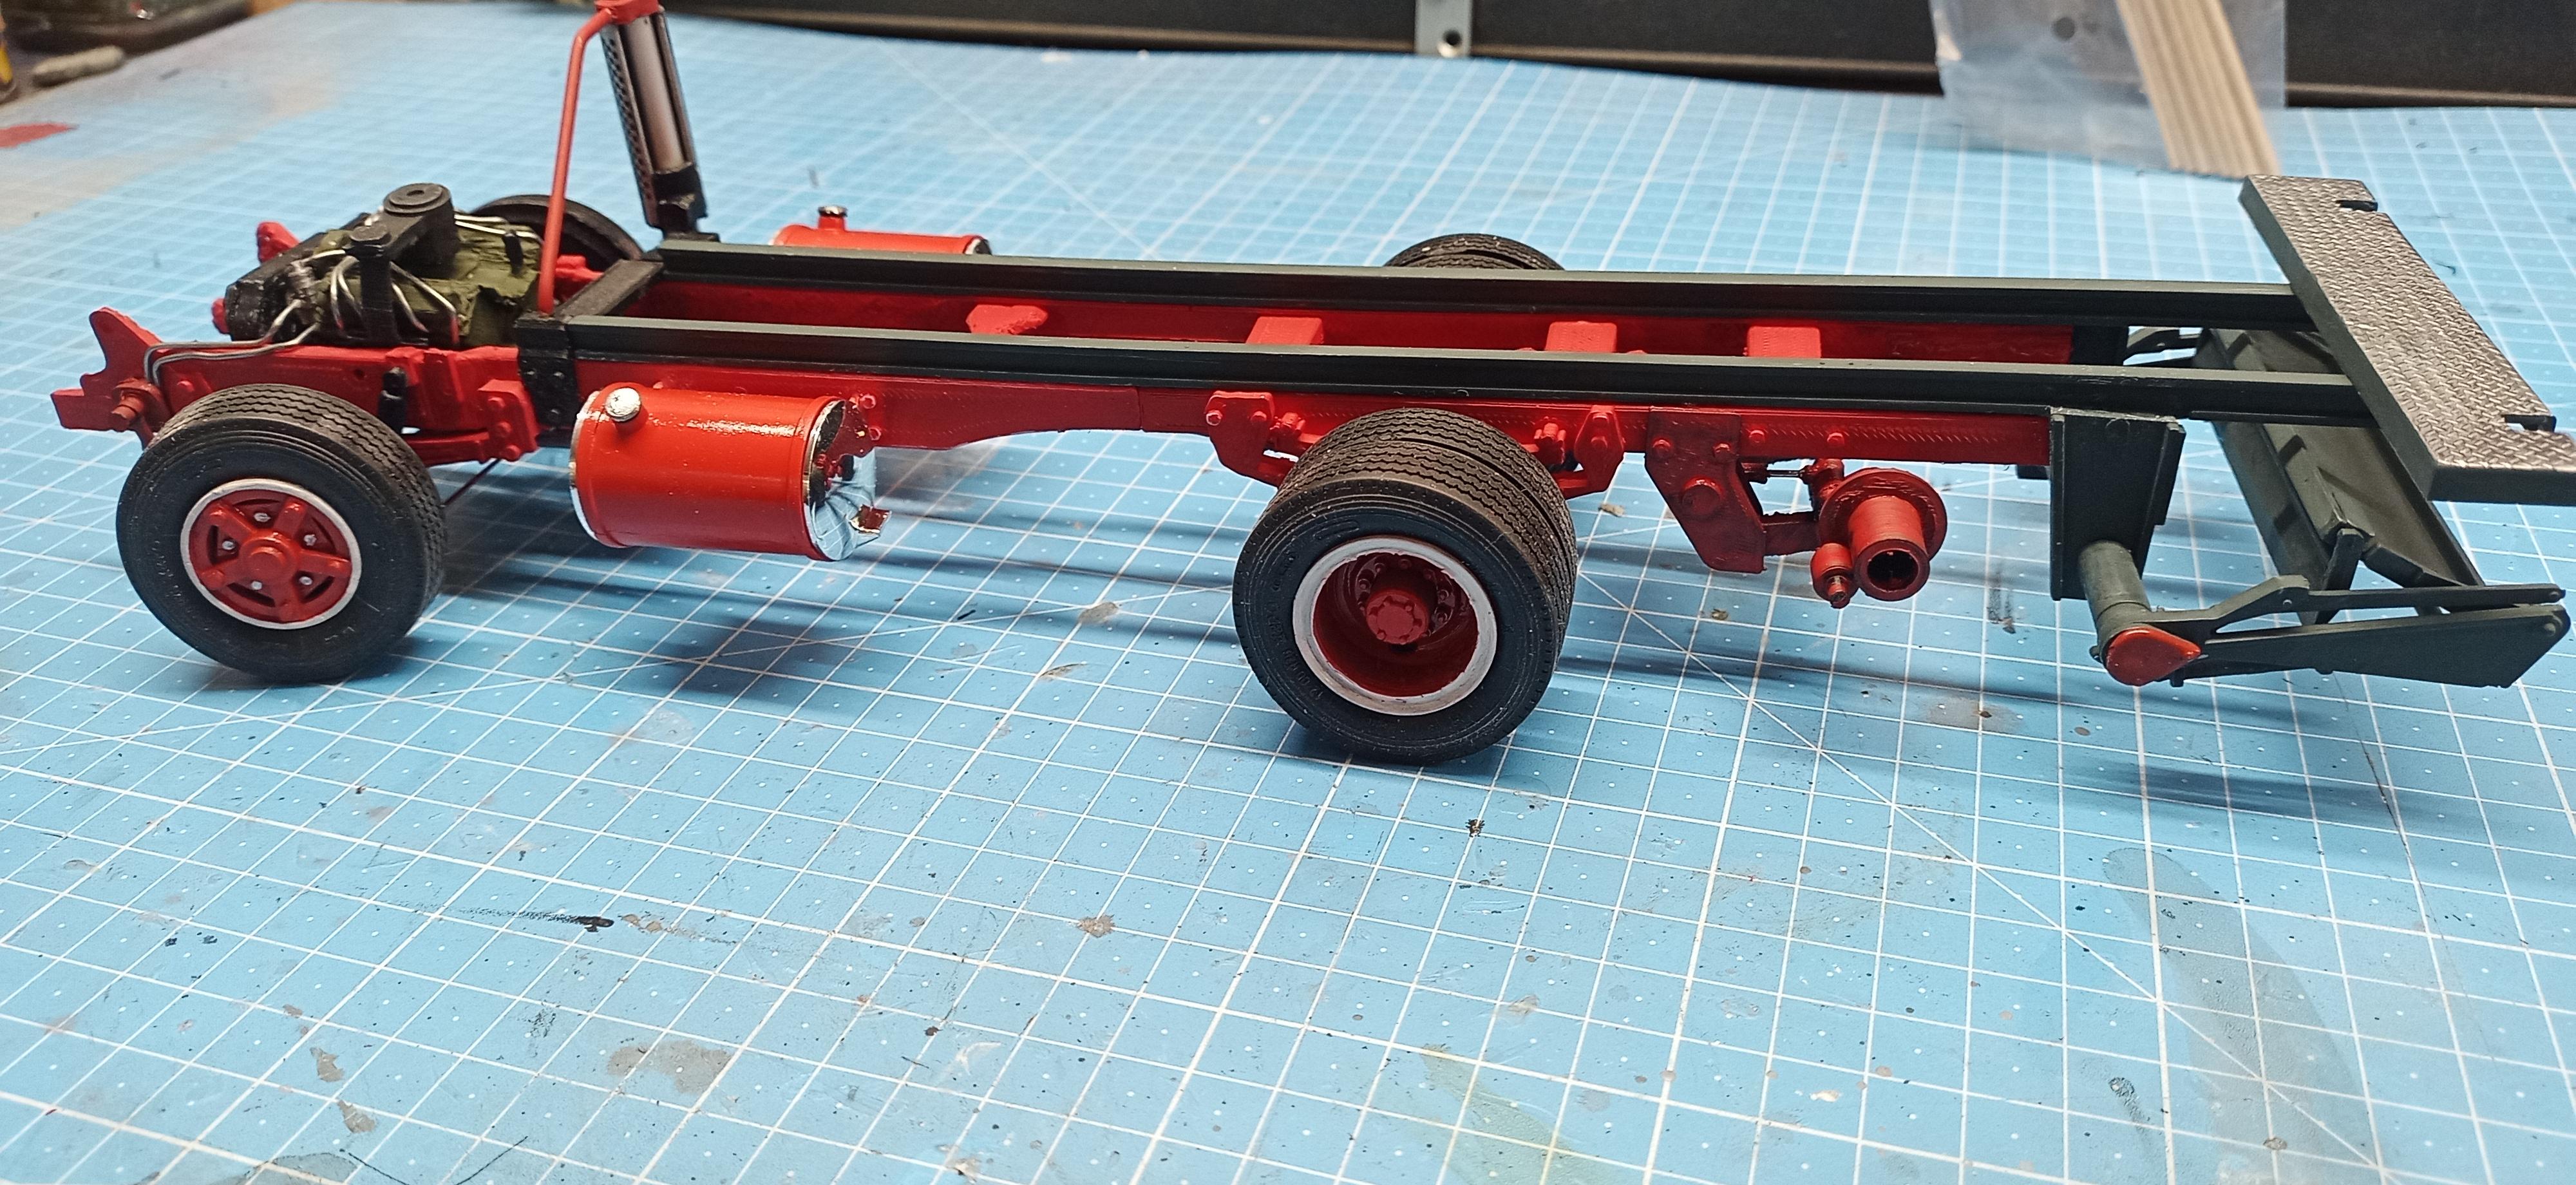
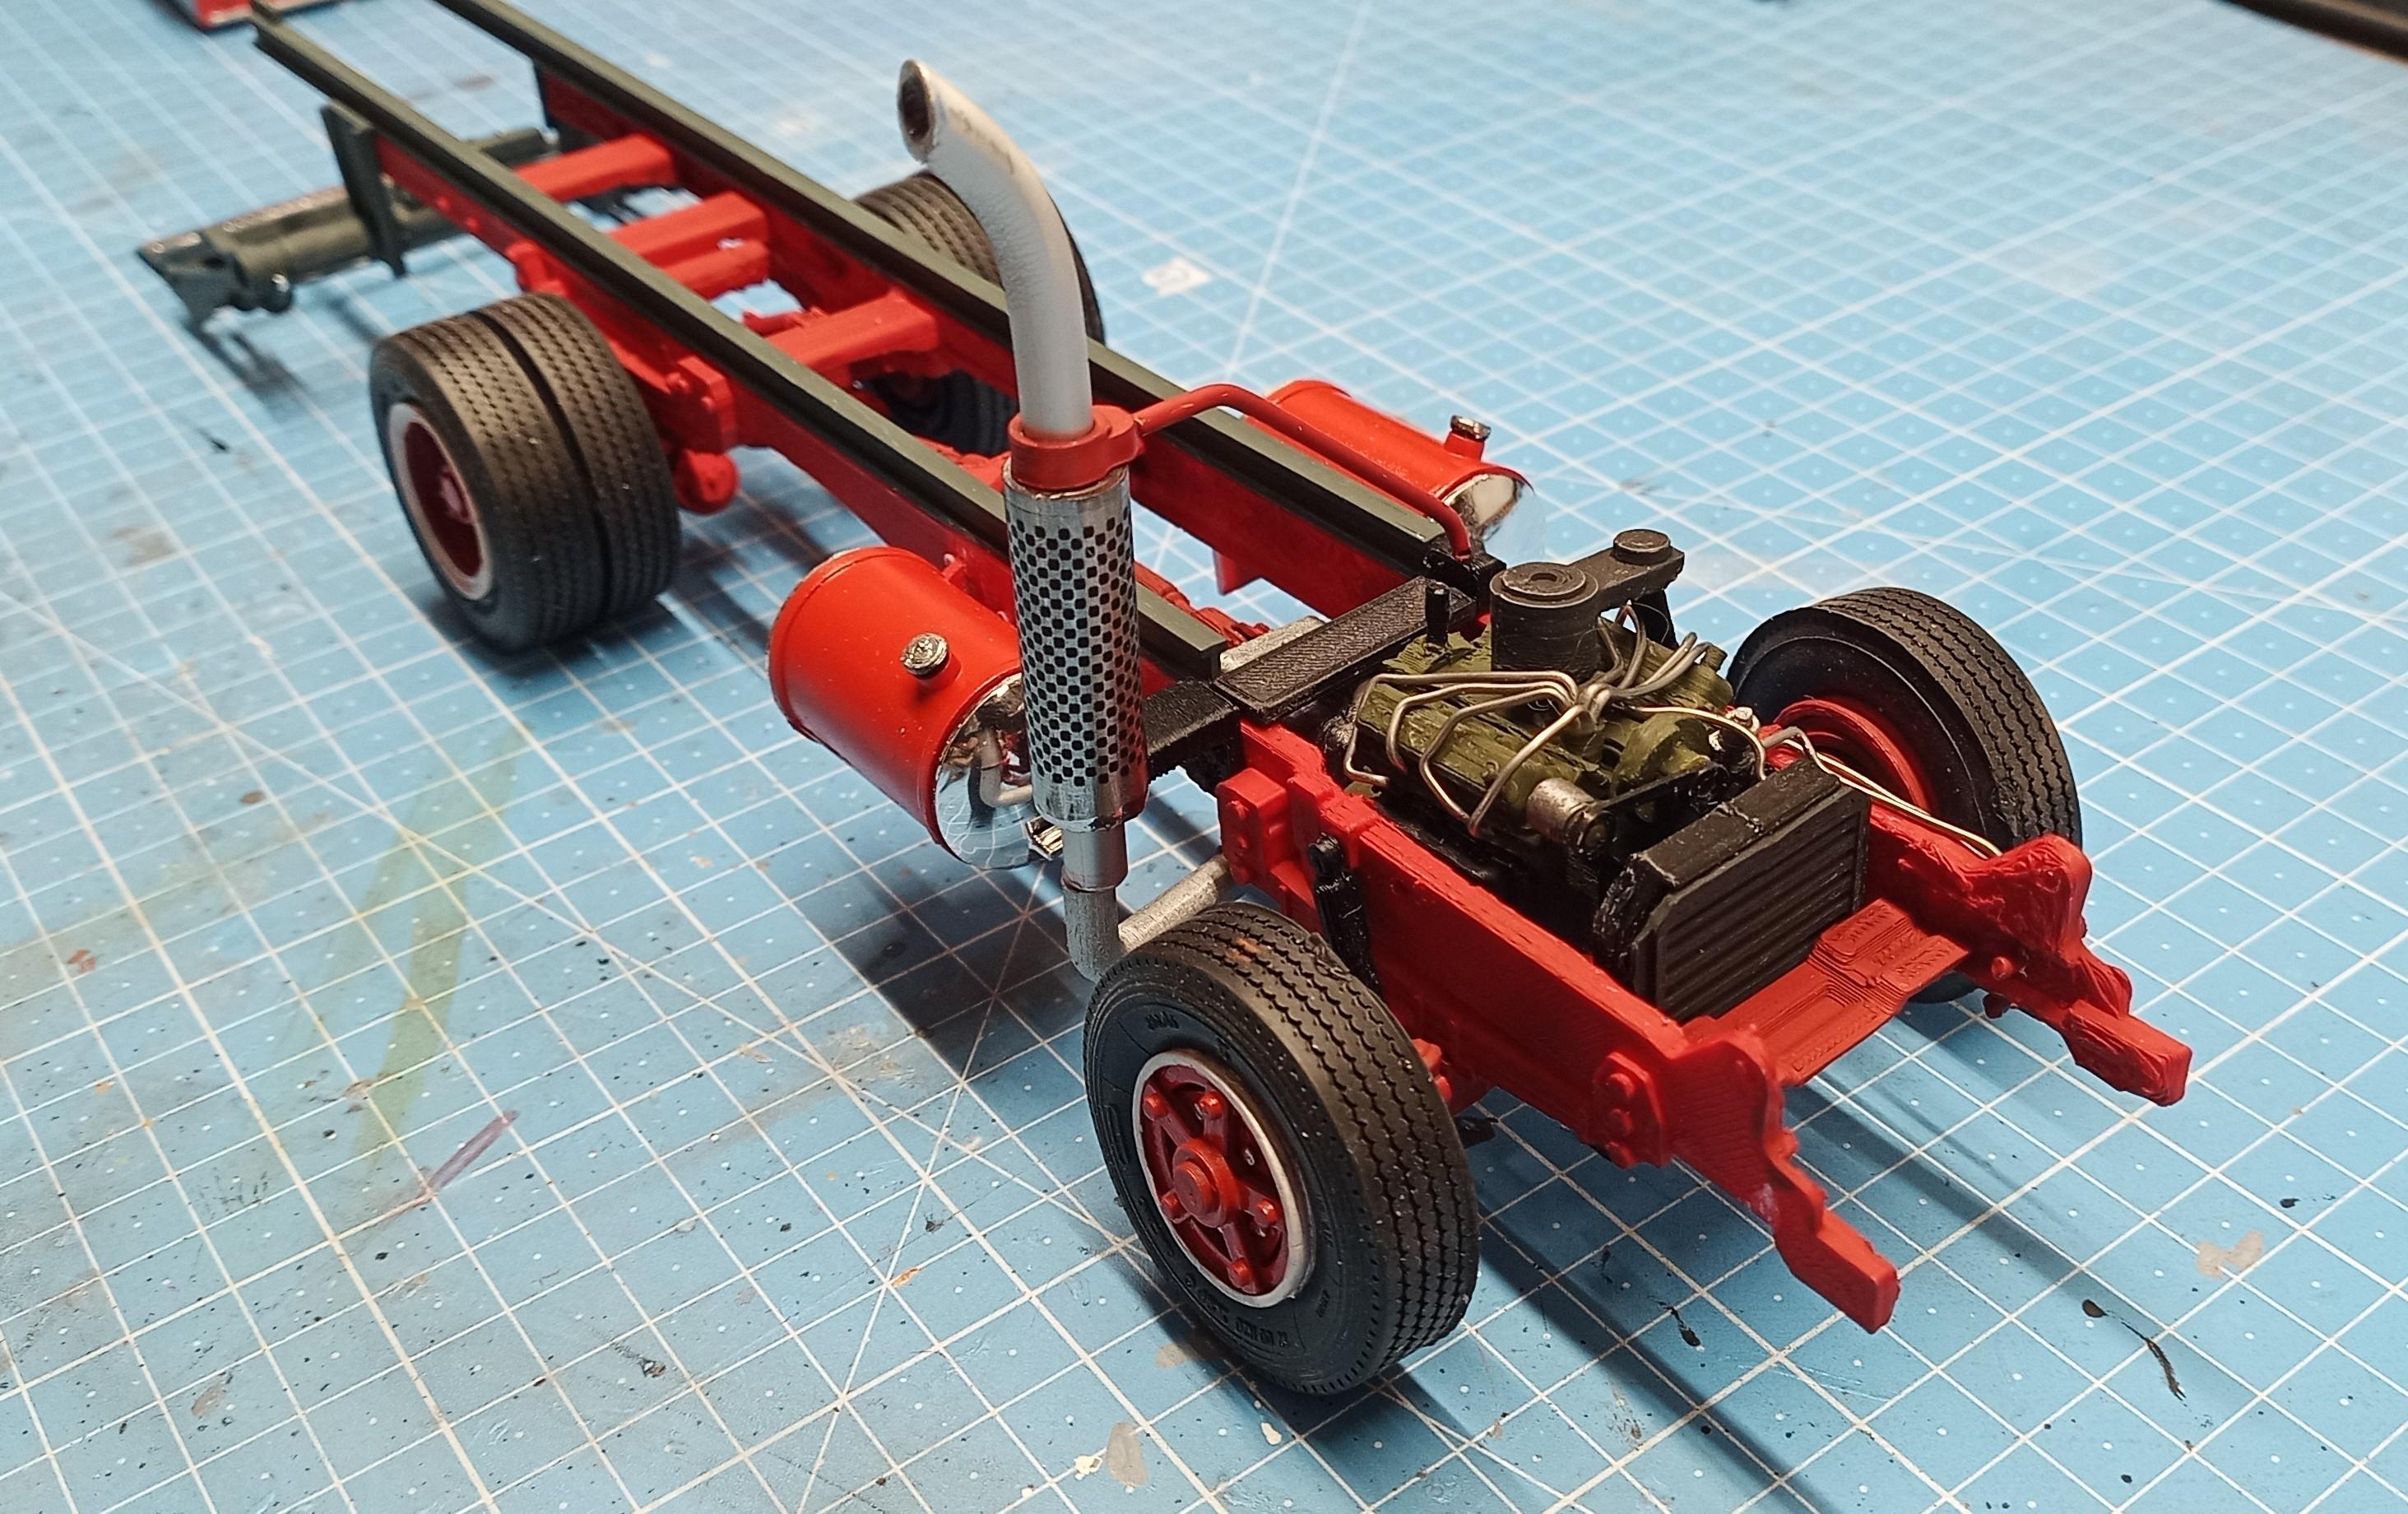
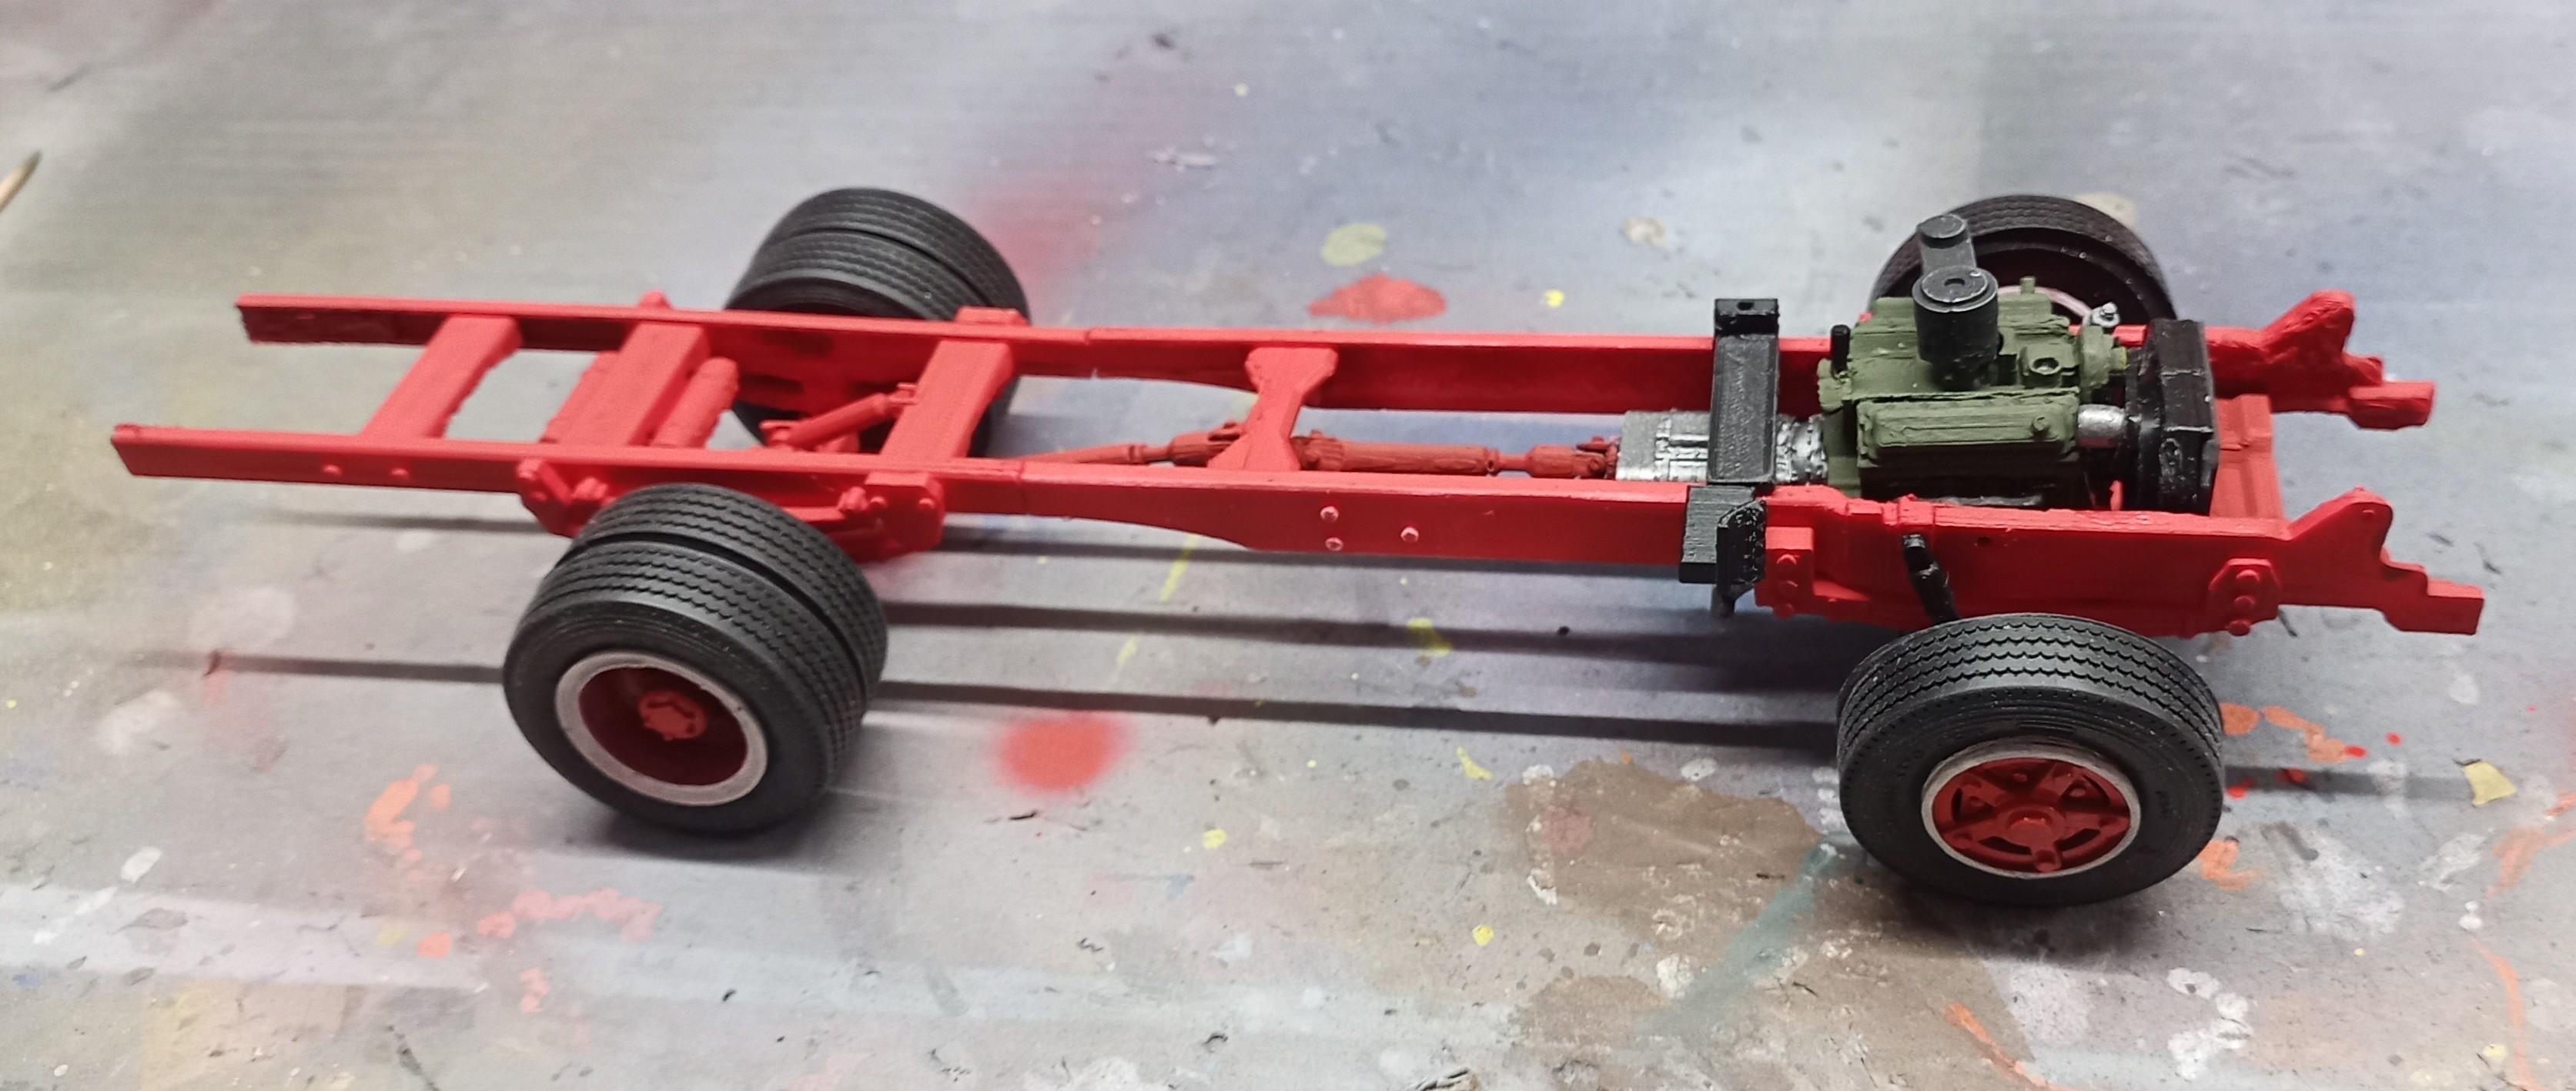
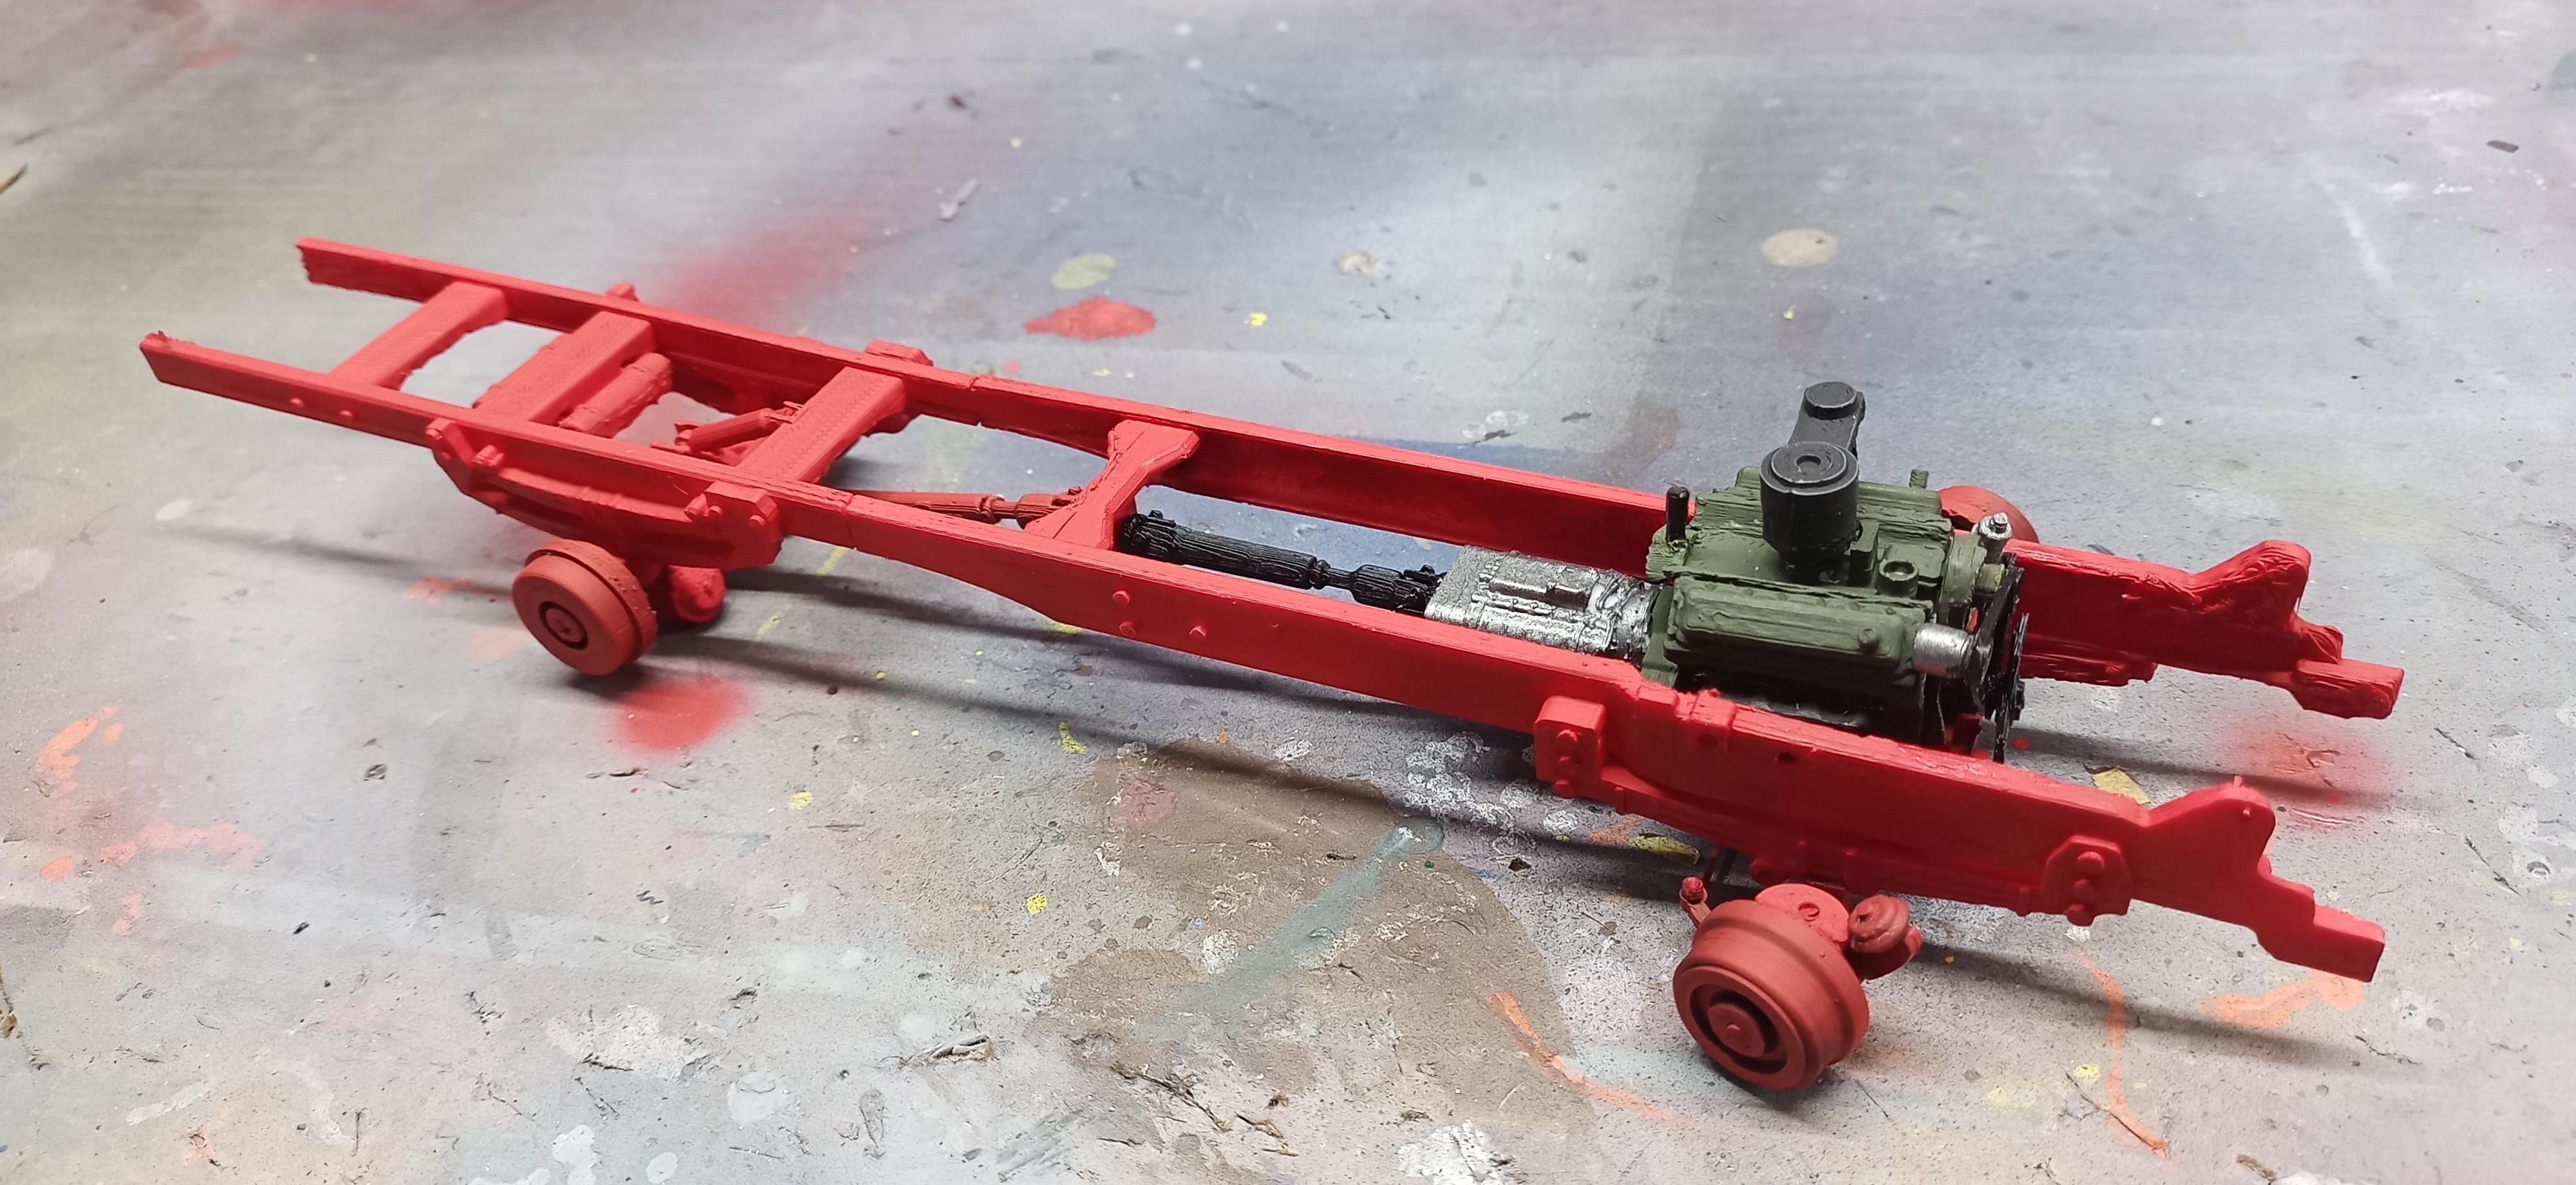
Had a bit of time in my lunch break. Painted the chassis! The engine is just positioned to see the fit.
-
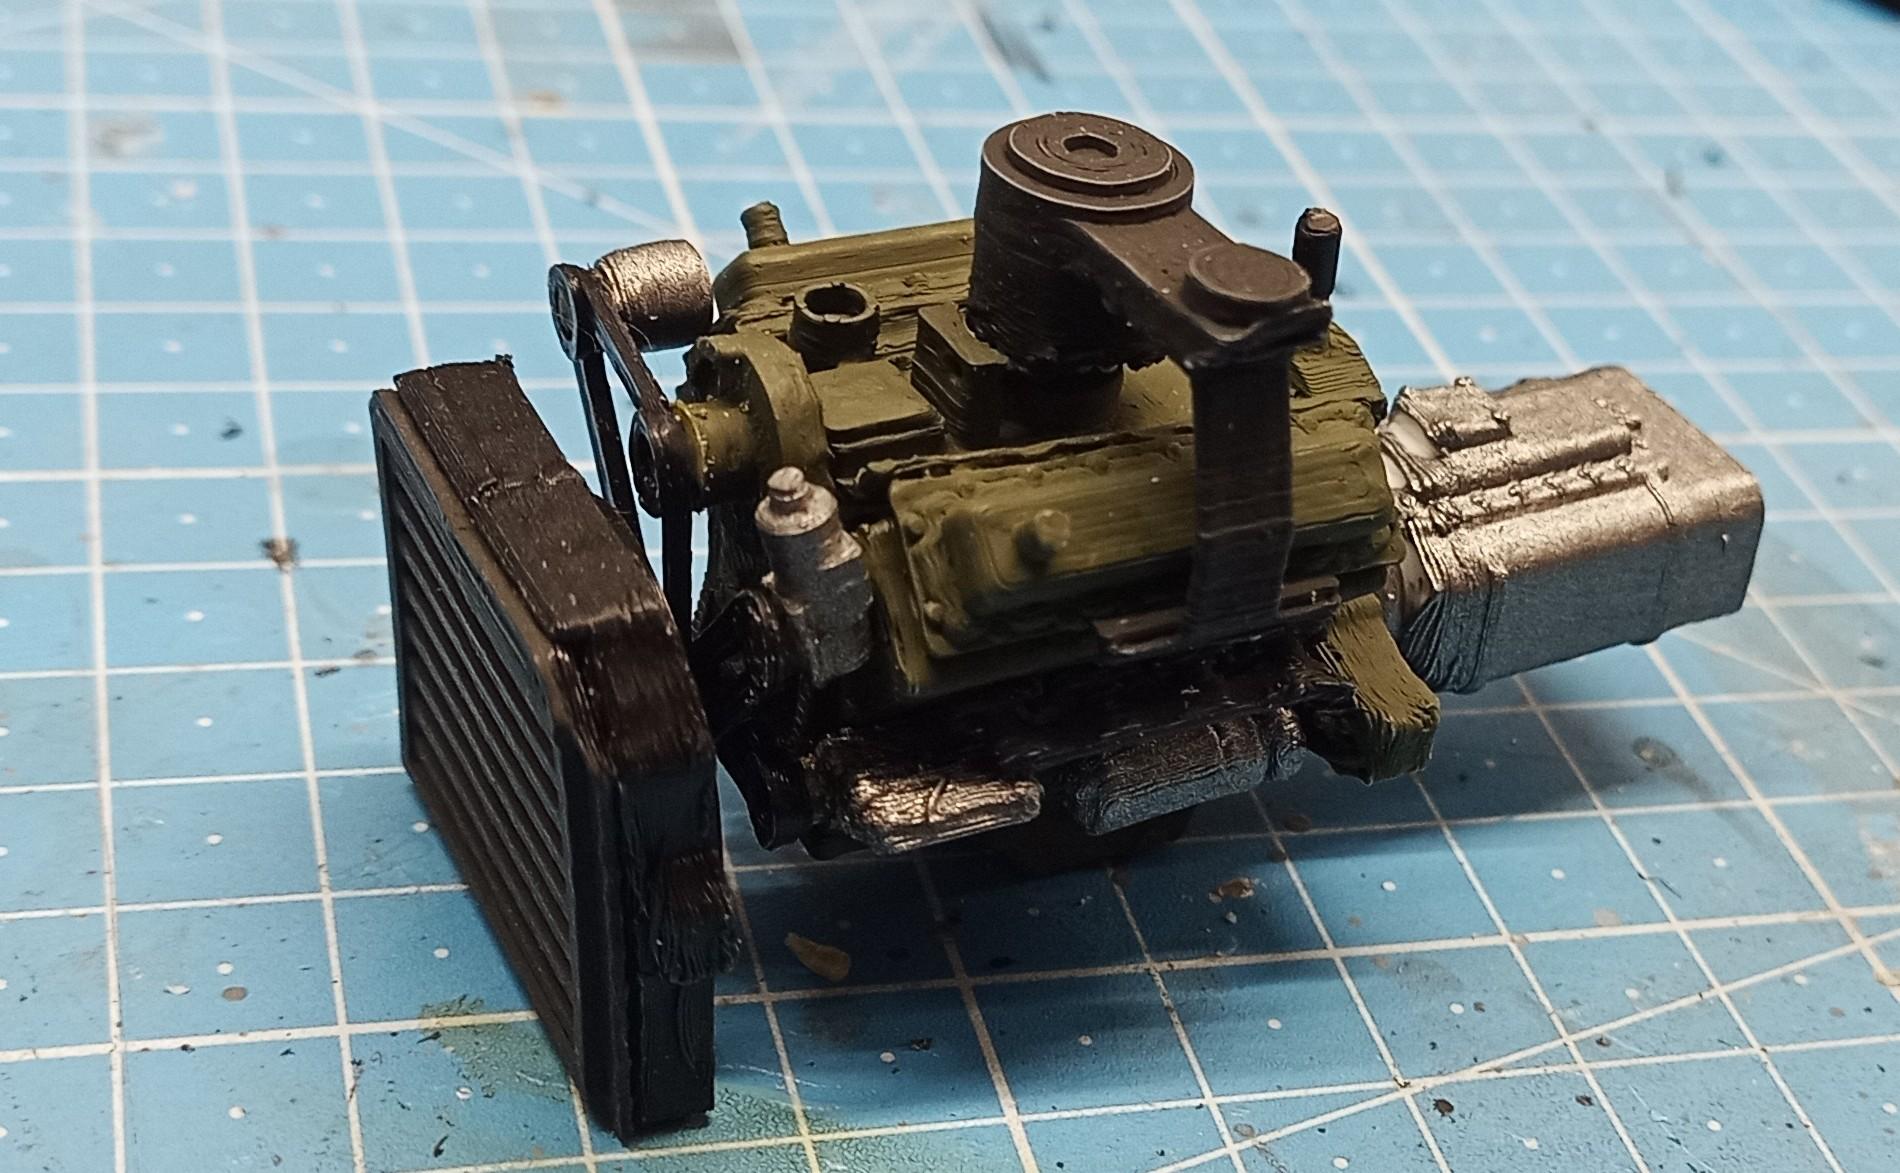
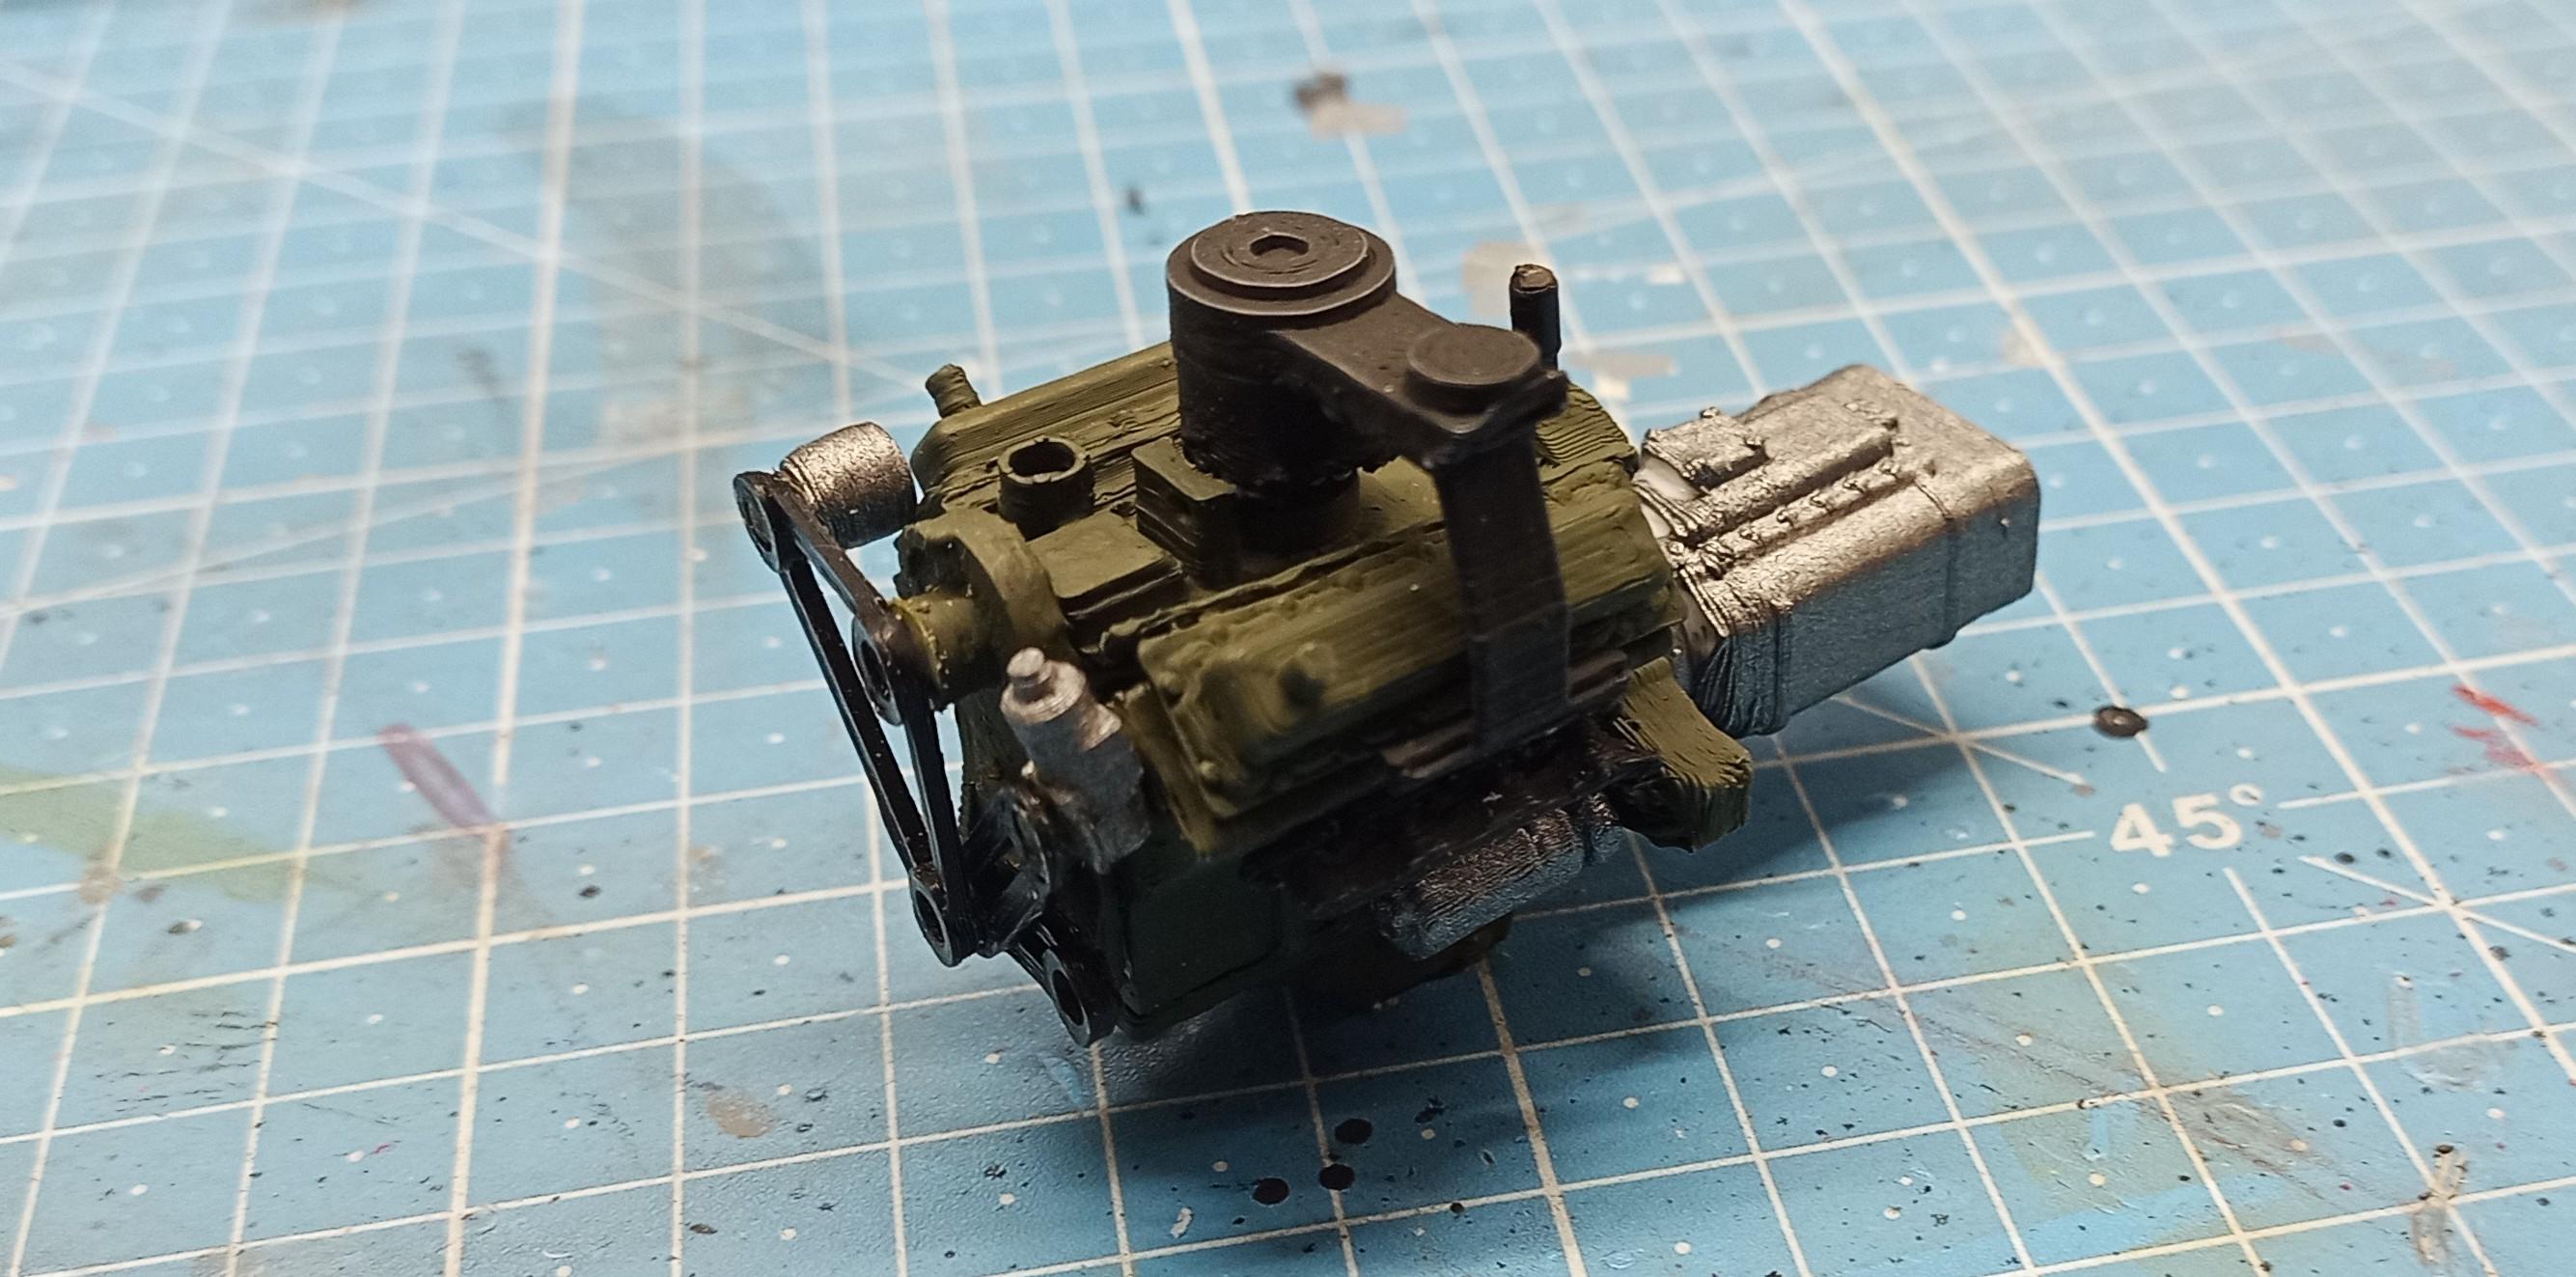
The engine is finished! (I know, Ford engines are/were normally blue but I like it better this way! The chassis is ready for painting:
-
Thanks very much to all of you. I just hope I took the correct measures off the pics I have but it should work out. I believe the Louisville and the C600 kits have the exact same box body so I also had the original parts to check size. Still it's always an adventure combining kit parts and printed ones. Especially when you don't have all the kit parts yet. There's always something you didn't see.
-
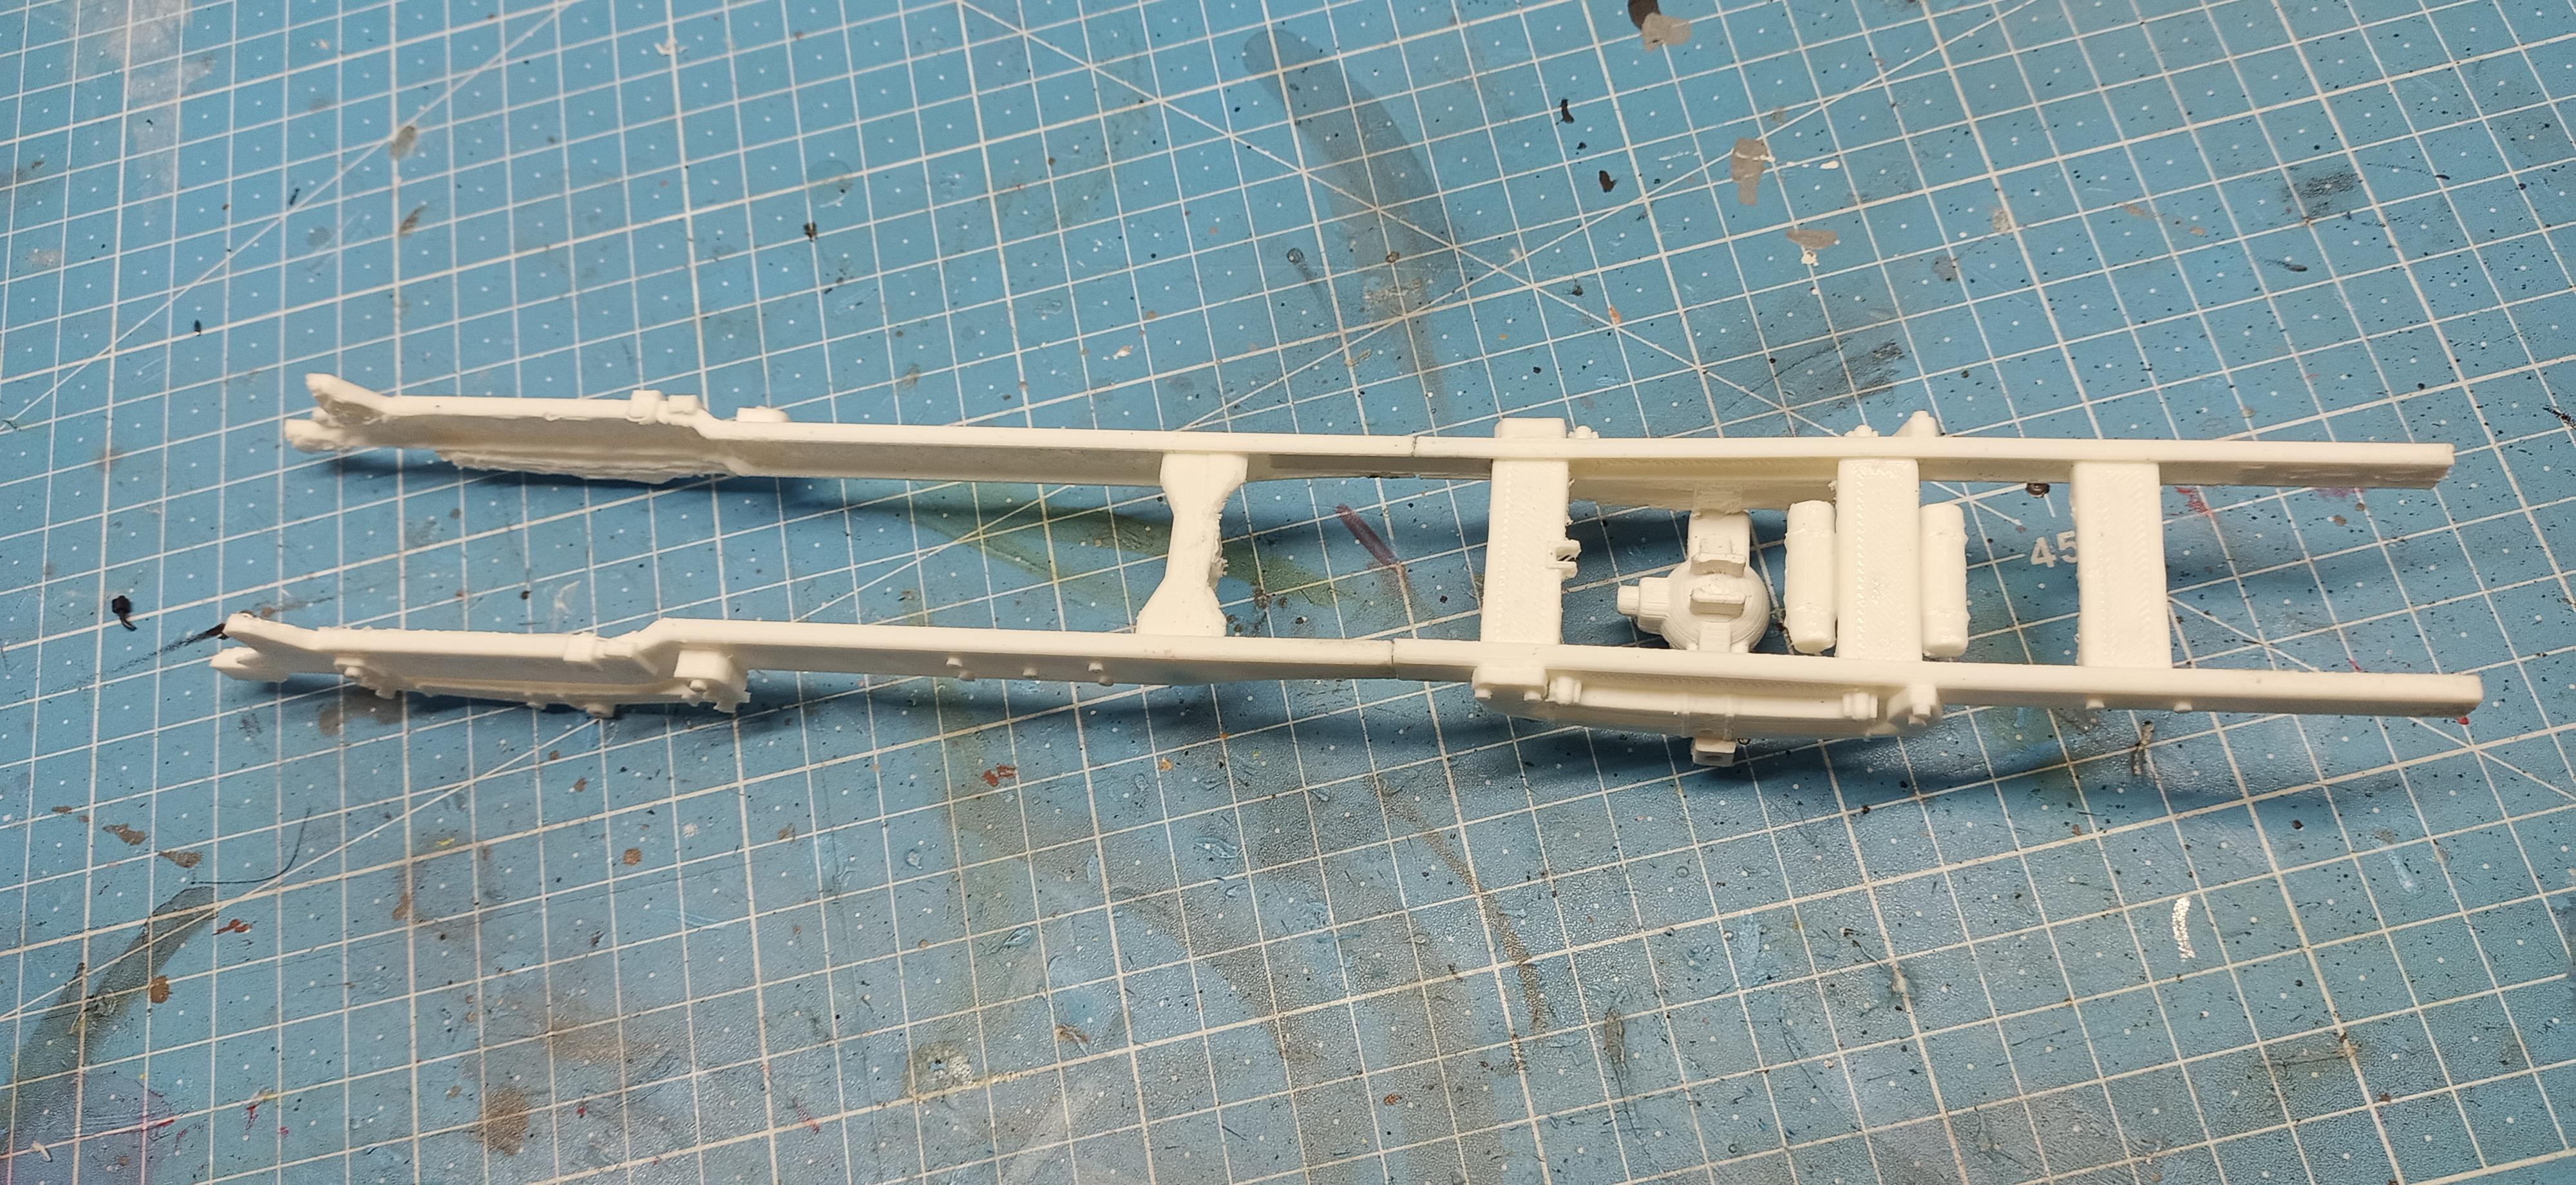
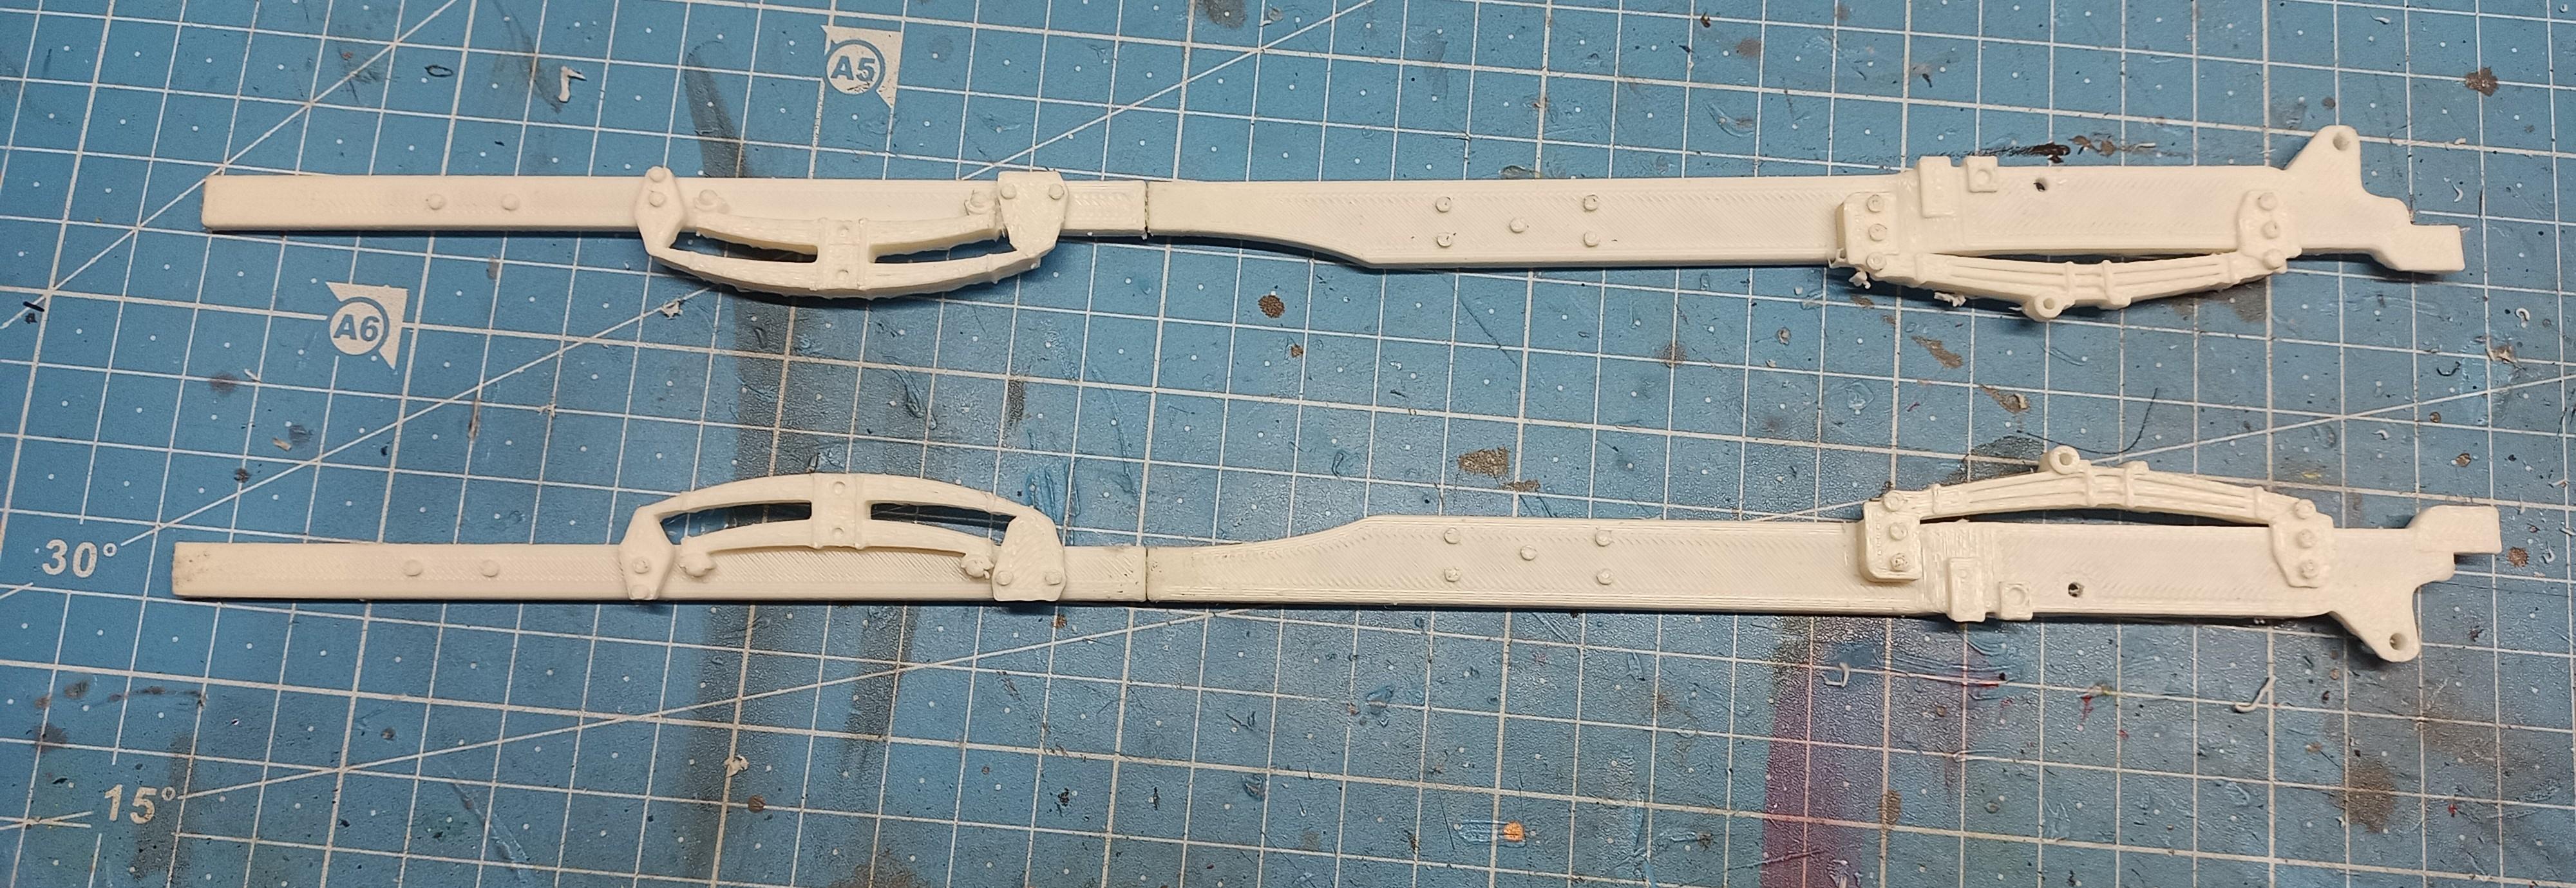
The first real parts progress: The engine is assembled and painted ... ...the chassis is started... ... Front axle made of earlier printed, now box parts and new parts is assembled ... ... chassis rests on front axle to check the fit.
-
Thanks Pal. Hope it turns out good!
-
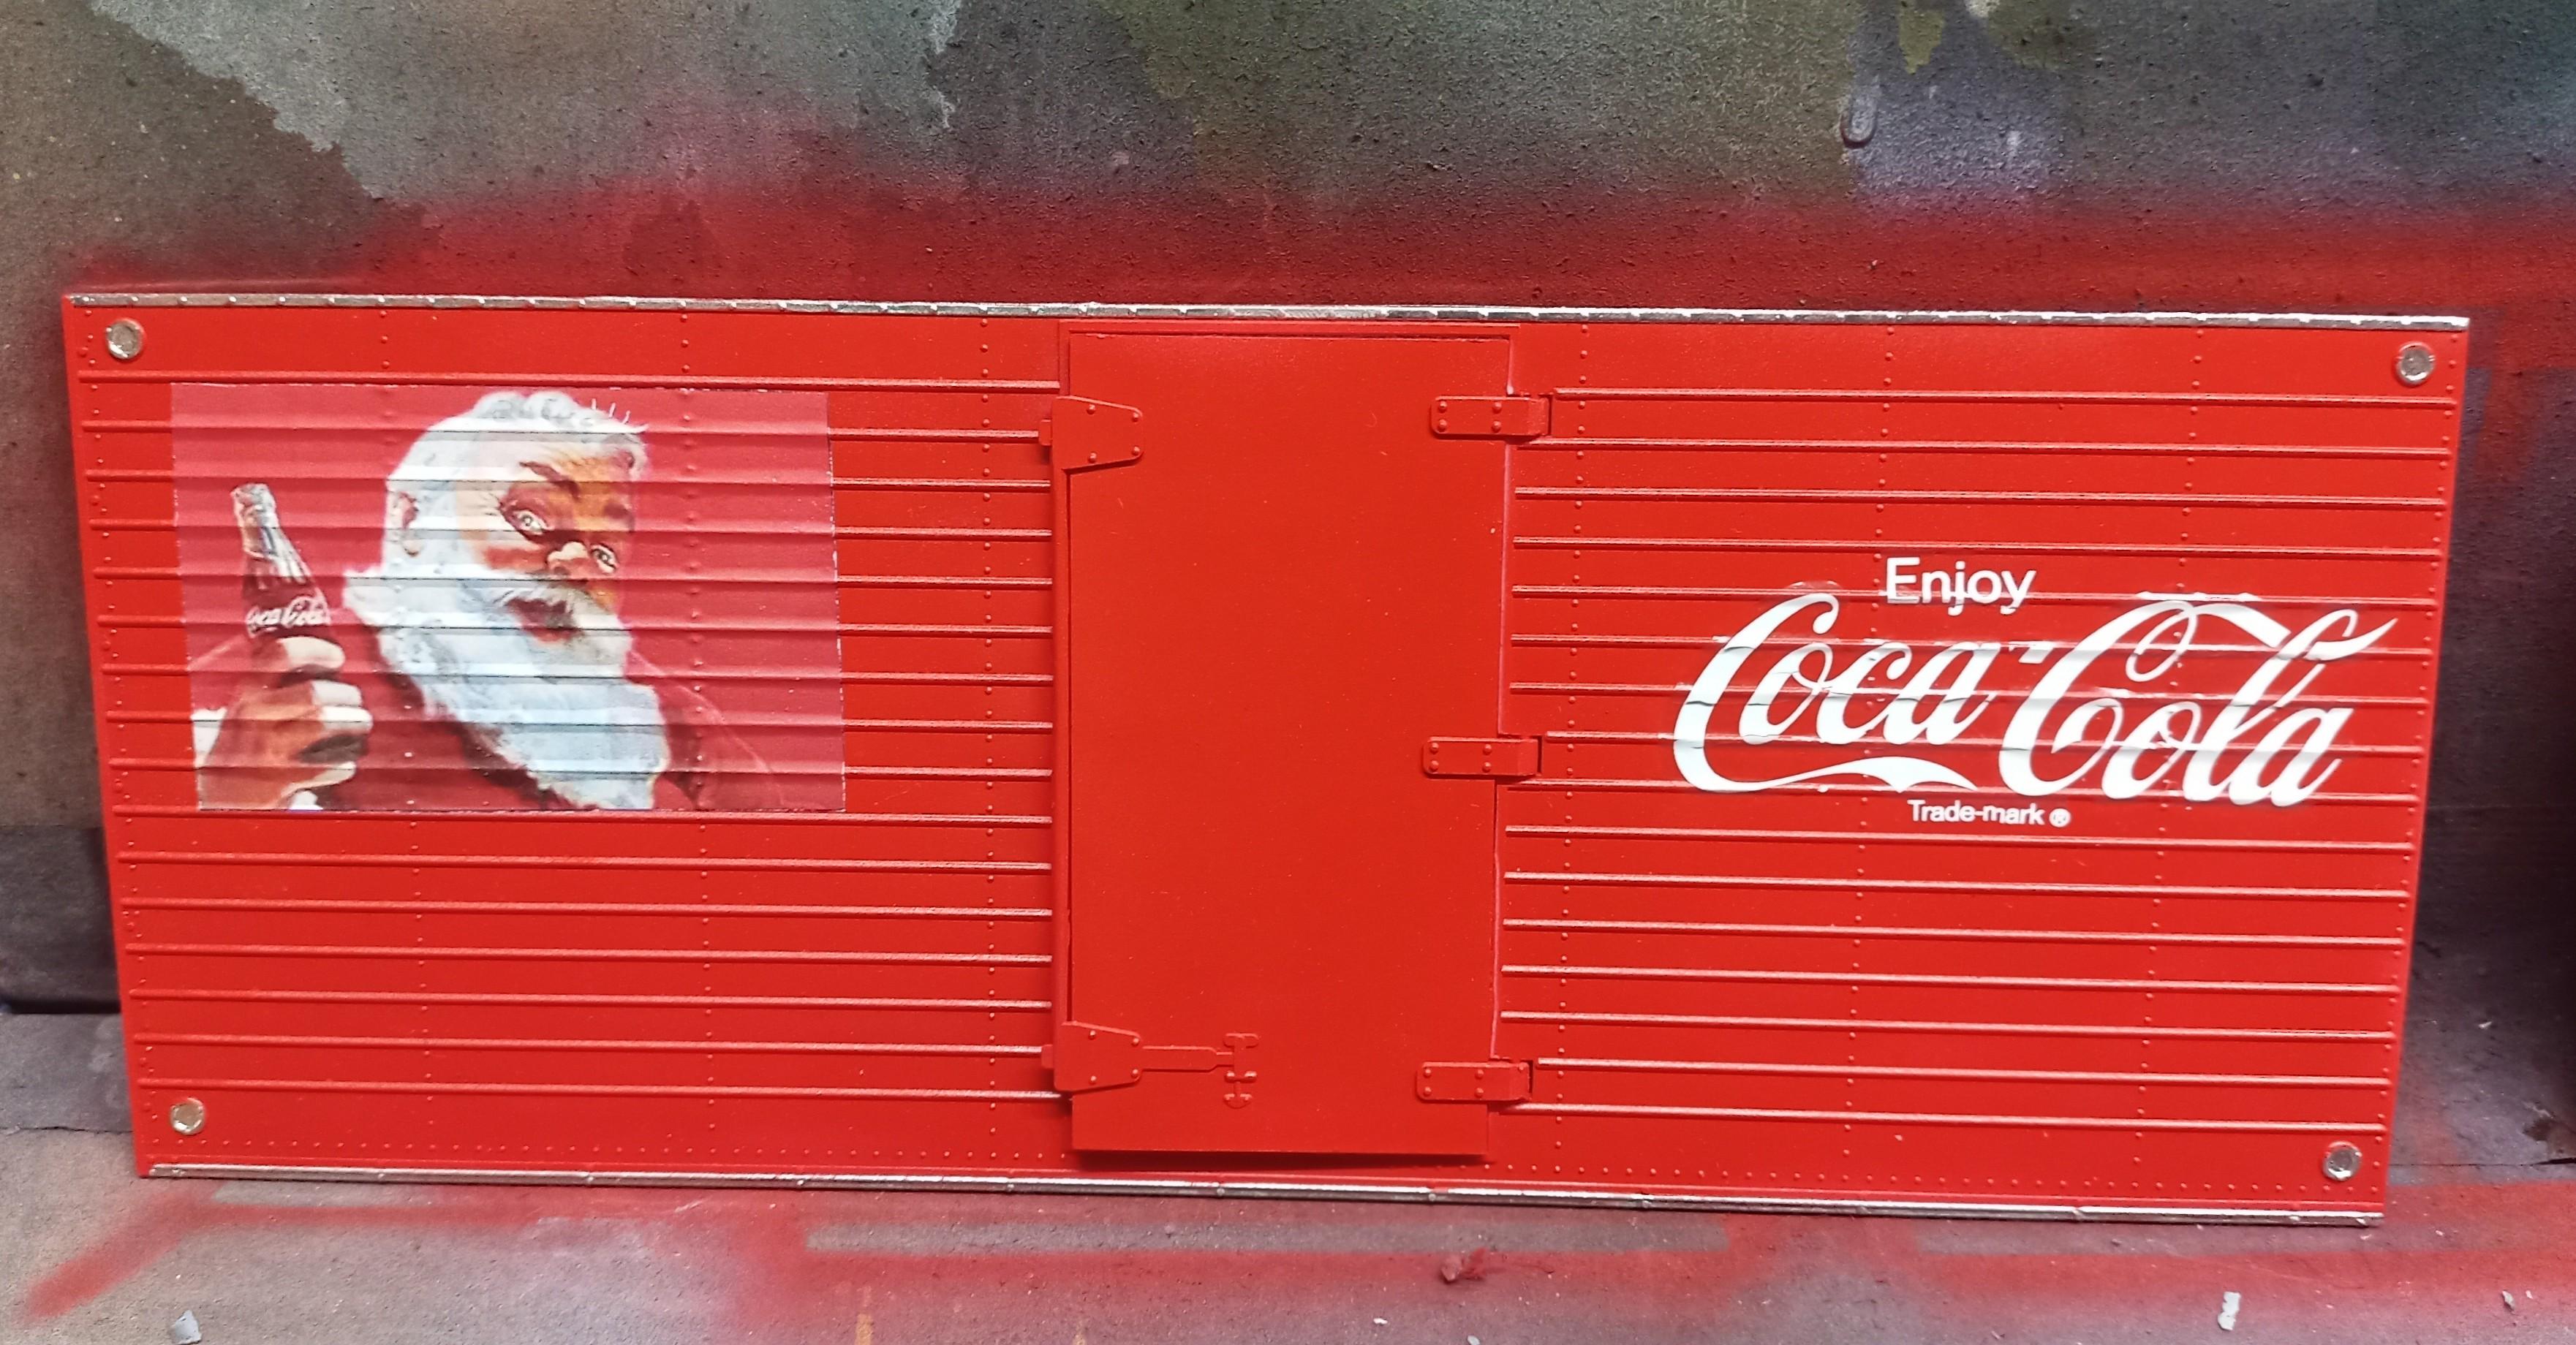
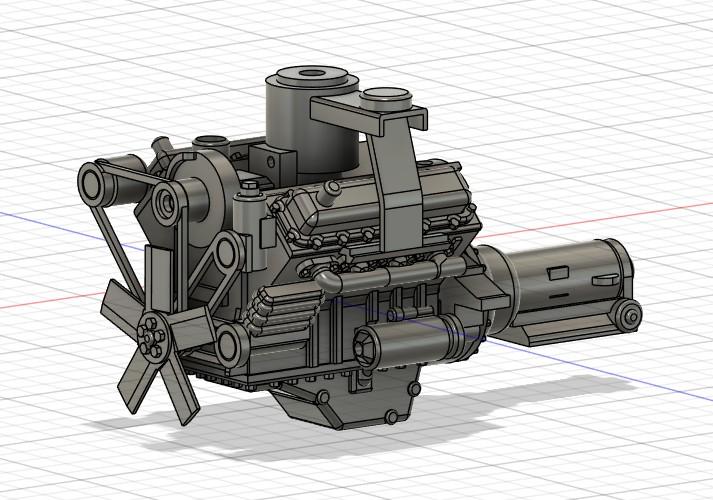
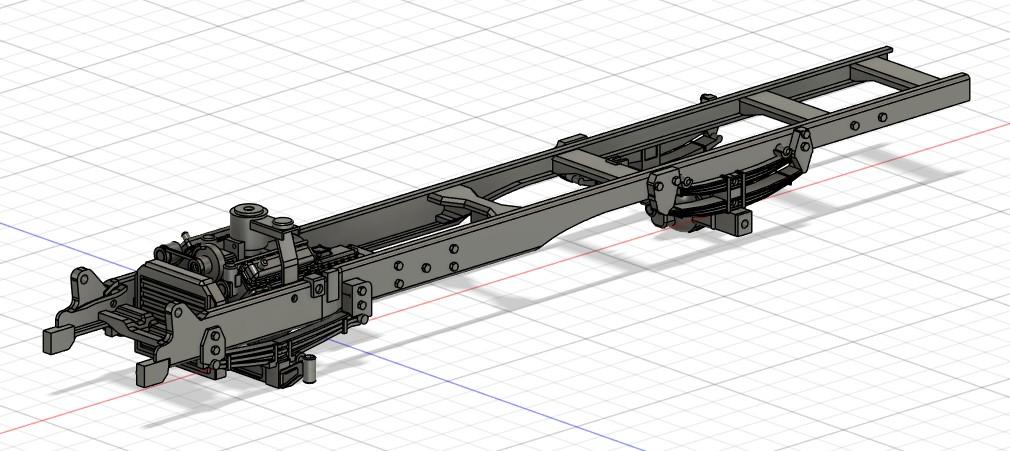
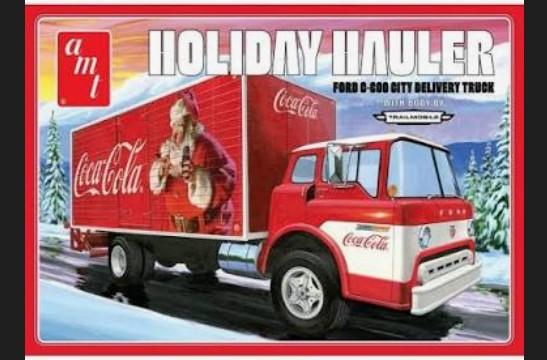
Hello everyone! I'm back with a new project. I'm building a C800 as a Coke truck but I'm not using the original AMT kit. What's the idea? After having finished the Louisville I had the box left with a lift gate and I knew I had to make a Ford cabover now that I have a conventional. Also making the scrap pieces (IH Transtar cab) for the Louisville I thought a Coke truck might be nice. I have Coke decals from three different kits (Western Star, Pete 352 and GMC General). Never used them so now's the chance to catch up on that. I tried desperately to design the cab but it's harder than I had expected so I cheated and ordered a cab with interior on eBay. (Thanks Jeff for the link to the offer). I designed and printed the engine and will be using a bunch of box parts to fill the parts gaps. Fuel tanks, exhaust system, rims, tires and a few other things will come out of the box. The engine will be the same V8 gas engine that Jeff has in his distributor truck but self designed. I downloaded the instruction sheet of the c600 Coke truck and used a few of Jeff's pics from his distributor build to get the engine and the chassis done. The chassis rails are materialized! A virtual mock-up of chassis and engine (I exchanged the automatic by a manual gear box). That's about it at the moment. It will hopefully look something like this: But it won't be a holiday edition. Just remembered that I wanted to make a comment on the Trailmobile box body. Those of you who are familiar with the Convoy movie might know that R.D.'s tank trailer seemed to be a Fruehauf (said so on the mud flaps) but it was actually a 1960 Trailmobile tank trailer. It was the only trailer they could find in the lack of time before the movie takes began. Since the trailer was quite short and looked a bit strange on that huge Mack they put the fifth wheel as far back as possible to make the trailer and the whole rig look a bit longer. A little story to both builds! 😊
-
Microbus from Convoy
Jürgen M. replied to Jürgen M.'s topic in Model Trucks: Big Rigs and Heavy Equipment
Yes they were. All except the reverend. -
Microbus from Convoy
Jürgen M. replied to Jürgen M.'s topic in Model Trucks: Big Rigs and Heavy Equipment
Thanks! I thought it would be too much to comb so much hair! 😁 By the way, did you know that those Jesus freaks were Kris Kristofferson's band? -
Ford Louisville 'Junkyard Dog'
Jürgen M. replied to Jürgen M.'s topic in Model Trucks: Big Rigs and Heavy Equipment
Thank you Steve. I always wanted a Louisville but never had a really interisting idea of what to make of it till I saw an old Scania here a while ago which had the same kind of scrap bin. Then I knew it was time!