Jürgen M.
-
Posts
1,923 -
Joined
-
Last visited
Content Type
Profiles
Forums
Events
Gallery
Everything posted by Jürgen M.
-

Ford Louisville
Jürgen M. replied to Jürgen M.'s topic in WIP: Model Trucks: Big Rigs and Heavy Equipment
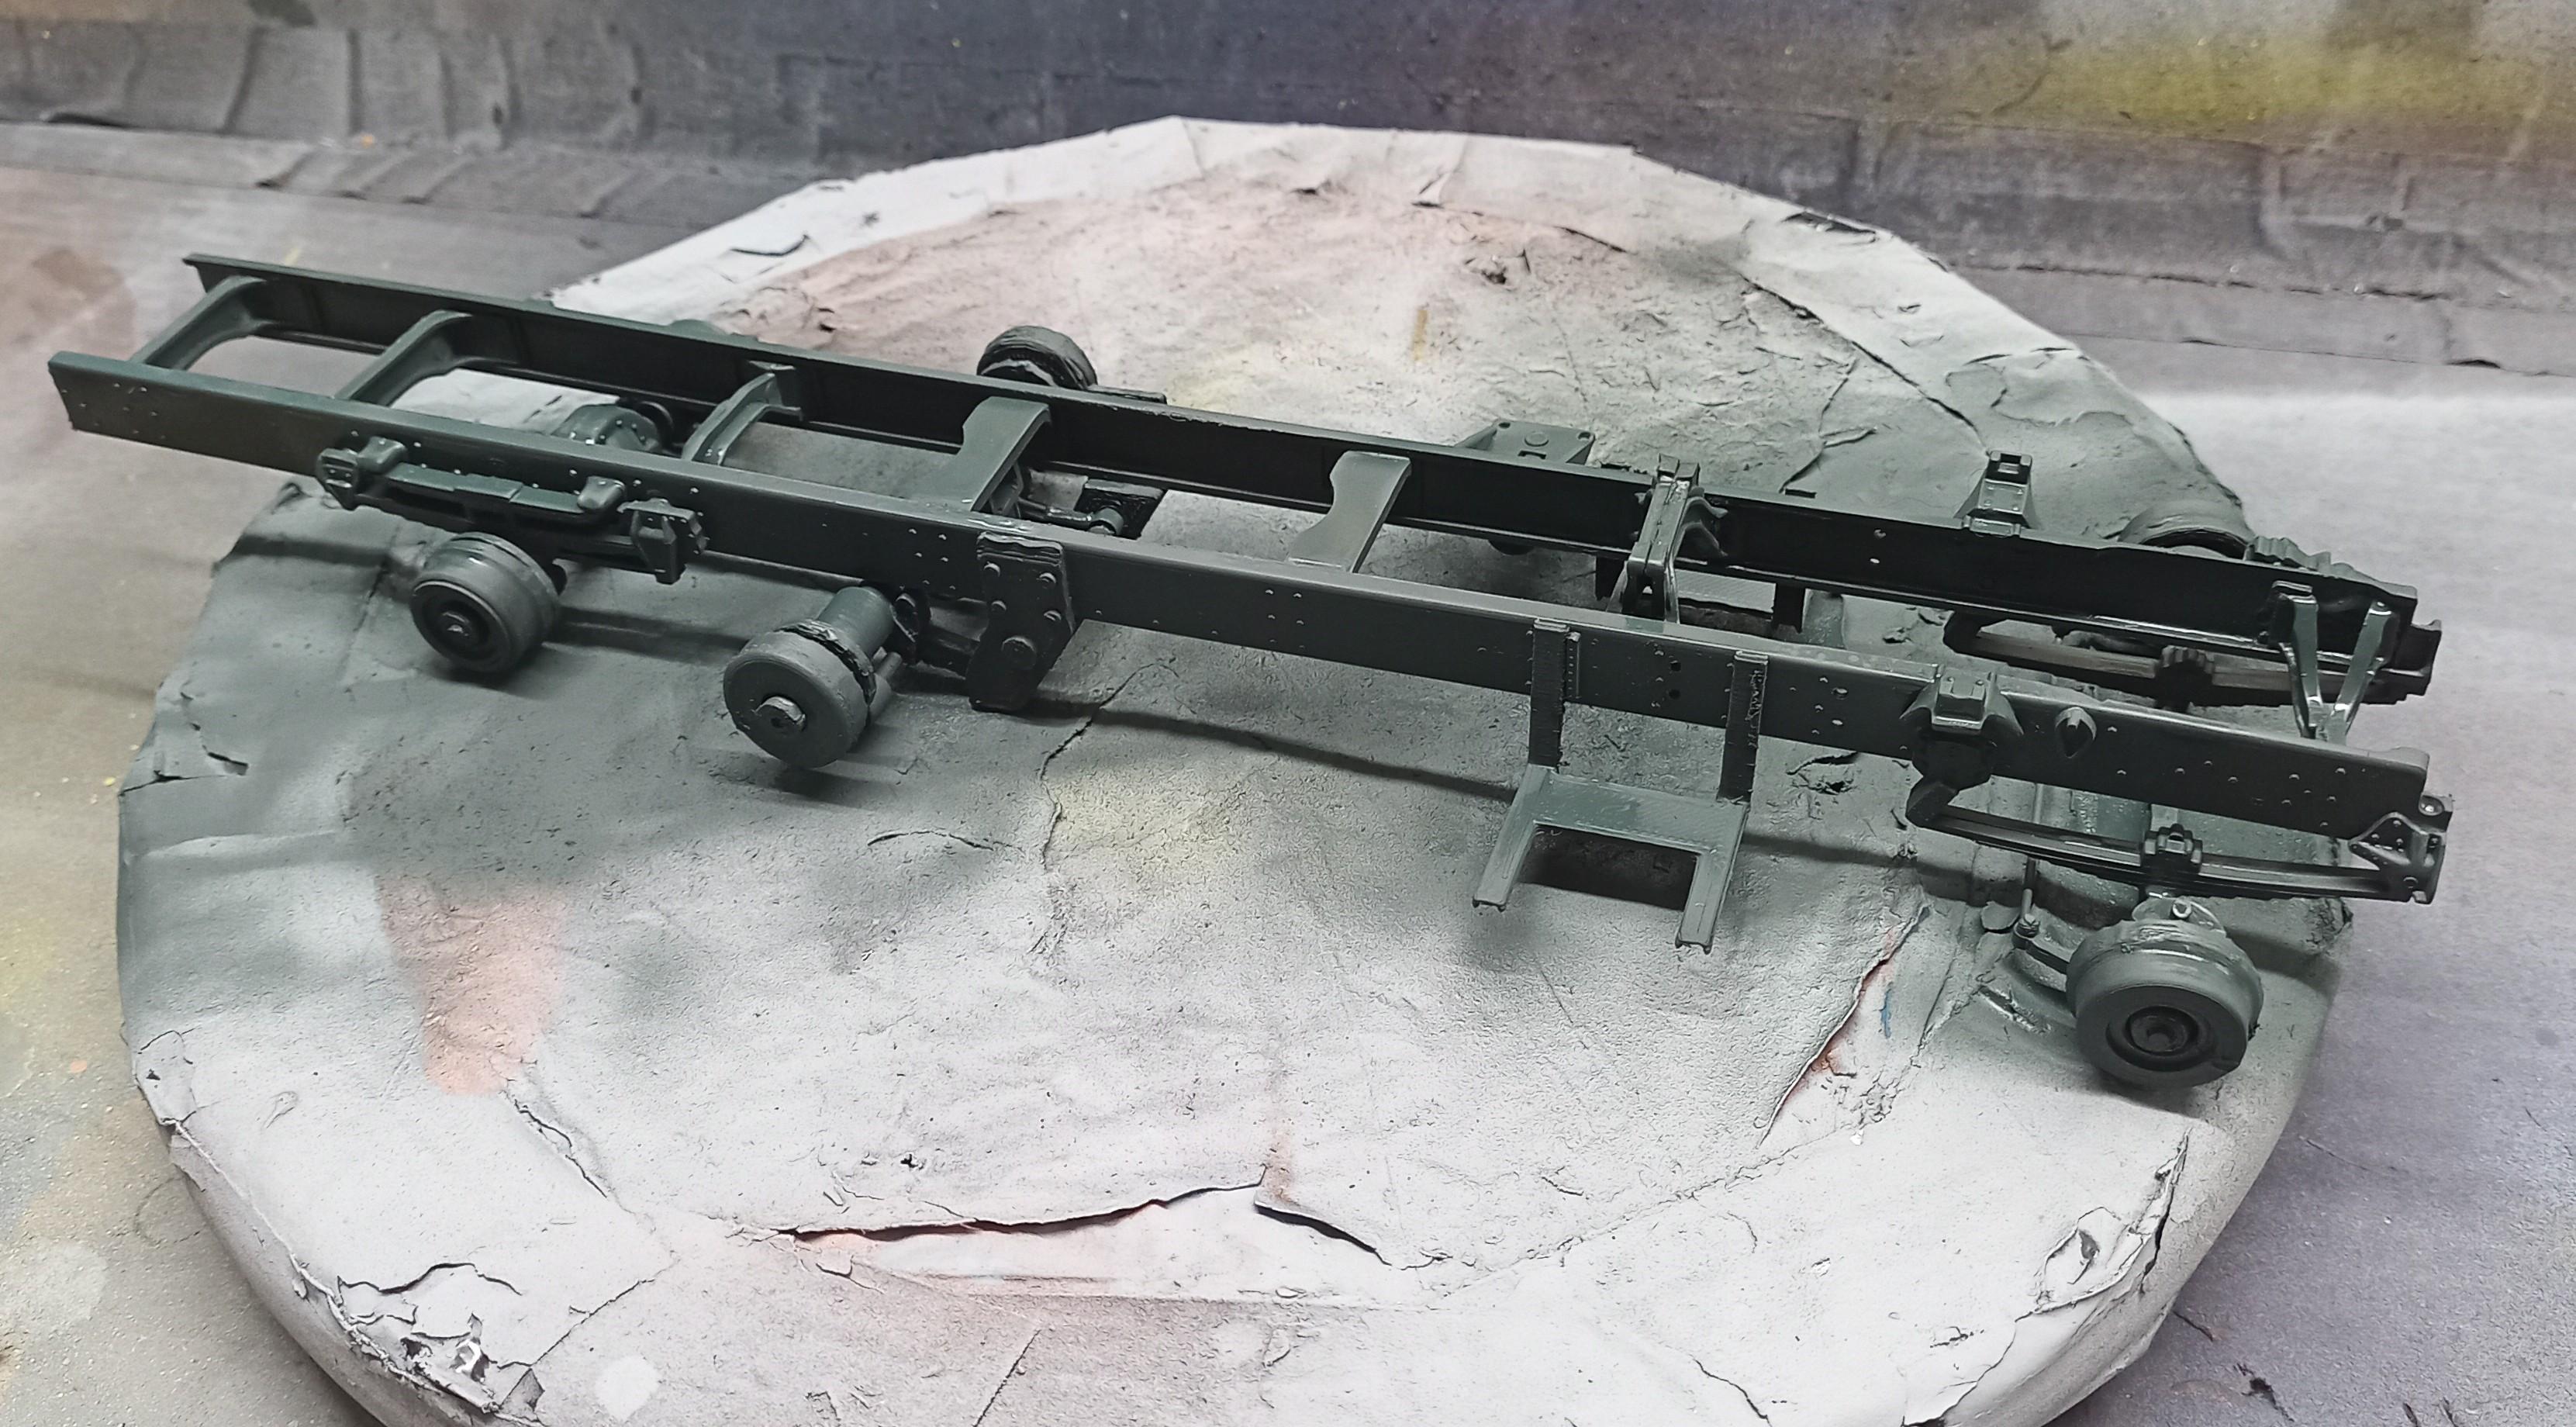
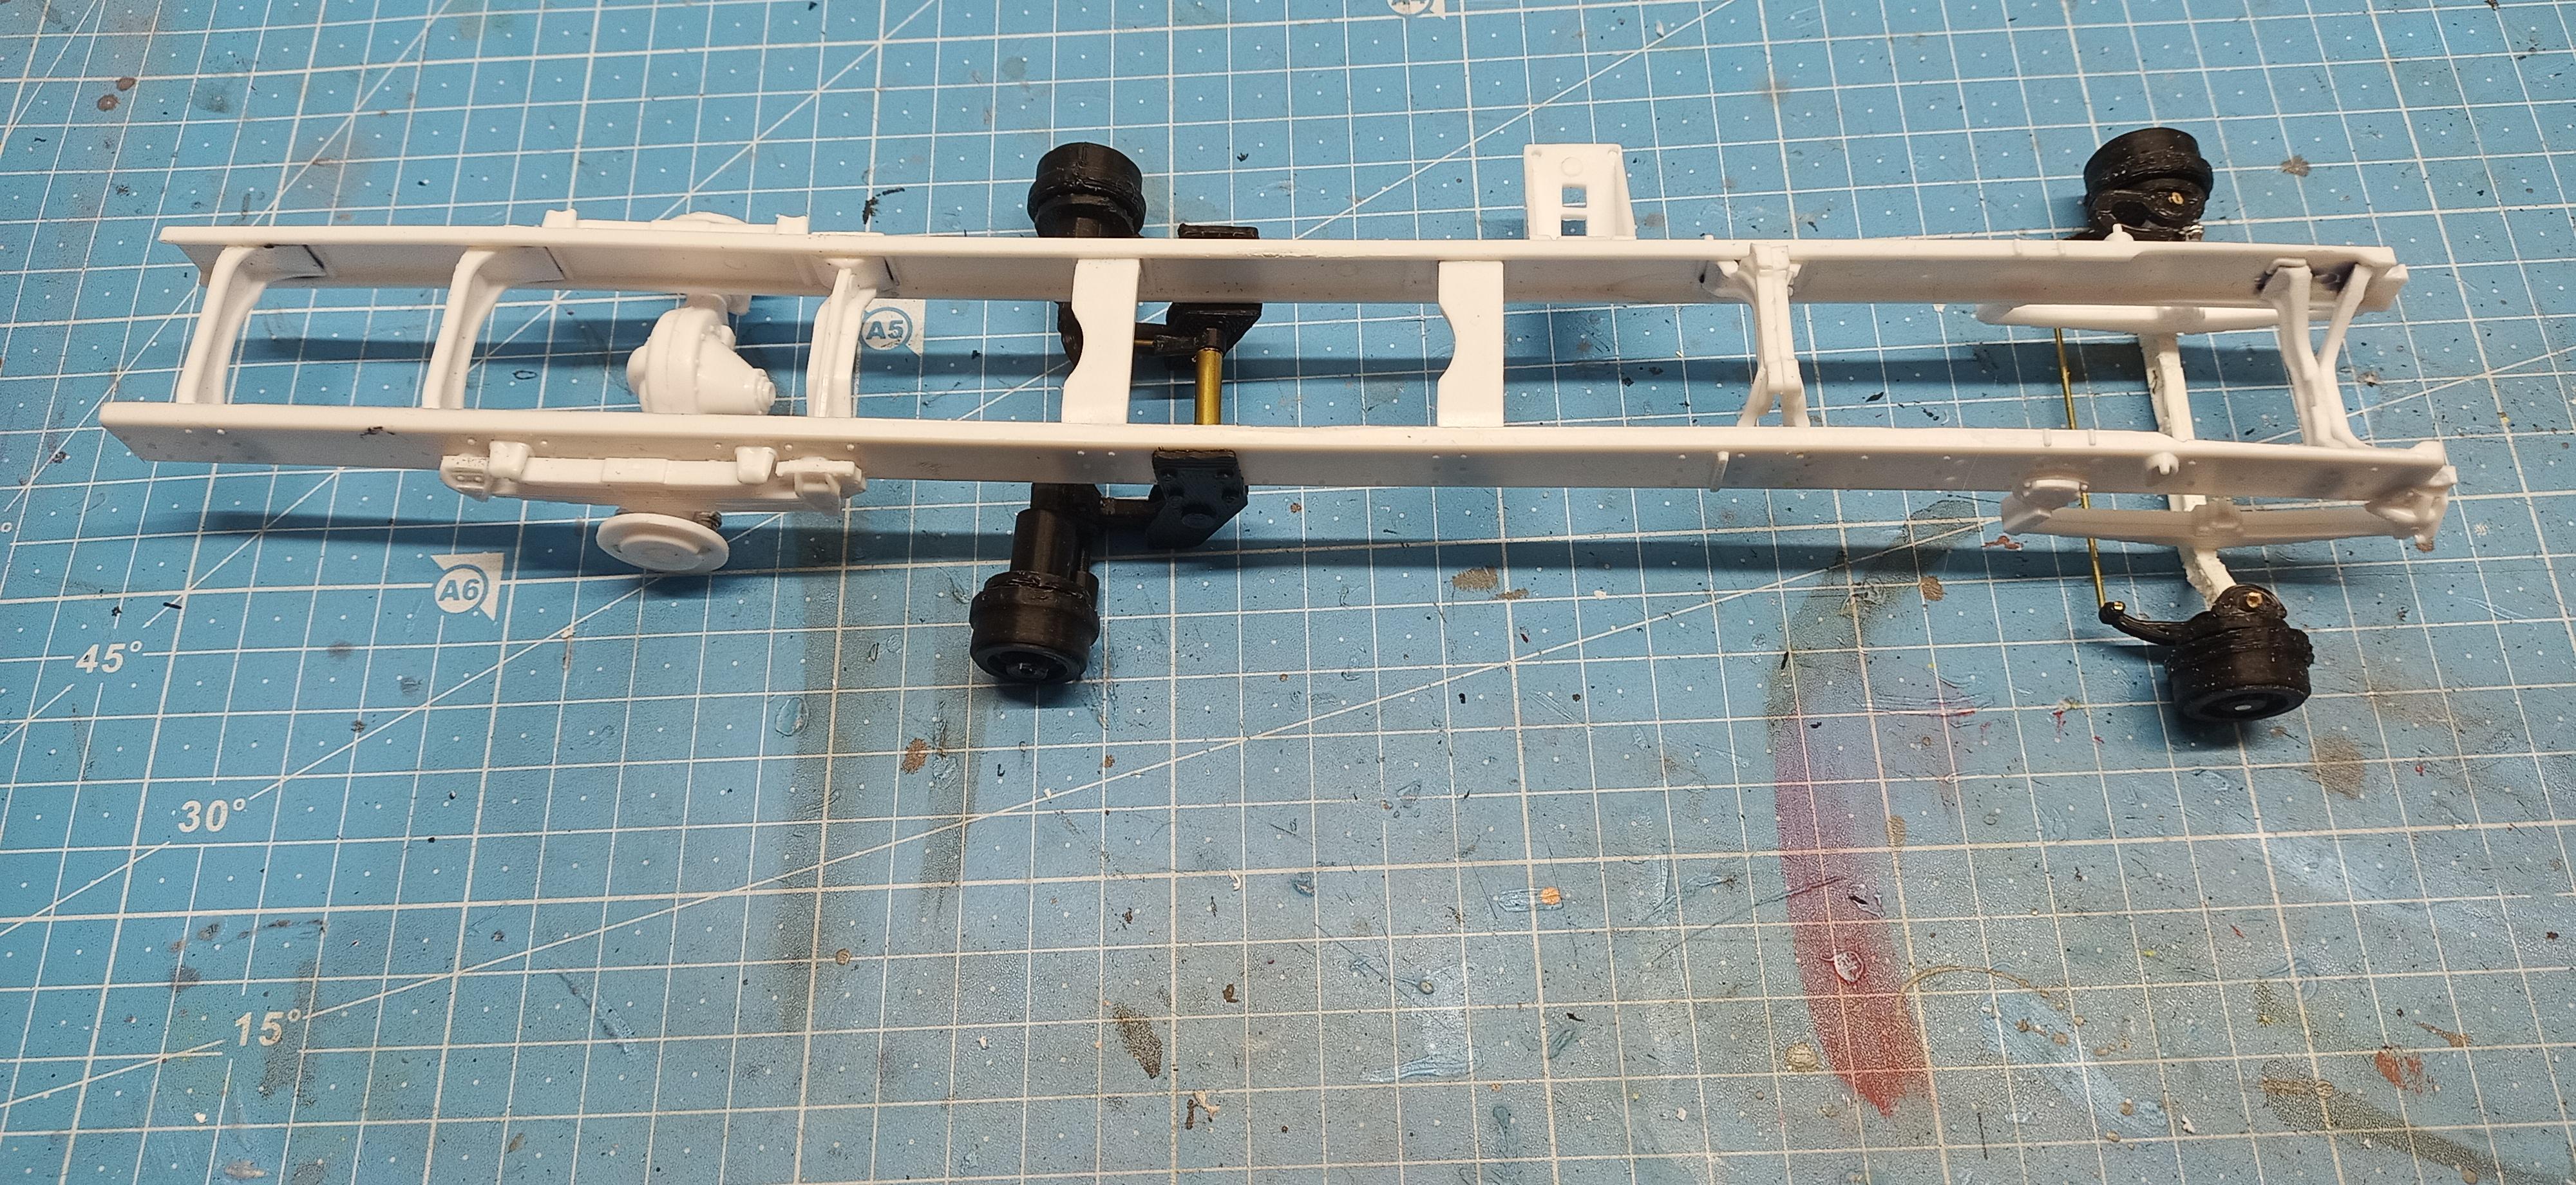
Got the chassis painted!
-
Ford Louisville
Jürgen M. replied to Jürgen M.'s topic in WIP: Model Trucks: Big Rigs and Heavy Equipment
Thank you Gary! Quite a compliment from a pro like you! -
Kenworth C500
Jürgen M. replied to Gary Chastain's topic in WIP: Model Trucks: Big Rigs and Heavy Equipment
Wow, Gary! Doing three builds at a time and all of them with the same great quality and defication! -
Ford Louisville
Jürgen M. replied to Jürgen M.'s topic in WIP: Model Trucks: Big Rigs and Heavy Equipment
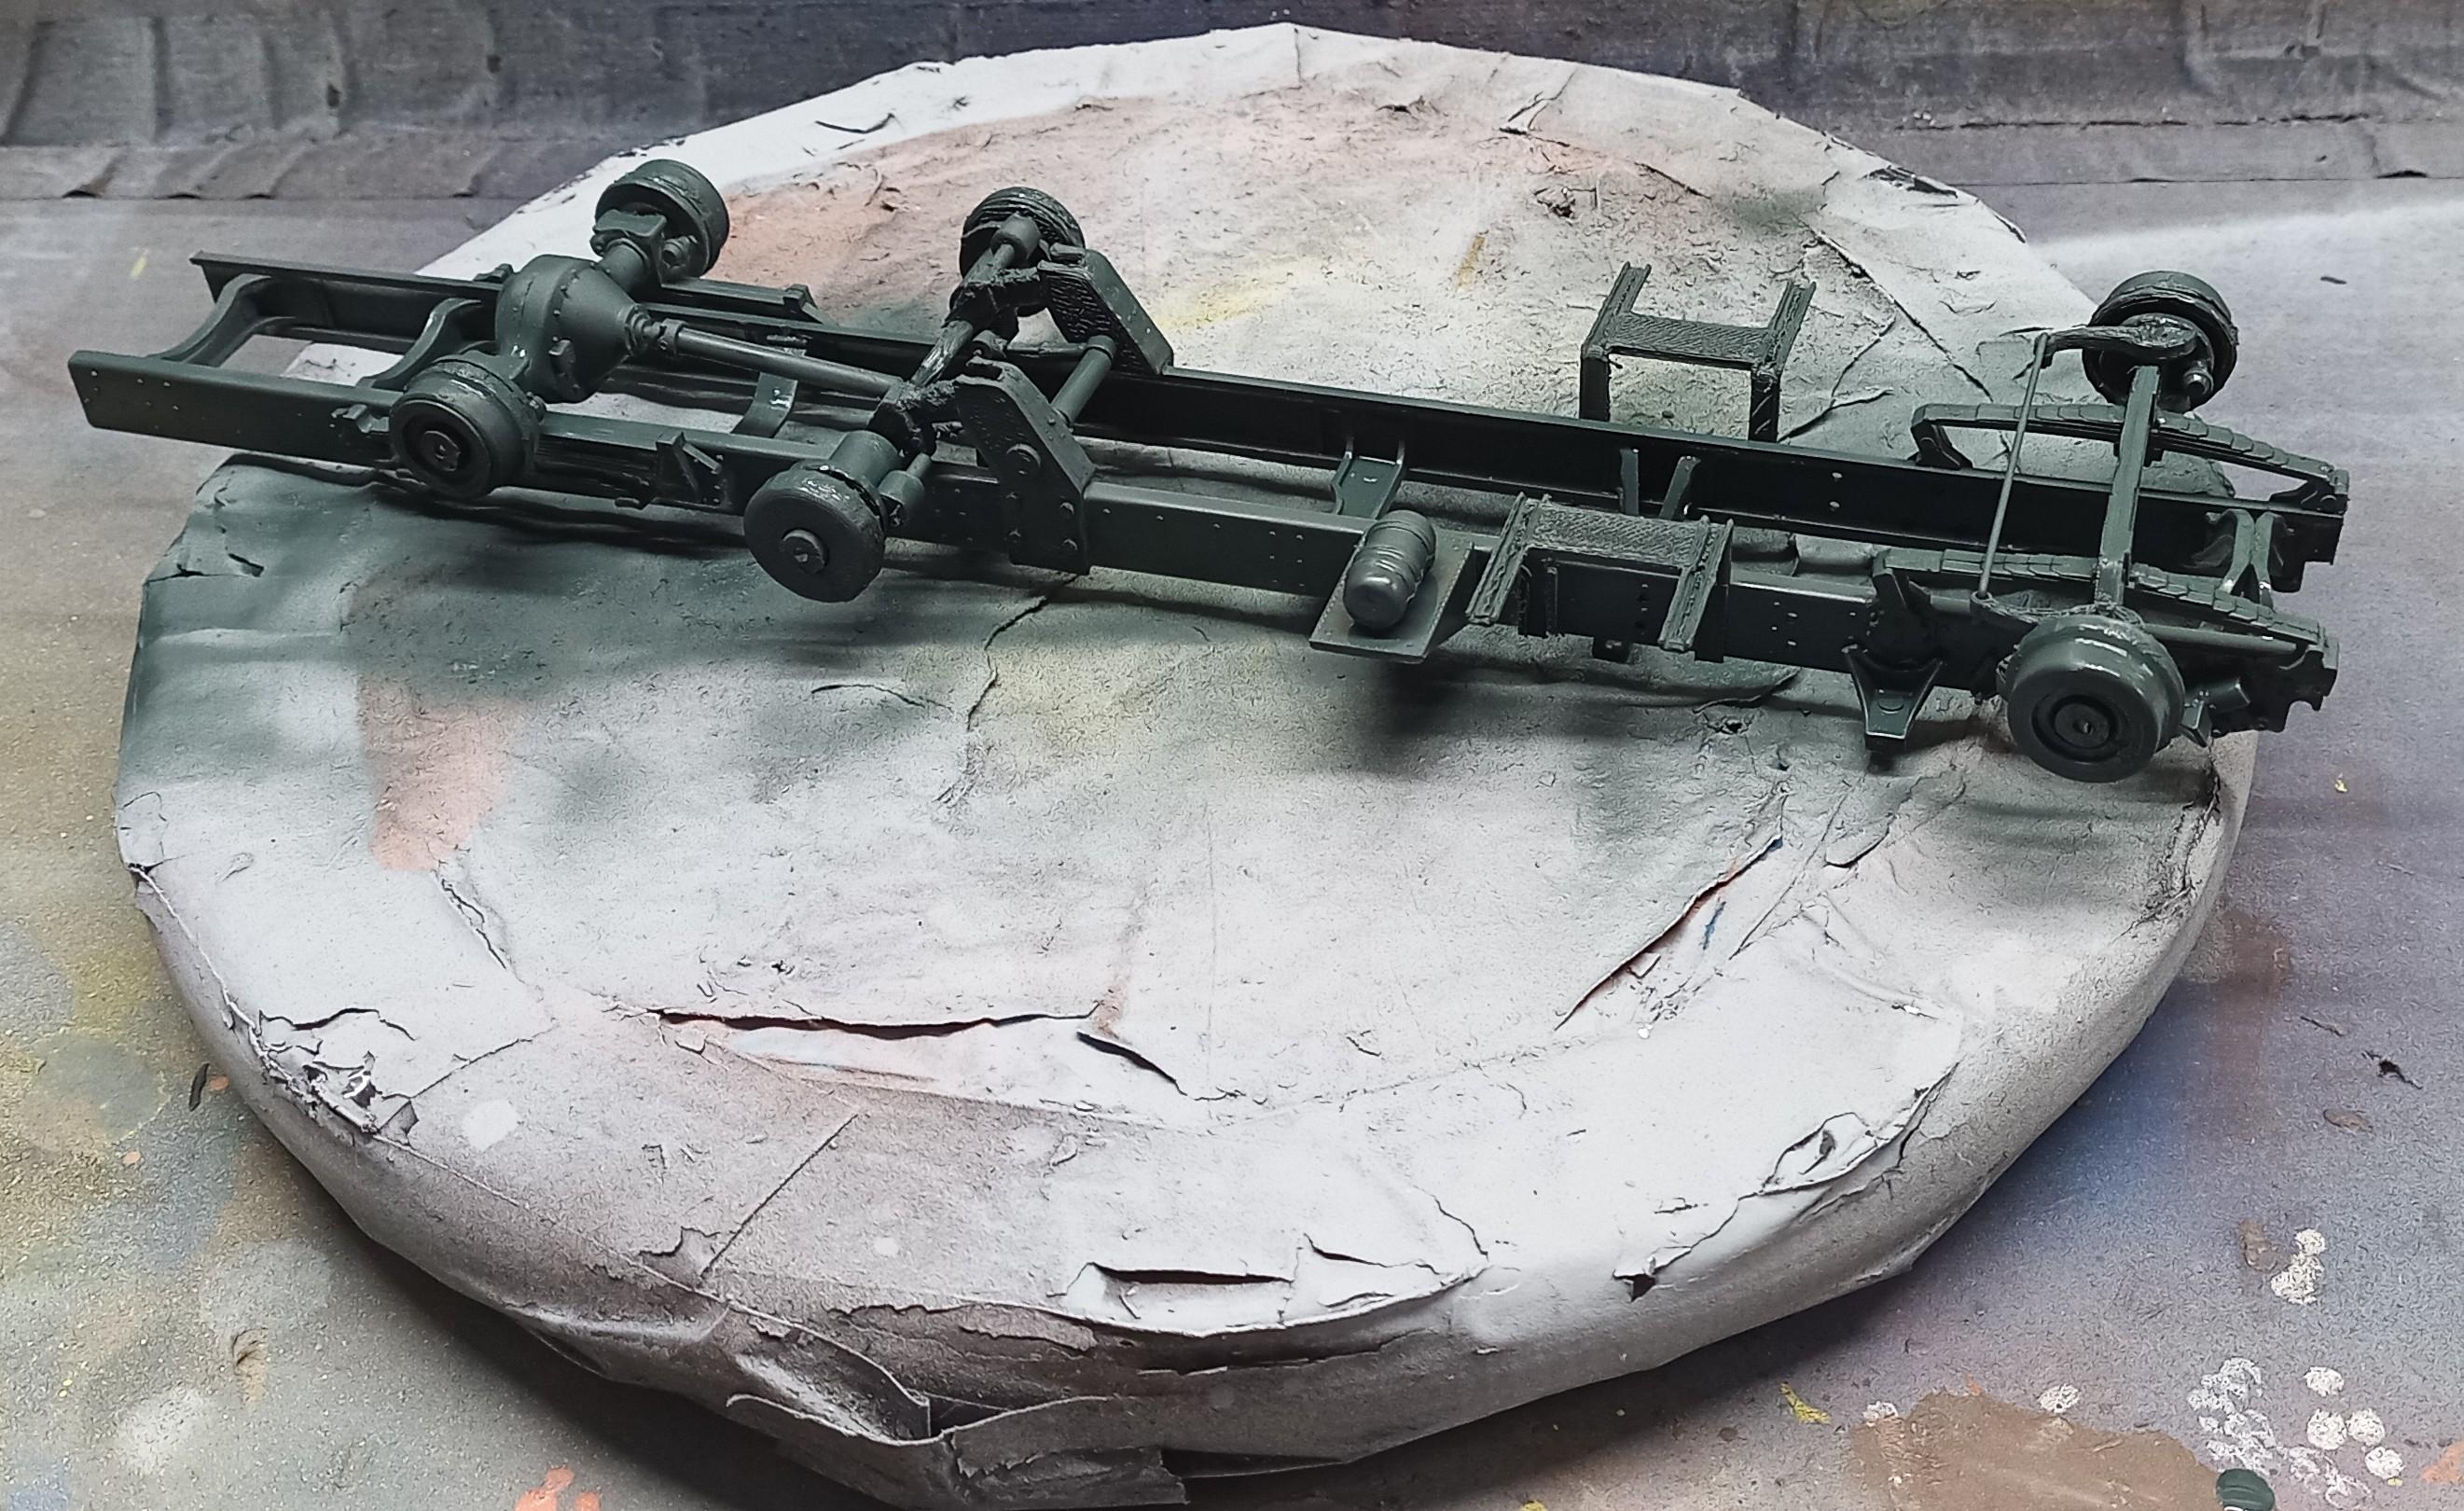
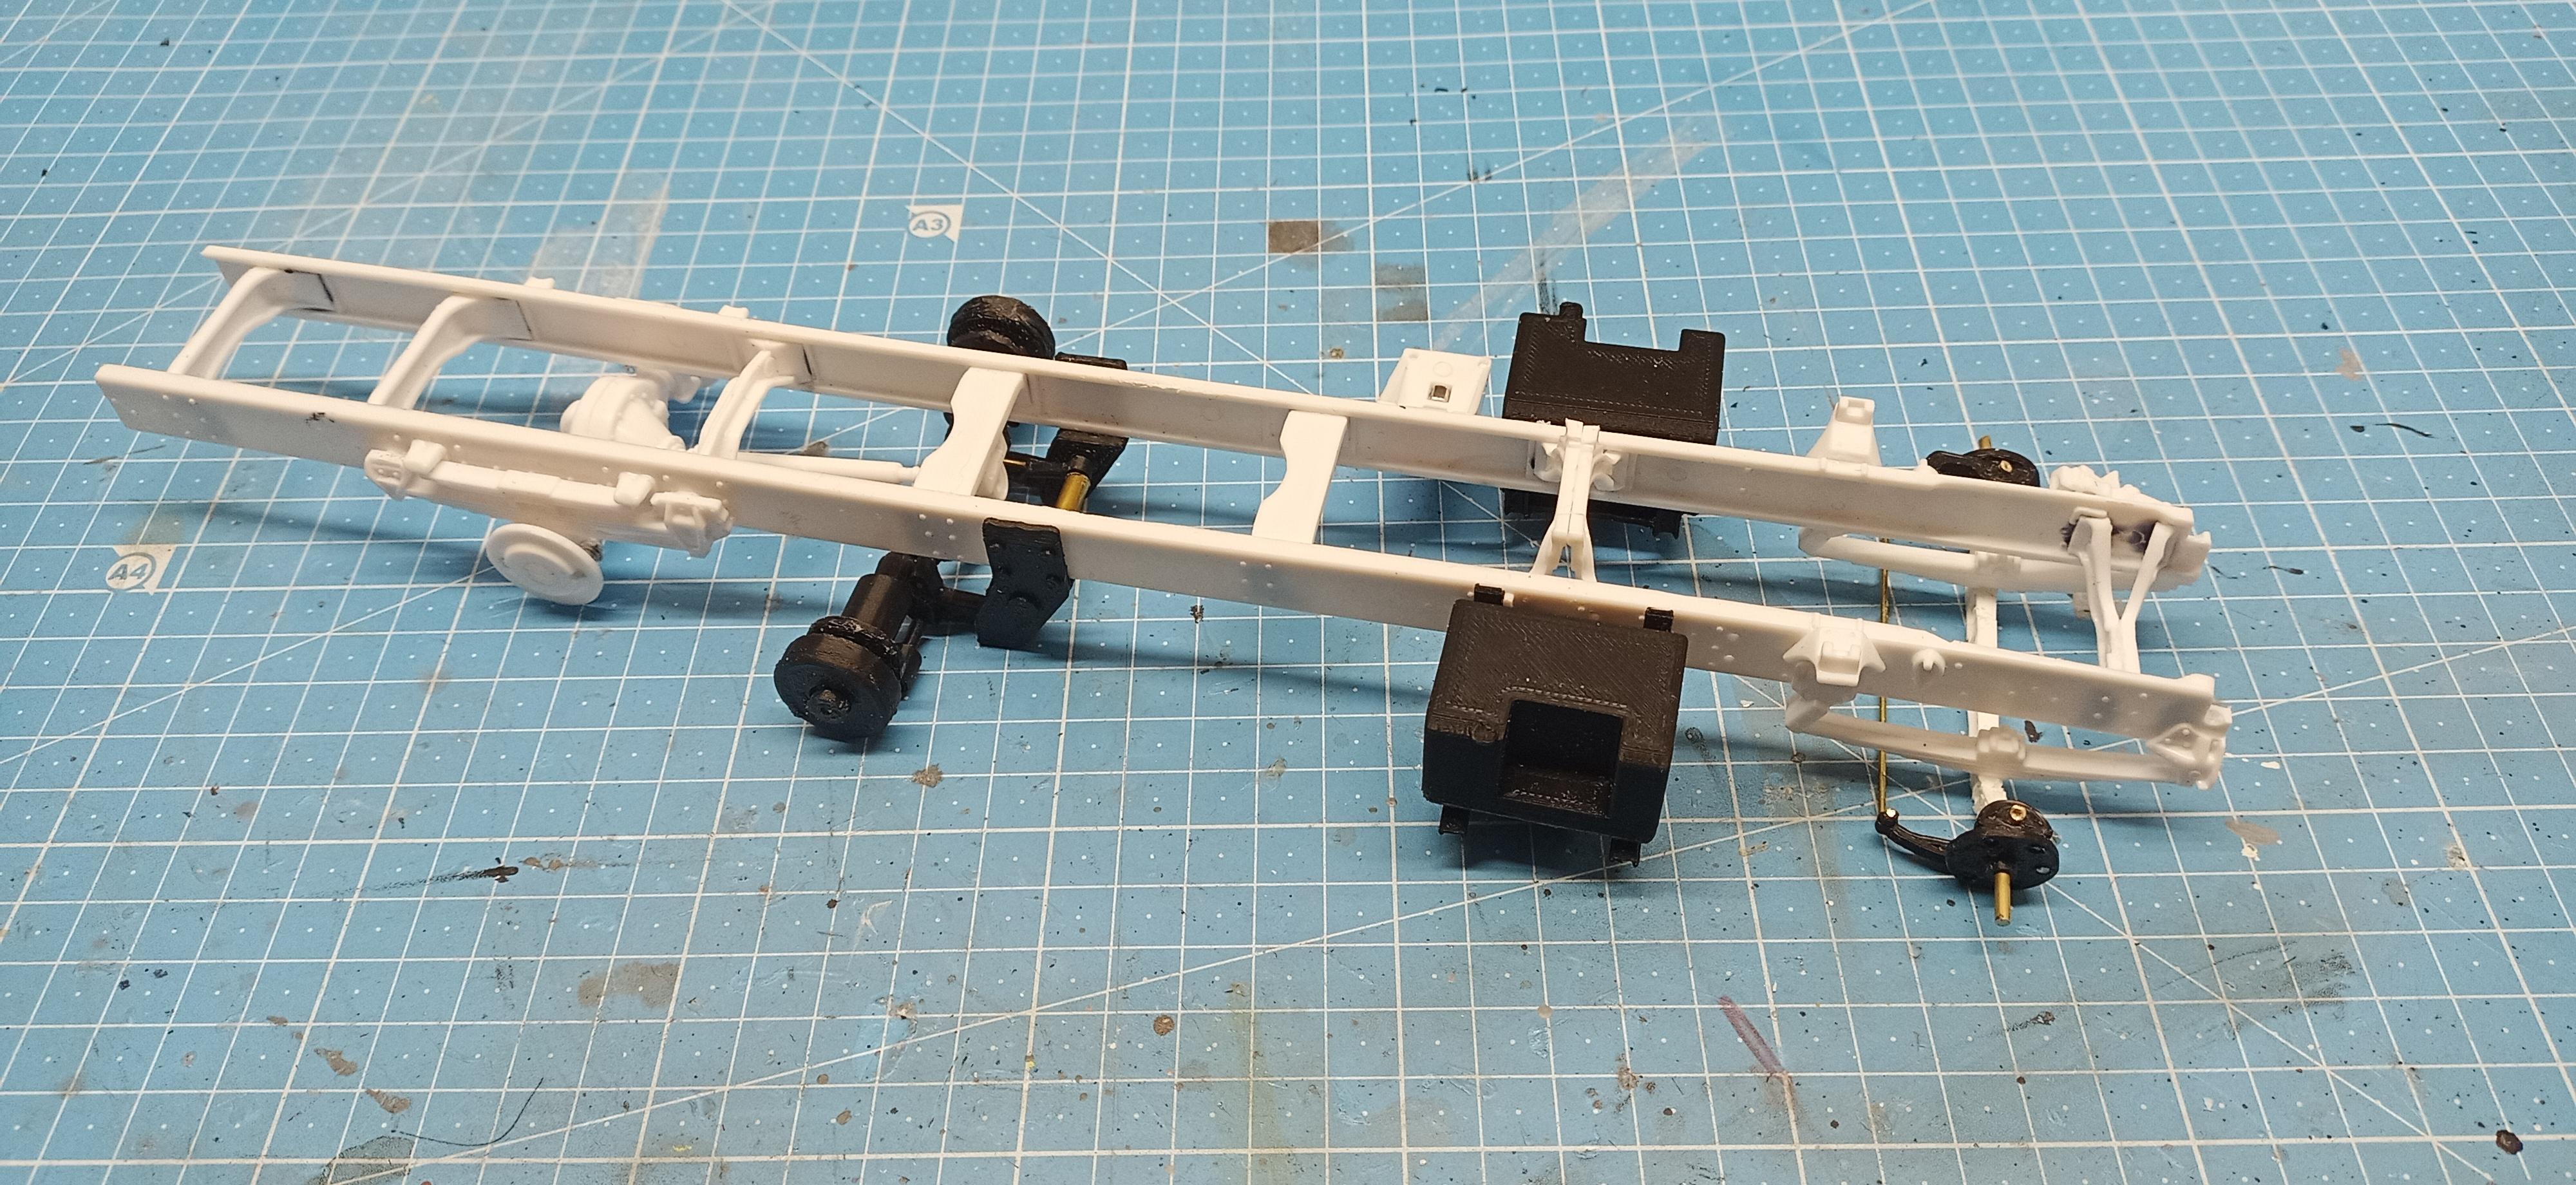
Chassis is ready for painting. Got the brake drums mounted and the lift axle works. Not easy to see here but when the wheels are on it should be noticeable!
-
Ford Louisville
Jürgen M. replied to Jürgen M.'s topic in WIP: Model Trucks: Big Rigs and Heavy Equipment
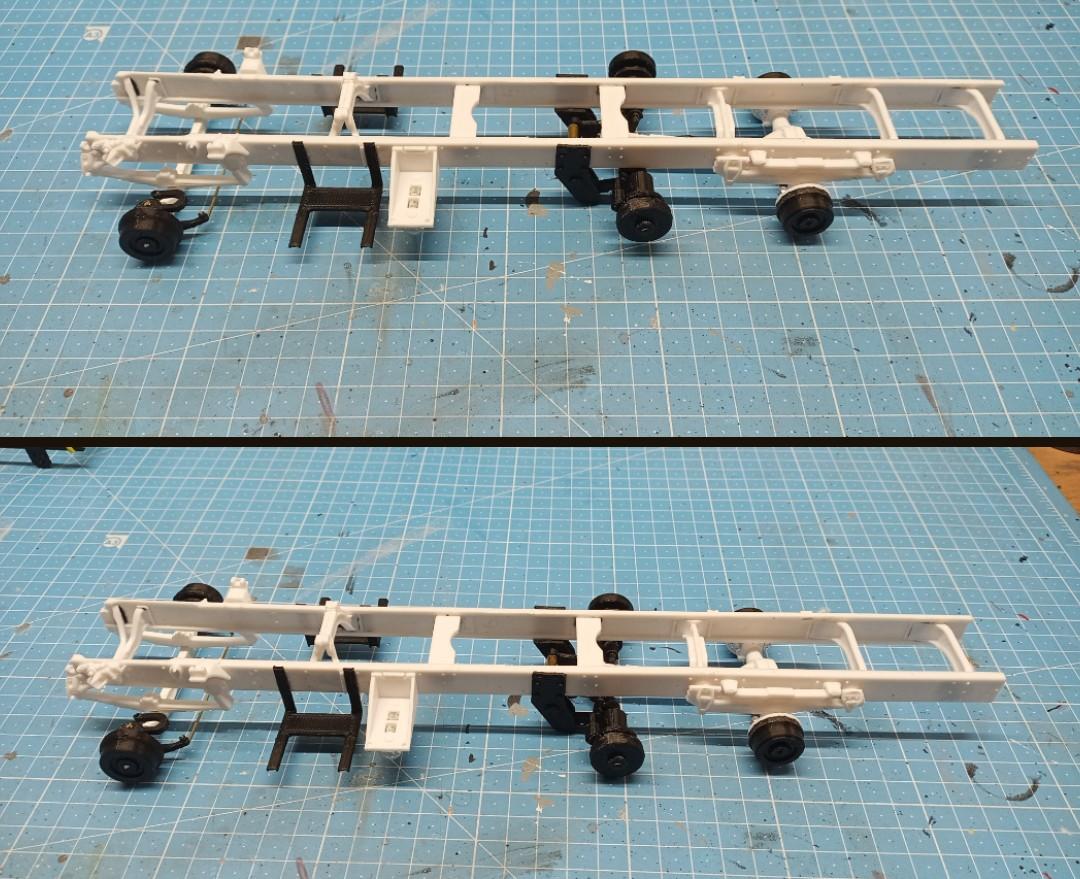
About ready for painting now: With the fuel tanks resting in place: Need to add front and rear brake drums, then primer!
-
Ford Louisville
Jürgen M. replied to Jürgen M.'s topic in WIP: Model Trucks: Big Rigs and Heavy Equipment
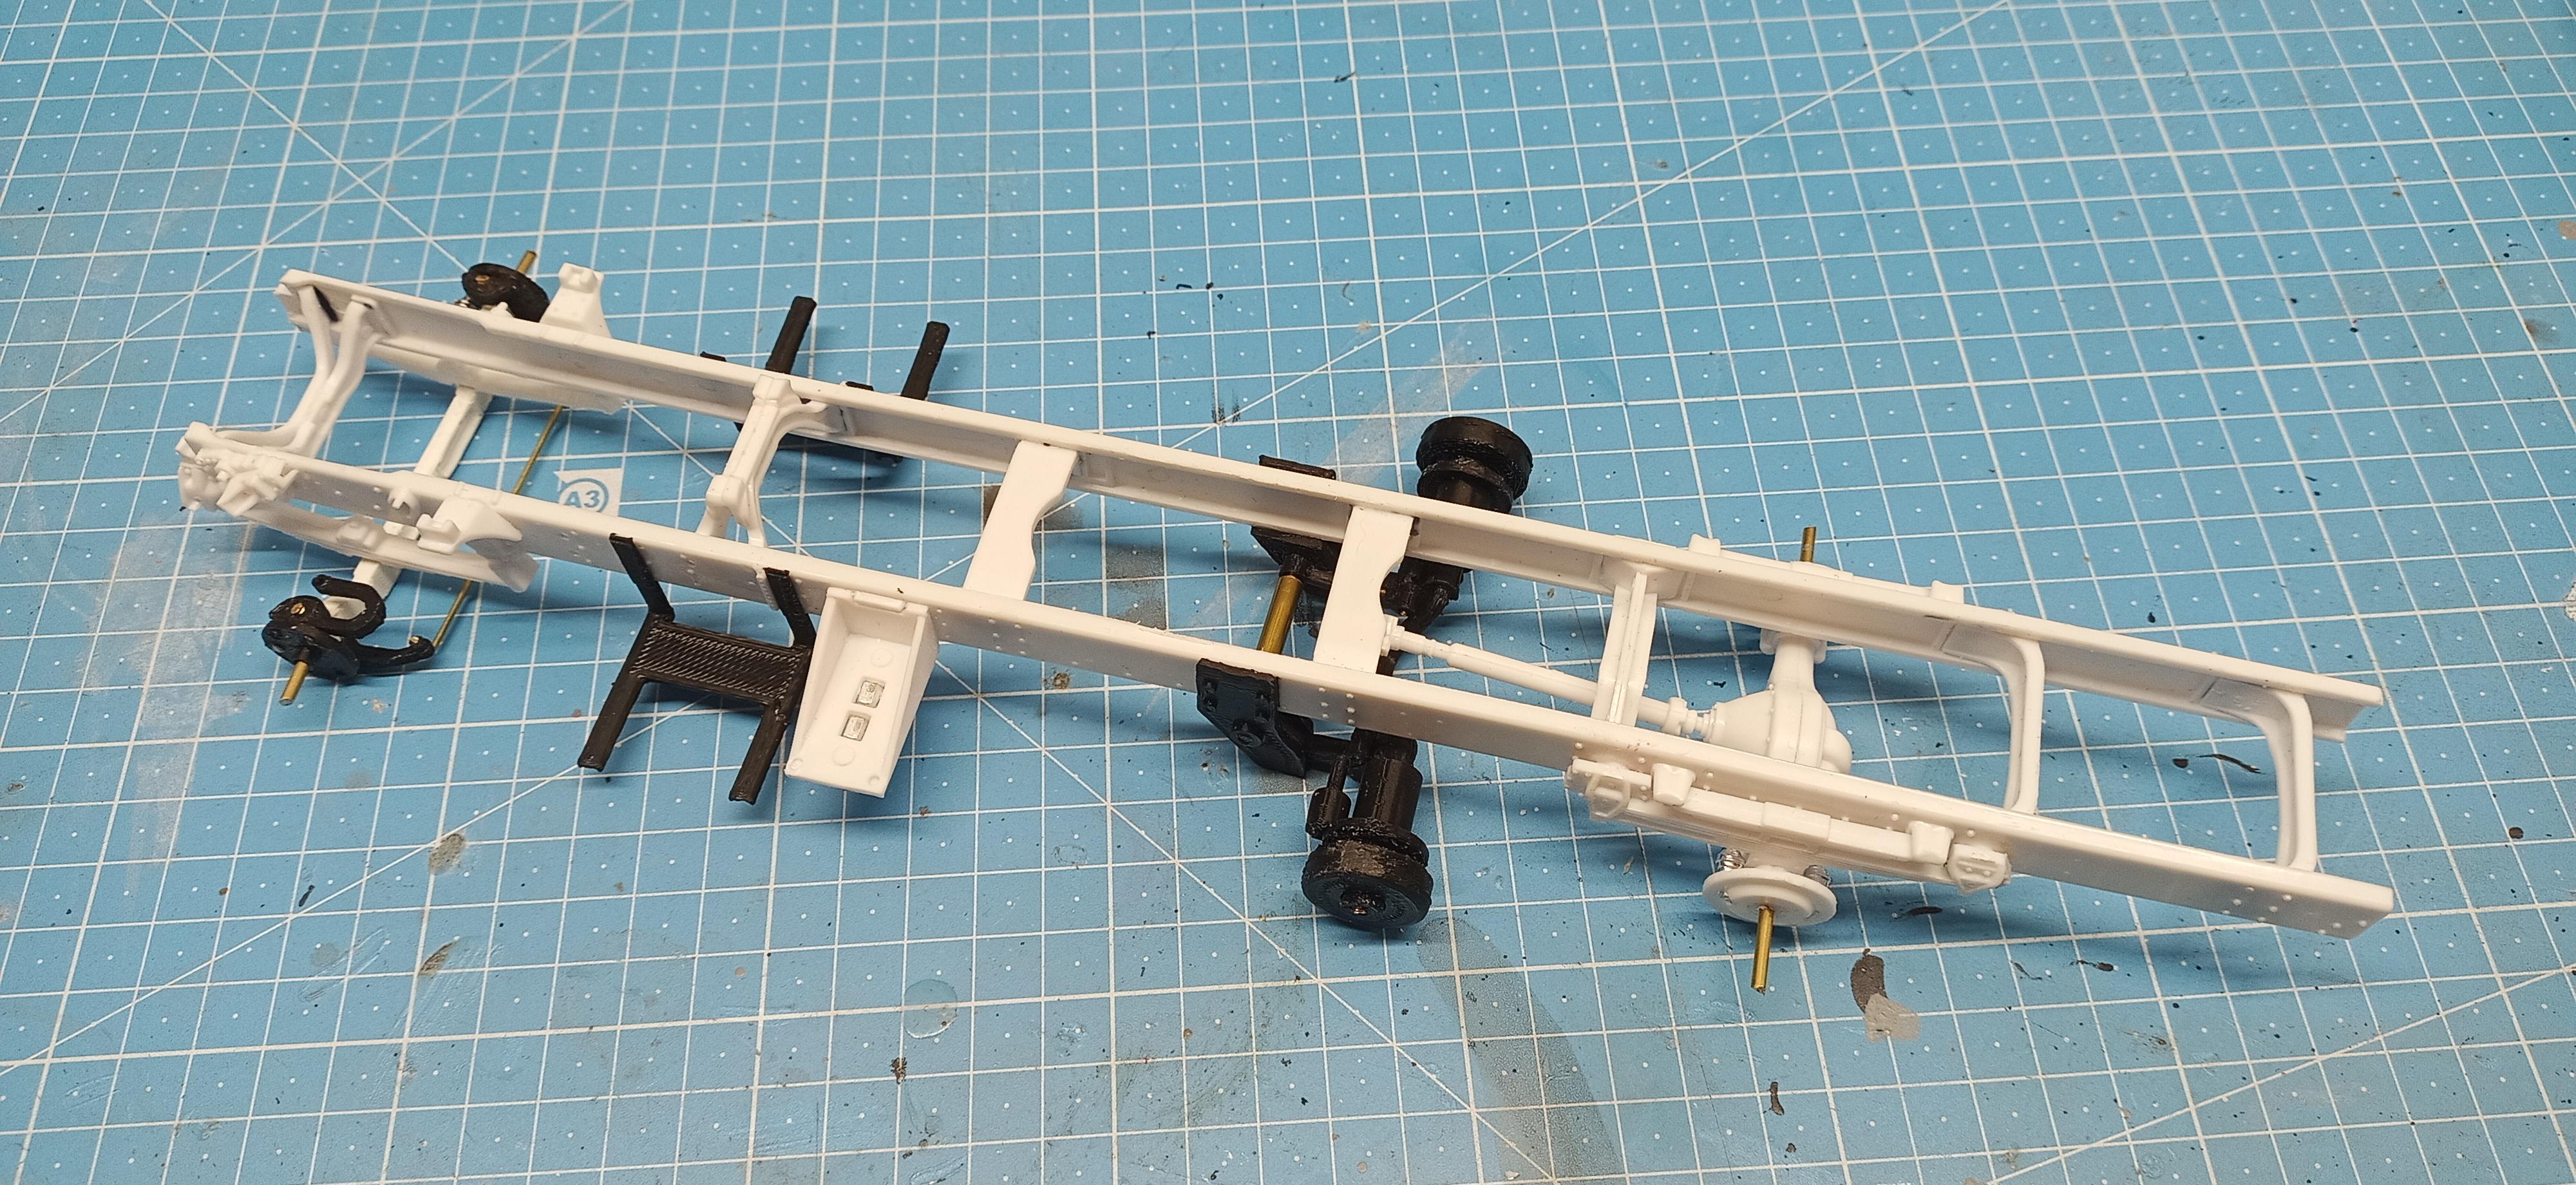
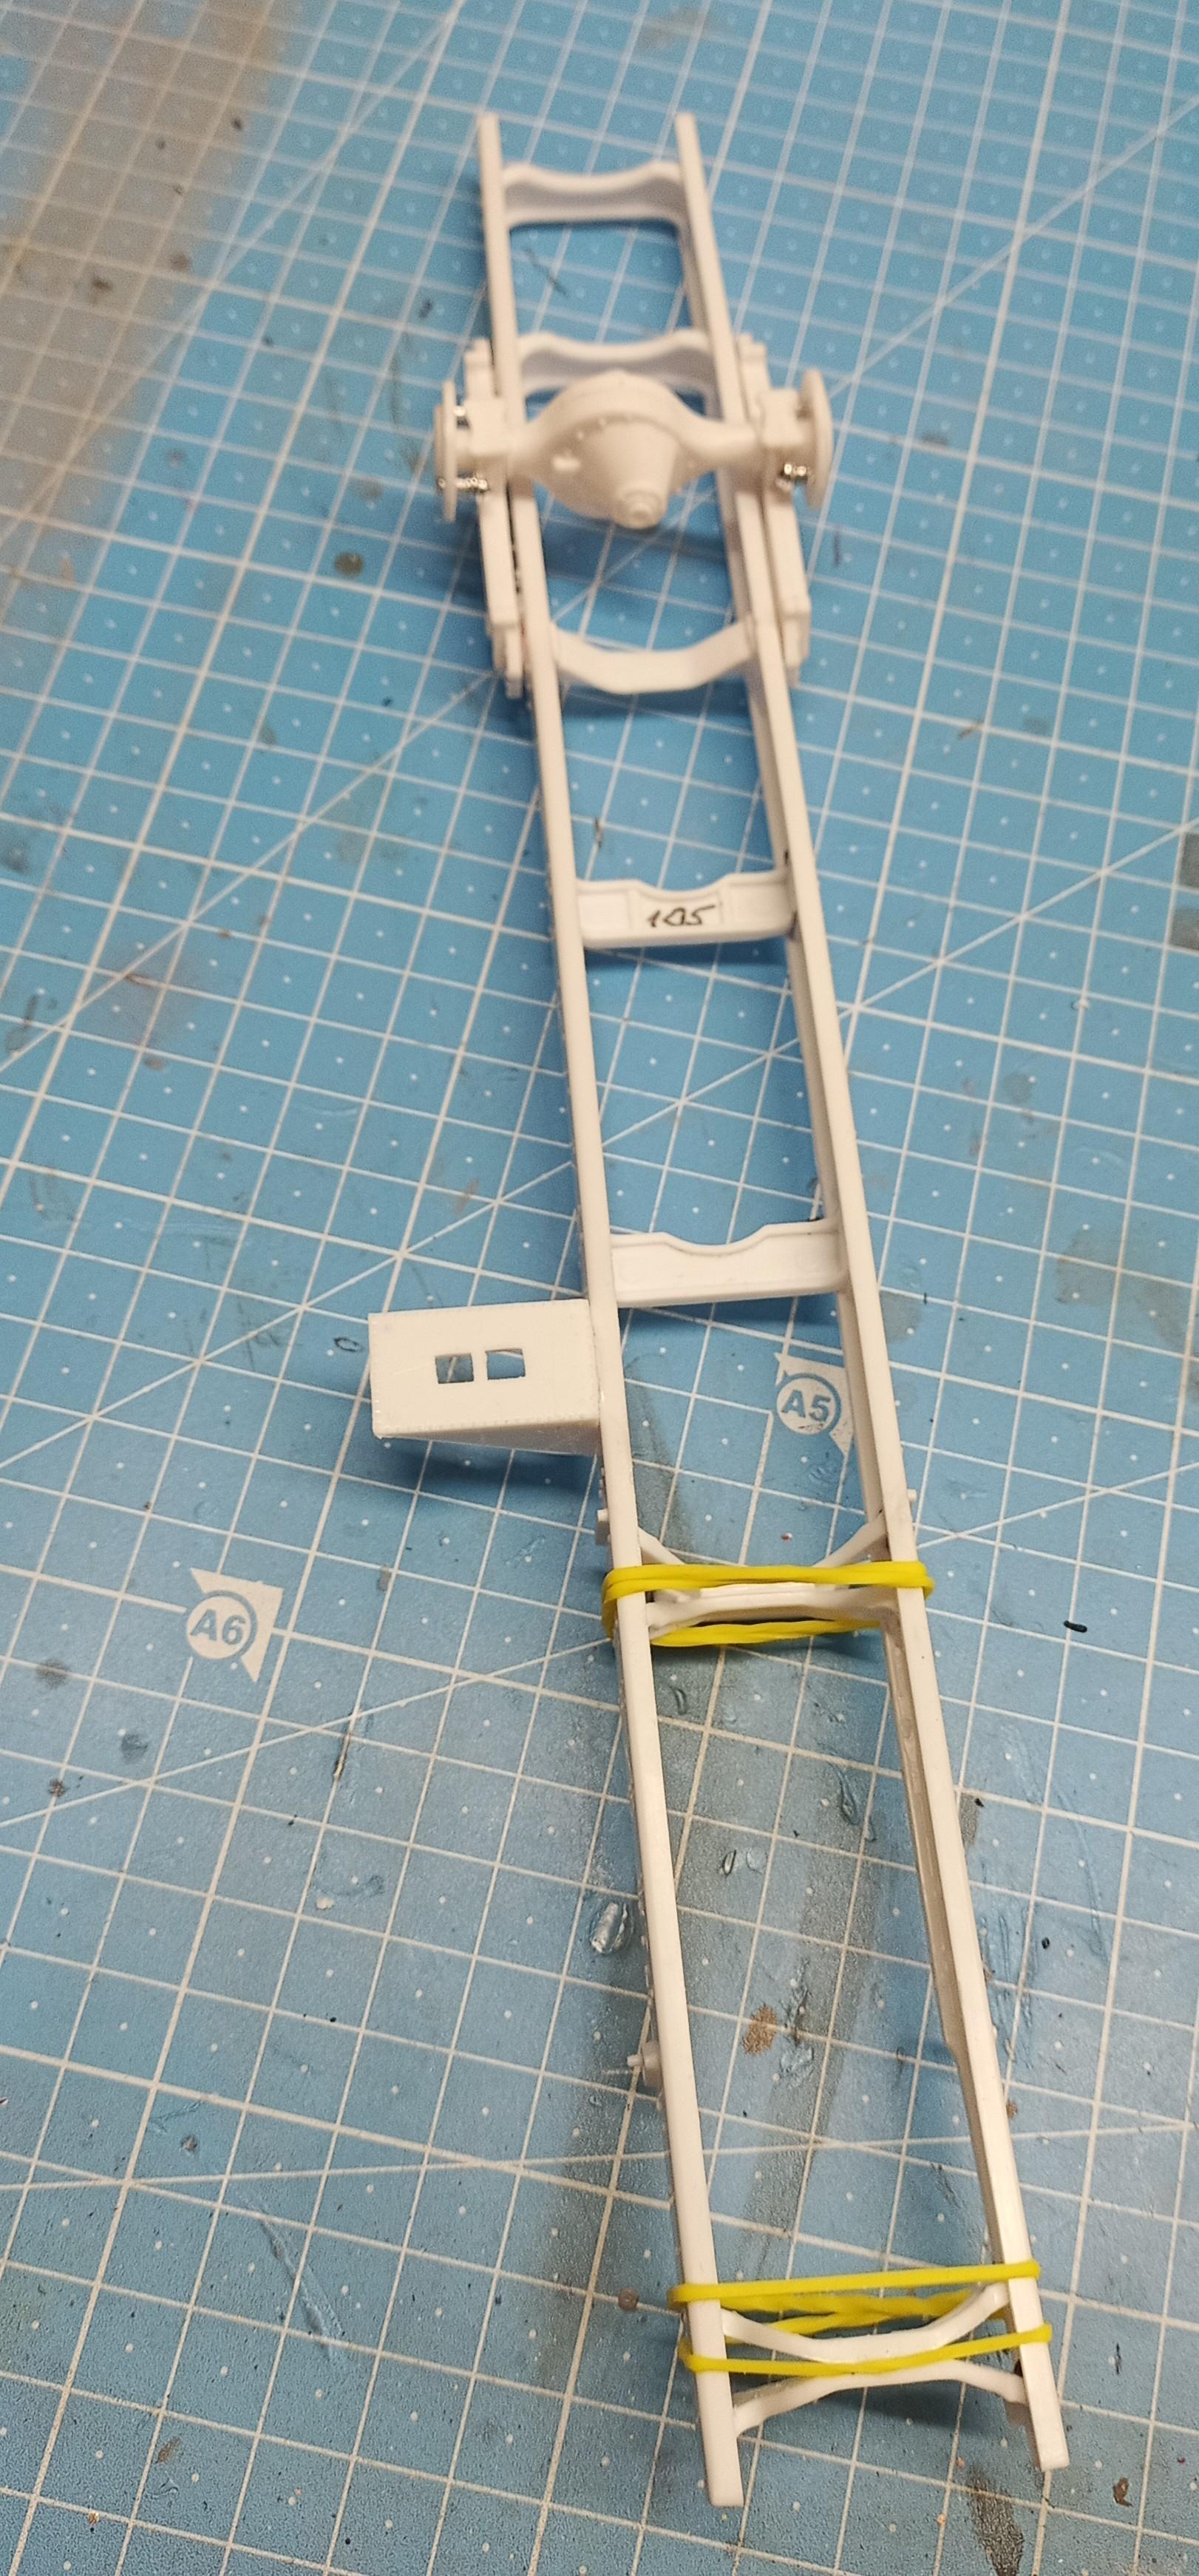
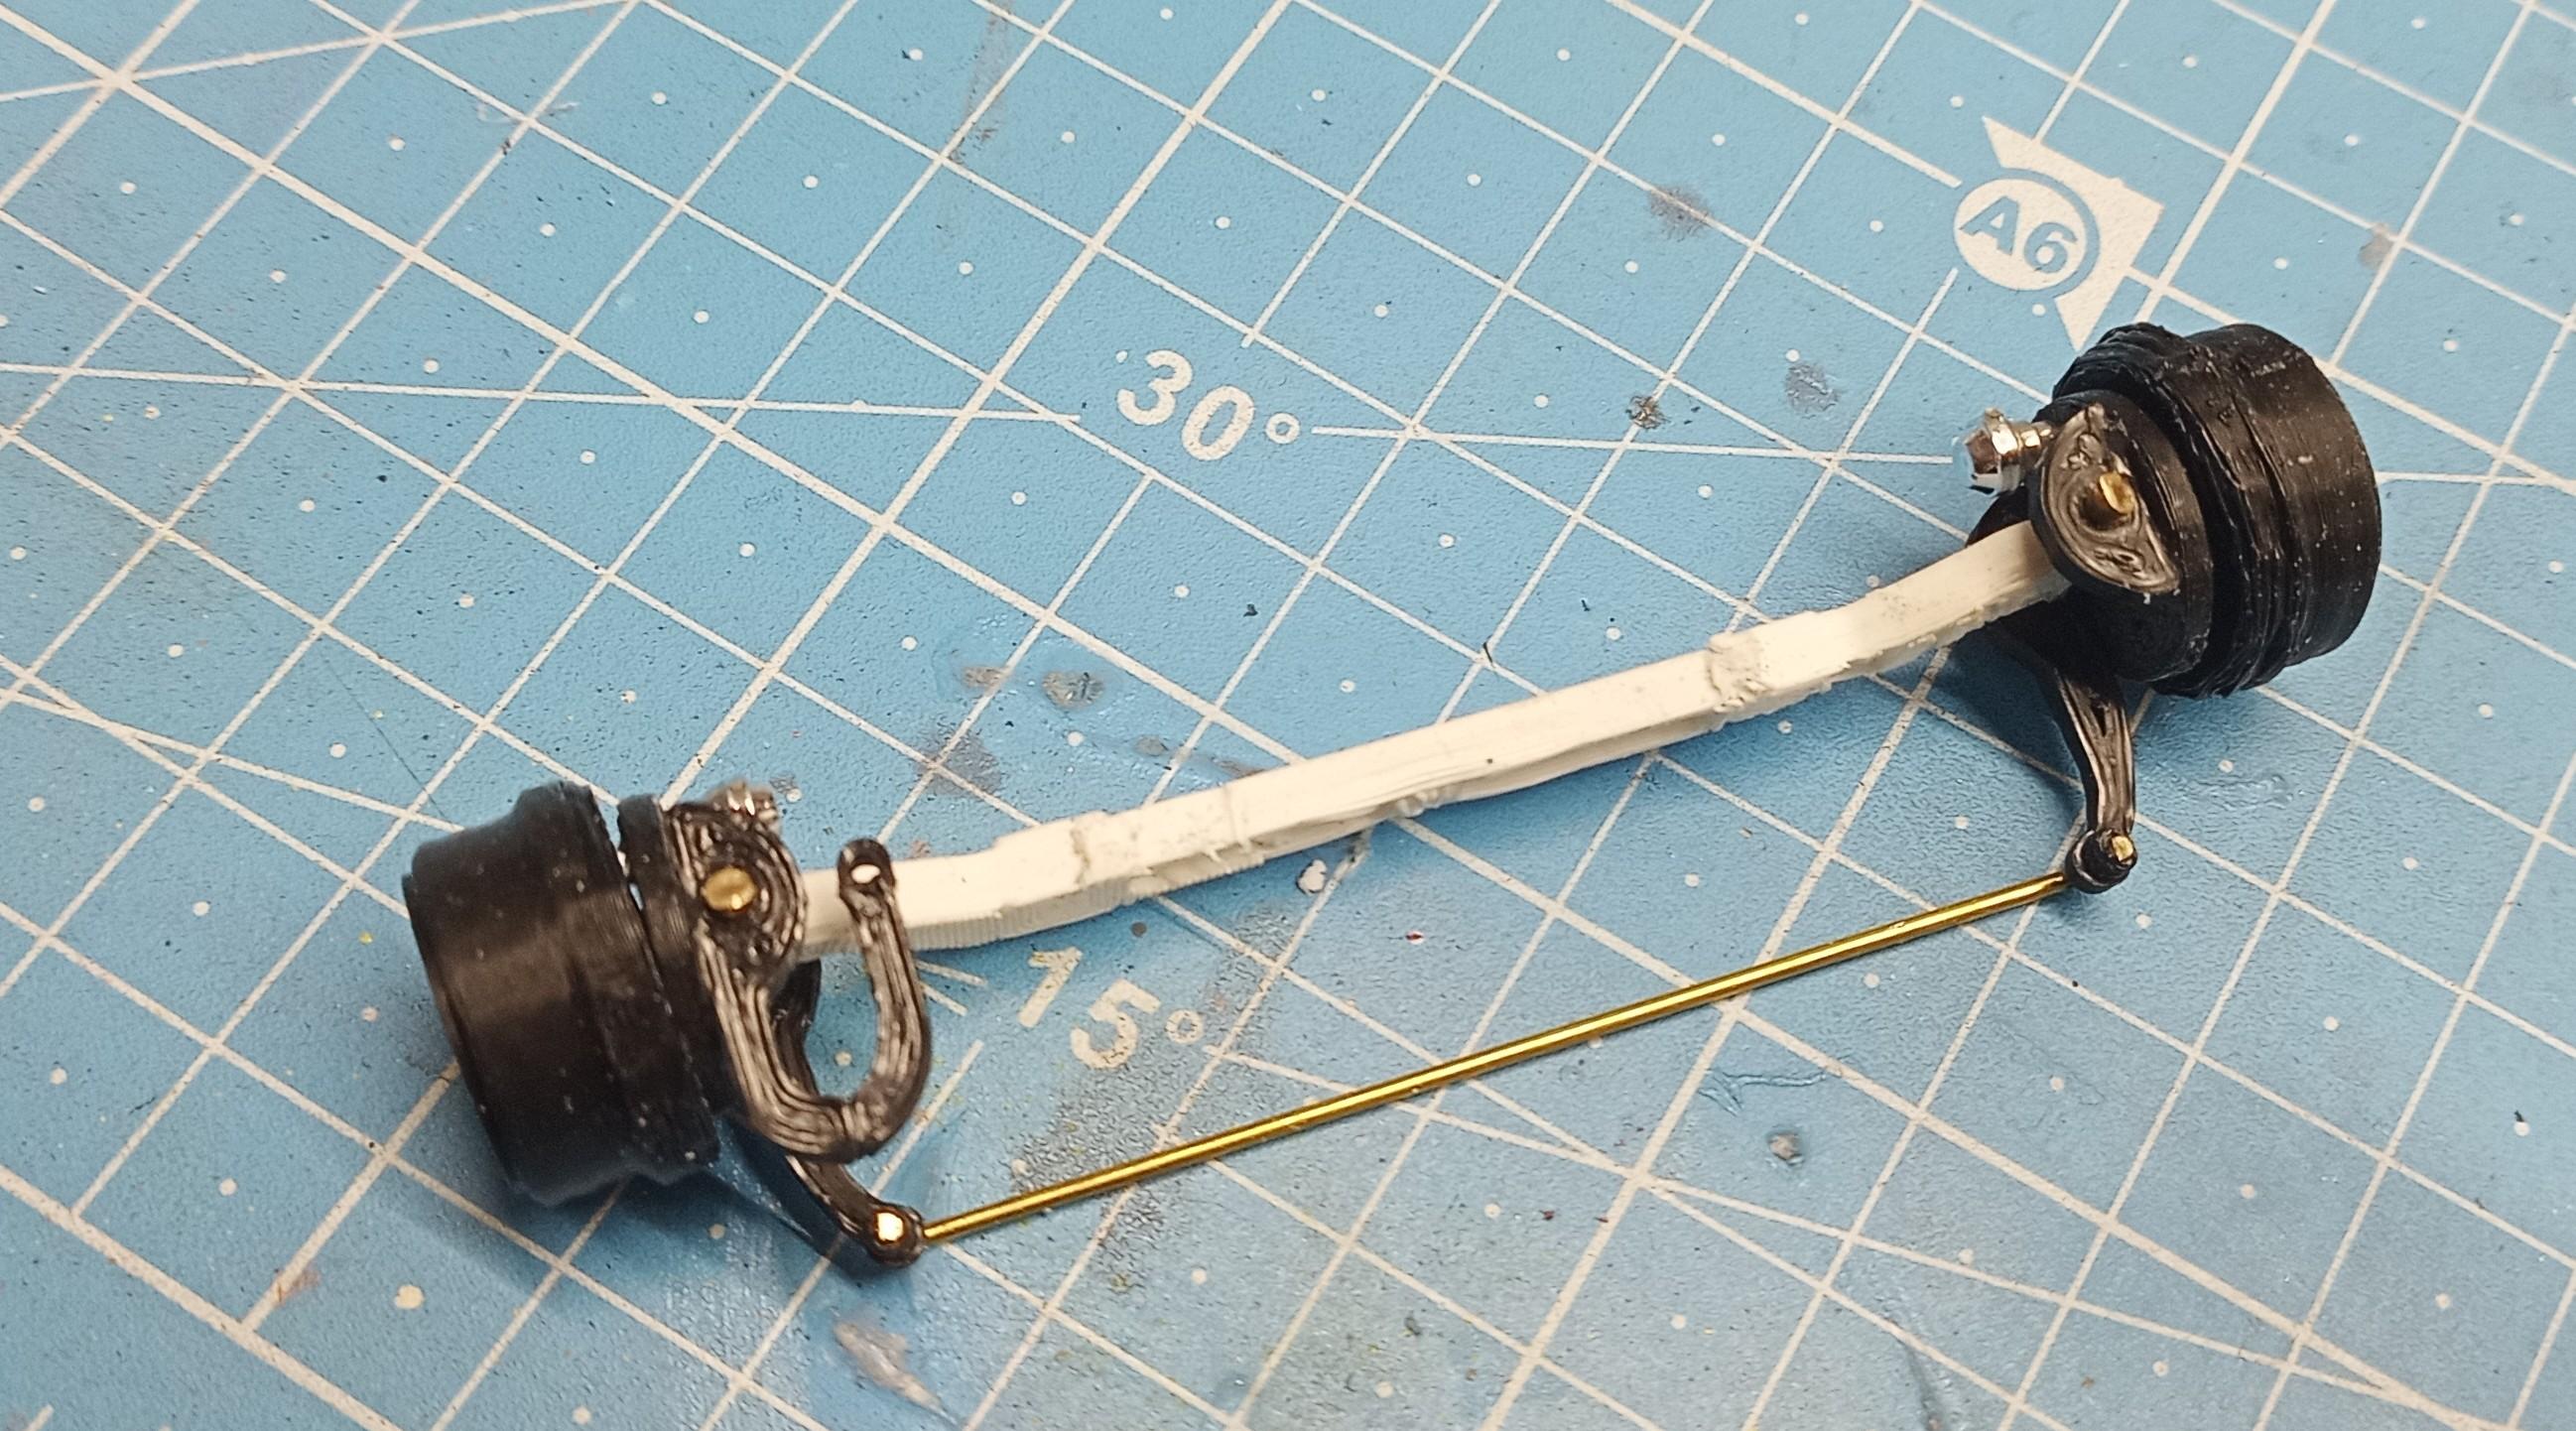
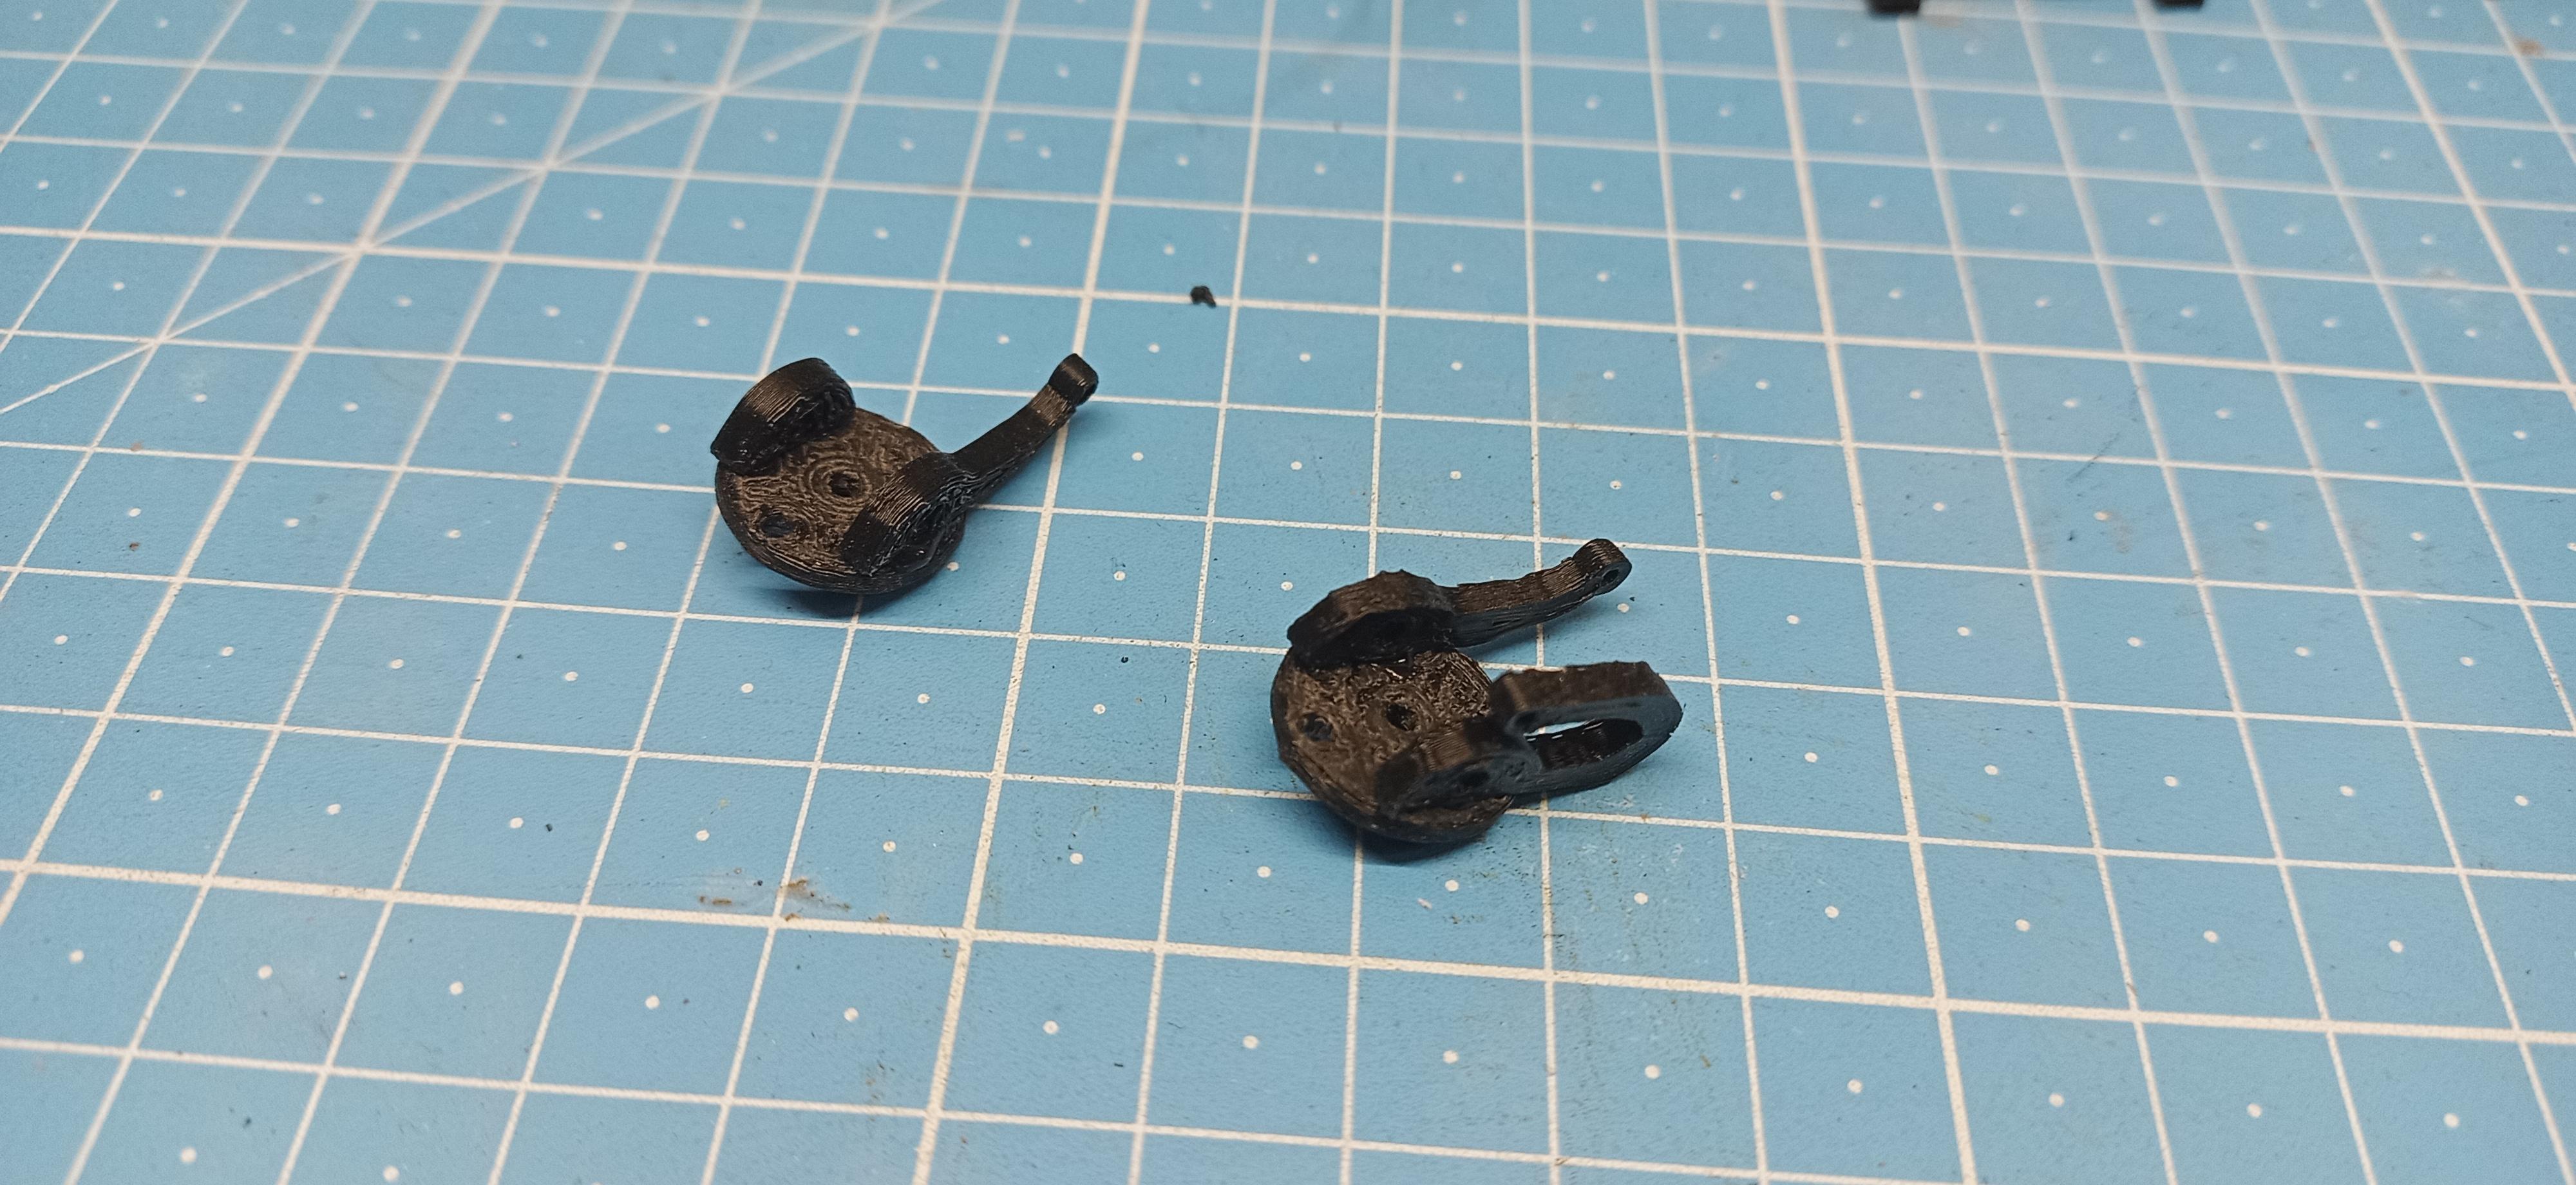
Thanks guys! The print quality especially of the smaller parts isn't that good but I'd say good enough. Here's a little mock-up to see the later position of the lift axle. I might even slip it a bit more to the front. Next will be steering box and other parts that need to be painted with the frame.
-
Ford Louisville
Jürgen M. replied to Jürgen M.'s topic in WIP: Model Trucks: Big Rigs and Heavy Equipment
The chassis is taking shape:
-
Ford Louisville
Jürgen M. replied to Jürgen M.'s topic in WIP: Model Trucks: Big Rigs and Heavy Equipment
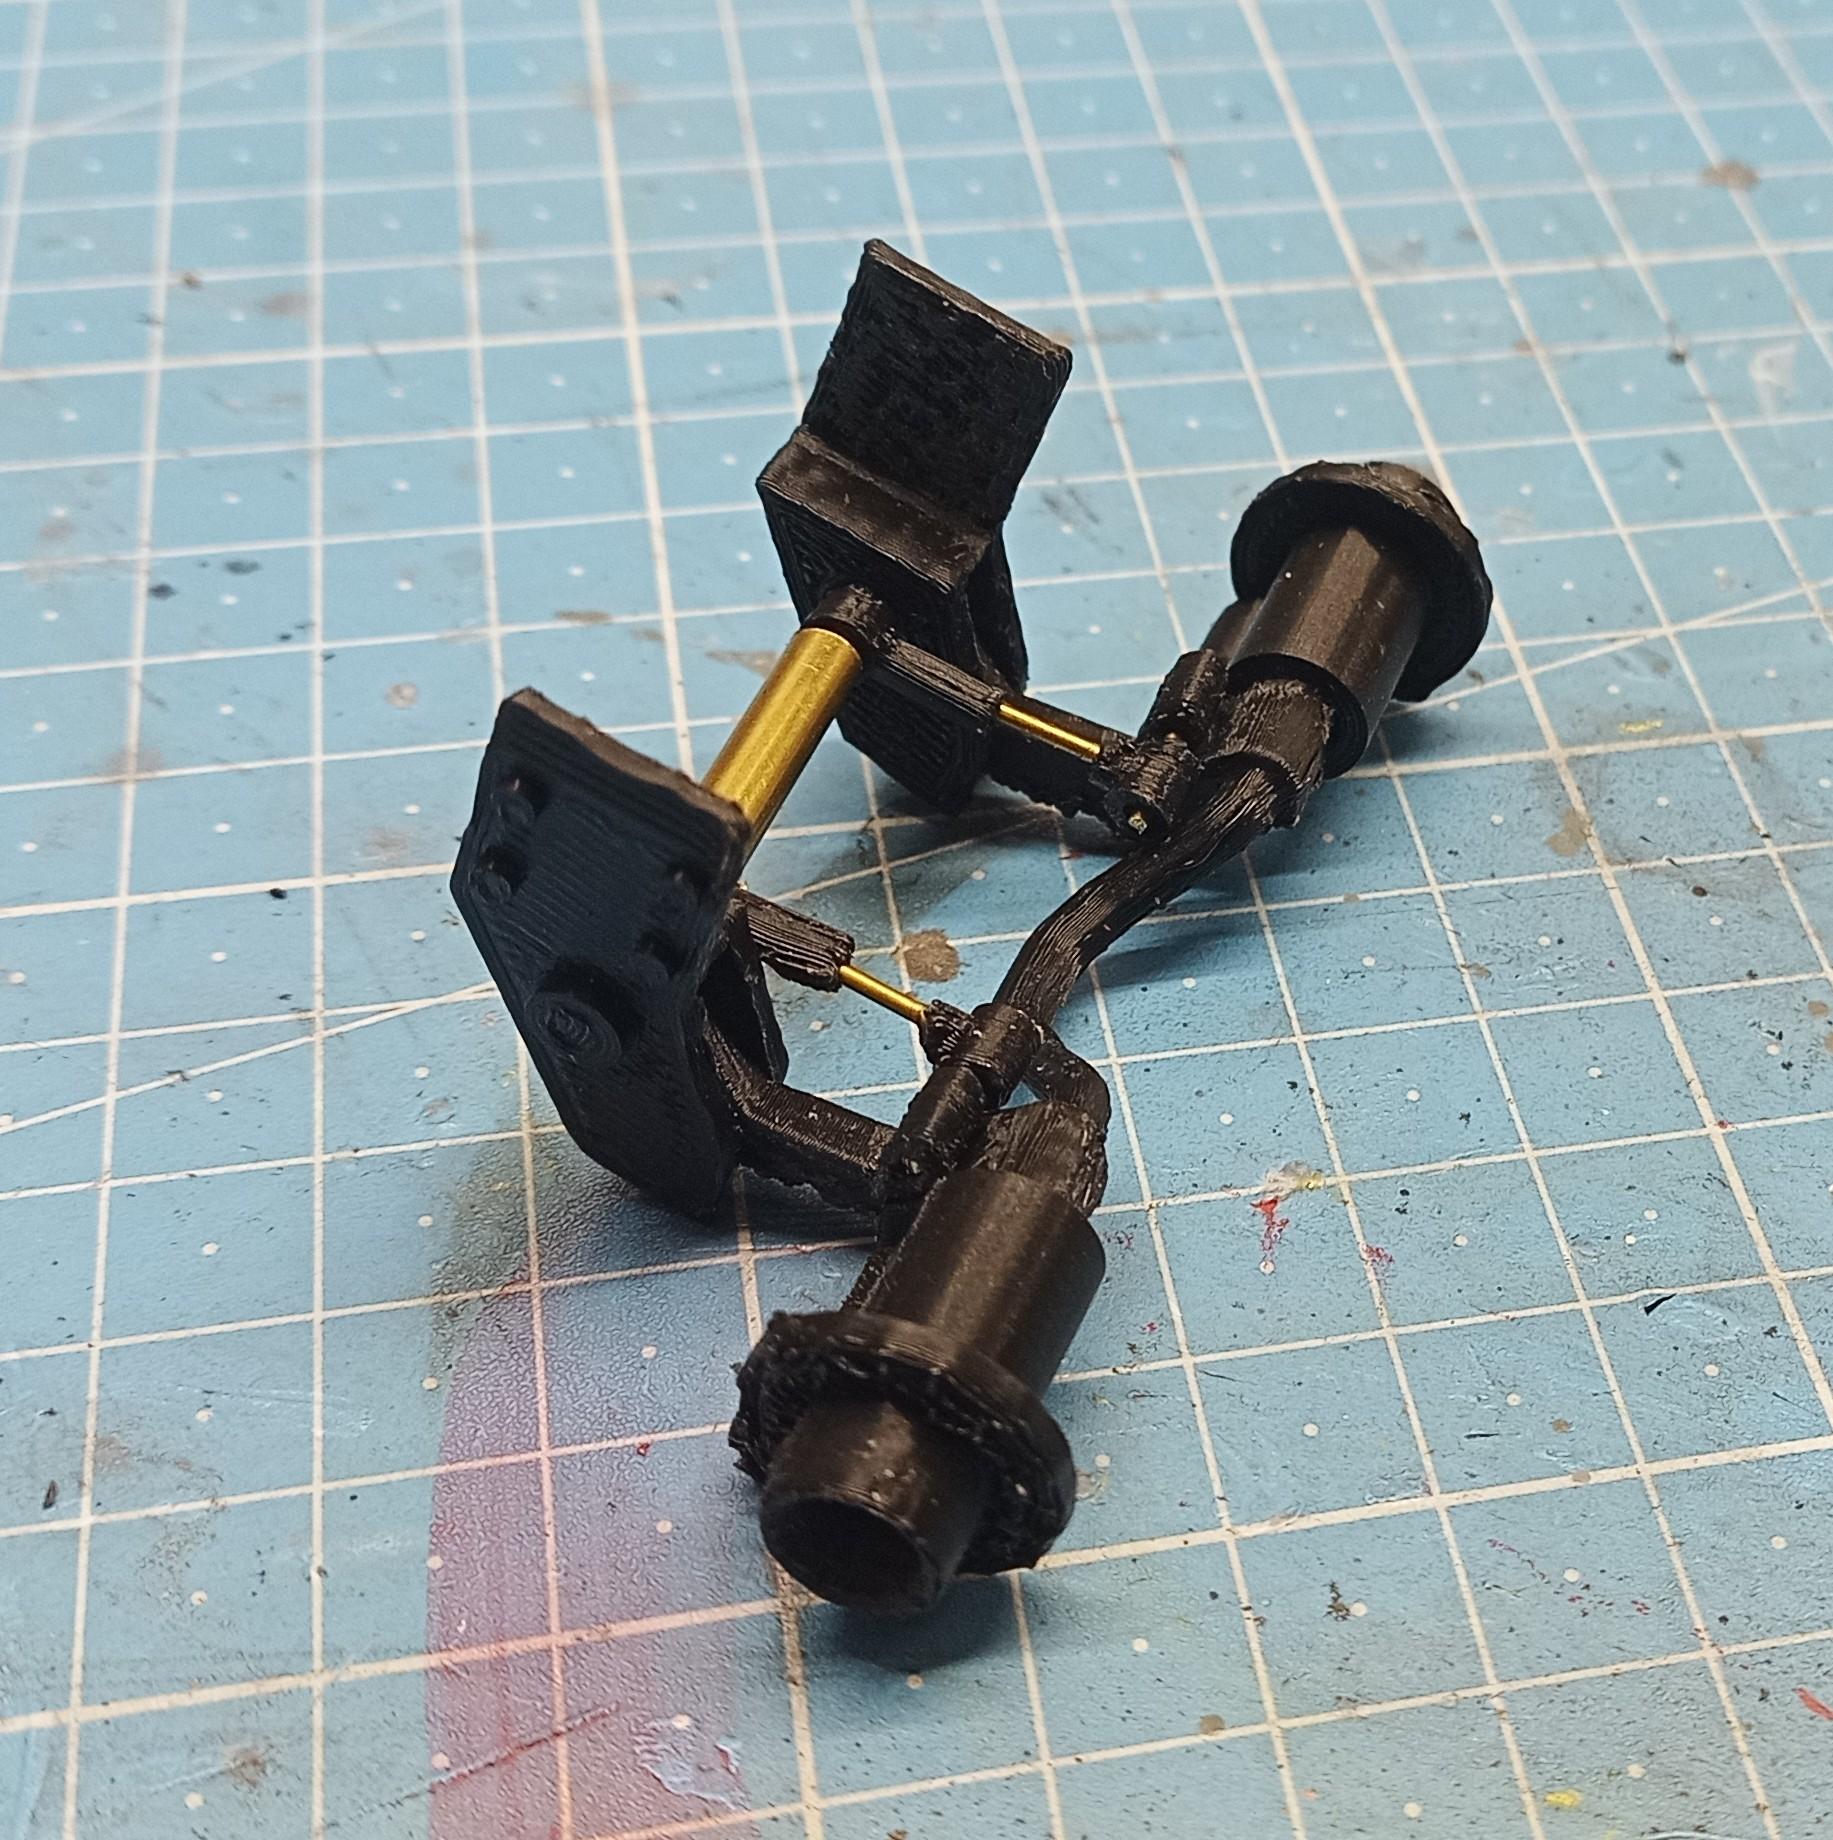
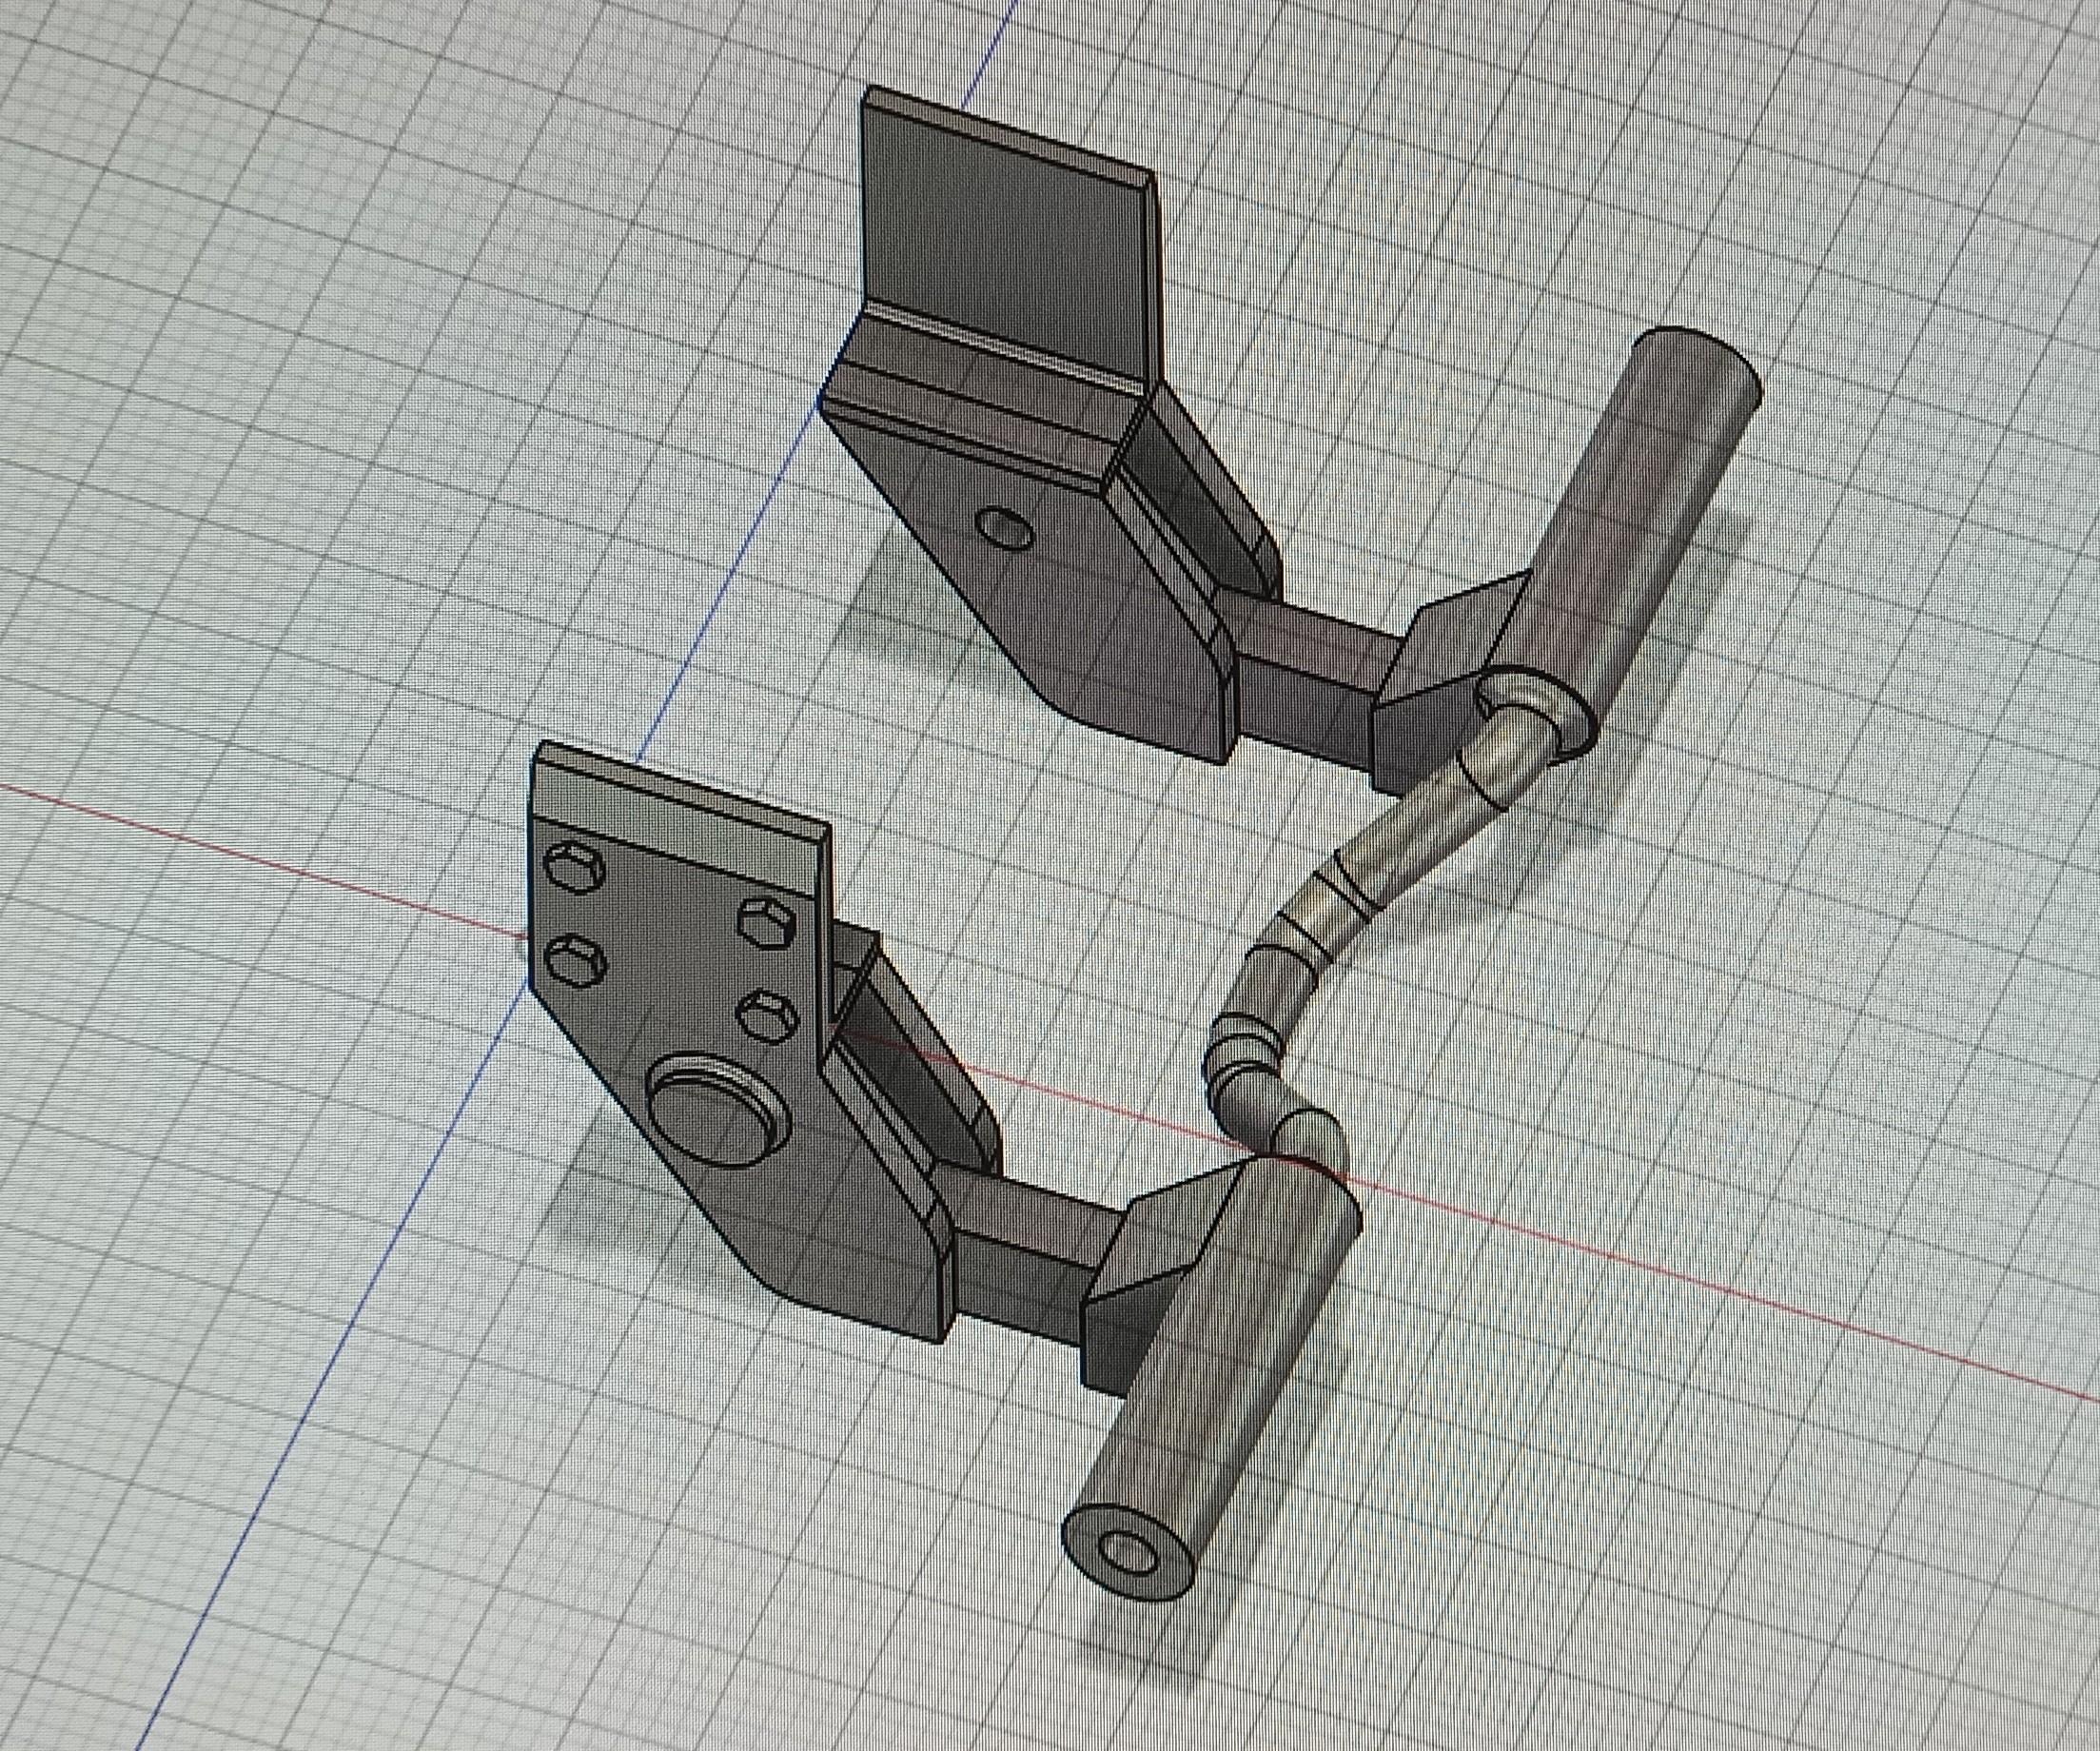
Got the lift axle parts printed (second time around worked) and assembled: During printing time I assembled a steering axle from box parts!
-
Kenworth W-925 (mild custom)
Jürgen M. replied to Gary Chastain's topic in WIP: Model Trucks: Big Rigs and Heavy Equipment
I agree with Steve! Great paint job but very sensitive for tiniest drops of glue or scratches by dust or something! My respect for this tidy job! -
California Special
Jürgen M. replied to Rockford's topic in WIP: Model Trucks: Big Rigs and Heavy Equipment
This is getting better and better! Great idea with the stacks! -
Ford Louisville
Jürgen M. replied to Jürgen M.'s topic in WIP: Model Trucks: Big Rigs and Heavy Equipment
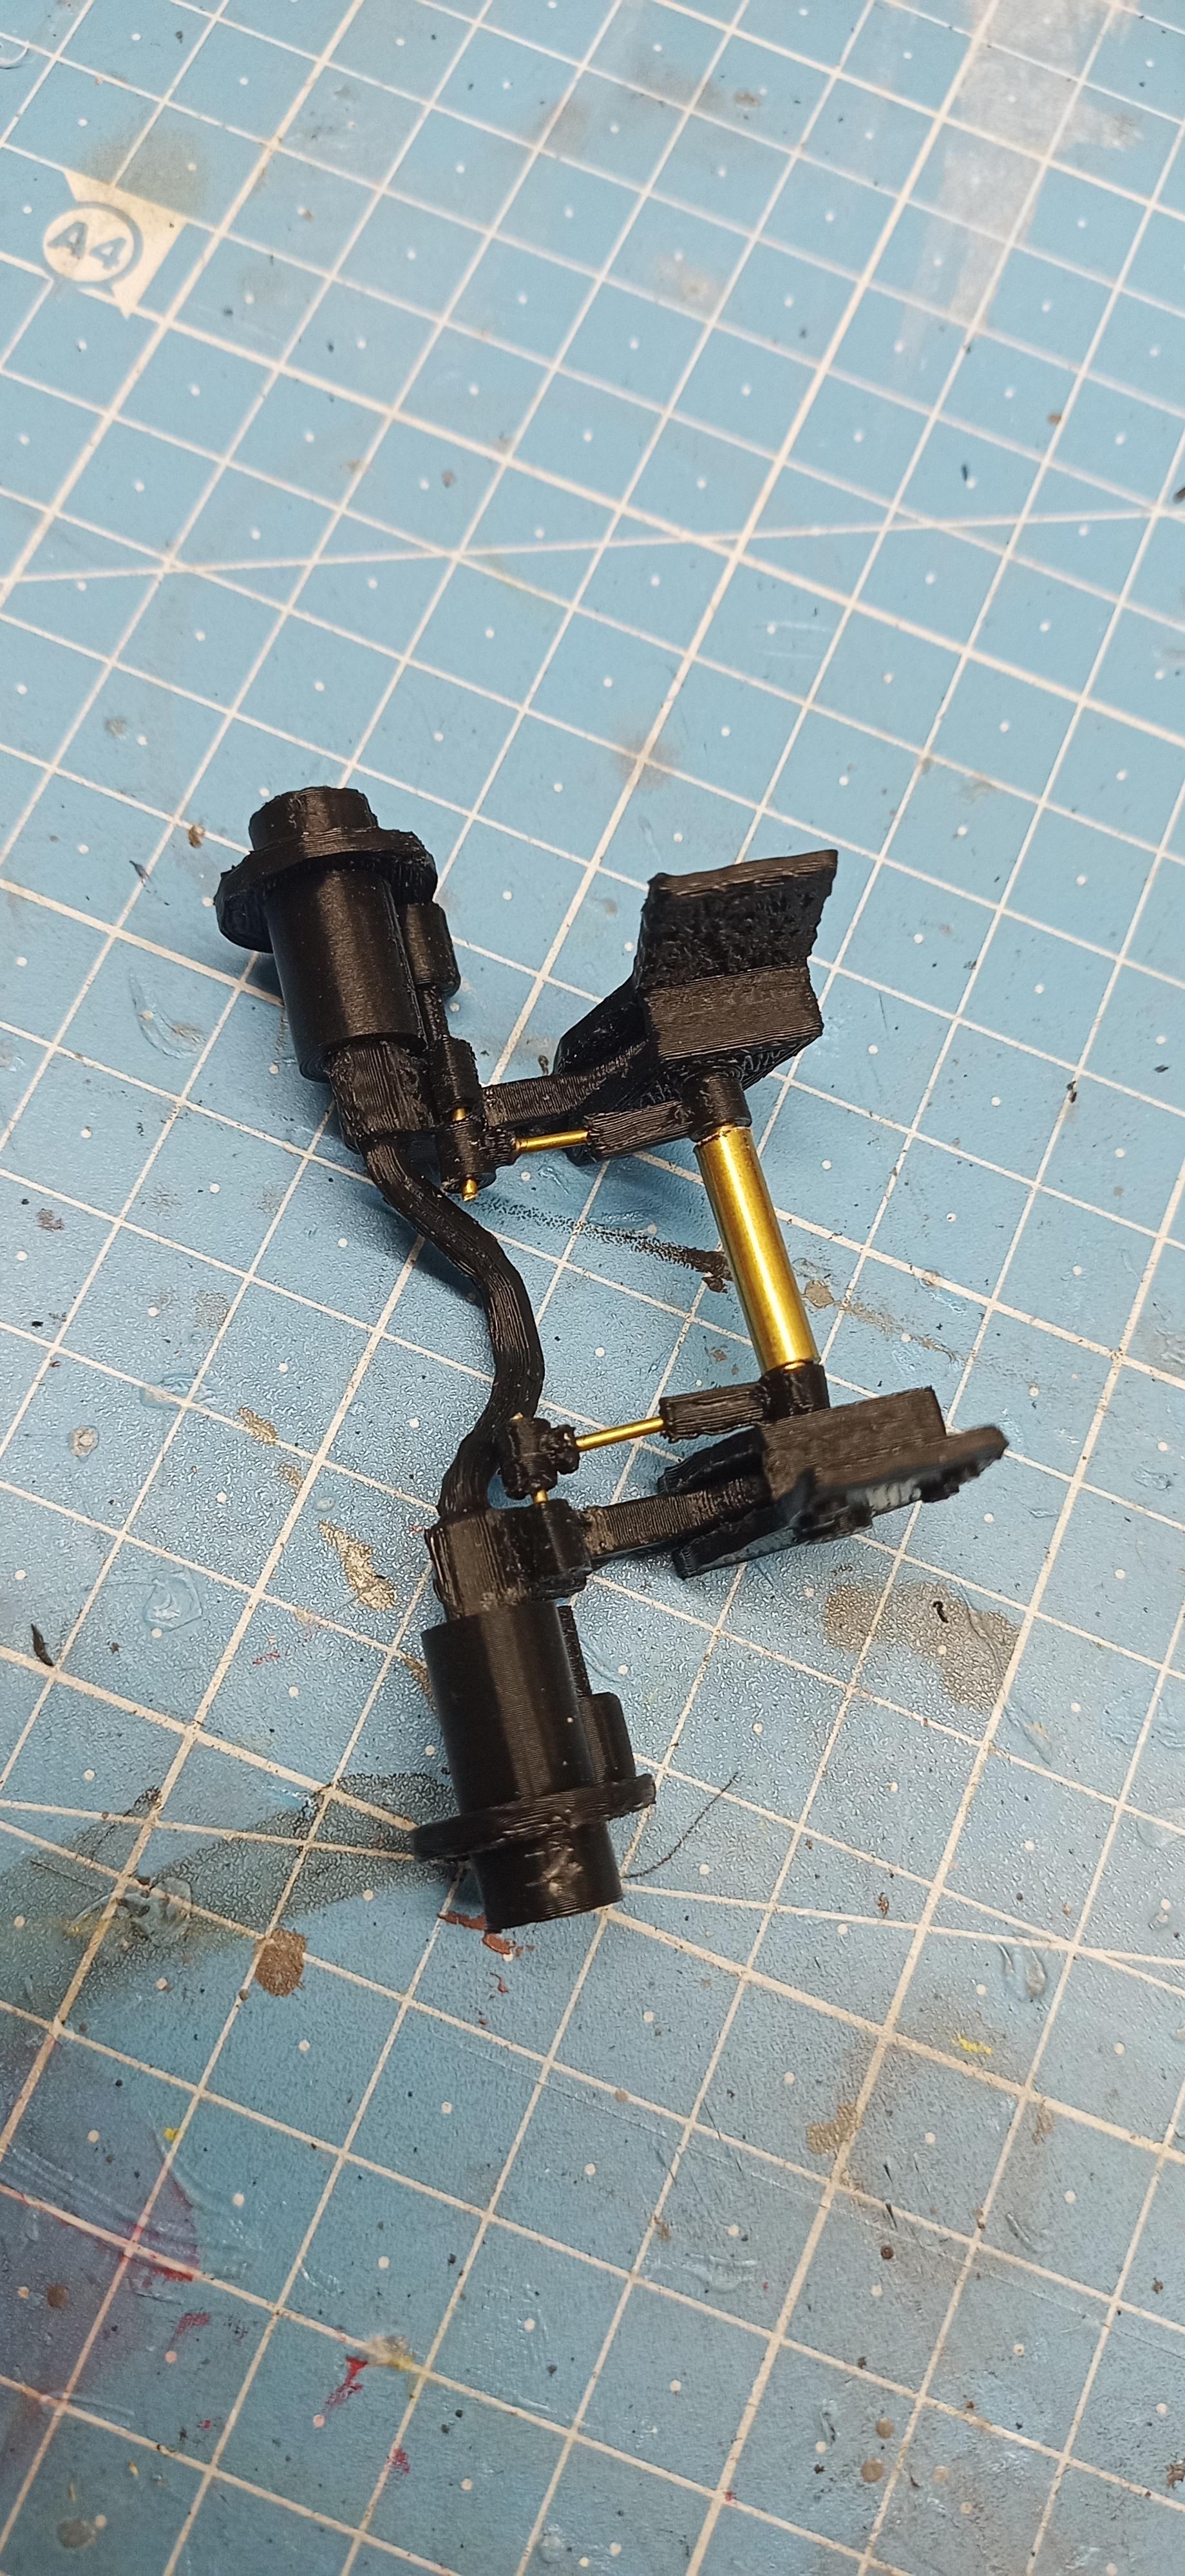
I designed the basic lift axle. There will be dampers added as well as backing plates and brakes. It will be functional too, meaning it will swing up and down. If I can make it stop in the upper position due to the weight of the wheels I don't know yet.
-
I'm back! I actually planned on designing this one myself and I was almost finished too, then I saw this kit for a pretty good bargain so I just couldn't refuse! The box and the functioning tailgate will be used for some furure project. This one will get a lift axle in front of the drive axle and a tiltable scrap container. I'll use different rims and fuel tanks ... ... and I'll install a steerable front axle. These are the first printed parts of the front axle. More later or tomorrow.
-
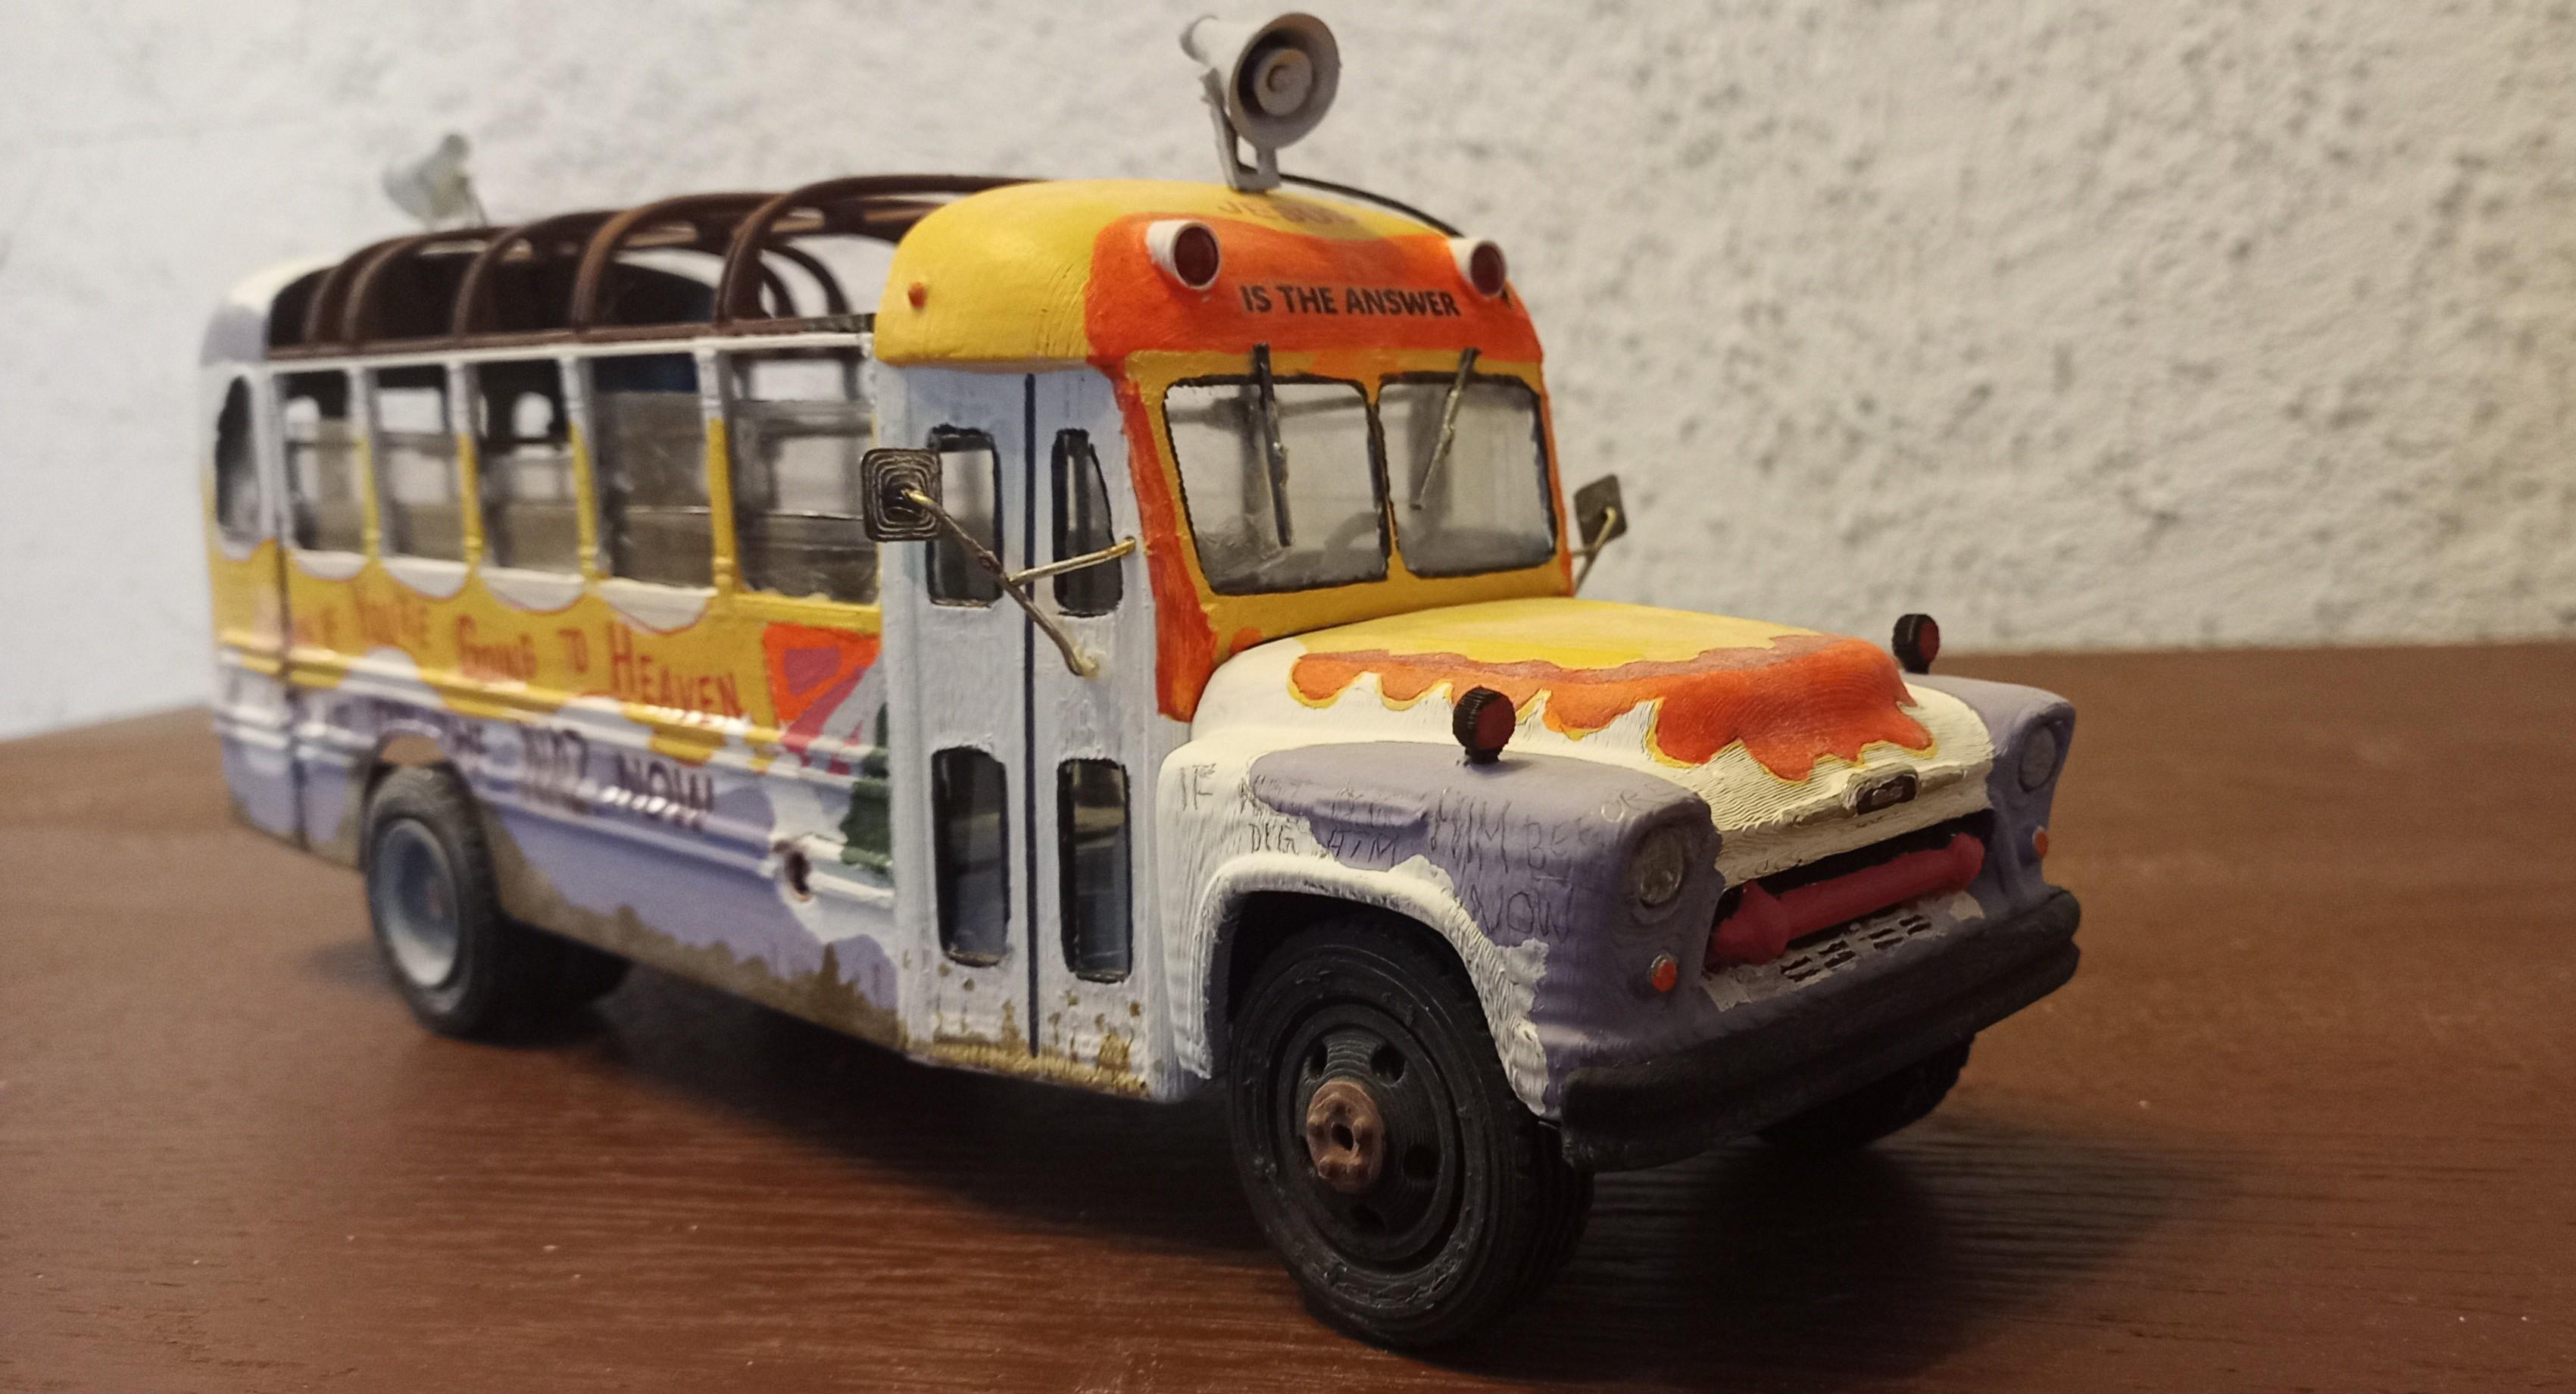
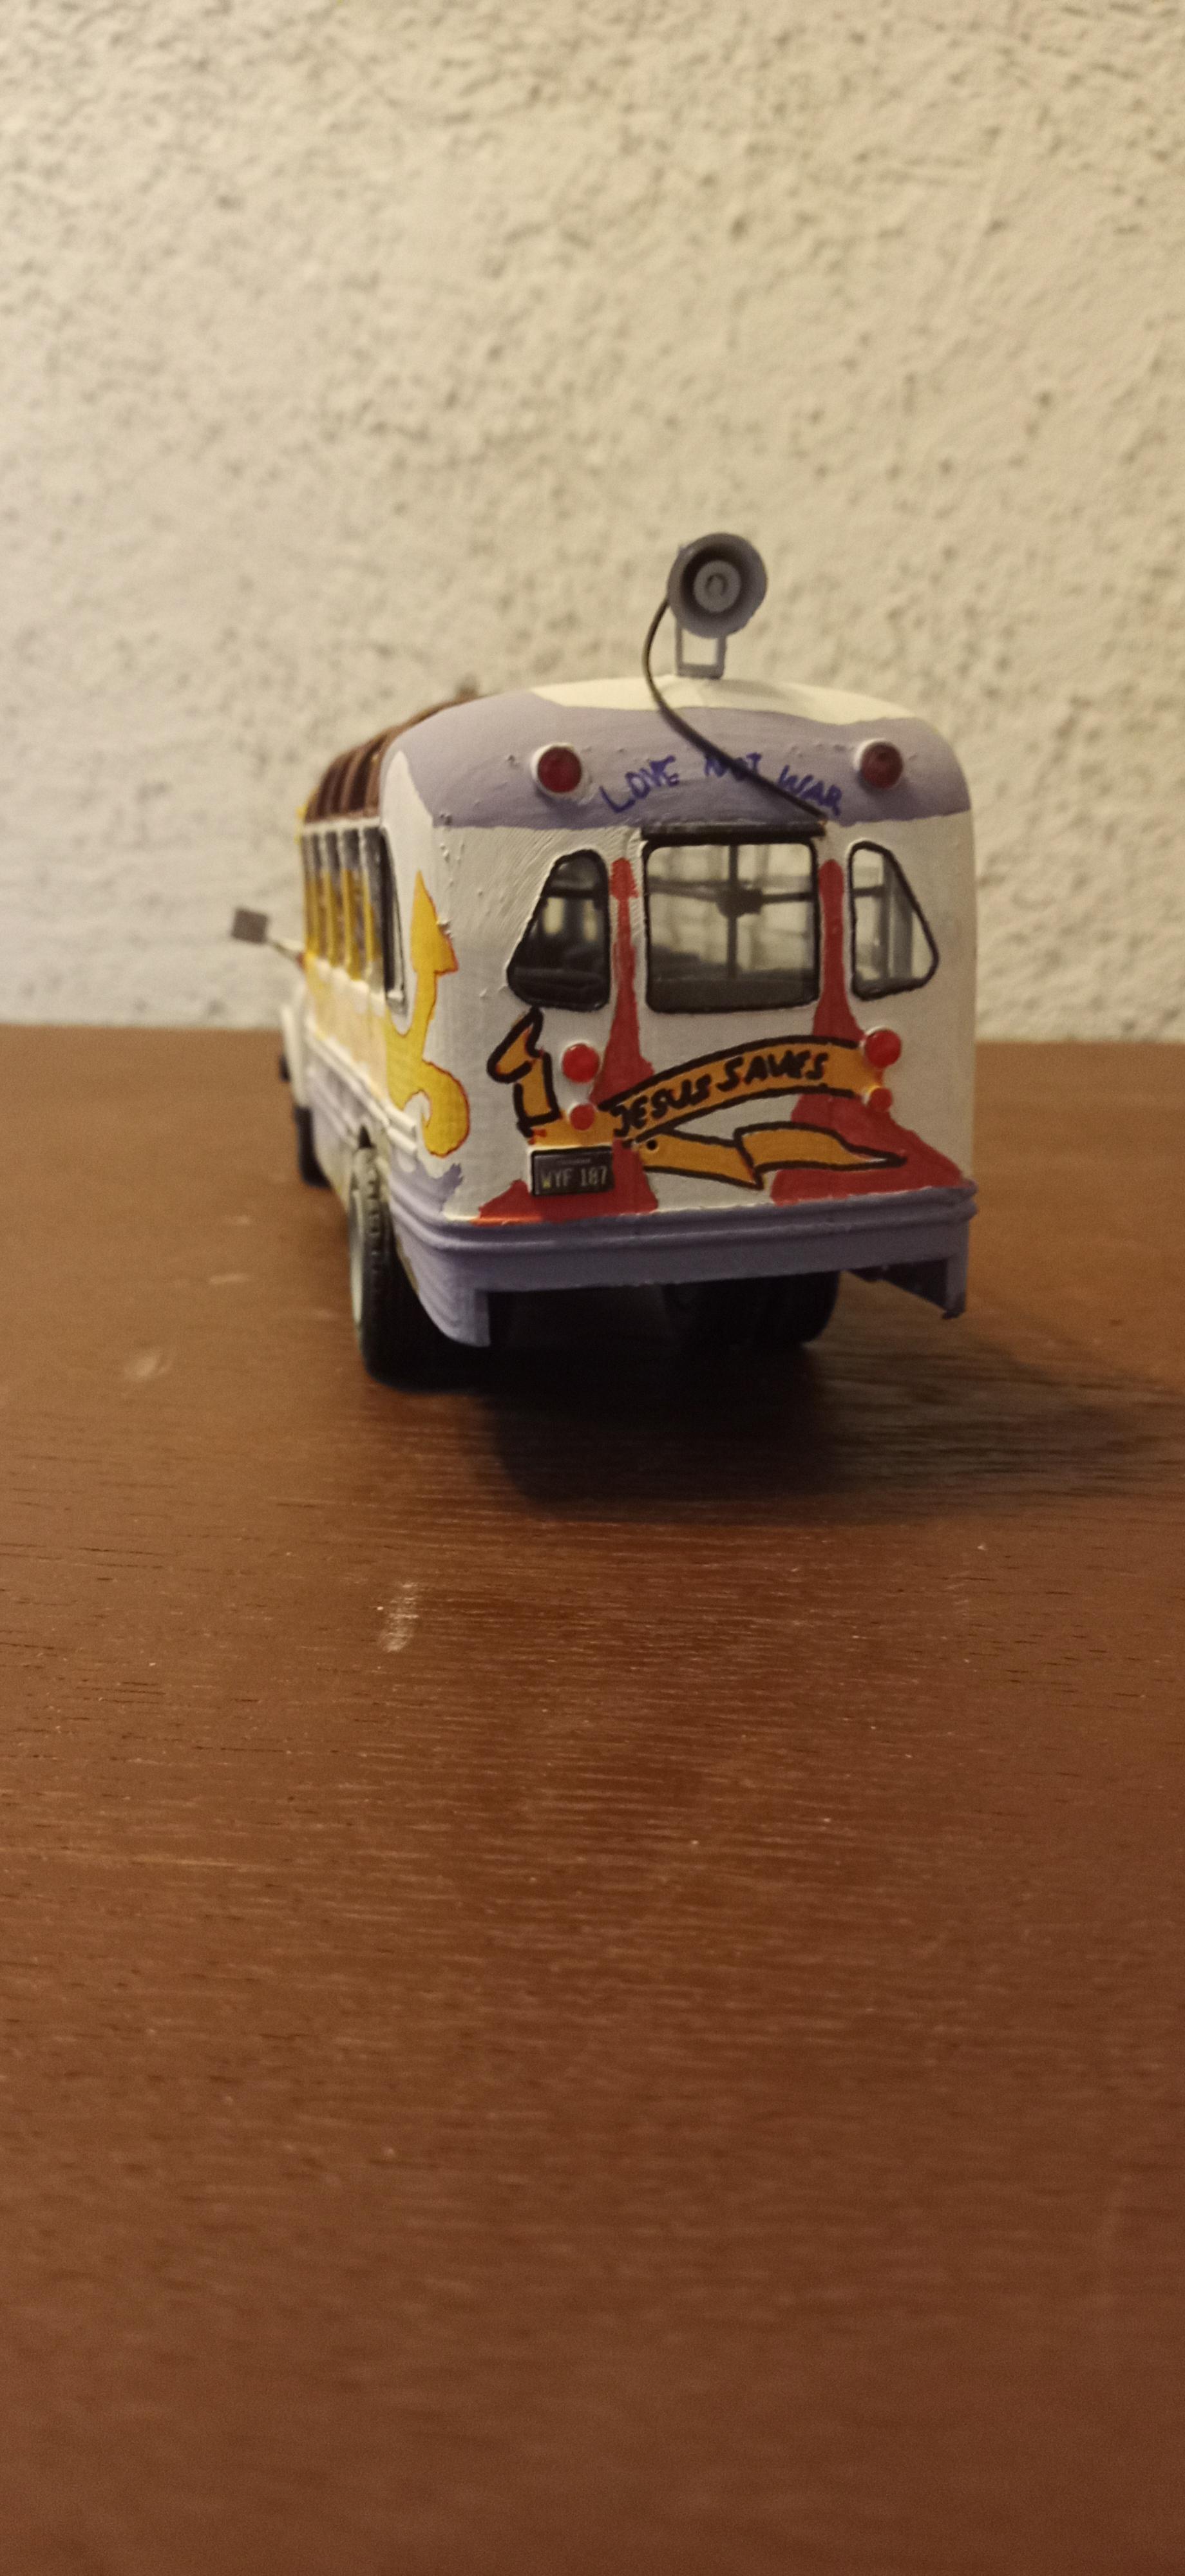
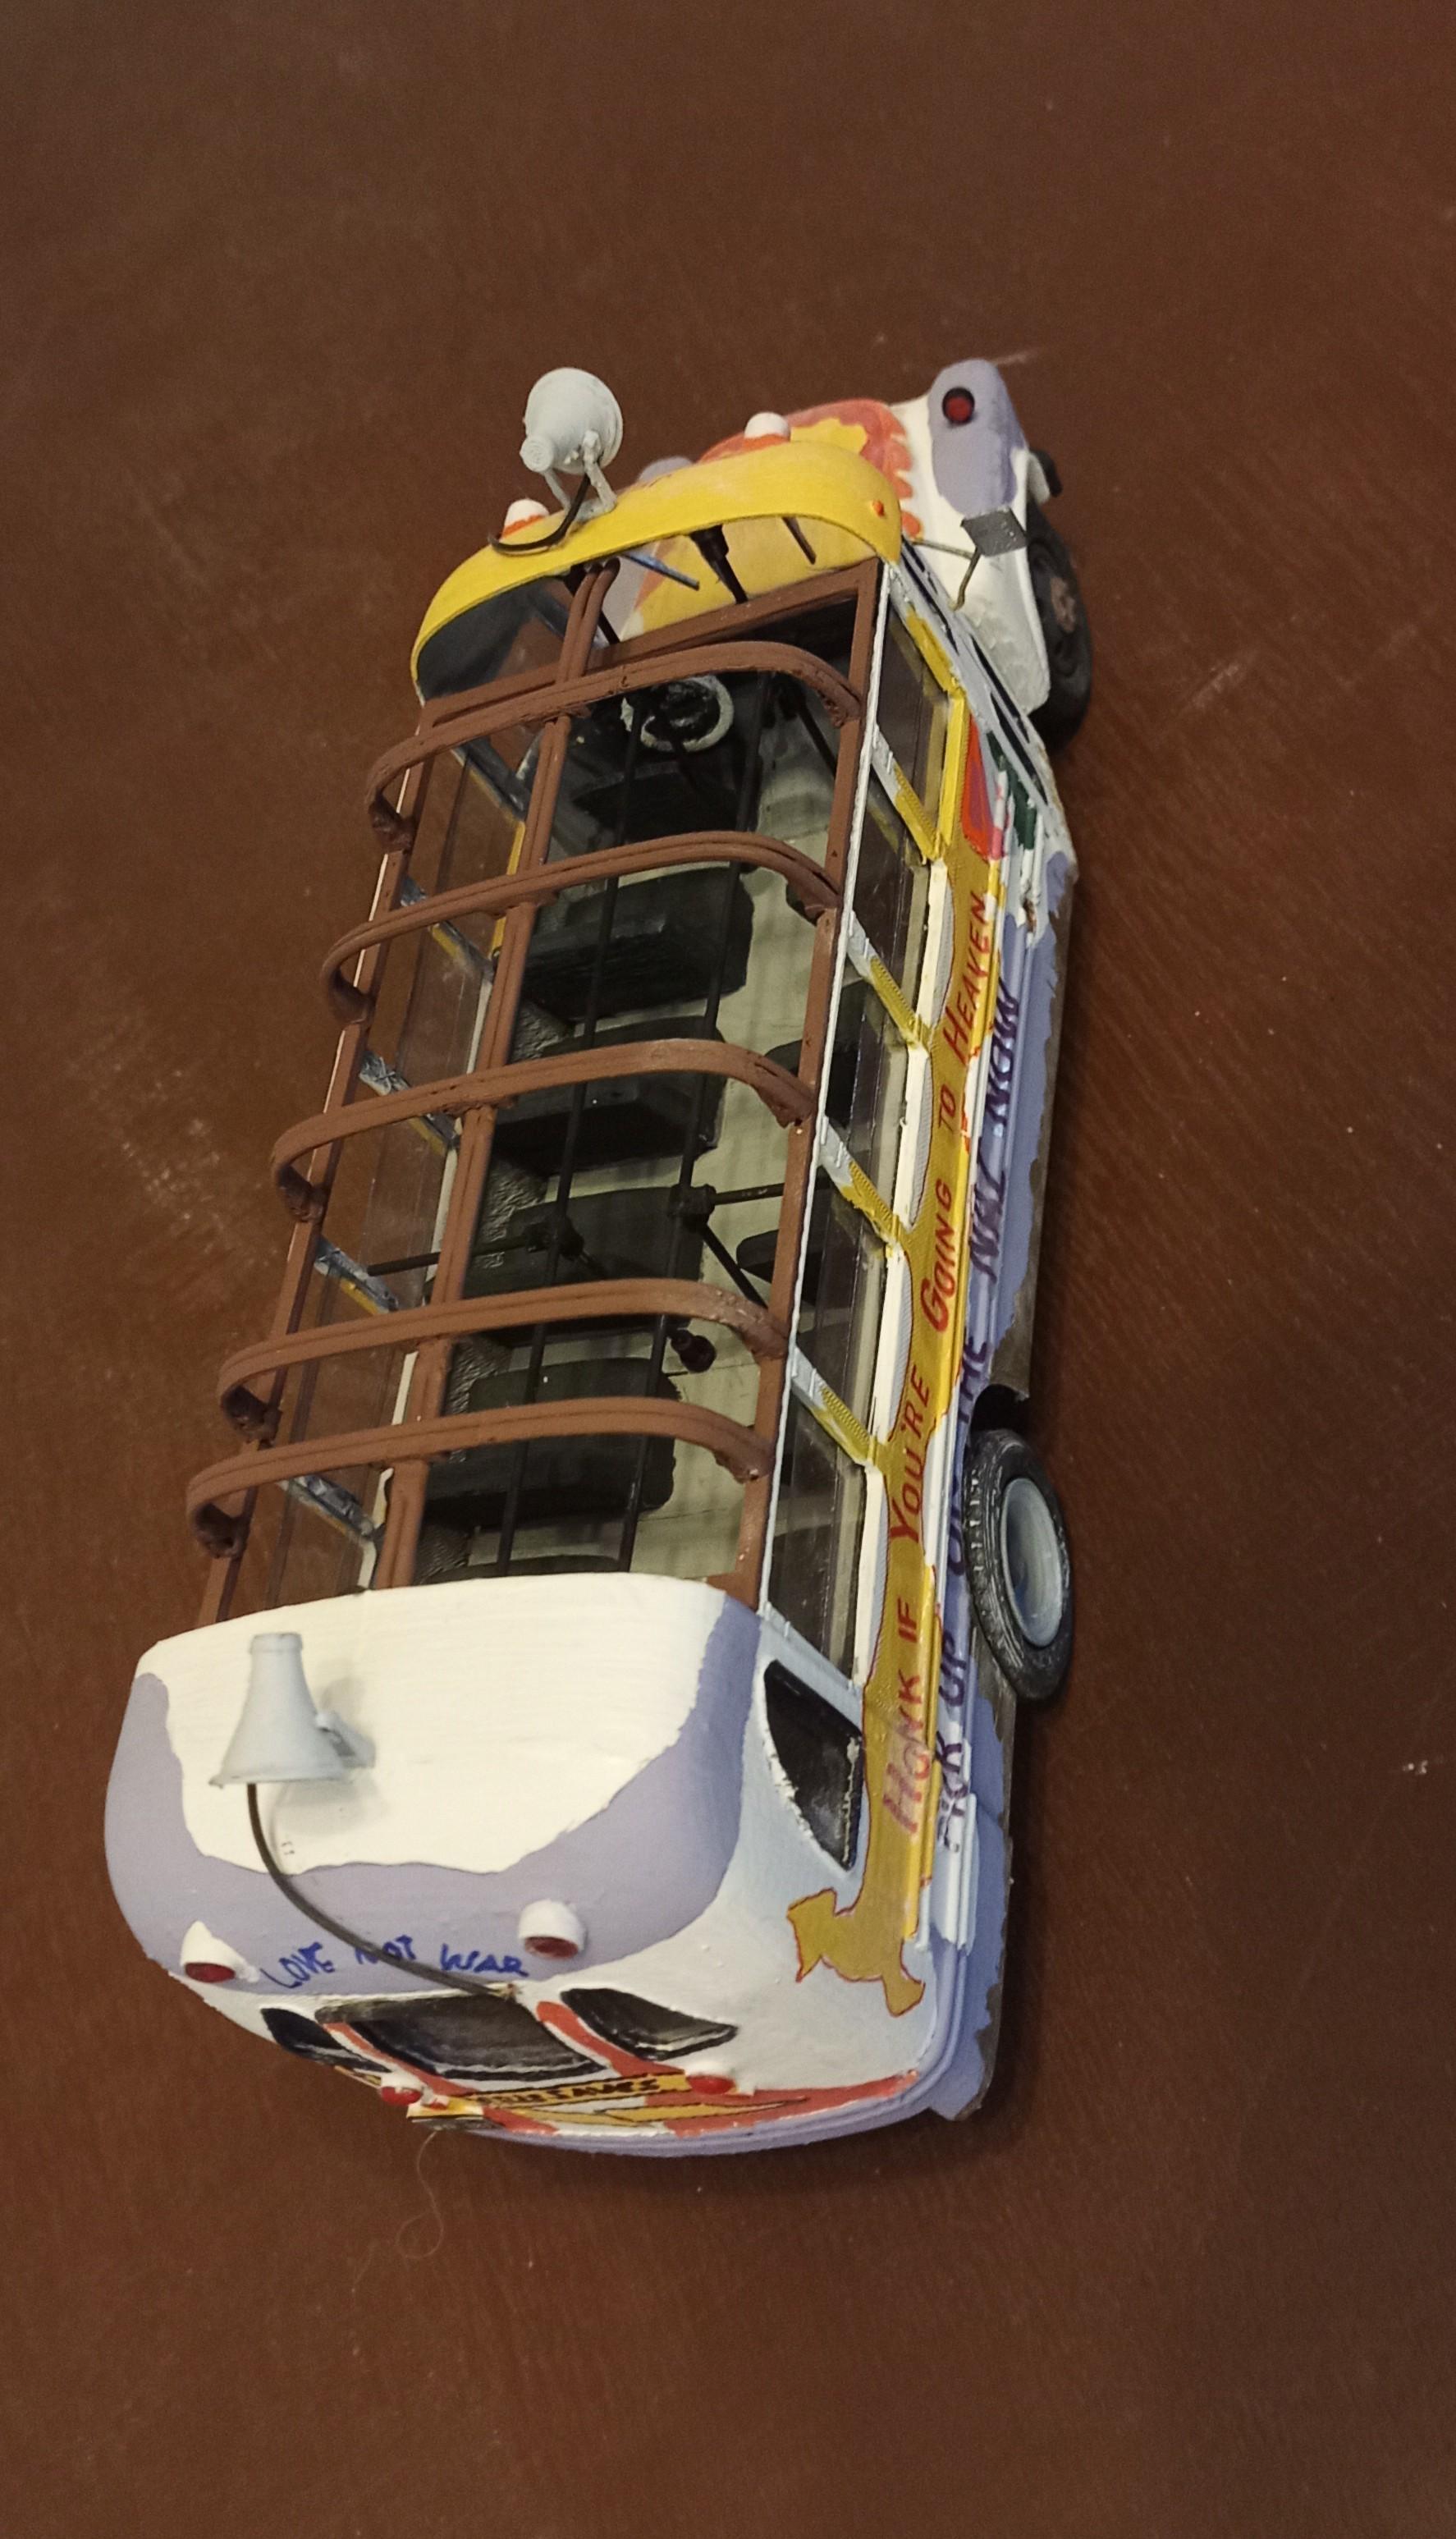
Microbus from Convoy
Jürgen M. replied to Jürgen M.'s topic in Model Trucks: Big Rigs and Heavy Equipment
Thanks Brian! I really appreciate the recognition all of you have given this build. I'm also looking forward to my next project. Hope to introduce it soon! -
Micro Bus, the final Convoy build
Jürgen M. replied to Jürgen M.'s topic in WIP: Model Trucks: Big Rigs and Heavy Equipment
Thanks very much to all of you who kept following this build and supporting me with such nice replies while I myself was only more or less convinced that this would become a good build. I think it did. I hope my next project will find your likes as much. See ya soon! -
Microbus from Convoy
Jürgen M. replied to Jürgen M.'s topic in Model Trucks: Big Rigs and Heavy Equipment
Thanks you Steve! A great compliment from a great modeler! -
Microbus from Convoy
Jürgen M. replied to Jürgen M.'s topic in Model Trucks: Big Rigs and Heavy Equipment
Anyone know why posts sometimes get doubled? -
Microbus from Convoy
Jürgen M. replied to Jürgen M.'s topic in Model Trucks: Big Rigs and Heavy Equipment
Oh I doubt that. I need a change. Want to try Out other things. Combine kits with printed stuff. New models. The Convoy is completed! Now comes new stuff! -
Microbus from Convoy
Jürgen M. replied to Jürgen M.'s topic in Model Trucks: Big Rigs and Heavy Equipment
Thanks everyone for following my Convoy posts! As soon as I repaired my air gun compressor I will present a new project! VID_20251106_194552~2.mp4 -
Microbus from Convoy
Jürgen M. replied to Jürgen M.'s topic in Model Trucks: Big Rigs and Heavy Equipment
The final vid: (I apologize for the bad sound quality) VID_20251106_194552~2.mp4 -
Microbus from Convoy
Jürgen M. replied to Jürgen M.'s topic in Model Trucks: Big Rigs and Heavy Equipment
In case anyone is interested in a few statistics to this build: Total no. of parts: 155 Printed: 90 Scratch & box: 65 Design/editing: 10 days Build time: 15 days Origin 3D file of bus: 3D cults (Body and interior) Chassis and additional parts self designed and printed, rest scratch and box. -
Microbus from Convoy
Jürgen M. replied to Jürgen M.'s topic in Model Trucks: Big Rigs and Heavy Equipment
Thanks Ron! -
Microbus from Convoy
Jürgen M. replied to Jürgen M.'s topic in Model Trucks: Big Rigs and Heavy Equipment
Thanks Pal! 😊 -
Micro Bus, the final Convoy build
Jürgen M. replied to Jürgen M.'s topic in WIP: Model Trucks: Big Rigs and Heavy Equipment
Thanks Steve! -
Here's the final vid with the completed convoy! (Completed to me, cause the shelf is full) VID_20251106_135331.mp4 I guess I can be satisfied ! 😊
-
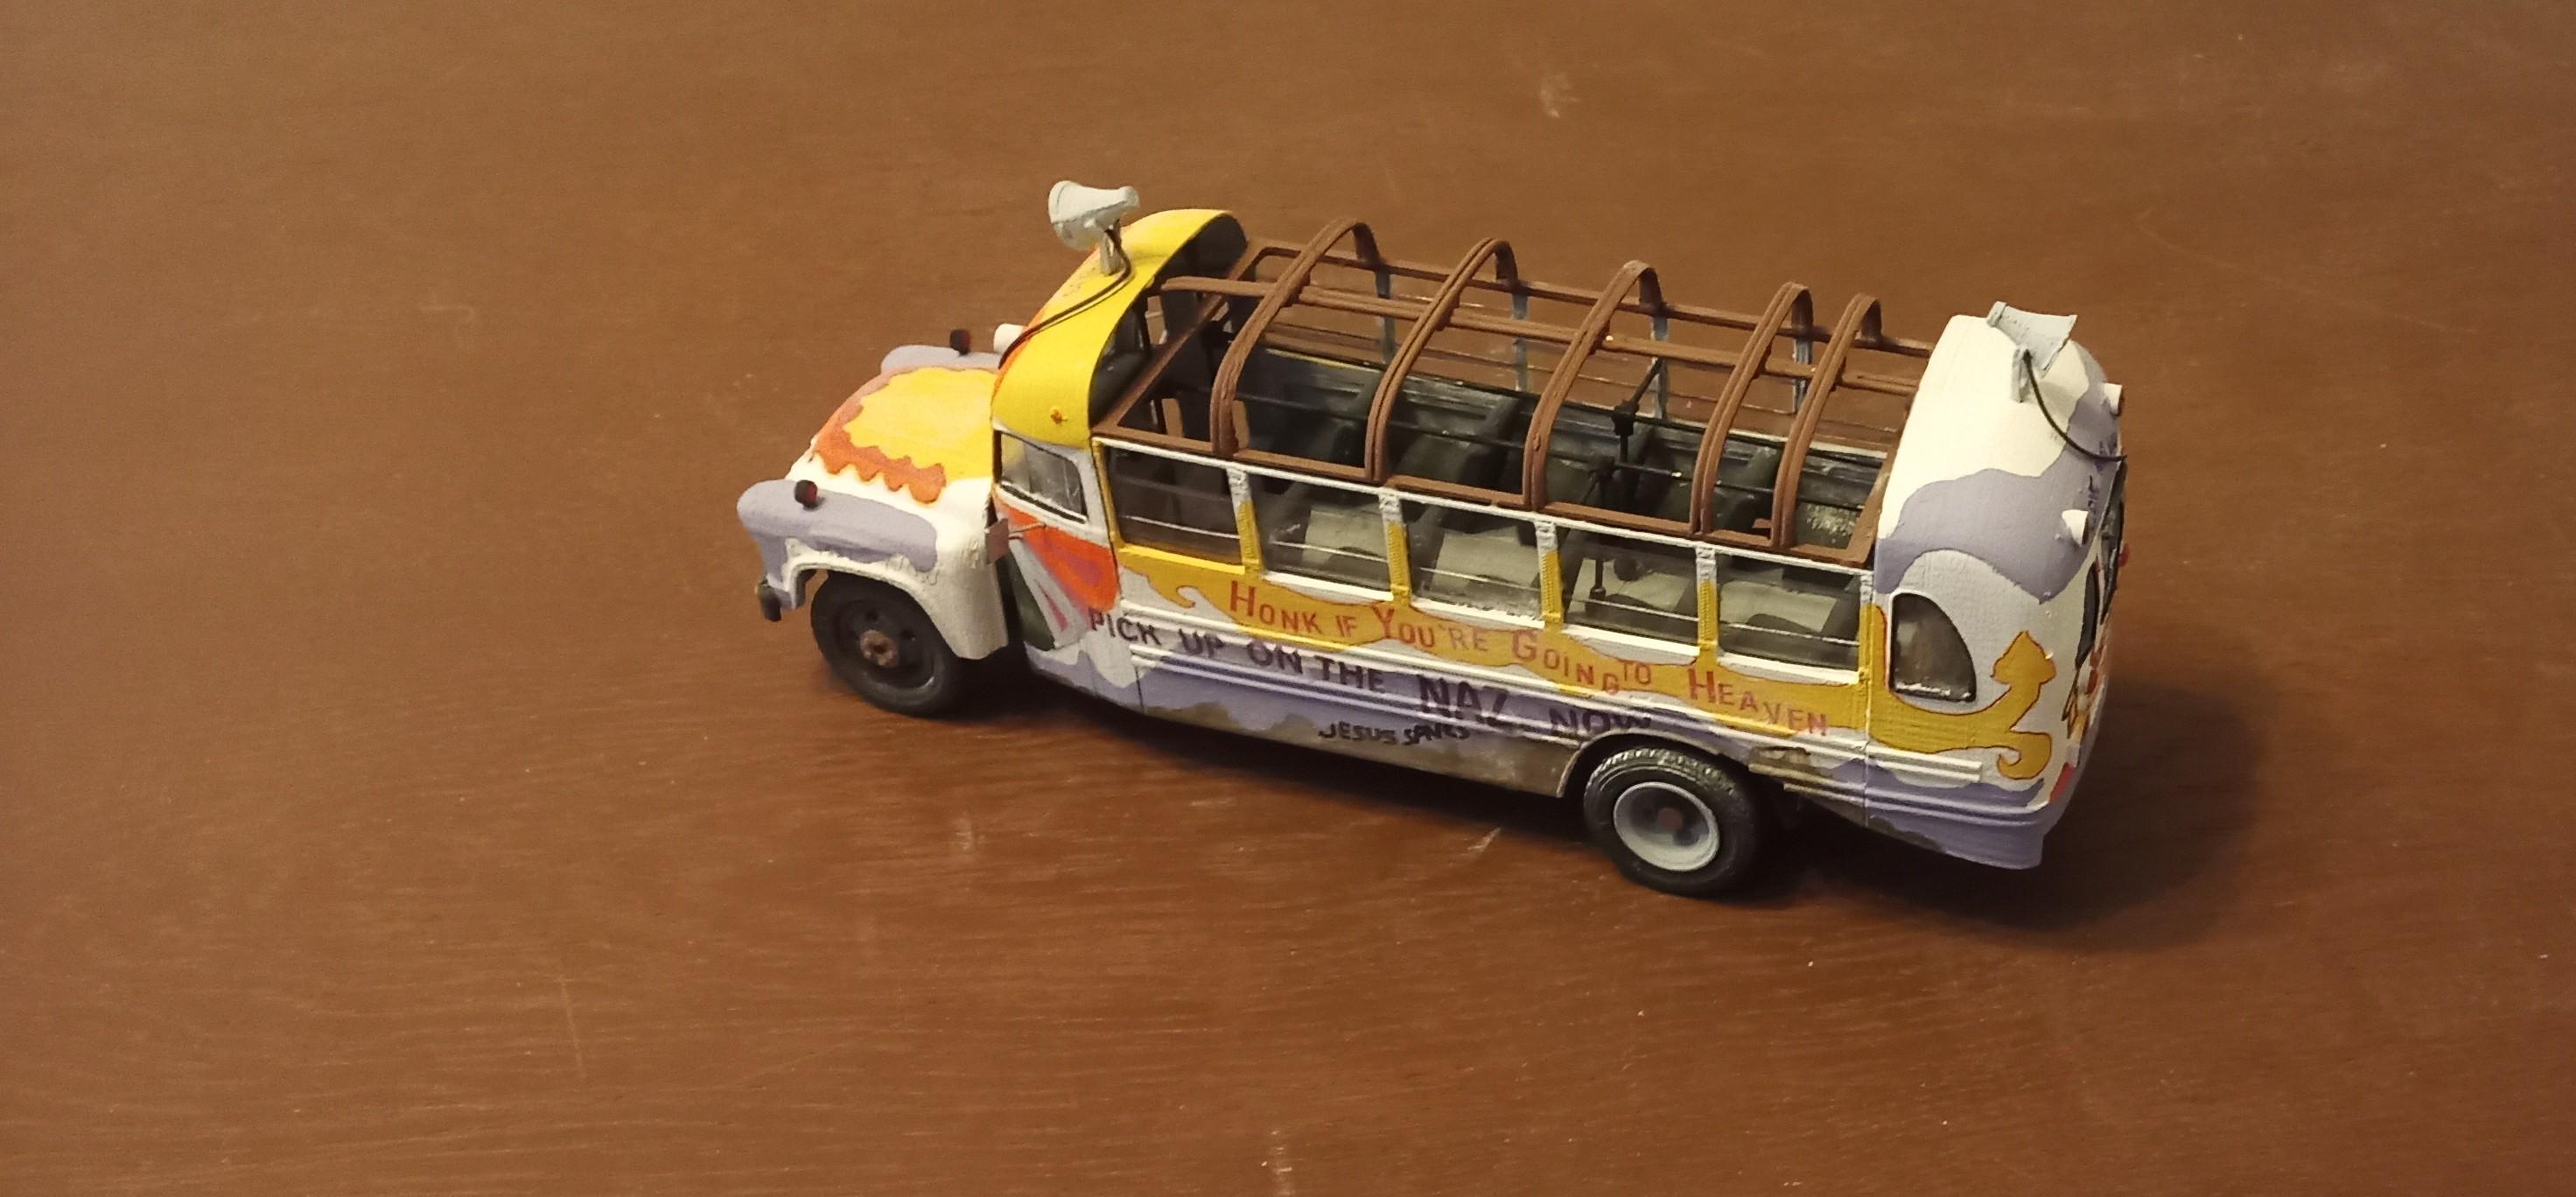
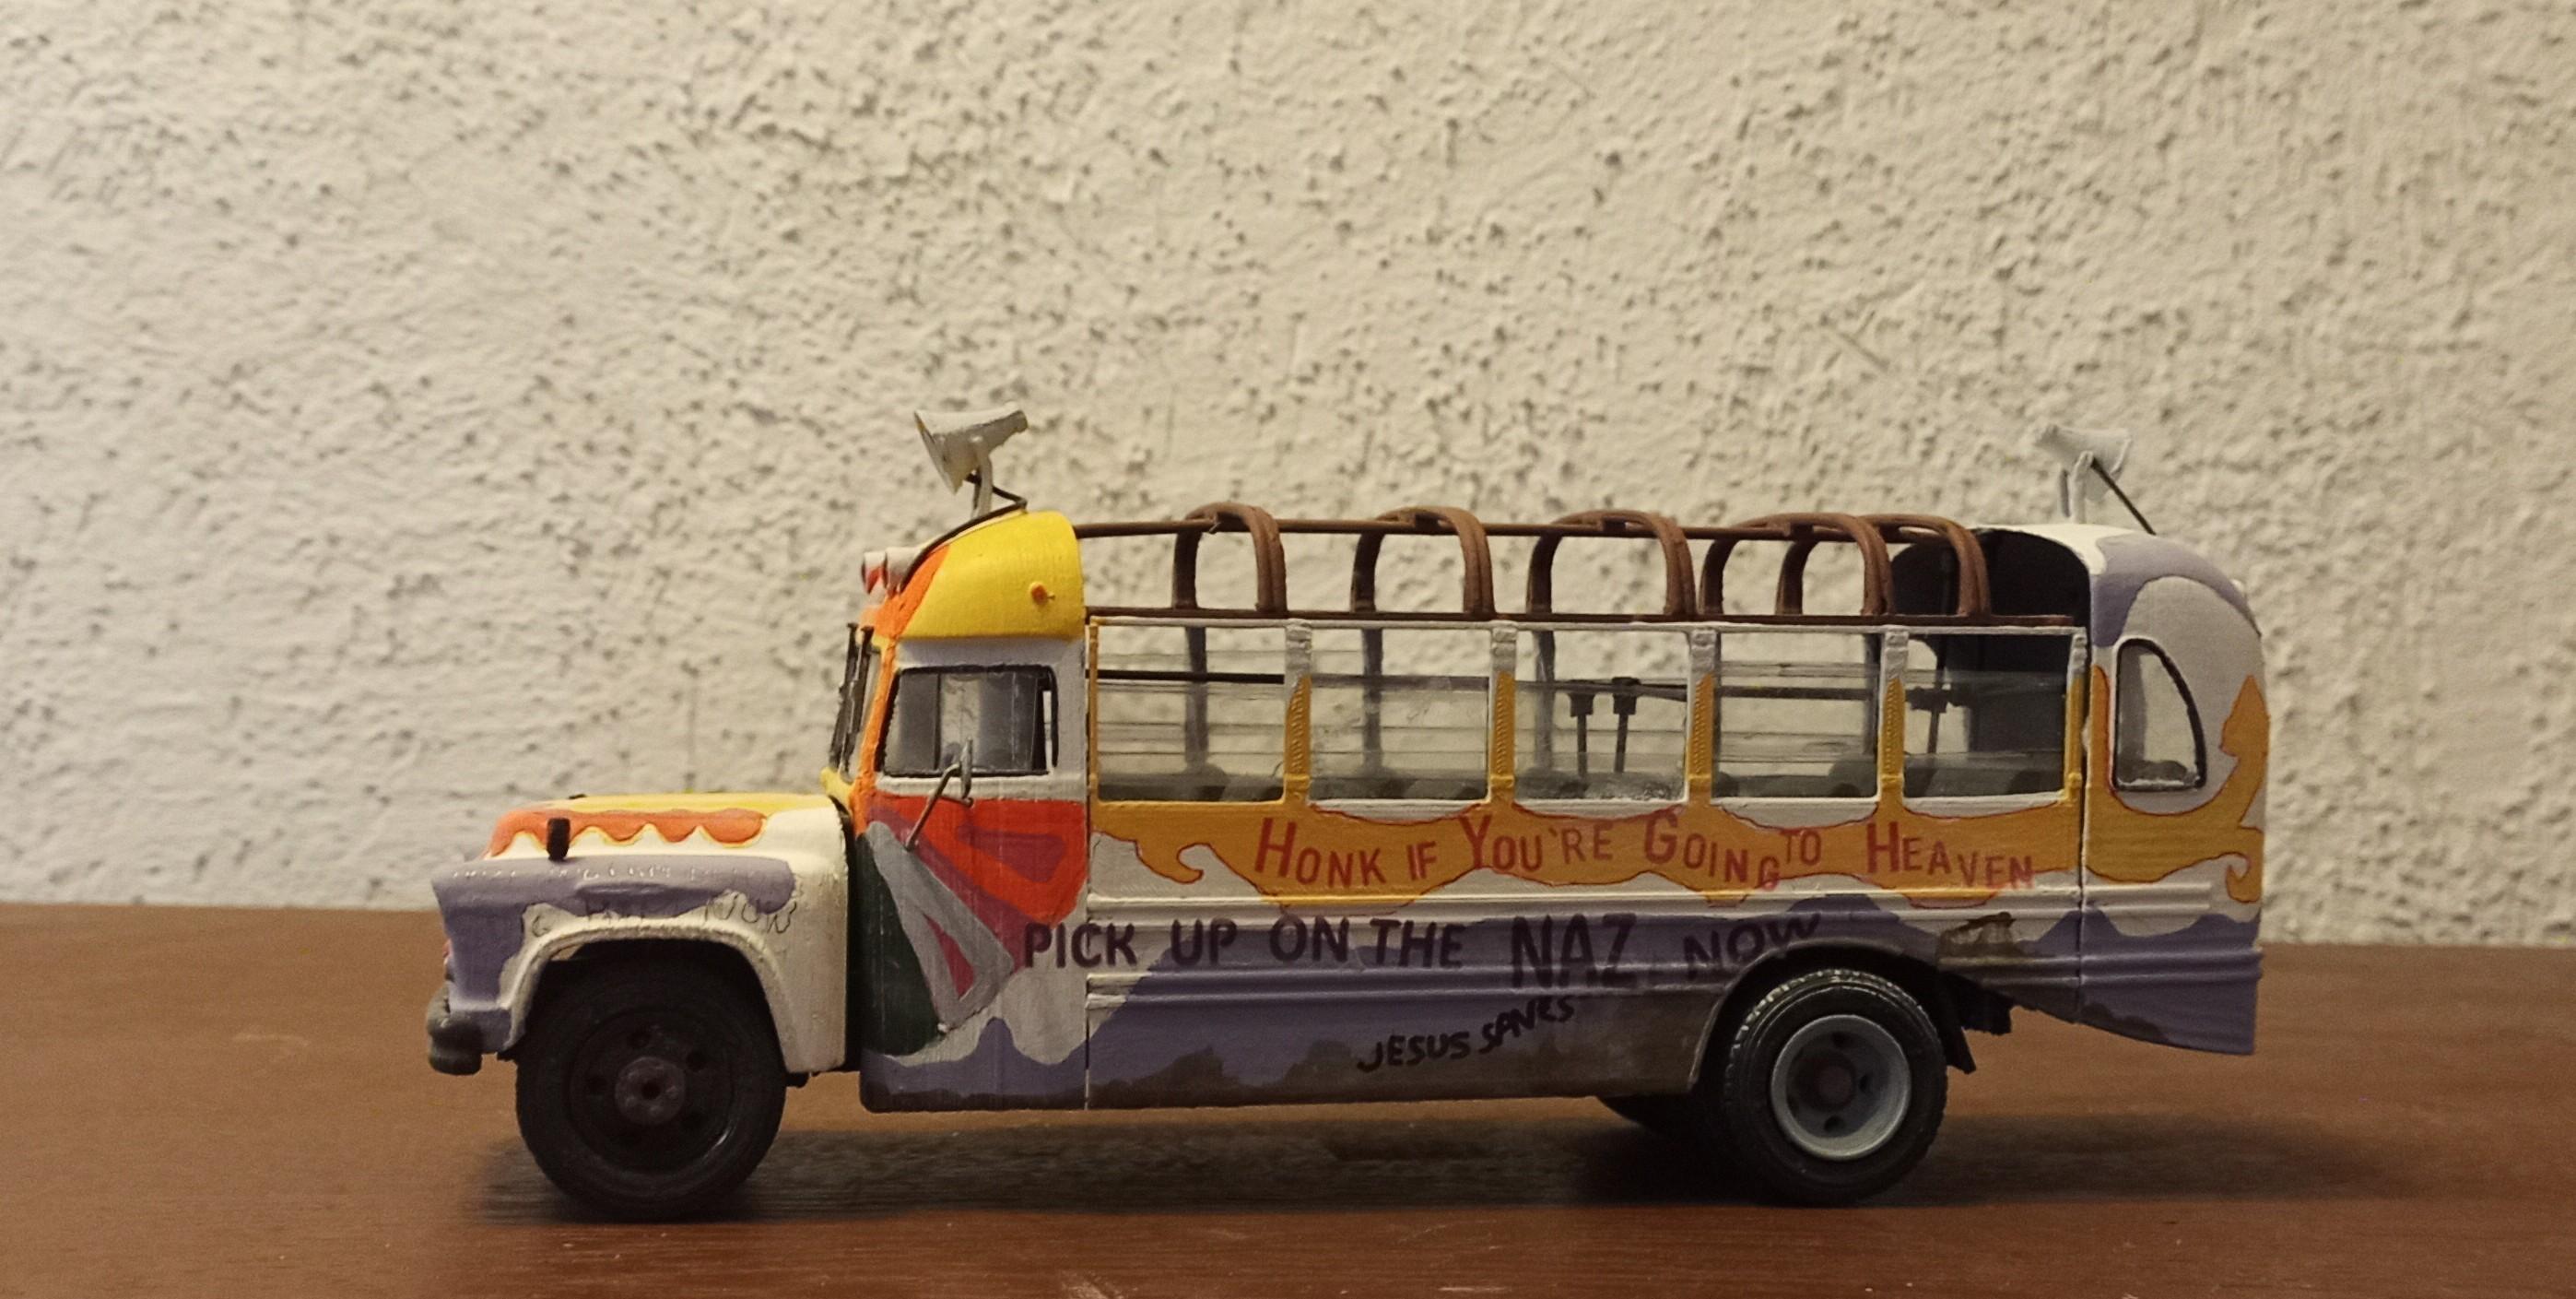
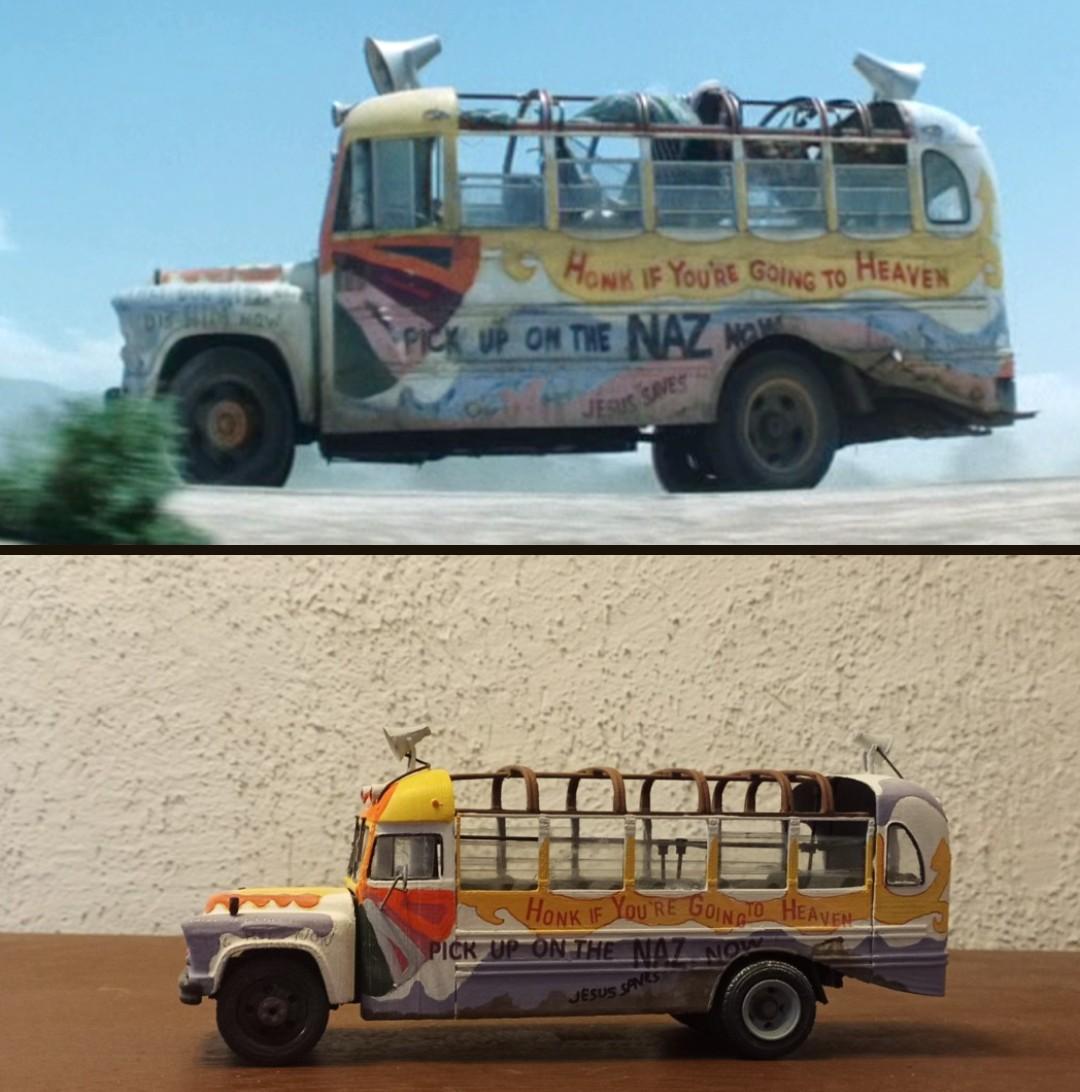
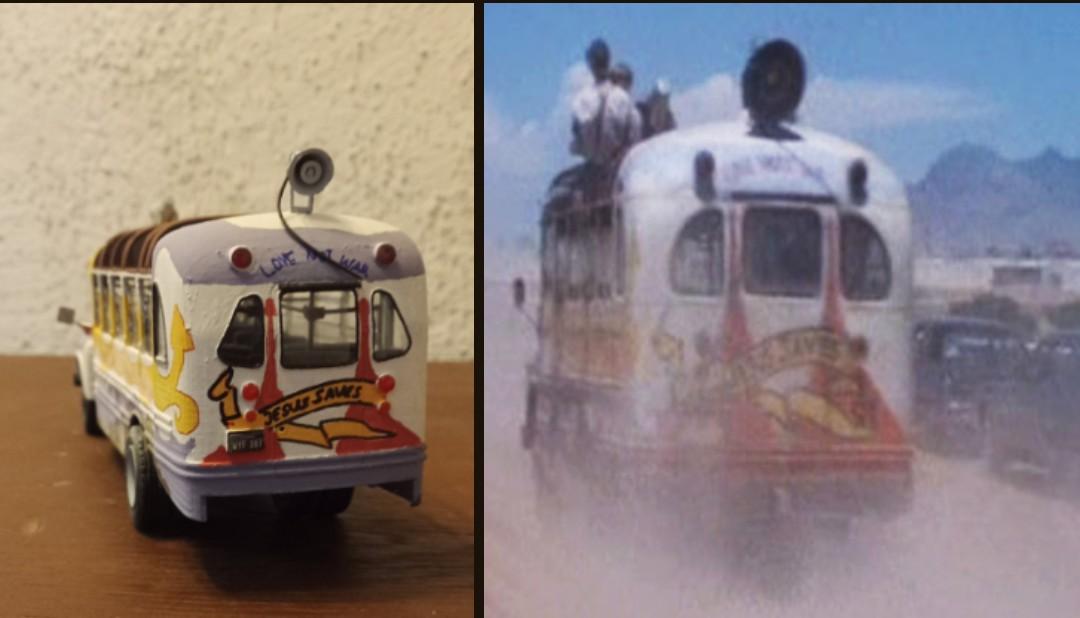
Hi everyone, I finalized my Convoy with this bus. It's a downloaded 3D file which I edited to make it look more like the bus in the movie! It's far from identical but I guess it'll do! Enjoy! And some pics to compare with the movie bus (No hippies) Thanks for dropping in!