Jürgen M.
-
Posts
1,783 -
Joined
-
Last visited
Content Type
Profiles
Forums
Events
Gallery
Everything posted by Jürgen M.
-

Freightliner FLC
Jürgen M. replied to Jürgen M.'s topic in WIP: Model Trucks: Big Rigs and Heavy Equipment
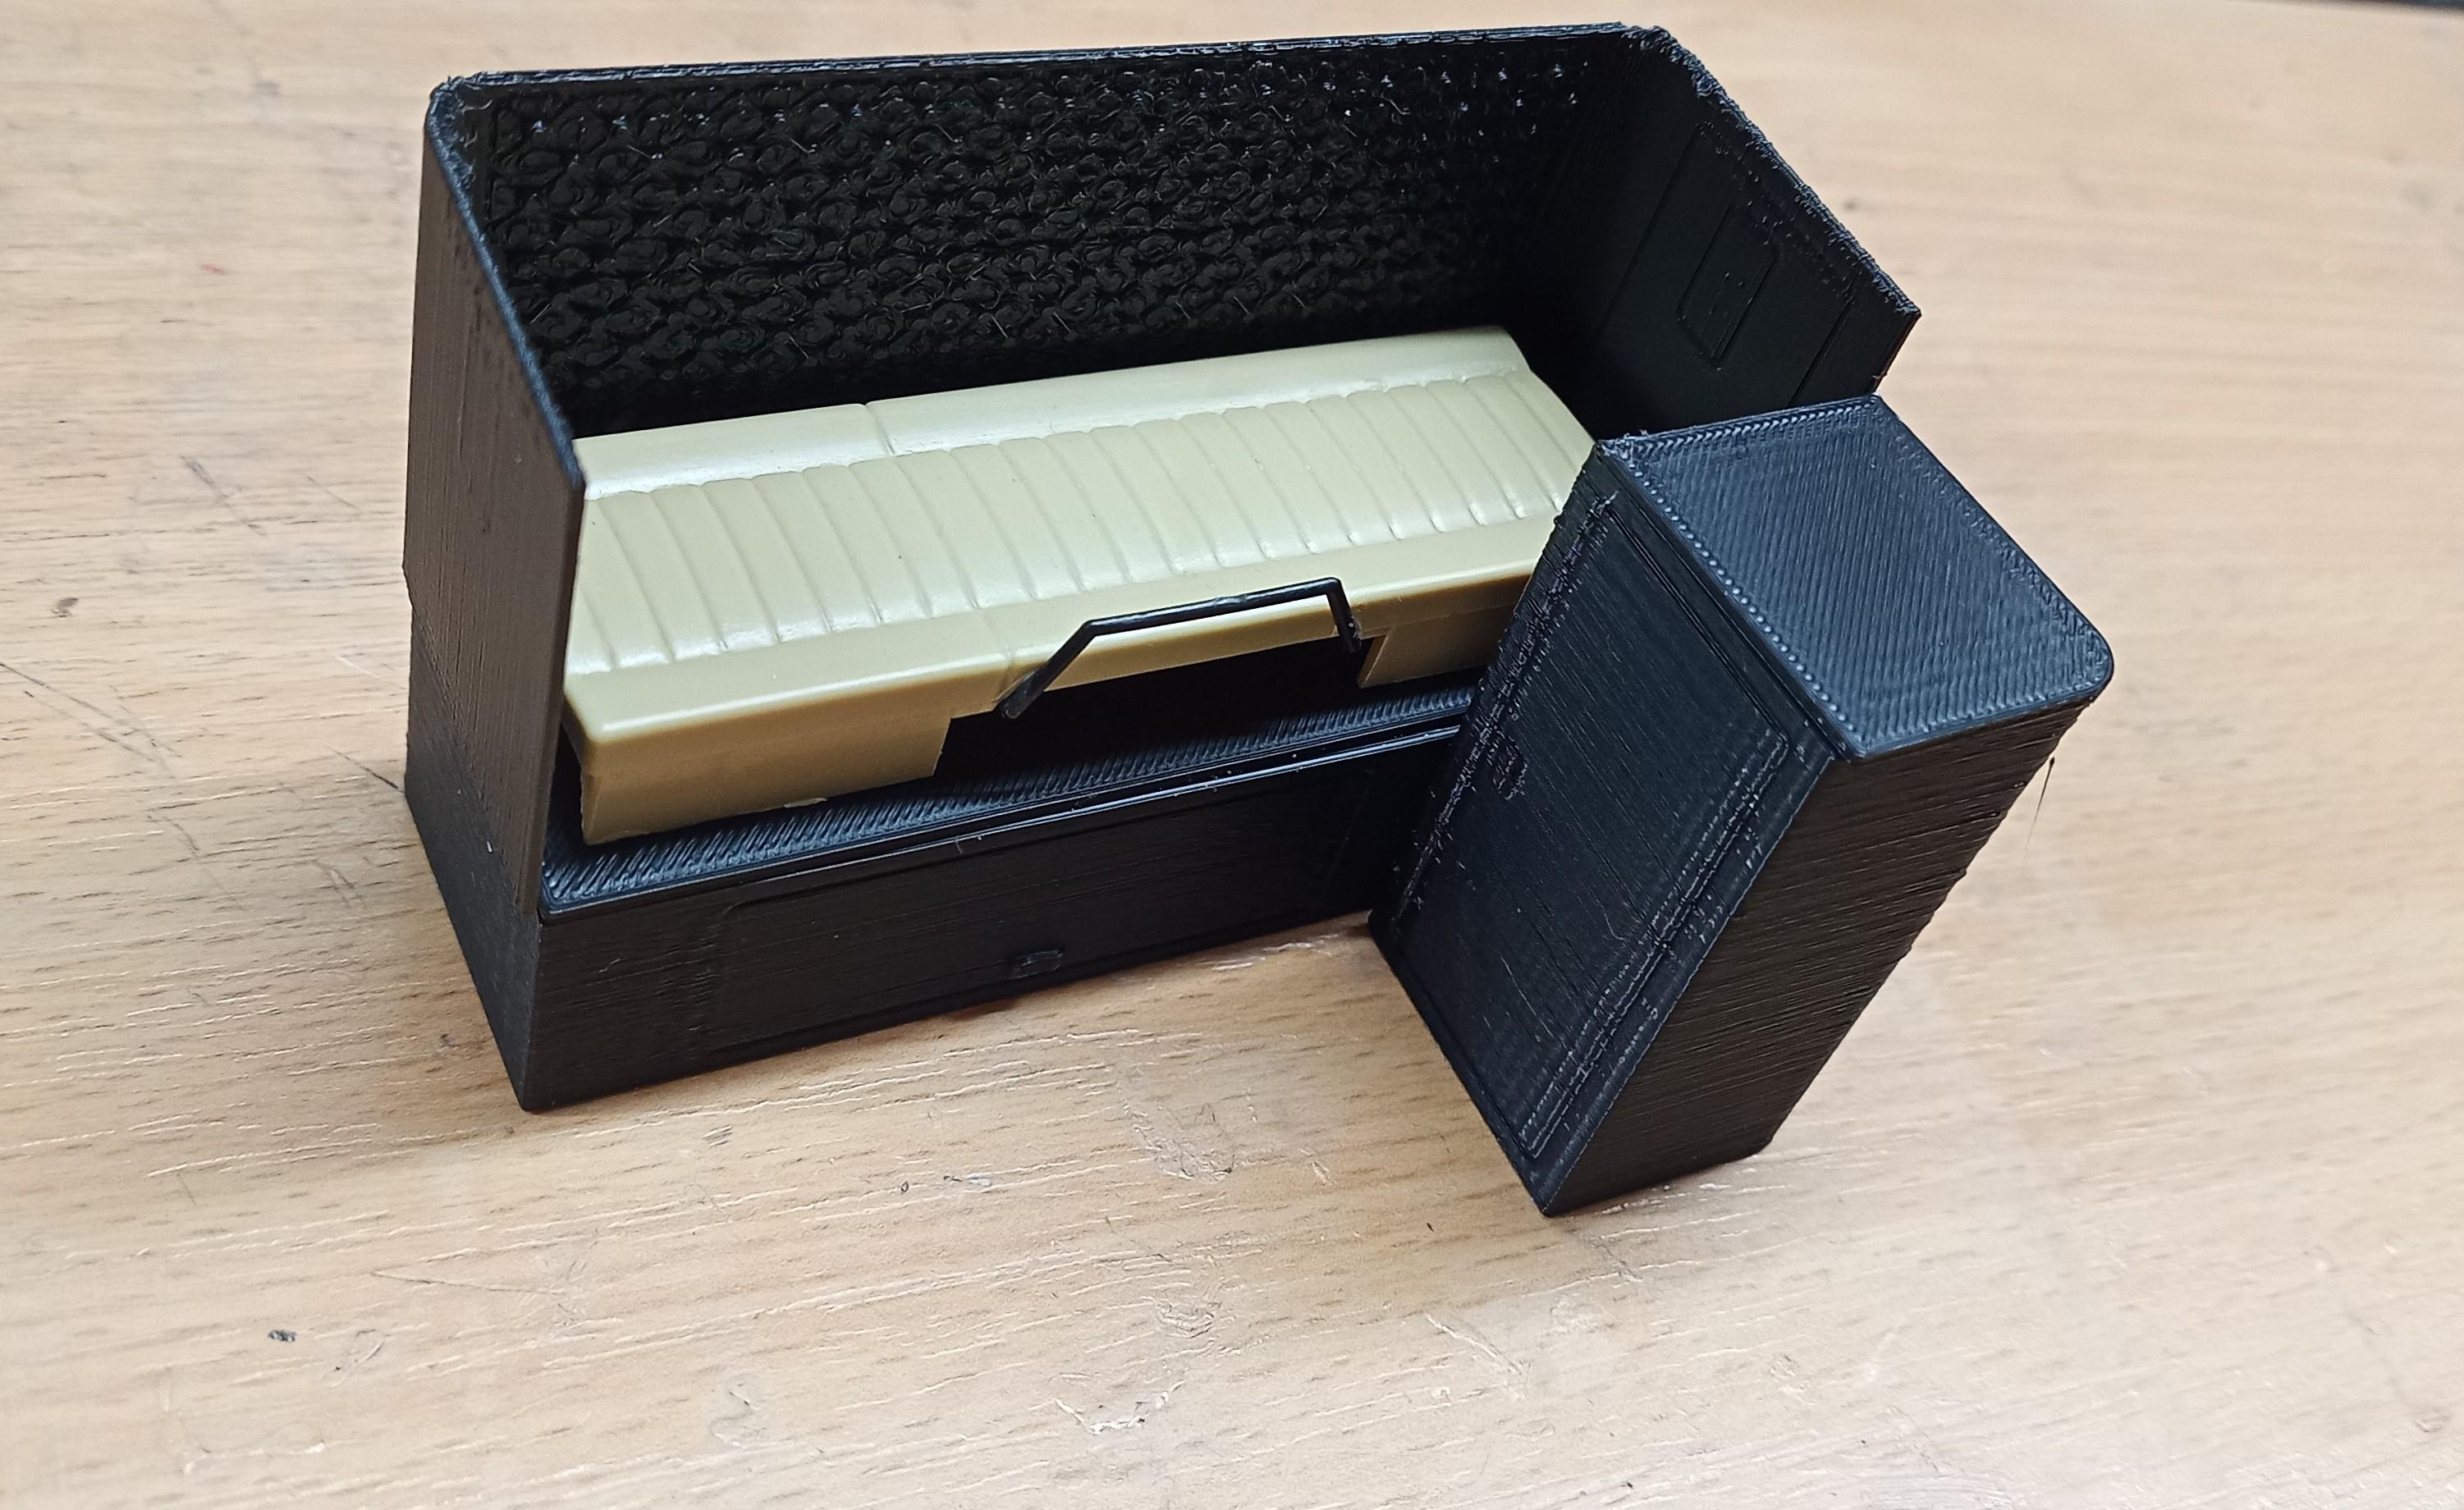
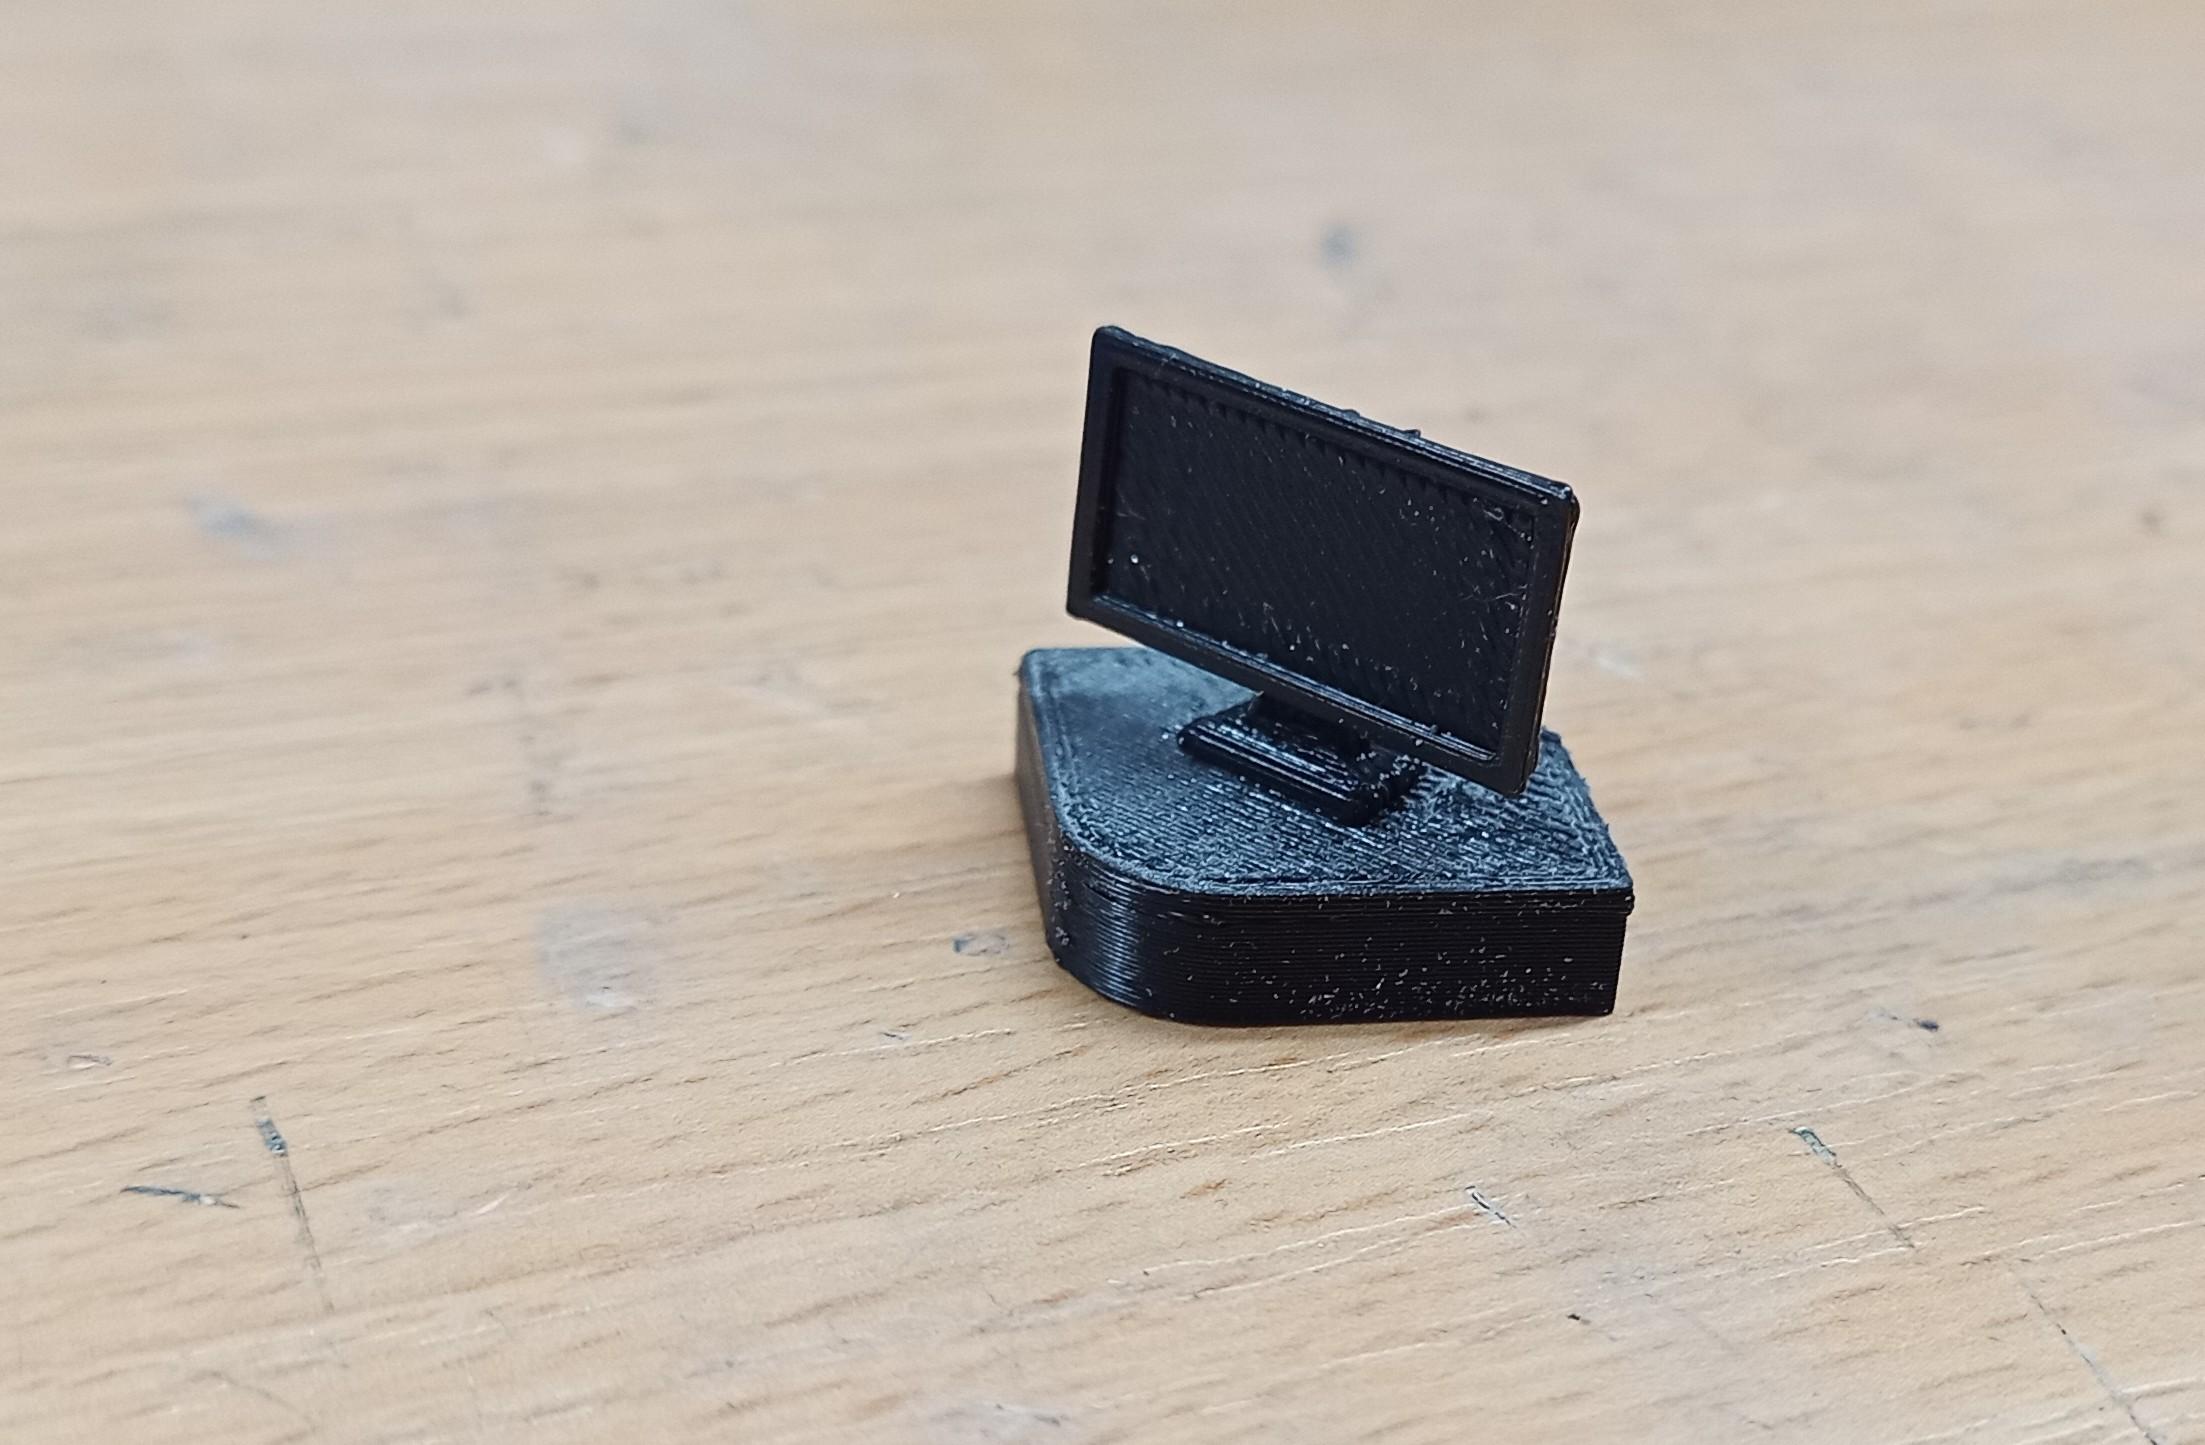
The sleeper interior is printed but still to be painted! The bed is from the Scania 142M that I converted to a cement mixer! I even made a tv and a little shelf! 🙃
-
Freightliner FLC
Jürgen M. replied to Jürgen M.'s topic in WIP: Model Trucks: Big Rigs and Heavy Equipment
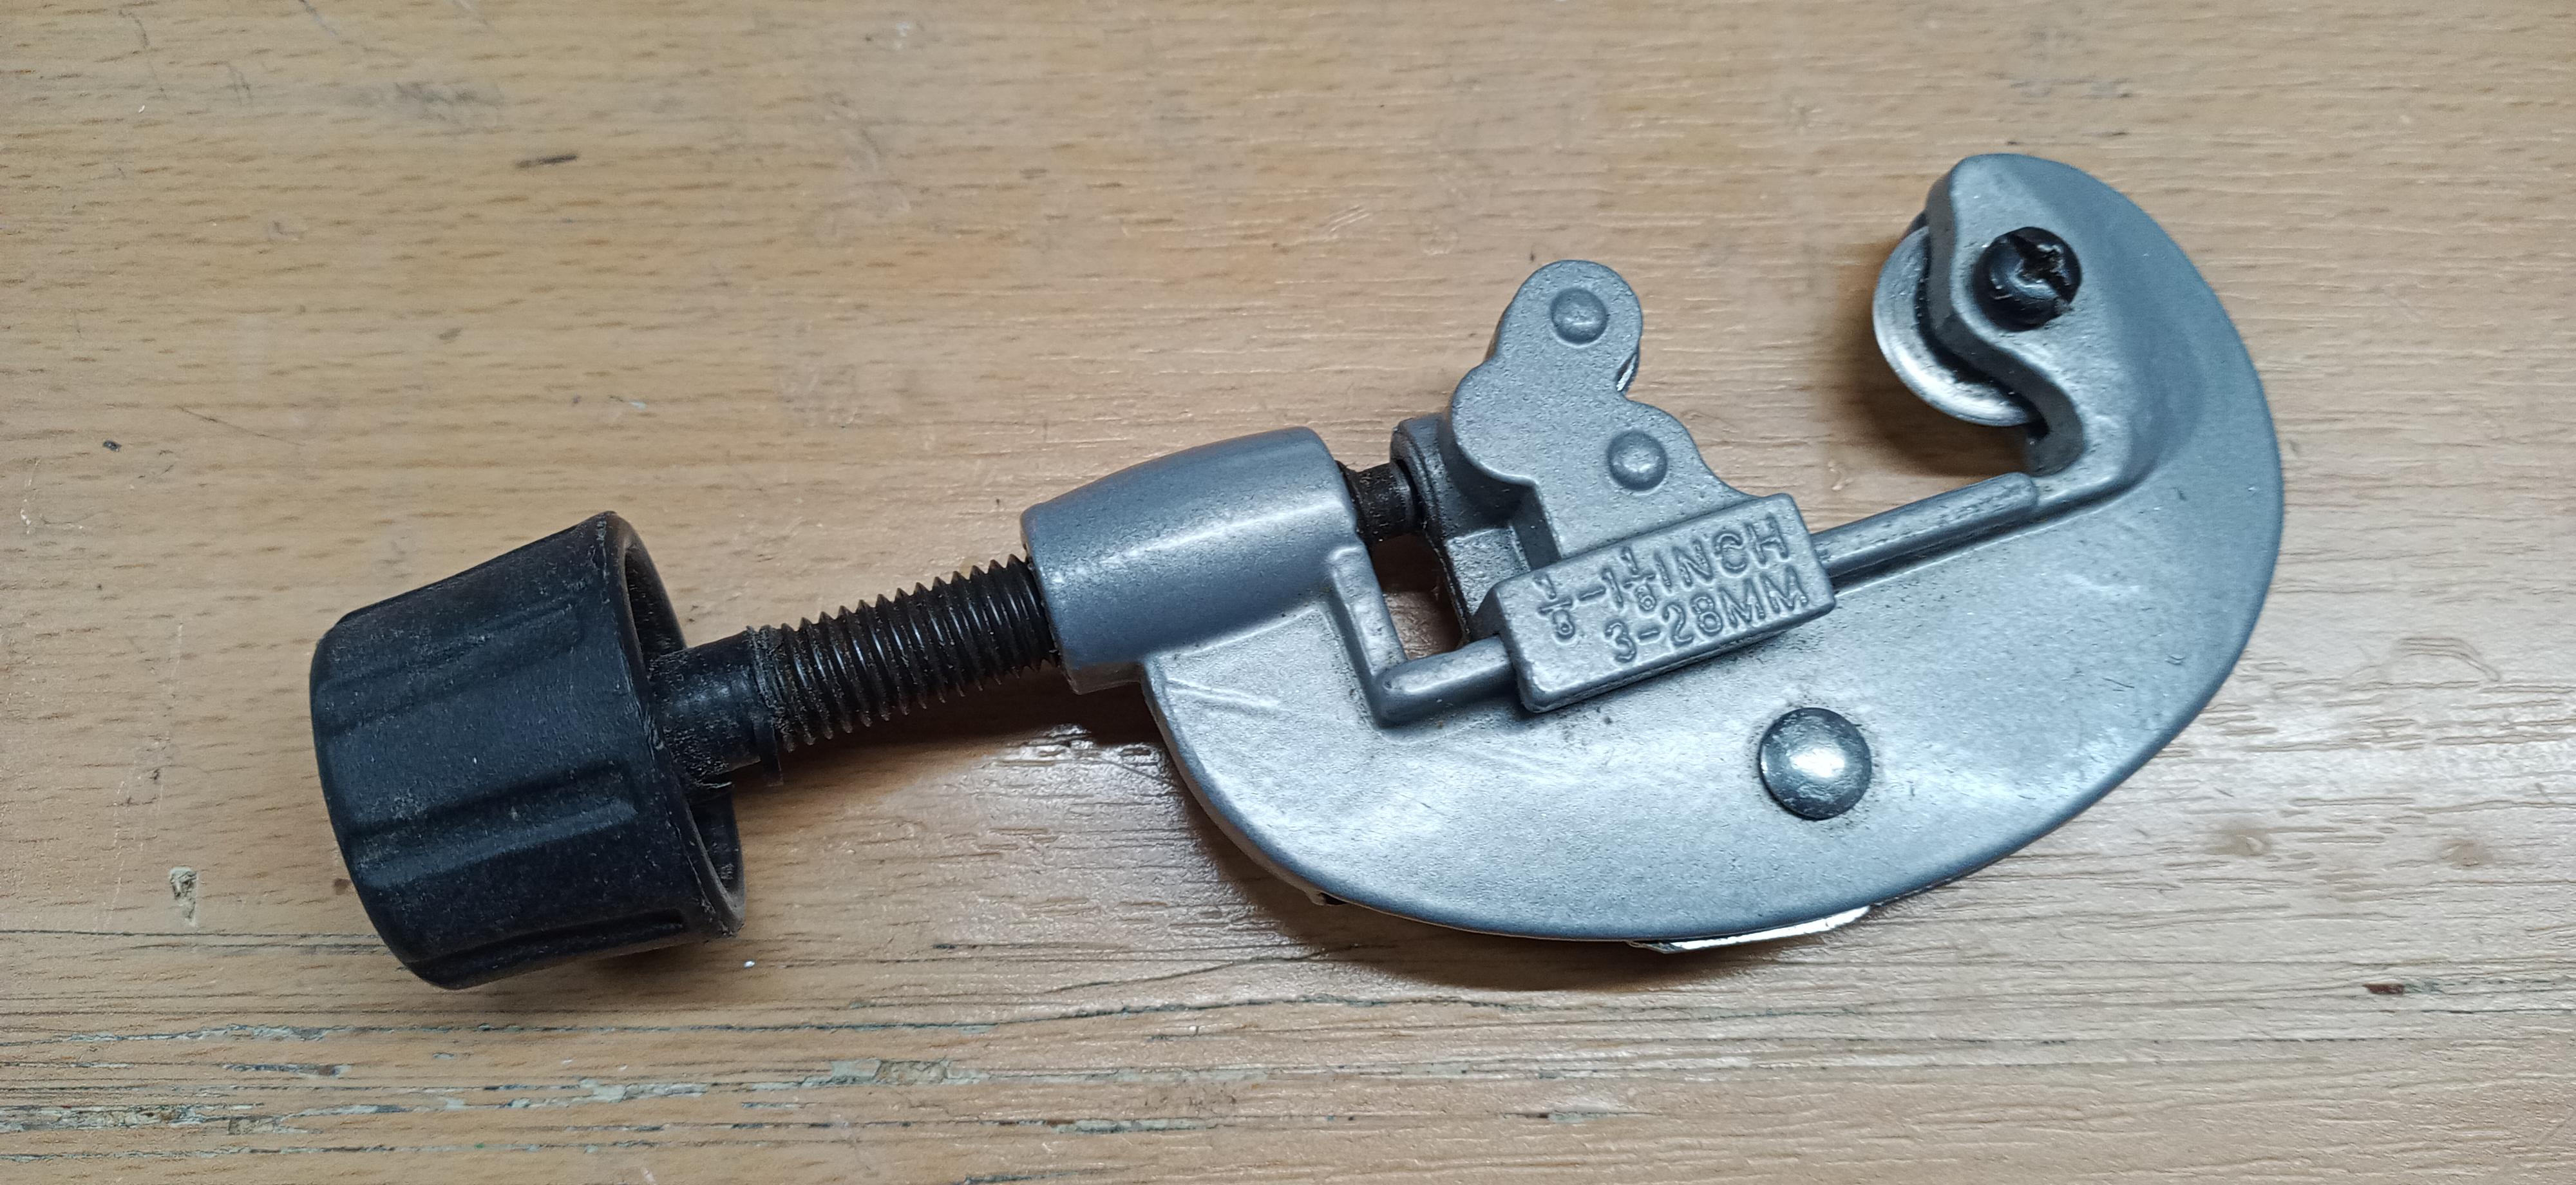
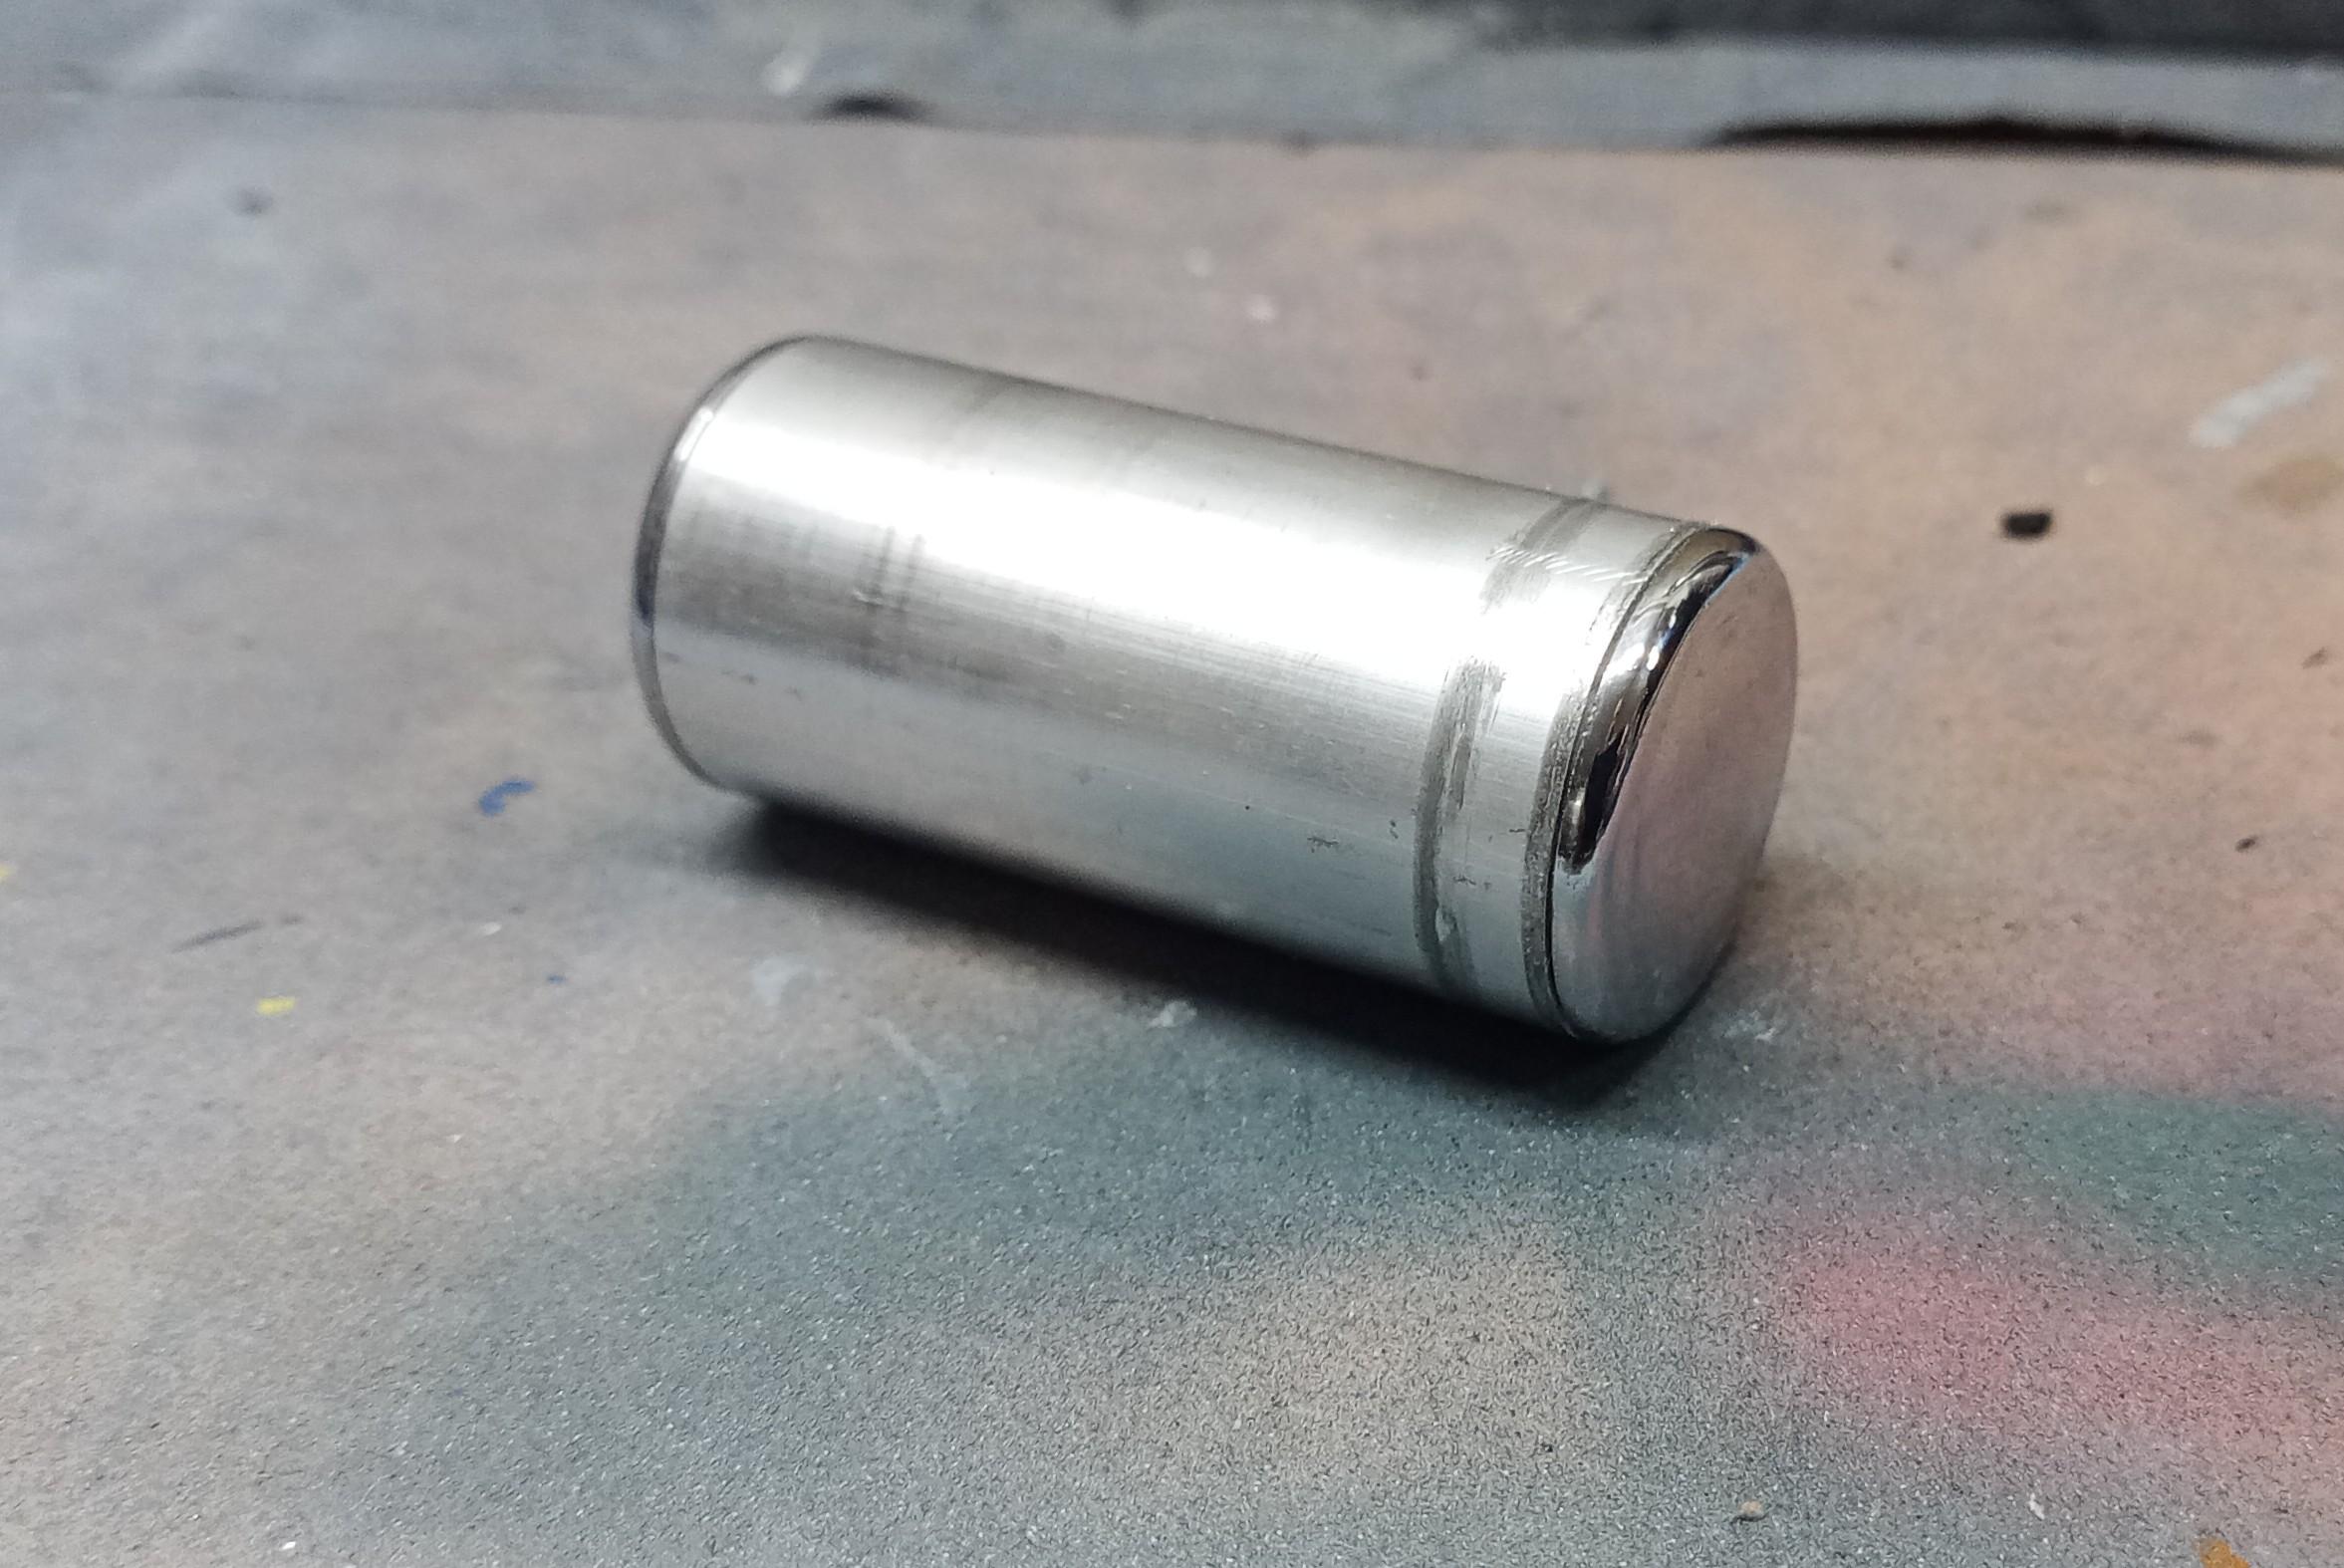
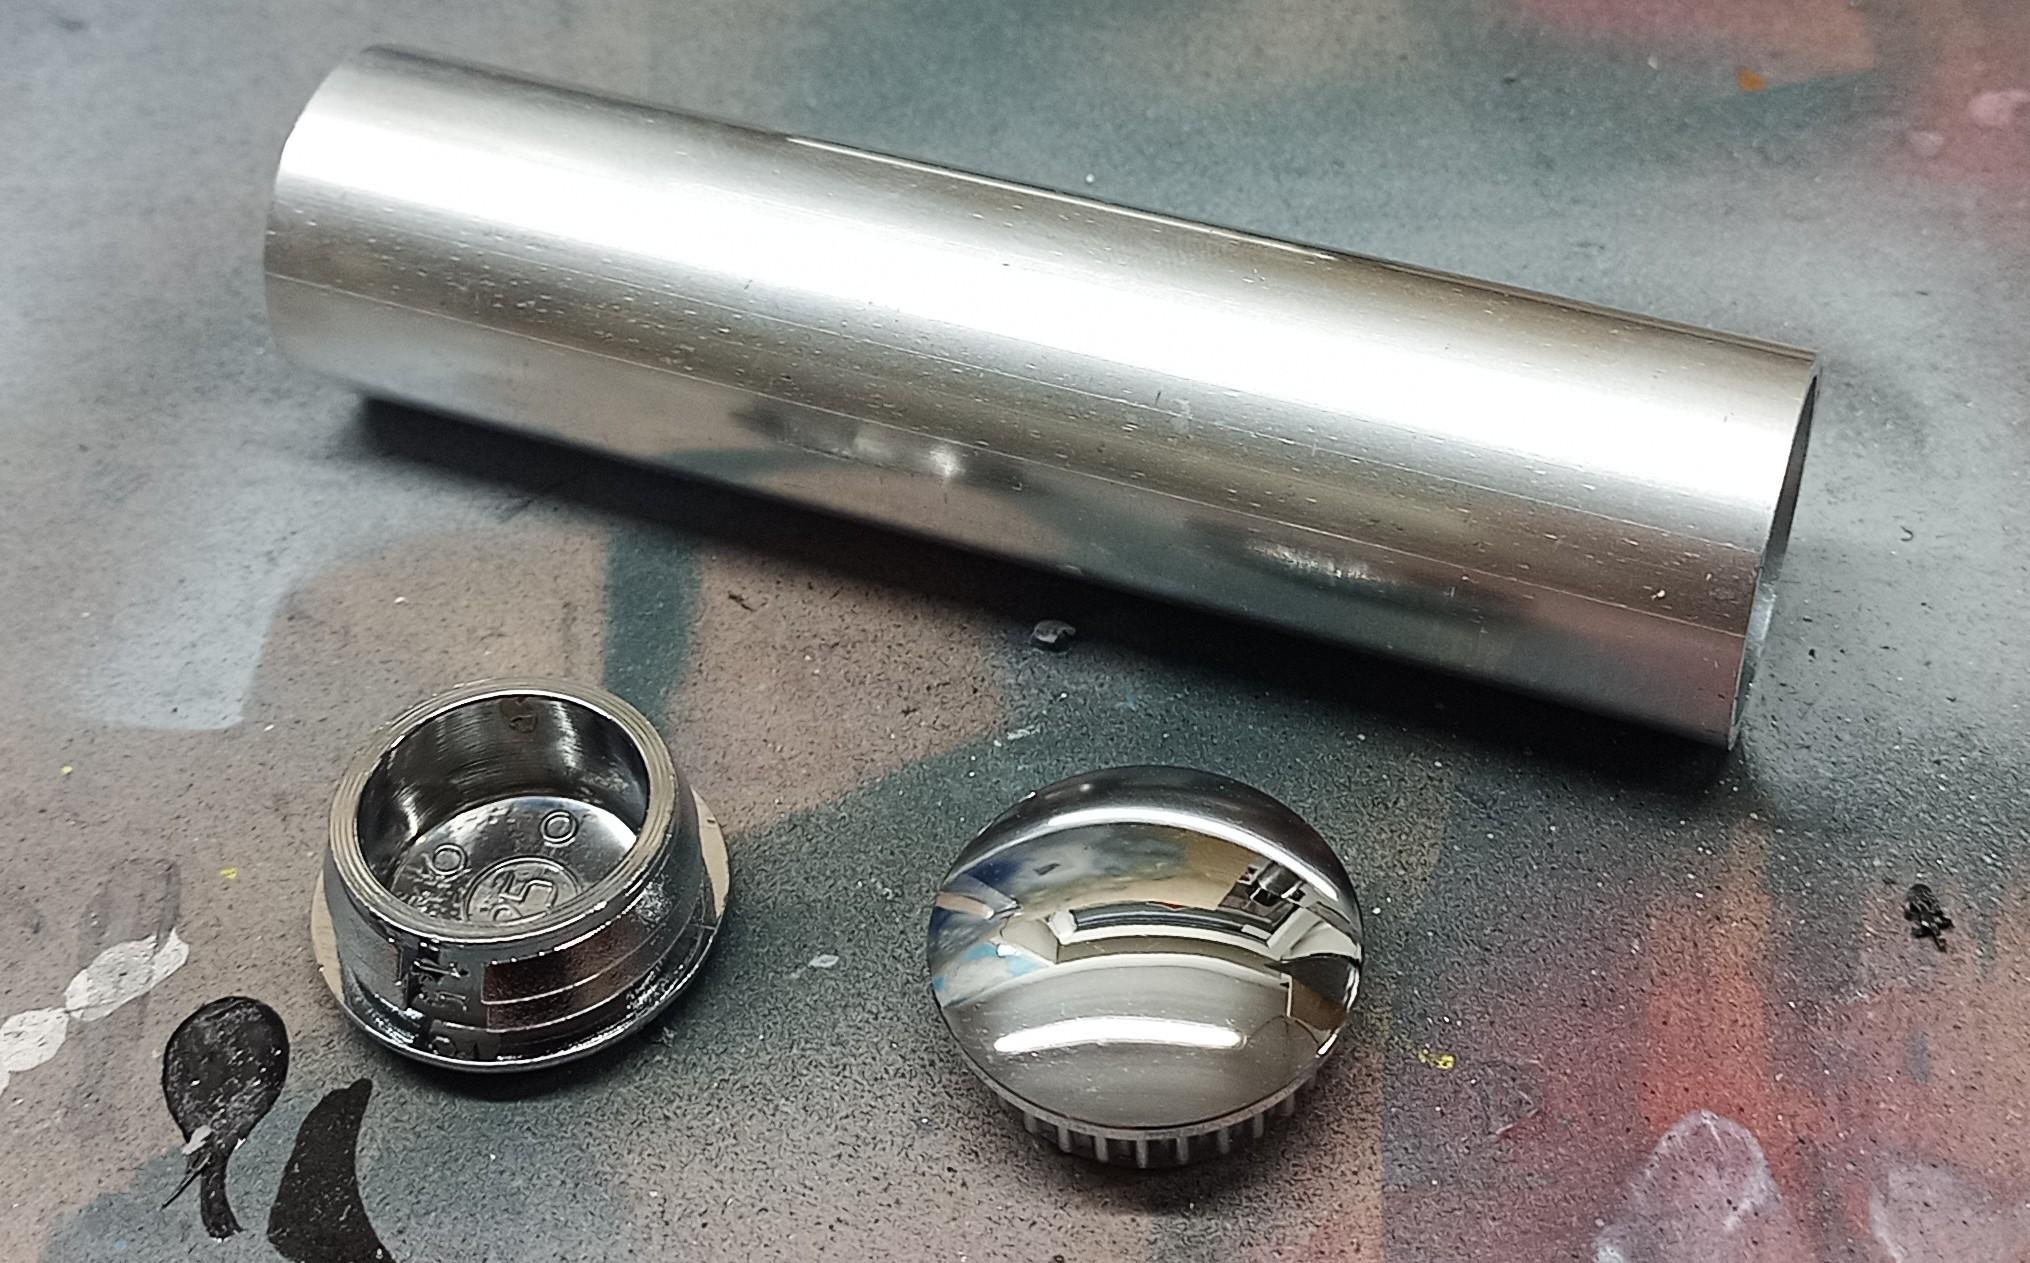
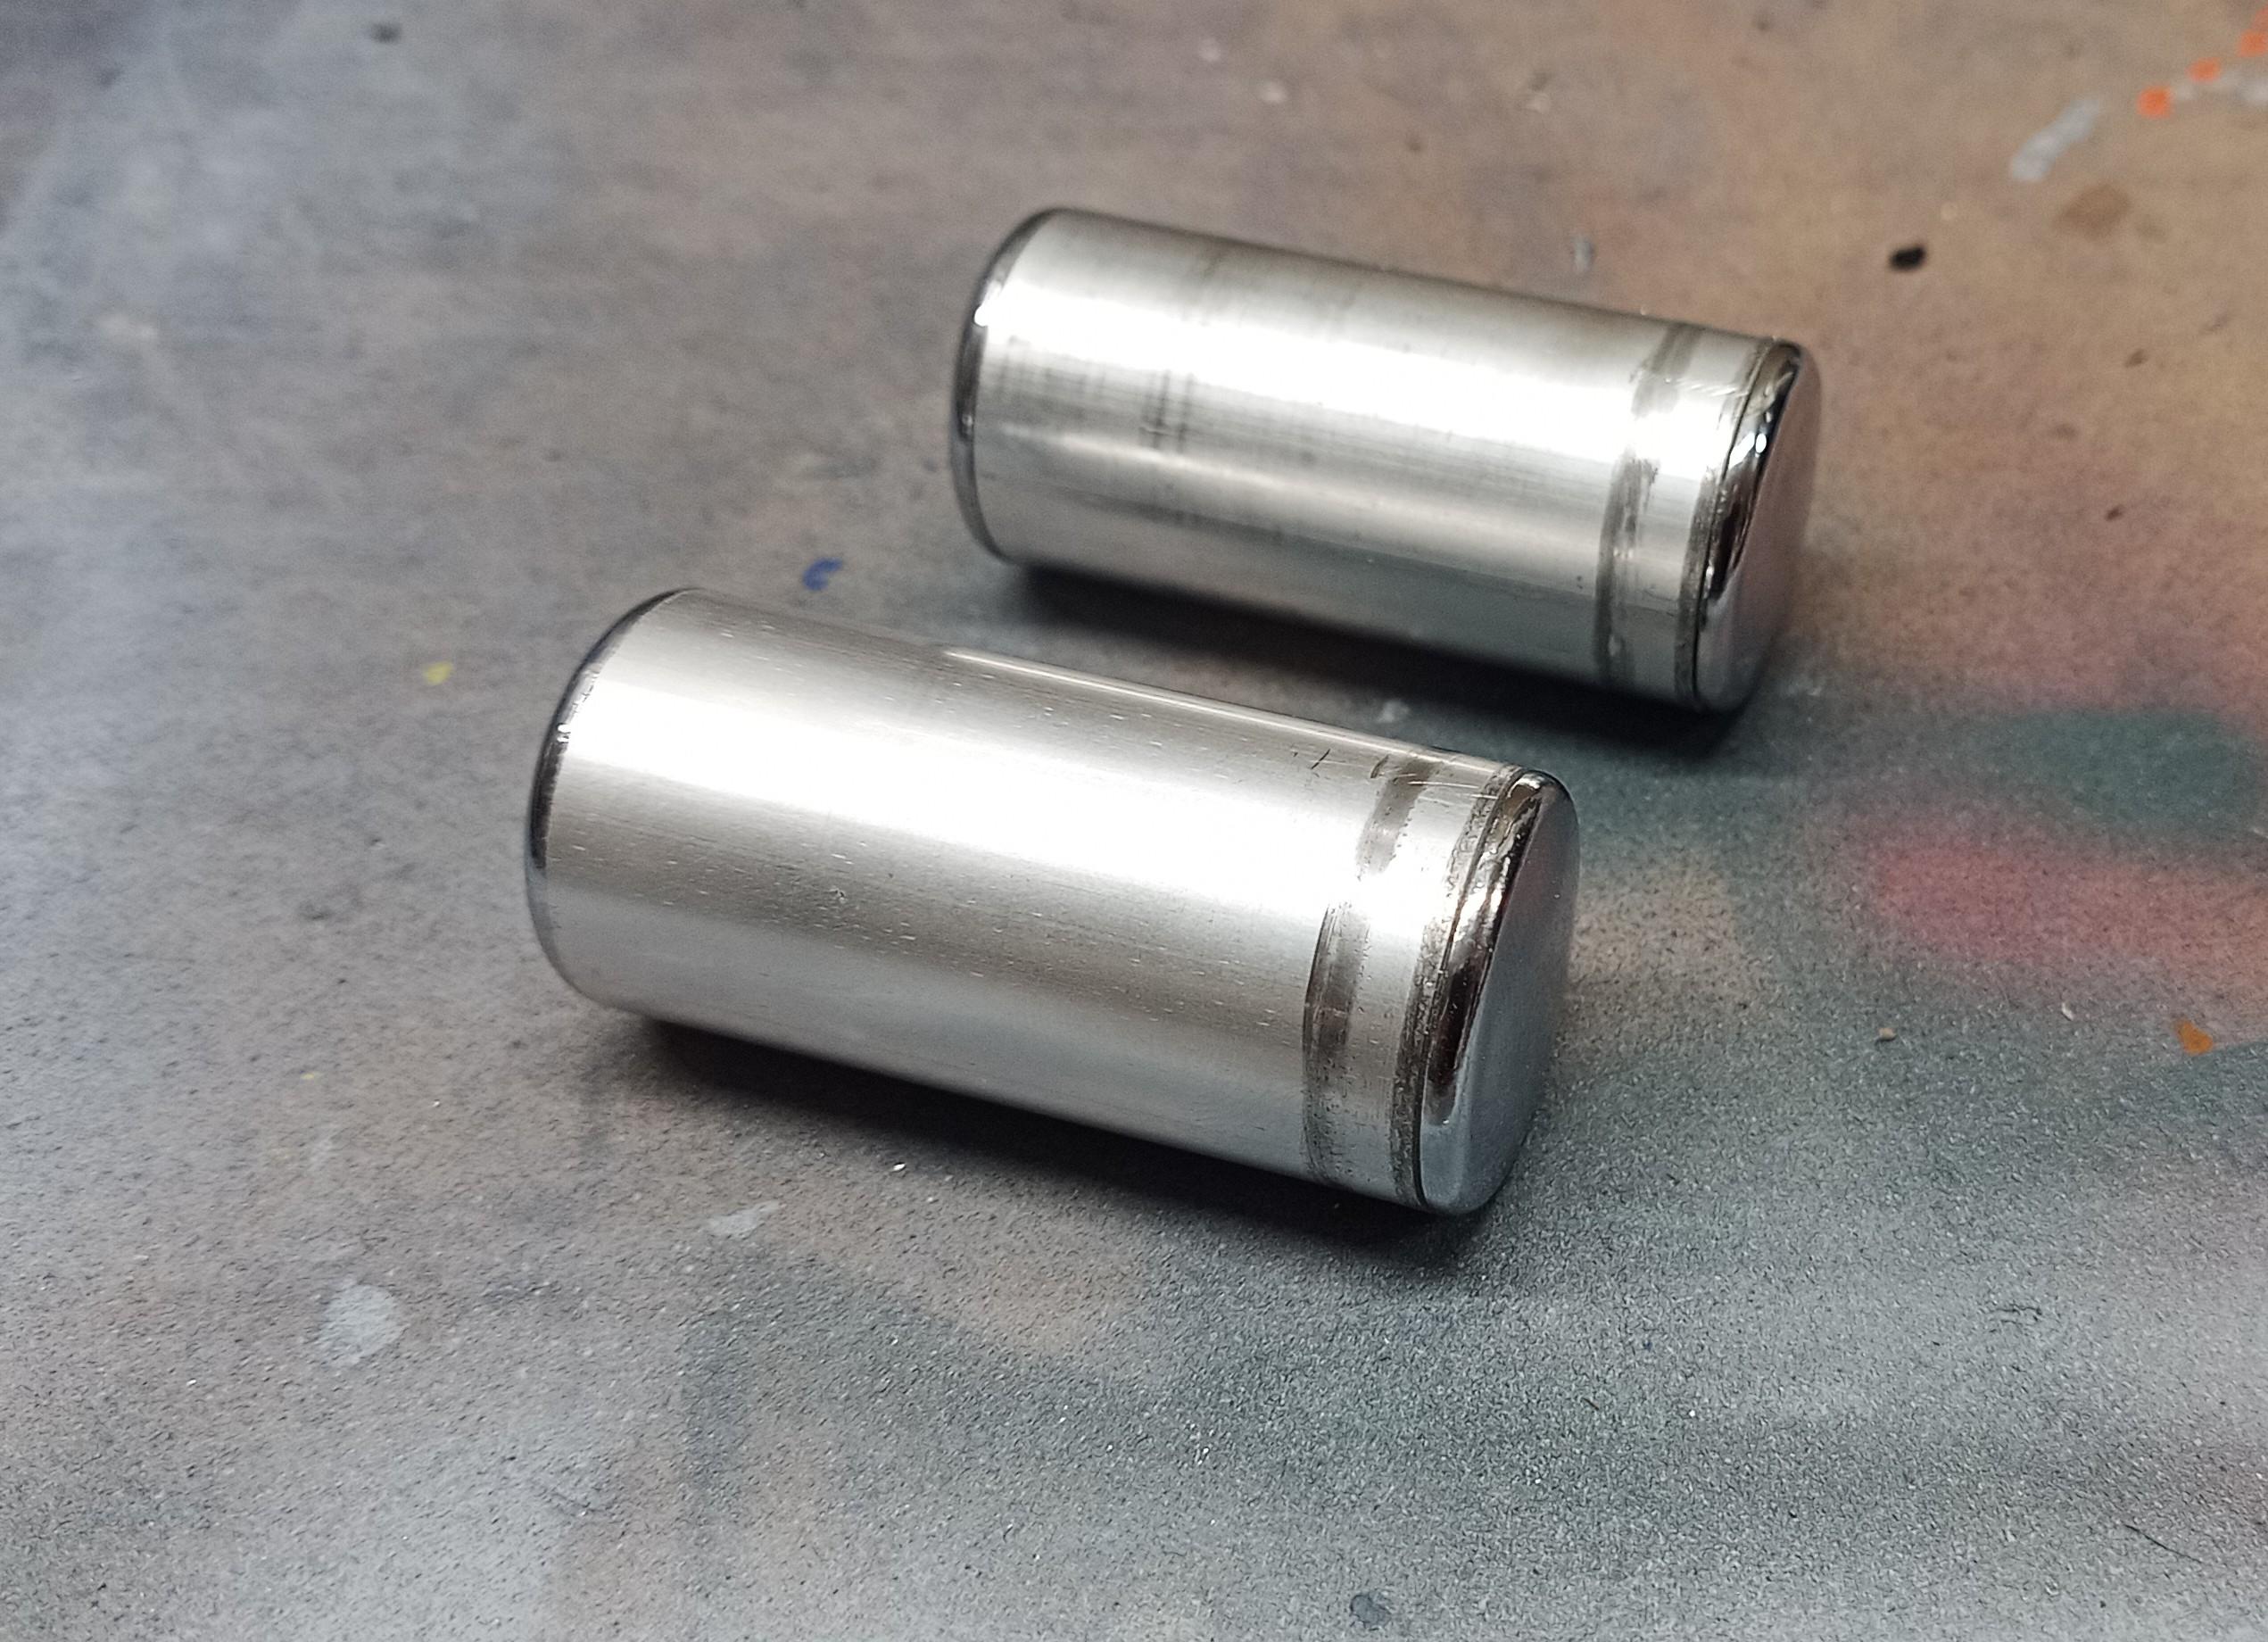
The fuel tanks are made of 25mm aluminium tube and plastic caps in the ends! I cut the tube in half making two 50mm fuel tanks. For straight cutting I use this: Afterwards the cut ends have to be deburred. Then the caps are added. No glue needed, they have a very tight fit. Now they're waiting for primer and paint!
-
Freightliner FLC
Jürgen M. replied to Jürgen M.'s topic in WIP: Model Trucks: Big Rigs and Heavy Equipment
True! They always get caught somewhere! The swinging will hopefully prevent bad accidents! -
Freightliner FLC
Jürgen M. replied to Jürgen M.'s topic in WIP: Model Trucks: Big Rigs and Heavy Equipment
Thanks Jeff. I did those free hand. I used the first one as a template for the other one. Works pretty well. -
Freightliner FLC
Jürgen M. replied to Jürgen M.'s topic in WIP: Model Trucks: Big Rigs and Heavy Equipment
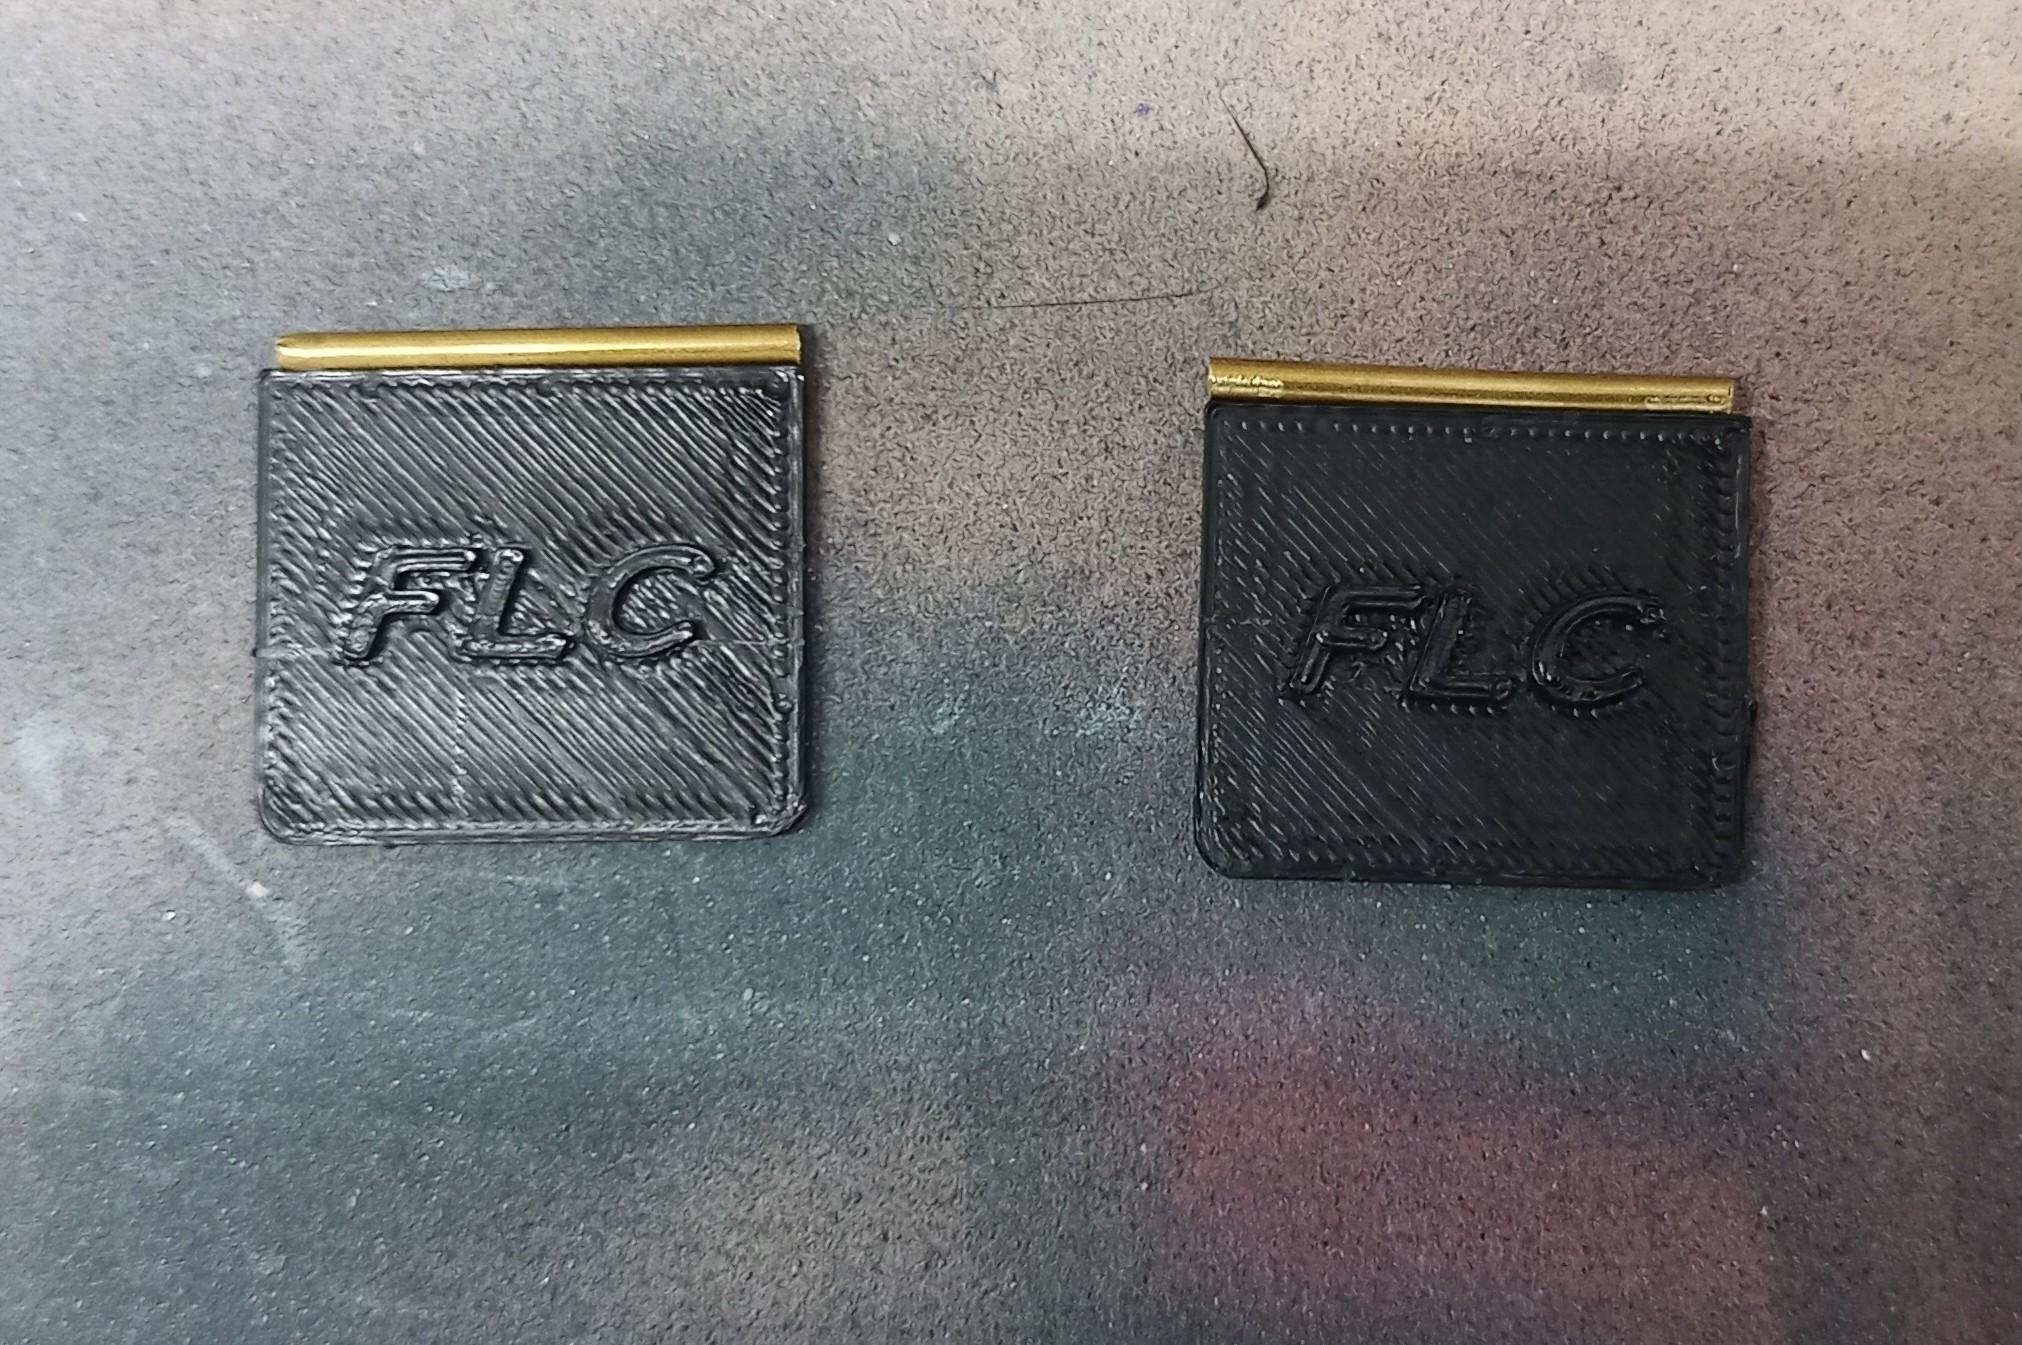
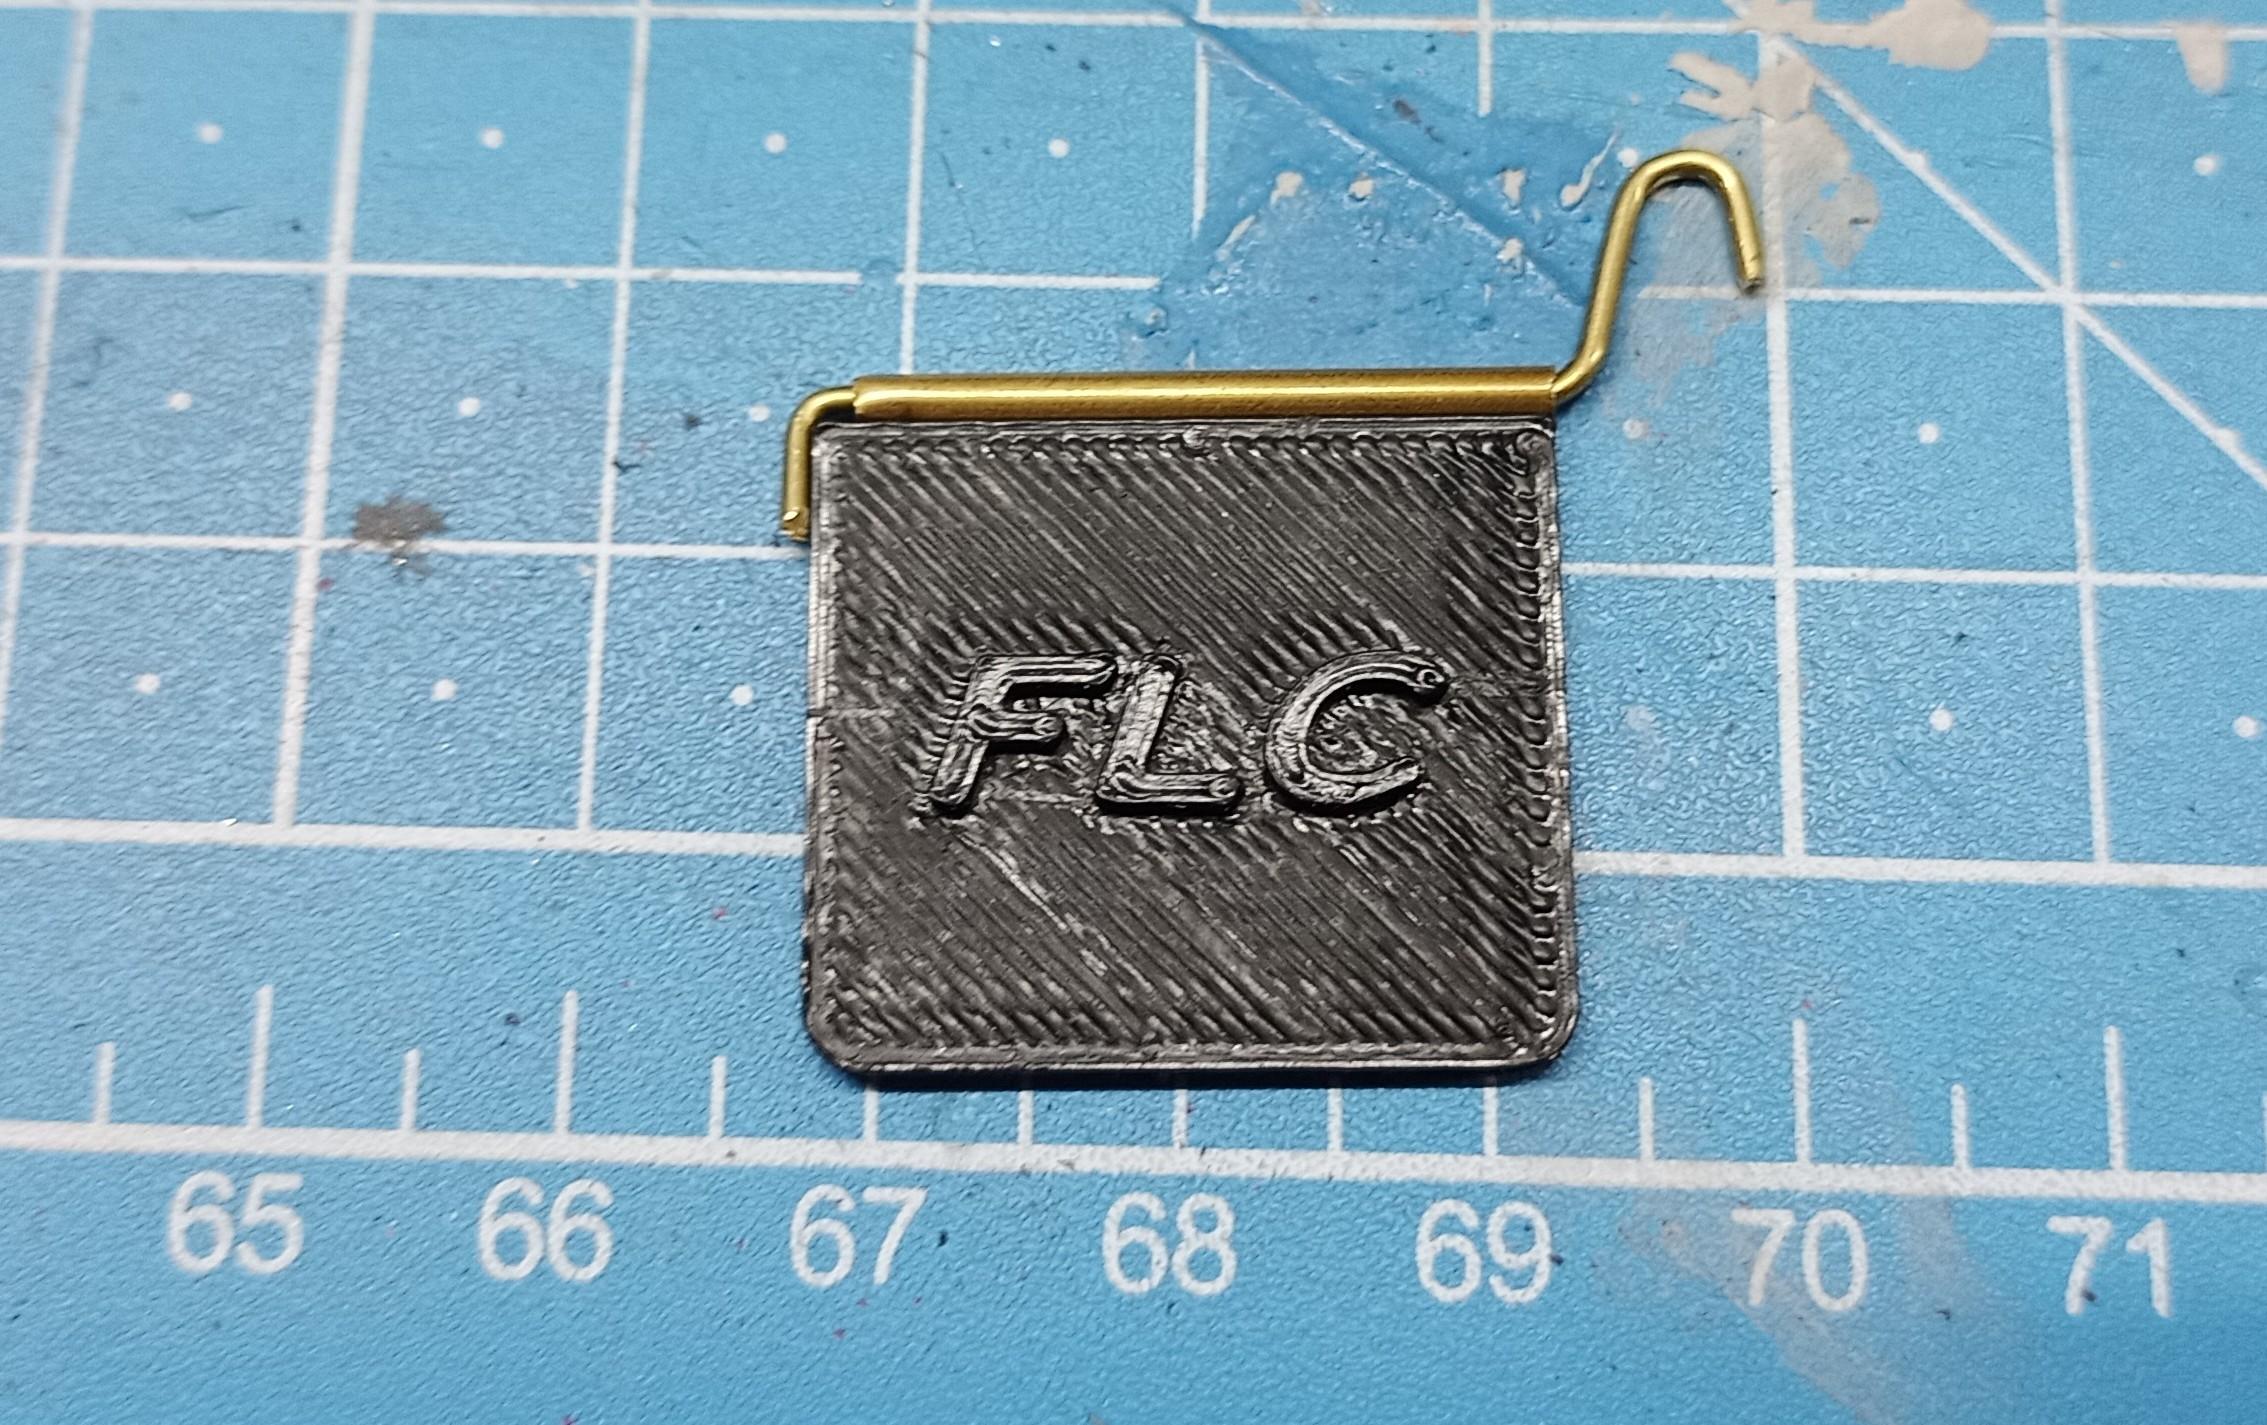
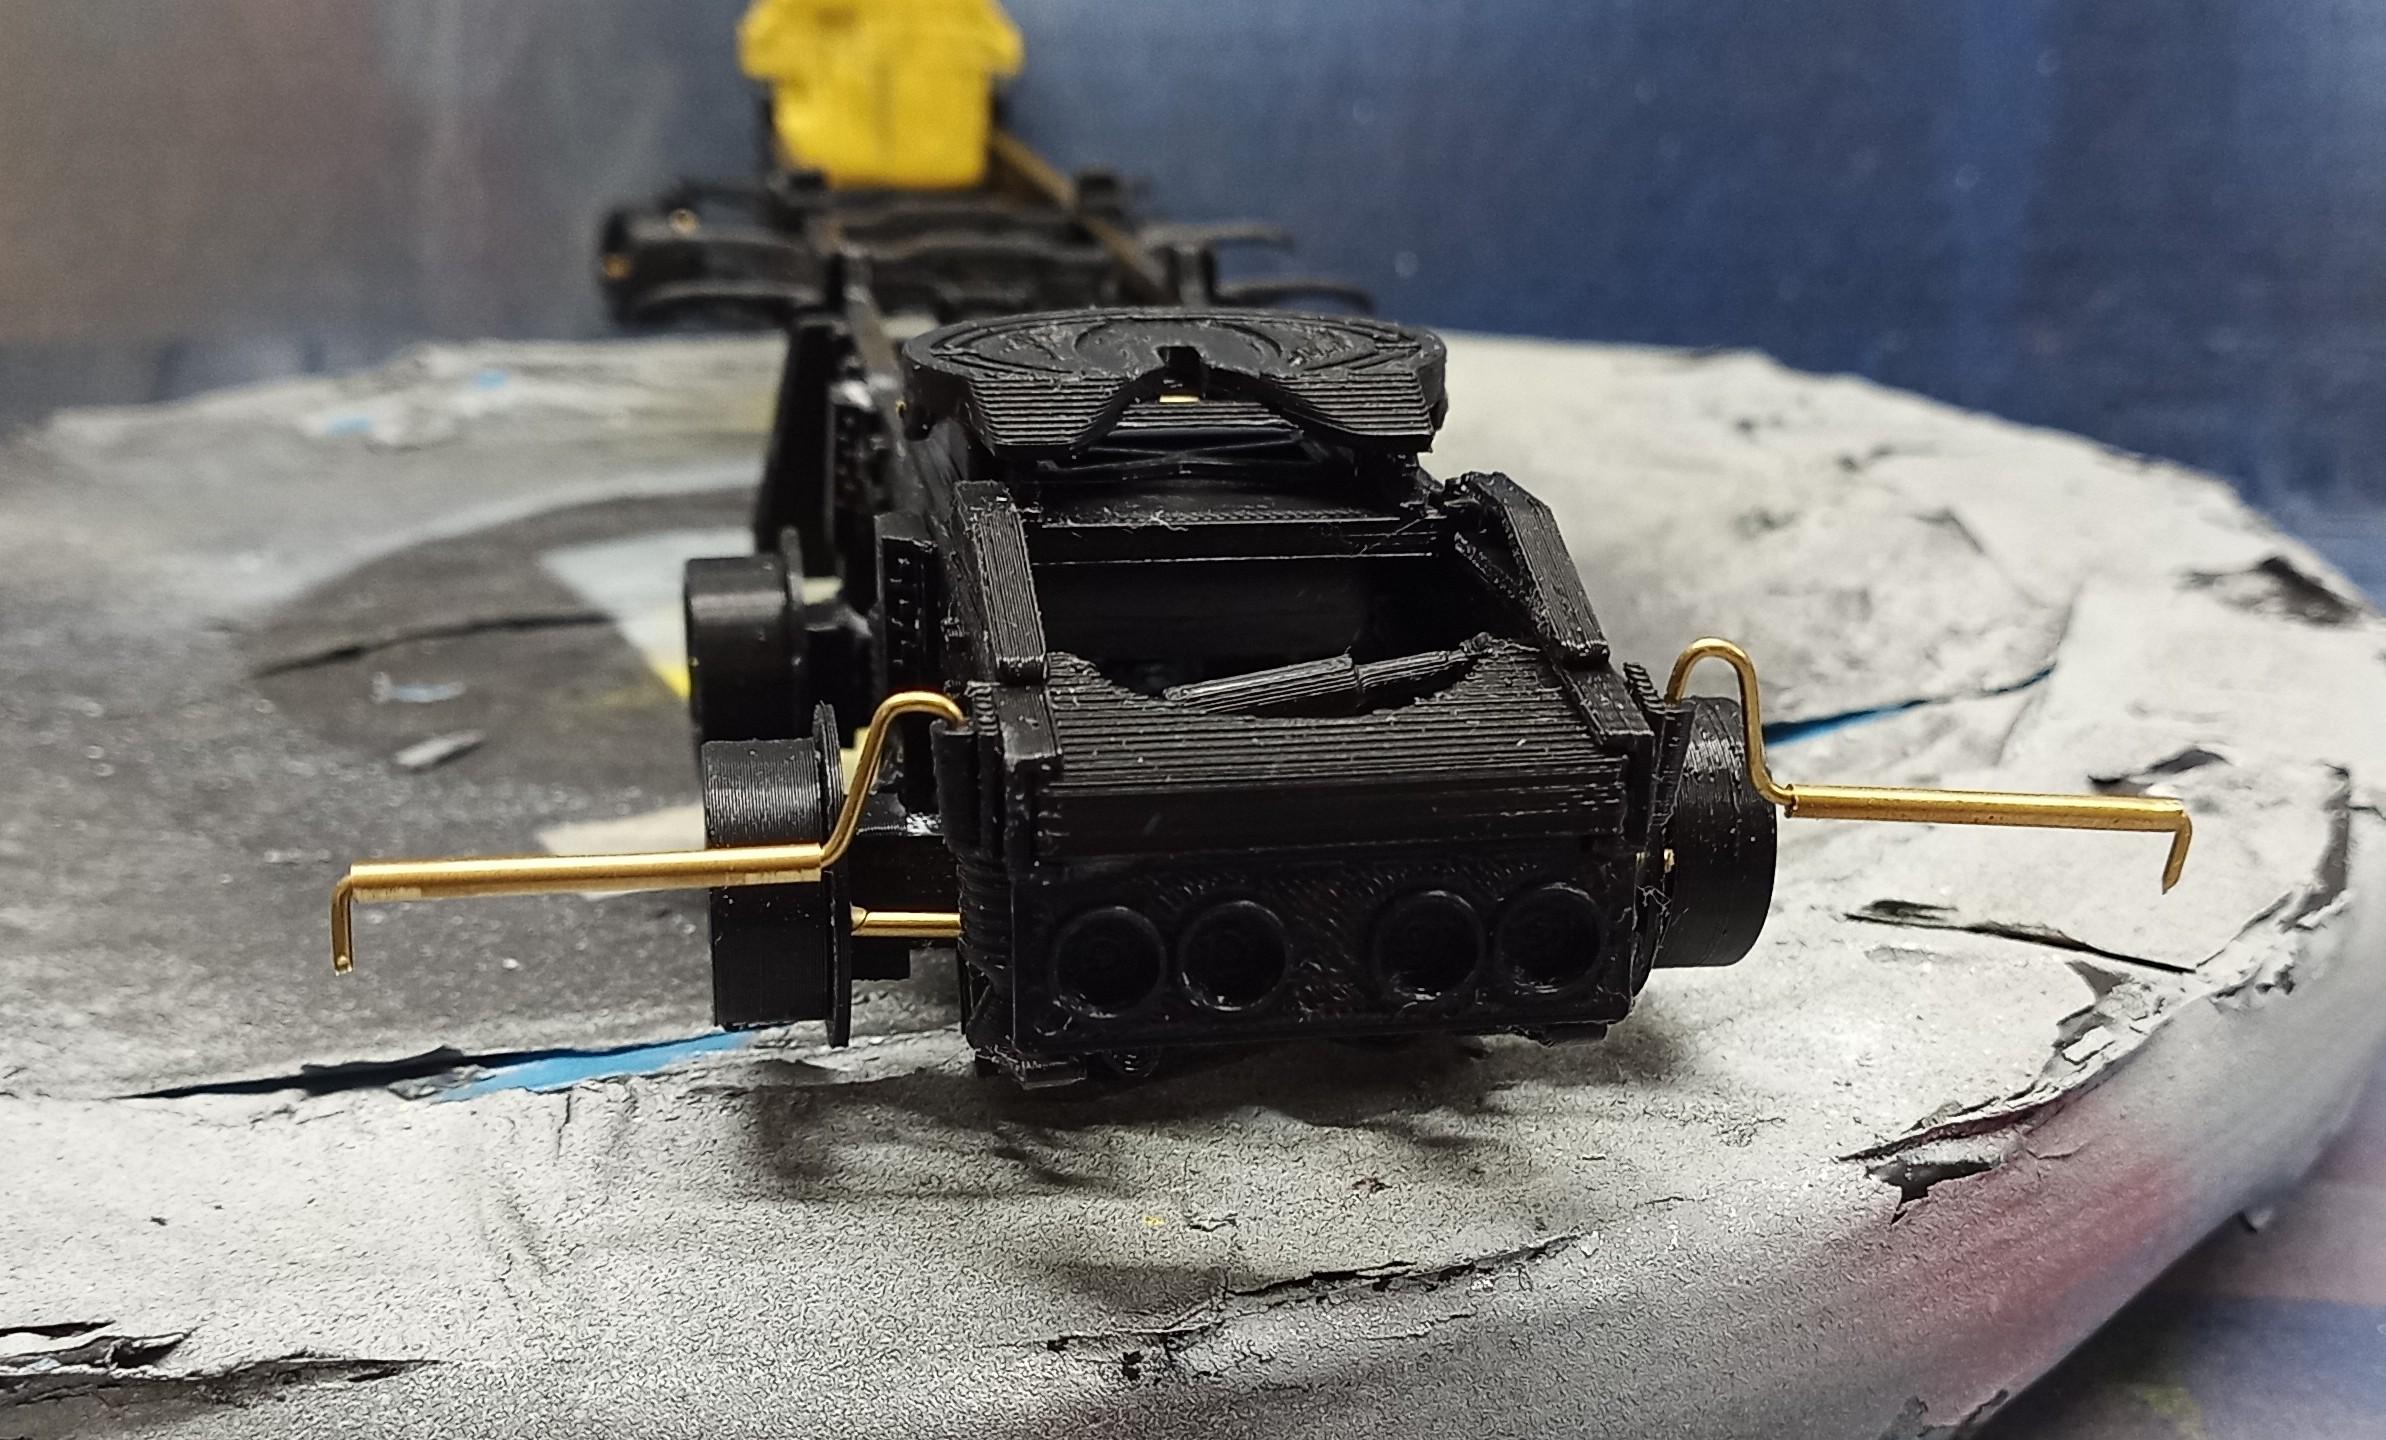
Working on the mud flaps: I'm using a 2mm brass tube with a 1.2mm inner diameter so I can stick a 1mm brass rod through and bend it into shape. I also designed extra mounts to fit in the rods. I'm not sure if I'll use the flaps shown here but I can attach any kind I like. A cute little detail is that the flaps will be movable since the tube isn't glued to the rod. They can Swing back and forth that way. And I can bend them any direction I need to if they're not in the correct position.
-
Freightliner FLC
Jürgen M. replied to Jürgen M.'s topic in WIP: Model Trucks: Big Rigs and Heavy Equipment
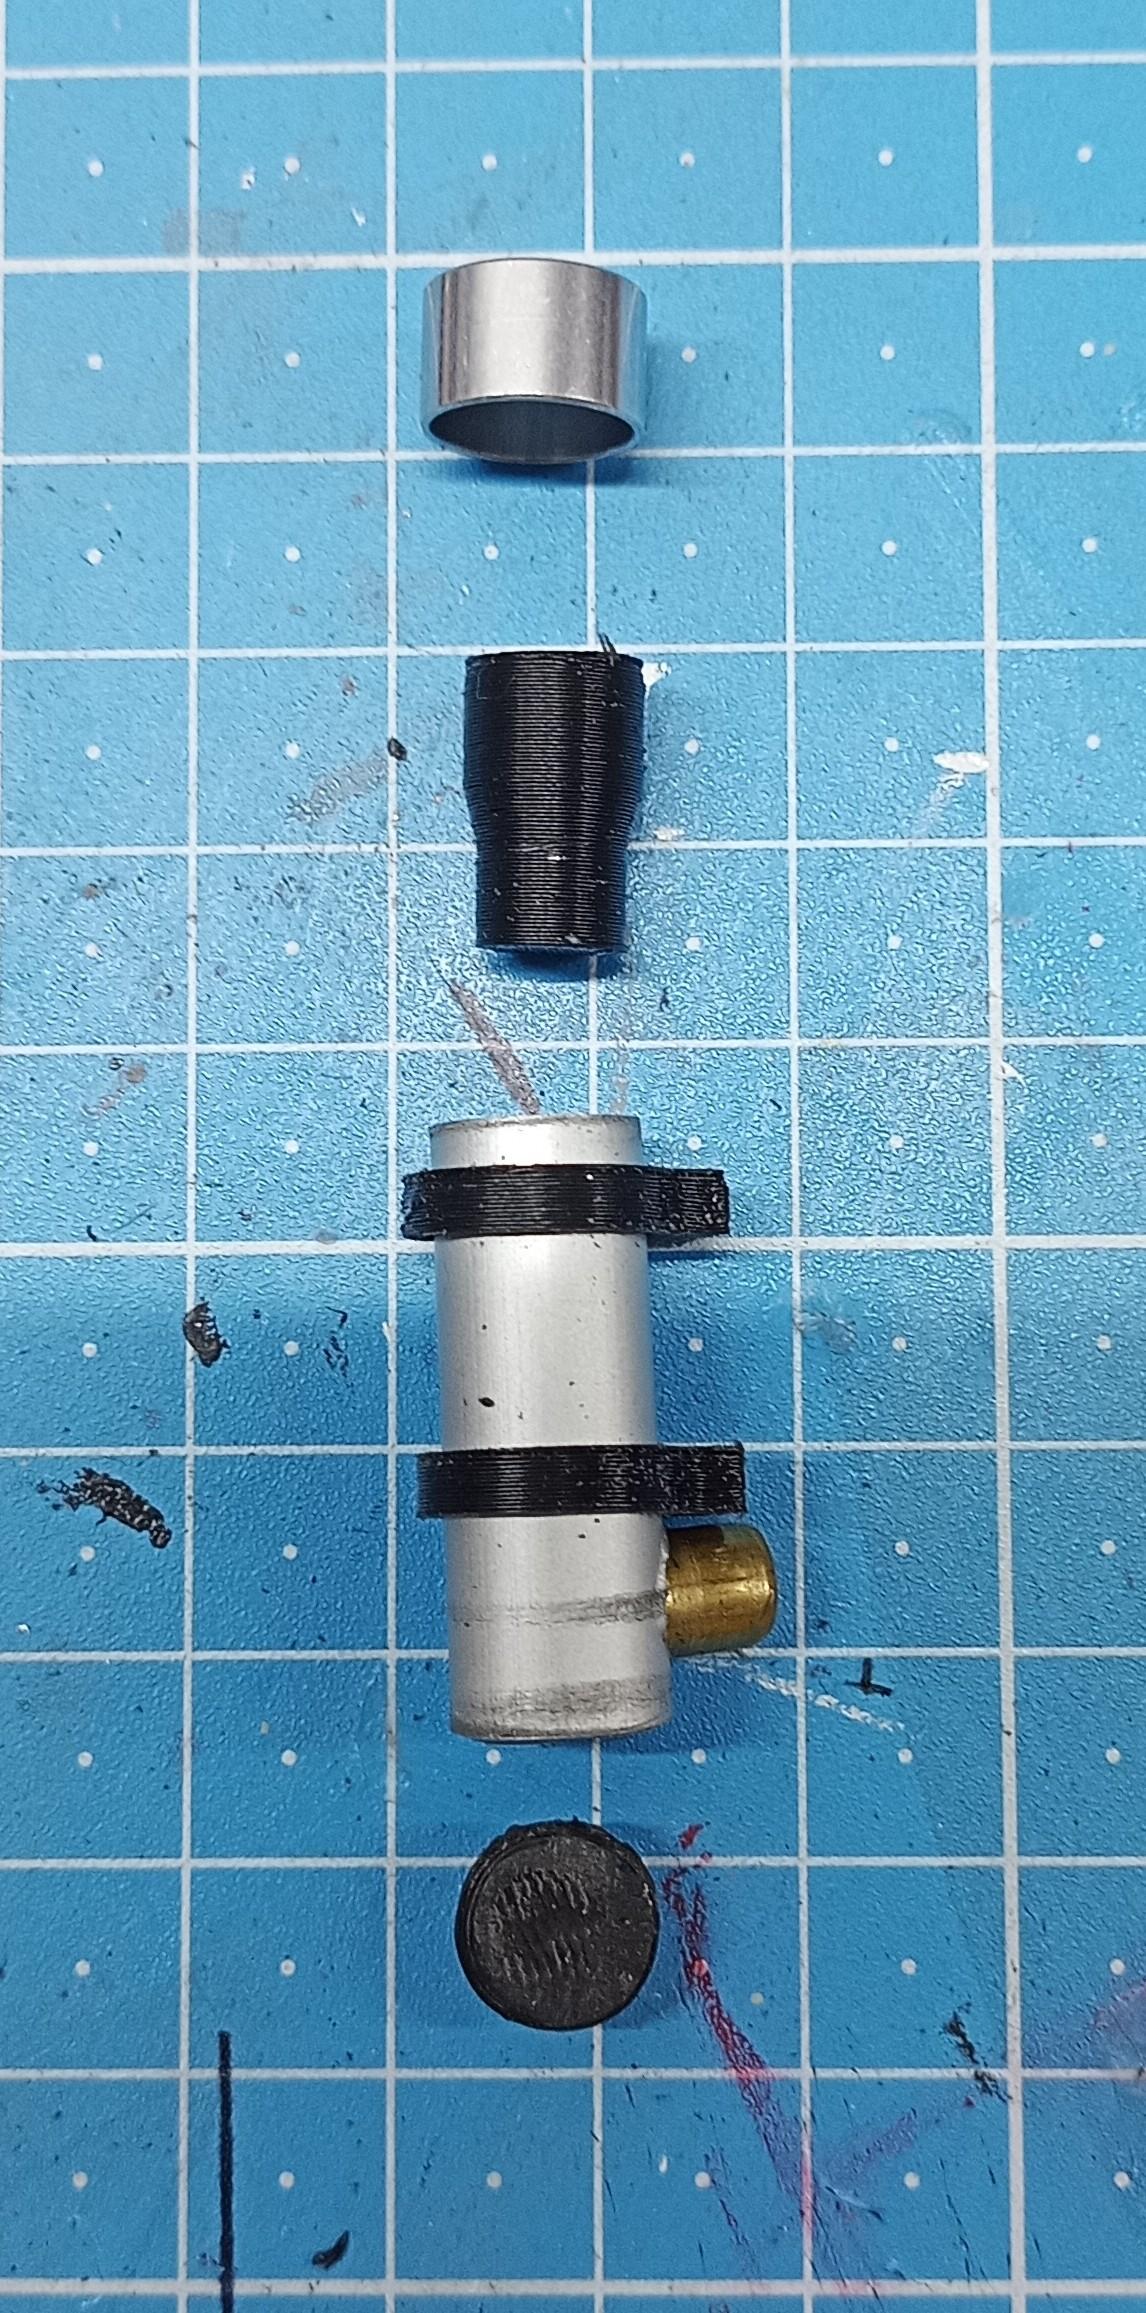
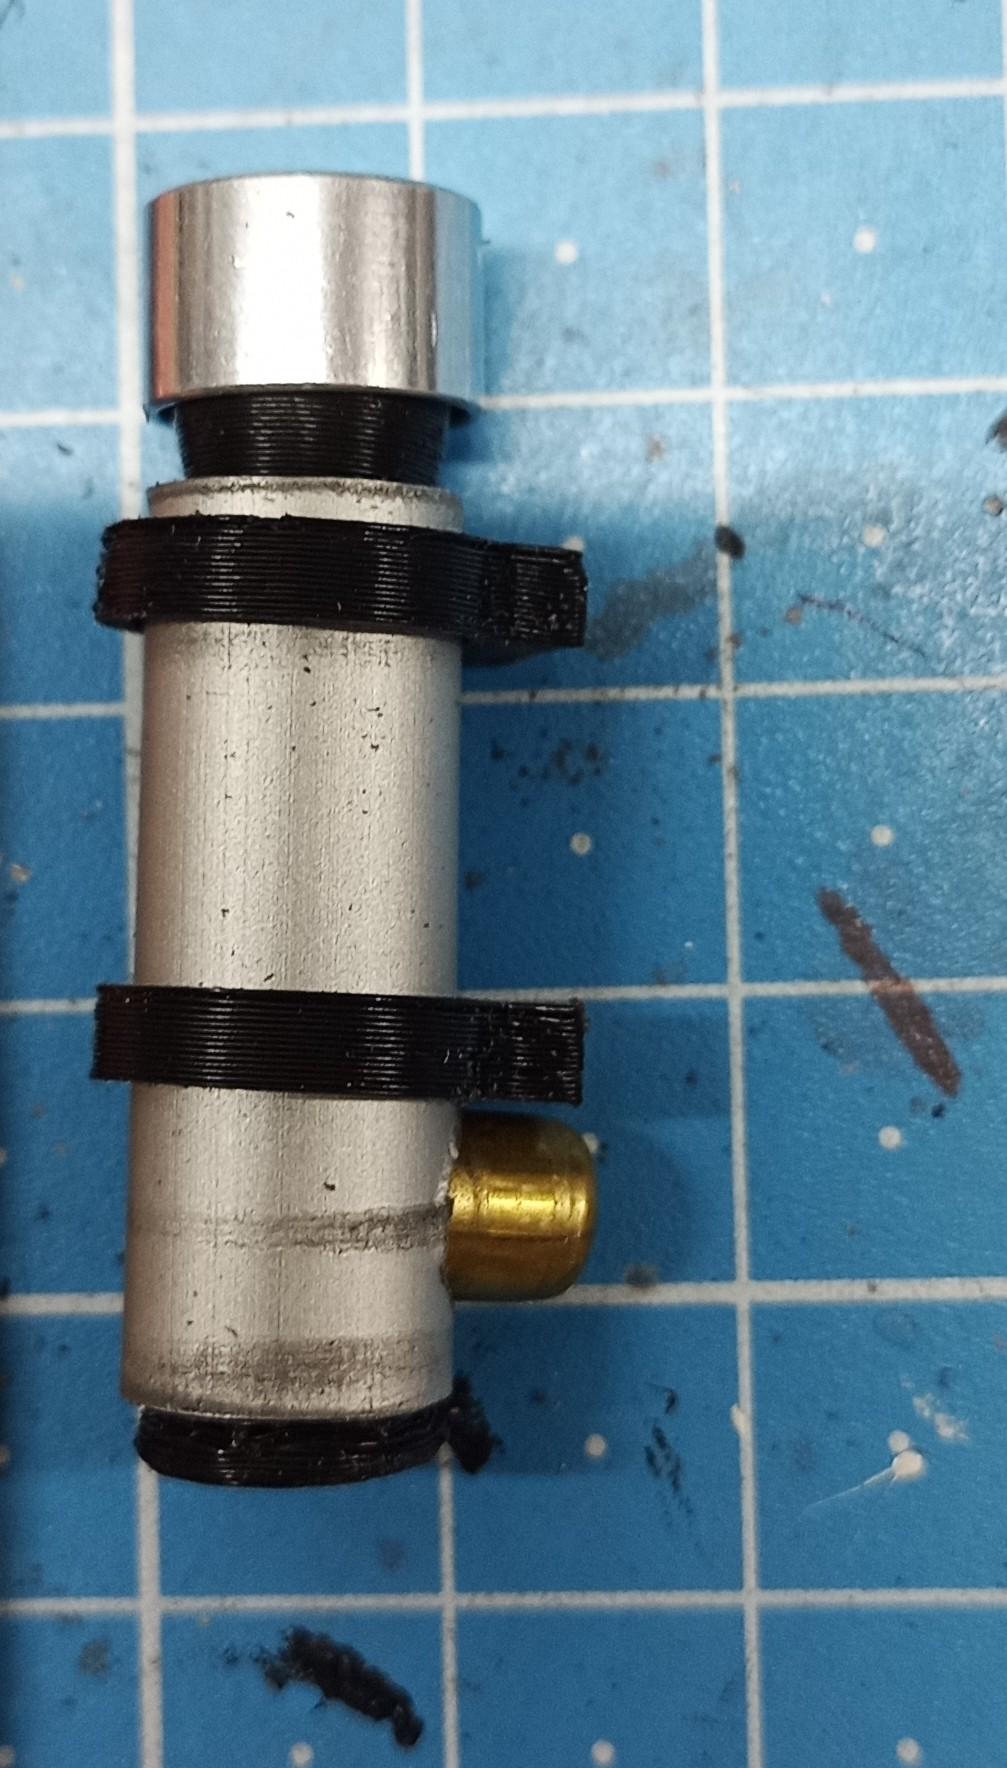
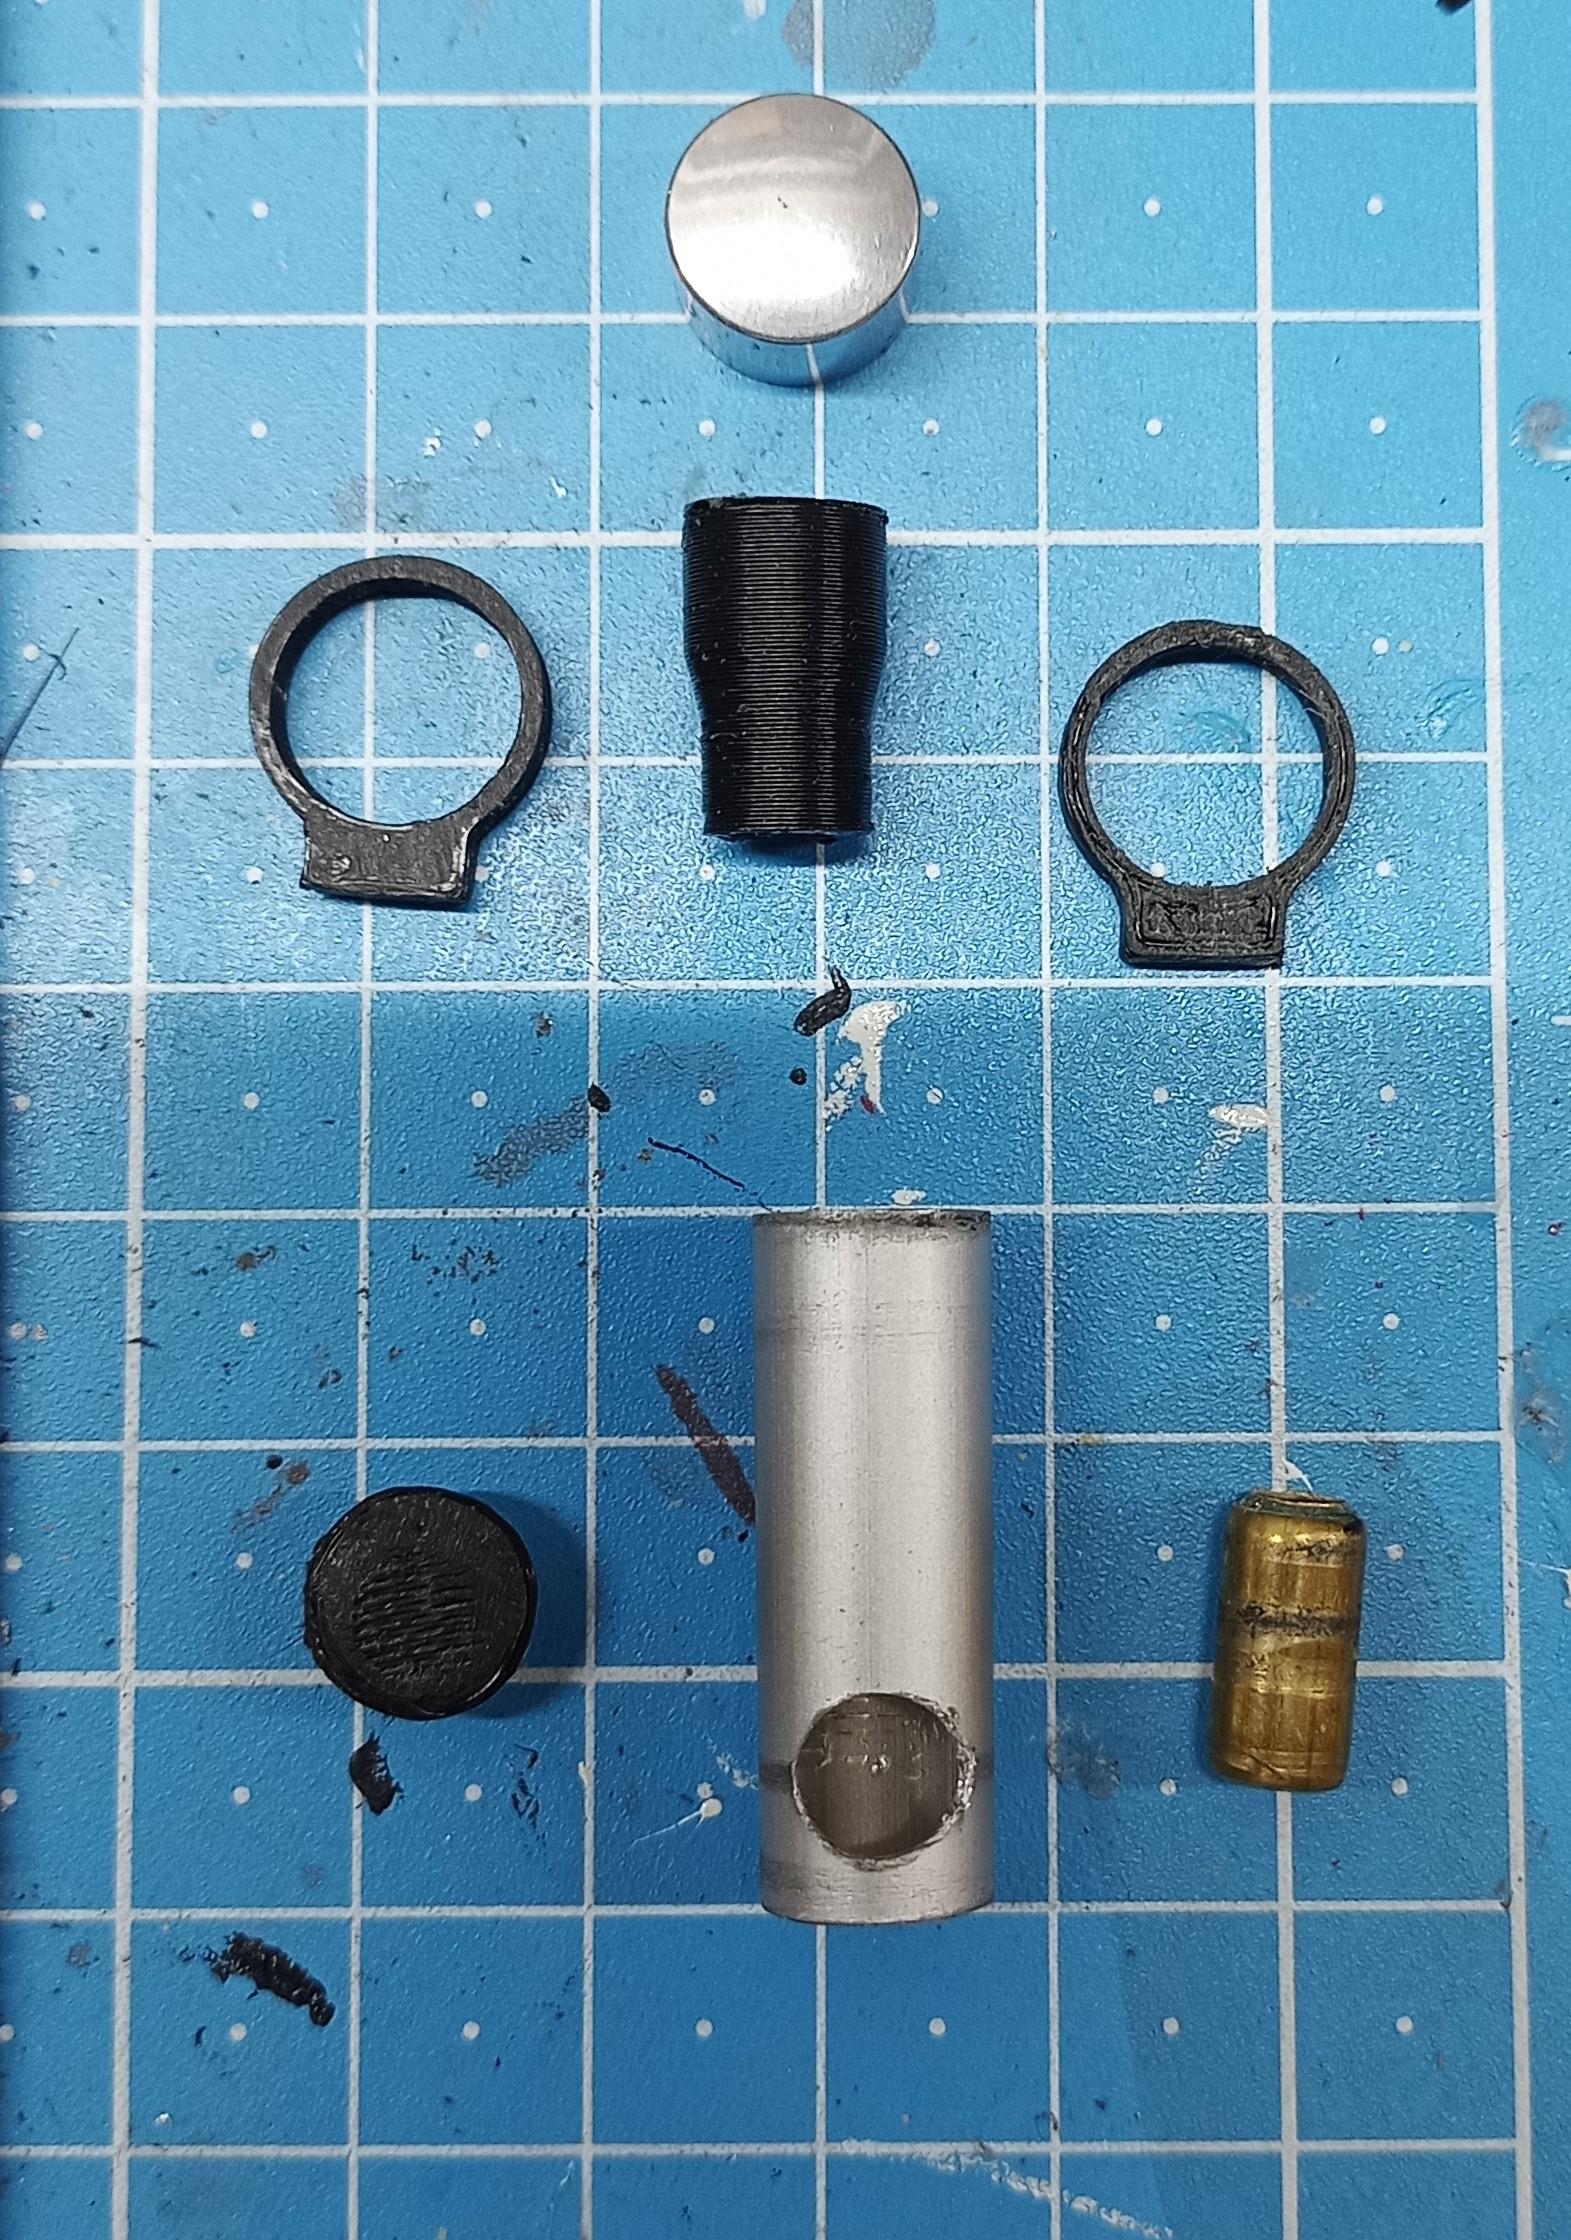
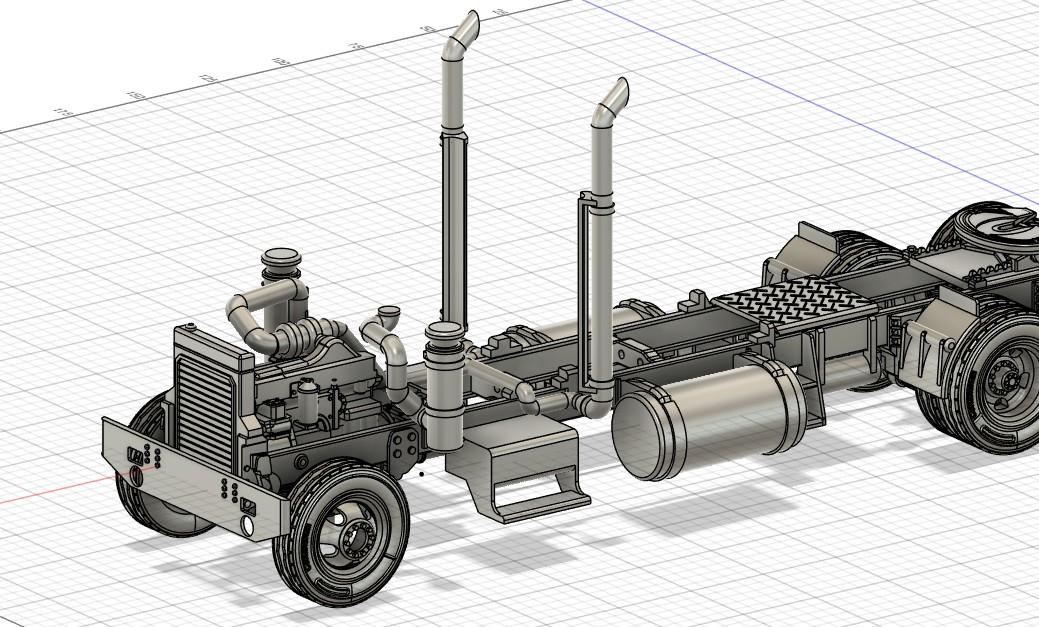
I'm doing a bit of scratch building too on this. The air cleaners are made of a 10mm aluminium tube, the top is an aluminium cap of an allen bolt, the connector is a 6mm brass tube. Only the brackets, the bottom cap and the filter piece are printed. These are the parts for one air cleaner: Assembly sequence: Assembly mock-up: Parts still need some attention but you can get the picture!
-
Freightliner FLC
Jürgen M. replied to Jürgen M.'s topic in WIP: Model Trucks: Big Rigs and Heavy Equipment
Thanks Gary! But no need to be jealous. I wouldn't need 3D printing if my scratch skills were half as good as yours! -
Western Star 4900 FA plow truck
Jürgen M. replied to BK9300's topic in WIP: Model Trucks: Big Rigs and Heavy Equipment
I'd take lessons any time! This is a real master piece. That sander is more than perfect. You should really pass on your knowledge and skills. How about making tutorials on YT? -
Kenworth W-925 (mild custom)
Jürgen M. replied to Gary Chastain's topic in WIP: Model Trucks: Big Rigs and Heavy Equipment
It is! I've tried lots of stuff. Fill primer, sanding, ... You just can't print without lines. I tried with a 0.2mm nozzle but it didn't work. Hope you're successful and achieve the surface you want. I think it looks awesome already! -
Kenworth W-925 (mild custom)
Jürgen M. replied to Gary Chastain's topic in WIP: Model Trucks: Big Rigs and Heavy Equipment
I'd say they're very hard to see. Compared to what's visible on my builds it's nothing! I'd be more than happy to get such a great surface. It's like a mirror! 👍 -
Freightliner FLC
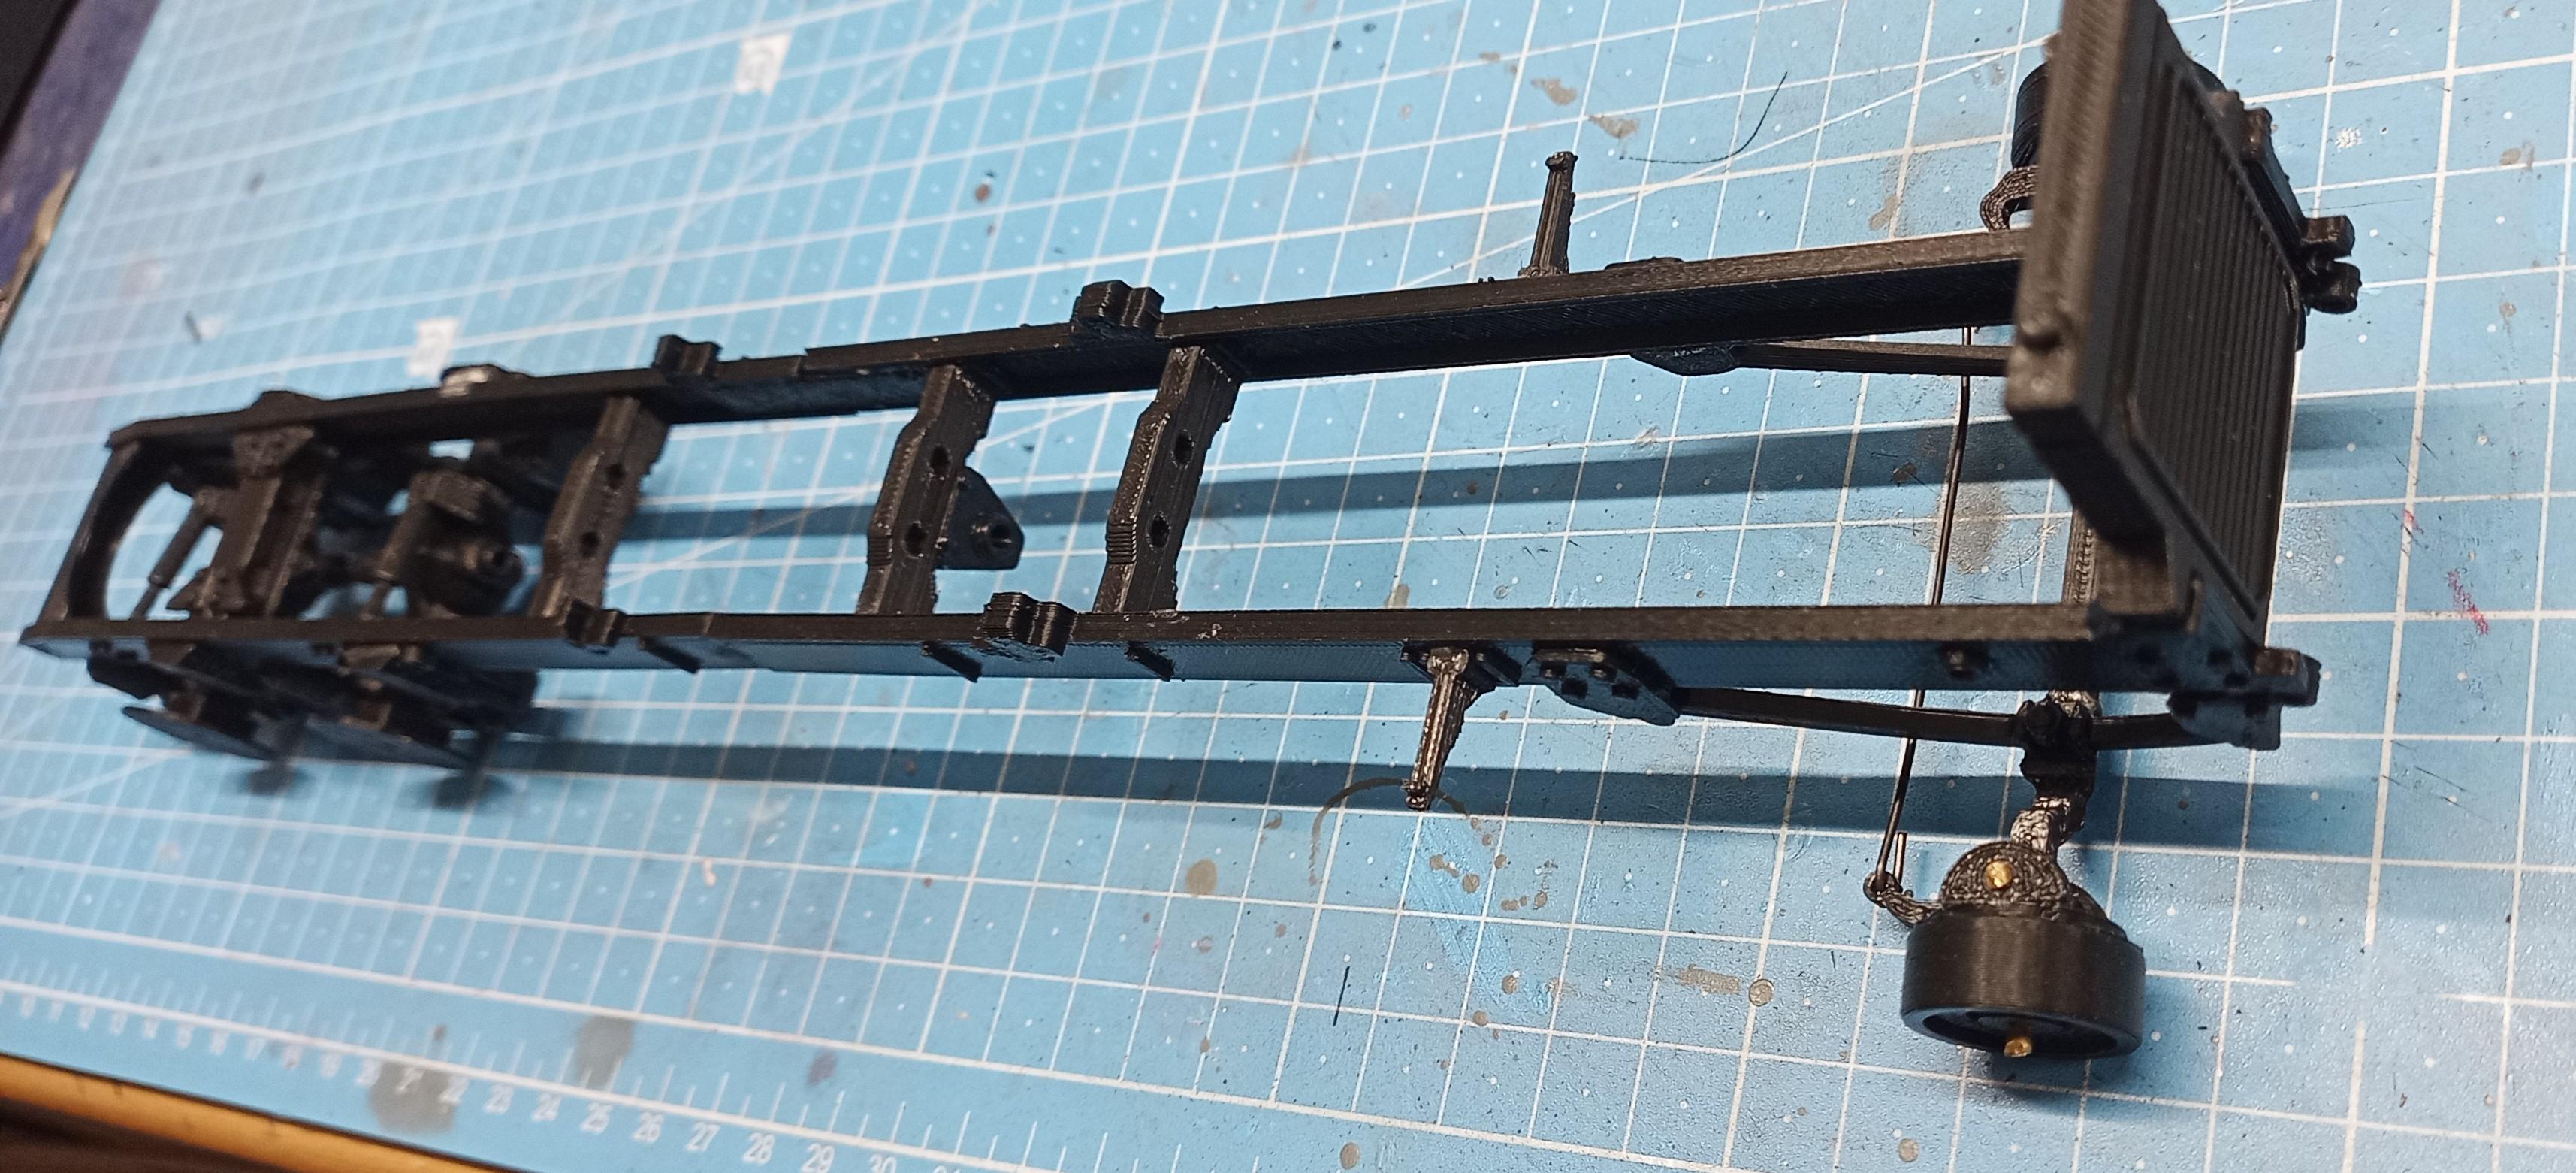
Jürgen M. replied to Jürgen M.'s topic in WIP: Model Trucks: Big Rigs and Heavy Equipment
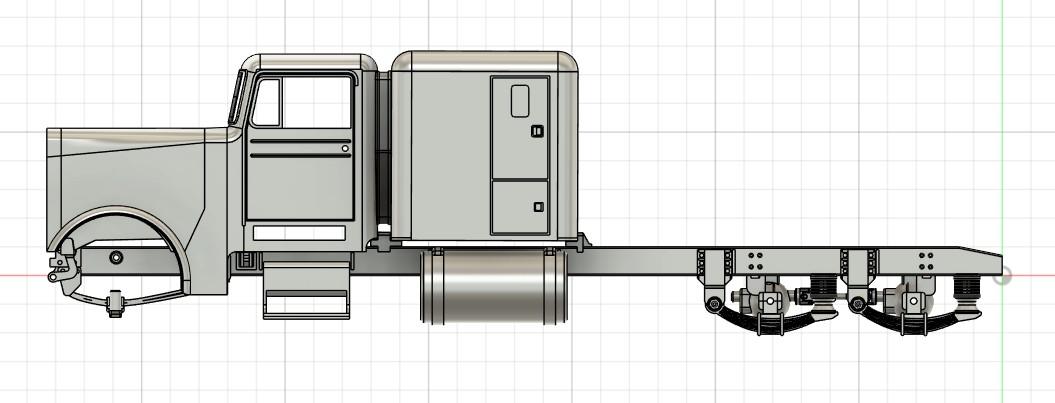
Got the radiator installed. Needed that to straighten the chassis. It actually had a little twist but nothing serious! I put weights in the front and rear of the chassis, then glued the radiator in. After the glue had hardened the chassis was straight again Test fit of the engine before painting: Engine out, radiator masked to make it ready for primer!
-
Freightliner FLC
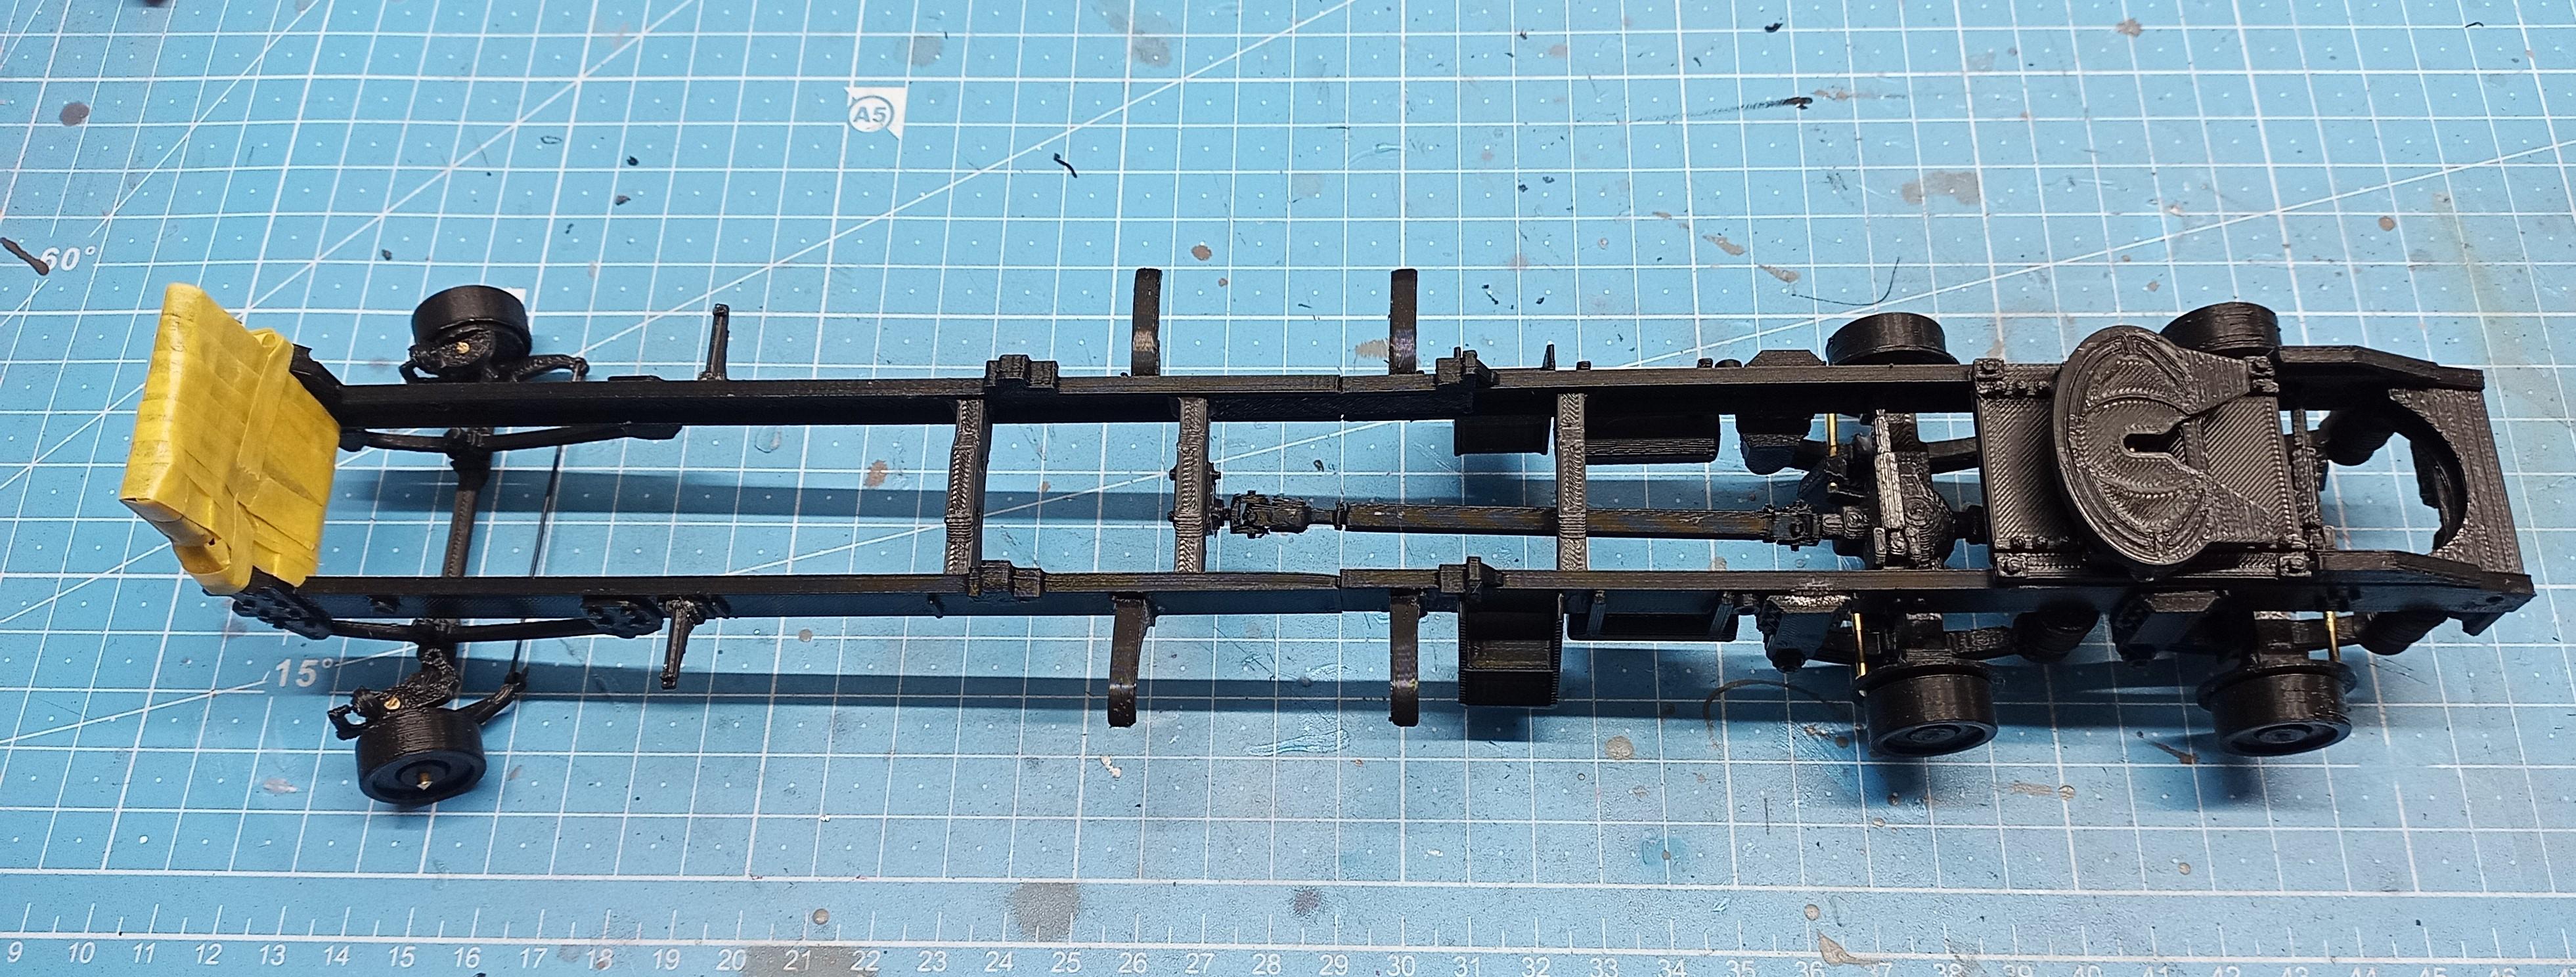
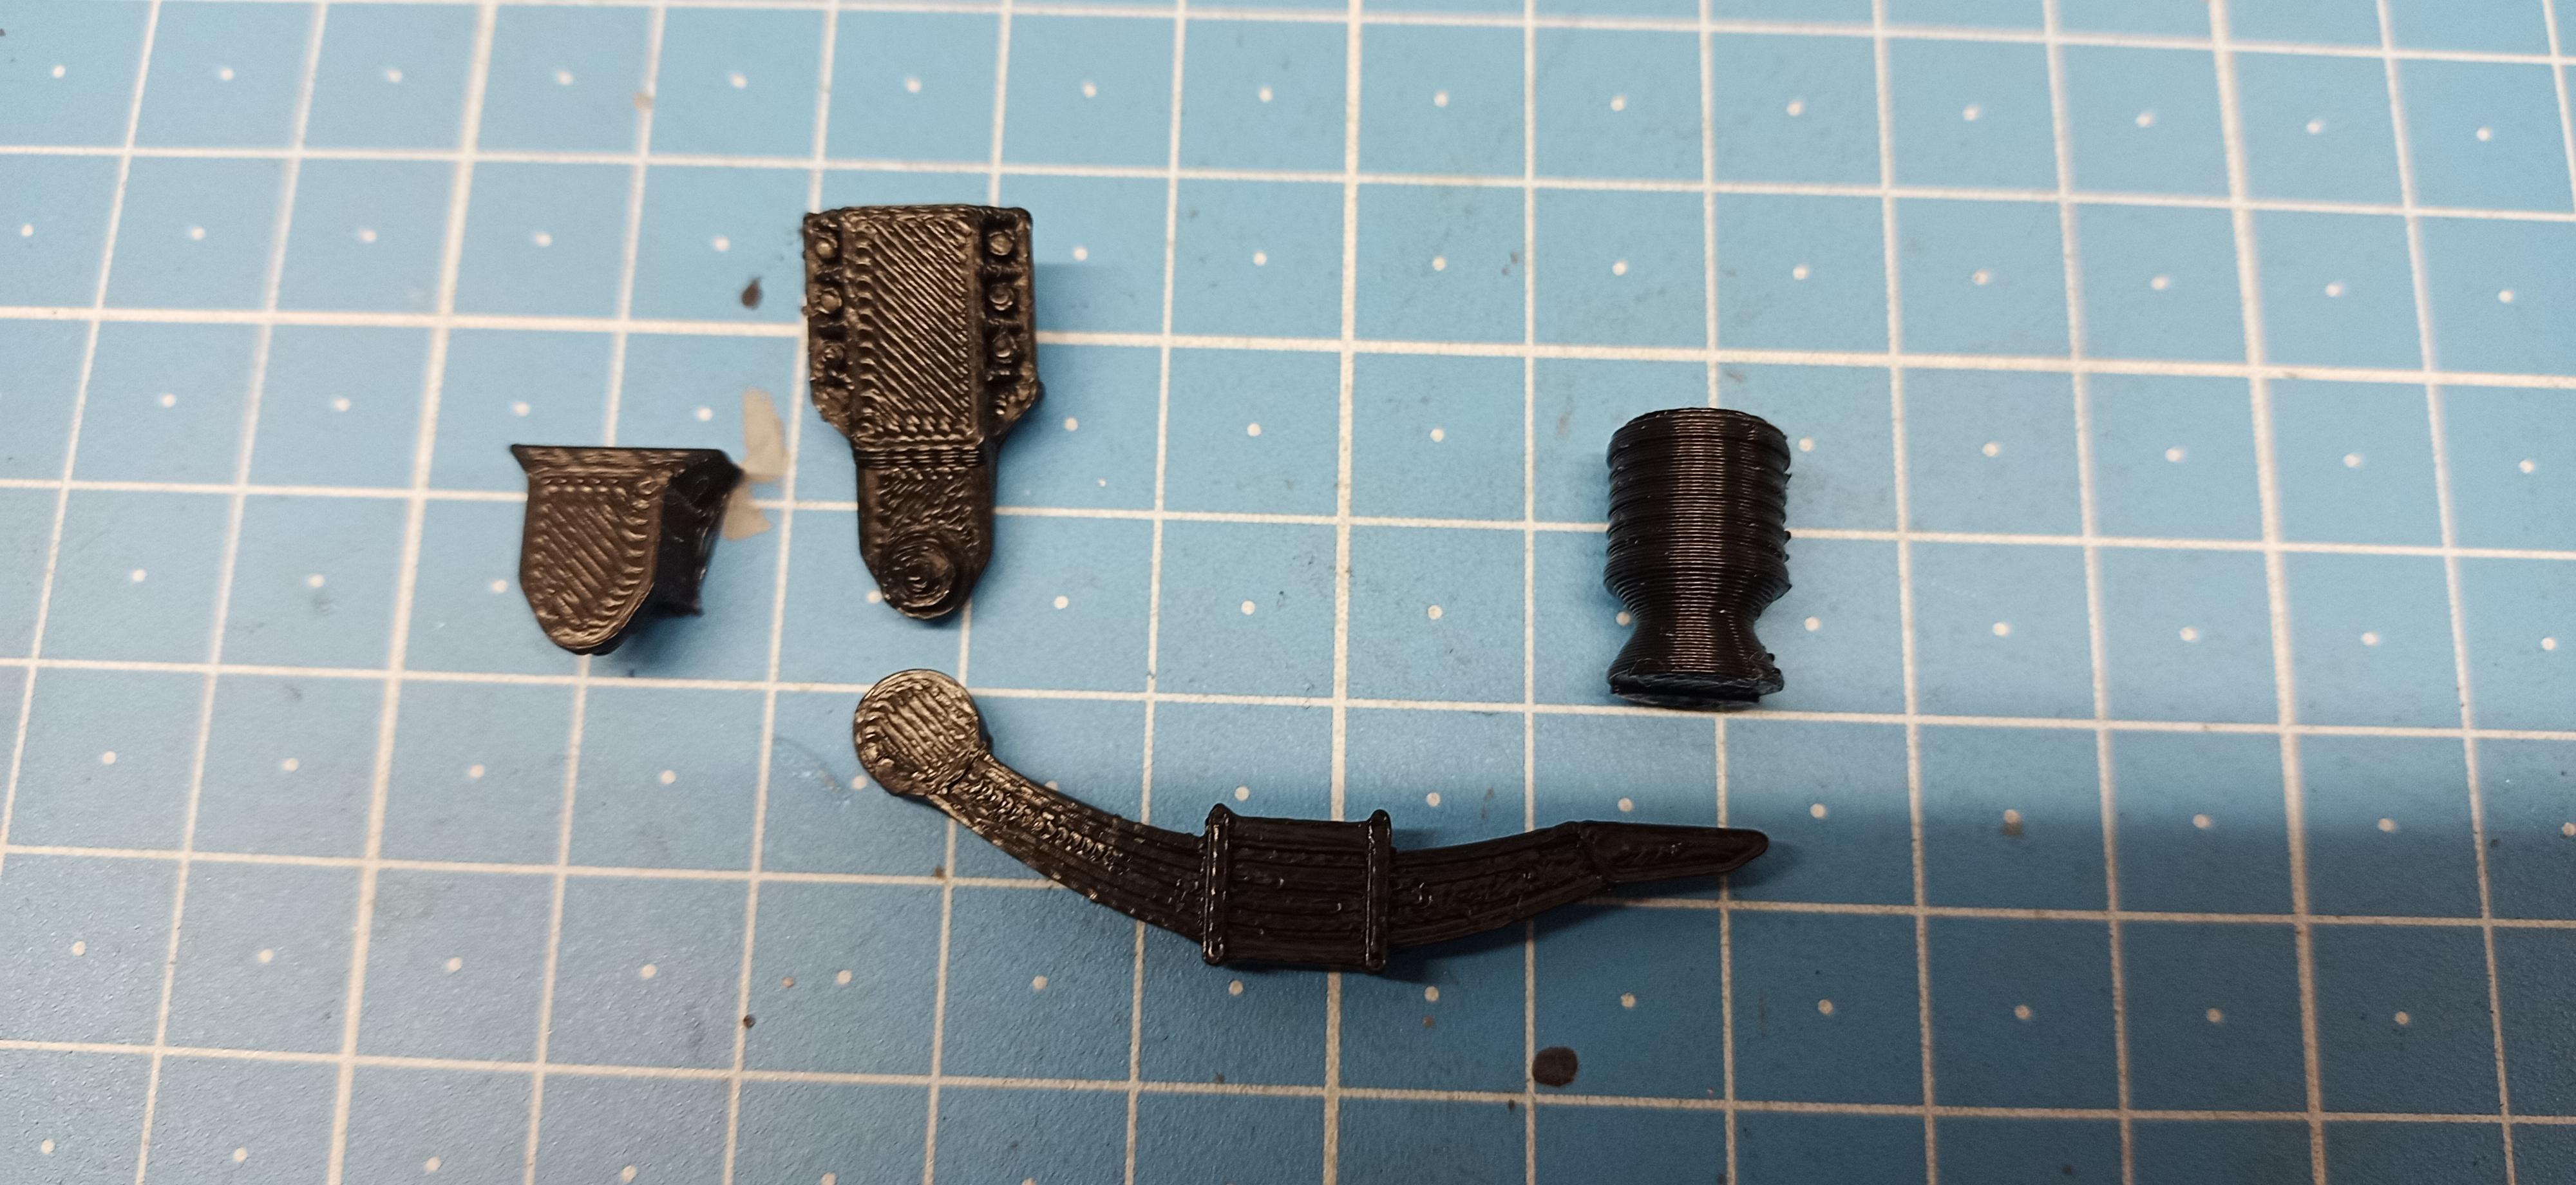
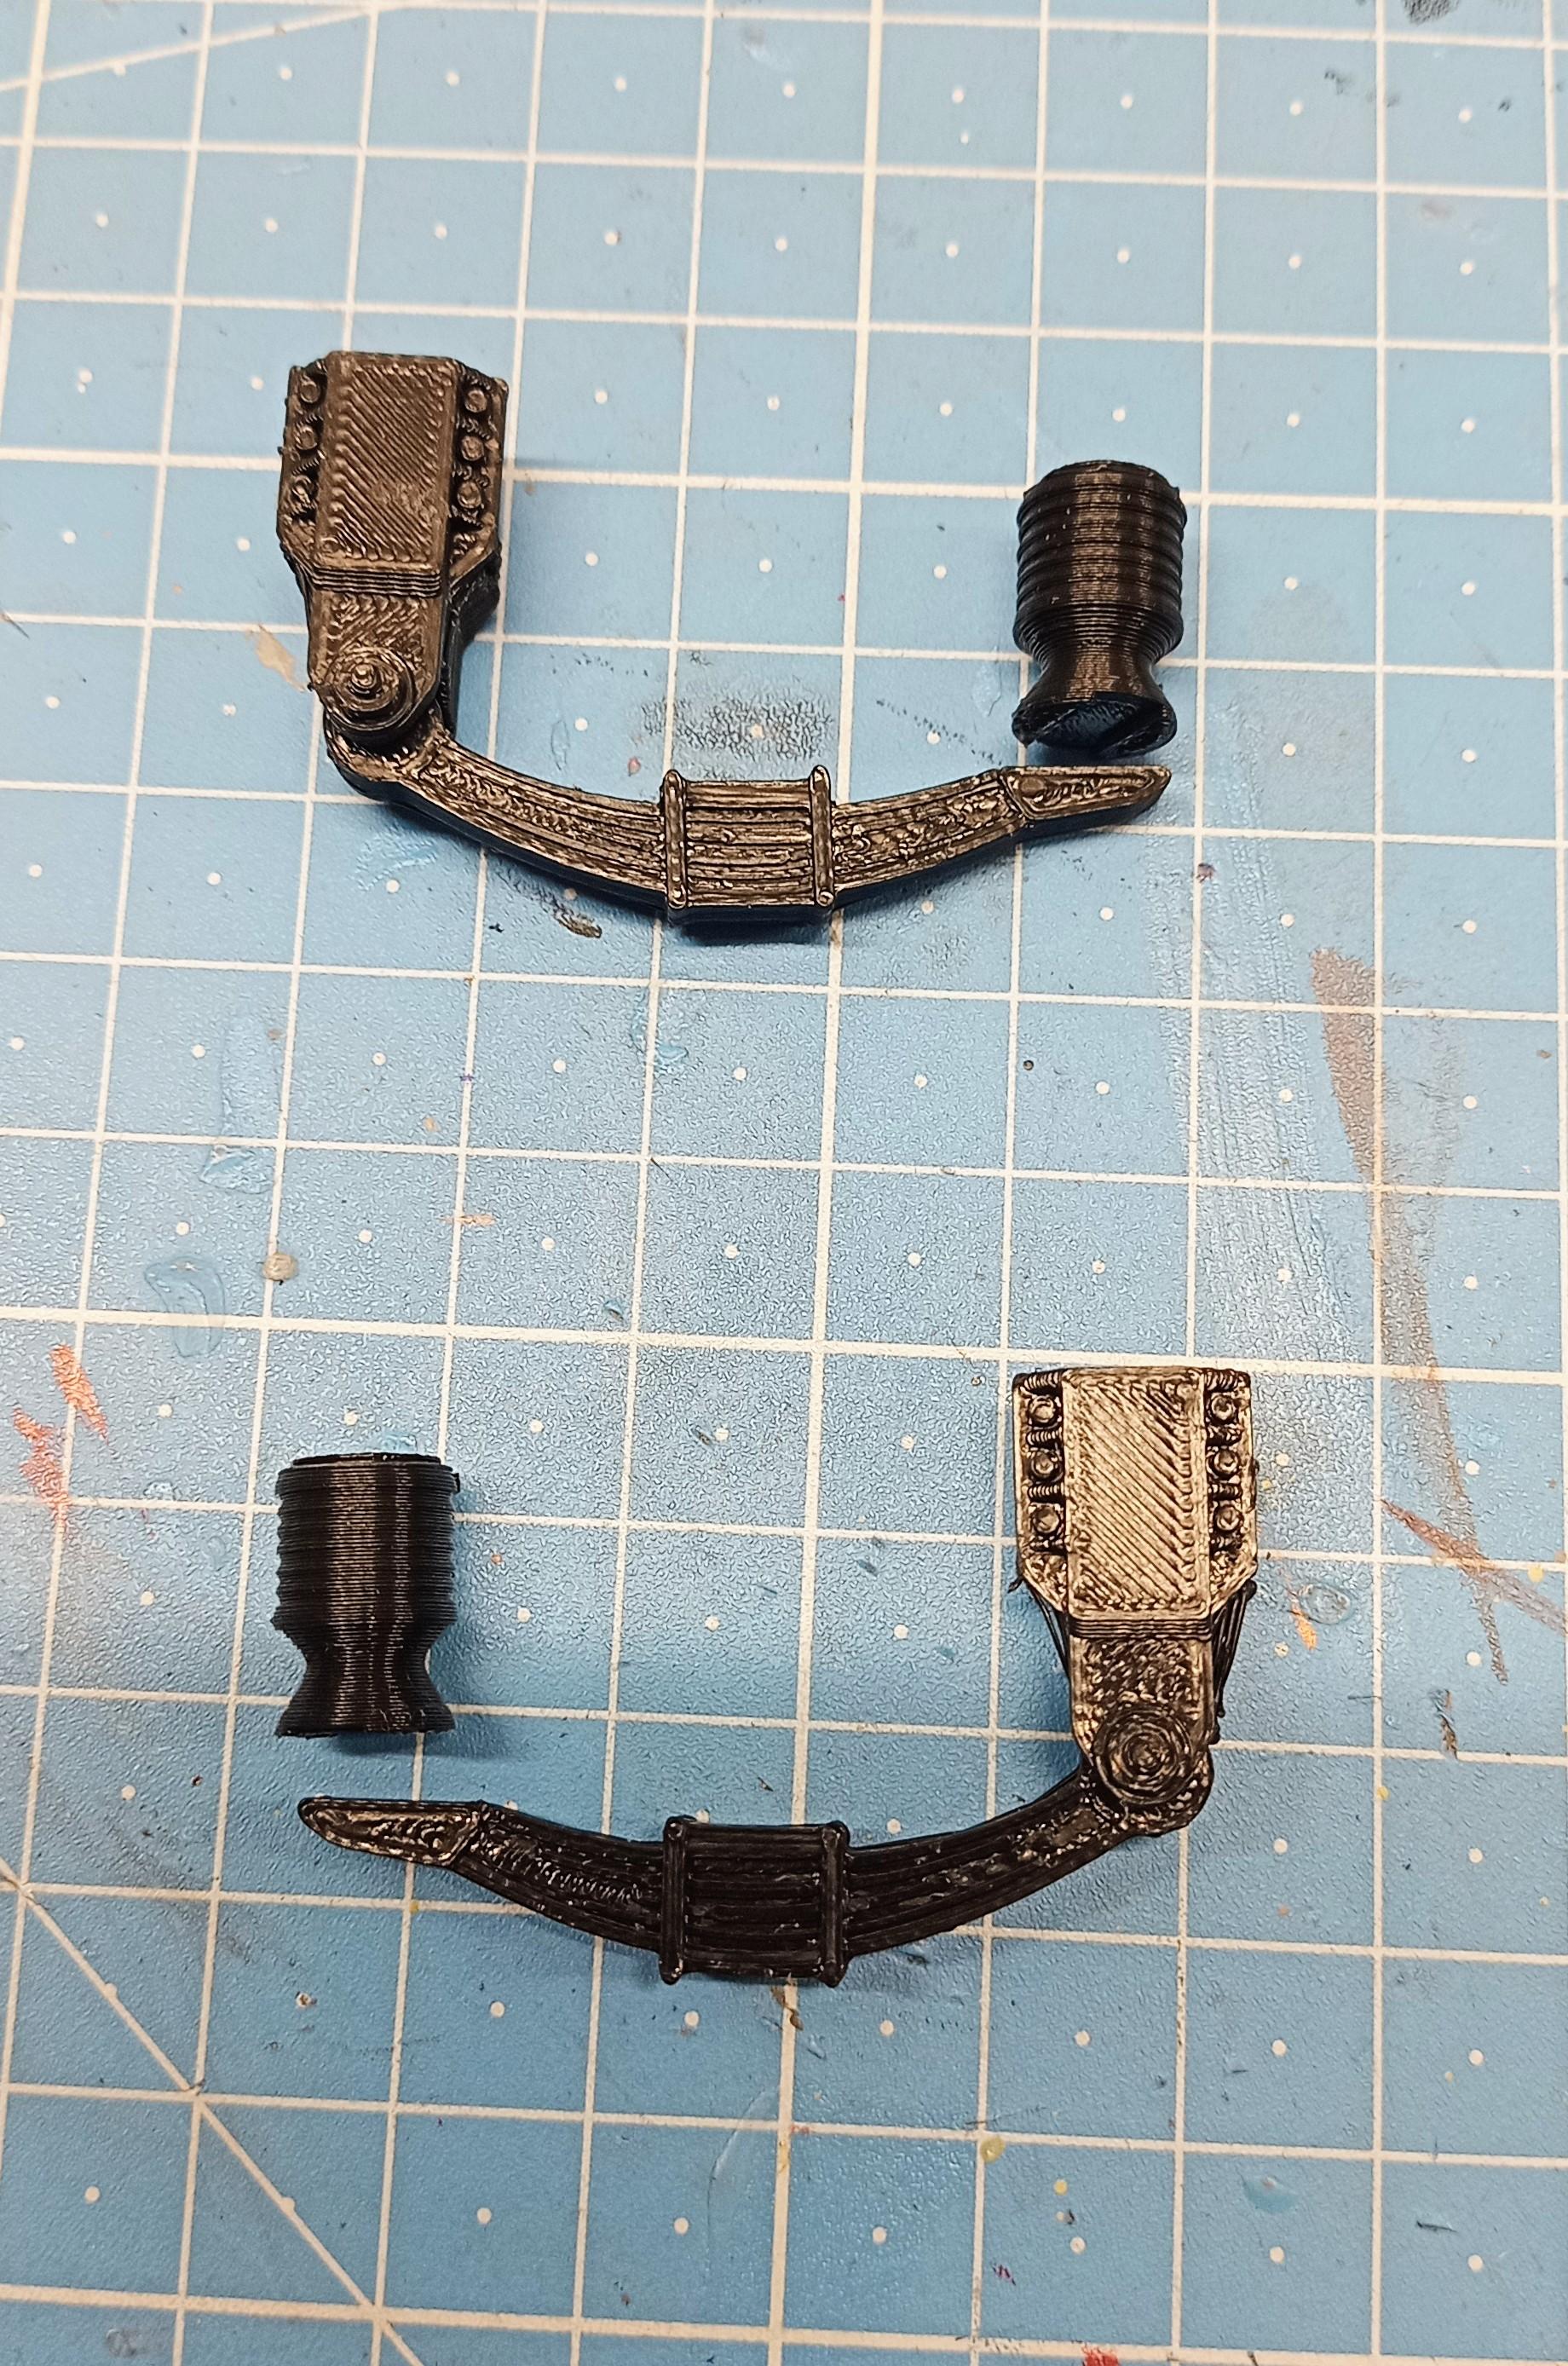
Jürgen M. replied to Jürgen M.'s topic in WIP: Model Trucks: Big Rigs and Heavy Equipment
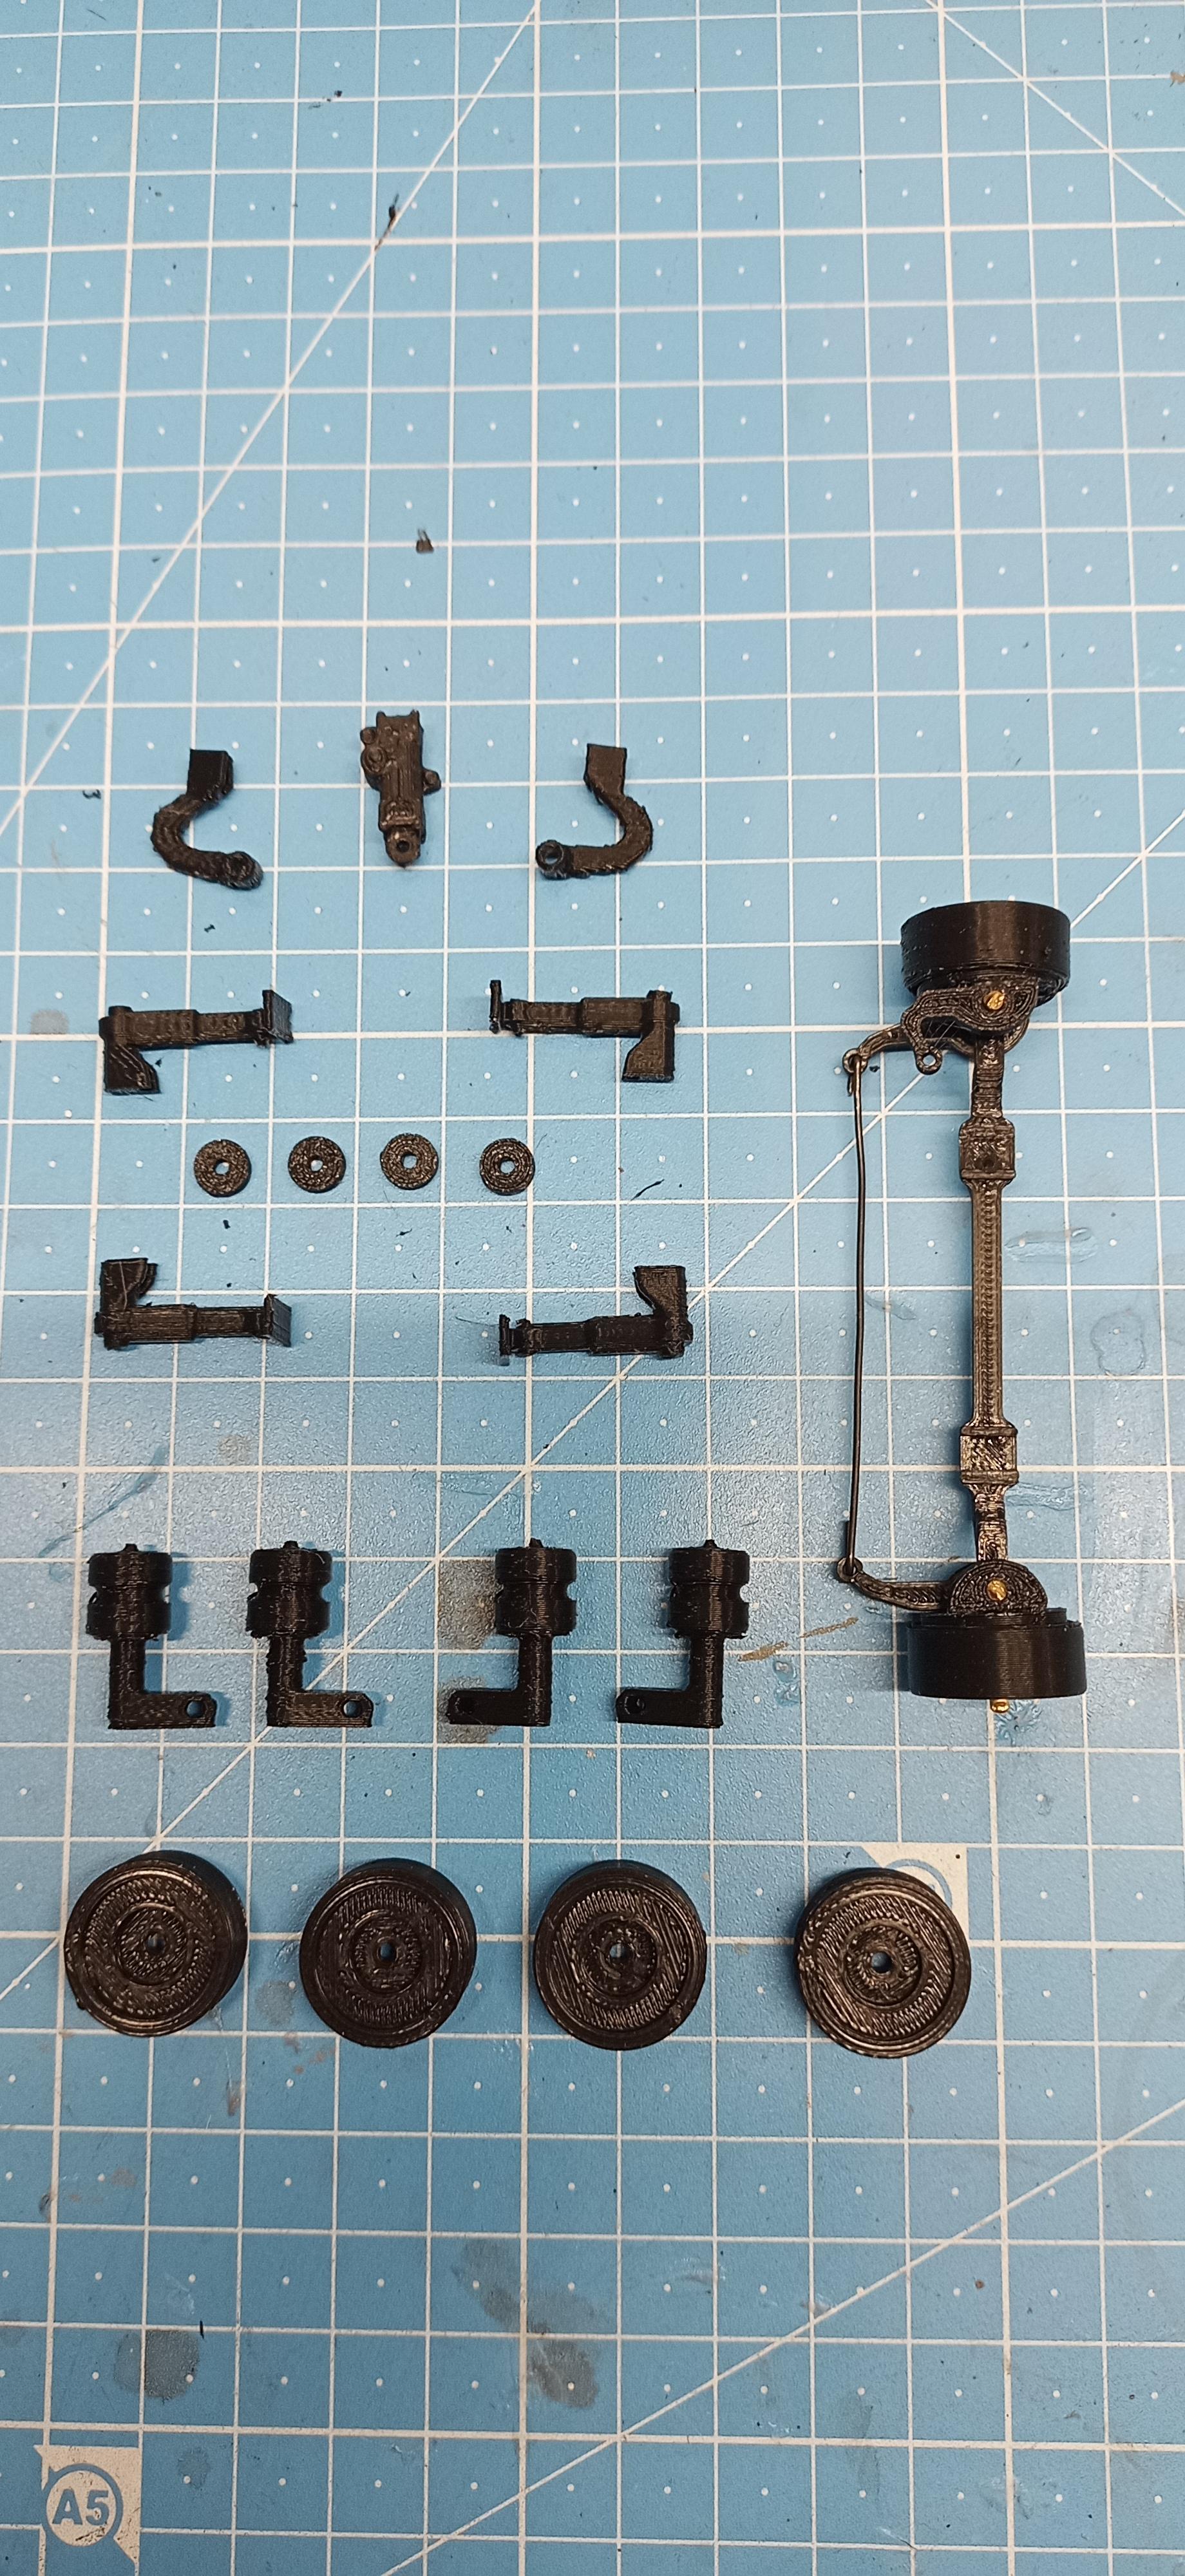
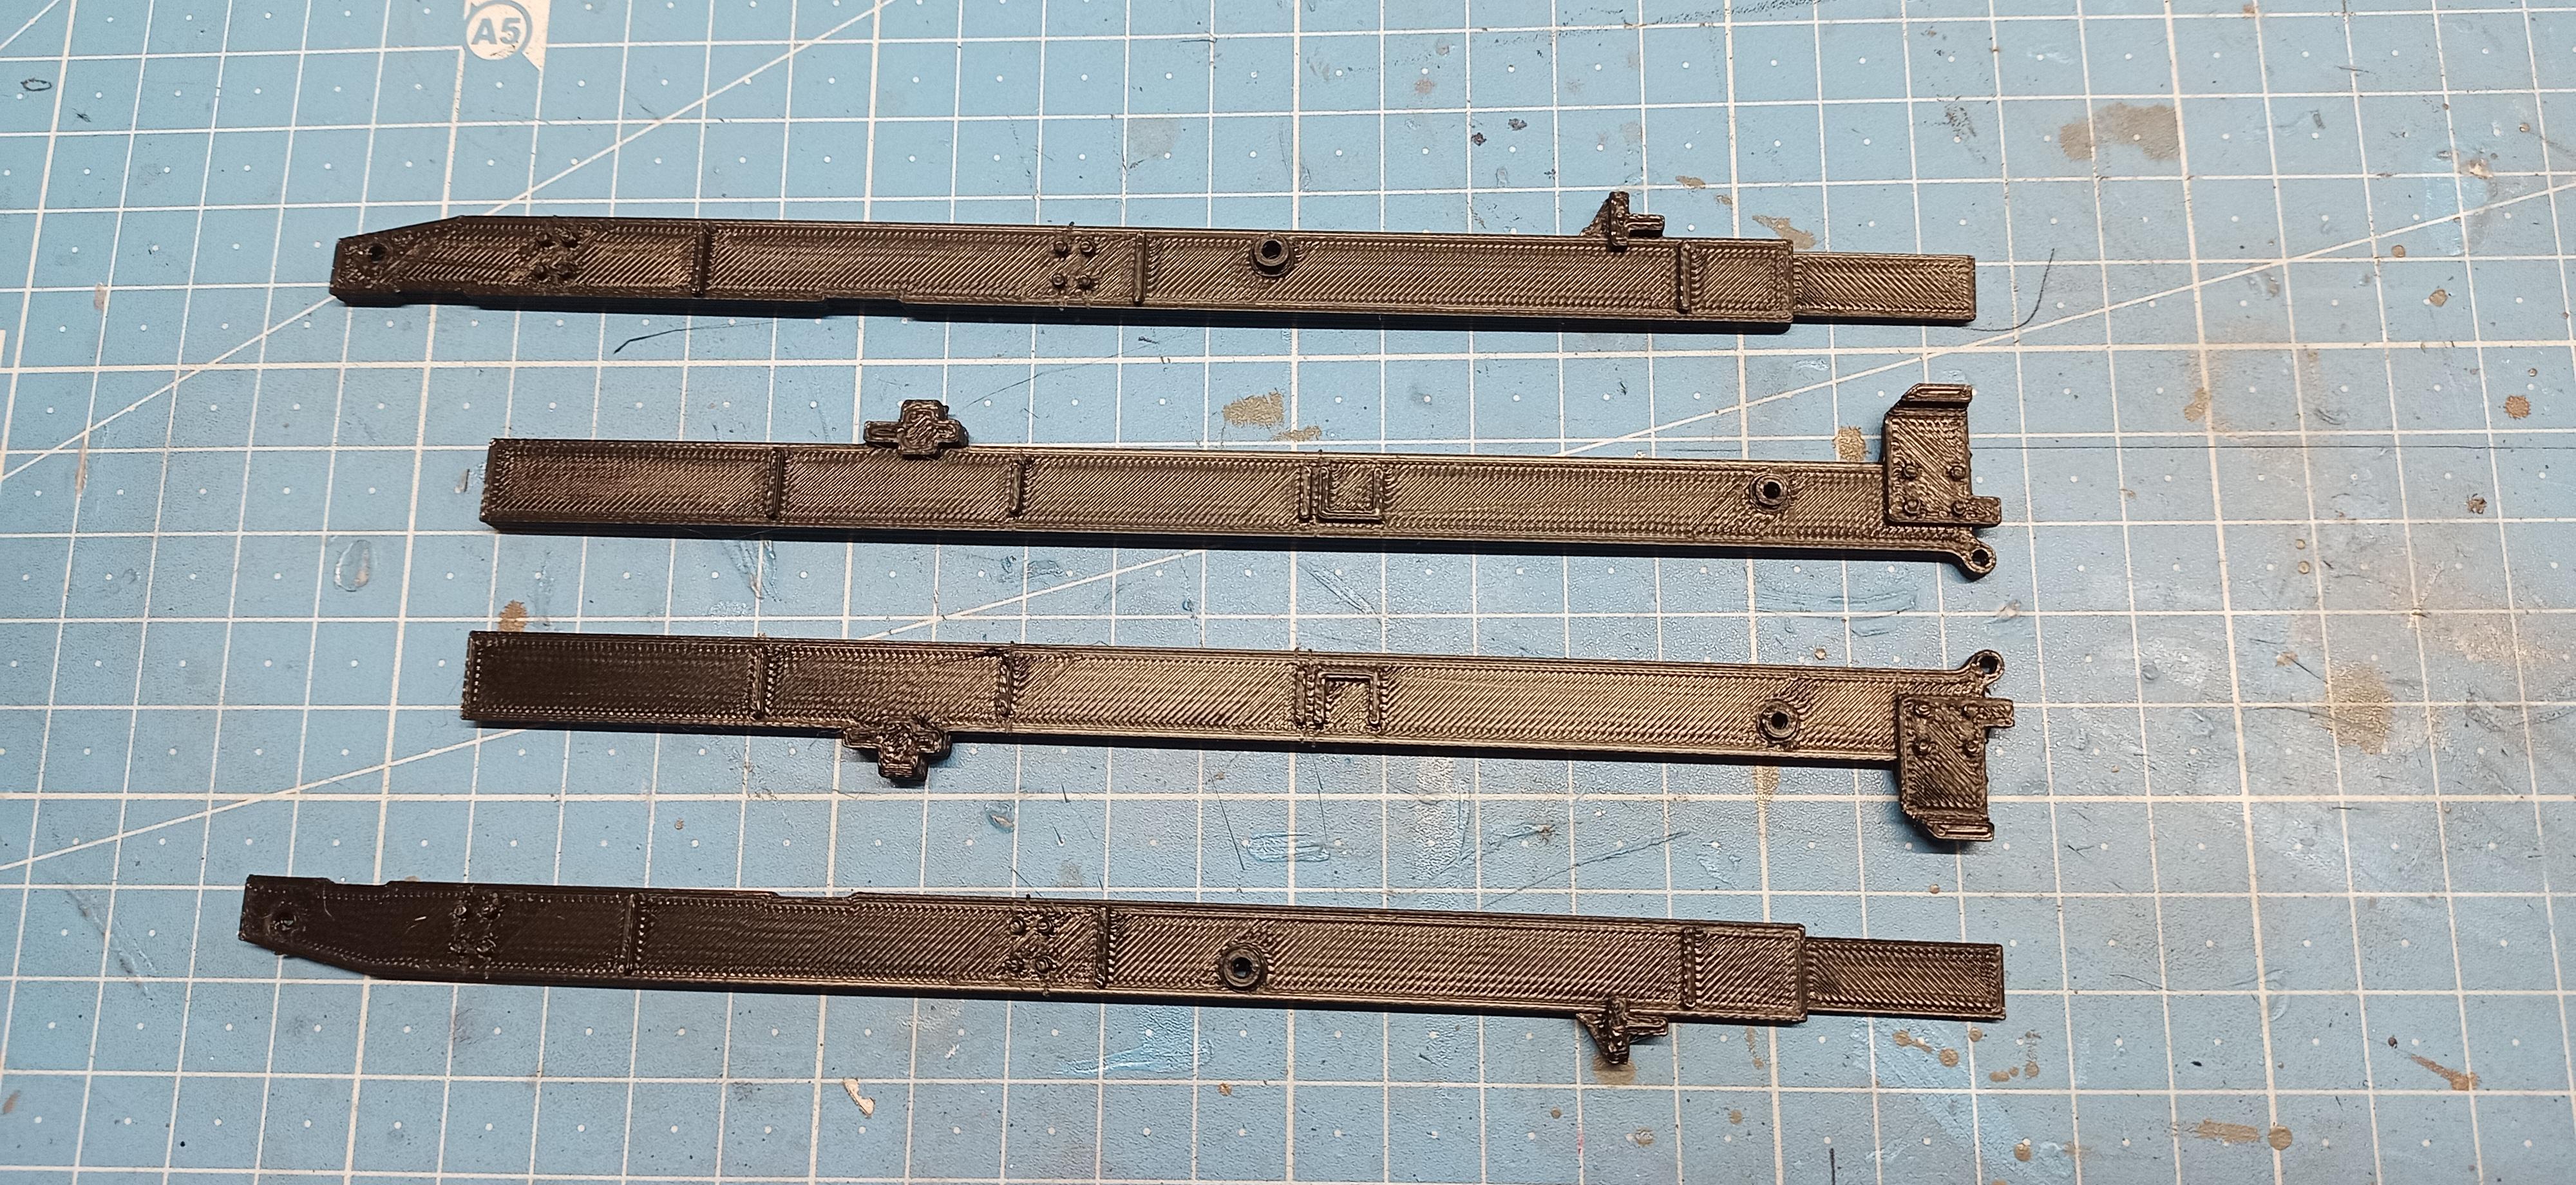
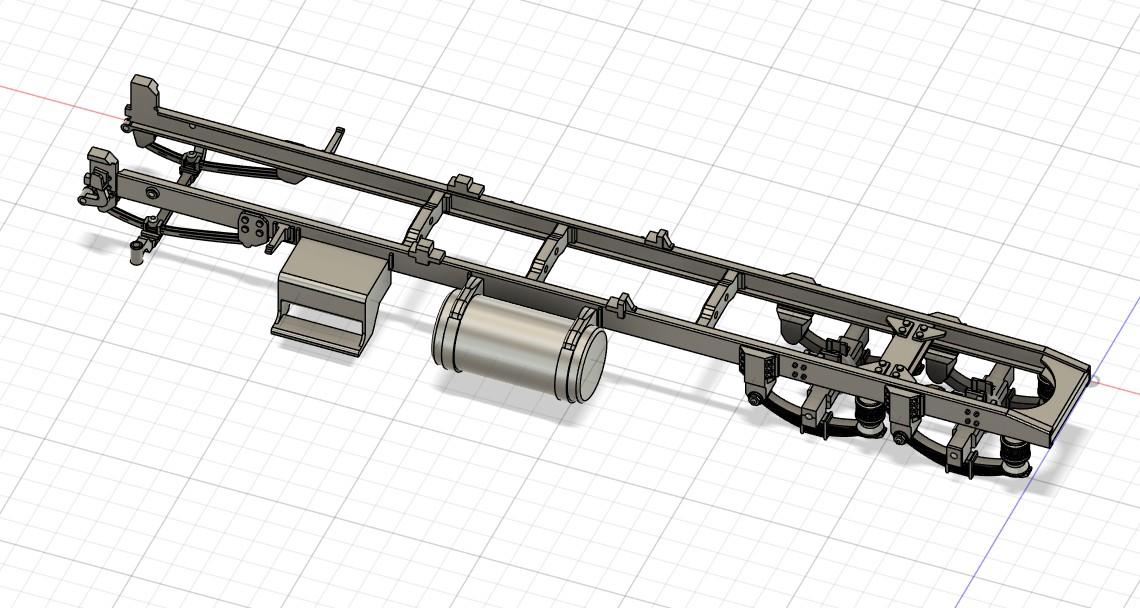
A little progress on the chassis: Suspension is also printed ... This is how it's supposed to come together: Chassis rails fit together Front axle and some smaller chassis parts ready to assemble:
-
Cross Country Hauler 359
Jürgen M. replied to Rbray47's topic in Model Trucks: Big Rigs and Heavy Equipment
Nice! Clean looking build! I like the color scheme! -
Soprano Carting Service Leach Packer
Jürgen M. replied to Scott Eriksen's topic in Model Trucks: Big Rigs and Heavy Equipment
Well done, Scott! A nice tribute to the hard working people and their daily working horse! -
Freightliner FLC
Jürgen M. replied to Jürgen M.'s topic in WIP: Model Trucks: Big Rigs and Heavy Equipment
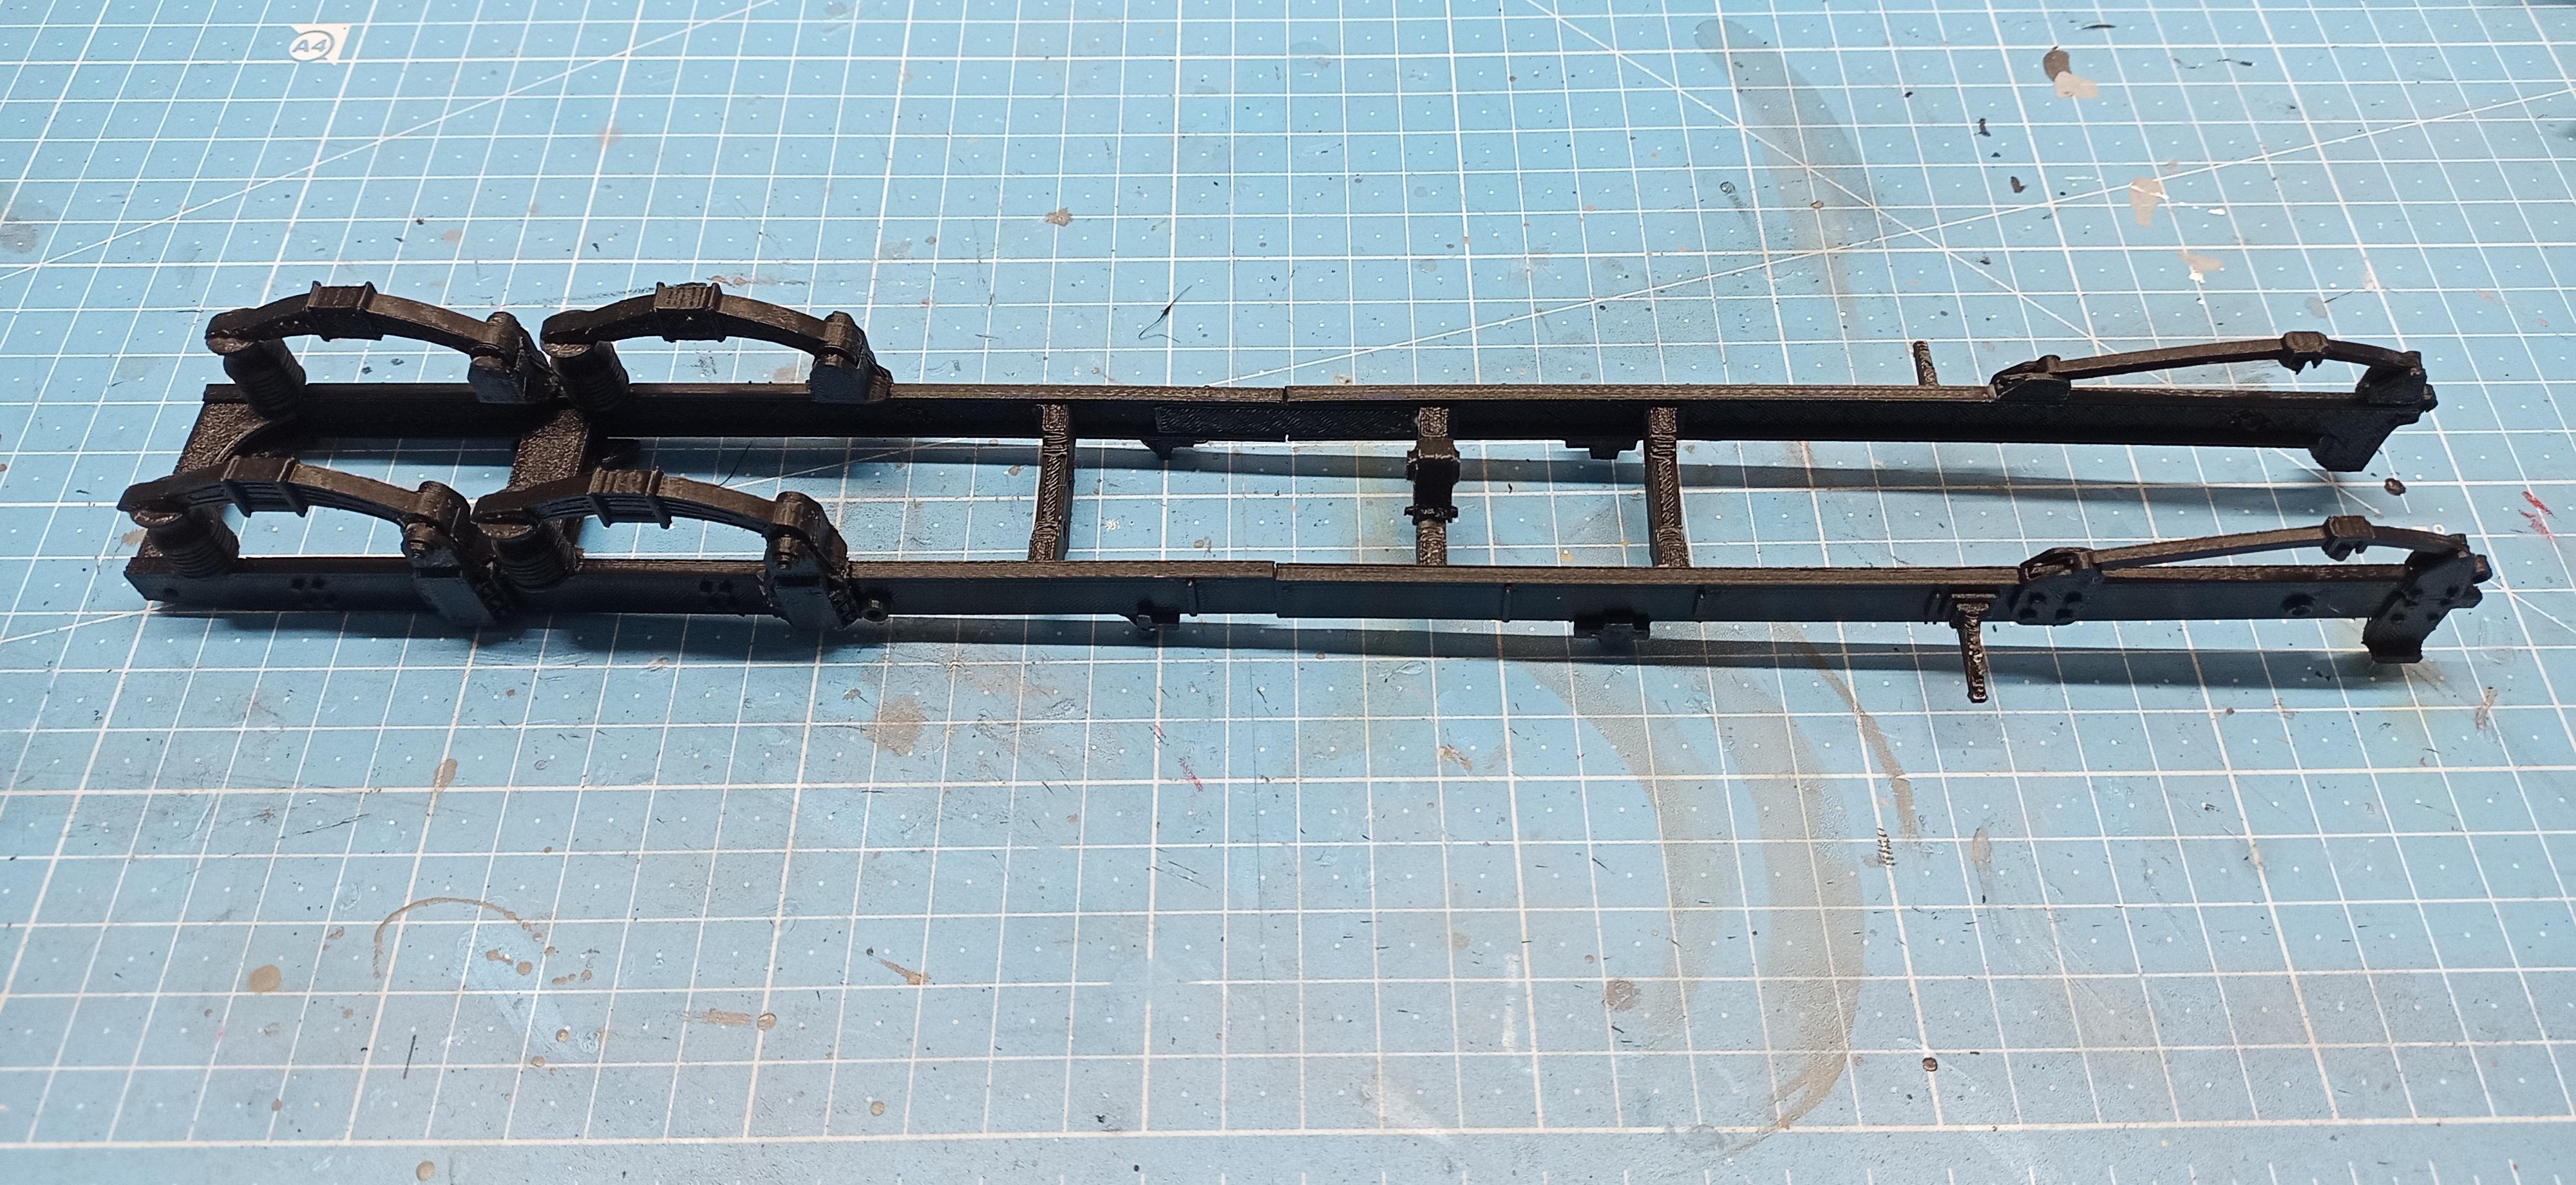
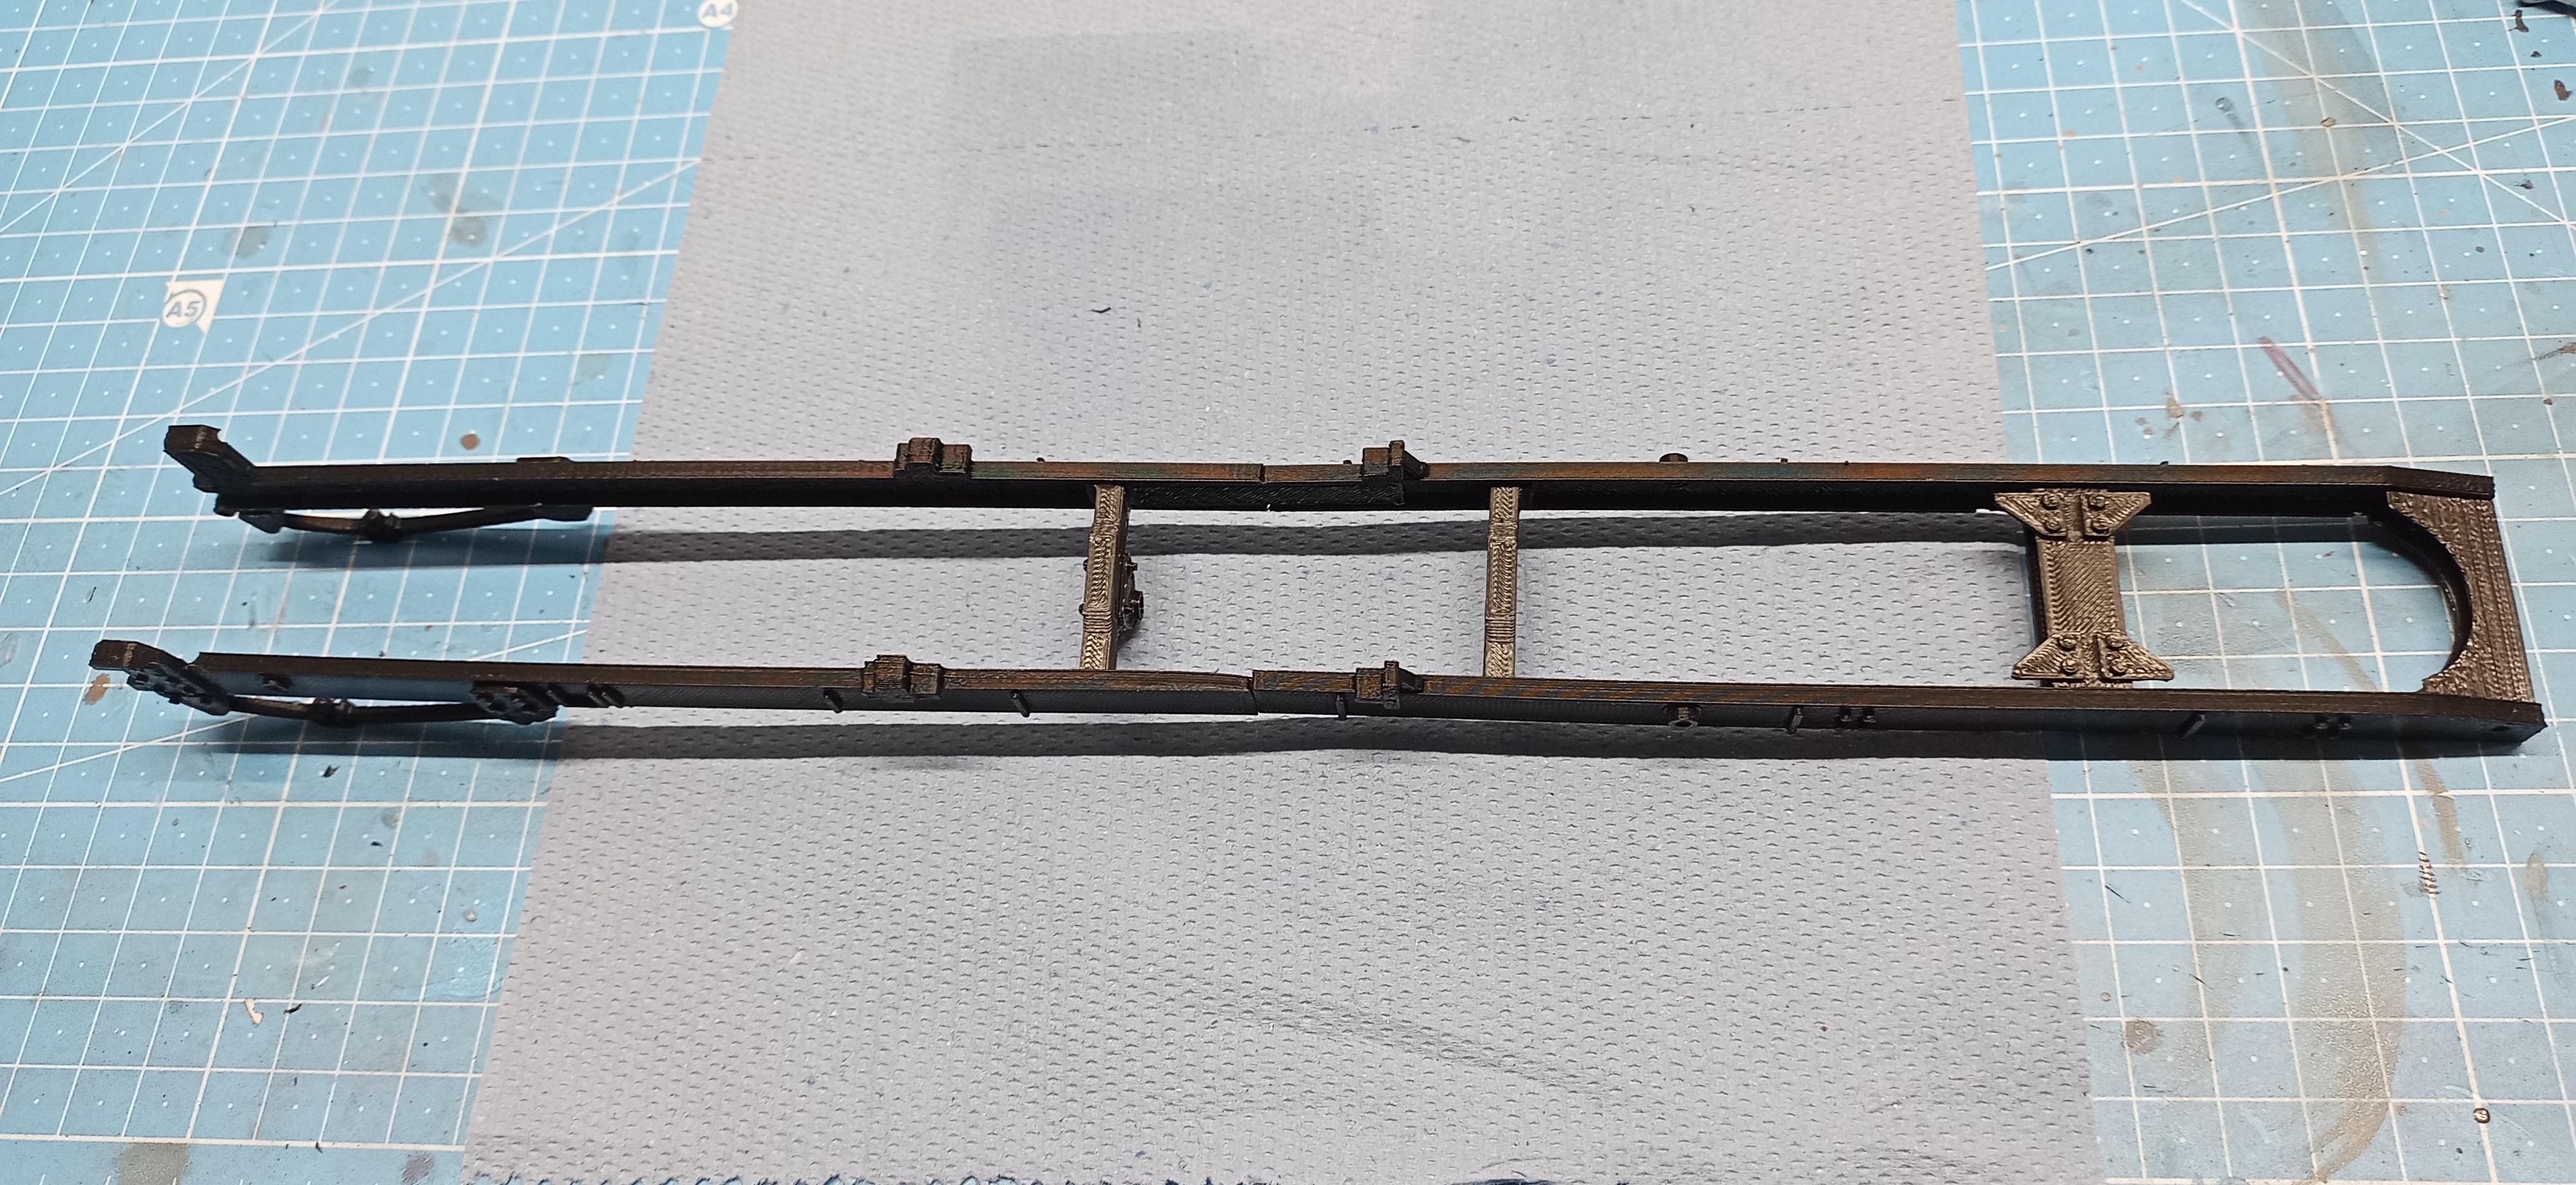
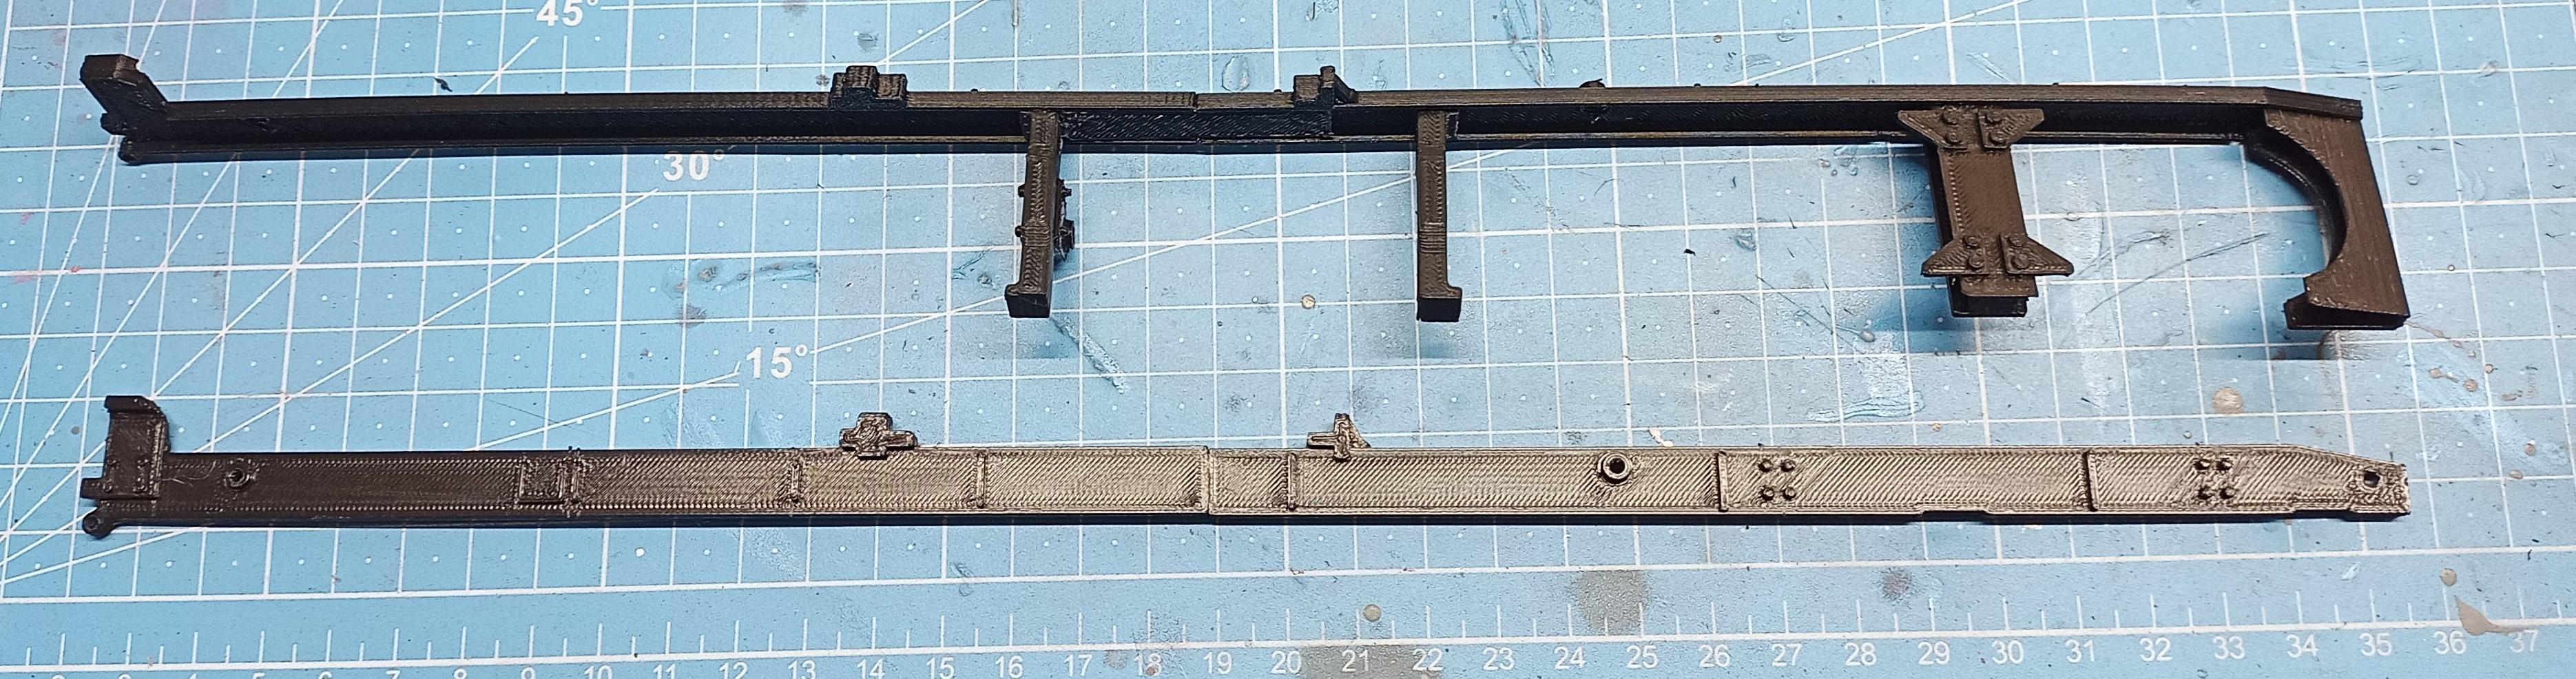
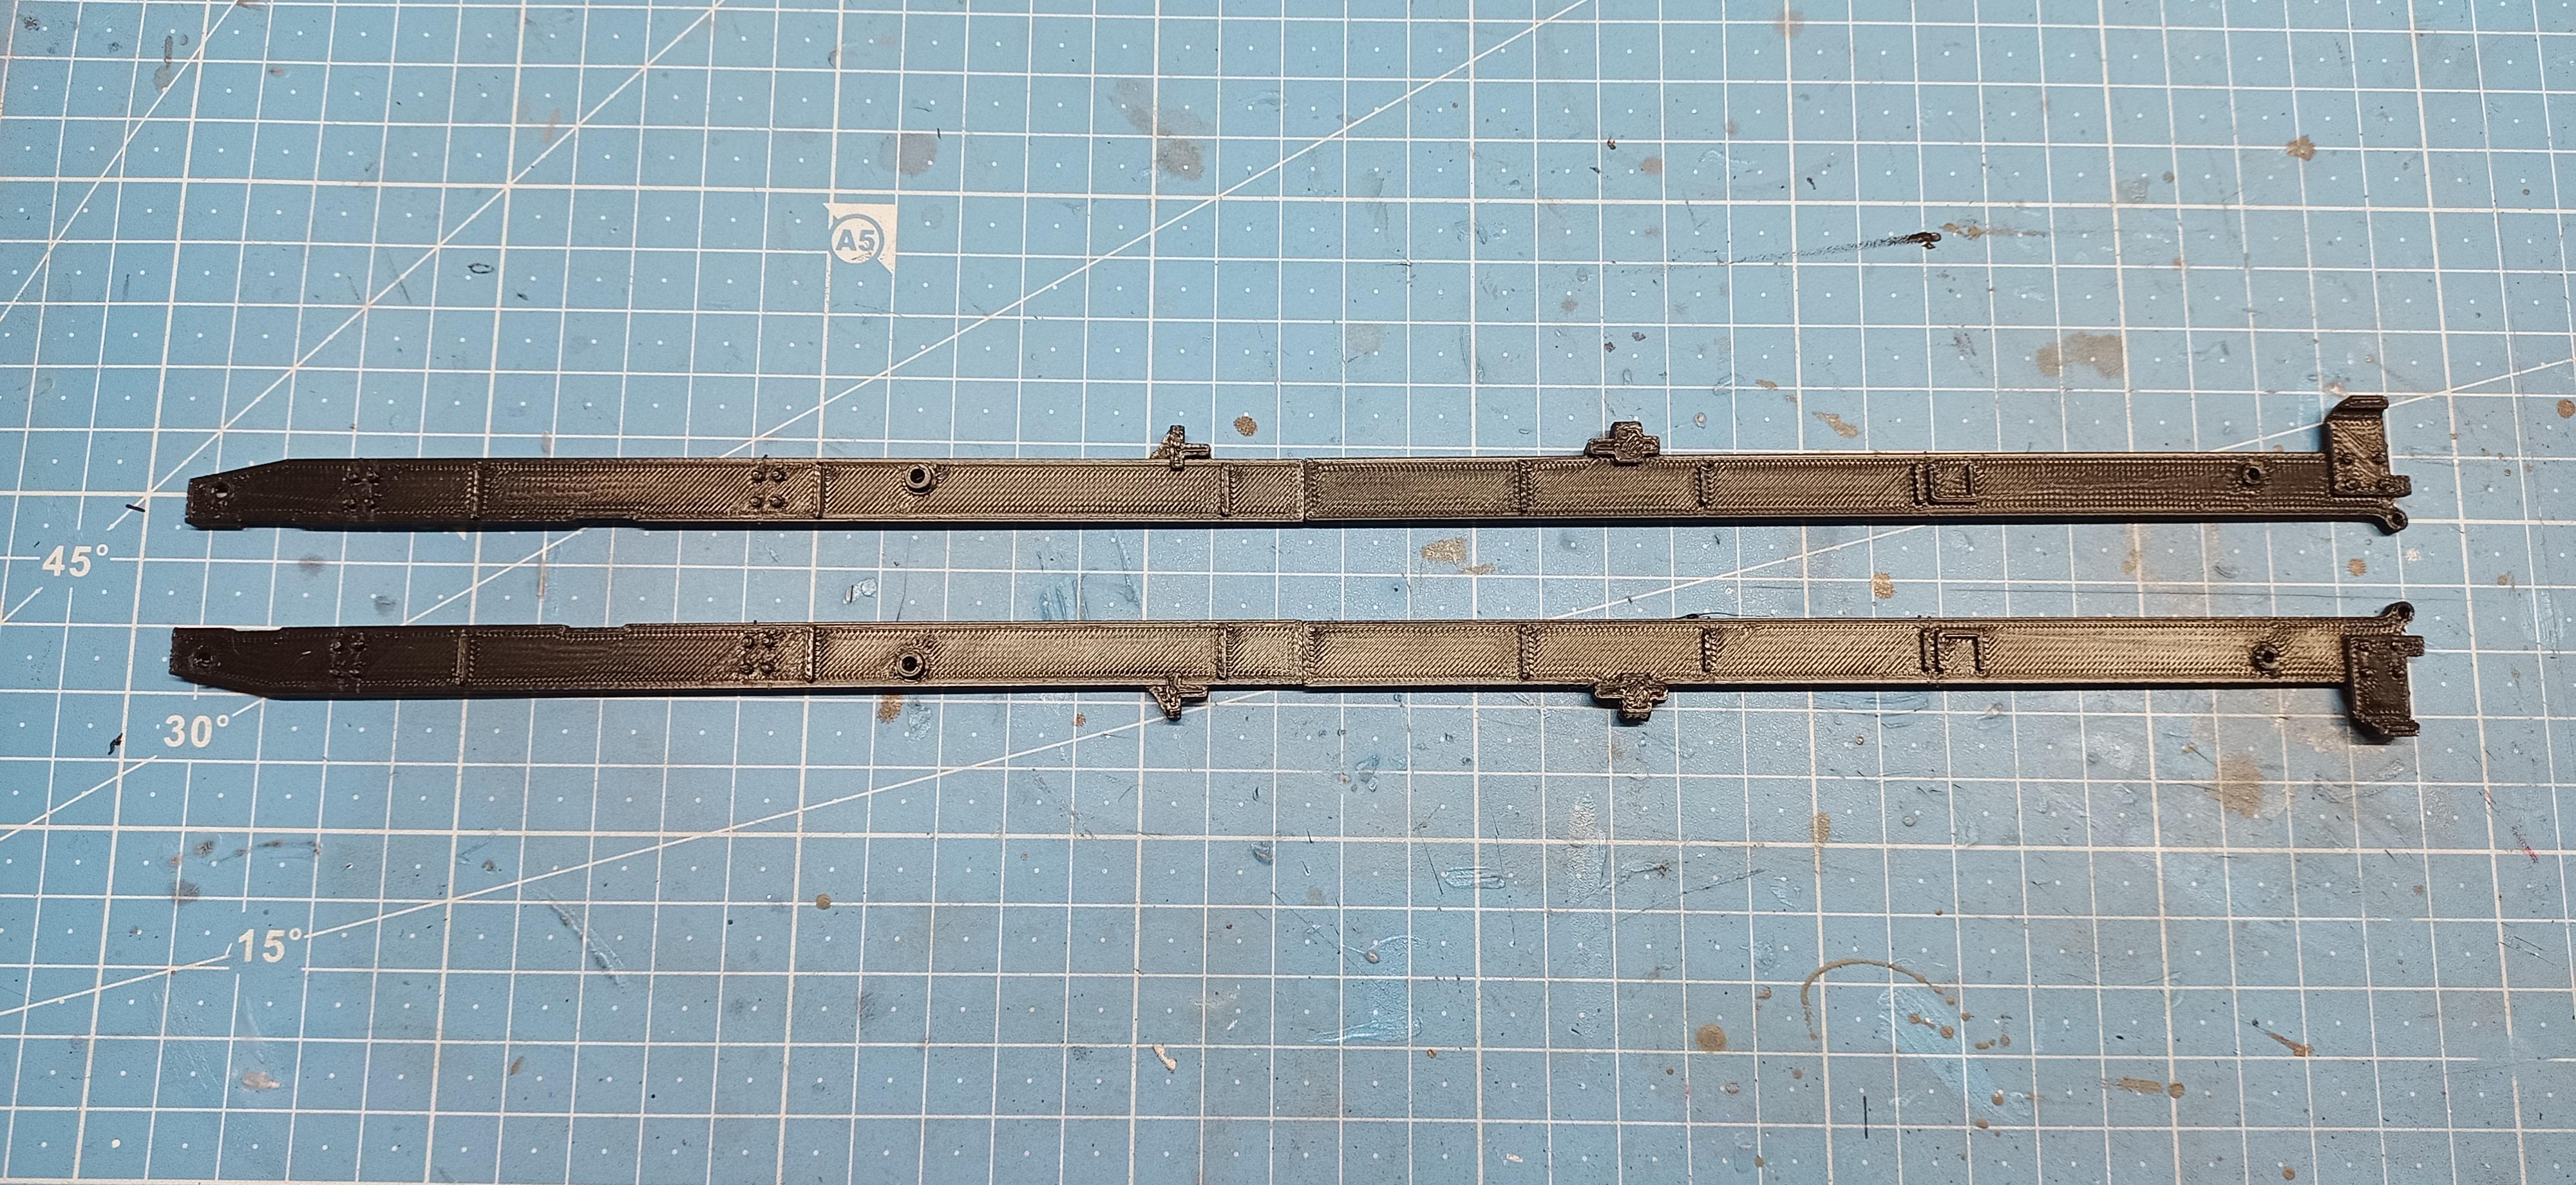
Got the first chassis parts printed. Had to split the rails to print them cause they we're too long! Rails seem to be straight. Looks promising!
-
Freightliner FLC
Jürgen M. replied to Jürgen M.'s topic in WIP: Model Trucks: Big Rigs and Heavy Equipment
Thanks guys! Hope it turns out as good as I expect. In the early 80s, when I found my interest for American trucks, this was theee stereotype of an American conventional to me. After my 1/32 Freightliner conventional got destroyed I never built one again. Today I'm building this revival version. I'll change the nozzle of my printer to get a better surface quality. Not sure if it'll work though! Anyway, it'll be a mixture of own design, box parts and virtual box parts! -
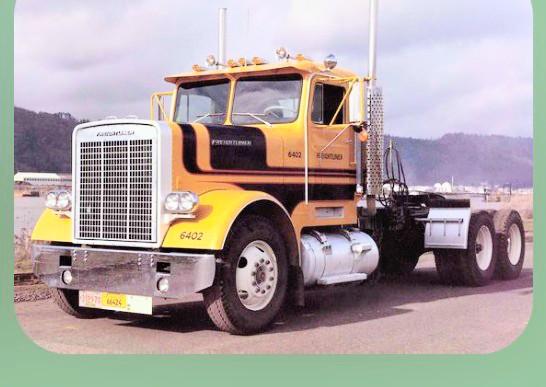
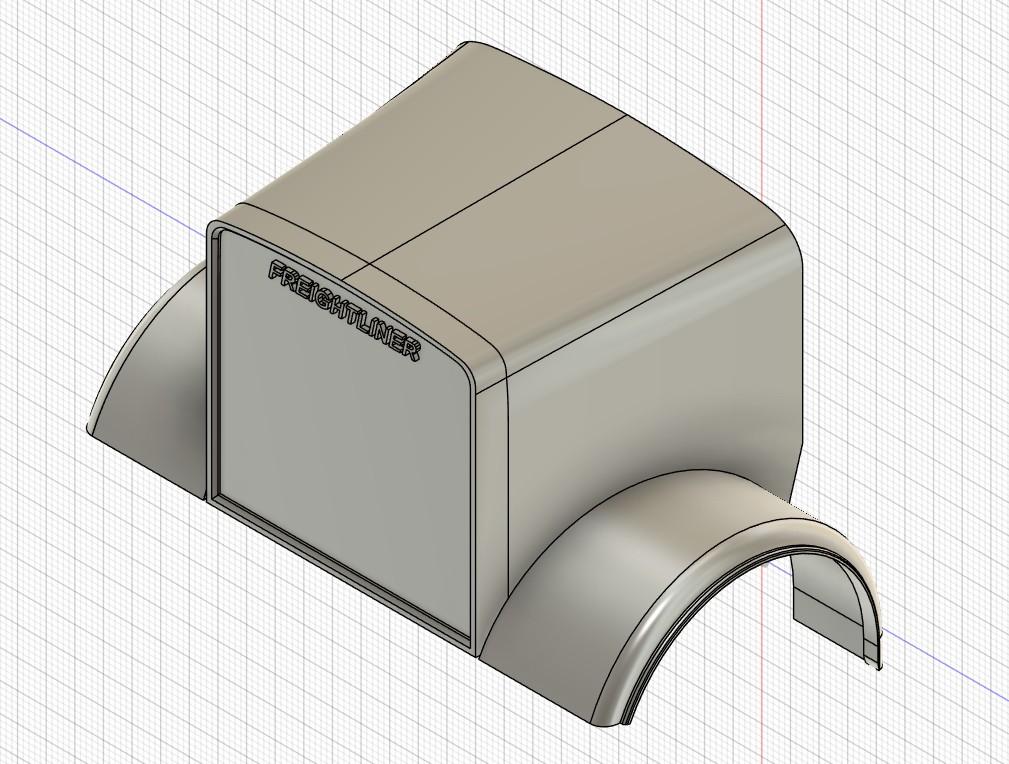
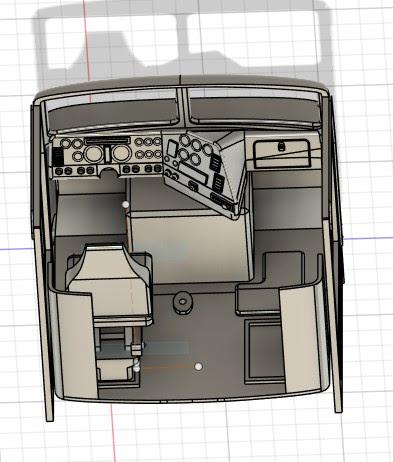
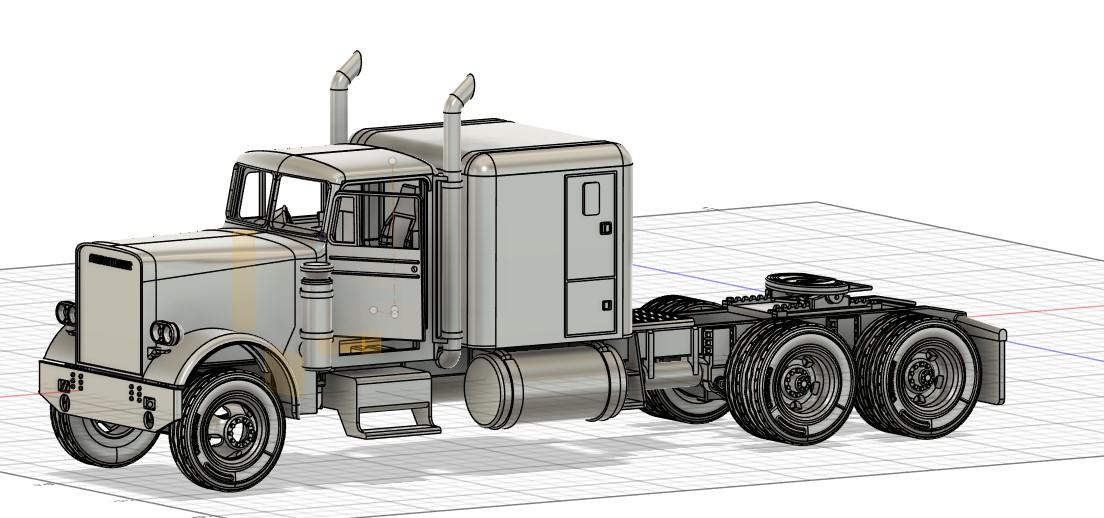
Hi everyone! I'm back with a new project. I chose a Freightliner FLC. Basically it's a 1975 model BUT while doing research on vehicle details I found some things I wanted to take over in this build. So it will contain a decade of attributes reaching from mid 70s to mid 80s. I was quite amazed to see that Freightliner had already used air ride suspension in the 70s. Maybe it was just a conversion though. Anyway I decided to use it and took over the parts I had designed for the Transtar II. I'm also using the Cat engine I had designed for the Marmon Harrington. Chassis rails, body parts and rims are be specially designed for this build and of course the interior. The pic shows the basic truck I'll be building. I'll add a long sleeper though and two external air cleaners. Here's a pre-view of the design: There might still be one or the other changes but principally that's where it's going!
- 116 replies
-
- 10
-

-
Kenworth W-925 (mild custom)
Jürgen M. replied to Gary Chastain's topic in WIP: Model Trucks: Big Rigs and Heavy Equipment
You could take over, Gary! That way the supply chain wouldn't be interrupted! 😉 -
1970 Ford C 600-800
Jürgen M. replied to Biggu's topic in Model Trucks: Big Rigs and Heavy Equipment
What a beautiful build Pal. You made a jewel out of it! Absolutely unique! -
California Special
Jürgen M. replied to Rockford's topic in WIP: Model Trucks: Big Rigs and Heavy Equipment
Same thought I had! Reminded me of a Freightliner! I have no idea if Peterbilt ever built something like that but it looks pretty cool! In that version maybe the radiator would tilt with the cab. That way no changes to the dog house would be neccessary! -
Kenworth W-925 (mild custom)
Jürgen M. replied to Gary Chastain's topic in WIP: Model Trucks: Big Rigs and Heavy Equipment
That looks perfect Gary! A clean and precise job on that dash and I love the idea with the pin heads! I might just come back to that in my next build! -
1970 Ford C 600
Jürgen M. replied to Biggu's topic in WIP: Model Trucks: Big Rigs and Heavy Equipment
It was my pleasure to help you build your vision Pal! I really enjoyed it and I learned a lot about the differences between resin and filament printing. Thanks for that knowledge Bren! -
1970 Ford C 600
Jürgen M. replied to Biggu's topic in WIP: Model Trucks: Big Rigs and Heavy Equipment
Congratulations Jeff! That Ford turned out so cool. You did such a clean and precise job. I think this is probably one of the most unique builds here. Something to be proud of Pal! -
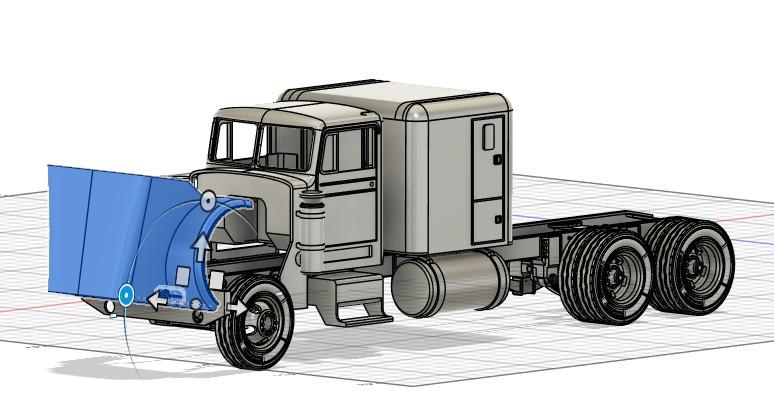
Western Star 4900 FA plow truck
Jürgen M. replied to BK9300's topic in WIP: Model Trucks: Big Rigs and Heavy Equipment
Looks to me as if it was ready for the winter season. It is a real one, isn't it? 🤔 -
1970 Ford C 600
Jürgen M. replied to Biggu's topic in WIP: Model Trucks: Big Rigs and Heavy Equipment
Looking awesome Jeff! Enjoy the last steps to completion!