Jürgen M.
-
Posts
1,783 -
Joined
-
Last visited
Content Type
Profiles
Forums
Events
Gallery
Everything posted by Jürgen M.
-

1970 Ford C 600
Jürgen M. replied to Biggu's topic in WIP: Model Trucks: Big Rigs and Heavy Equipment
Painting is of course a very elegant way of solving the problem! 👍 You could also print them! Concerning the plates, I just google the plates I need, e.g. truck licenses of Utah (😉) and then I choose what I like, make a screenshot and downsize it to be printed! -
1970 Ford C 600
Jürgen M. replied to Biggu's topic in WIP: Model Trucks: Big Rigs and Heavy Equipment
I don't know the details of this kit, I've never built it but I can imagine how that area is executed. Decals can be made easily by drawing them in a graphics programme or even Power Point and then printed on decal paper. I make all my decals that way. Stripes, corporate logos, licence plates, ... Give it a try. It's not hard. -
Hi Ron, sorry I missed this one. Looks really cool. I remember seeing one or two back in the 70s in Chicago. Great build Pal! You also seem to enjoy building rare trucks. They just need to be remembered! 👍
-
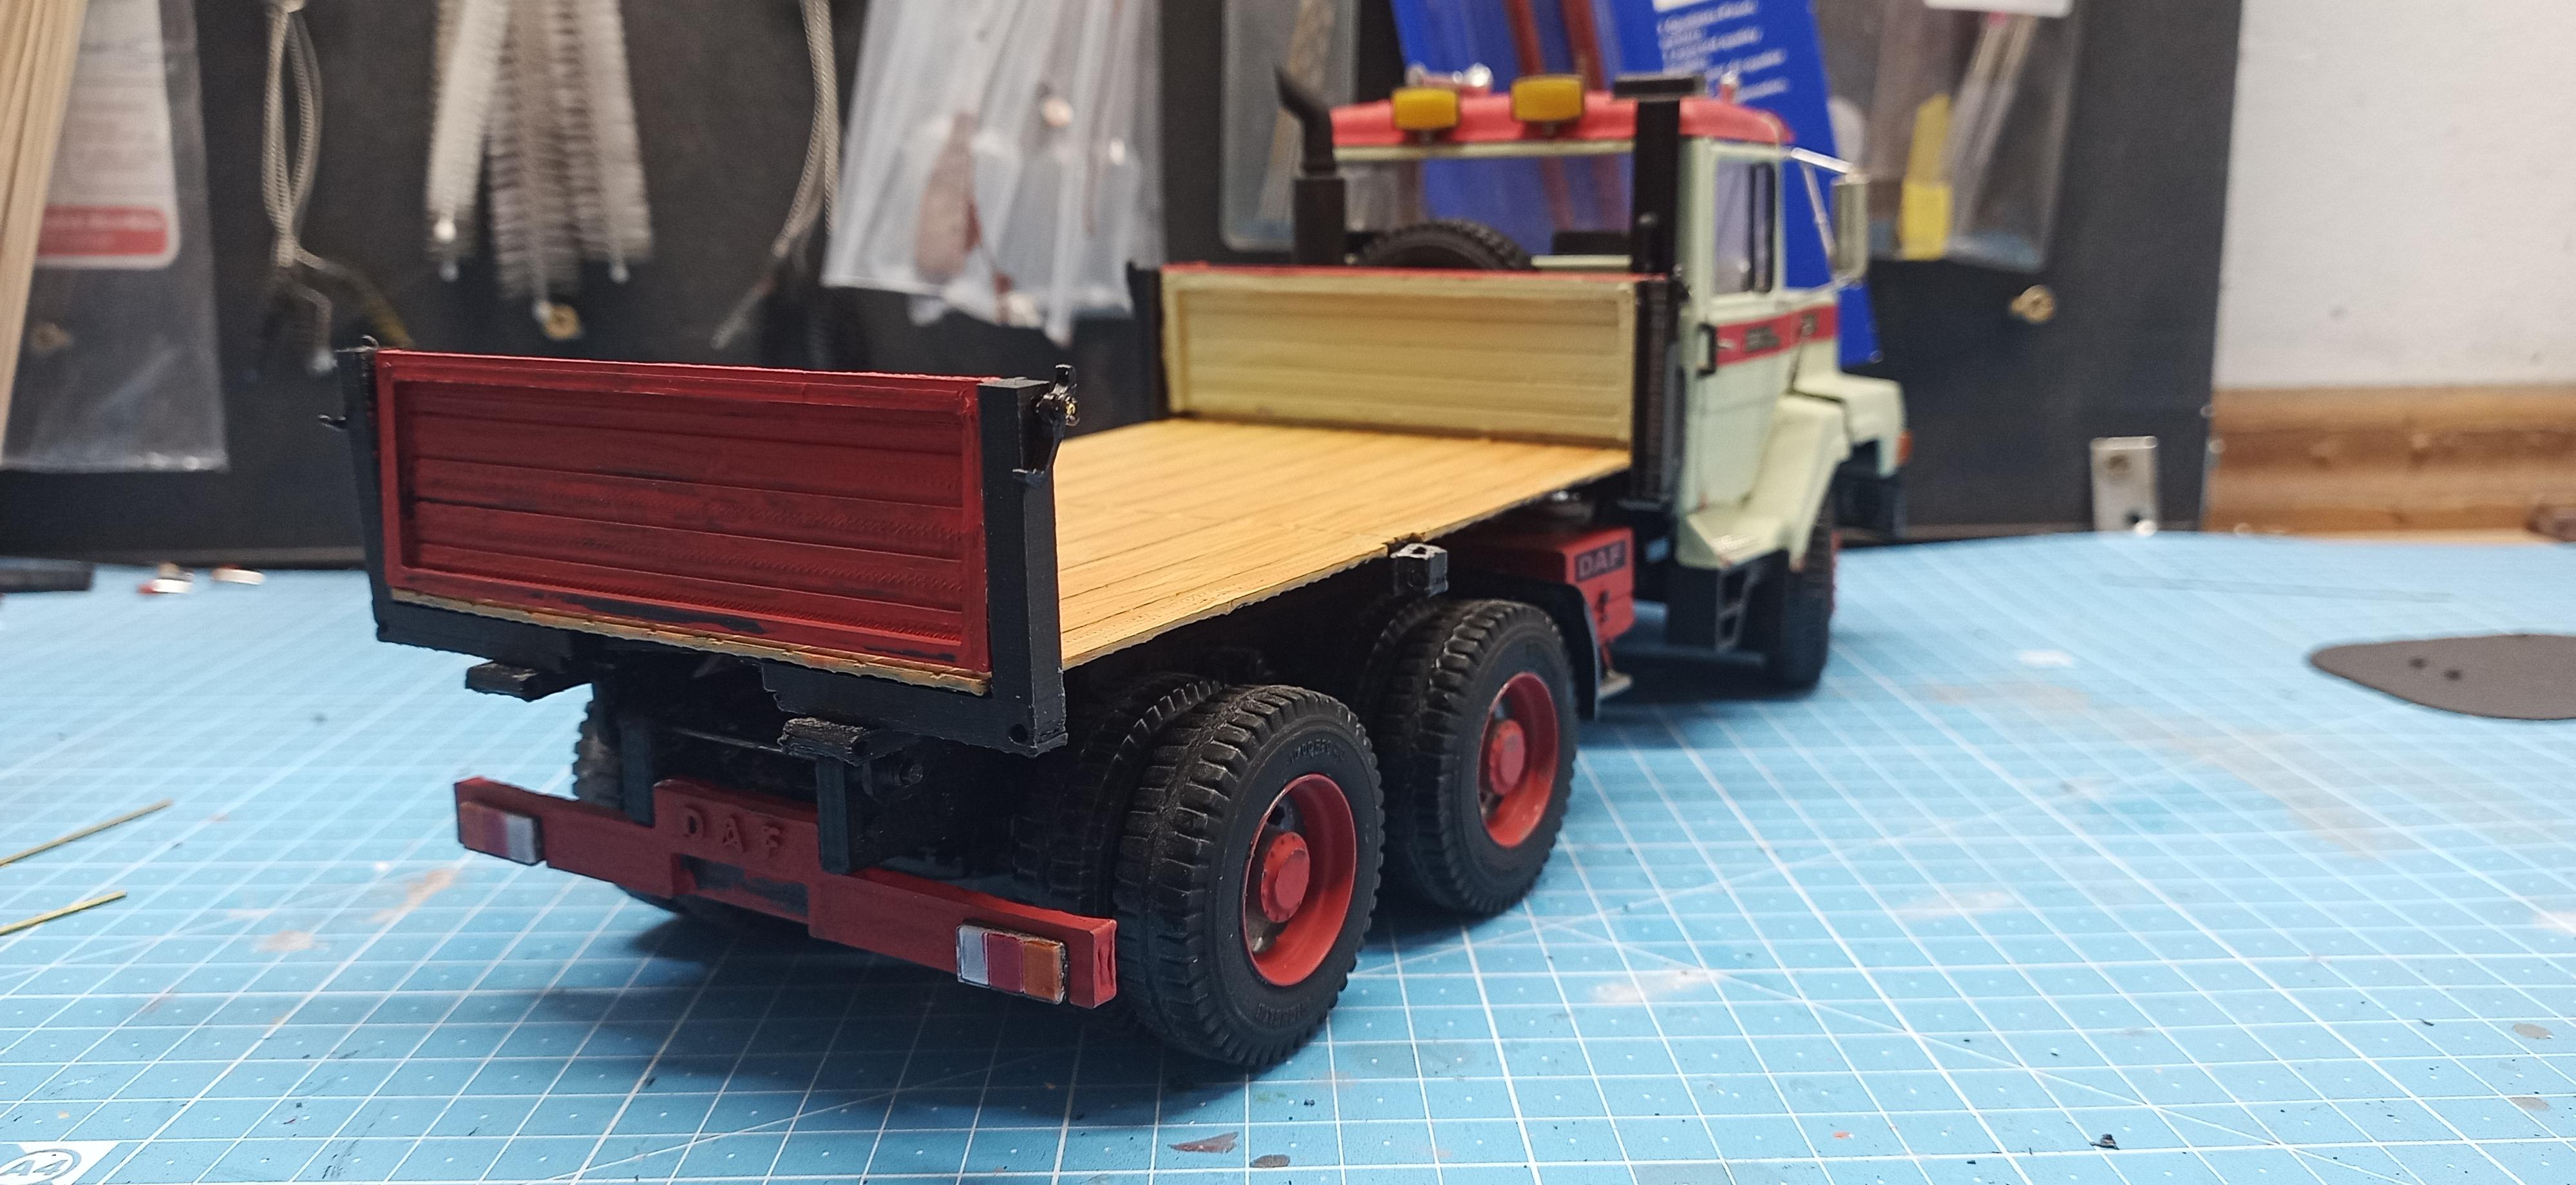
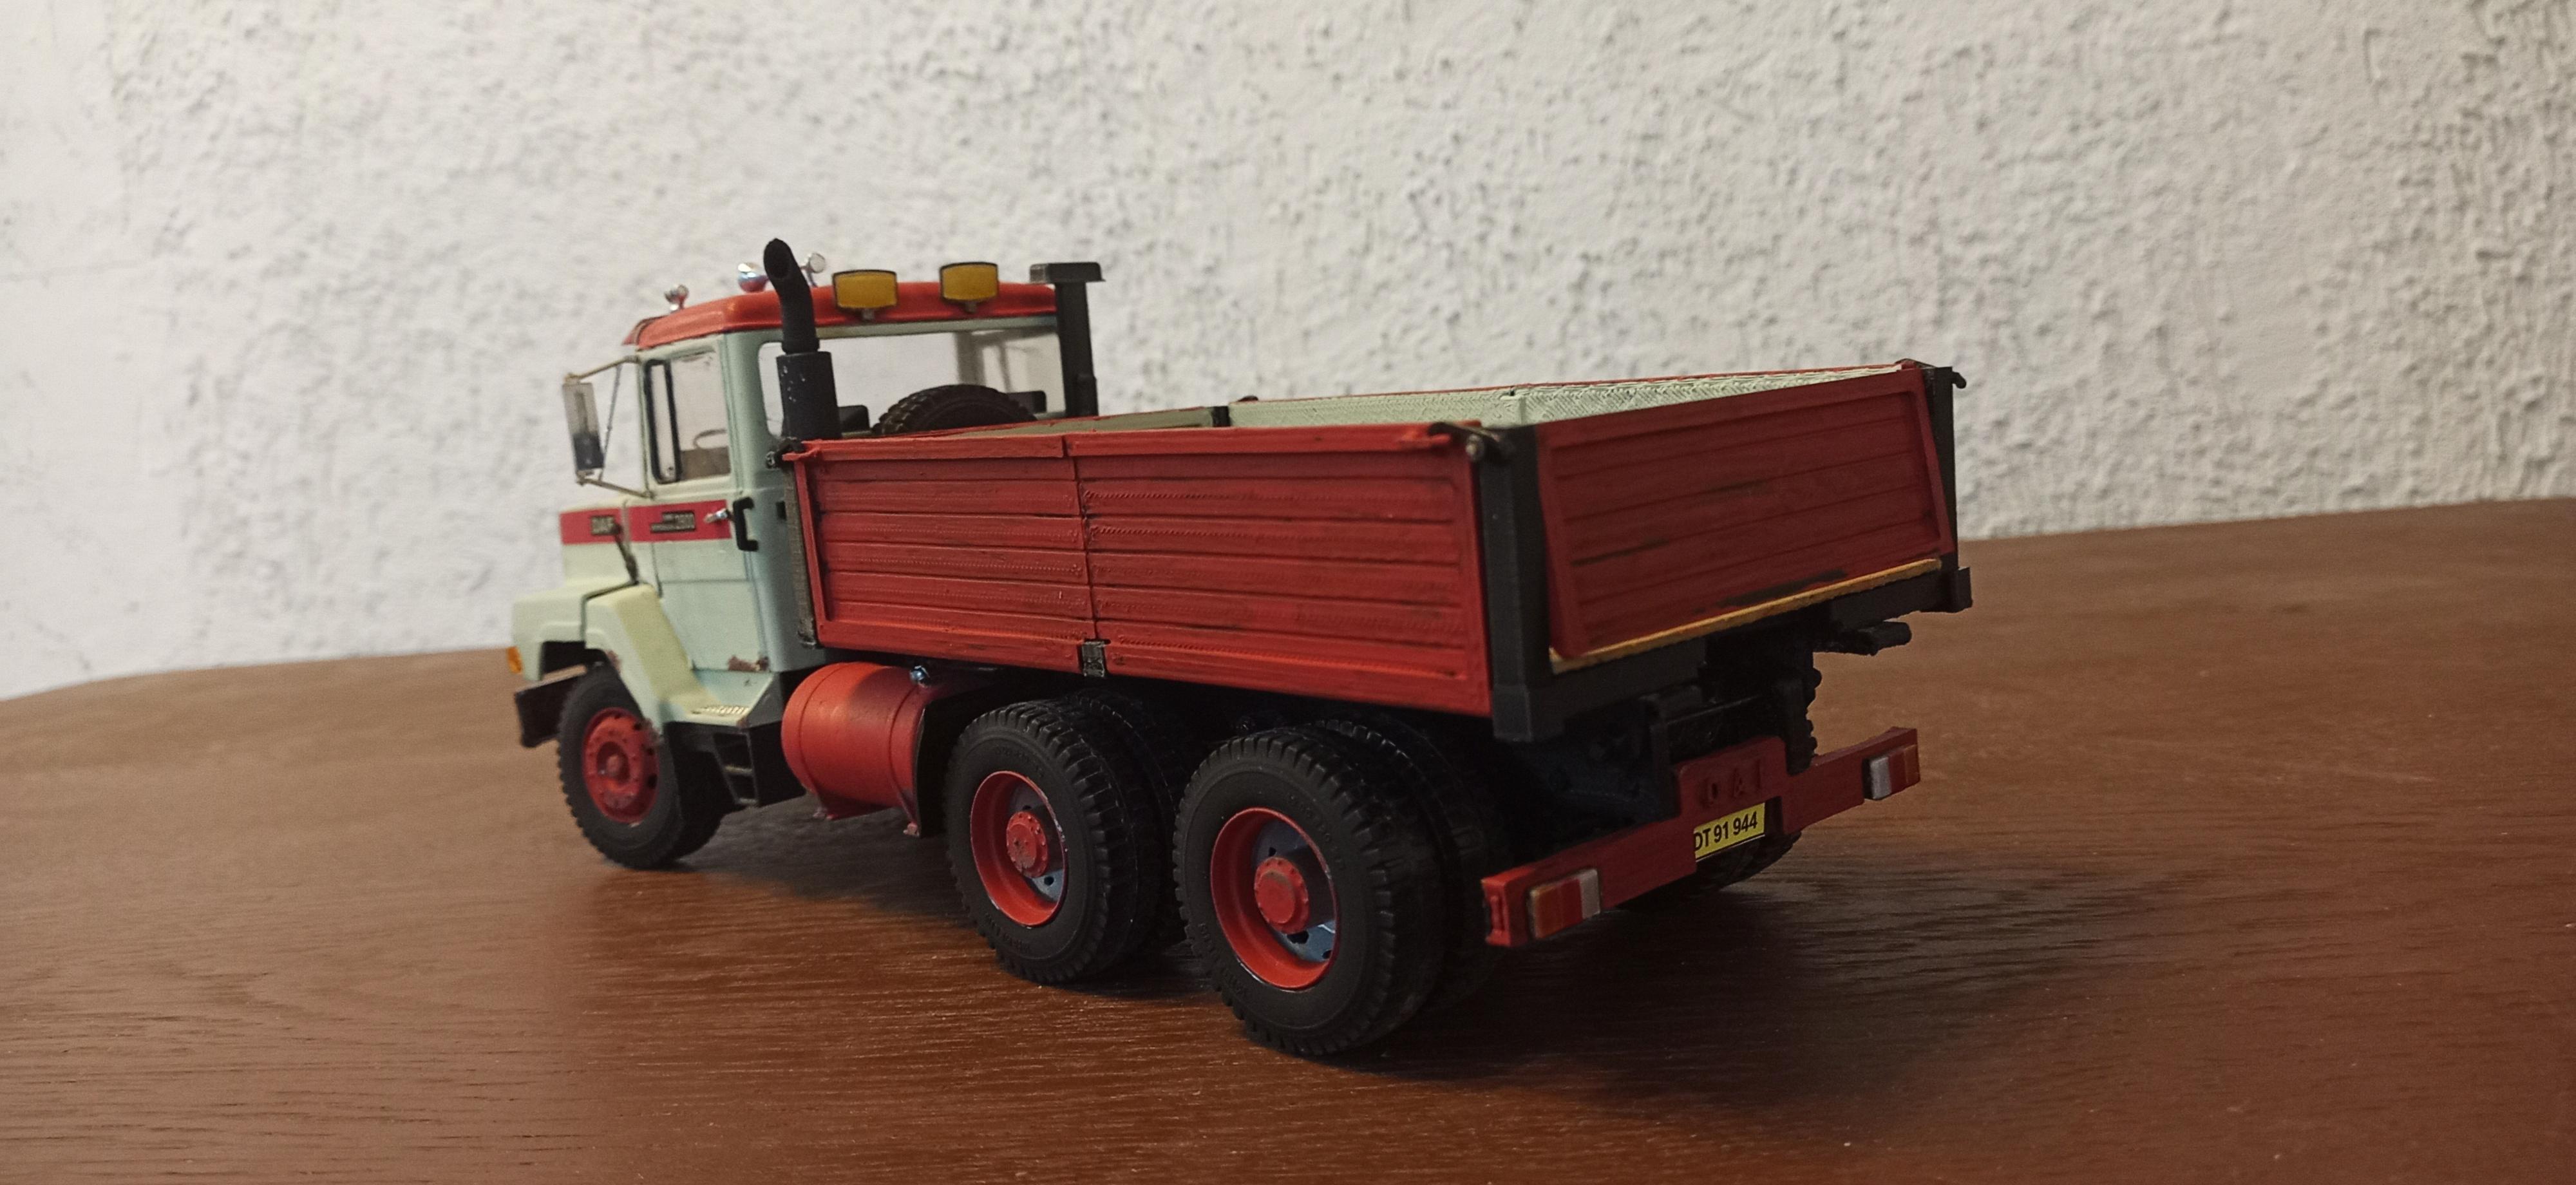
Wow! Thanks very much! You described my goal concerning this transformation very precisely! A hard working truck not receiving much love but still always there! That's why I didn't use clear coat on the flat colors! It's supposed to look worn but kept in shape enough to keep going! Maybe a trailer will follow after the IH is done!
-
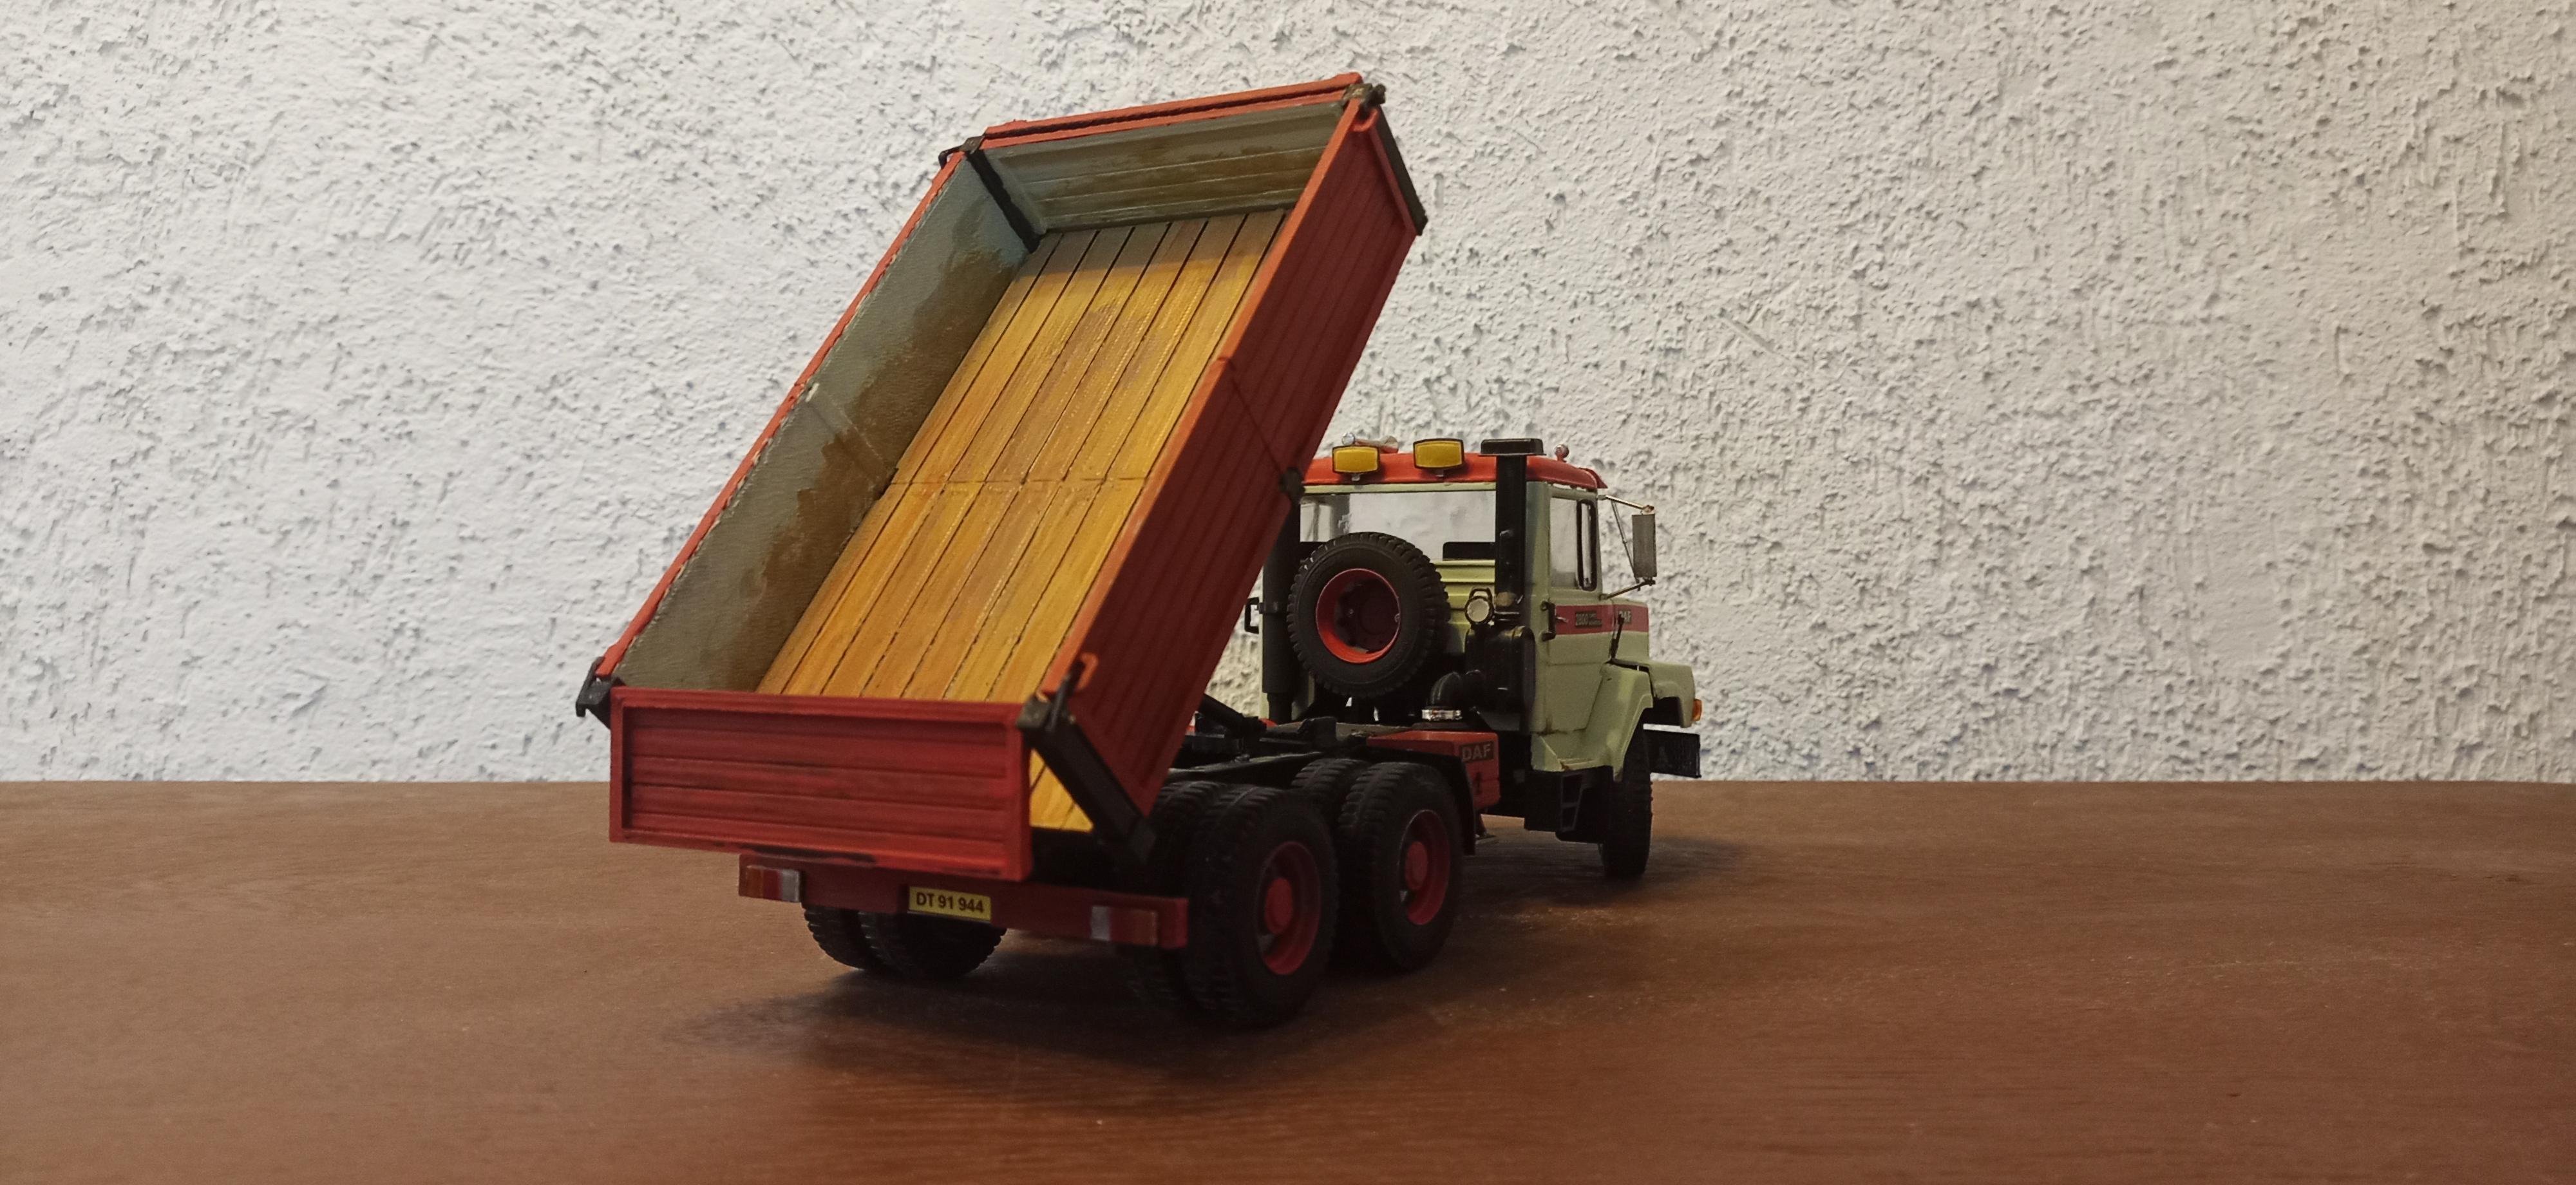
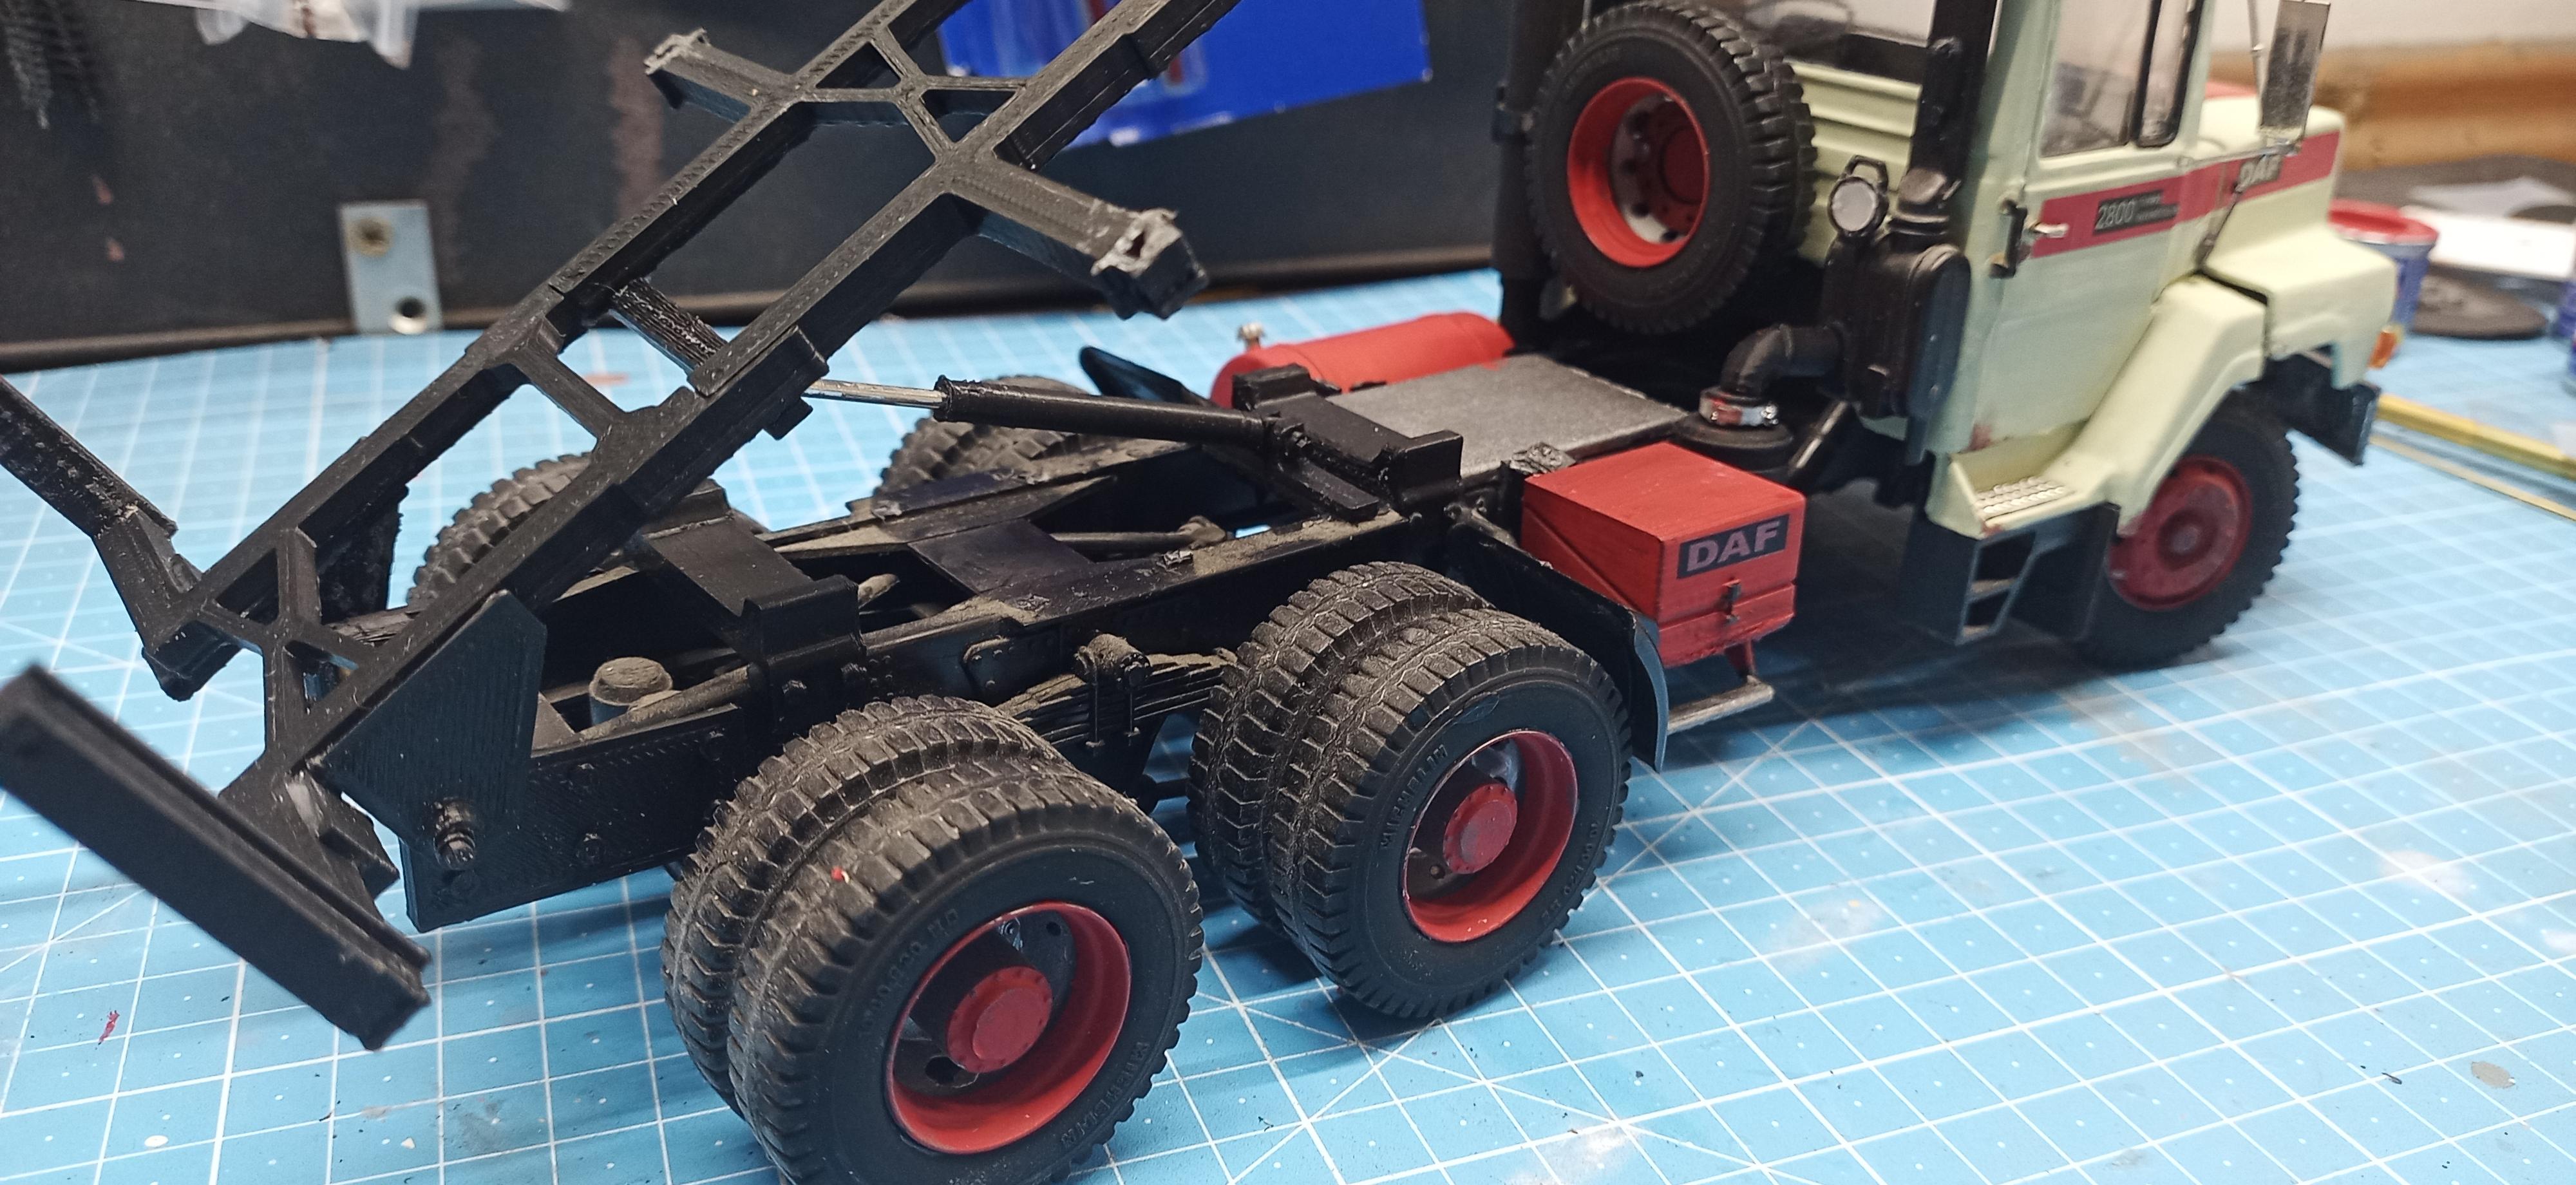
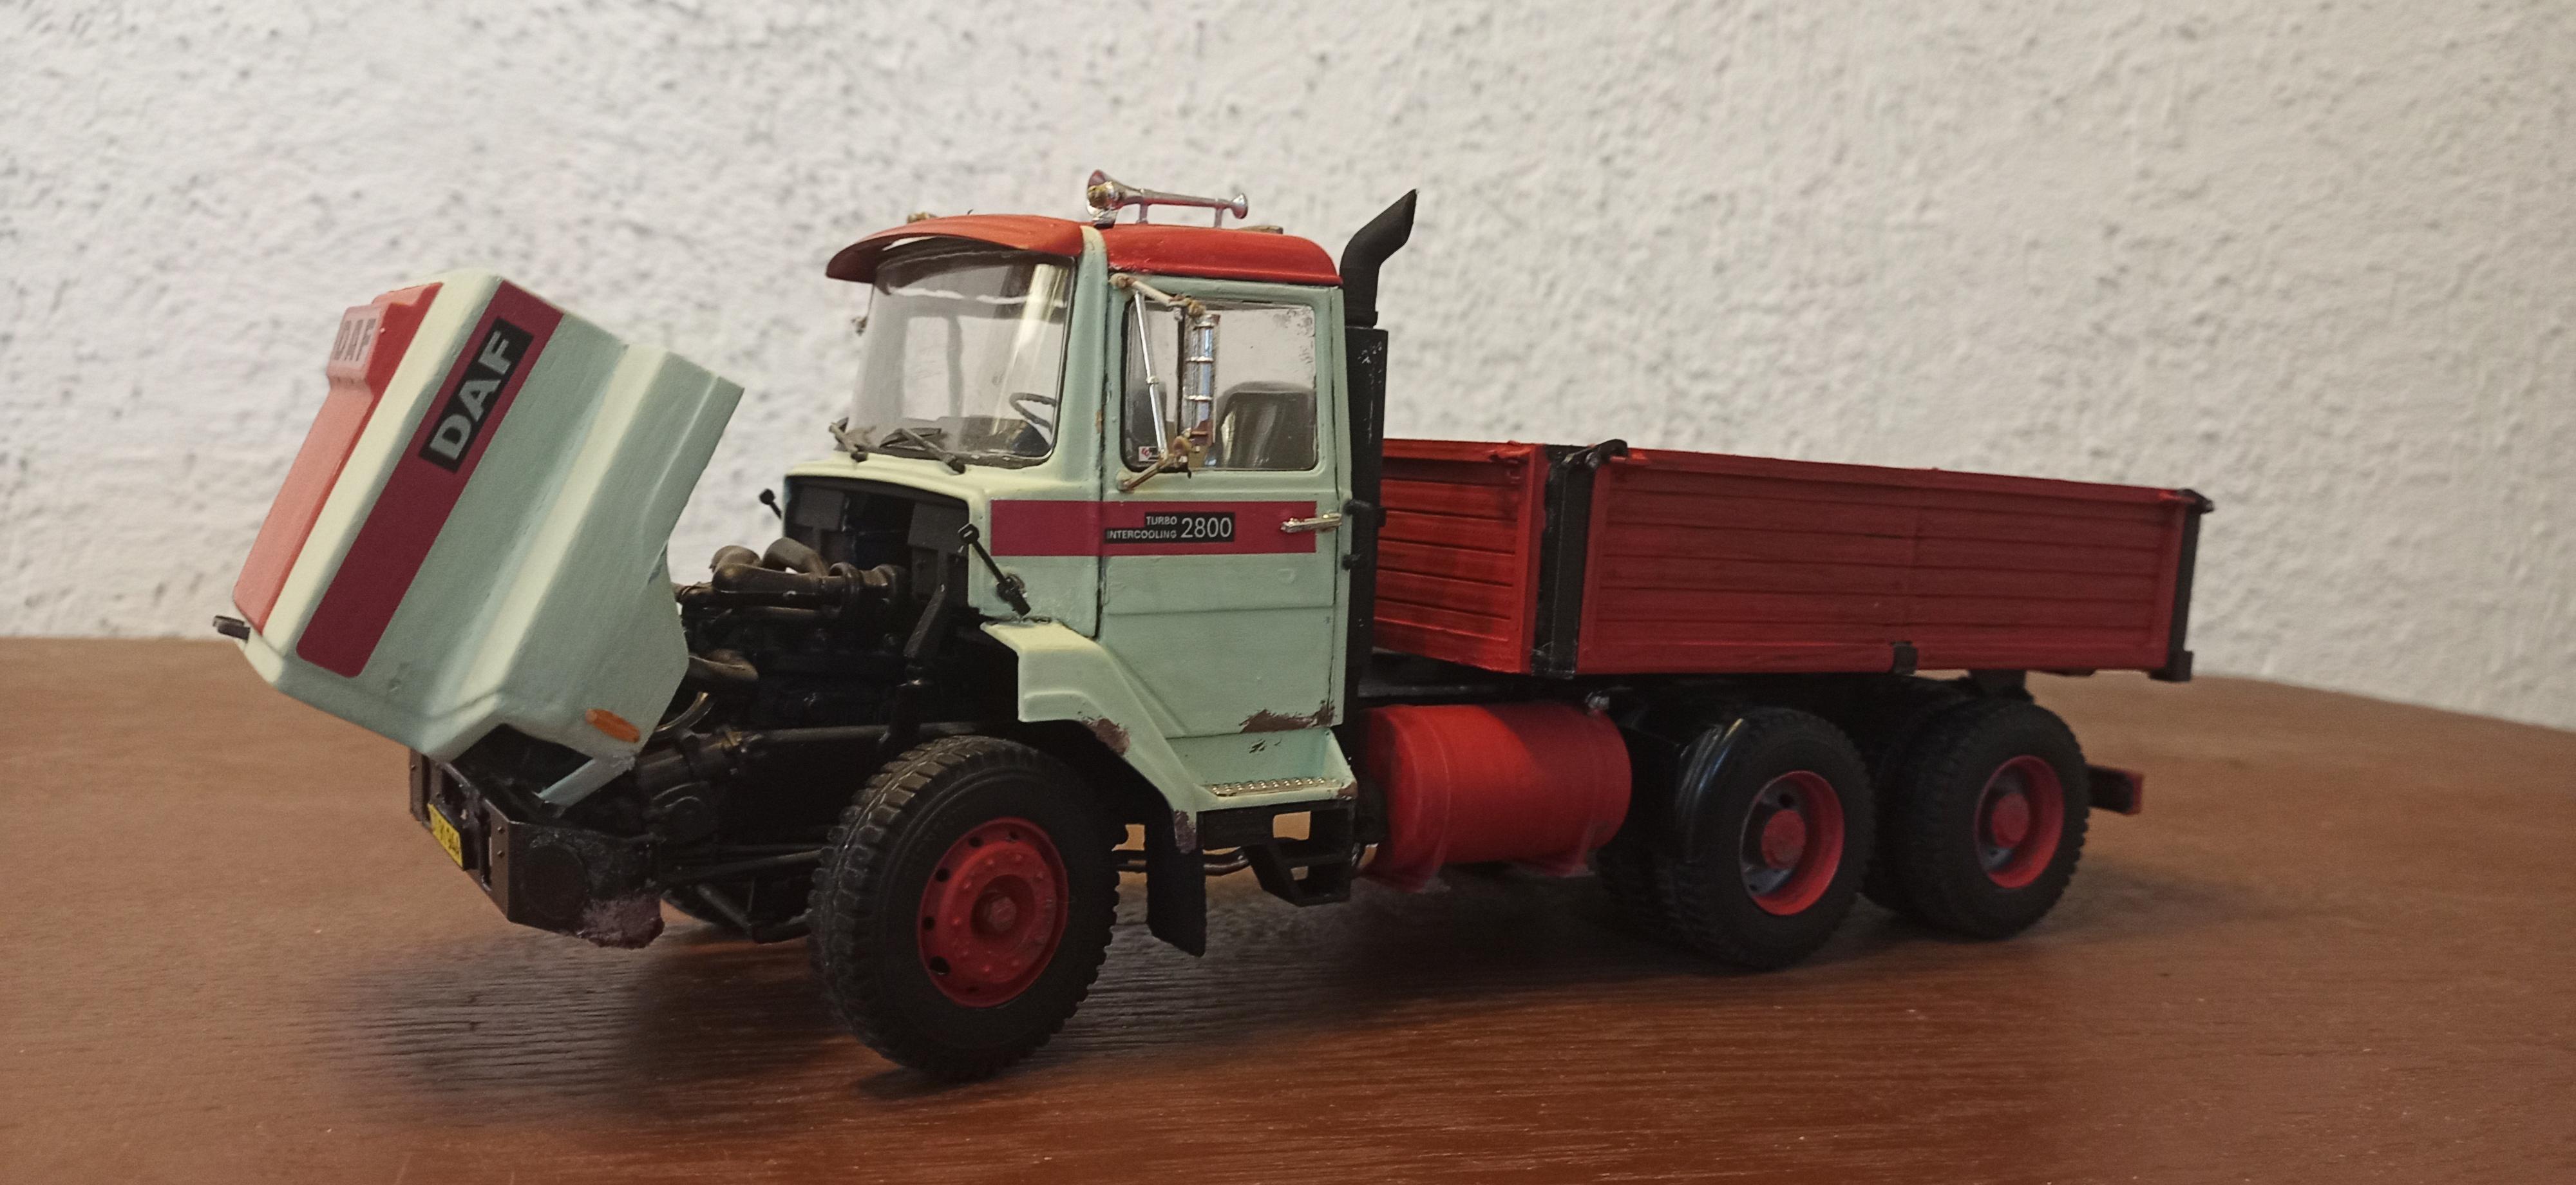
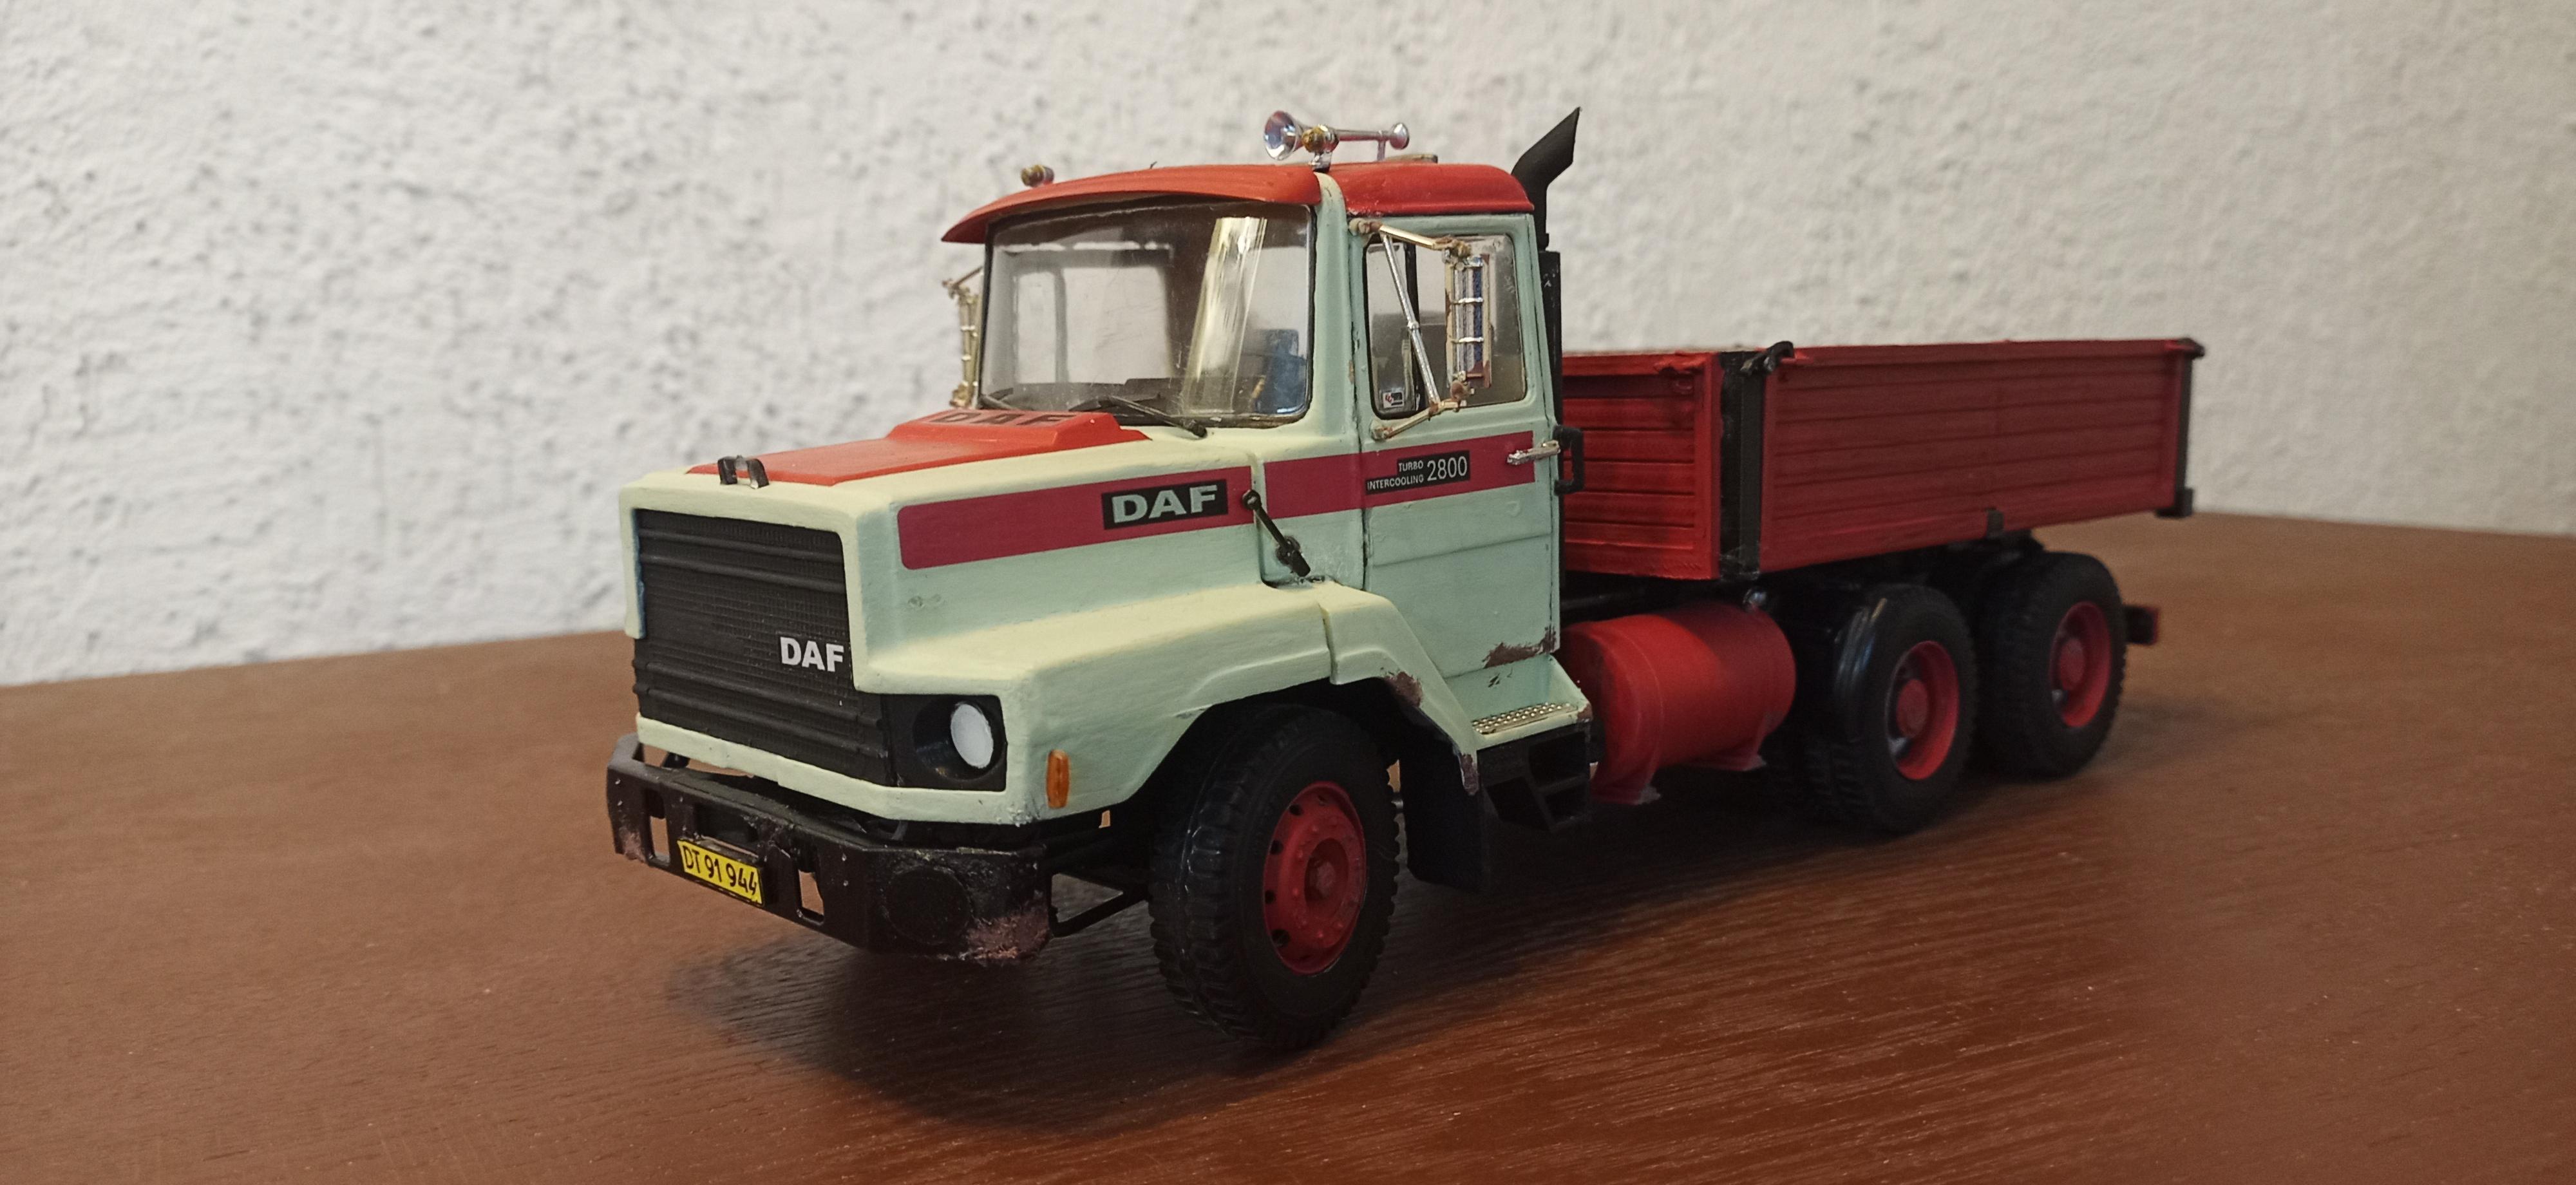
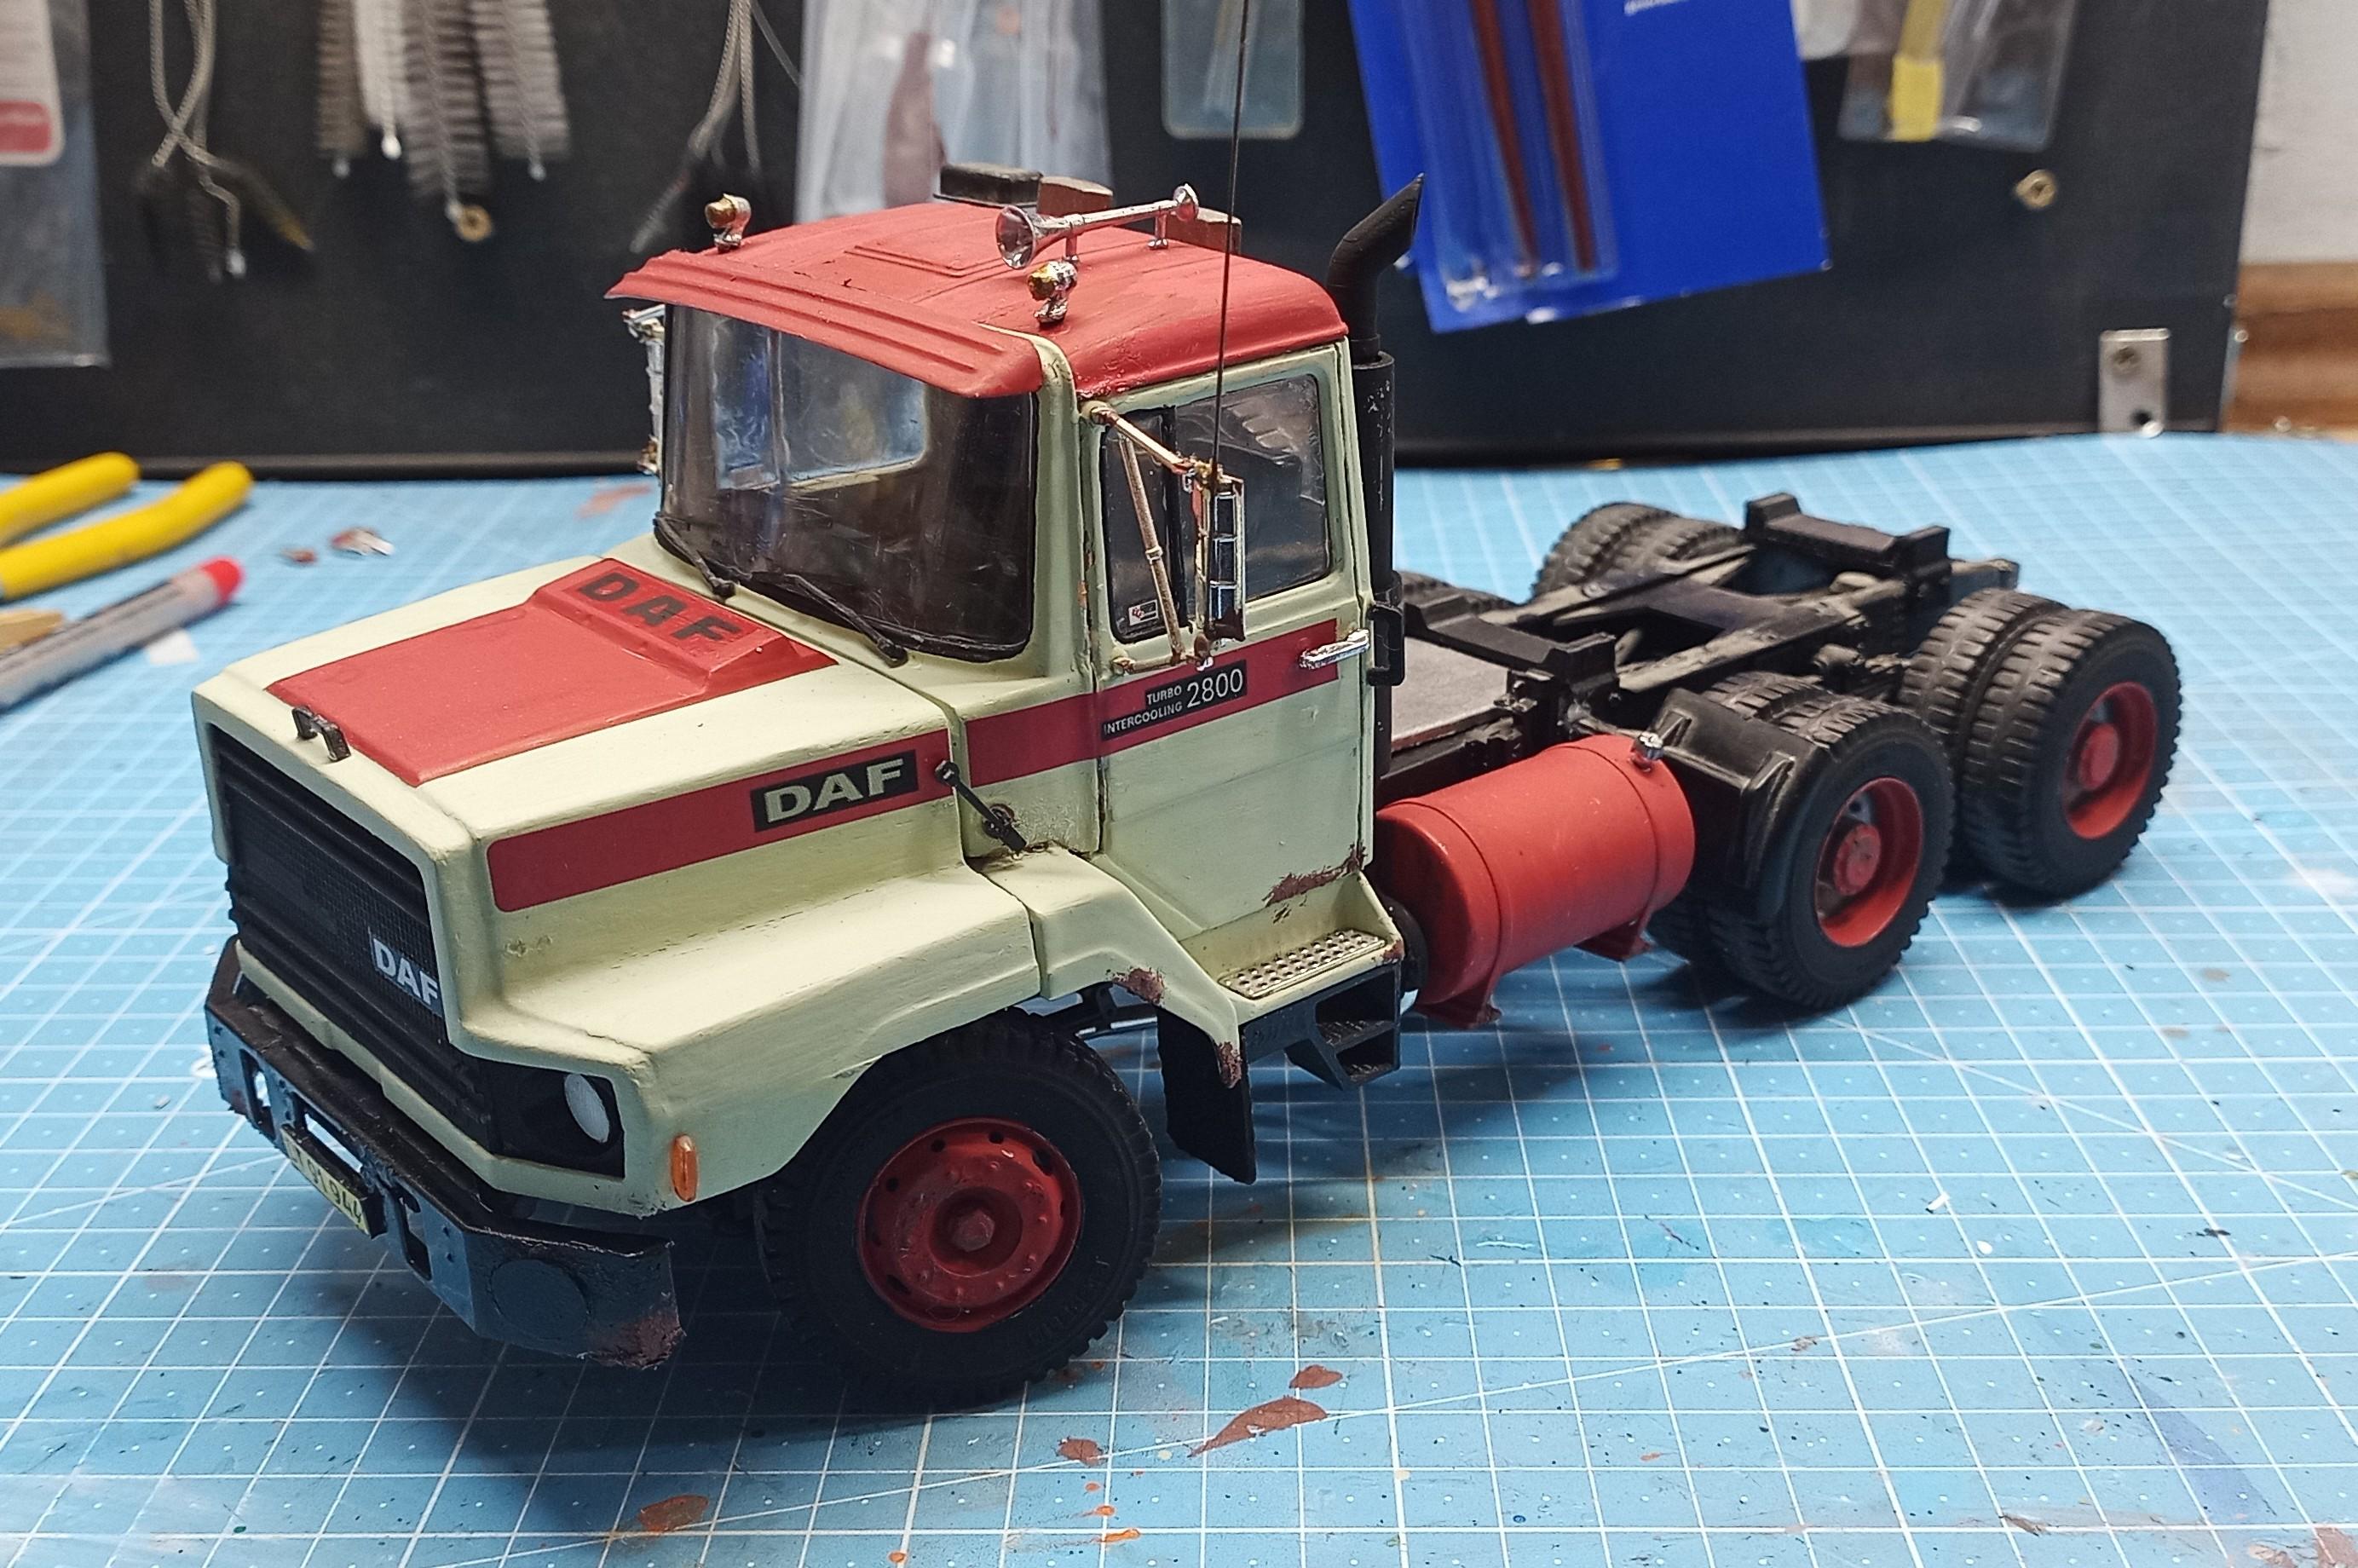
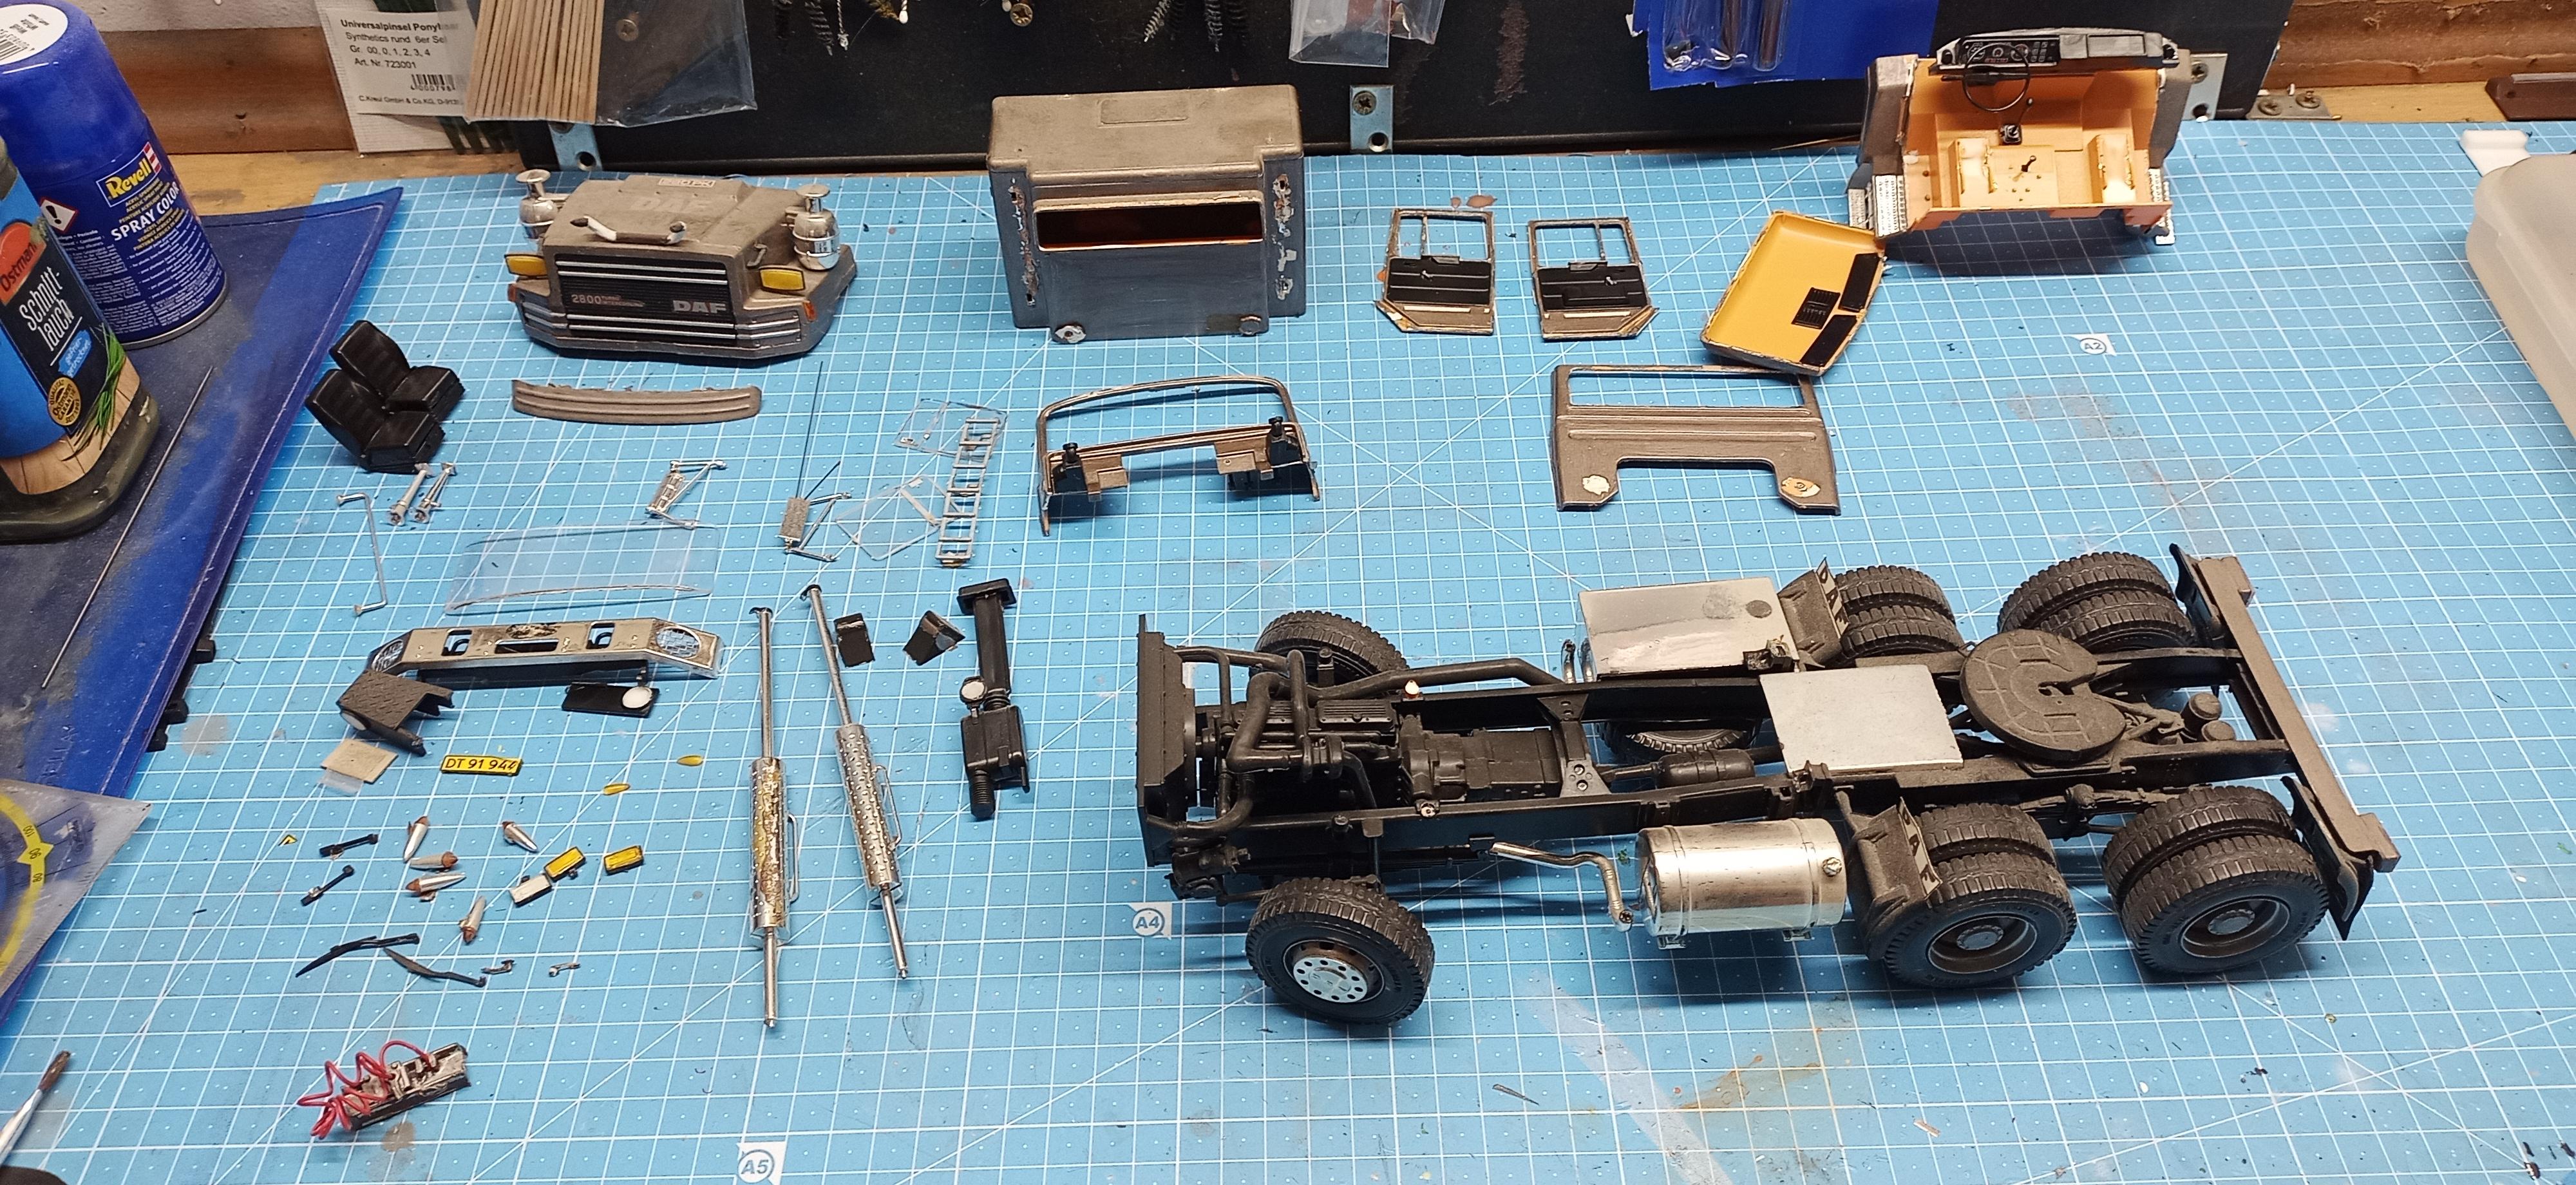
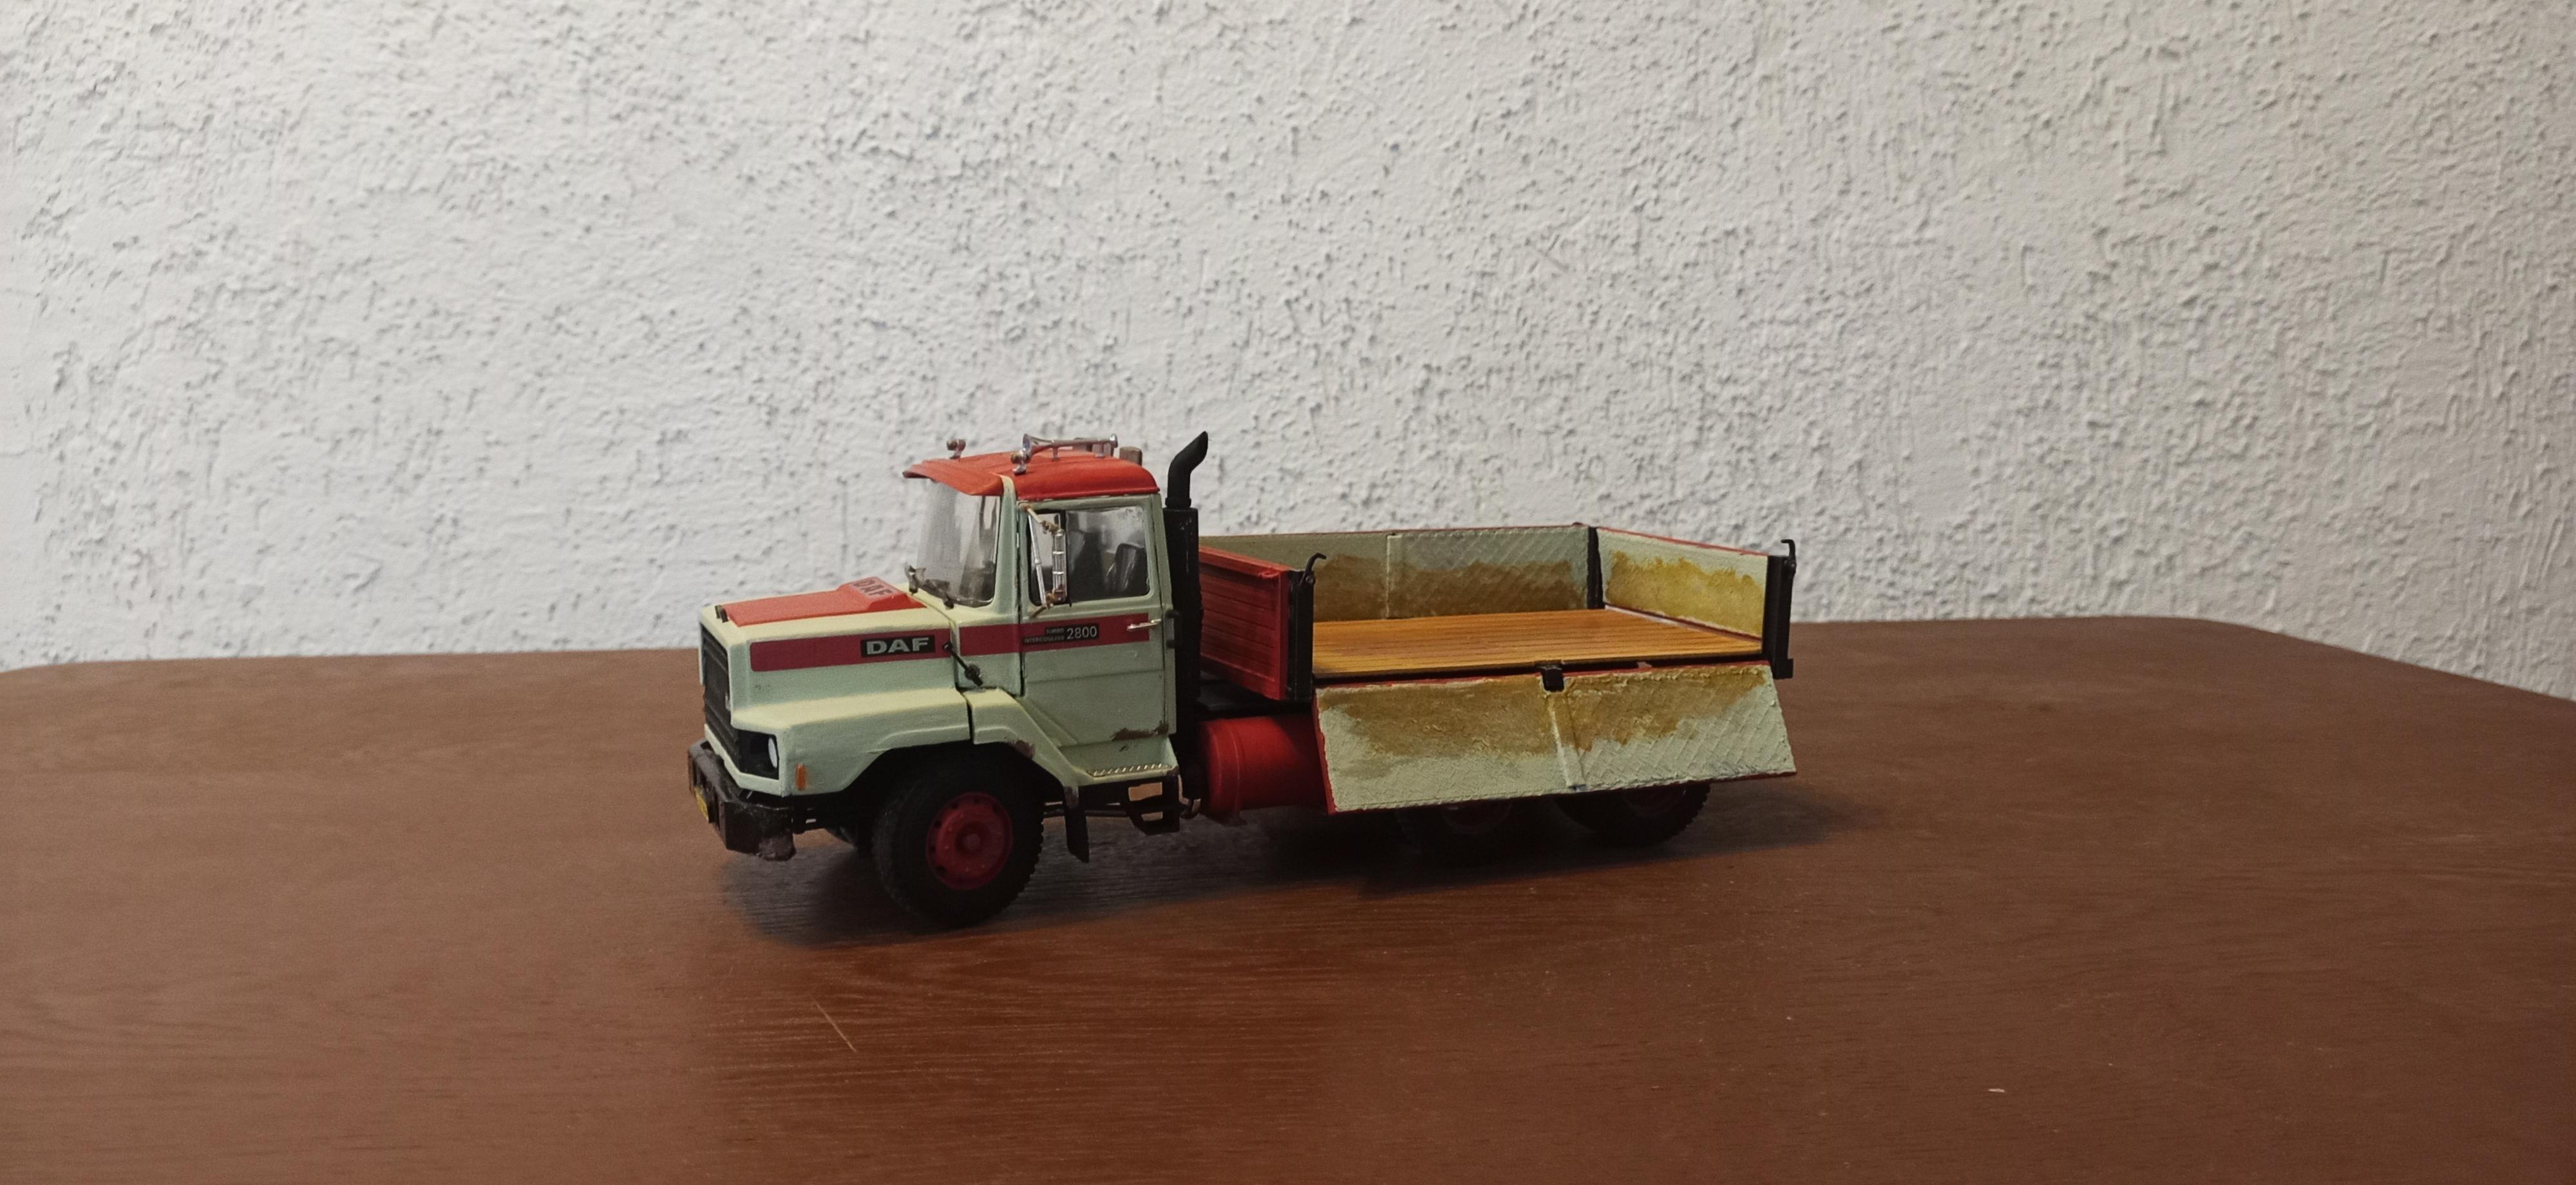
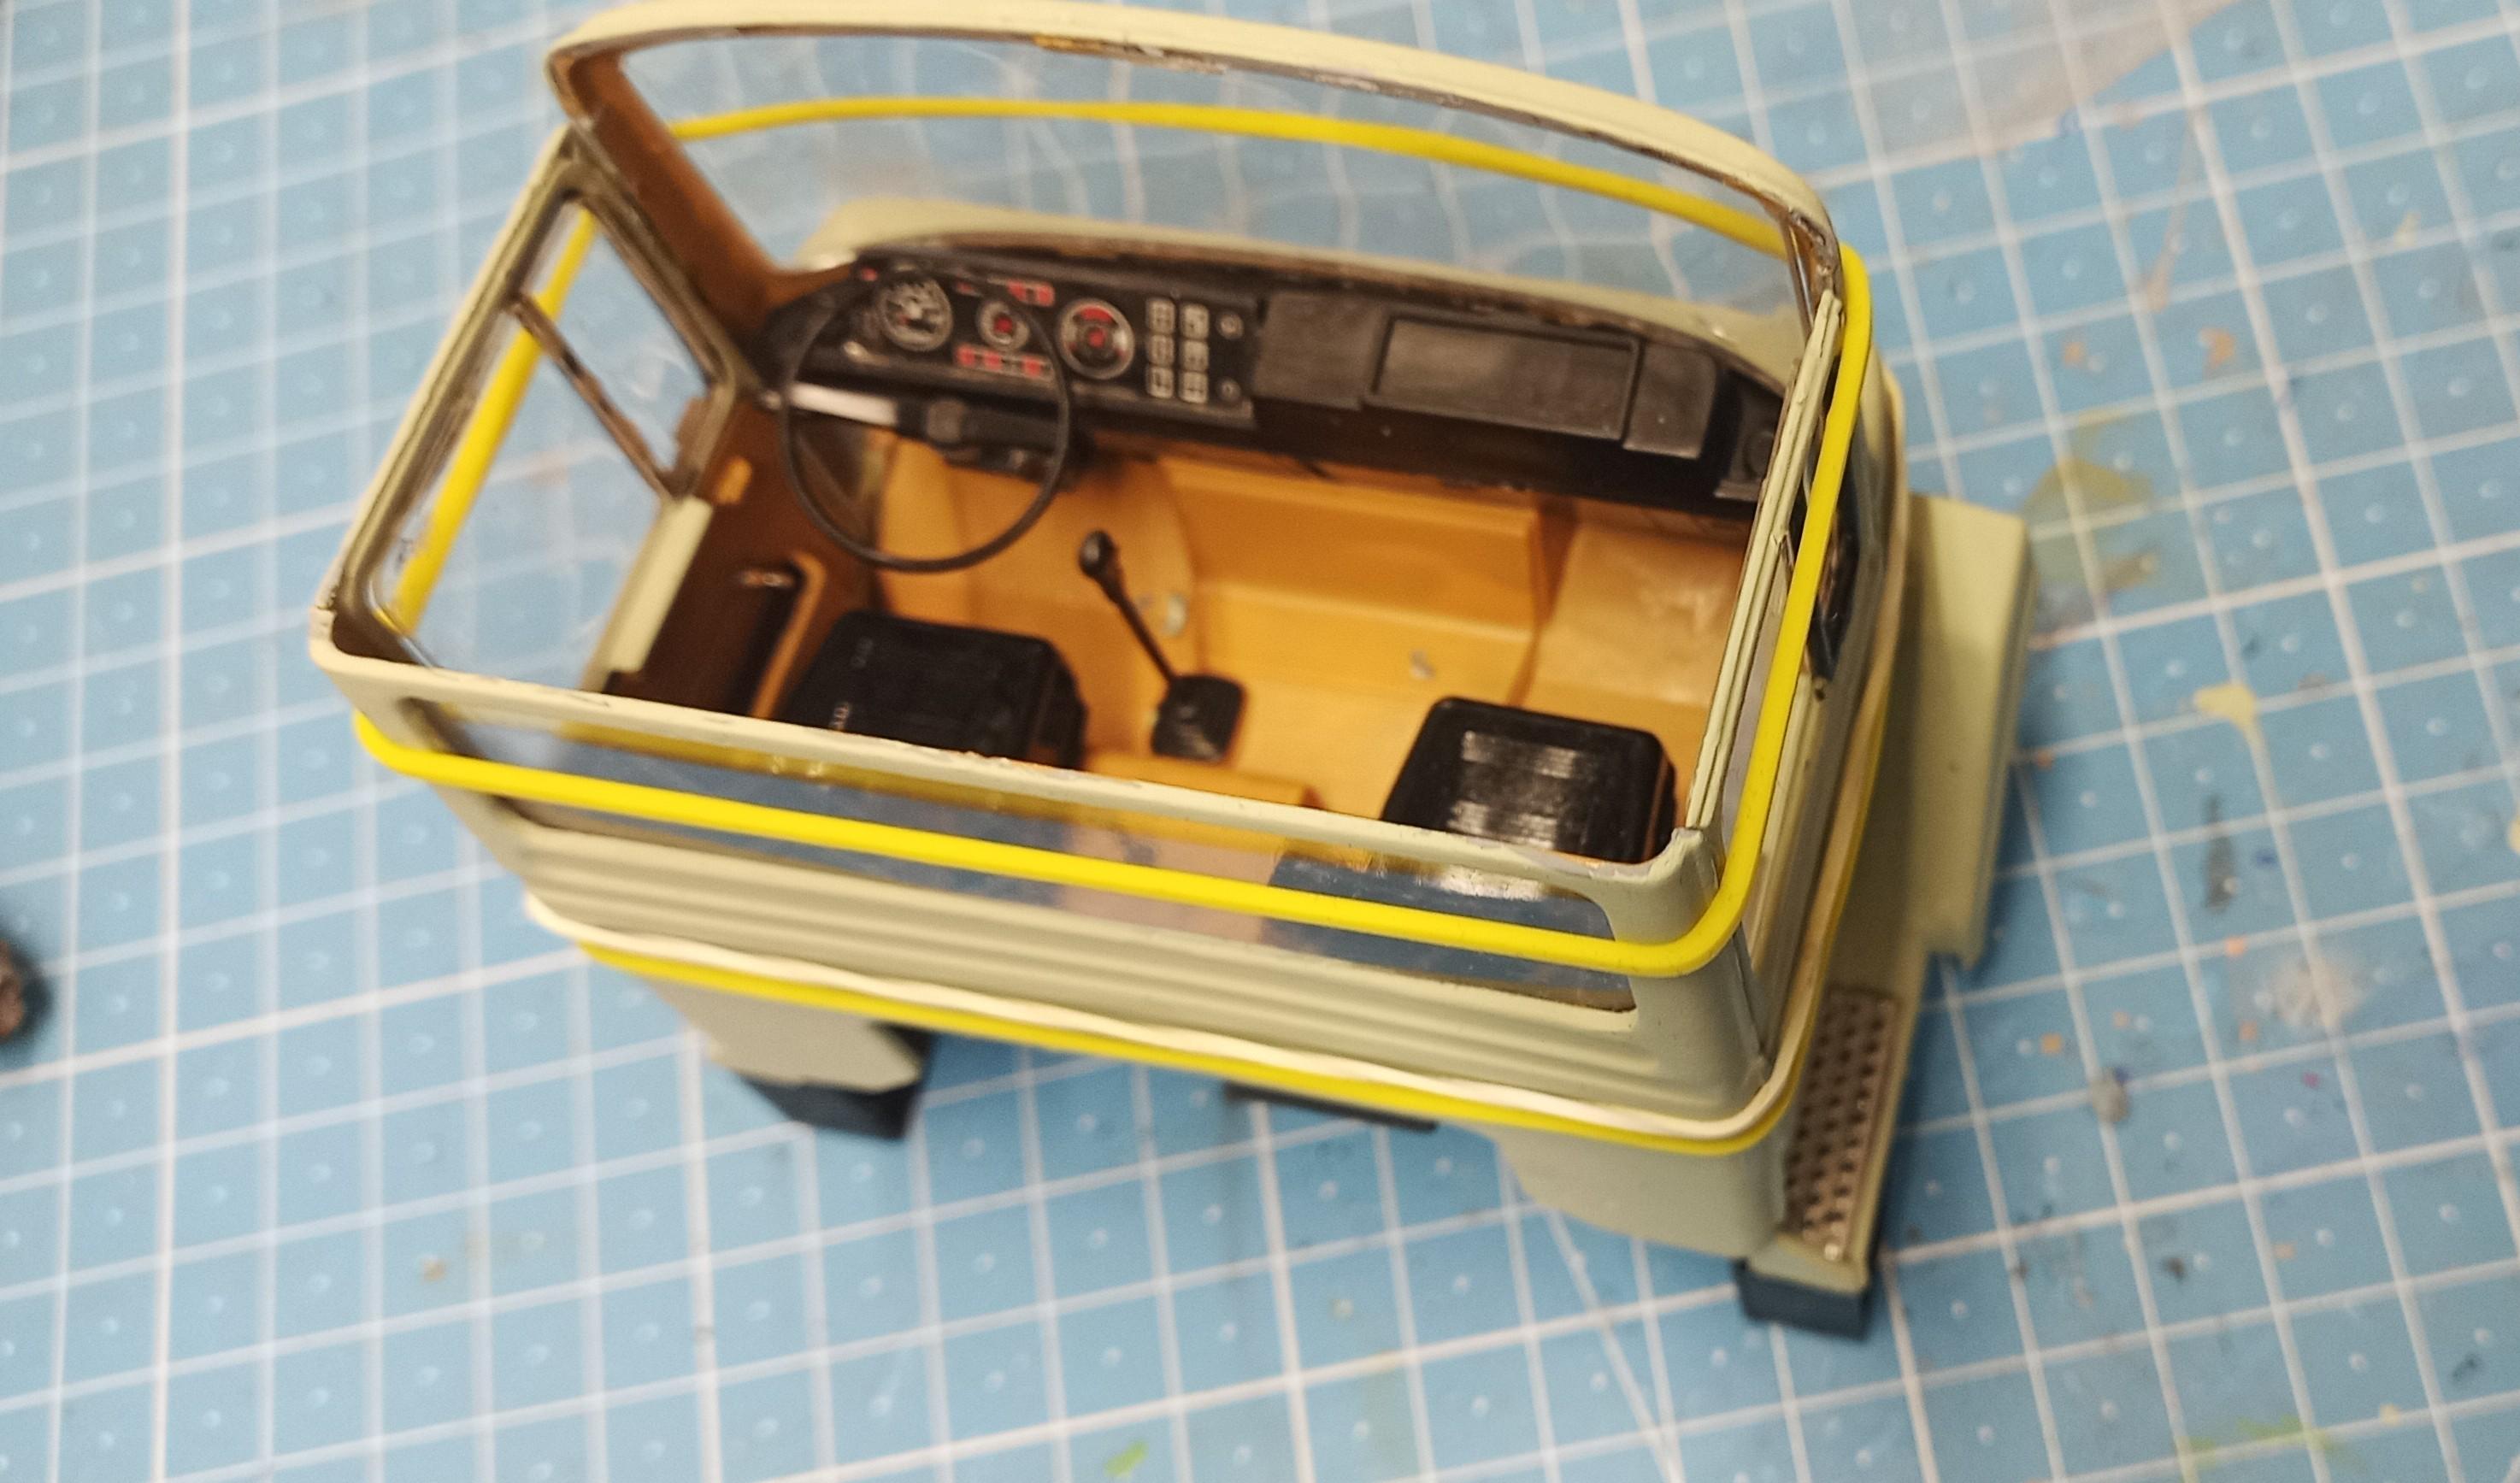
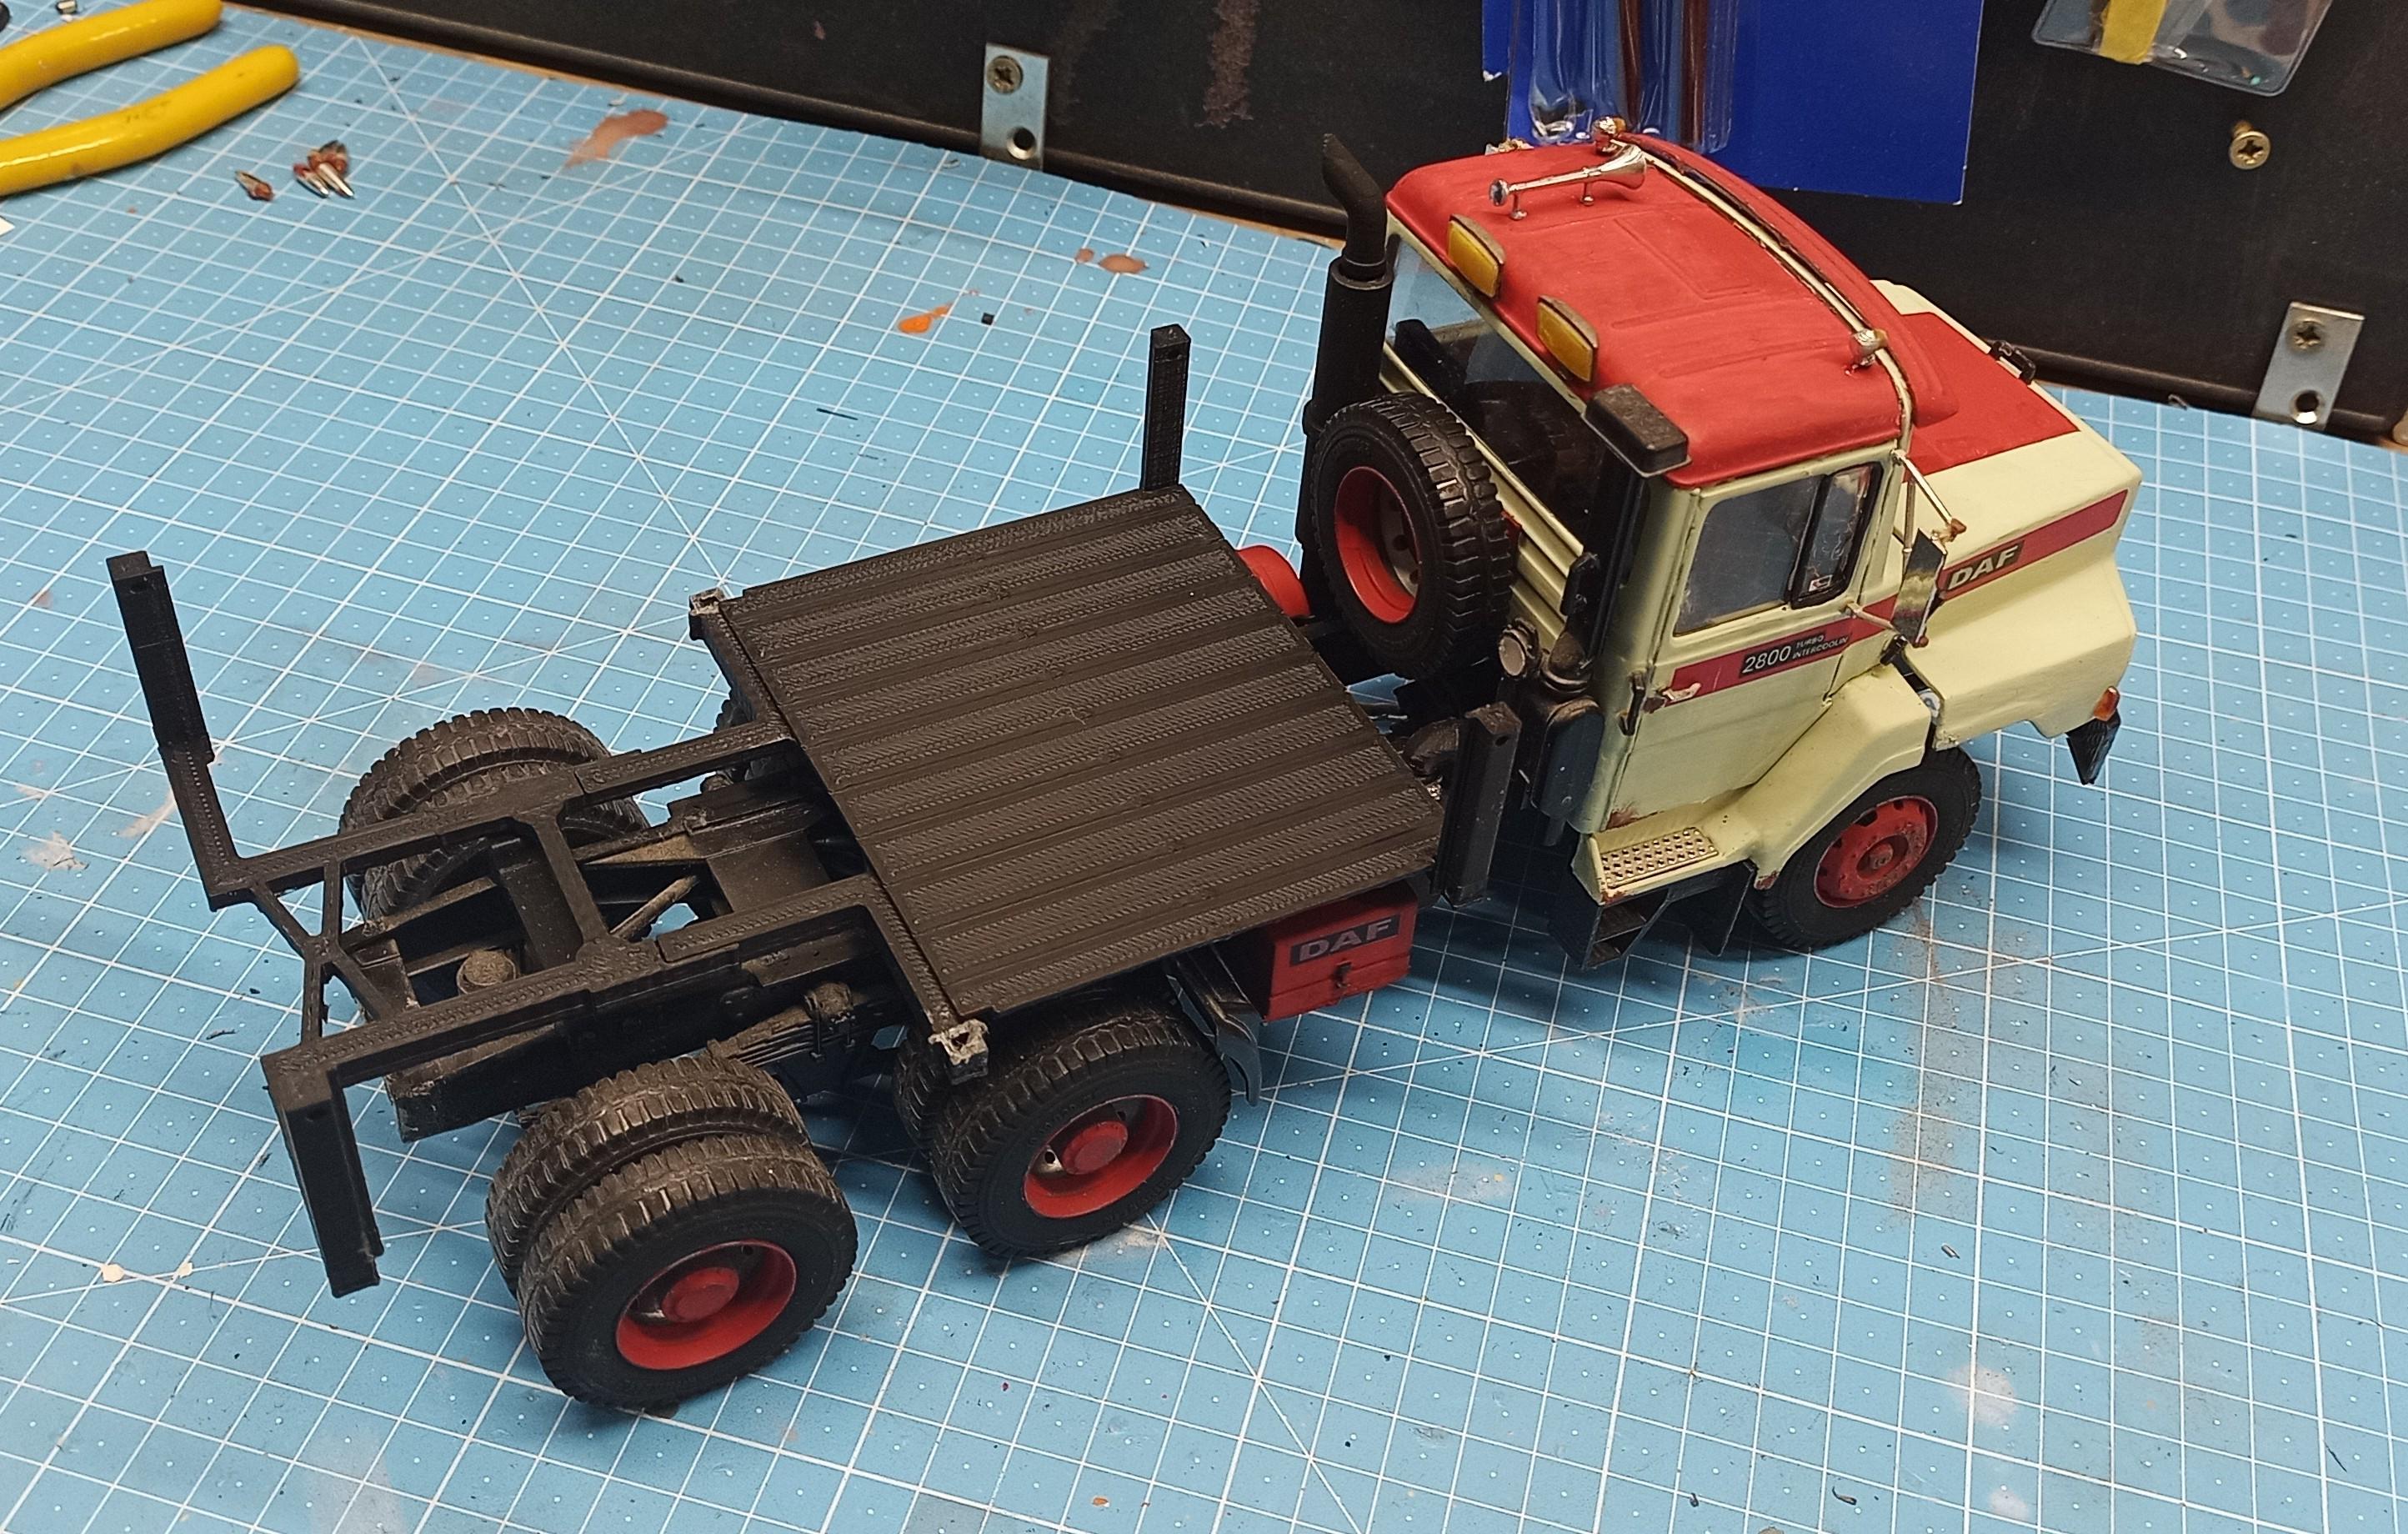
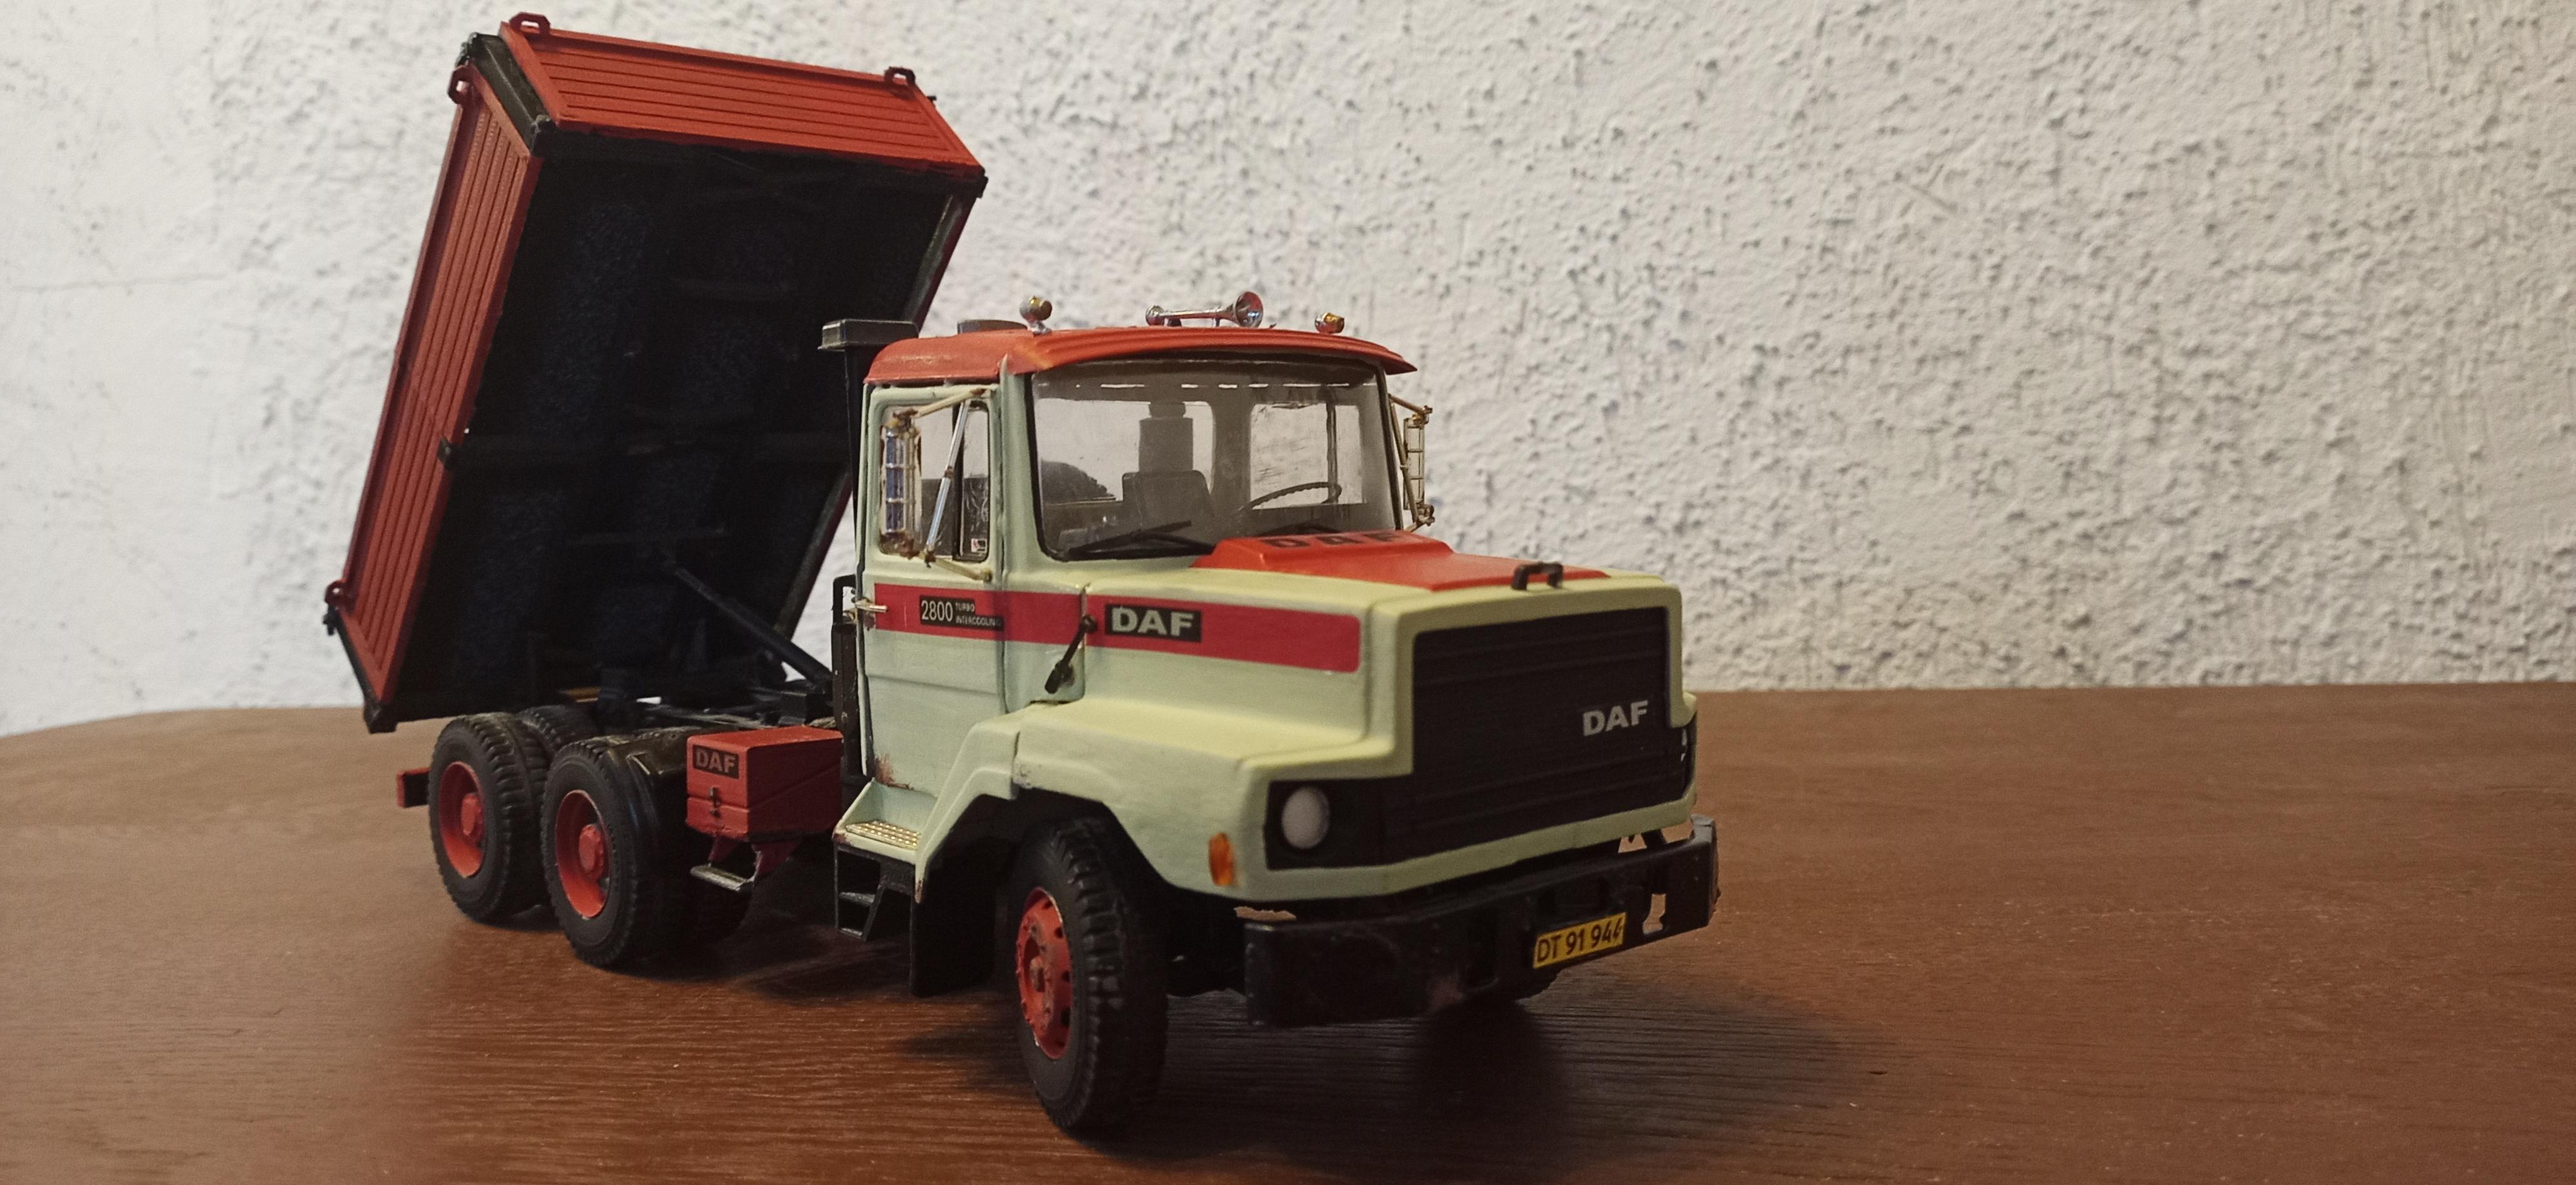
Hi Folks, as I announced in my WIP thread 'Convoy, take 7' I refurbished an old DAF 2800 NTT Cattleman while waiting for the cab of my CO4070b. I never really liked what I had made of that DAF kit so I used the time to turn it into something I like! This is it before: Knock down.... .... rebuild: Thanks for dropping by! Hope you like it!

-
1970 Ford C 600
Jürgen M. replied to Biggu's topic in WIP: Model Trucks: Big Rigs and Heavy Equipment
Looks great Jeff! That's going to be a really nice build! Haven't seen anyone build anything similar! Staying front row till it's finished! -
De-snapping
Jürgen M. replied to Rockford's topic in WIP: Model Trucks: Big Rigs and Heavy Equipment
Wow, Steve! That's awesome! Those rims look excelent, they make a real truck out of that snap kit! Amazing how you manage to 'mature' those kits to make them look authentic! It's really fun watching! -
Convoy, take 7
Jürgen M. replied to Jürgen M.'s topic in WIP: Model Trucks: Big Rigs and Heavy Equipment
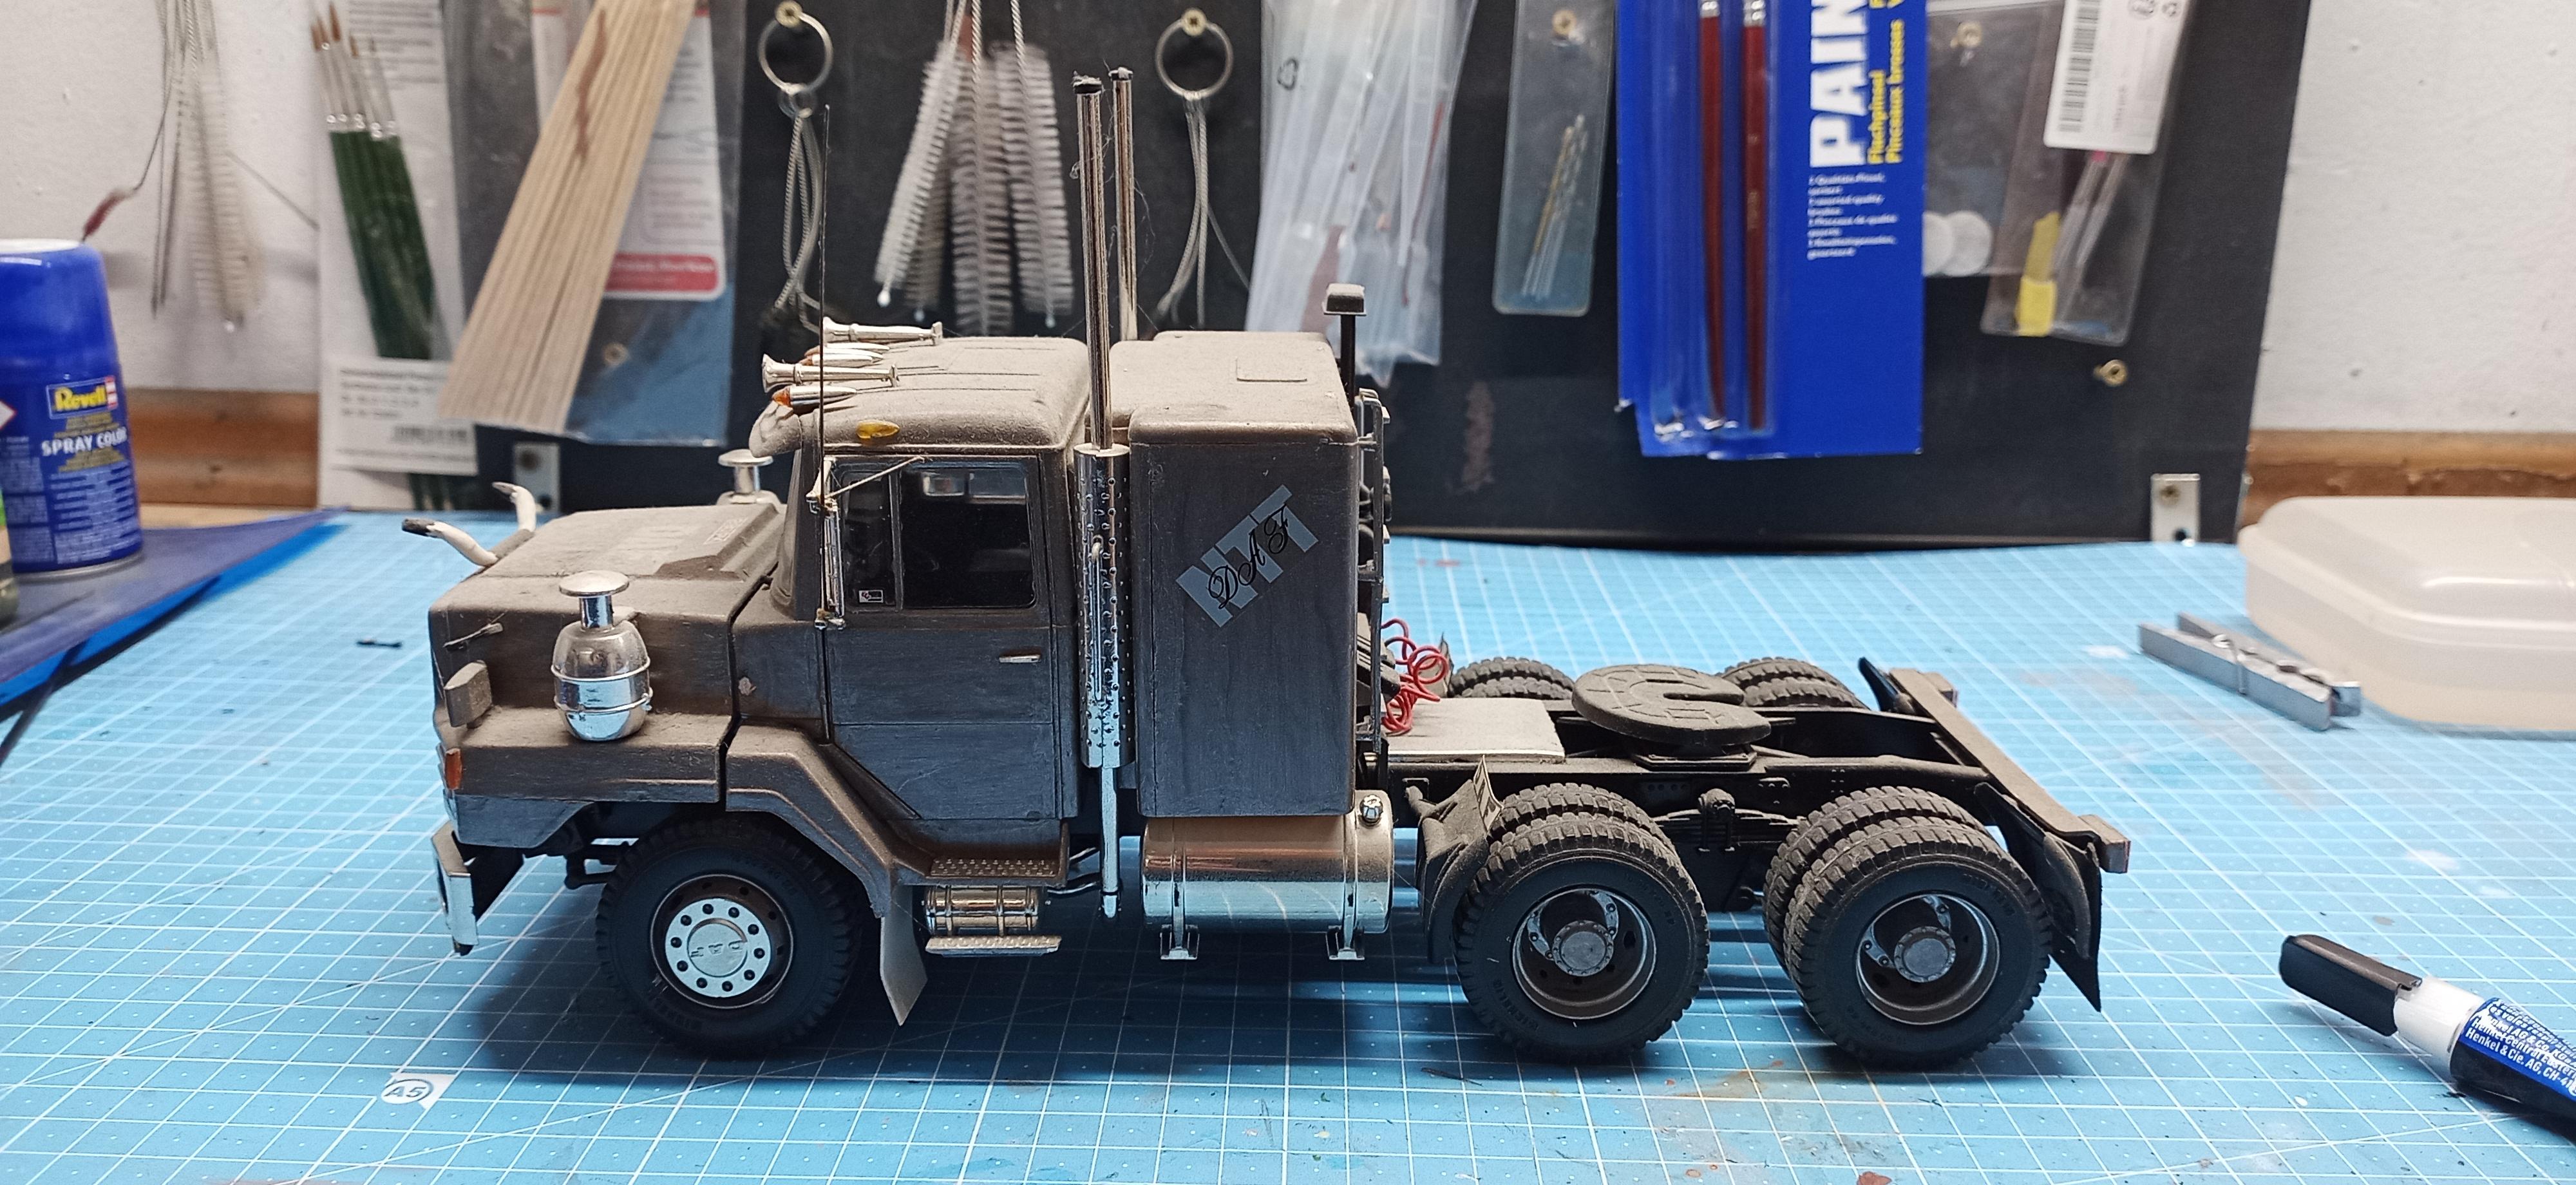
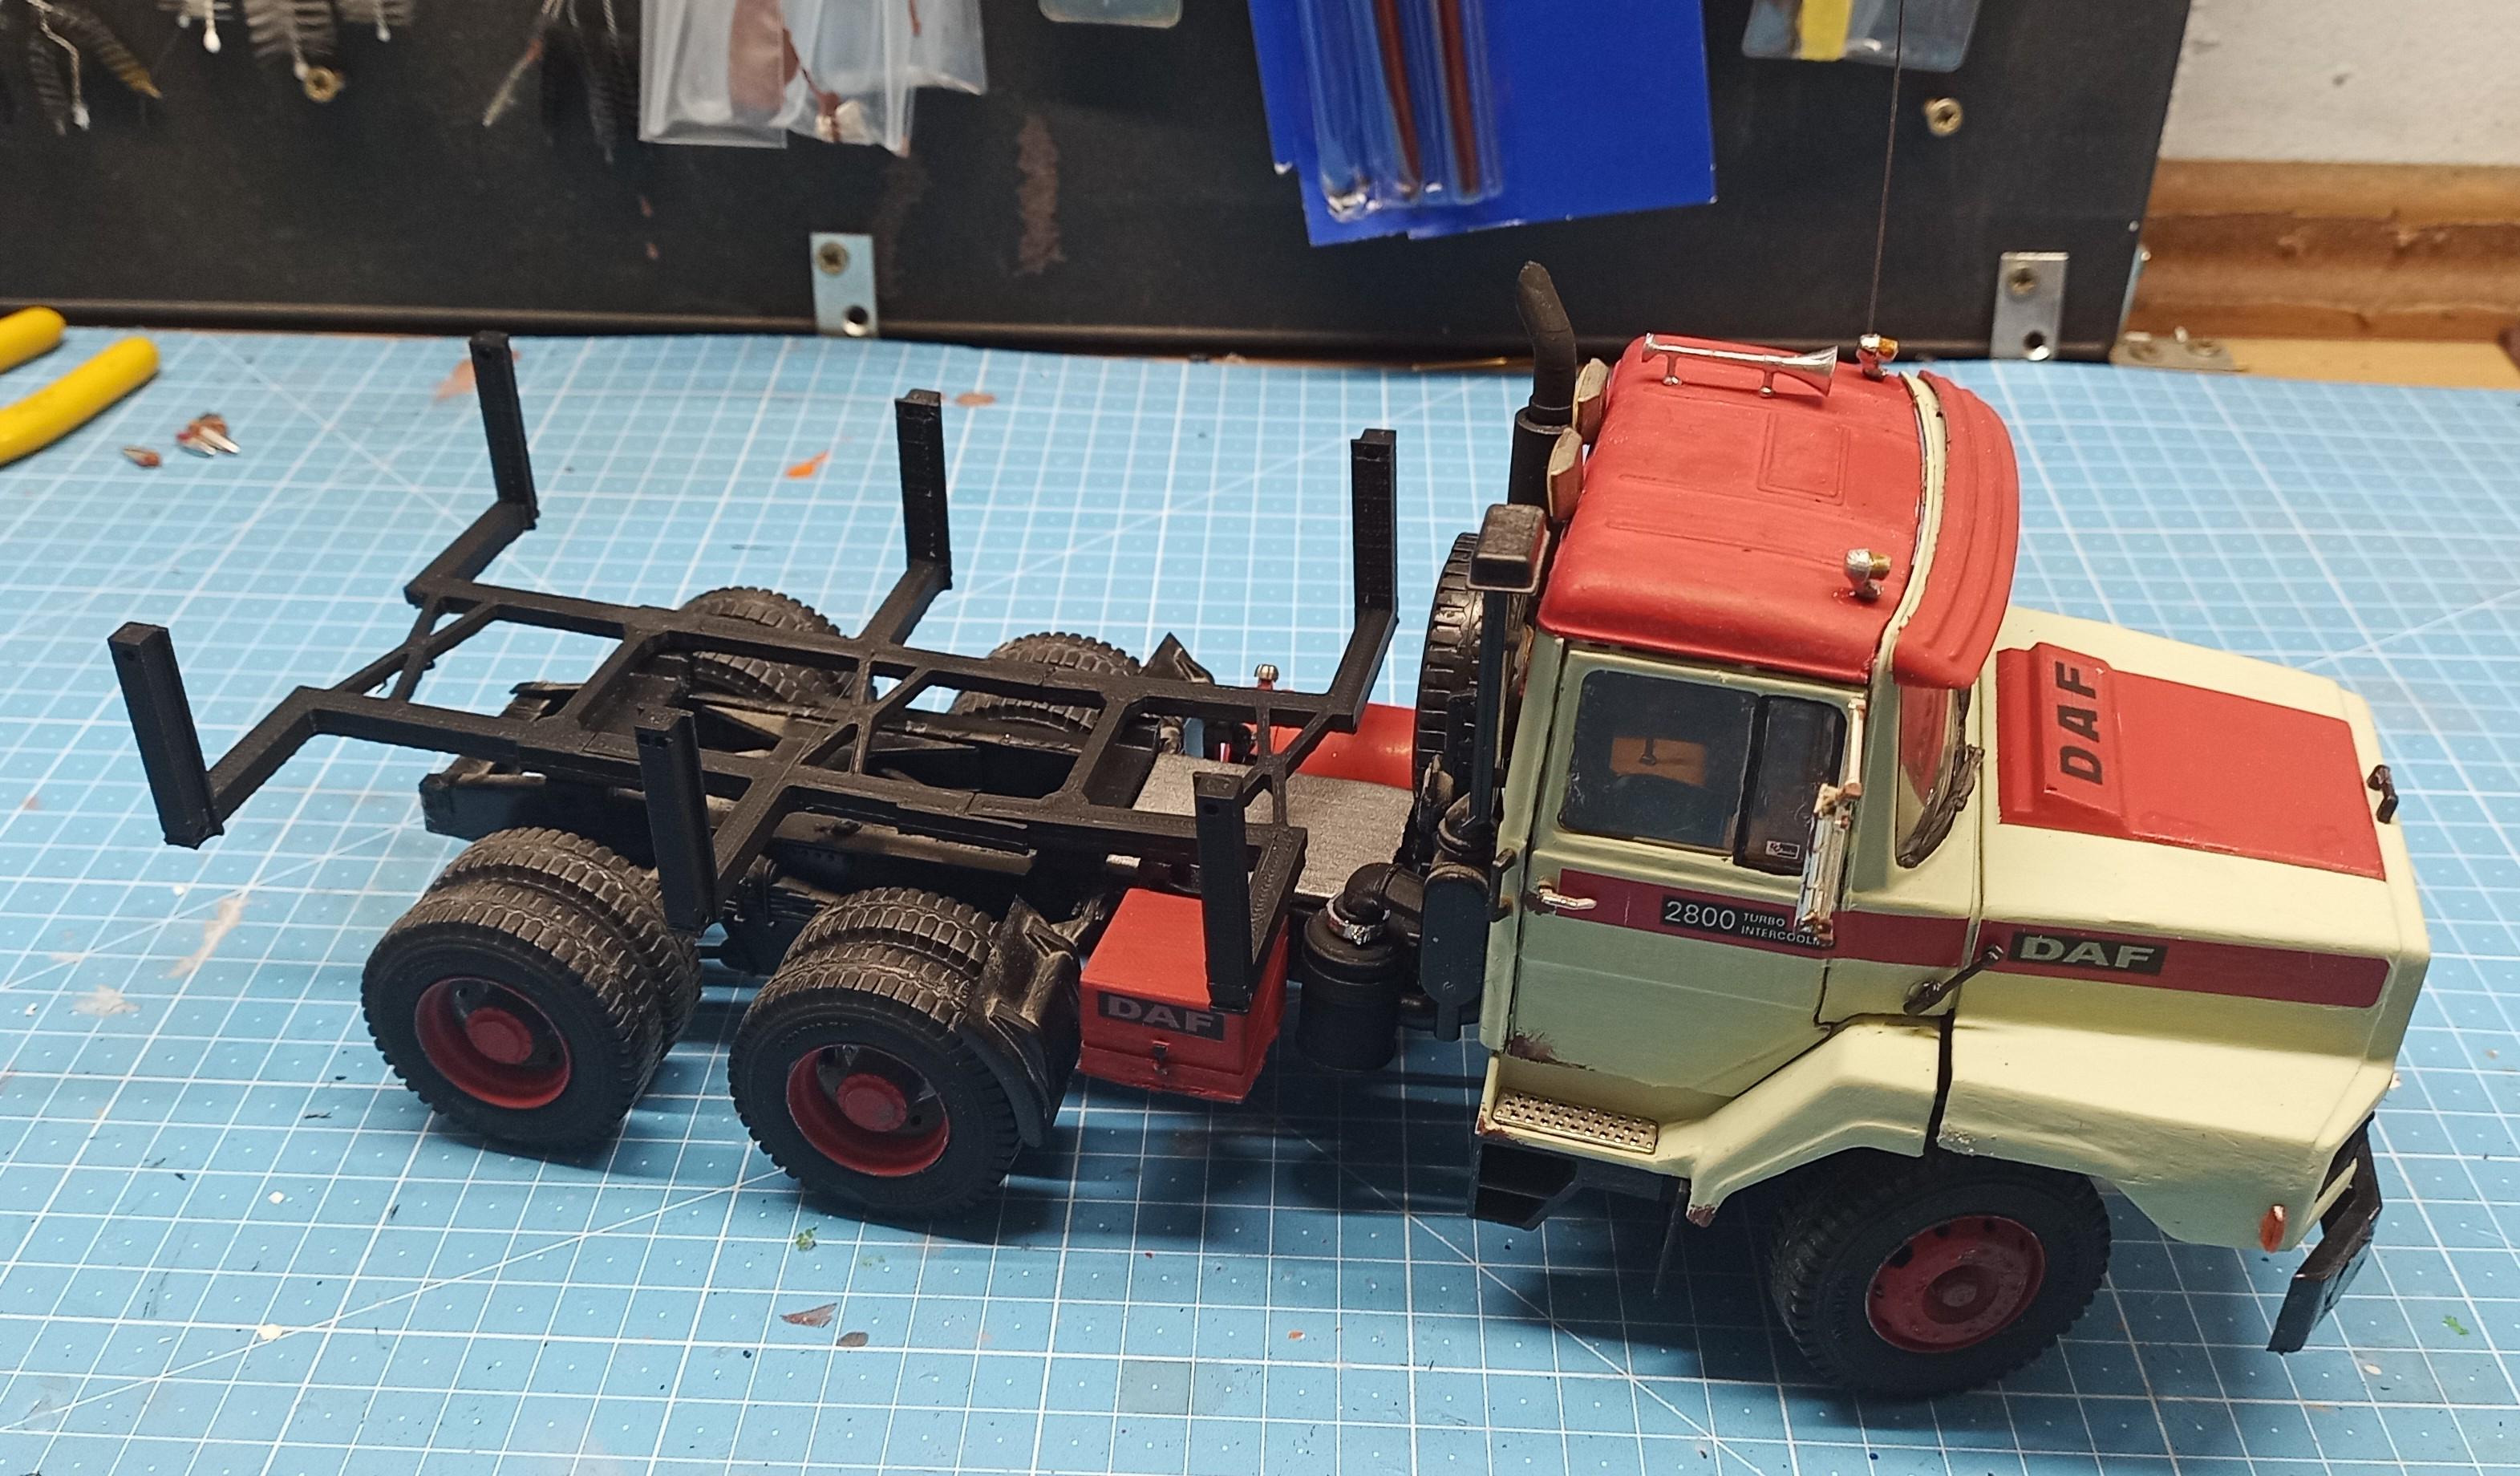
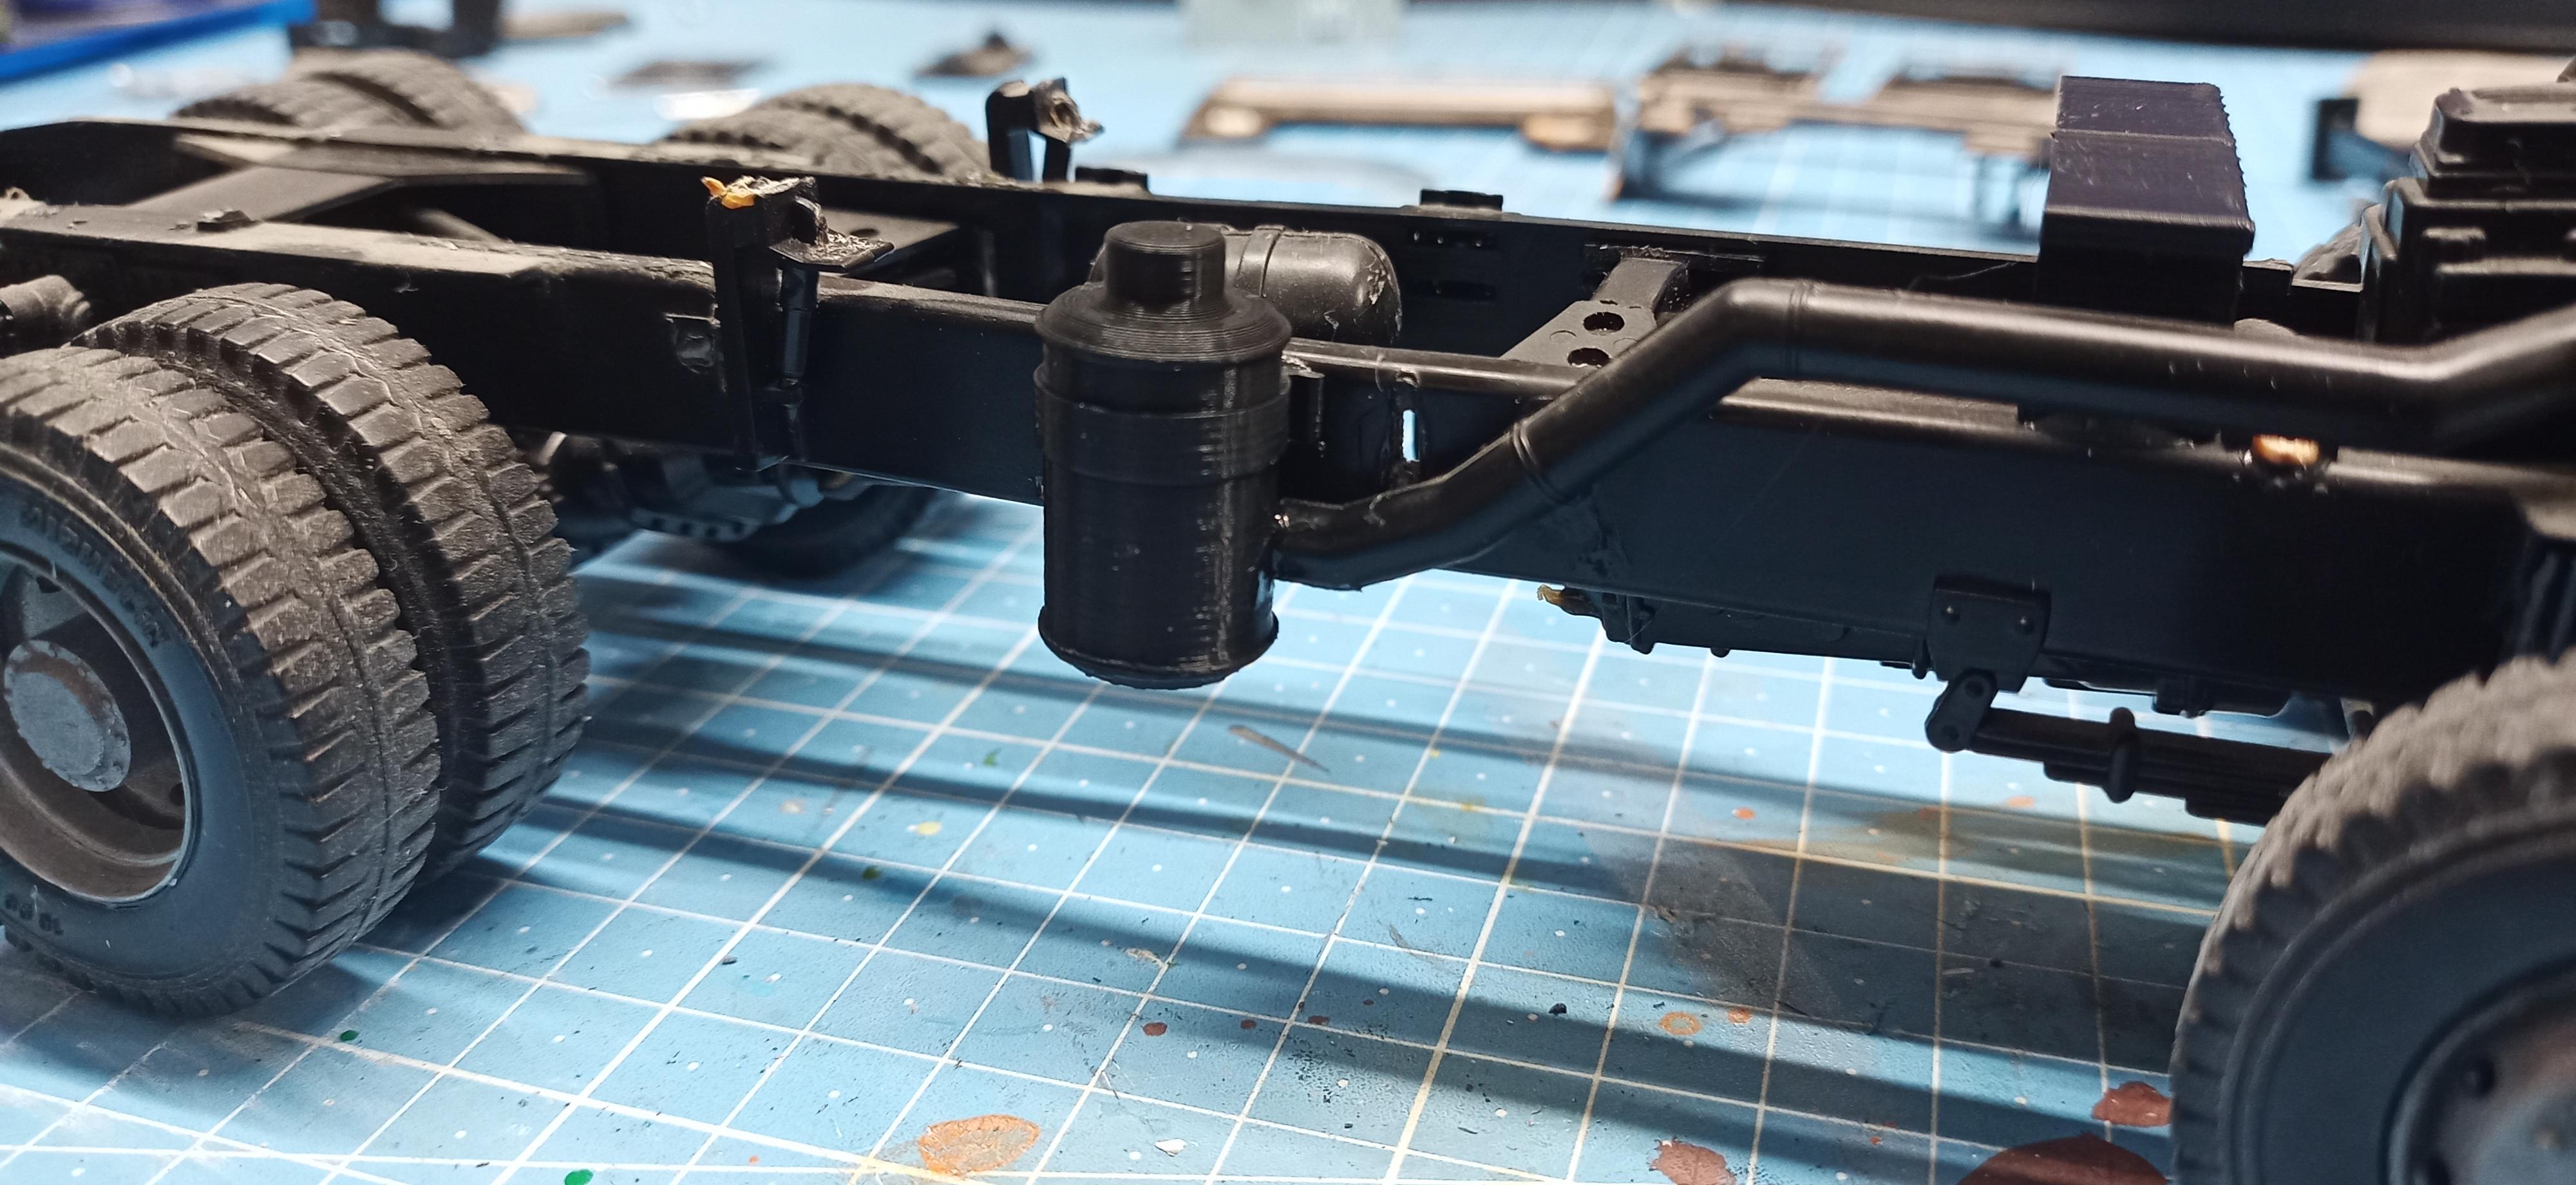
Since the cabs still haven't arrived and I hate sitting around in the little bit of free time I have I began to work on something else! I took this old DAF 2800 NTT Cattleman apart. The more I looked at it during the past weeks and months the more I hated it. I like the truck type but not what I made of it back then. I'll turn it into a regular N2800. An everyday working horse. When it's finished I'll post it under glass. Didn't want to open up a thread here for it. It's just to fill up waiting time till I can get back to the IH!
-
Convoy, take 7
Jürgen M. replied to Jürgen M.'s topic in WIP: Model Trucks: Big Rigs and Heavy Equipment
Just slight withdrawal symptoms! 😉 -
1970 Ford C 600
Jürgen M. replied to Biggu's topic in WIP: Model Trucks: Big Rigs and Heavy Equipment
Looking really nice Pal. Can't wait to see it painted and on wheels! Keep going! Its a wonderful Idea! 👍 -
Convoy, take 7
Jürgen M. replied to Jürgen M.'s topic in WIP: Model Trucks: Big Rigs and Heavy Equipment
Thanks Pal! I do hope the cabs arrive soon! My hands always get a bit shaky when I'm in the middle of a build but can't work in it! -
Convoy, take 7
Jürgen M. replied to Jürgen M.'s topic in WIP: Model Trucks: Big Rigs and Heavy Equipment
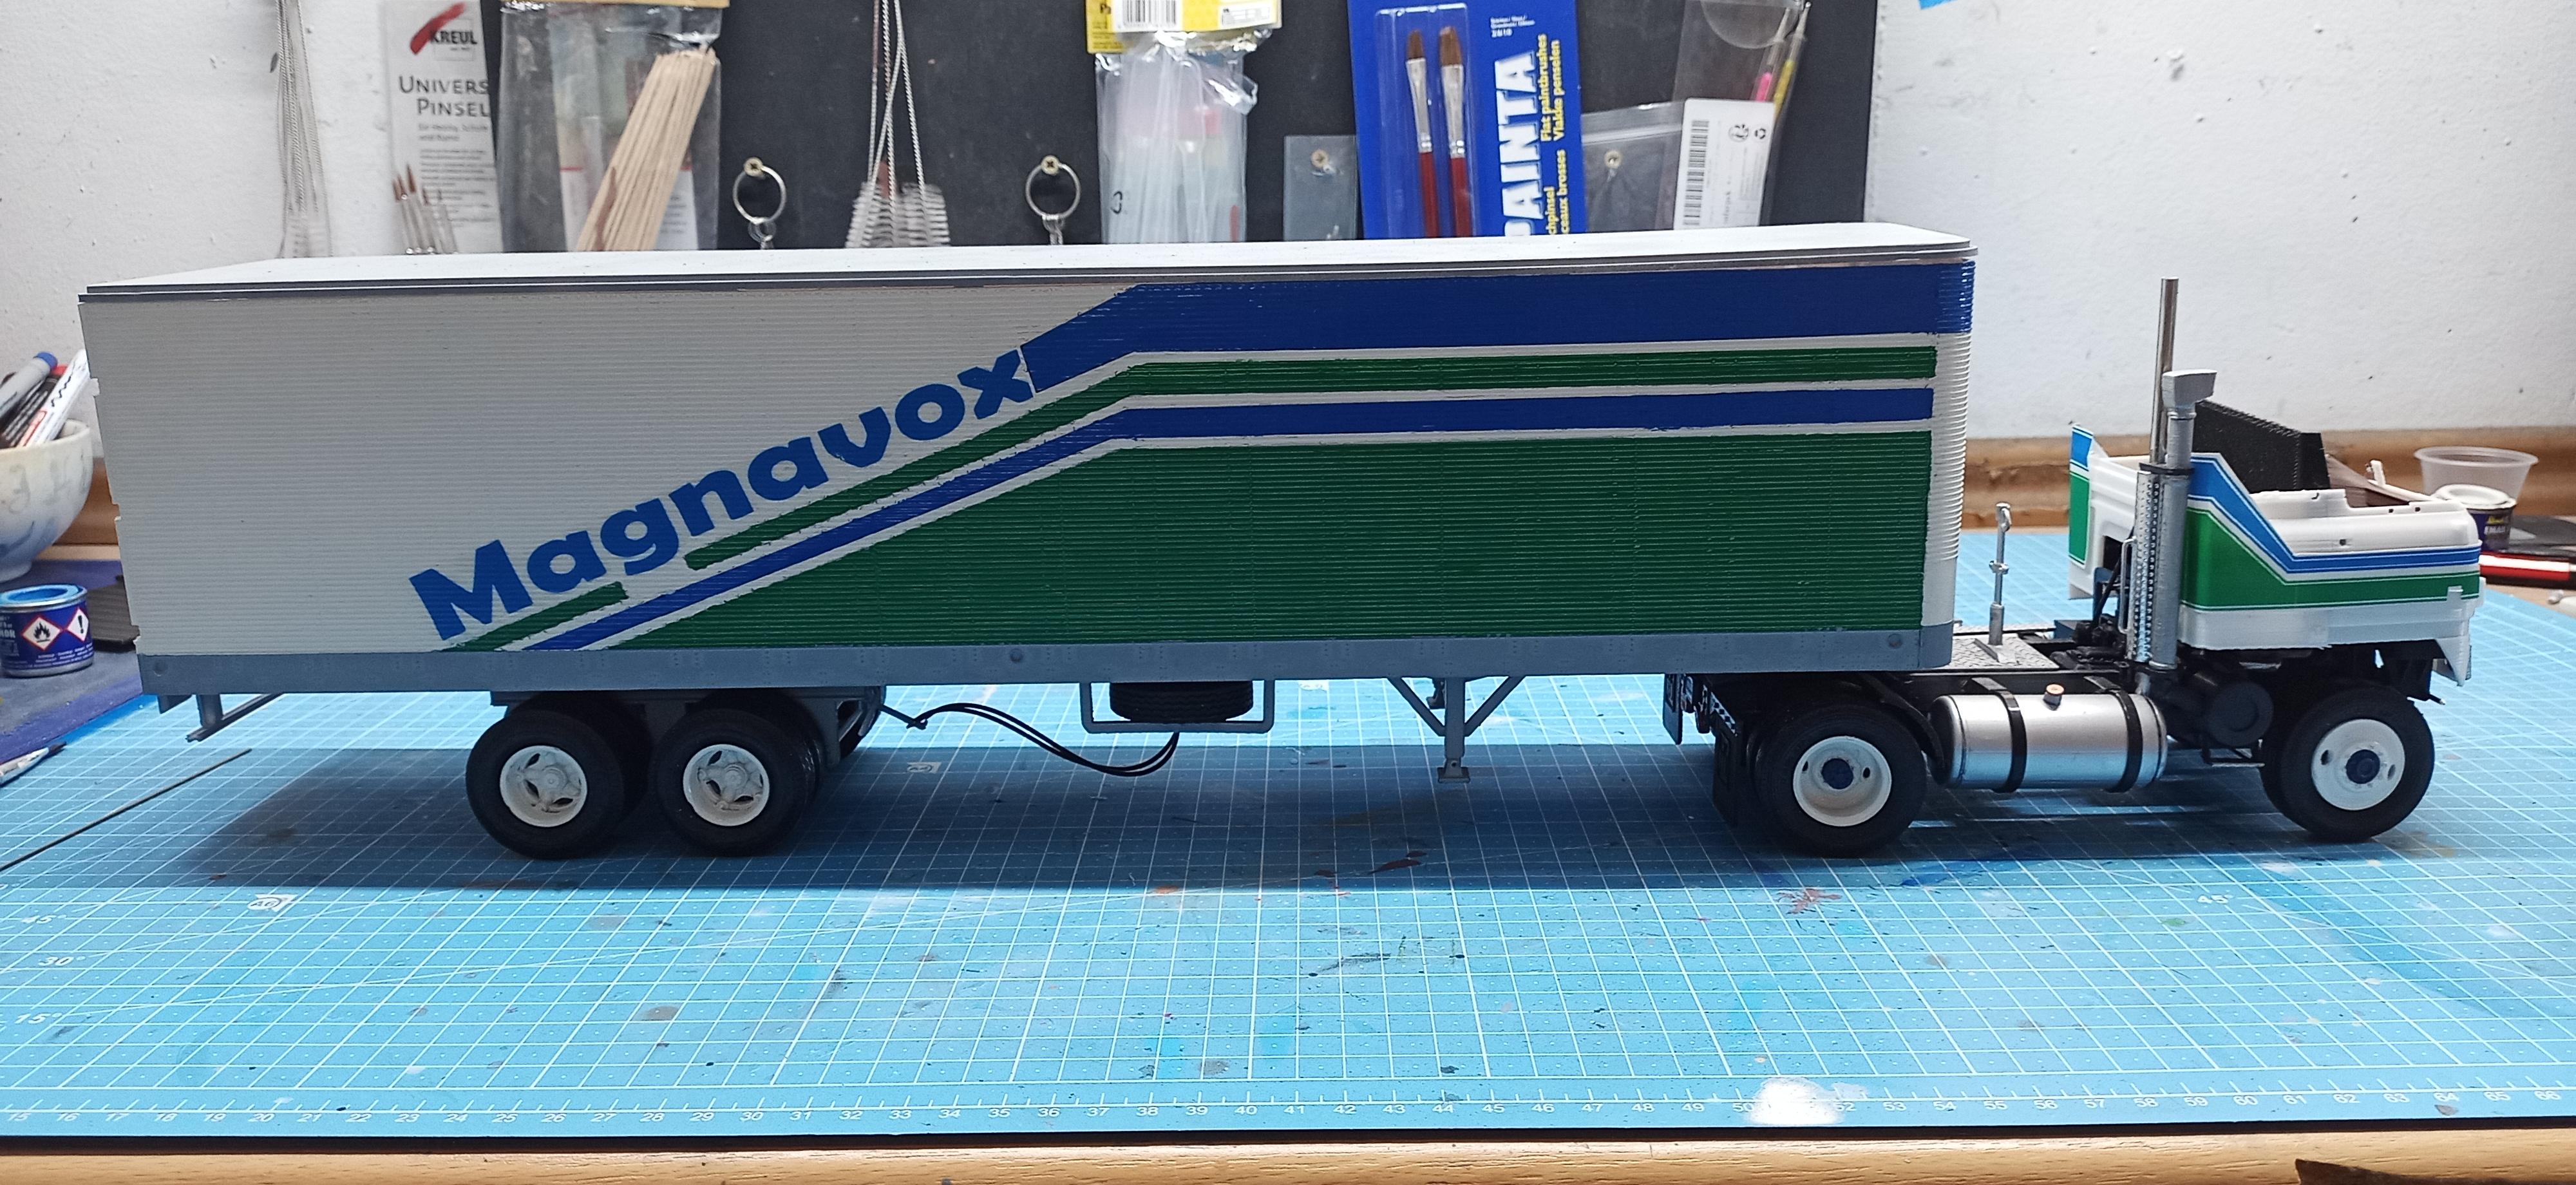
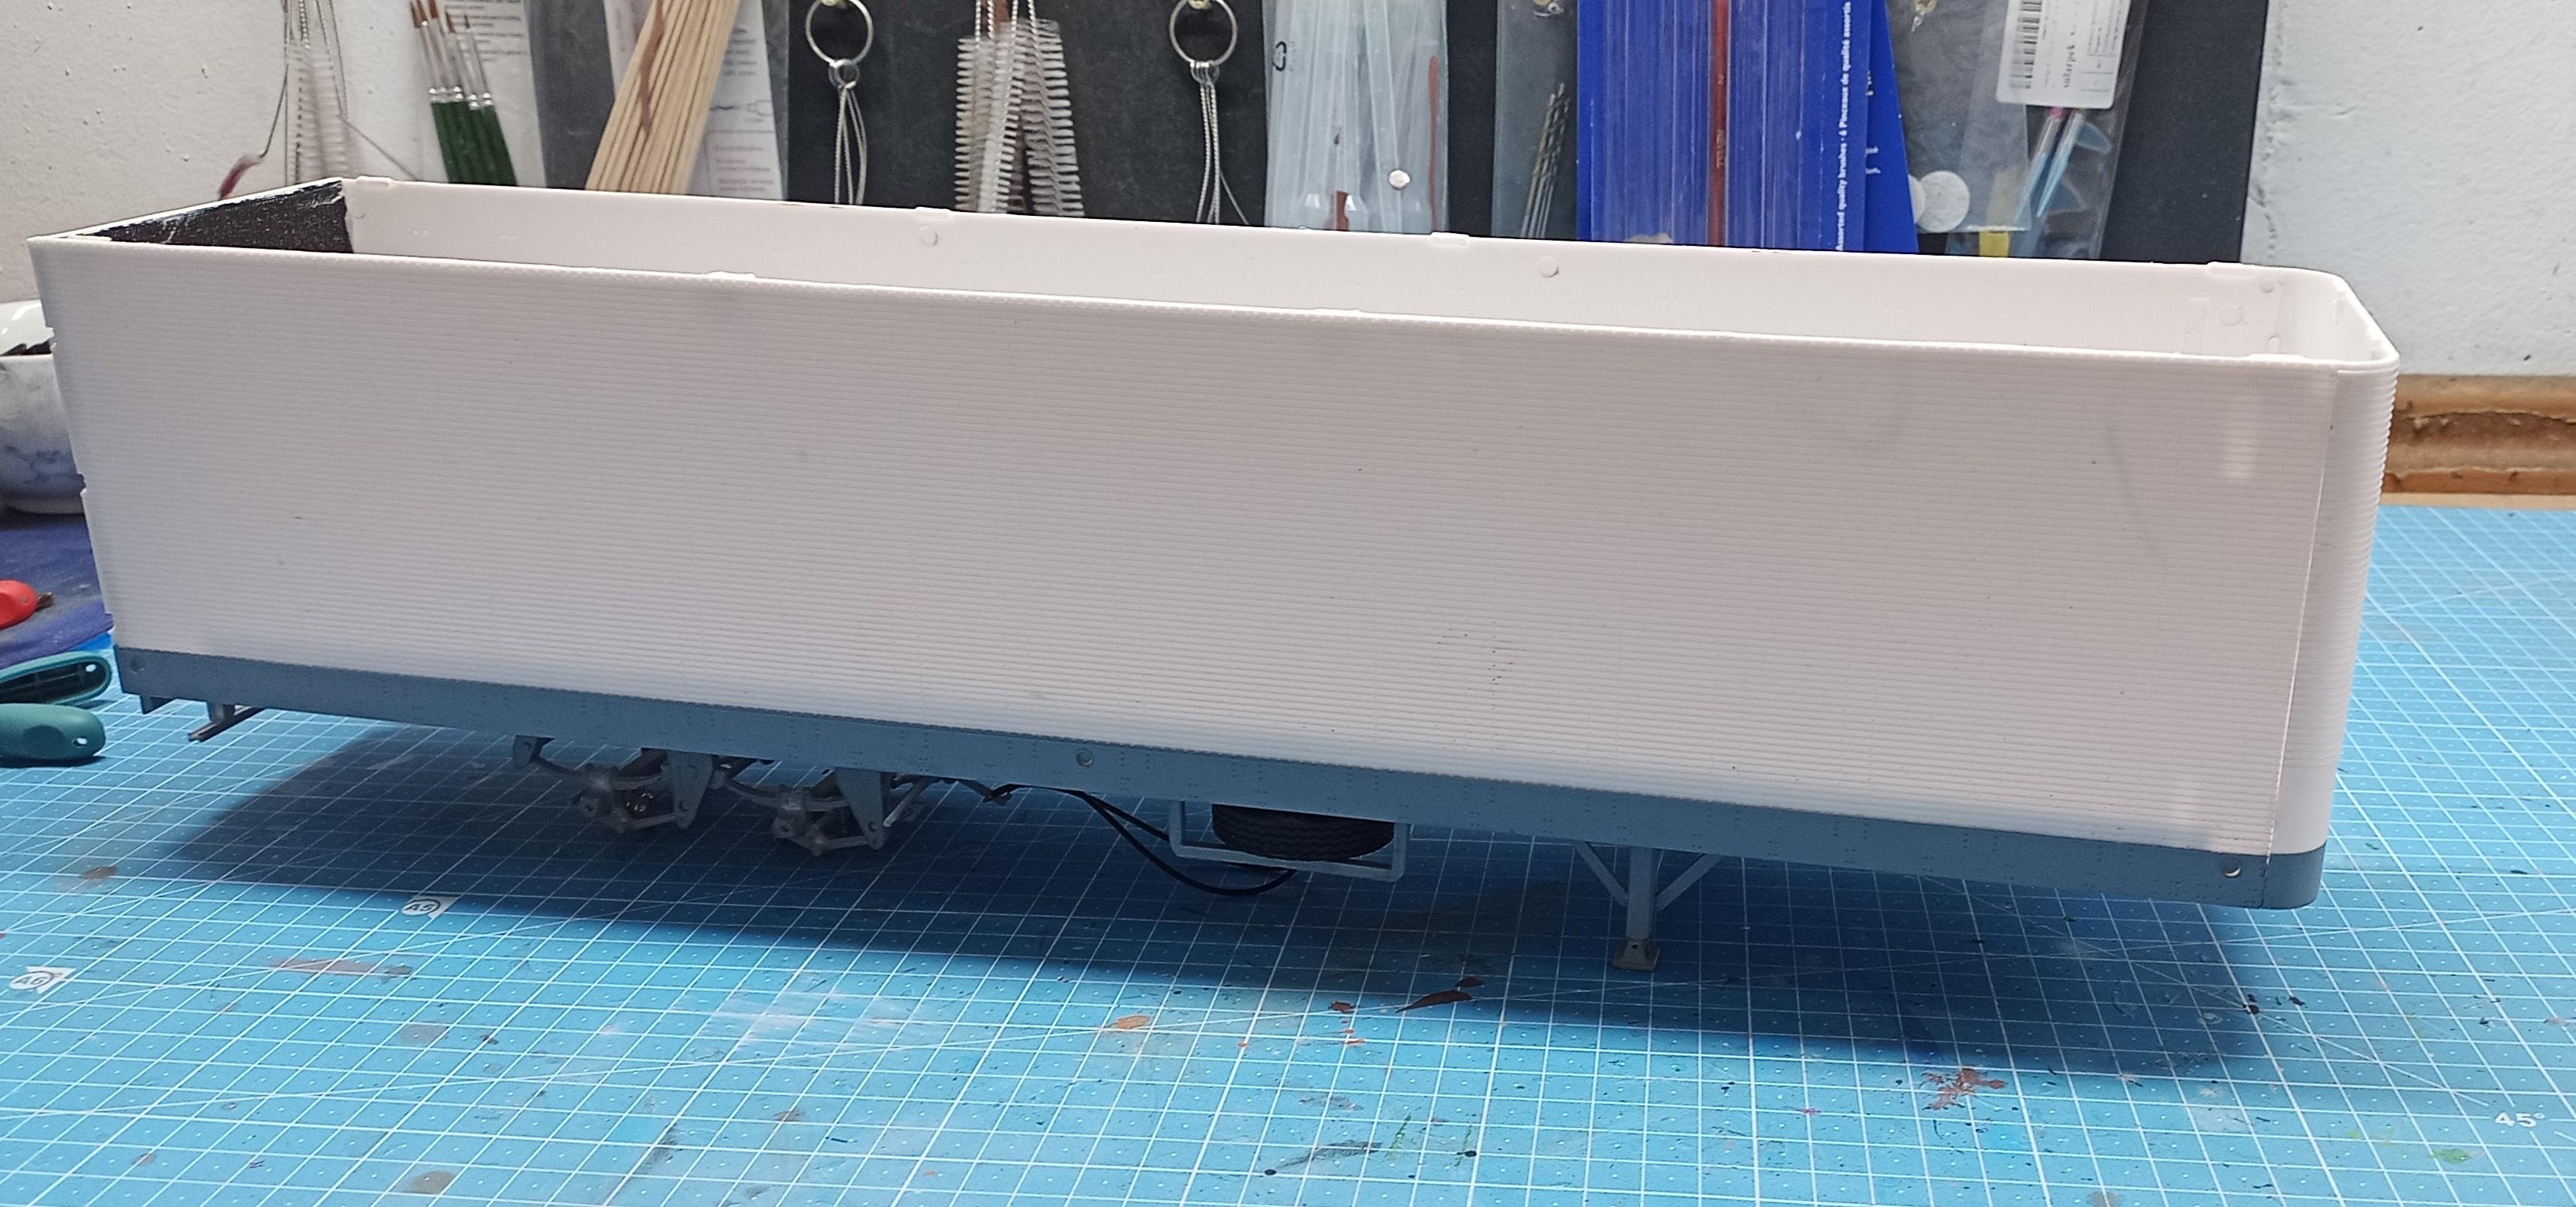
Got the trailer more or less finished yesterday: Now I'm desperately waiting for the cabs!
-
Western Star 4900 FA plow truck
Jürgen M. replied to BK9300's topic in WIP: Model Trucks: Big Rigs and Heavy Equipment
That looks so awesome! Endless details and top quality execution! Chapeau! -
Convoy, take 7
Jürgen M. replied to Jürgen M.'s topic in WIP: Model Trucks: Big Rigs and Heavy Equipment
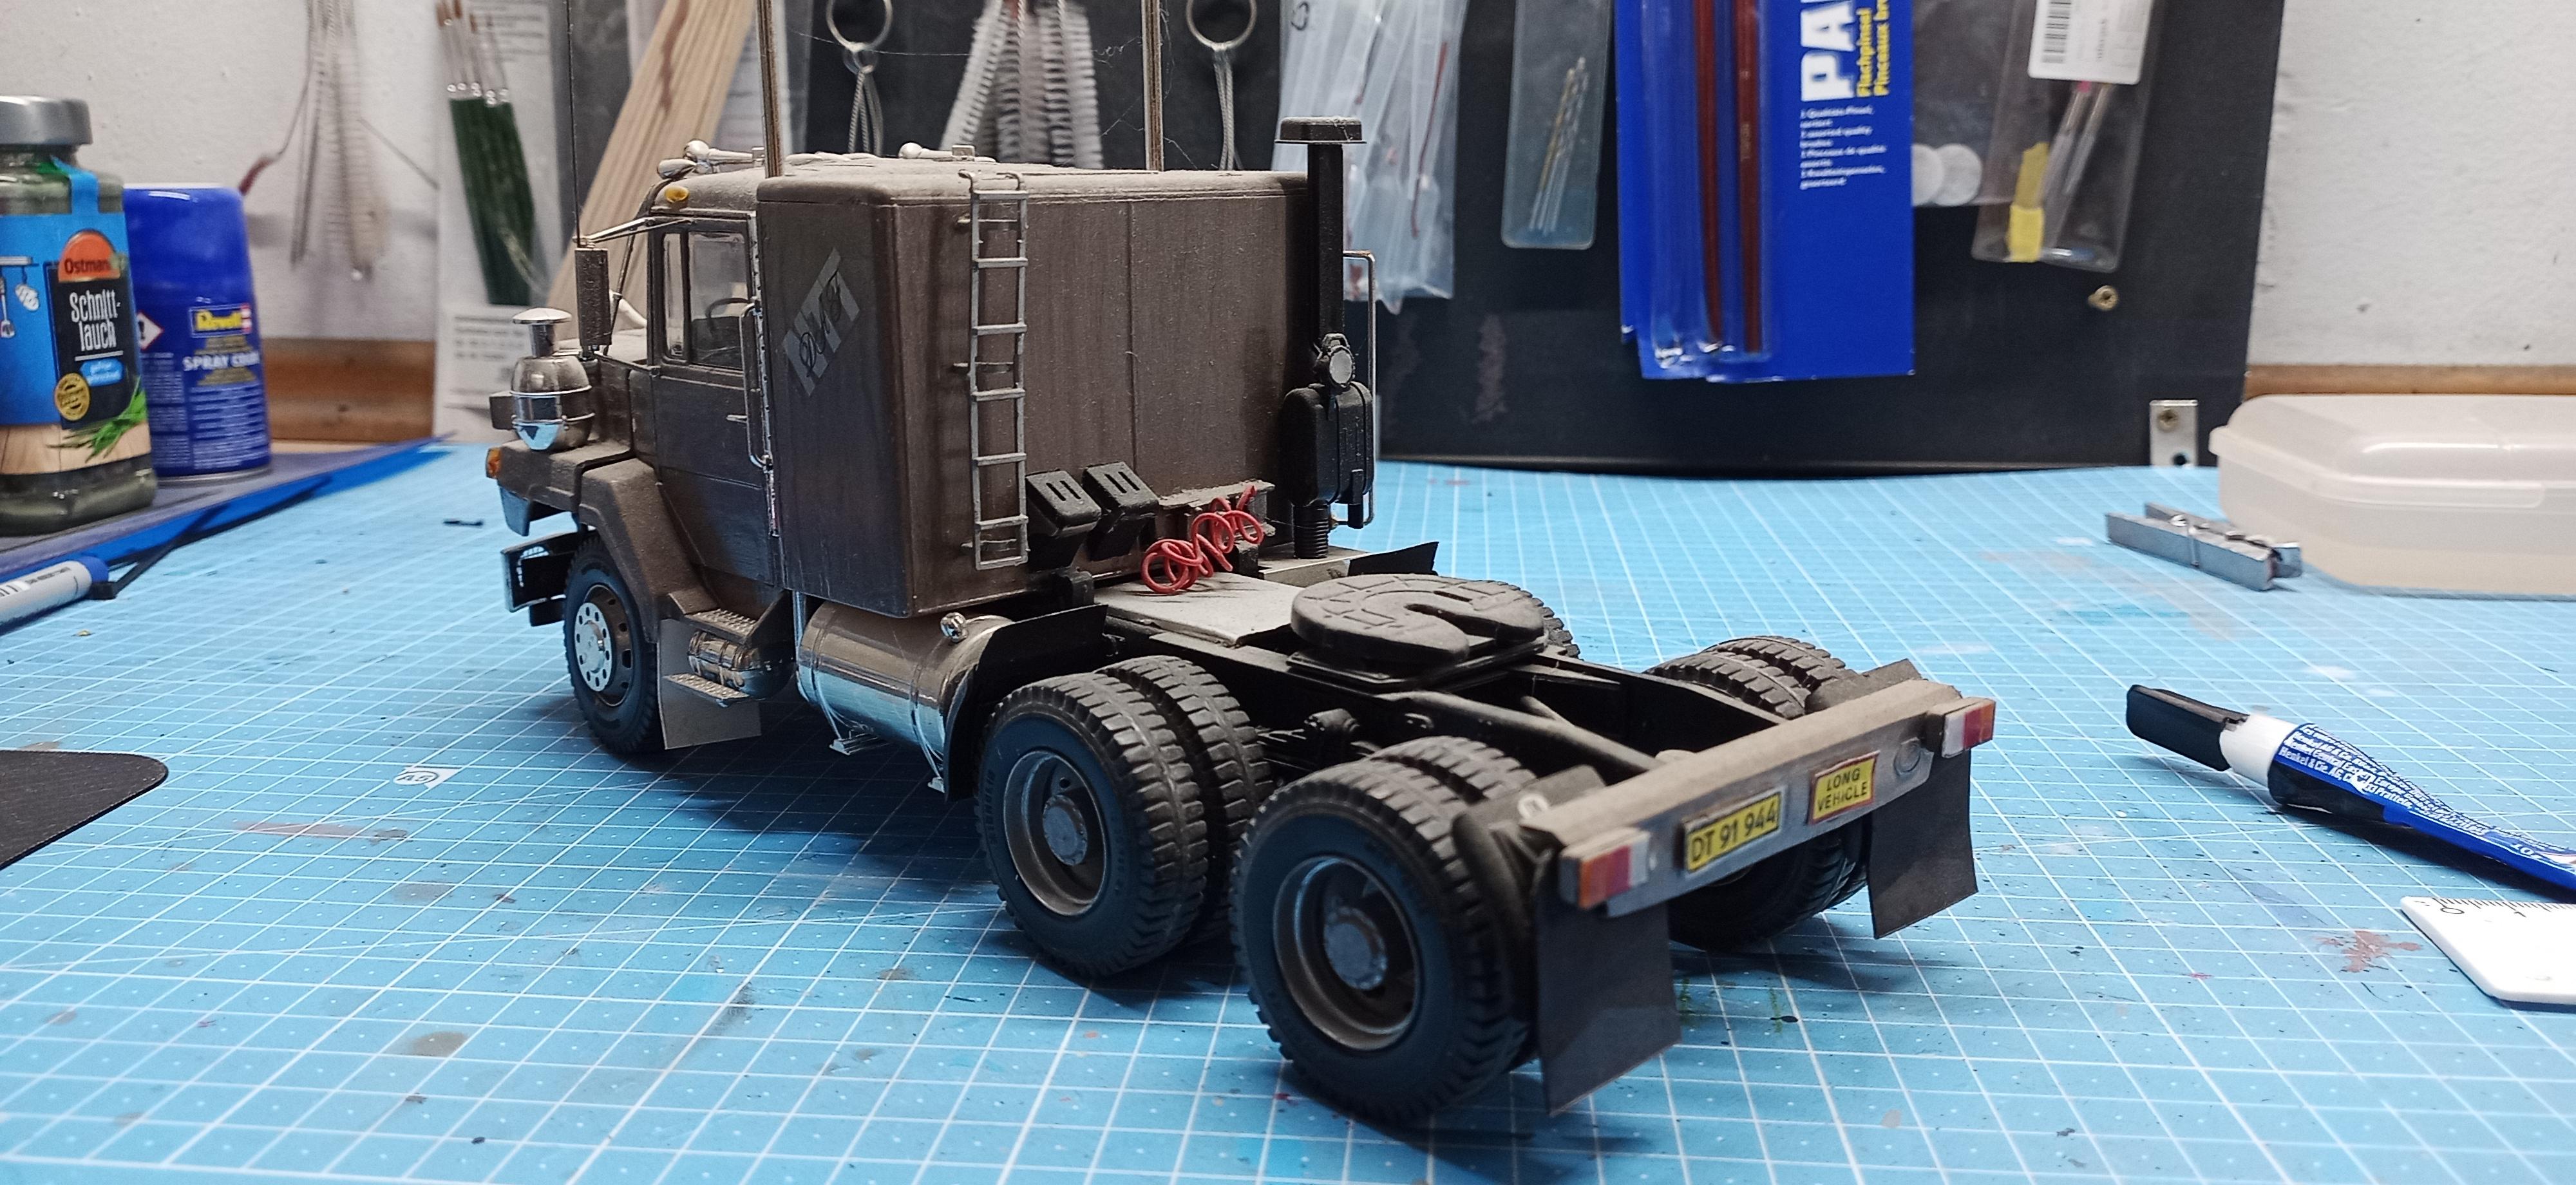
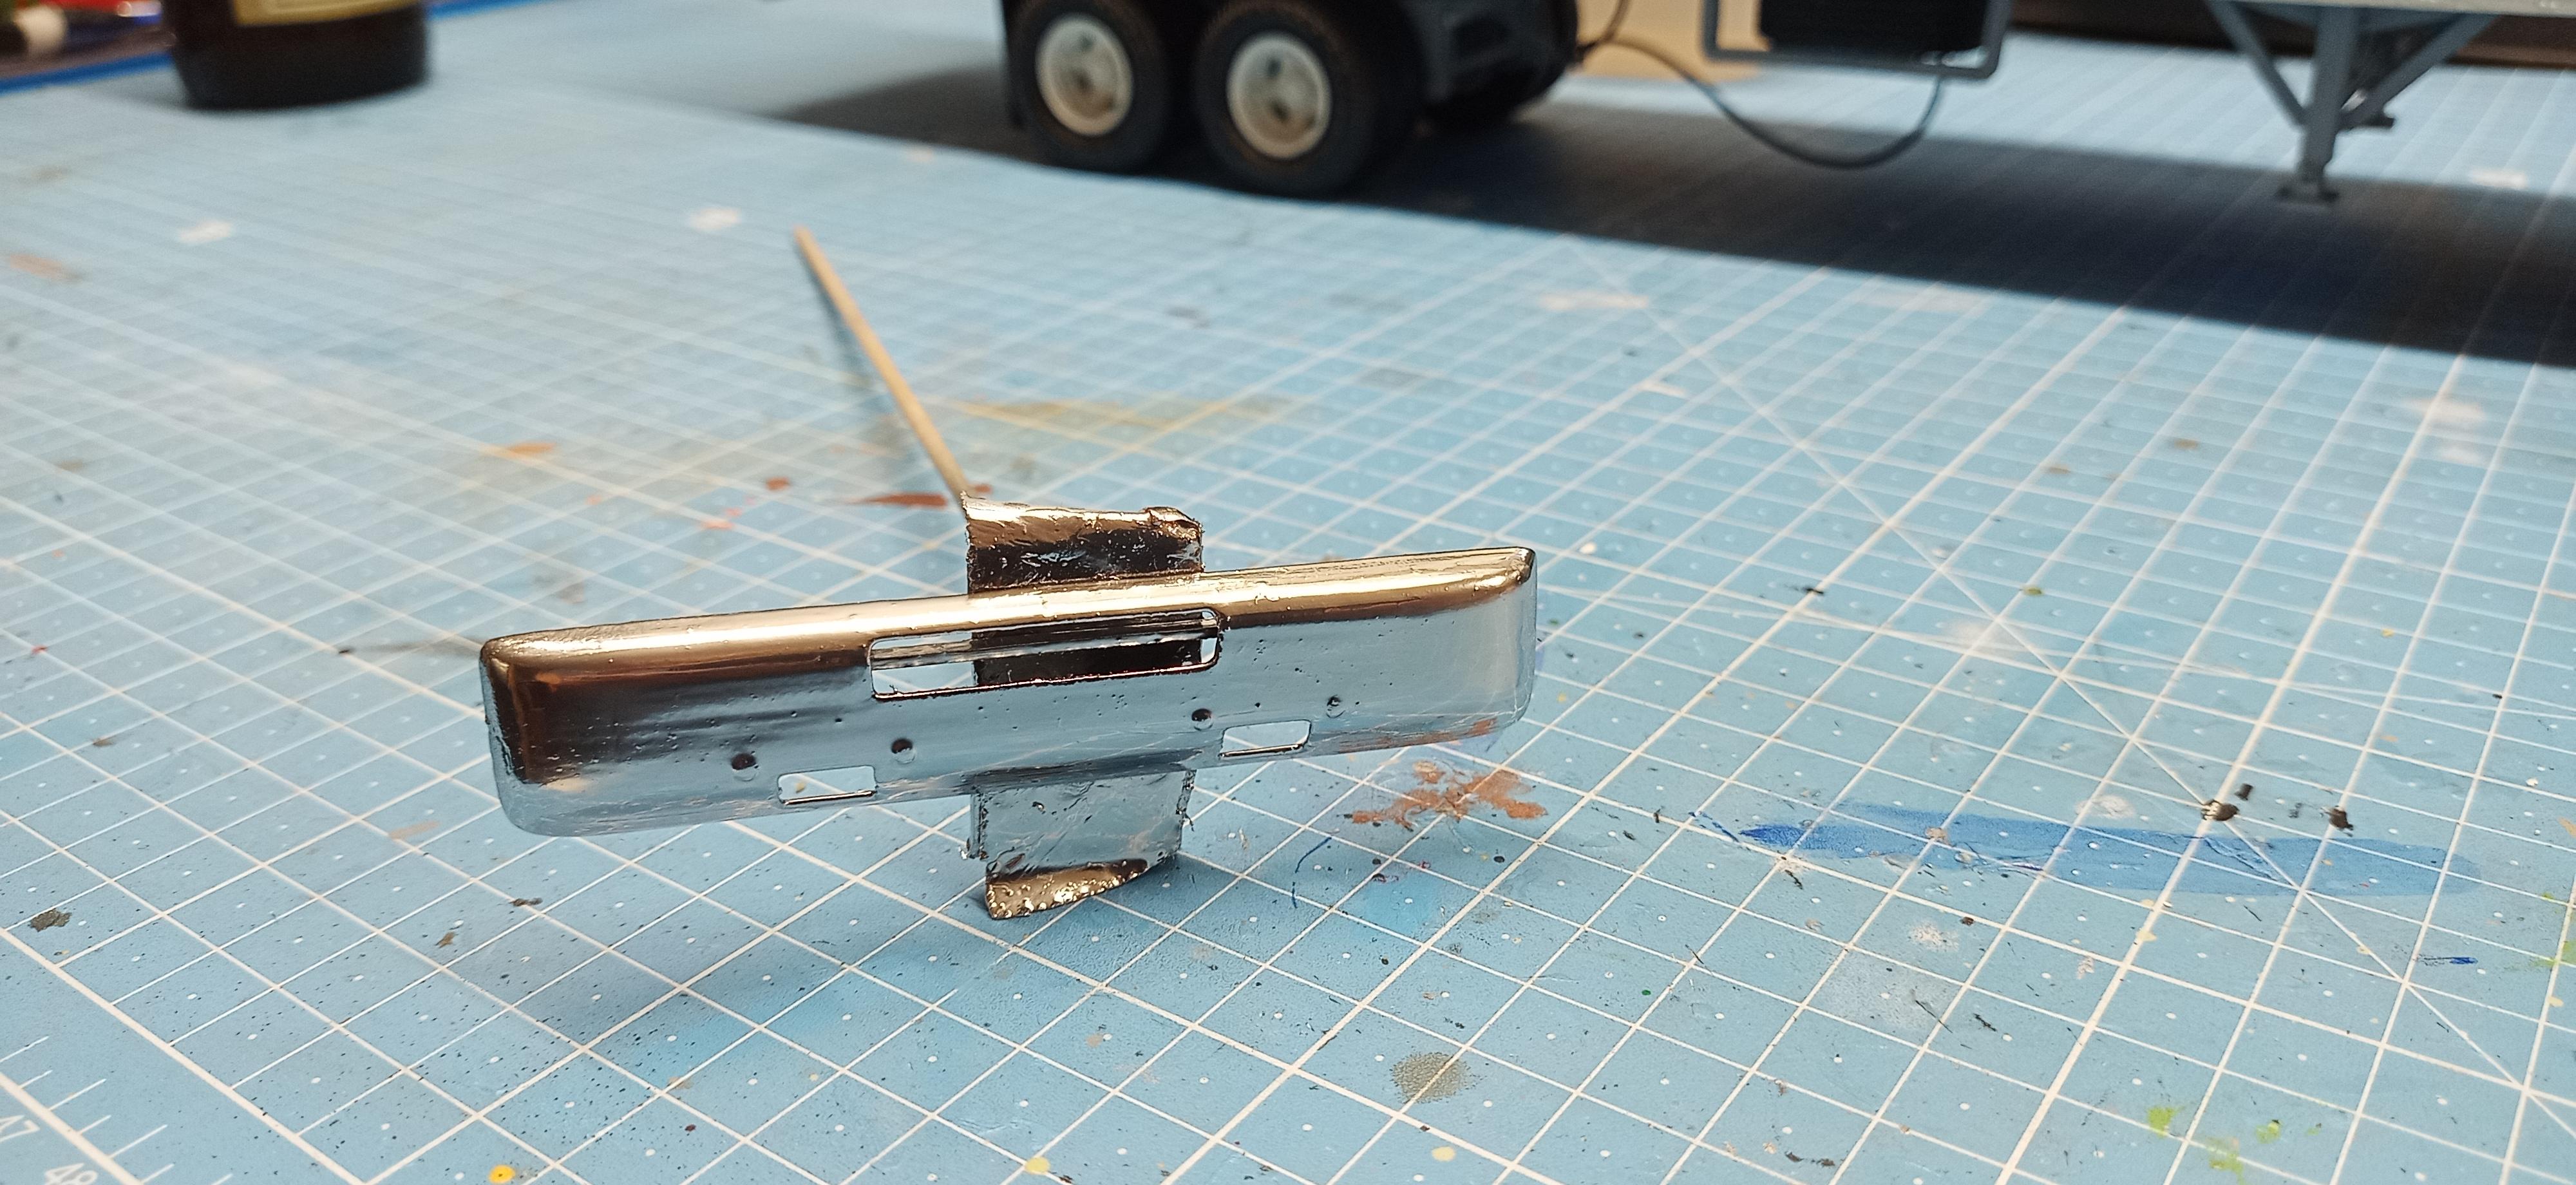
Here's another view of the rear! I tried to make it look used! And I chromed the bumper! Since we have 39°C in the garage it cured very quickly!
-
Convoy, take 7
Jürgen M. replied to Jürgen M.'s topic in WIP: Model Trucks: Big Rigs and Heavy Equipment
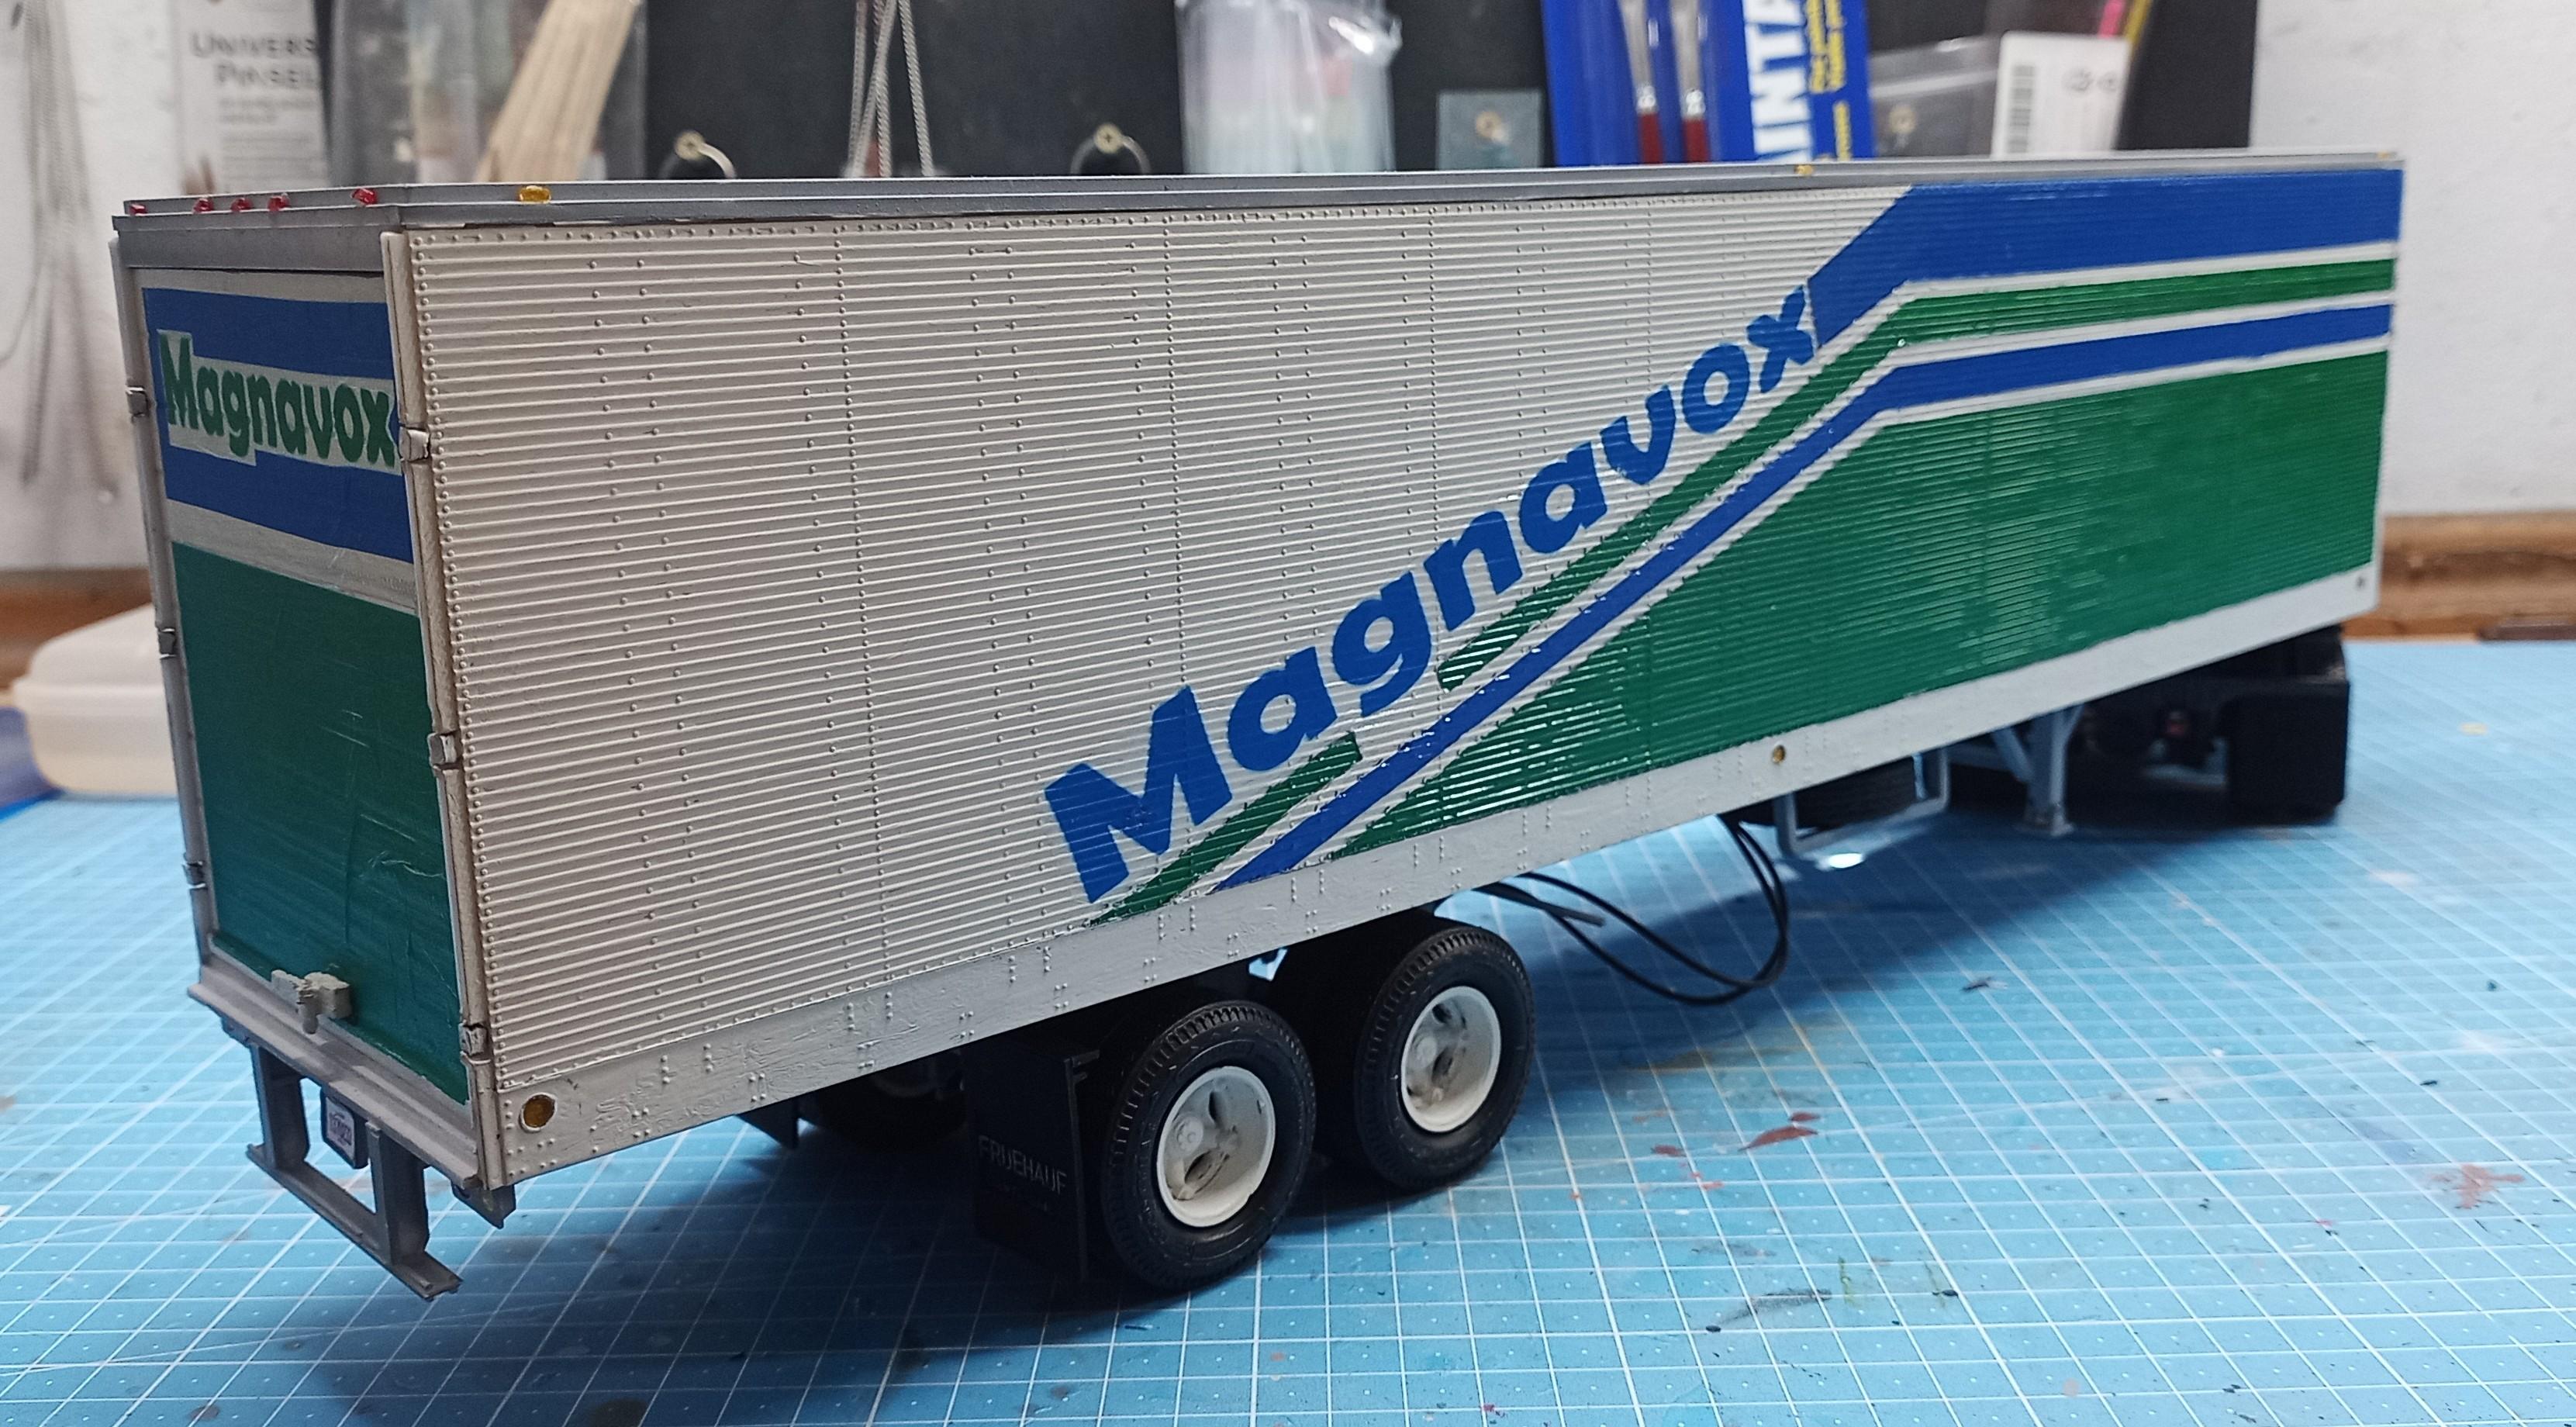
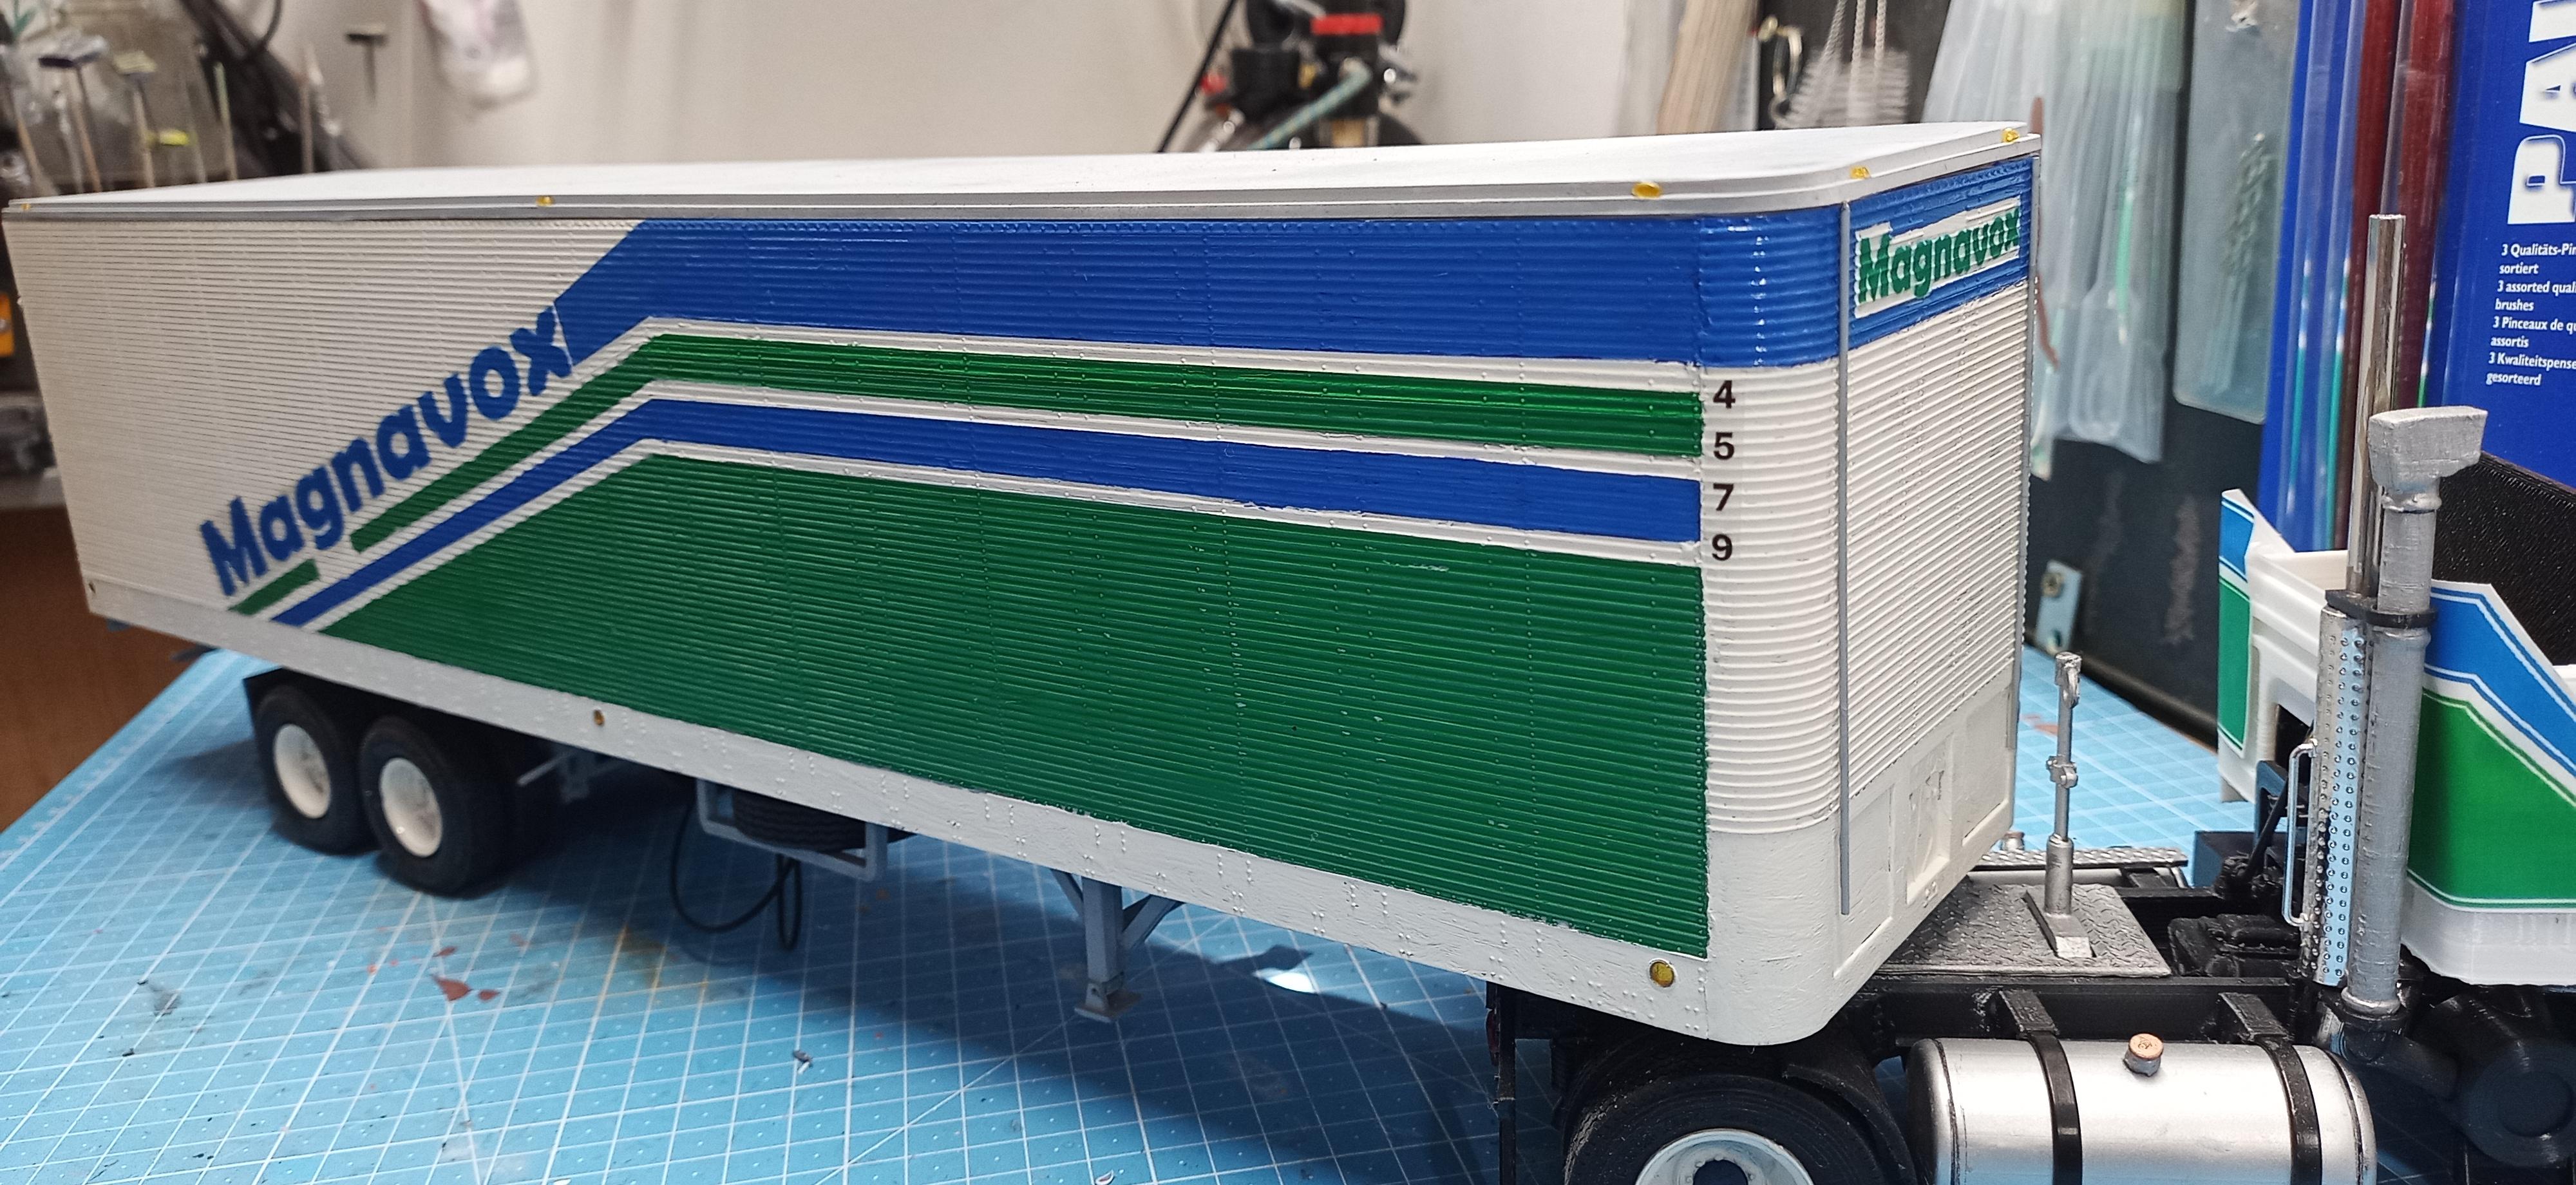
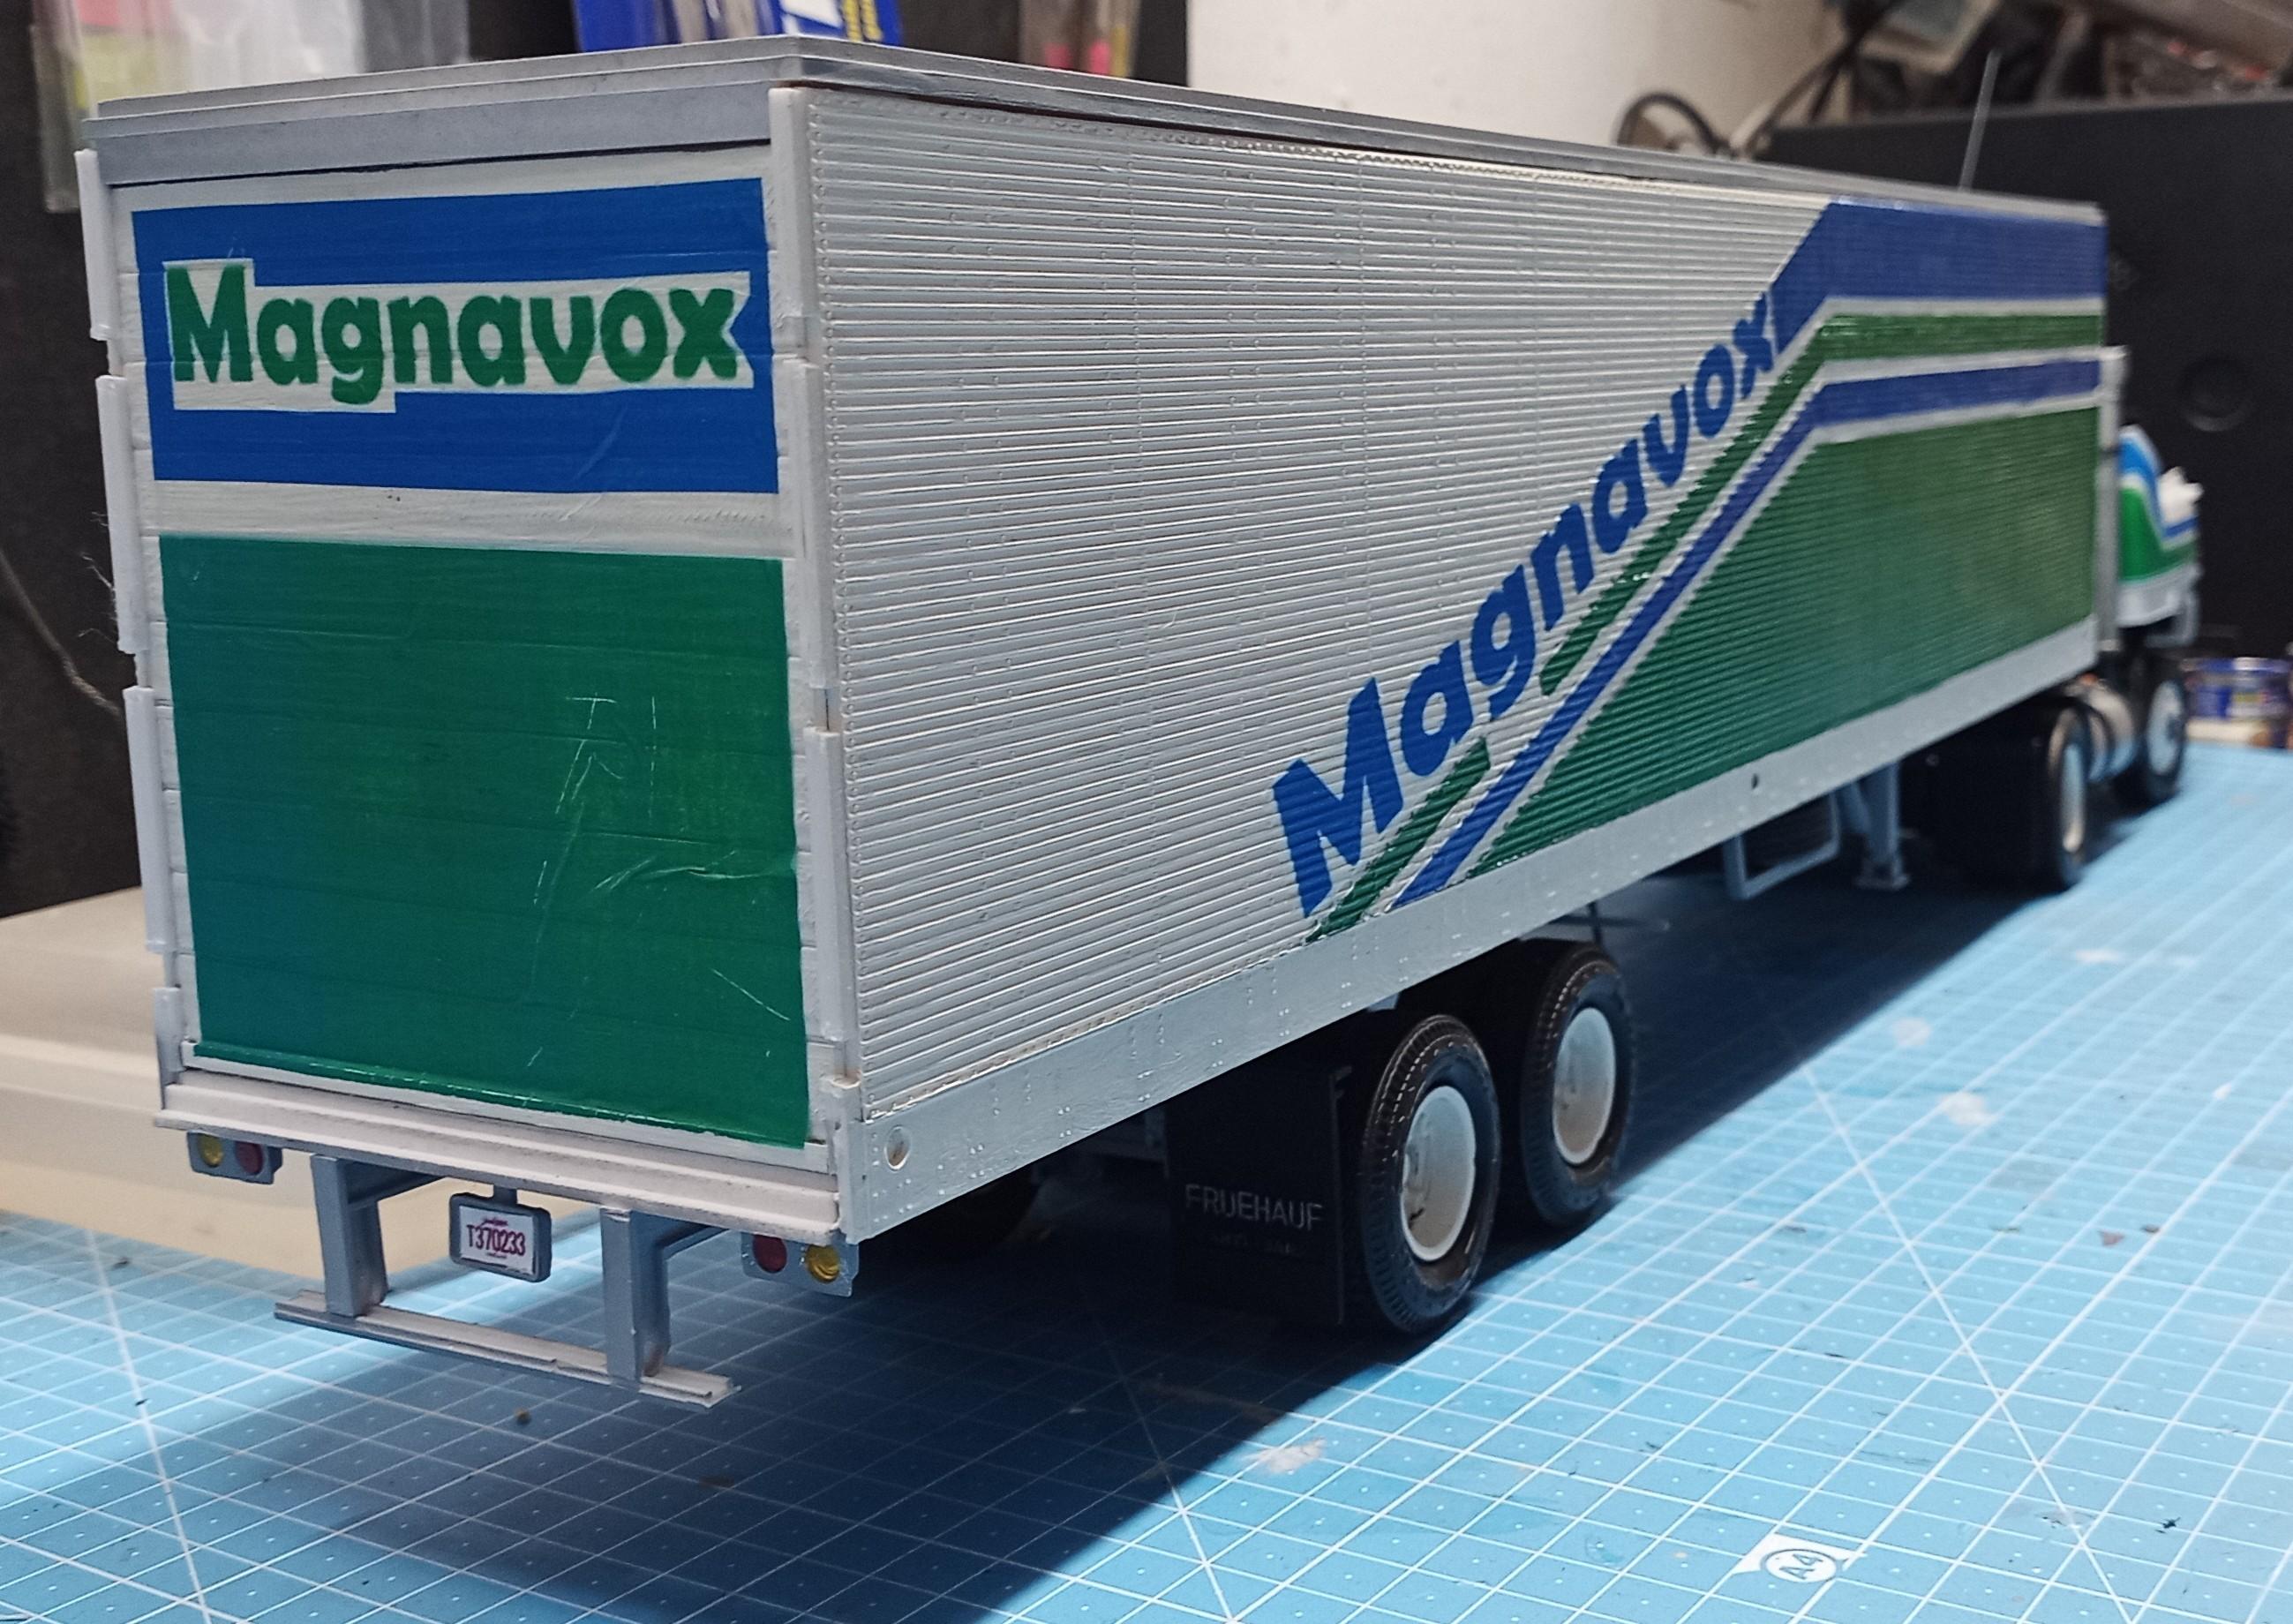
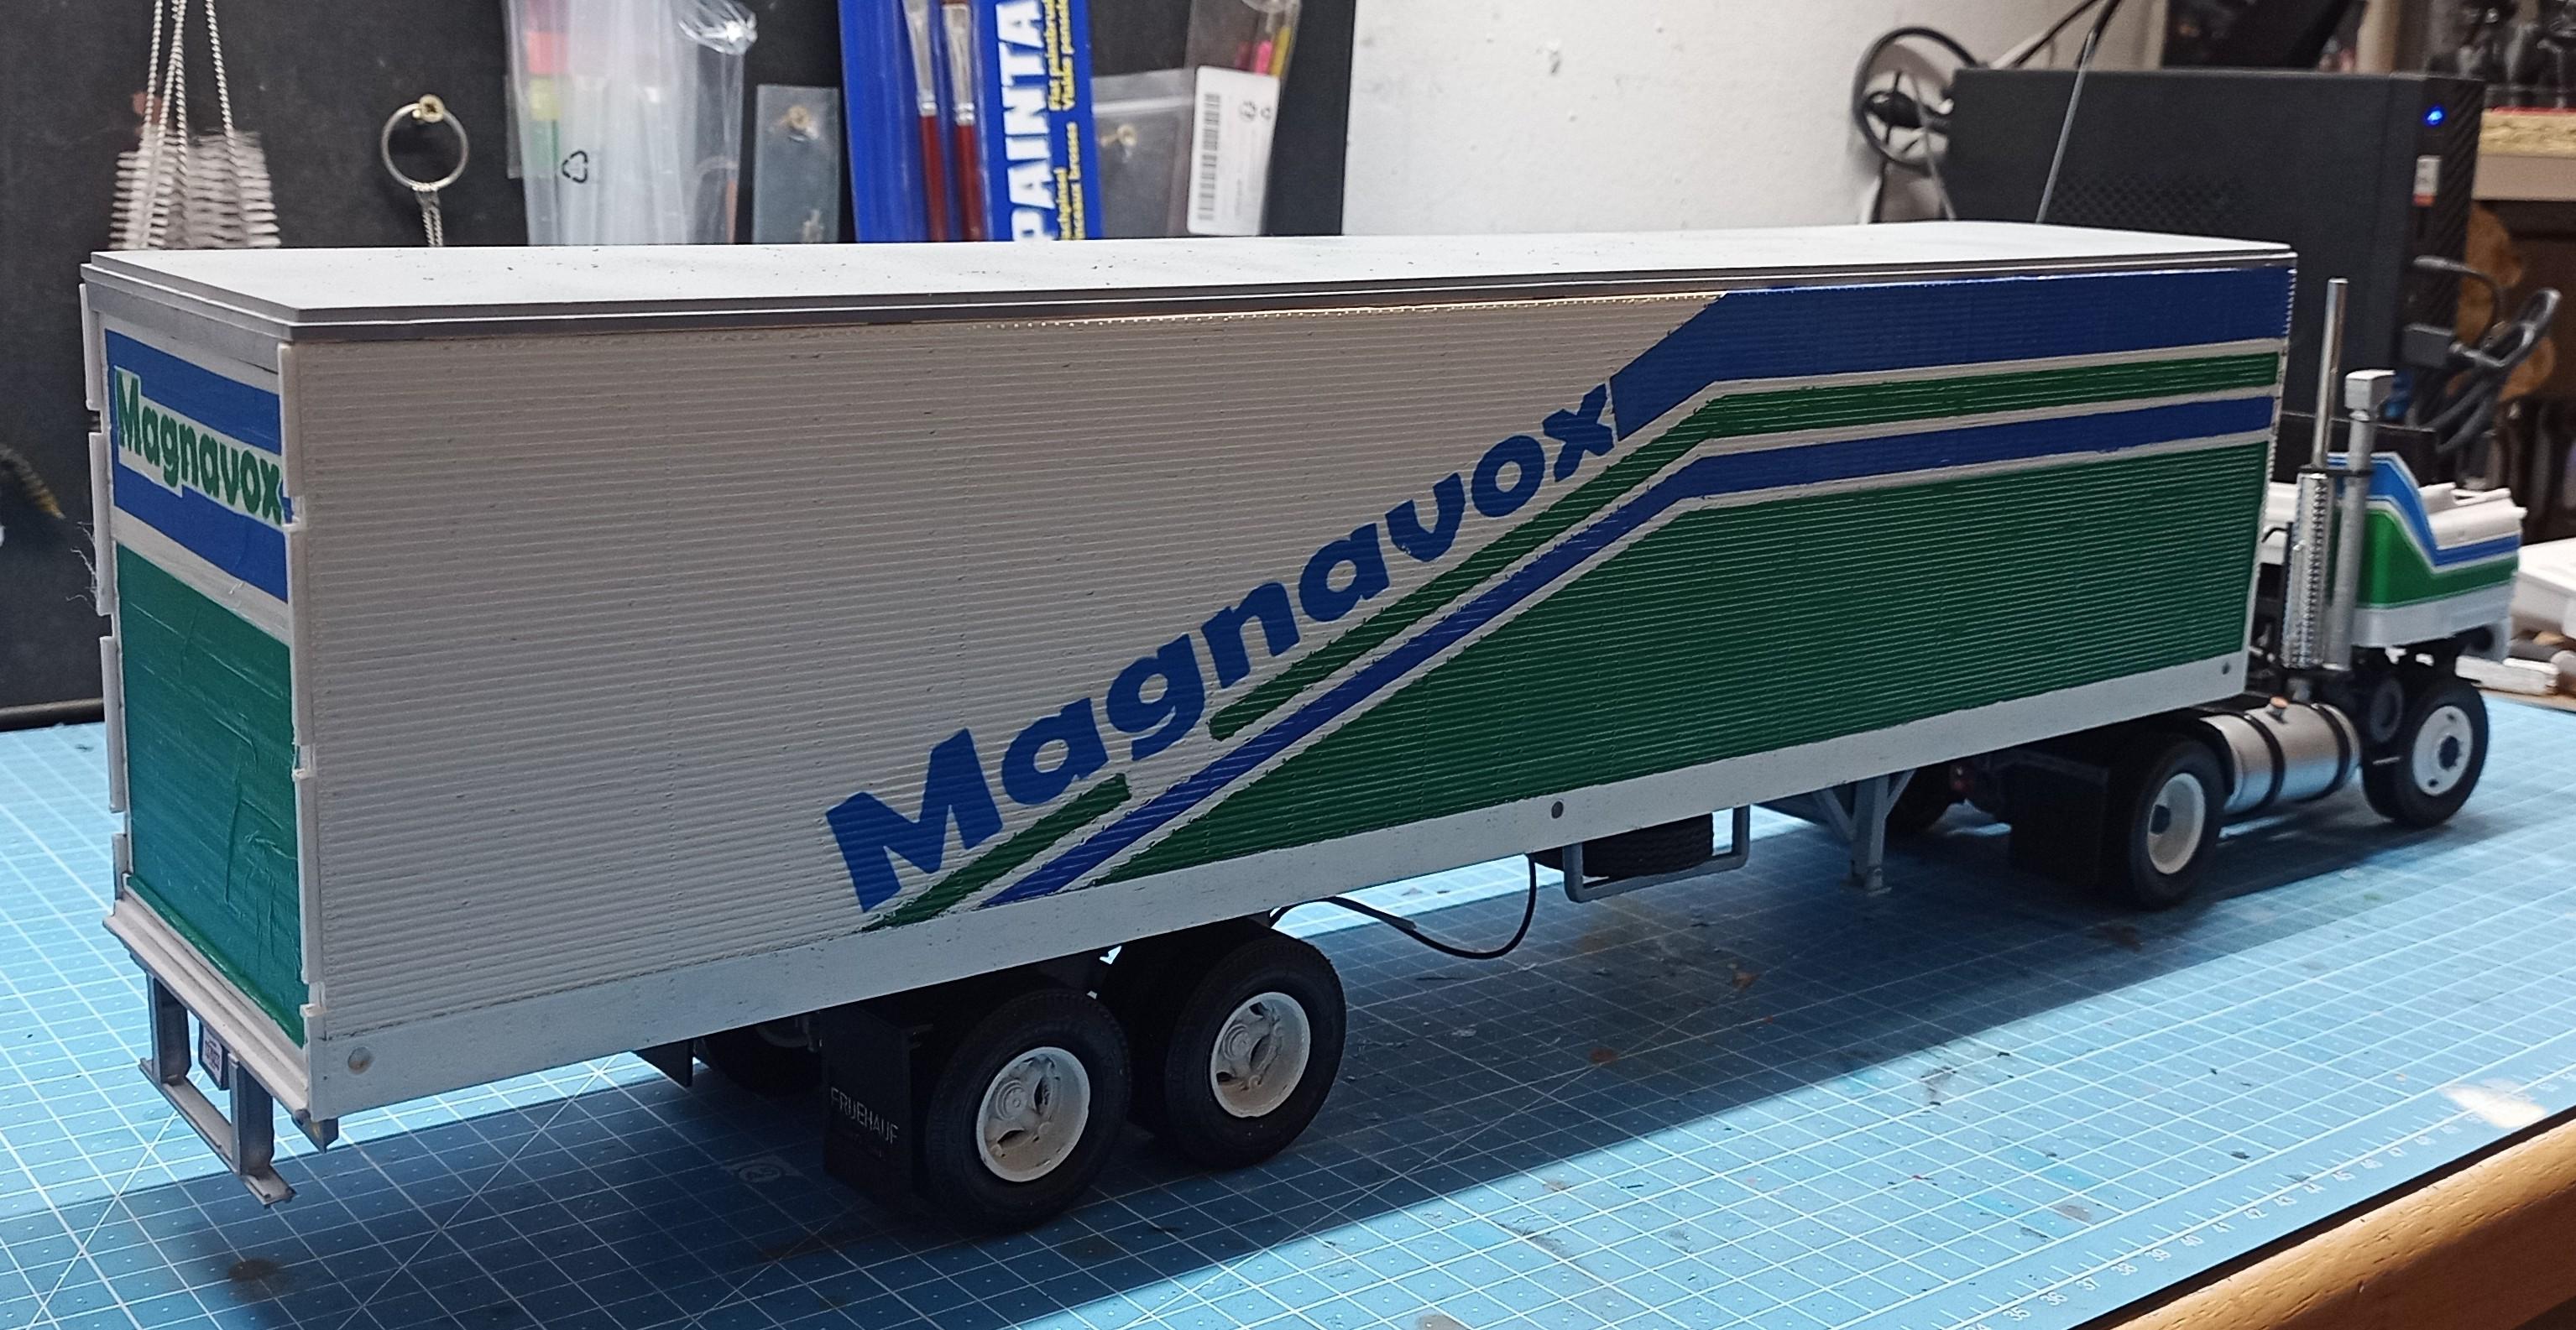
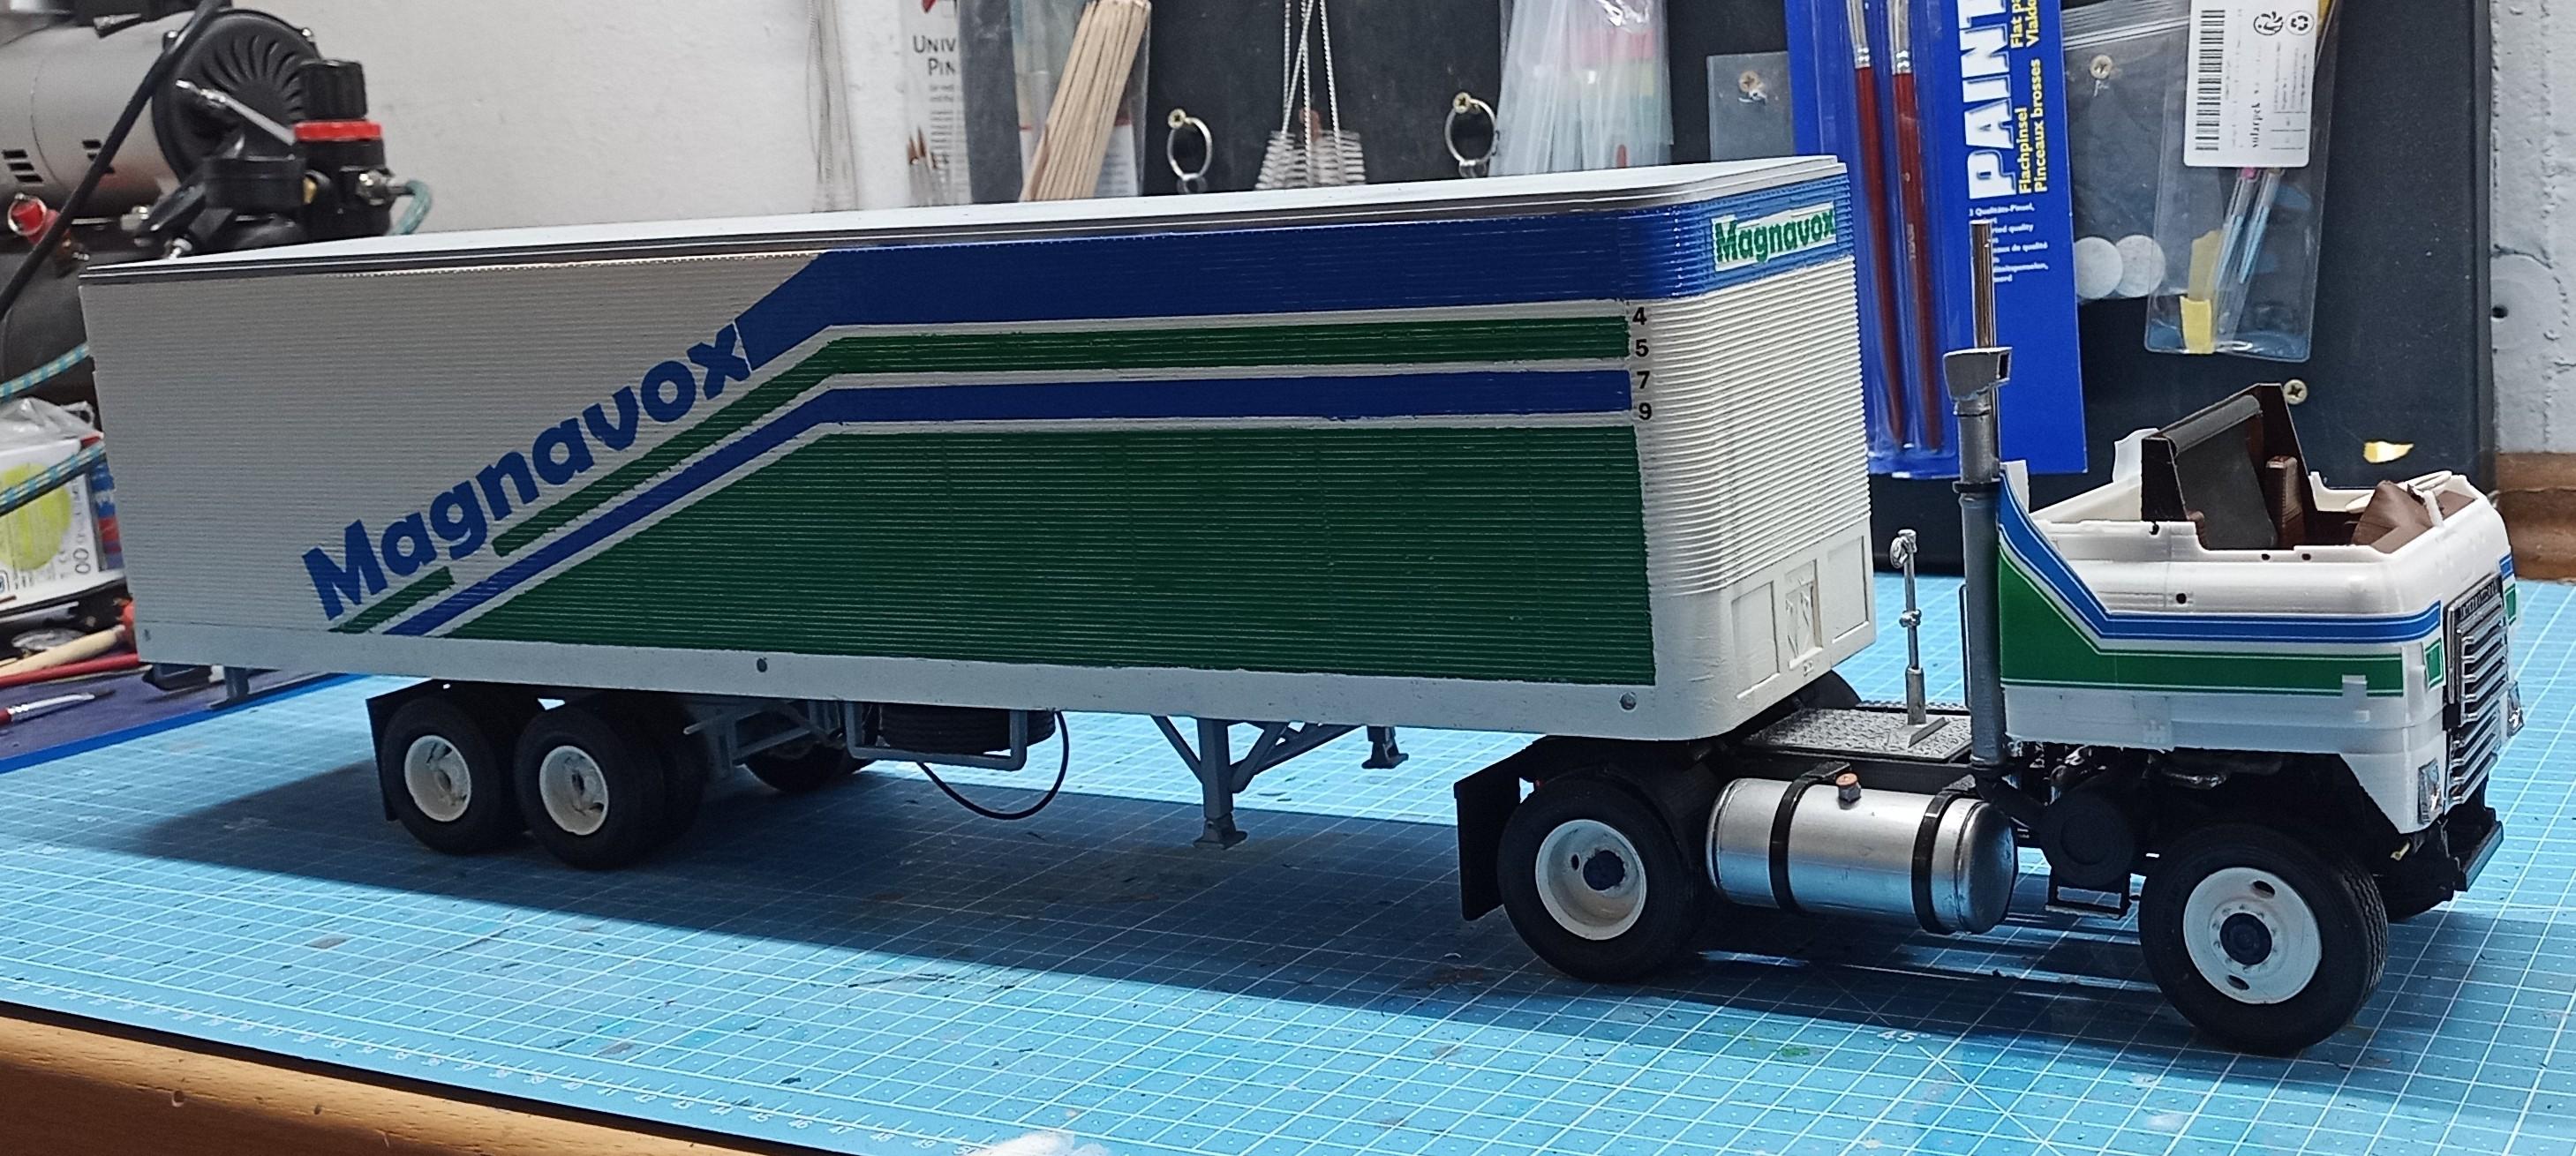
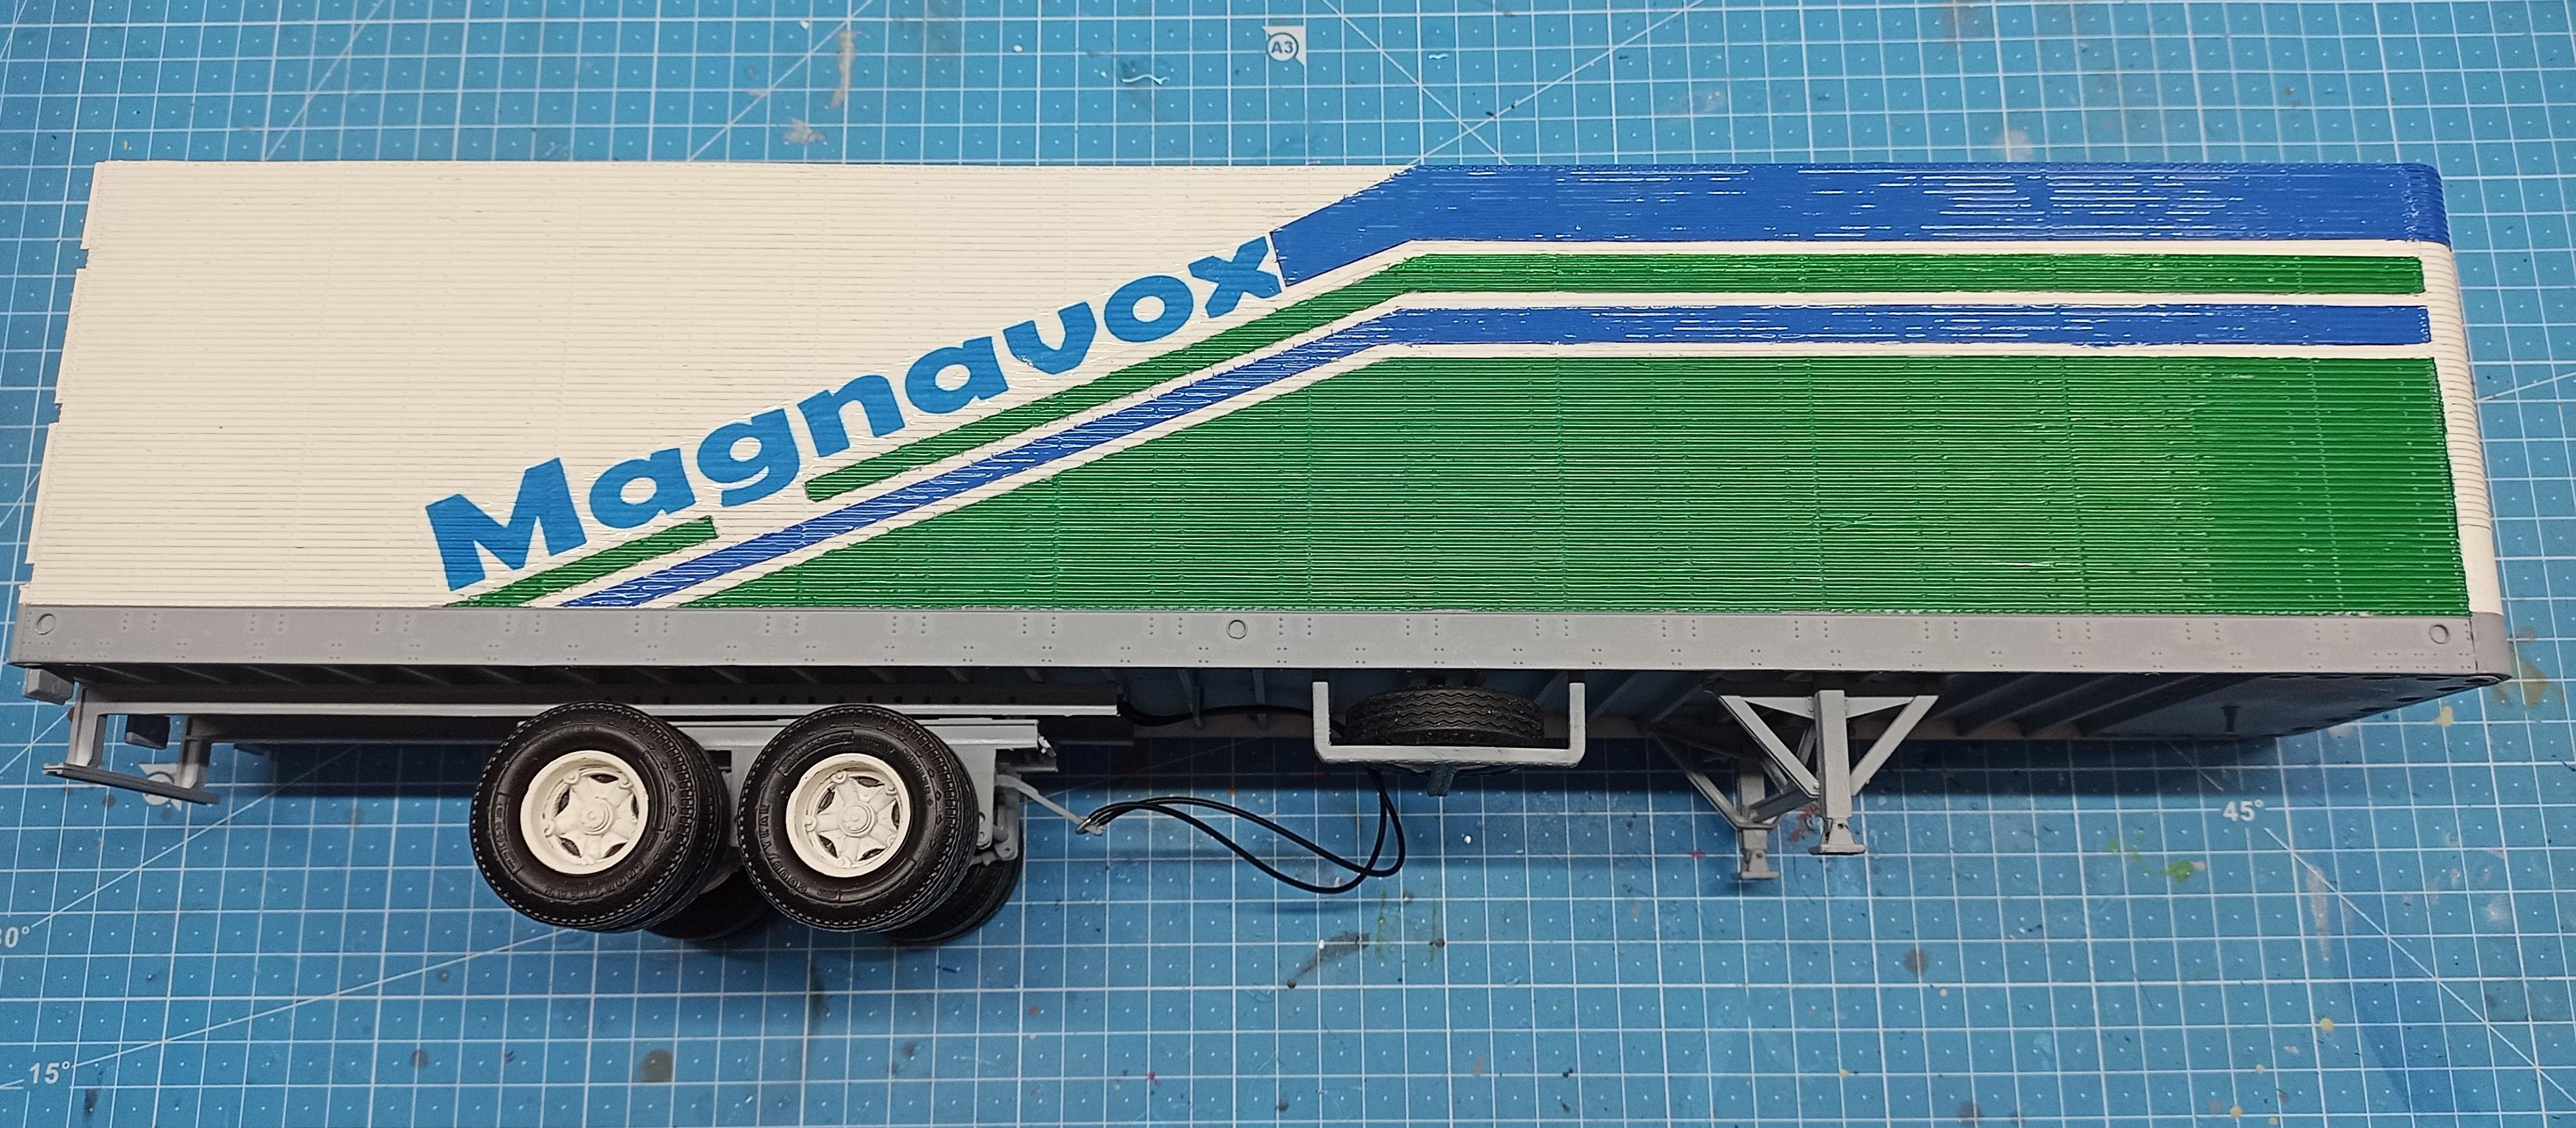
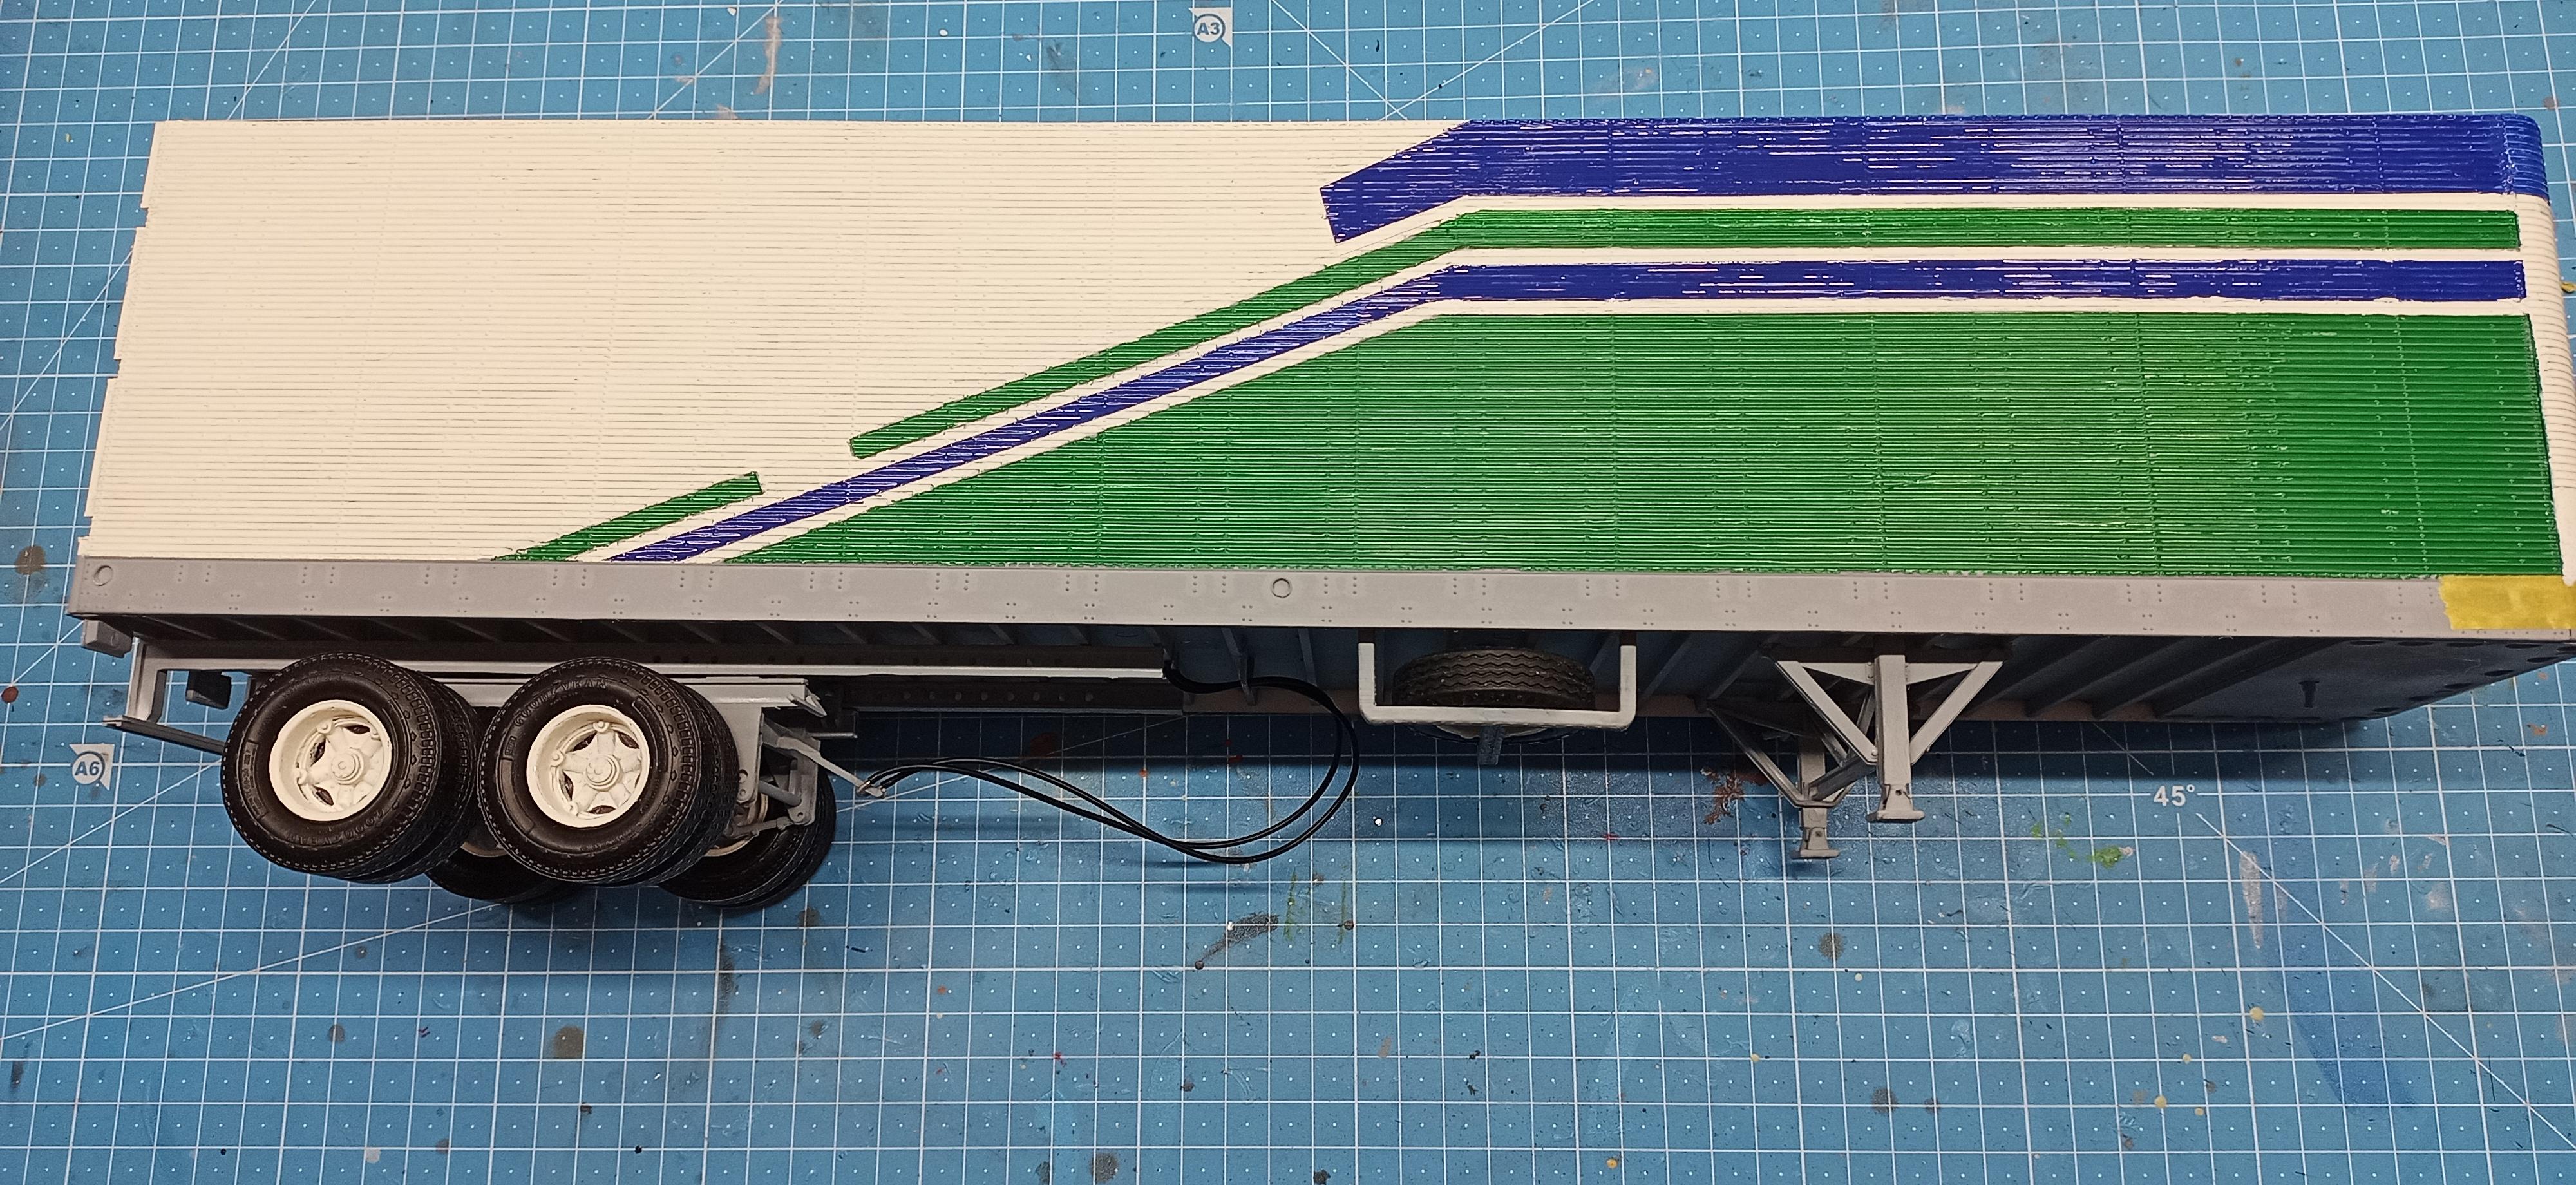
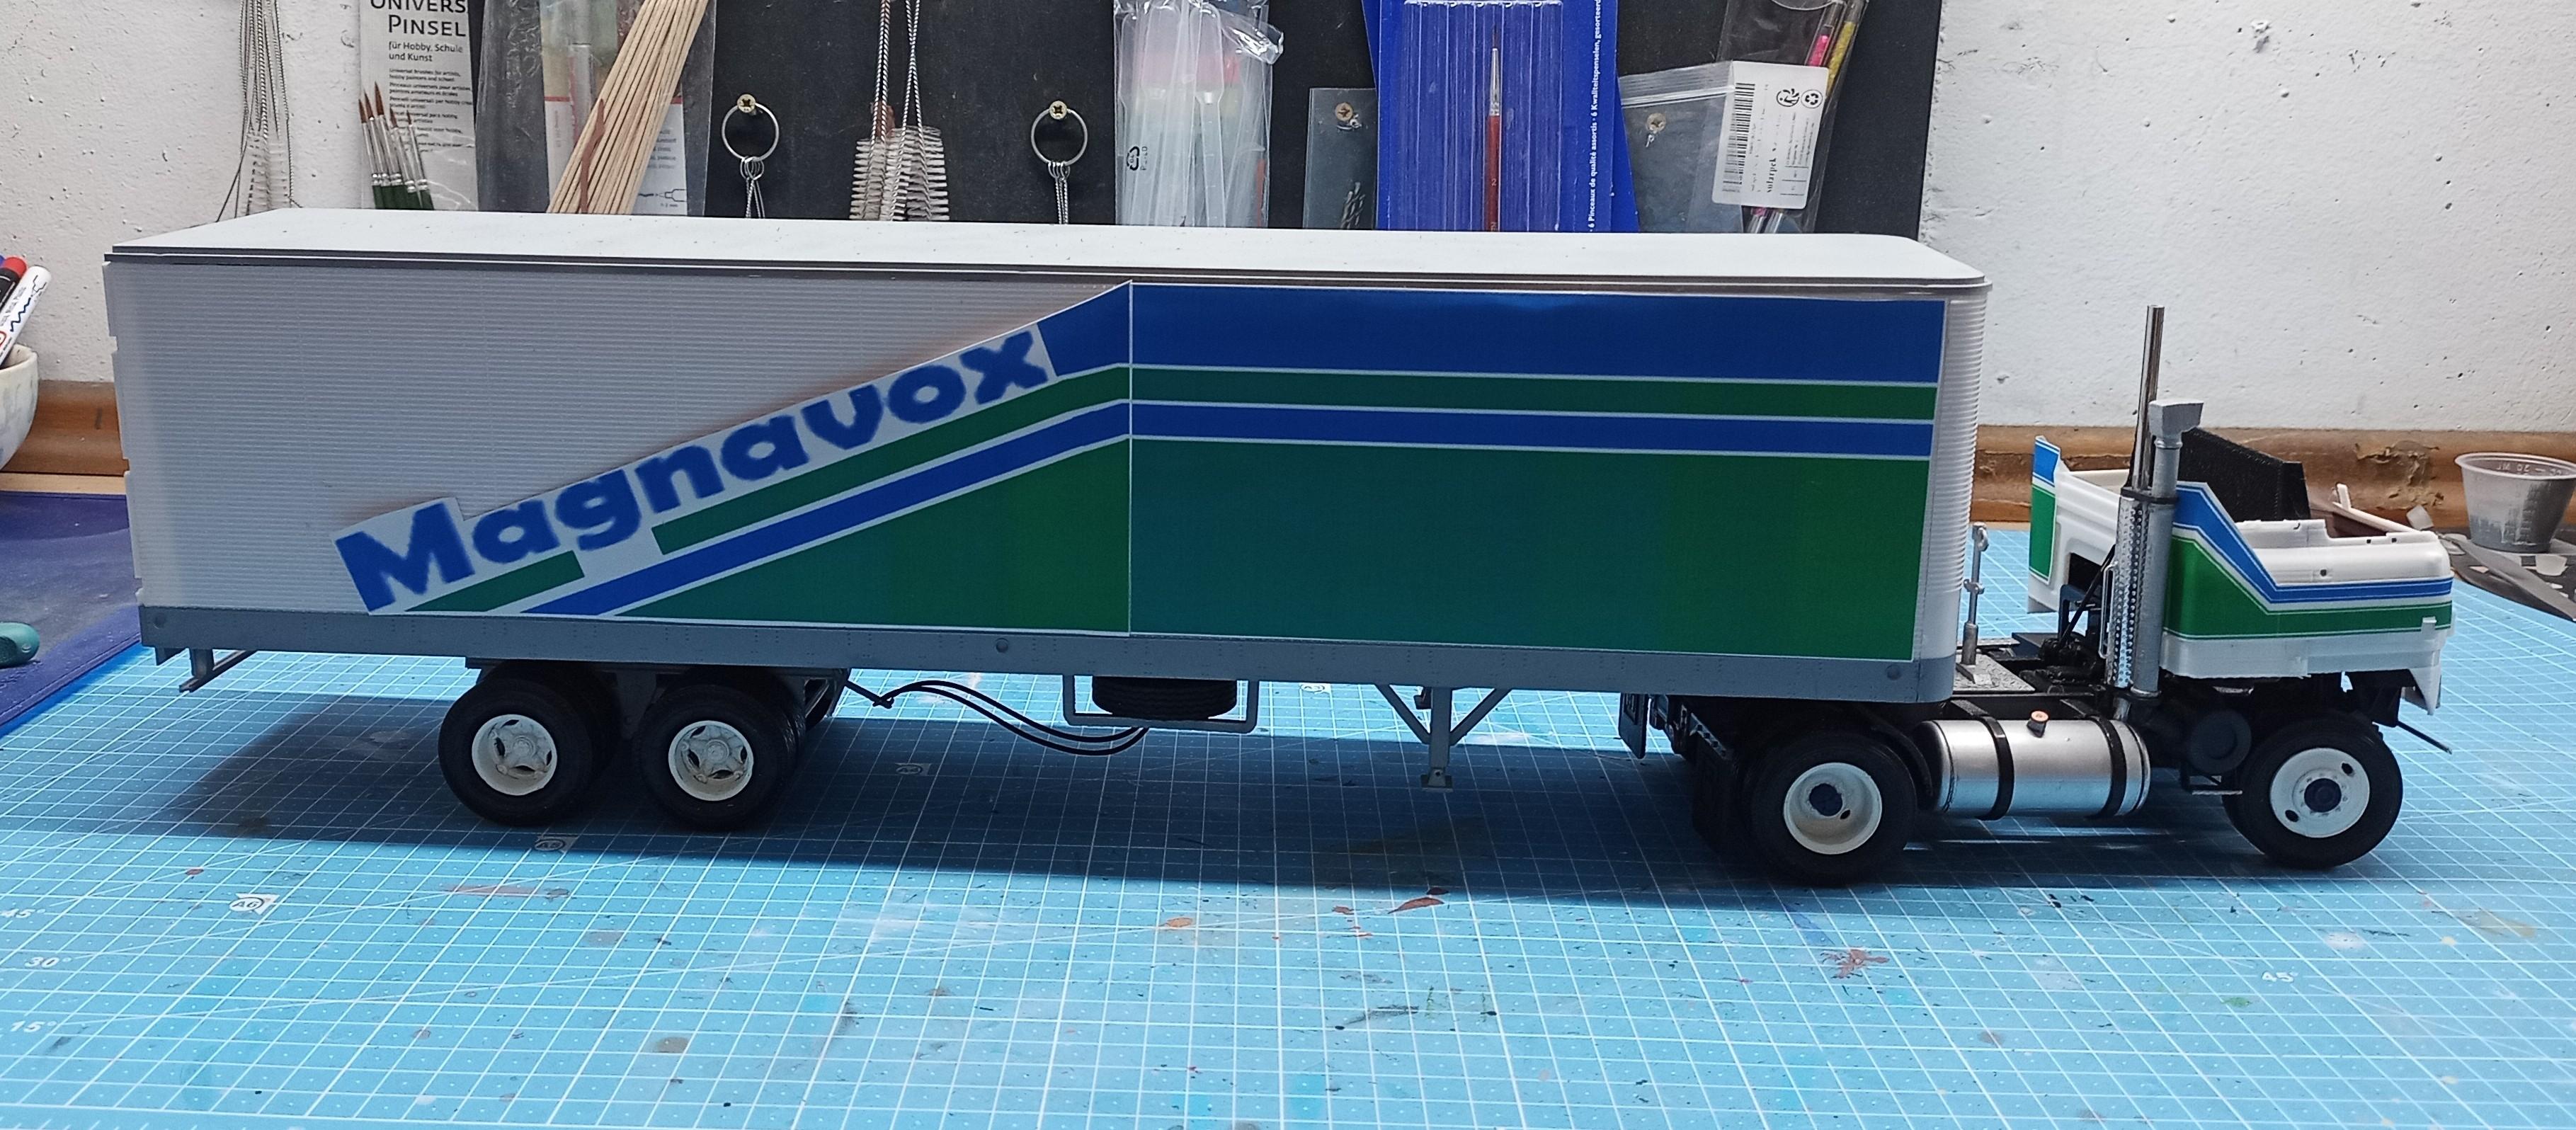
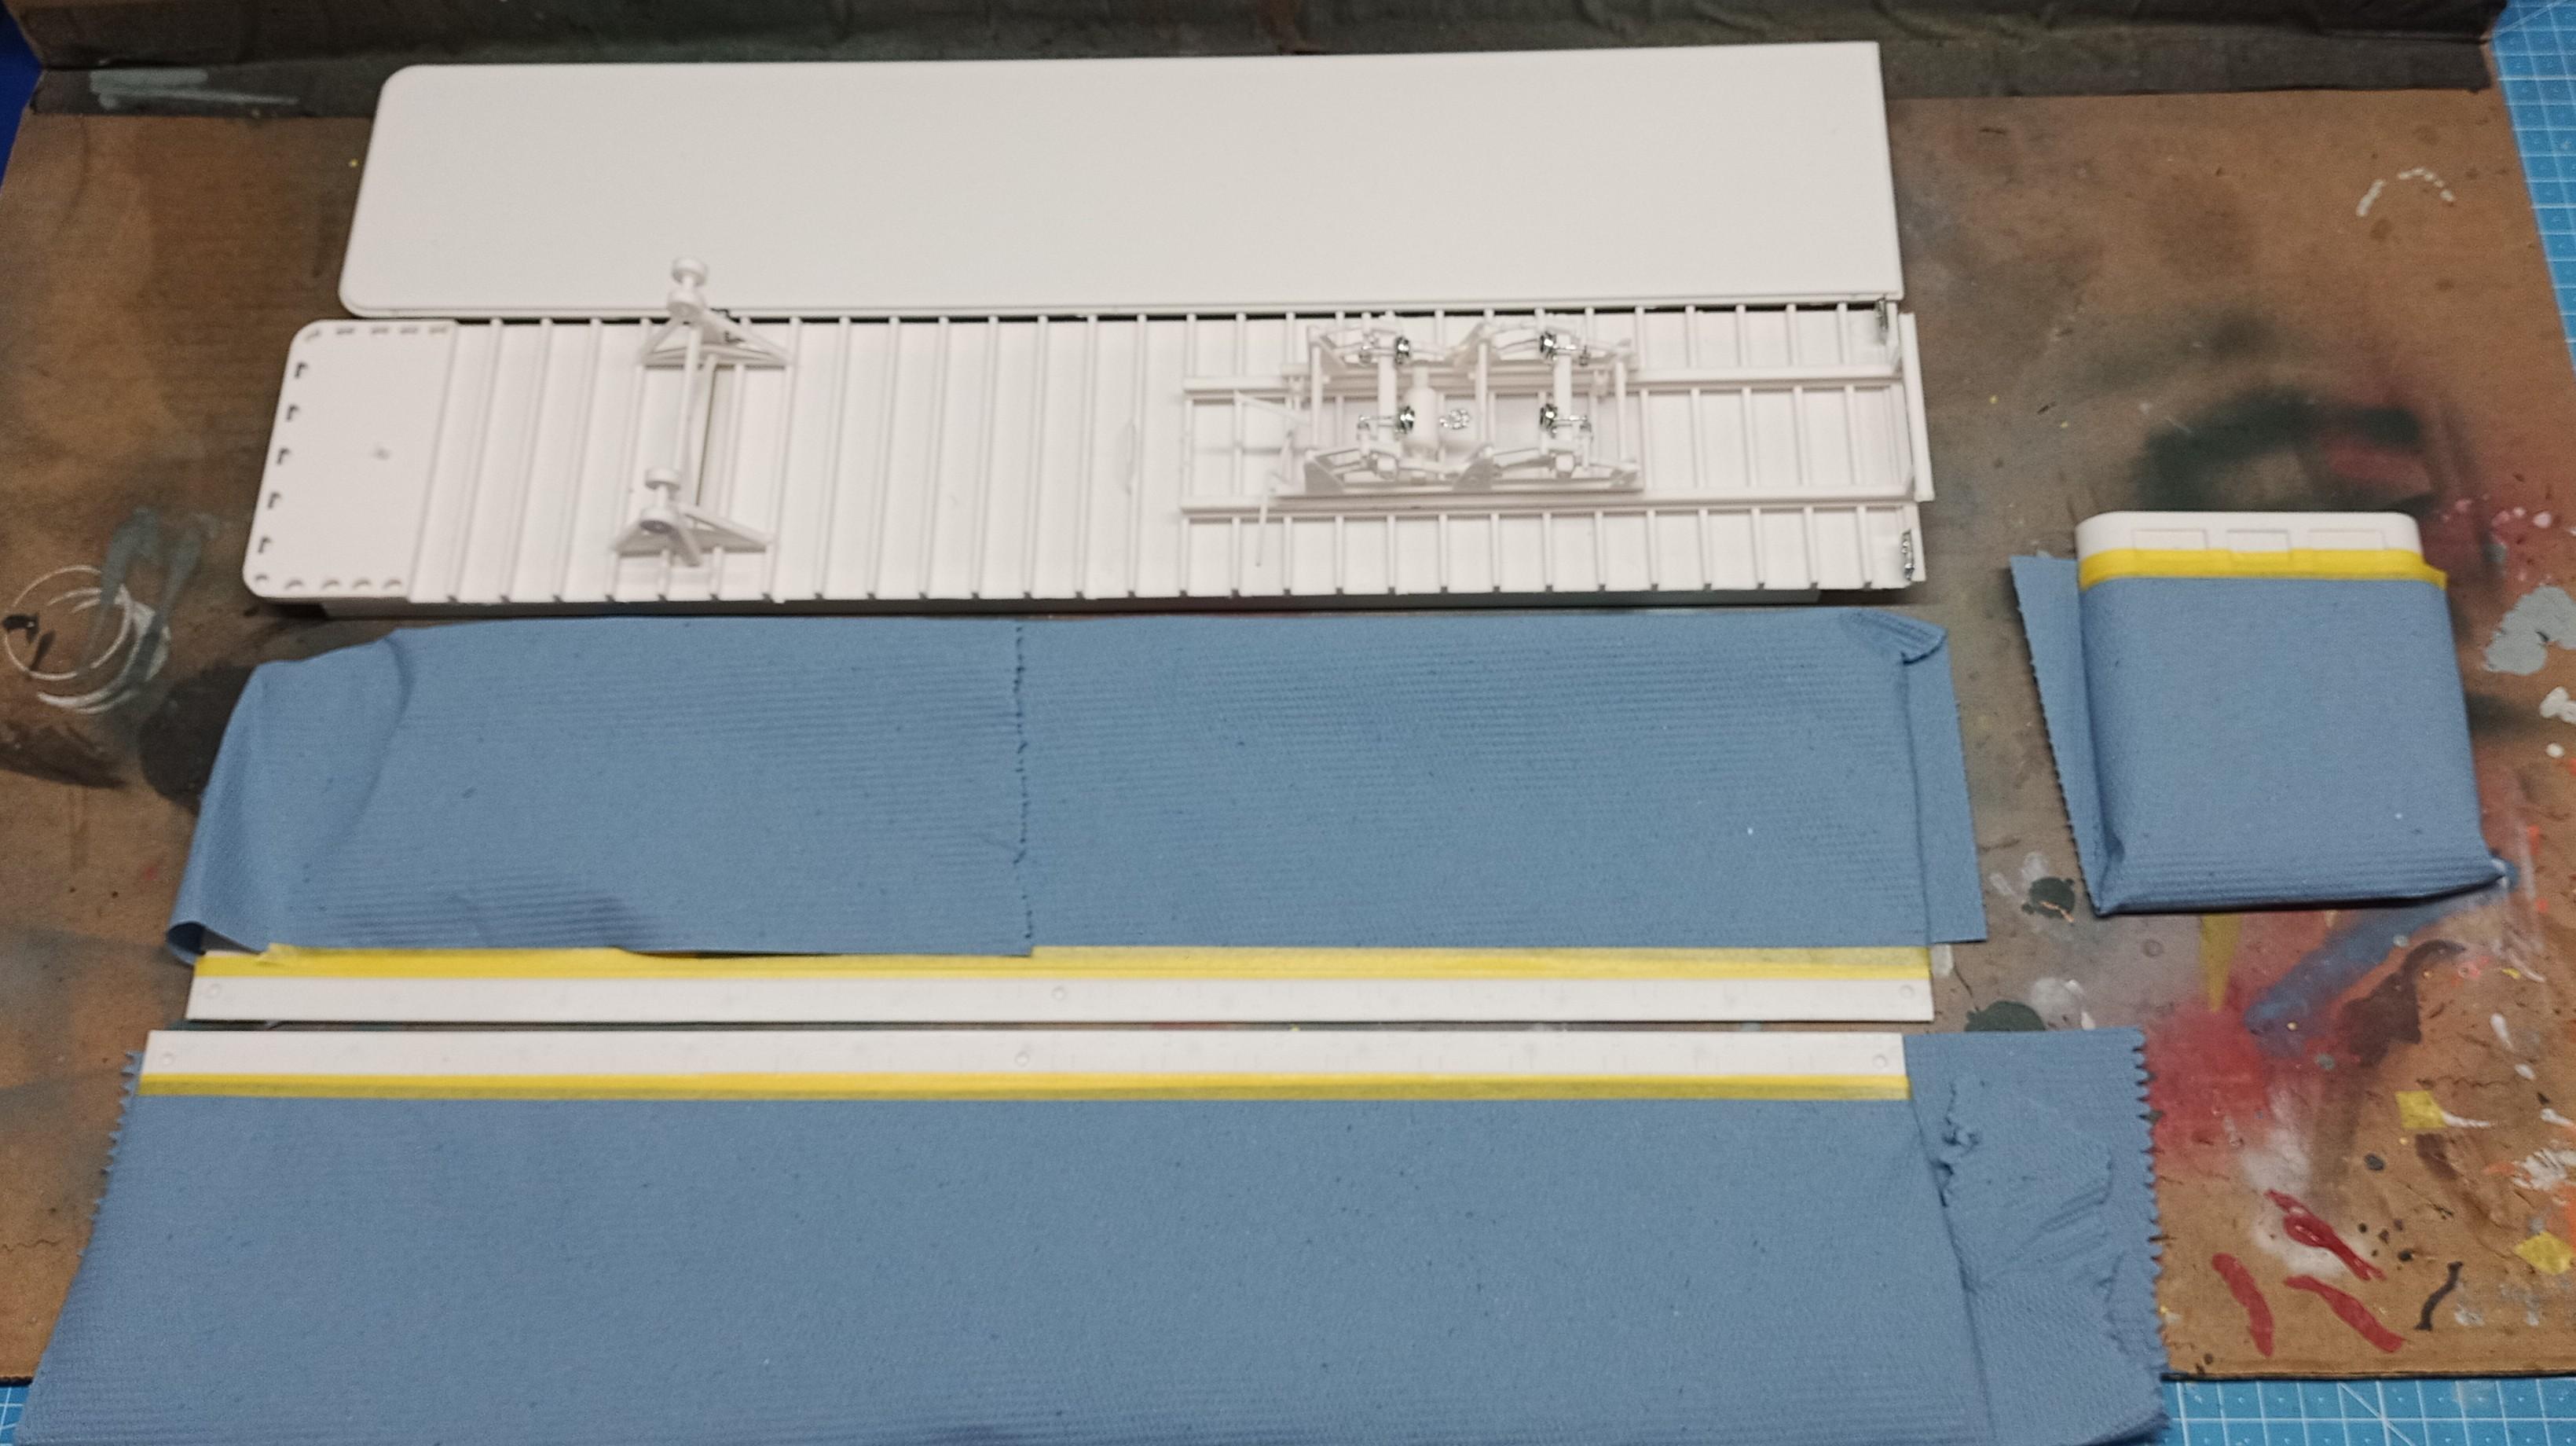
I had another look at some scenes in the movie where this truck is seen. There I noticed that the lower part on the side of the trailer is actually white. In some scenes it looked a bit grey but it does seem to be white so I changed that on my trailer! Looks better I think! I also put the decals on the rear door (I printed that. It's a part I had also used for the pups on my "Big Nasty" build) and on the front wall. Now I just have to paint the other side of the trailer and add markers lights and a few minor details! The roof will be glued when the left side of the trailer is finished! Hope the cabs will have arrived by the time I'm finished with the trailer.
-
Convoy, take 7
Jürgen M. replied to Jürgen M.'s topic in WIP: Model Trucks: Big Rigs and Heavy Equipment
That's better, I'd say! ...and it fits the decal color! Looks pretty nice! I think I'll leave it that way and go on with the other side!
-
Convoy, take 7
Jürgen M. replied to Jürgen M.'s topic in WIP: Model Trucks: Big Rigs and Heavy Equipment
Got some more painting done yesterday: The blue is still too dark eventhough I put in quite an amount of white. I might just mix a new blue and try again. It should fit a bit better to the decals on the cab.
-
Convoy, take 7
Jürgen M. replied to Jürgen M.'s topic in WIP: Model Trucks: Big Rigs and Heavy Equipment
Thanks Jeff! Actually it's not that hard! I paint the whole area in a base color, in this case flat white! When cured I mask the shapes I want. Then I use the same base color to close the gaps between the masking tape and the area to be painted. After that's dryed I paint the color that area is supposed to be! When it's almost dry you pull off the masking tape really low and flat. If you wait till it's completely dry you risk pulling off more paint than you wish! It's like painting a wall in your house in different colors. Of course it takes time but it works! 👍 -
Coming along nicely! I like the Astro kit! Not a perfect fit but for AMT pretty good! I like your gladhands and the hitches! Look really authentic!
-
Convoy, take 7
Jürgen M. replied to Jürgen M.'s topic in WIP: Model Trucks: Big Rigs and Heavy Equipment
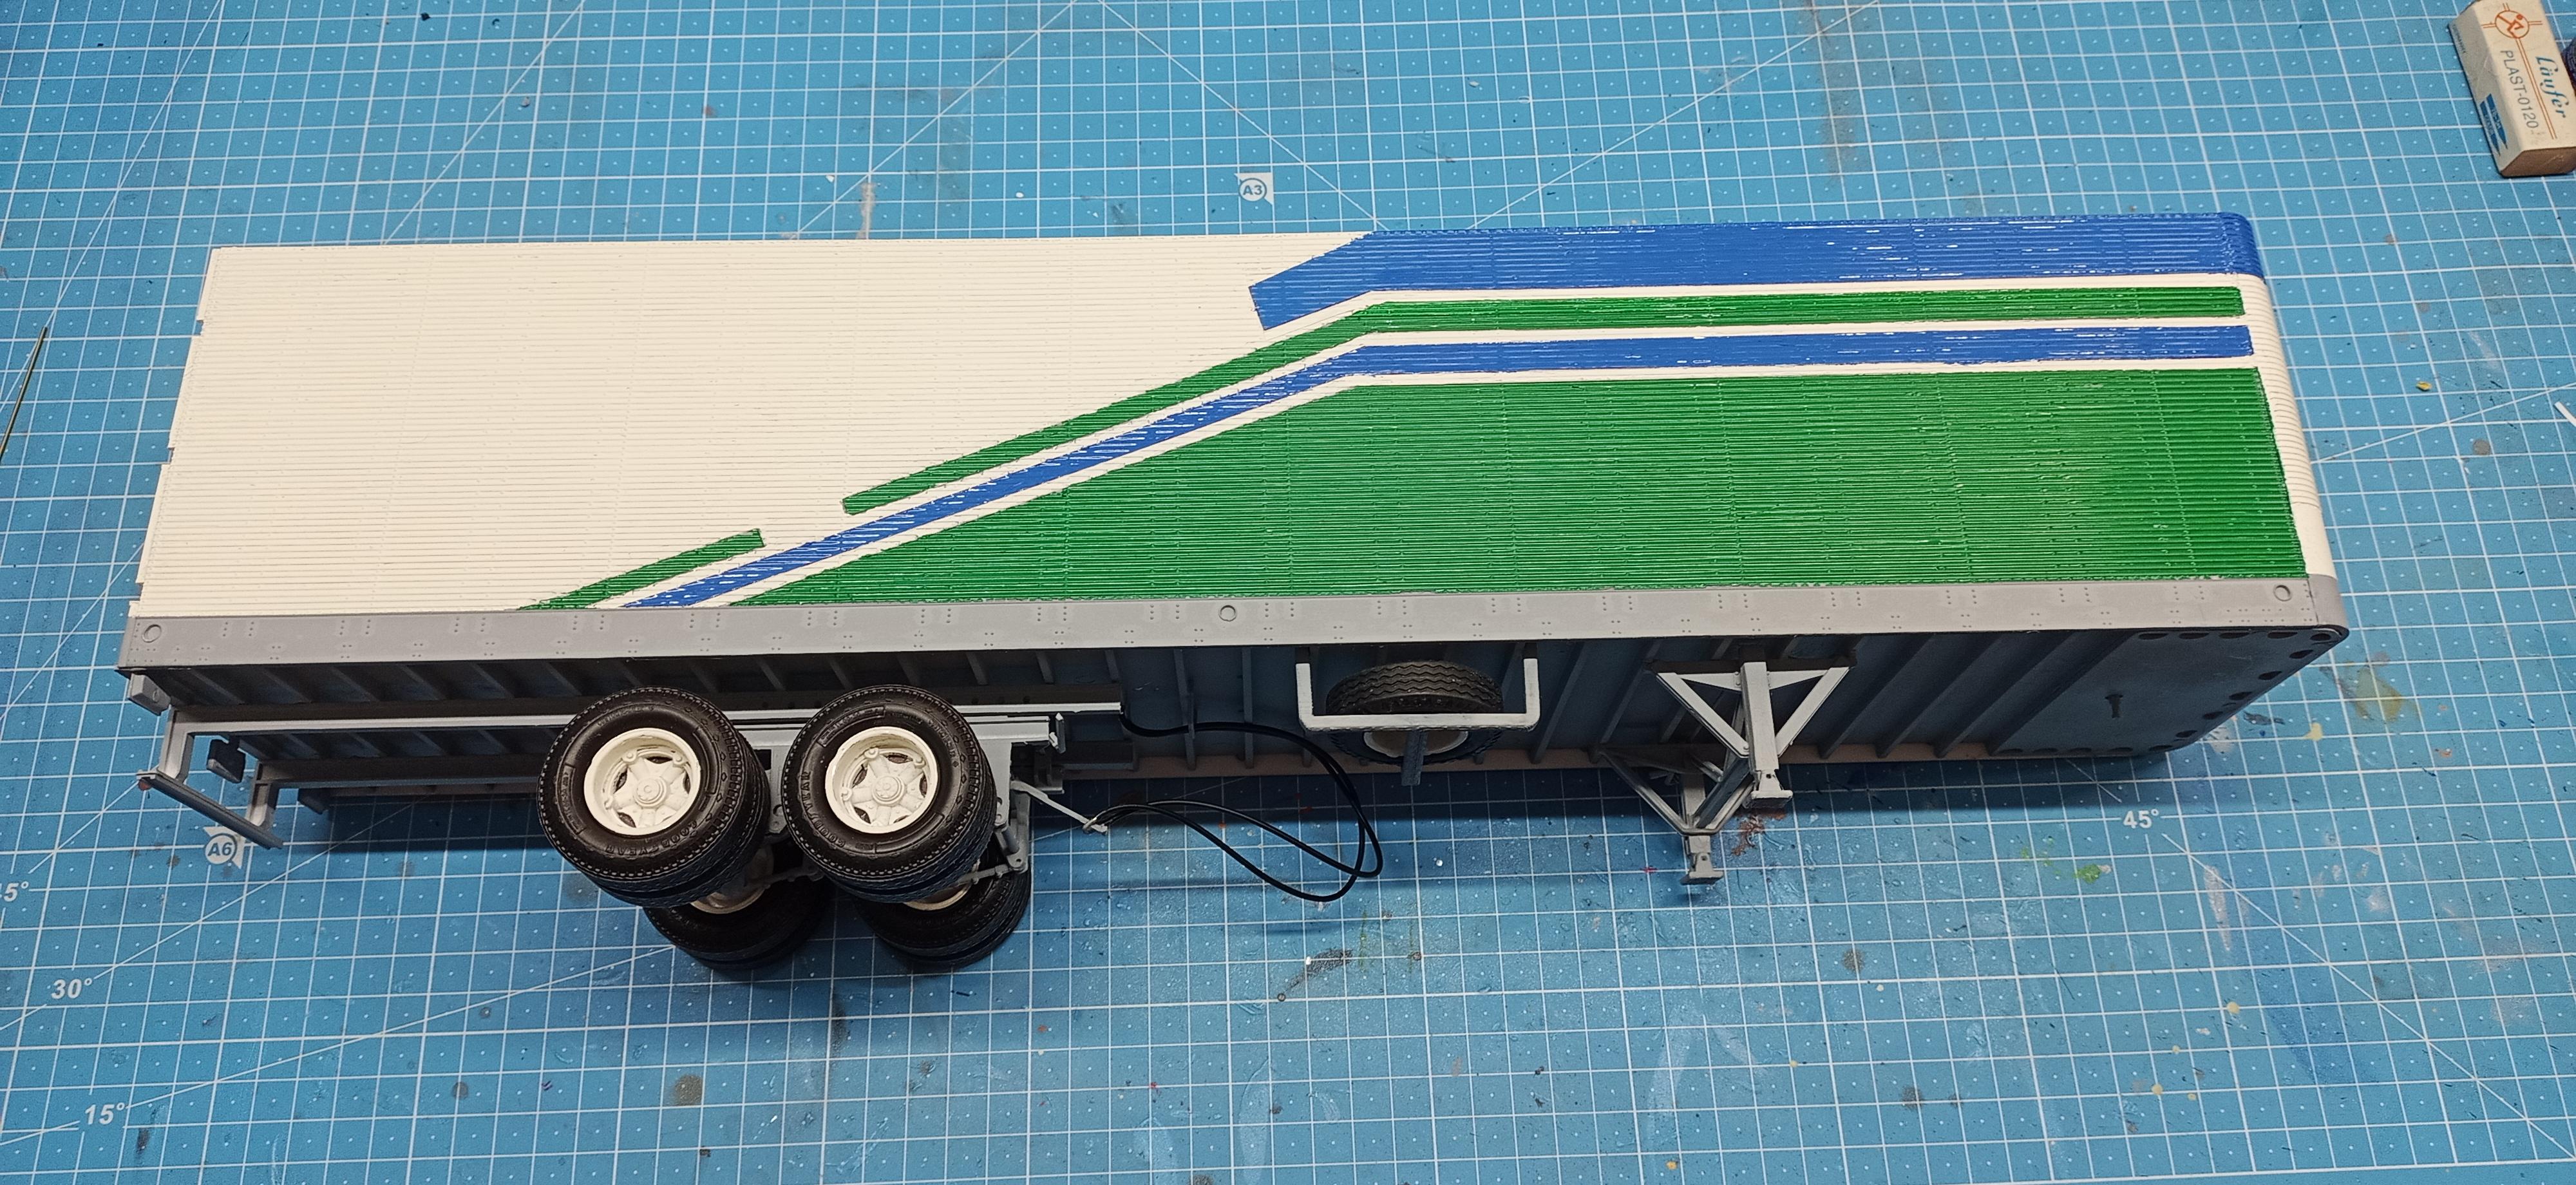
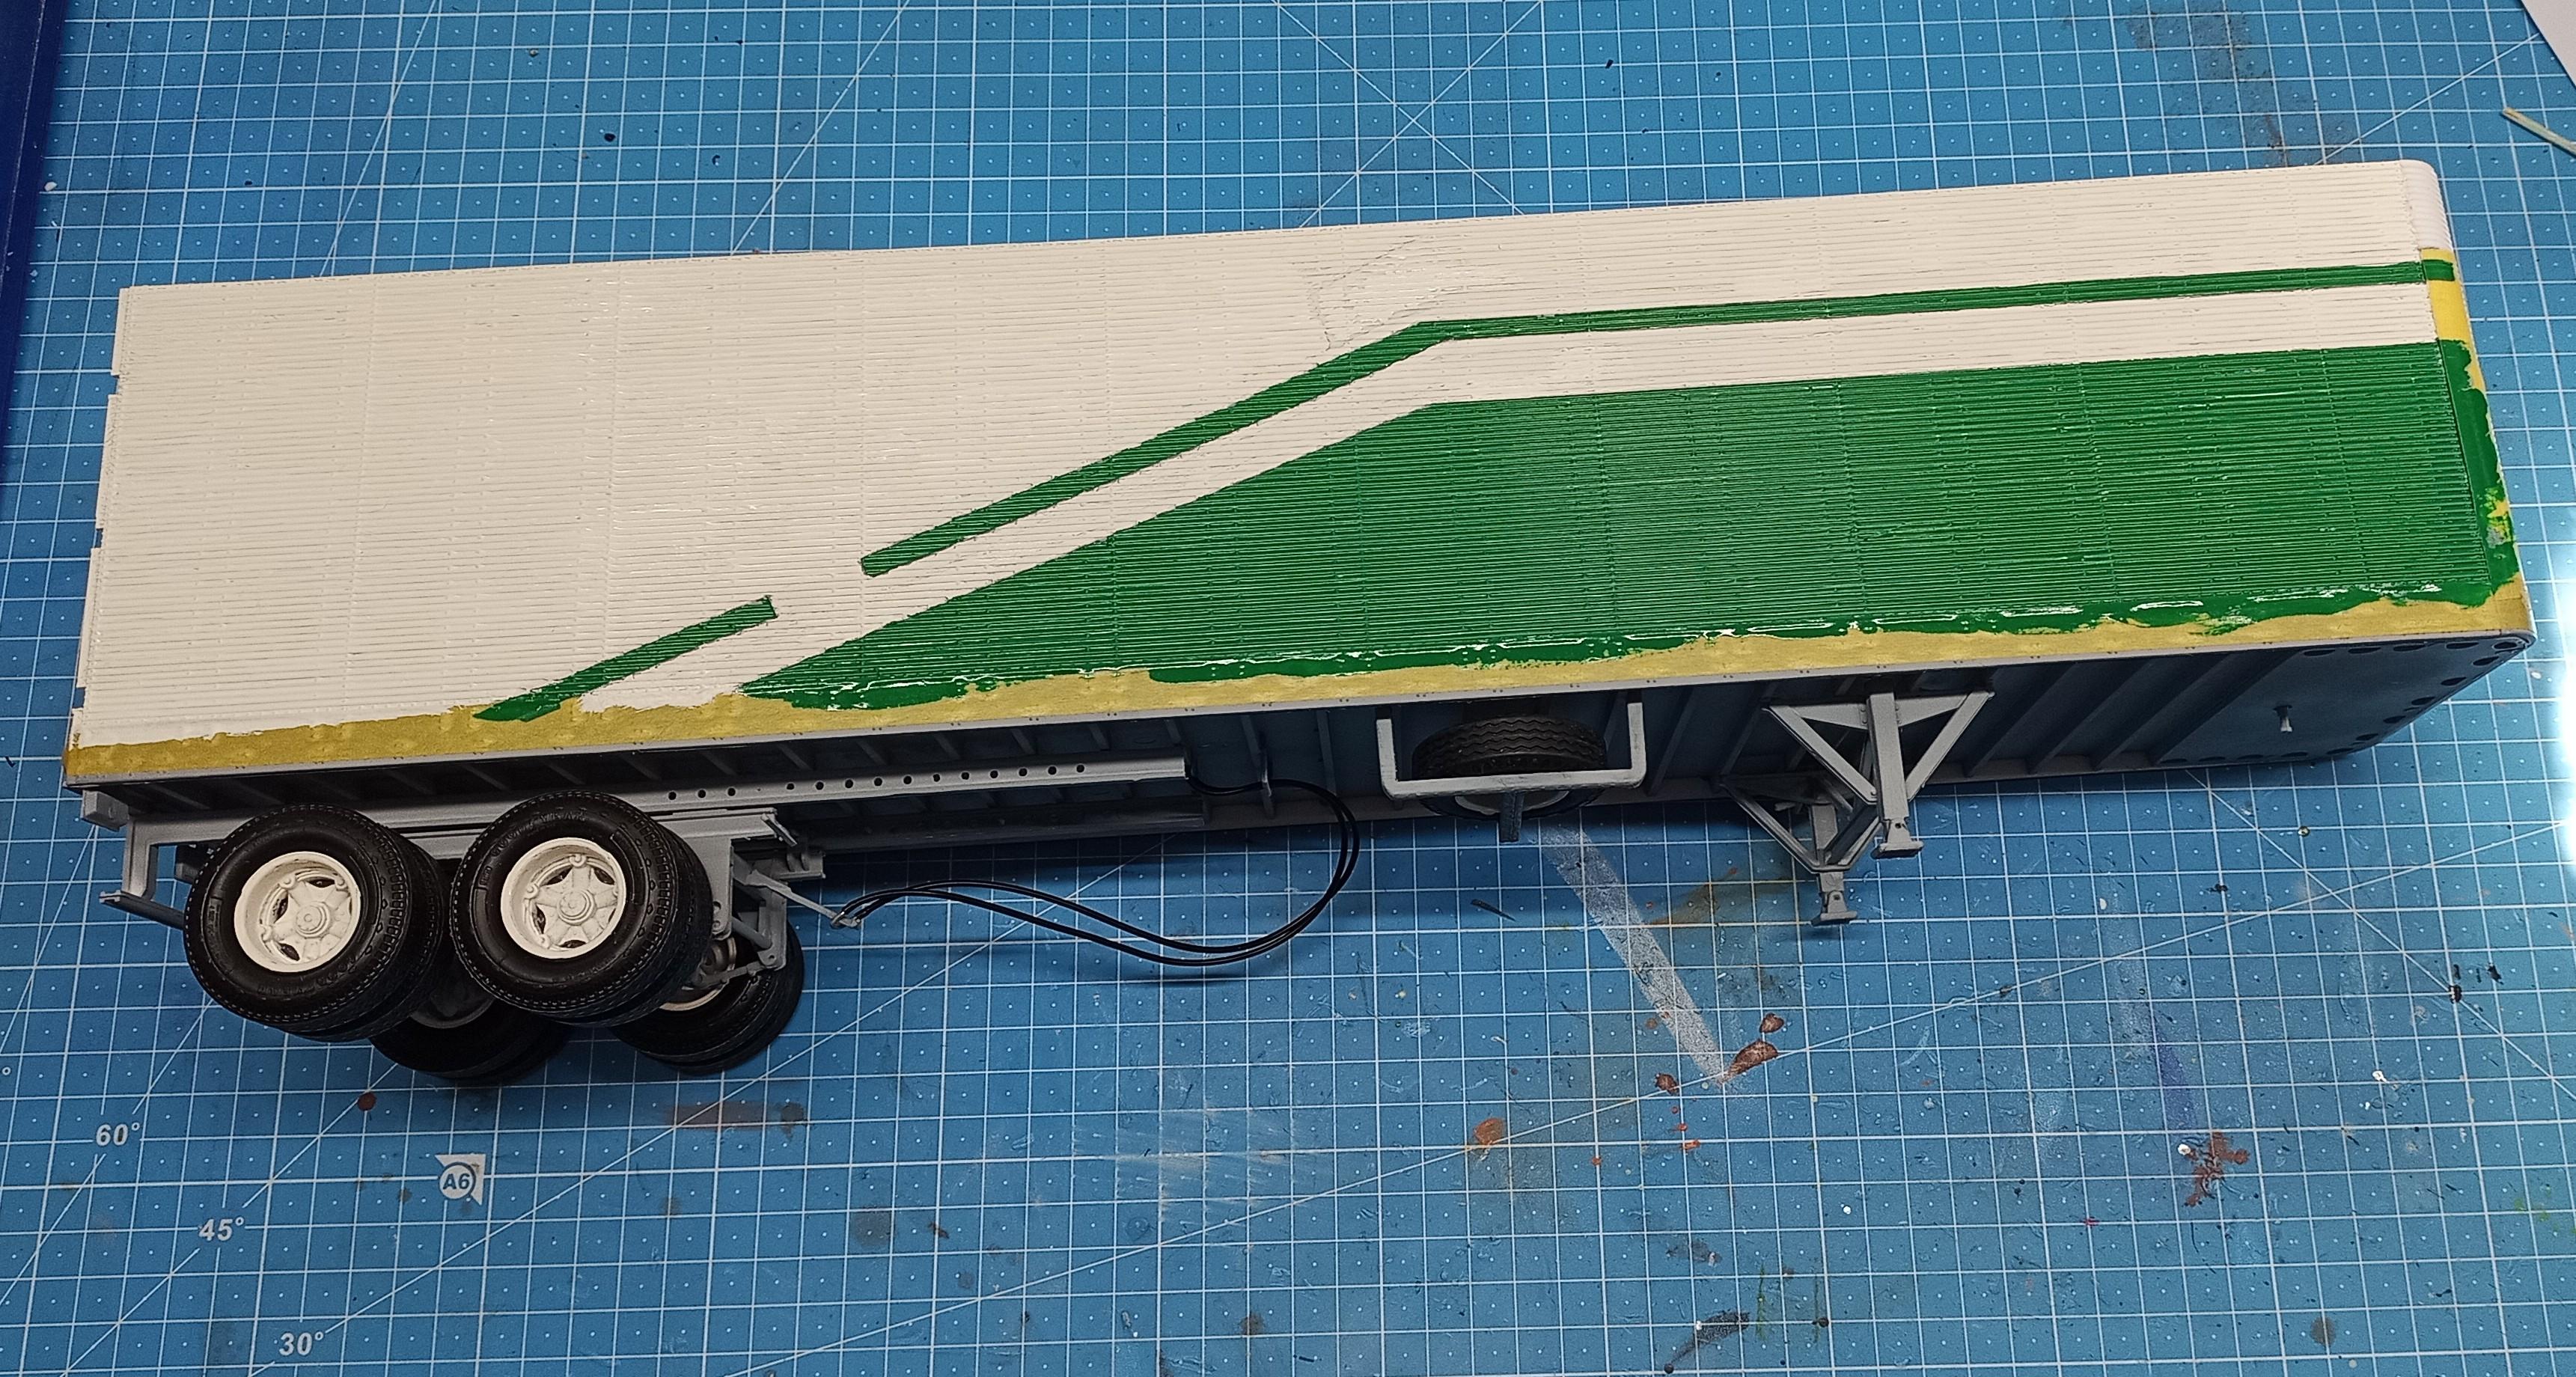
First step is done! Not perfect yet but better than expected considering the trailer walls aren't smooth! Now I'll mask for the blue stripes!
-
Convoy, take 7
Jürgen M. replied to Jürgen M.'s topic in WIP: Model Trucks: Big Rigs and Heavy Equipment
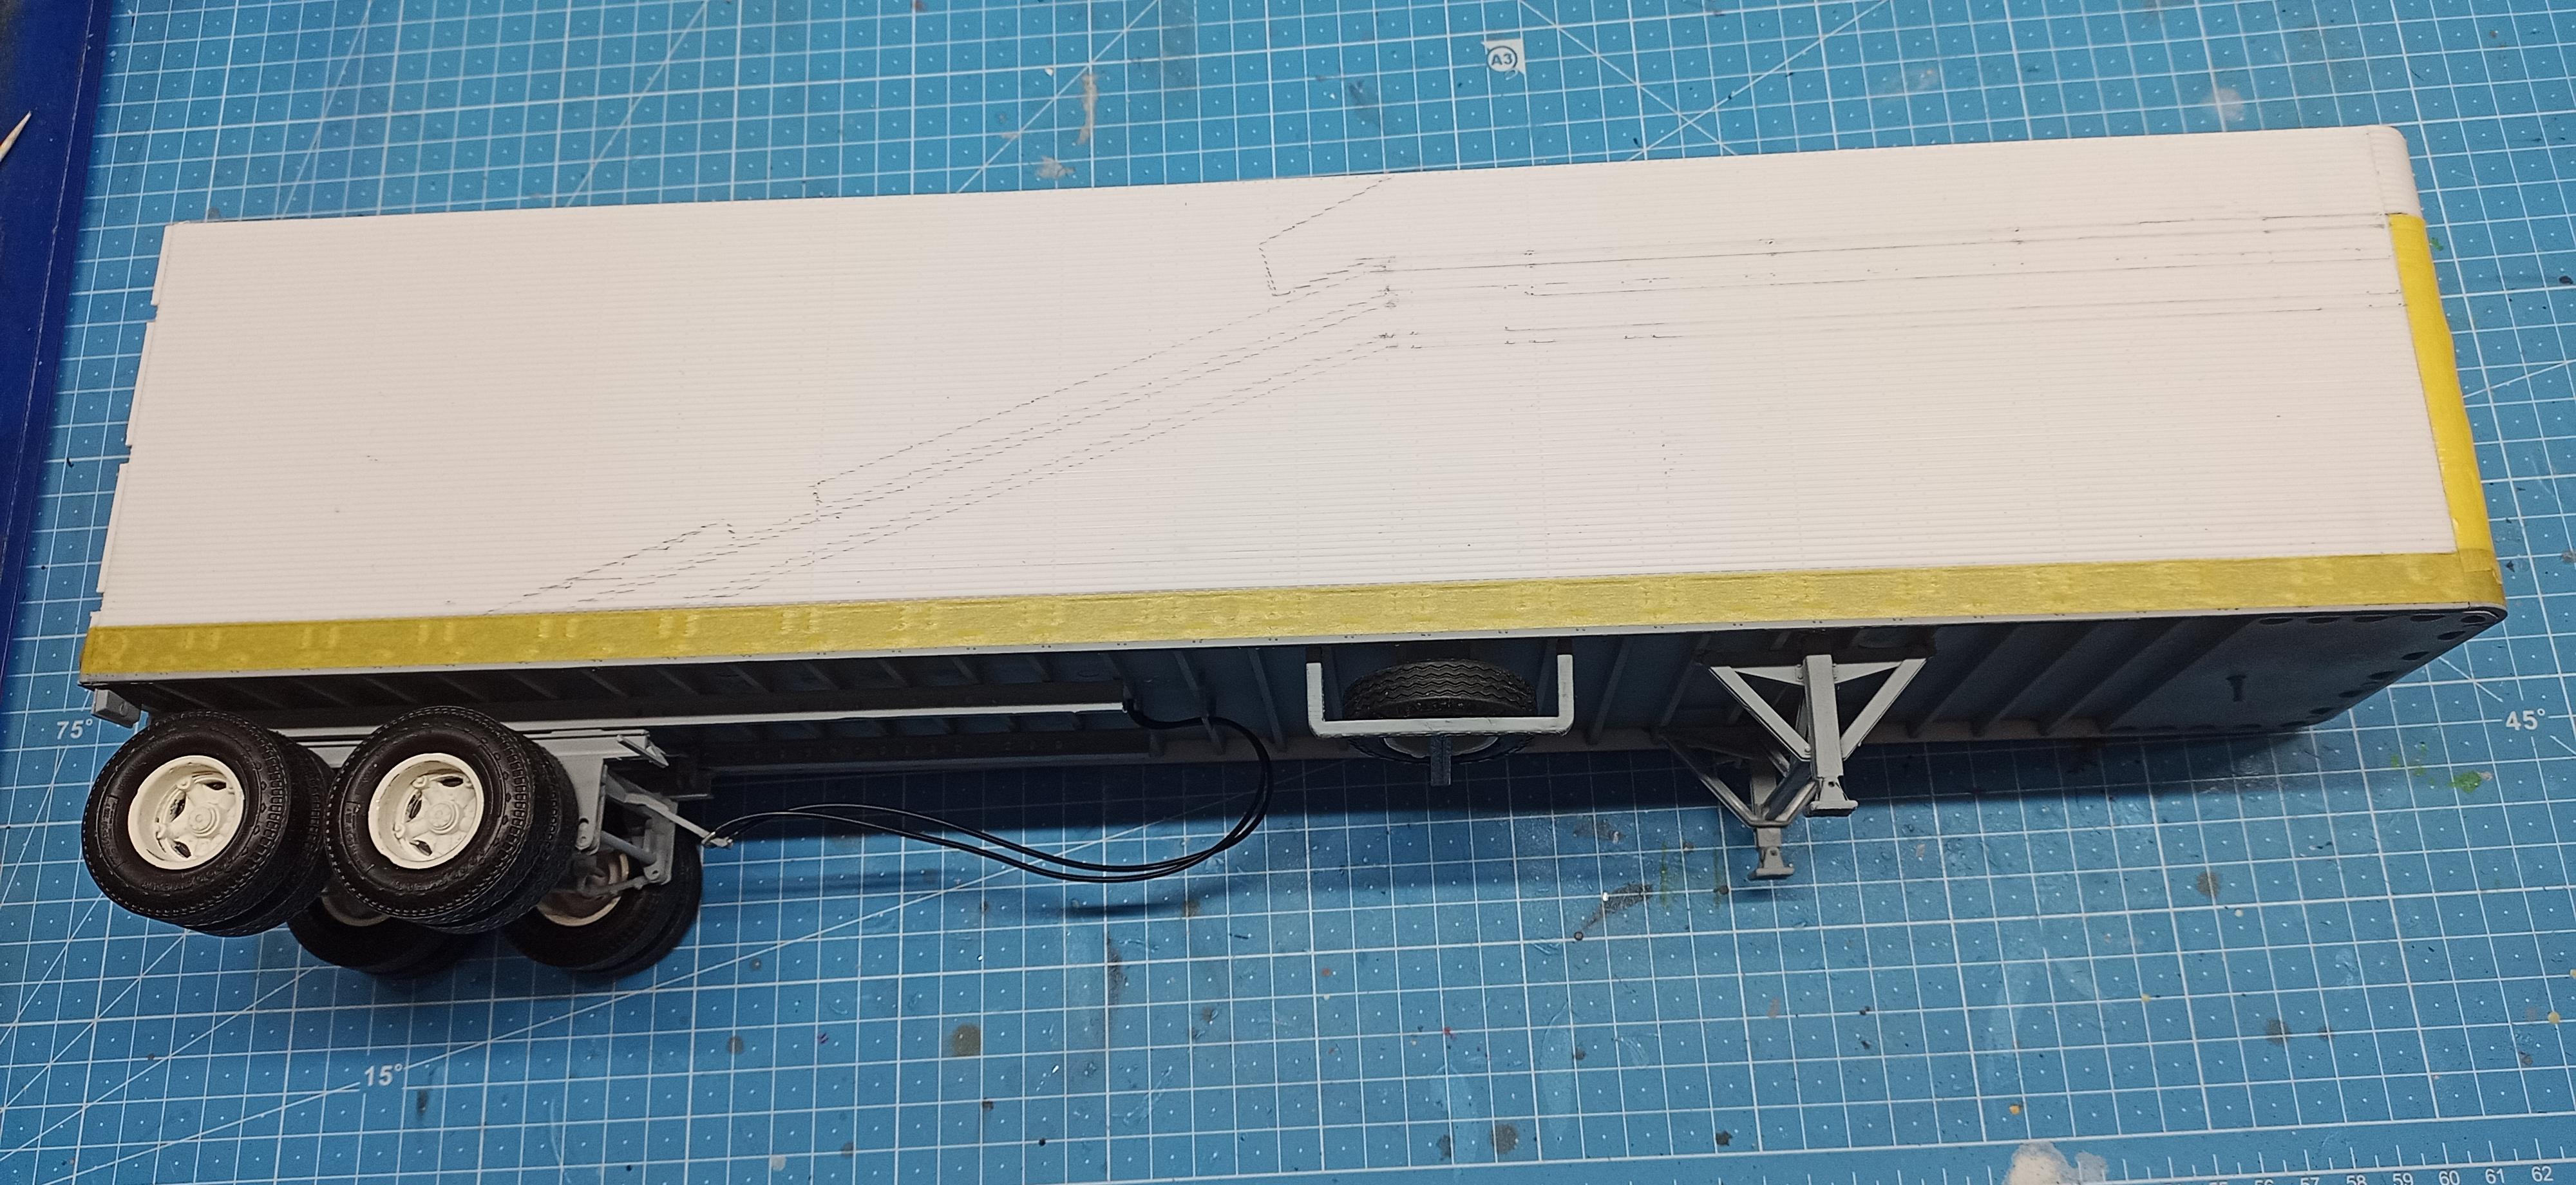
Printed the graphics in decal paper but the colors just doesn't come out even, especially the green! So I began to draw lines in the trailer walls so I can paint it and then put the "Magnavox" decals on! So now I have to stop with the coffee to keep my hand calm! 😉
-
Convoy, take 7
Jürgen M. replied to Jürgen M.'s topic in WIP: Model Trucks: Big Rigs and Heavy Equipment
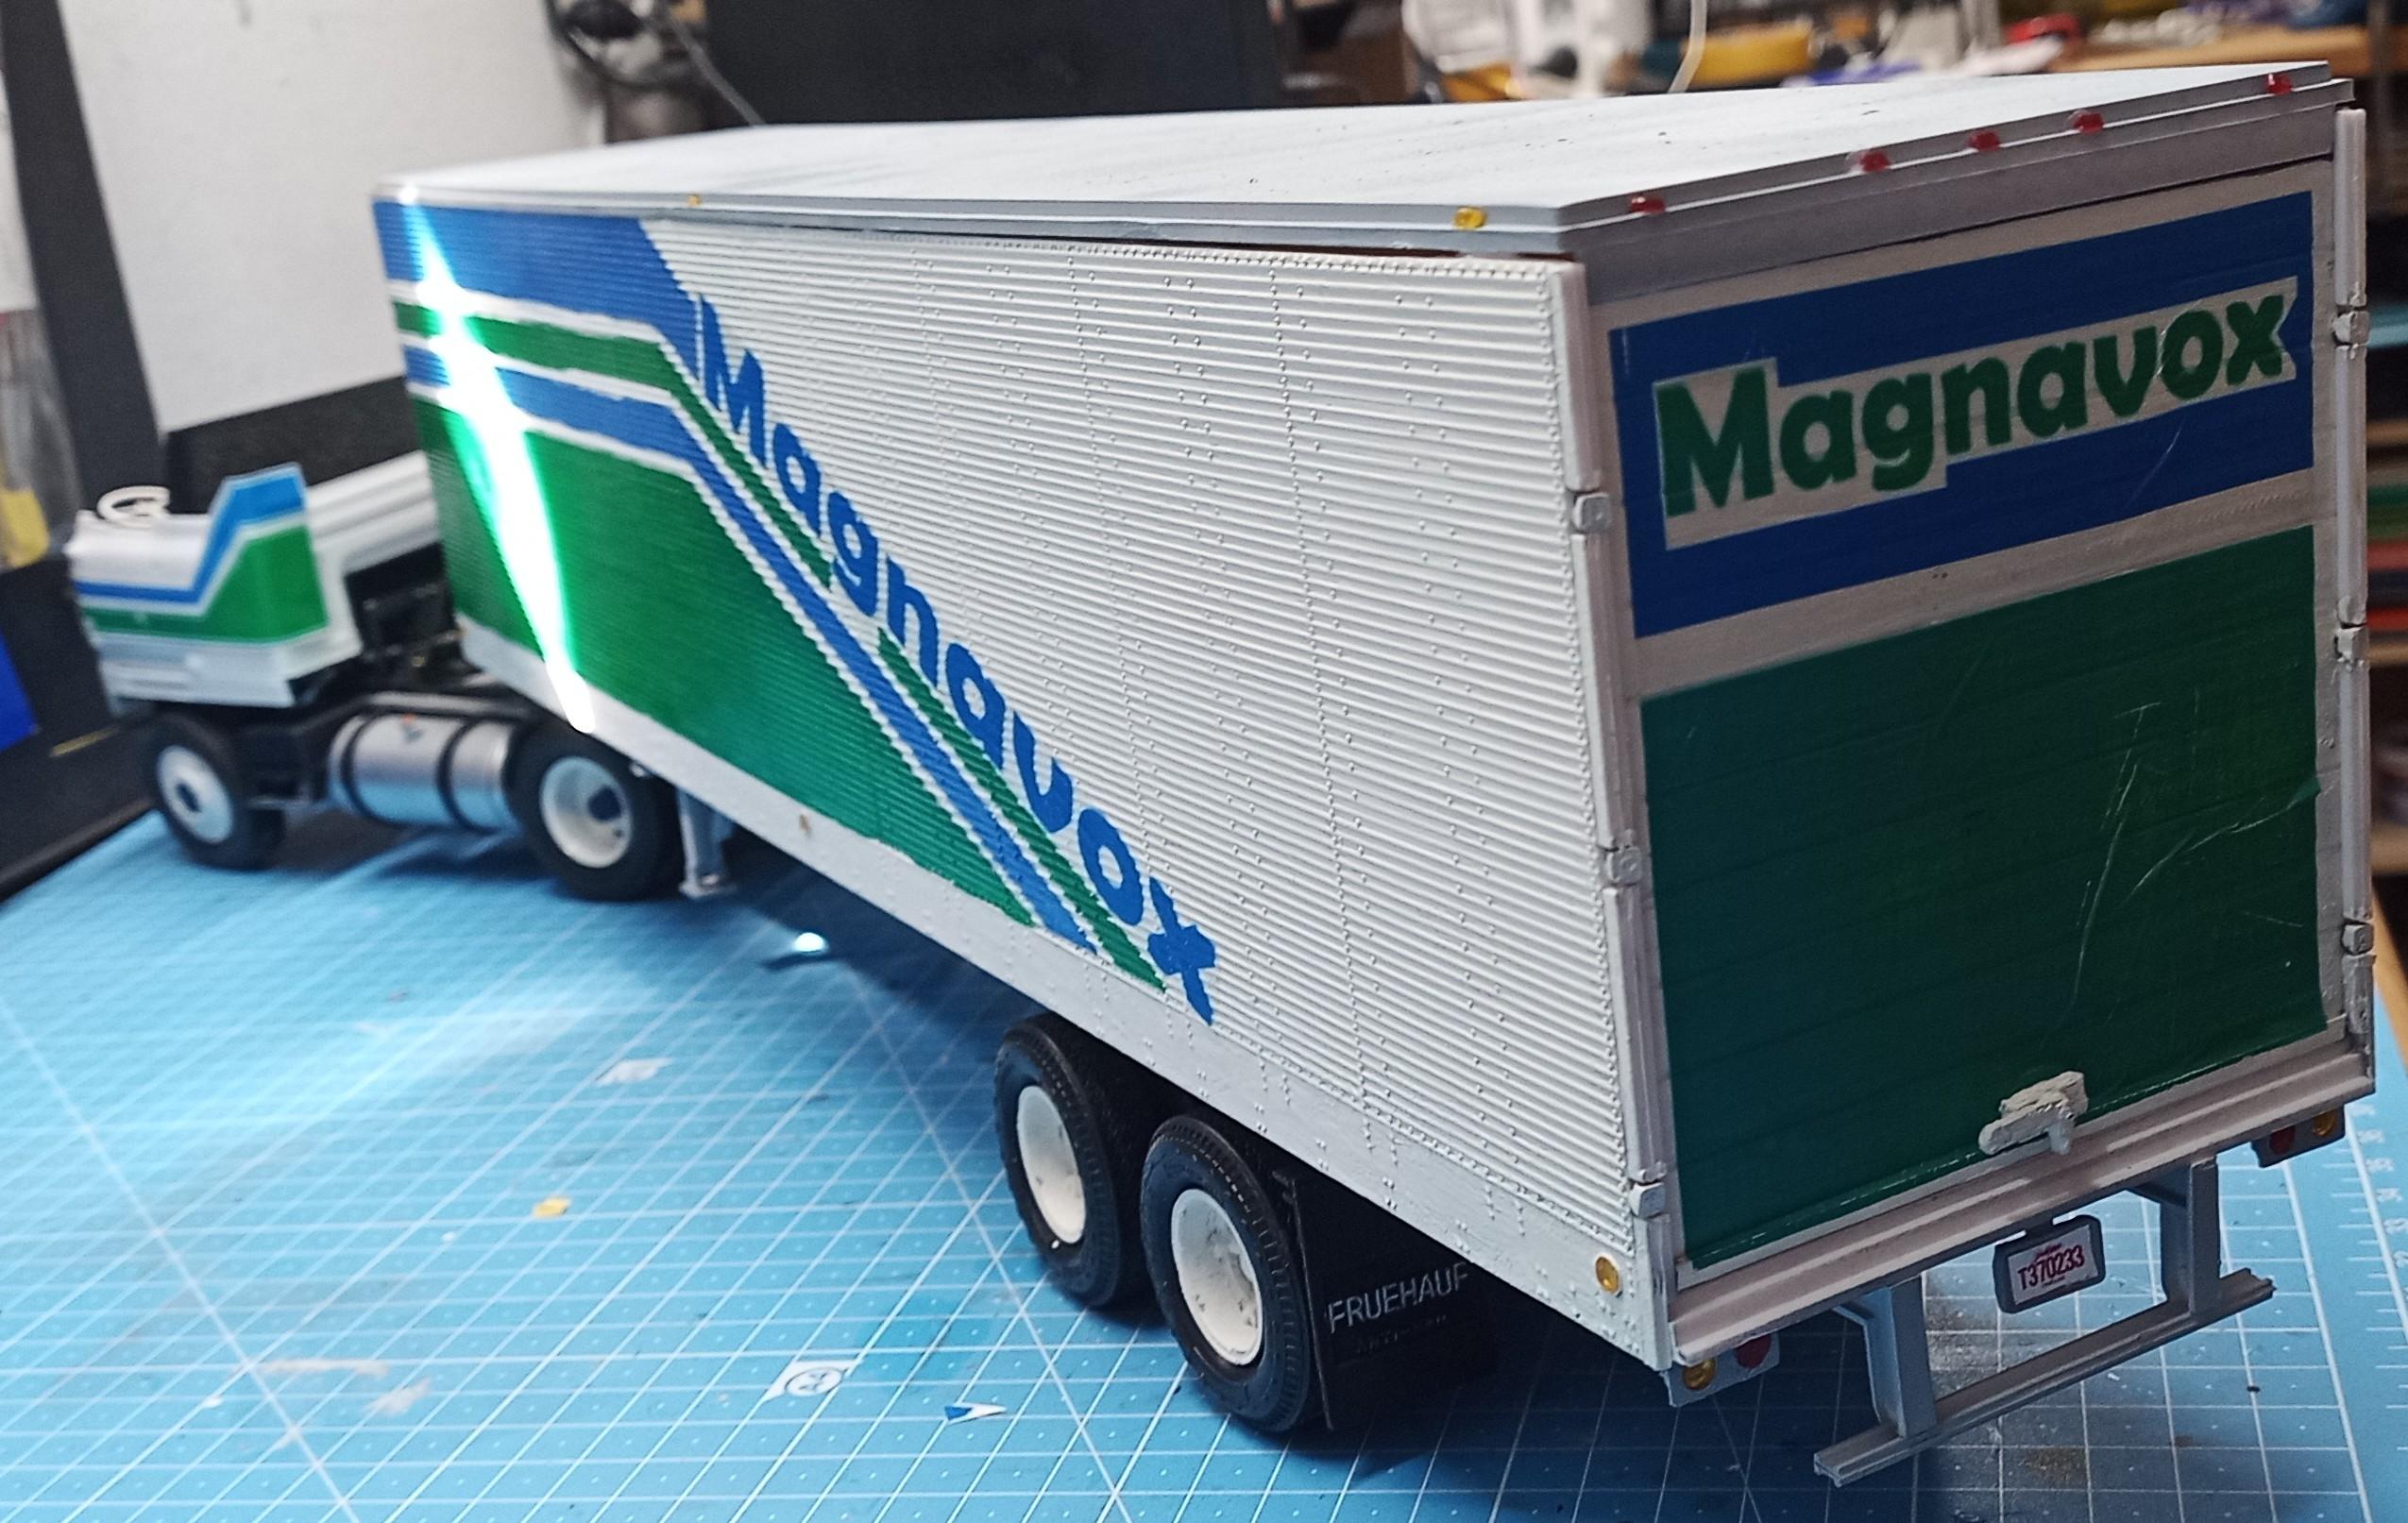
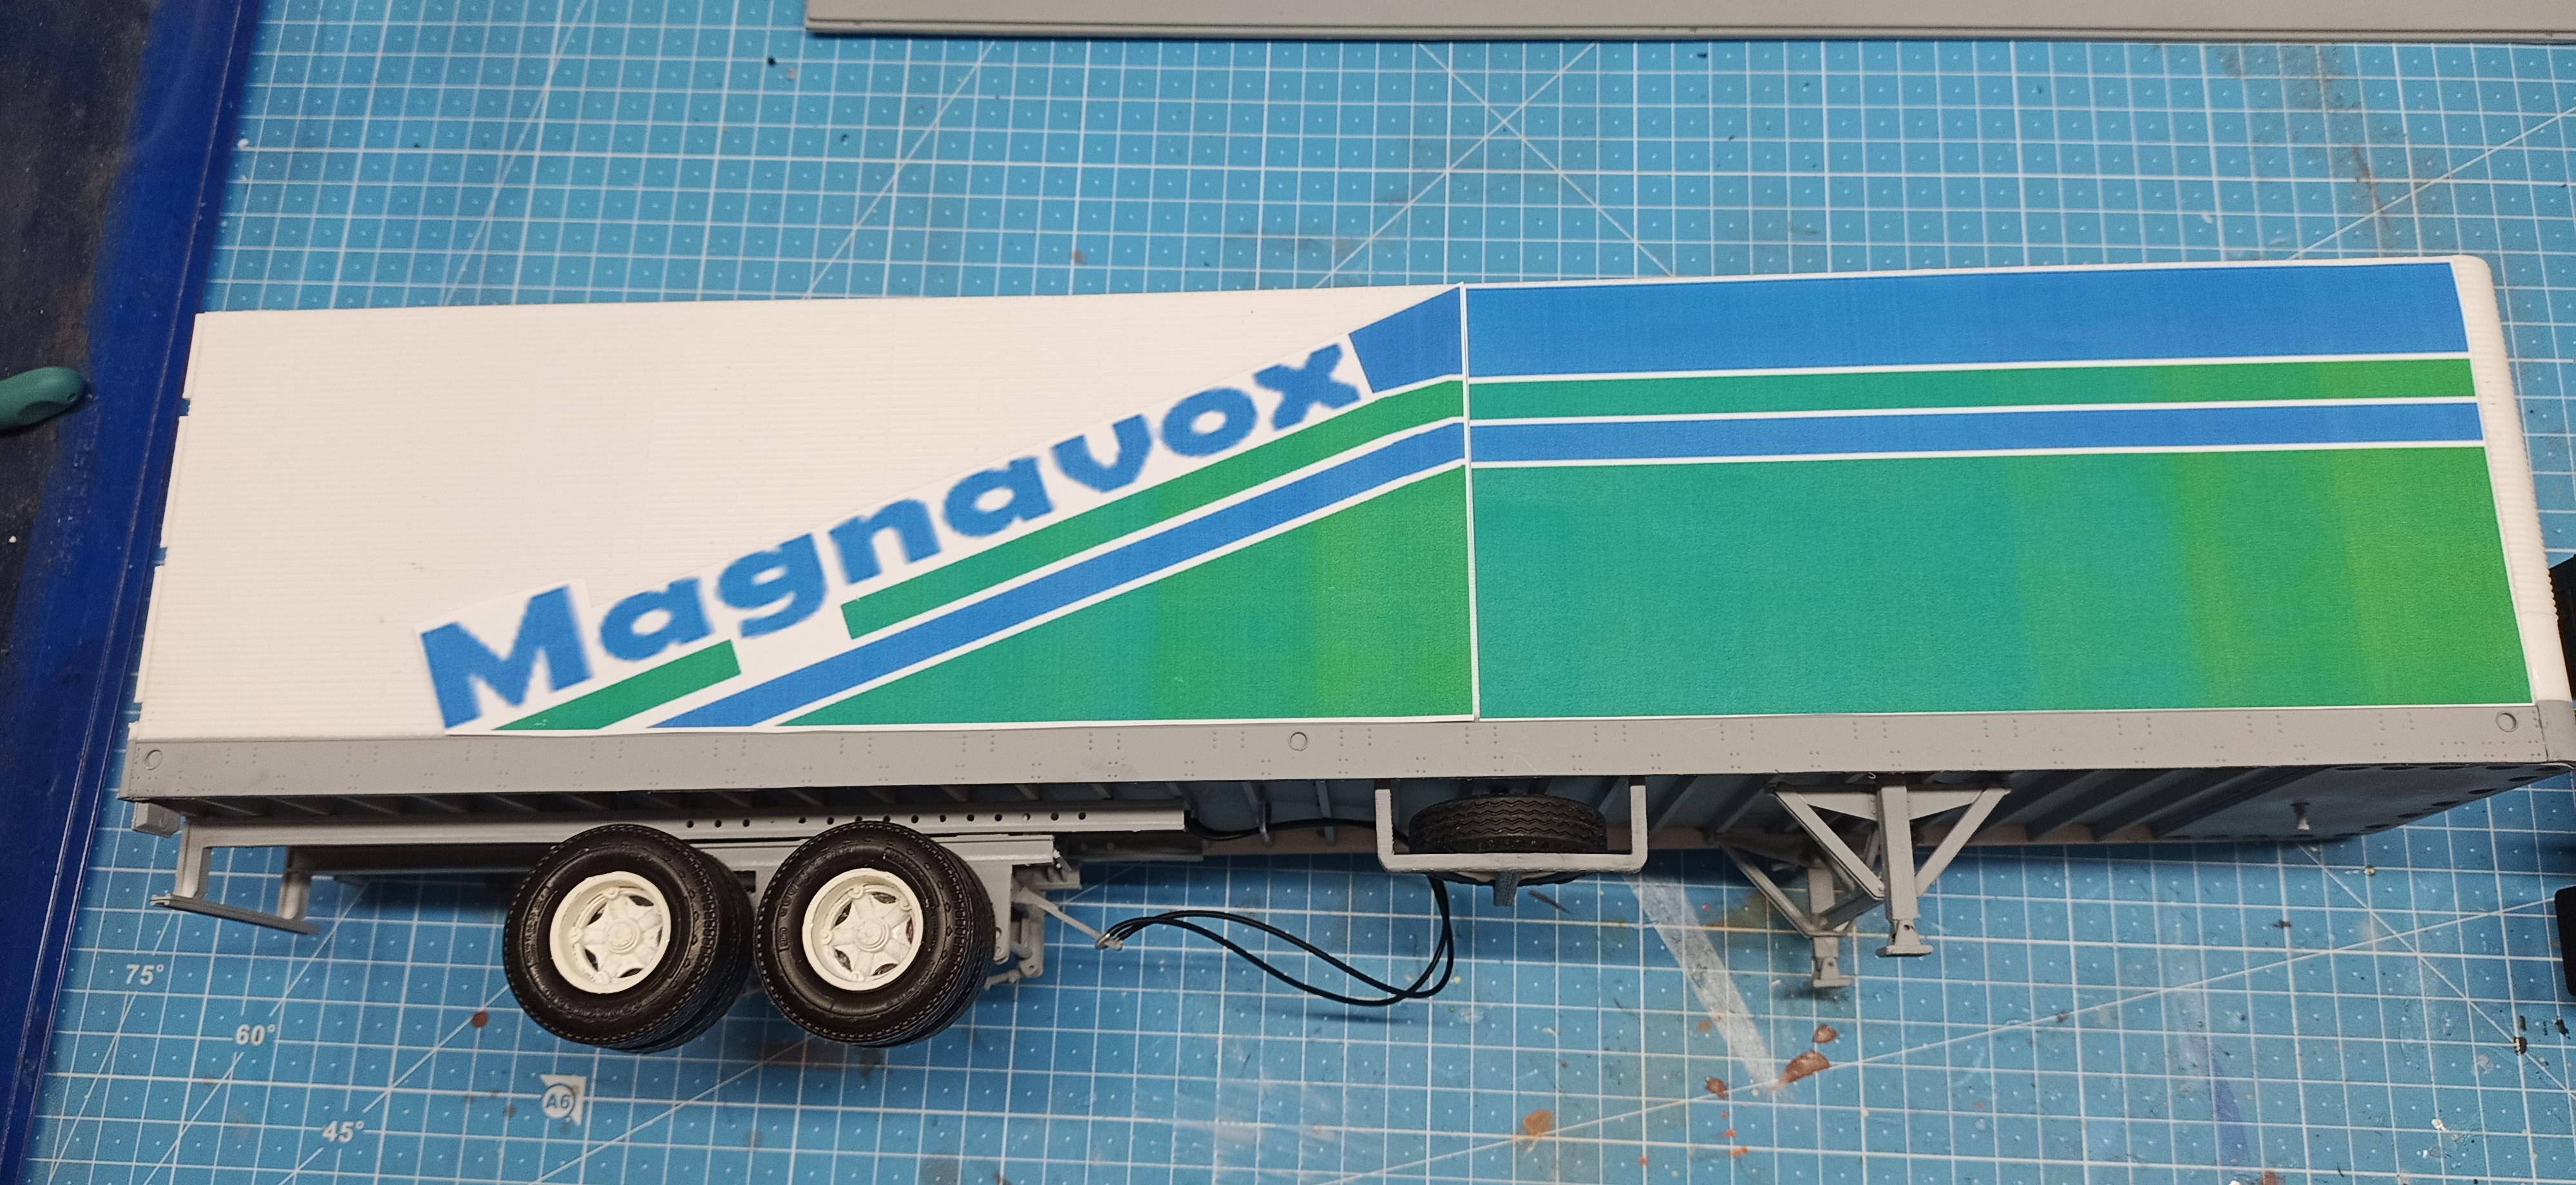
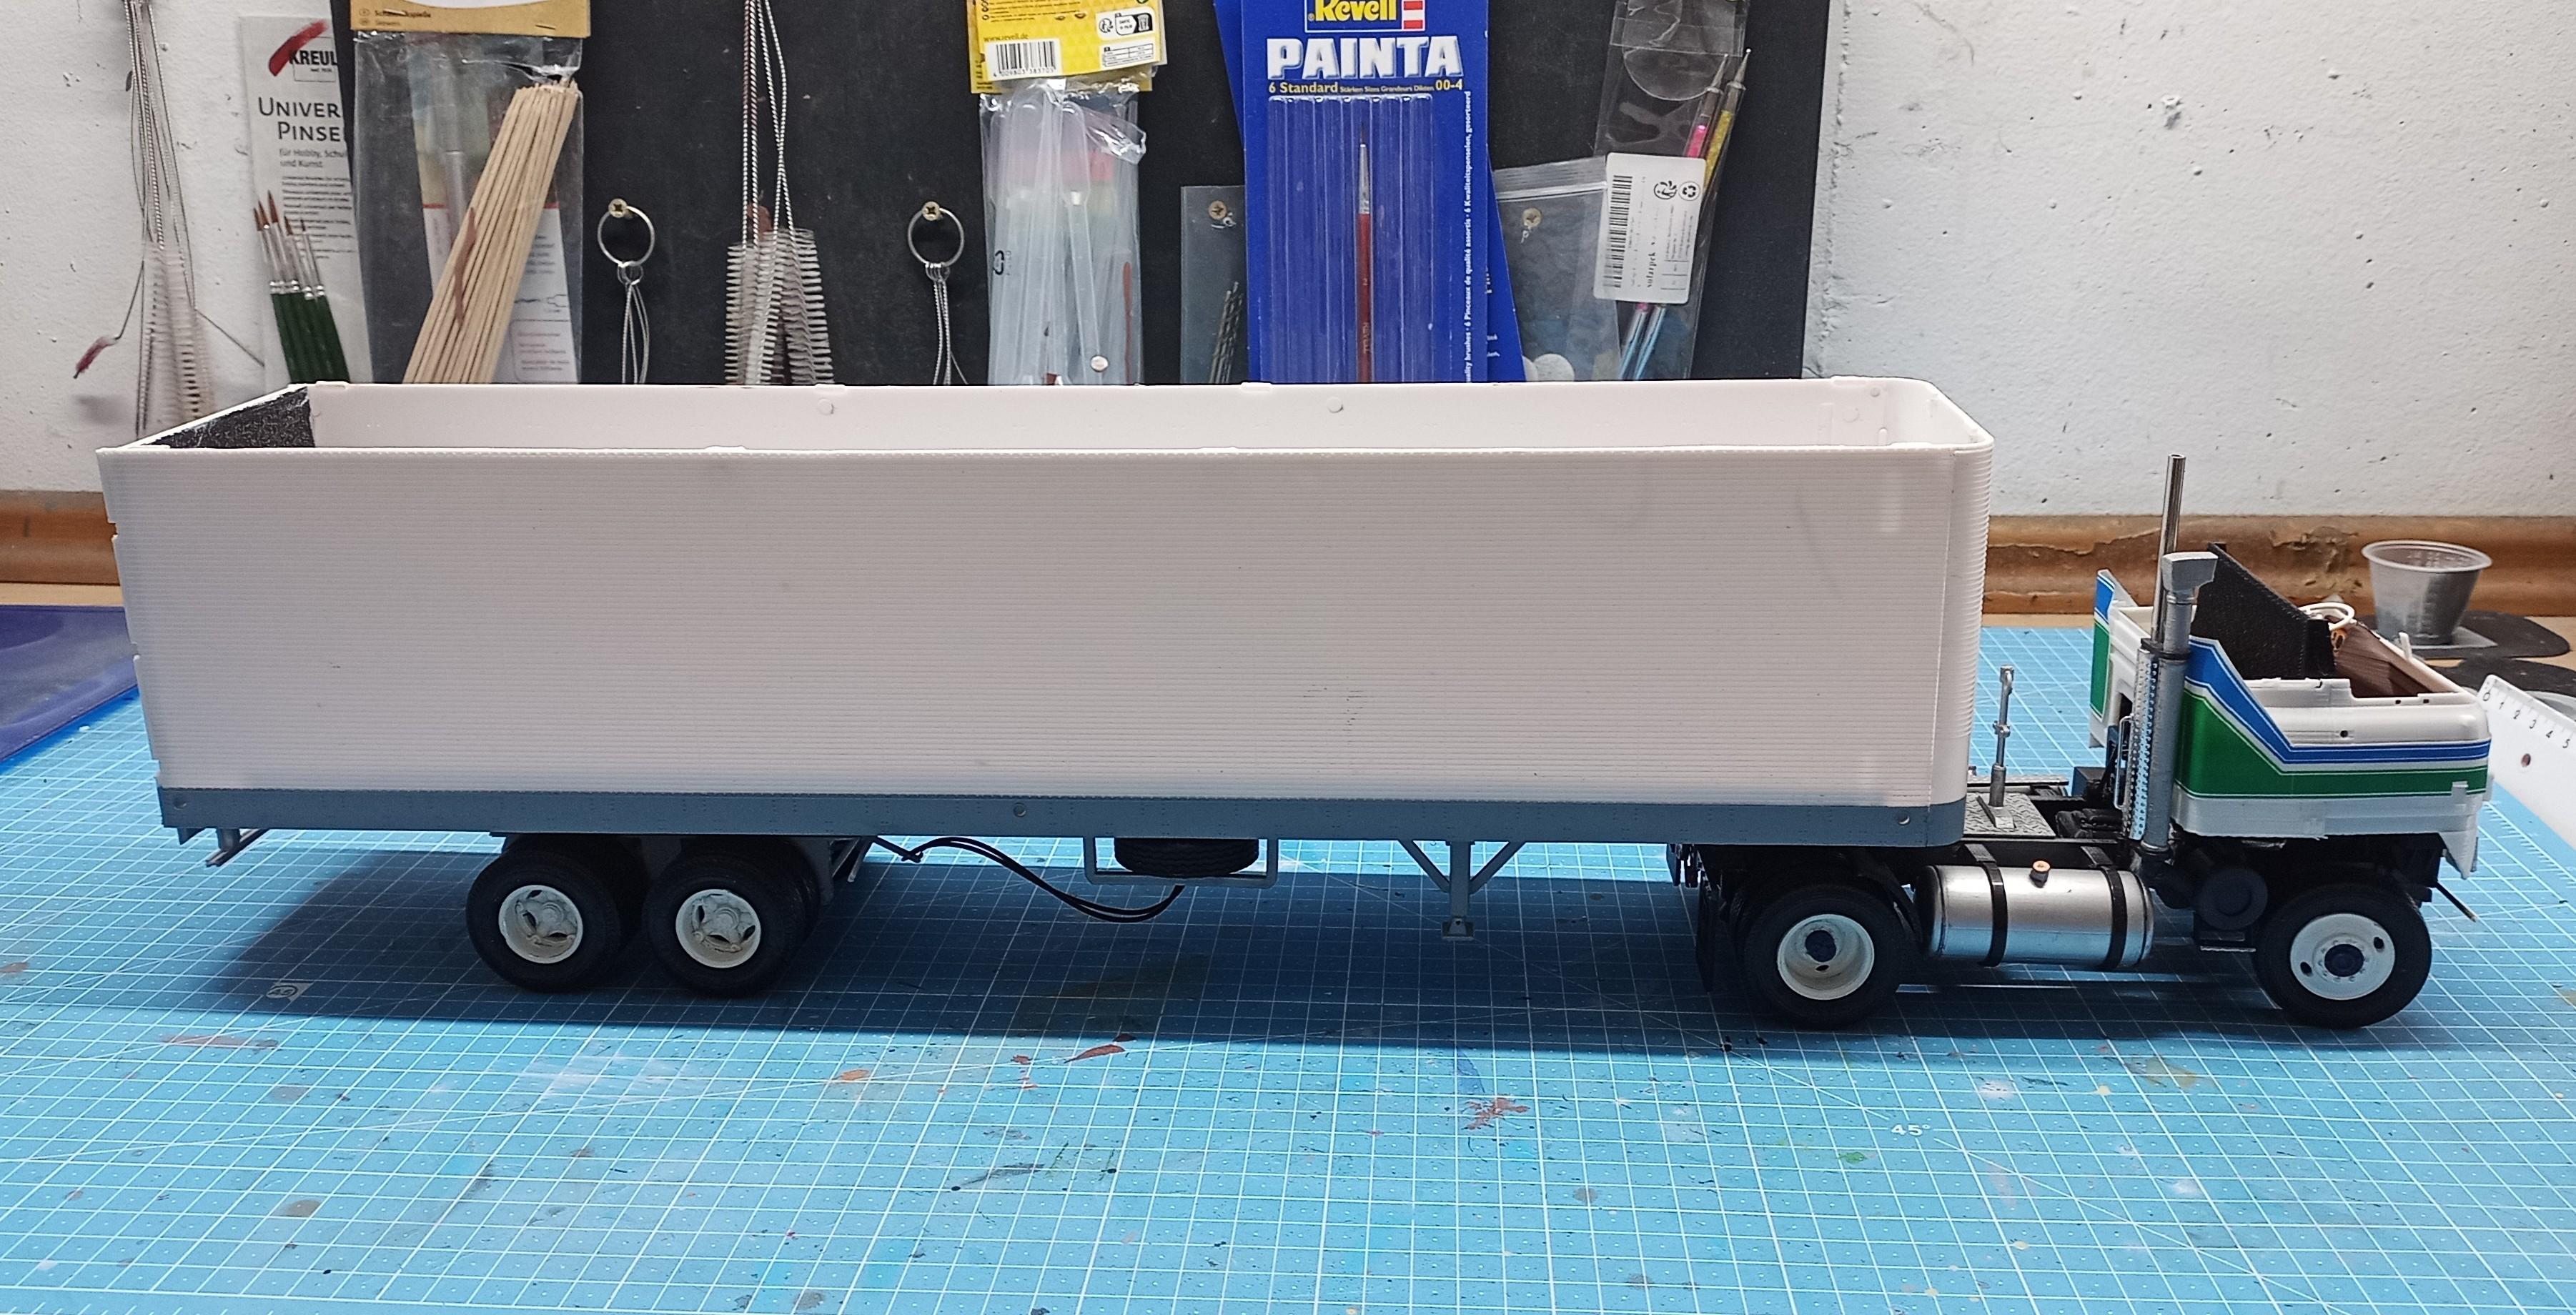
Some progress on the trailer! This is just a mock-up in order to enable first contact between truck and trailer: And a decal mock-up: The decal print didn't come out that good. Luckily it's just paper. No harm done! I'll give it one more try. If it still comes out like this I'll probably paint the stripes and just make decals of the writing.
-
Convoy, take 7
Jürgen M. replied to Jürgen M.'s topic in WIP: Model Trucks: Big Rigs and Heavy Equipment
That's true, Brian. But as I said, a lot of filament would be needed and I'd have to split the long parts at least into 3 pieces each. I also wanted to build a kit again after such a long time! -
Convoy, take 7
Jürgen M. replied to Jürgen M.'s topic in WIP: Model Trucks: Big Rigs and Heavy Equipment
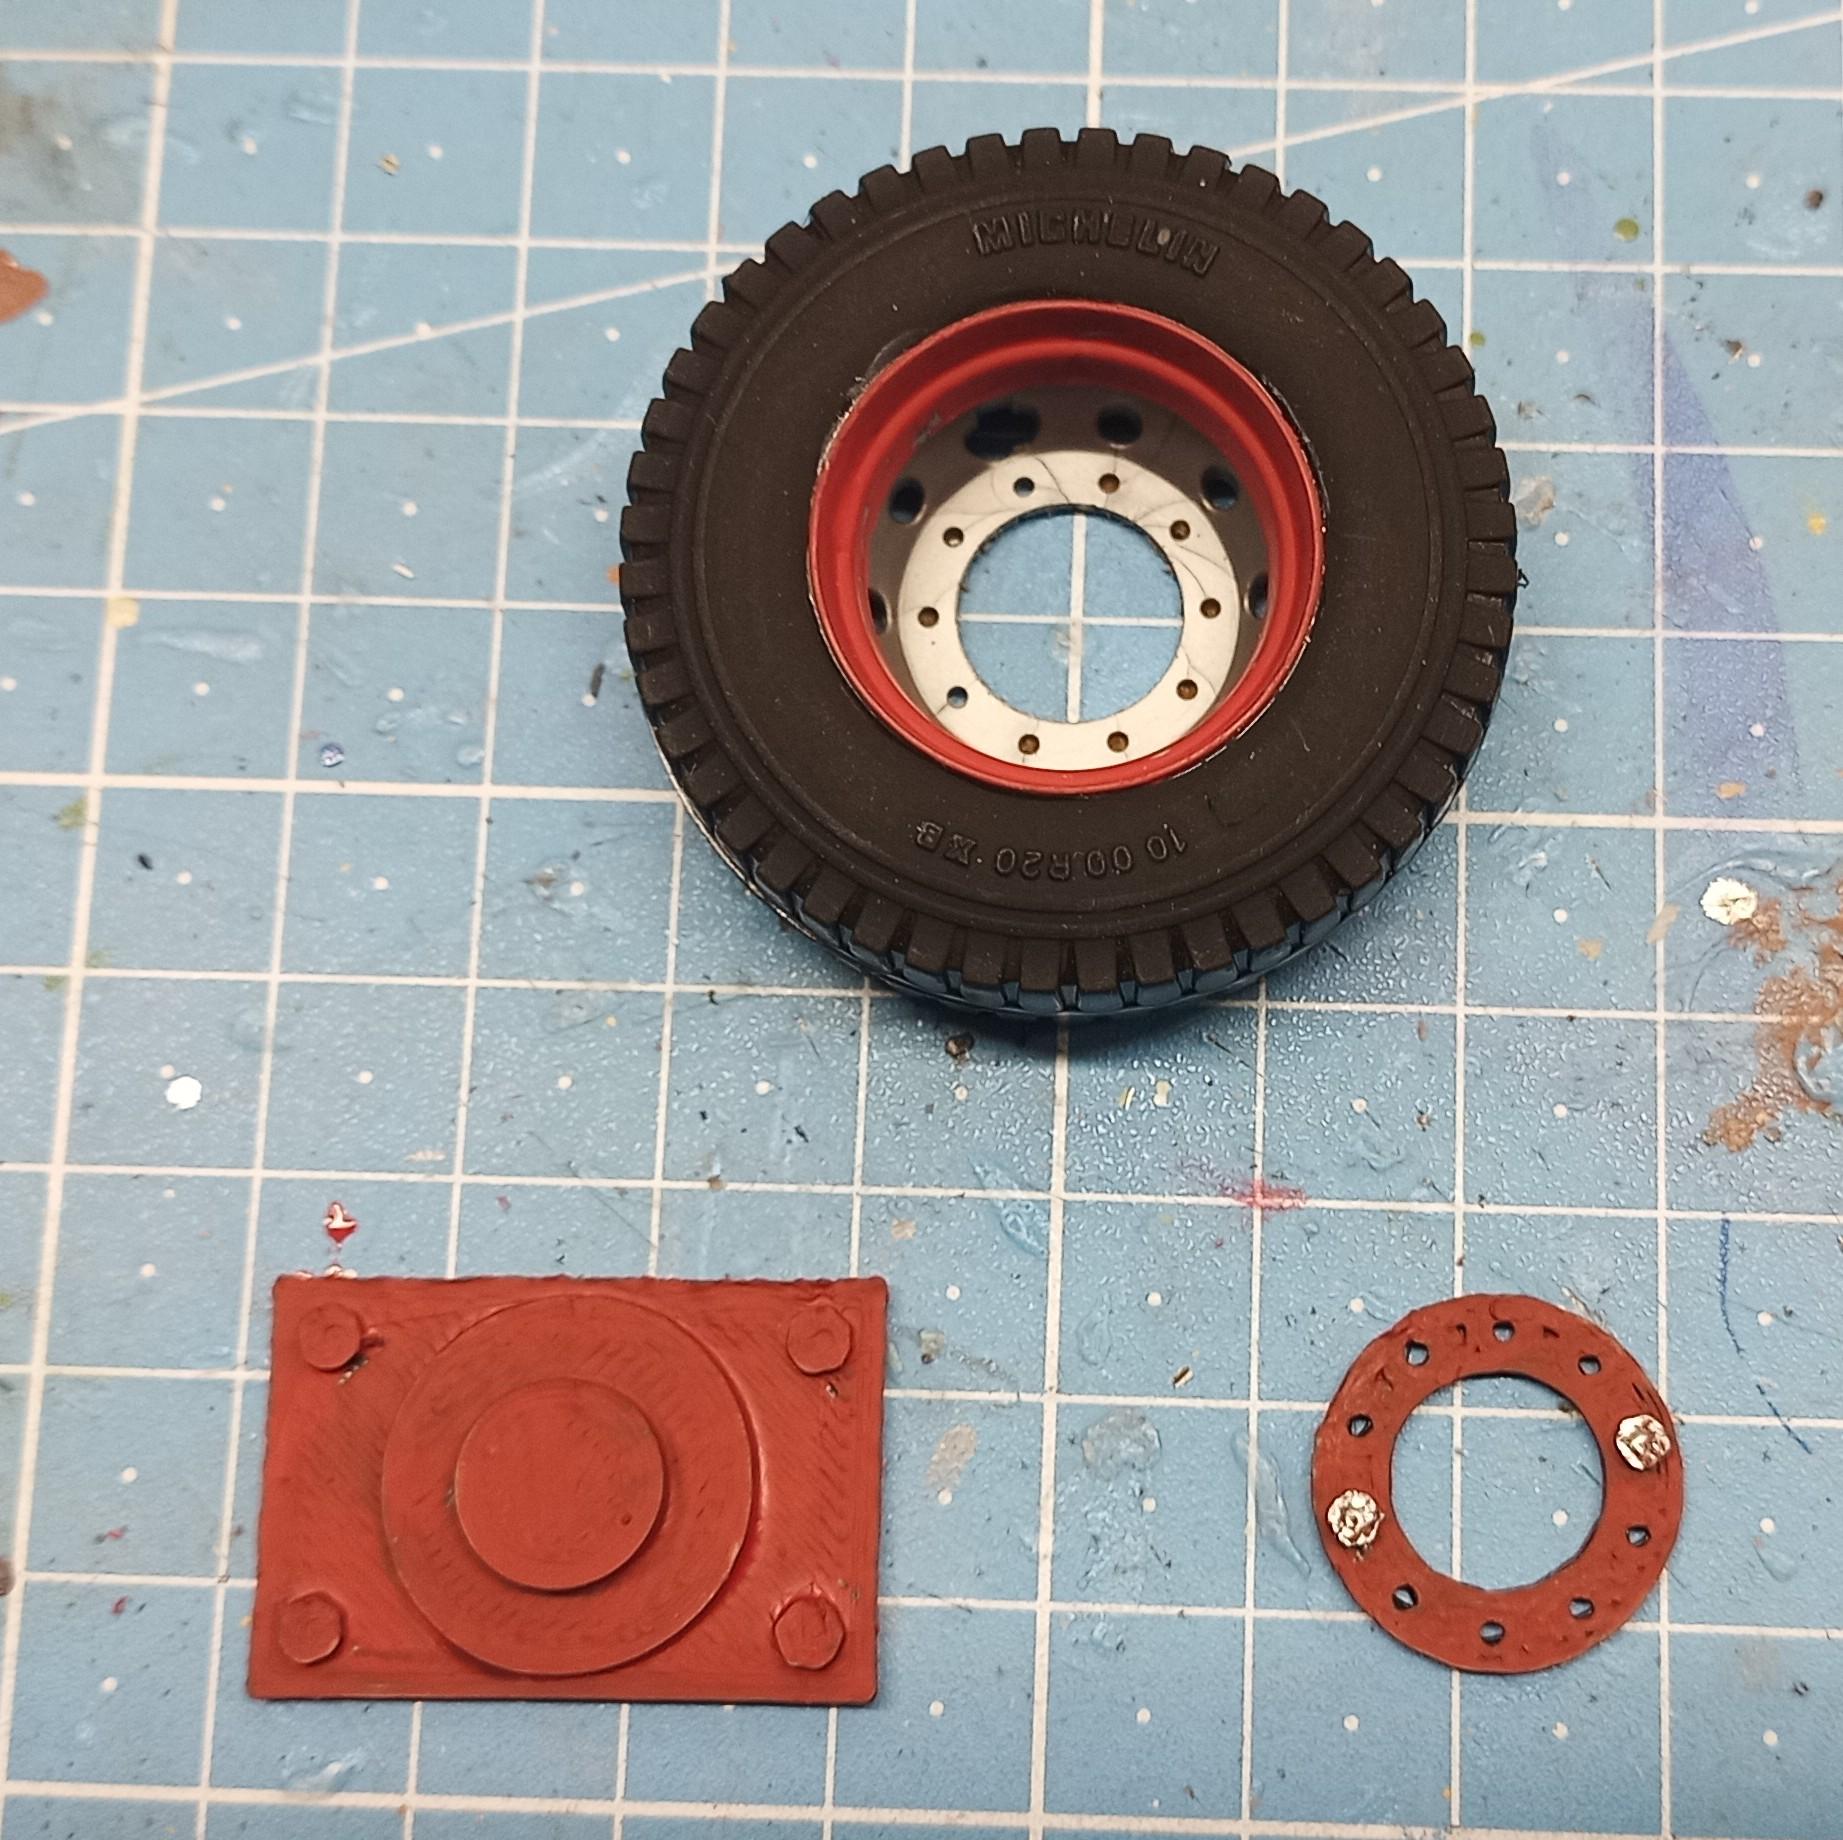
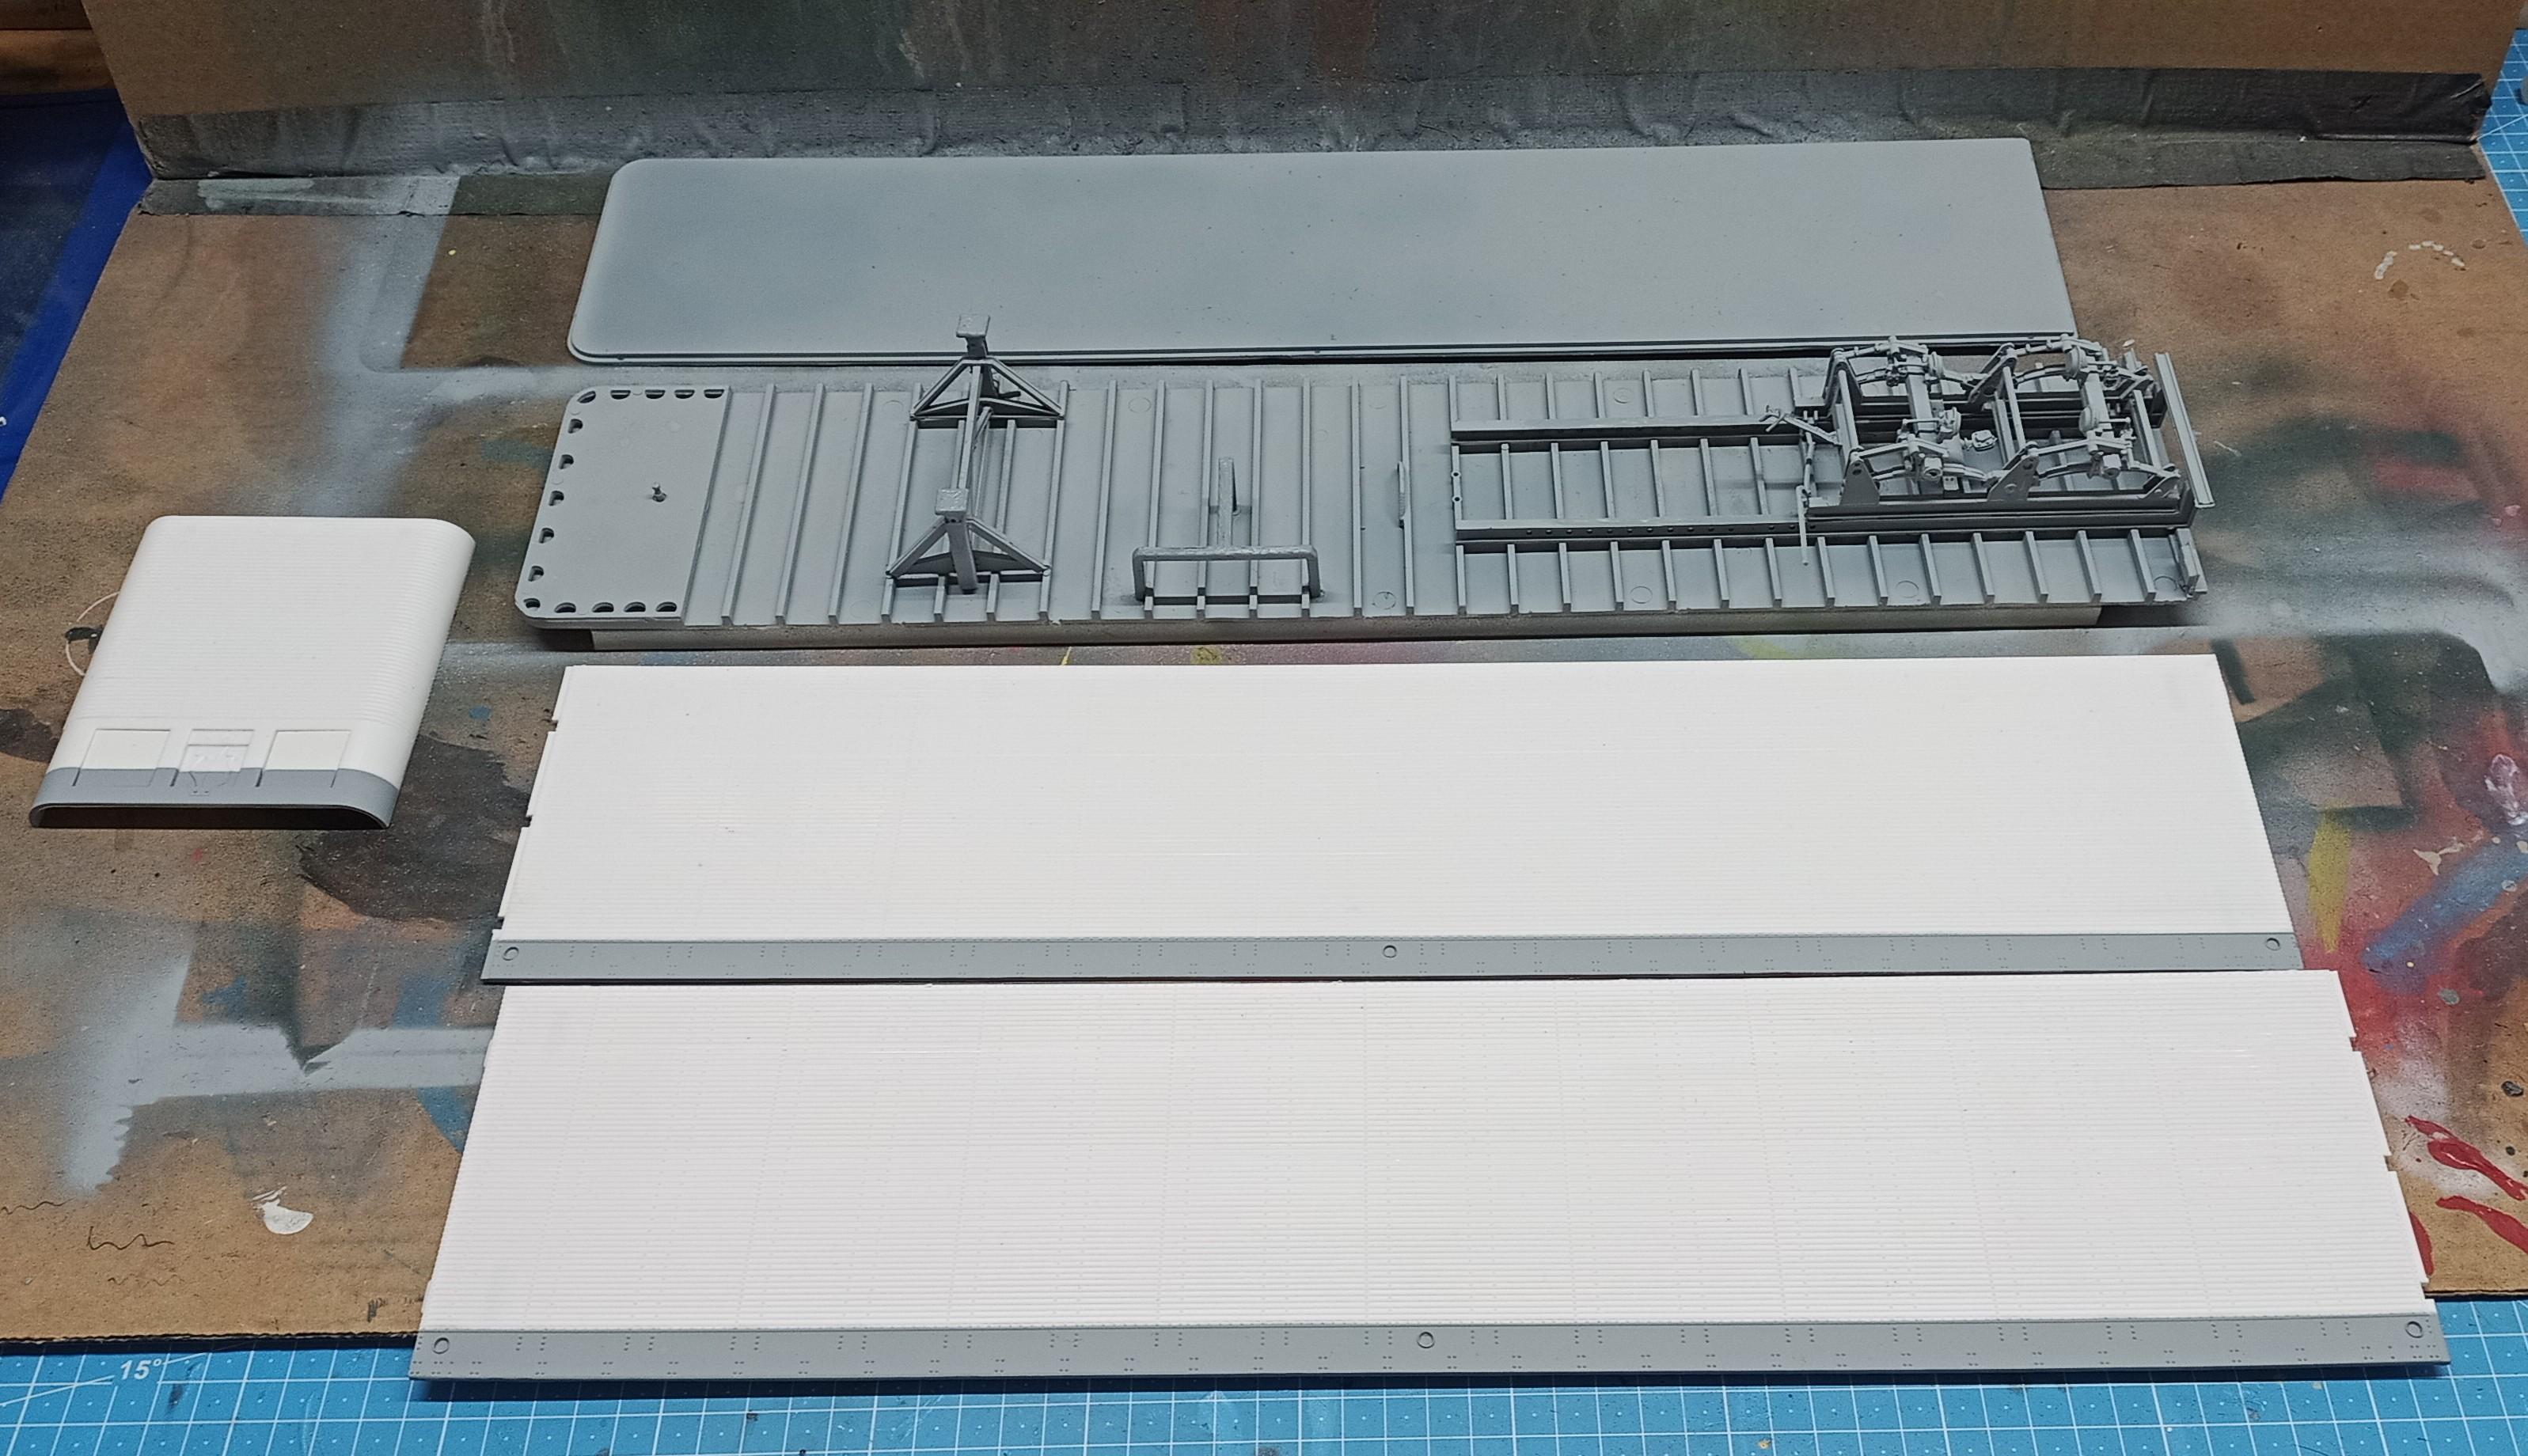
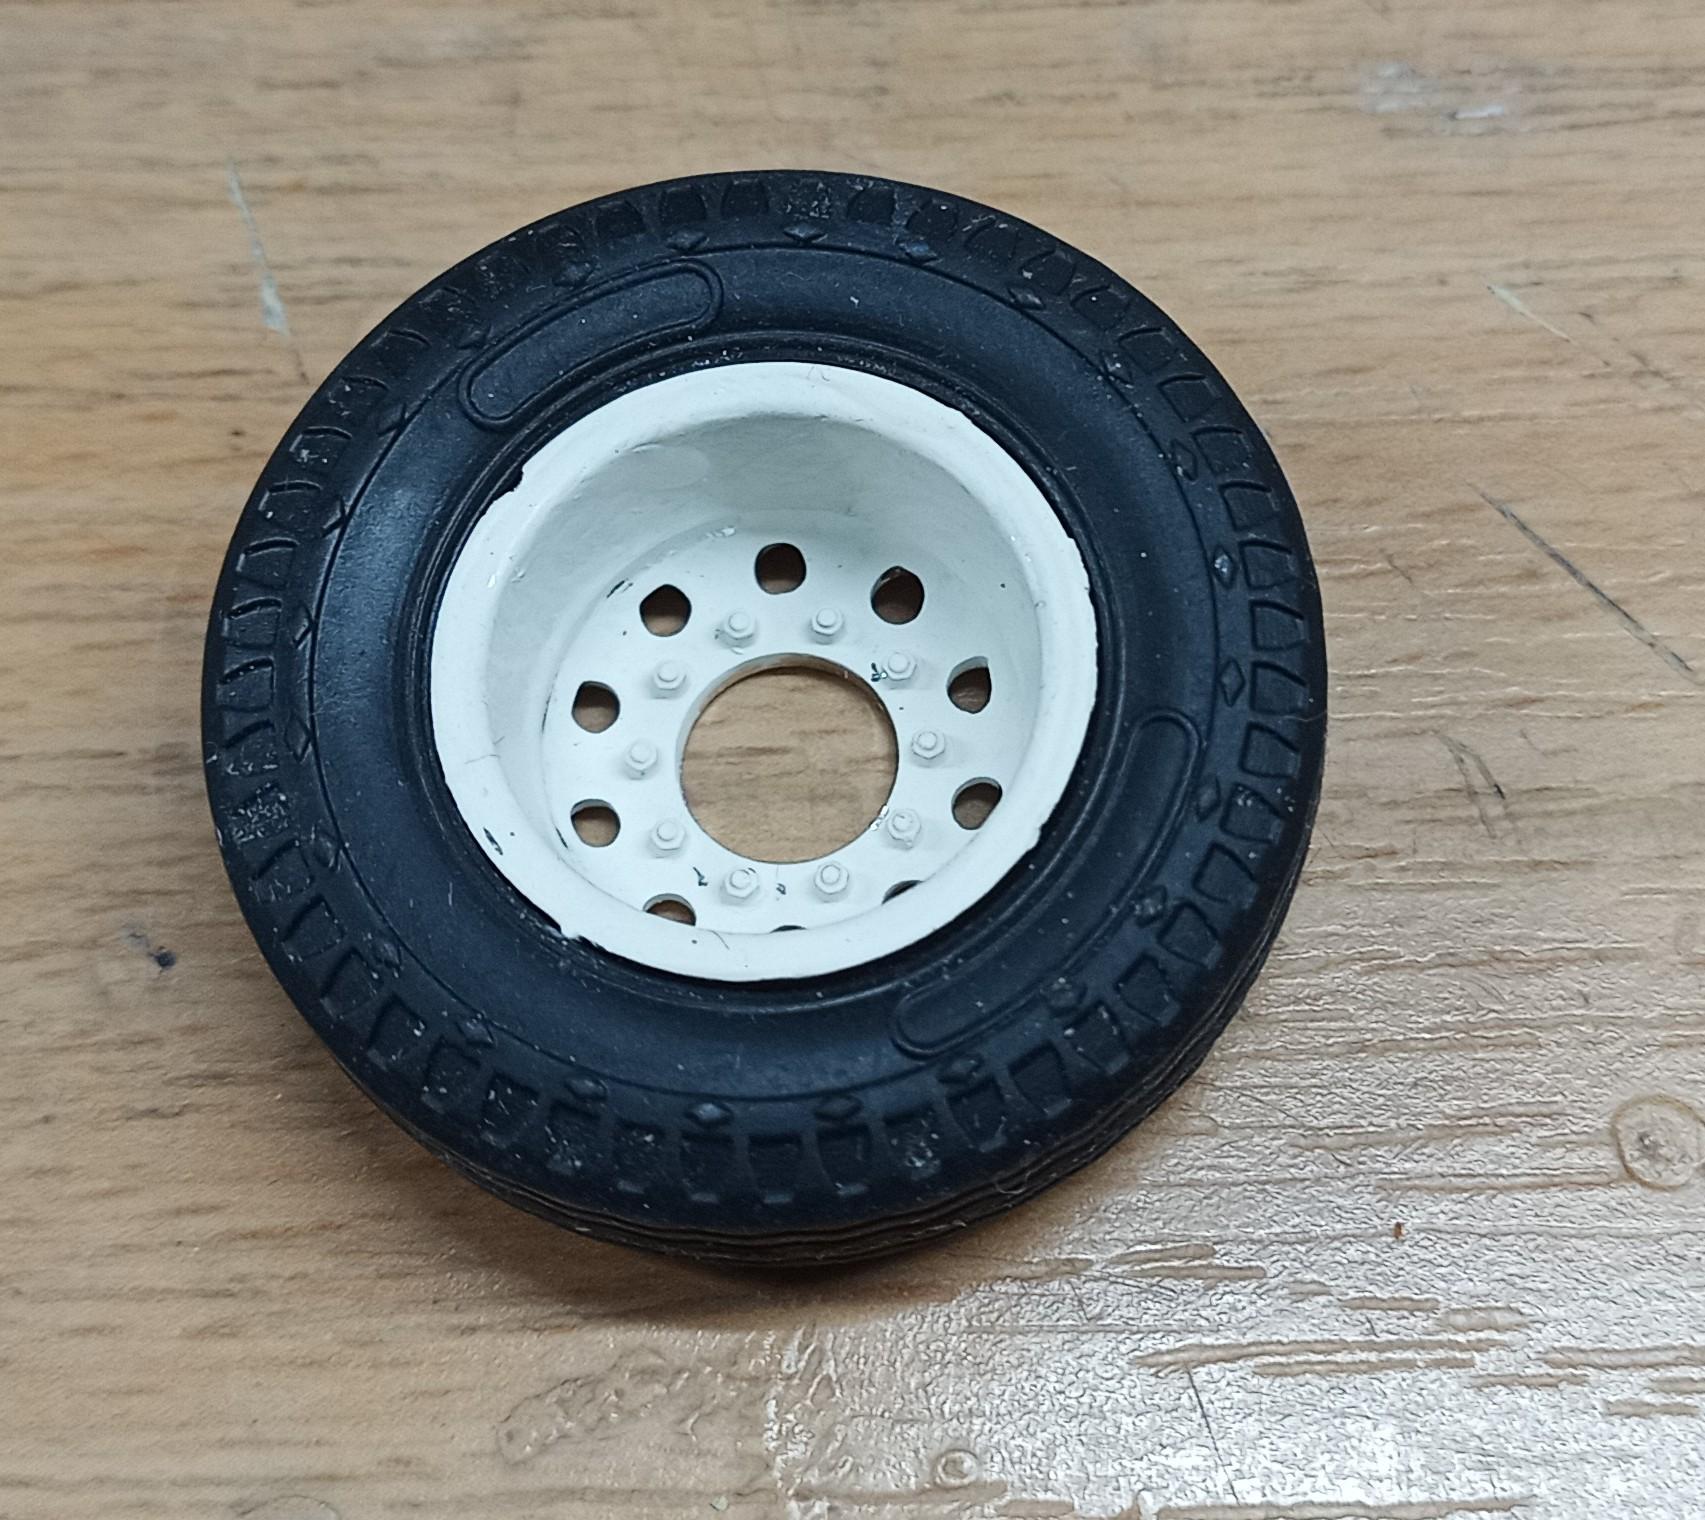
What would we do without a lunch break? I actually got the trailer parts painted! I also exchanged the support wheels and attached printed flat supports I had designed for the trailers of my "Big Nasty" build. I designed and printed a spare wheel holder. I saw that there was one on the passenger side and I added a "u" shaped brass rod to the air hose bracket so the hoses can be just slipped on instead of trying to glue them in place! As a spare I'm using an AMT rim I had in the box!
-
Convoy, take 7
Jürgen M. replied to Jürgen M.'s topic in WIP: Model Trucks: Big Rigs and Heavy Equipment
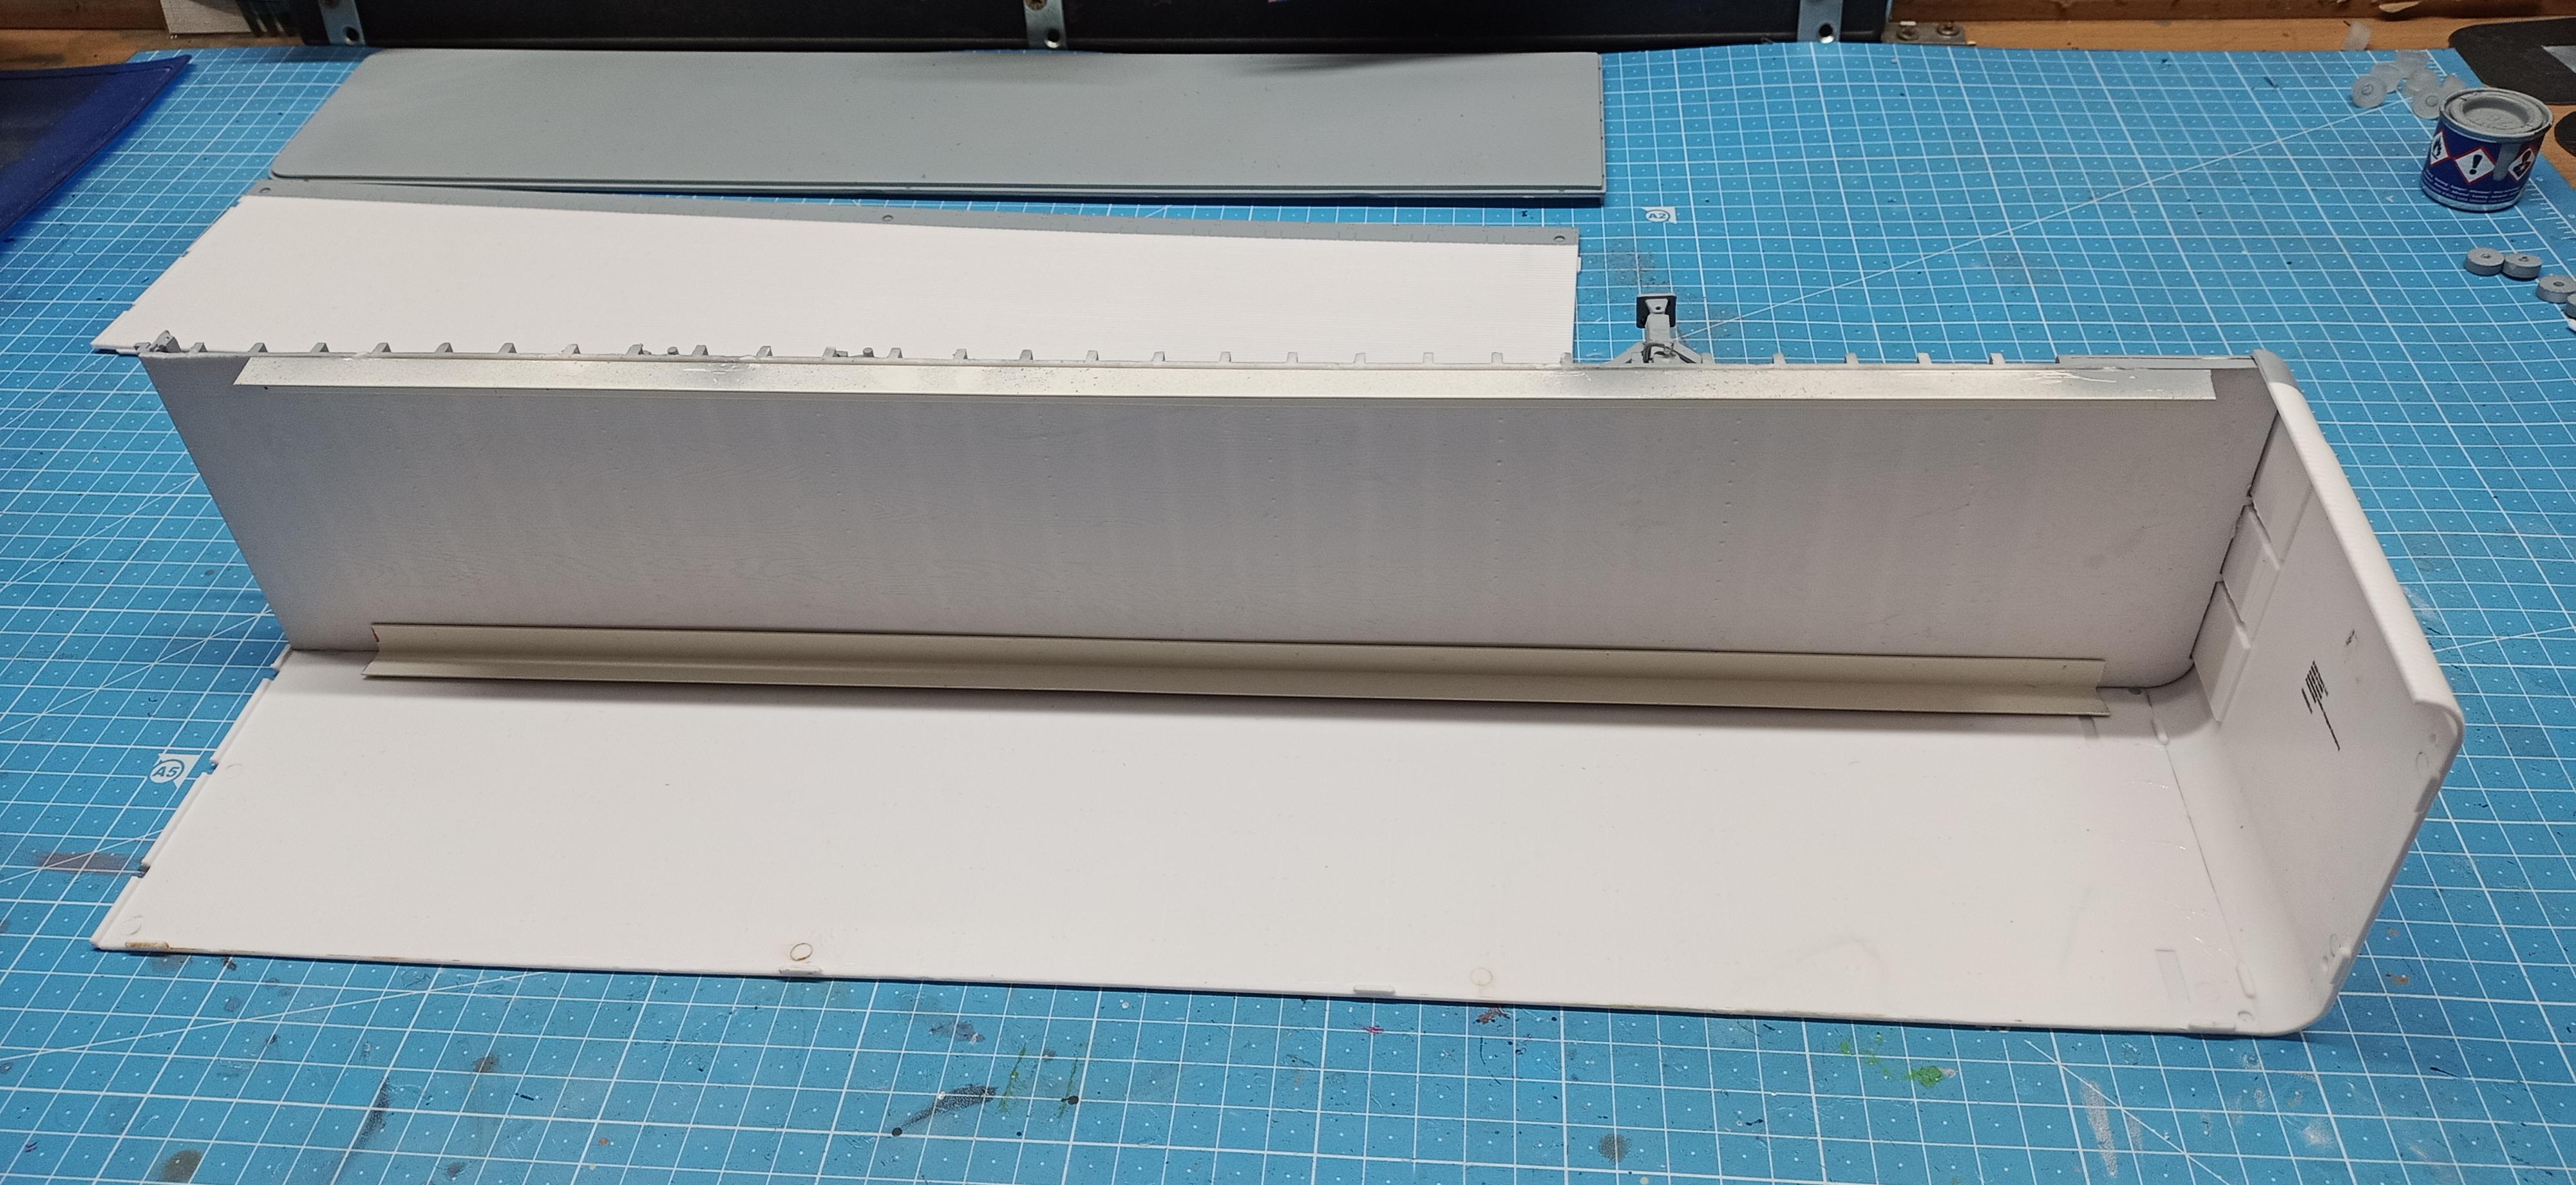
I managed to mask the trailer parts hoping to find time to paint today! First coat and on most parts the final one too will be a flat light gray! Revell no. 76. The roof will then get a silvery, sort of aluminium touch. For that I'll use the no name dull chrome spray I used for the fuel tanks!