Jürgen M.
-
Posts
1,783 -
Joined
-
Last visited
Content Type
Profiles
Forums
Events
Gallery
Everything posted by Jürgen M.
-

Freightliner FLC
Jürgen M. replied to Jürgen M.'s topic in Model Trucks: Big Rigs and Heavy Equipment
To complete the statistics: It took me 3 weeks to complete the basic design. Further parts were designed and printed along the way as needed. Then printing, paintjob and assembly took another 4 weeks.
-
Freightliner FLC
Jürgen M. replied to Jürgen M.'s topic in WIP: Model Trucks: Big Rigs and Heavy Equipment
Wow, thanks very much! I'm flattered to be getting such positive feedback from such great modelers! -
Freightliner FLC
Jürgen M. replied to Jürgen M.'s topic in WIP: Model Trucks: Big Rigs and Heavy Equipment
Thanks guys. I appreciate it! I'm so glad you like it. I might even agree and say it's one of my best! 😊 -
Freightliner FLC
Jürgen M. replied to Jürgen M.'s topic in Model Trucks: Big Rigs and Heavy Equipment
Thanks very much Pal! I'm glad I finally built it. It was missing in my collection for so long! -
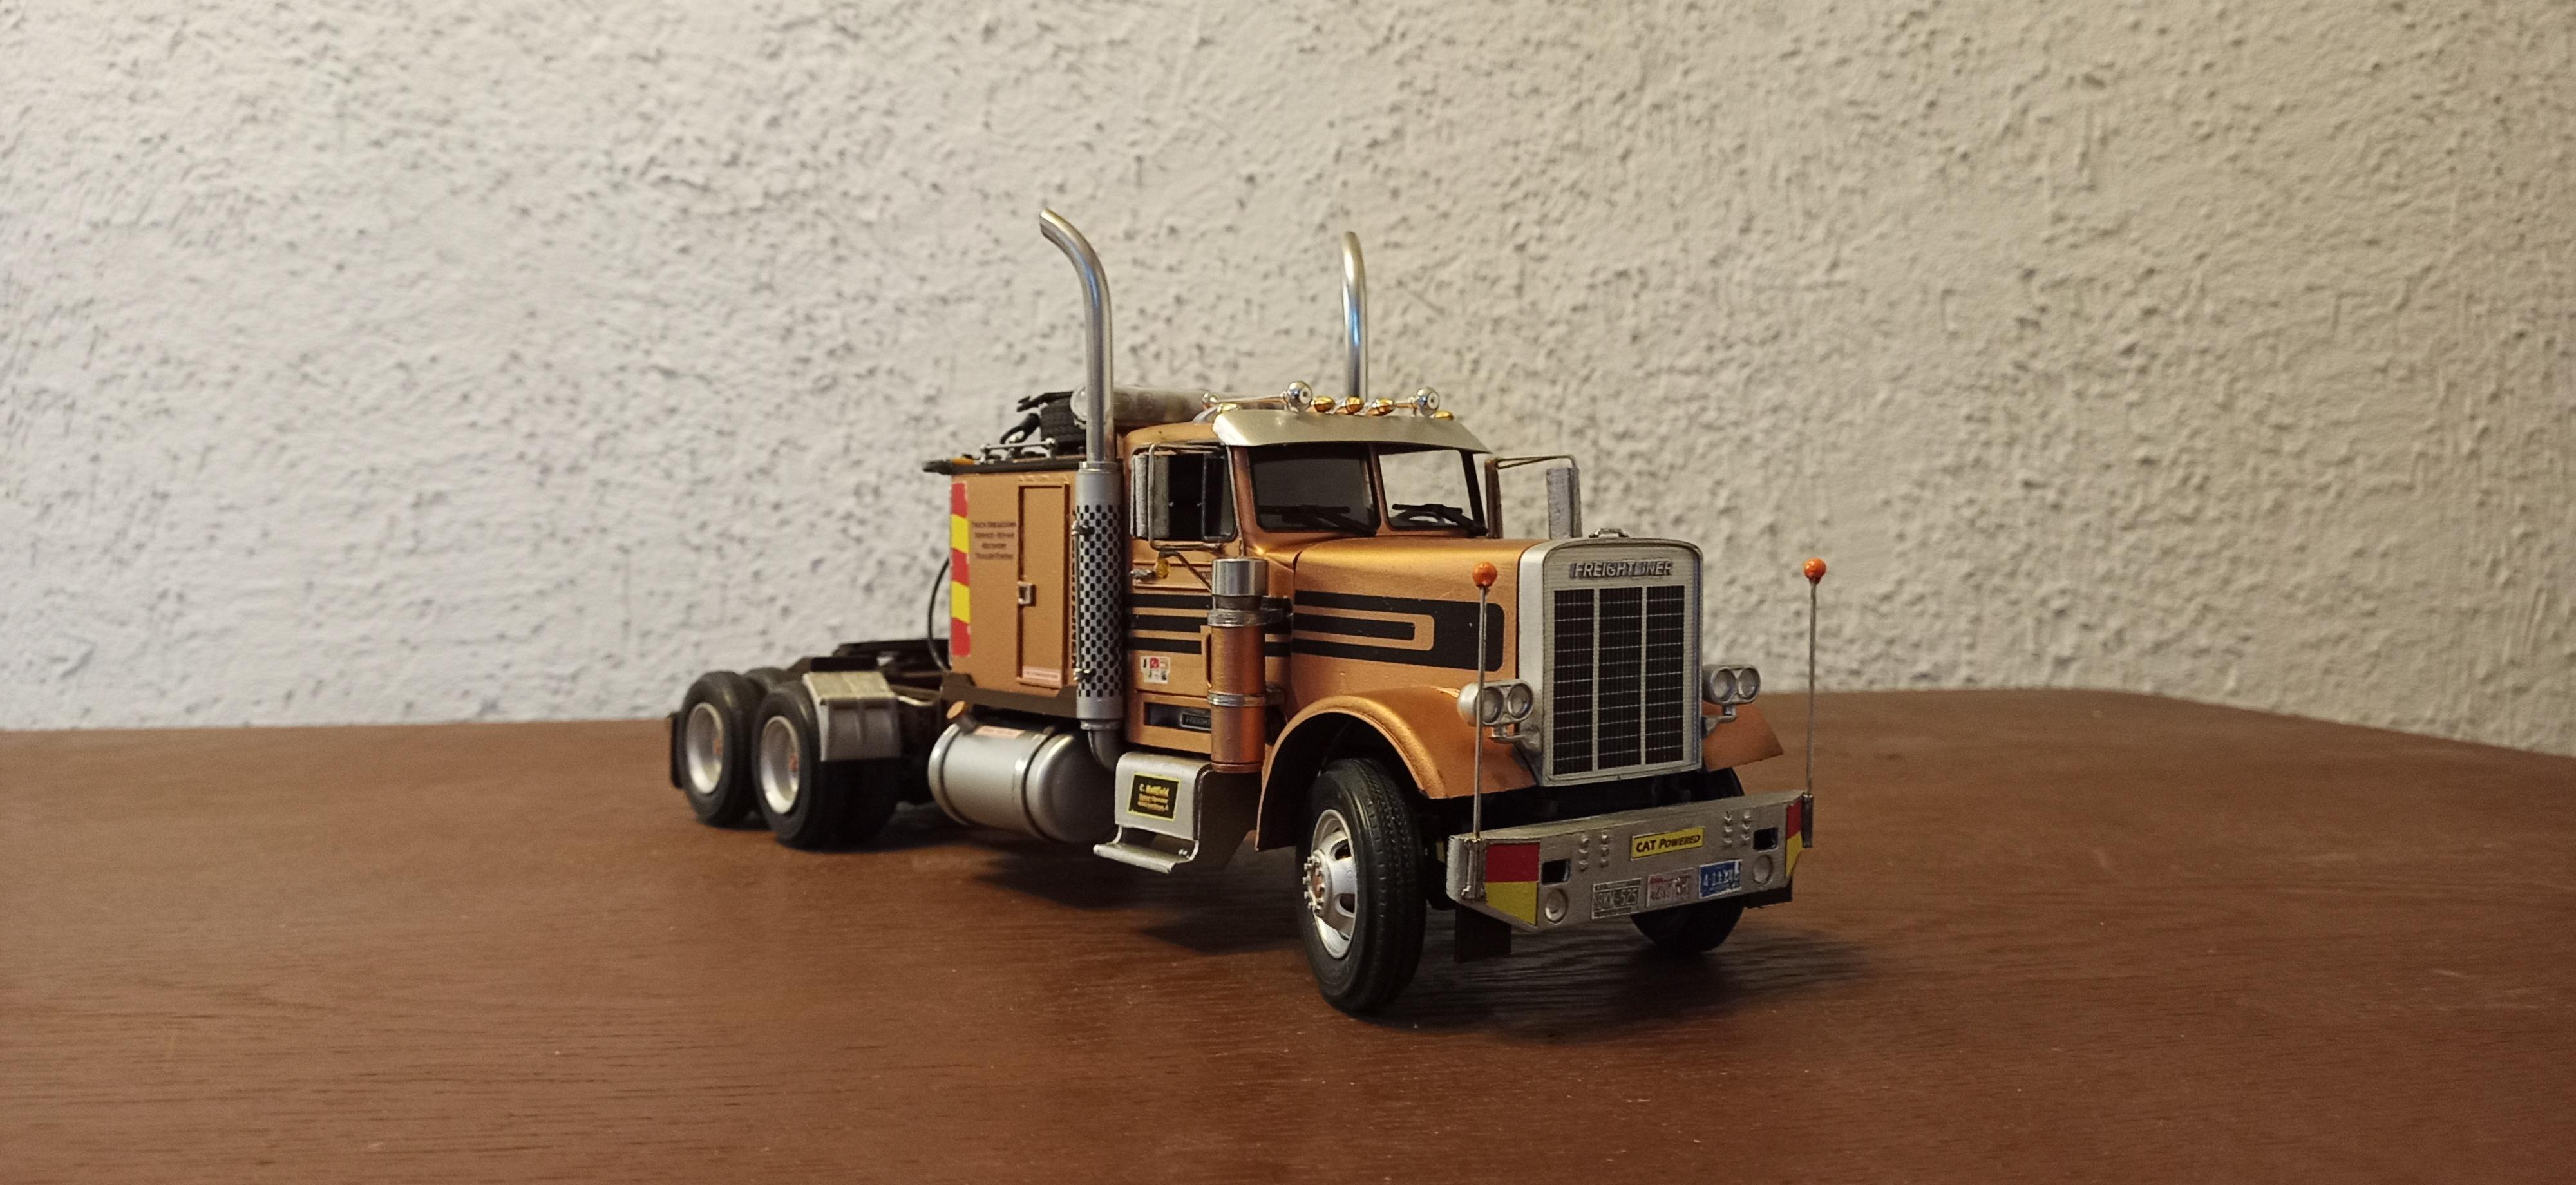
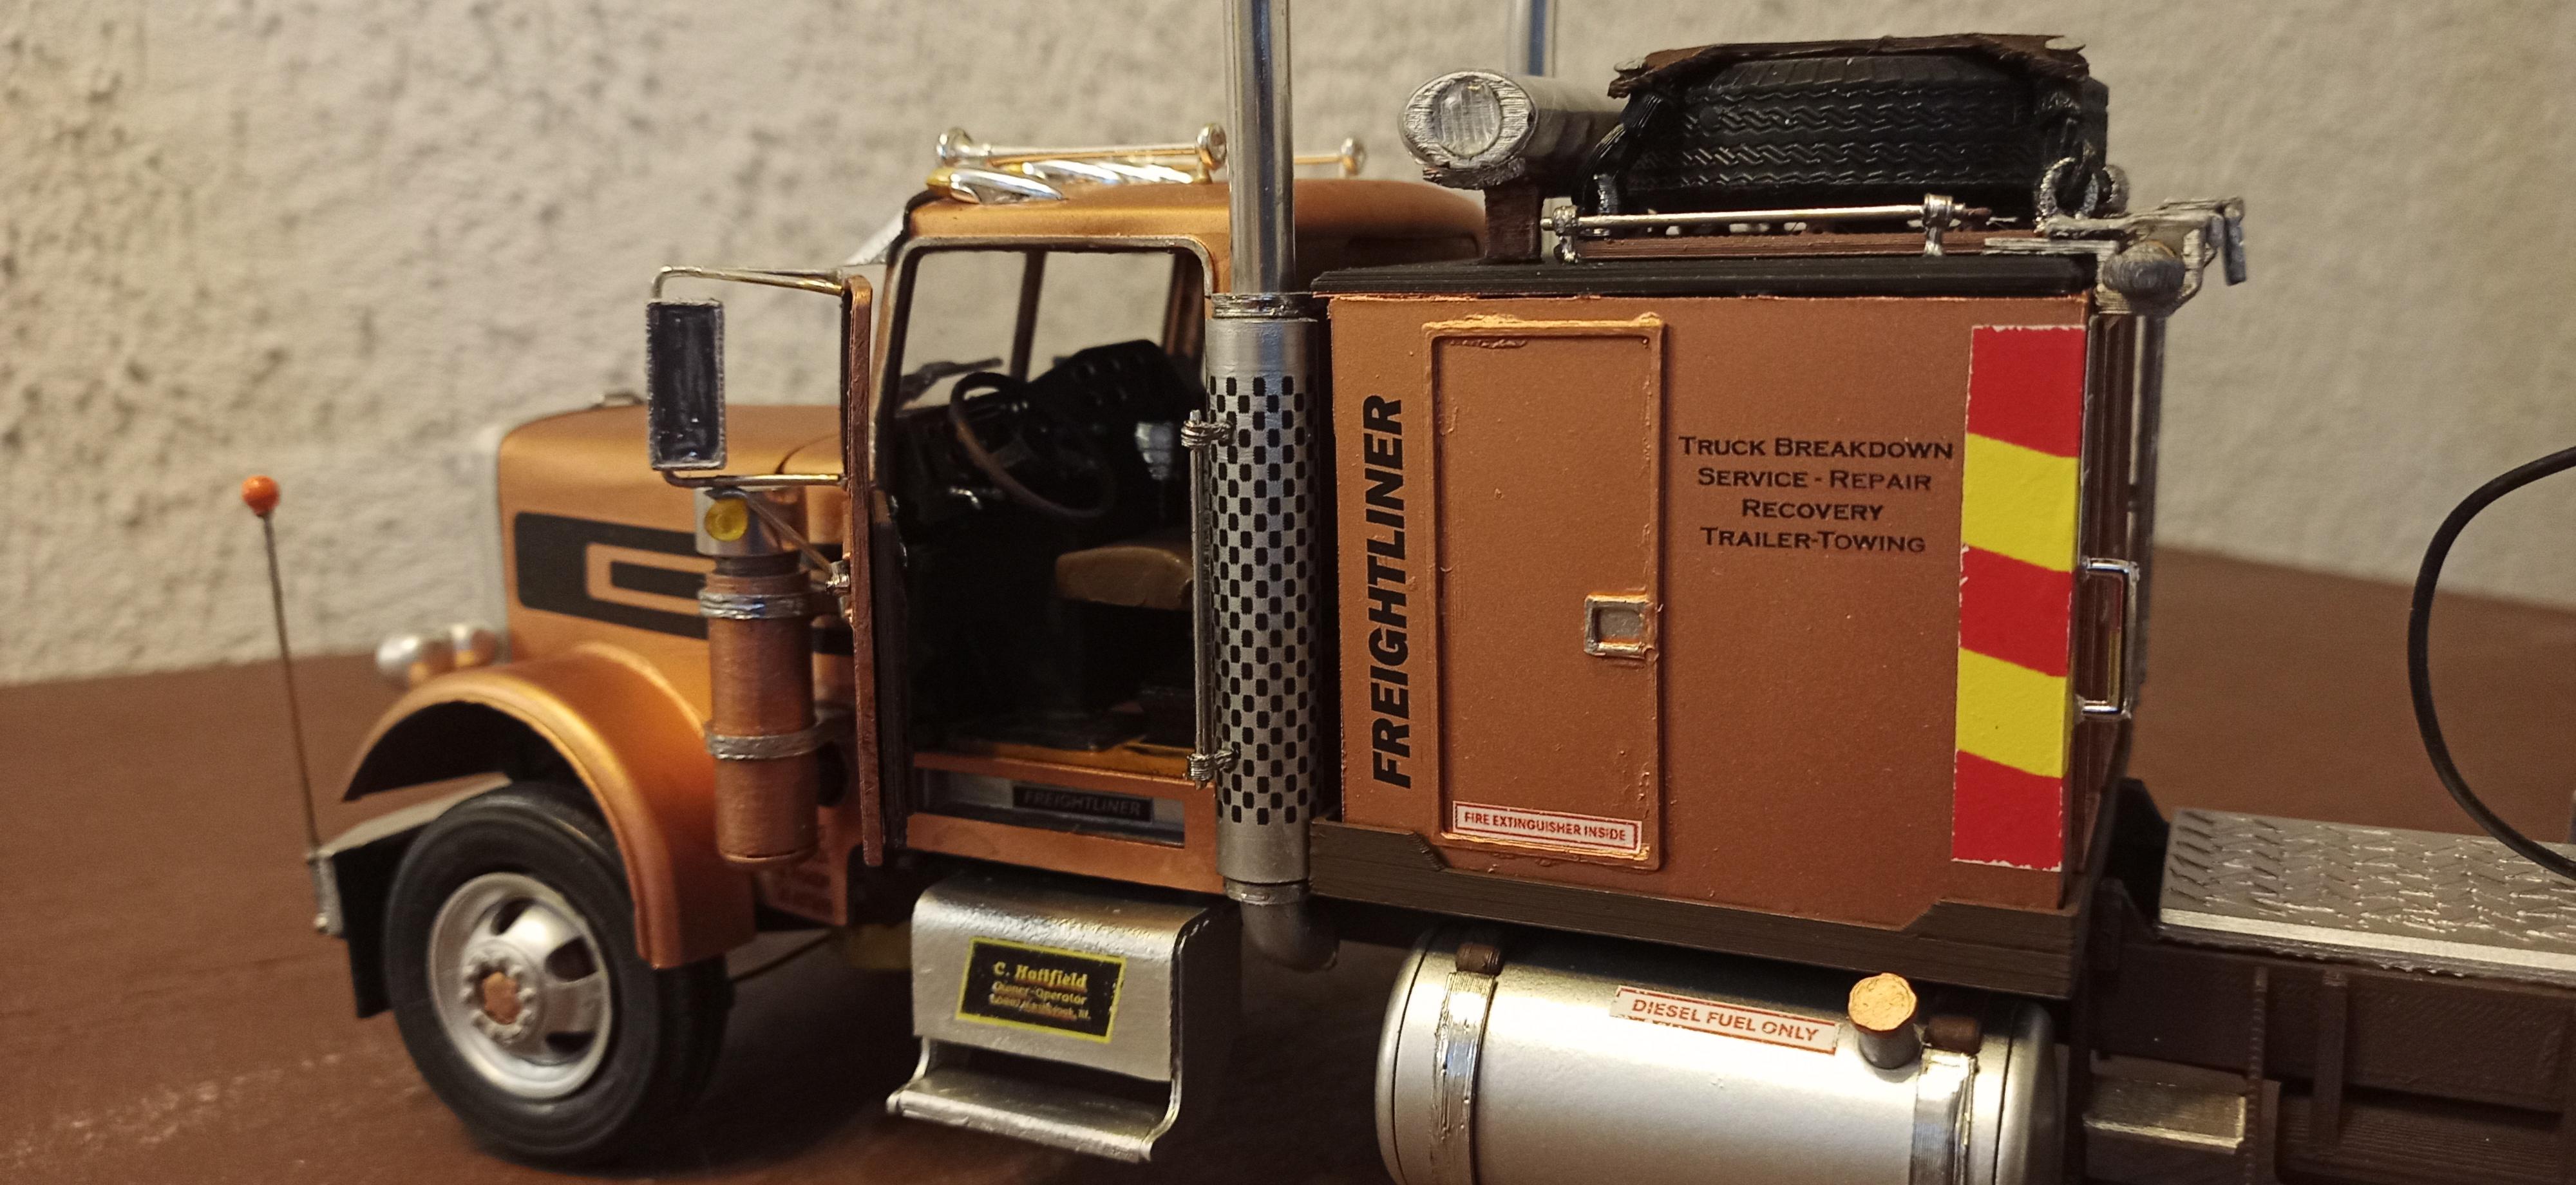
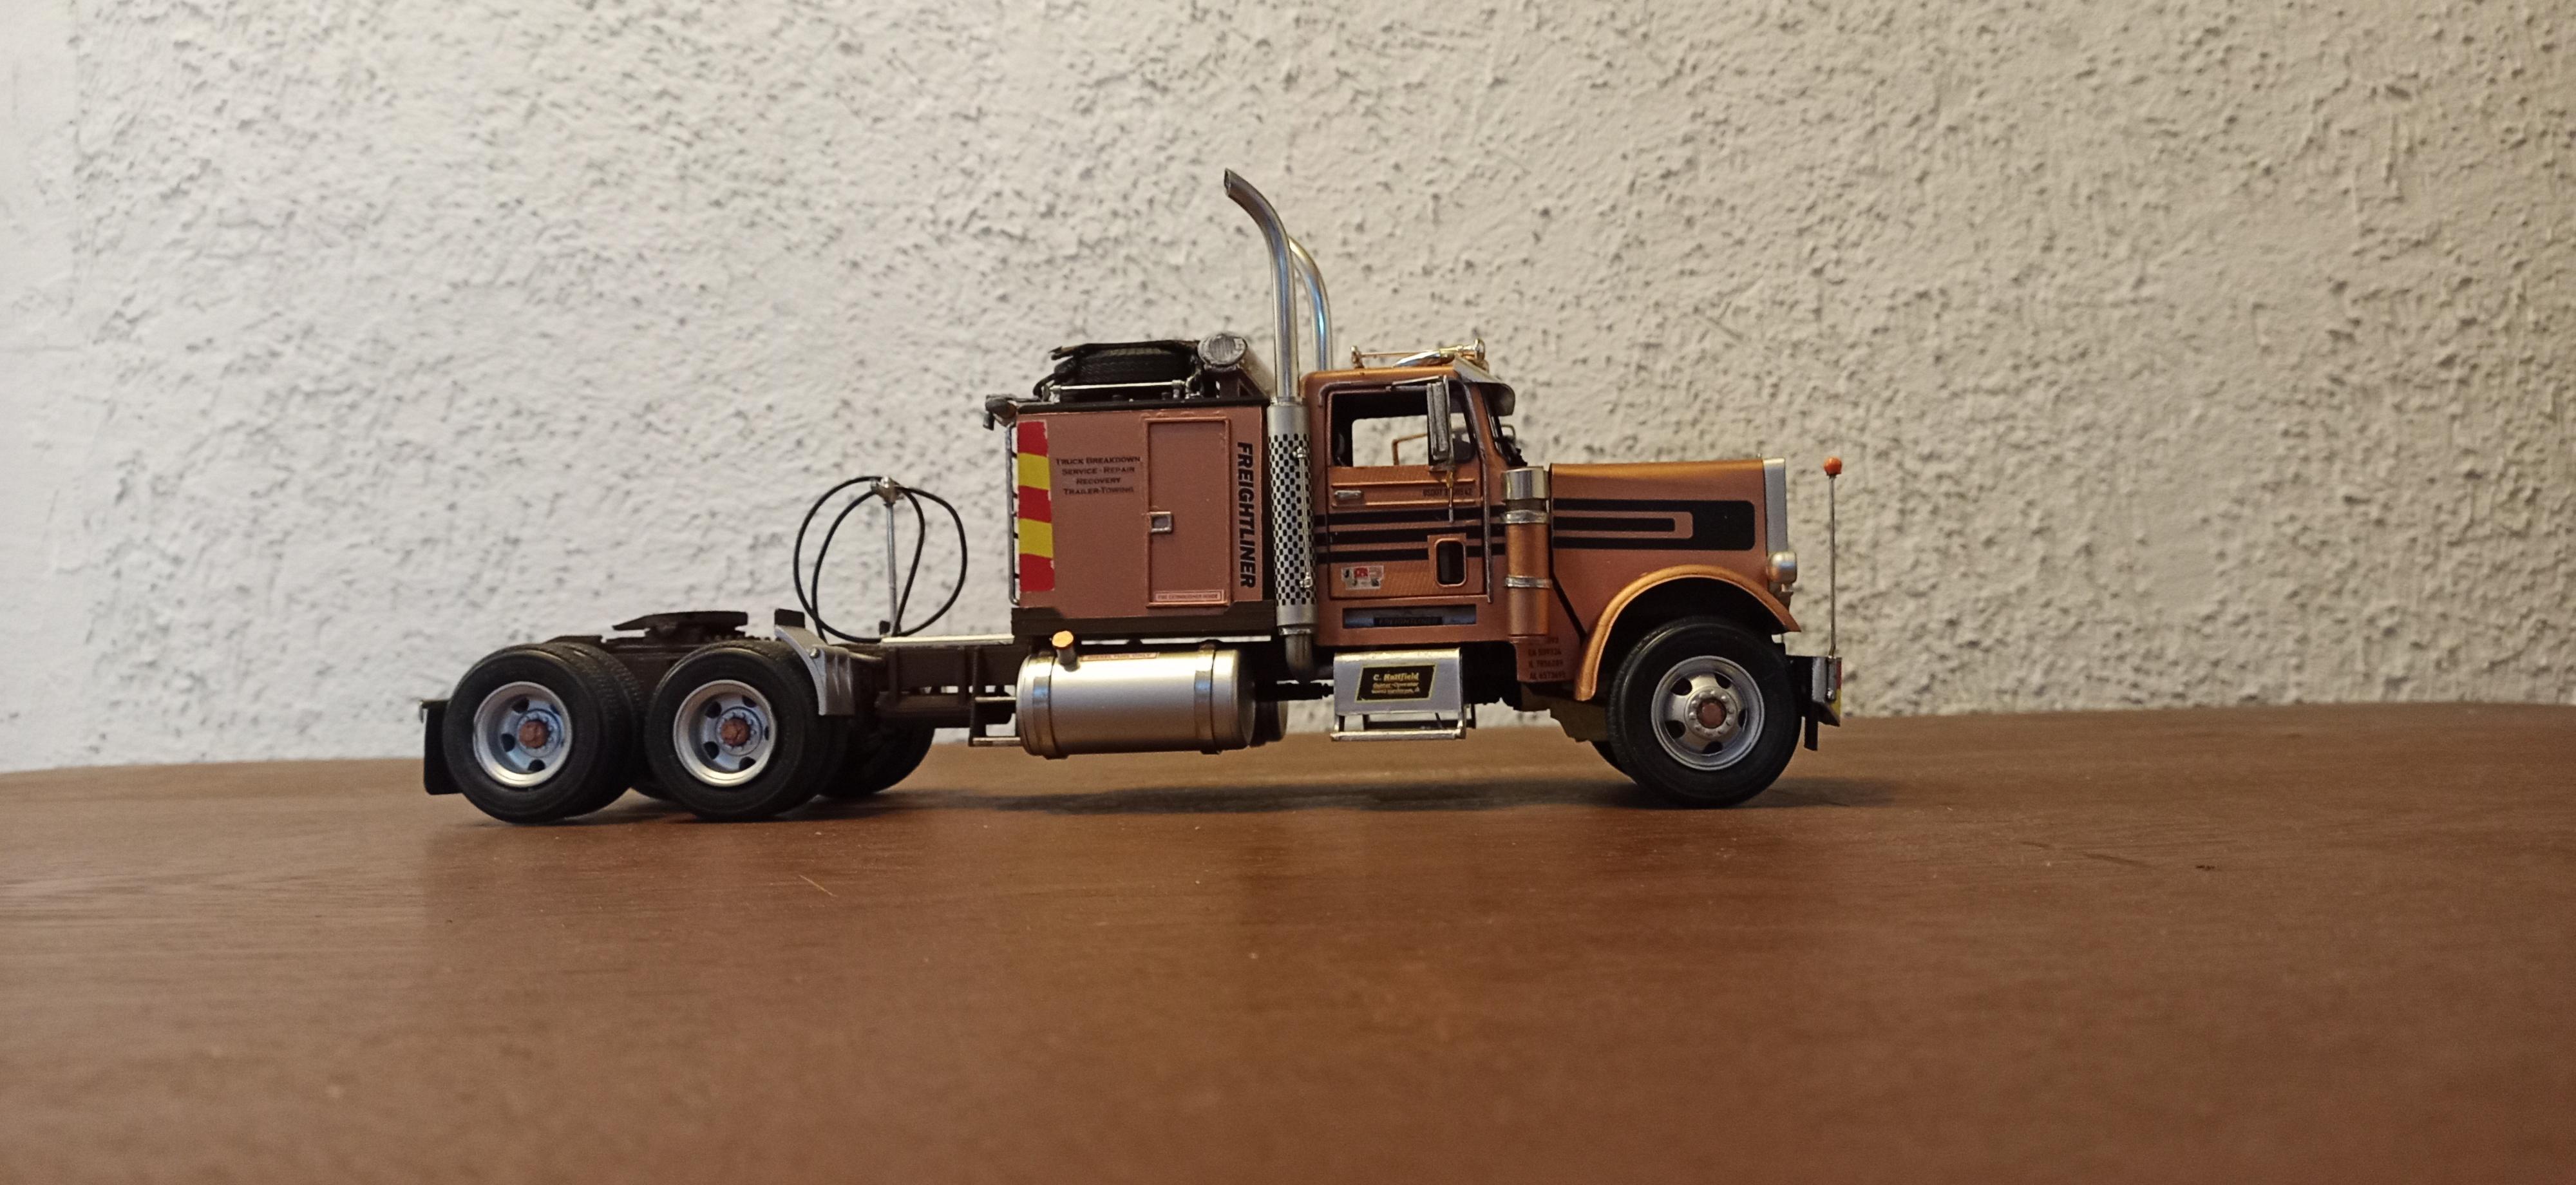
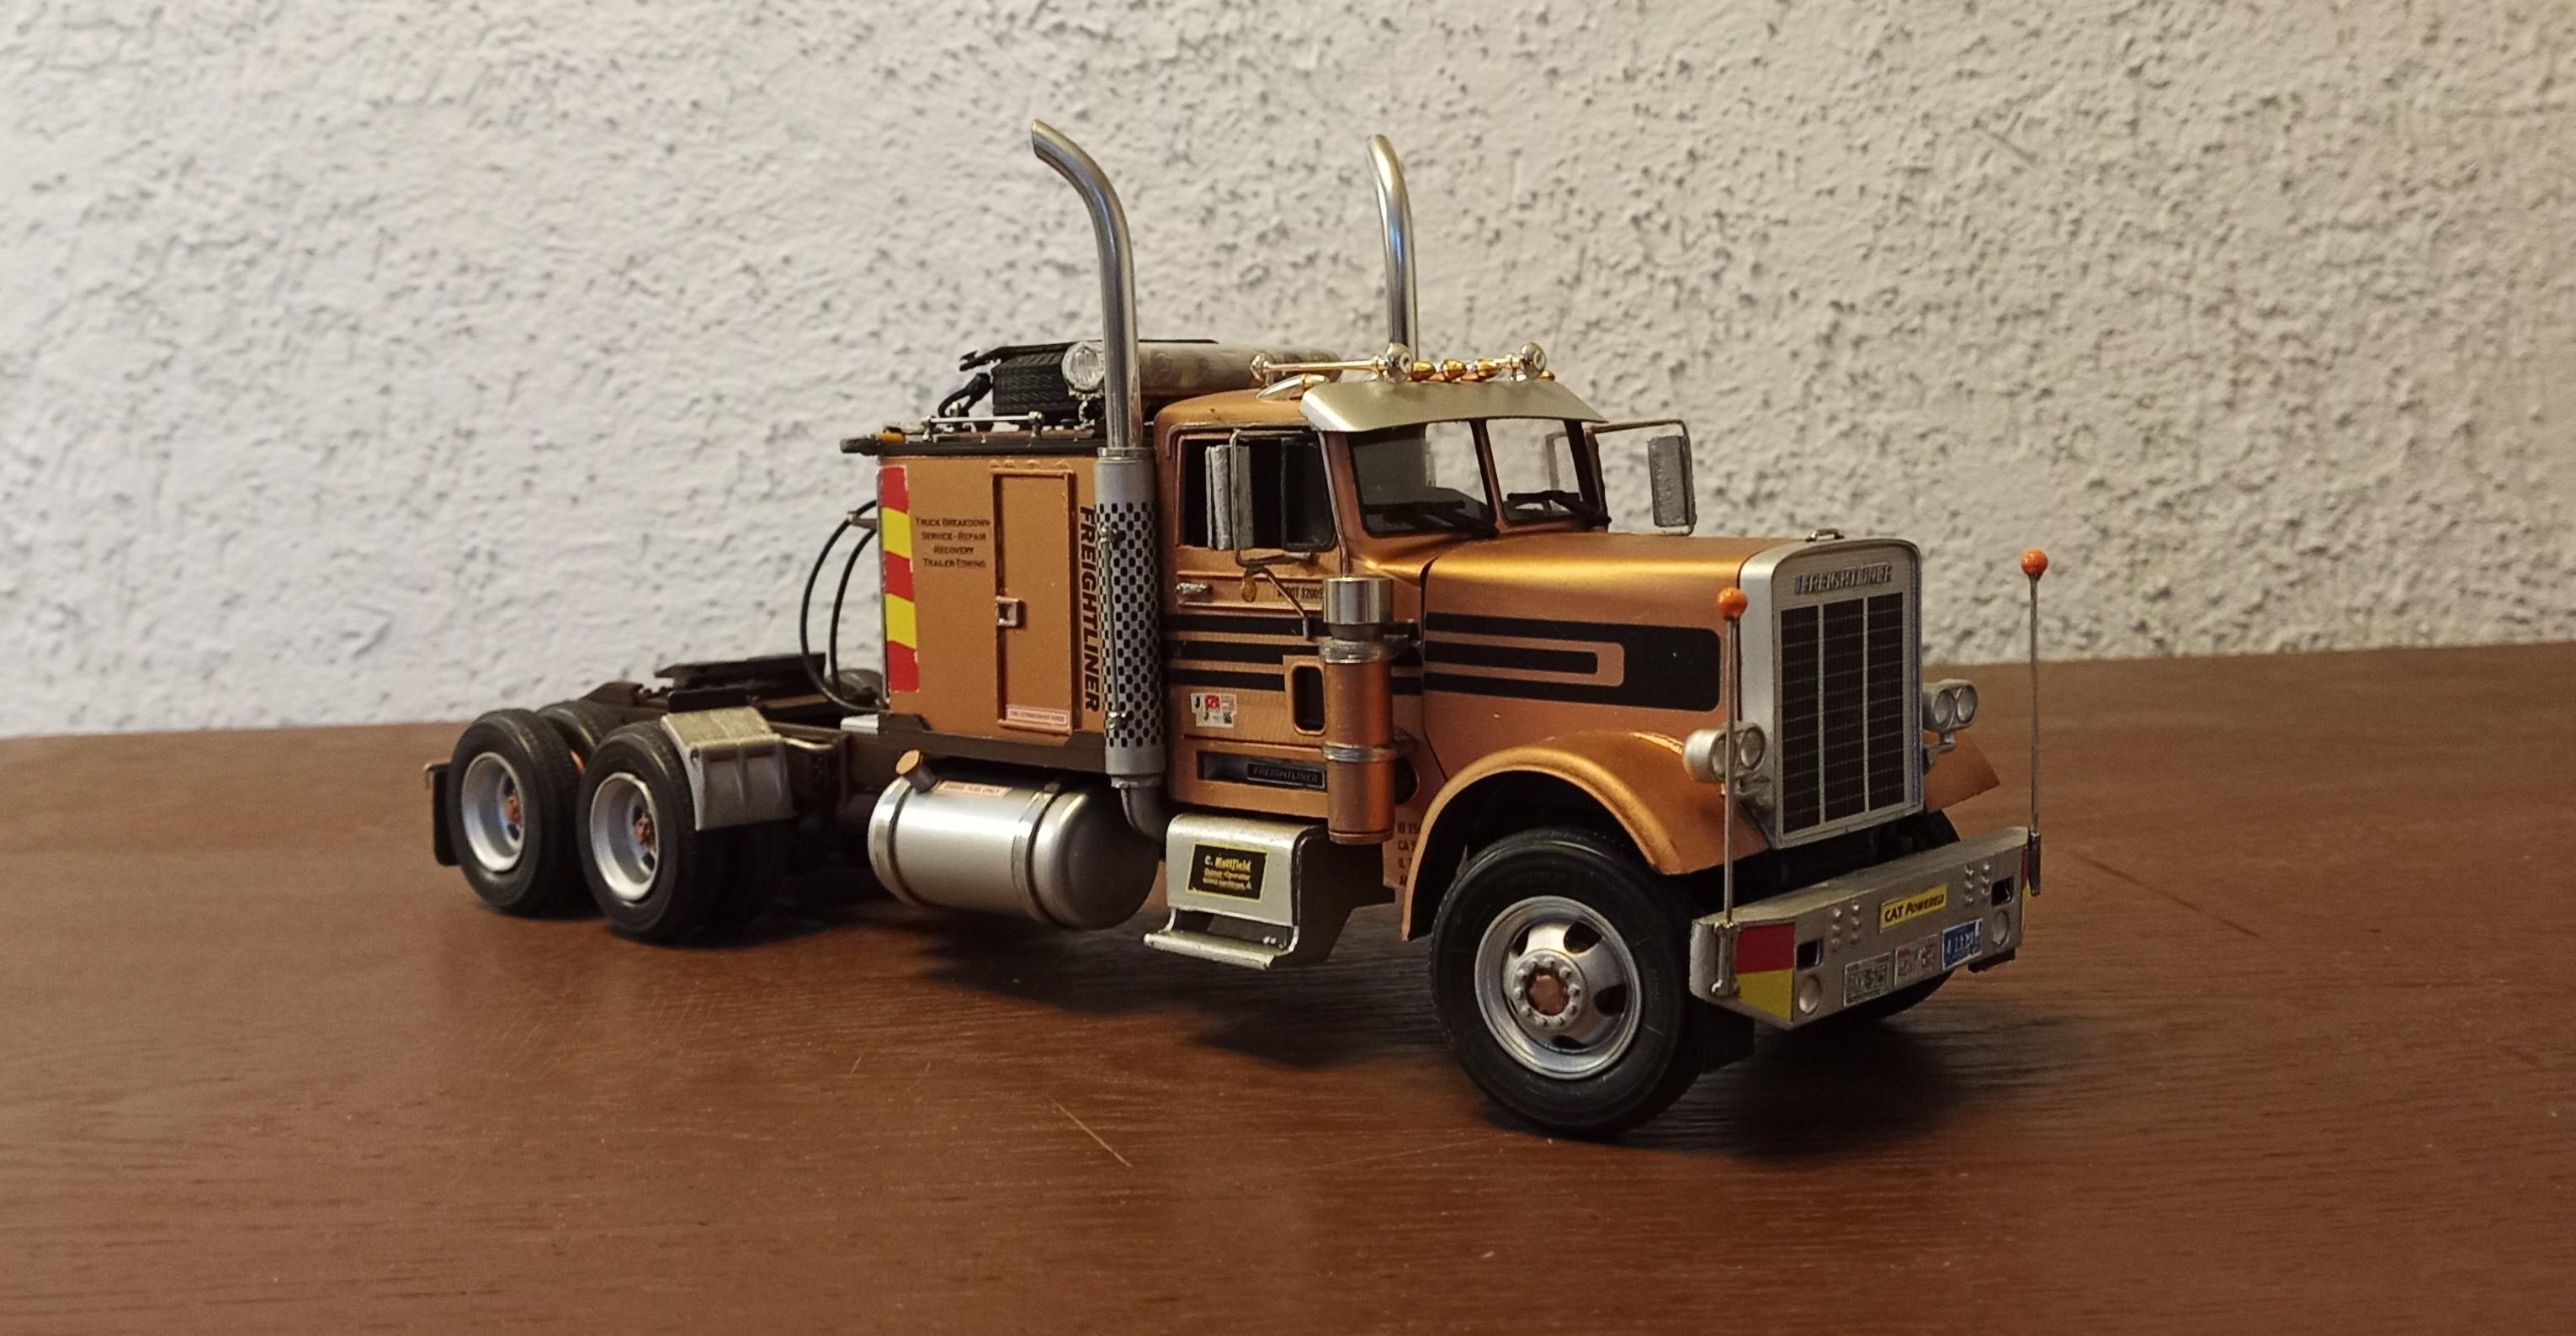
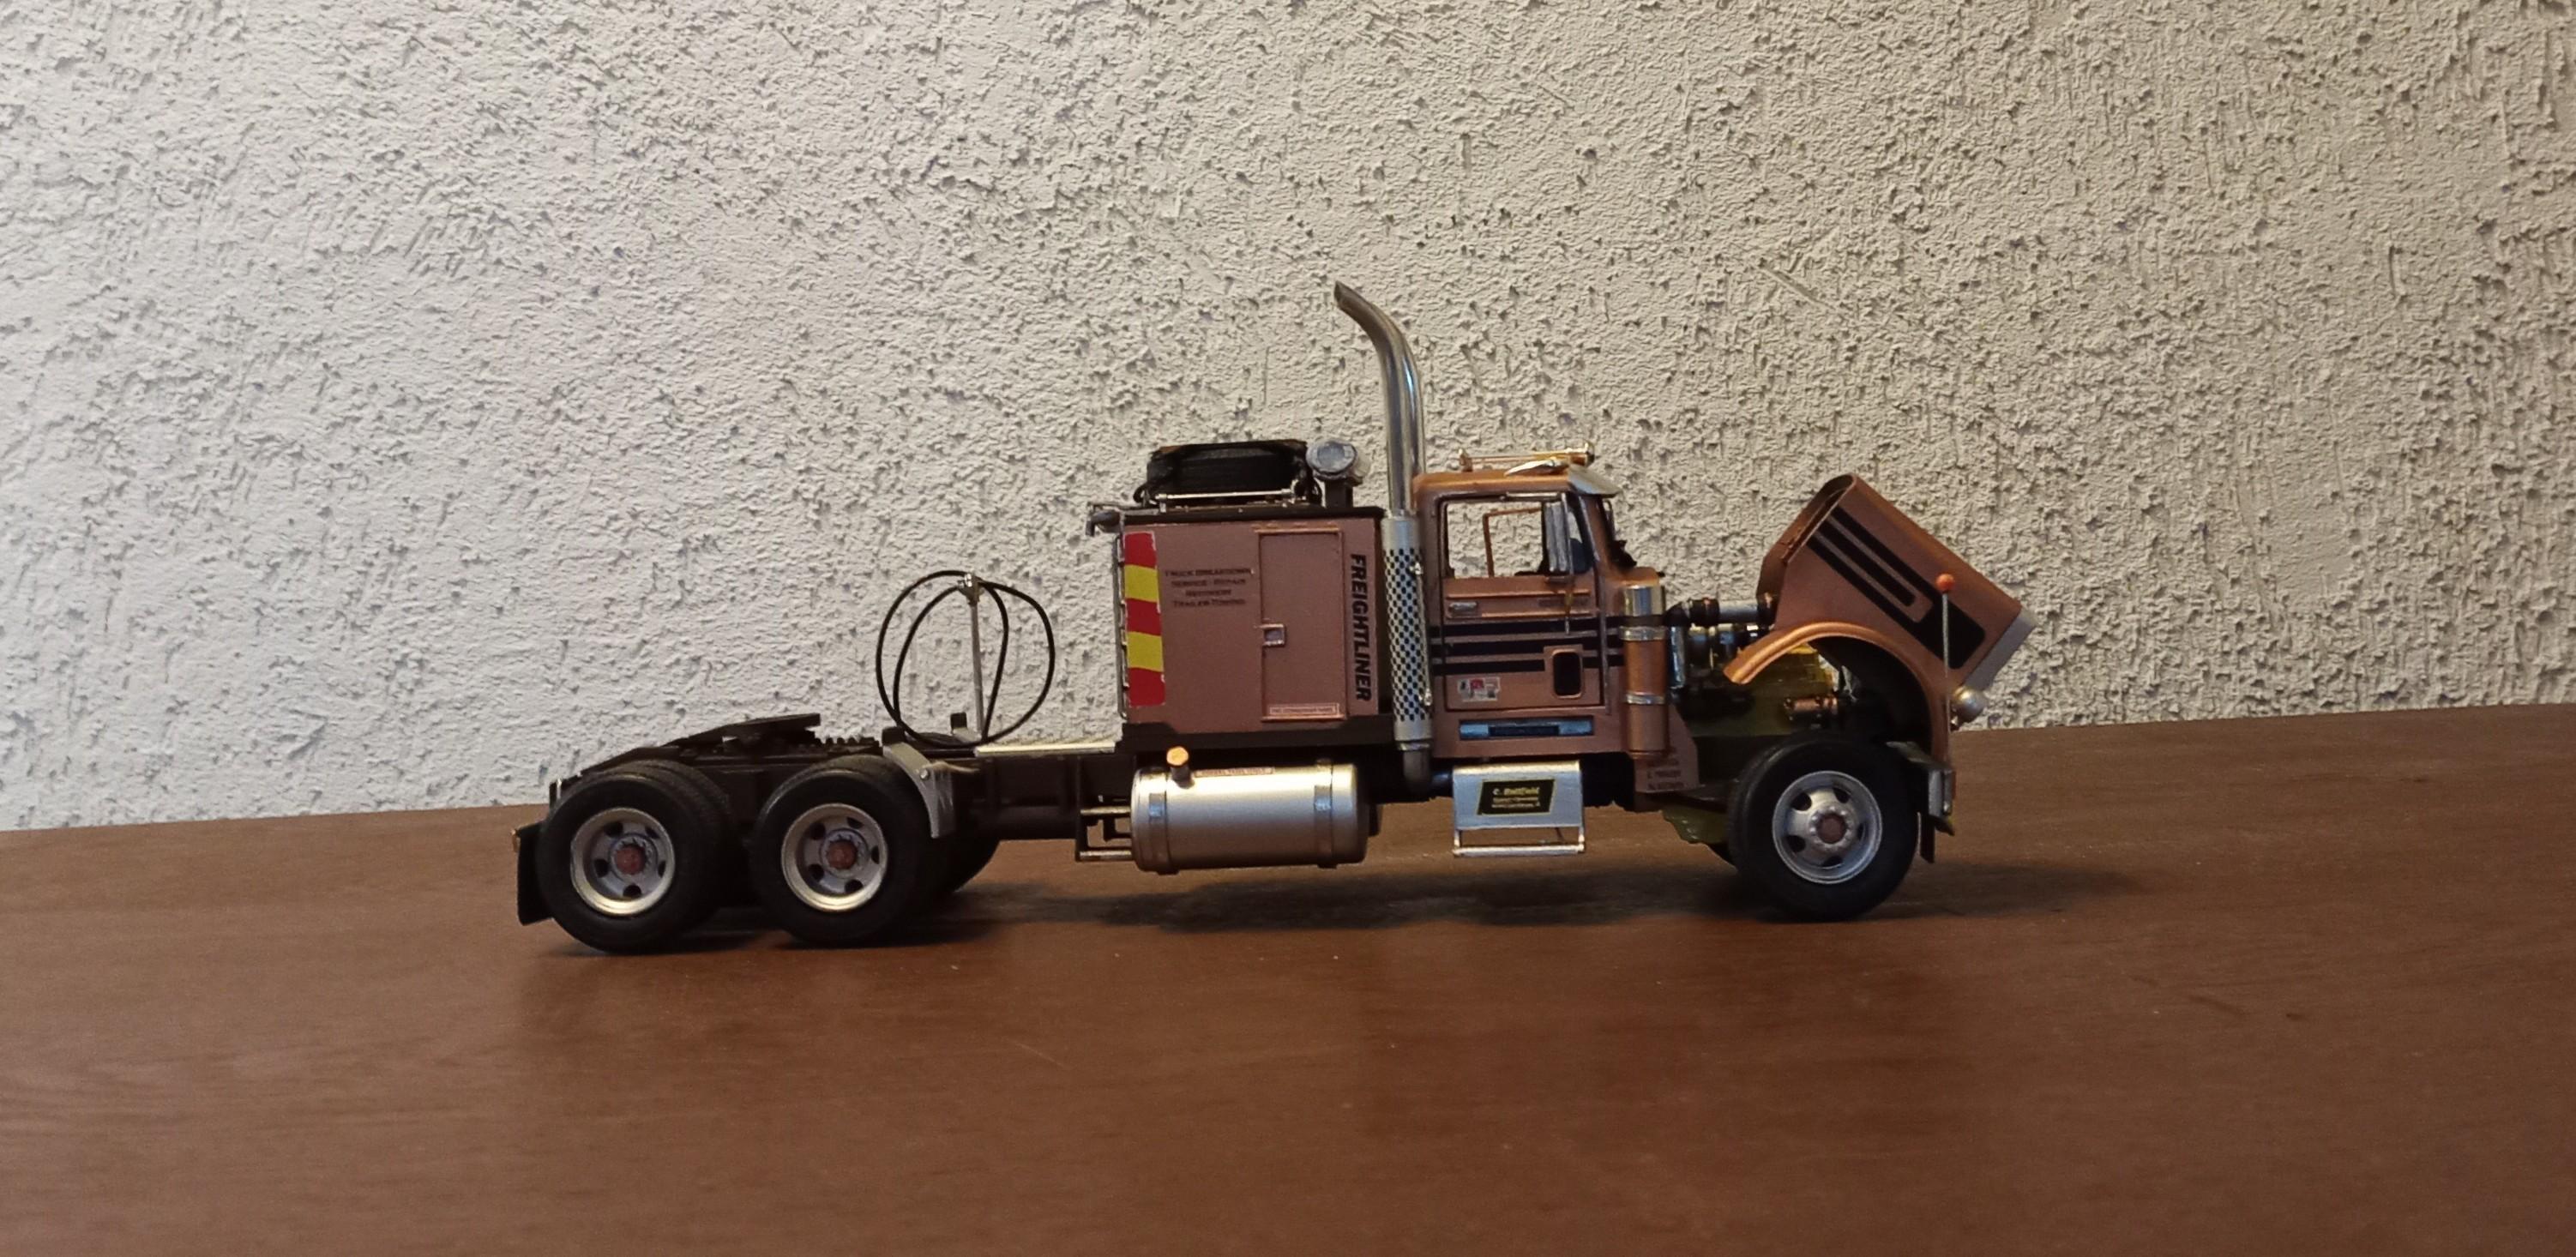
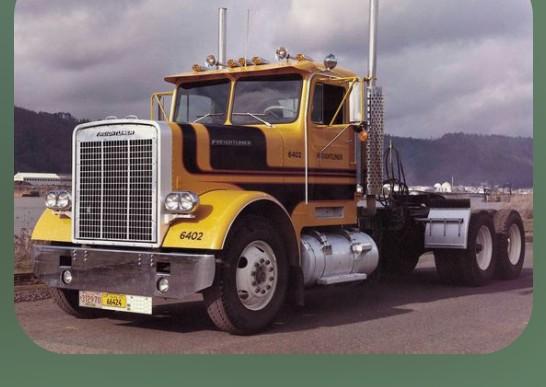
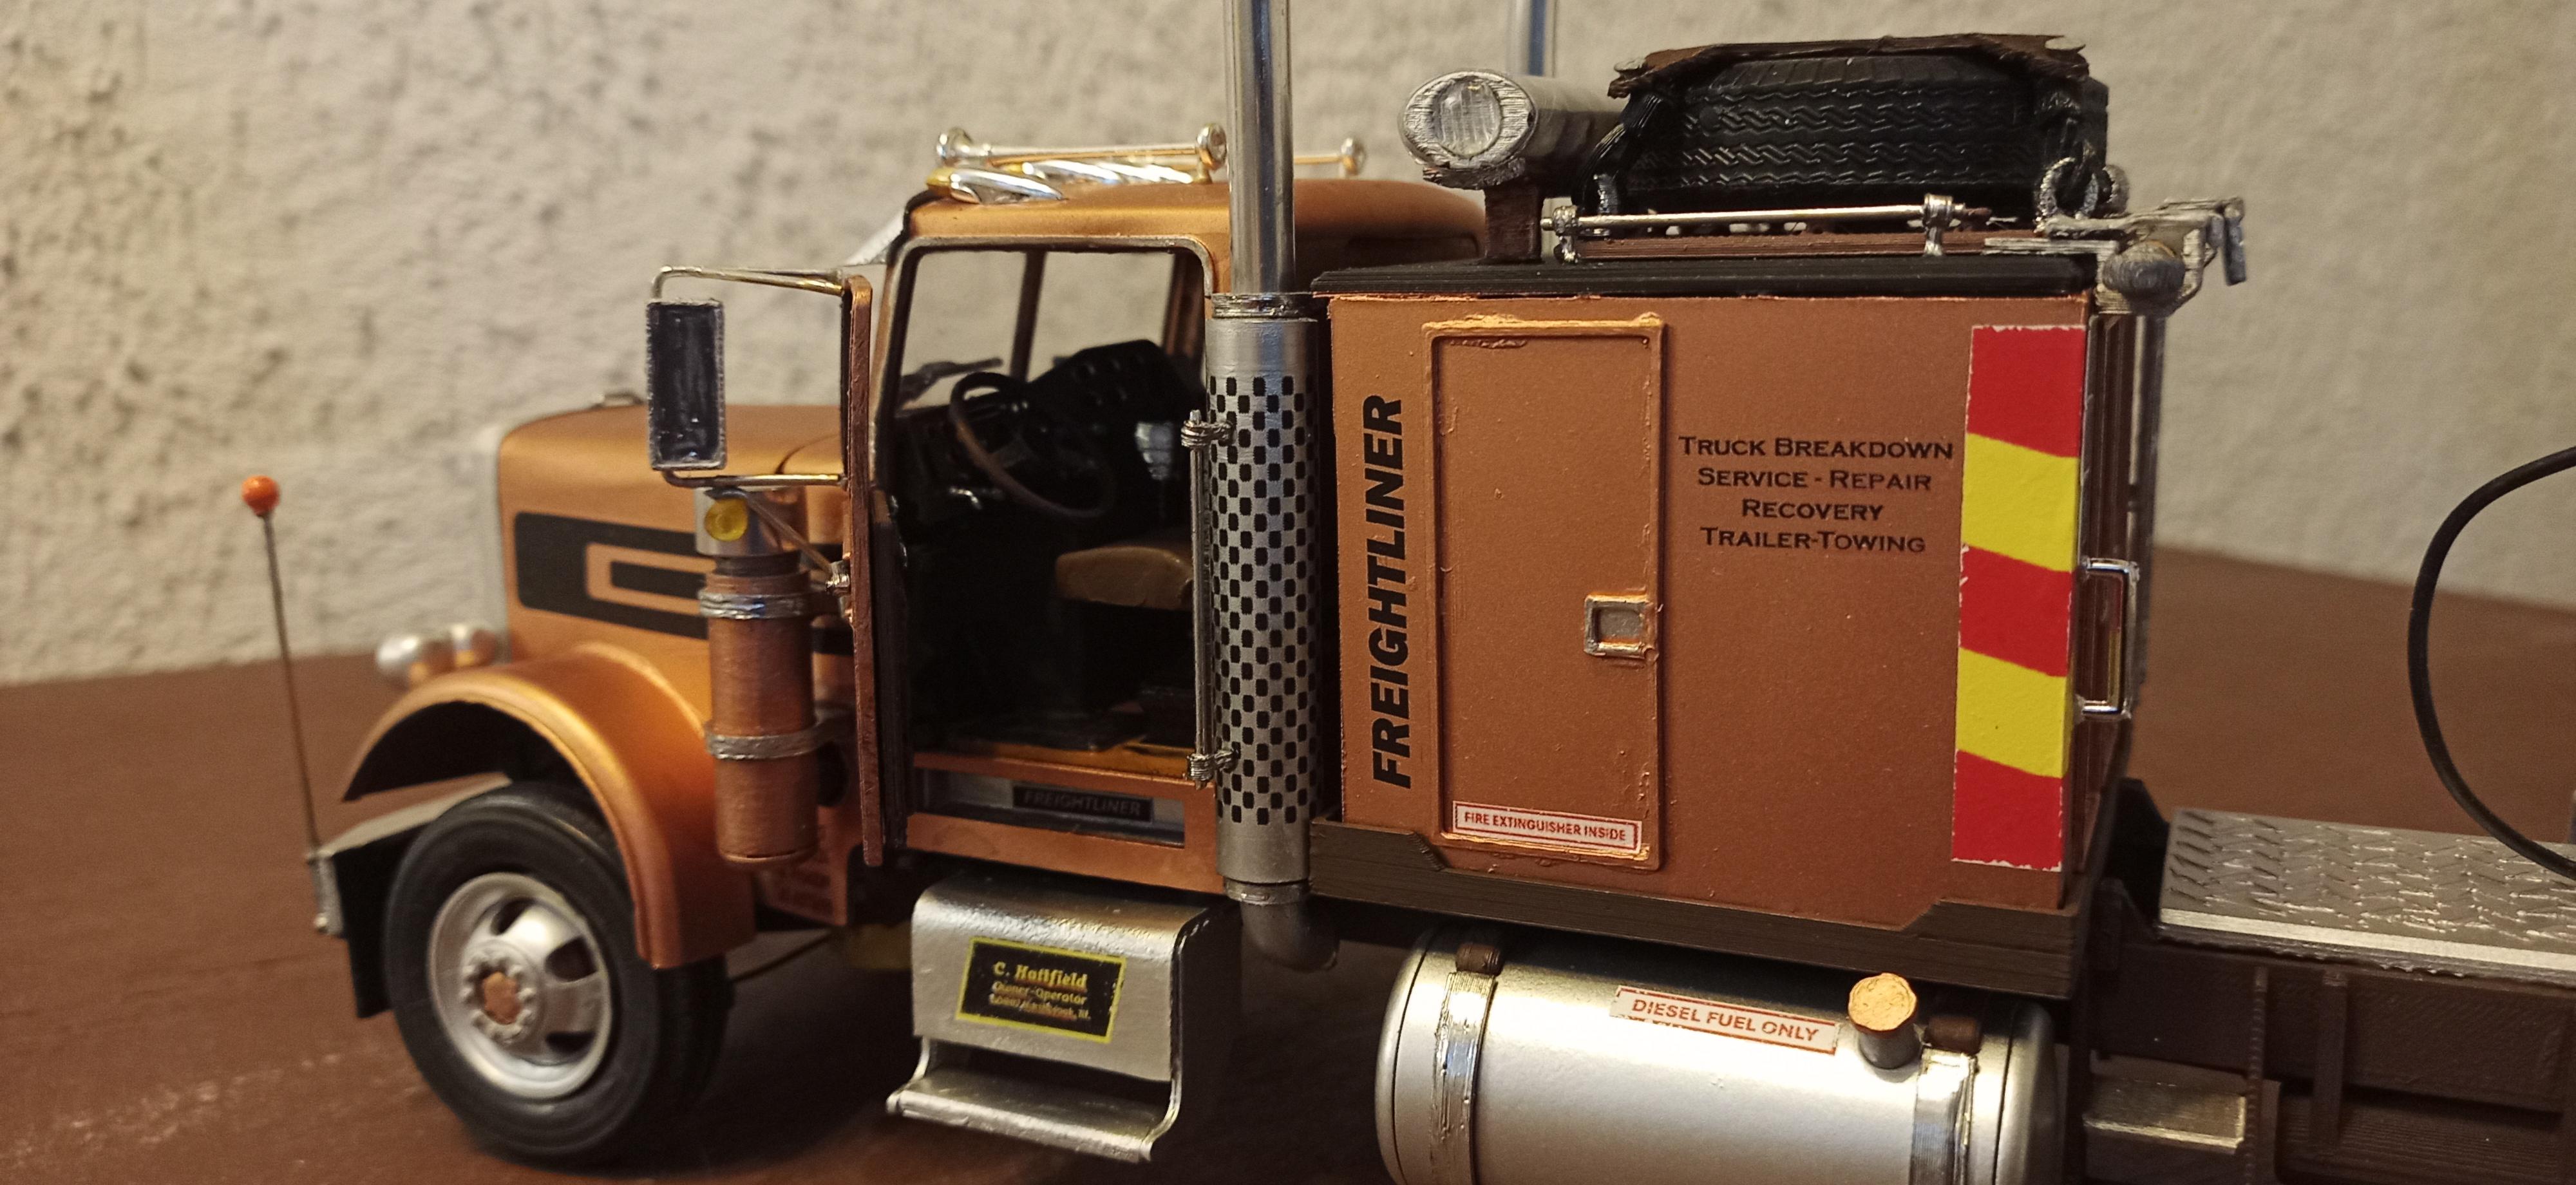
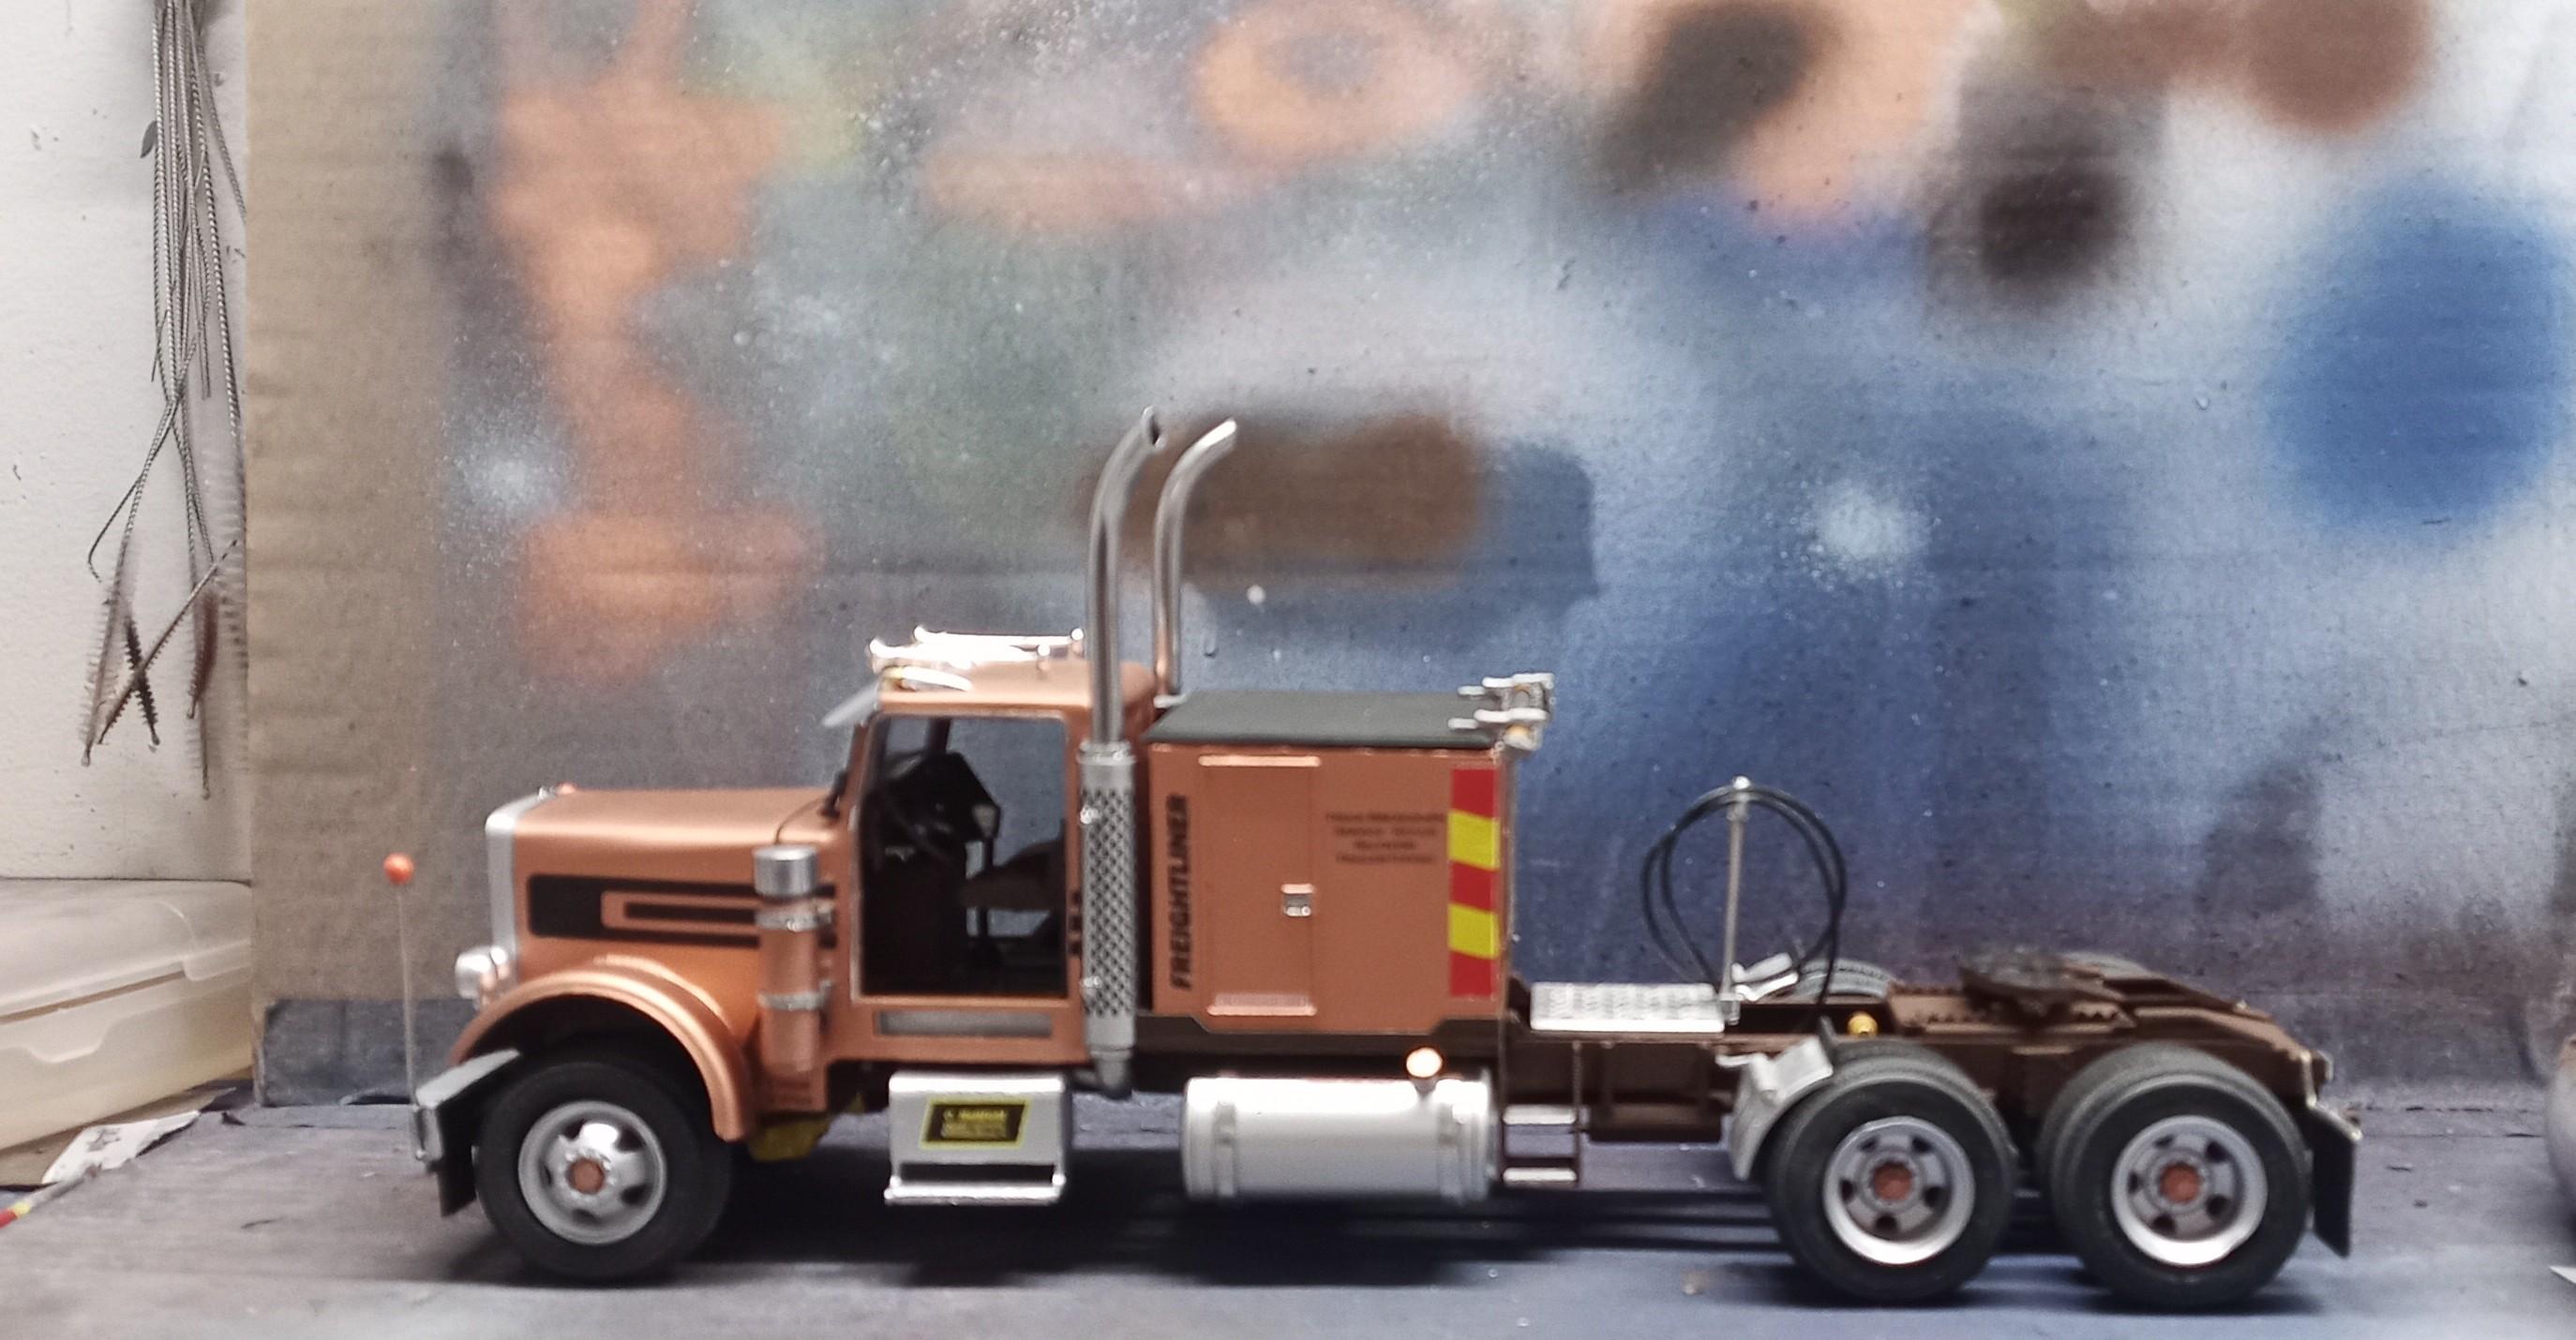
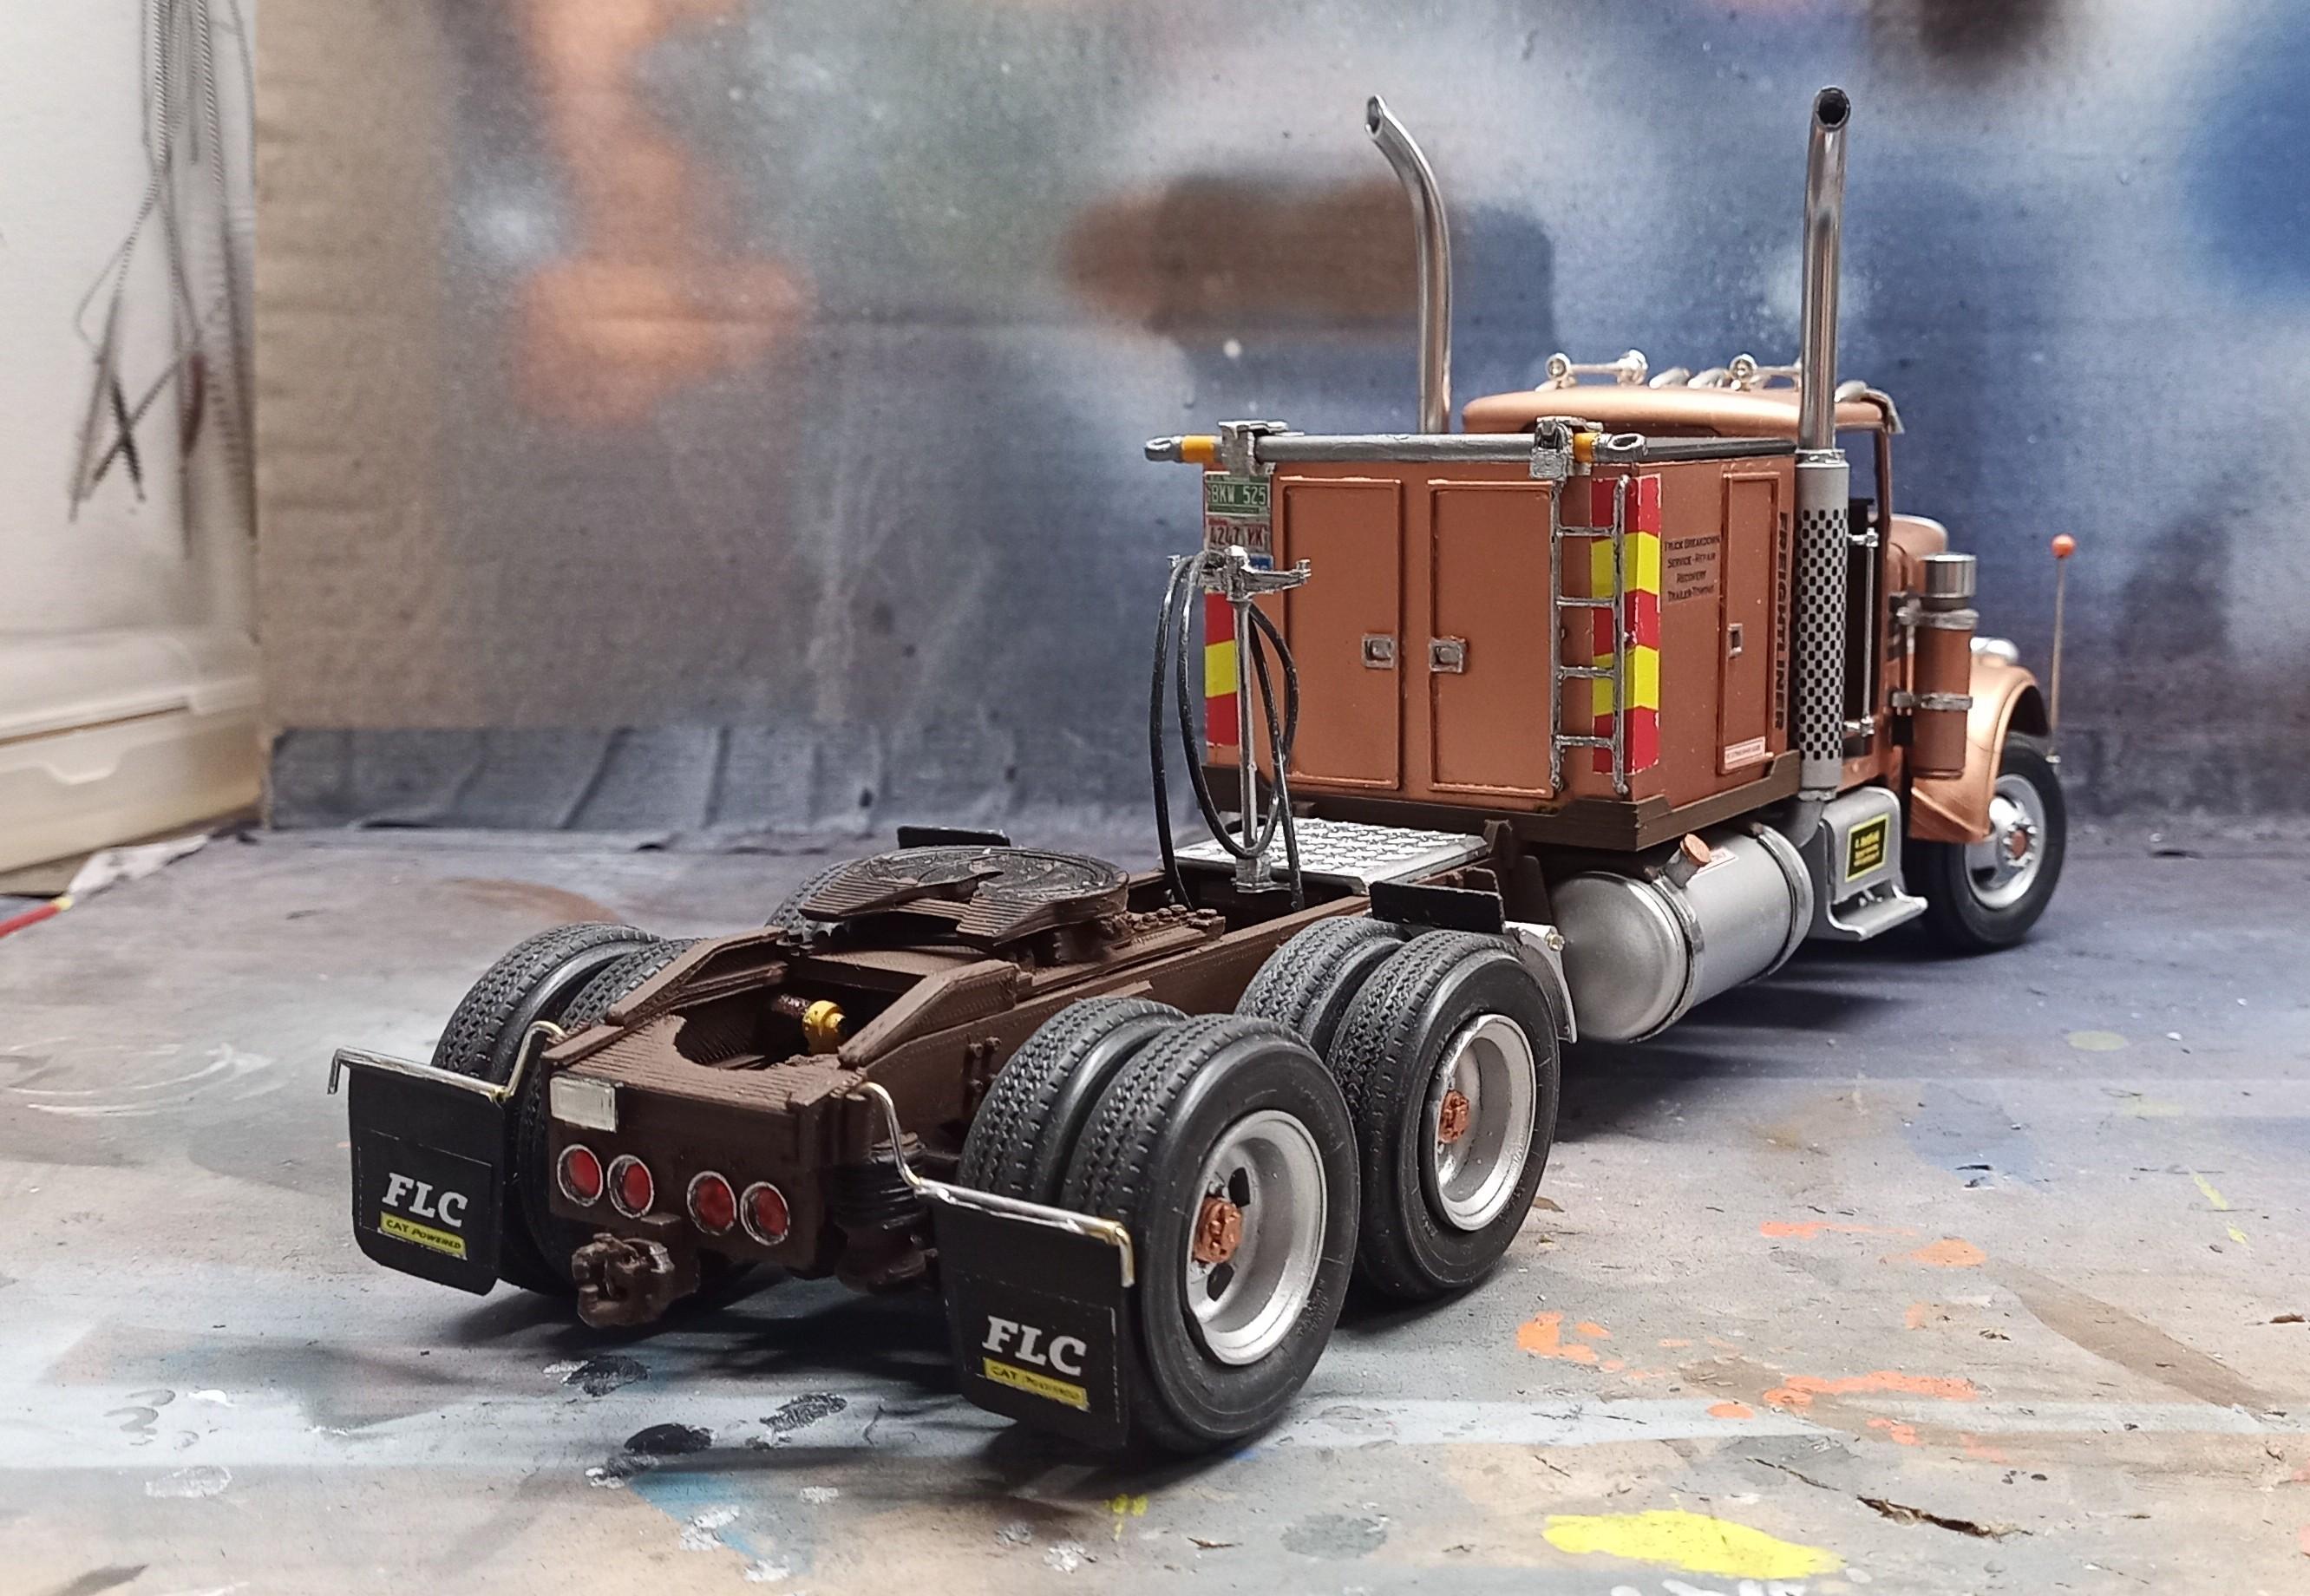
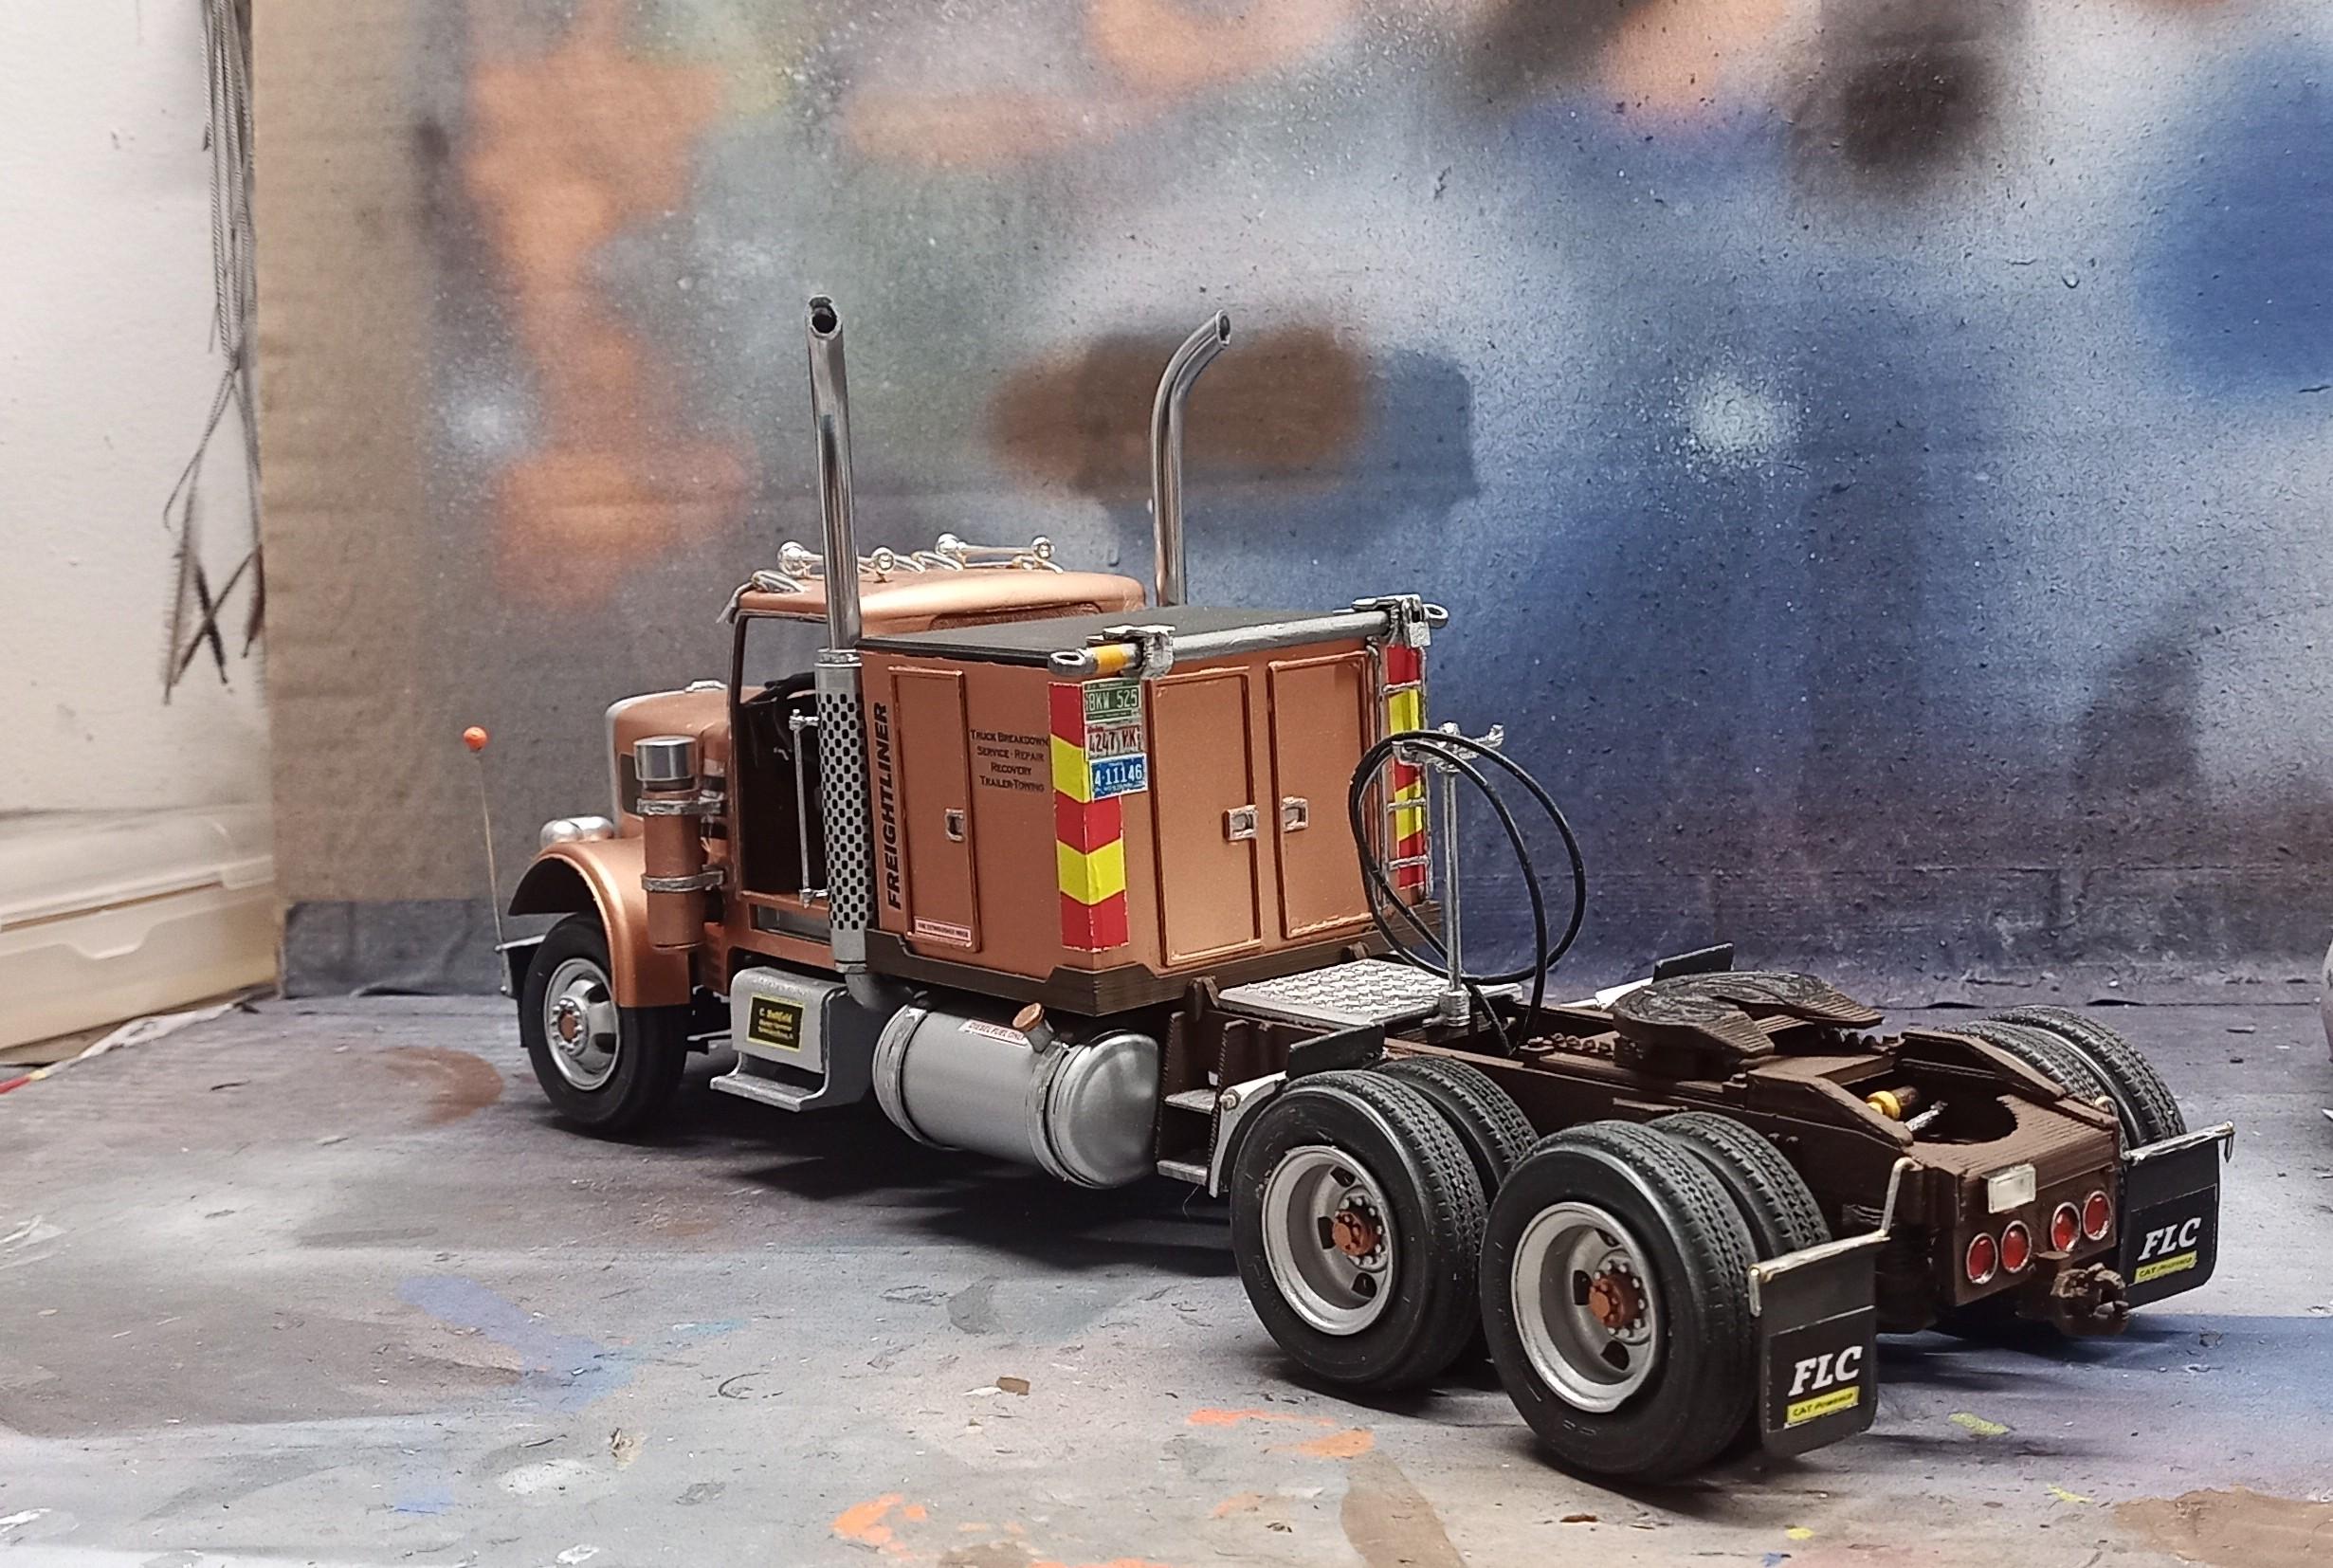
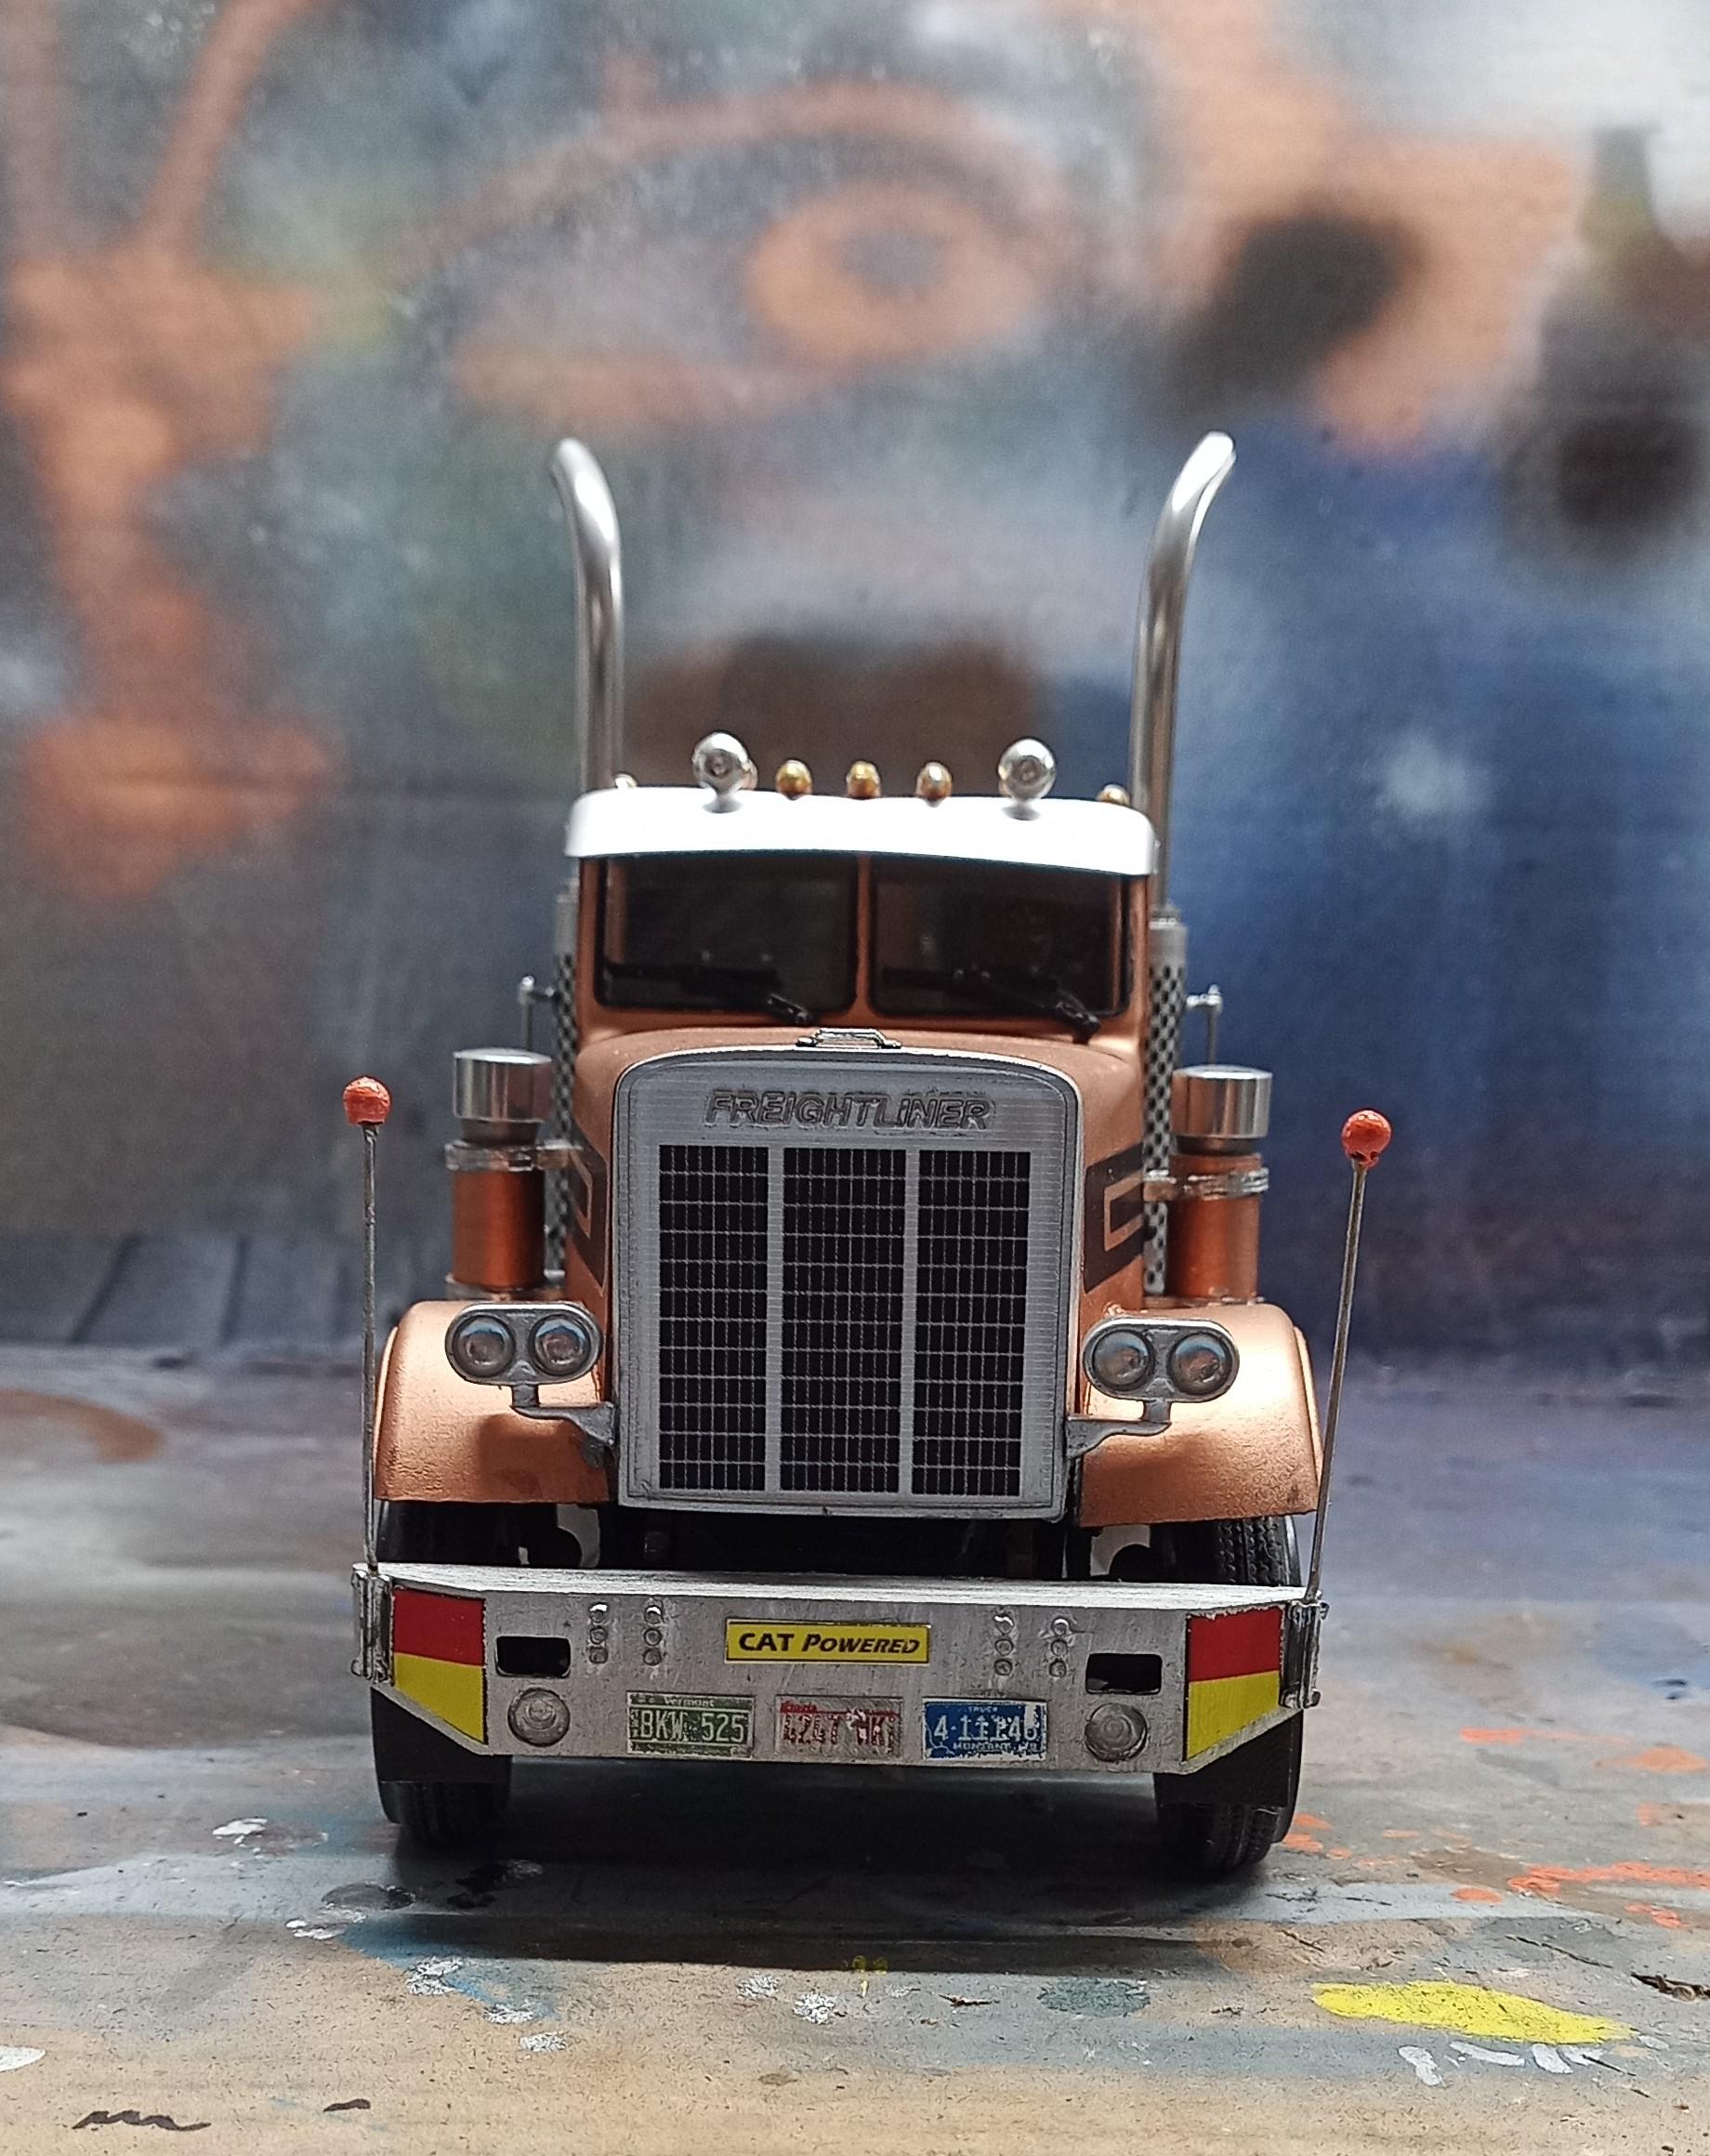
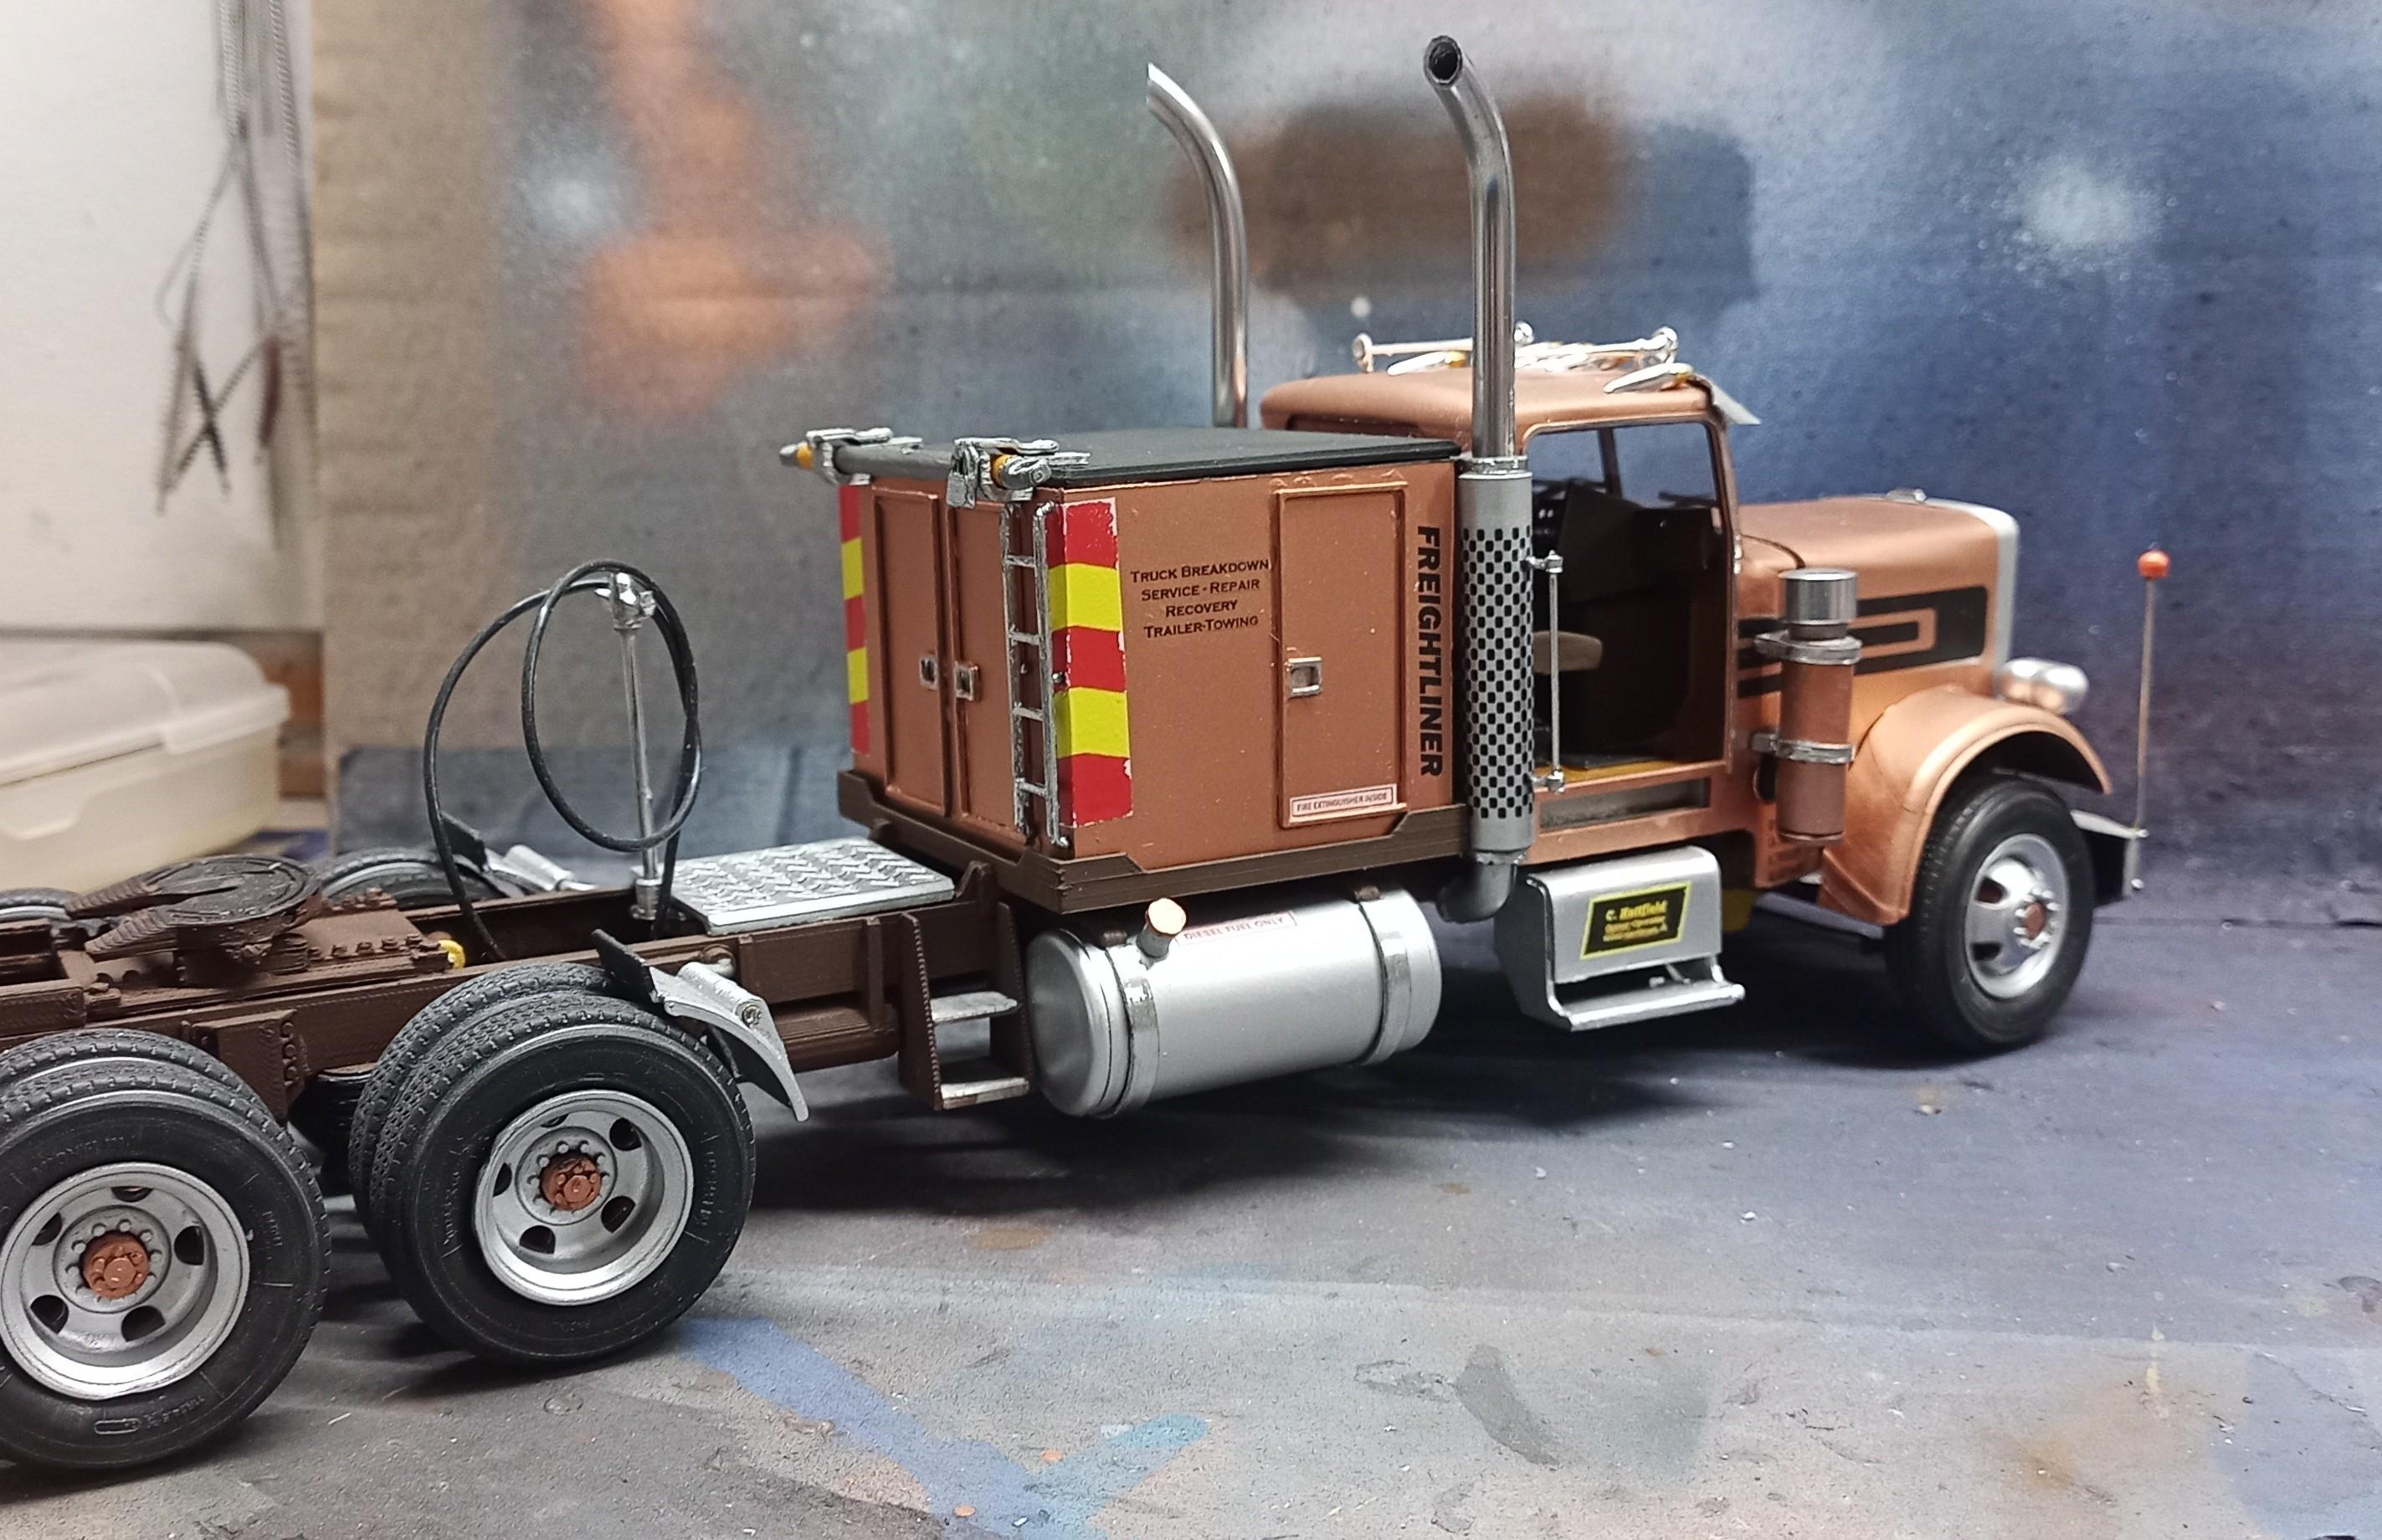
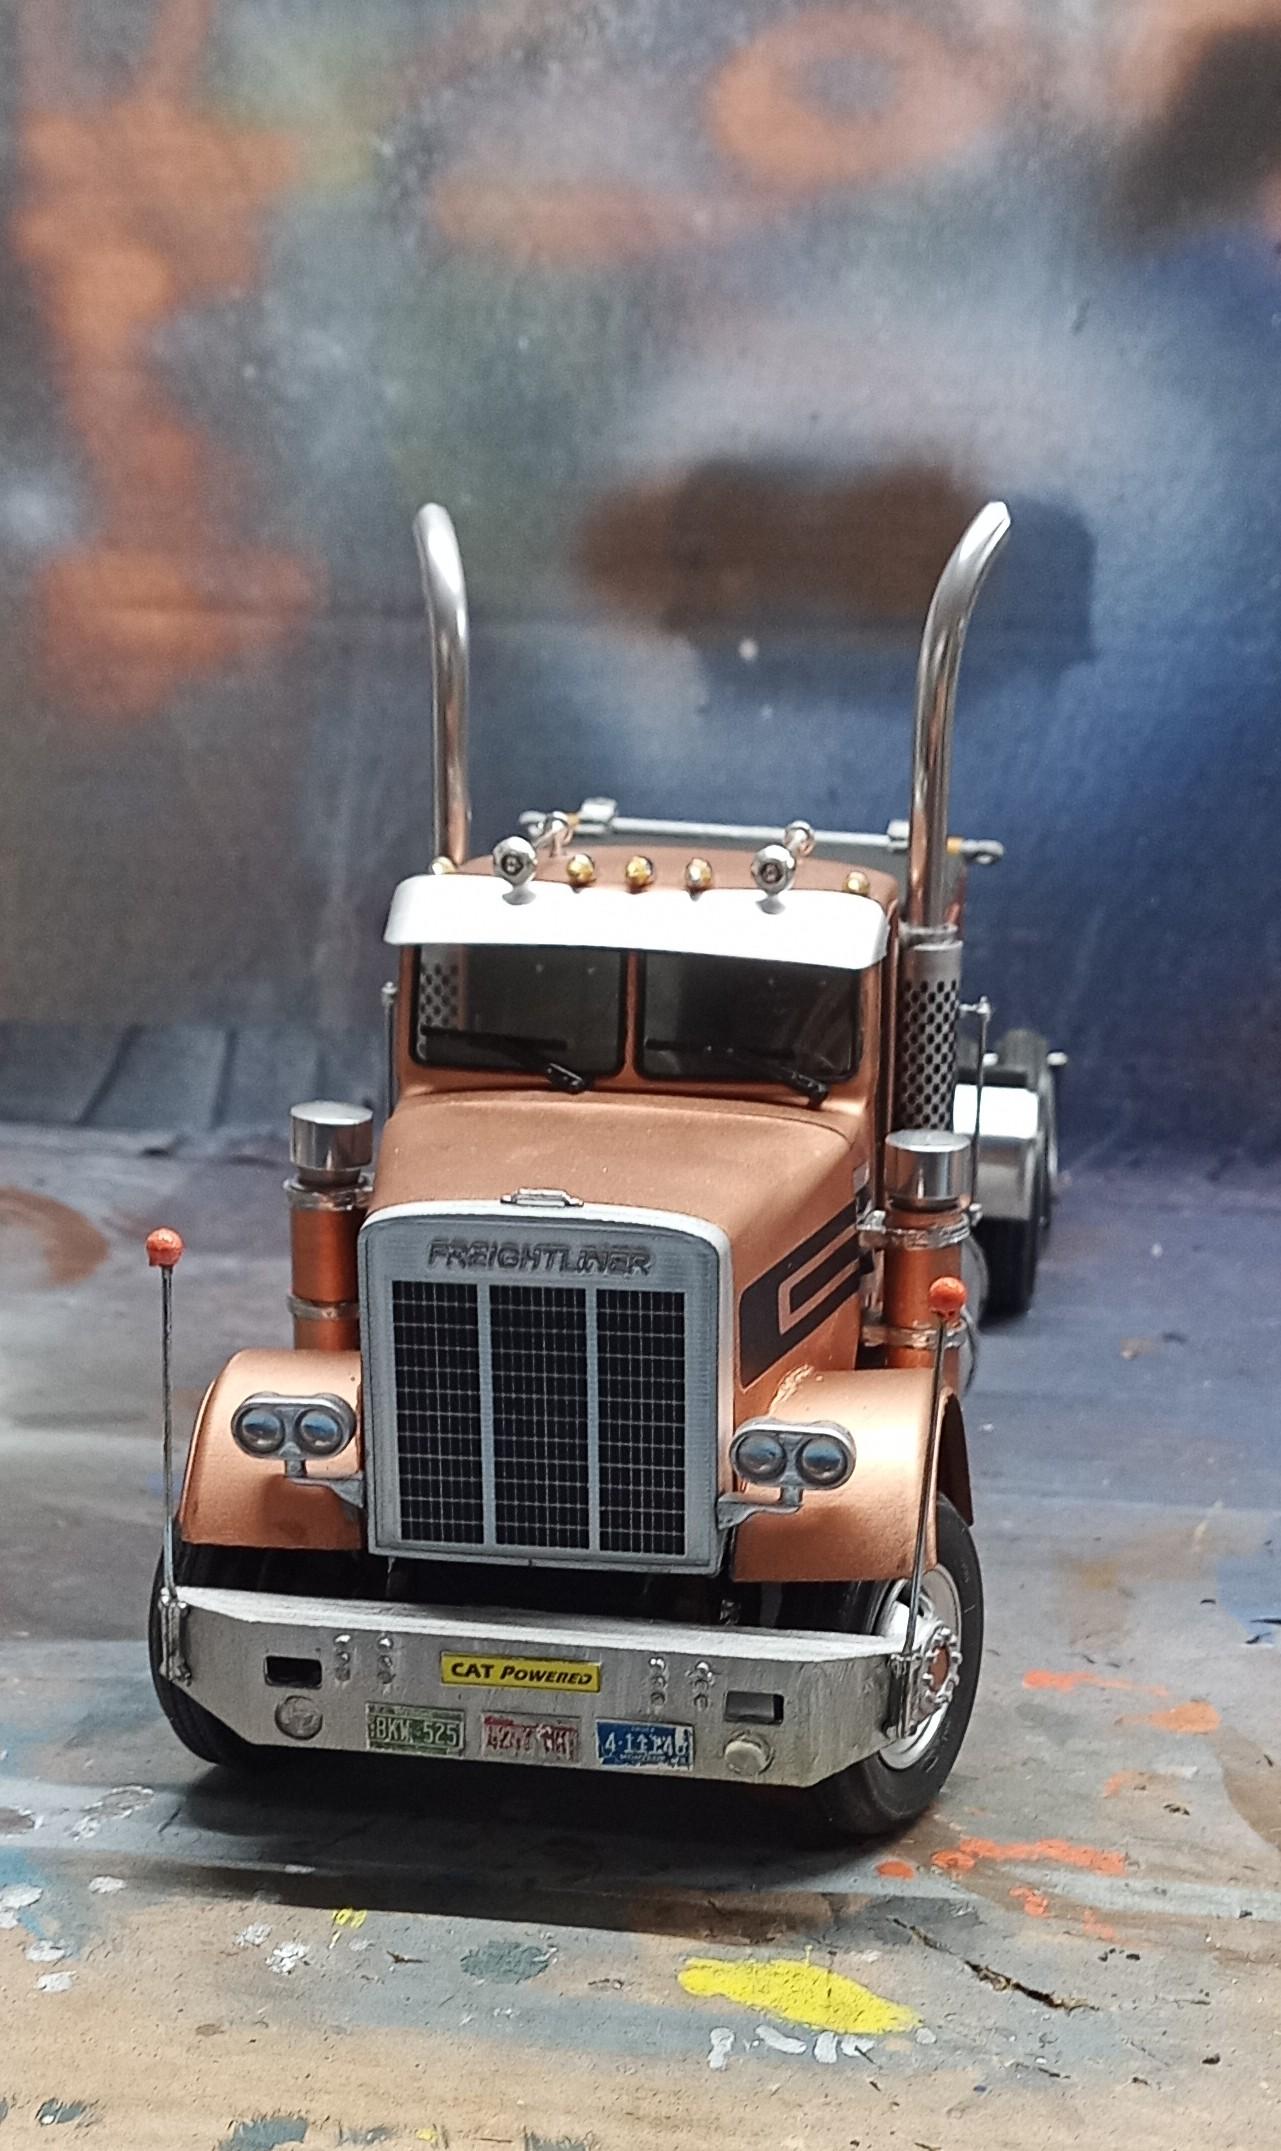
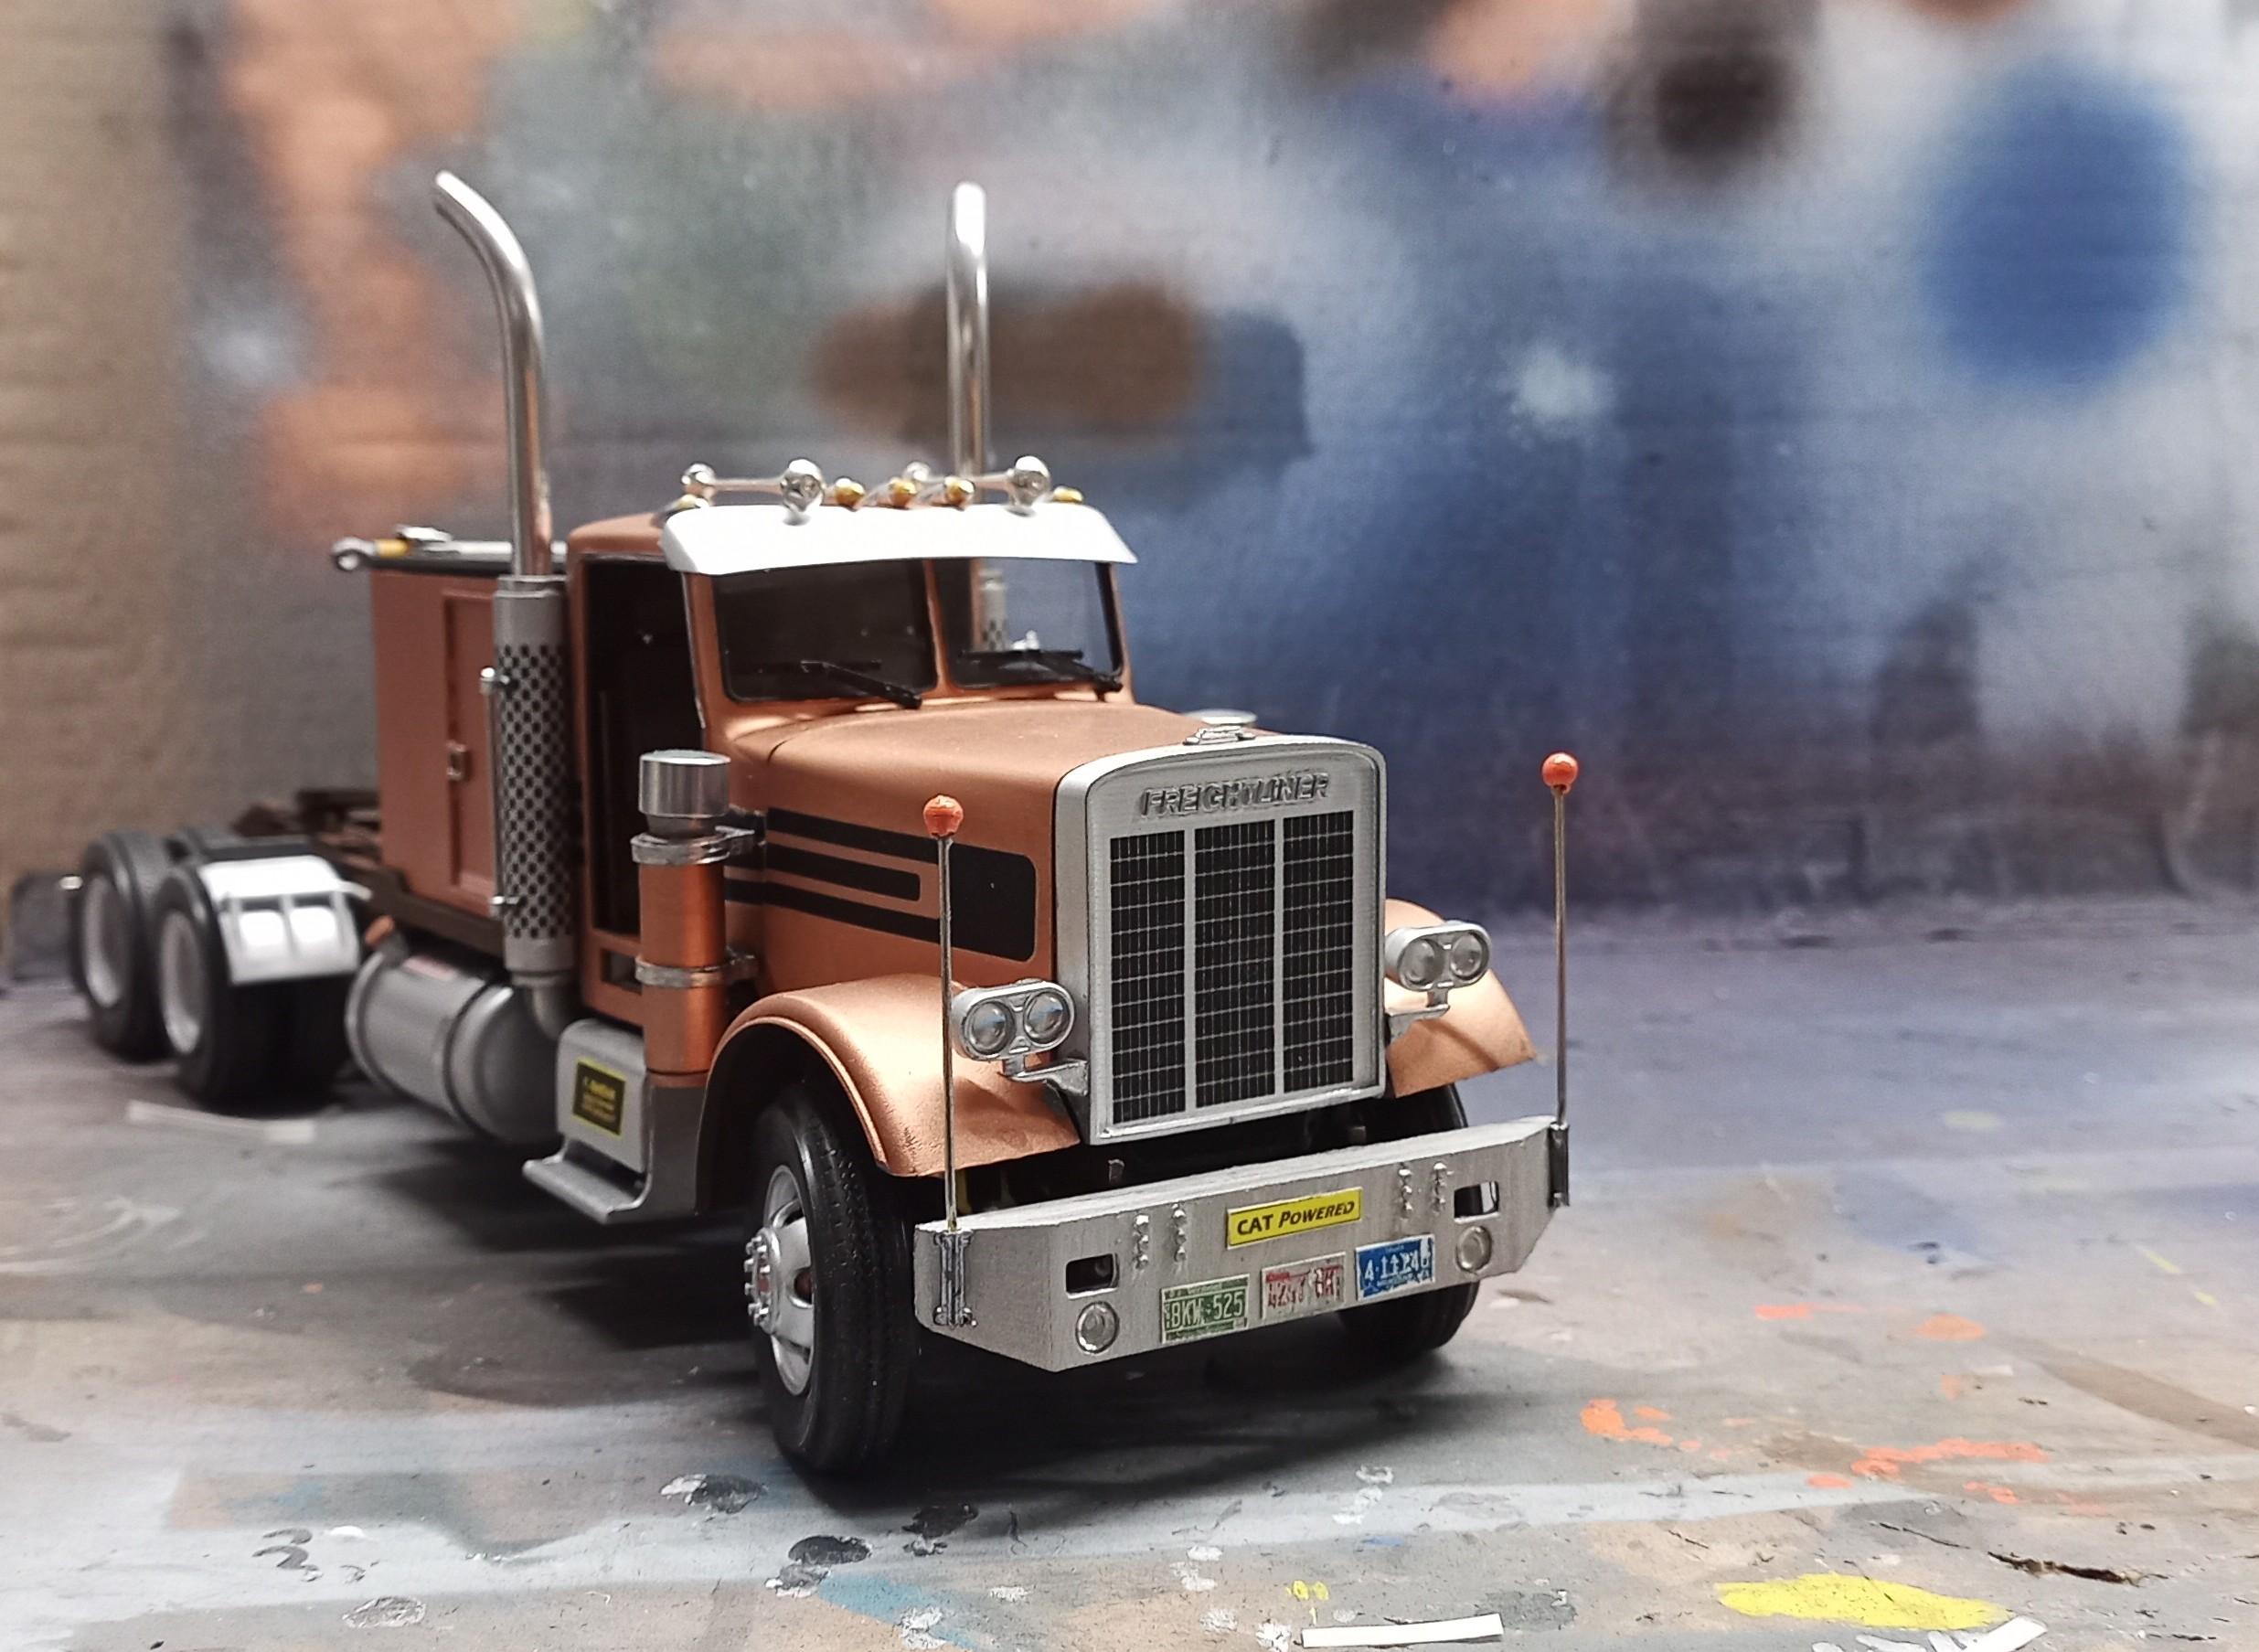
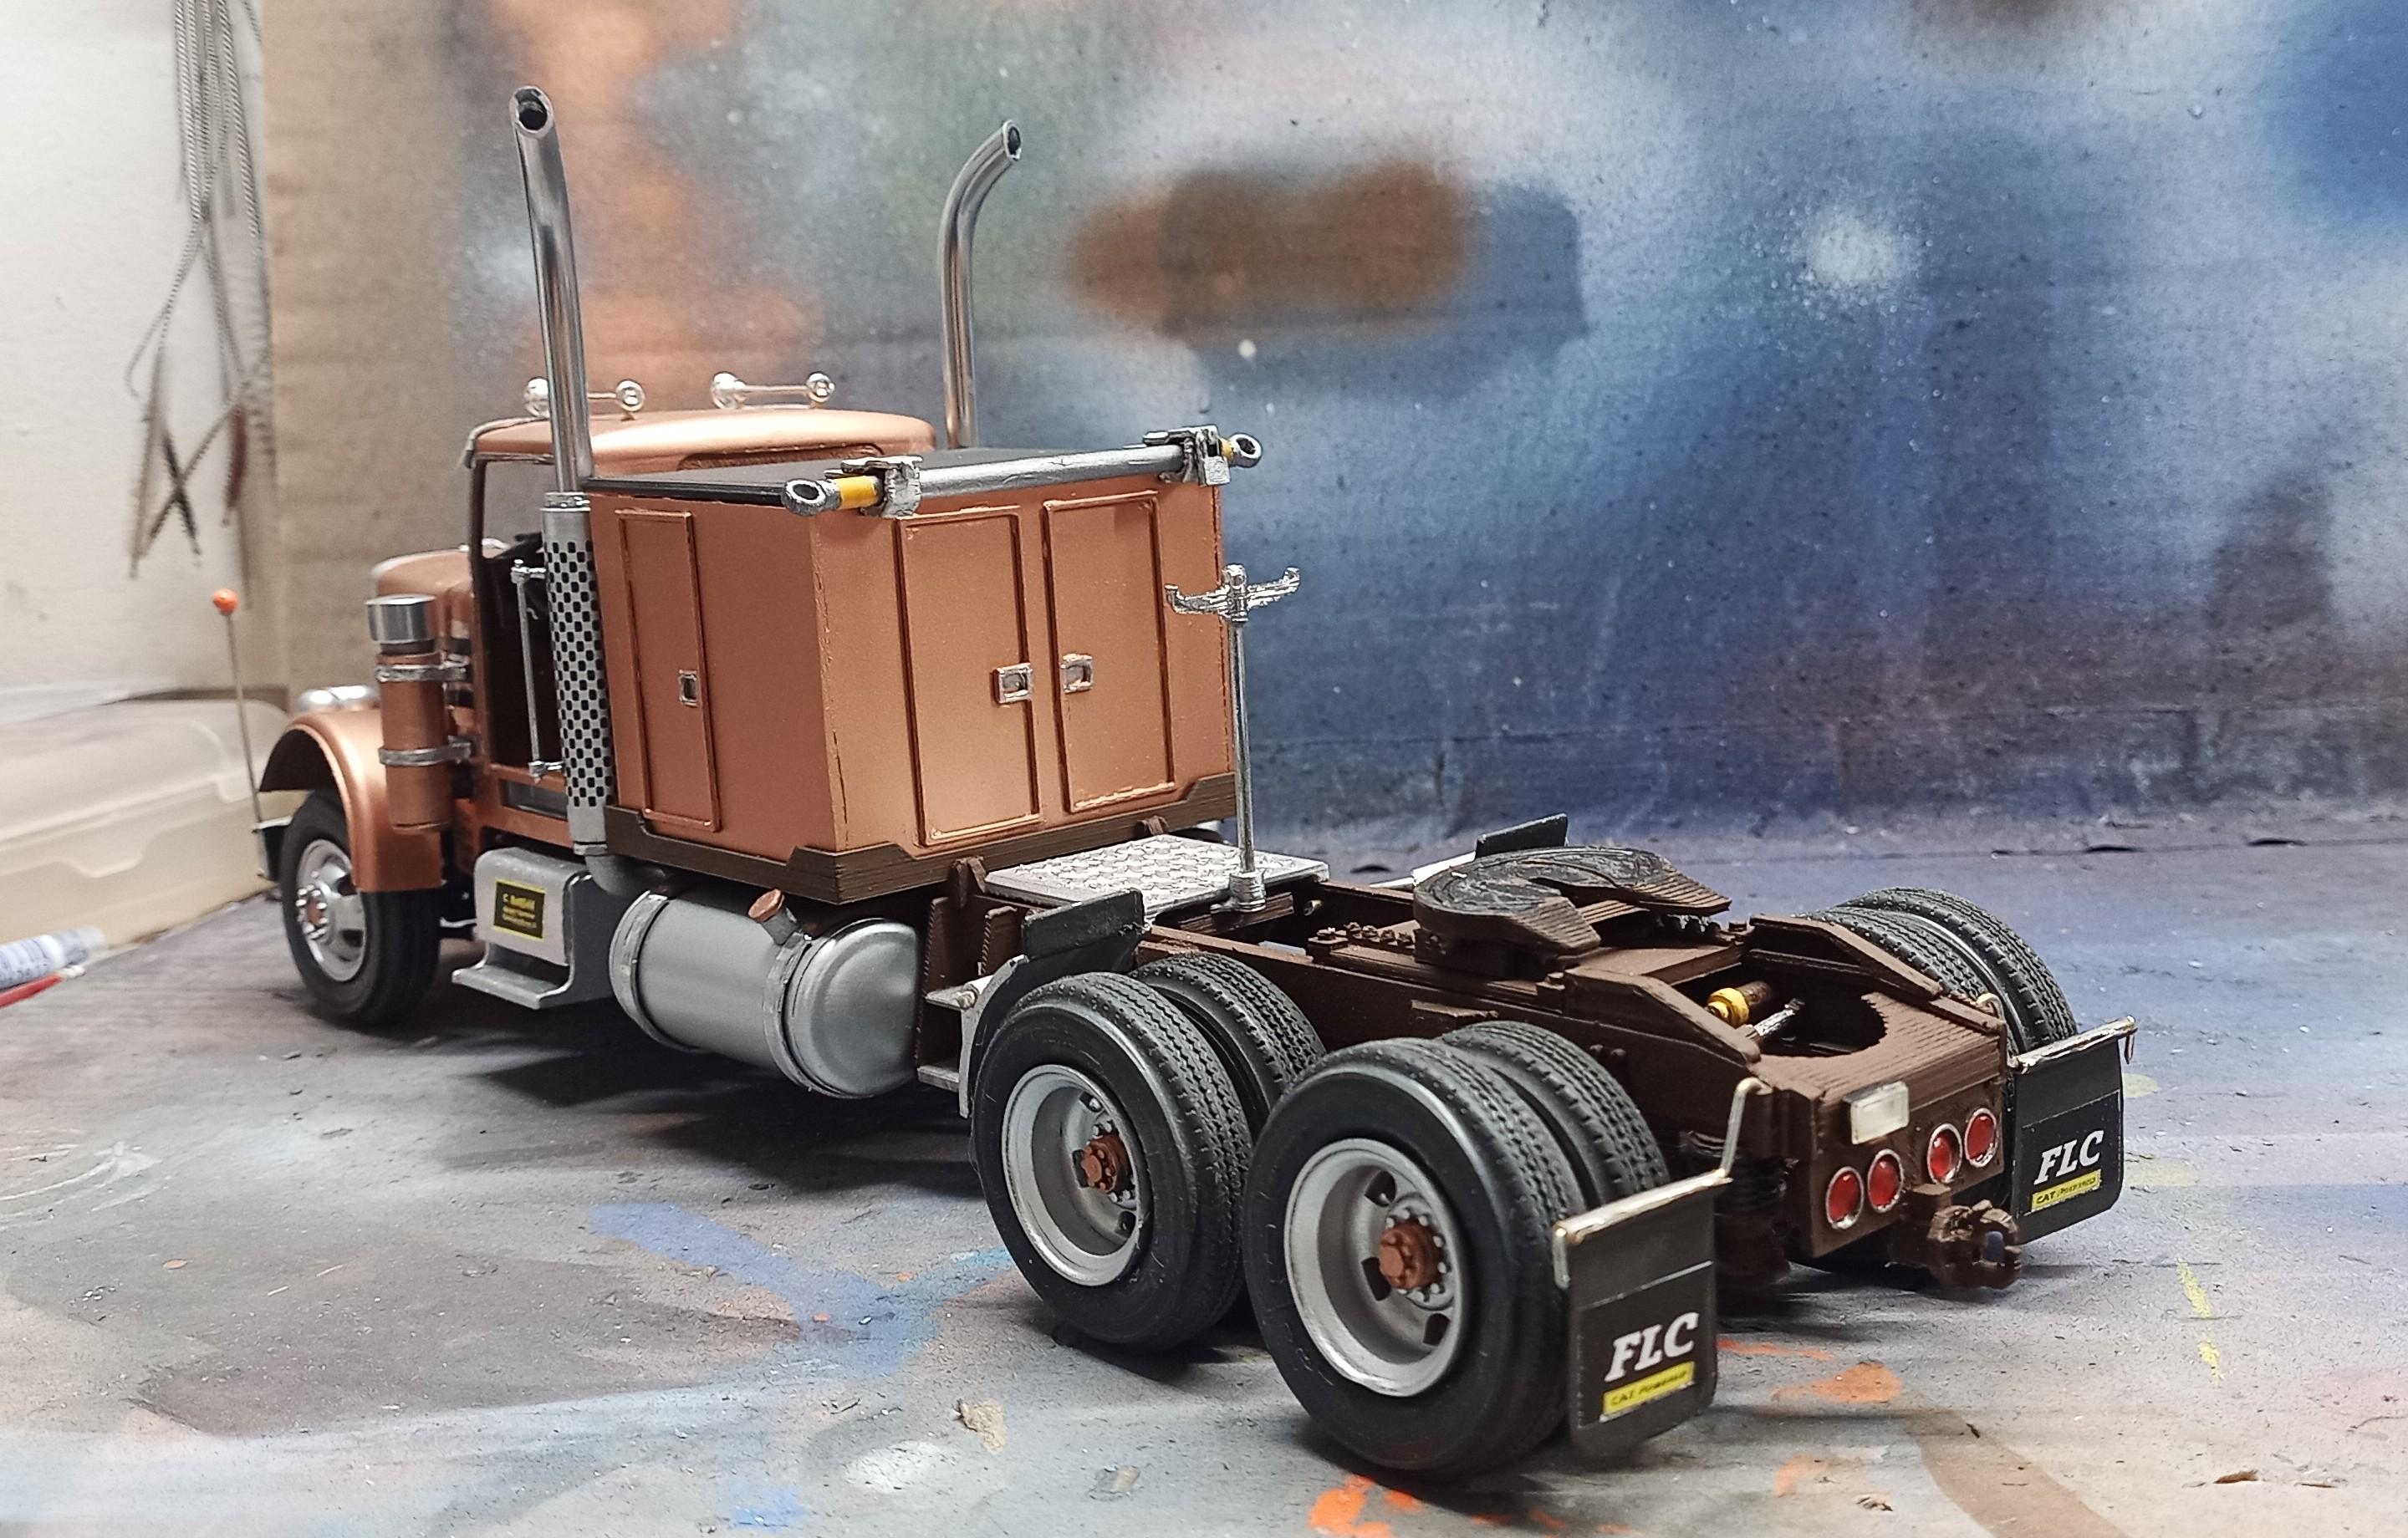
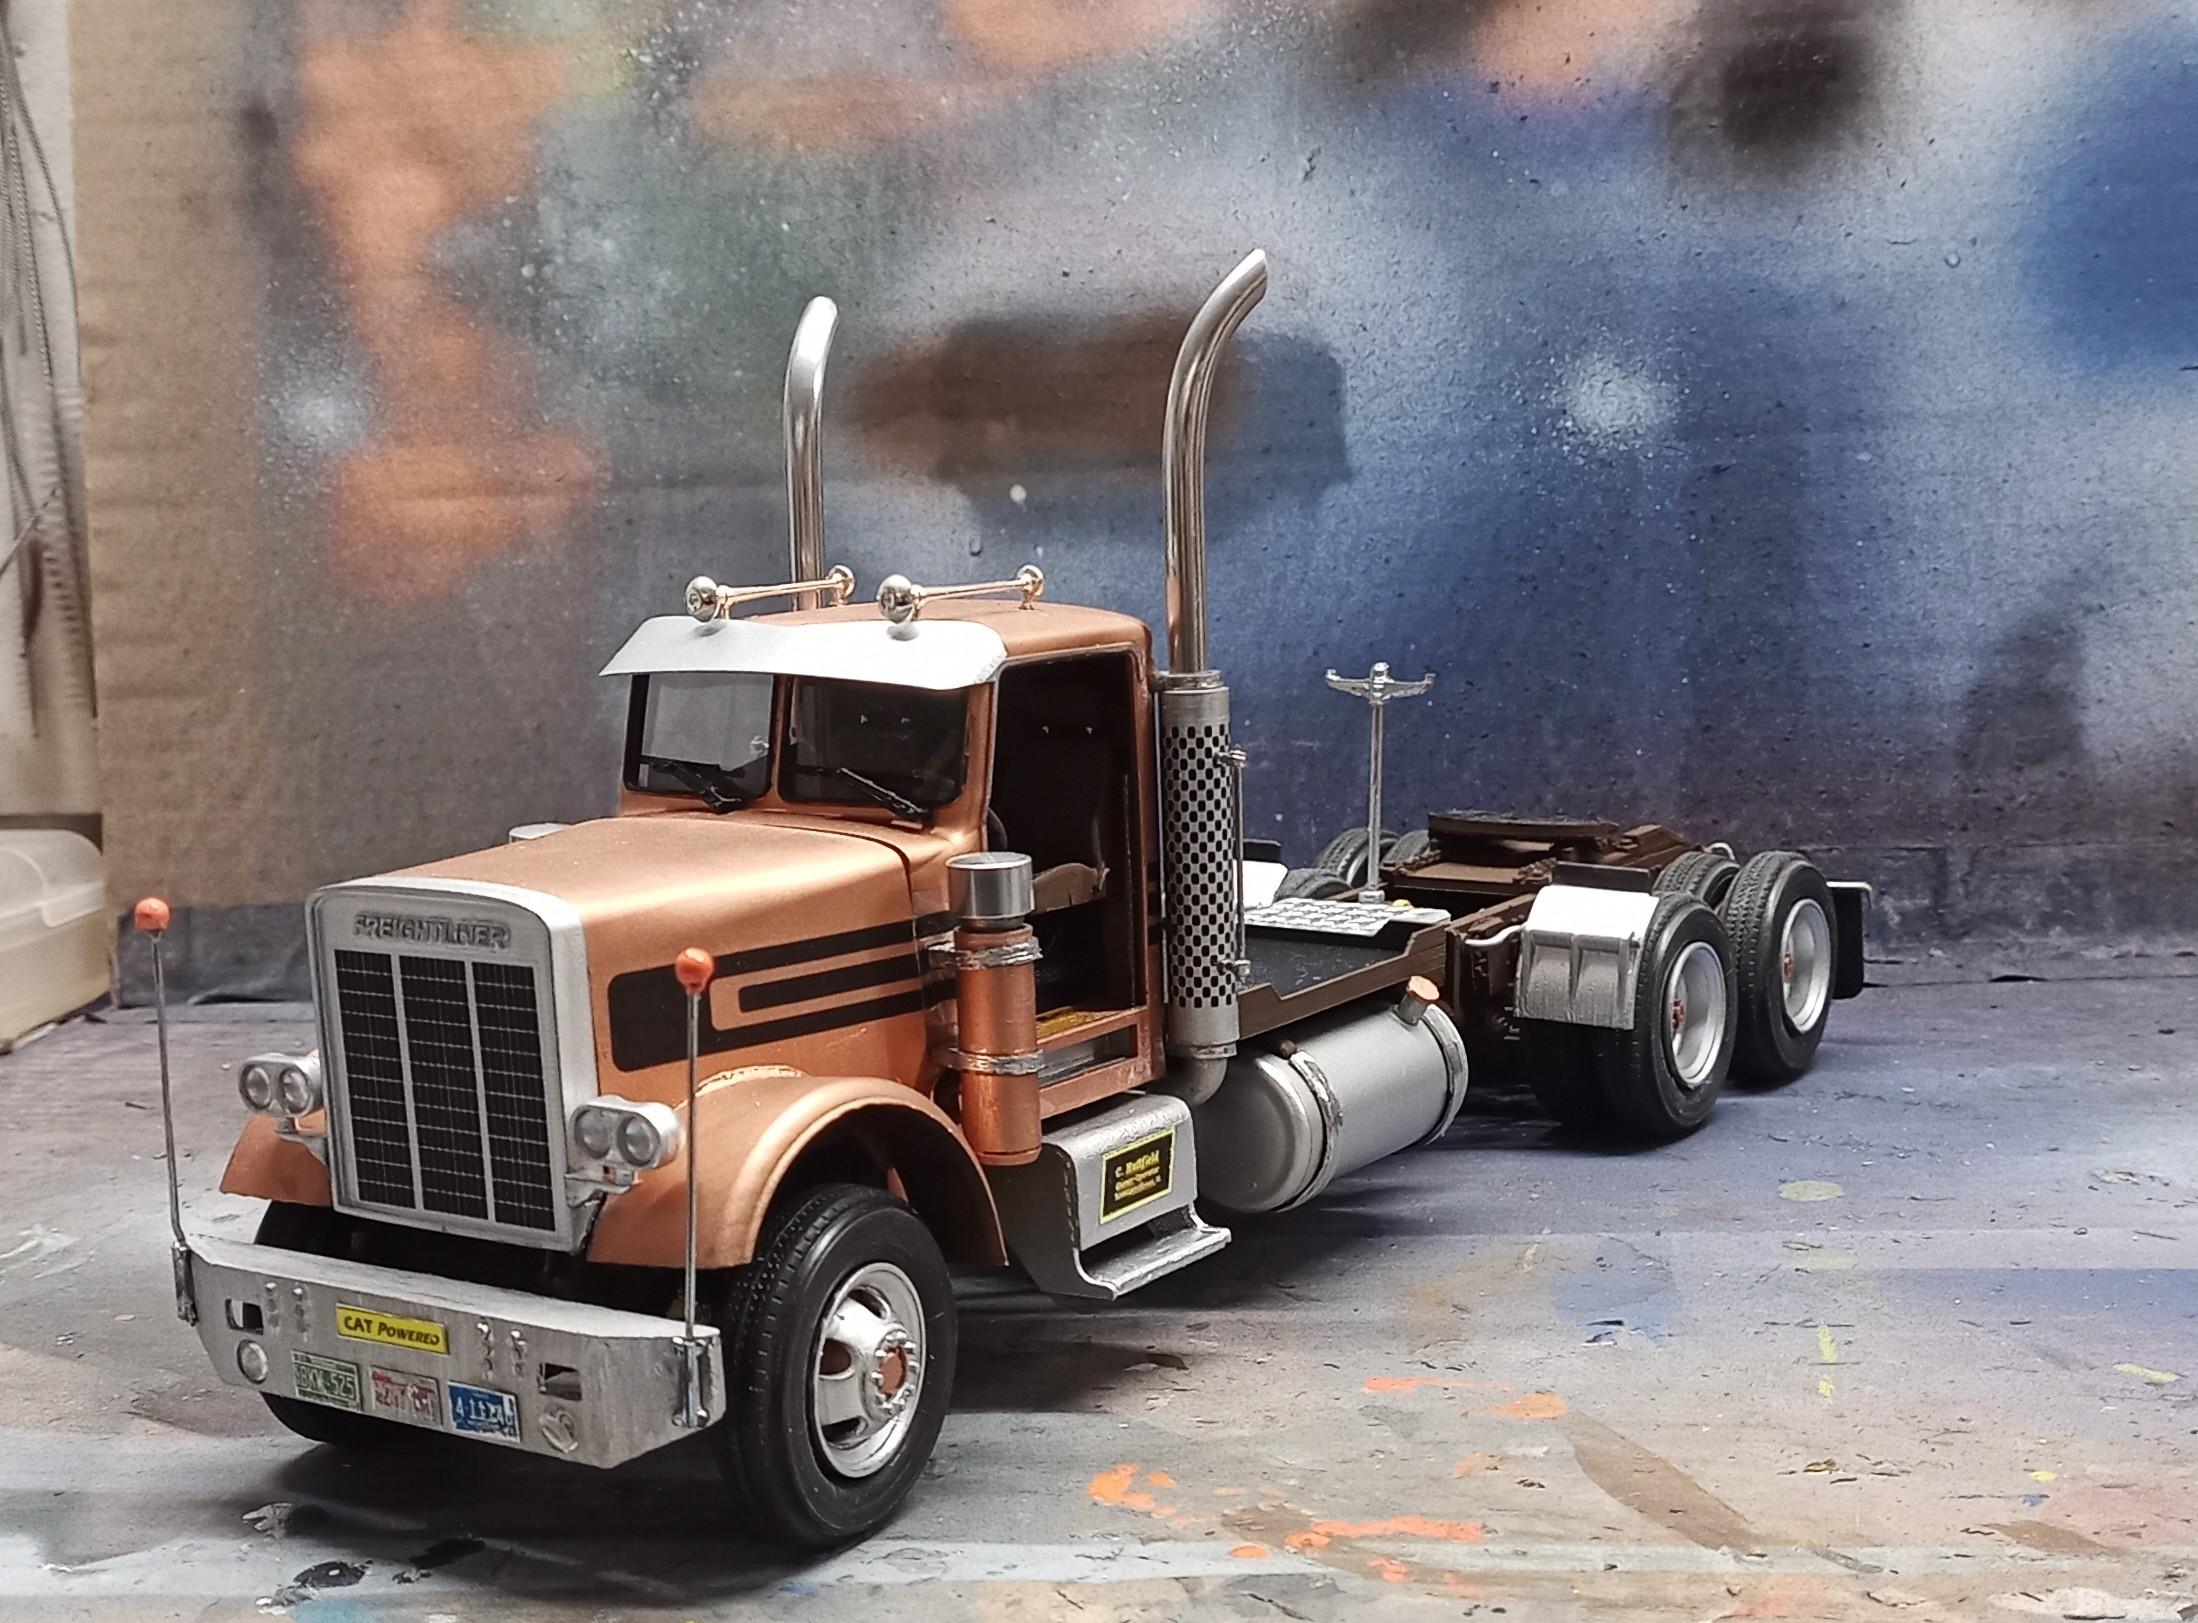
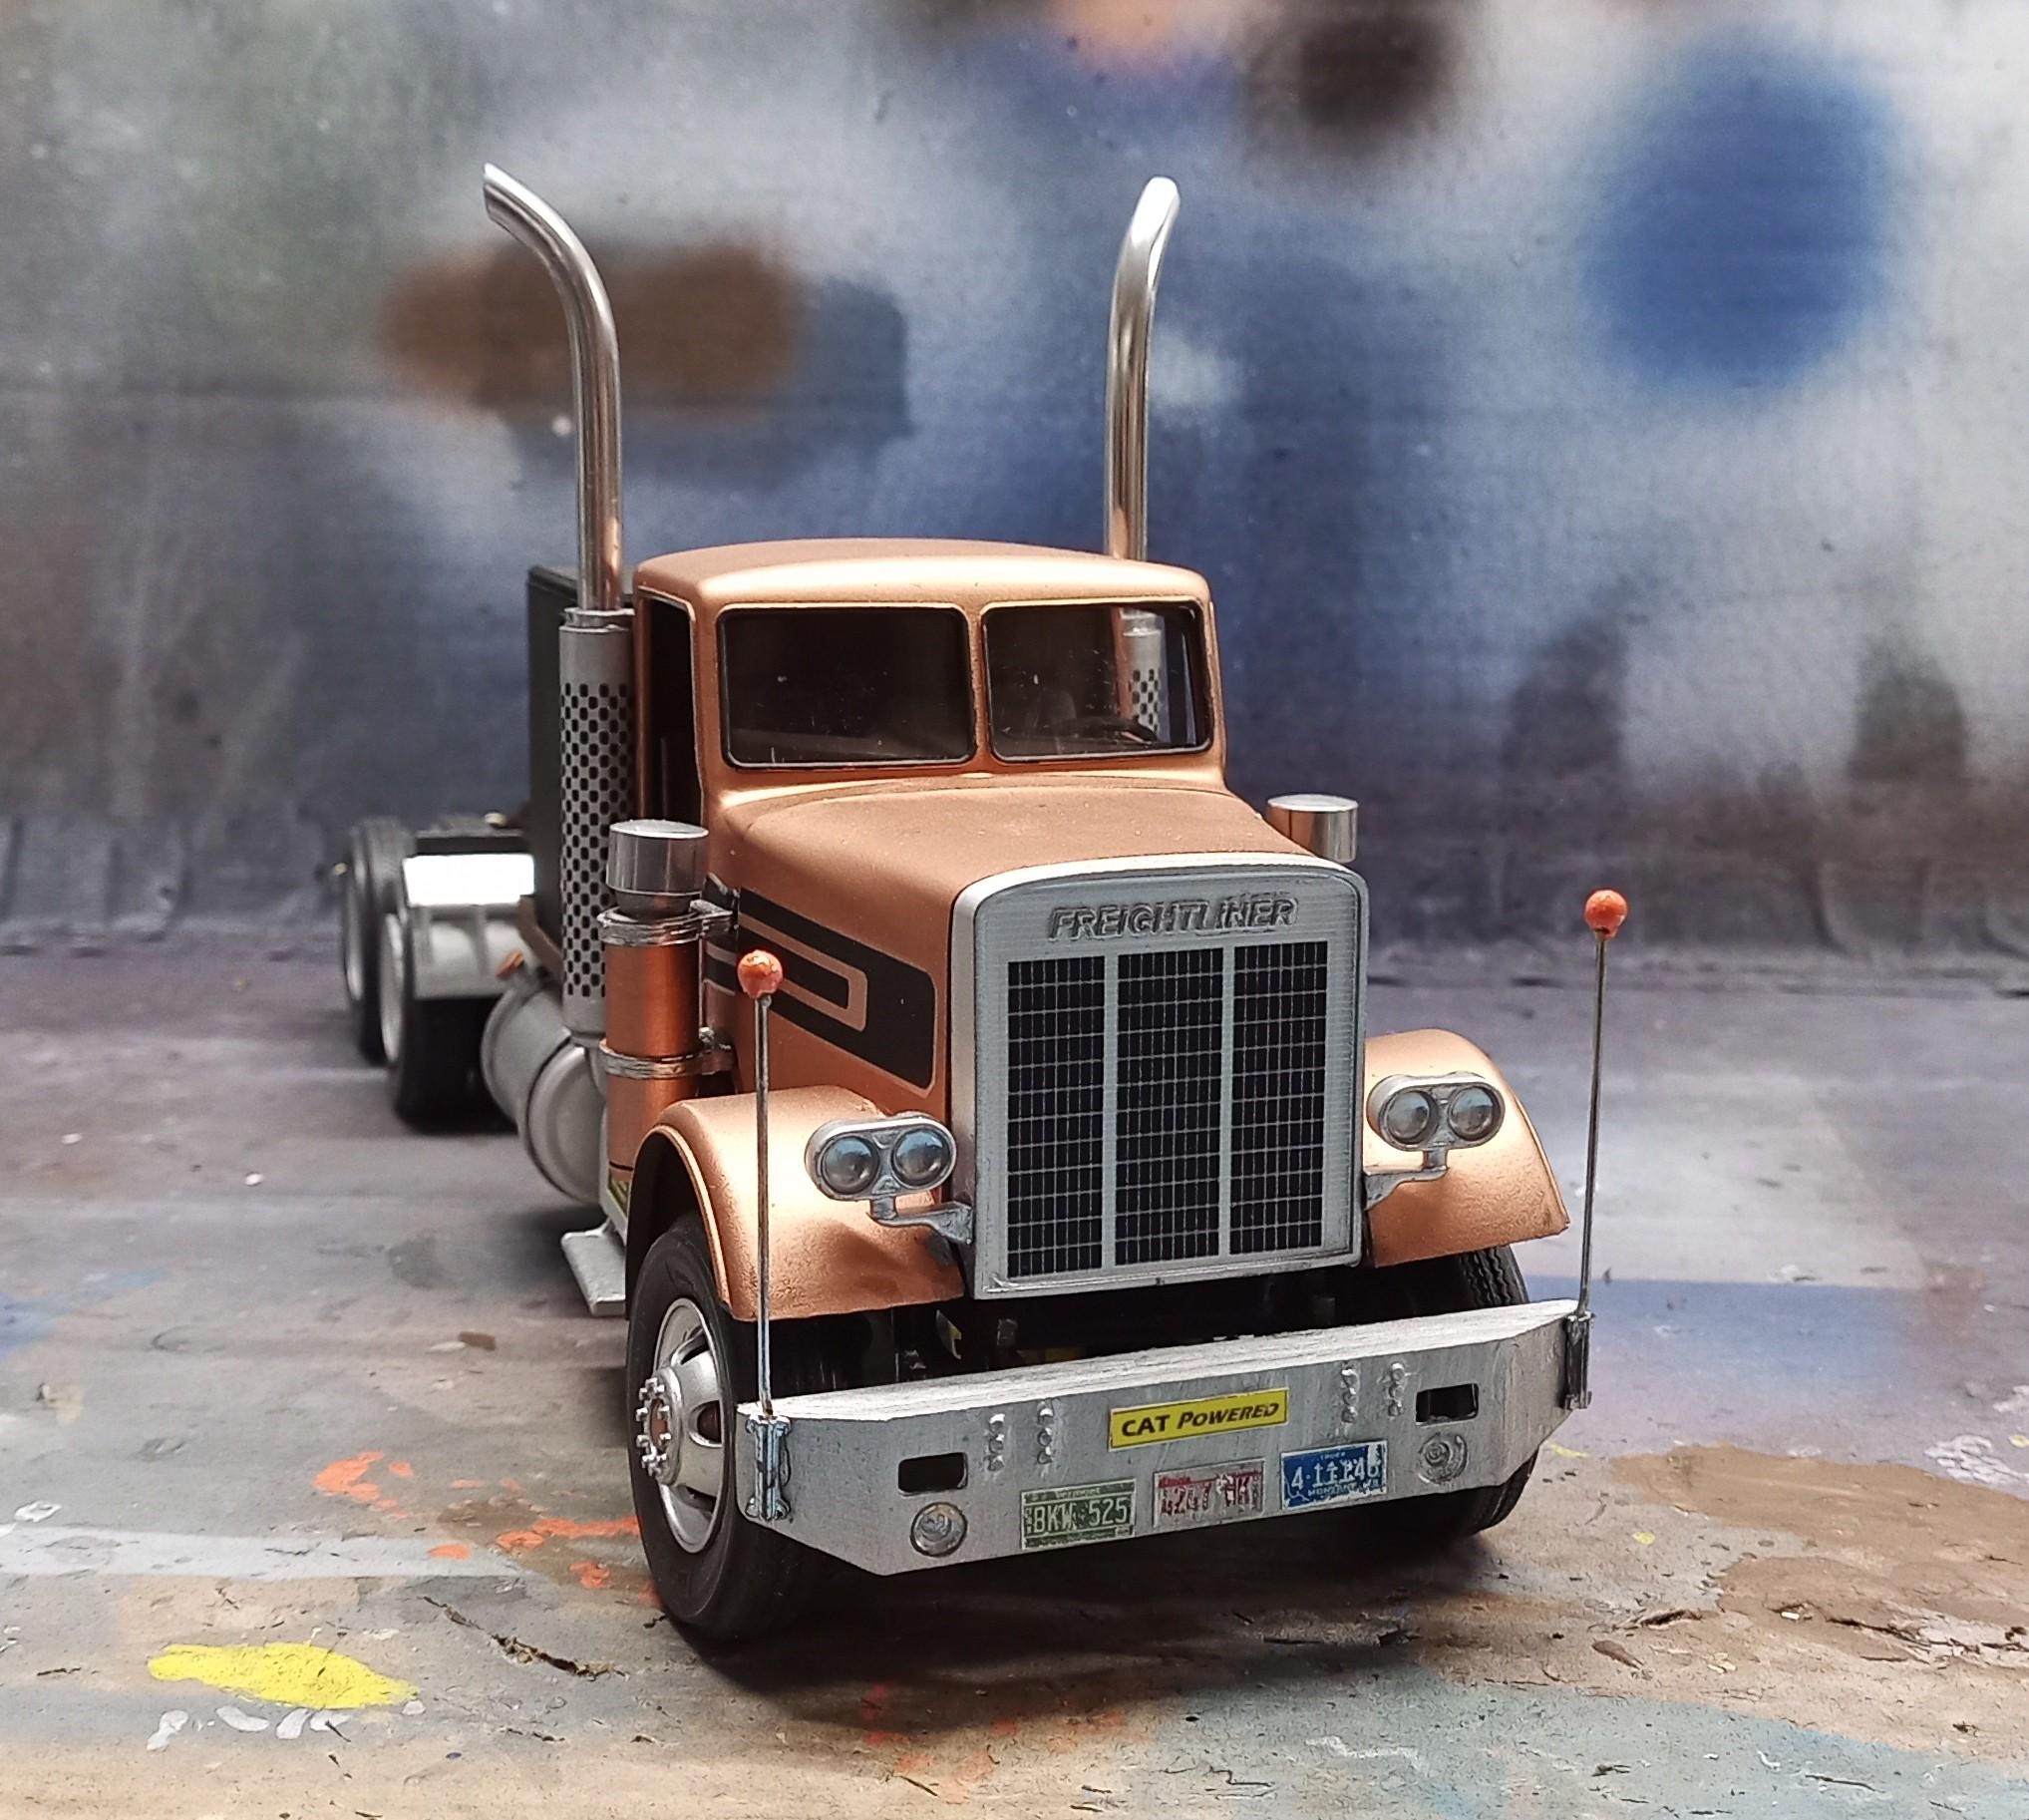
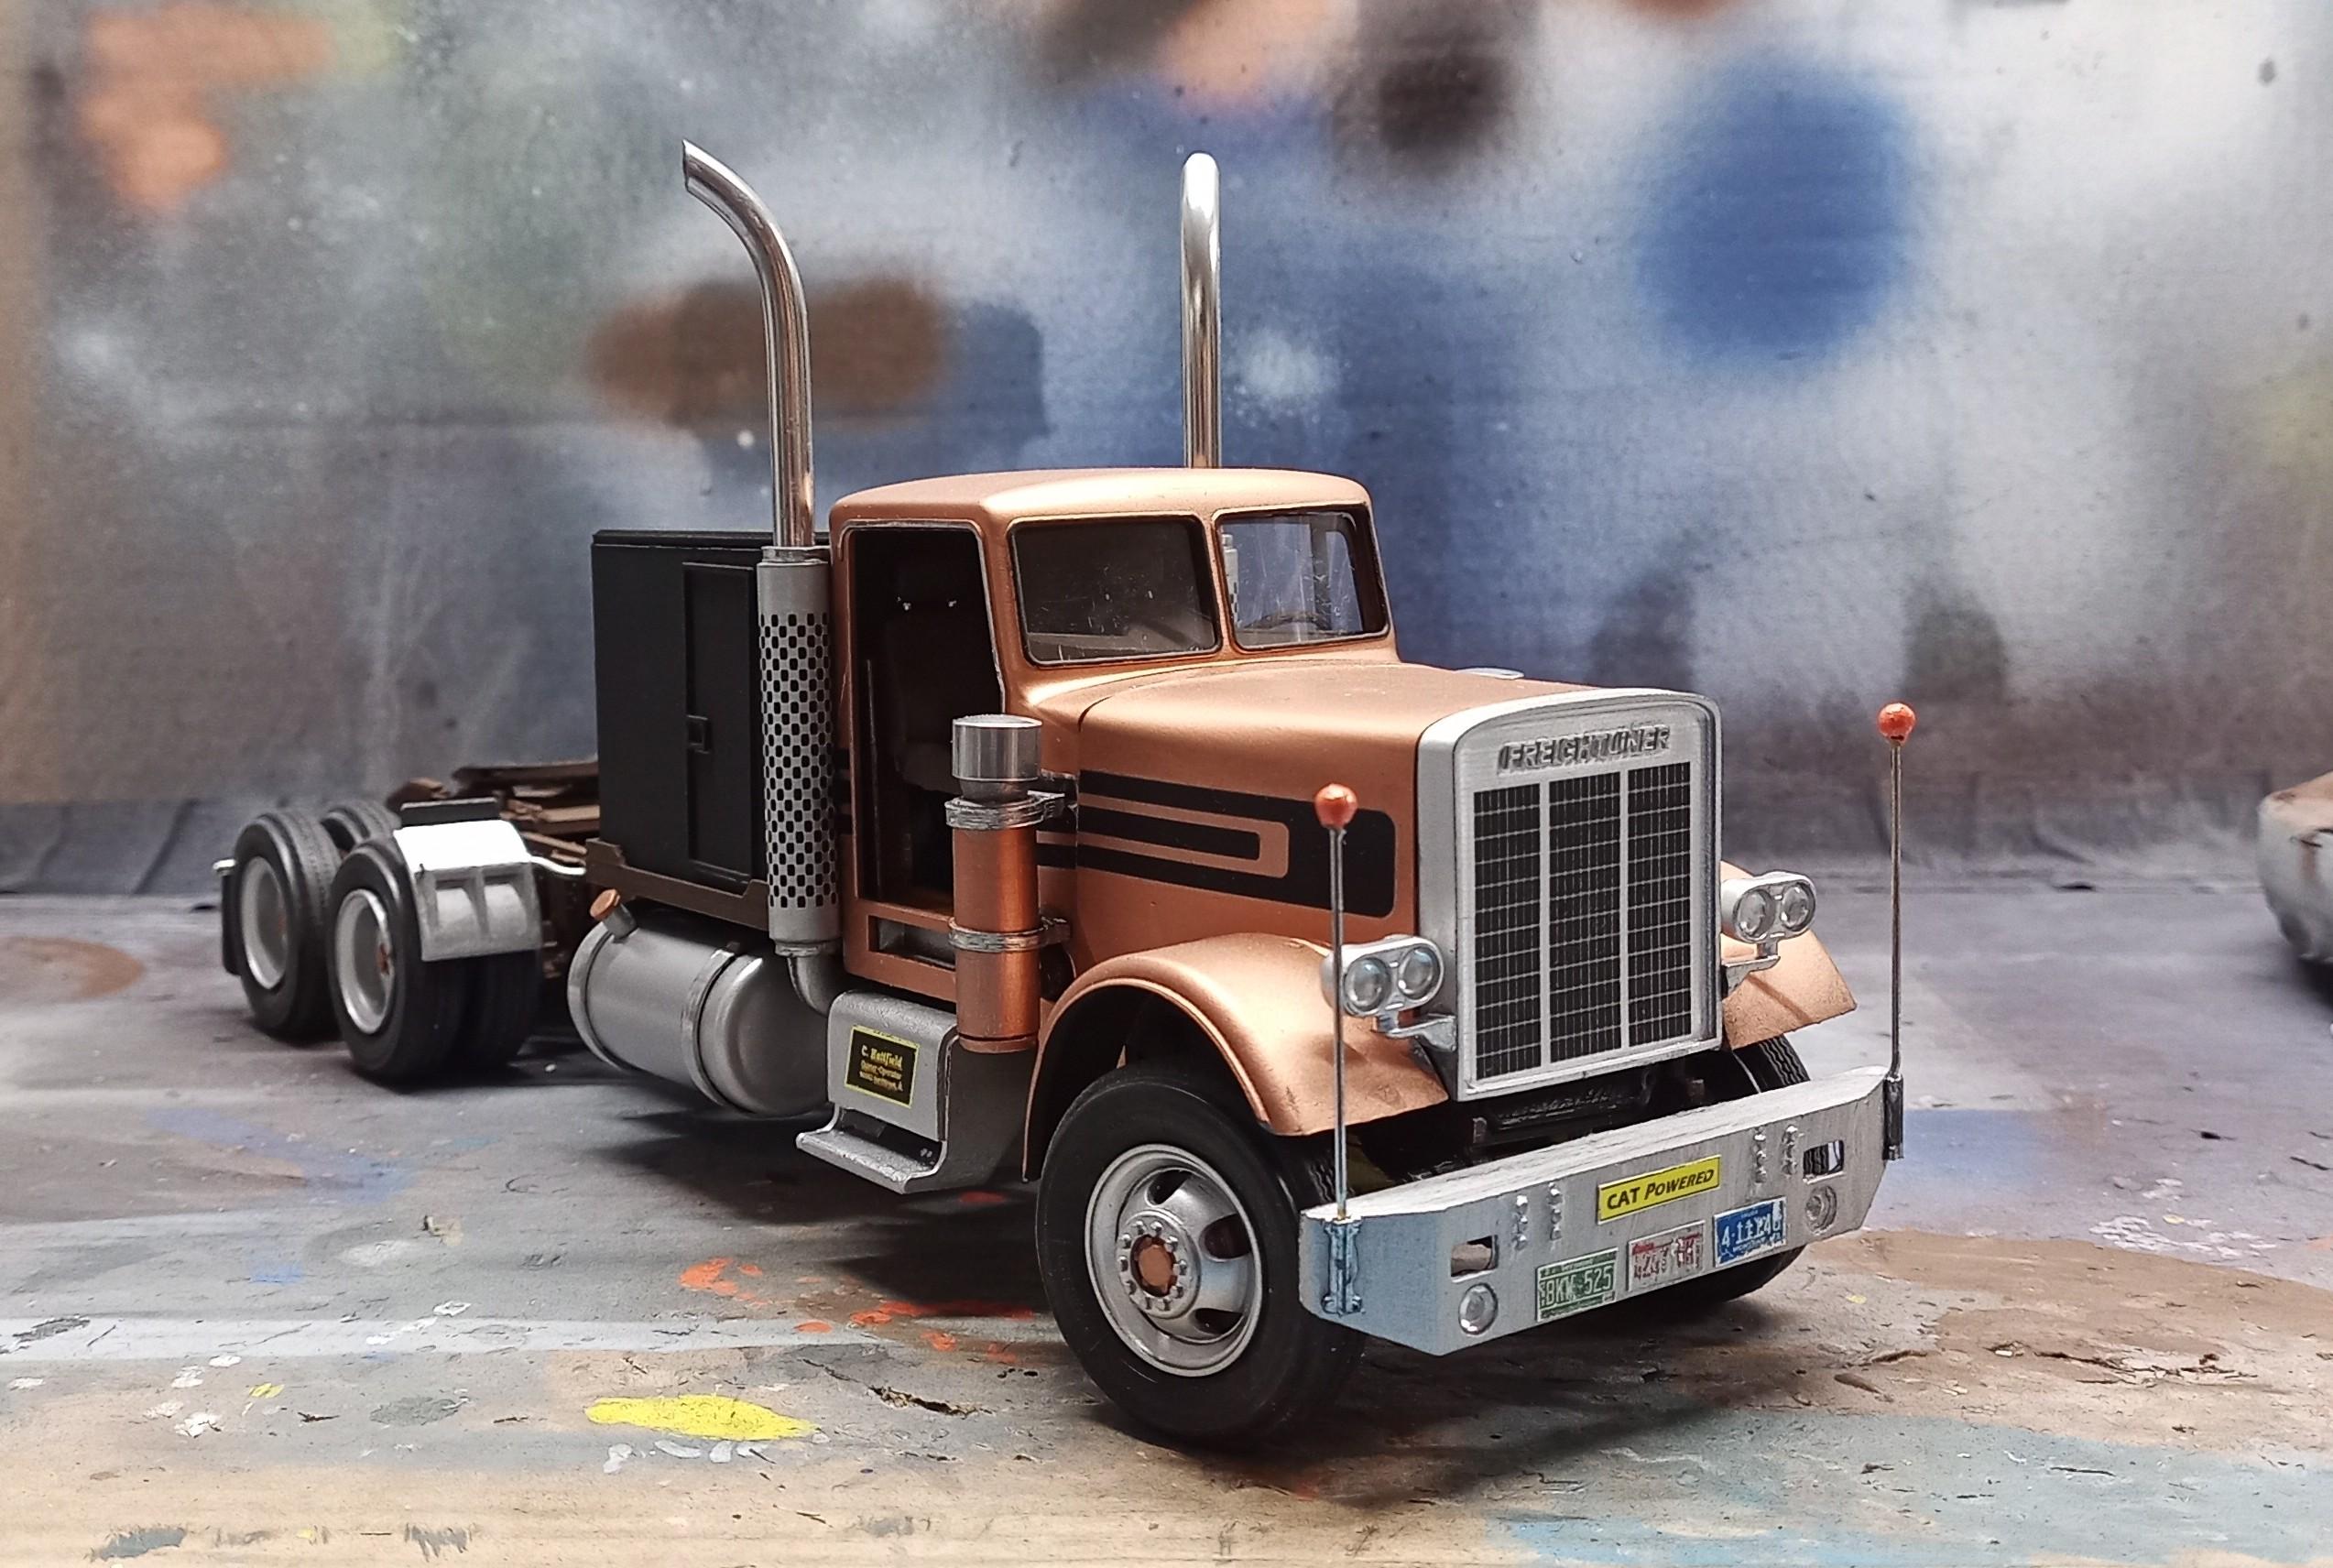
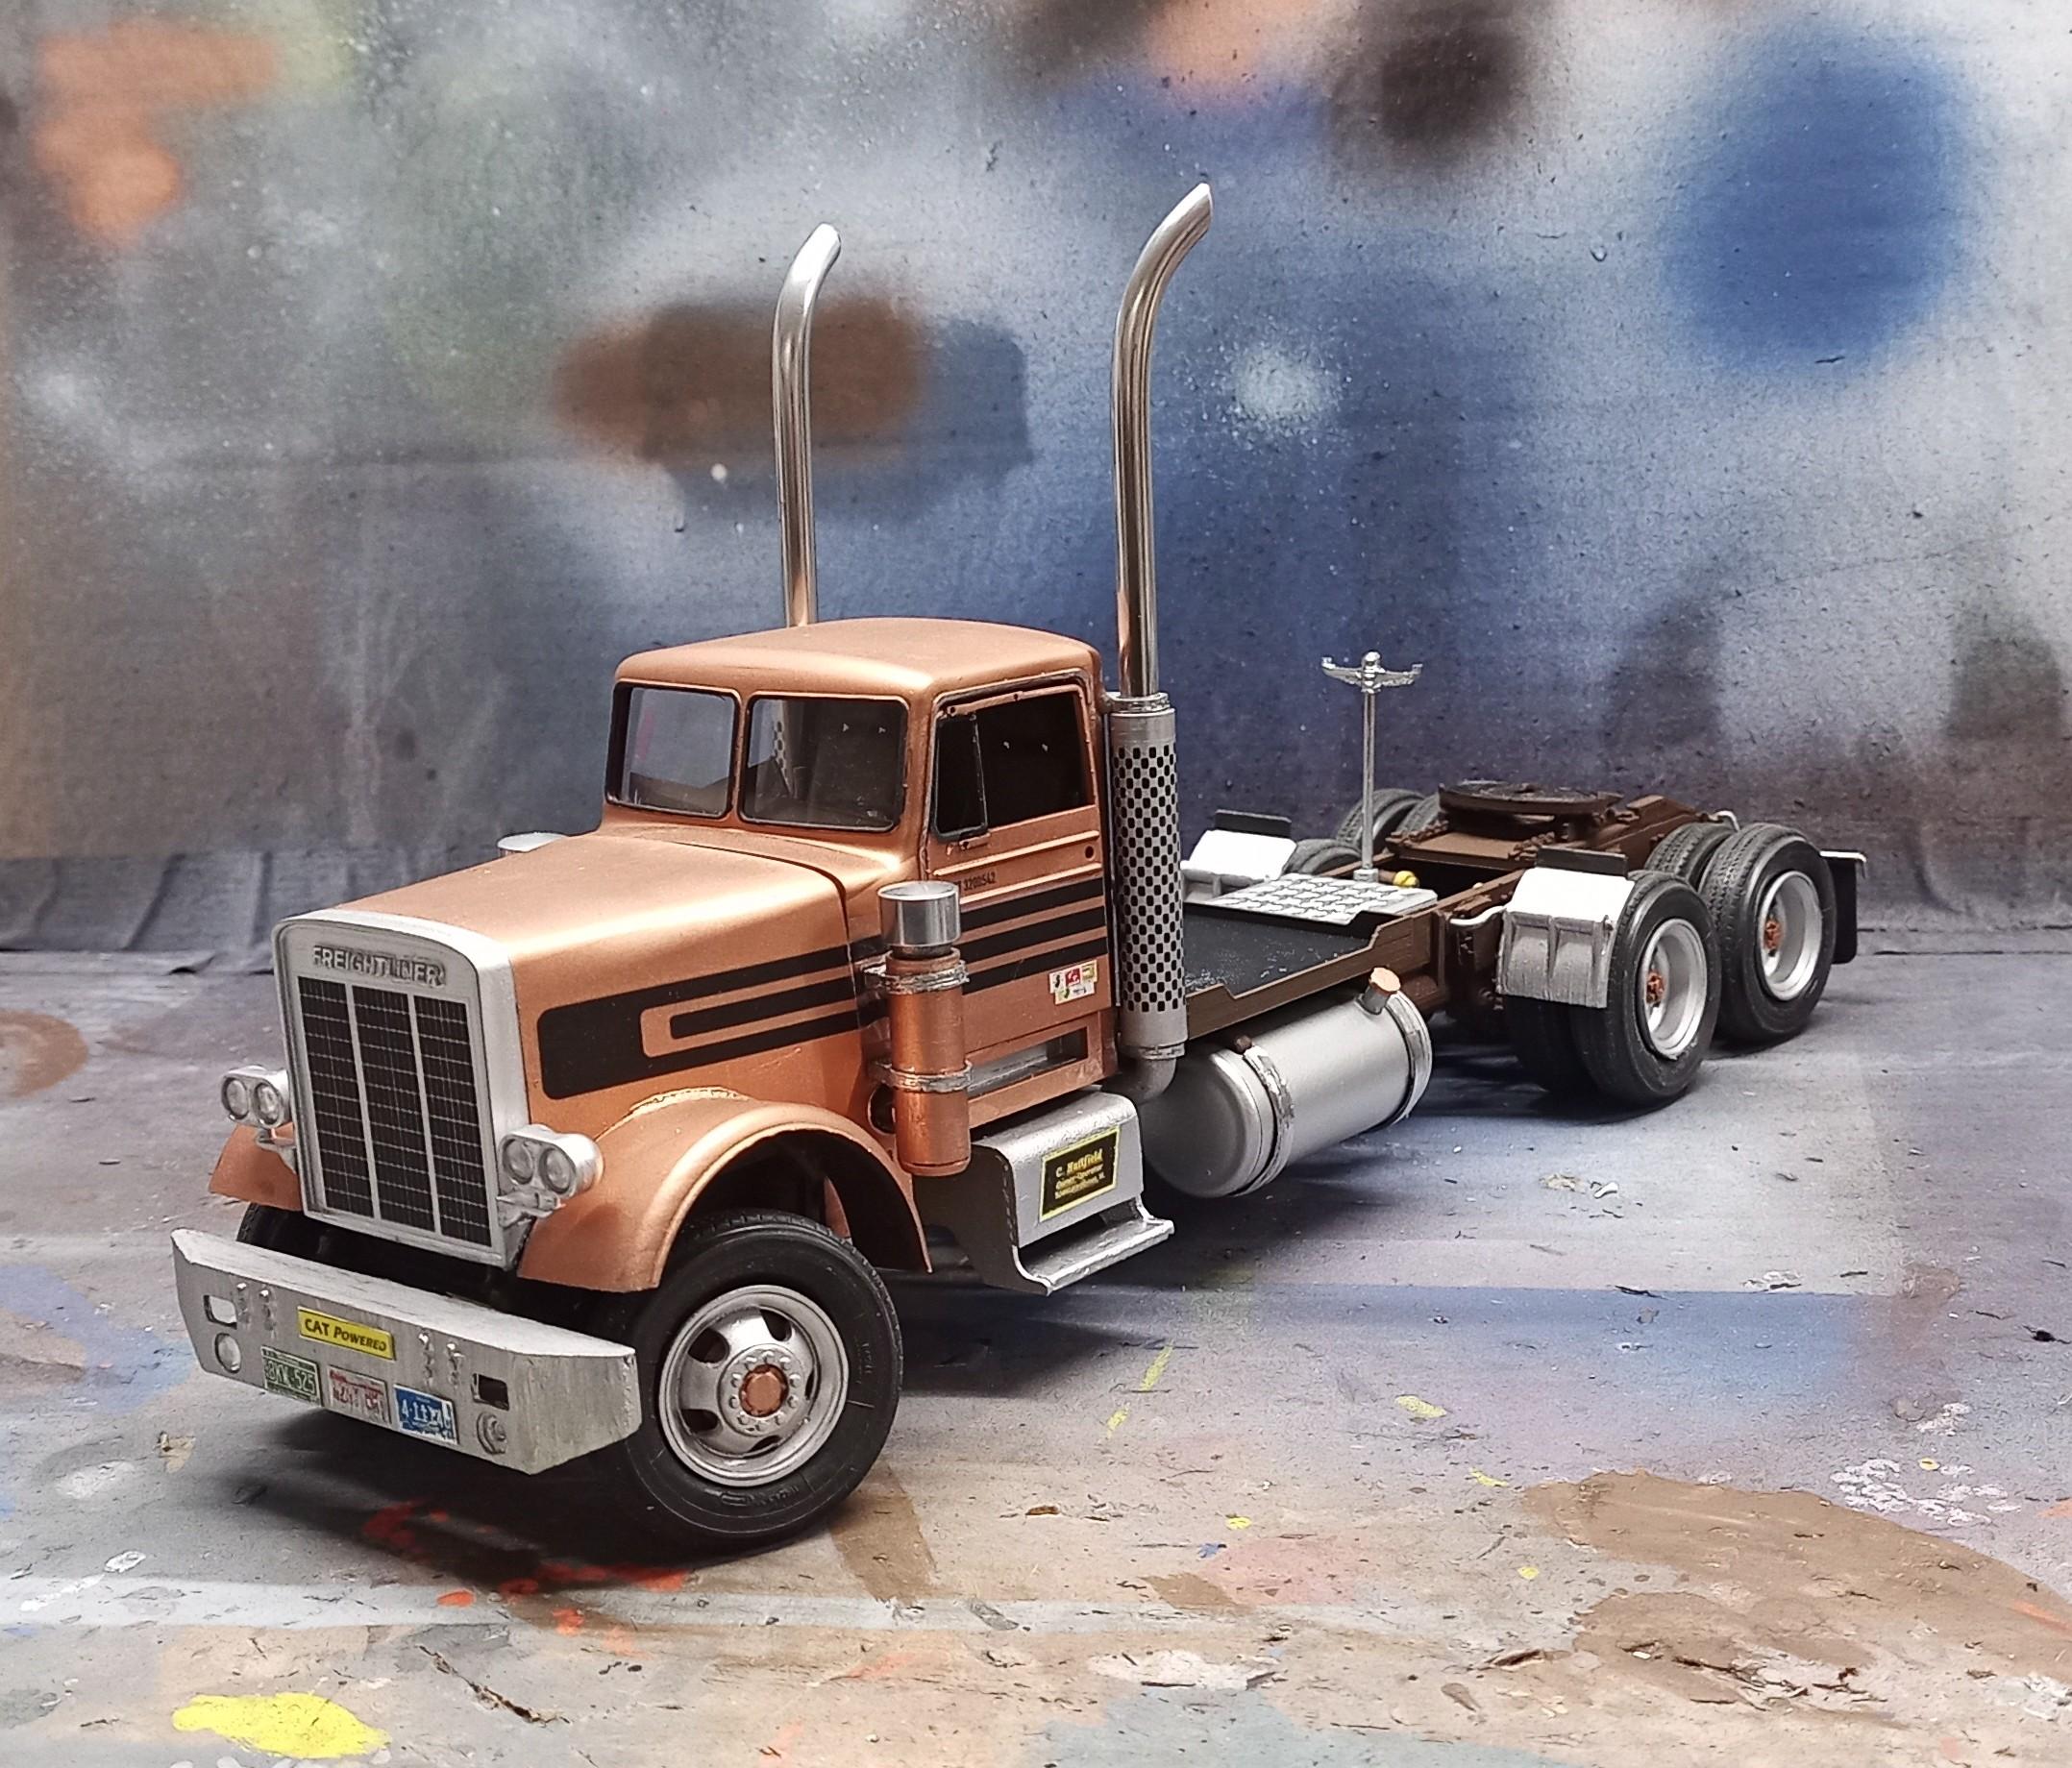
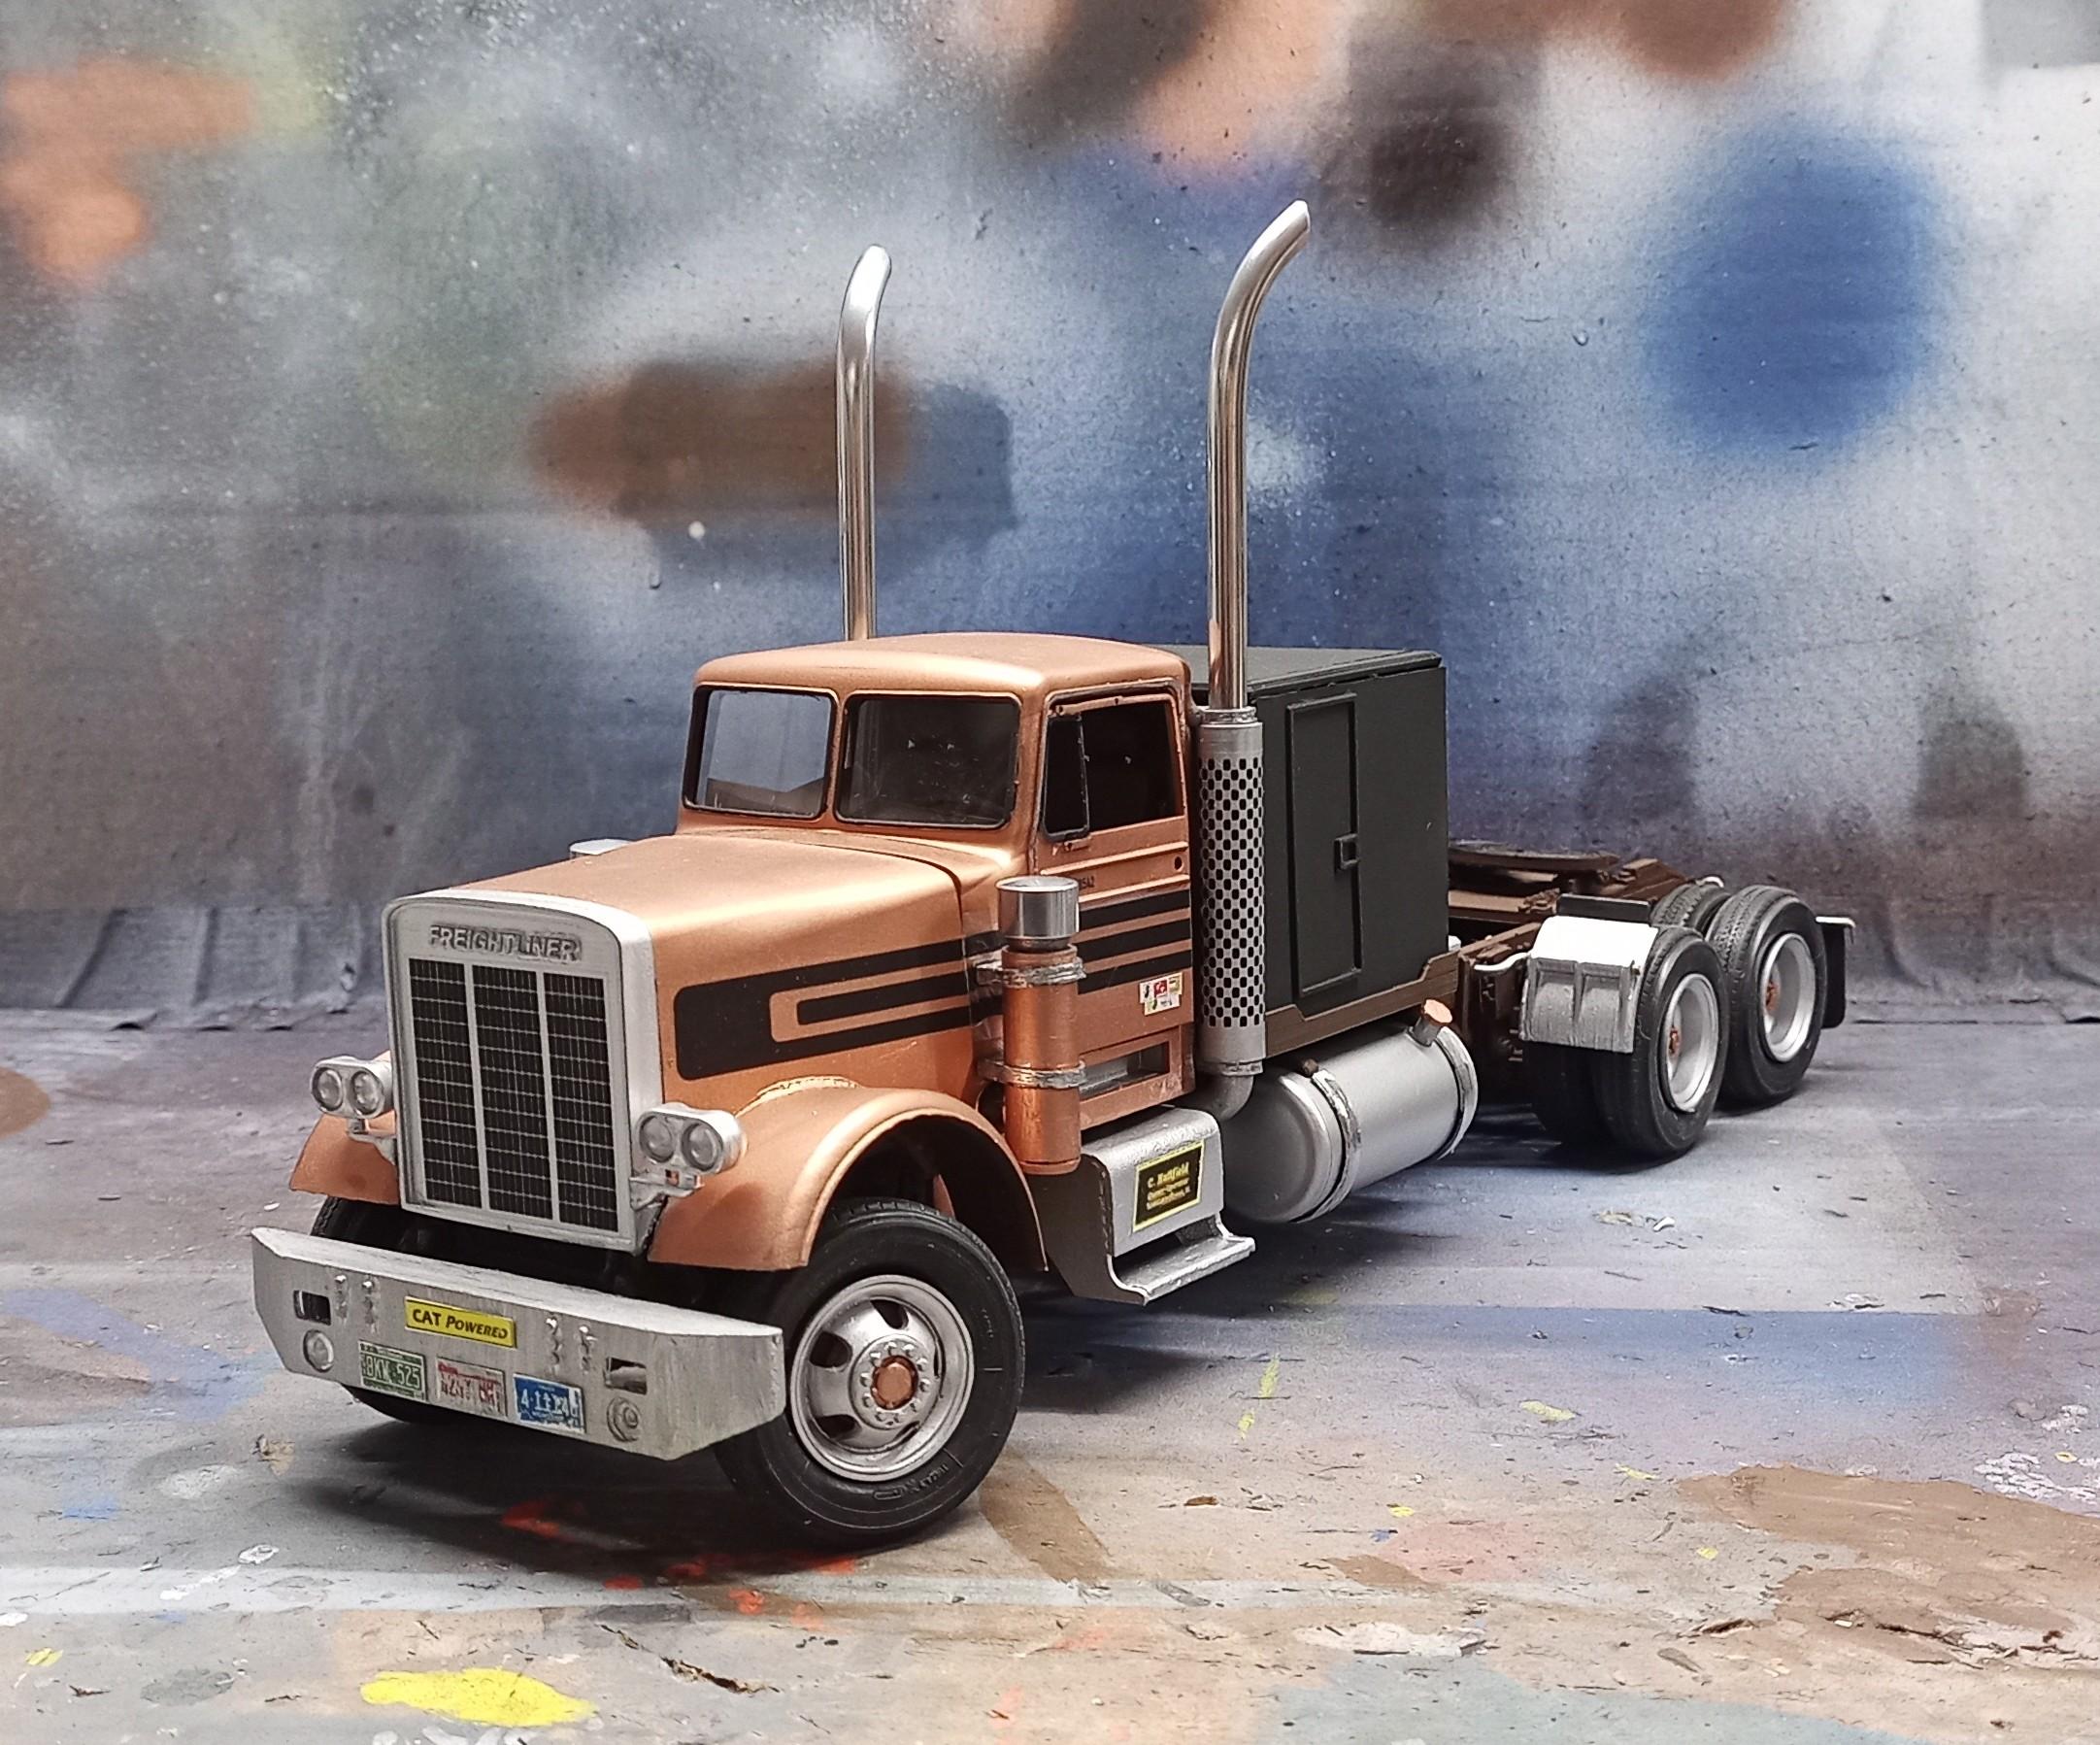
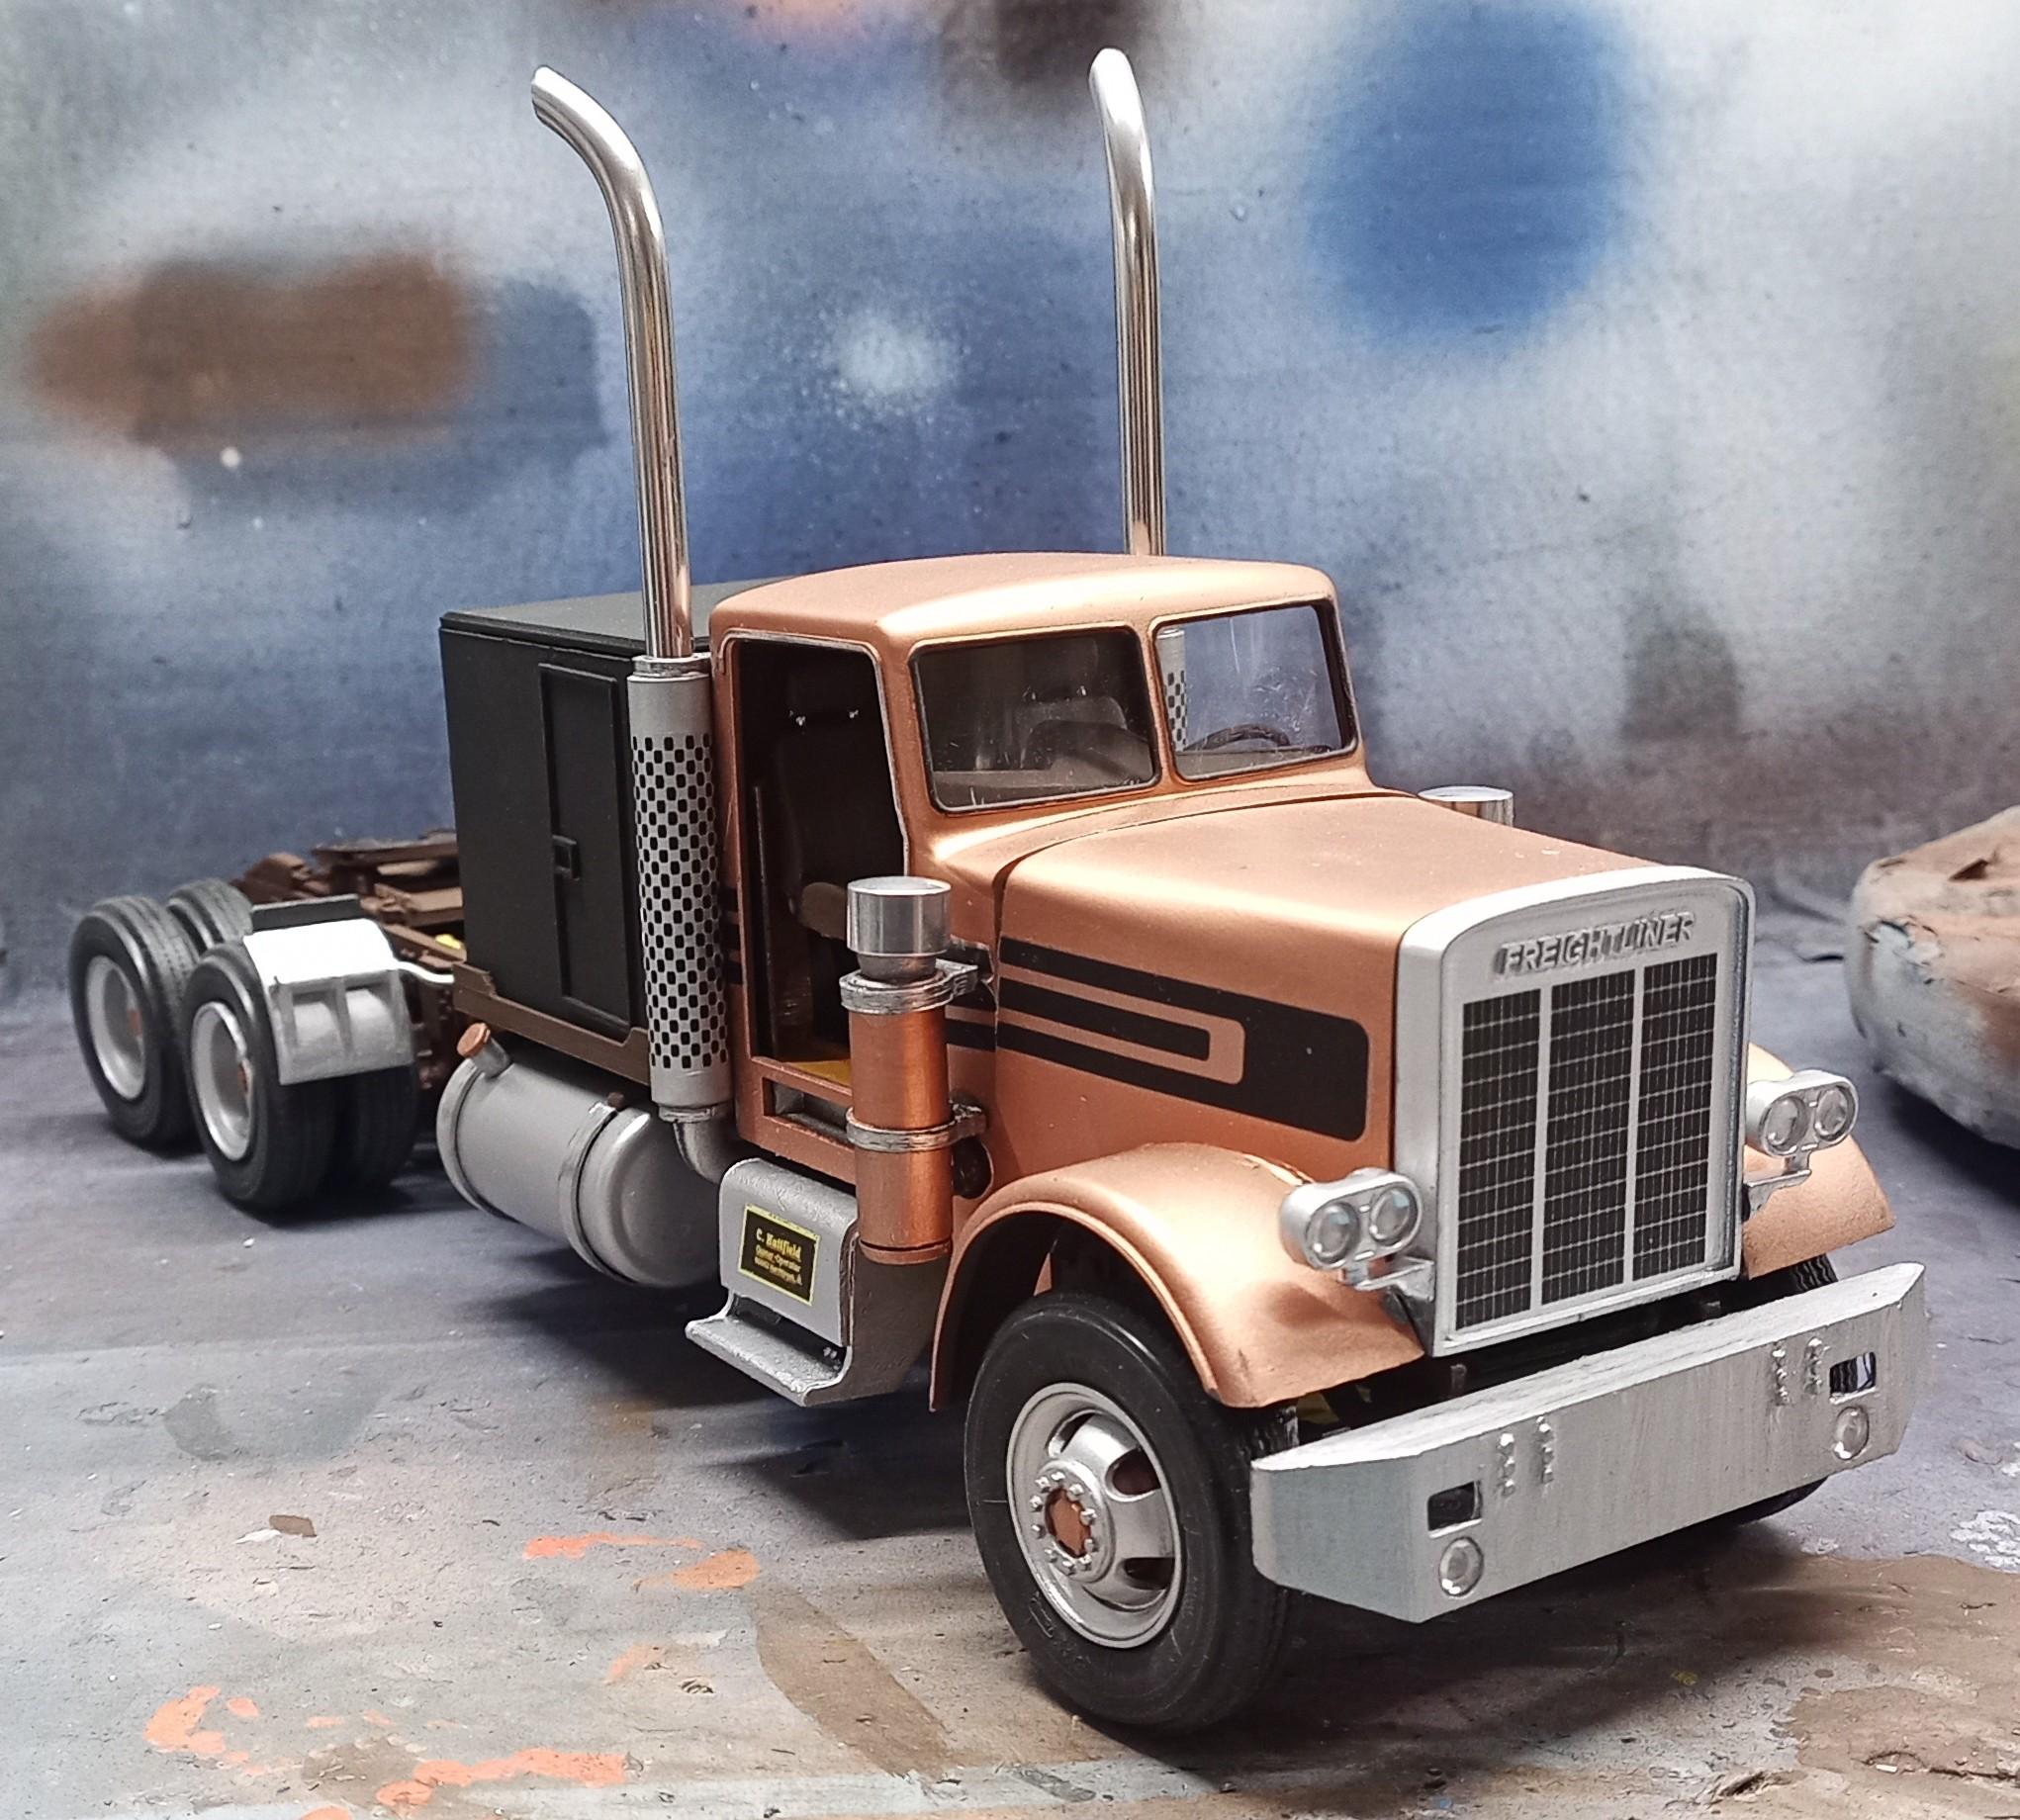
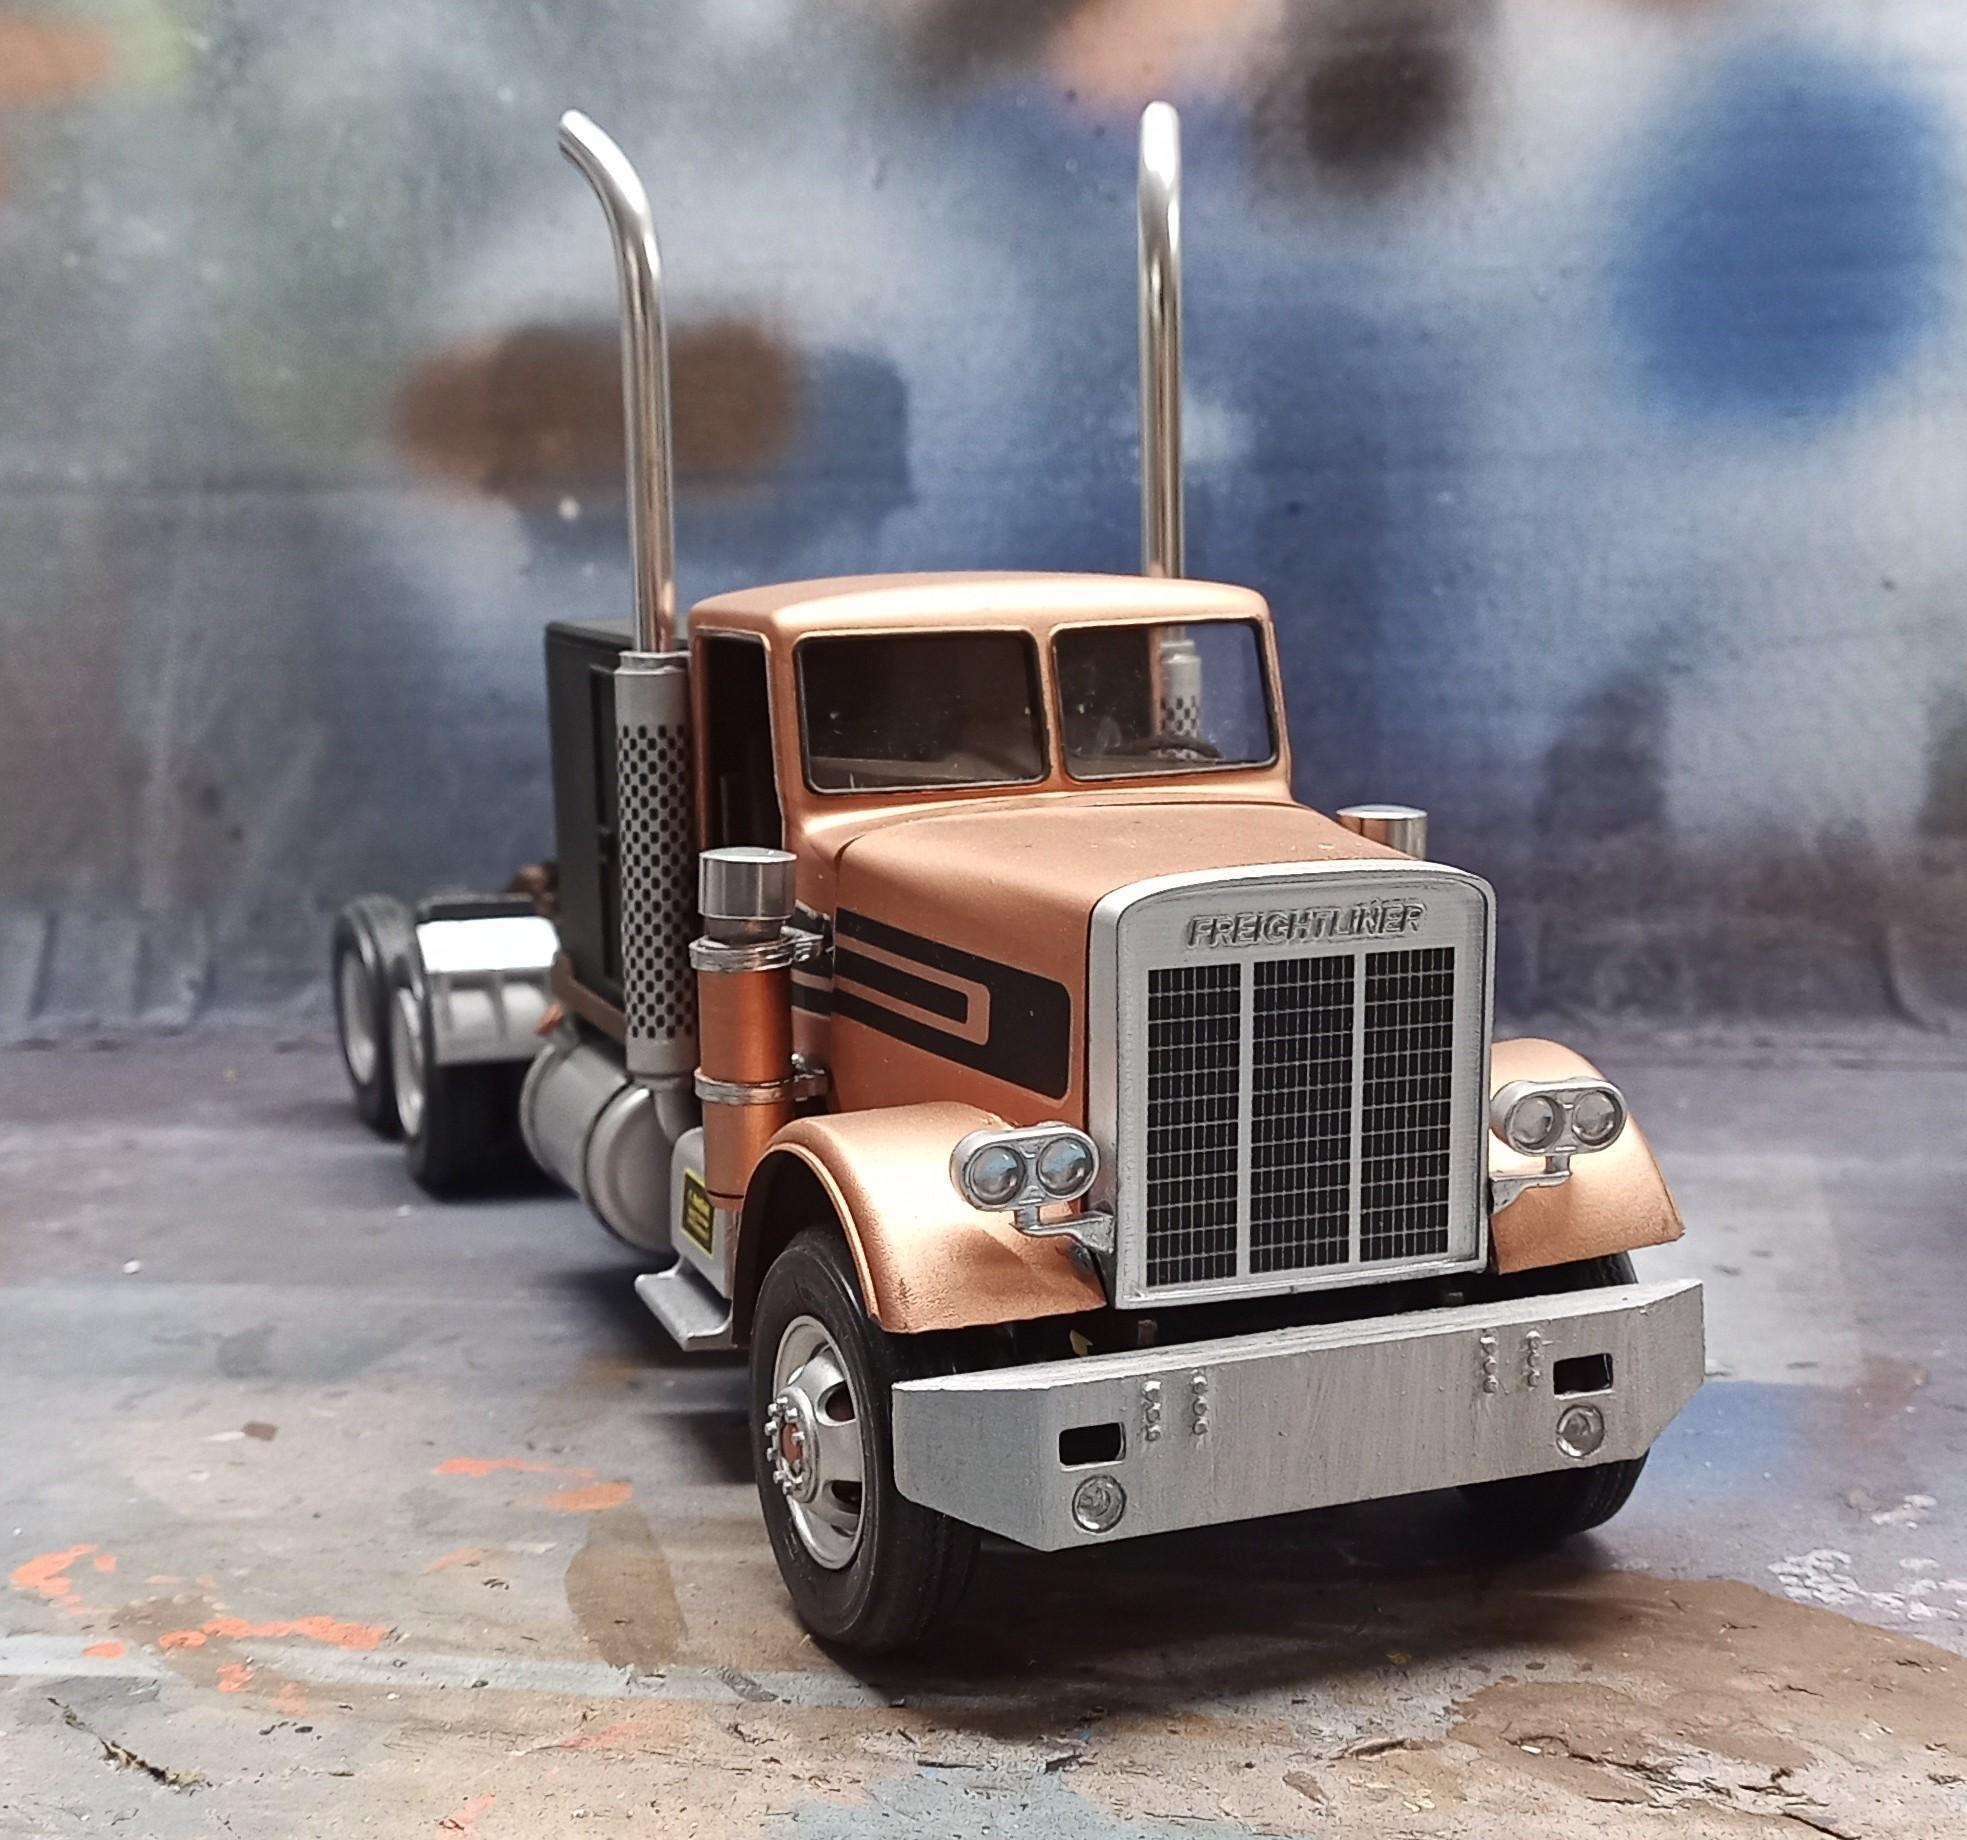
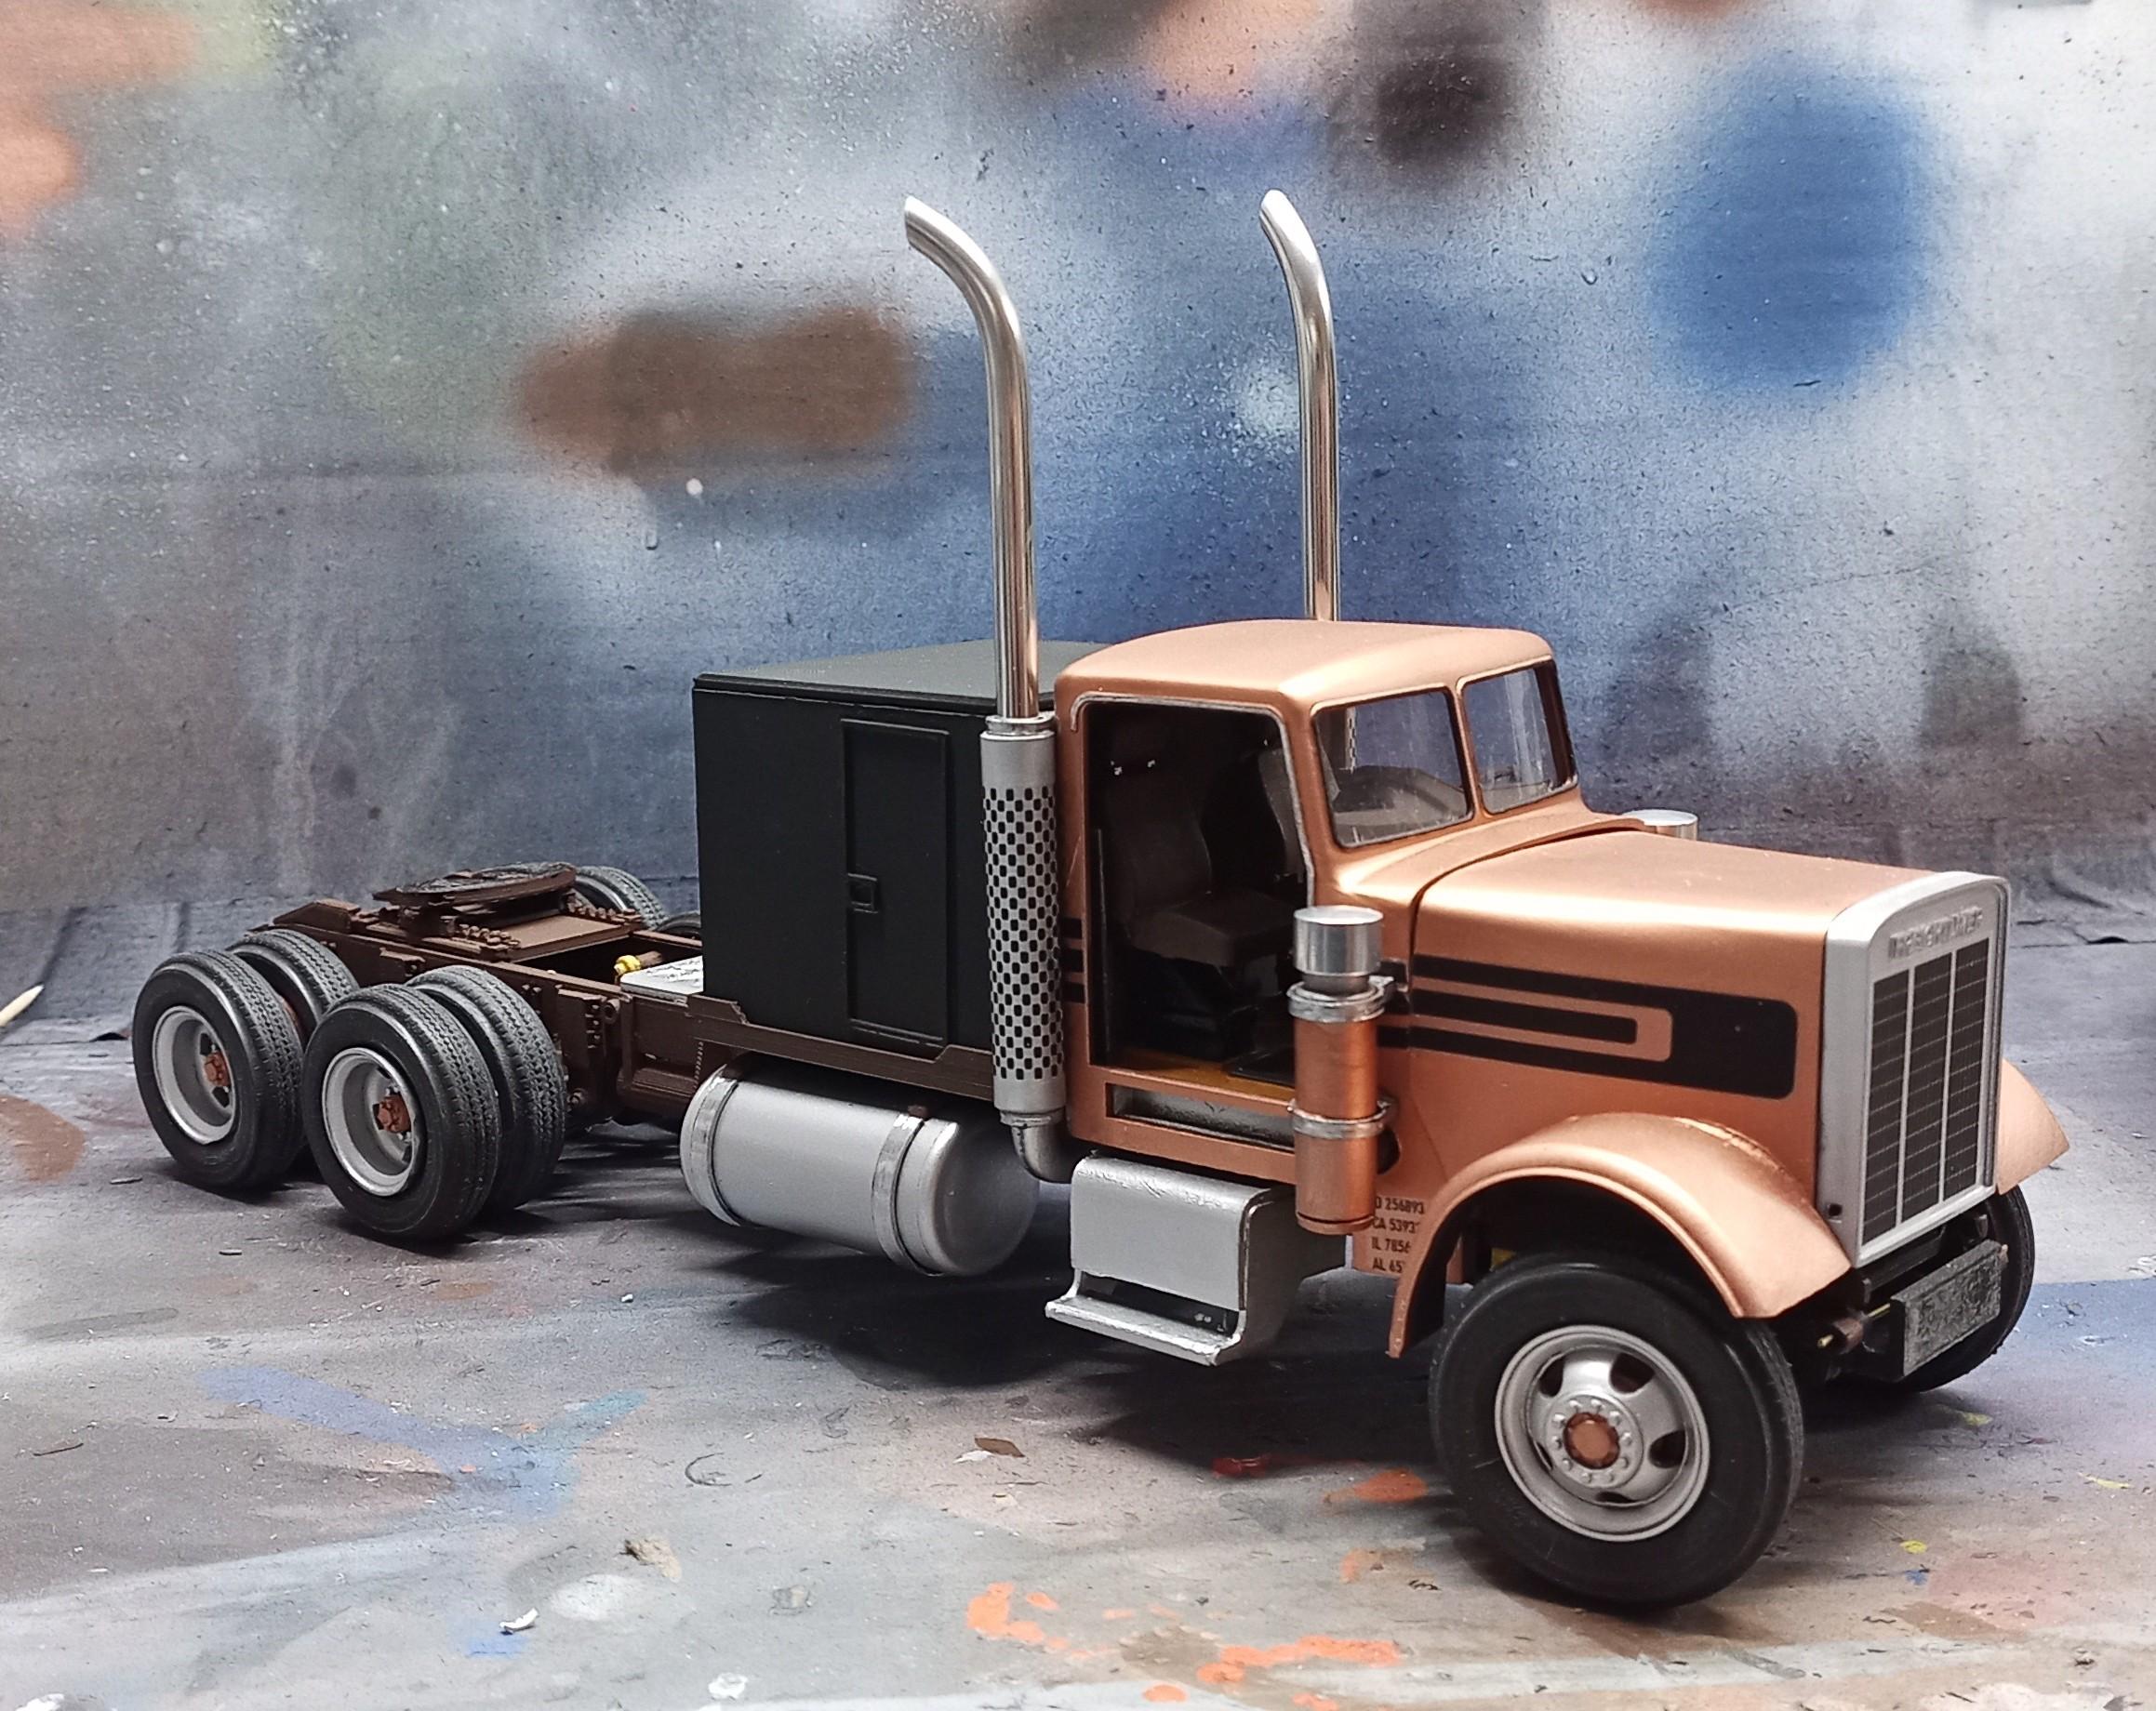
Hi everyone, I finished this build today and thought it would be appropriate to post it here now! This was always theee conventional of all American trucks to me. From the beginning of my truck affinity starting about 1980 I always loved this truck and it was more than overdue in my collection! My vision began with this picture: A 1975 FLC. I designed it as a long distance truck.... ...and it evolved to a kind of service truck for break downs including attributes of model years from 1975 to about '85. Enjoy! The doors were a bit of a challenge since I made a big mistake in the assembly sequence. I wasn't able to install the doors after I had inserted the interior. I just didn't want to tear everything apart again. So, I glued the passenger door in place and left the driver's door open. In my WIP thread I posted a statistic on how many parts of this build are self designed and printed and how many are box parts or scratch built. I'd like to update that now since it has changed quite remarkably: Total no. of parts: 412 Designed and printed: 293 Box parts and scratch: 119 Decals are also self made. Thanks to everyone following and supporting with wonderful remarks.
-
Freightliner FLC
Jürgen M. replied to Jürgen M.'s topic in WIP: Model Trucks: Big Rigs and Heavy Equipment
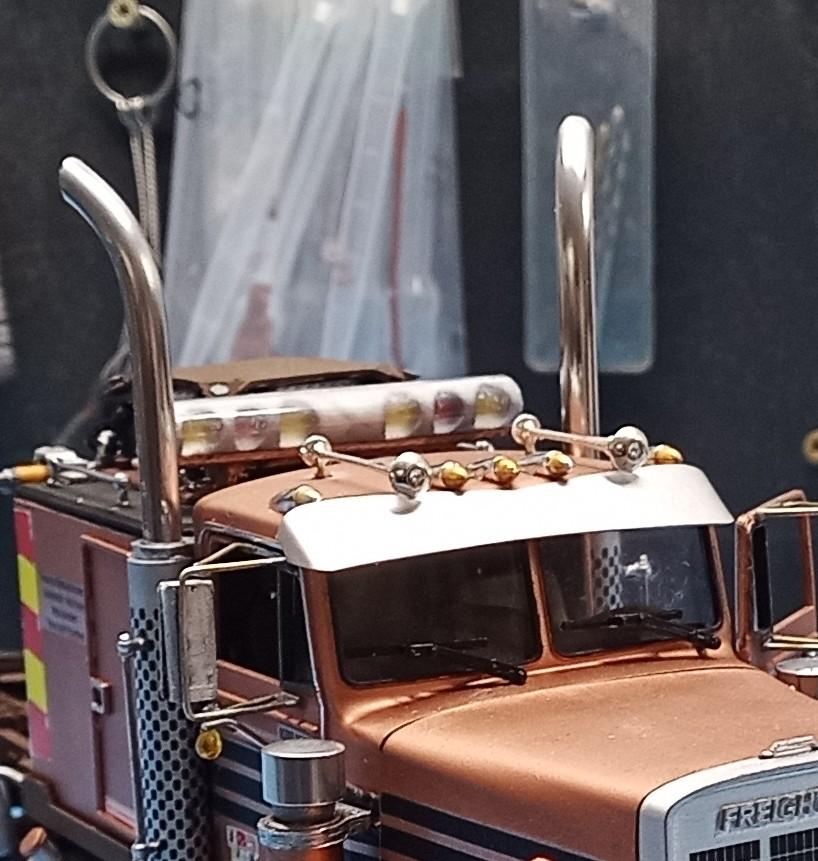
Thanks Ron! I think it's about done now! Here are the first pics: Concerning the doors: The passenger door is glued in place, the drivers door doesn't close right so I left it open! It'll be posted 'Under Glass' shortly!
-
Freightliner FLC
Jürgen M. replied to Jürgen M.'s topic in WIP: Model Trucks: Big Rigs and Heavy Equipment
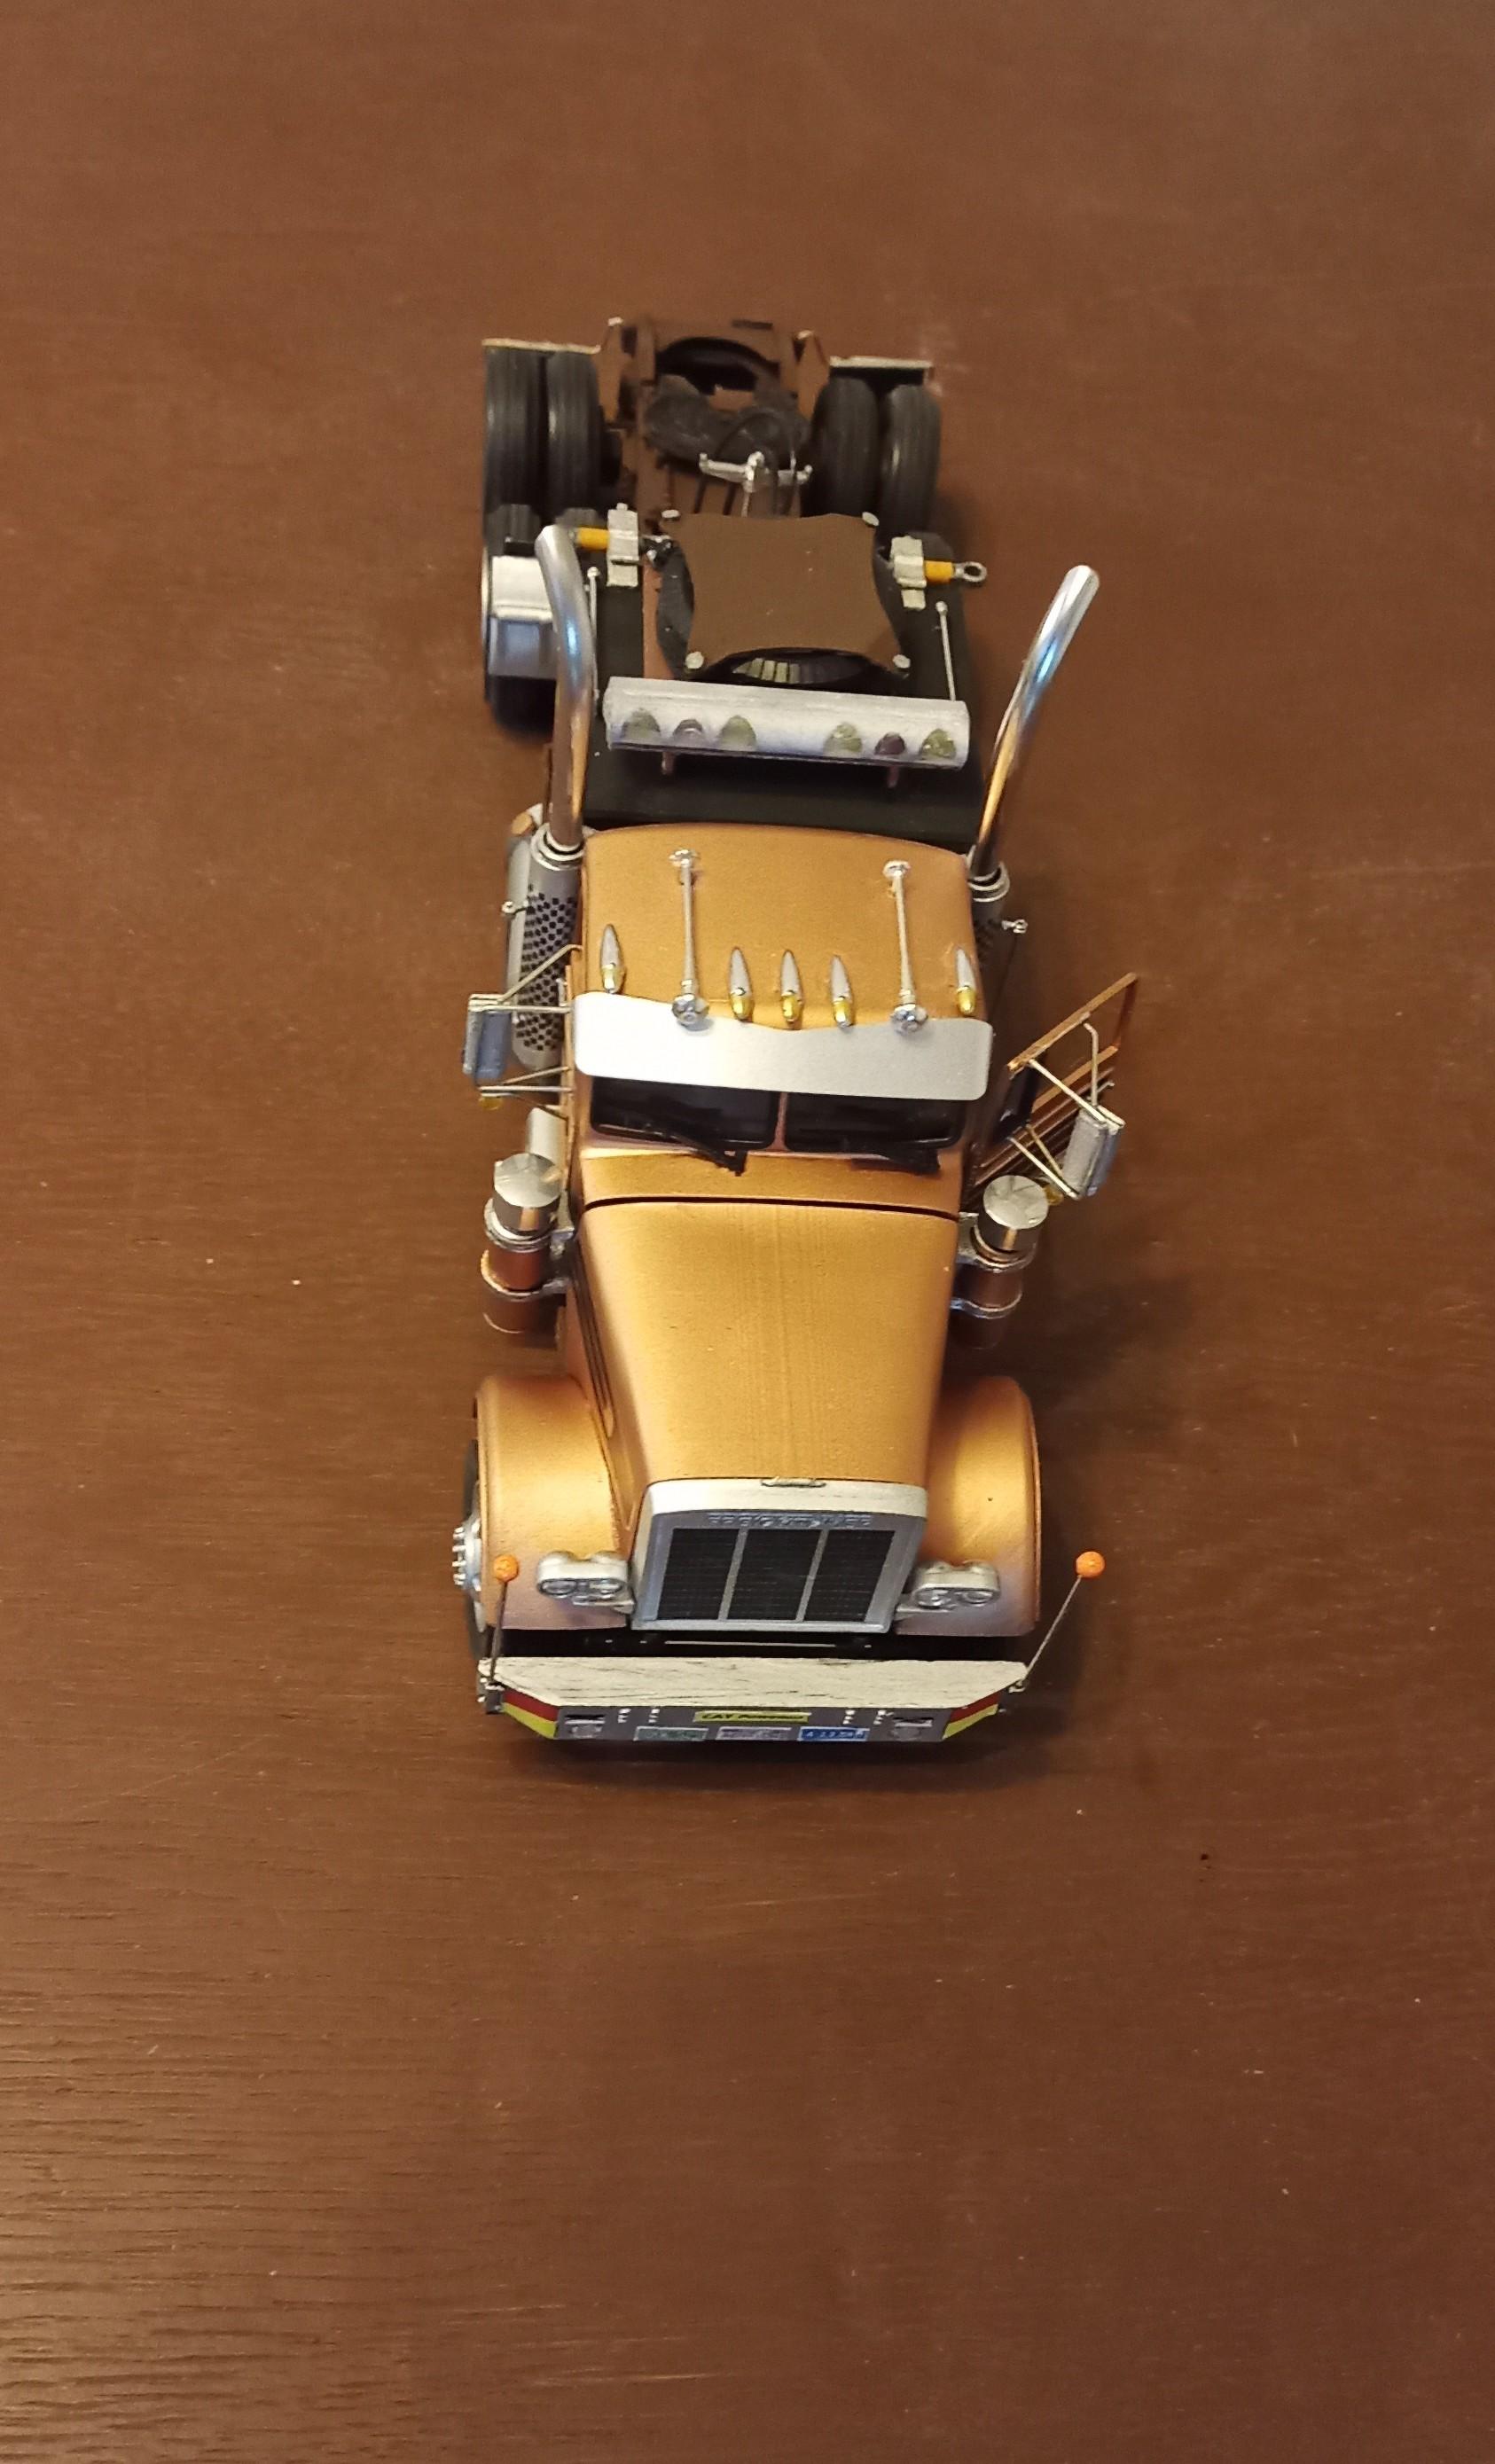
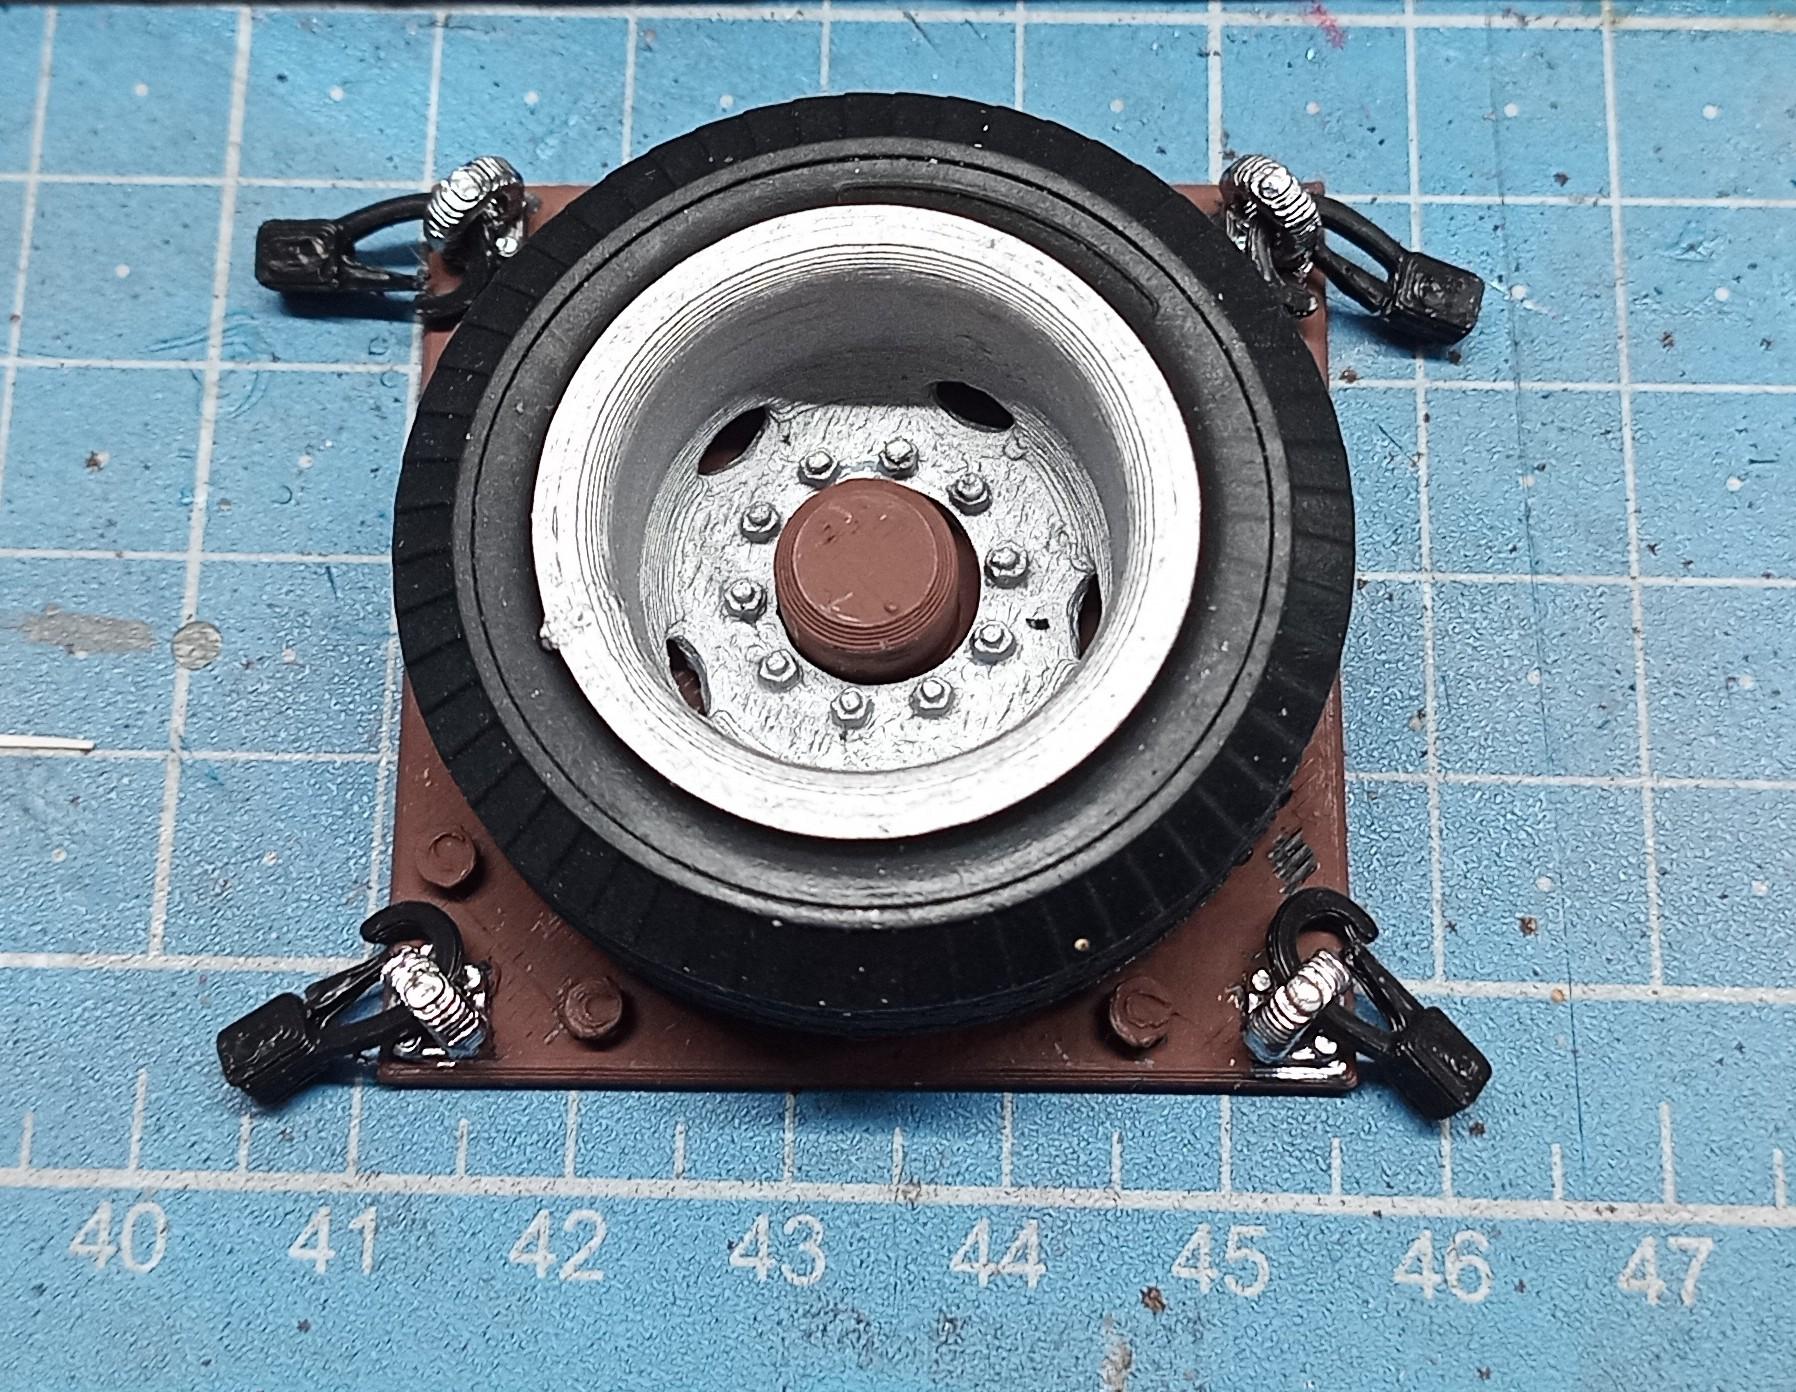
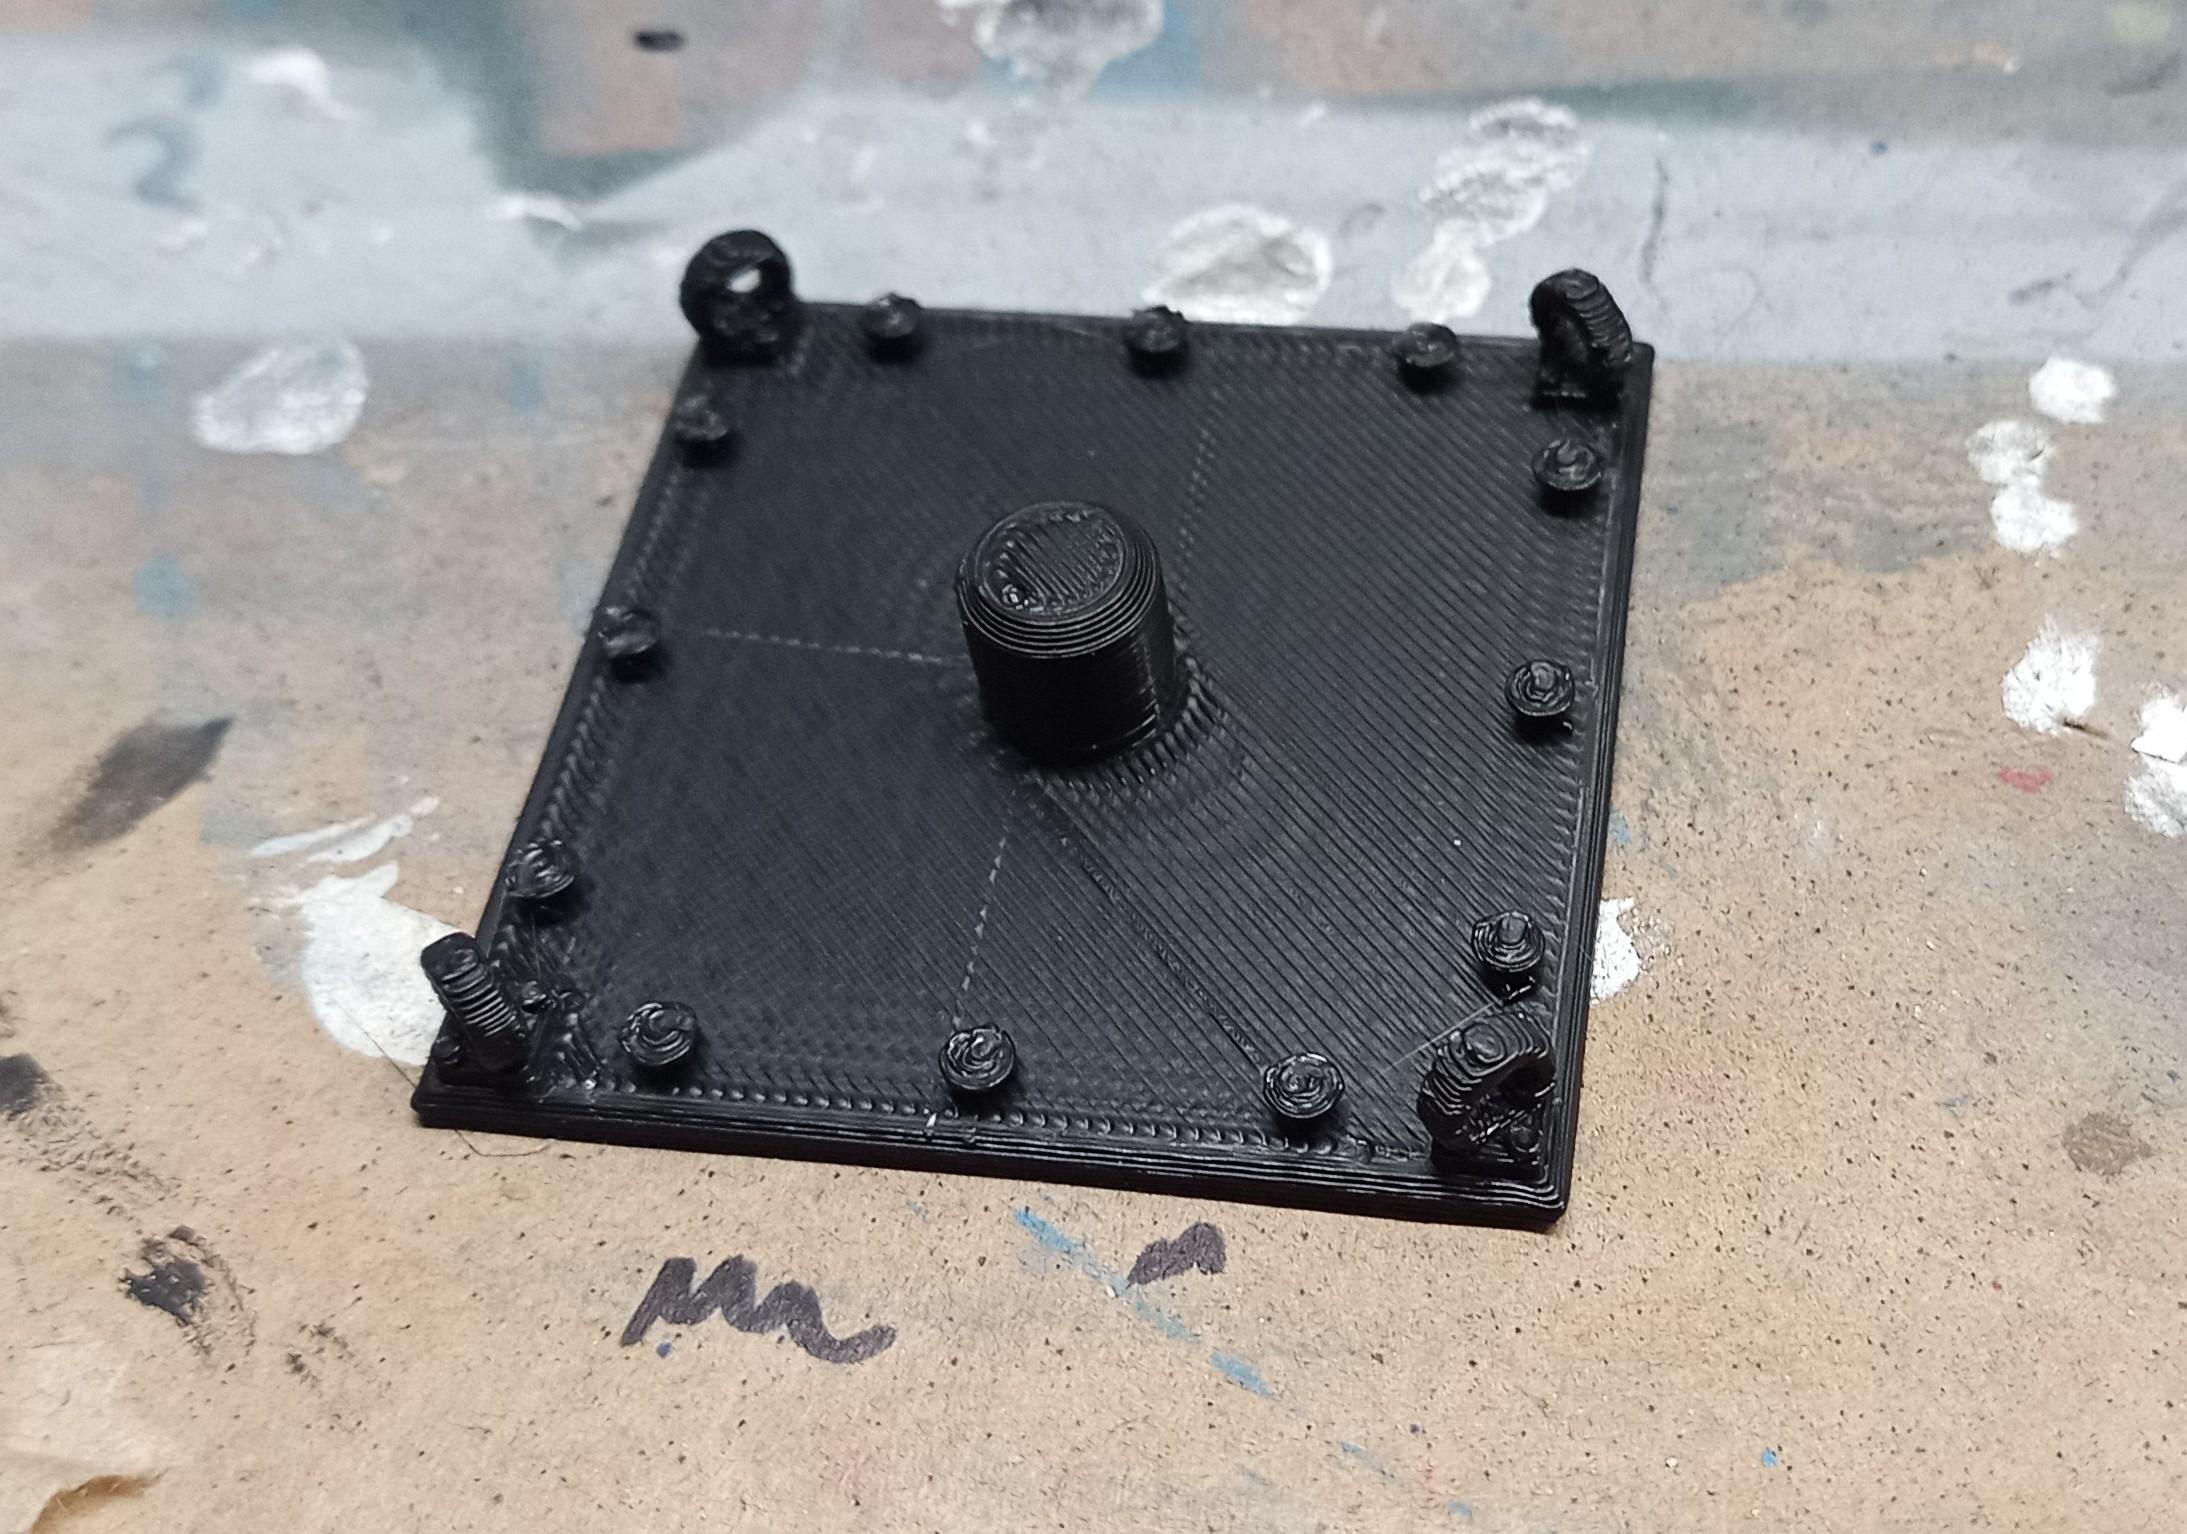
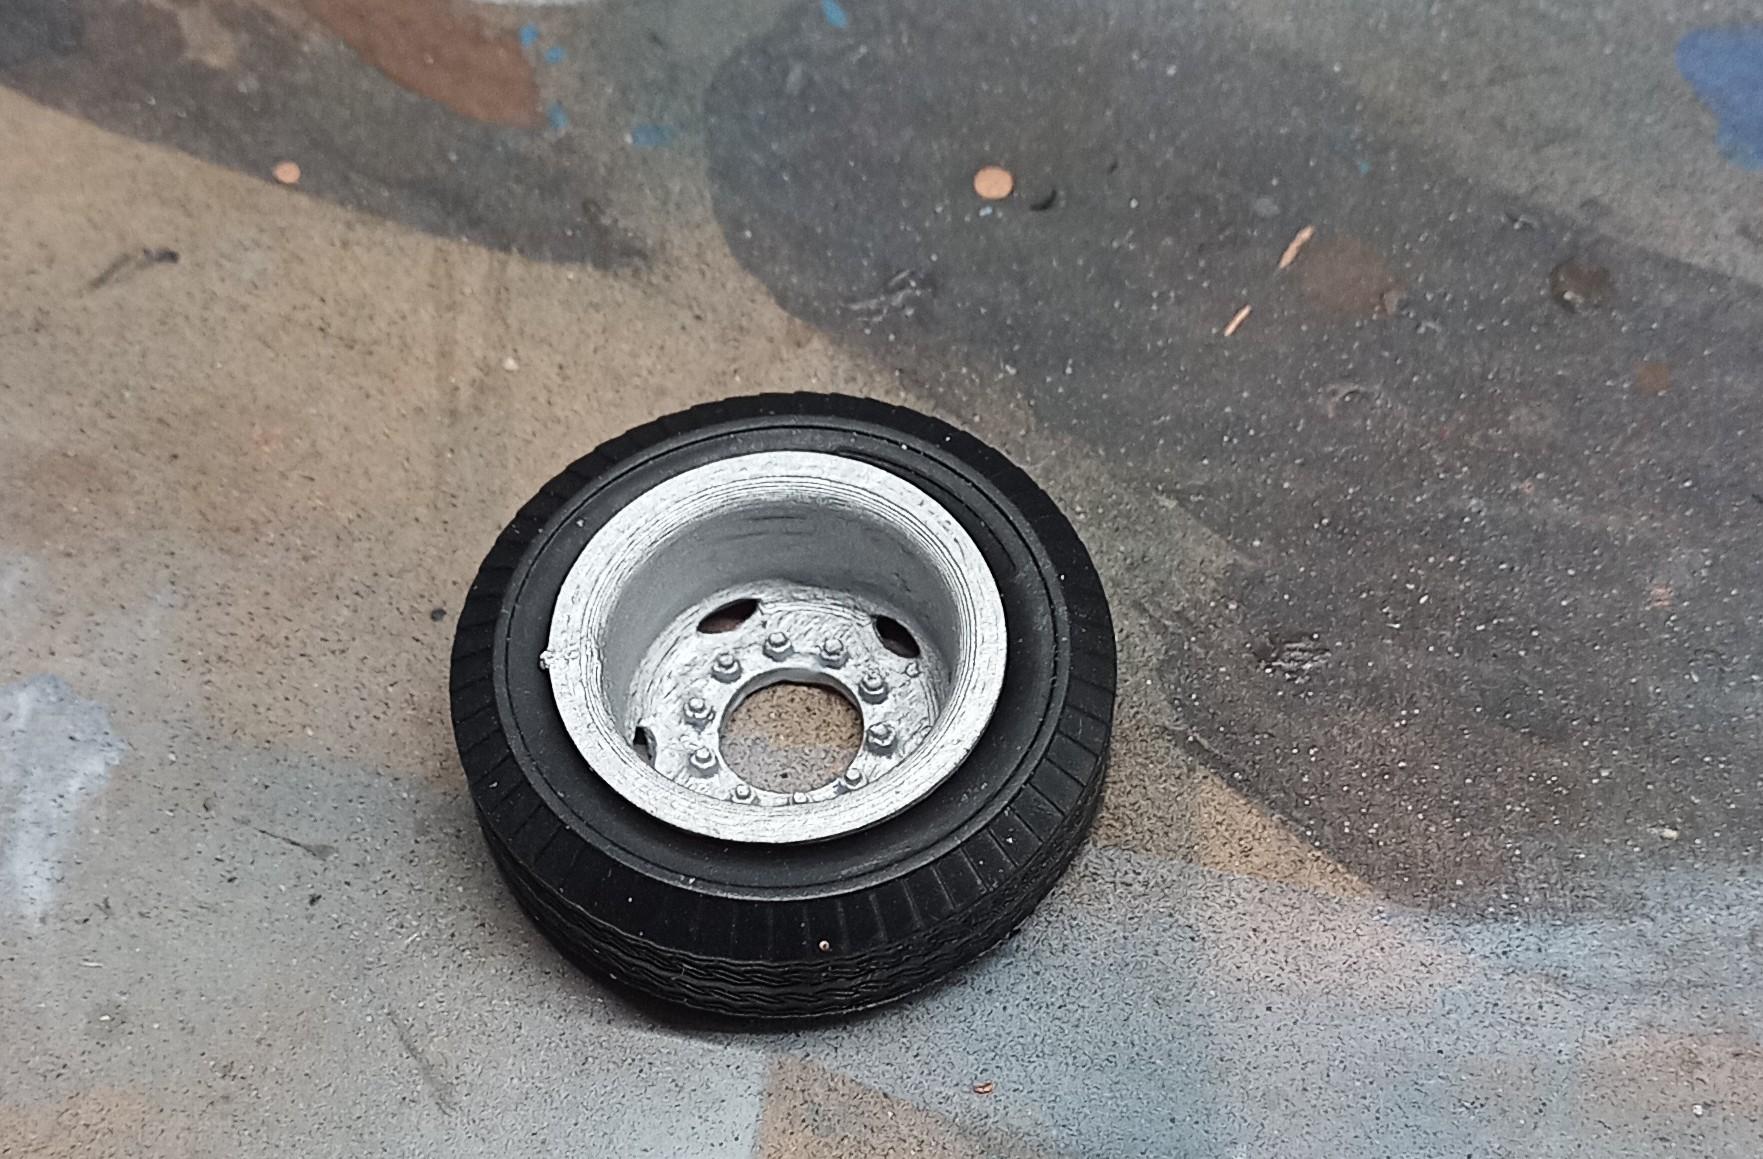
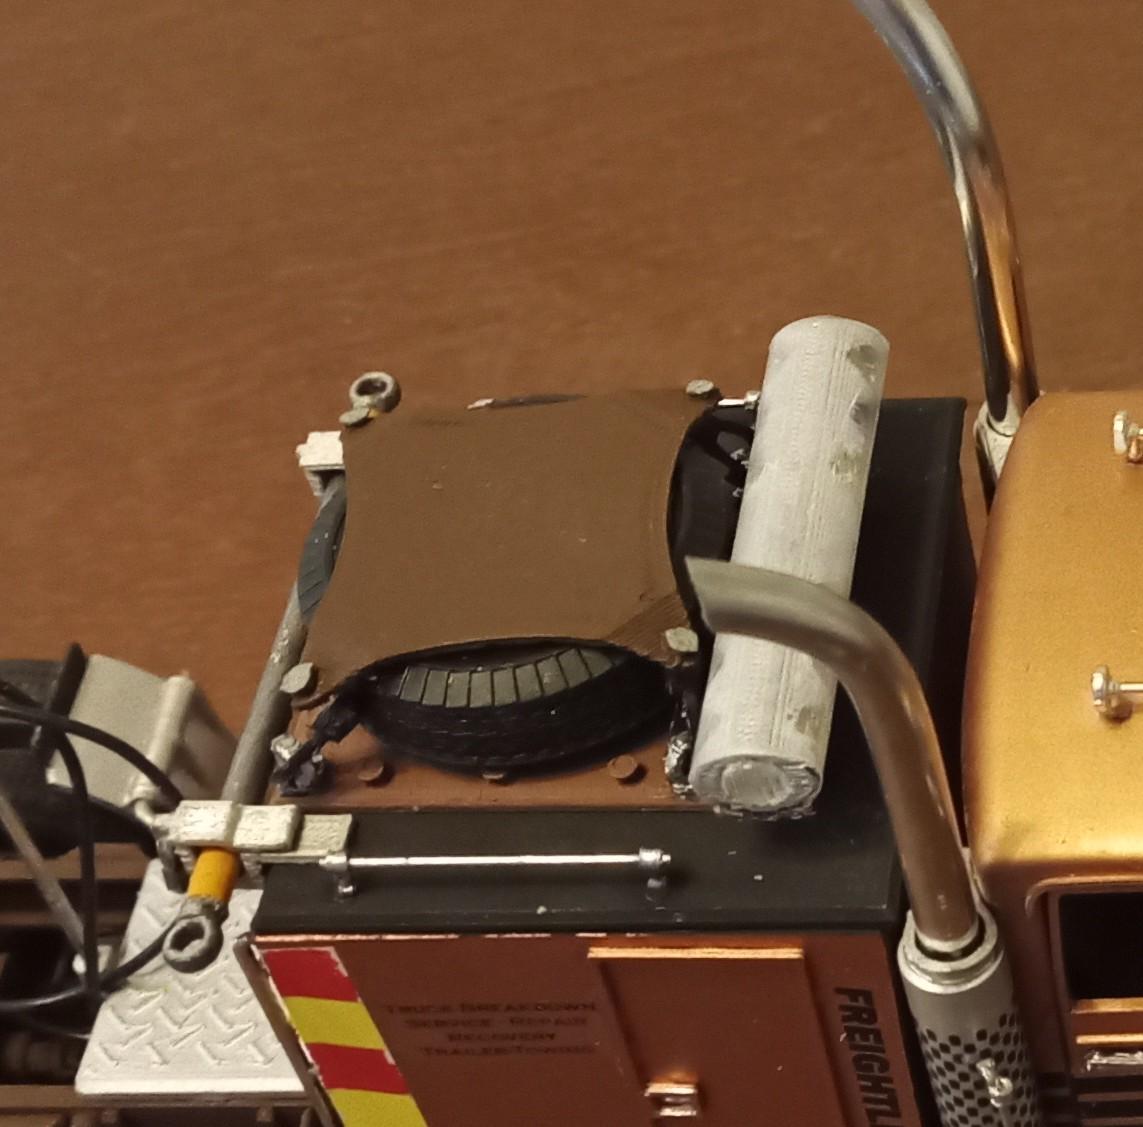
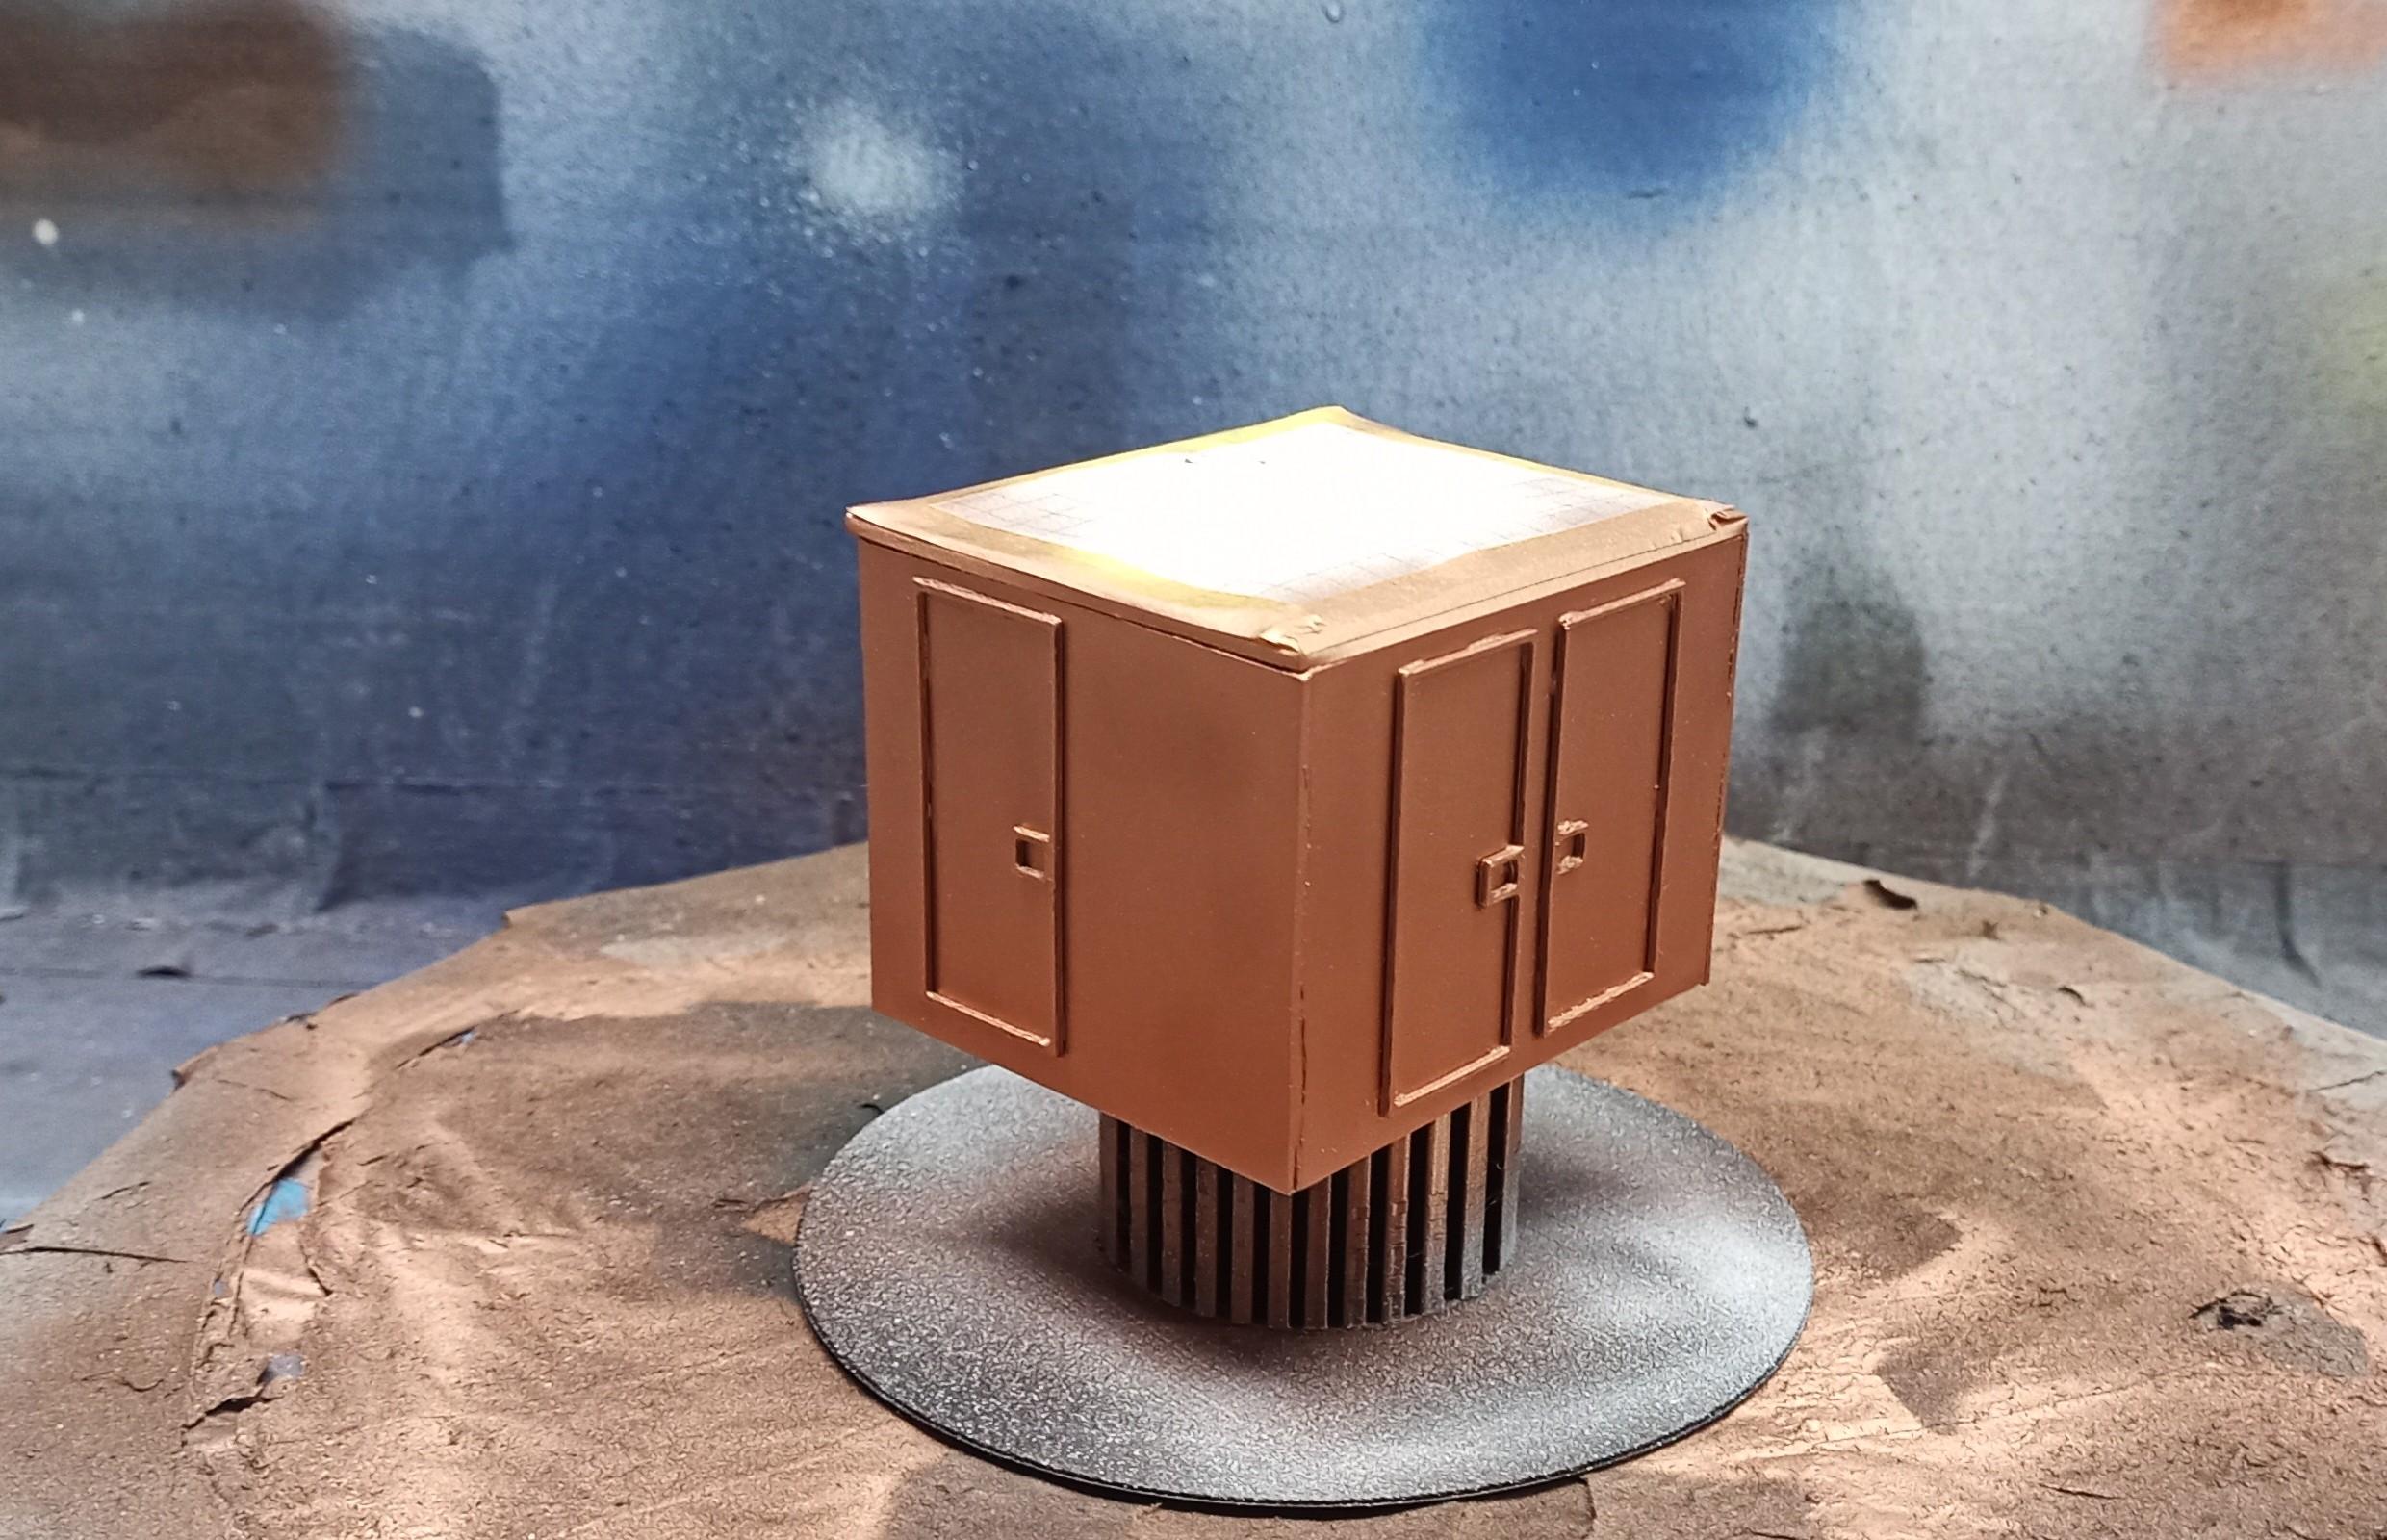
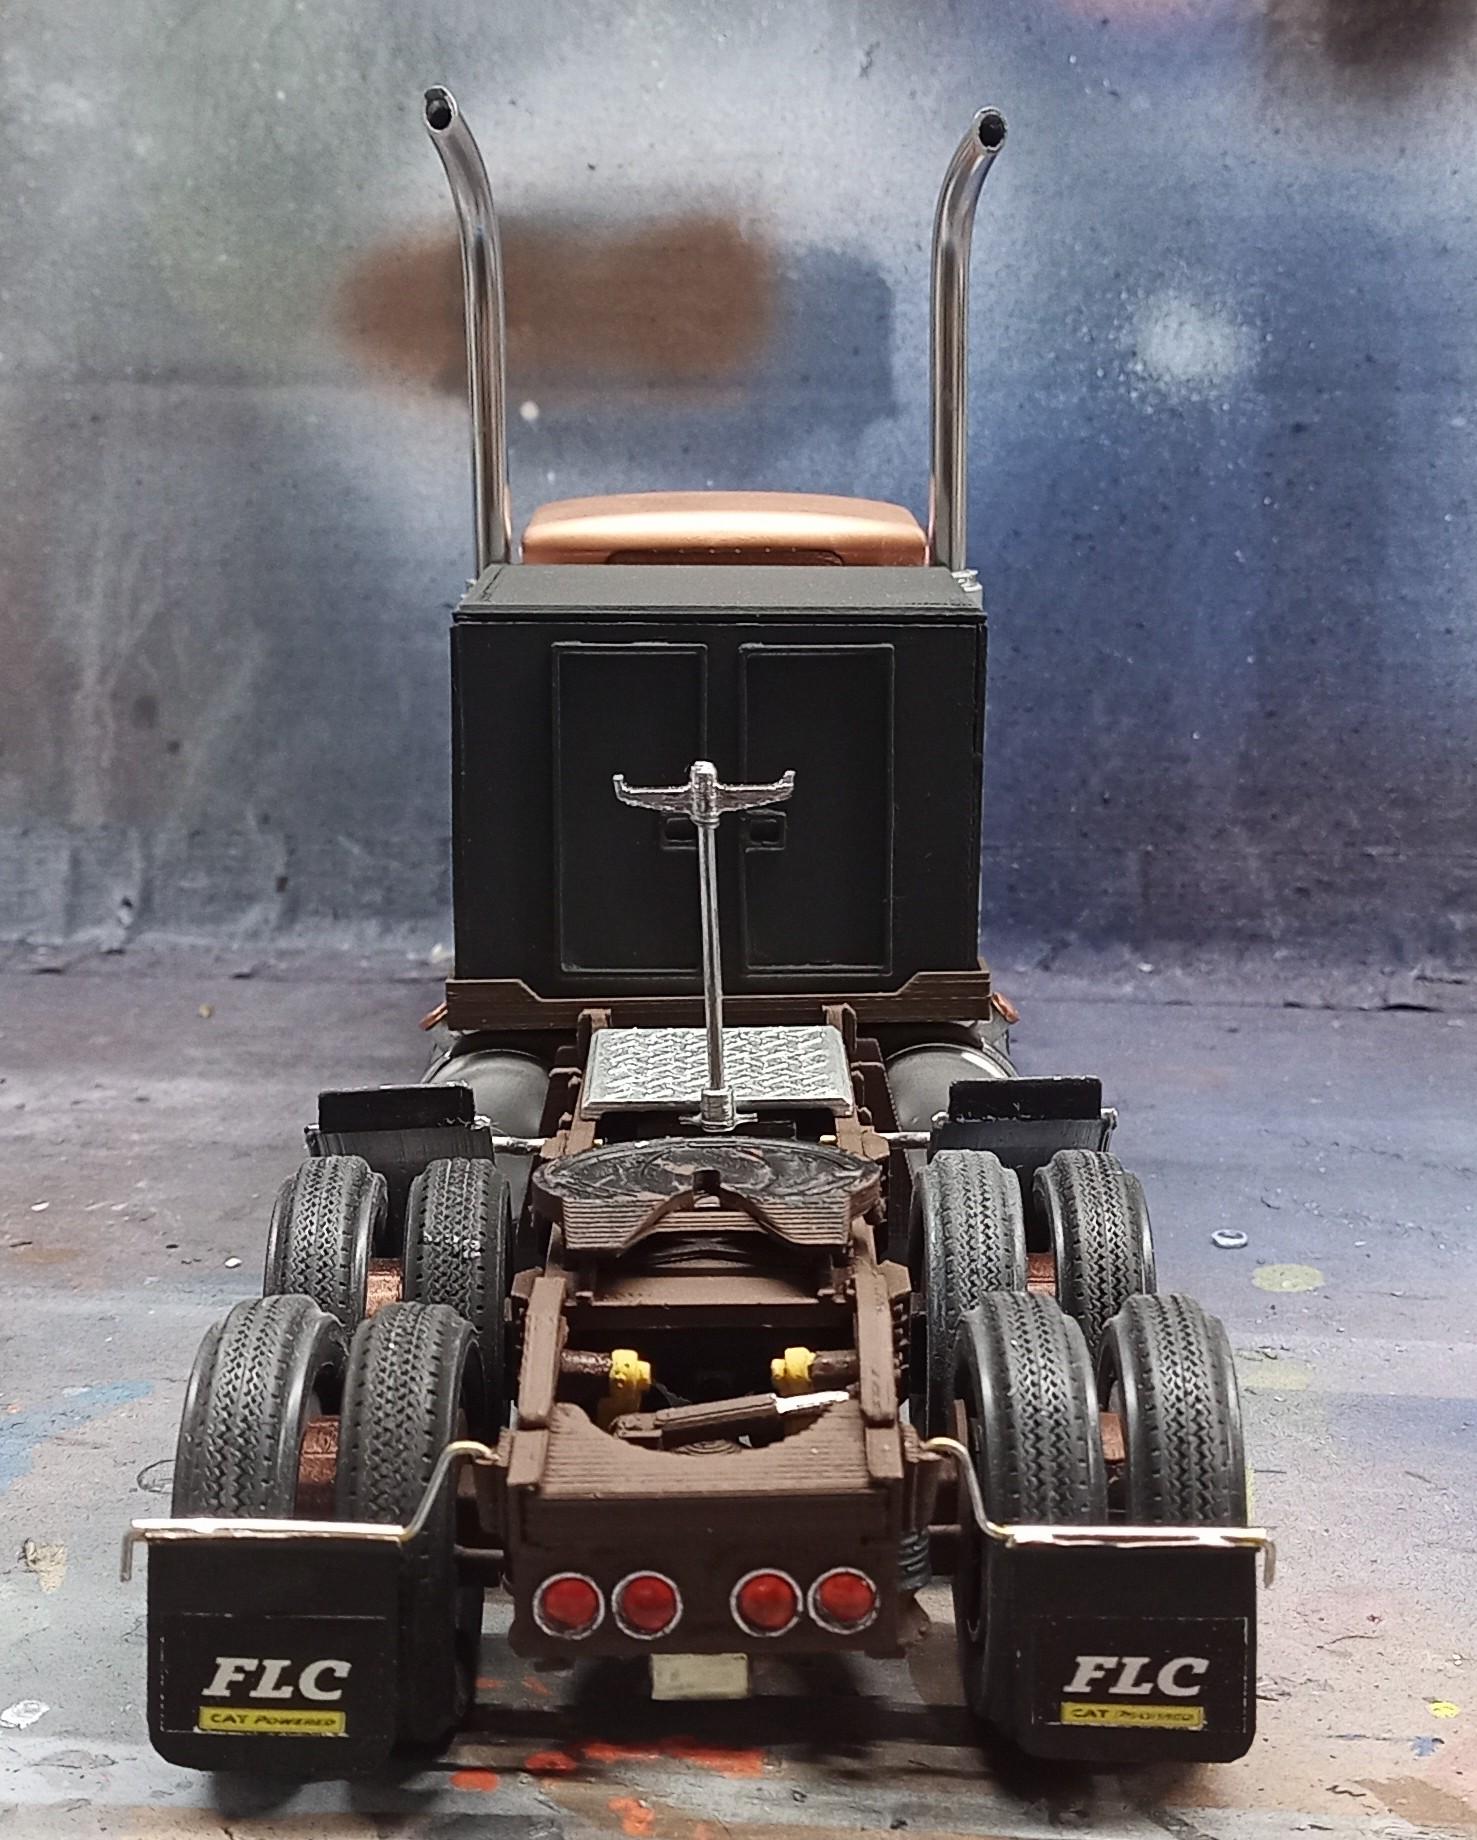
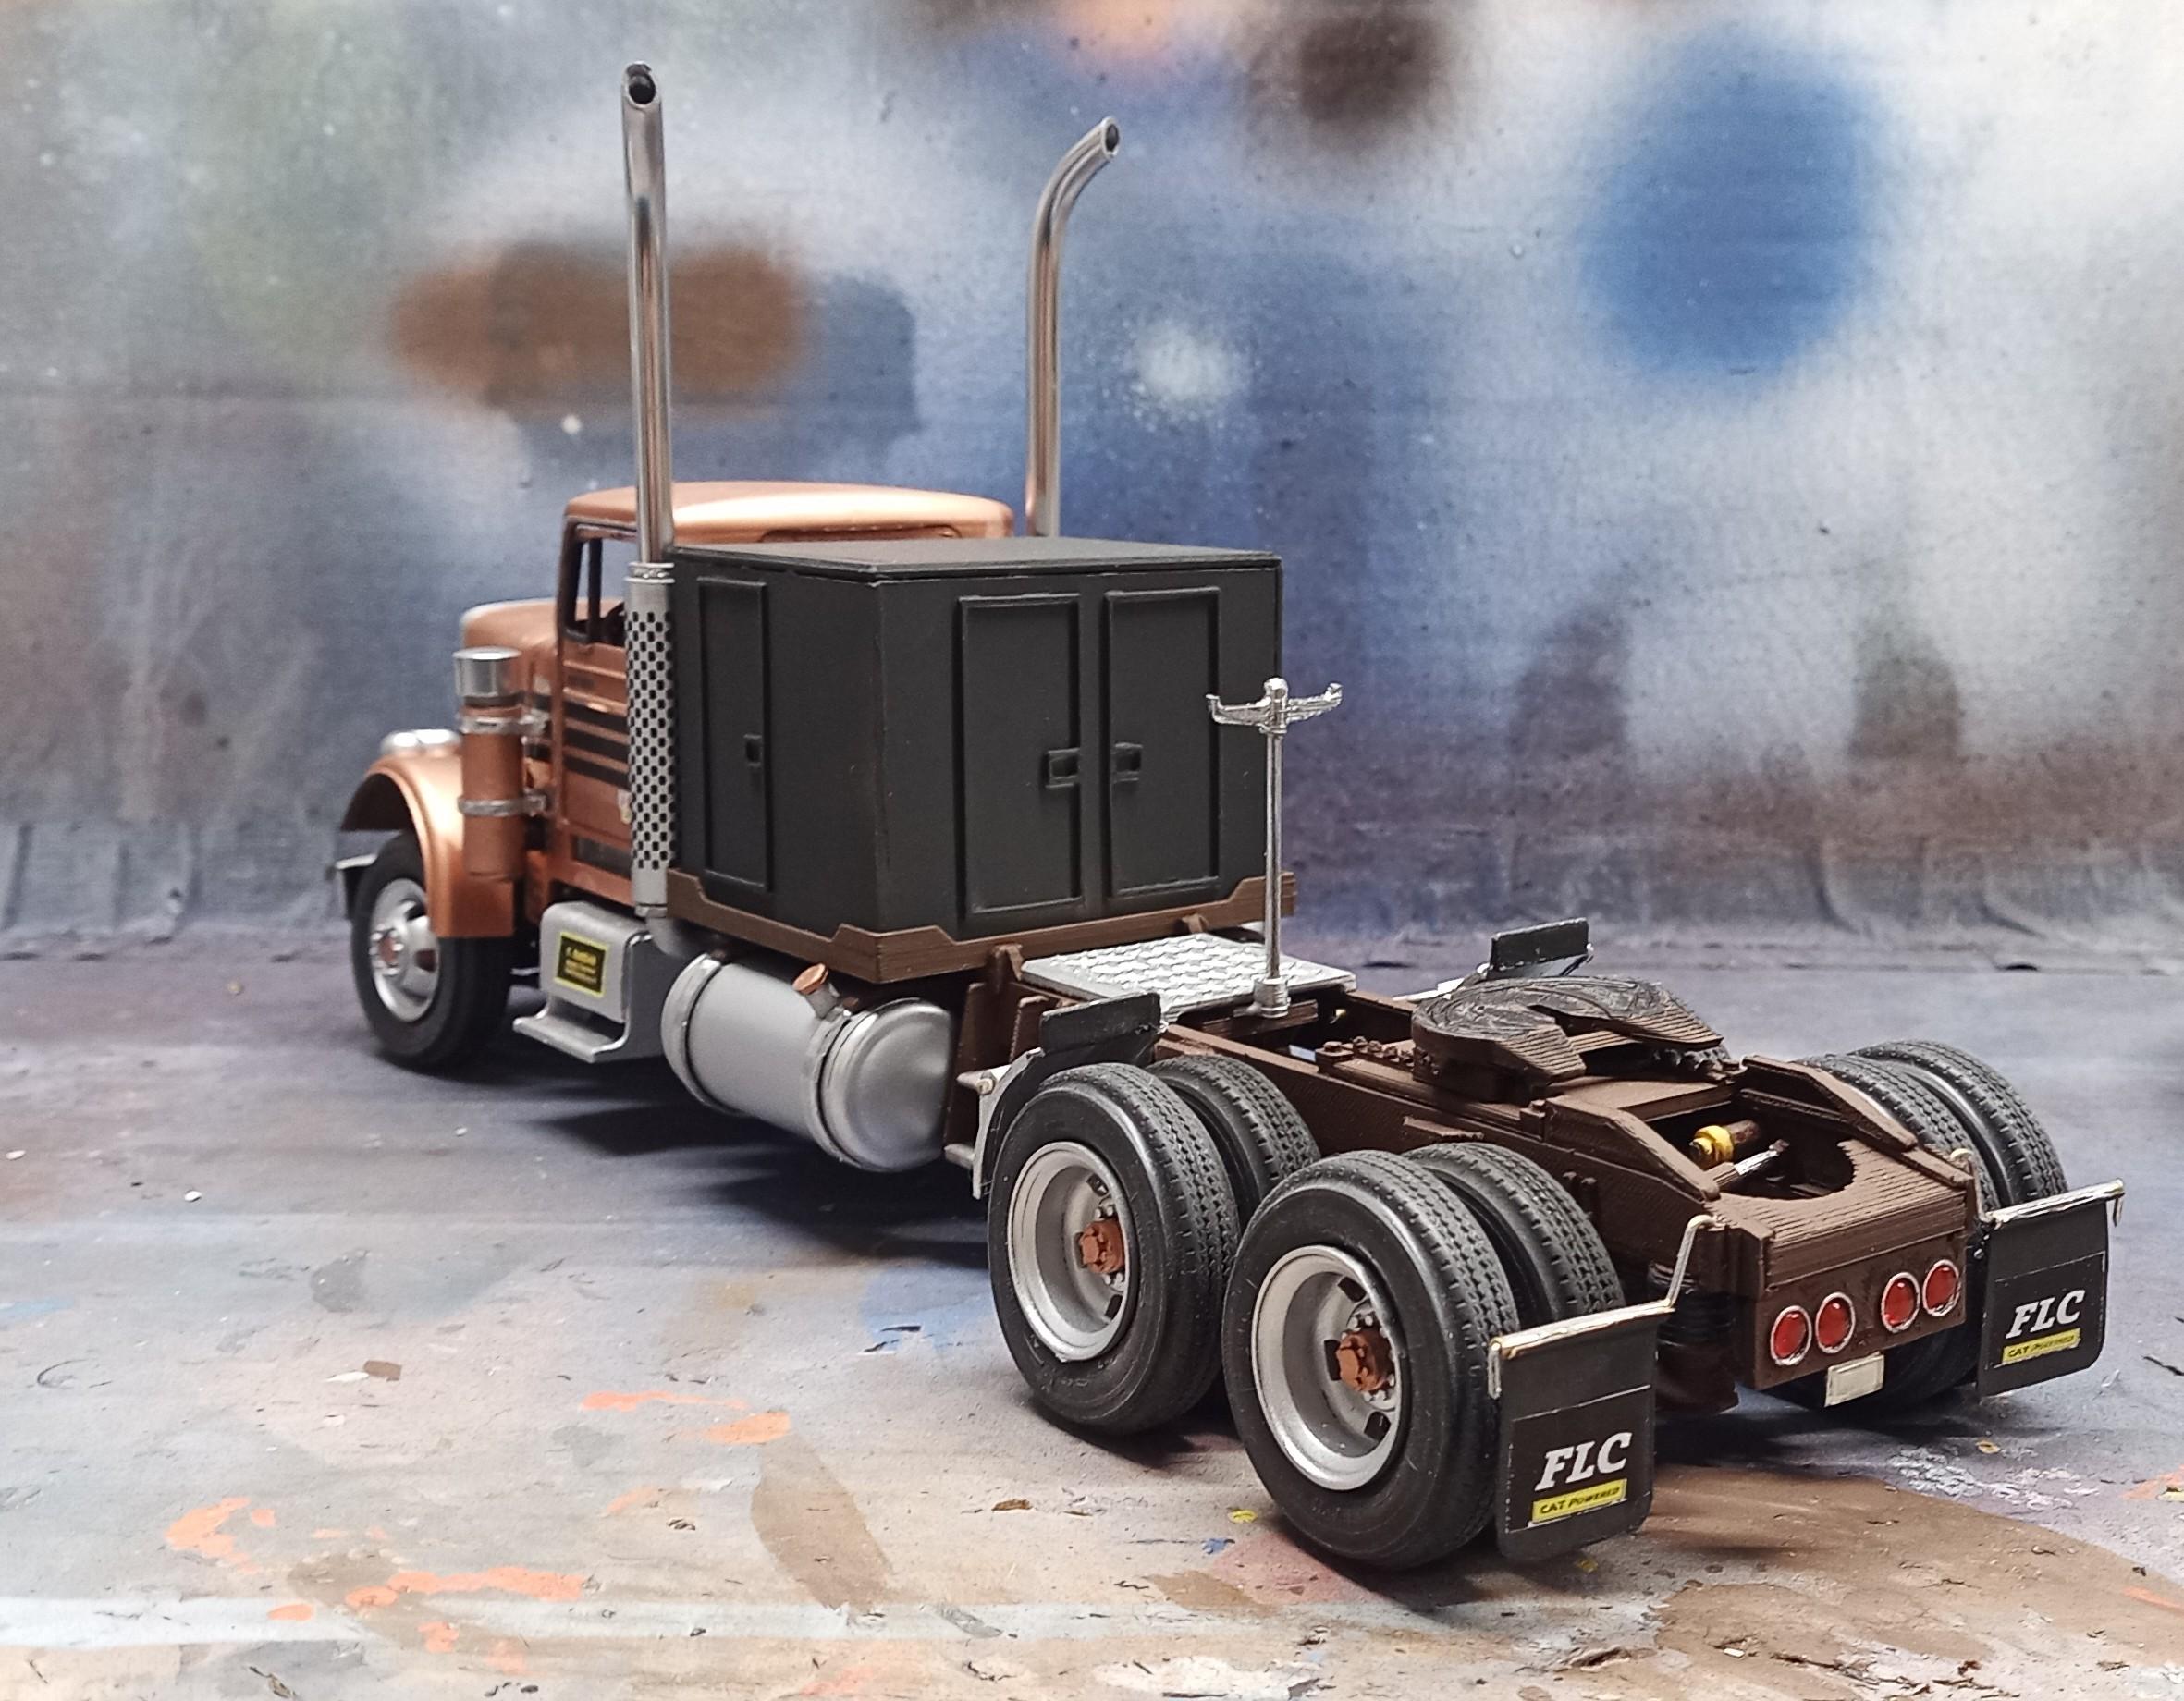
I thought a spare would make sense for a service truck: Made this plate to mount the spare on top of the service box: The spare will be held down by a (printed) canvas and four spring hooks! I also made some working lights. Unfortunately the transparent foil I wrapped around it became a bit dull. Who cares! Looks worn that way.
-
Freightliner FLC
Jürgen M. replied to Jürgen M.'s topic in WIP: Model Trucks: Big Rigs and Heavy Equipment
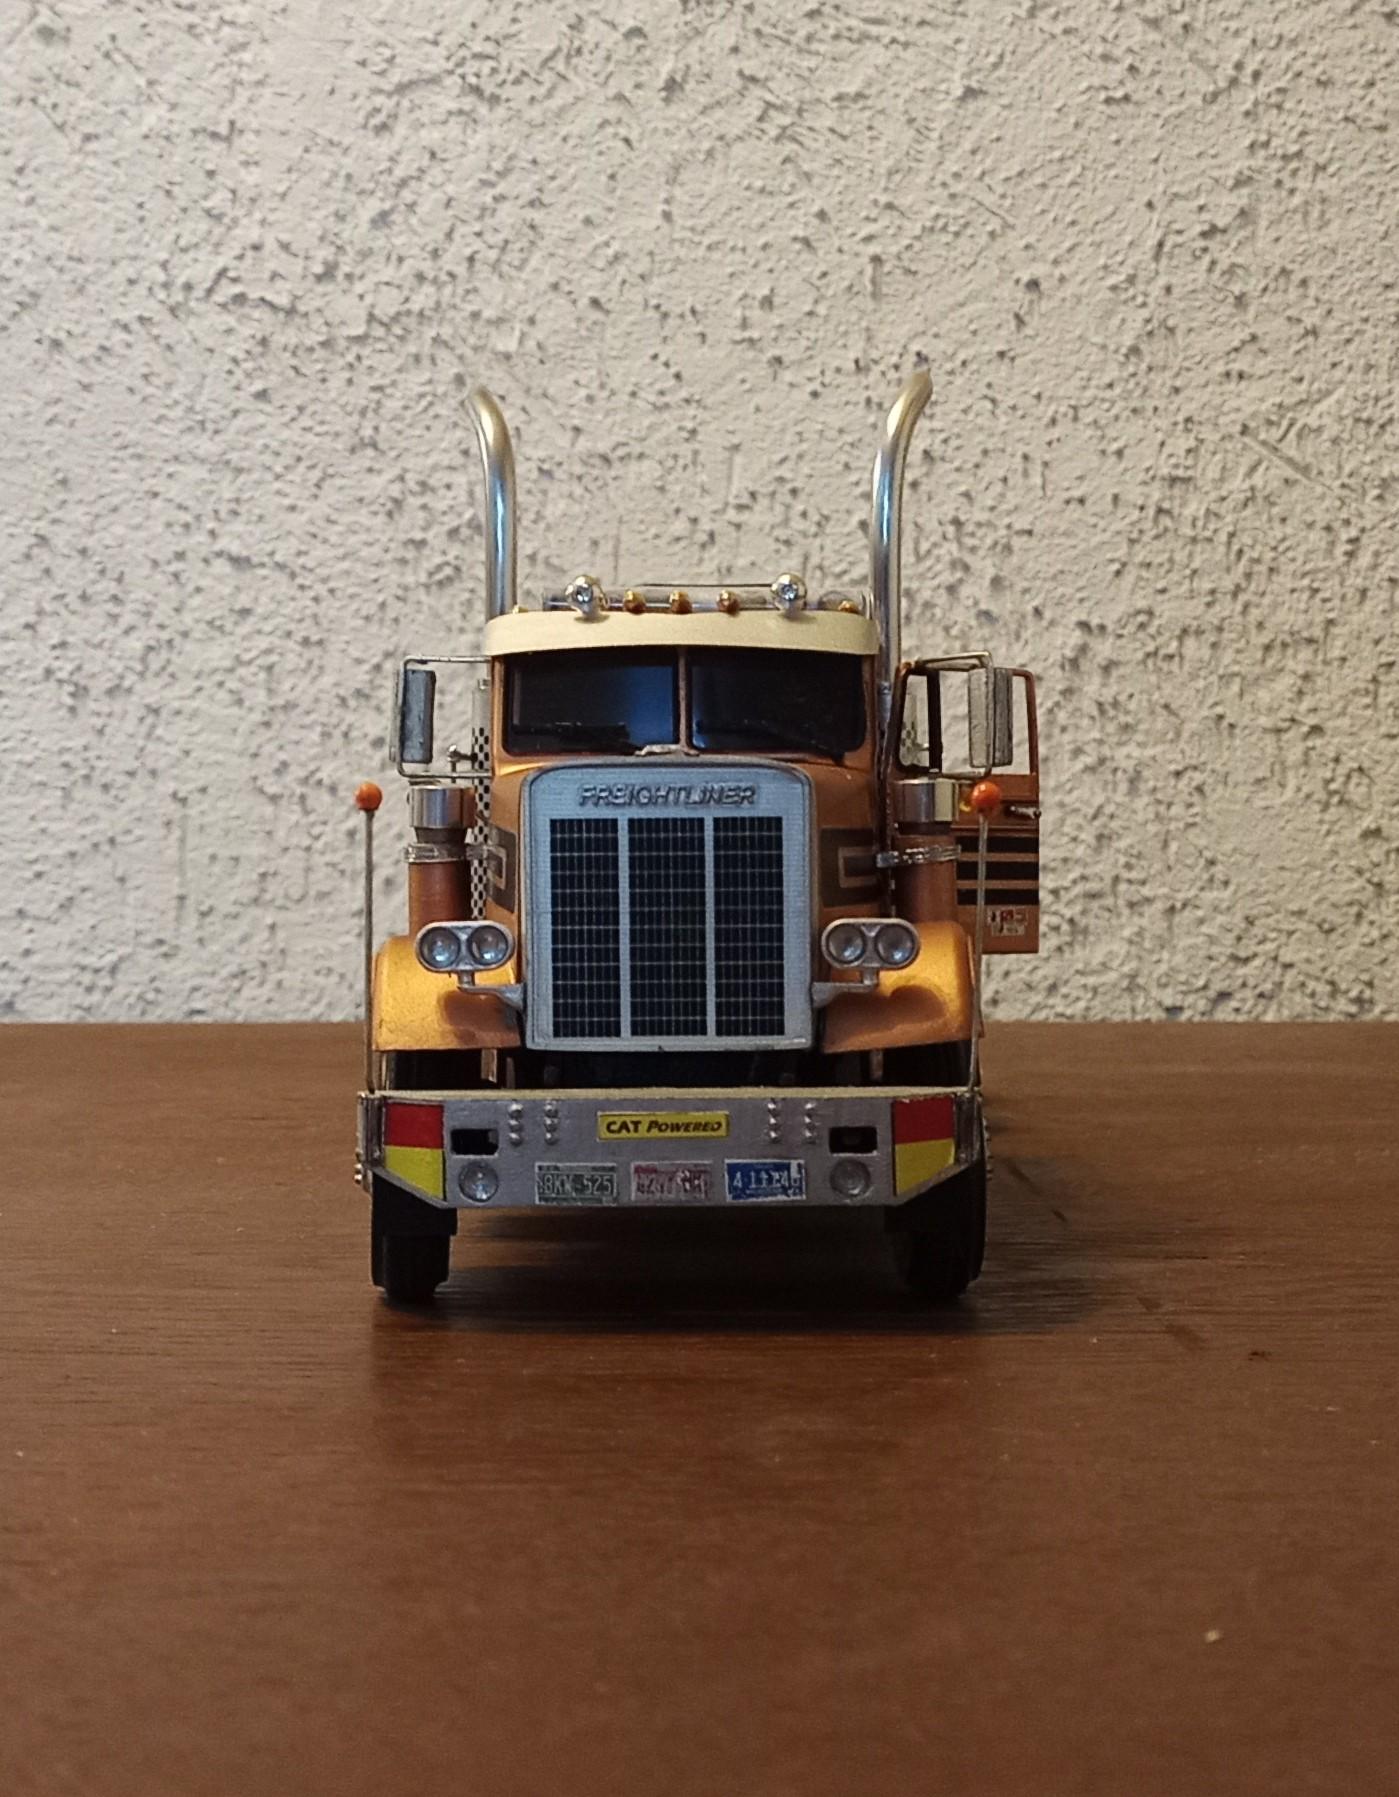
Thanks Pal! The Cat decals I could add. Good idea Today I hope I will get the doors in. But first comes work! -
Freightliner FLC
Jürgen M. replied to Jürgen M.'s topic in WIP: Model Trucks: Big Rigs and Heavy Equipment
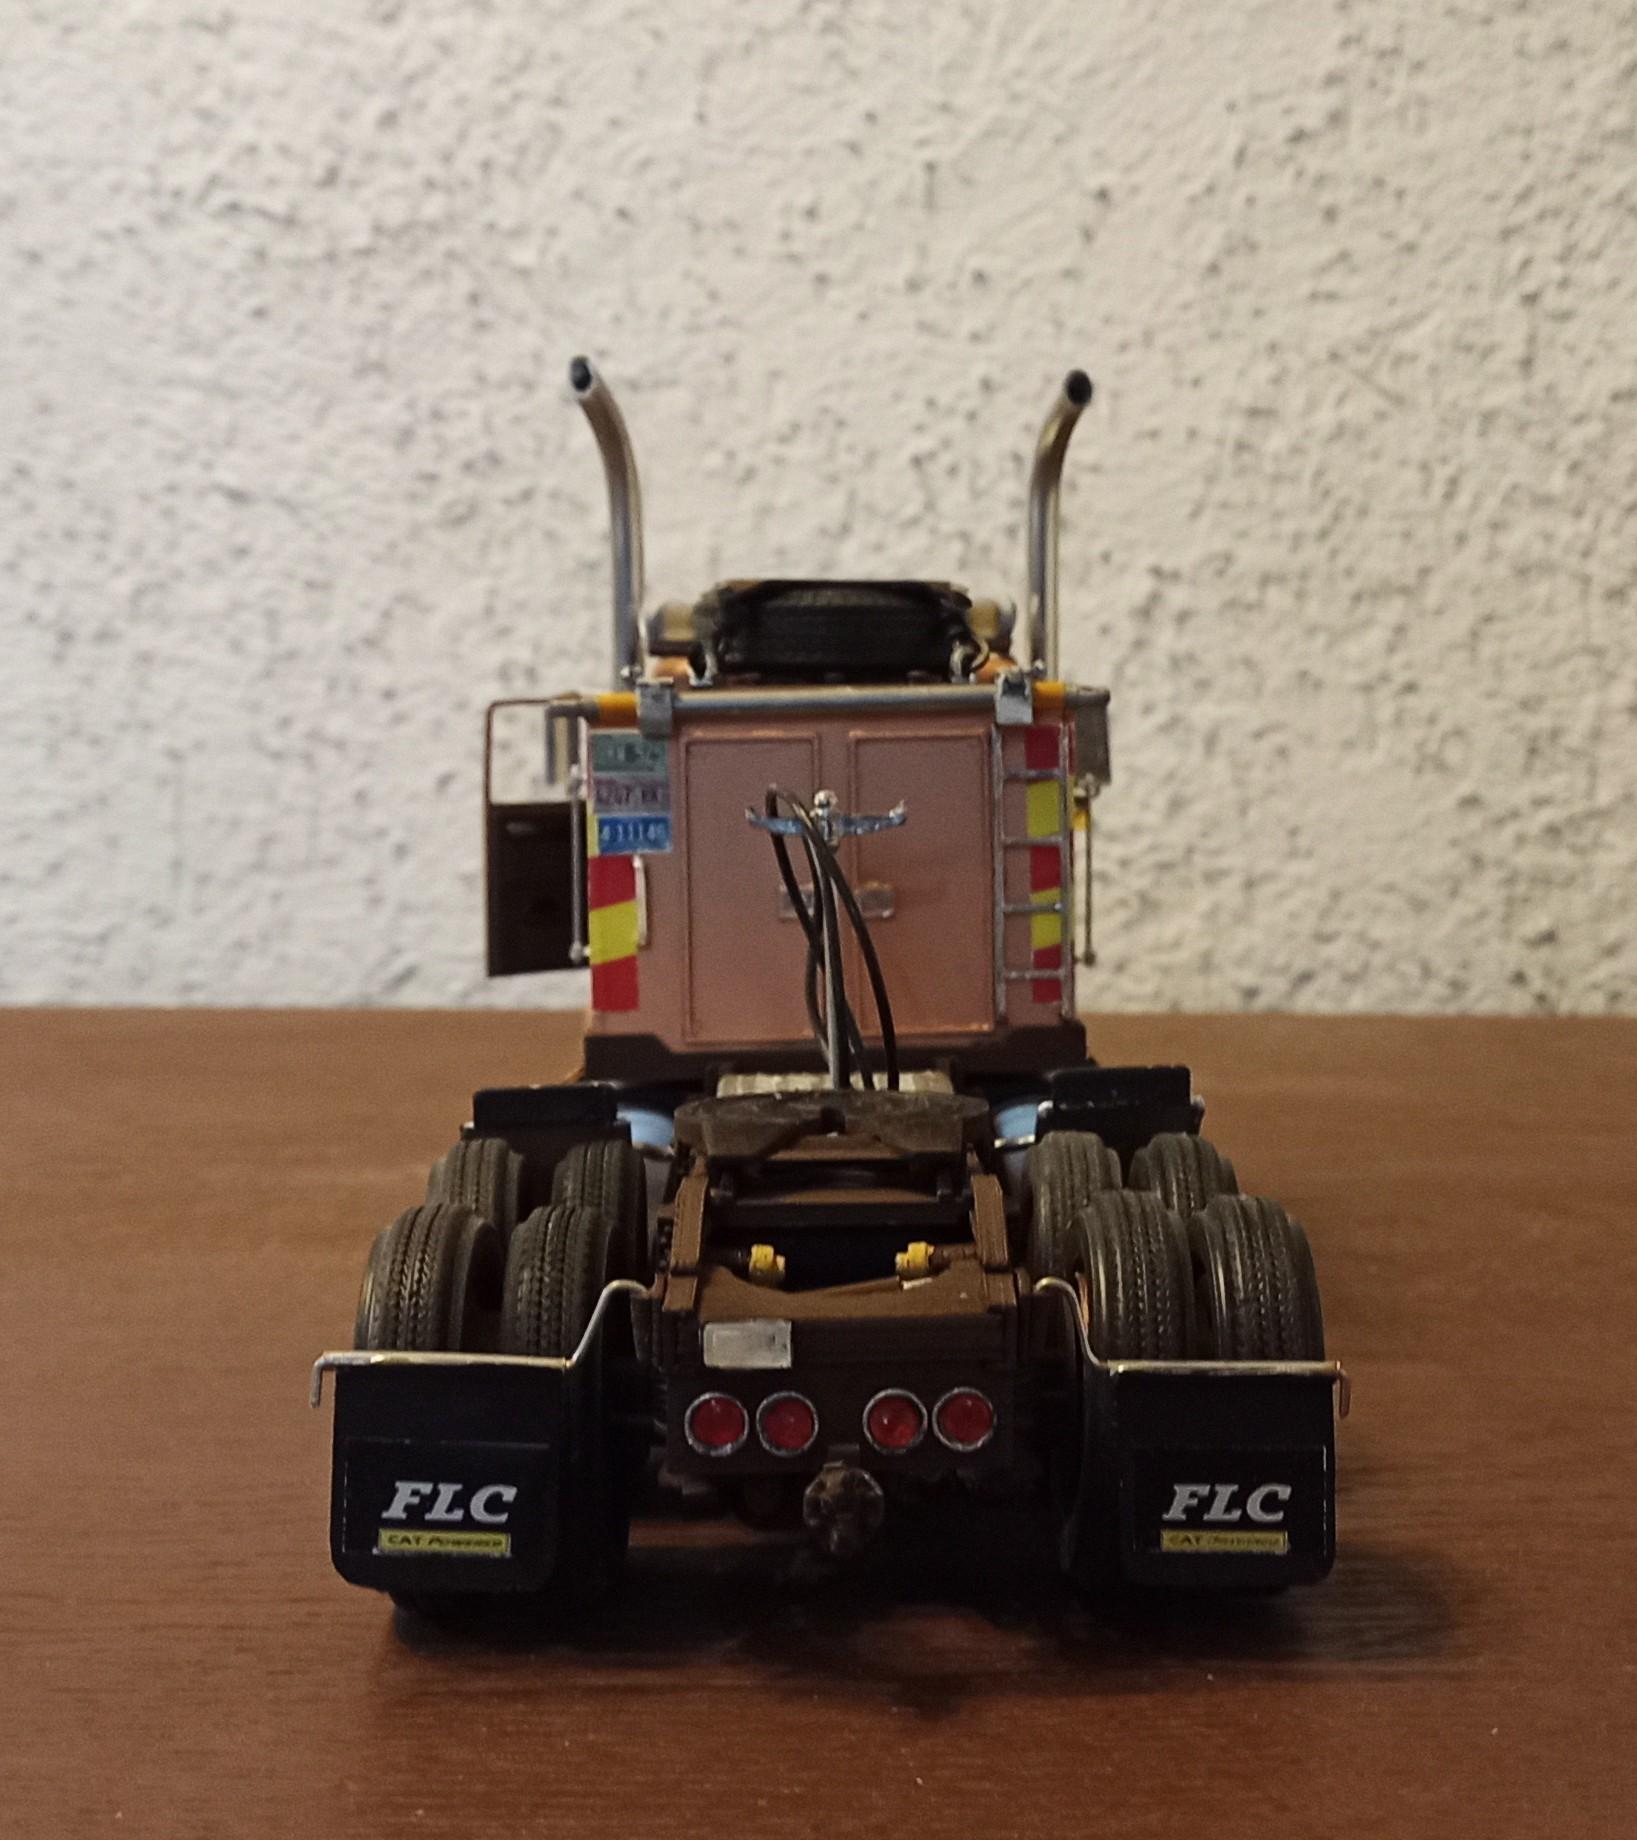
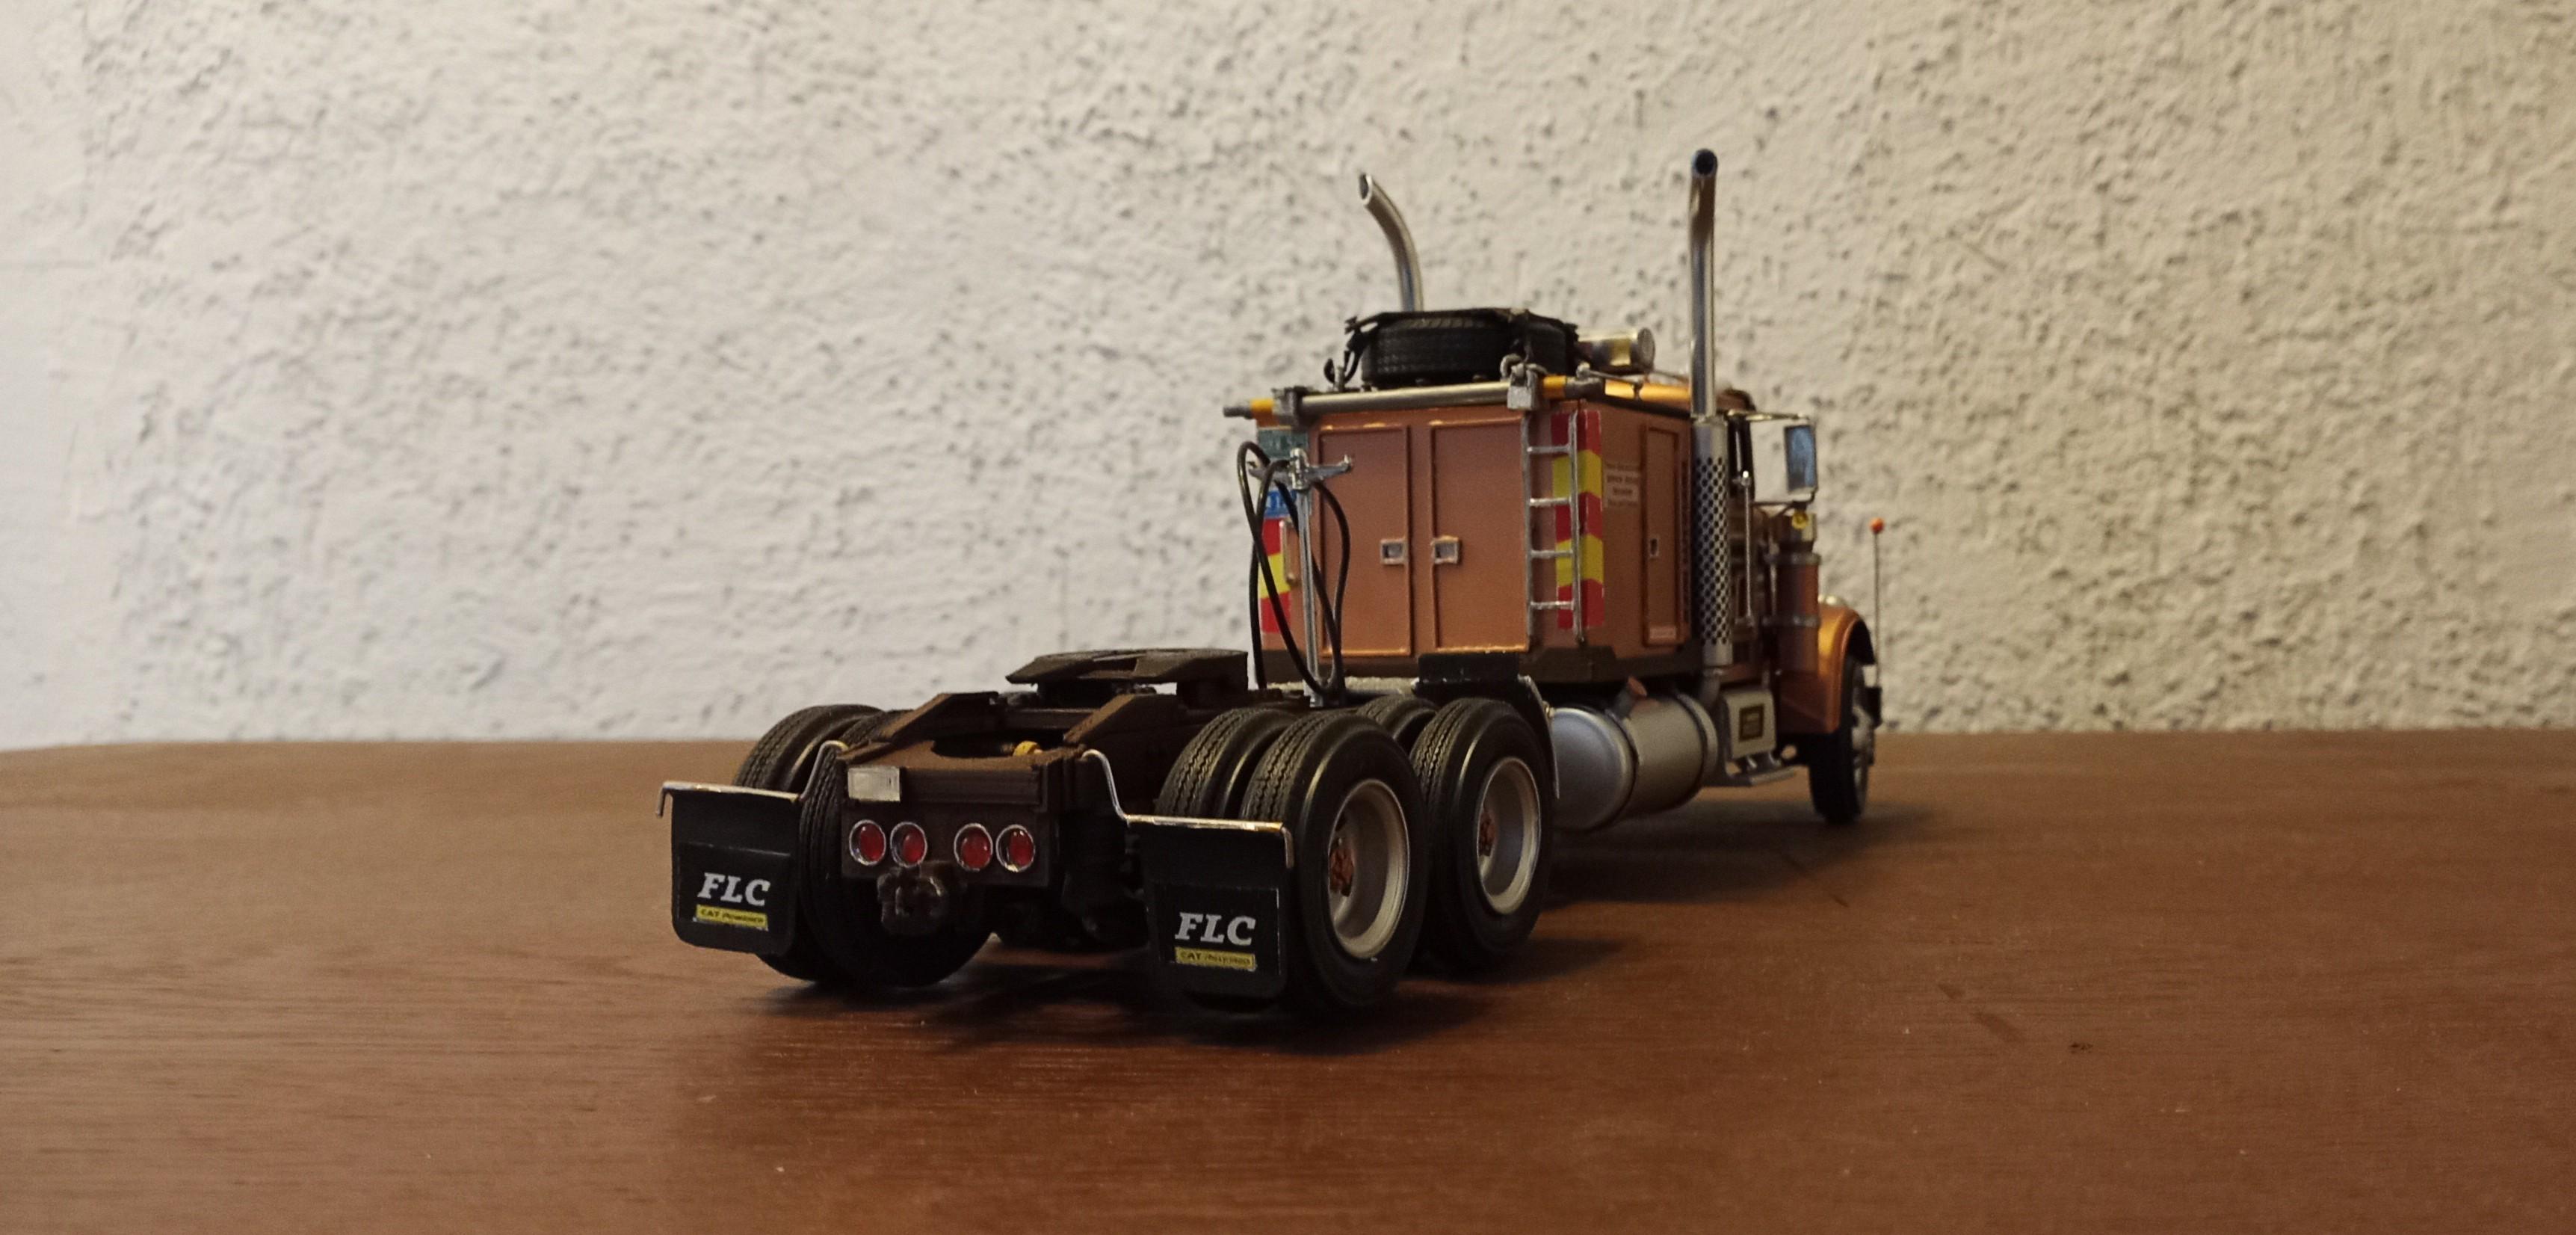
A few more decals and mud flaps in front. The doors will be mounted tomorrow!
-
Freightliner FLC
Jürgen M. replied to Jürgen M.'s topic in WIP: Model Trucks: Big Rigs and Heavy Equipment
Getting there: Tried to make the decals look a bit worn.
-
Freightliner FLC
Jürgen M. replied to Jürgen M.'s topic in WIP: Model Trucks: Big Rigs and Heavy Equipment
Thank you Gary! Nice of you to say that. I always enjoy hearing how others see it. Especially guys with your expertise! -
Freightliner FLC
Jürgen M. replied to Jürgen M.'s topic in WIP: Model Trucks: Big Rigs and Heavy Equipment
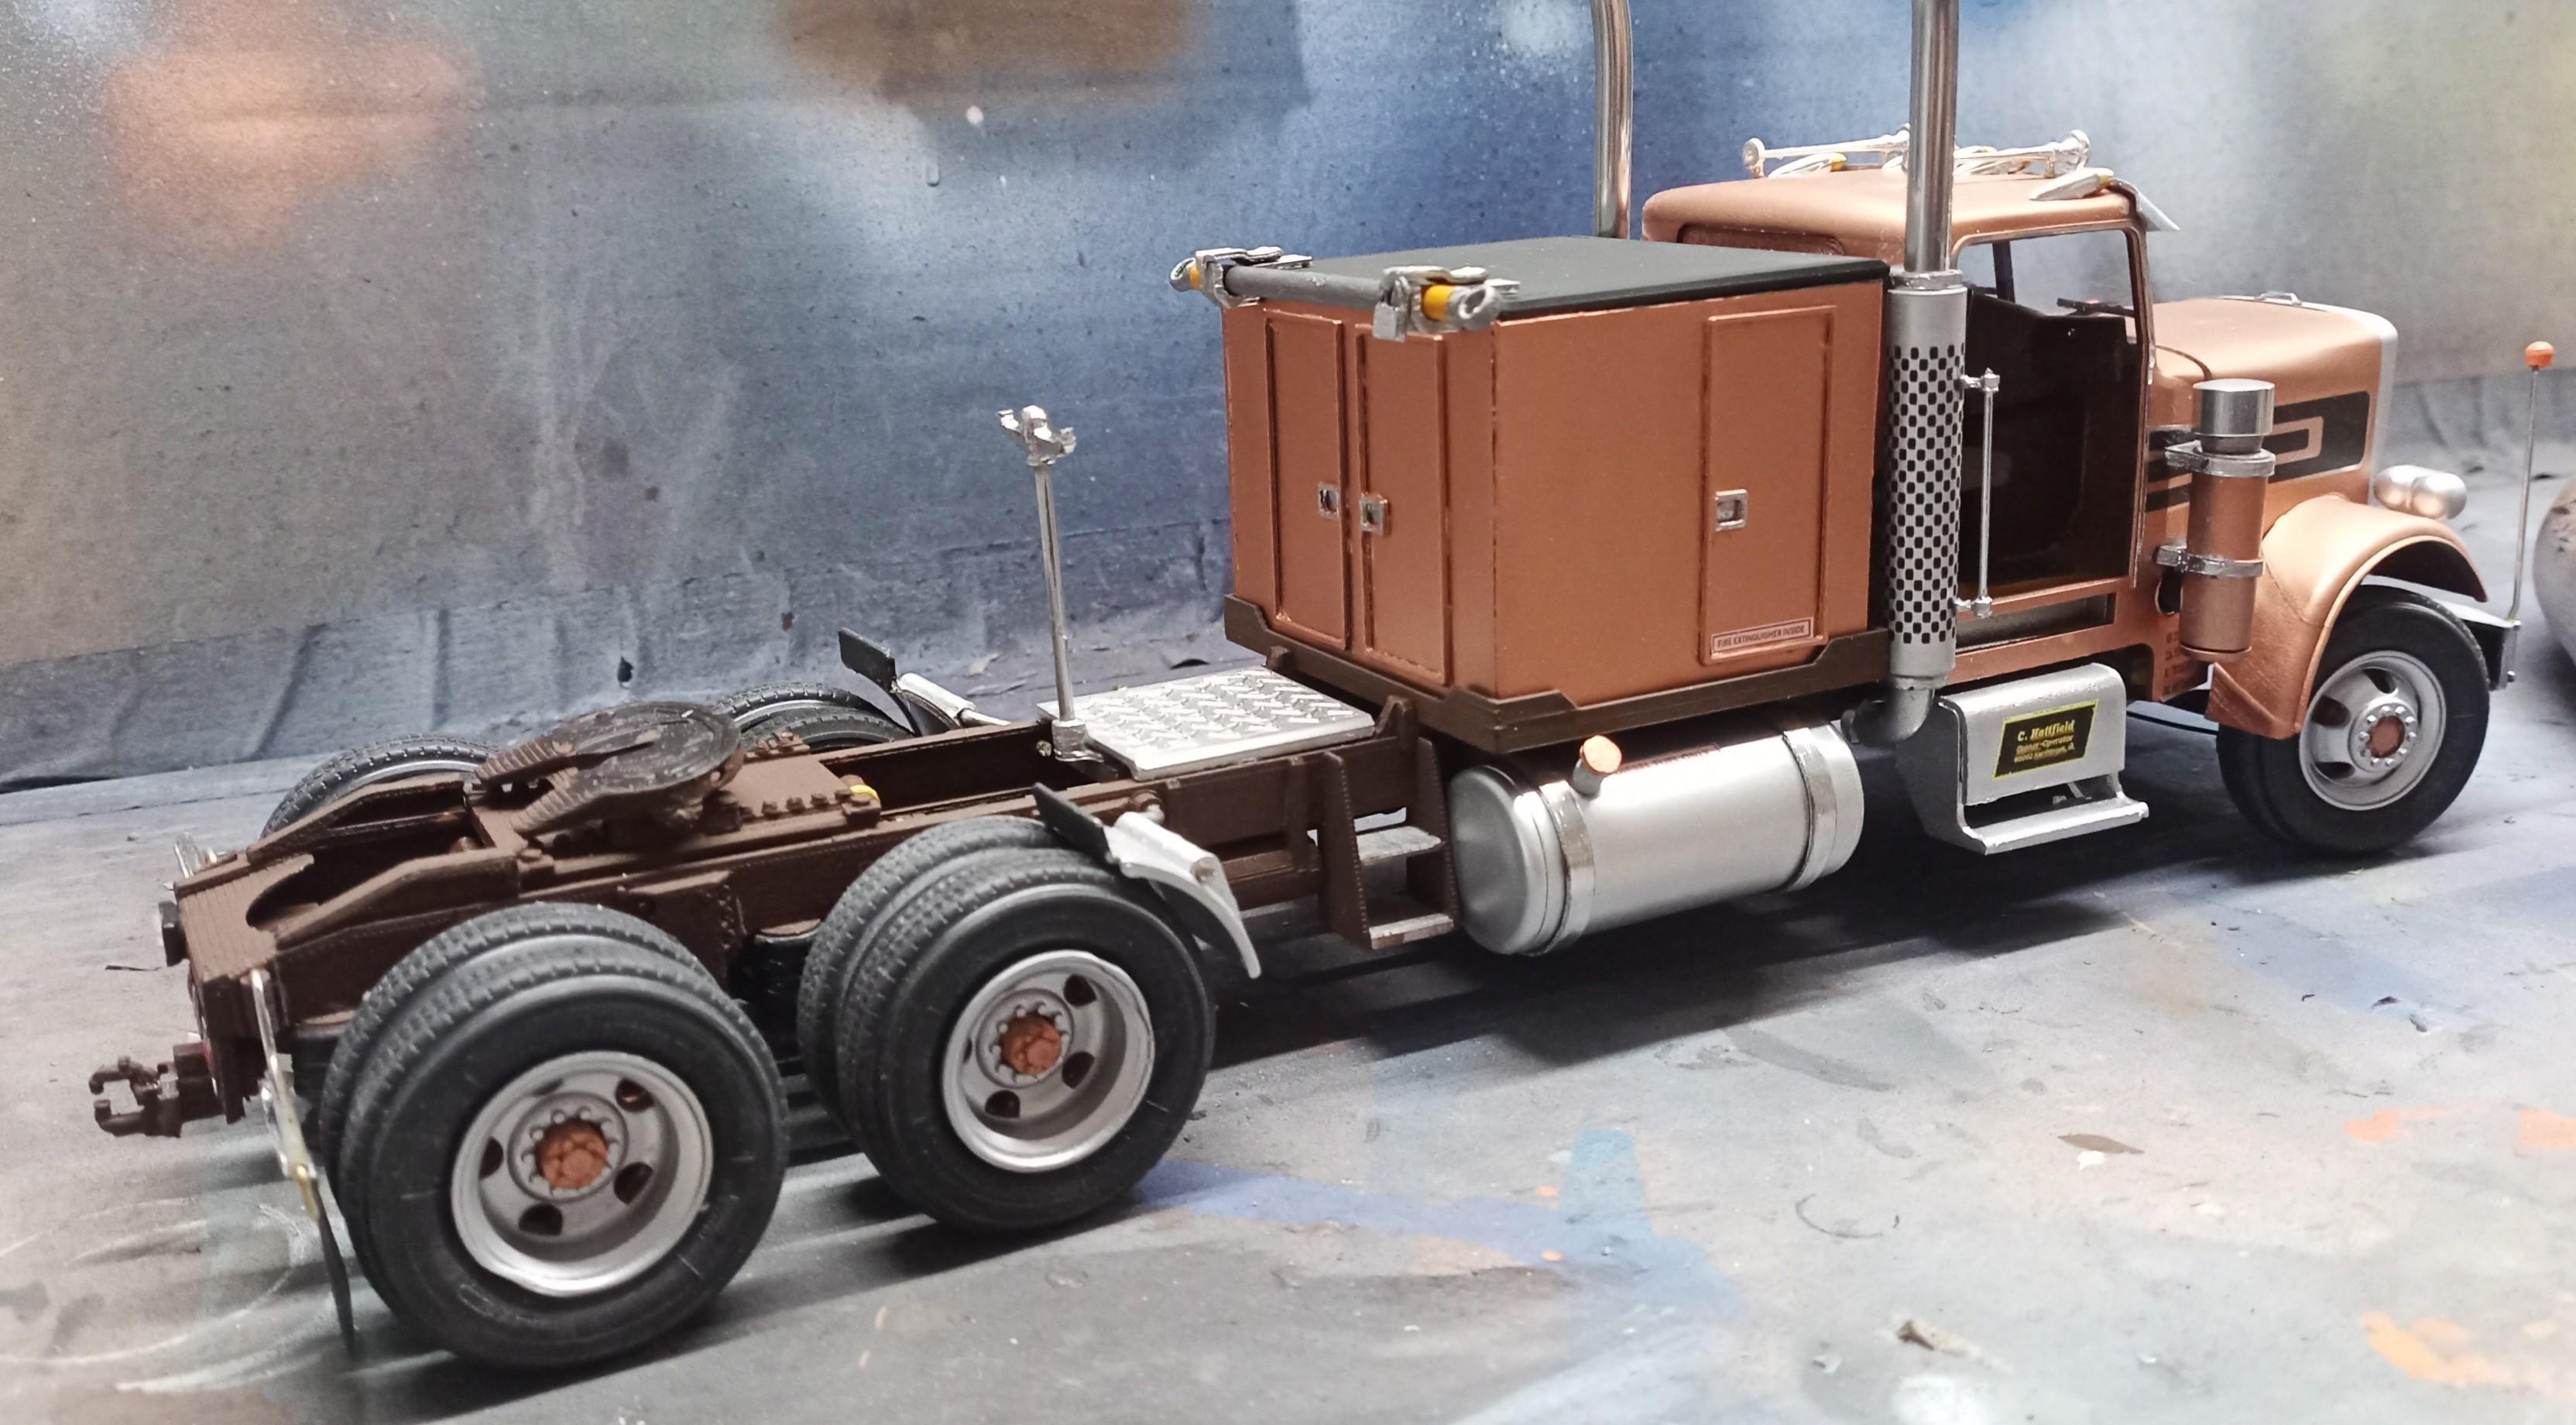
A few more parts added: Marker lights, a little grab handle, ... Mounted the tow bar up on the service box (including a padlock to secure it against theft! You never know!) and I thought that if it's supposed to be a break down helper a hitch would be a good idea. Hope to mount the doors today. Don't expect them to be functional. I made a serious mistake in the assembly sequence so I probably won't be able to hook them up with the hinges to make them work. I might give it a last try but my hands are just too big to fit in through the side window! 🙈
-
Freightliner FLC
Jürgen M. replied to Jürgen M.'s topic in WIP: Model Trucks: Big Rigs and Heavy Equipment
Finally got some paint on the service box! Also added a few small parts like wipers, sun visor, horns, hand rails. I'm still working on the mirrors and a few other things. It's the small stuff that takes most of the time.
-
Kenworth W-925 (mild custom)
Jürgen M. replied to Gary Chastain's topic in WIP: Model Trucks: Big Rigs and Heavy Equipment
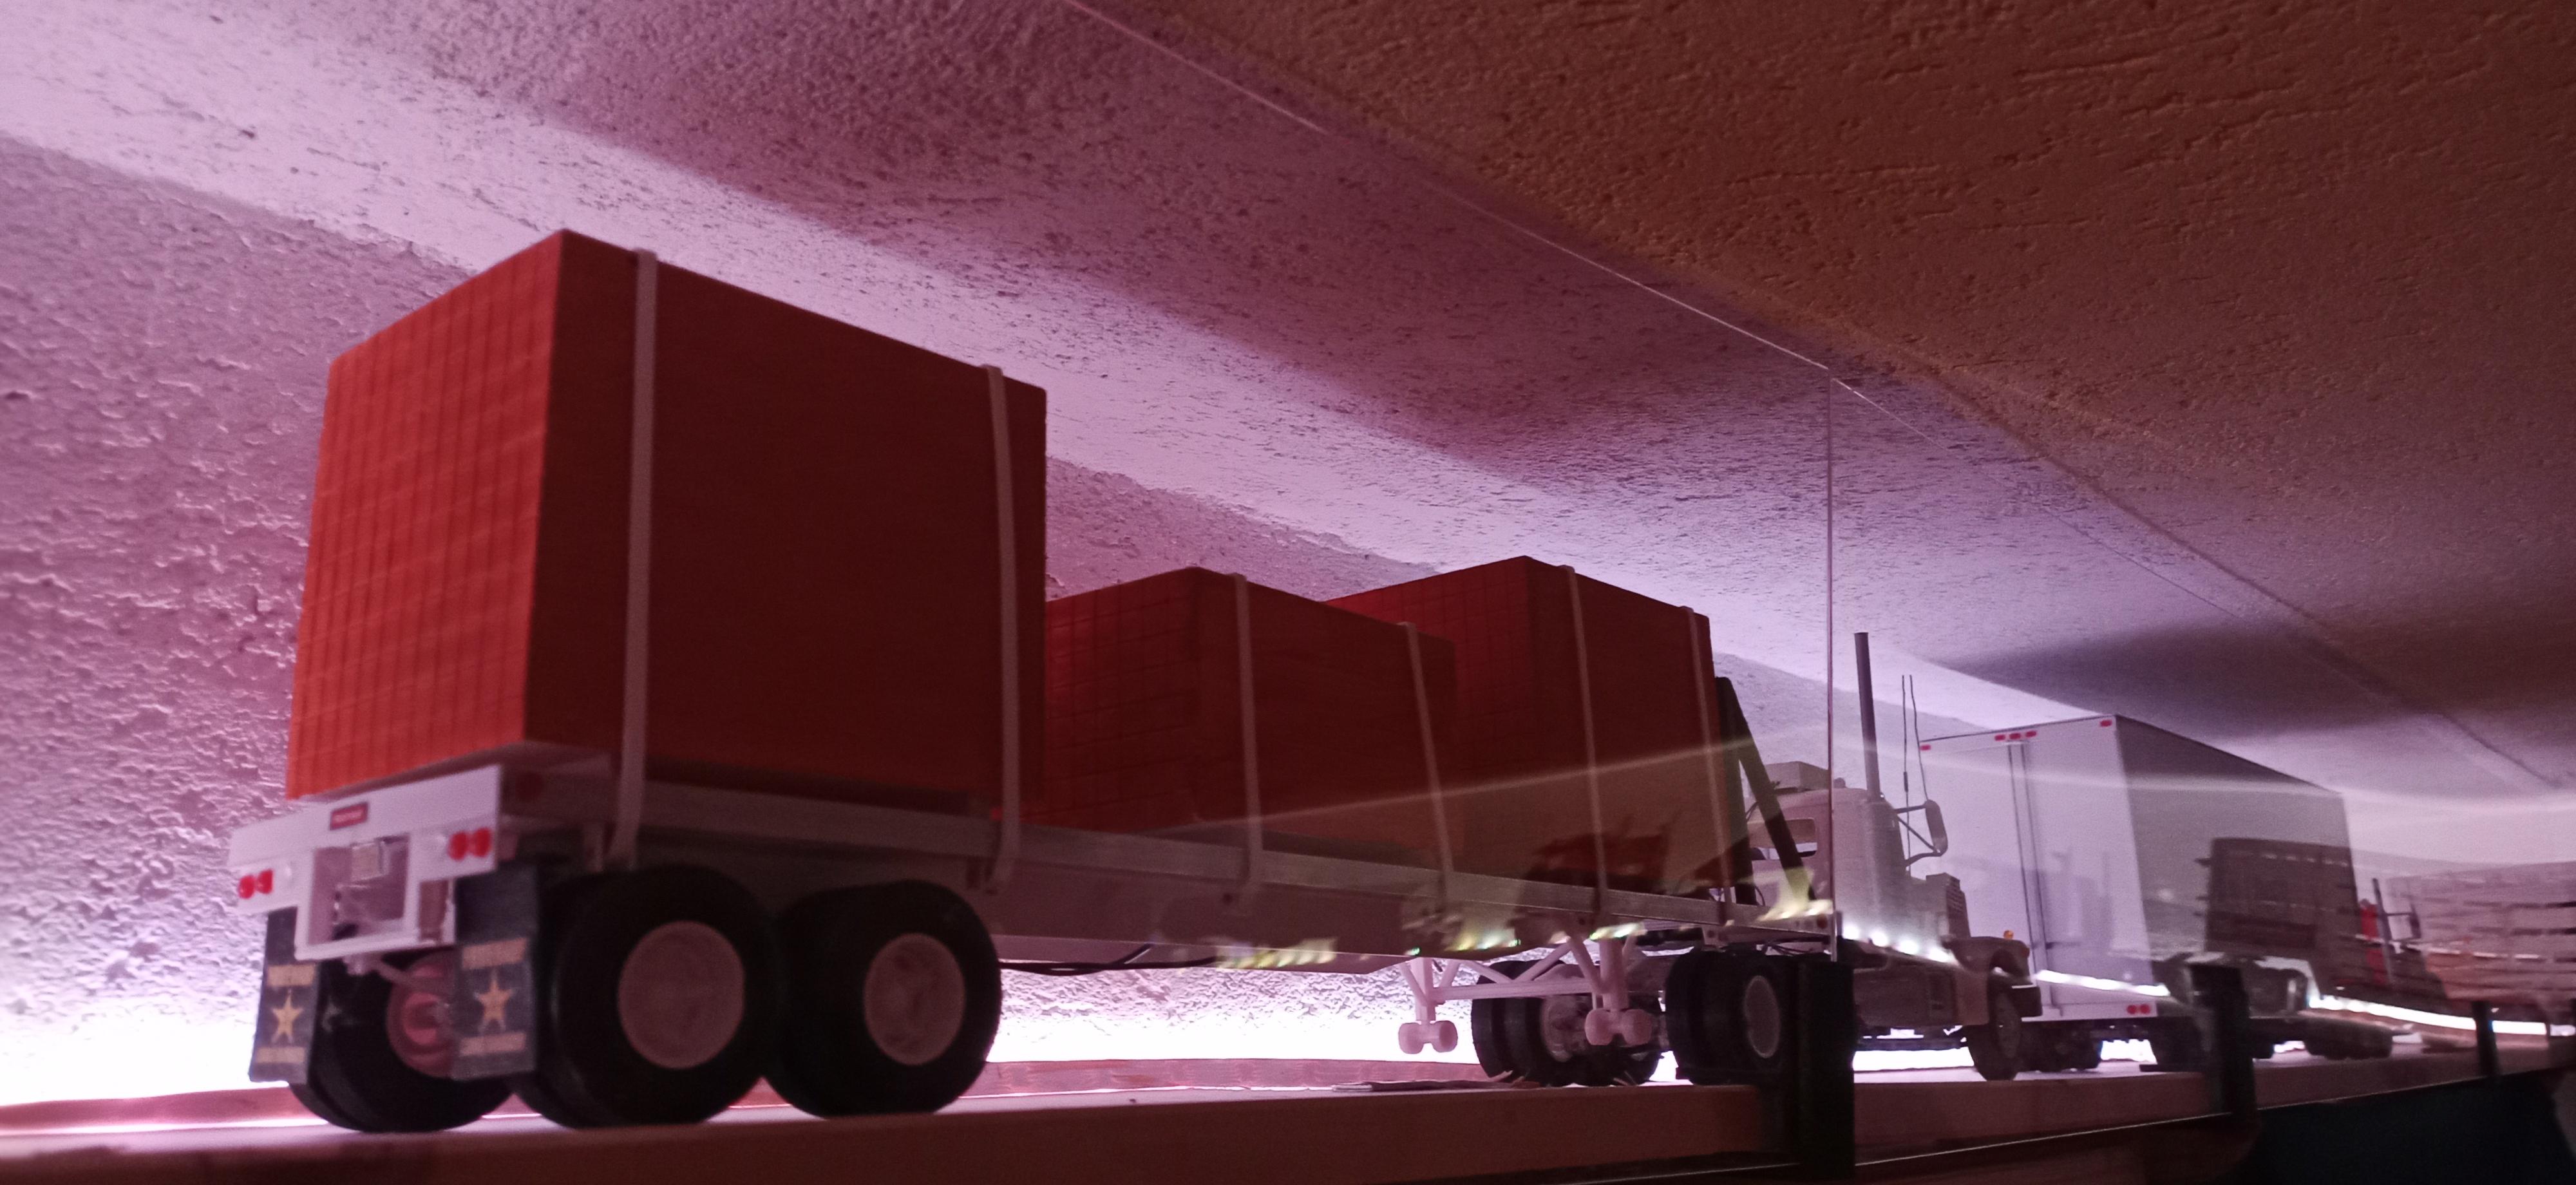
Thanks! I'm not trying to hijack here but I wanted to show you the straps I had printed for the Brockway (Convoy): They were measured to the mm, designed and printed. Of course they're nor flexible! Just thought it might be interesting! Sorry if anyone thinks I hijacked!
-
Kenworth W-925 (mild custom)
Jürgen M. replied to Gary Chastain's topic in WIP: Model Trucks: Big Rigs and Heavy Equipment
Looks awesome! What are you using as straps? I'm curious cause I always print them or I use cable ties! I'd love to discover new ideas! -
Freightliner FLC
Jürgen M. replied to Jürgen M.'s topic in WIP: Model Trucks: Big Rigs and Heavy Equipment
Thanks Ron. When you're building such a model you just tend to try and make everything fit perfectly and be straight. Of course that's not reality! The doors won't fit perfectly either and I'm afraid I might have to glue them in and just ... function. I'll see if I can make at least one door work. -
Freightliner FLC
Jürgen M. replied to Jürgen M.'s topic in WIP: Model Trucks: Big Rigs and Heavy Equipment
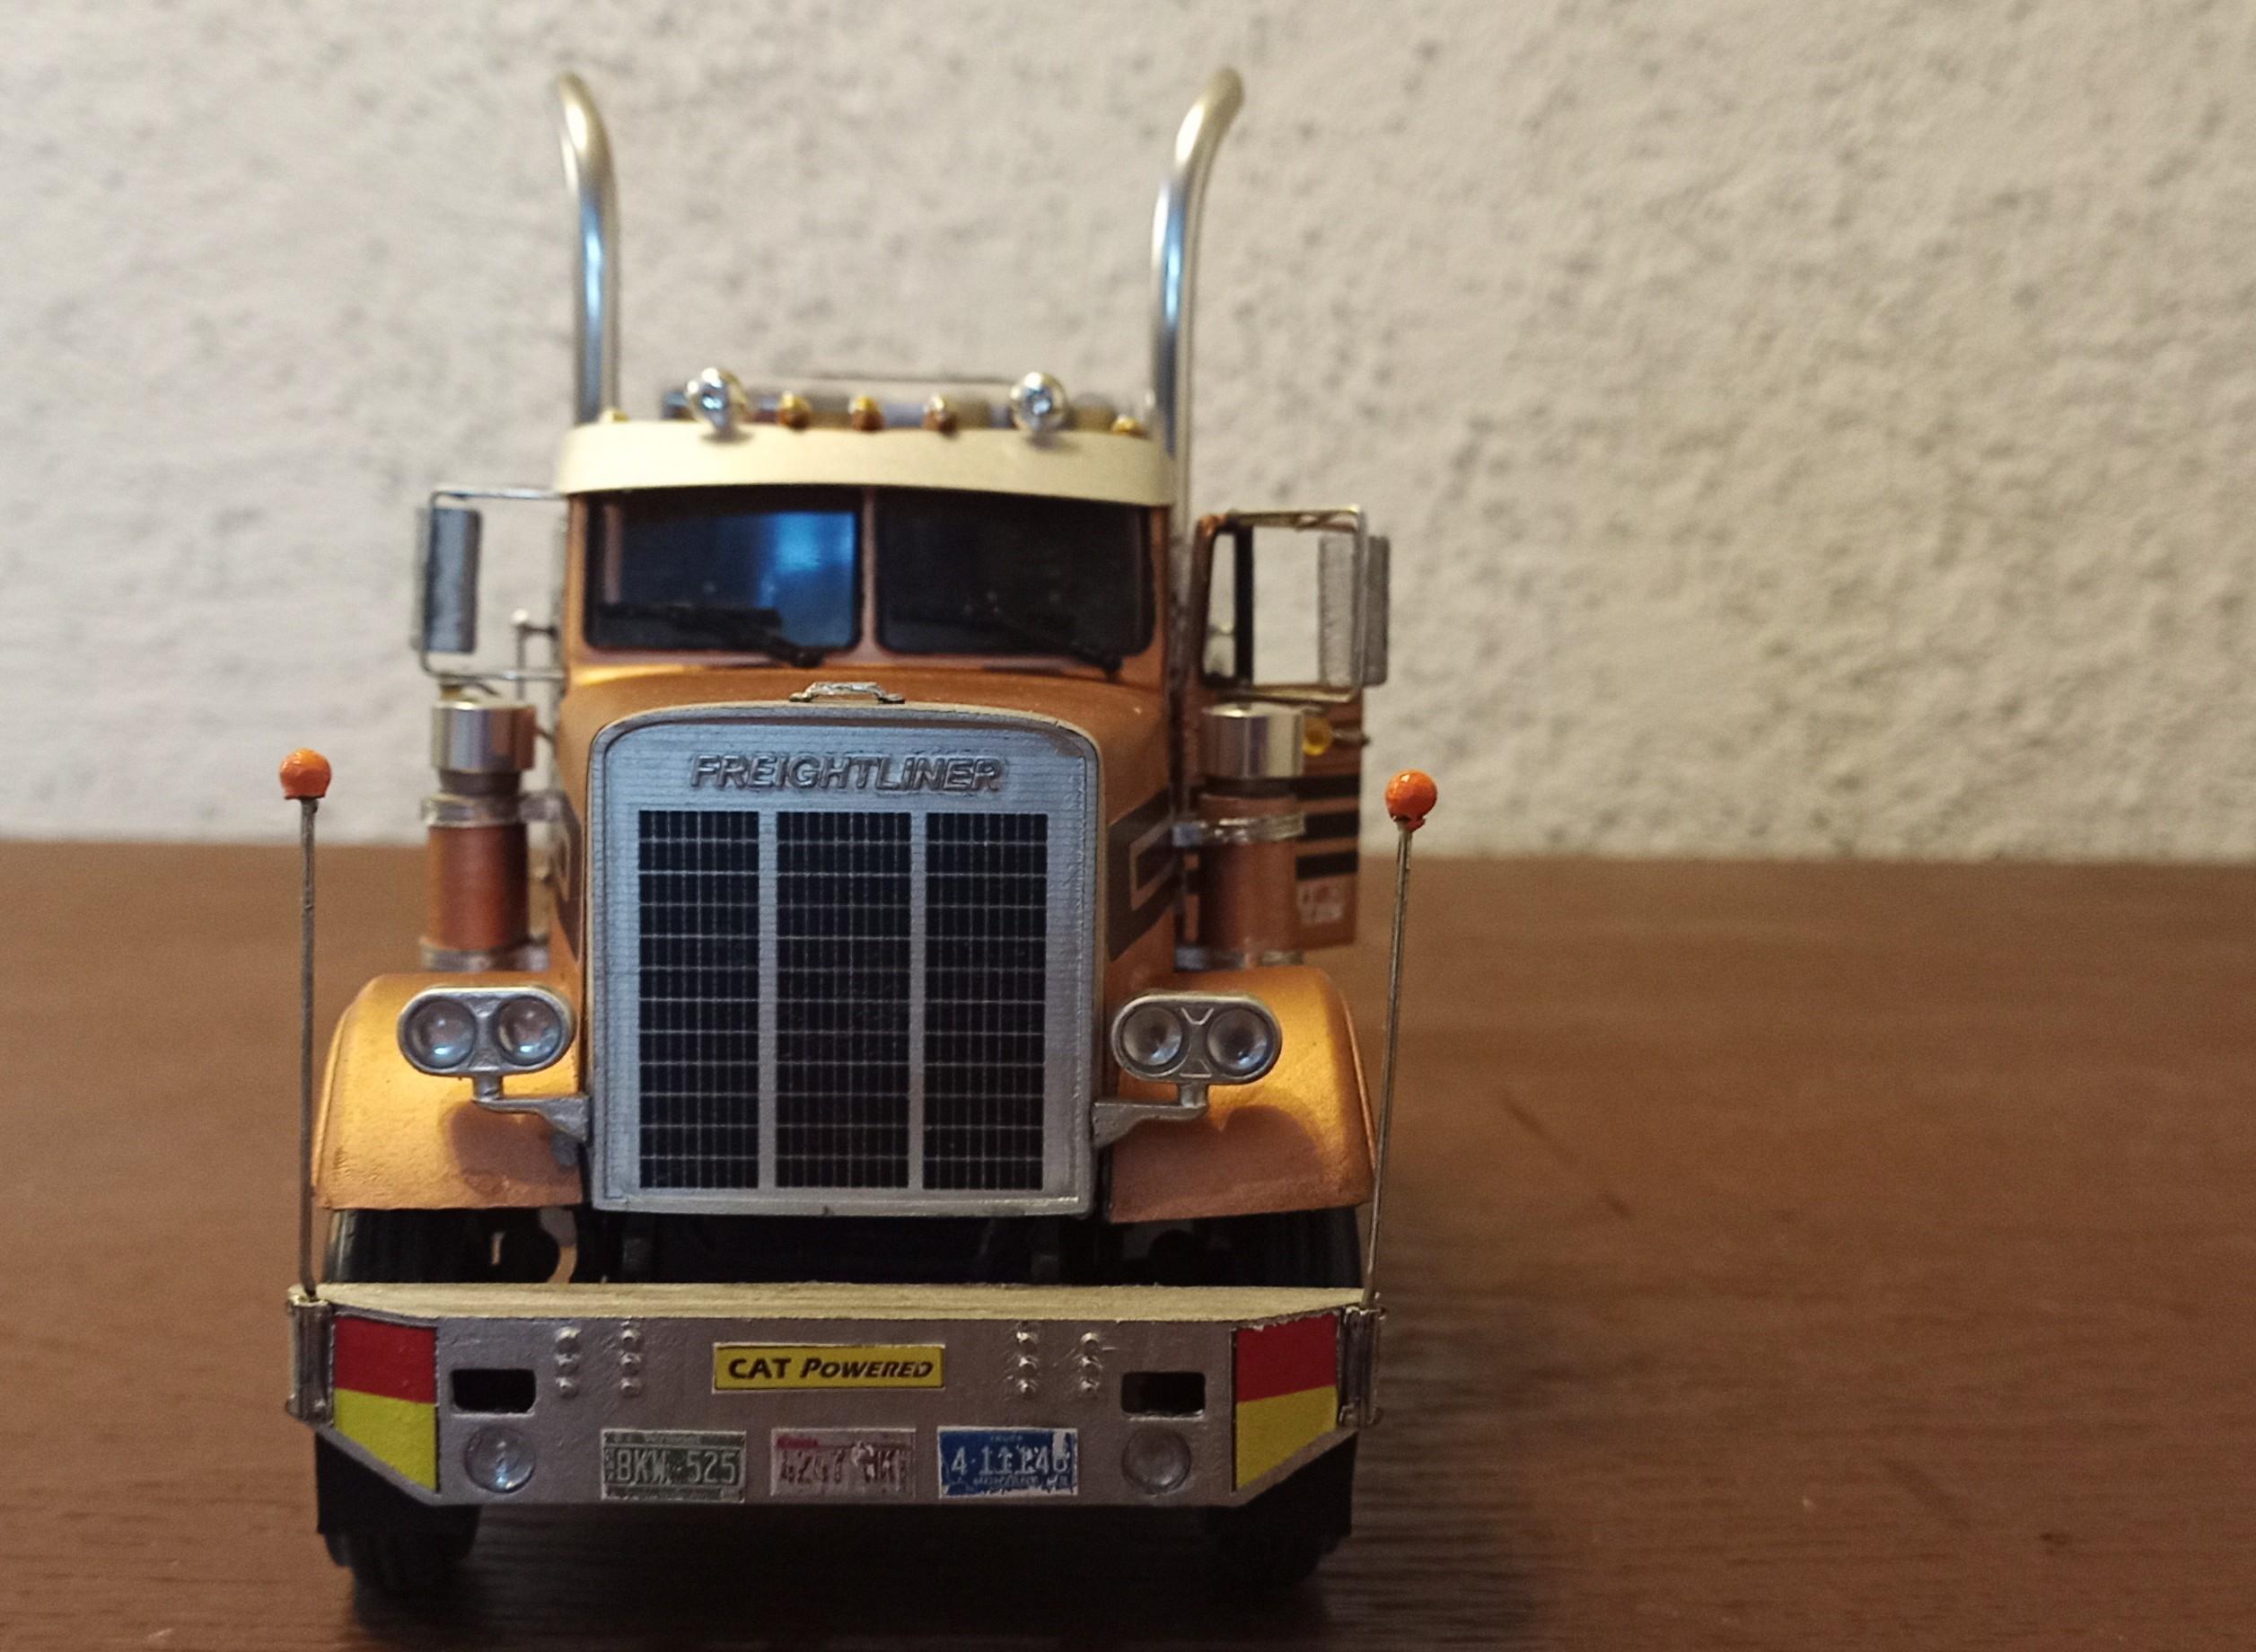
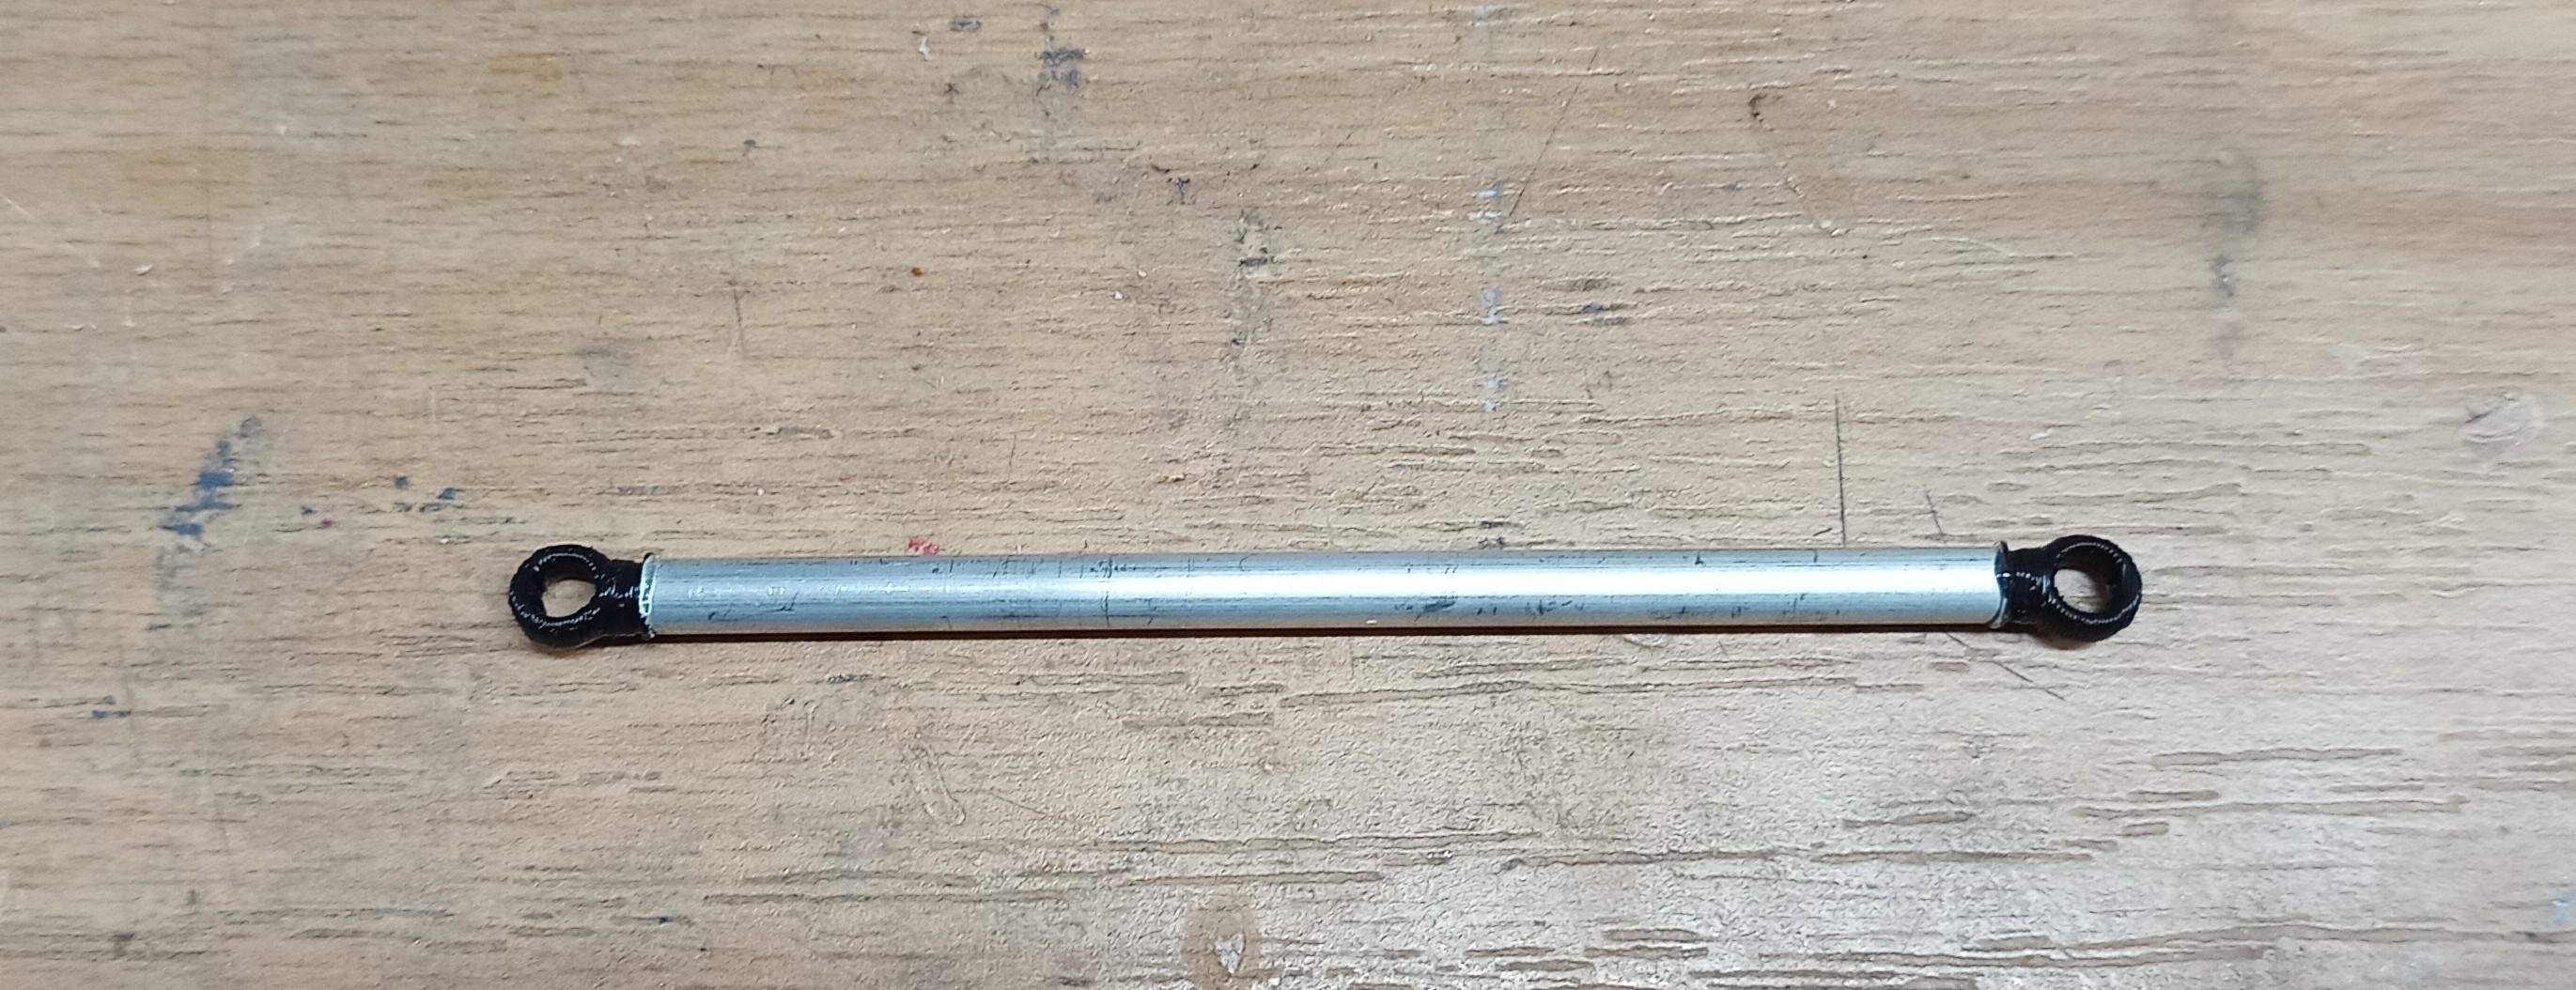
Made a tow bar. 4mm Aluminium rod and the ends are printed! Made these parking poles or whatever they're called. 1mm brass rod chromed with a pen. Brackets and balls are printed. The bumper is just stuck on, Not glued yet. Needs to go up a bit higher. Stacks are shortened by about 12mms.
-
Freightliner FLC
Jürgen M. replied to Jürgen M.'s topic in WIP: Model Trucks: Big Rigs and Heavy Equipment
Thanks Jeff! Perfection is for the shelf. I've seen hoods and other parts that don't really fit. I'm satisfied with the results of my efforts. Hope the rest works out too. Still have the doors to install. Won't be easy! -
Freightliner FLC
Jürgen M. replied to Jürgen M.'s topic in WIP: Model Trucks: Big Rigs and Heavy Equipment
Thanks Gary! I really appreciate your opinion. Your KW and trailer are fabulous and will be a real eye catcher. -
Freightliner FLC
Jürgen M. replied to Jürgen M.'s topic in WIP: Model Trucks: Big Rigs and Heavy Equipment
I might add some orange flashing lights on top of the service box. Also red and yellow signal decals. Don't know what they're called. My vision of this build is a service truck for broken down trucks on the highway or where ever. The fifth wheel is for towing trailers of non reparable trucks to a service point of some kind or to their destination. A tow bar and chains might also be added. -
Freightliner FLC
Jürgen M. replied to Jürgen M.'s topic in WIP: Model Trucks: Big Rigs and Heavy Equipment
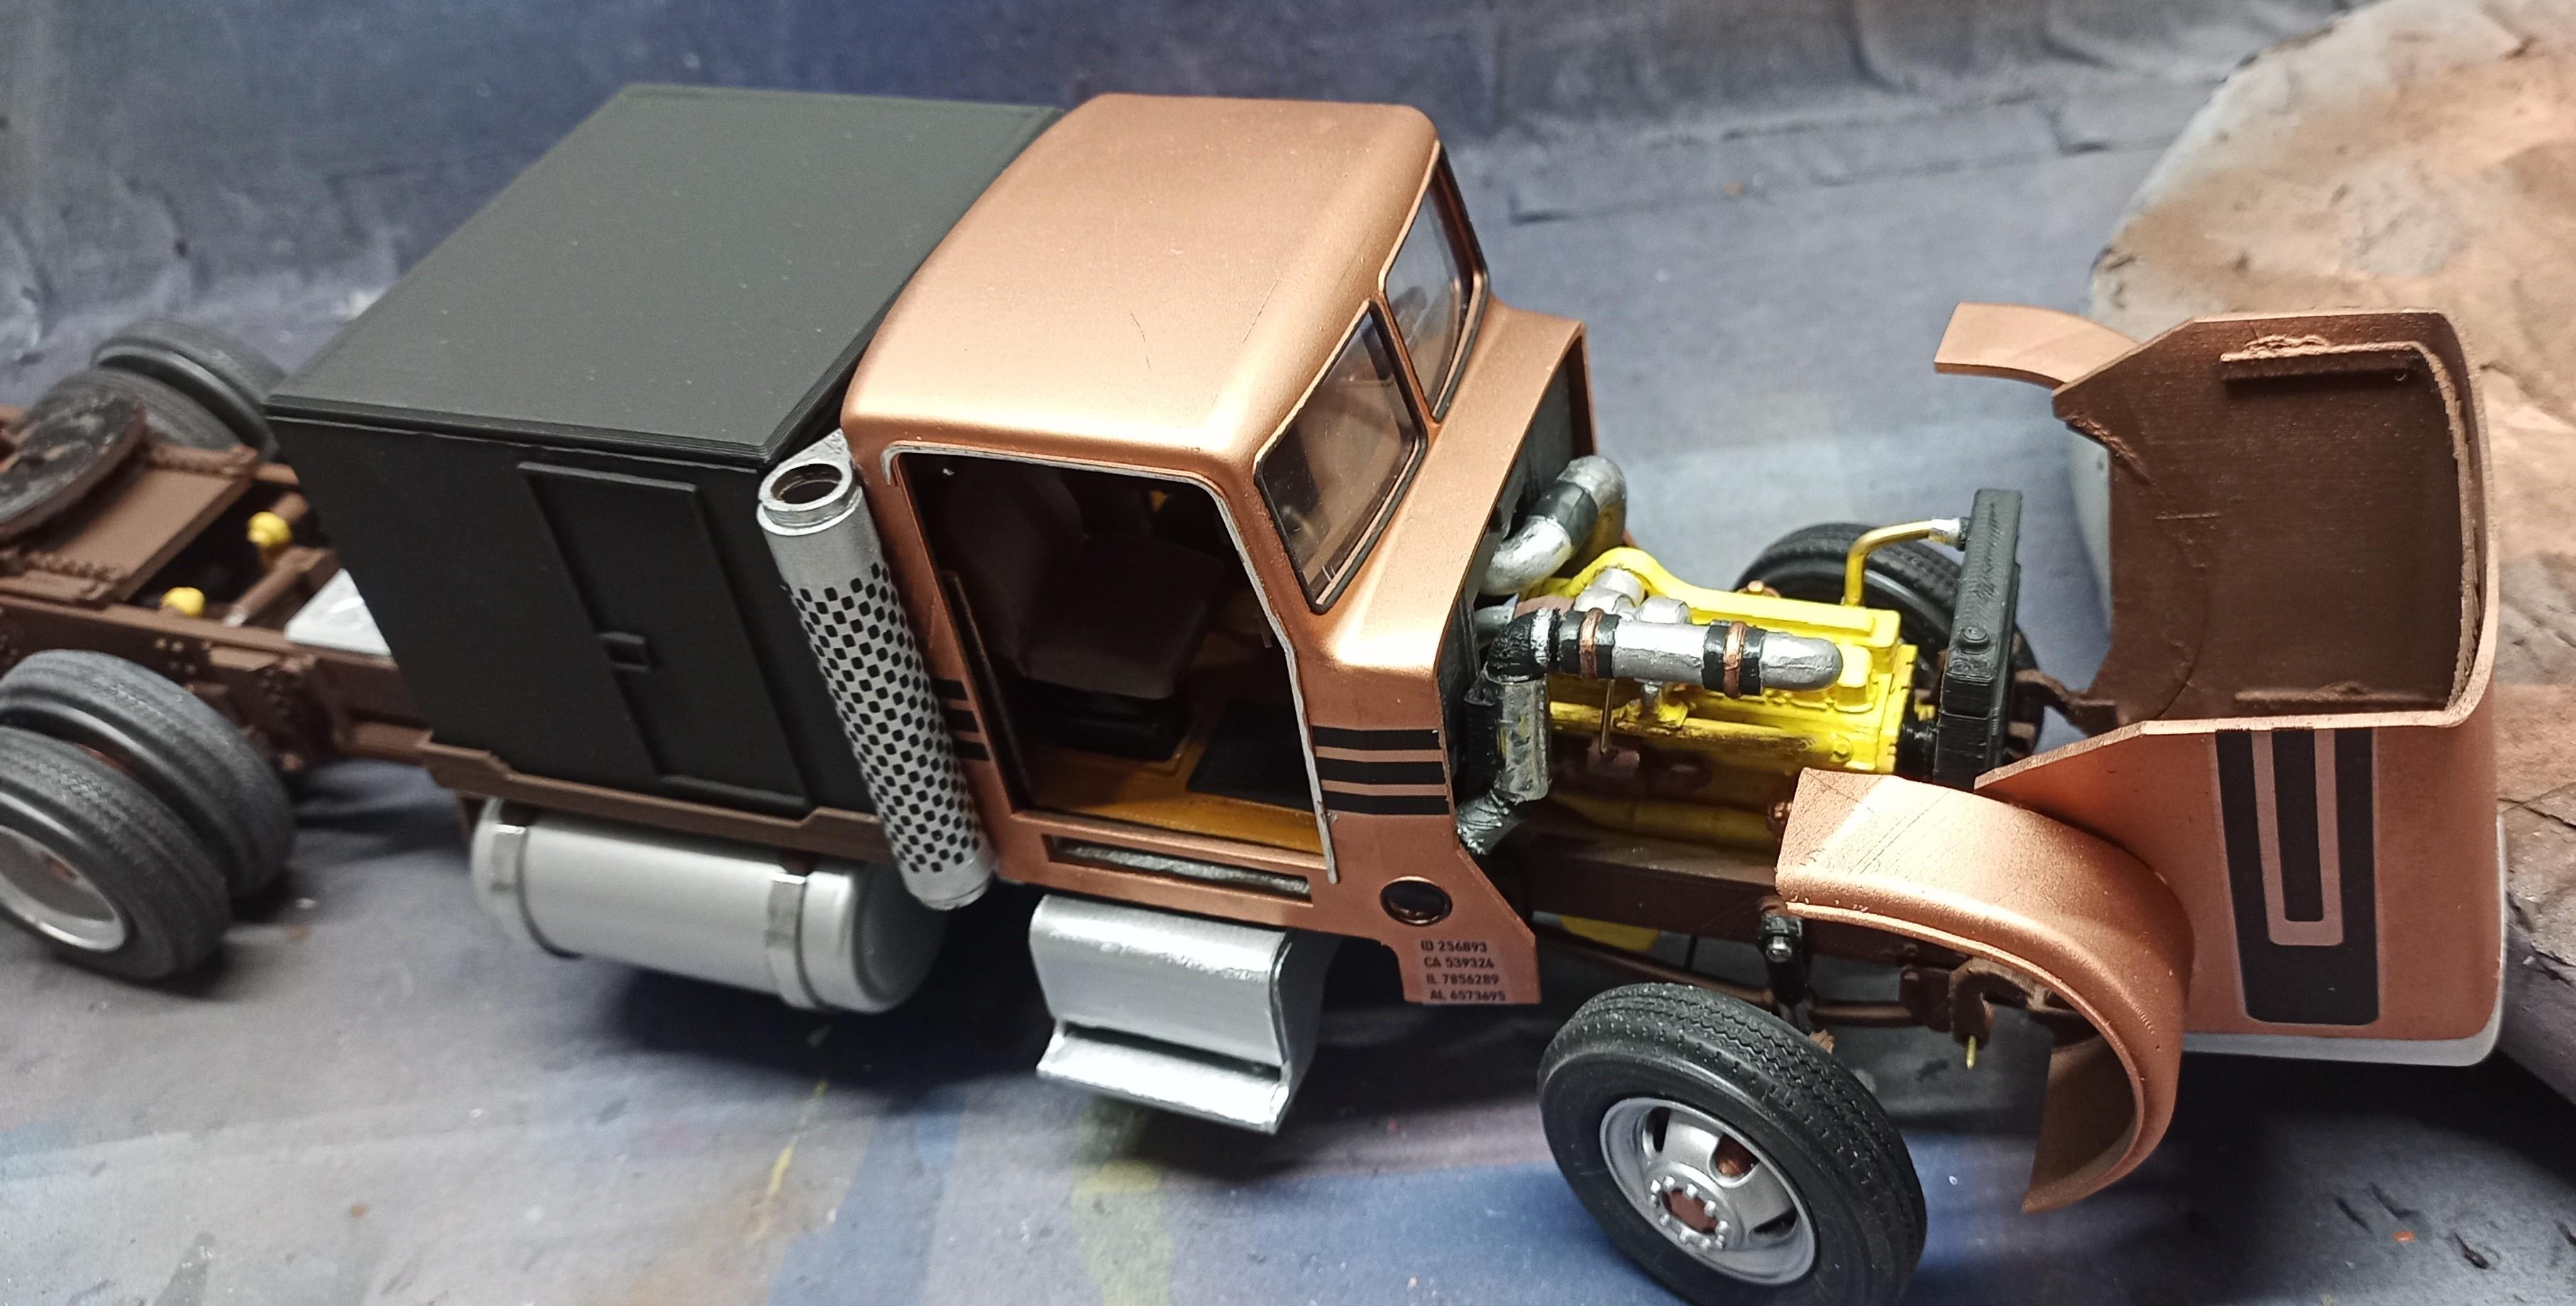
Thanks guys! I'm beginning to believe that it will be at least one of my best. Considering that I started out with the plans of a long distance truck with a big sleeper and now arrived at some sort of service truck trying to look a bit heavy duty. The hood is aligned as good as possible. Had to print new hinges cause I lost one and the other one showed some plastic deformation. Anyway, it took only 10 mins to print new ones and I was able to arrange them in a way that would allow the hood to close almost flush on both sides. It's not perfect but it's all I could do. The service box still has to be painted. Got the mud flaps hooked up: I might shorten the stacks a little bit before glueing them into place. I also got the hint that mud flaps in front would fit that bumper pretty nicely. I'll give it a try and see how it looks! Next will be attaching the doors, hoping they will be functional. If not, ...! Then bend the mirror brackets of 1mm brass rod. The mirrors will be made of three parts each. The shell, the 'glass' made of chromed styrene sheet and the frames printed and everything assembled like a sandwich.
-
Freightliner FLC
Jürgen M. replied to Jürgen M.'s topic in WIP: Model Trucks: Big Rigs and Heavy Equipment
I'm afraid I have to take the challenge of correcting the hood alignment now! I managed to remove the hinges from the hood and the bumper from the frame without breaking anything. So far so good! Next step is to tape the hood into the best possible position so I can find the perfect position of the hinges. Sounds easy, will not be! My biggest worries are that the tape will peel off the paint! 😬 Maybe I'll find a way to support the hood in a different way.
-
Freightliner FLC
Jürgen M. replied to Jürgen M.'s topic in WIP: Model Trucks: Big Rigs and Heavy Equipment
Some more parts added: Slowly getting there! Hope to get finished by next weekend! Still have to install the doors, scratch build the mirrors and brackets, paint the service box, ... and lots of small stuff!
-
Freightliner FLC
Jürgen M. replied to Jürgen M.'s topic in WIP: Model Trucks: Big Rigs and Heavy Equipment
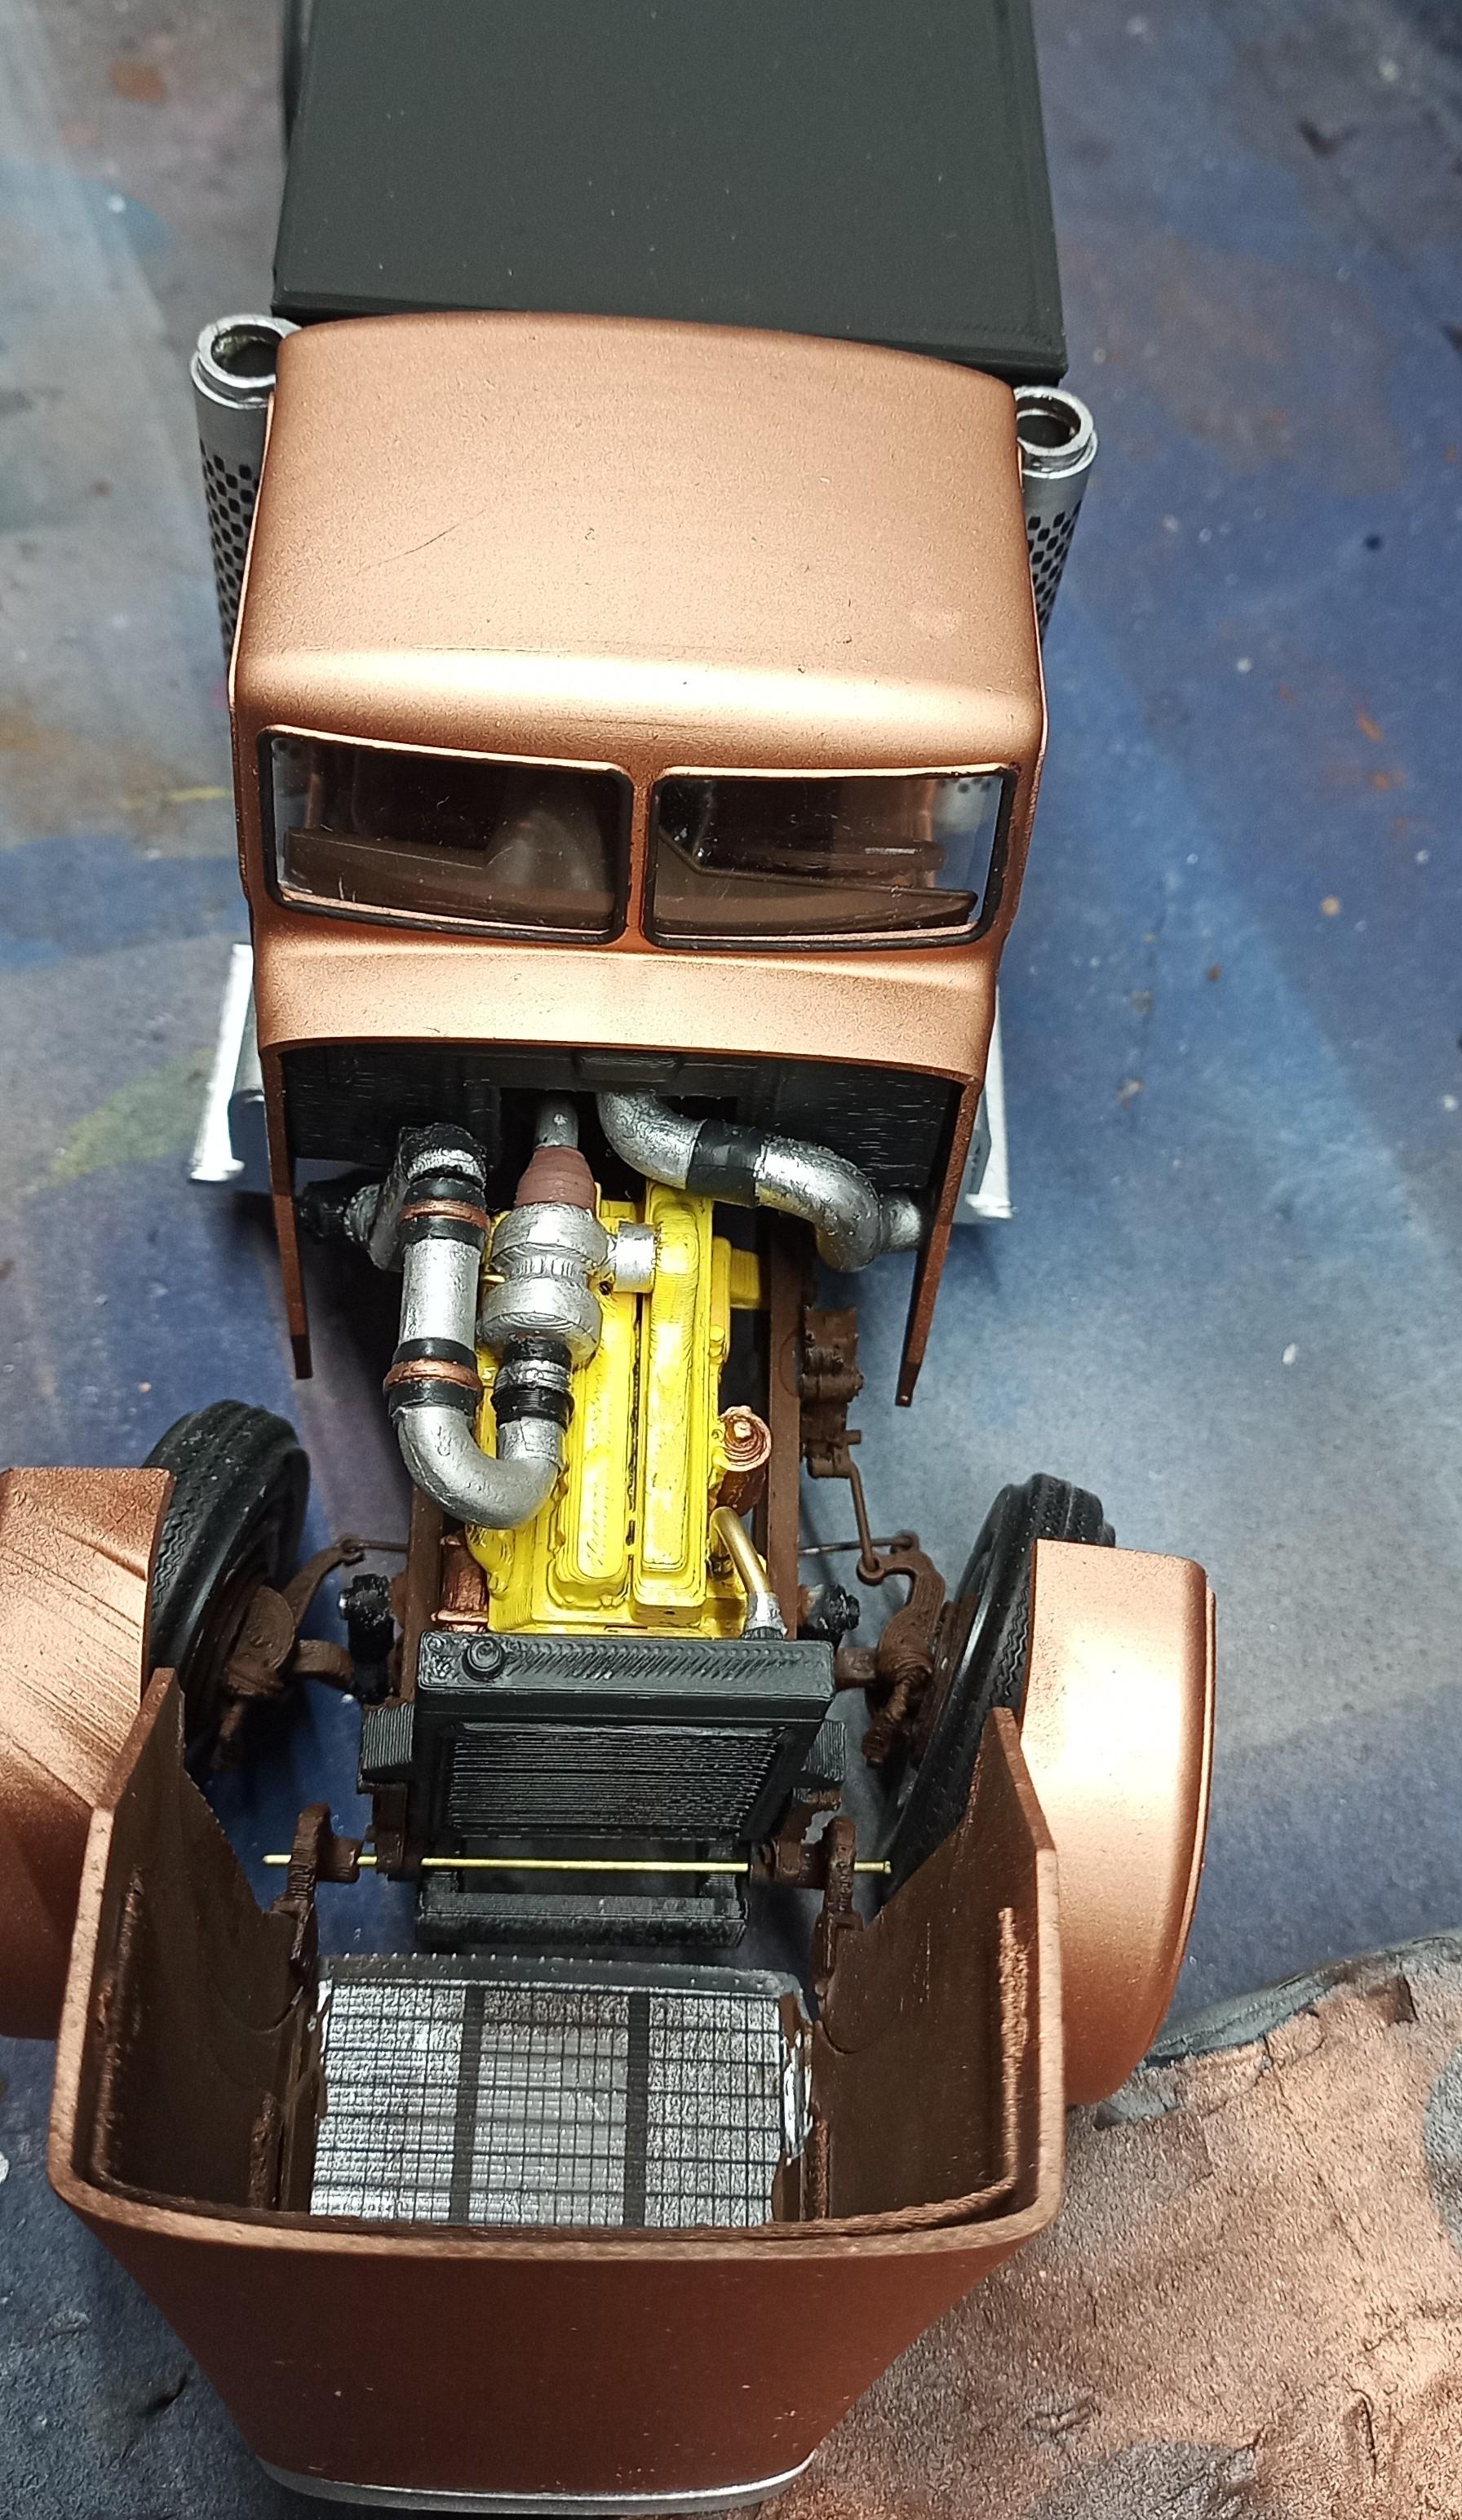
Air cleaners are mounted. The left one I'll have to take off again. Don't like the looks of the brackets. (That's why I'm only showing the other side) 😉 Stacks are just stuck in, not glued yet.
-
Freightliner FLC
Jürgen M. replied to Jürgen M.'s topic in WIP: Model Trucks: Big Rigs and Heavy Equipment
A bit more progress: Plumbing from air cleaners to cab and turbo charger mounted. Stack heat shields also mounted as well as the side steps. I'll leave the hood alignment till shortly before completion. I noticed a bit of a twist in the chassis which will make it complicated. Might have to adjust the hood hinges differently on each side! The doors will be a challenge too. I have to work on a different sequence concerning the mounting of the doors and hinges. Worst case would be to take off the cab again and remove the dash and steering wheel. Then mount the hinges and doors, then remount dash and steering wheel when the interior is back at its place. Hope to avoid that.