CA Whitecloud
-
Posts
358 -
Joined
-
Last visited
Content Type
Profiles
Forums
Events
Gallery
Everything posted by CA Whitecloud
-
 Love that Corvette.
 -
How on earth did you have a photo of the exact part and placement on the very same kit so readily available? Boggles the mind. ?
- 39,081 replies
-
- 2
-

-
- johan
- glue bombs
- (and 1 more)
-
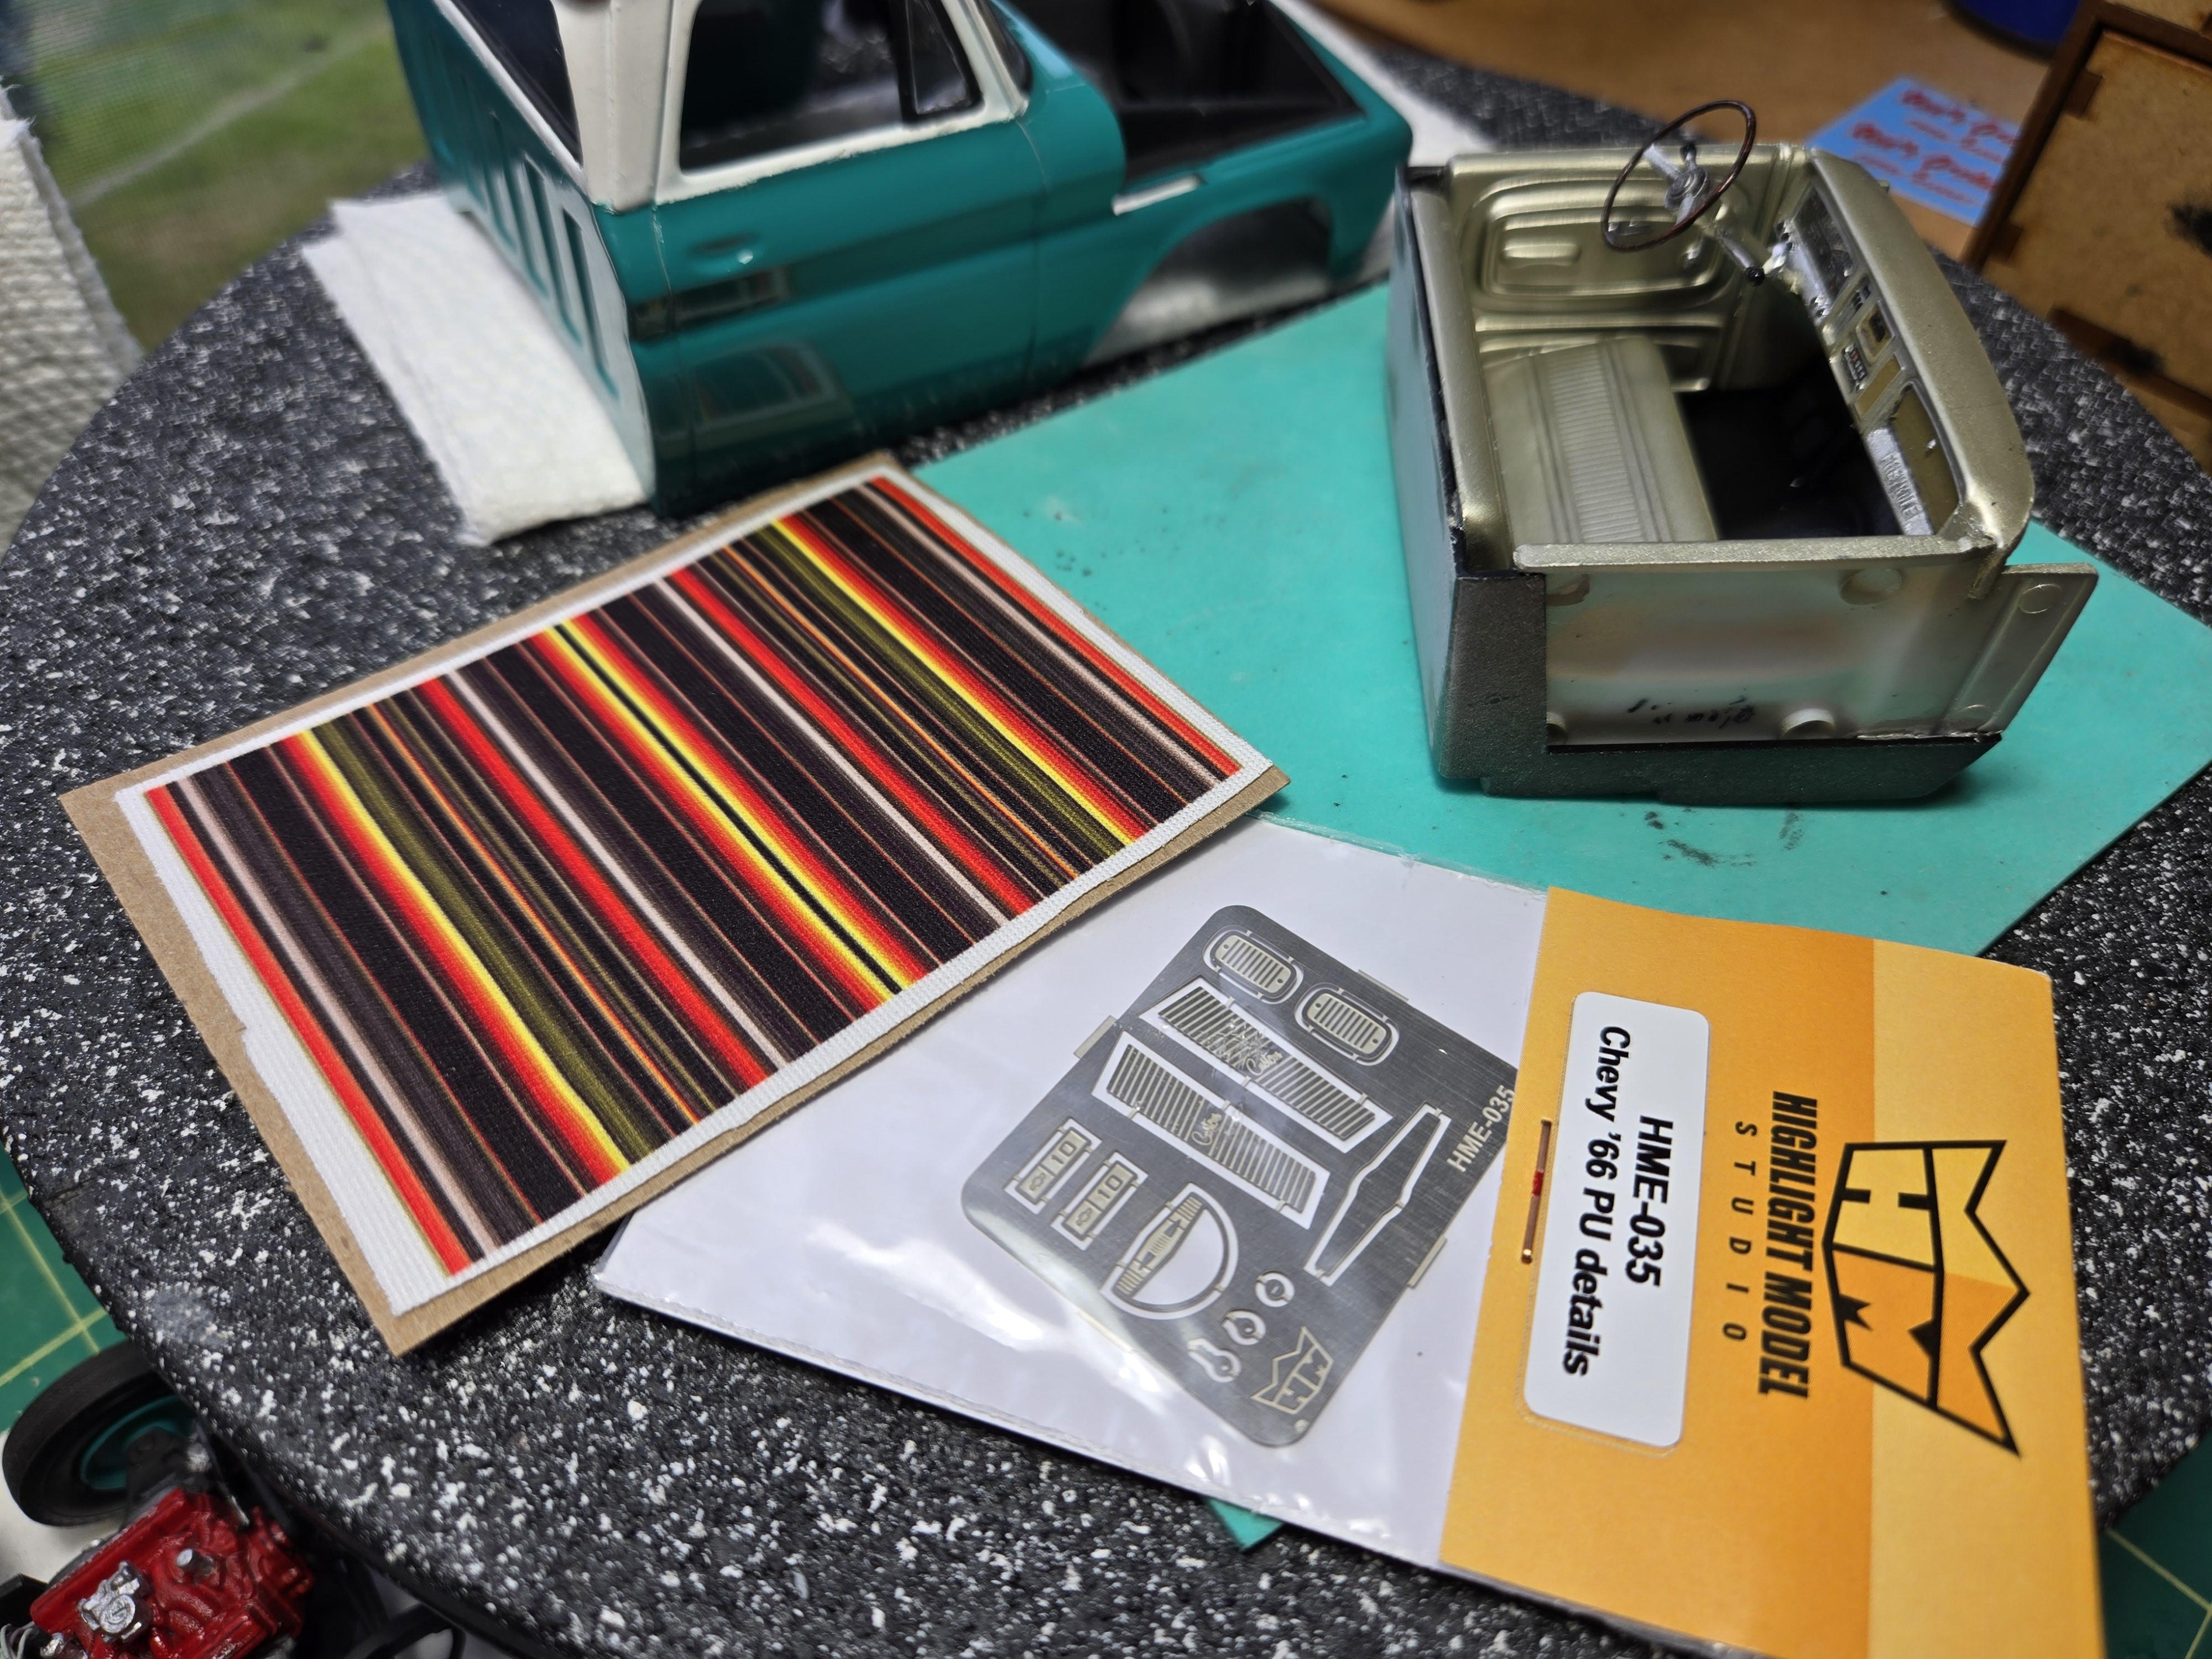
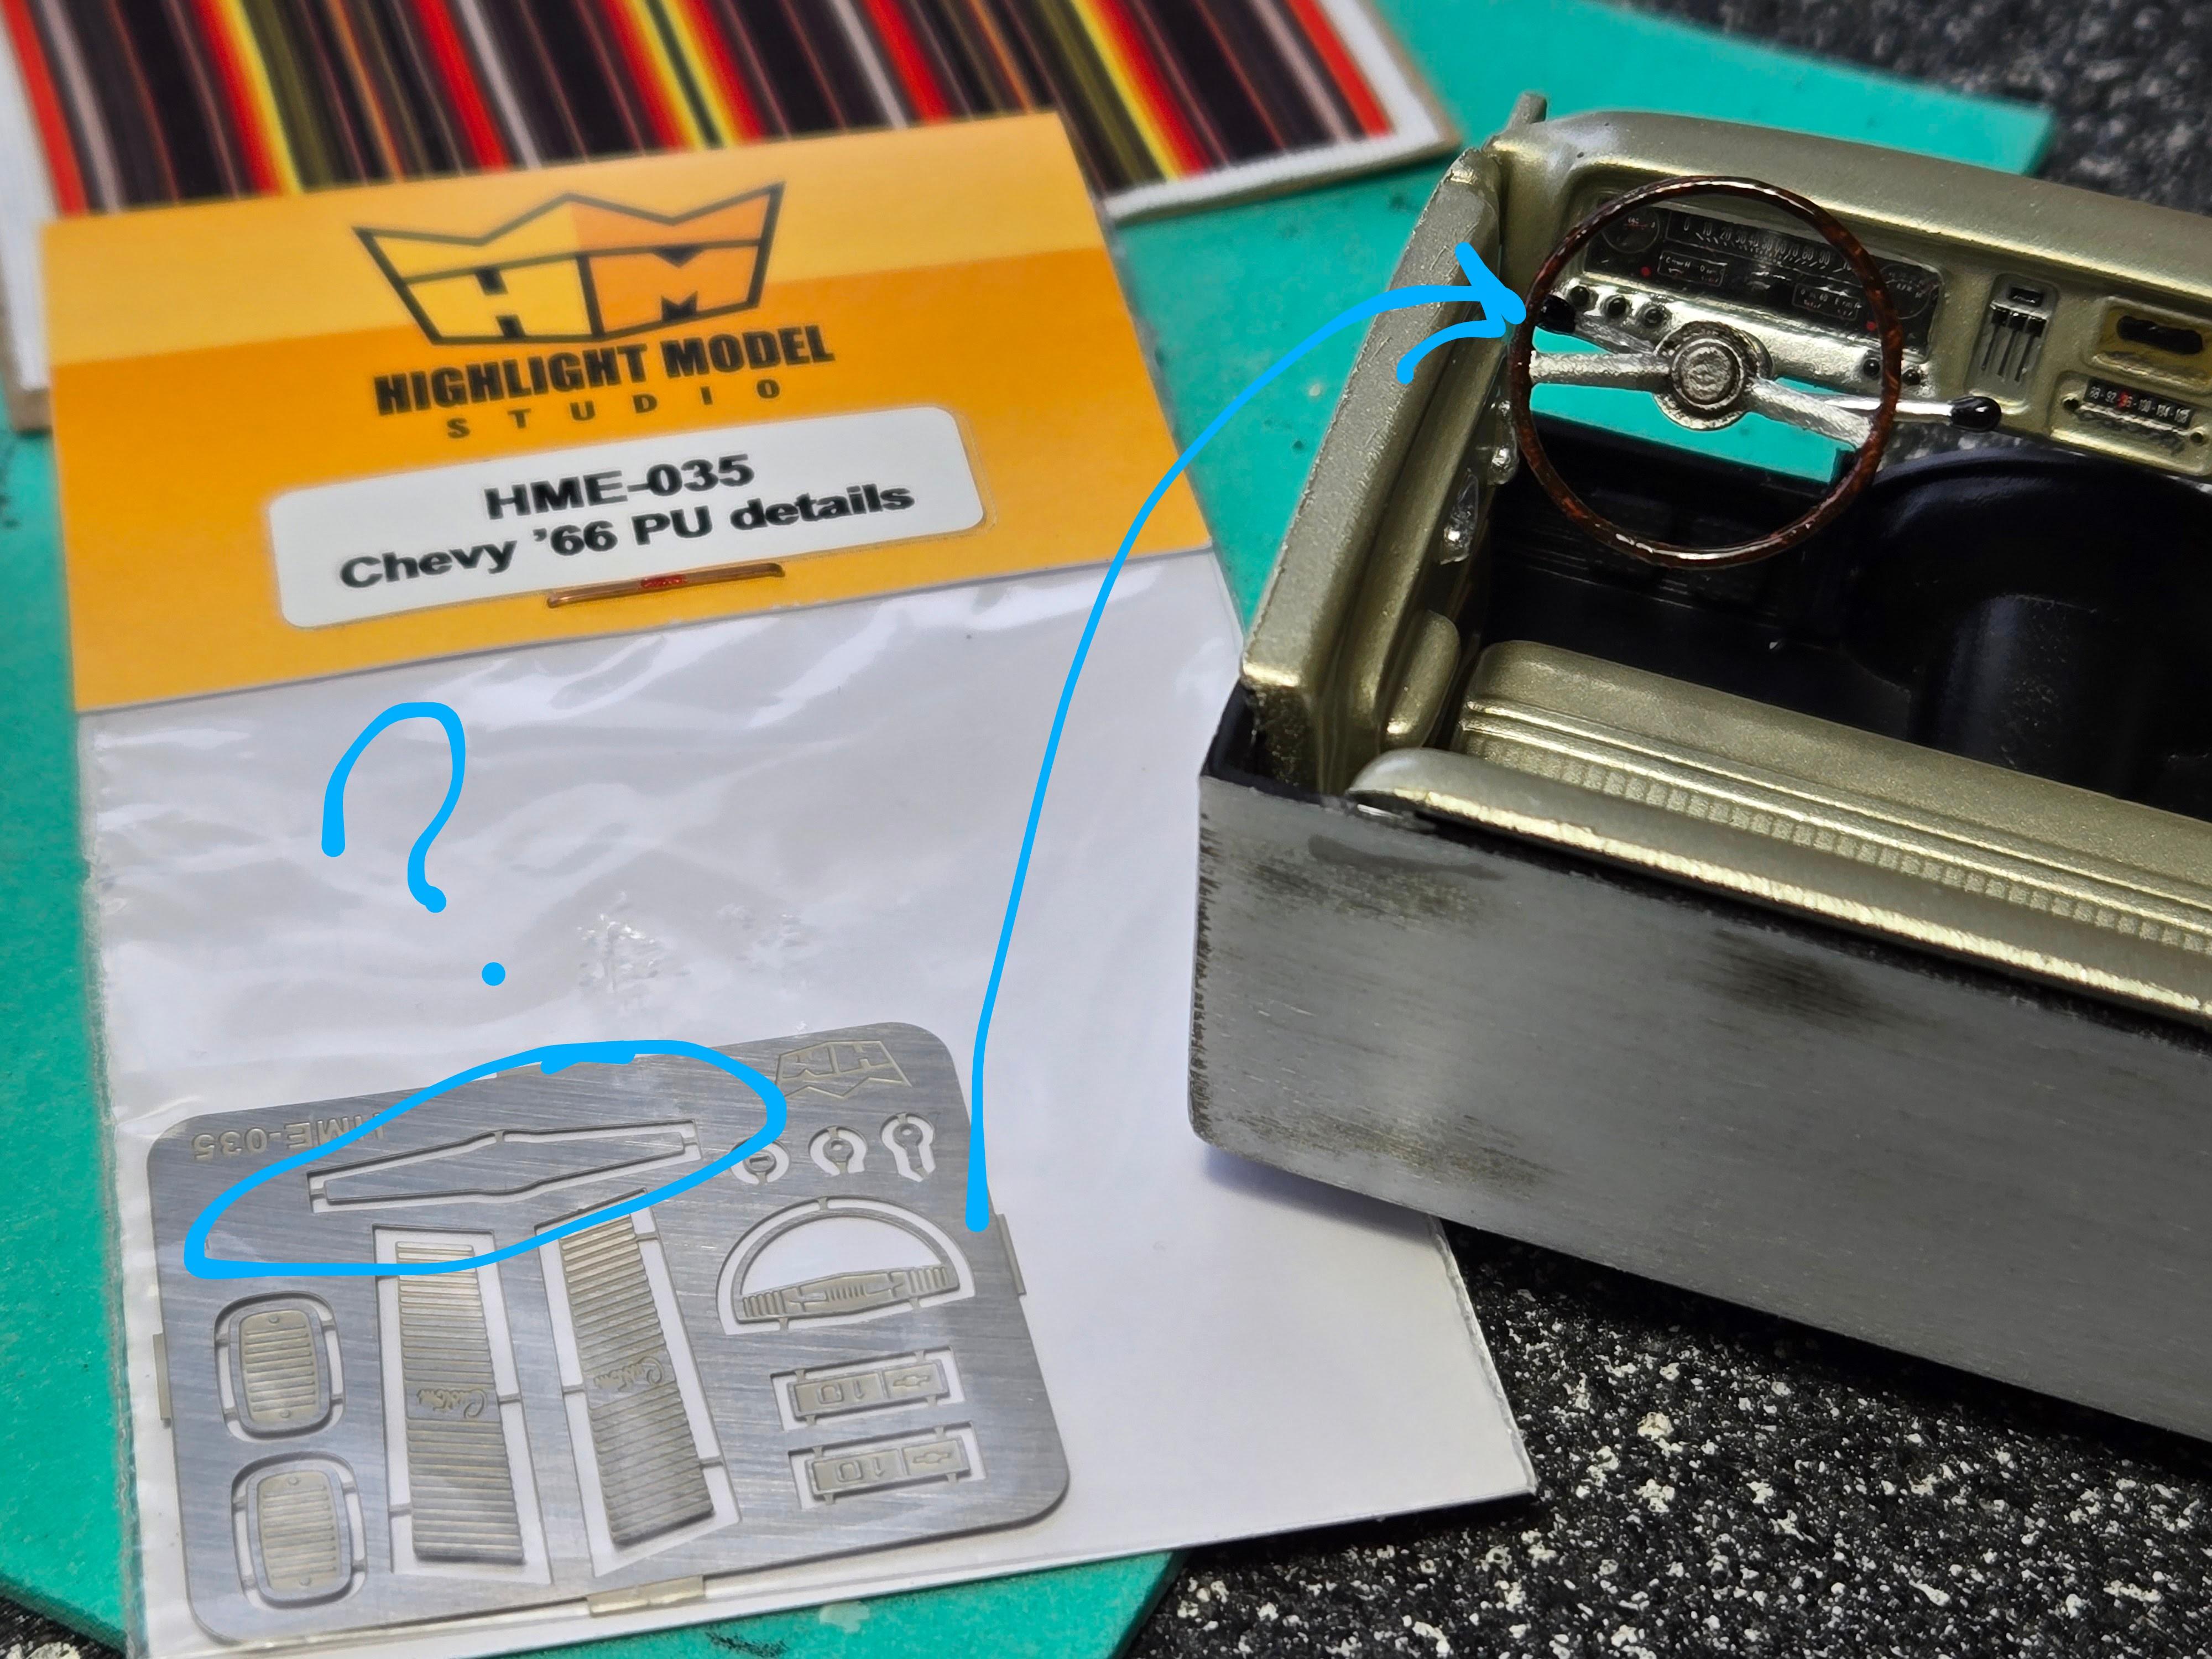
I ran across some photo etch details and a fabric blanket for my '66 Chevy Fleetside build already in progress. One piece I don't see the placement for, and how would I apply/bend the steering wheel ring to look right?

- 39,081 replies
-
- 3
-
-
- johan
- glue bombs
- (and 1 more)
-
'66 Chevy Fleetside Pickup - Revell
CA Whitecloud replied to CA Whitecloud's topic in WIP: Model Cars
OK, good to know. Thanks. -
'66 Chevy Fleetside Pickup - Revell
CA Whitecloud replied to CA Whitecloud's topic in WIP: Model Cars
*What would I use the oval PE bits at the bottom of the sheet?
-
'66 Chevy Fleetside Pickup - Revell
CA Whitecloud replied to CA Whitecloud's topic in WIP: Model Cars
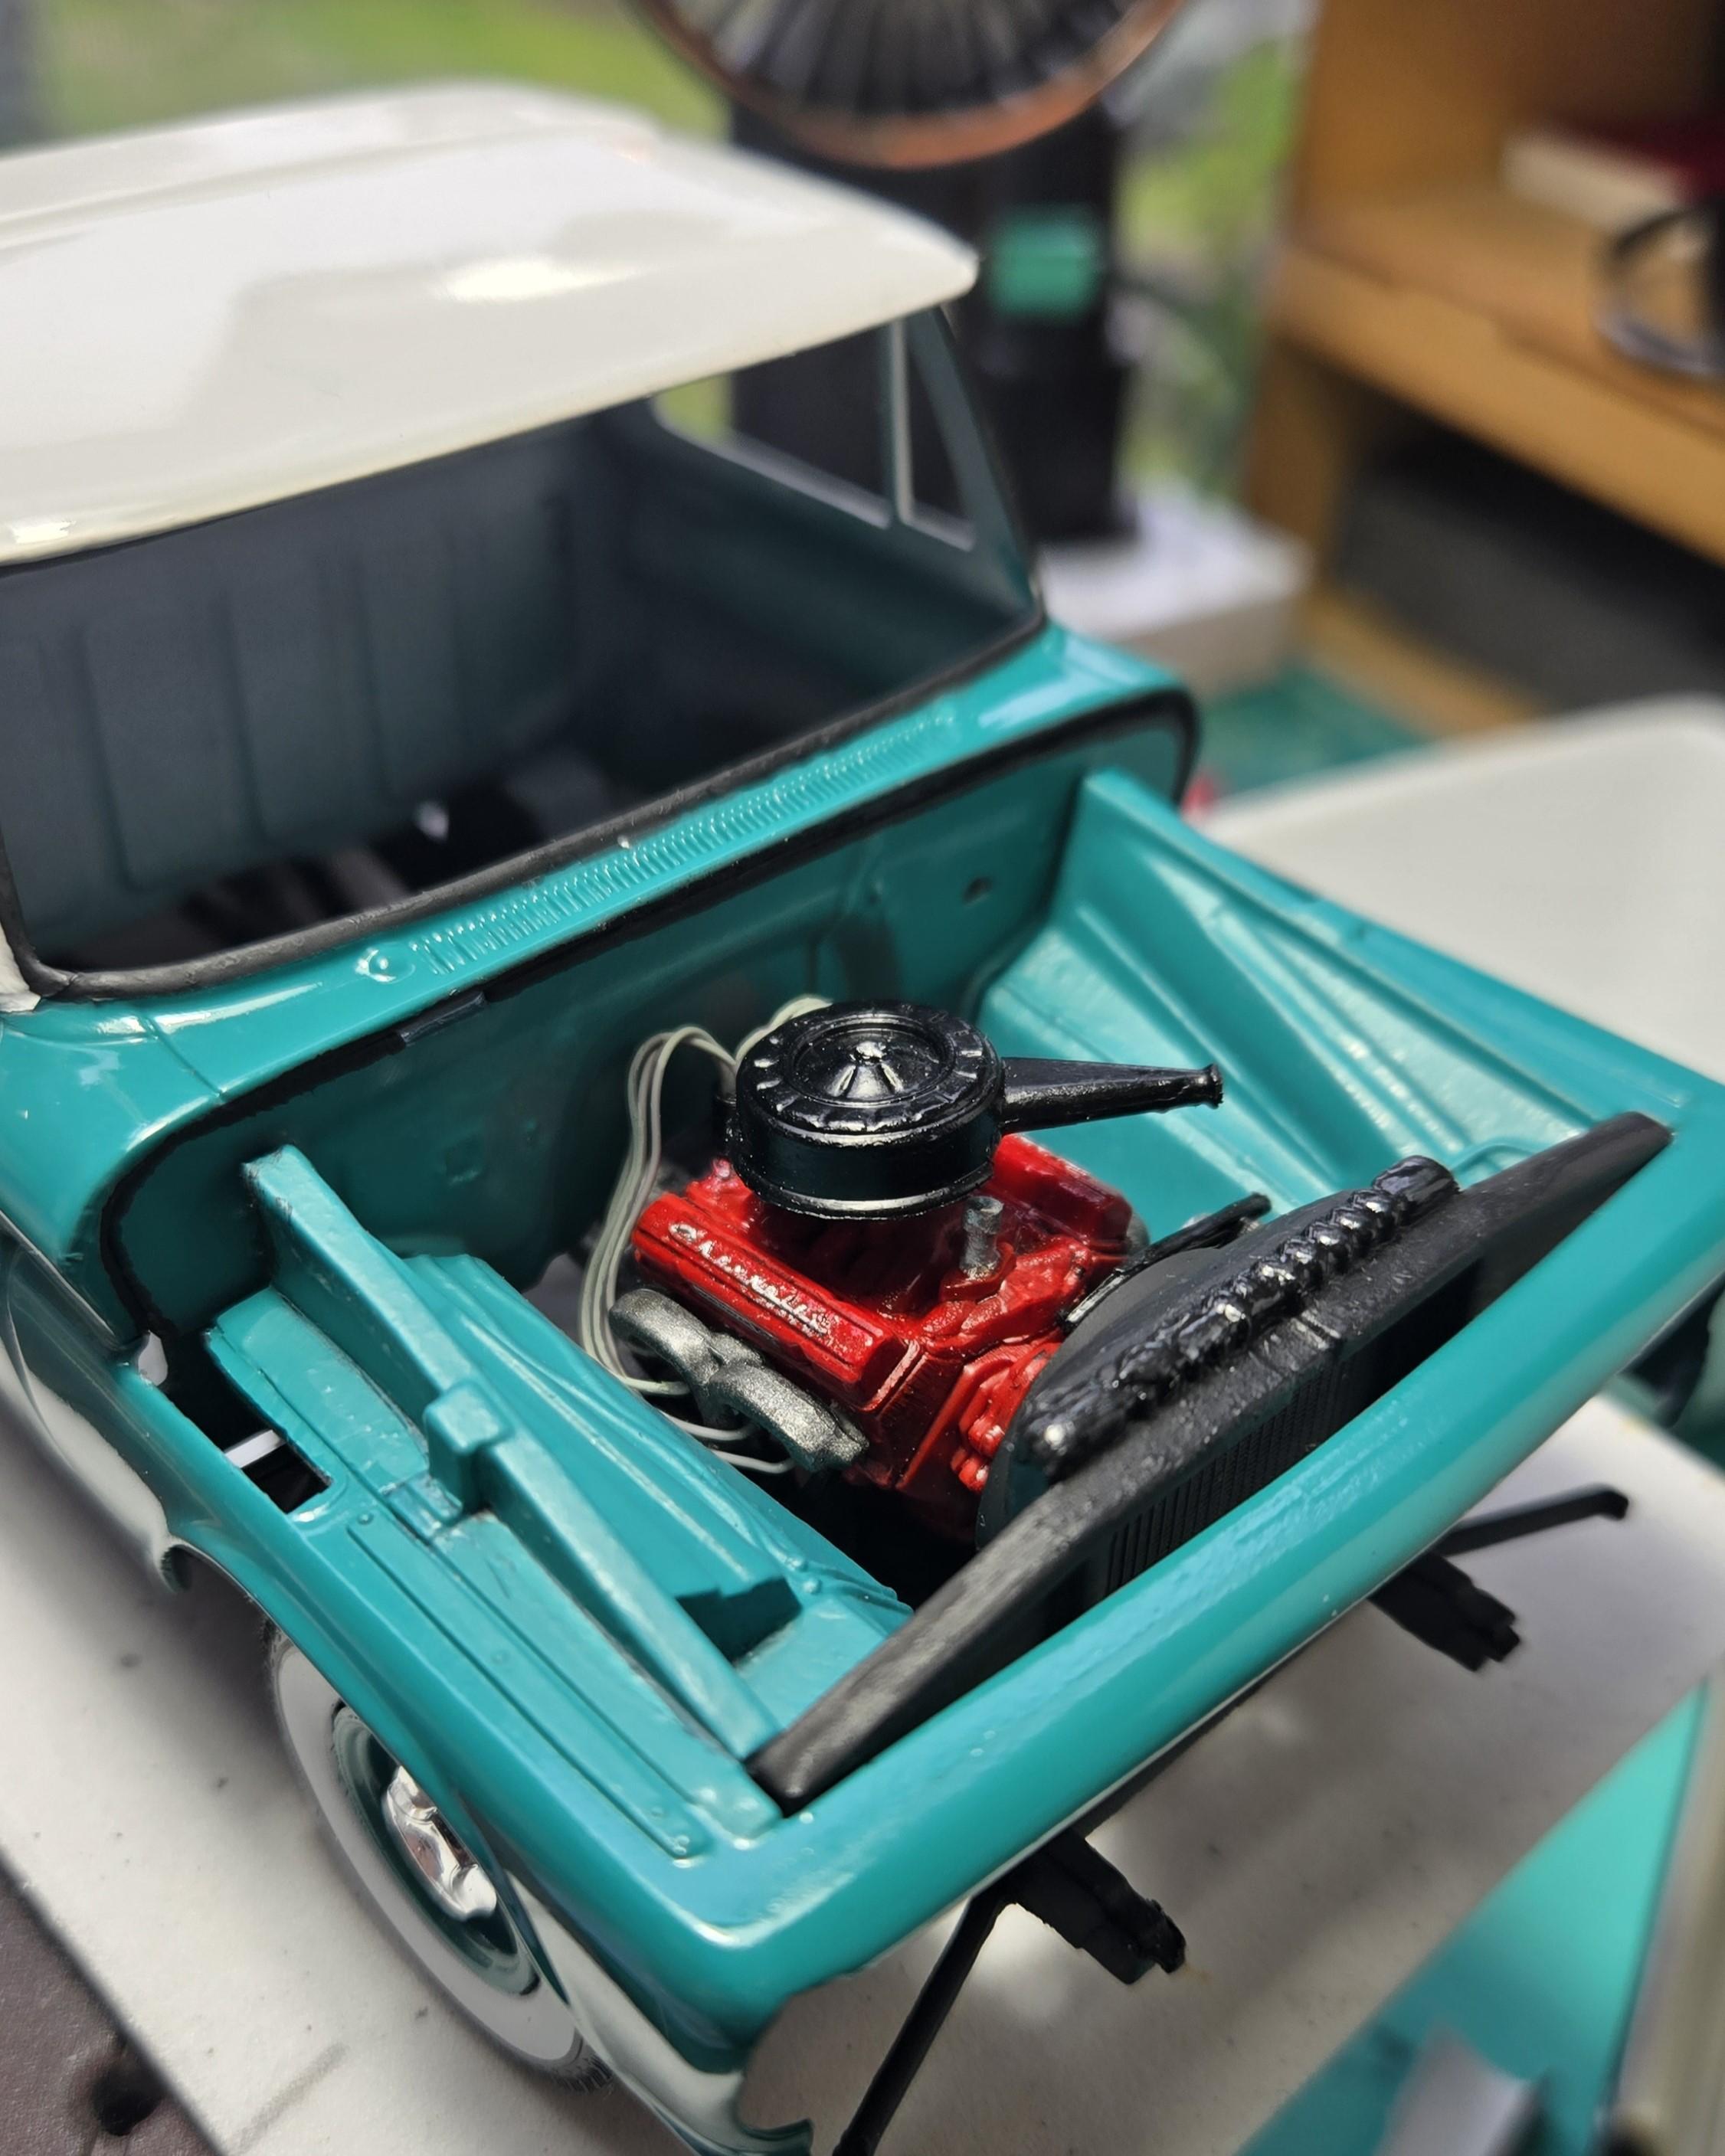
Going to try hoses and battery cables for the first time. ?
-
'66 Chevy Fleetside Pickup - Revell
CA Whitecloud replied to CA Whitecloud's topic in WIP: Model Cars
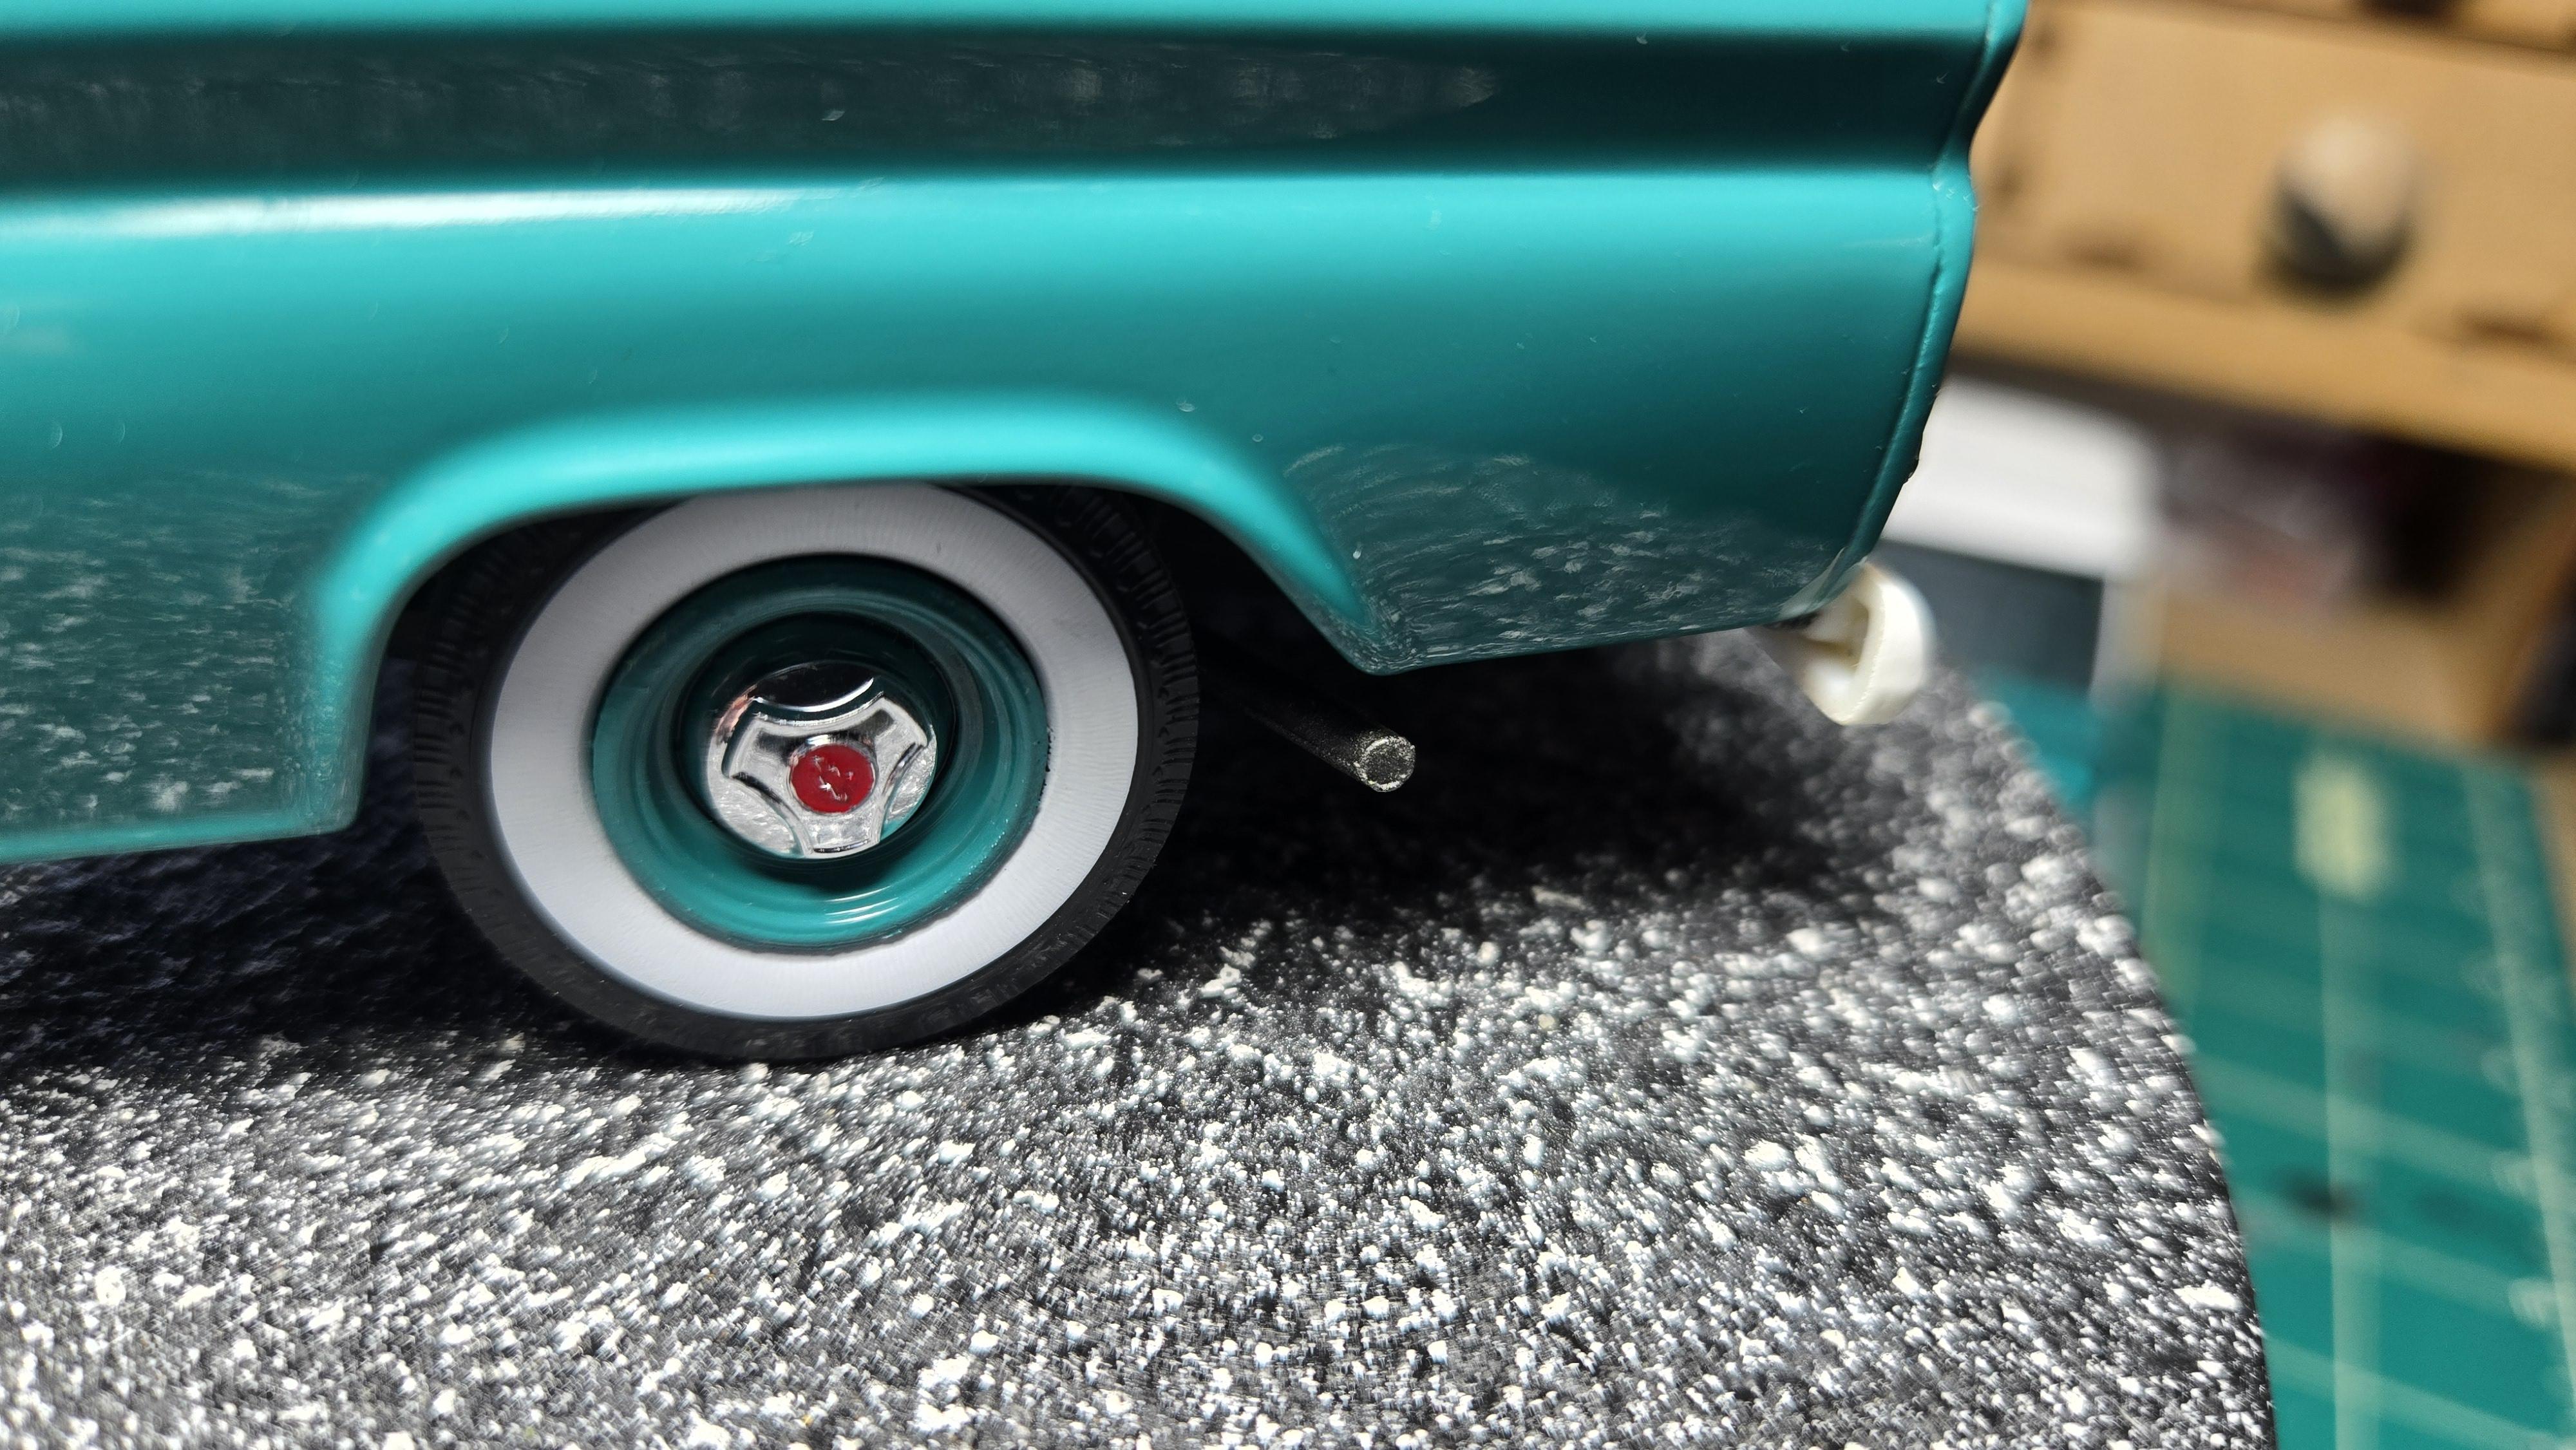
I really tried to get the Chevy to show on the hubs, but I couldn't get the detail to come out. I also forgot to put a divot in the end of the tailpipe. What a rookie mistake!
-
'66 Chevy Fleetside Pickup - Revell
CA Whitecloud replied to CA Whitecloud's topic in WIP: Model Cars
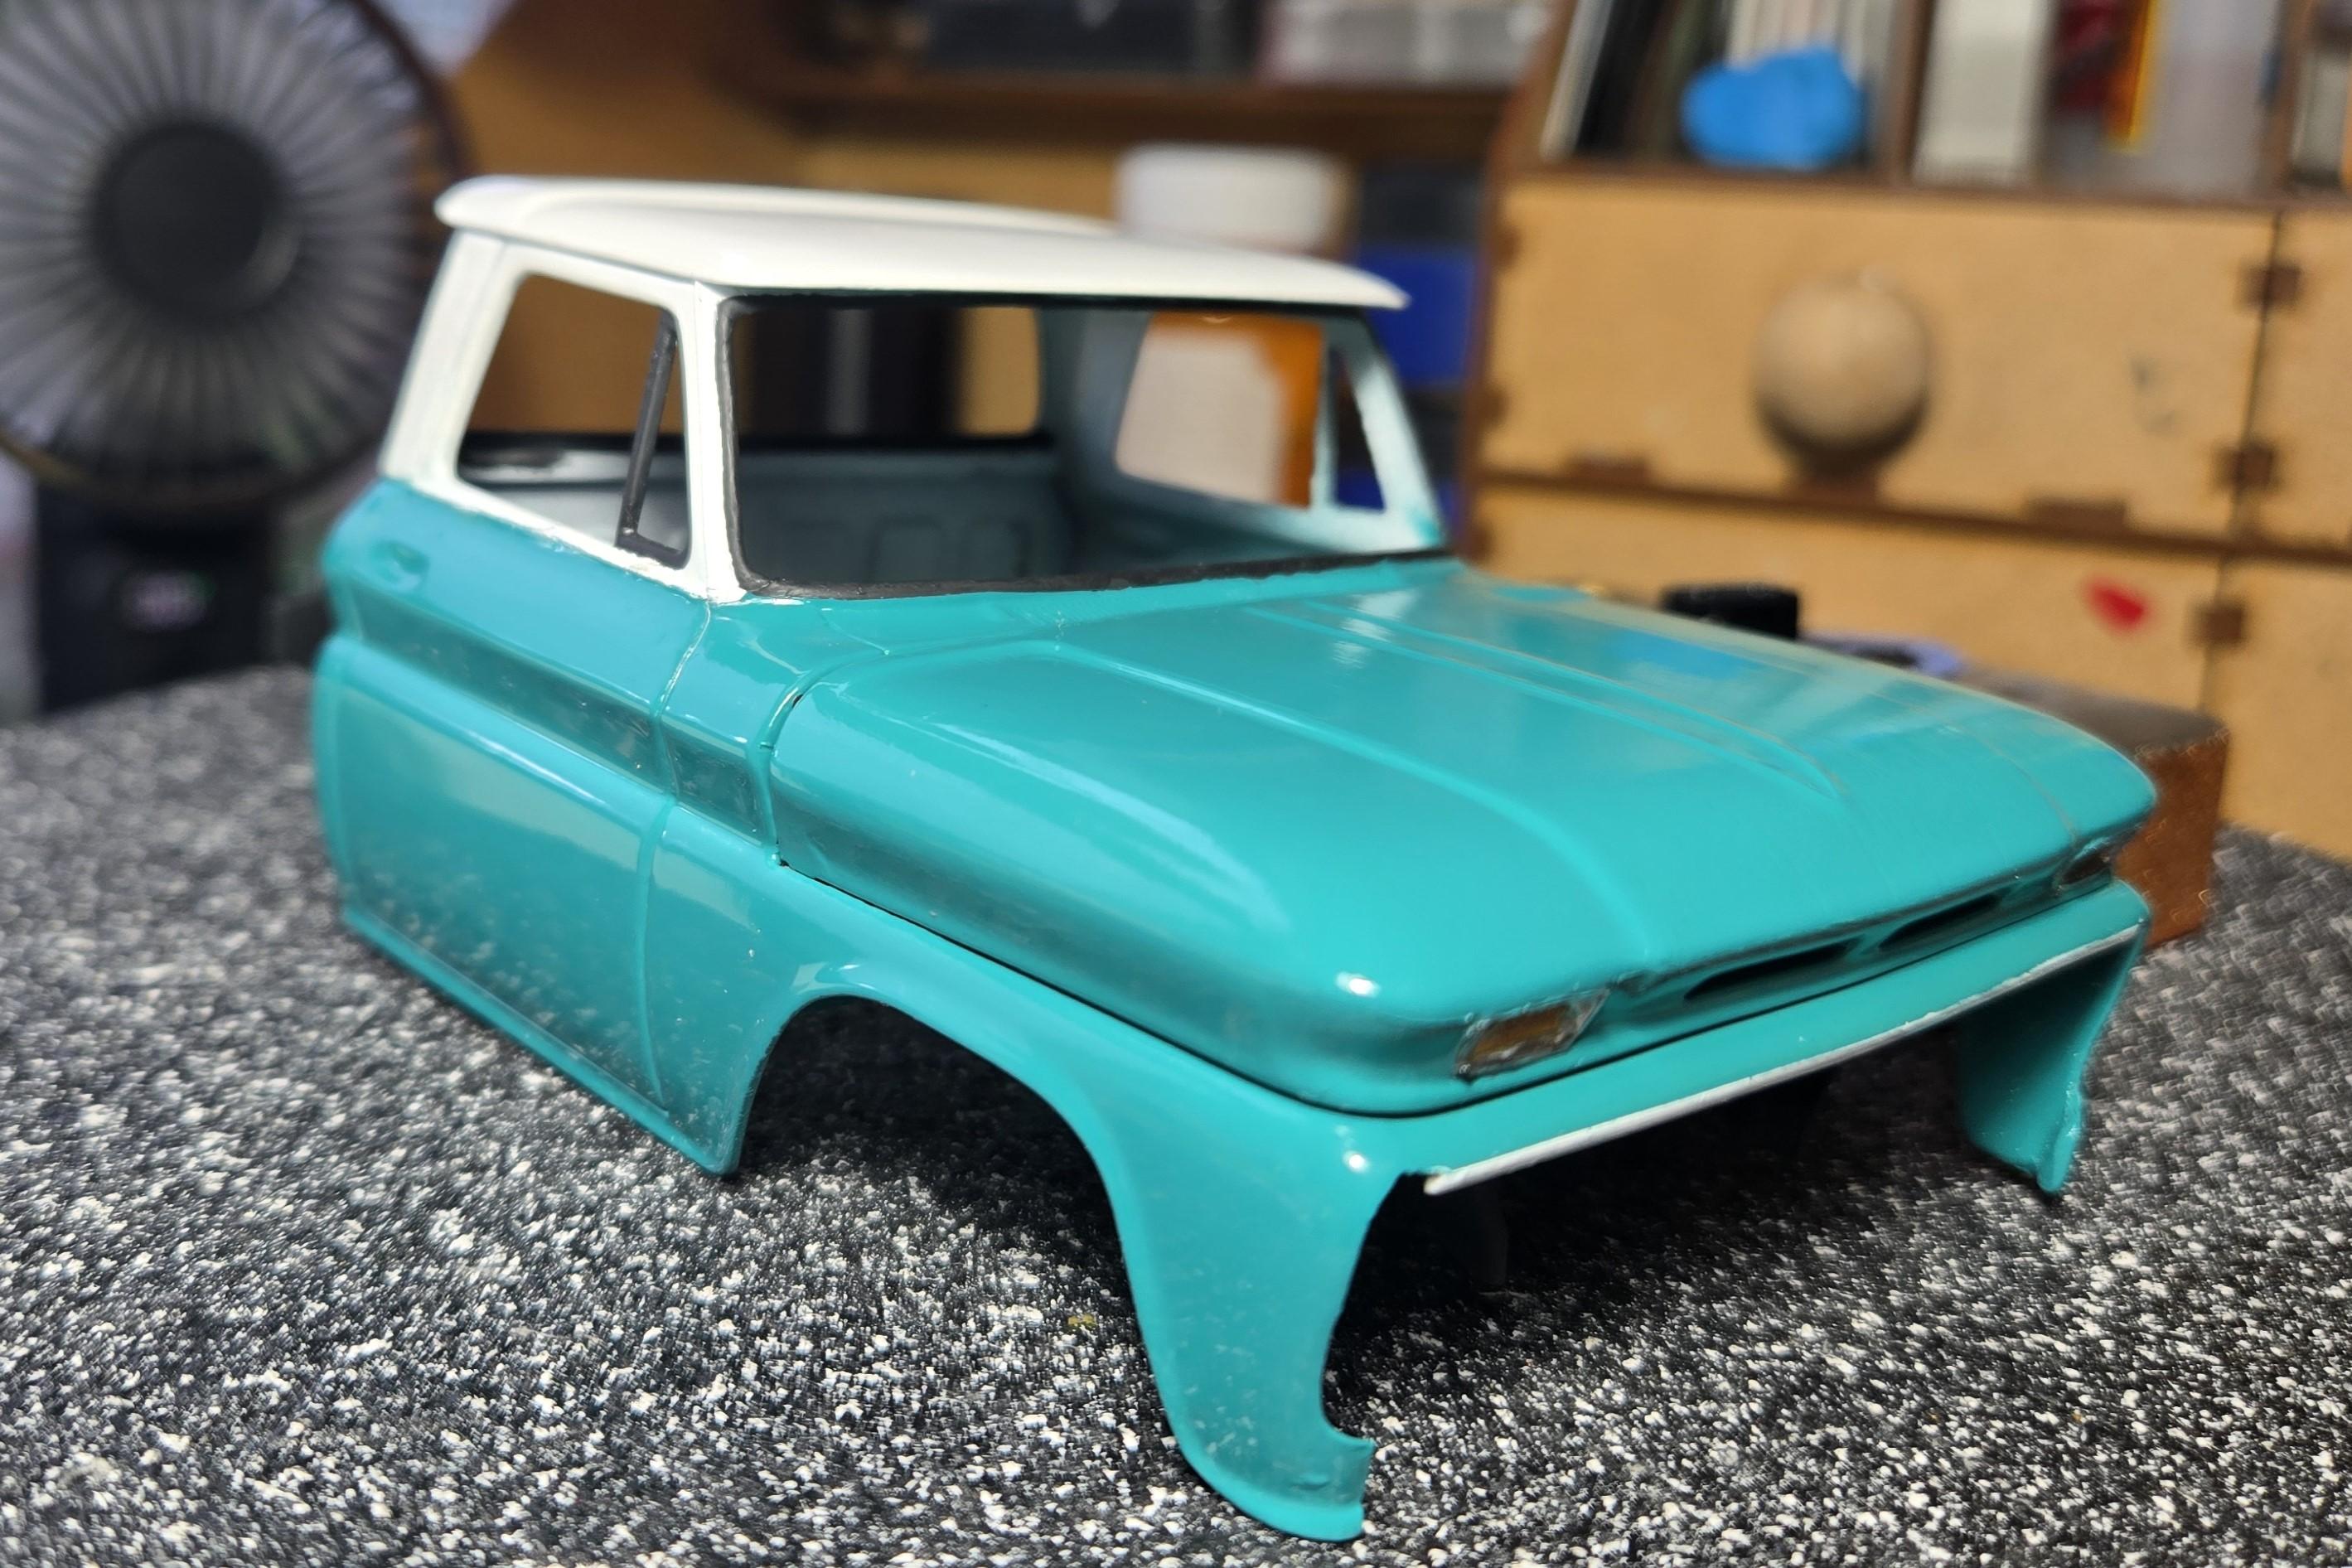
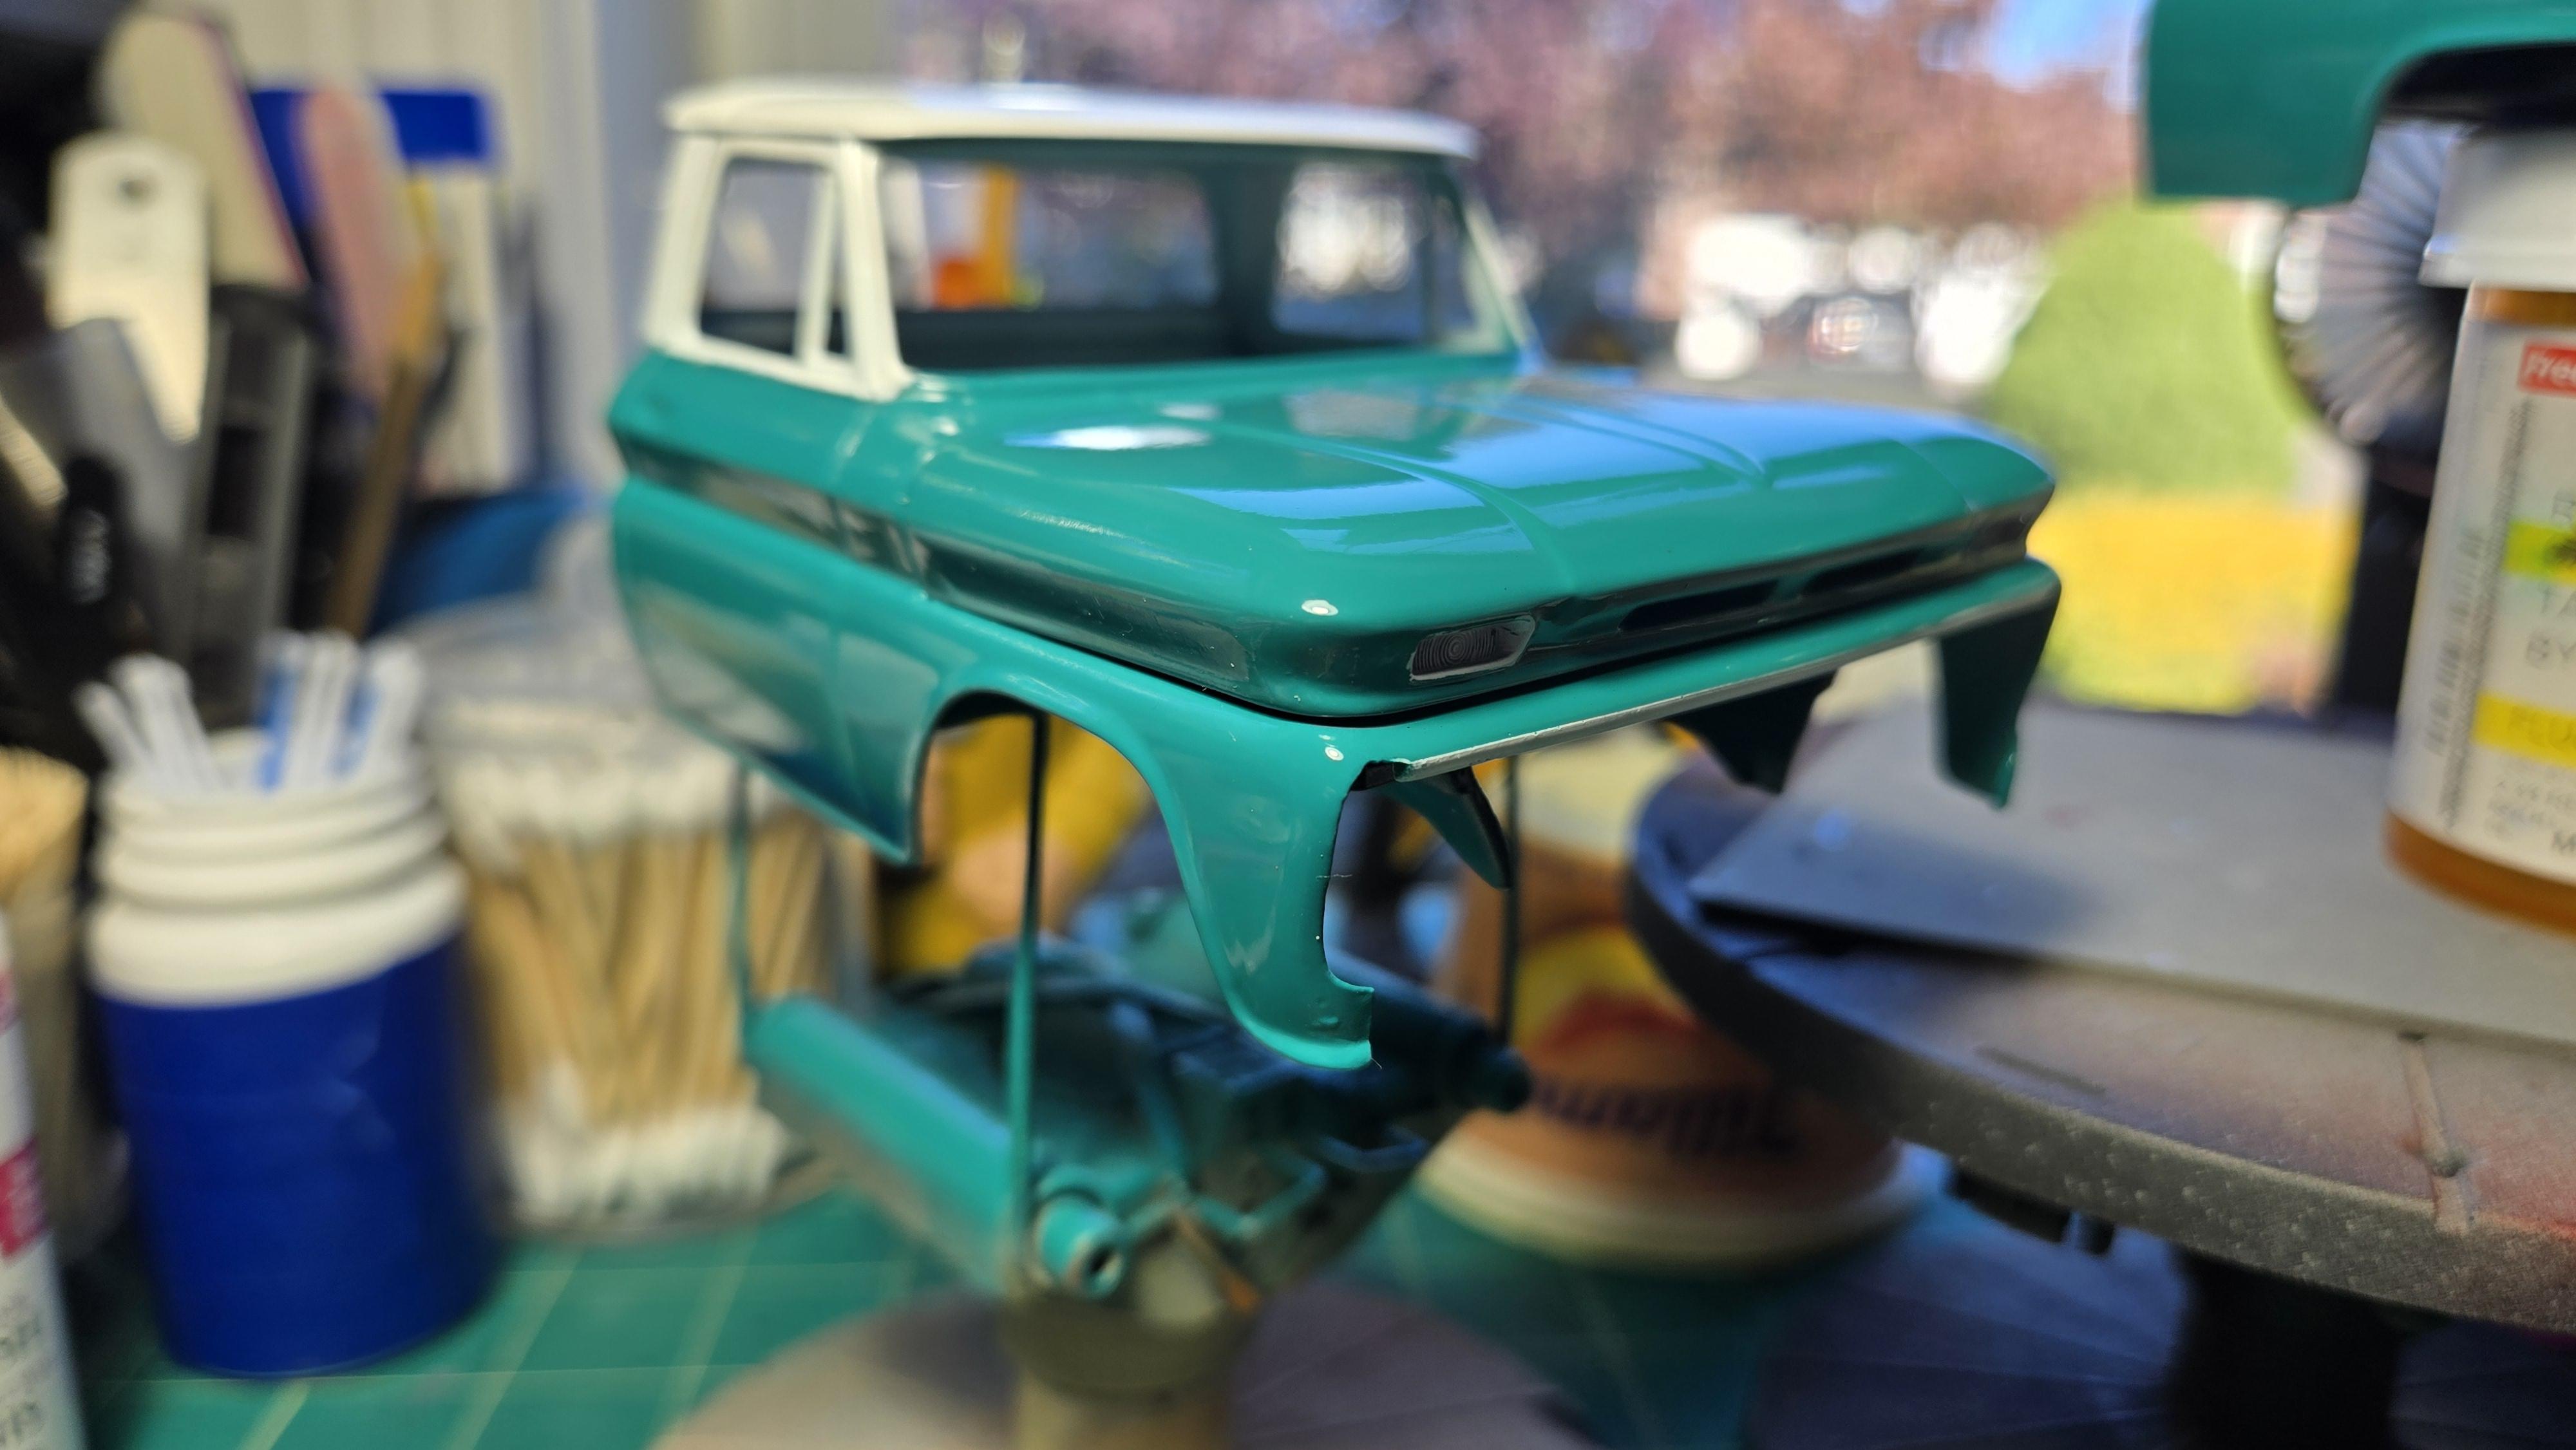
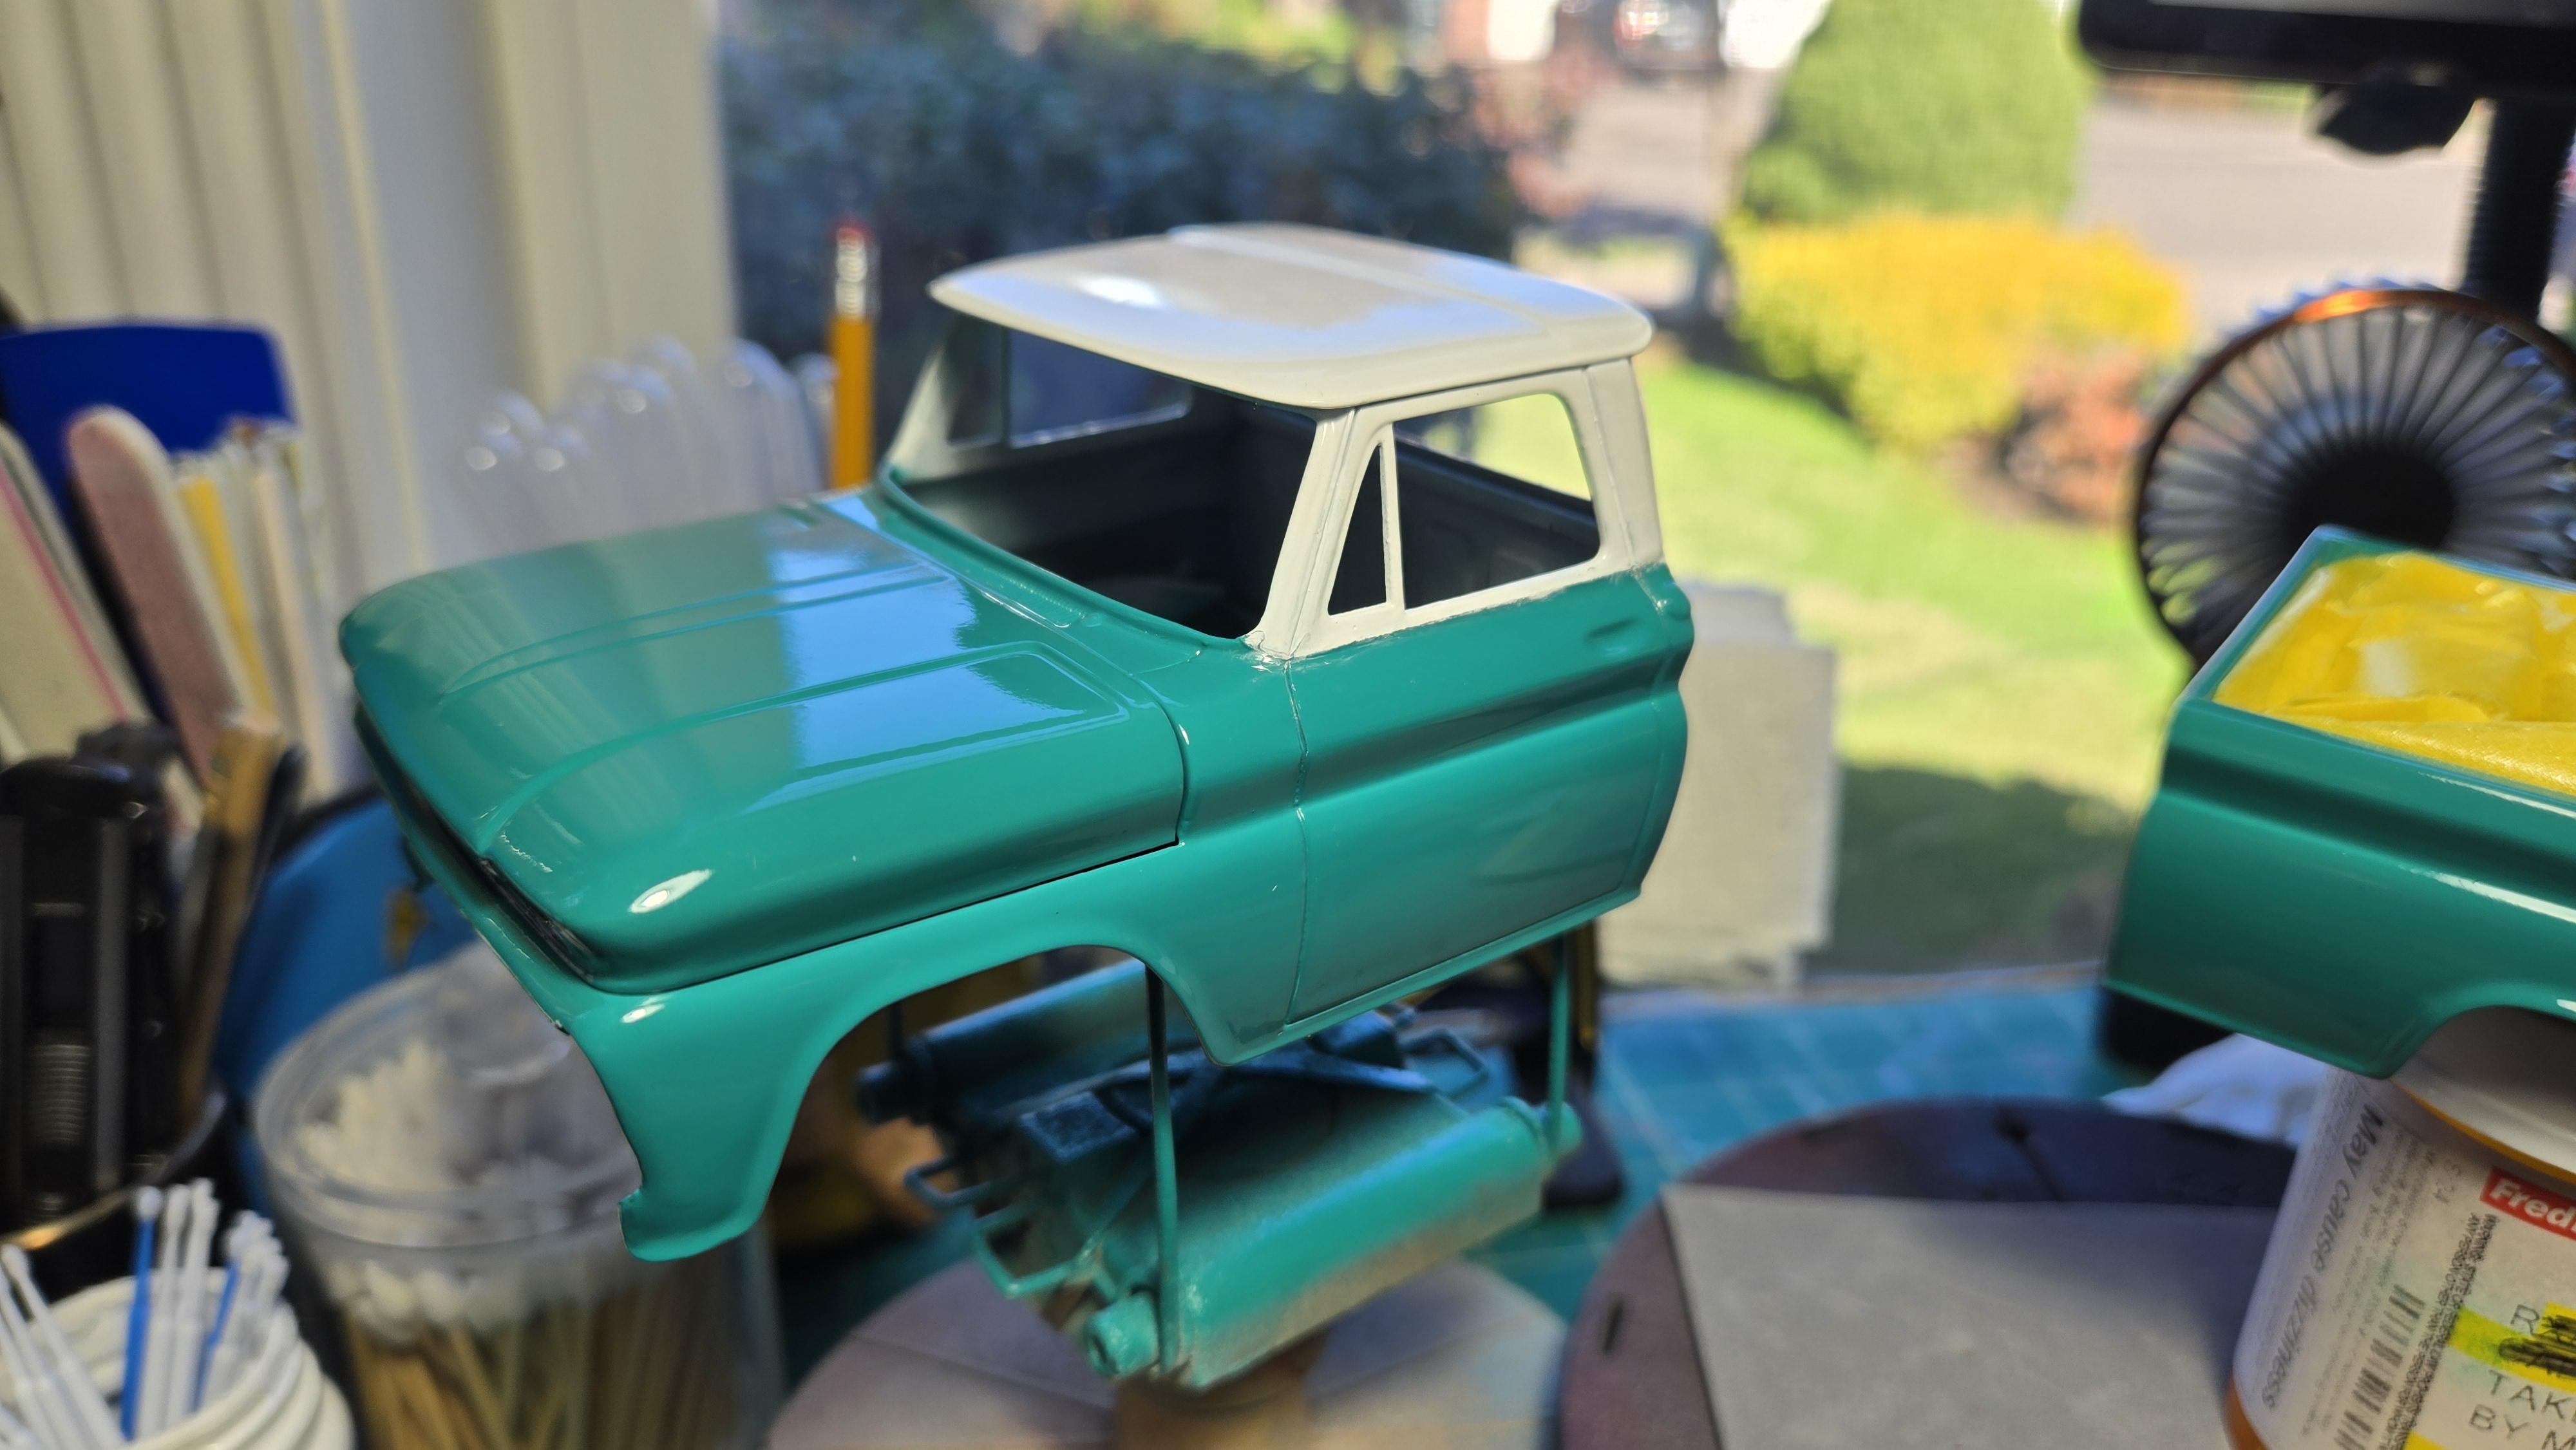
I put a heavy coat of clear on the hood, and the results are good enough for me and my shelf. Of coarse it all depends on how you look at it.
-
'66 Chevy Fleetside Pickup - Revell
CA Whitecloud replied to CA Whitecloud's topic in WIP: Model Cars
Thanks for all that help. I will definitely take one of those routes. I'm going to concentrate on completing the rest of the build and come back to the hood. I do NOT want to dwell on it to the point it's not fun. -
'66 Chevy Fleetside Pickup - Revell
CA Whitecloud replied to CA Whitecloud's topic in WIP: Model Cars
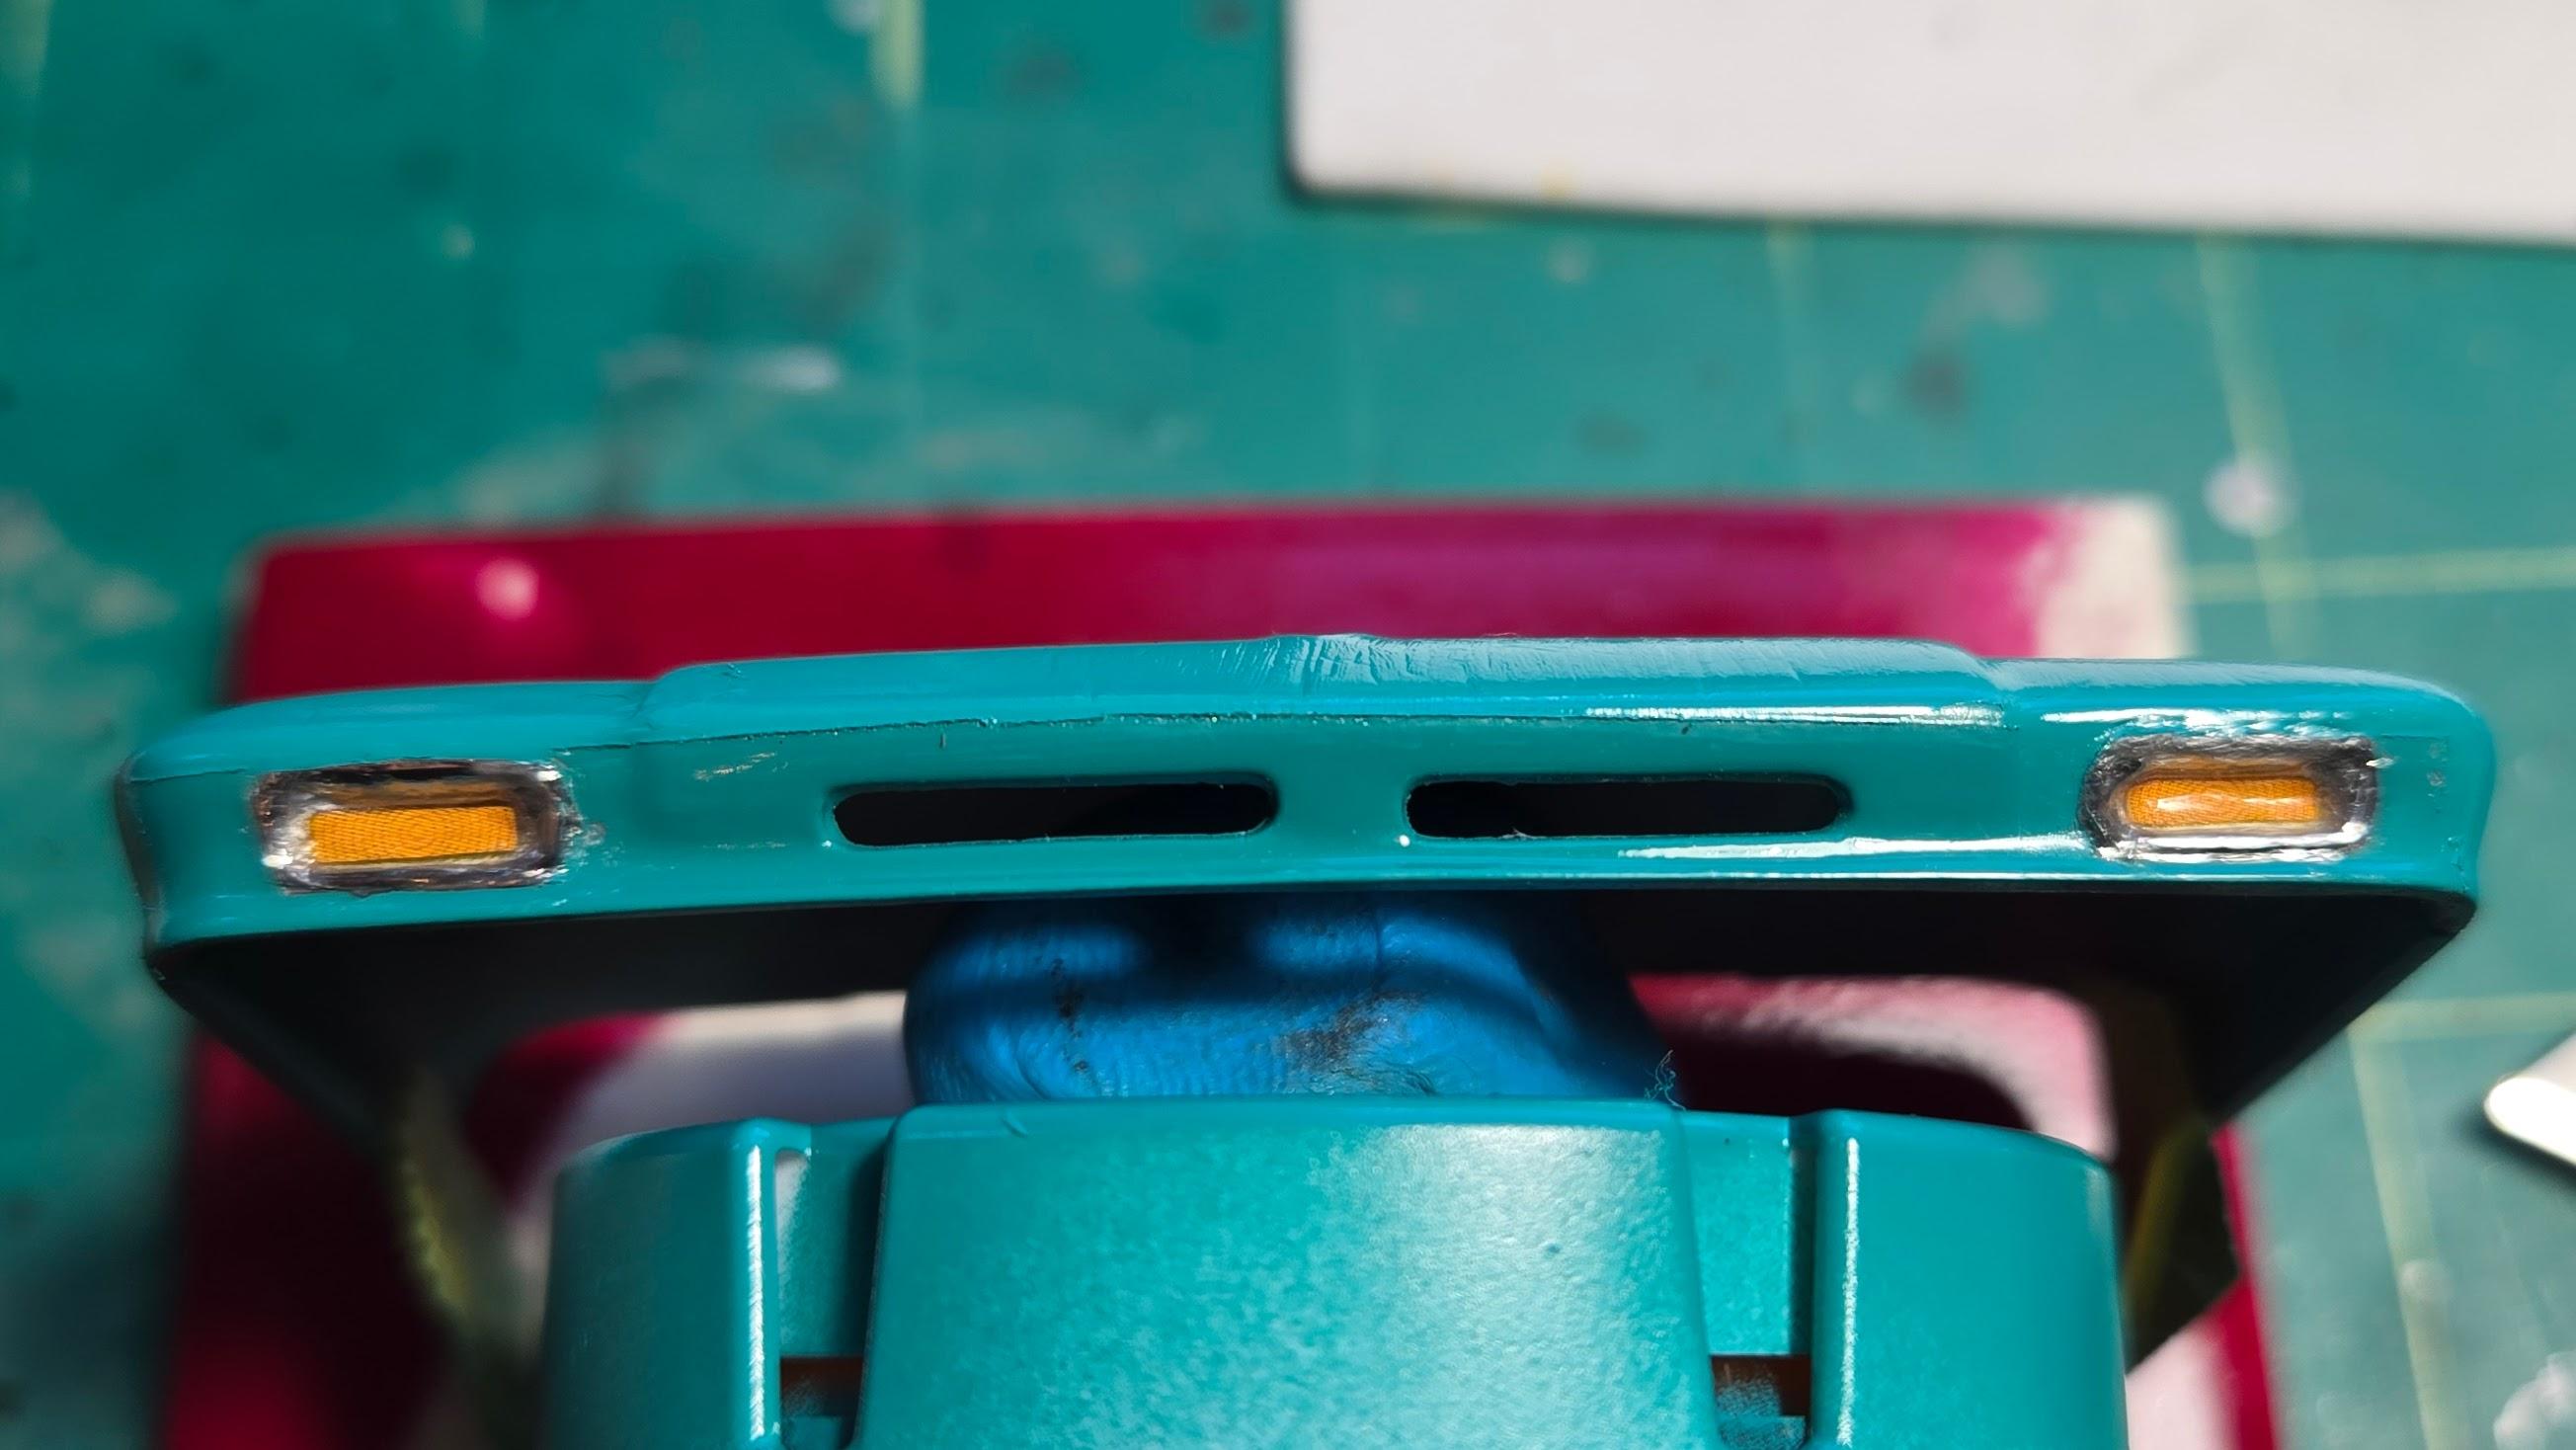
Thanks for the encouragement. I wouldn't mind redoing the marker lights, but they don't have lenses just the amber decals. Hmmm.
-
Zowie!
-
'66 Chevy Fleetside Pickup - Revell
CA Whitecloud replied to CA Whitecloud's topic in WIP: Model Cars
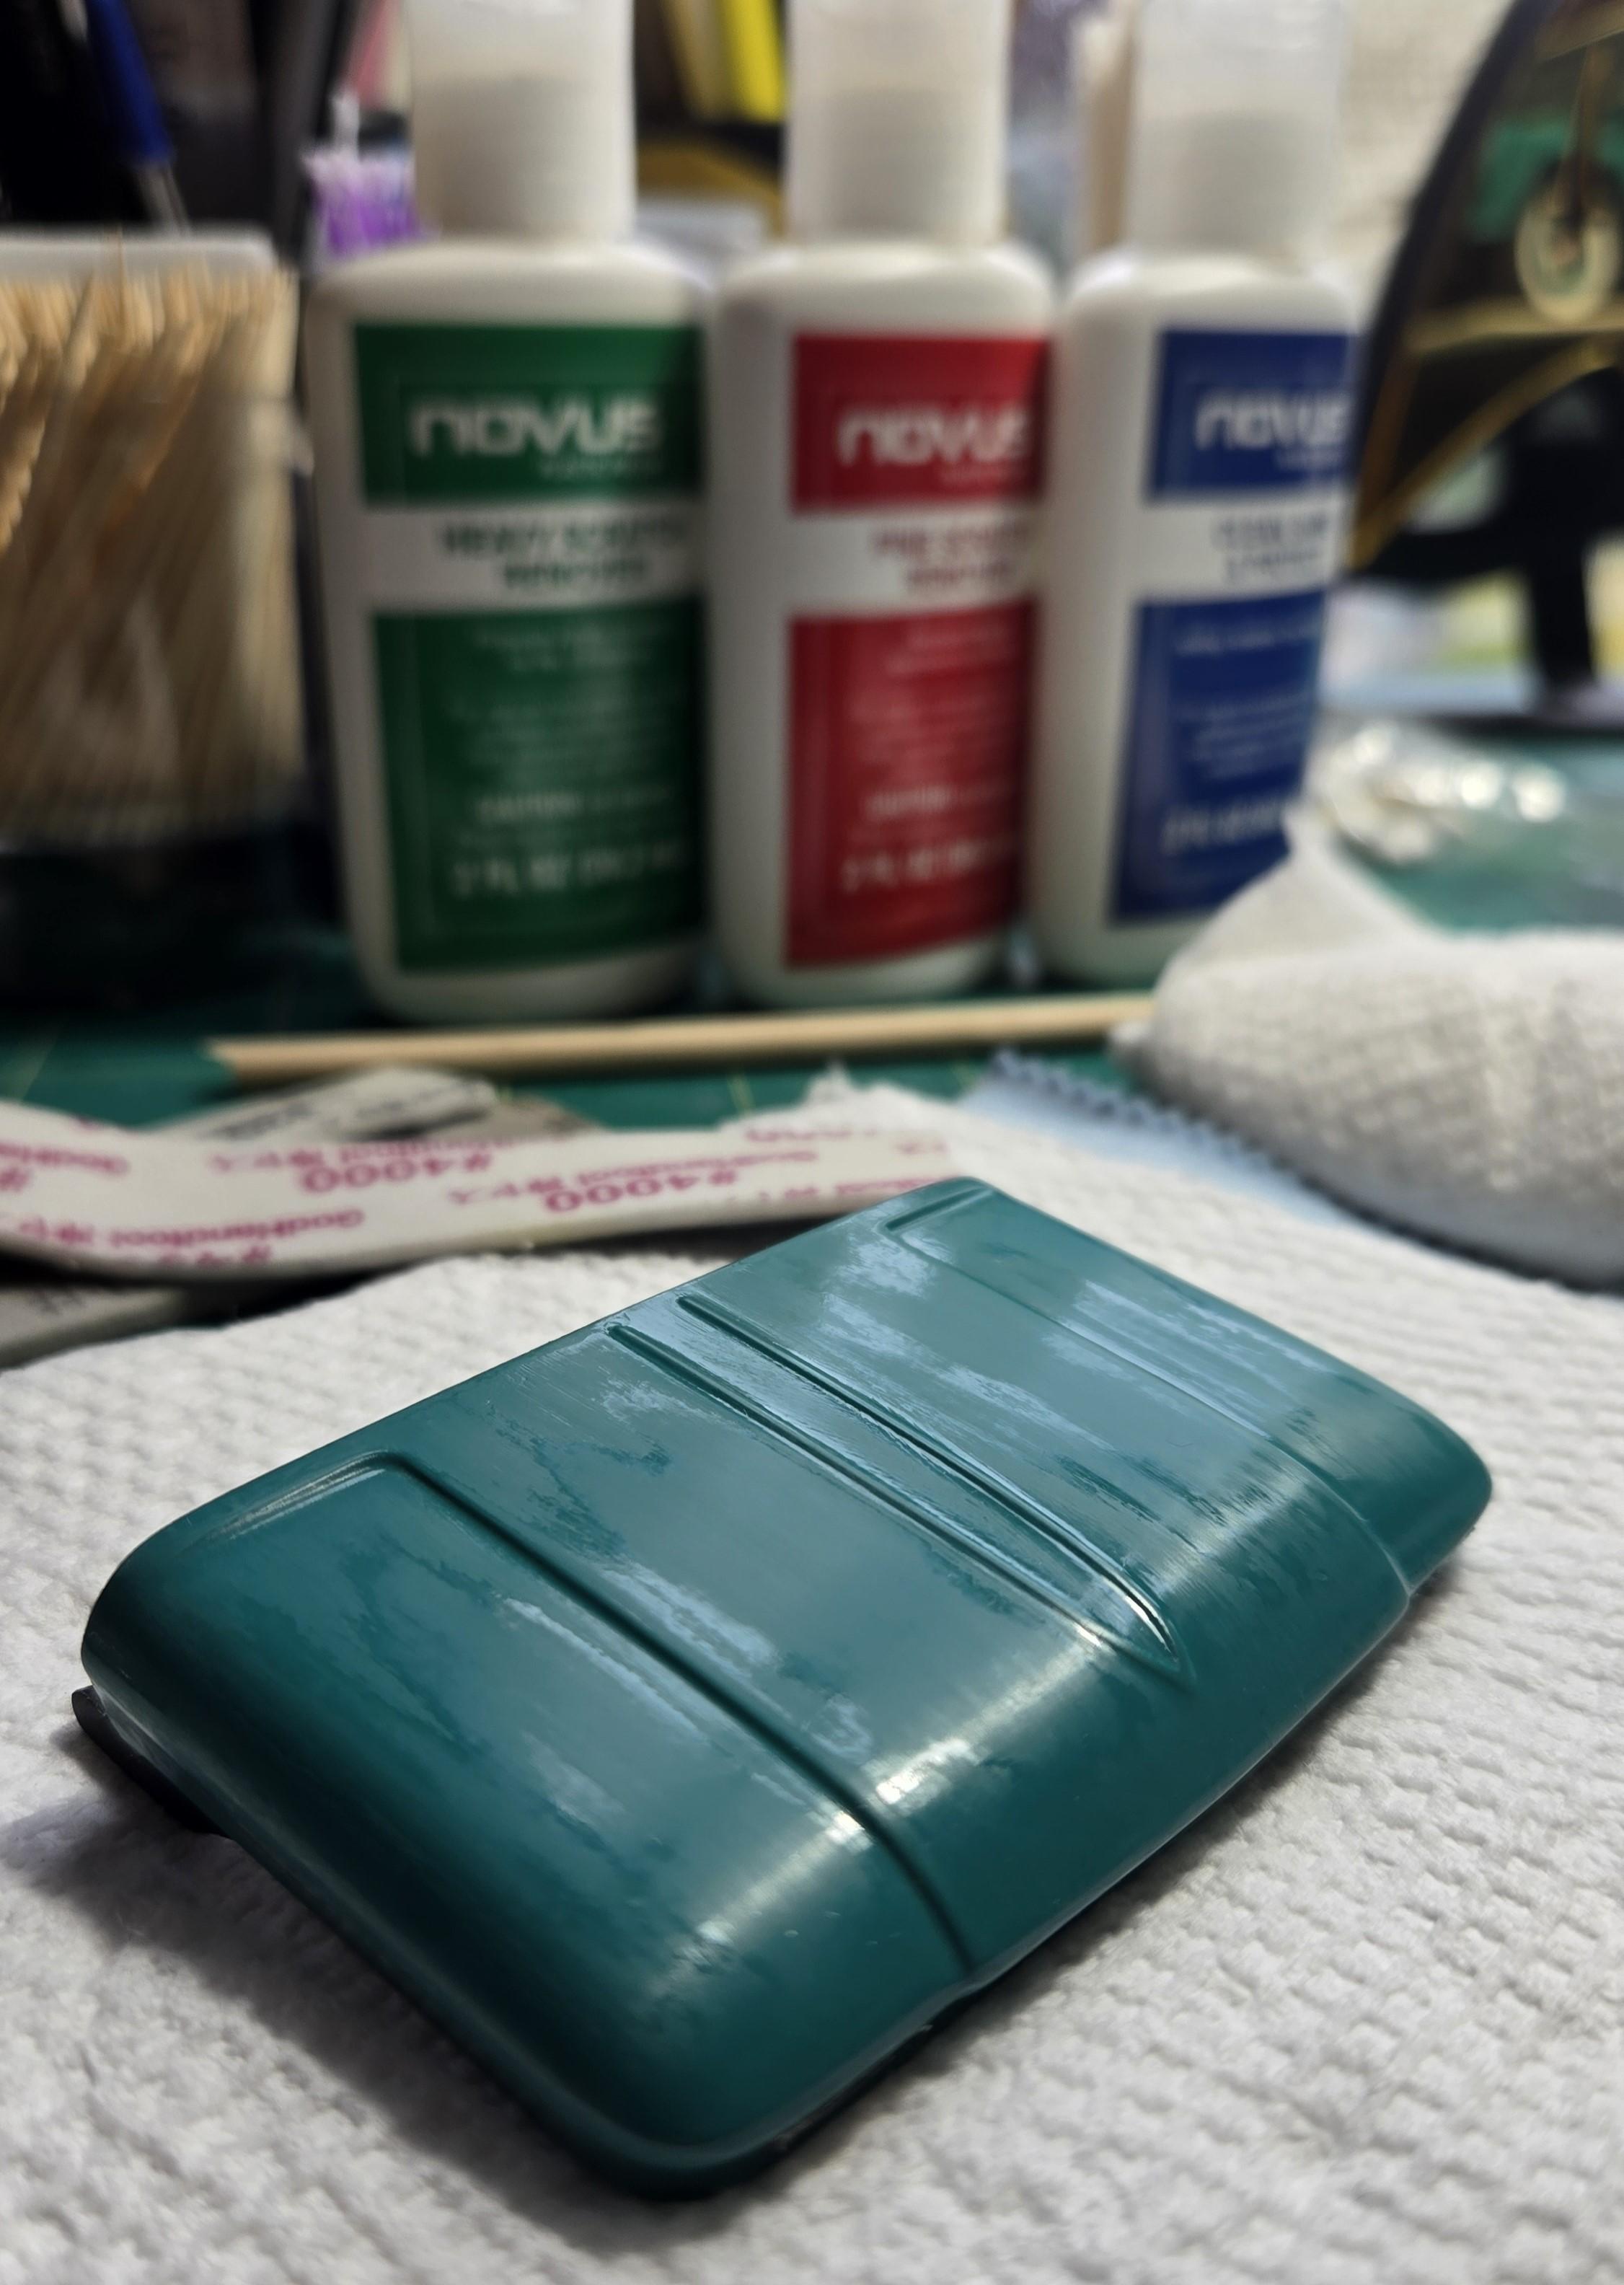
Hood of Horrors! Well that did not go as planned. I can't strip it because I've done the marker lights up front. Will a thick gloss coat cover any of this? I don't even remember why I was trying to "fix" the hood in the first place.
-
'66 Chevy Fleetside Pickup - Revell
CA Whitecloud replied to CA Whitecloud's topic in WIP: Model Cars
So, was a mistake to put the Future on top of the Tamiya? I have X-22 in the bottle but I did not know if I could brush that on. I'm still working my way up to the airbrush world. -
'66 Chevy Fleetside Pickup - Revell
CA Whitecloud replied to CA Whitecloud's topic in WIP: Model Cars
I used Tamiya clear first. I was hoping the Future would self level enough to just polish after. I decided to put down another color coat and move on. -
'66 Chevy Fleetside Pickup - Revell
CA Whitecloud replied to CA Whitecloud's topic in WIP: Model Cars
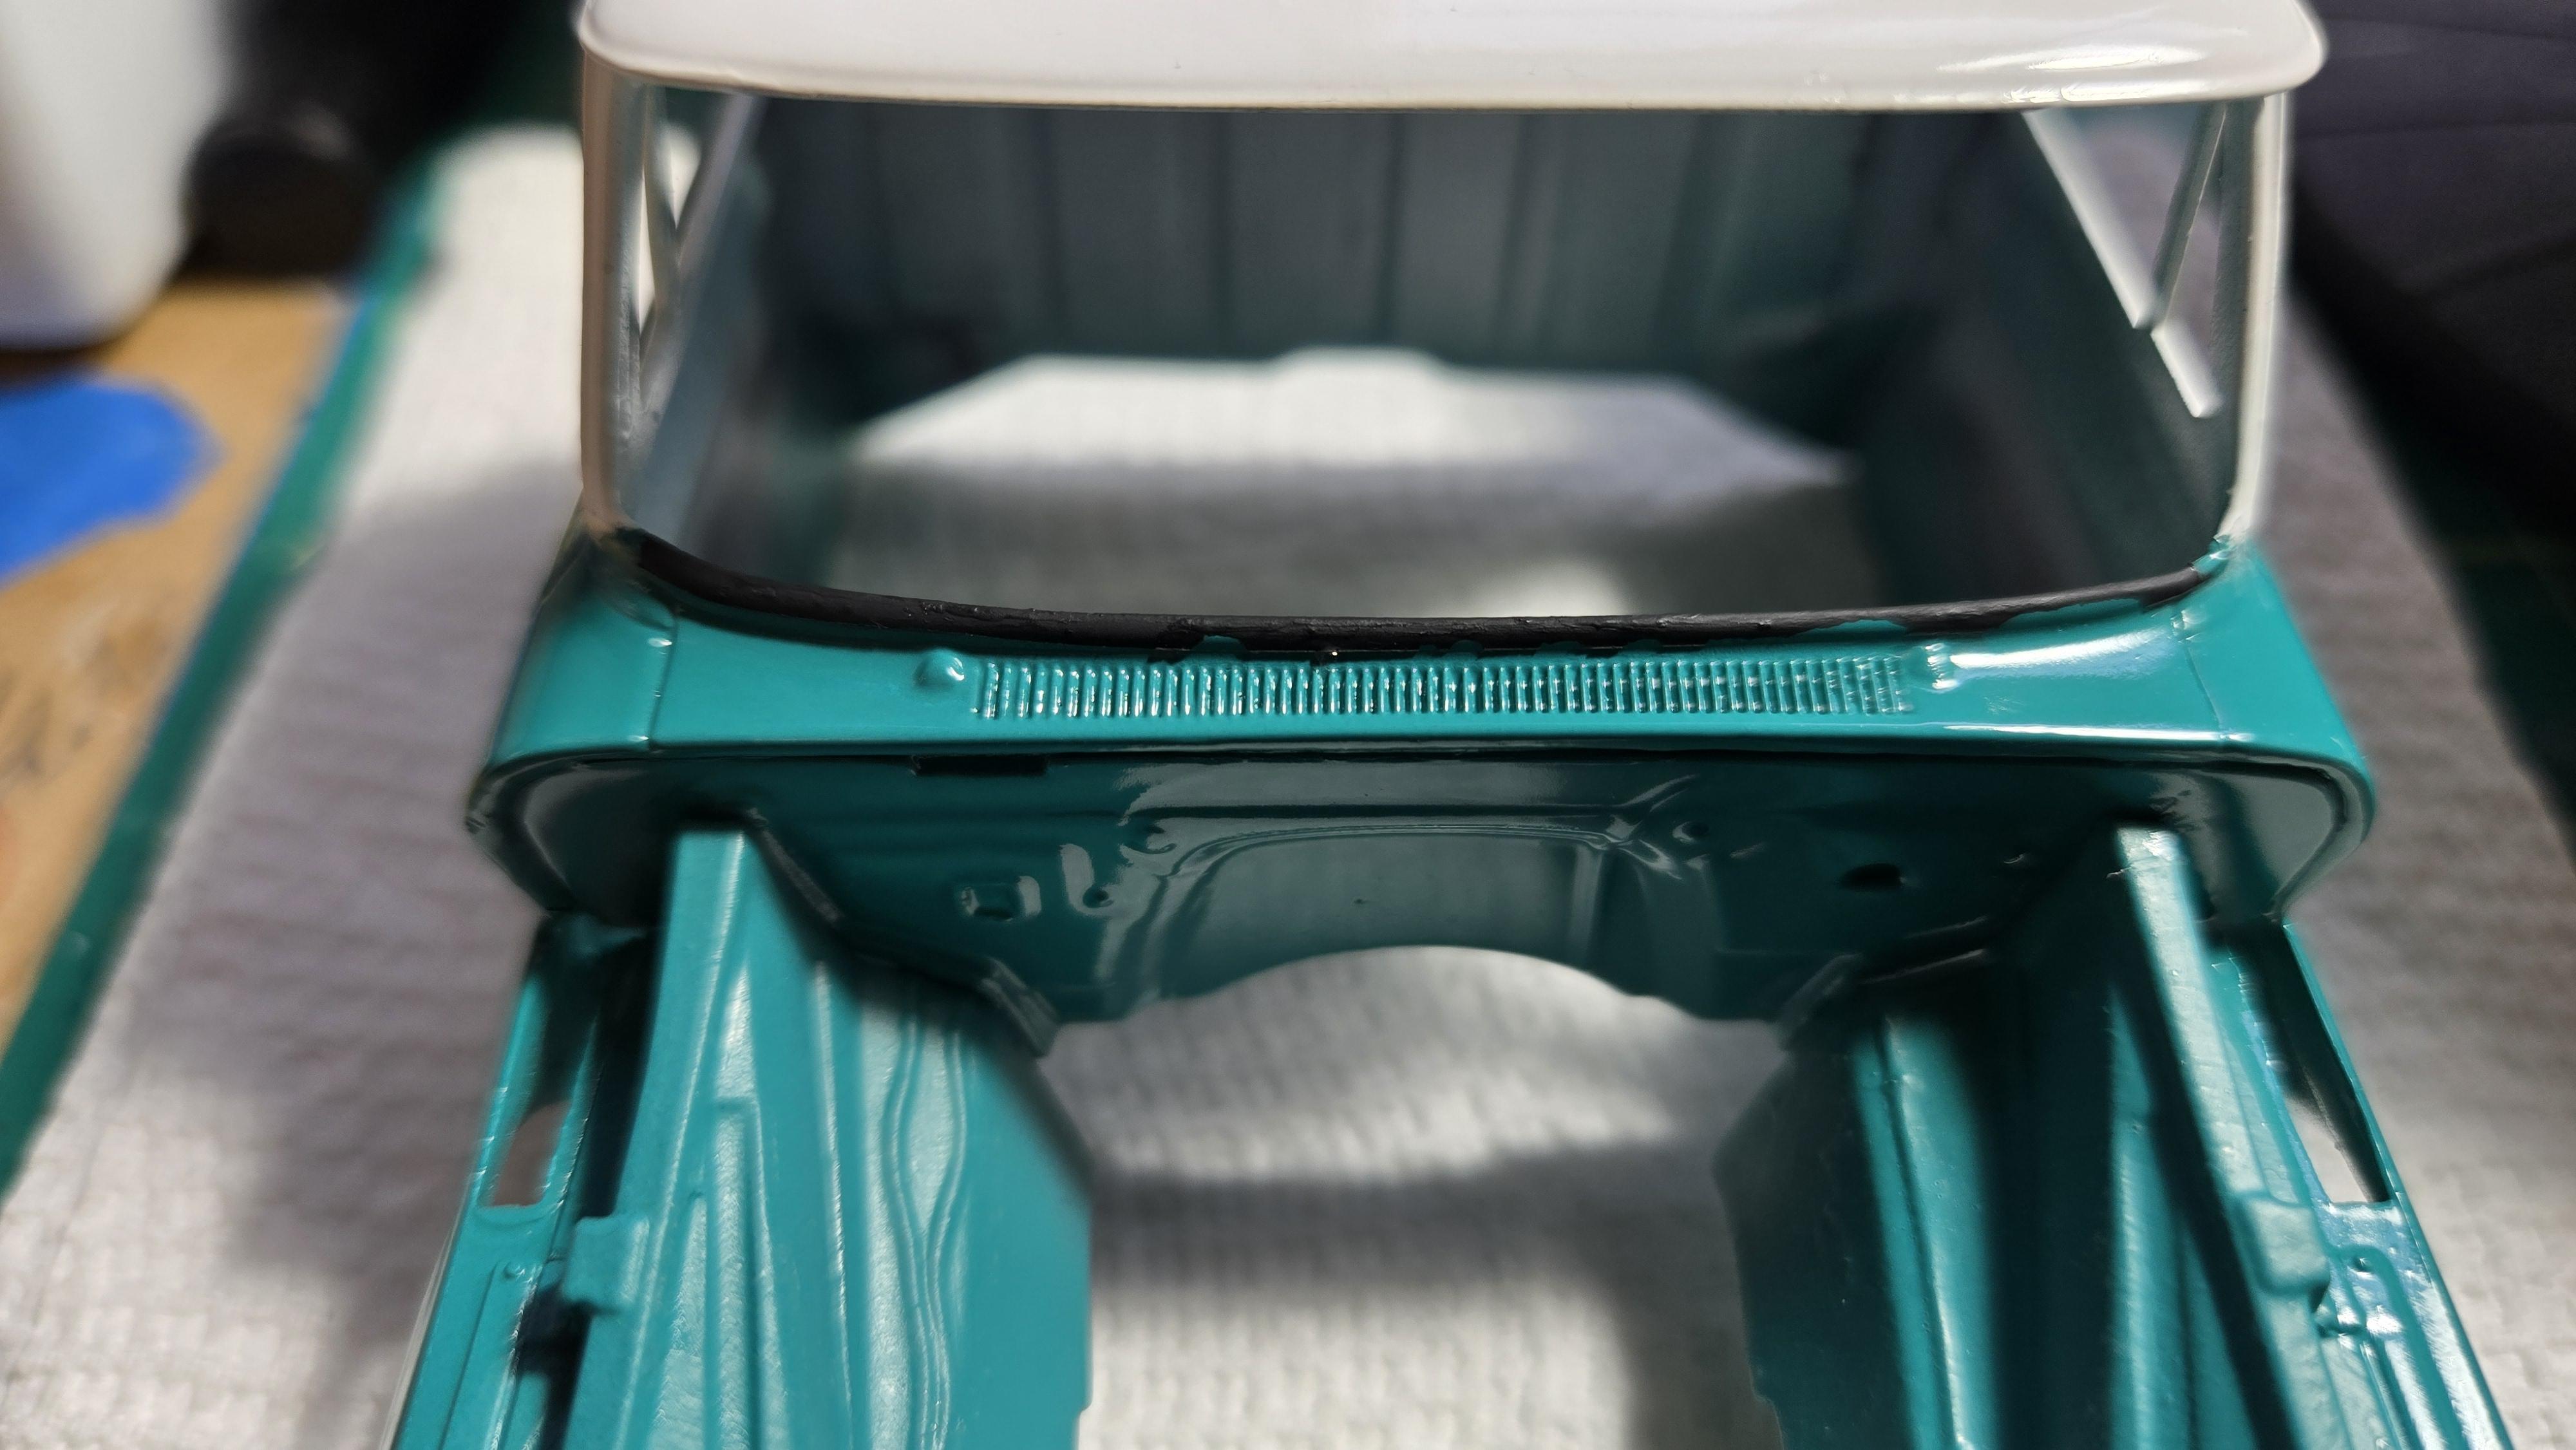
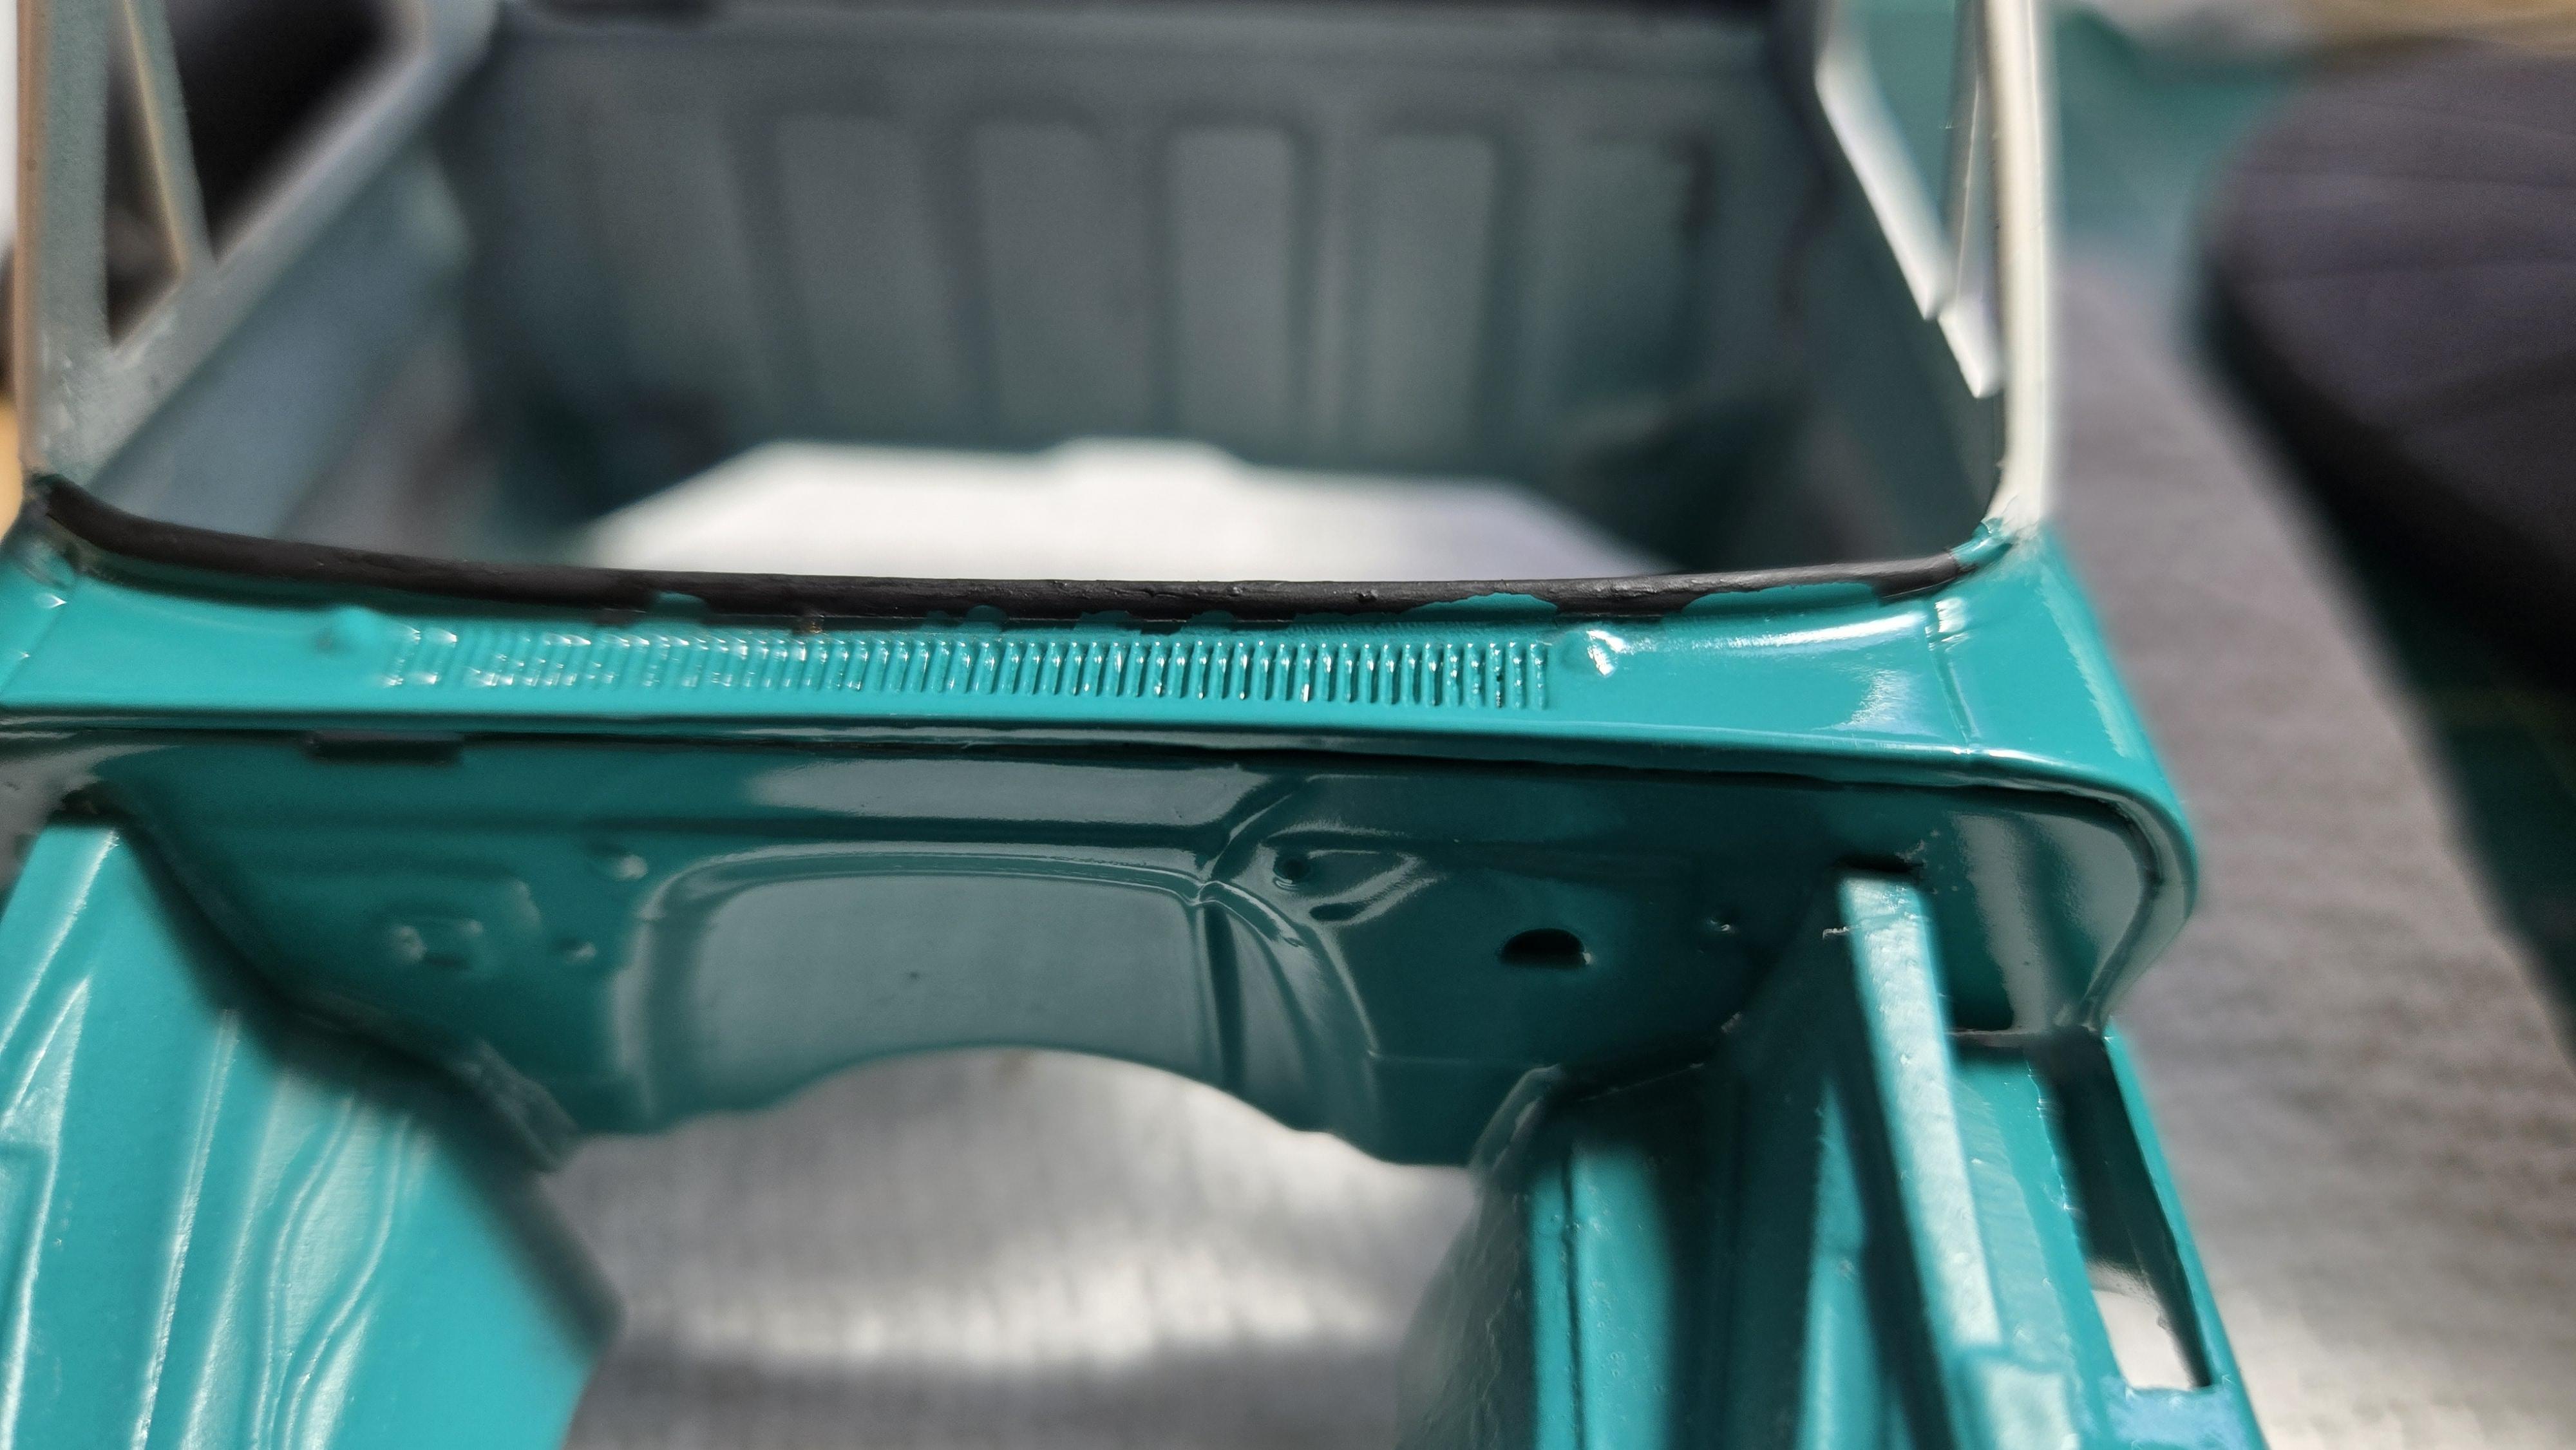
I did not like the big gap in the firewall and I was past using putty. So I faked a seal with rubber paint. I like it. I thought that was clever ?
-
'66 Chevy Fleetside Pickup - Revell
CA Whitecloud replied to CA Whitecloud's topic in WIP: Model Cars
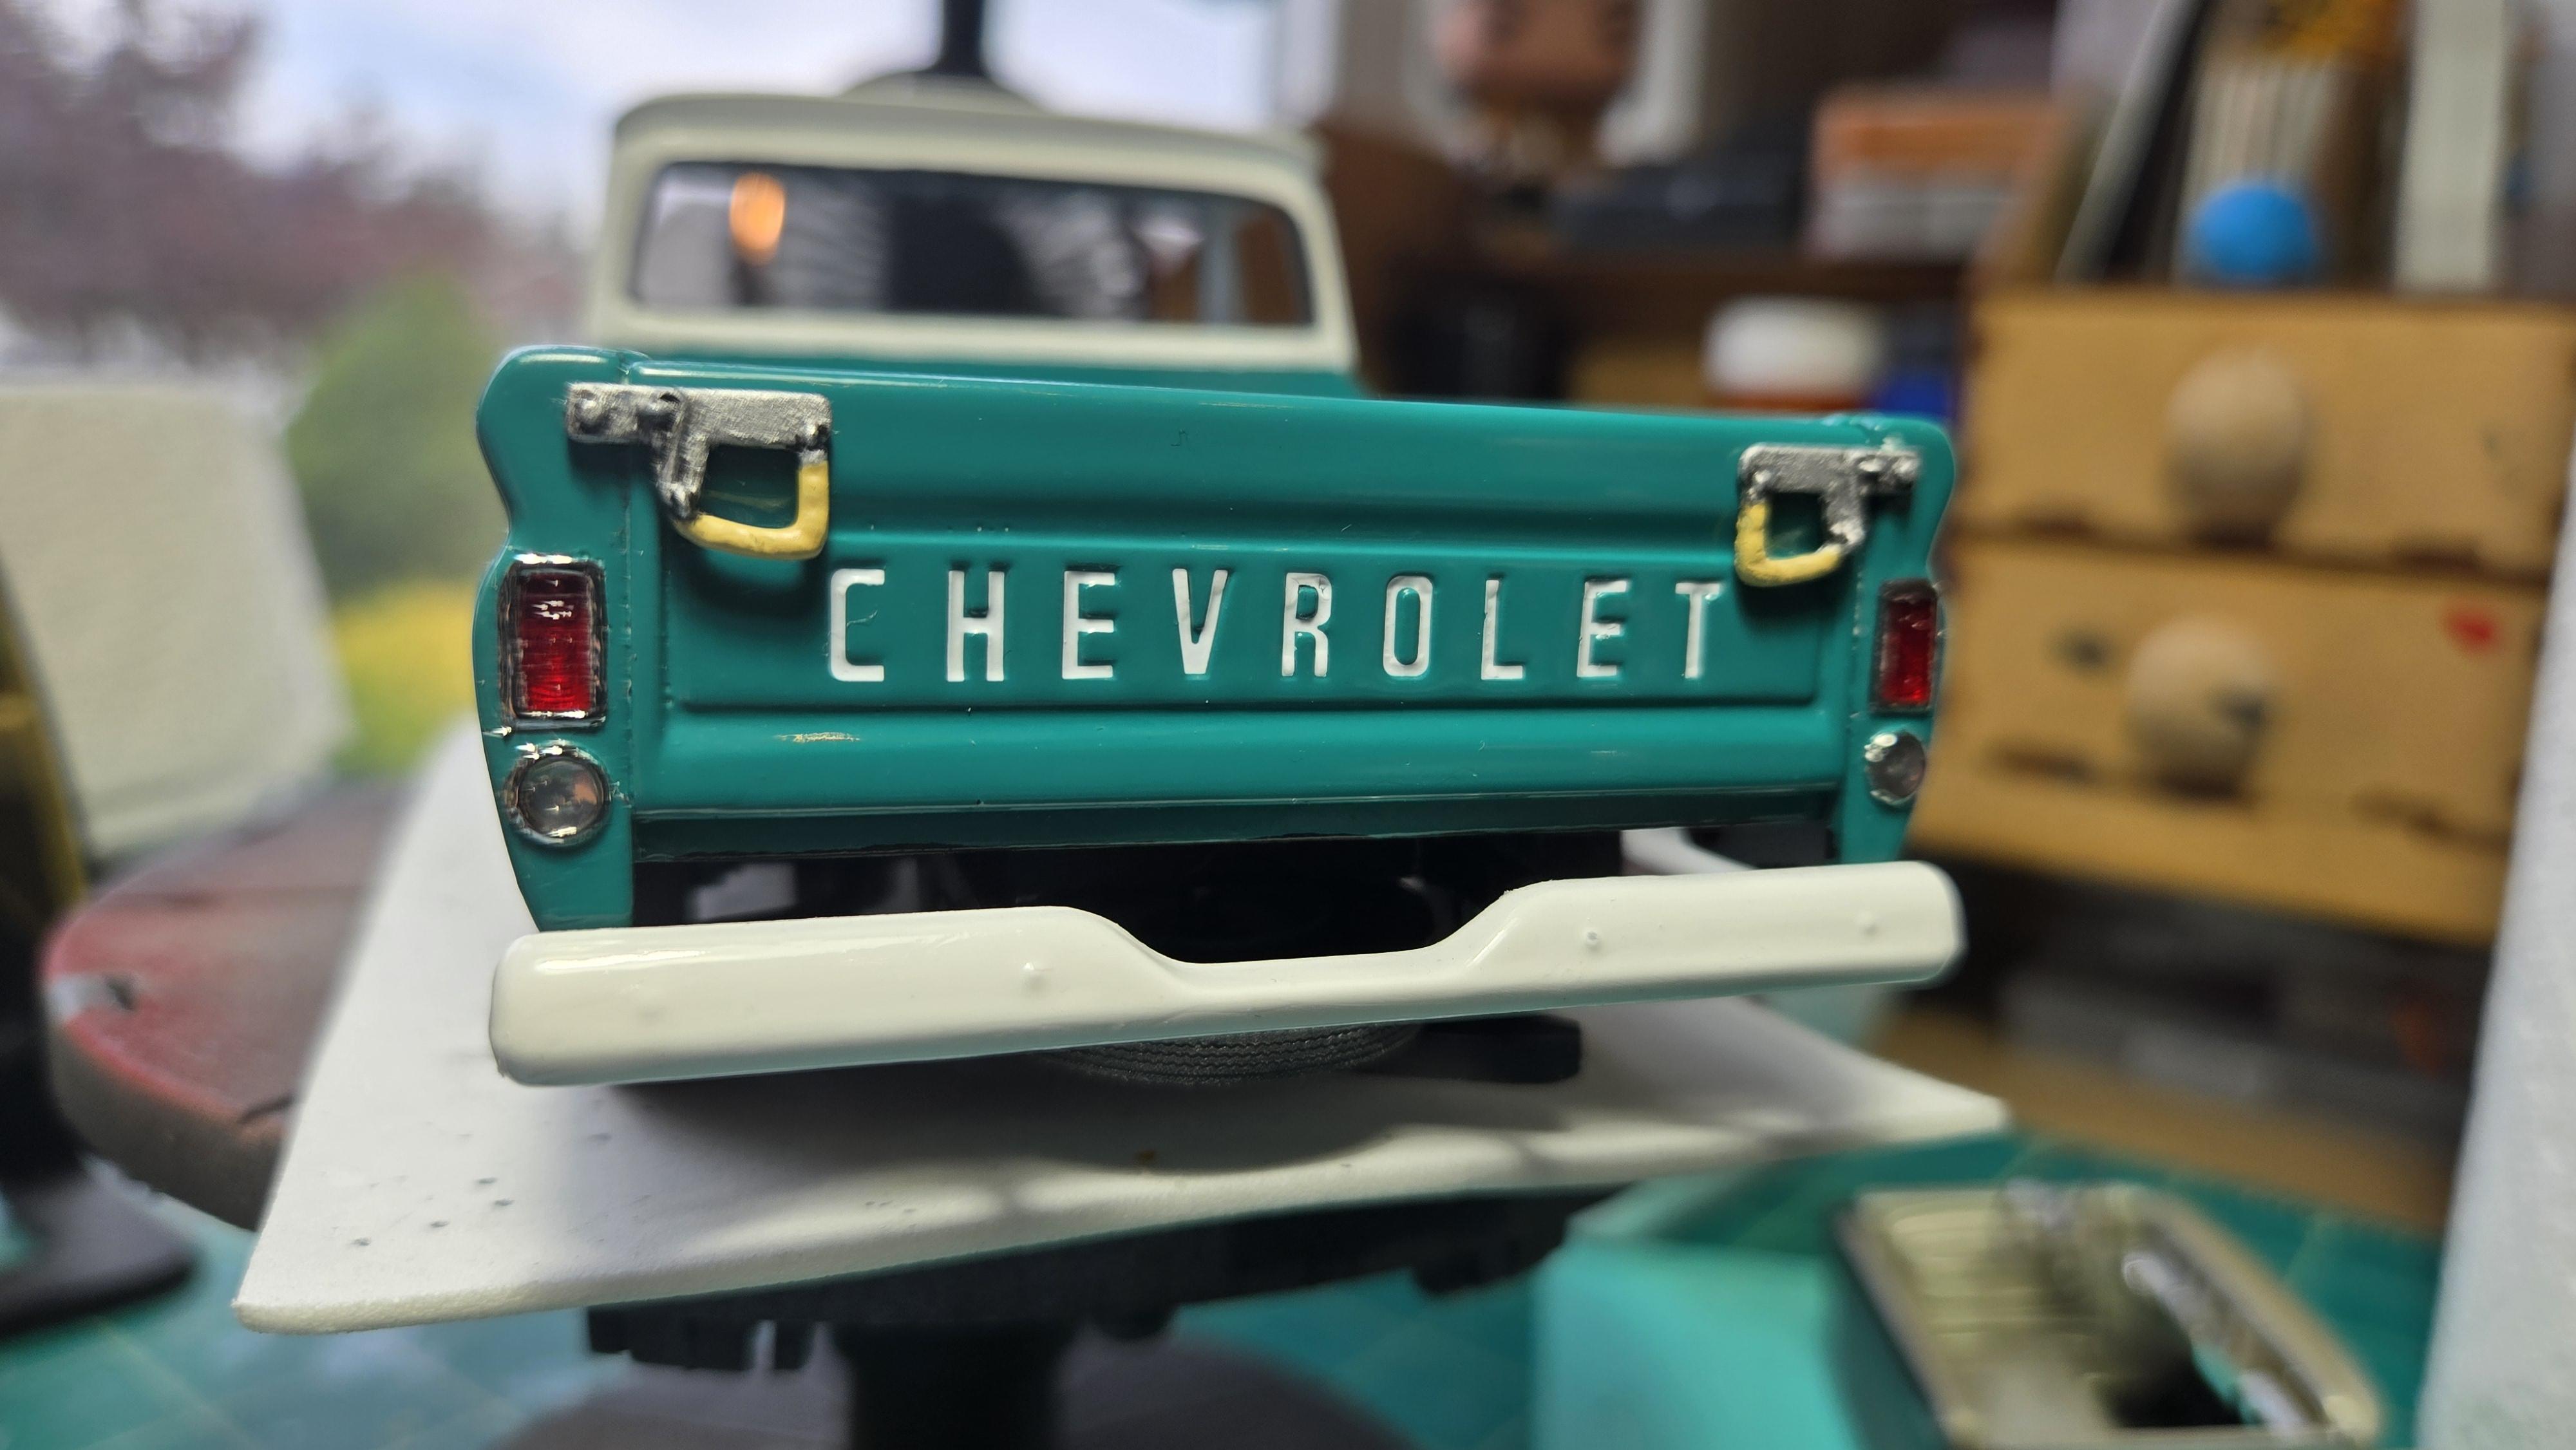
Test fit looks good. Of course some final fiddling at glue time will be needed. She's riding high in front. The tail end looks cool. Even though I accidentally threw away the clear lenses for the backup lights so I filled in with Mod Podge.
-
'66 Chevy Fleetside Pickup - Revell
CA Whitecloud replied to CA Whitecloud's topic in WIP: Model Cars
Thanks, I needed that. -
'66 Chevy Fleetside Pickup - Revell
CA Whitecloud replied to CA Whitecloud's topic in WIP: Model Cars
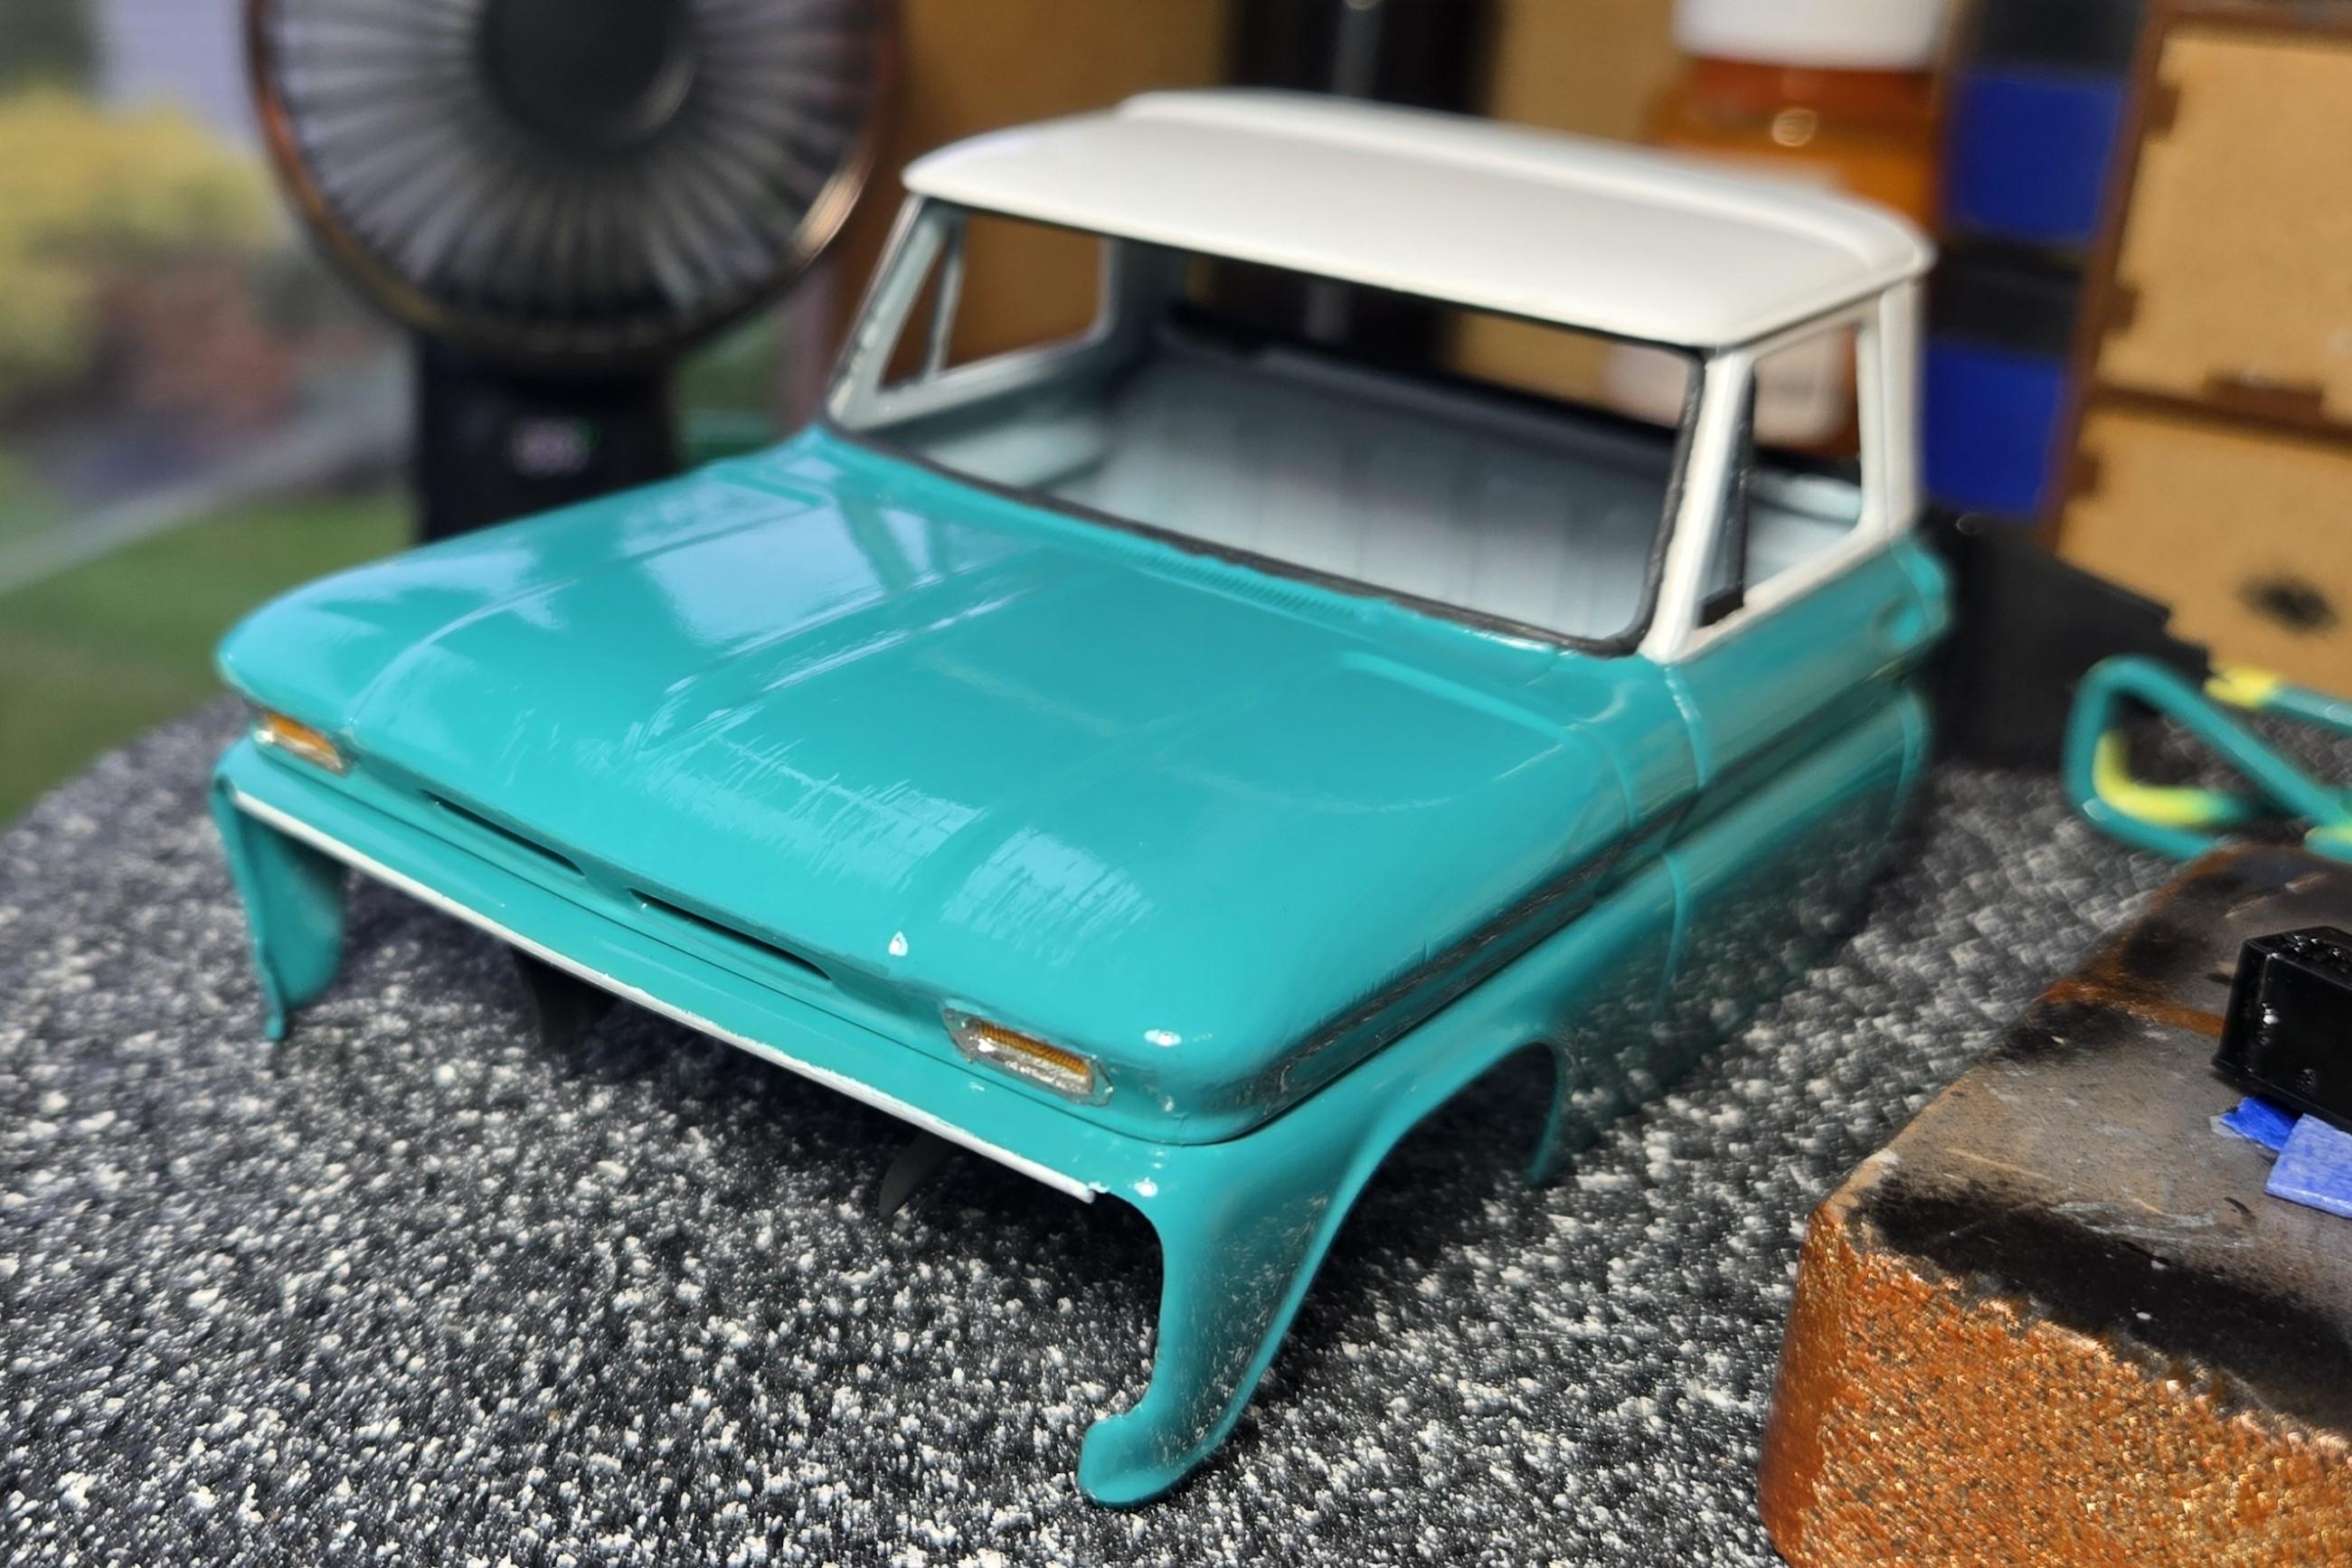
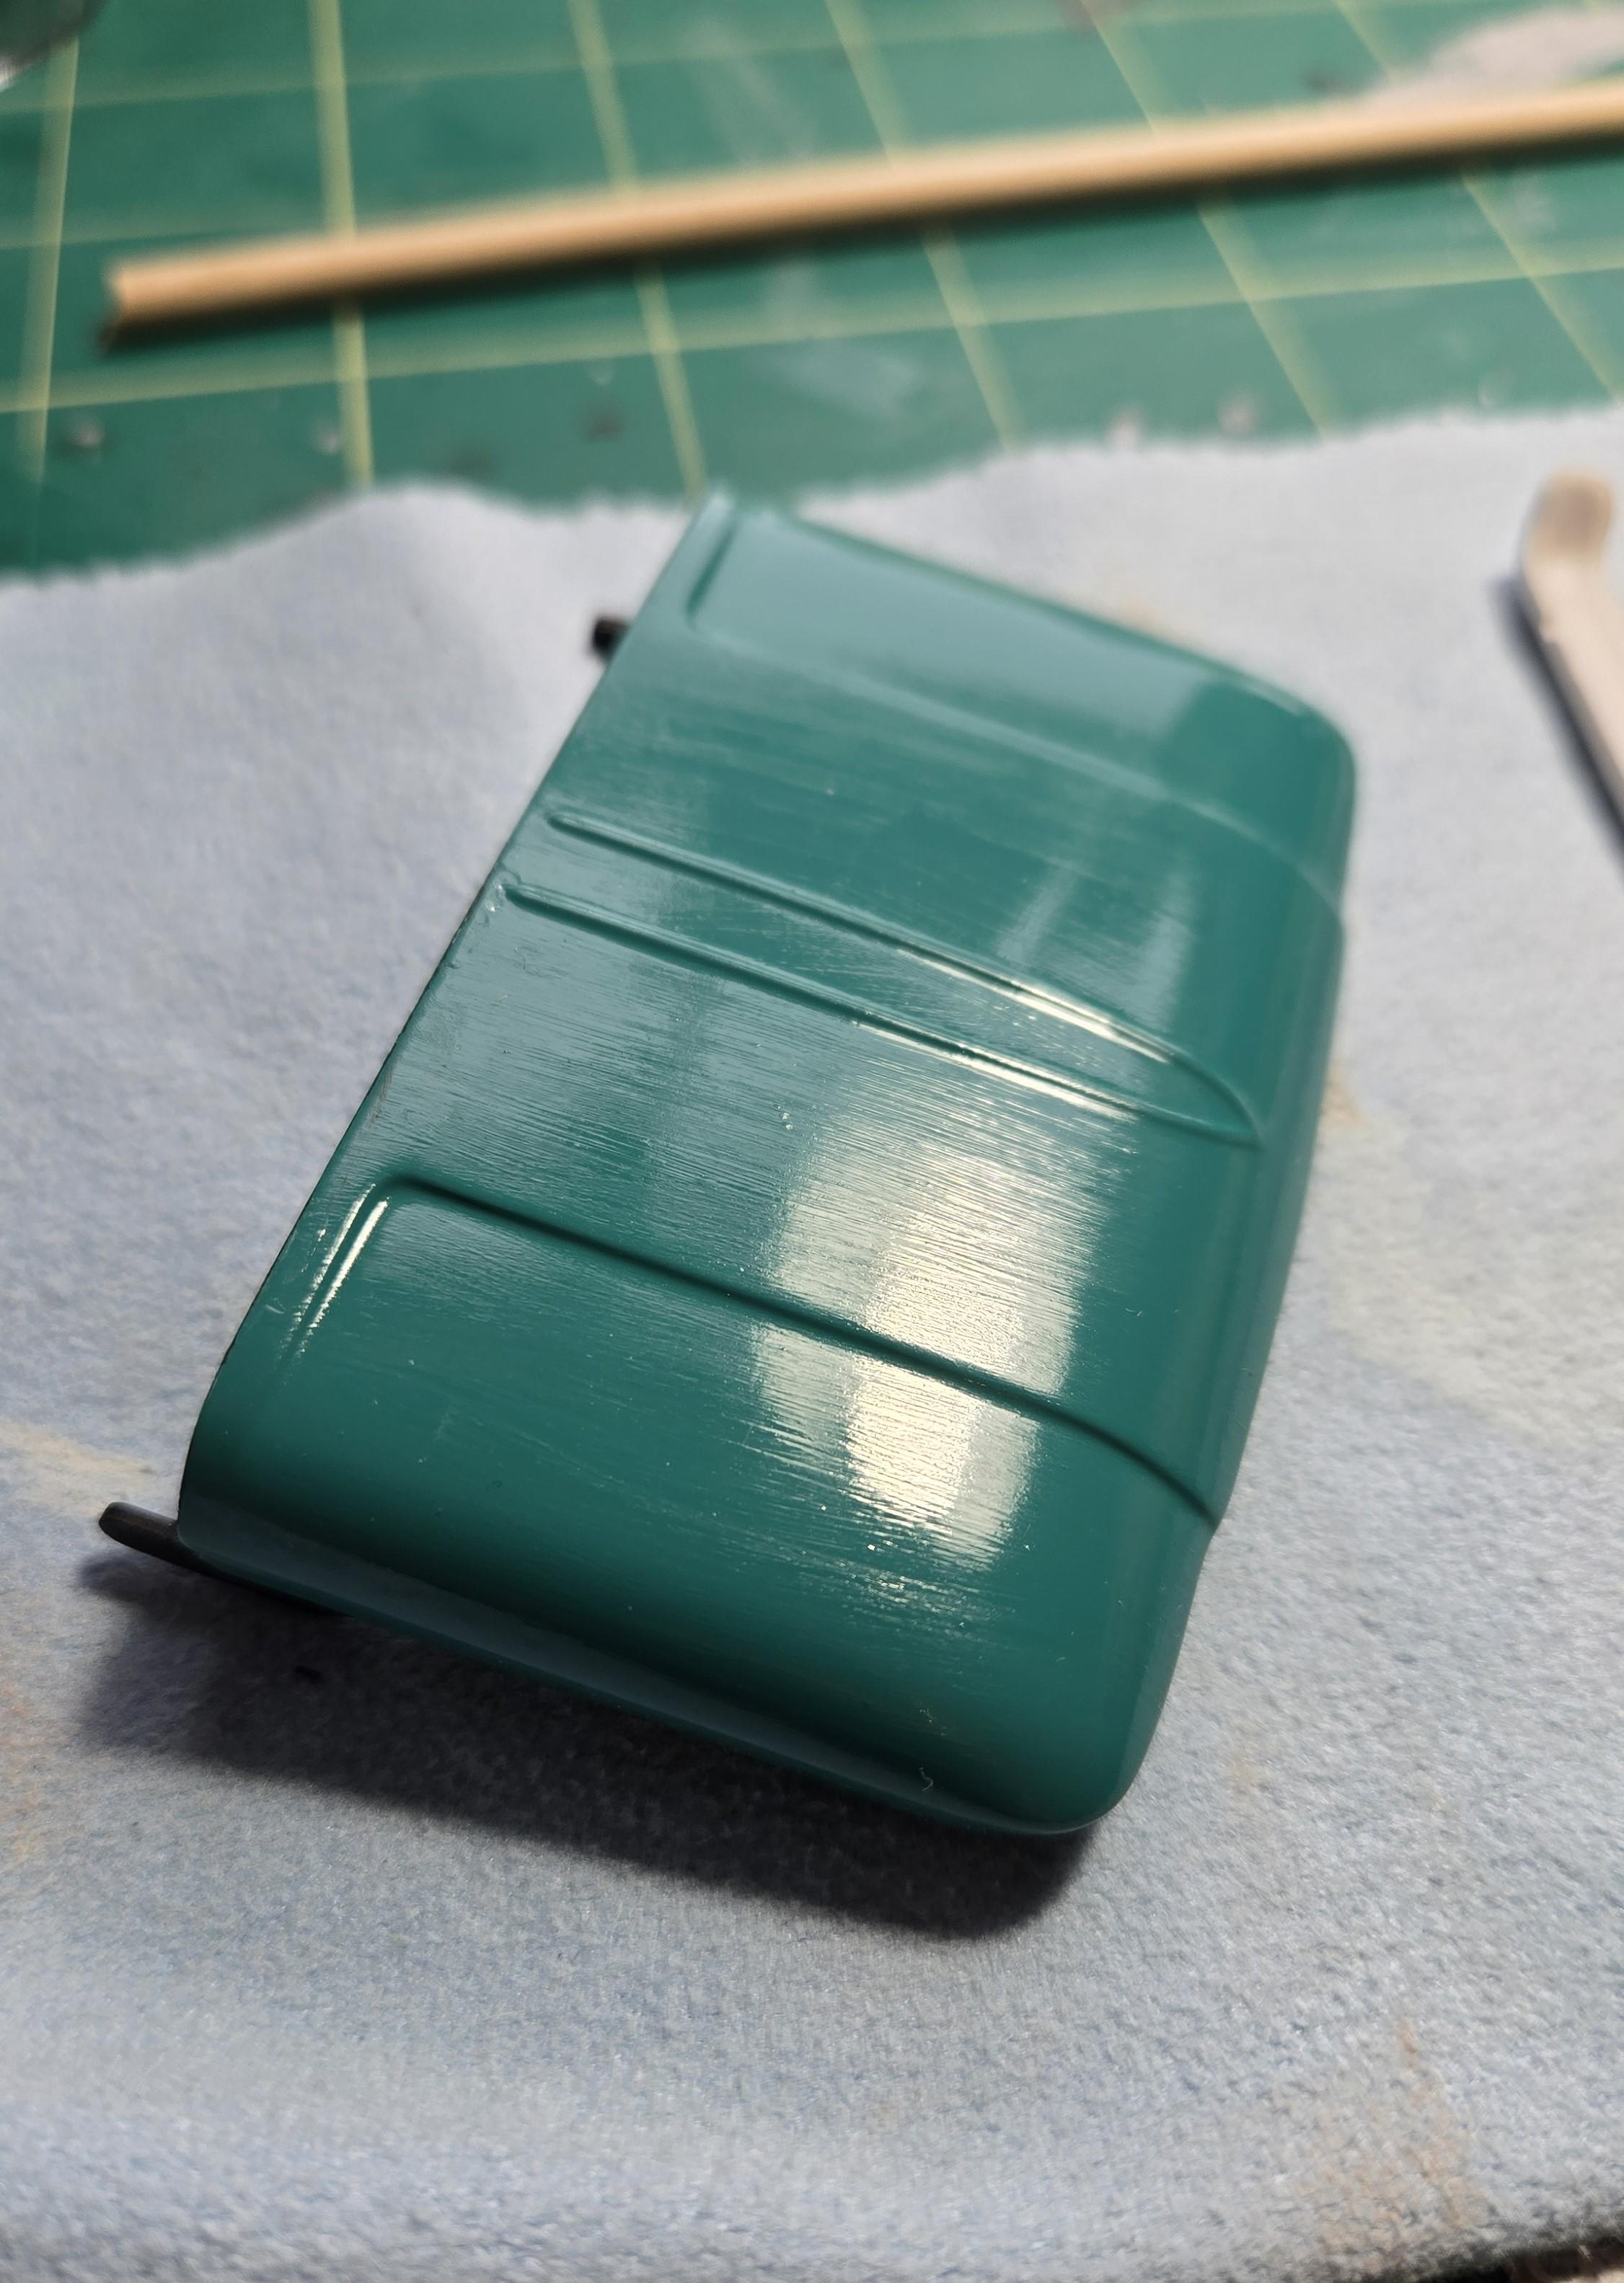
So some wet sanding and I'm here. I wanted to "freshen" the clear coat on the hood, so I brushed on some Future. Unfortunately, my desk fan was on, and it dried the clear coat too fast, resulting in brush strokes. So, I wet sanded the hood and now it's very smooth to the touch. My question is: If I spray the clear coat on this time, will the color be fine and show evenly? Or, do I need to sand all the shiny bits away? Or, do I need a fresh color coat? Any advice is appreciated. I've spent too long on this kit, and it's starting to show. Do you guys ever get burned out on a build? I really don't have the resources or the motivation to save this one and start another. So, onward!
-
'66 Chevy Fleetside Pickup - Revell
CA Whitecloud replied to CA Whitecloud's topic in WIP: Model Cars
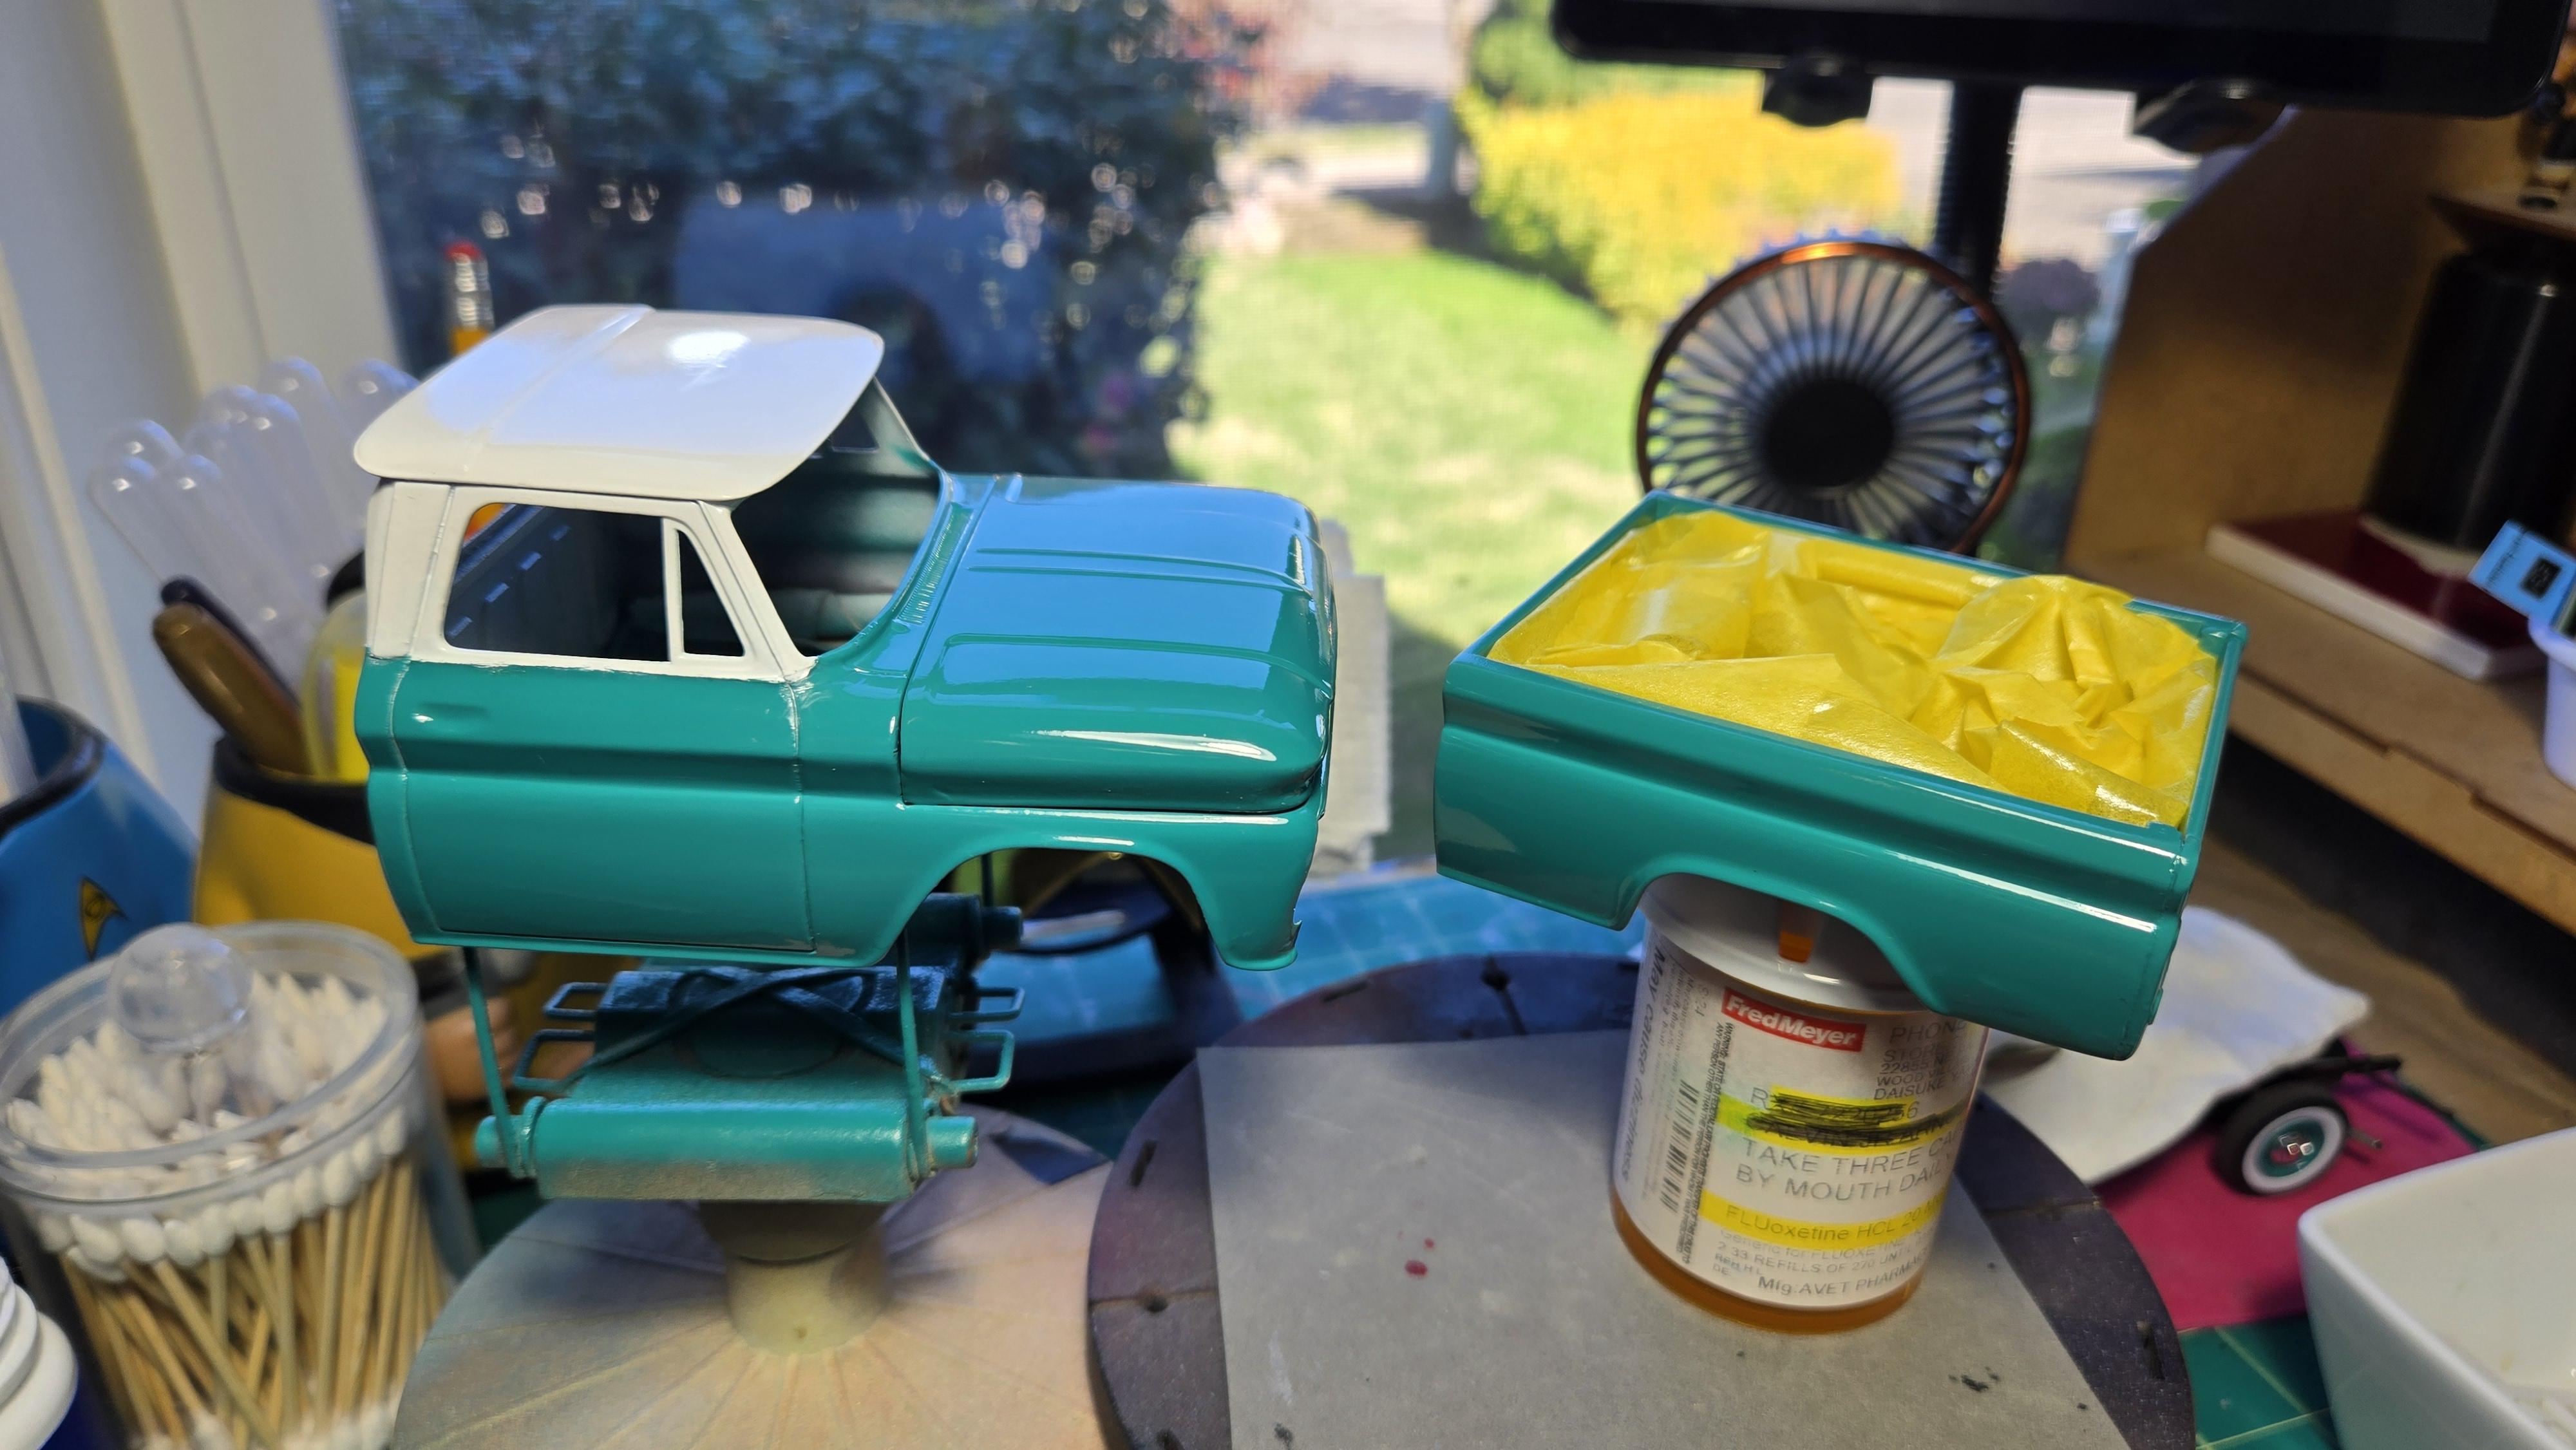
more masking woes.
-
'66 Chevy Fleetside Pickup - Revell
CA Whitecloud replied to CA Whitecloud's topic in WIP: Model Cars
Thanks Stu. They only come out perfect sometimes...NOT! My builds are usually GFAD. Good from a Distance -
'66 Chevy Fleetside Pickup - Revell
CA Whitecloud replied to CA Whitecloud's topic in WIP: Model Cars
Thanks Nick. -
'66 Chevy Fleetside Pickup - Revell
CA Whitecloud replied to CA Whitecloud's topic in WIP: Model Cars
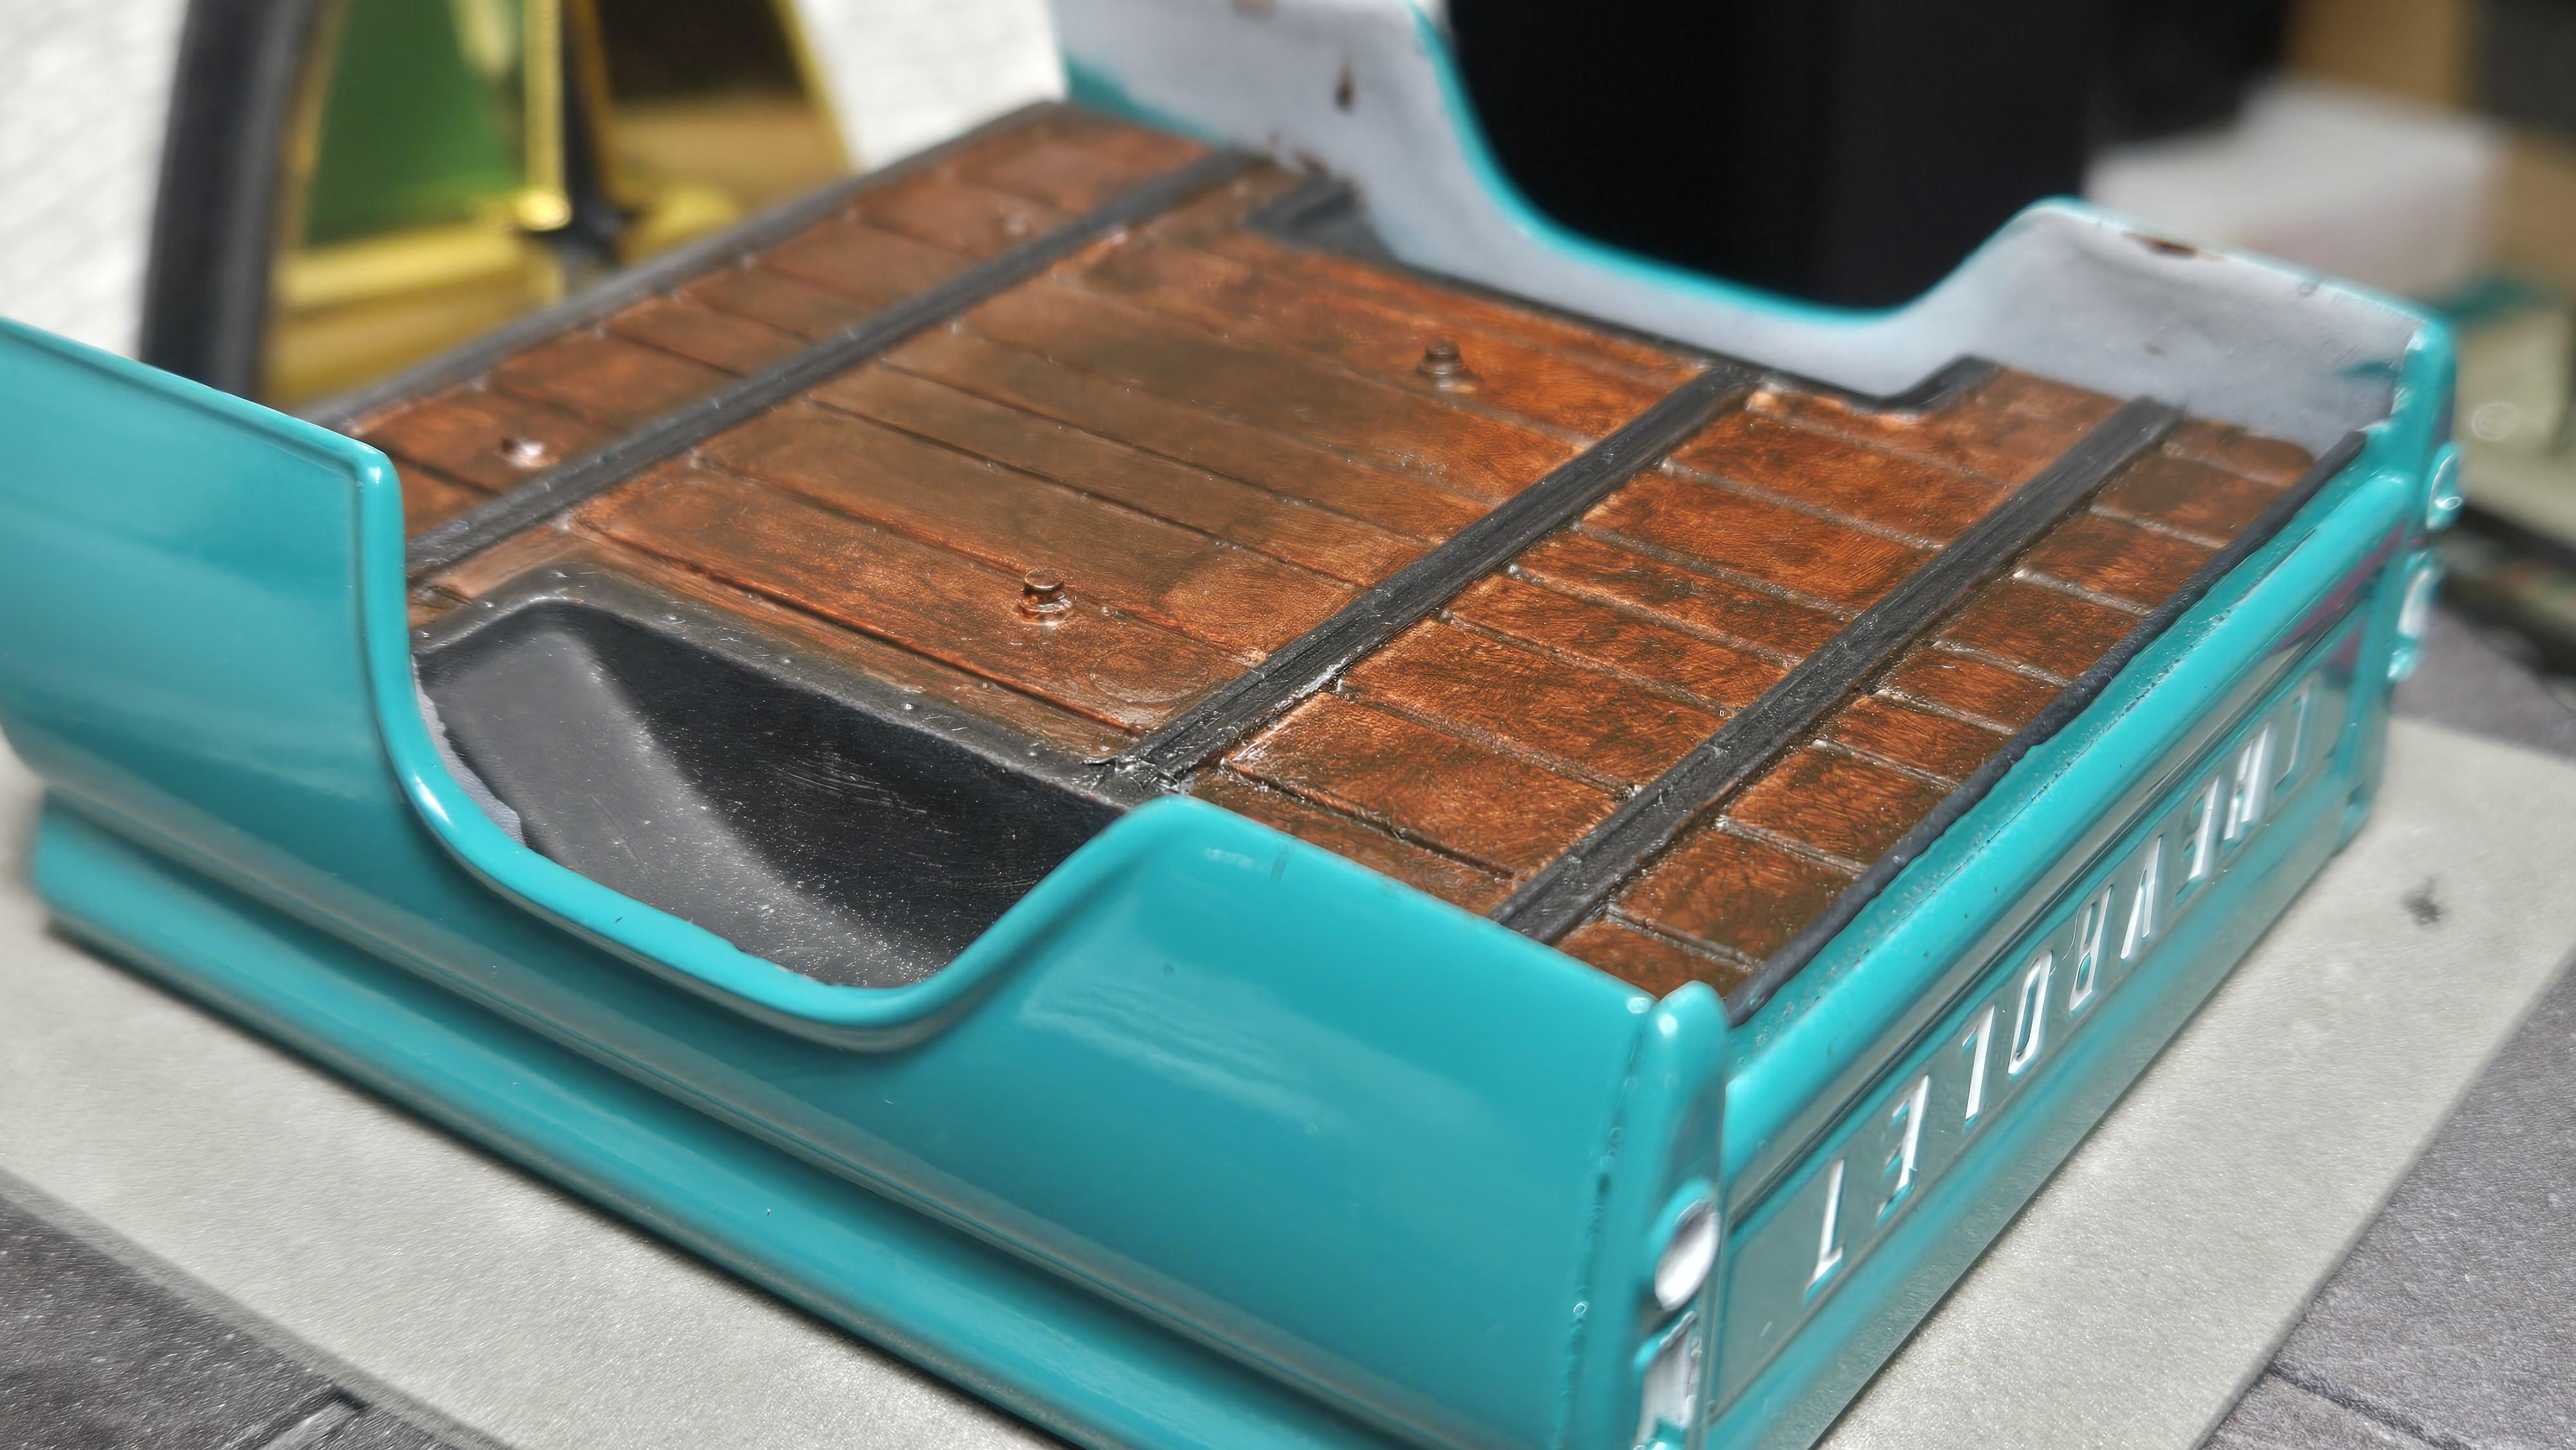
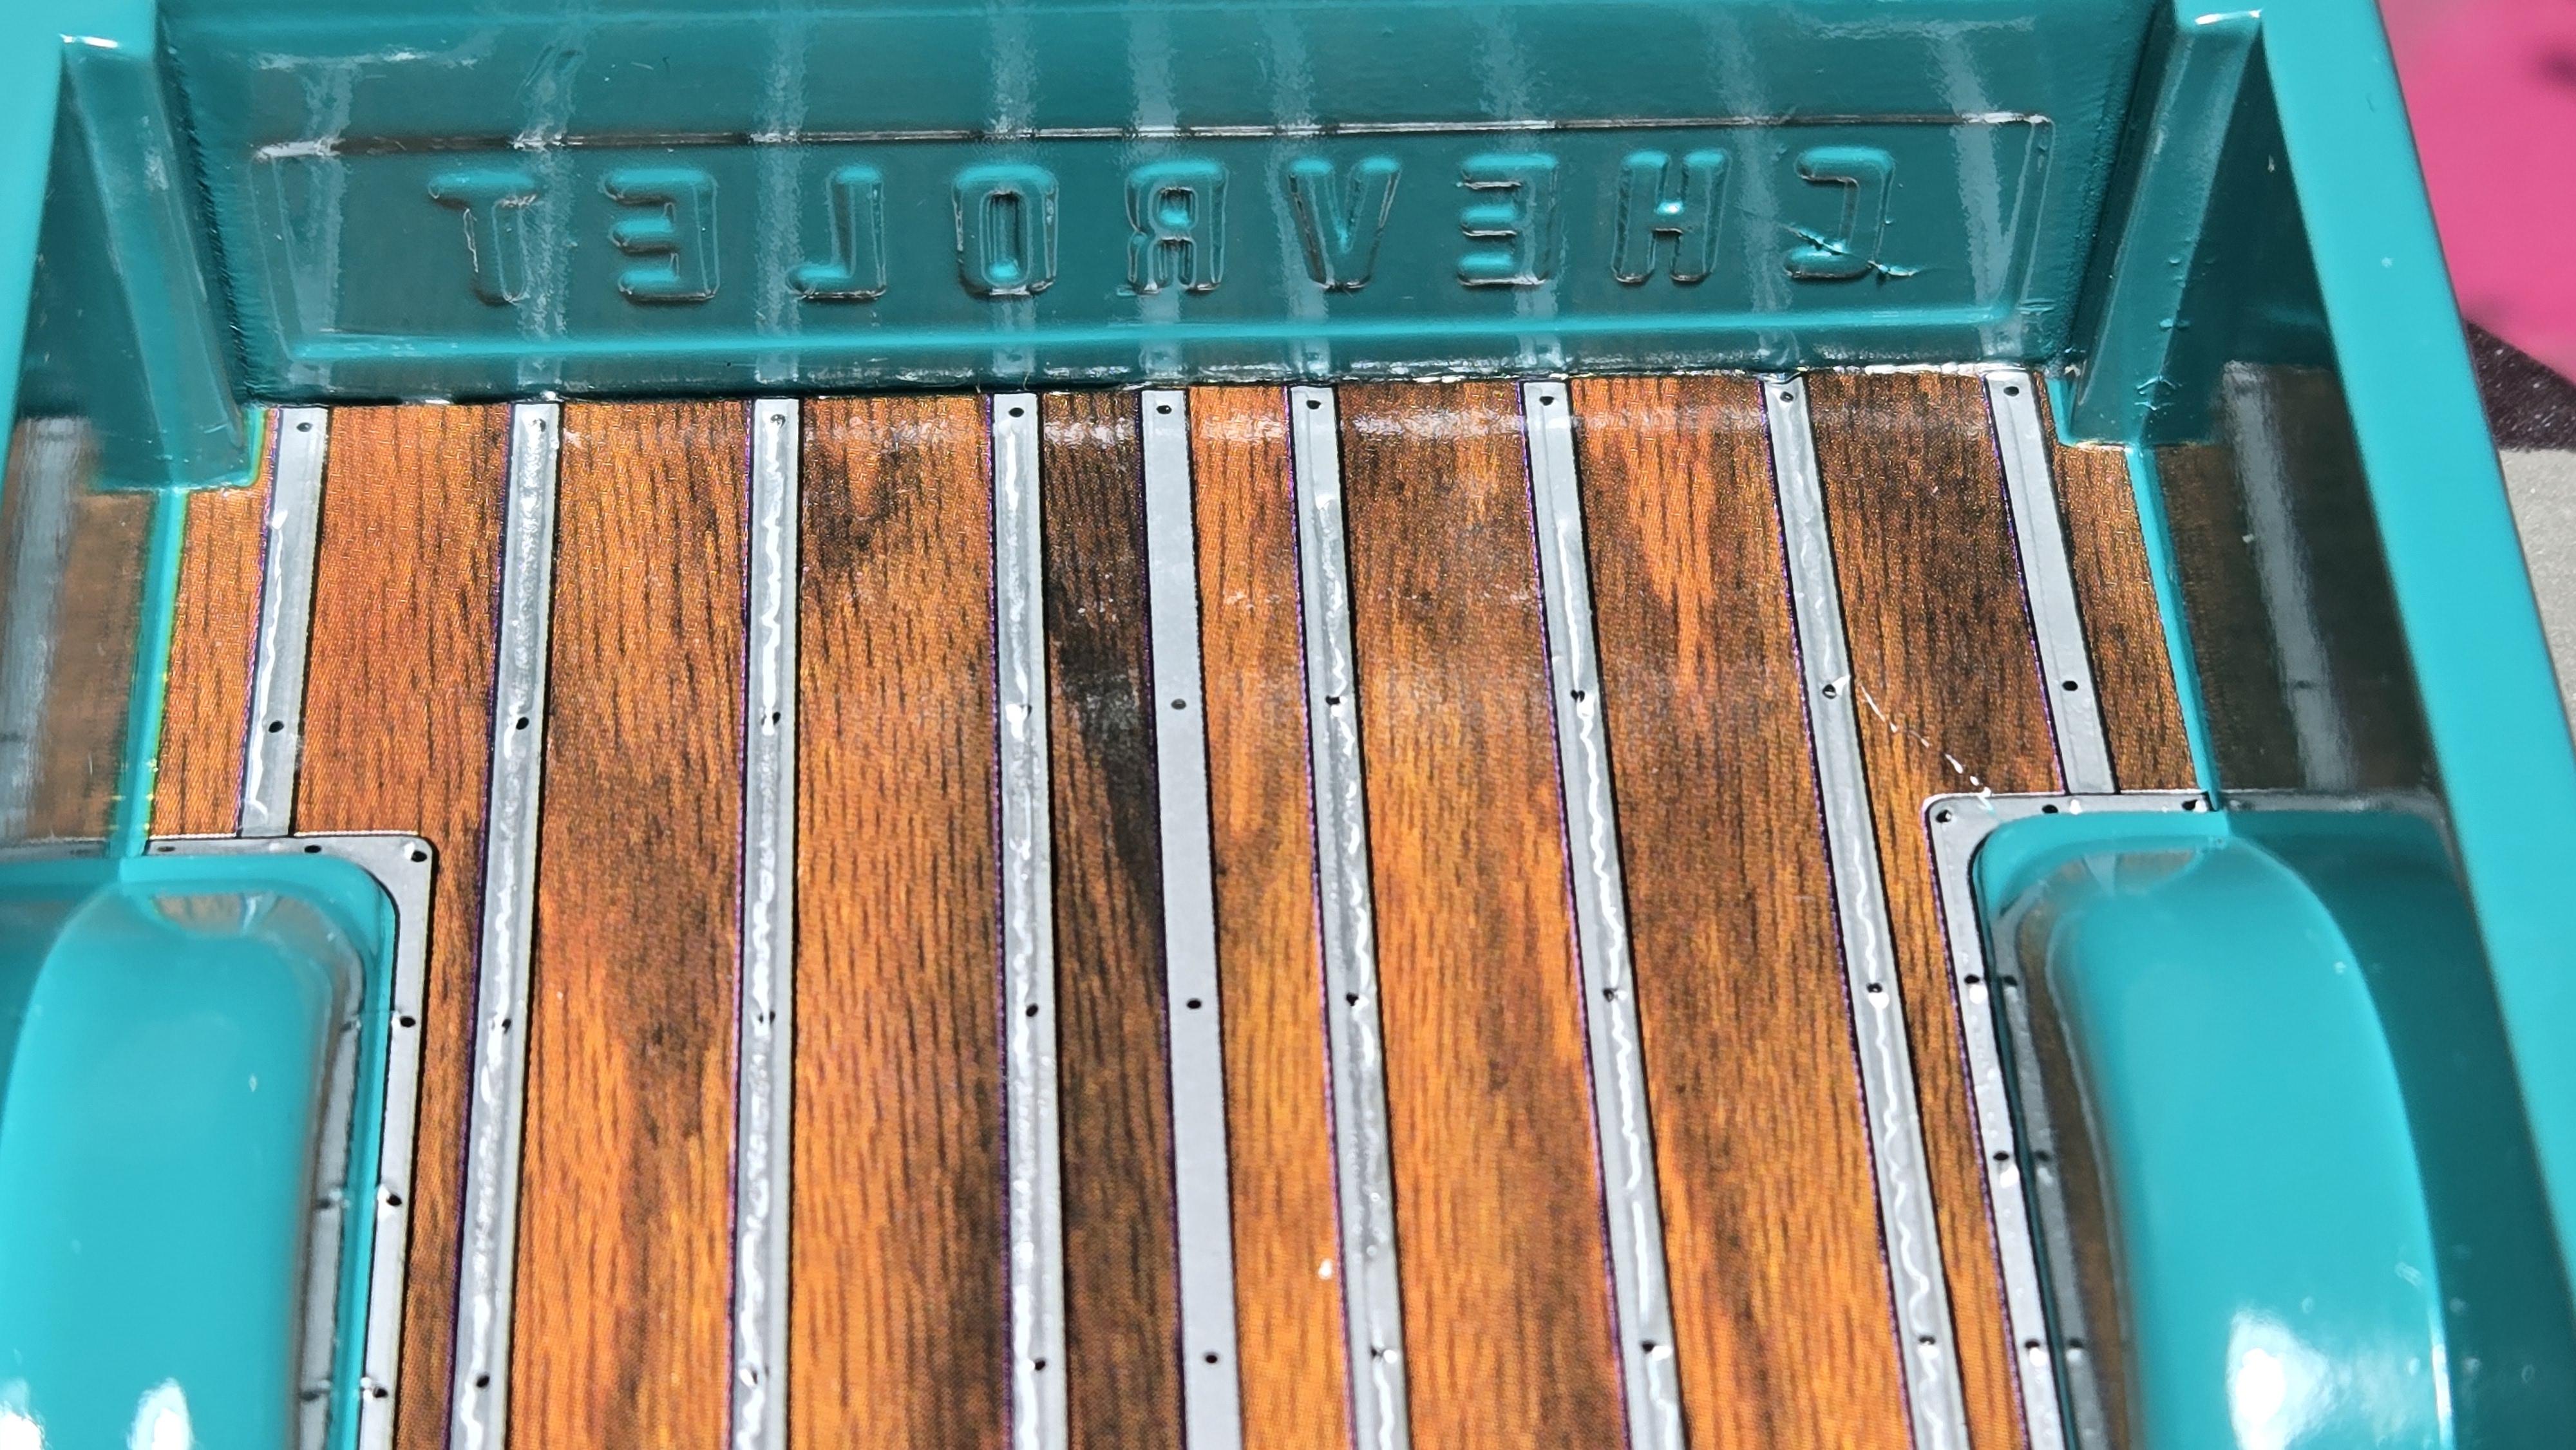
I hand painted the bottom to see if I wanted to use the kit decals. I went with the decals. The decal cracked a bit along the raised detail of the rails. I kept applying solution, but that only did so much. It's not to noticeable.
-
'66 Chevy Fleetside Pickup - Revell
CA Whitecloud replied to CA Whitecloud's topic in WIP: Model Cars
We're just going to have to go with it.
-
'66 Chevy Fleetside Pickup - Revell
CA Whitecloud replied to CA Whitecloud's topic in WIP: Model Cars
I will add that when using the alcohol, I "DAB" the alcohol with a micro-applicator instead of rubbing to get the offending paint loose. Then I wipe off with a clean cotton bud to avoid the smears. -
'66 Chevy Fleetside Pickup - Revell
CA Whitecloud replied to CA Whitecloud's topic in WIP: Model Cars
That is really clever. I'll have to keep that in the one in the toolbox.