SDC
-
Posts
60 -
Joined
-
Last visited
Content Type
Profiles
Forums
Events
Gallery
Everything posted by SDC
-
Looks great man. I think that black and red color scheme works really well for that body.
-
Good job man, nice and clean. It looks great. Is that area under the hood a molded in texture that you painted or did you do something to create the insulation effect?
-
Thanks for the tips Noah, I 100% agree that I probably taped it too quickly. Something about seeing the finish line makes it so hard for me to stay patient, then I mess up, and ultimately spend much more time correcting the mistakes in the end than if I'd have just waited. What's funny though, is I'll still do it again eventually. It's insanity I guess.
-
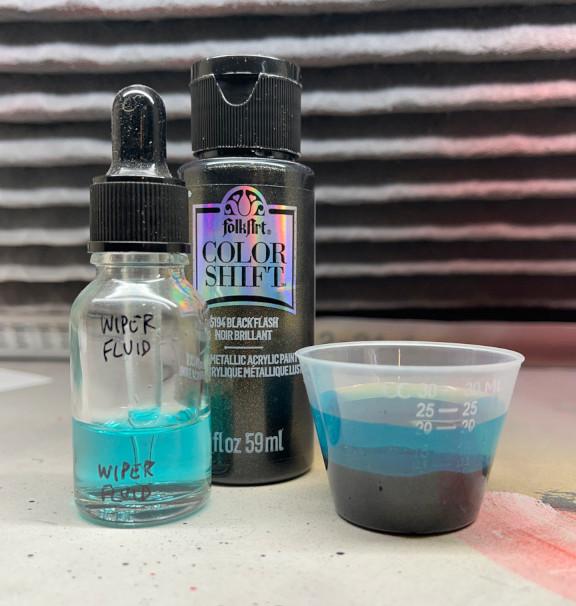
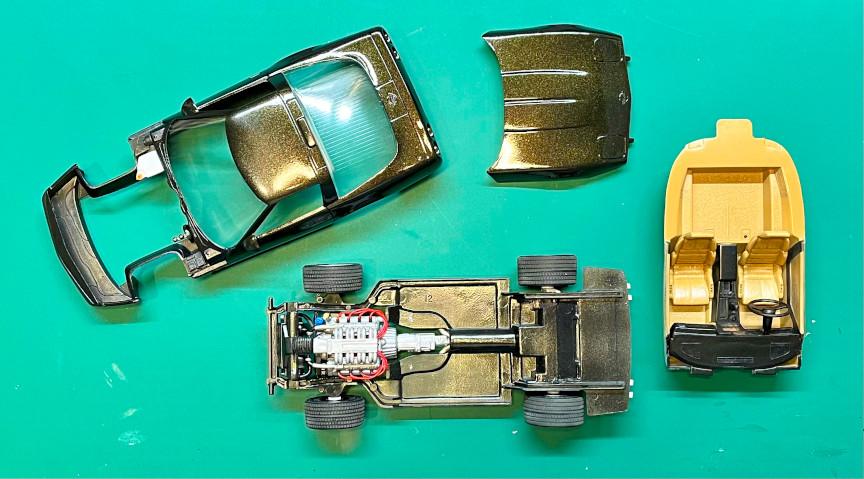
If this was a rodeo, then I reckon I got thrown off my bull around 7.5 seconds into my ride, with the finish line in sight. I had a pretty interesting craft paint I wanted to try called BlackFlash from the Folk Art Color Shift line. I think it's supposed to shift a bit between black and gold. Since it is a cheaper craft paint, I didn't really know what to expect. I cut it 50/50 with washer fluid and it sprayed really well out of a 0.5 tip. I realize it's probably not much of a Corvette color, but I sort of like it, kind of reminds me of Root Beer. Well, I liked it until I peeled some of it off with my Tamiya tape. To the Super Clean dunk tank and try again! The second round went a bit smoother, so now I'm down to the finishing touches and final assembly. I hope to have this wrapped up in the next day or so.

-
I don't recall where I picked up the habit, it was certainly from another builder's channel, but I use one to hold my discarded blades. Keeps them from flopping around loose in the trash bin that I occasionally need to rummage through for something I shouldn't have thrown away.
-
Welcome aboard Kevin, I am relatively new here as well. Though it's not really a return to modeling for me, more like just getting started after a 30+ year hiatus from the one and only model I ever built as a 12 year old. This group has been very helpful to me, so I think you will like it here.
-
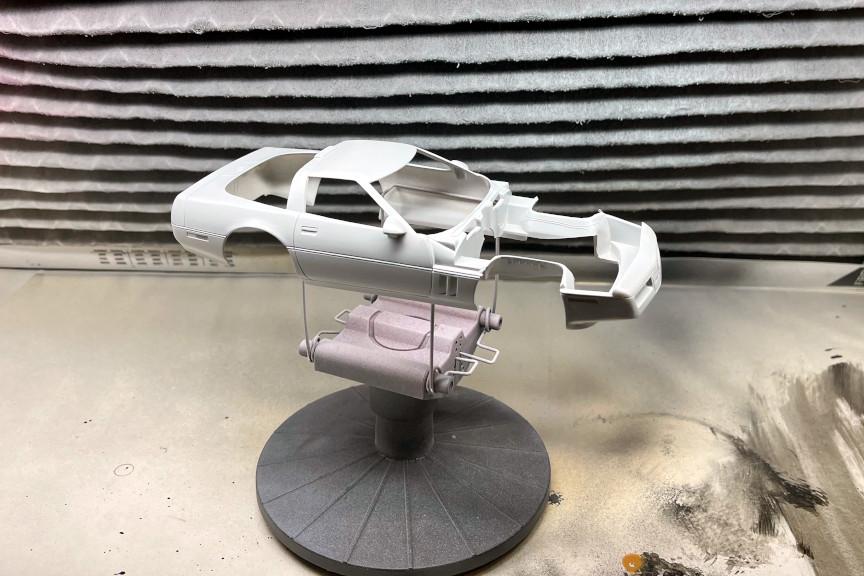
I'm starting to see the finish line with this one. I primed the body this morning and was able to tape it up and spray the engine bay and under the hood this evening. The interior is pretty much done as well. It's a little plain, but I am really happy with how the Apple Barrel craft paint turned out. I basically have the body color and some little details left and I should be ready to stick it under glass. Thanks for the support everyone!
-
I think you a right Carl! I have seen many color combos with the tan leather and they all looked good to me.
-
Thanks for your kind words Pierre. I had read through your information regarding some of the versions of the kit, and I also recalled your advise in a previous question of mine; so thanks for leading me down a good path to position it well. I wasn't sure how it would turn out, but I knew I'd need to hide the bulbous rear end no matter what. LOL.
-
Thanks Carl! When you are colorblind, you never quite know if you are seeing what everyone else is seeing (in fact, you can often bet that you aren't). I've been called out for using some odd color combos throughout my life, from clothing to paint and everything between, that weren't quite what I thought they were. I think have a decent handle on browns though!
-
Truly, I do not have the answer to the science behind how it works, I am sure someone smarter and more experienced than me can chime in if they stumble across this thread. That being said, I did a bit of searching after I originally asked about it a few weeks ago and found numerous examples of guys that had success using it as a thinner, so I went with it!
-
I followed shoopdog's advice and tried spraying some Apple Barrel Classic Caramel craft paint (mixed 50/50 with washer fluid) and I think I created a pretty convincing tan leather interior for the ZR1. I'll give it a bit and do a bit of a wash to see if the seat details pop a bit better, but I am pretty happy with it so far.
-
Absolutely, sometimes it's fun to see something that doesn't quite belong! Also, good job on that tiny wiring, I'm trying to get a handle on those little details myself now, it's tricky.
-
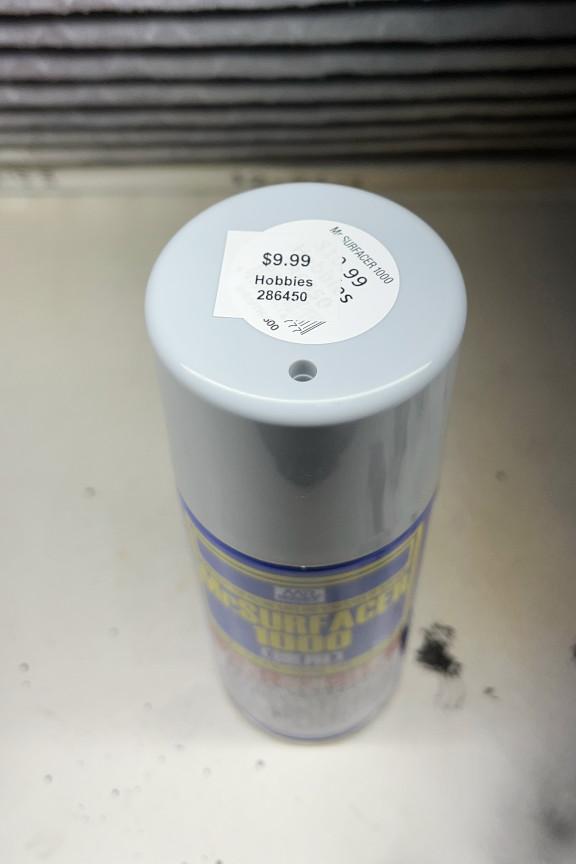
In a world where prices seem to regularly increase, it's a pleasant surprise when they go the other way, even if it's just a buck. This weekend I reached into the case at Hobby Lobby for a can of $10.99 Mr Hobby Surfacer 1000 I've been using, only to find that a $9.99 sticker placed over the normal $10.99 sticker. It's like I hit the micro lottery or something. ? Now I'll just sit back and wait for someone to let the wind out of my sail by telling me their HL sells it for $7.99 or some nonsense. LOL.
-
Thanks Gary and Helmut and David! I felt pretty good about it, I think mainly because it was my first, I suppose you always remember your first, LOL. I had NEVER considered weathering anything as part of model building until I decided I wanted to actually start building models. I guess, like many who don't build them, I figured it was a bit of glue and paint and that was it. I stumbled into some weathering videos while searching for other things and was really impressed with how some guys can really capture a scene, emotion, etc., so I kept watching them and got the itch to try it. I think box stock is still what I am drawn to most though, since I am trying to get better at basics, but I really did enjoy the creative freedom with the weathering aspect.
-
Like everyone has already said, that finish looks excellent man!
-
Thanks Curtis and Brian! I'm glad to be moving on the the interior because the engine (it's fitment as a whole as well as it's mounting to the chassis) really frustrated me and sort of gave me my first dose of reality that this is hard sometimes. And then, once I'm good with it, I look at a picture and suddenly 30 new seams have appeared that I wasn't seeing before! Lol. Anyway, engine, suspension, and exhaust are in the rearview, moving to the interior now. (sorry about the glare in the photos)
-
Propping open a hood for an Out-of-the-Box build?
SDC replied to SDC's topic in Model Building Questions and Answers
Well, I received an answer (in blue). It seems like they are very laid back, and many of you were spot on with your recommendations. ? Lol, the debate of the century... Depends... you can have the hood open, closed, on the table next to it. Just realize if open, everything is judged. Can't scratch build parts or add wires. The best thing to do is lay the hood next to the car. That is what I've seen at other shows. Try not to over think as we're pretty laid back about things. Some car clubs or car shows are pretty strict about stuff, but we try not to. As long as you try to meet the intent of the category, we're happy. -
Looks great! Is it a gift for your friend or is it going on your shelf?
-
I'm looking forward to seeing your build since I plan to do this one soon as well. Have you decide on colors already?
-
Propping open a hood for an Out-of-the-Box build?
SDC replied to SDC's topic in Model Building Questions and Answers
I'm a curious guy in general, so I've been wearing the poor guy out who listed his contact information on the show flyer, but he has been very nice and answered each question I've had so far. I went ahead asked him about the hood propping as well, so I will probably get an official host club answer soon. Thanks to everyone for the info and suggestions! -
Thanks for the kind words everyone, this community has been very helpful as I try to find my way as a new model builder. I had a great time working on it!
-
As a new builder, I keep having "firsts", and I had another one last night. I partially wired my first engine! I watched a few tutorials, and ultimately went with using some wire and heat shrink I already had. The wire measures right at 0.5mm, so is a bit oversized (right at 12mm in 1:1). I'll probably go ahead and order something in the 0.3mm-0.4mm range for the future, but I'm ok with this one as it is. I'll try to button up the remainder of the engine and get the final detailing done tonight before moving over the the chassis.
-
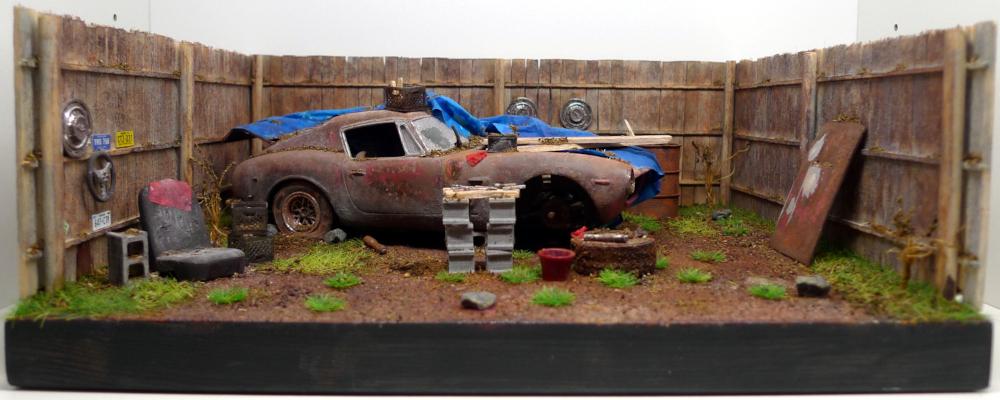
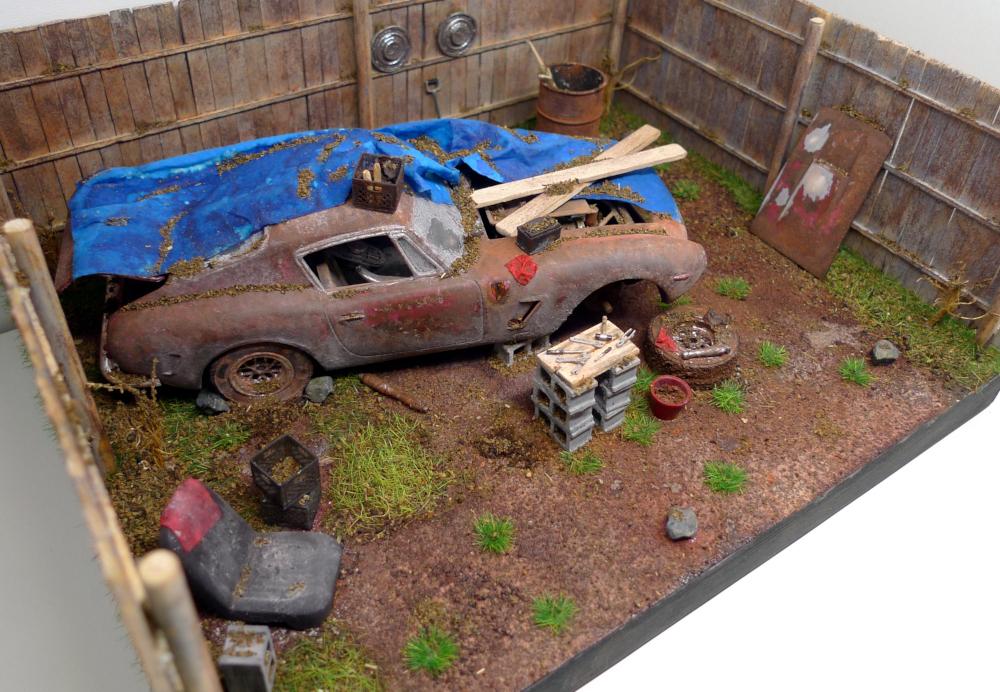
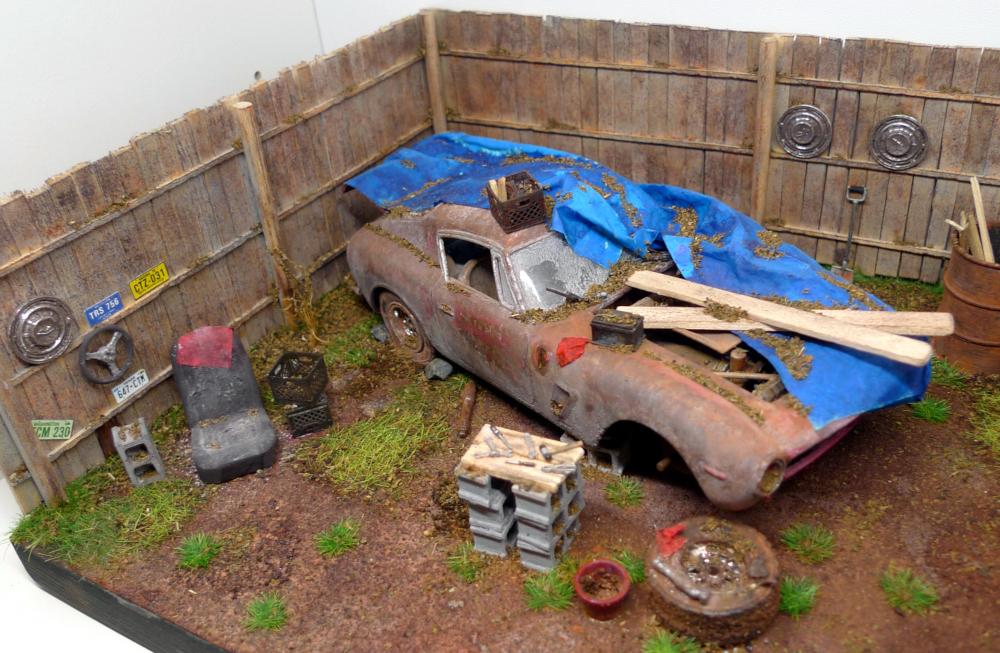
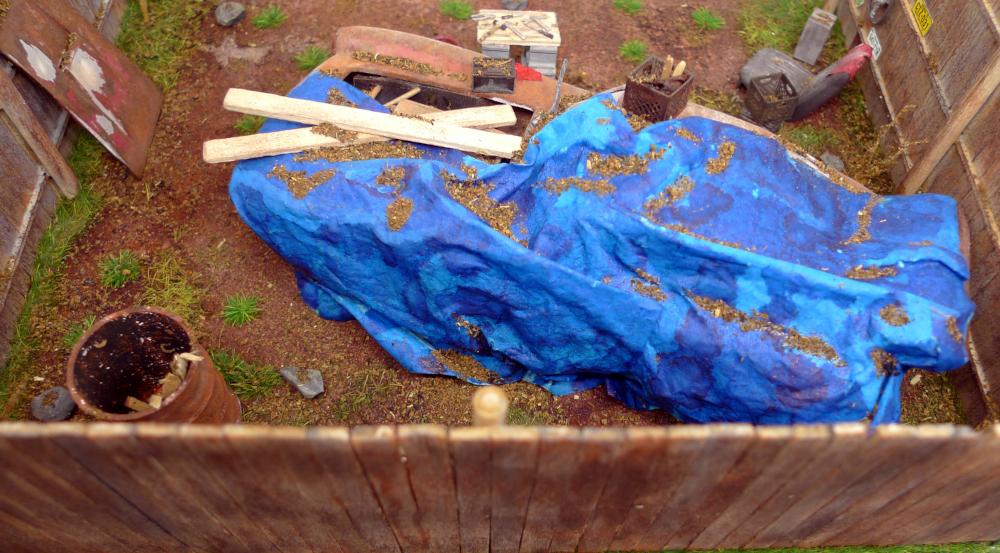
I received this cracked and busted, missing a few parts, AMT Ferrari in a trade a while back. It had been sitting around for a while and I had been thinking I could try to make a diorama with it. I’ve never created a diorama or tried to weather a model before, so I learned quite a bit along the way and had fun doing it, so I think that means it was a success! It's a Ferrari 250 GT SWB that has seen better days. While it was once a promising project car, it now sits weathered and faded by time as the earth begins to slowly embrace it as a long-lost Italian son. The base is an 8x10 gesso board and the bulk of the weathering was trial and error made with a variety of acrylic browns that I also periodically dusted with some dry pastels from Hobby Lobby. I printed the cinder blocks and burn barrel in PLA, and the crates and shovel in resin. The tools are from the Fujimi Garage kit. The fence, weeds, and dying shrubs were handmade using static grass, twine, and craft sticks. The tarps were created from one-ply hand towels dipped in a solution of water, glue, and blue alcohol ink before being shaped. The dead leaves are dried and crumbled tea leaves, and the soil texture is a mix of recycled coffee grounds and sand which was painted with craft paint and stained with brown alcohol ink. Finally, thanks to Pierre Rivard for the suggestion to hide the bulbous rear end. It's got quite the caboose so I tried to angle it hide it under the tarp best I could.
-
I was able to work on this one a bit more yesterday. The engine is brush painted with good old Testors enamels, likely not color matched, but as a member of the fraternity of colorblind fellows, I don't worry about paint matching too terribly much. I learned a lesson from my first build, where I glued the manifolds to the engine without considering how they will mate to the rest of the exhaust. For this build I connected the exhaust (friction fit, not glued) before gluing the manifolds get the angles correct and then glued them to the engine. The passenger side exhaust manifold is a bit rough in regards to the mated seams, but I likely won't mess with it much for fear if making it worse. Also, I also got the chassis cleaned up and shot the primer, so it's ready for paint now.