SDC
-
Posts
60 -
Joined
-
Last visited
Content Type
Profiles
Forums
Events
Gallery
Everything posted by SDC
-
Looking great John. Maybe I missed it, and I apologize if I did, but what did you use to create the vinyl top texture? I've never attempted that look, but I have a few that I'd like to try it on.
-
This looks great! I recently built this kit and I liked the idea of the Levi's edition, but didn't think I'd be able to pull it off, so I went with black. Such a great little car, I'd proudly drive one today if I could!
-
Propping open a hood for an Out-of-the-Box build?
SDC replied to SDC's topic in Model Building Questions and Answers
I see a lot of recommendations for sprue, and that seems reasonable to me since it's in the box, but I guess it would depend on who's in charge that day. If they want to go the route of it's in the box but not in the instructions, then I guess anything would be out of bounds. Otherwise maybe sprue or even permanently gluing the hood in an open position (supported while the glue dries and removal of support once stable) might be a viable option. I plan to attend my first model show this weekend, so I'm going to take a close look and ask a few judges how they interpret the category. Thanks for the replies, I'll let you know what I find out! -
I was looking at some Out-of-the-Box builds that were entered in some IPMS model shows over the last few years. I saw a lot of closed hoods on kits that have engines and I also saw some hoods sitting next to vehicles to allow for viewing of the engines, but don't recall any that were propped open. Are you not allowed to prop up a hood for an Out-of-the-Box build if the kit doesn't supply hinges or a prop rod? I guess I was thinking you were allowed to use a piece of wire or toothpick or something without it being considered a customization or add-on which could get it moved out of the OOTB category. I assume the host chapter has the final say, but I was curious what you've typically ran into.
-
Nice job! And you get a second engine with a display stand as a nice bonus!
-
That's a nice looking color! Do you recall any of the problem areas in that kit? I noticed the front nose panel doesn't fit all that well on mine. So it will take a bit of work that I am likely not yet qualified to perform admirably, but I'll give it a shot anyhow!
-
I hope I can turn it into something I can be proud of, but I'll have a good time trying regardless! Luckily there isn't a ton of parts in this kit, and some of them actually look pretty good.
-
Not a ton of movement here, but I was able to at least shoot a few black bits last night. Hopefully I can work on some of the accent colors for the dash, axles, suspension, etc., this evening.

-
I'm gonna keep that tidbit in mind for the future, thanks! I had a sort of brushed silver look in my head that I couldn't seem to shake for this one though, so I figured I'd dump the chrome and open up a few color options if needed.
-
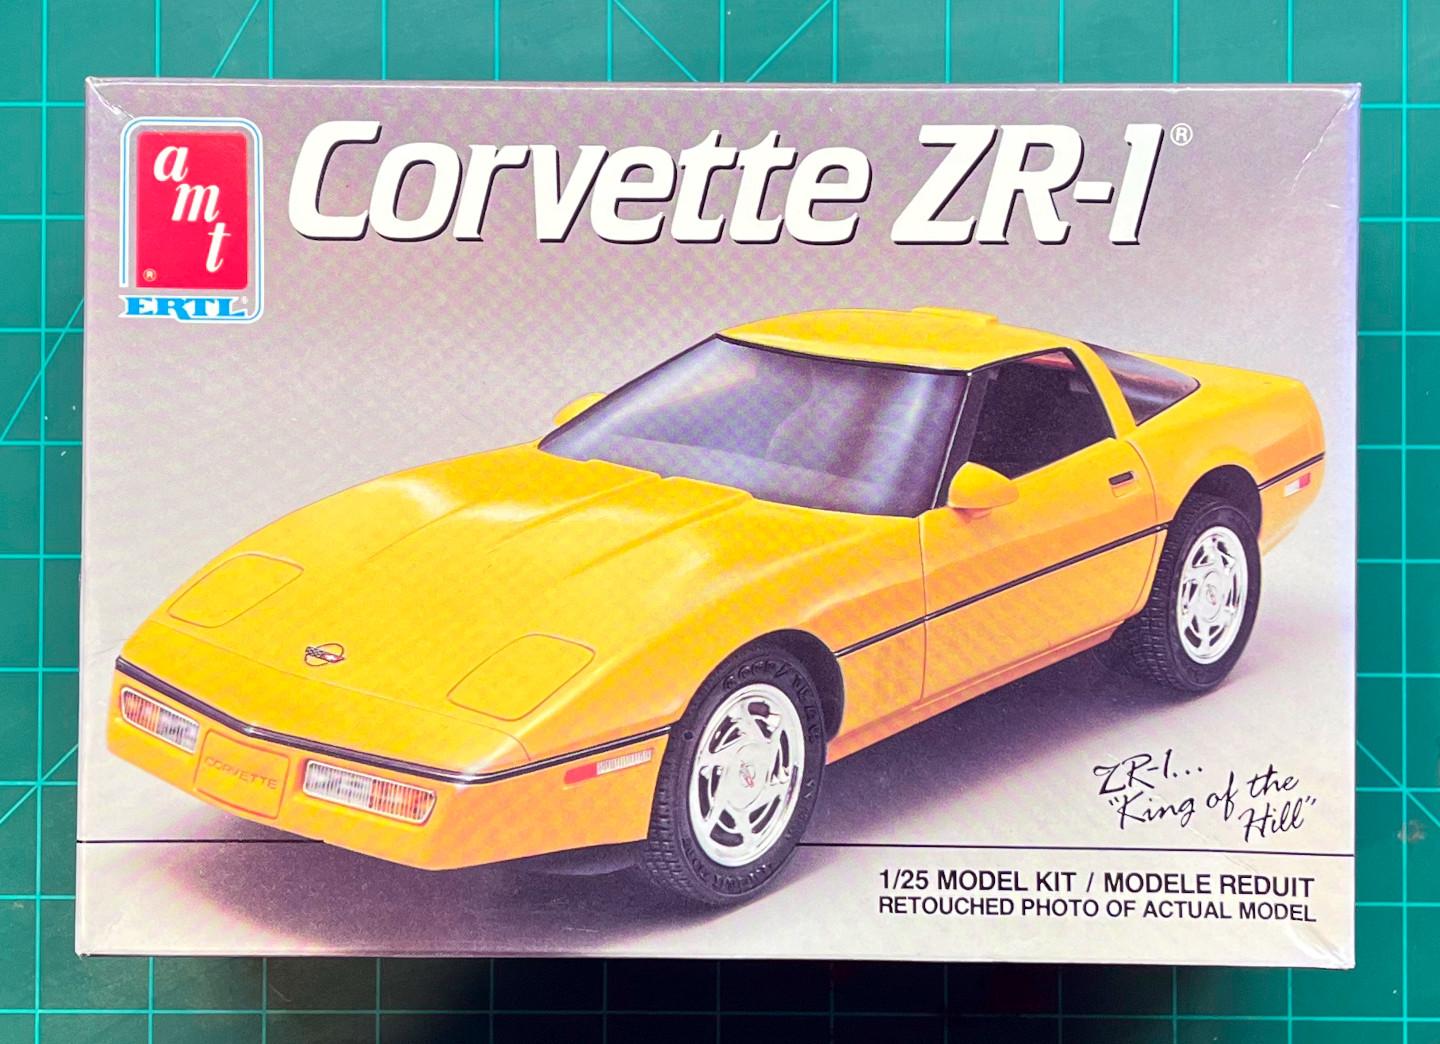
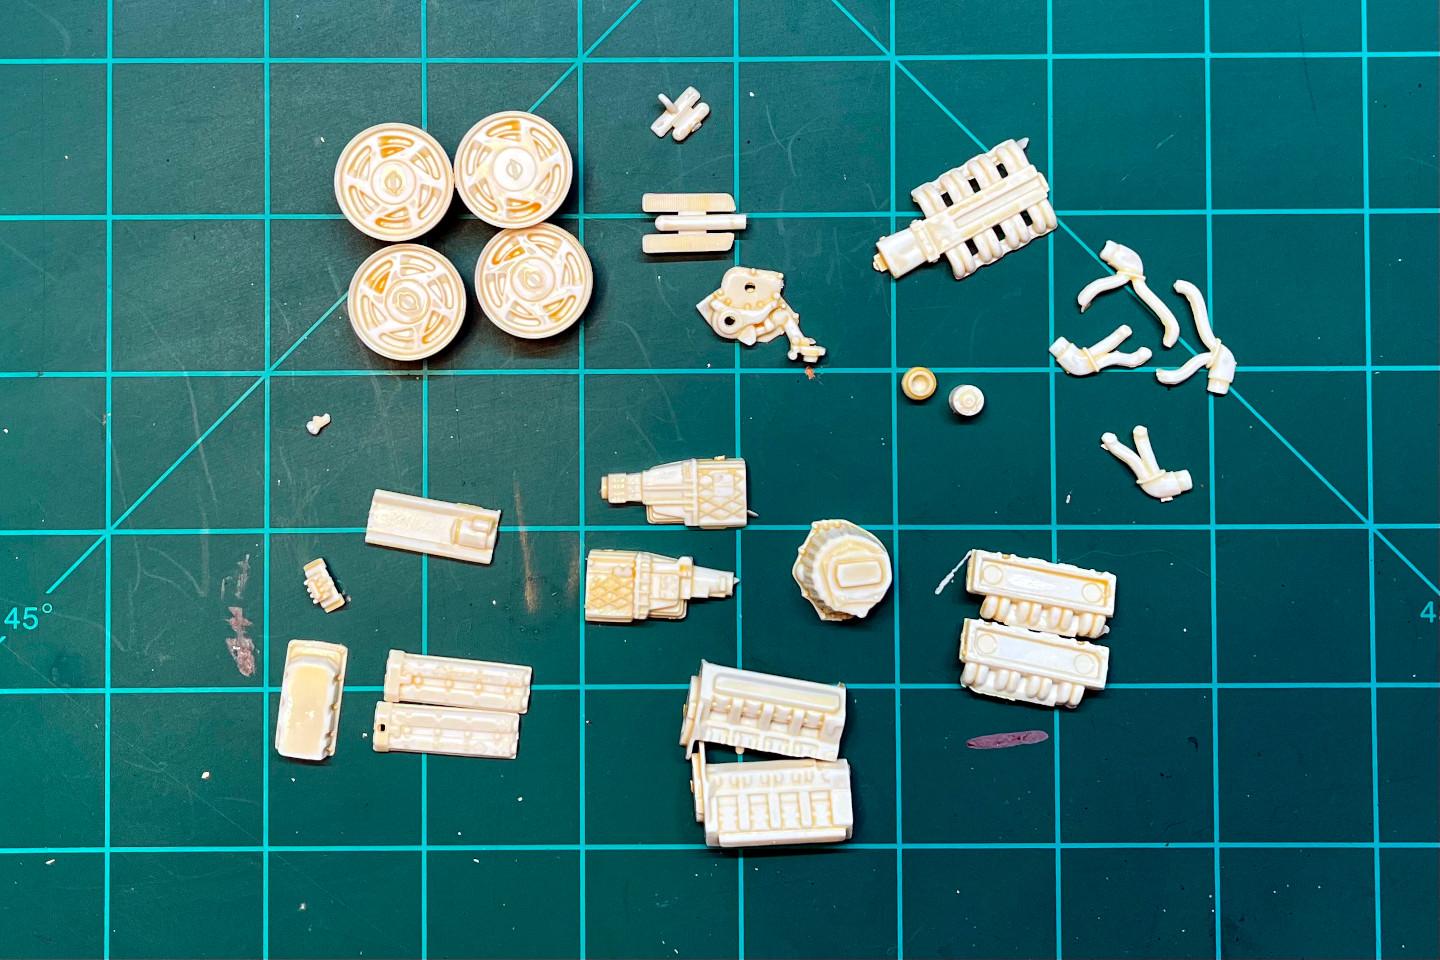
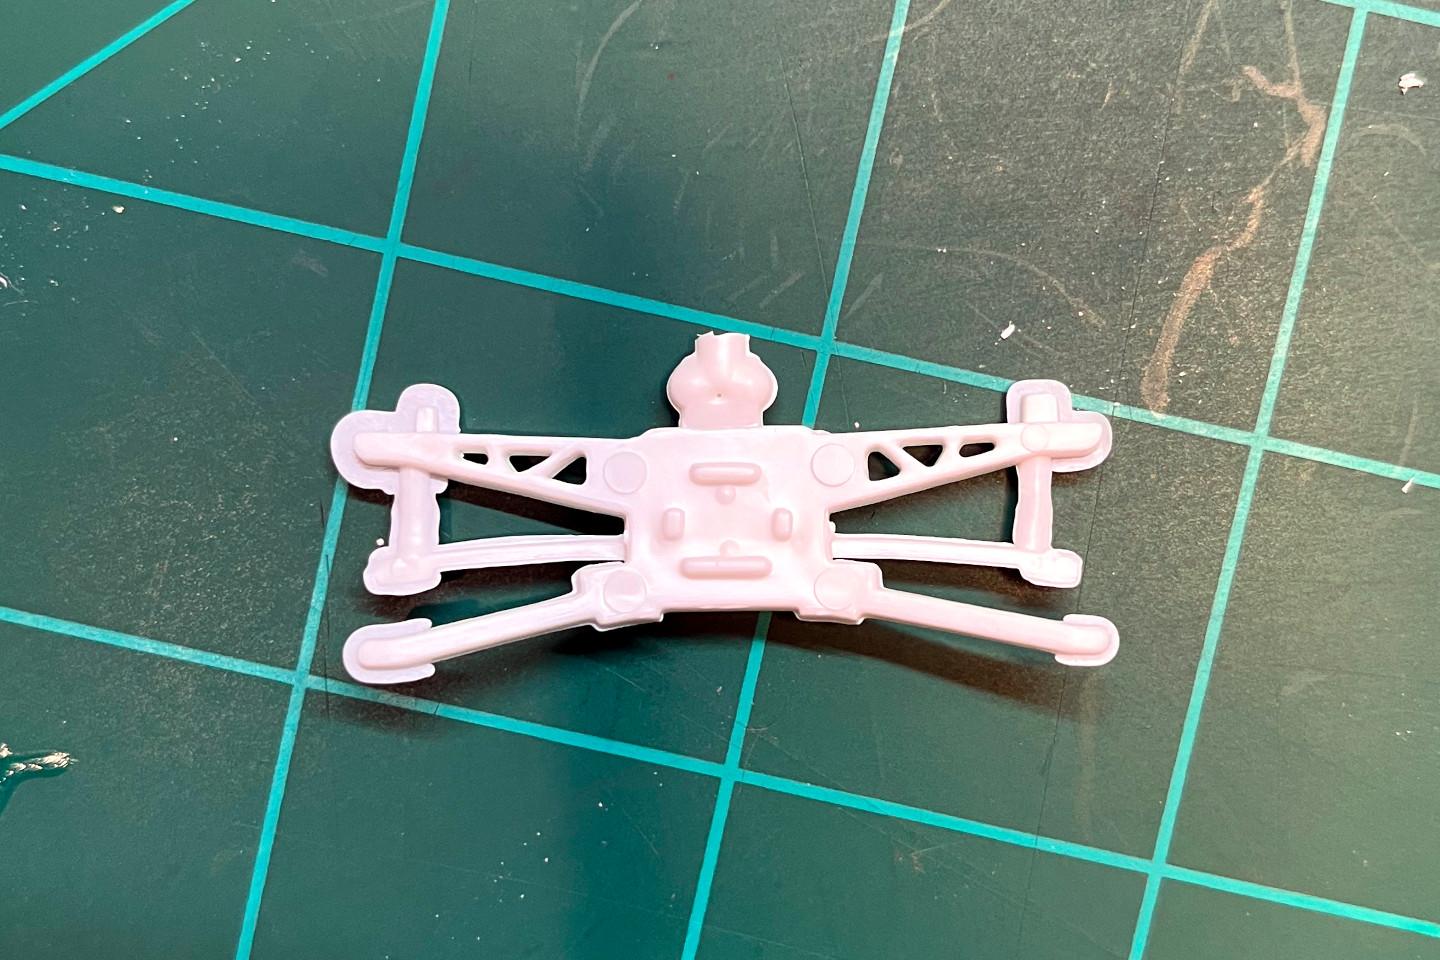
I guess I'll quit lurking around the WIP threads and jump into the fire with the rest of you. This AMT 1989 Corvette ZR1 is my 4th build as an adult, but it's my first to put into a WIP thread. To get started I removed the chrome pieces and dropped them in a bath of Super Clean to strip. While that was going on I prepped a few of the parts that will be black to get them ready for paint. As expected, there is a bit of flash here and there and some of the parts need a bit of extra attention, but I'm ok with that. I figure if I can learn how to make an older AMT kit look pretty good, that will help make nicer kits even easier. I haven't decided on a body color yet, but I plan to do the wheels in aluminum and the interior in black and tan, so it'll be something that goes with that combo I suppose. Unfortunately there is nothing much to post just yet, but I'll make sure to update my progress as I move along. Box Art Parts Stripping the chrome parts Chrome parts after Super Clean bath Example of some of the flash in this kit
-
I bought the '60 Chevy mainly for the go cart. Yours has turned out great! I'm tempted to pull it out and build it on it's own now! Excellent work all the way around Joe!
-
Great job so far, can't wait to see the end result!
-
This thing is looking good man, the details are really coming out in the engine, and the woodgrain looks great too. Let us know if you learn any little beginner tricks to wiring. I'm currently building my 4th model and won't be tackling wiring just yet, but I plan to give it a go very soon. Good luck!
-
I like postings of older kits that I haven't seen built before, looking good! What color are you thinking for the wheels? Like the box or something else?
-
That Metallic Grey looks really nice! Looking forward to seeing the final result.
-
Glad you're giving this one a second chance, it's looking mean. I bet it'll turn out great!
-
Those wheels! I love that look man, great job!
-
Thanks so much for the kind words and motivation guys, it's greatly appreciated. I only wish I had taken an interest in modeling sooner, I have a lot of missed years to make up for.
-
That might be my favorite thing about it! I had never applied a decal before, it somehow felt like quite an accomplishment.
- 26 replies
-
- 1
-

-
- amc gremlin
- amt768/12
- (and 1 more)
-
Hi Joe, I think you'll like it here. I built a single model as a 12 year old, then took a 30+ year break. Like you, I lurked a bit and then joined, and it's been great. This is a great group of guys, and they've already been very helpful to me in my short time here. Enjoy!
-
Wow, great work here. I actually took note of the sidewalk and side of a building on our town square while running an errand after looking at this a while back. You captured it perfectly. The small details like the gum and the cigarette butts really take it to the next level. I know this is about a year old now and you had mentioned growing this into a billiards hall with apartments above it, were you able to accomplish that yet? In another thread I missed perhaps? I'd love to see the next evolution of this.
-
This looks great, and the dead leaves were a nice touch. I'll be trying this myself soon on my current build. Did you paint the tarp blue after the Kleenex was dried to it's final shape or while it was still damp?
-
I must've been reading your mind Pierre, I cut the trunk a few days ago so I can have it set in a partially open position. Also, the view of the car when I place it on the platform will be from the front passenger side corner looking back and across. I chose this because I read the rear end is one of it's weaker points, as well as my kit having some damage to the driver side rear, a missing gas cap, etc. So, the build seems to be working out well for viewing the more attractive parts of that AMT body. Thanks for the input and your excellent comparison of the AMT kit!
-
Nothing groundbreaking here, and it's likely been brought up before, but someone might find it useful. Most of the time if I need paint, I'll put it on some flat scrap of whatever I might have on my desk; a post it note usually. That doesn't always work well when thinning something down though, so for that I had been using water bottle caps. Well, recently we stopped buying bottled water and I quickly found myself out of "mixing canisters". So, while taking out the bathroom trash I had an "ah ha" moment when I happened to notice a few of my wife's discarded daily contact lens packages in it. They work great for a quick little mix or dilution, and thanks to her poor vision, two of these little guys show up on my sink each morning now. Well, as long as she doesn't wear glasses that day.
-
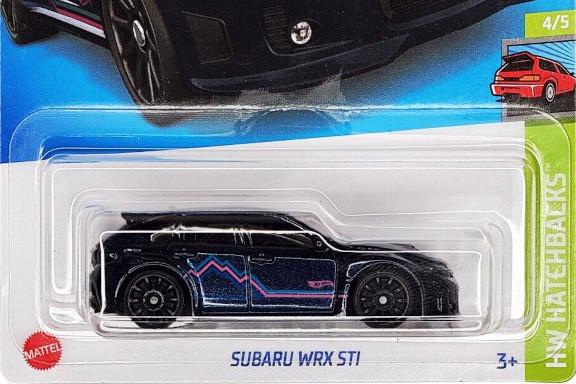
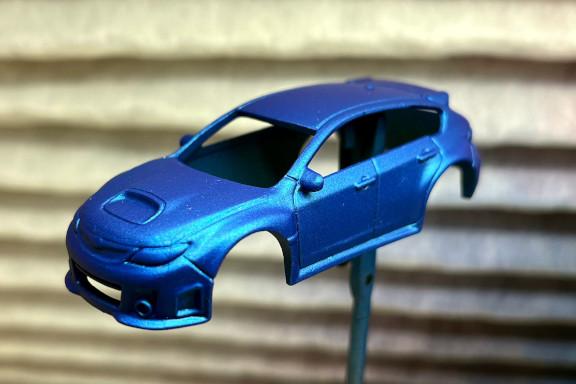
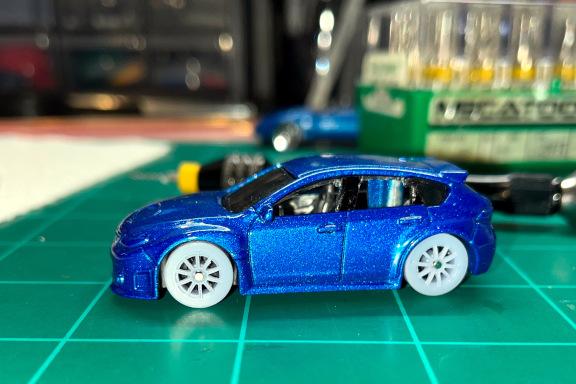
I've always liked blue Subaru wagons with gold wheels, so I thought I'd try to create something similar. I didn't have World Rally Blue, but I did have some Createx Pearlized Blue. The car is a Hot Wheels Subaru WRX STI from their Mainline Hatchbacks series and it was my first attempt at a 1/64 custom. After drilling and tapping it, I stripped it, hit it with self etching primer, paint, and Dupli-Color 1K Clear. I don't recall where I found the .stl file for the wheels, but they were initially created for an RC car, so the hollow backs didn't work well for 1/64 axles. I beefed them up in Fusion 360 by adding some material to the back of them, then I printed and drilled them for new axles. I am pretty happy with it, especially as a first attempt in this scale. It was fun and easy.