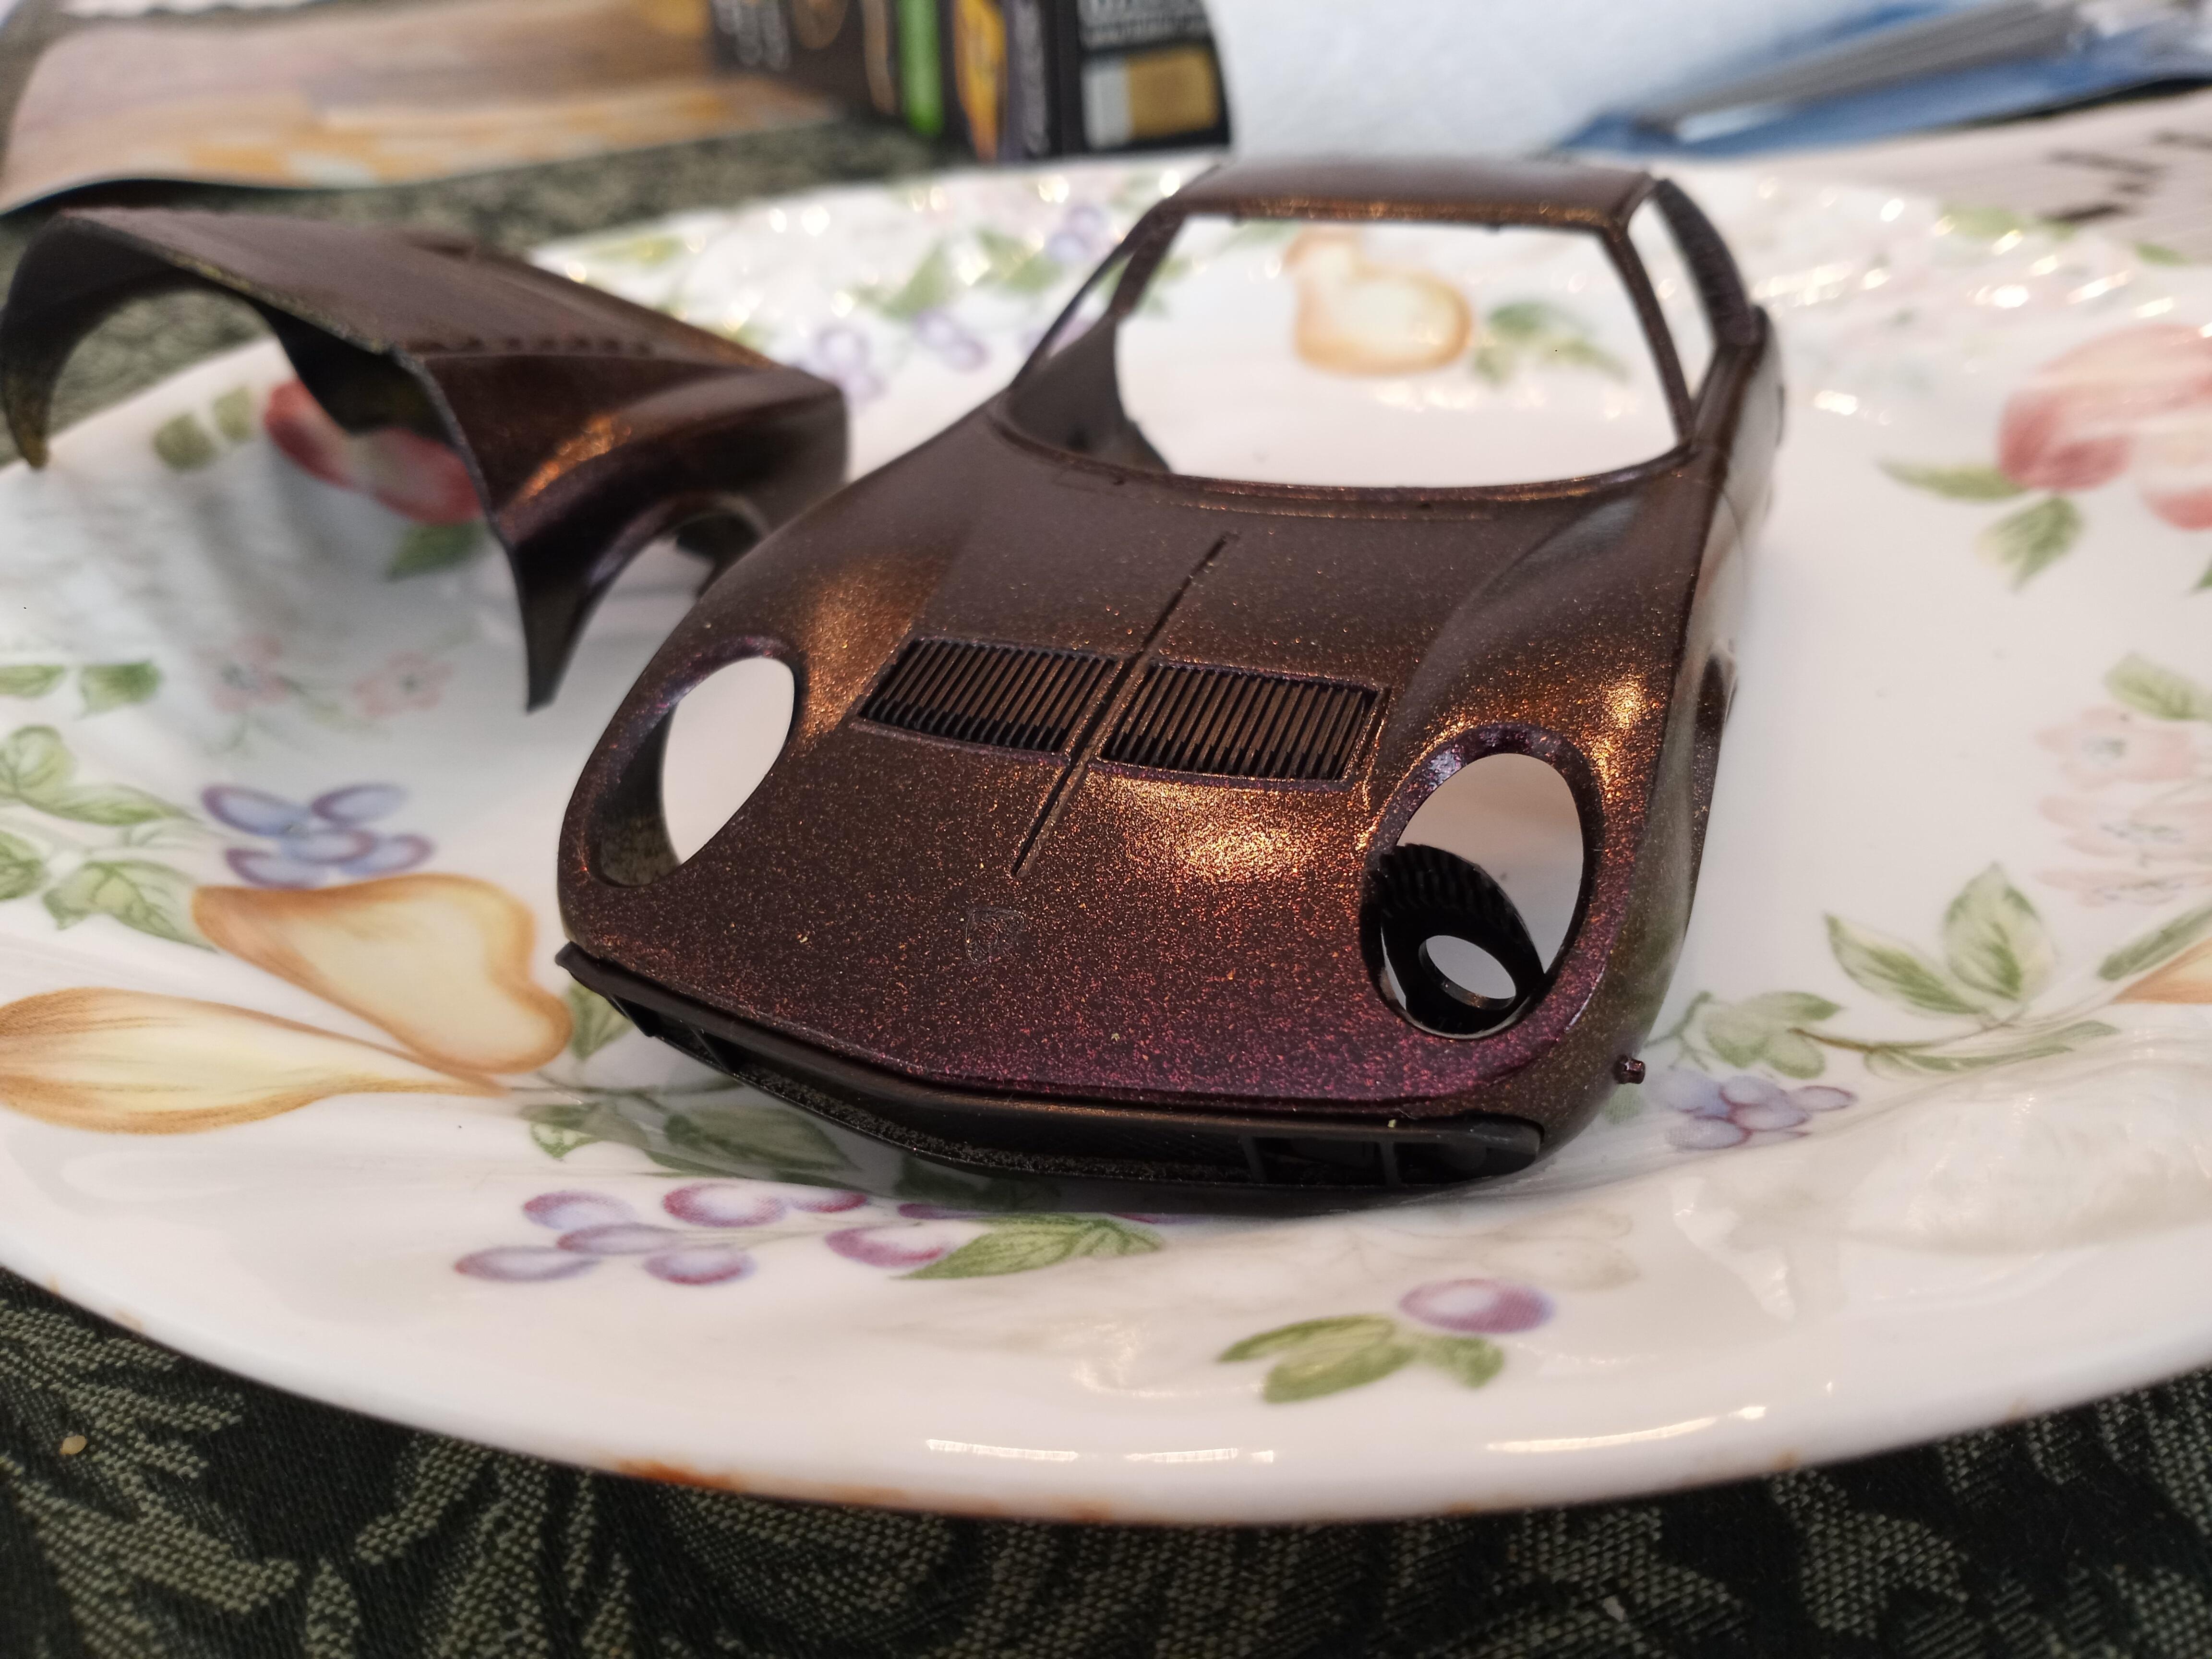
Kurt, thank you for the welcome! Haha, yeah I did go sort of light for my first post. But you are right, this particular kit was extremely challenging. There appeared to be many manufacturing defects which I had to compensate for during the assembly process. For instance, the instructions were so poorly written, I put the back wheels on the front and and front wheels on the back and when I realized that there was a problem with trying to make them spin, I saw that the instructions had not properly indicated which wheels to put where on the chassis. I was able to remove the wheels and remount them to the chassis without any further problems/damage. My main issues were with the windshield and front lights. The windshield was not molded properly and curved away from the frame of the body too soon. If you look really close, there is a gap. I enclosed a picture from preassembly which really demonstrates the gap between the windshield and the body. This made gluing the windshield in place extremely difficult.
Another defect I had to compensate for related to the front headlights. I had to make brackets out of extra plastic trim to support the underneath of the headlight fixtures which otherwise without additional support simply fell through the holes in the hood they were to be inserted in during assembly.
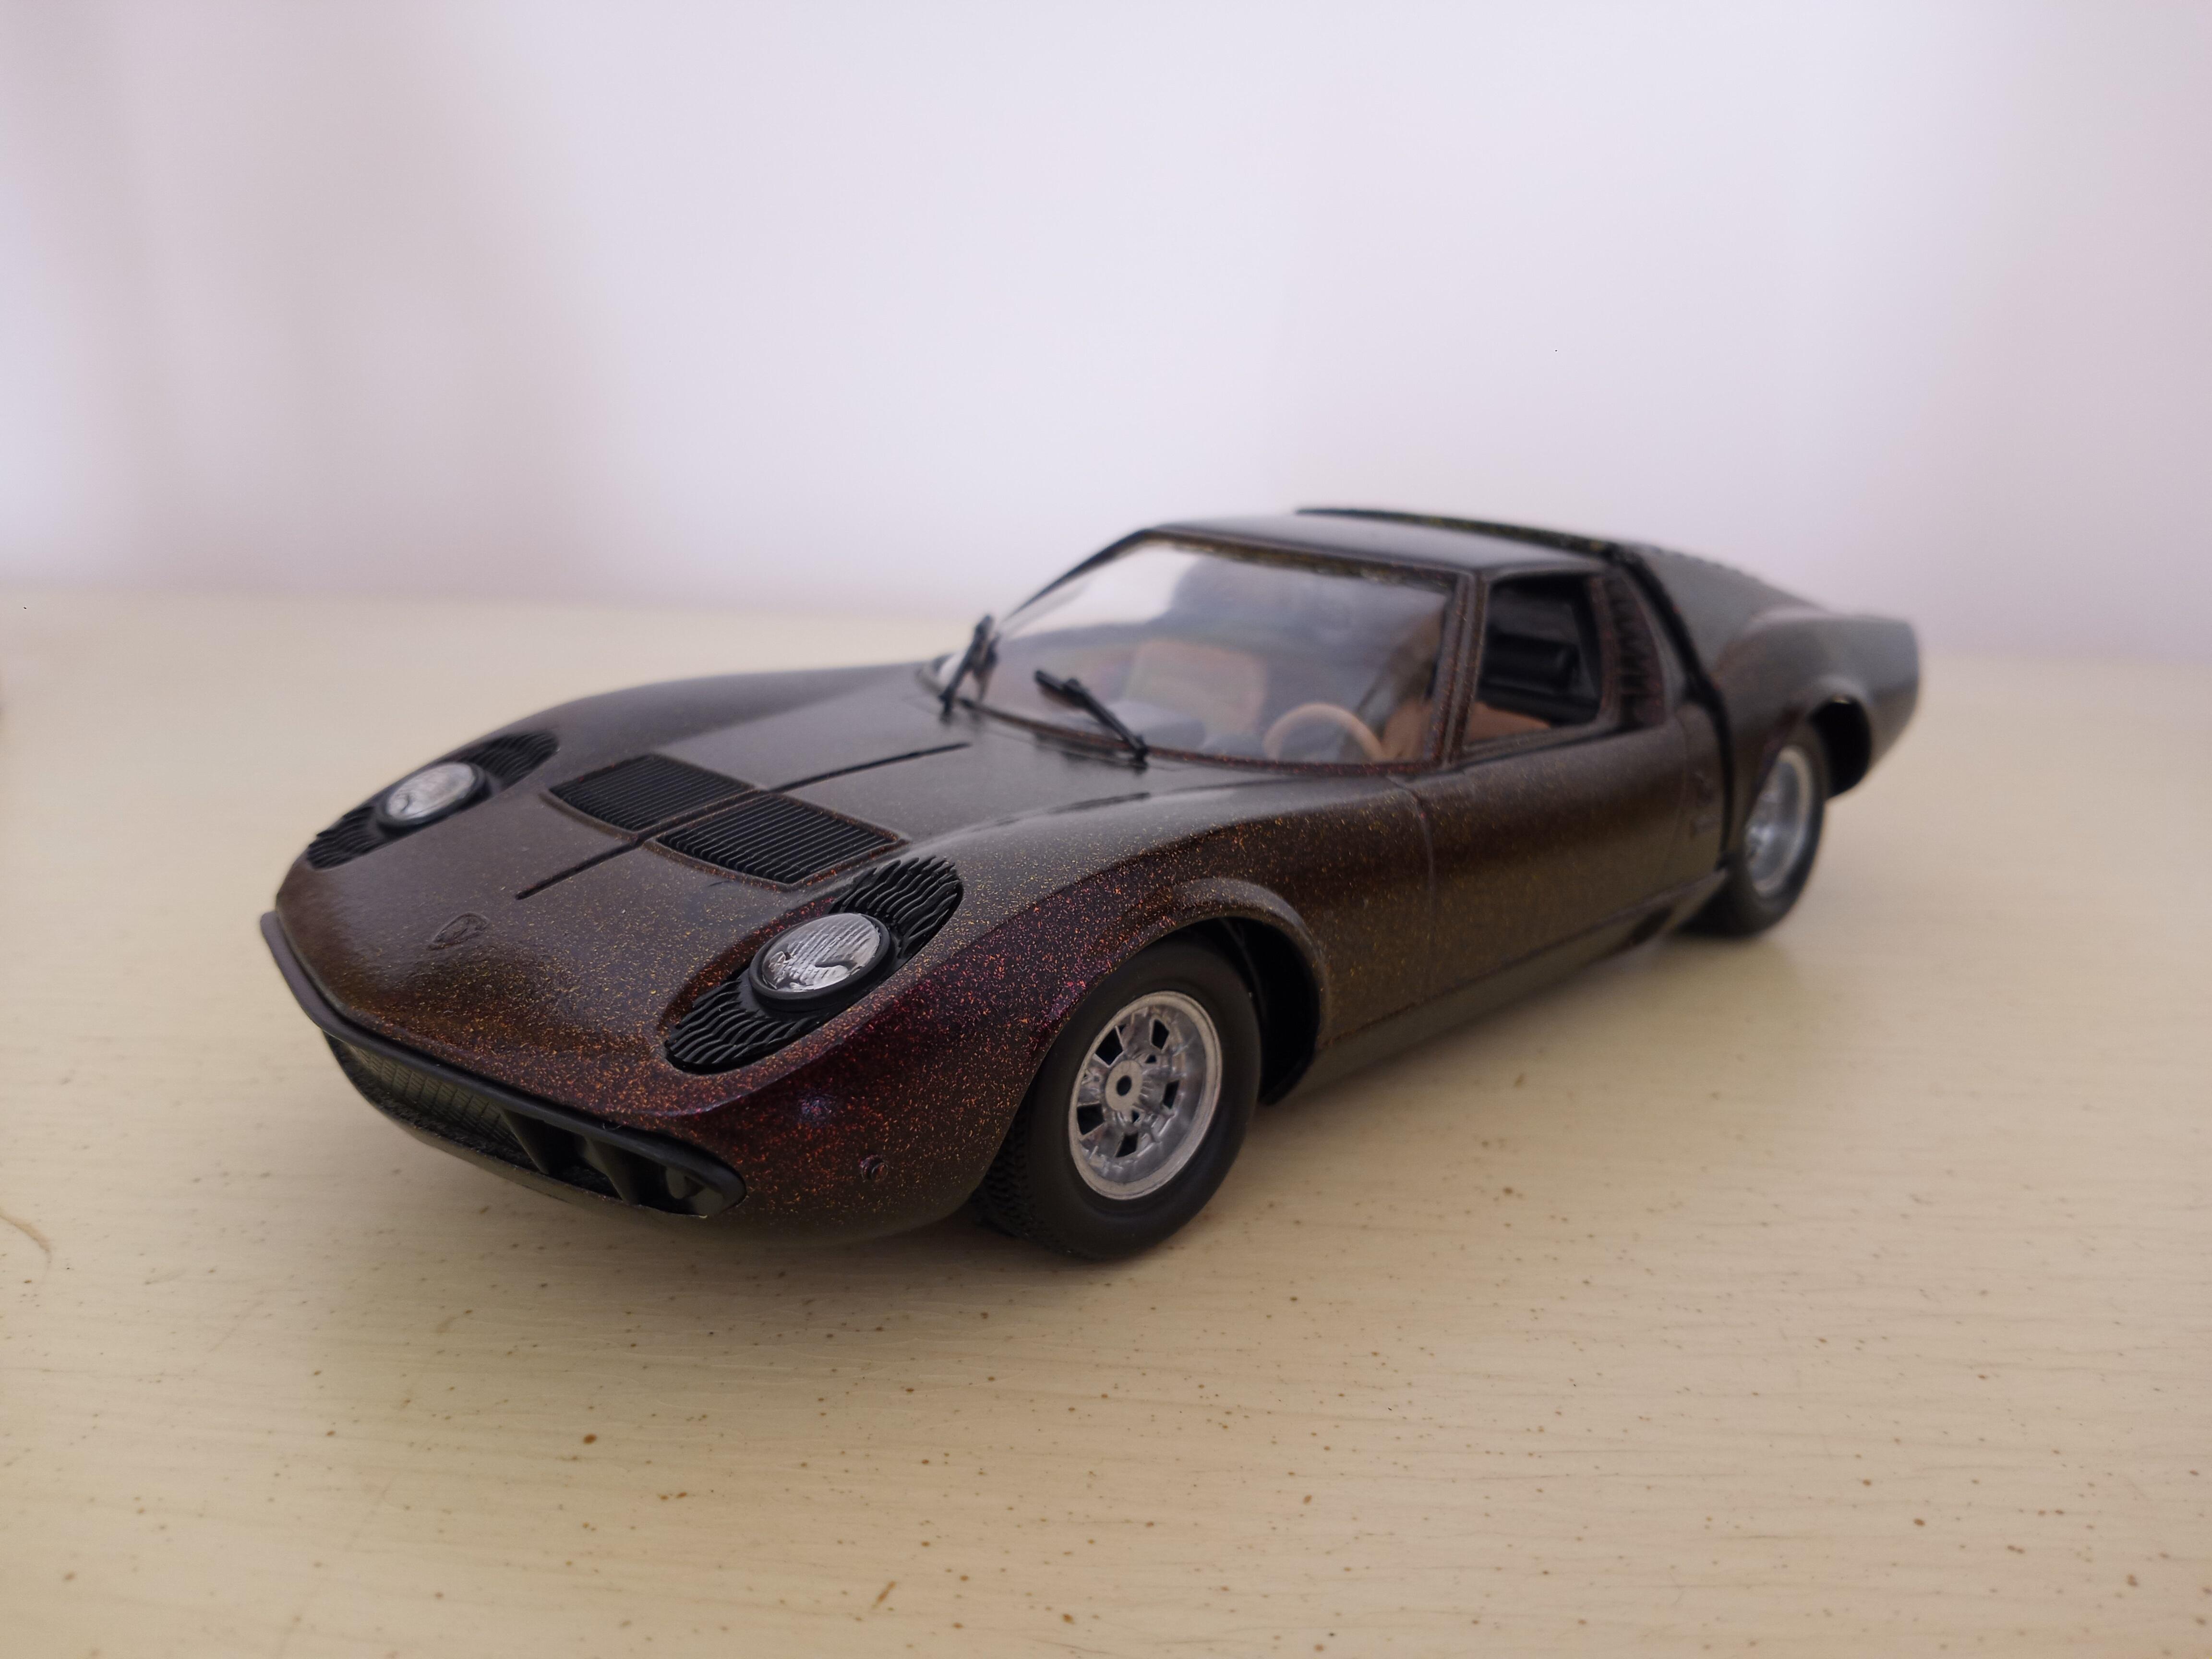
I have another picture showing how poorly molded the front headlight assembly was prior to making a bracket from scratch for it. It literally fell right through the hole where it was supposed to be placed in for assembly. Not photographed is how poorly designed the assembly was for the mounting of the body to the chassis. I worked on a model car many years ago where the body was mounted to the chassis via four screws, one at each corner of the chassis. That was not the case with this kit. The manufacturer literally intended for the body to be glued to the chassis. This was a difficult process and I had to put a thin bead of glue around the perimeter of the chassis/body and hold the two pieces together for an hour and then set it down to dry for a day.
There were many other issues with this kit. But the last one that I will describe in this post created another issue when the time came to mount the chassis to the body. The dash/console assembly as instructed interfered with properly mounting the body to the chassis. The pieces were evidently not molded correctly and what happened was the body floated and rocked back and forth over the top of the dash, preventing the bottom of the body from fitting flush with the chassis. Therefore, I had to detach the top piece of the dash from the center console, which I had already glued together per the instructions. After I detached the two pieces, I had to sand down the edges of the center console (not the sides but the edges). Then I had to reglue the top piece of the dash to the underneath of the front hood where the hood met the bottom of the windshield. I also detached the piece of the center console where the pedal assembly was glued to from the chassis/interior where I had originally glued that piece to per the instructions. I sanded down the edges of that piece as well and then reglued it to the chassis/interior. After that I was able to successfully mount the body to the chassis by allowing the sides of the center console attached to the top dash/front hood to easily slip into and through the sides of the center console walls/pedal assembly attached to the chassis/interior. Photos enclosed will allow for a better understanding of what I have described above.
The first photo I uploaded demonstrates the large gap on both sides of the windshield. Although this photo only shows the gap on one side because I had to hold the windshield in place while taking the photo. The second photo shows how the front headlight assembly fell through the hole it was to be inserted into on the front hood. The next photos show the brackets I made from the extra plastic trim in the kit. The following photo shows the dash assembly before it was originally glued to the chassis/interior along with the back window assembly. The last photo shows the top of the dash/center console assembly after I detached the whole assembly shown in the prior photo from the chassis/interior and then glued it to the underneath of the front hood where the hood meets the bottom of the windshield.
Kurt, I hope this is the level of detail you were looking for in a post. Please let me know if you need more information about my build. I would be more than happy to provide you with the details.