
Ron Hamilton
-
Posts
4,467 -
Joined
-
Last visited
Content Type
Profiles
Forums
Events
Gallery
Everything posted by Ron Hamilton
-
Cadillacs eh?
-
 That looks mighty familiar. I had to fix the vent windows and a sun visor, but now it's ready for primer. I like the wheel covers on yours better than the ones I got on mine.
 -
'67 Chevelle SS 396 (Under Glass ***3-May-2015***)
Ron Hamilton replied to taaron76's topic in WIP: Model Cars
I enjoyed talking to you last Saturday at the meeting, and I loved seeing your work in person. This one looks to be another winner!!! -
One of these days!!!!!!!!
-
Friday, I was able to install the DMouldworks '69 Mustang corrected front end on the model, and it came out pretty good. I am going to start a thread on this one under its own heading.
-
Oh Wow!!!!!!
-
Yes, you are winning with this one. It is vicious!!!!! I suggest working the rear window area too. Revell did not do that right.
-
Steve, I am enjoying this one. Looks like you started something. Pics later.
-
AMT 1957 Ford Thunderbird 1/25
Ron Hamilton replied to Nova-ss's topic in Car Aftermarket / Resin / 3D Printed
At one time, Replicas and Miniatures CO of MD offered a small set that would work with it. While not as comprehensive as a Model Car Garage set, it had the things needed to make the model better. I plan to use the one I have on a '57. -
As I wrote before, I love the '69 - 72 Pontiac G/P. I have a copy of all of the MPC kits to be restored. 1969 I was the original builder of this one back in 1970. I stripped it down, and it is ready for primer and paint. 1970 1971 I may not go with the Honeycombs, but I am definitely going with the whitewall tires. I have not photographed either of the '72's I have, but one will be a Hurst SSJ, as I have removed the vinyl roof from it, and the other is a pretty clean one moulded in Brown, which I may leave alone, as I like the color the kit is moulded in.
-
Ooooooooohhhhhhh!!!!!!! I have two '62 Sports Roadsters built. A White one and a Black one. I love that red too, I did my Hardtop in Red on Red. My next Sports Roadster is going to be red, as it is so cool, and it is the best color for the car in my opinion.
-
Very Nice!!!!
-
It looks to me like the Revell Part, just corrected.
-
Oh yeah!!!!!
-
'59 Bonneville, Update, Done! 4/11
Ron Hamilton replied to StevenGuthmiller's topic in WIP: Model Cars
You are the master of the interior!!!!! -
You're right about that. The fact that is mostly unpainted is a plus too. The original builder used a lot of glue to attach the "Kustom" parts, didn't they?
-
$18.95 from Russia, and it took about 15 days. I am very happy with the service.
-
Funny story about the '69 Pontiac Grand Prix. It is one of my all time favorite cars, and I do have the original MPC annual I built back in 1969. It's been stripped of the multi color Testor's green and black paint, and is sitting waiting to be restored. Day before yesterday, I found a '69 I was once working on, and may come back to. I painted it Black, with a Black Vinyl roof, but I put it in the junk pile, as I was trying to build a more detailed model, using the AMT '70 Monte Carlo Chassis and guts. Unfortunately, the last straw came when one of the "A" pillars snapped off. I had Bare Metaled the body, and the paint was pretty smooth. I was cleaning up the basement when I came across the body, and it looks pretty good. I may just fix that pillar and build a car out of it, I have a lot of G/P parts from that era, and junkers are not too hard to come by for anything else I need. I have all the years of that era of PontiacGrand Prix cars, only one being a pristine unbuilt car ('71), but the rest are servicable. My original is slated to be painted Verdoro Green, with the Verdoro Green Vinyl Roof, and the Saddle Interior, like the brochure car.
-
Of course I did. I bought a few that were like that too.
-
Whenever I get a resin part, I test fit it to the styrene to see how it fits. What I did was to set the hood onto the body, and place the new resin part where it is supposed to go. I noticed that the resin part sat about 1/32" below the fender line. At first, I thoght that the resin part needed a little clean up, as most do. In this case, I compared the ridge arond the backside of the styrene part, and the resin trans-piece, and I noticed a difference between the two parts. The flange around the bucket of the resin part was not as deep as the kit piece, and that is where the interference lies. With a little file work on the underside of the fender, and the fit would be perfect. On this kit, the styrene front end is a fiddly fit also. I know that because I have another one that I glued the front end on, and I was not too happy with how that process went. I got it on with even gaps, but I had to do a little file work on that too, so like I wrote before, I do not see much of a problem with the fit of the new piece, just as long as you work carefully to get the fit right. It is best to work one side at a time with either front end allowing the glue to dry completely, and you should smooth the edges and the mould lines from the fender. There were no instructions on how to install these parts onto the car from the resin caster, as they go on the same way as the kit part. Maybe I should install the part on the car so you can see what I am writing about. I was not planning on this build right now, as I have several others to do, even though the red Q-Code I posted is very tantalizing. Monty, I appeciate your comments concerning my abilities, and I cannot wait to see how it would work out too. To be absolutely honest, The Revell 1969 Mustang Sportsroof kit (the '69 Shelbyand the 1970 variants)has a few issues, which I will address when I put my touch on it. The other fixes are simple, as I have done the same to other builds.
-
I received my resin parts from DMould Resinworks today, which is 15 days from when I ordered the part on line, and paid for it through Paypal. The parts came in a small box which originated in Russia. Inside the box was a small packet, which consisted of a Headlamp/Grille surround and a new grille in crisp, clean smooth white resin. The quality of the parts is reminiscent of what I have gotten from Replicas and Miniatures, and Historic Racing Miniatures, in that it was hard to discern these parts from the white styrene. They were that nicely done, and they were very well cleaned up of flash. I did a test fit on a kit body I have, and while there has to be an adjustment of the fender (thinning out the underside of the upper fender edge on each side, due to the realignment of the headlamp buckets, and cleaning up the flash from thh kit body) the part fit was pretty good, and vastly improved the looks of the model, virtually eliminating the droopy looking front end. They also reshaped the grille opening, and added a correct surround moulding to the part, as well as a replacement grille. It looks great. Unfortunately, I am not able to show my model with the grille attached, as I did not mount the grille to the car permanently, as I have to do some clean up of the kit body before permanent attachment of the resin part. In finger fitting the part, I am quite confident that this part will look much better than the original kit parts once properly attached to the car. I suggest that you work one side at a time when you attach the resin parts. I recommend this transkit if you intend to build this kit. This is the look I am going for when I build mine.
-
Mine came in today's mail from Russia in a rather beat up box. I have not looked at it yet, but I will report on it once I am able to put it on a body and compare it to the Revell piece.
-
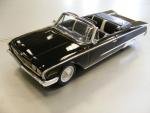
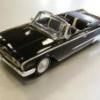
I have a terrible resin '70 Cadillac DeVille Convertible that I will build, just to prove that I still have some sort of skills. This thing is the absolute worst piece of resin I have ever seen in over 50 years of building. It is workable, but it is rough. I will have to wear some hazmat gear just to work on it. I bought it off of Ebay, as I really wanted a '70 Cadillac Deville Convertible. Fortunately, I have an unbuilt JoHan '70 Coupe DeVille to use as a guide in getting this pig into shape. Even though TKM offered subjects that I would love to have, there is not enough time on earth to get one of those to my standard.
-
That is beautiful. Everything you did fits the concept to a t. One of the lot attendats at a dealershipI worked at had a very nice Butternut Yellow '67 Camaro SS350 that was set up similar to your car. I had considered doing my build in Yellow, but I already have an Impala SS427 coupe in that color, so I went with Turquoise. I liked the '67 Chevrolet lineup. One day, I will convert an AMT '66 Nova into a '67, as a very good friend of mine had a Metalflake Red '67 SS when we graduated from high school.
-
Tim, Here is the link to our meeting schedule. I would love to meet you, and see your works of art in person. http://www.mamasboyz.org/Sched.html