Igor
-
Posts
102 -
Joined
-
Last visited
Content Type
Profiles
Forums
Events
Gallery
Everything posted by Igor
-

1969 Torino Fastback - Almost finished (plus some commentary) - 04/20/17
Igor replied to Igor's topic in WIP: Model Cars
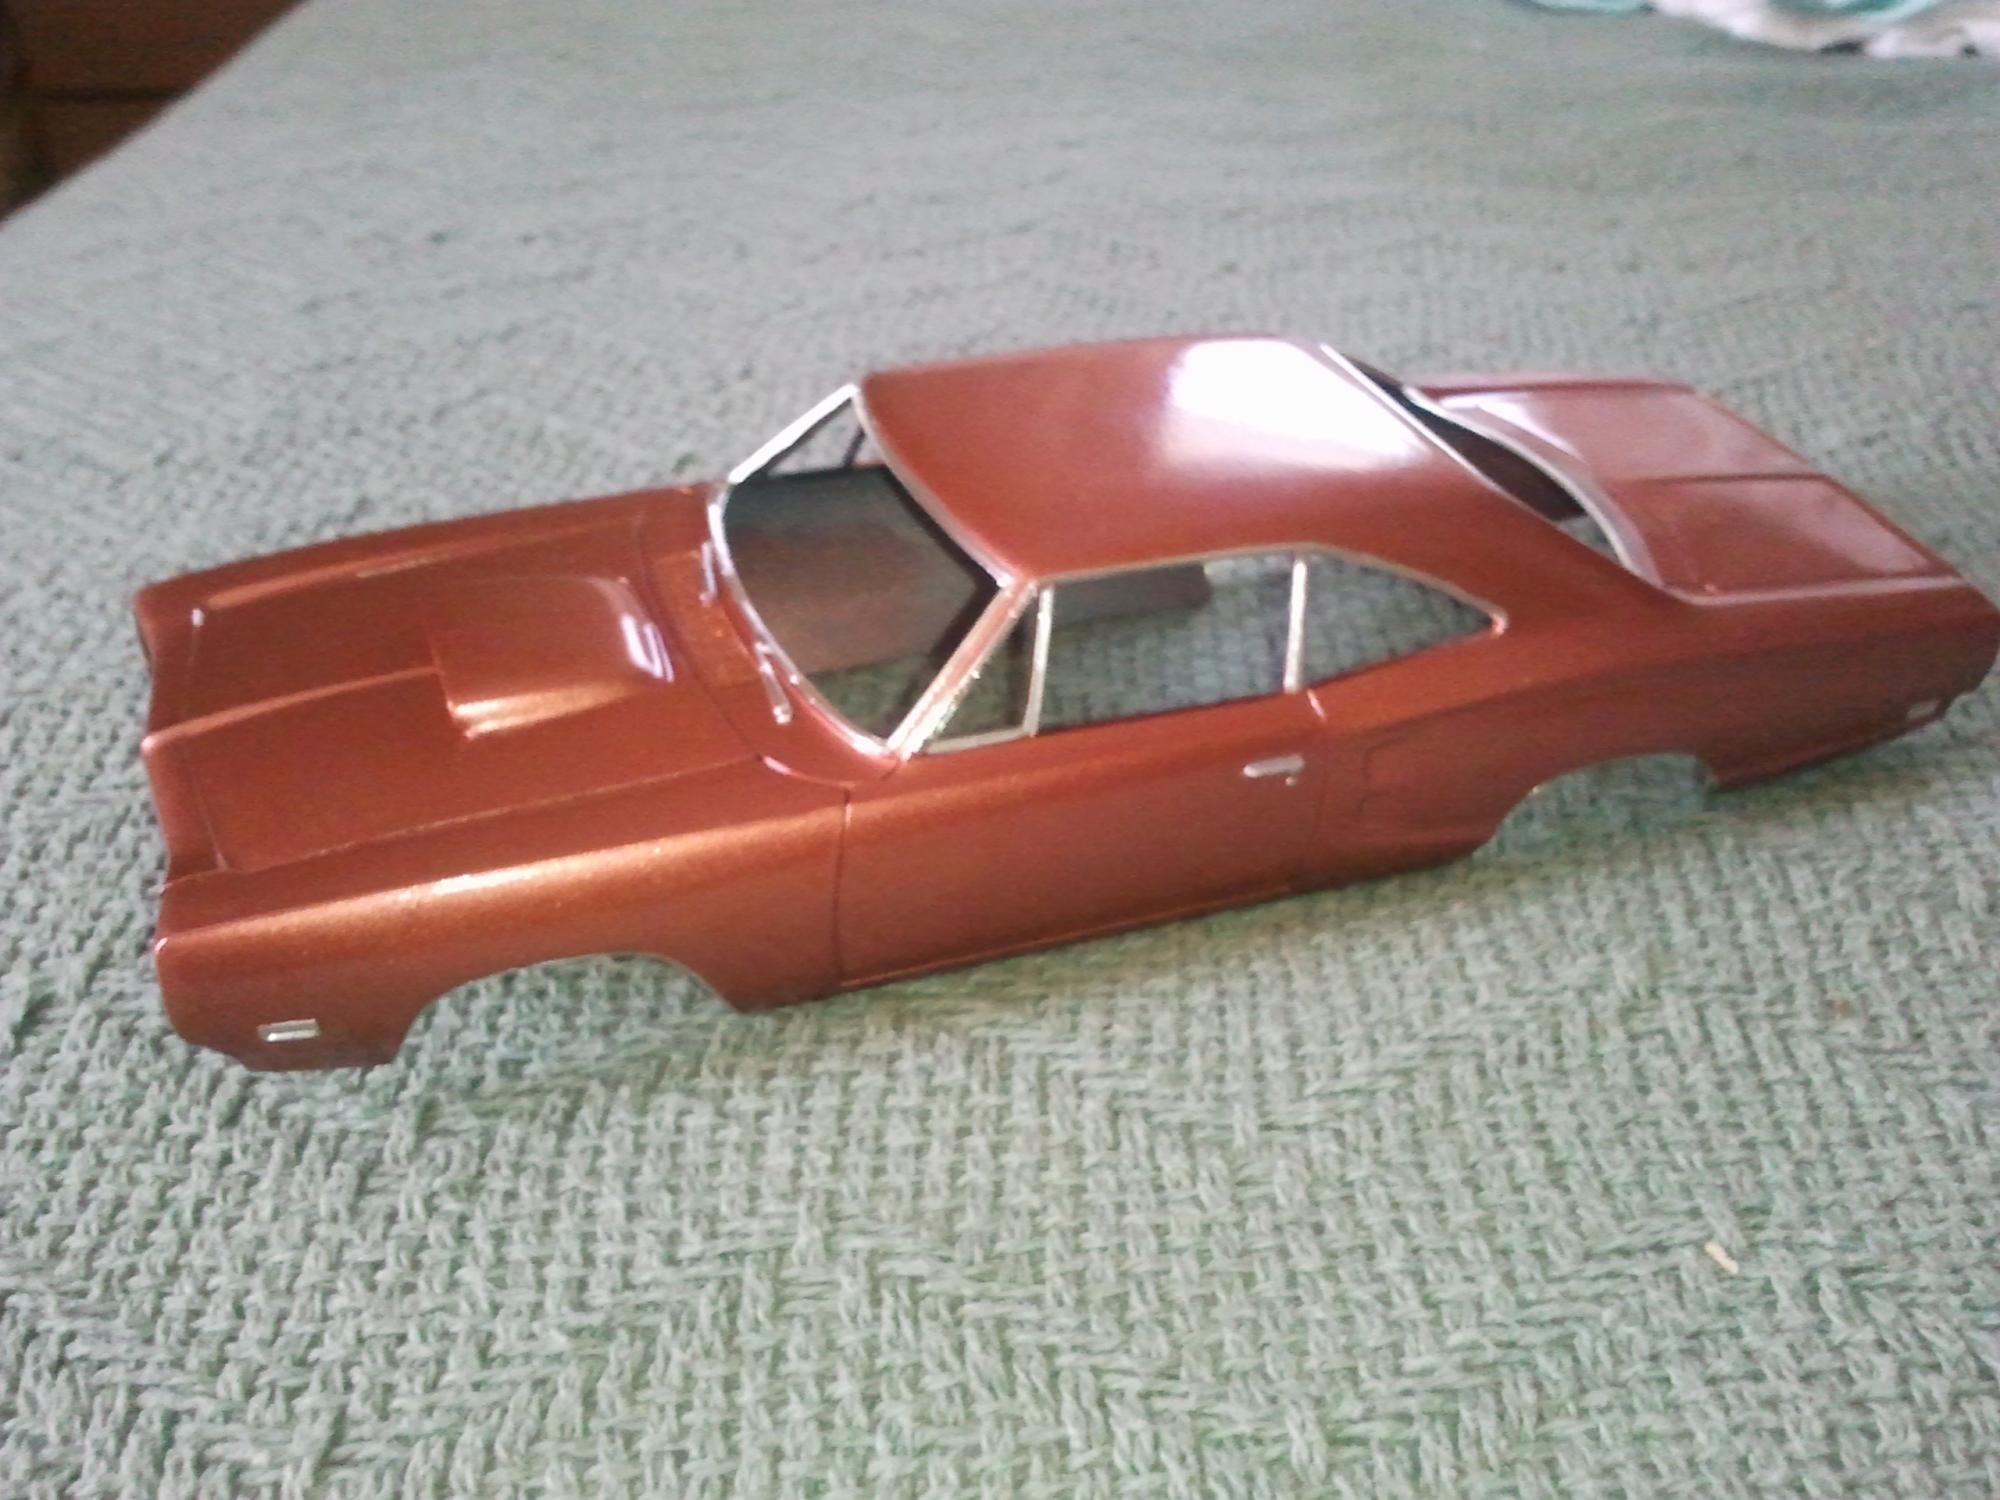
Minor setback today. I was getting ready to spray a new coat of Future on the hood, and when I powered up the compressor, I heard a "pop" that sounded like air pressure releasing. I checked the hose, and it seemed OK. But no air coming out of the compressor... Oh no... Well, long story short, I opened the compressor and LUCKILY it was just one of the hoses inside had come off one of its nipple. Whew! Coat of Future sprayed and is now drying. Second coat coming later, pics to follow. -
1969 Torino Fastback - Almost finished (plus some commentary) - 04/20/17
Igor replied to Igor's topic in WIP: Model Cars
Paint didn't look so hot, so I put a second coat on, and will see what it looks like tomorrow. -
1969 Torino Fastback - Almost finished (plus some commentary) - 04/20/17
Igor replied to Igor's topic in WIP: Model Cars
OK... Lesson learned. Can not use NOVUS on Future. Noted for future reference (no pun intended!). Hood has been repainted, and will be sanded and polished tomorrow... Then a new coat of Future and I will be back to where I was yesterday. -
1969 Torino Fastback - Almost finished (plus some commentary) - 04/20/17
Igor replied to Igor's topic in WIP: Model Cars
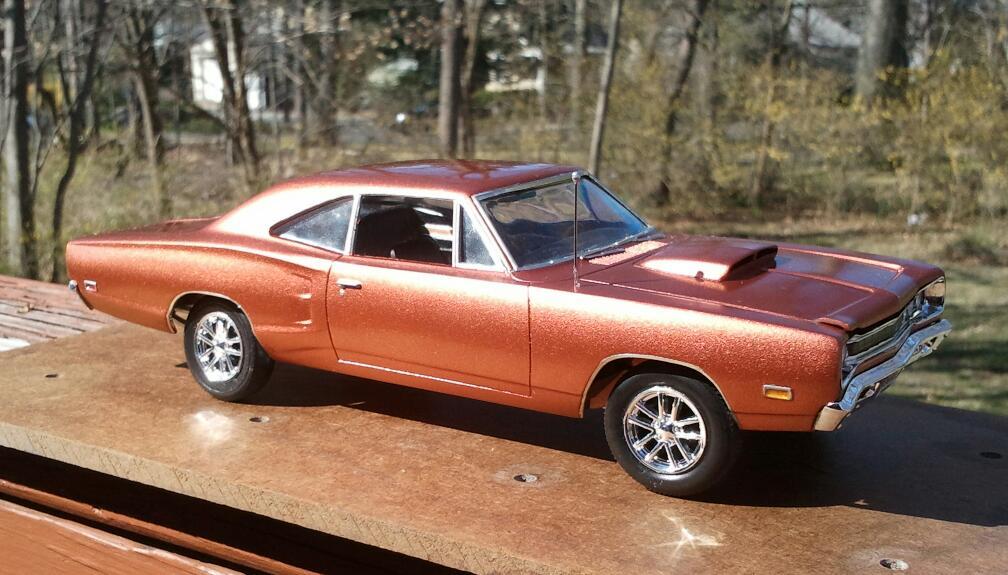
So, with less than two weeks to go until NNL East, I have decided that I am bound and determined to get this model done before then. I have decided to go back to more stock looking wheels (they may actually be the ones from the original kit, I'm not sure, I have kind of lost touch with which ones are which) and some wider tires (from the 1977 Joker's Goon car) in order to fill out the wheel wells a little bit better. I have polished the paint job, and sprayed it with a coat of Future. I plan on spraying another coat and then polishing that as well. More updates to follow, rather rapidly, I hope!
-
1969 Torino Fastback - Almost finished (plus some commentary) - 04/20/17
Igor replied to Igor's topic in WIP: Model Cars
Picked up a shift at work, so I don't expect to get anything done today. -
1969 Torino Fastback - Almost finished (plus some commentary) - 04/20/17
Igor replied to Igor's topic in WIP: Model Cars
With a little less than 3 months until NNL East, and 4 days off from work, I decided to do a little more work on this one. I painted the gauge faces, the wood trim, vents, and knobs on the dash, and put a drop of Future on each of the gauges. I also cleaned up the rest of the interior. I am still considering replacing the horn ring with a piece of wire, as the molded in one is way too thick. Either way, the interior will probably be reassembled tomorrow.
-
1969 Torino Fastback - Almost finished (plus some commentary) - 04/20/17
Igor replied to Igor's topic in WIP: Model Cars
I was browsing Facebook the other day and came across this post... "My new year's resolution is the same as last year's... Finish the build! " It inspired me to get started on this one again. I started by spraying some color on the body. Craft Smart Premium Metallic Icy Blue Acrylic, from the craft store whose name begins with "M".
-
1969 Torino Fastback - Almost finished (plus some commentary) - 04/20/17
Igor replied to Igor's topic in WIP: Model Cars
Sprayed the body with a new coat of primer. Still needs a little bit more sanding.
-
1969 Torino Fastback - Almost finished (plus some commentary) - 04/20/17
Igor replied to Igor's topic in WIP: Model Cars
Dashboard has been repainted...
-
1969 Torino Fastback - Almost finished (plus some commentary) - 04/20/17
Igor replied to Igor's topic in WIP: Model Cars
I think I have gotten as much of the old paint off as I'm going to be able to, although not as much as I would have liked. No biggie, a little sanding and a new coat of primer and I'm sure it will be fine.
-
I have a blue Superbird just like that waiting for me to rebuild it as well... Looks about the same!
-
1969 Torino Fastback - Almost finished (plus some commentary) - 04/20/17
Igor replied to Igor's topic in WIP: Model Cars
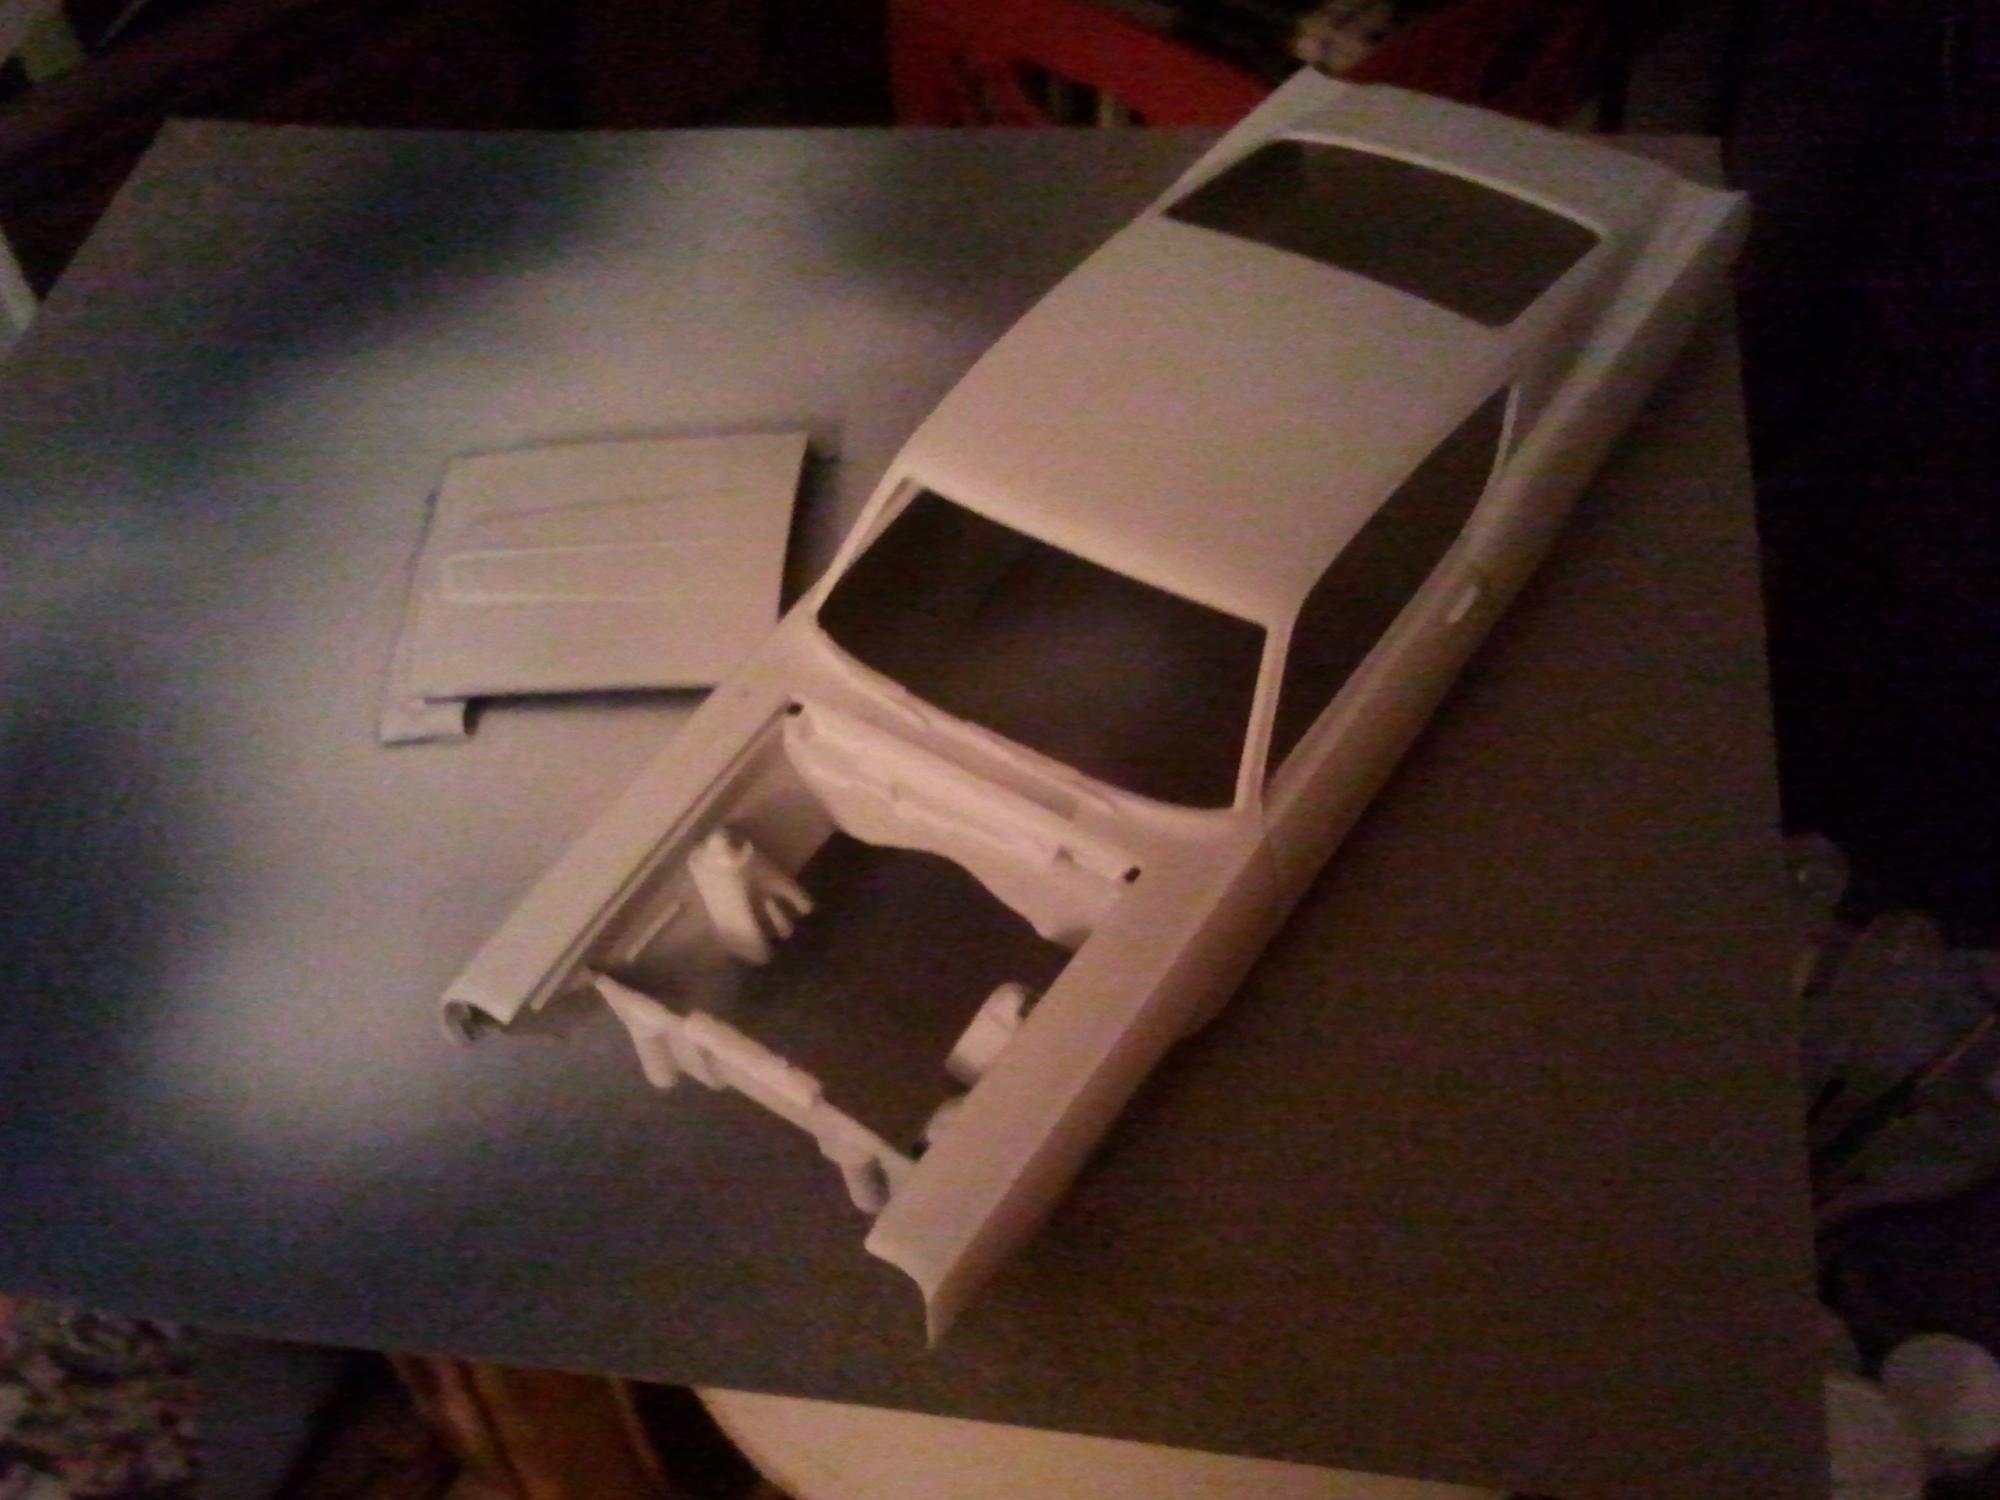
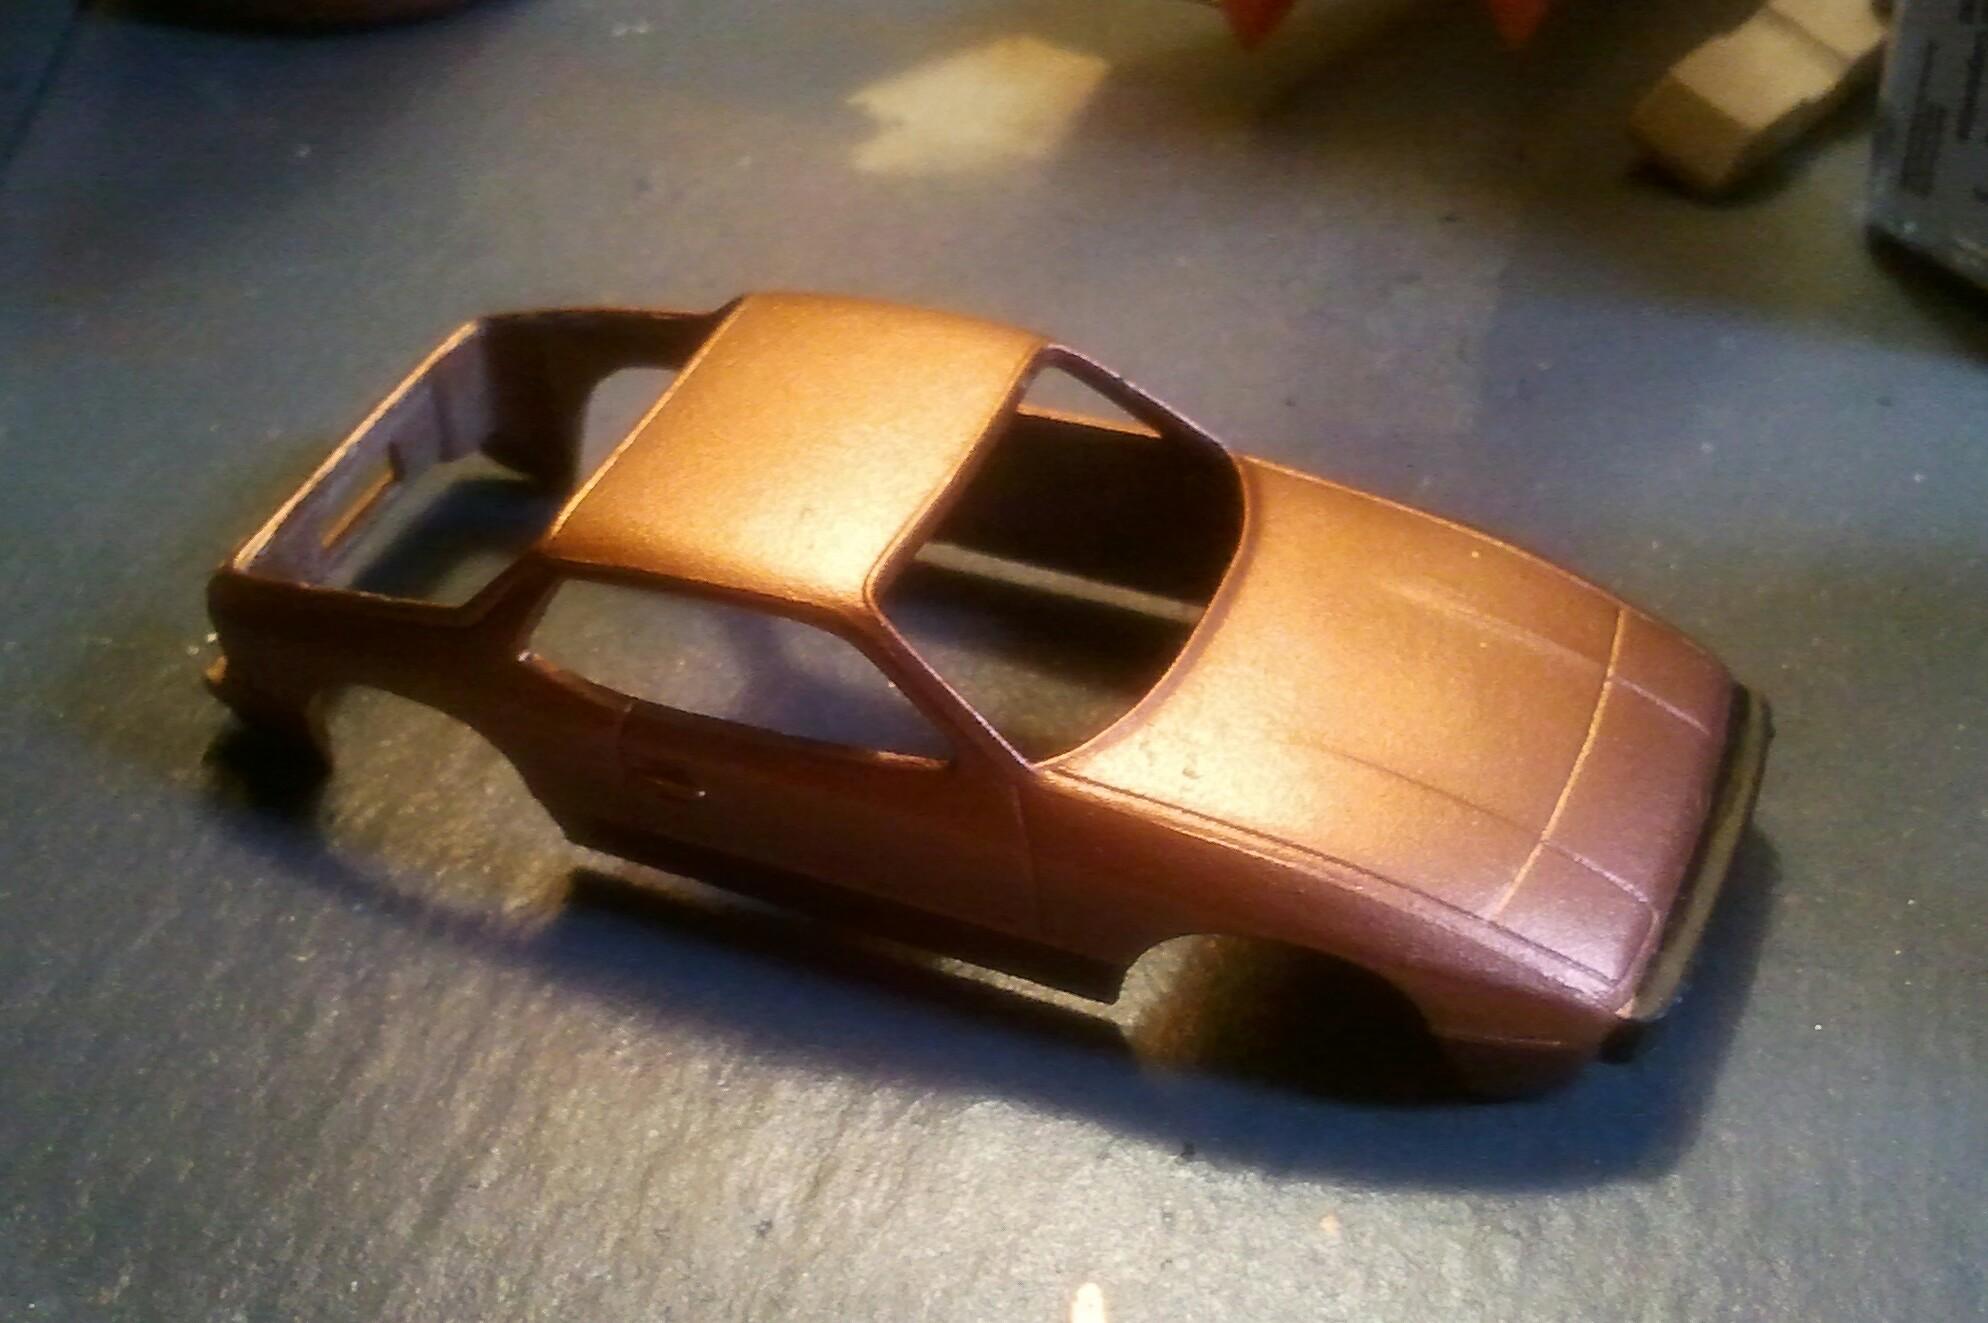
I was off from work for a couple of days and got bored, so I have finally gotten around to working on this one... The more I looked at it, the more I realized that I really could have done a better job on it. The paint job was less than perfect, not to mention the color was just plain boring. The engine compartment was missing details I had meant to include. The wheels and tires just didn't work, and the windows never fit properly. I know that I could have done better. Yesterday I started stripping the paint from the body and dashboard (Yellow can oven cleaner), and today I picked up some acrylic craft paint from work (the craft store who's name starts with "M") to repaint it with. -
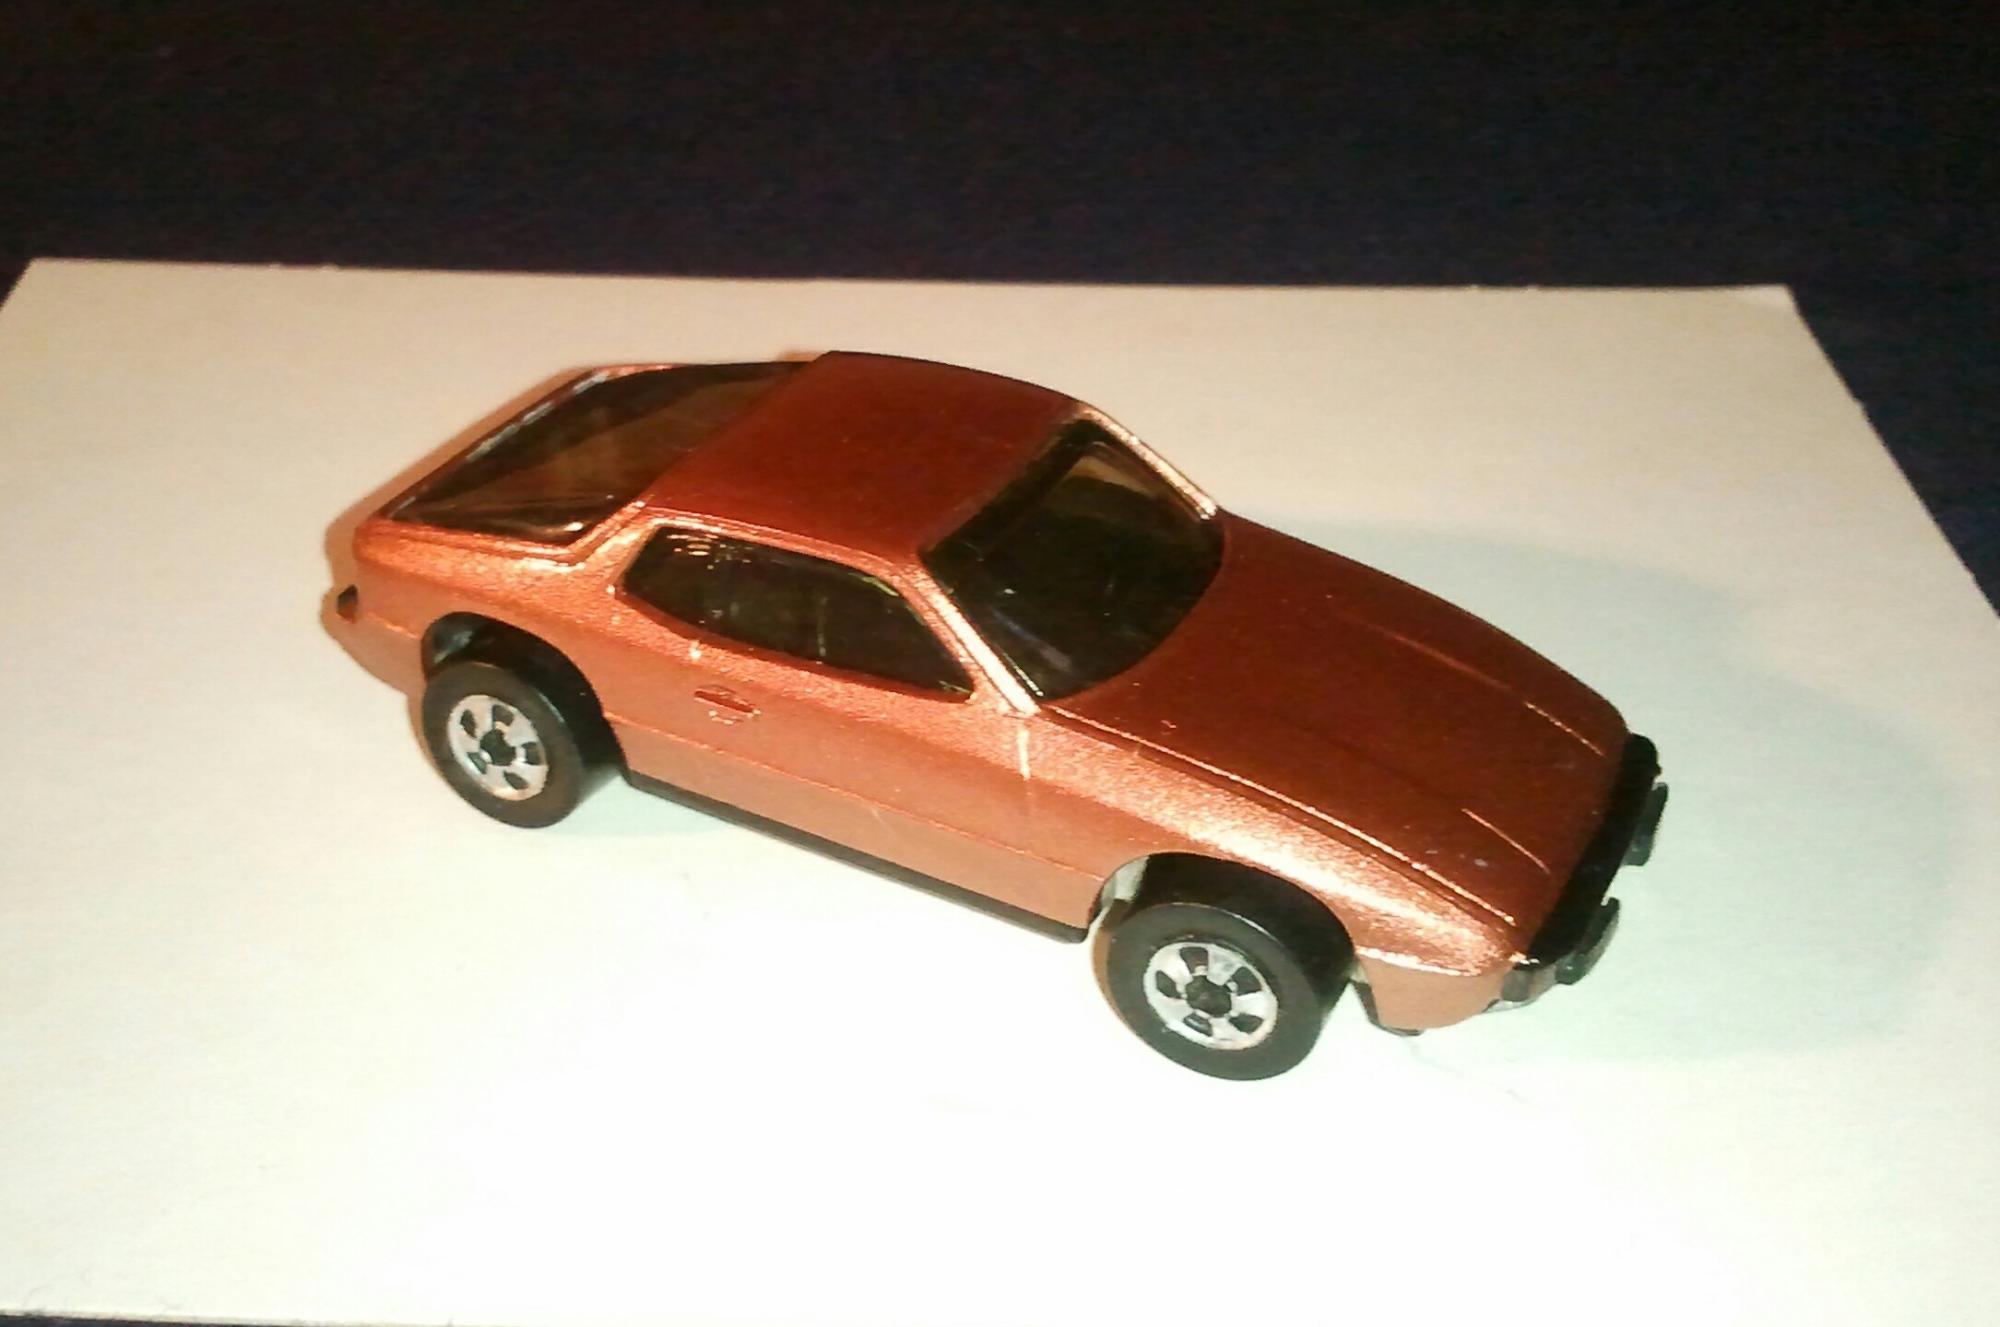
So, I finally got around to finishing this up (Well, almost. I still have to find a small screw or something to hold it together). I painted the tail lights a couple weeks ago, and today I put a couple coats of Future on it and touched up the silver on the wheels.
-
Looking good. I have to pick me up a can of that.
-
I also put a coat of Future on the windows to clean up the scratches and such.
-
I started off by, yes, stripping the original paint. Yellow can oven cleaner made short work of it. Then a coat of primer and the paint left over from the jar. I then brush-painted the bumper black.
-
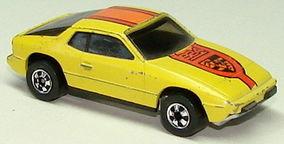
I had a little thinned paint left over from the Super Bee model in the jar for my airbrush... So I decided that rather than dump it, I would use it up. Here is the subject, this is not a photo of the actual Hot Wheel, I forgot to take a before photo, so I downloaded this from the interweb. I had removed the graphics from it many years ago, so it started out plain yellow, and the paint was probably a little worse than this.
-
Why do I have to log in every time I change a browser?
Igor replied to sjordan2's topic in How To Use This Board
Same thing happened to me today. I always access the site from my phone, and I'm always logged in. But today I logged in from my computer, and when I went back to my phone I had to log in again. -
Eric, I'm with Bill. I was watching your build on the board, and it was great to see it up close and in person. Love the idea of using 3D printers and computer cutting machines to make parts. Well done sir!
-
Hey Bill! My sister and I were the ones who walked and talked with you in the parking lot as you were taking stuff out to your car (about quarter of 2). It was great to meet you, and, like I said, love your work.
-
Assembled
-
Assembled
-
Minor setback, last night I noticed that somehow I managed to get a blemish on the roof. Sanded down the problem and resprayed it with Future. Now I'm just waiting for it to harden so that I can begin final assembly.
-
Michael: As I posted earlier, the paint is an experiment. I've never used it before. I've also never used 2K clear, and don't know anything about it other than what I just read on their website. Just remember, these are acrylic paints, so I would definitely recommend that you try it on something disposable first.
-
BMF applied, and other chrome painted.