RickArt
-
Posts
108 -
Joined
-
Last visited
Content Type
Profiles
Forums
Events
Gallery
Everything posted by RickArt
-
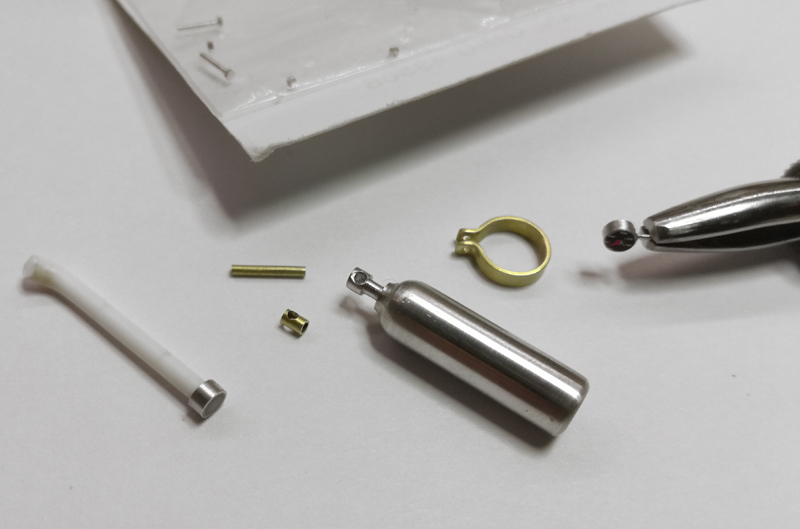
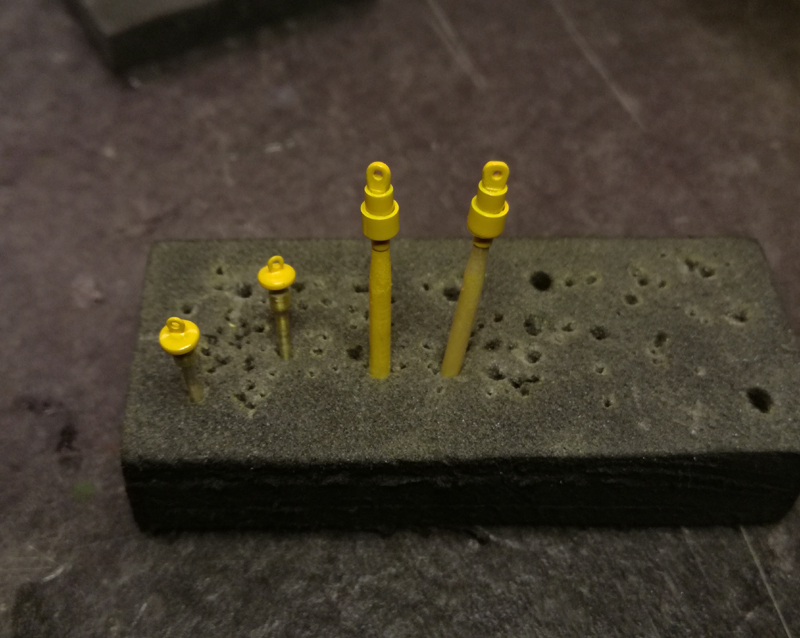
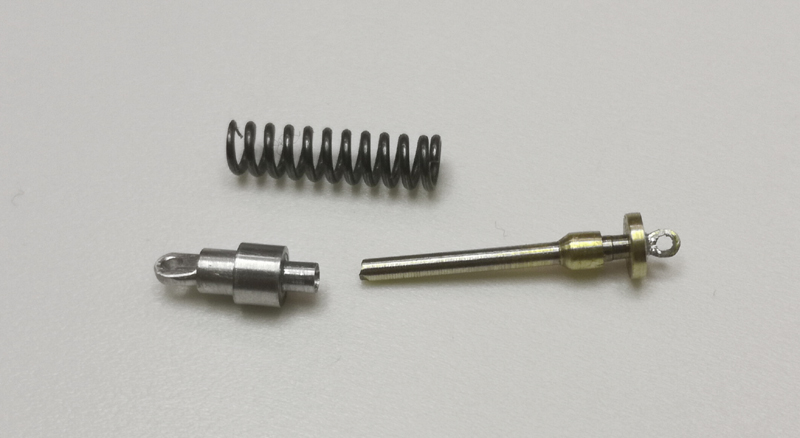
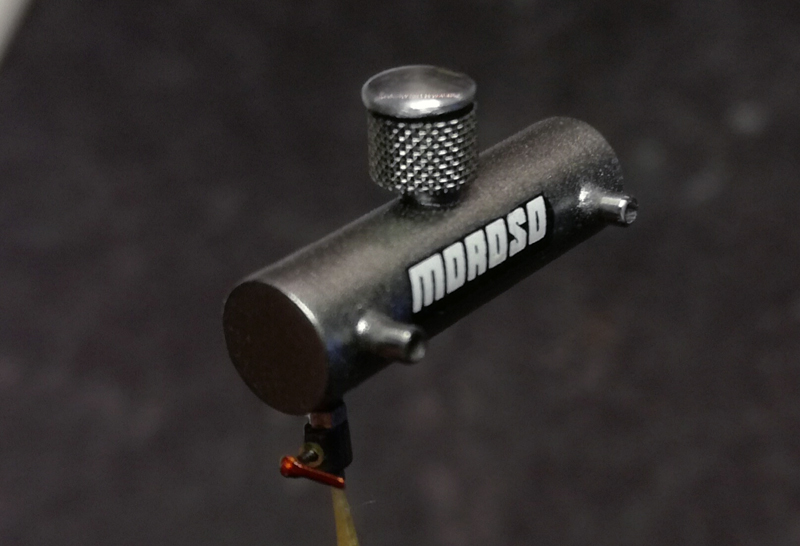
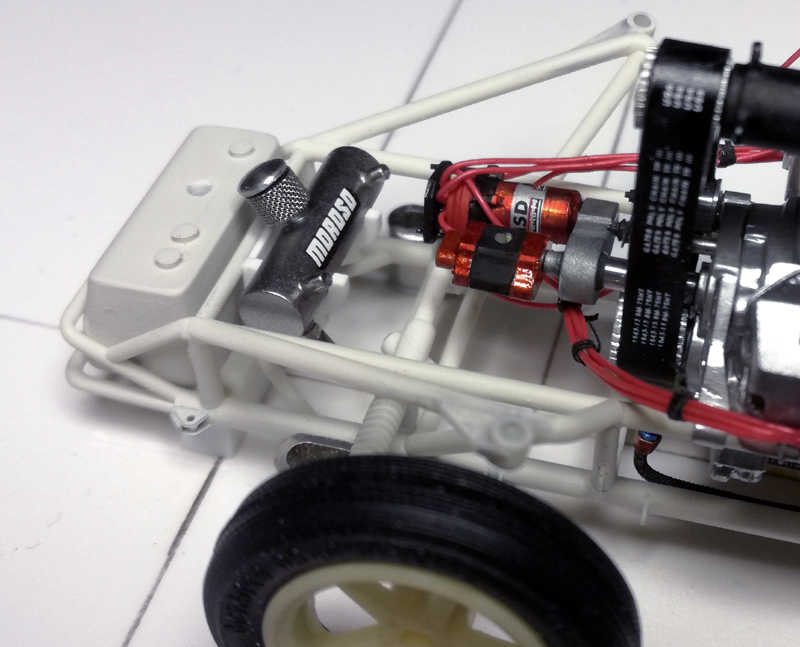
Hi all and thanks for all nice comments! Modeling going pretty slow here, but I stole some time to make some progress on this build. The regulator on this air bottle was made from small brass and aluminum tubing. This bottle are going to feed the shift system and Lenco airpods. Rear coilovers. I used the same method on this one as I did on my silver pro mod Nova. Airbrushed Koni yellow. ...

-
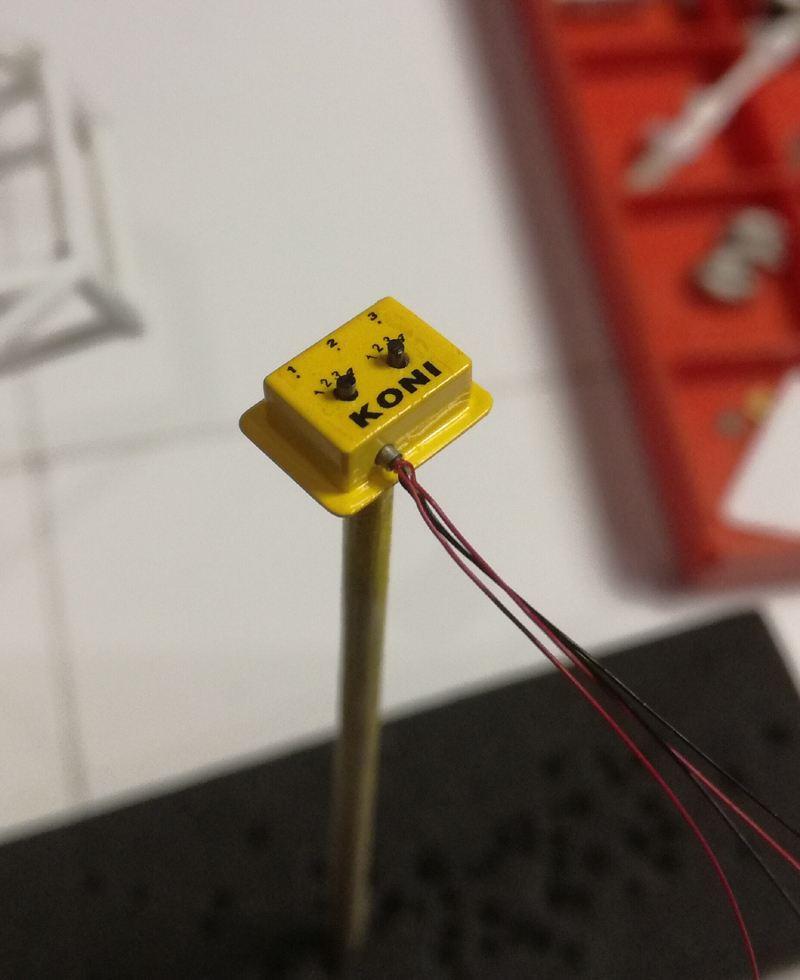
Small update on this one...and thanks for all comments! Carbon tubs made from .020" Evergreen sheet. Mockup. Koni control box. / Rick
-
Very nice build...I love it!!!
-
Small update on this one. Burnout! The Revell 1/24 scale top fuel/funnycar slicks was a little bit oversized for the 1/25 covette body. Thanks for looking! / Rick
-
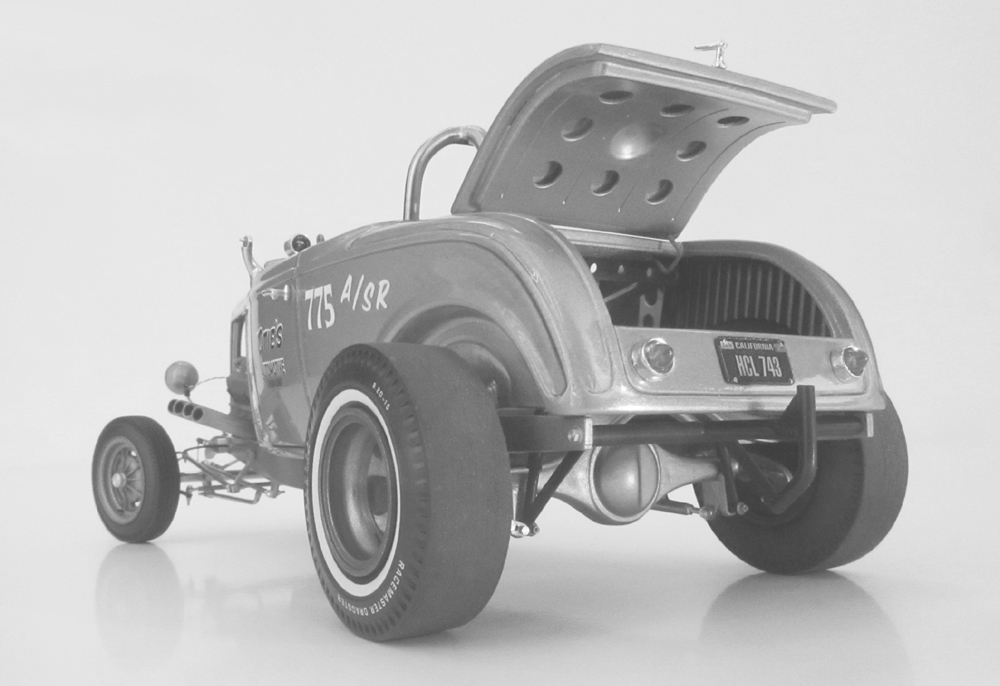
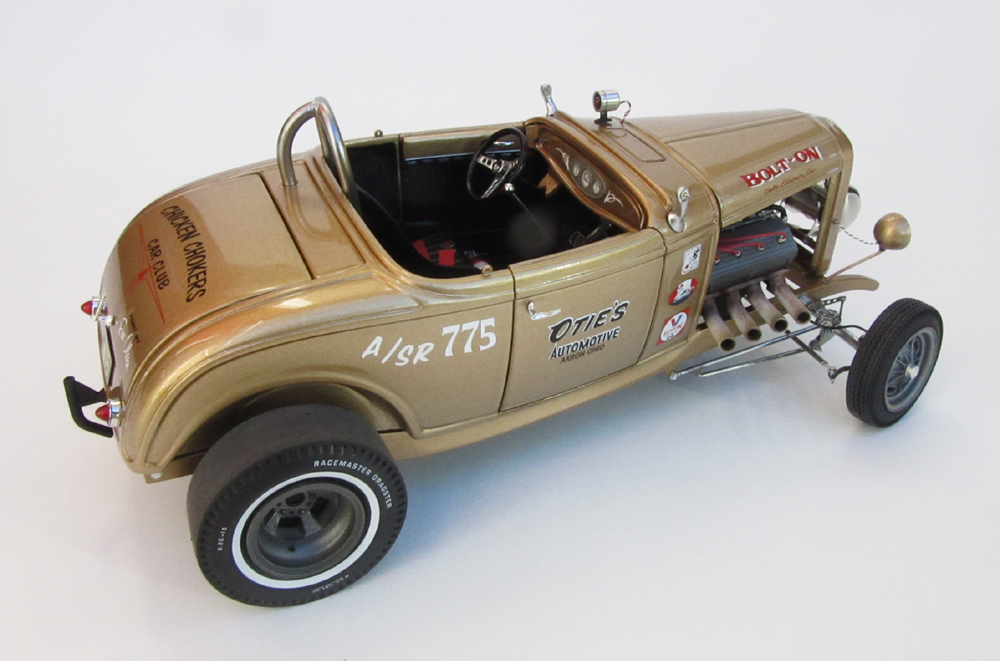
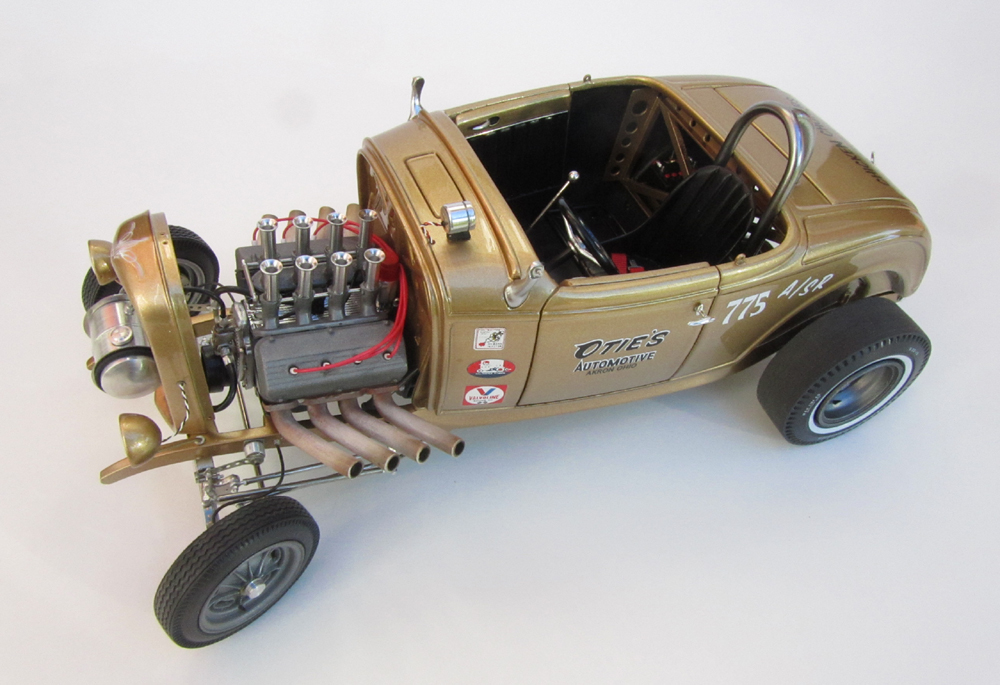
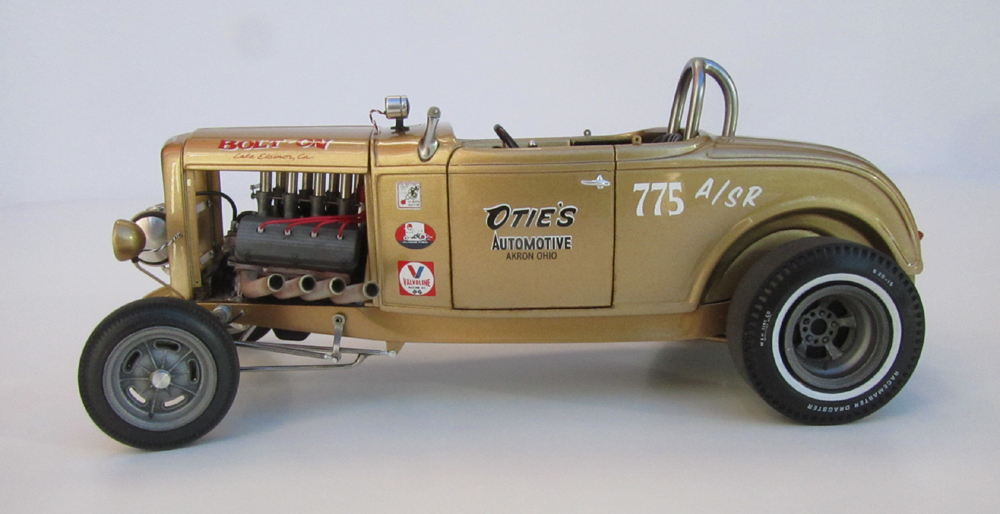
I knew about the fenders, but I didn´t want to put such small ugly fenders on this one. I also knew that an A/SR must have a passenger seat...but the disc brakes....hmm. Anyway, I will not rebuiltd that front suspention...trust me It´s a model...and I had a lot of fun building it. Thank u guys for all comments, I´m glad you like it!!! Thanks!!! / Rick
-
Problem fixed! Now we can all sleep well tonight. /Rick
-
Thanks guys Here is some of the parts I cast for this project. The firewall, frame horns, rear body fenders and steering gear will appear on my next rod...a 32 Tudor with a blown Ardun flatty Here´s a pic. showing the firewall buildup. B&W photo... /Rick
-
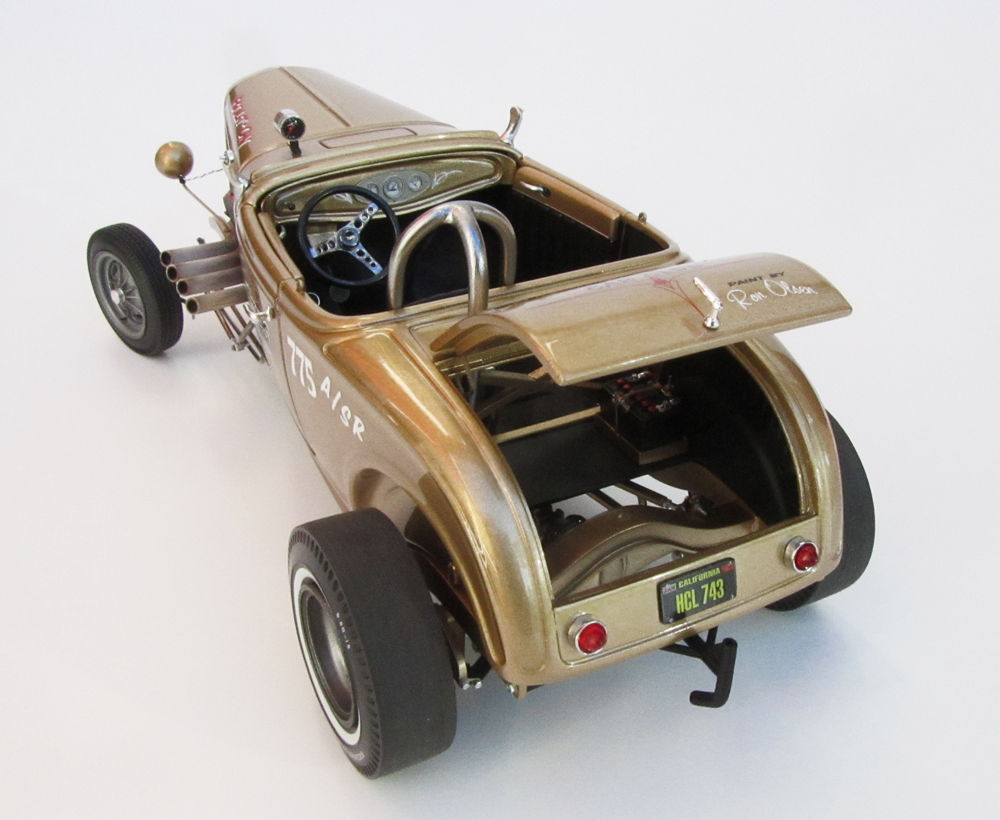
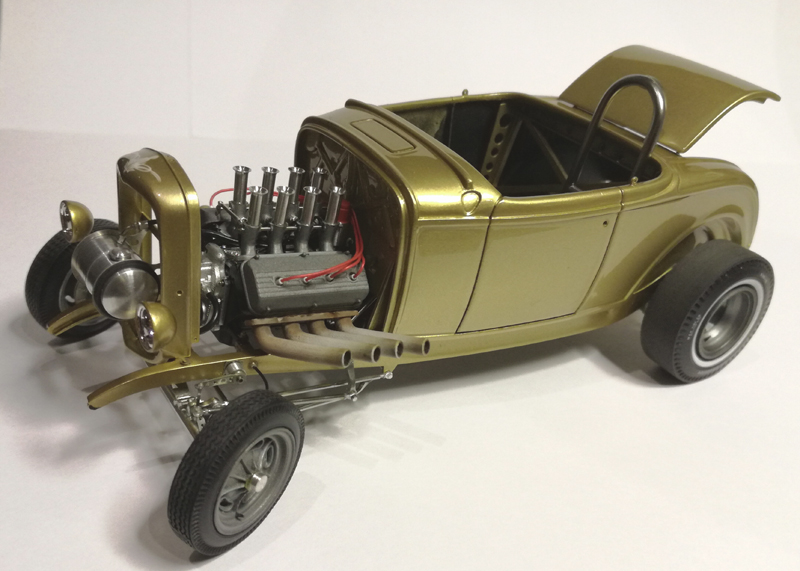
Finished! Hope u like it, and thanks for following this project the last eight years! /Rick
-
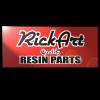
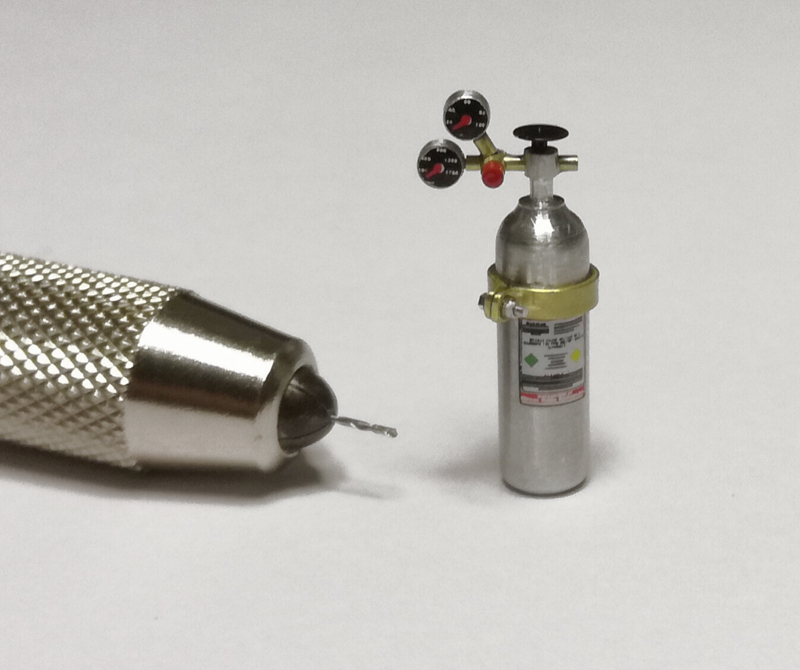
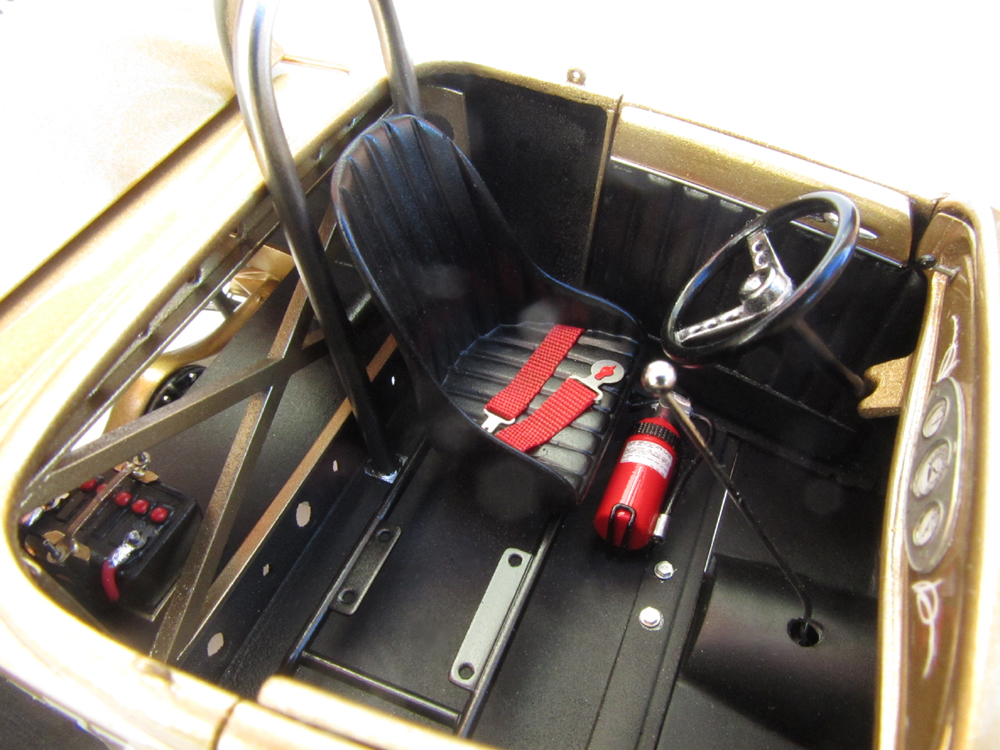
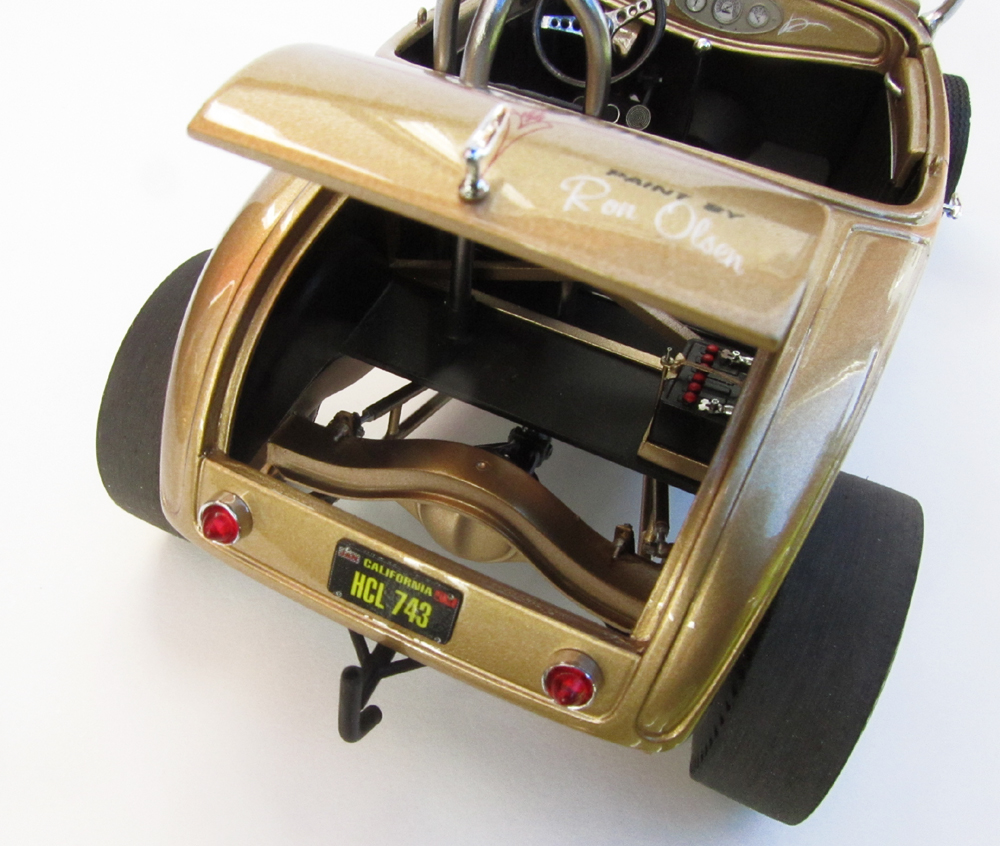
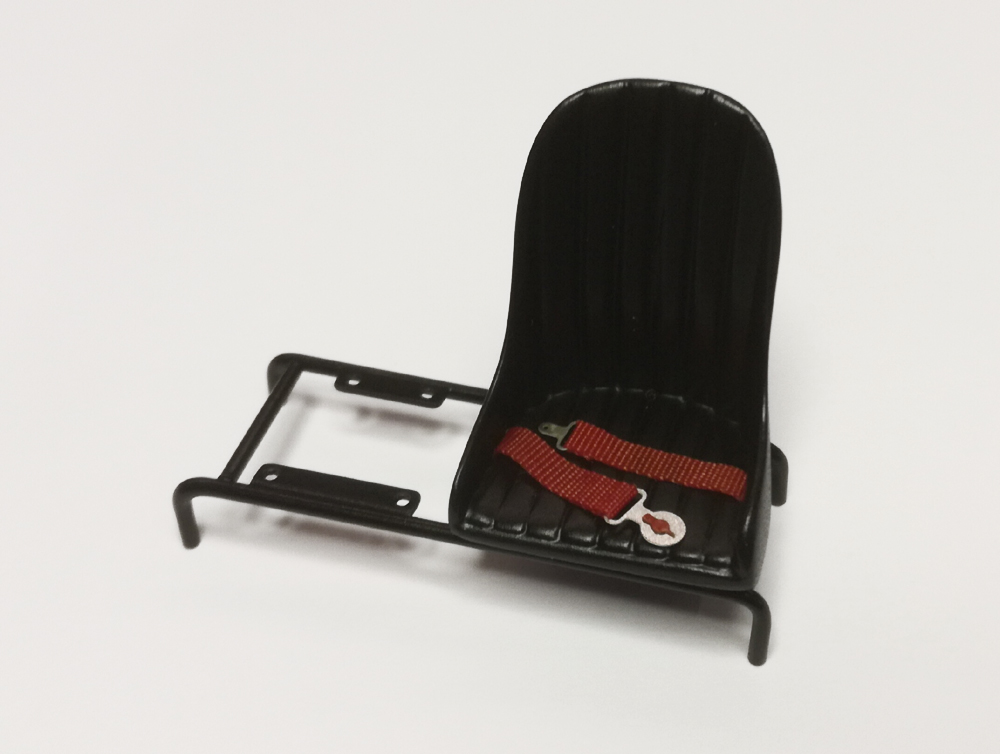
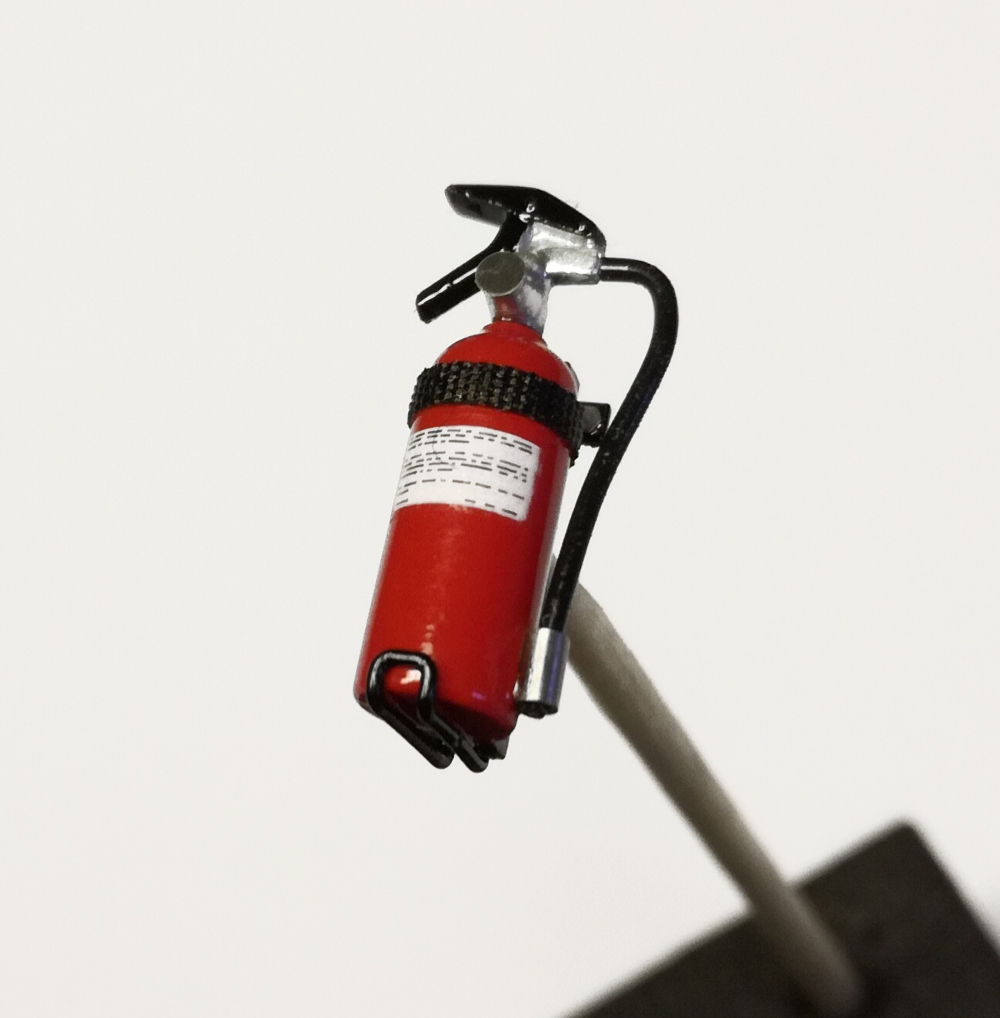
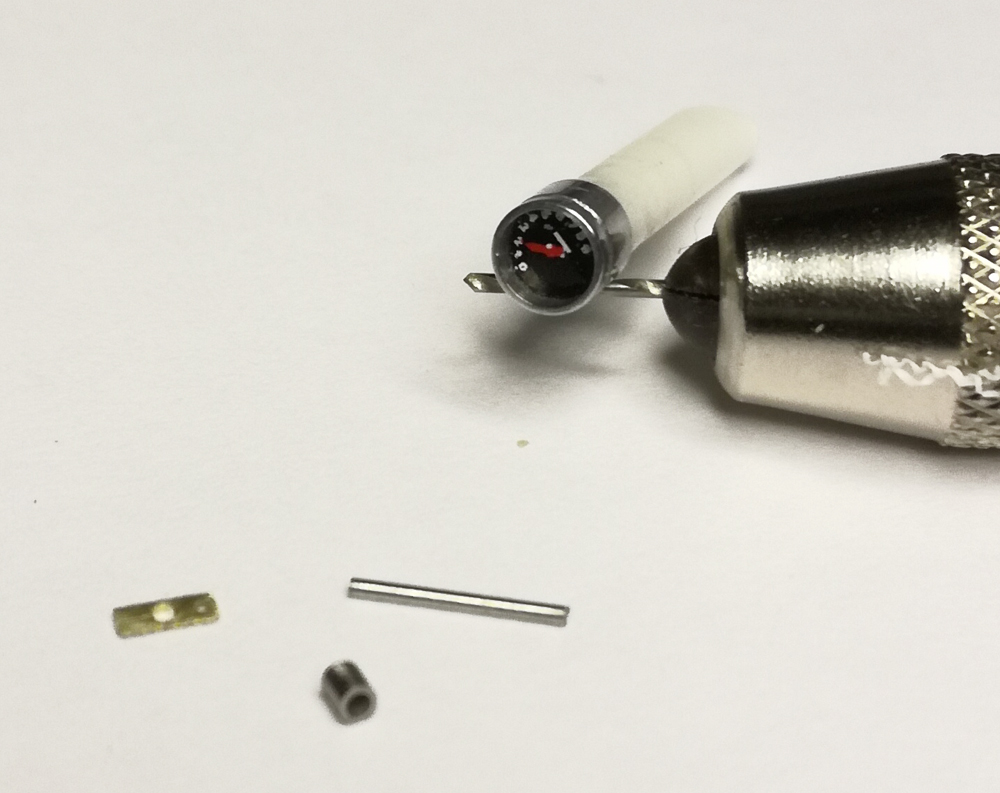
Update. Here is some pics. of the last pieses. I made a new undercarrige for the seat, scratchbuilt from Evergreen rod. This one look better and more accurate. The steering wheel was stolen from Revells "Big John" 41 Willys kit. I masked the rim with Vallejos "Liquid mask" and then airbrushed the center with Alclad stailess steel. Tachometer decal from Slixx. Housing made from K&S alu tubing. The fire extinguisher. / Rick
-
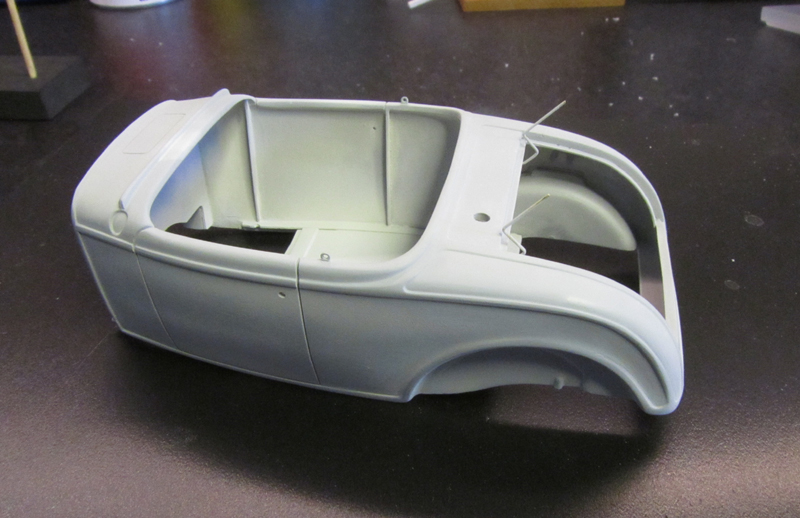
Hi. Thanks for all comments. I´m finaly done with the chassie...the onely thing missing are the headlight glass linces. Then it´s all about the interior and decals and som small details. This will be the final update before the finished build.... Hope u like it so far. Thanks for looking in /Rick
-
Small update. No windshield on this one, but I´m gonna keep the lower stanchion posts. / Rick
-
-
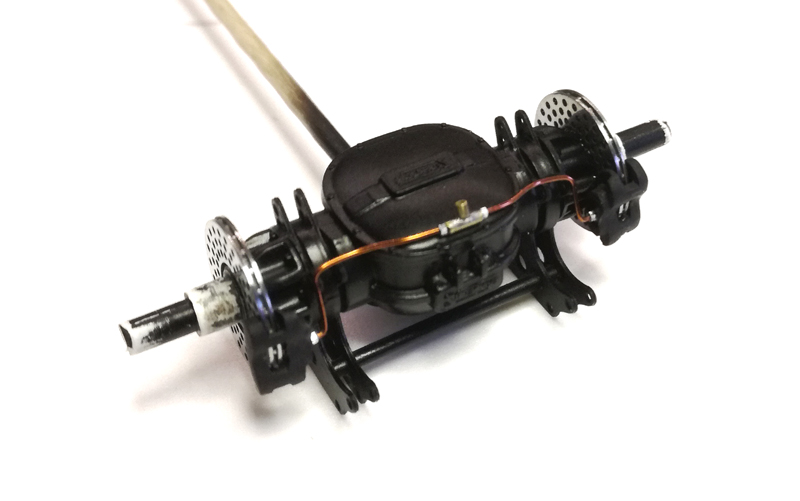
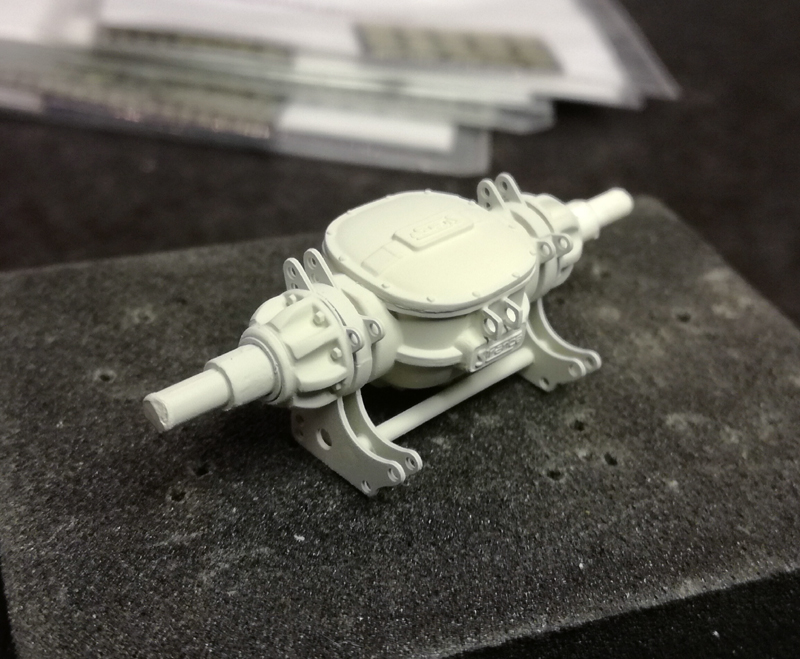
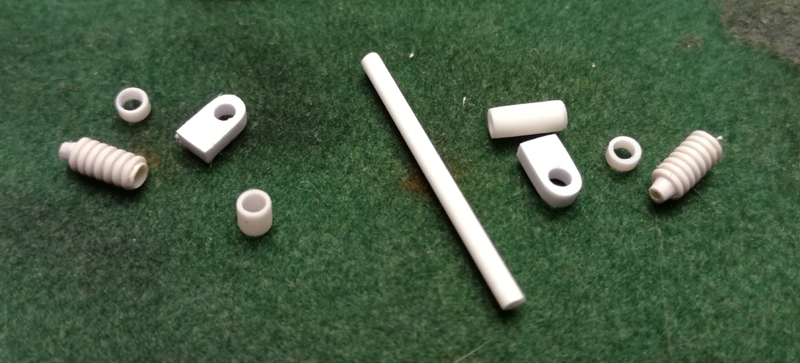
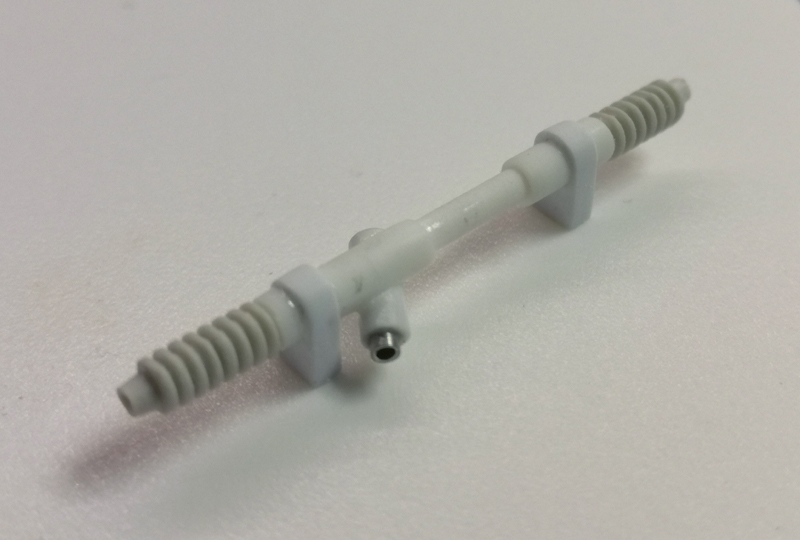
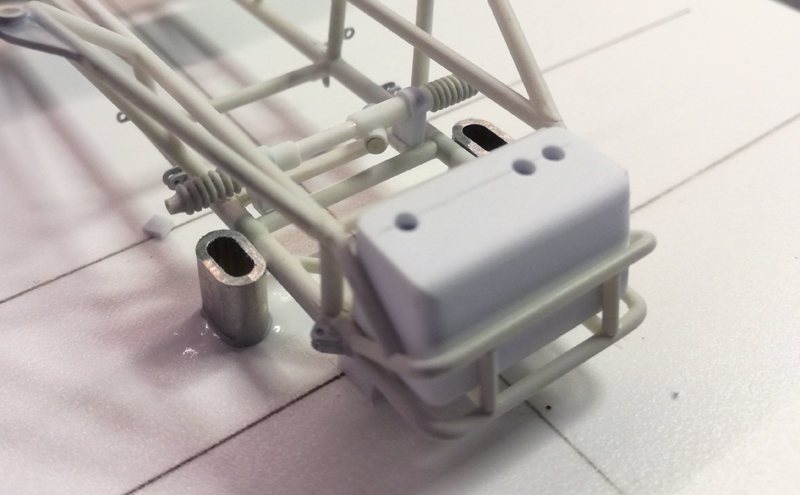
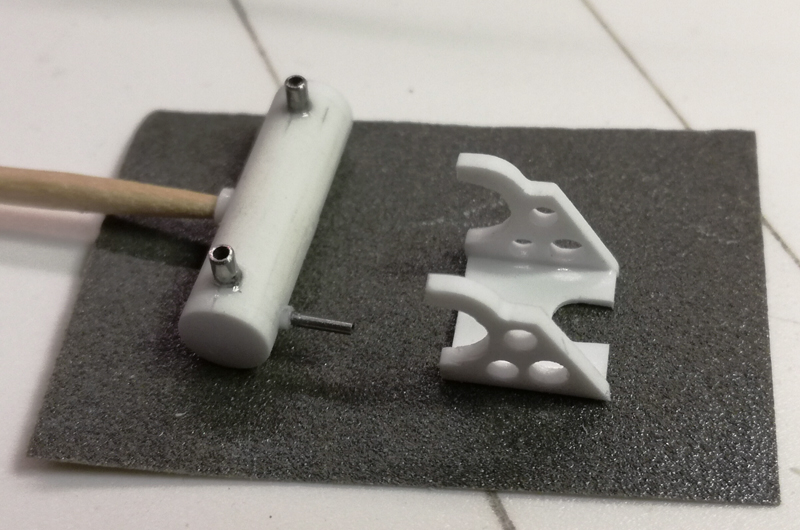
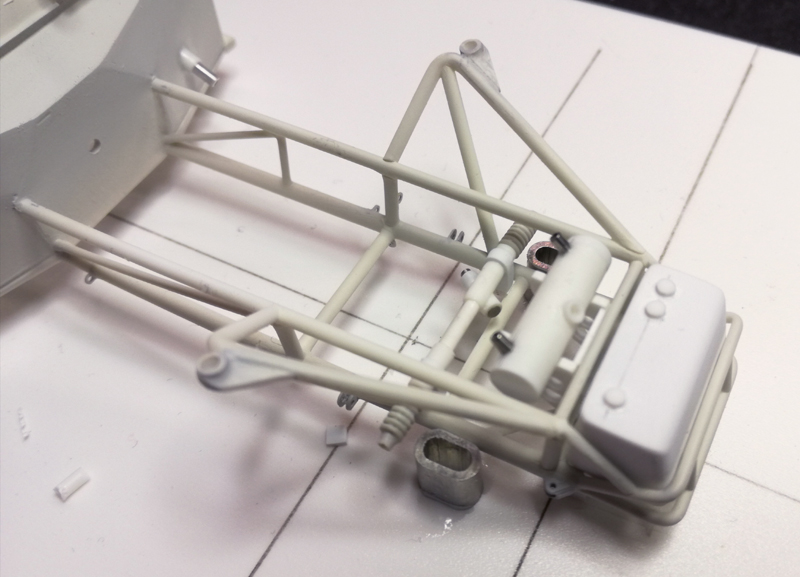
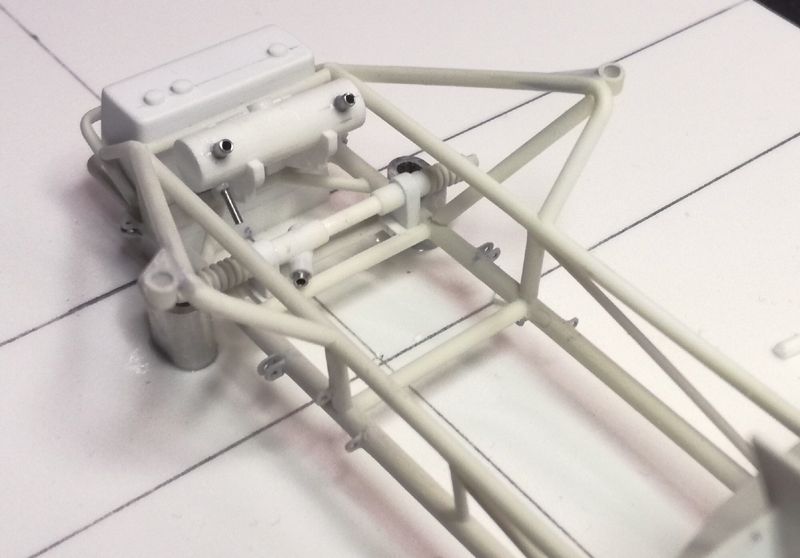
Hi. Finaly some progress...and it feels fun to do some modeling again The rear axle were taken from an Revell Top fuel dragster. I choose this top loader because I needed a narrow axle to fit in the small Vette body. With some photoetch plates it turned out pretty good. On previous builds I used the steering gear from Revells pro stock/pro mod kits. This time I decided to scratchbuild my own steering gear, because the parts from the kits didn´t fit and didn´t look the way I wanted. The scratchbuilt fuelcell...made from Evergreen plasticard. A scratchbuilt breather tank with bracket. Stainless tubing as ports...I even added a valve at the bottom. More details on this later. Mockup pics. Hope you like... /Rick
-
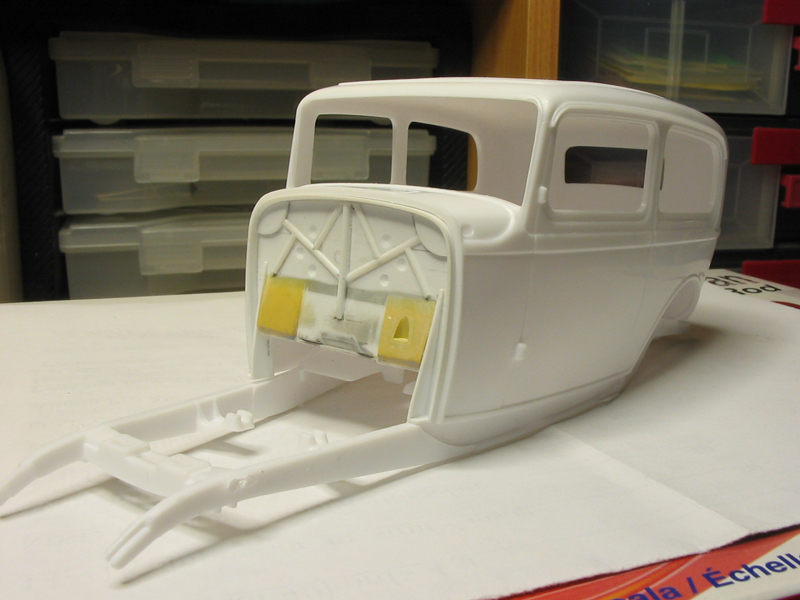
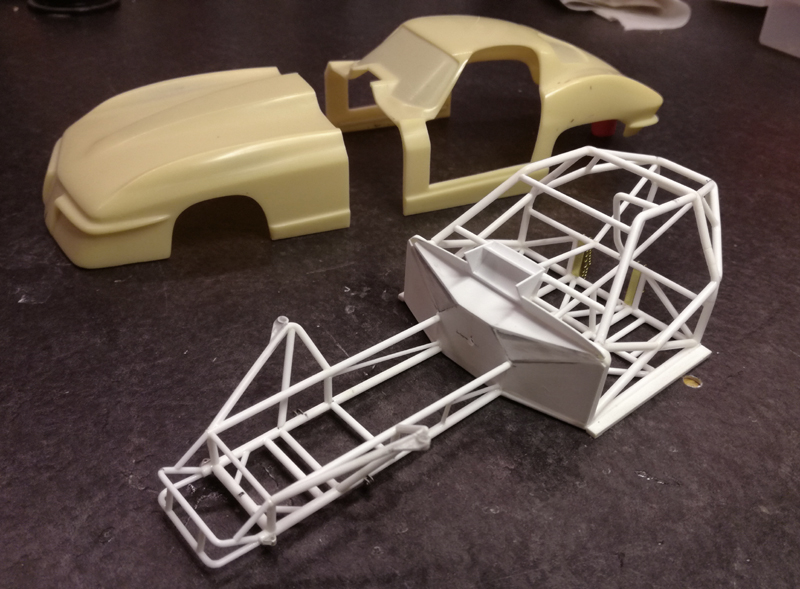
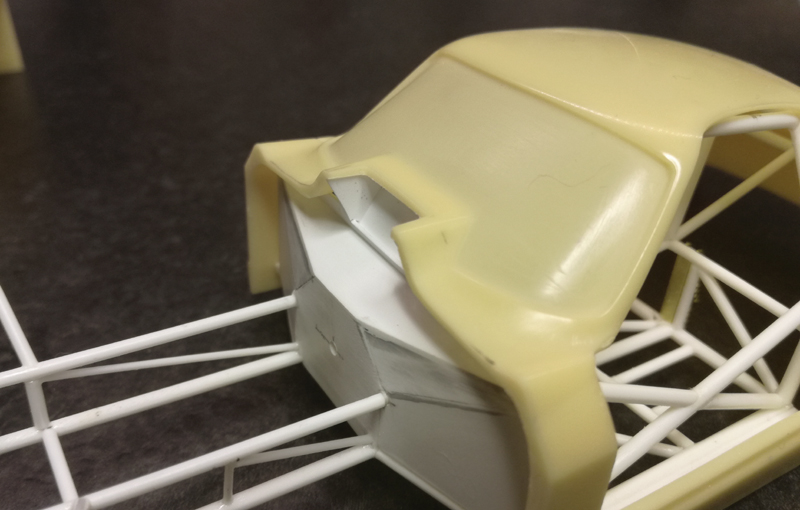
Hi all, small update on the frame. Tricky to get a perfect fit between body an firewall...
-
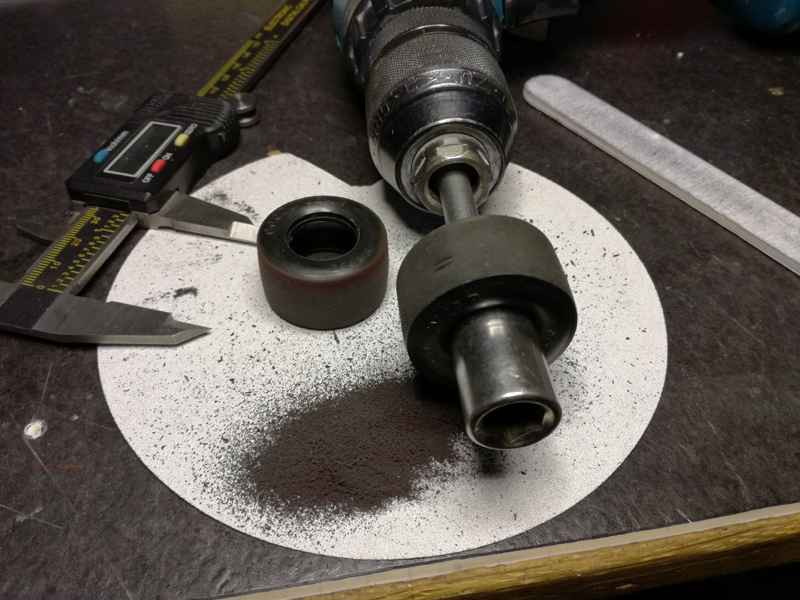
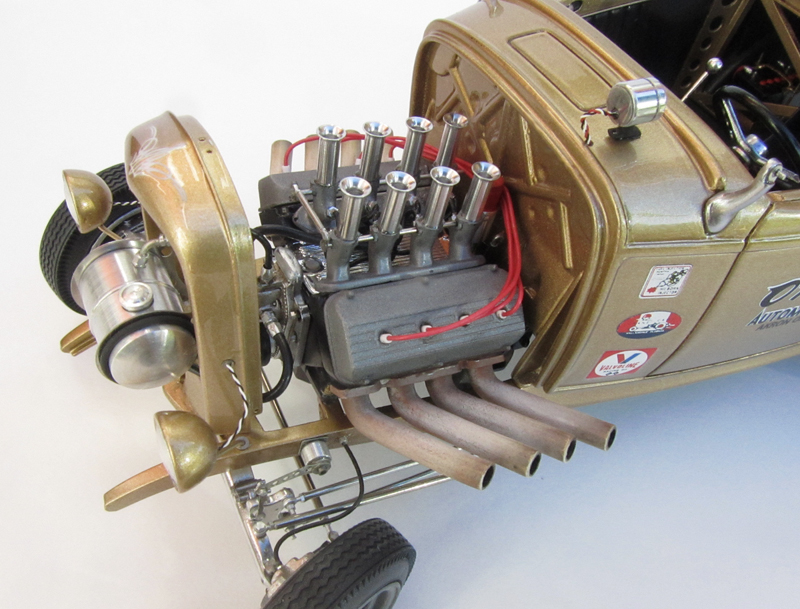
Hi Chris, I think I found those holding tools at Micro Mark many years ago...I think they still got them. Thanks for all comments guys... I have looking for some nice headers for this build for a while now, but I have not find any that fits spot on. The space between the frame and the engine heads are very very tight. I´ve been looking in evrey signle model kit , part box whitout finding what I´m looking for...so I decided to make my own headers the same way that I did on the "Skunkworks Pro Mod Nova"... from electrical installation cord.
-
Thank you Scott This is how the gas pedal turned out. / Rick
-
Throttle gas pedal time / Rick
-
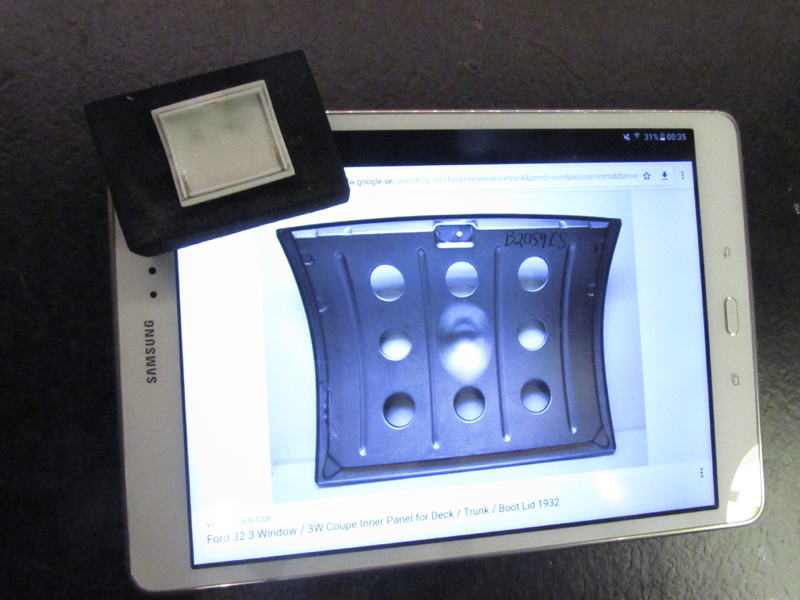
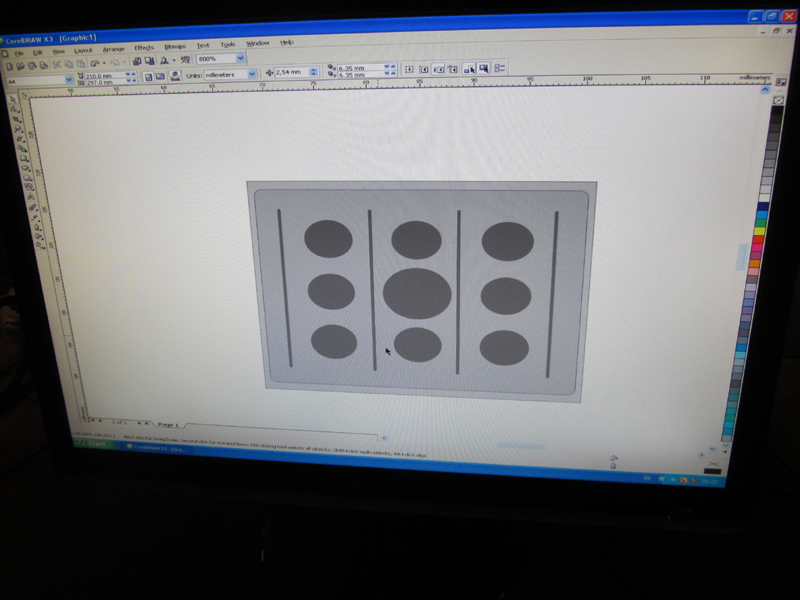
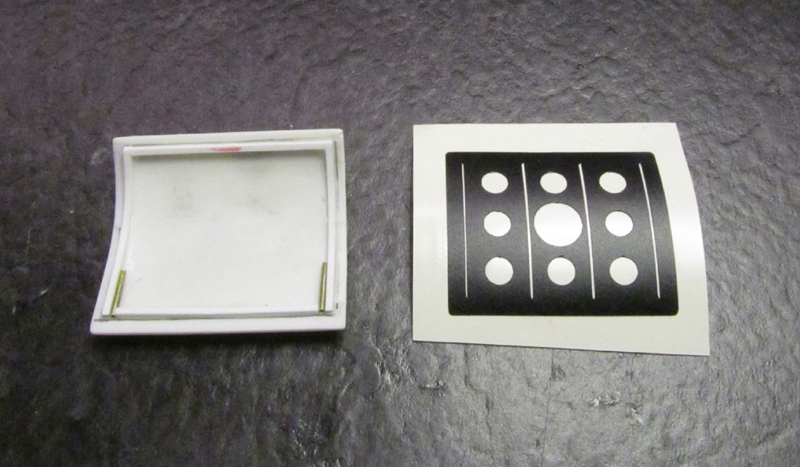
The trunk upholstery finaly in place.... / Rick
-
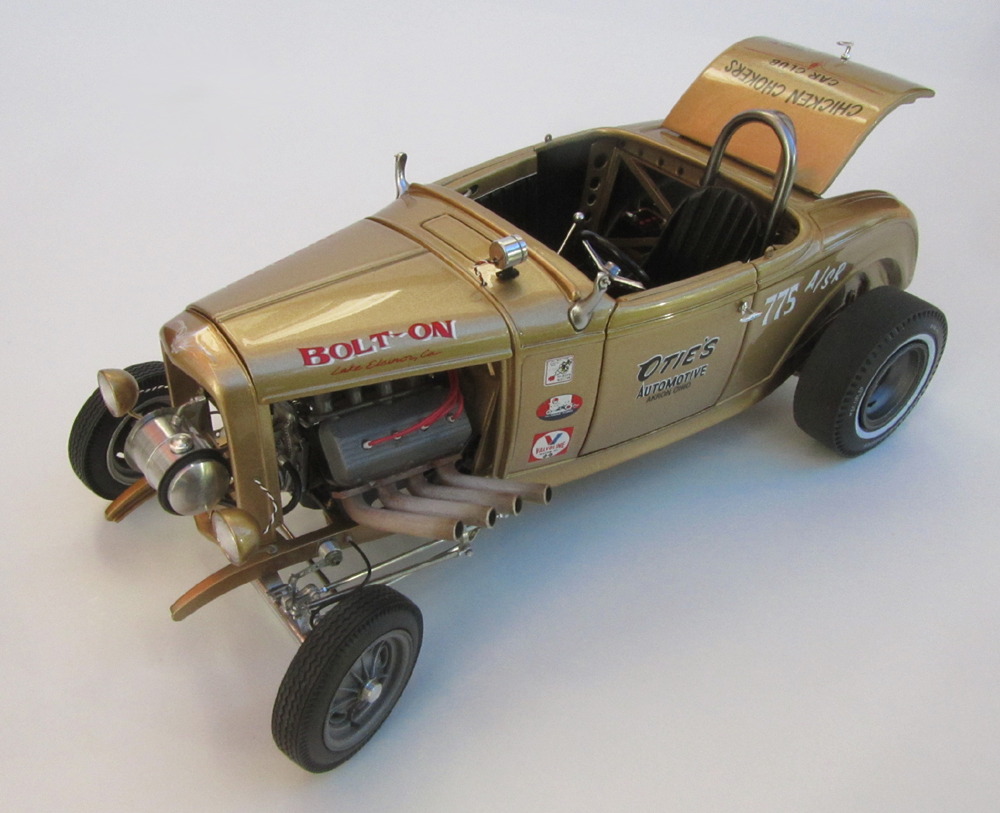
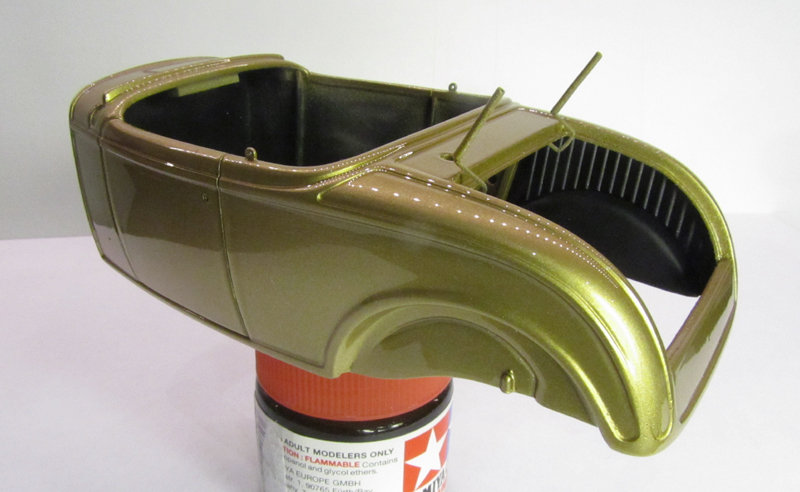
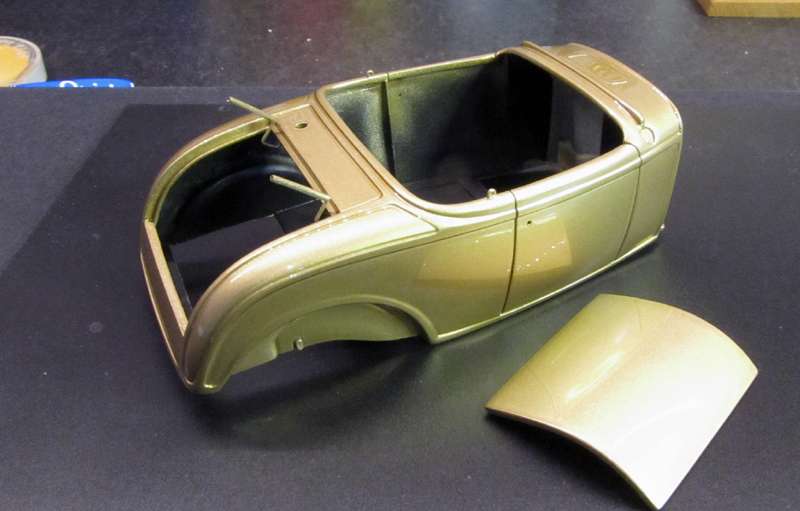
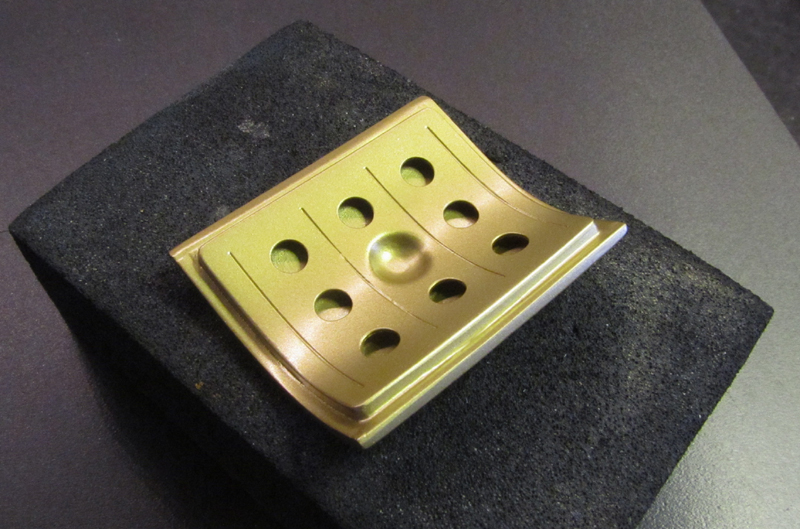
Hi Tim, yes I notice my previous uploaded pics don´t work. Photobucket want me to upgrade my account to get "unlimited 3rd party hosting"...and they expect me to pay $399 for that.......haha . Instead I will re-upload all pics in this thread from page one soon. If some one want to chek out my old stuff on Photo bucket I´ll put the link below http://s172.photobucket.com/user/RickHedlund/library/?sort=3&page=0 It´s time for a small but nice update I finaly got the gold base on the body. I used a IWATA HP-BH1 PLUS airbrush for the basecoat/clearcoat...everything went well this time, The clear coat (Sikkens Auto Clear 2K) was spayed in 4 thinn coats and the results turned out just great /Rick
-
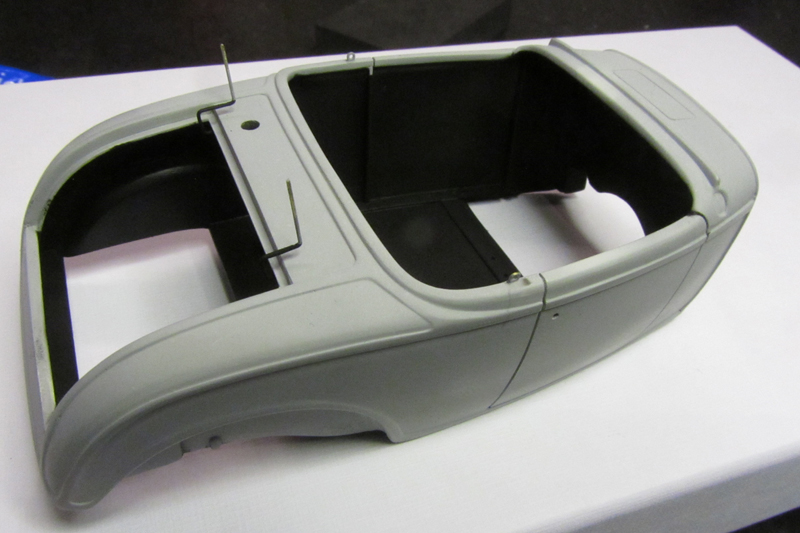
Small update. Primercoat complete. Not easy to get the paint in every corner on the inside...and even harder to sand the inside before the semi gloss black. / Rick
-
small update.
-
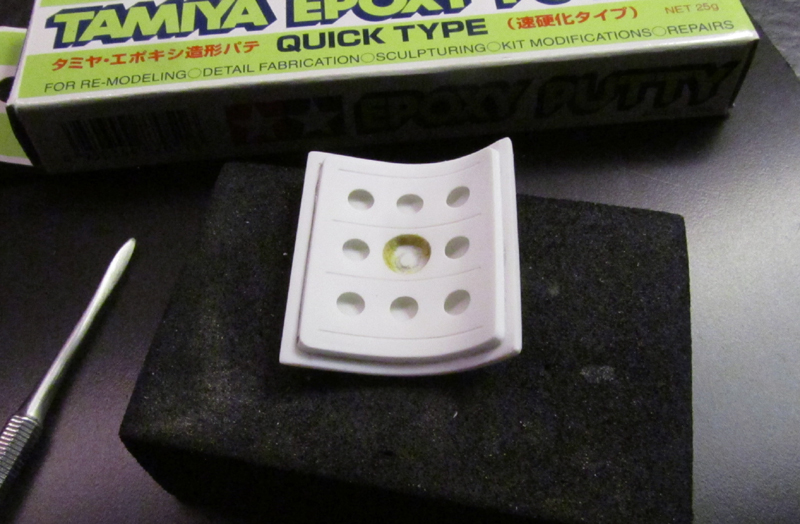
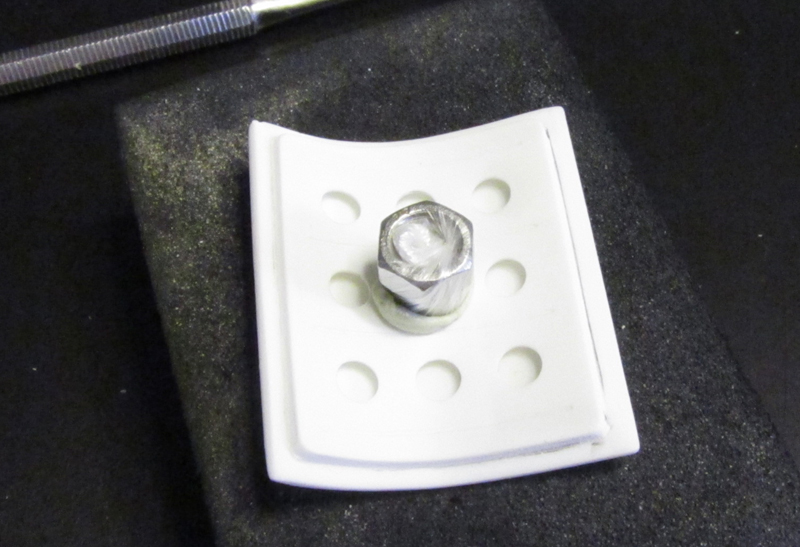
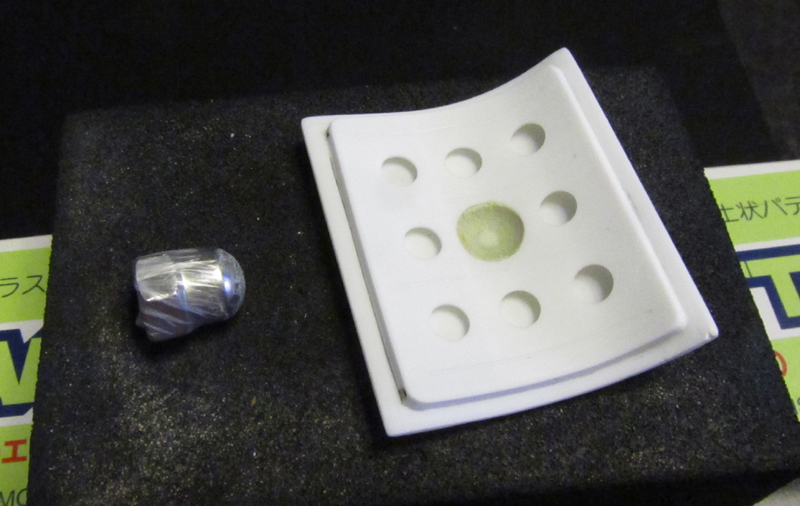
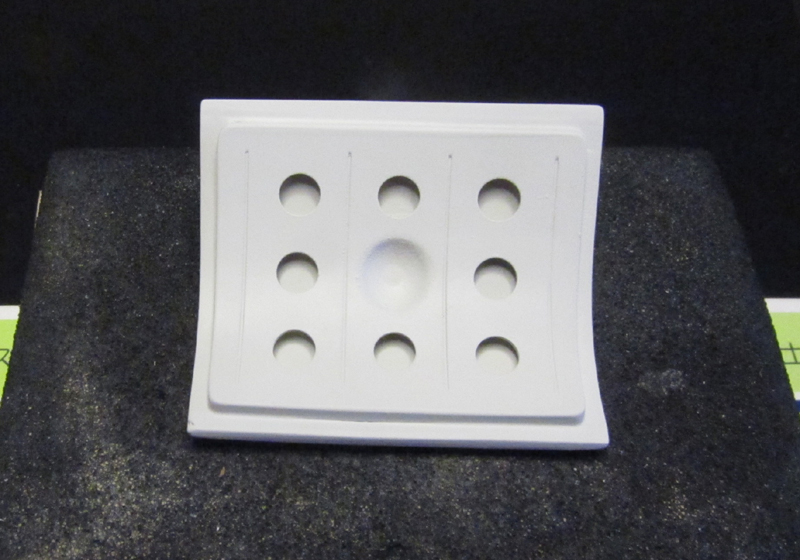
Thanks Brad. The acorn nut was THE perfect tool to get the right shape. I wraped a small plastic bag aruond metal surface so it would not stuck in the bondo. / Rick About the primer failure, All I can say it was a mix of human error and murphys law. / Rick
-
-
-
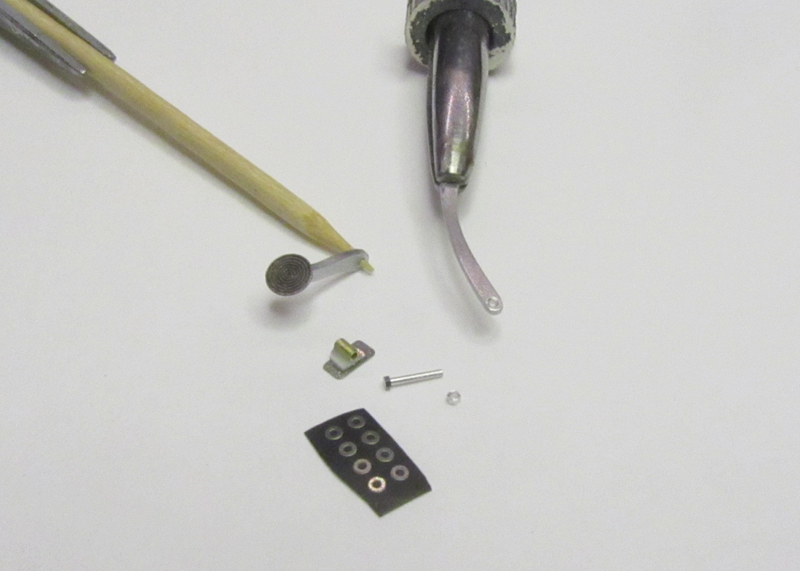
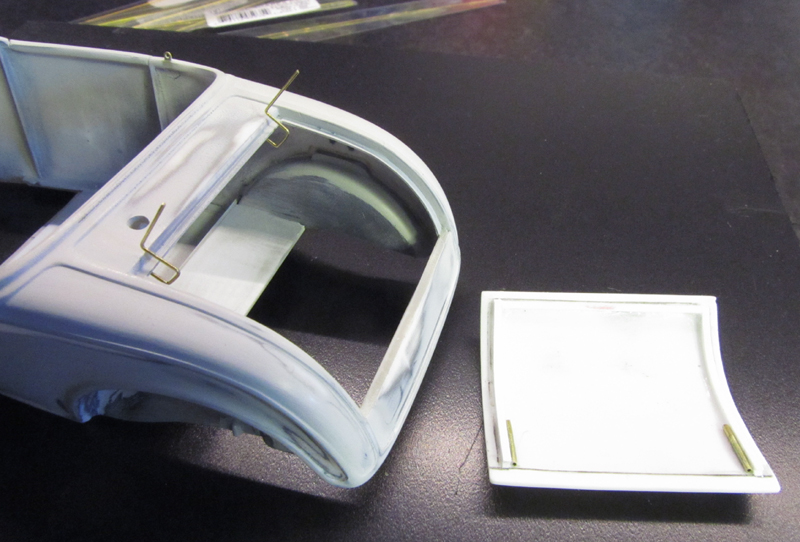
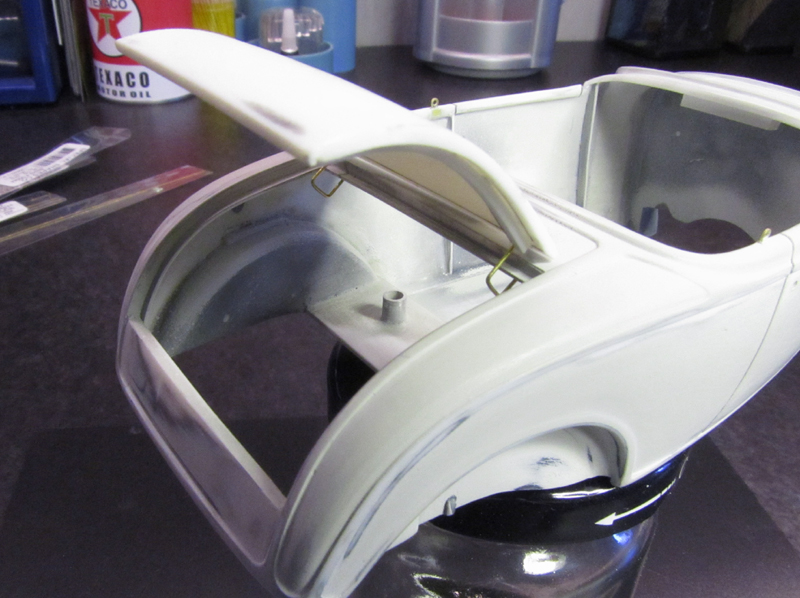
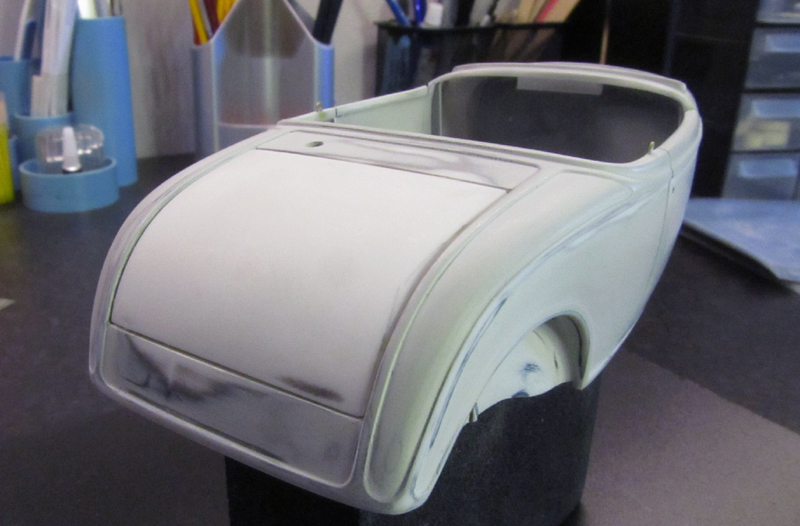
Thanks for all comments guys, I´m glad you like this build. Some progress on this one. The second primer layer went terrible, so I spent many hours to get the surface back on track again. Once the body was ok I decided to make a neat hinge for the trunk. I made the hinge from brass rod and tubing. / Rick