RickArt
-
Posts
106 -
Joined
-
Last visited
Content Type
Profiles
Forums
Events
Gallery
Everything posted by RickArt
-
Thank you all! I have about 2 ½ month to finnish this one... so........yeah... Brake shute made from bandage tape. Yepp, it´s gonna be red /Rick

-
-
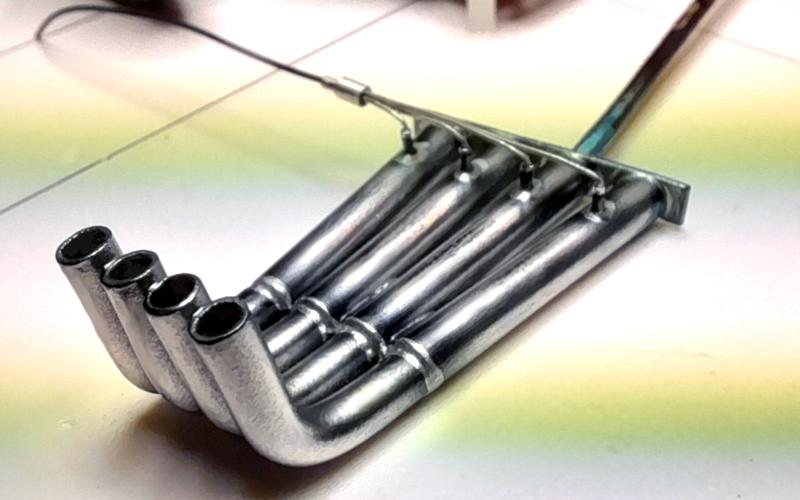
Hello friends! This project has been on halt for some time now, but I have made some small progress over long time now, so there will be an larger update soon. This headers was scratchbuilt from evergreen tube and electic installation cable. /Rick 🙂
-
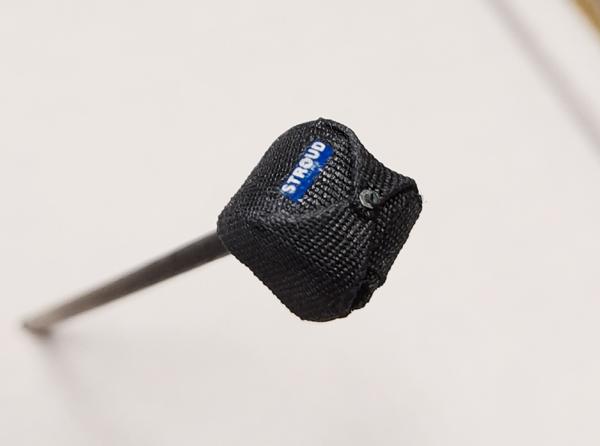
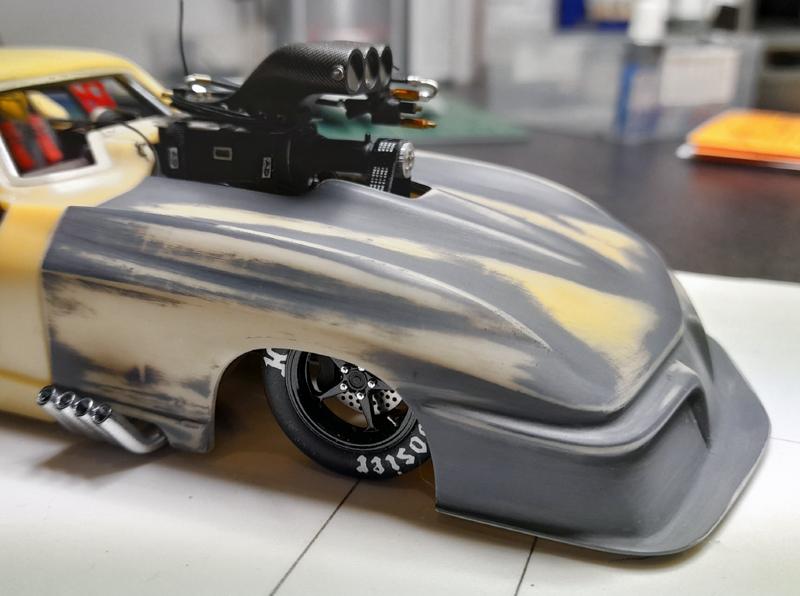
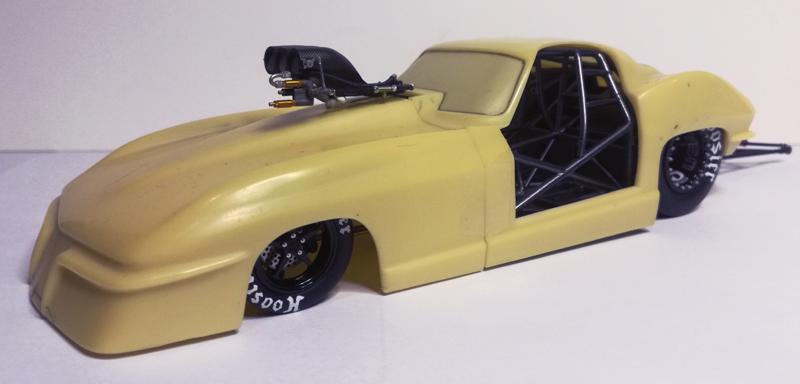
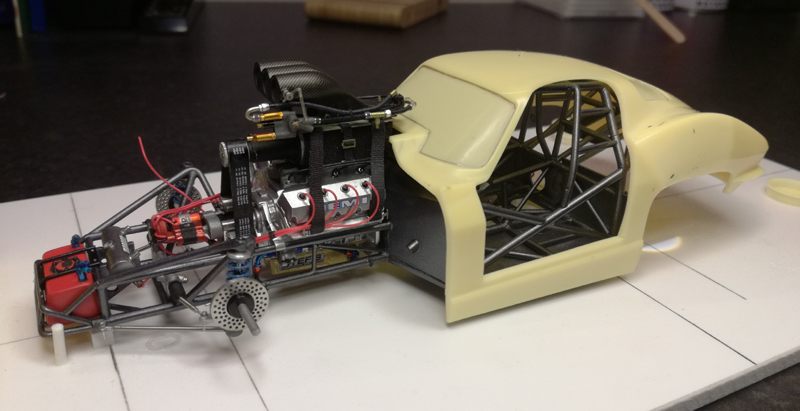
Thanks for the comments! Here is a quick mock up with body! Not the best quality on the pics, but u got the idea. The stance feels right! /Rick
-
yes, I´ll do that! Both rear wheels are now glued in place. The epoxi must cure over night first. /Rick
-
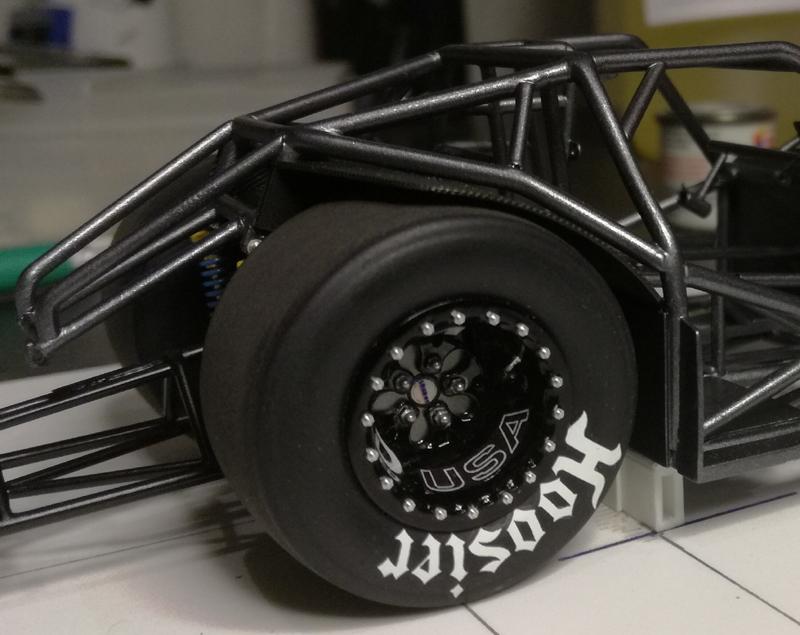
Thanks for your comments guys! Today I recived some fine small parts in my mailbox Finaly I can finnish the rear wheels! thanks for looking! /Rick
-
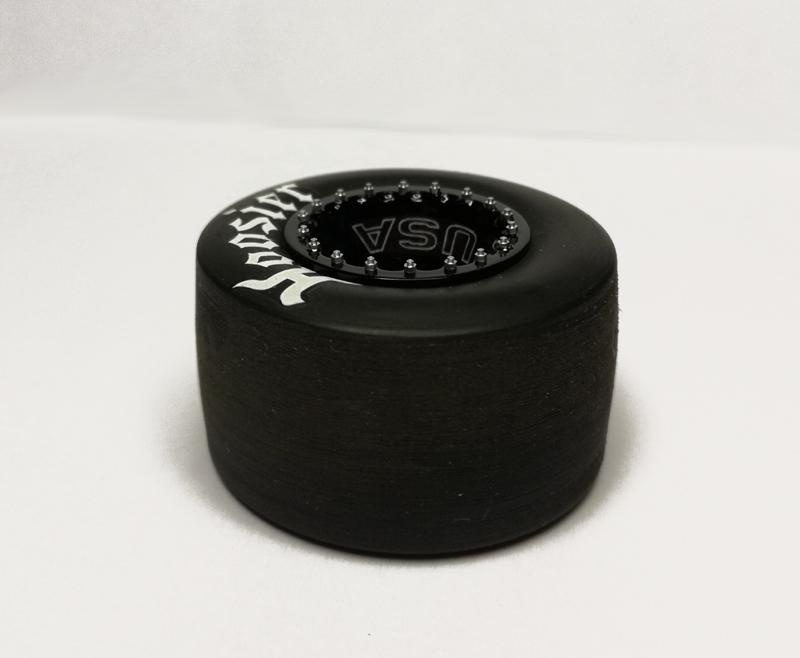
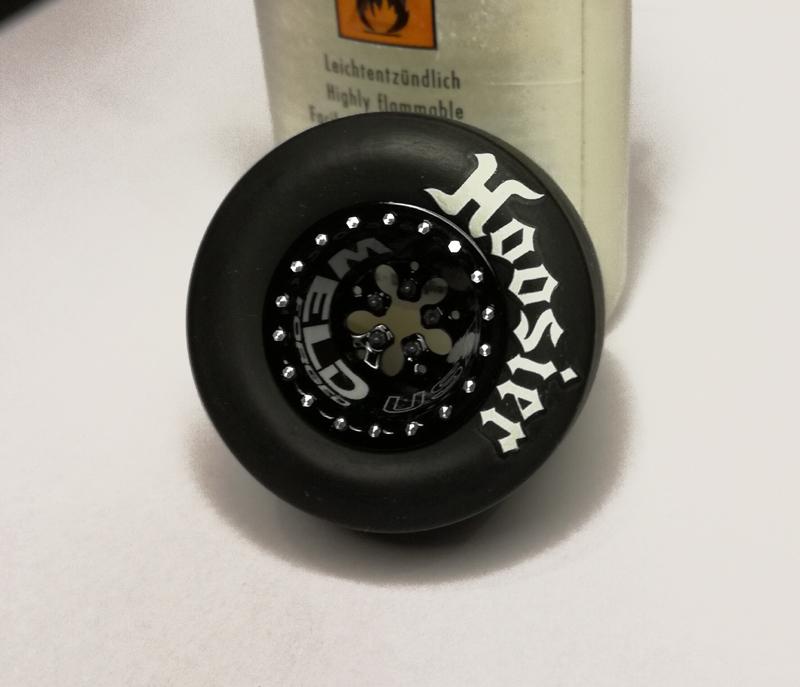
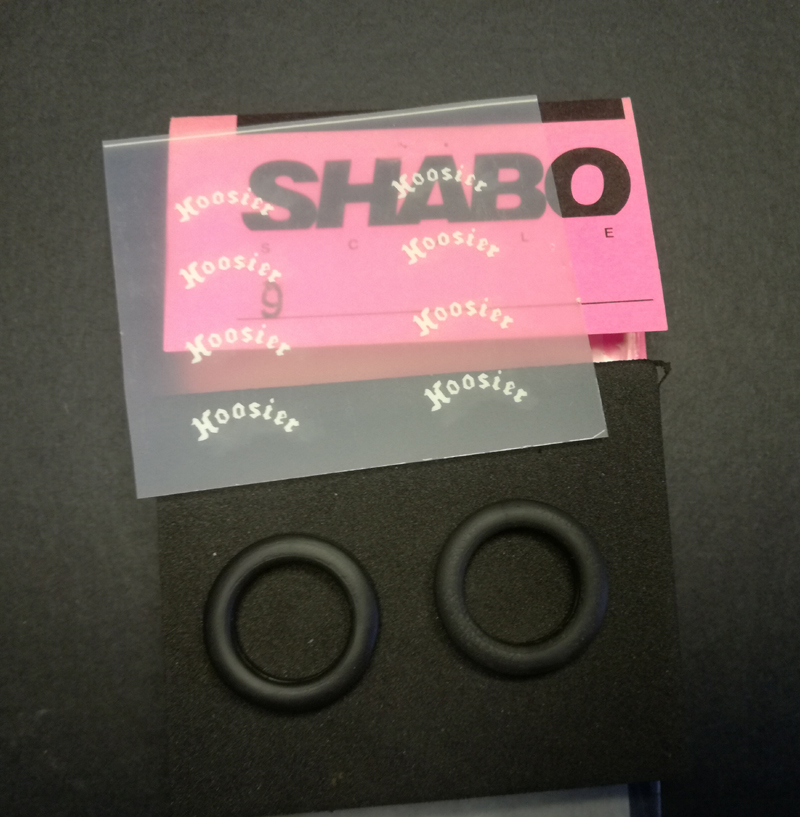
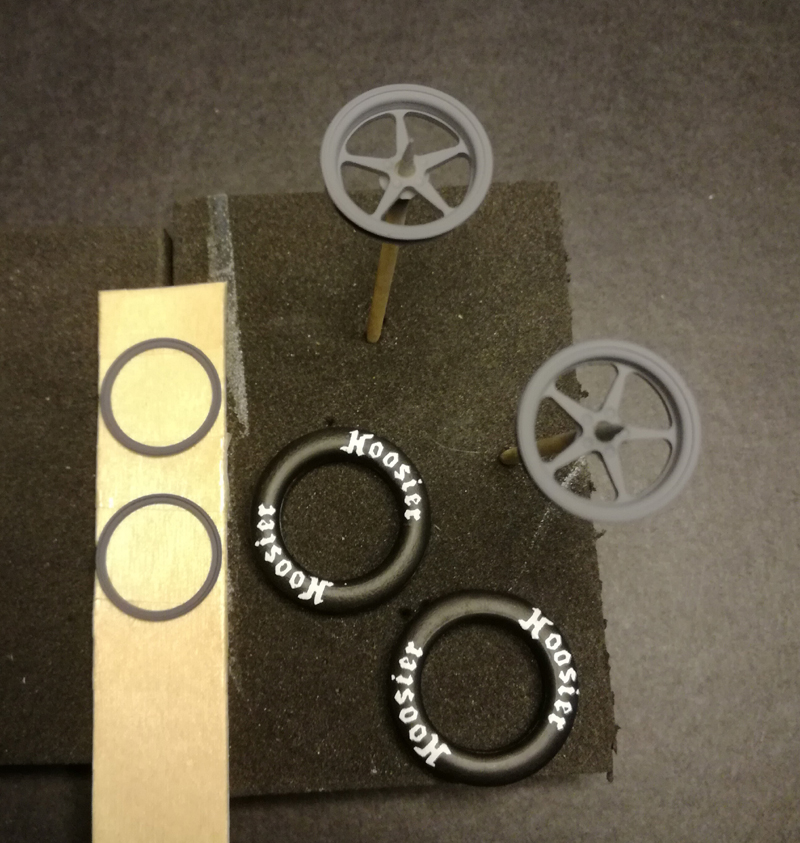
Hi all! The "Weld" decals was not easy to make. I decided to buy a cheap ink jet printer and a package of withe decal paper, and from there try to make my own custom decals for the wheels. I made the design in Corel Draw on my computor. This is how they turned out. /Rick
-
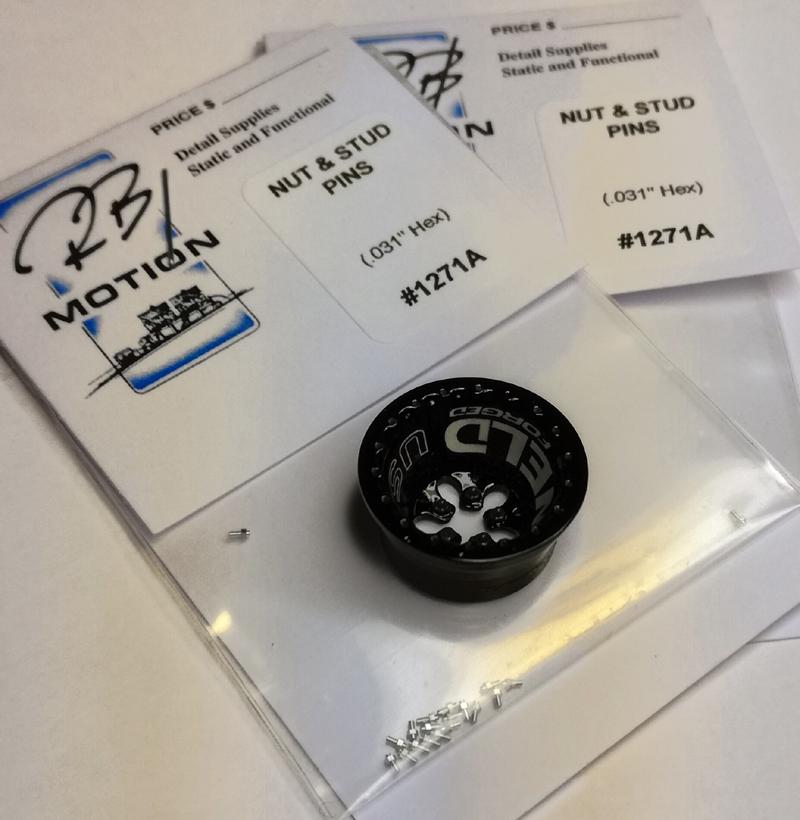
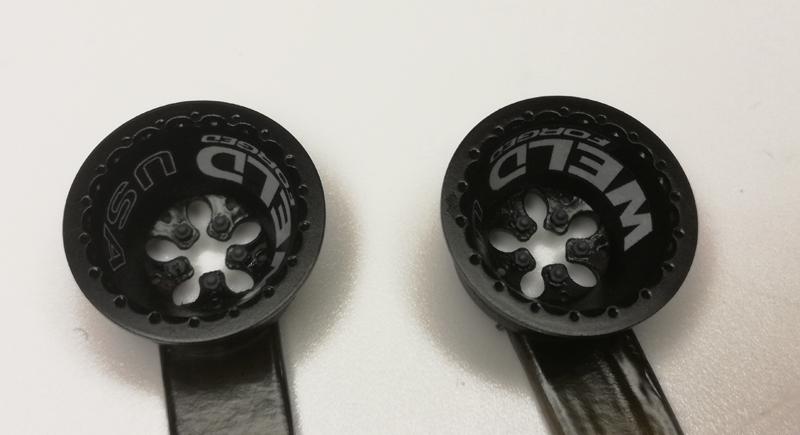
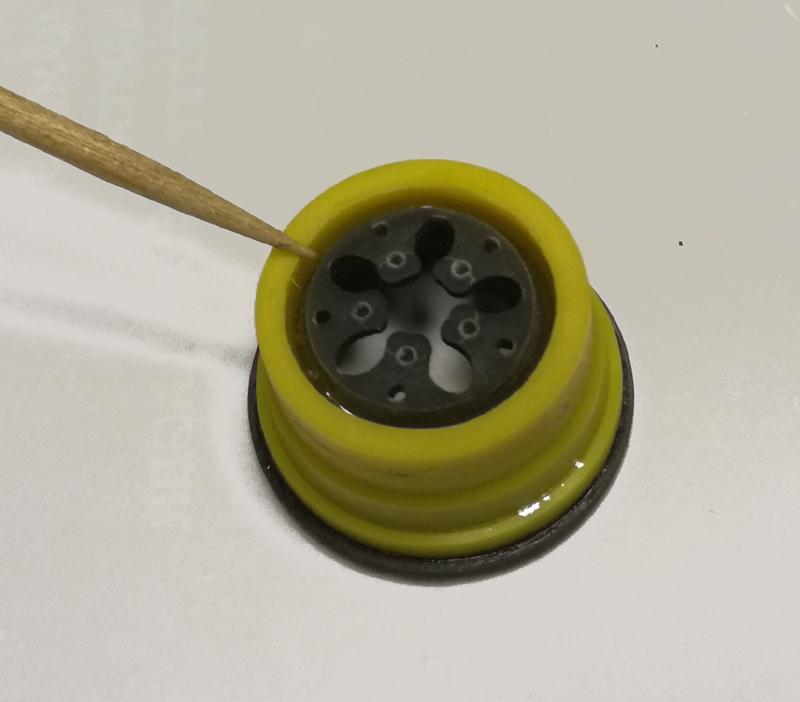
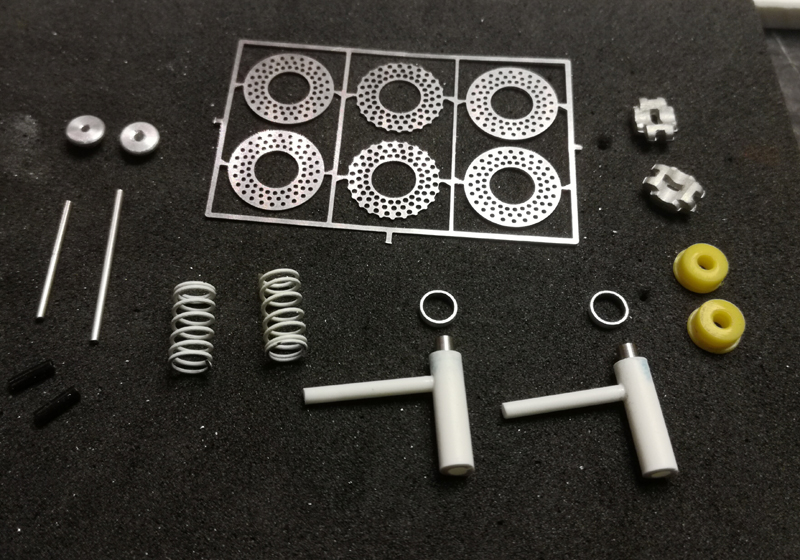
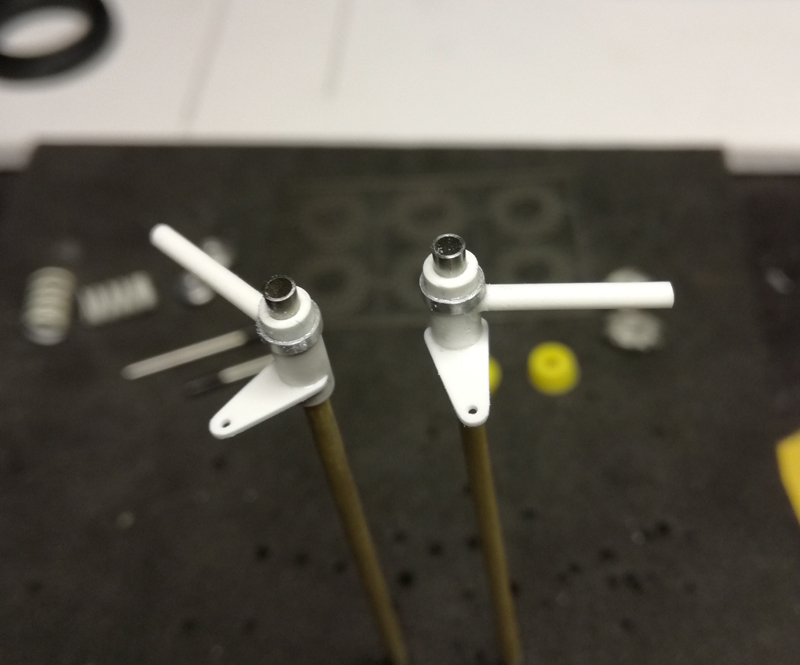
Tim: You´re right, those printed parts are extremley fragile. I broke a small part off when I was removing the sprue...no big deal, it does not show... I thought I must make the wheels stronger. Another problem was the conic shape, it did not fit the tyre at all...it sort of rolled around in the hole, not good. So, I had to solve those problems. I found four Penzoil pro stock rear wheels im my sparebox. I cut out the center and sand the inner side a little. Then I glued the Deltas in the rim. To make the wheels stronger I filled the gap between the rim and the printed part with epoxy. After a light coat of primer I sanded the surface very carefuly. I sanded off the beadlock bolts and drilled holes for new aftermarket bolts. Another primer coat, and it looks like this. /Rick
-
Thank you! If using this Weld Delta 1 wheels, the decal are most important. You naild it! ? /Rick
-
Very beatiful and brutal build! I love it! I have a question...where did you find the "Weld Forged" decals for the rear wheels? Slixx? ...some kit? Regards/ Rickard
-
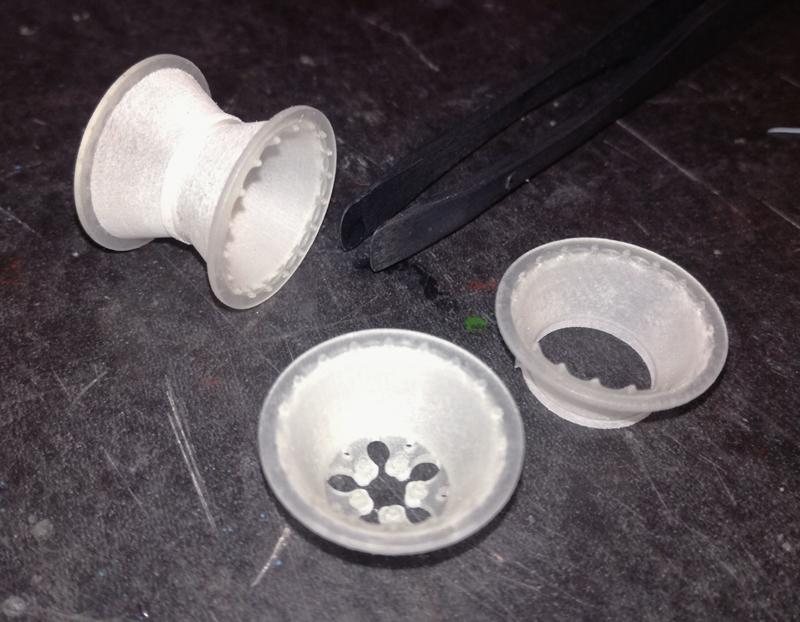
Wow, those wheels looks truly amazing!! I recived a package from Shapeways today. the 3D printed Delta-1 rims looks really good what I can see. They are printed in a milky-clear filament or resin...I dont know. /Rick
-
Thanks Erroll. I´m still looking for some nice rear rims. On my previous builds I used Revells Convo pro wheels from the Top Sportsman kits, but on this I want something else....Weld Delta-1 with beadlock would be nice! Cheers / Rick
-
... / Rick
-
-
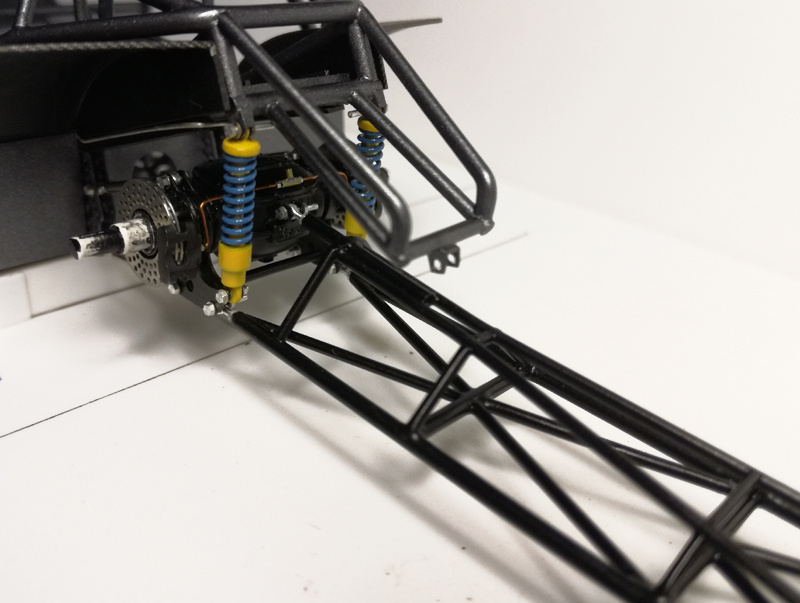
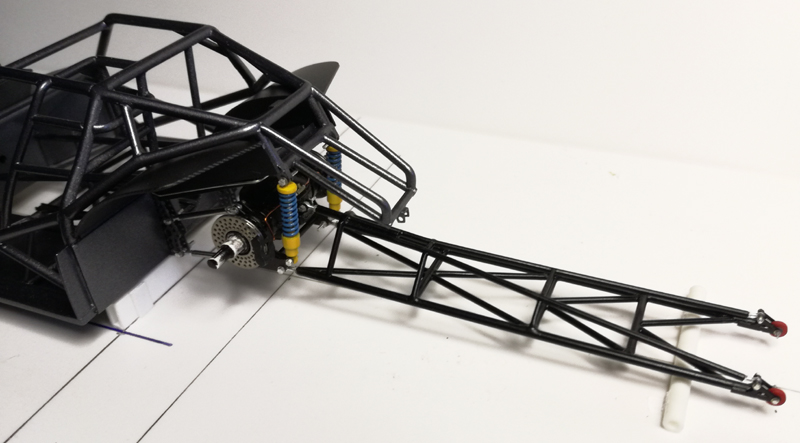
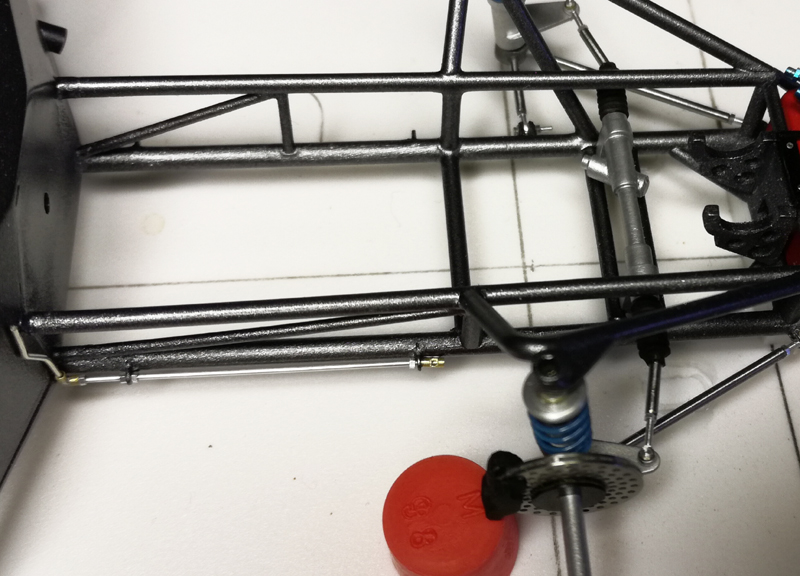
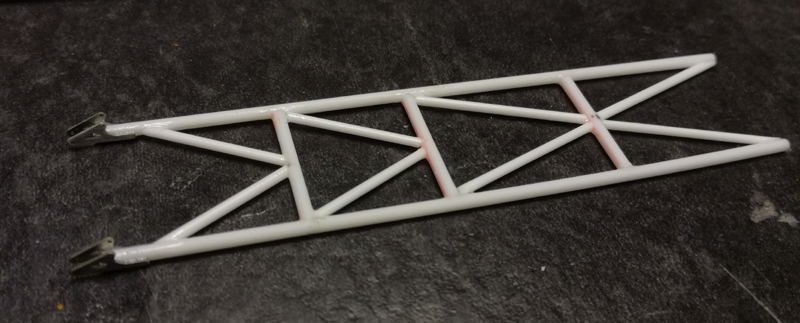
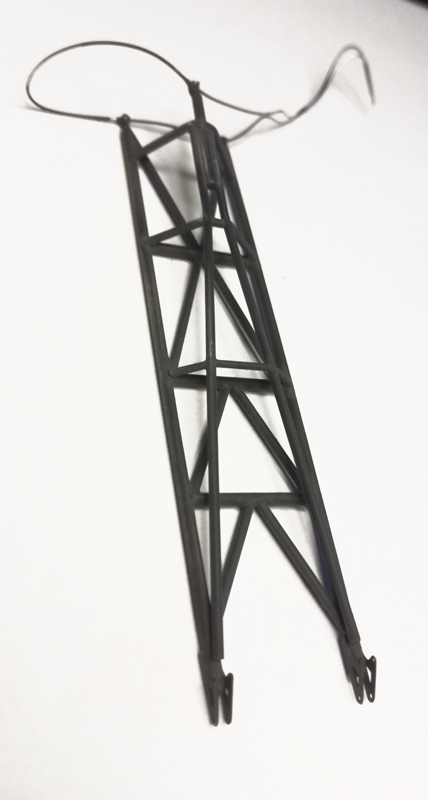
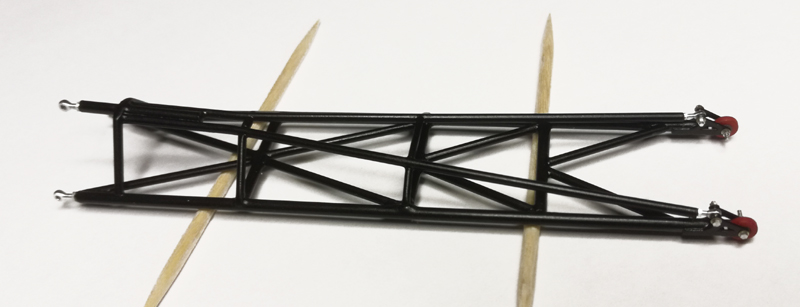
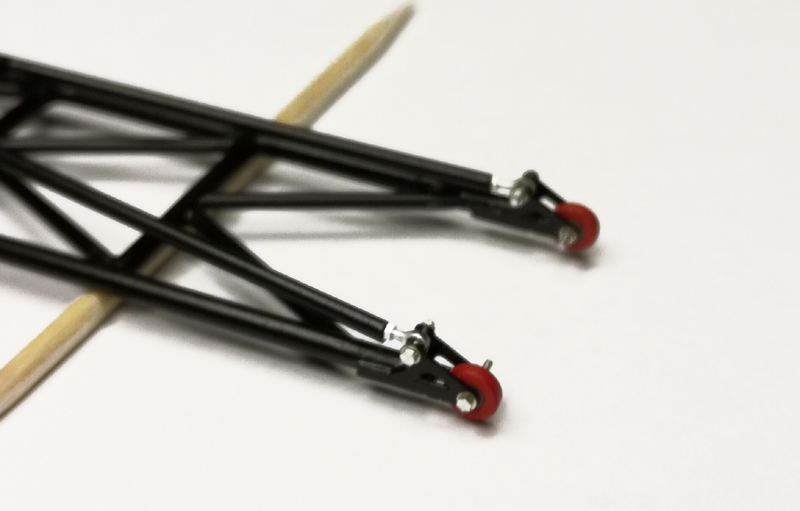
Update! Rear axle are now mounted on the chassies. The wheelie bars was built from Evergreen strips. Primer. I wanted them look like they were pouder coated, so I airbrushed then semi gloss black. I scratchbuilt those small wheeli-wheels from Evergreen tubing. Mounted with RB Motion bult, washers and nuts. Thanks for watching! / Rick
-
Hi guys. As many of you can see, my update ratio are more less than many. I started this project more than 9 years ago, so I can understand that many of you get tired and bored. I know, I should put more effort in modeling, but time is the problem here. I wish the day had more than 24 hrs Update! Rear axle are now mounted on the chassies. The wheelie bars was built from Evergreen strips. Primer. I wanted them look like they were pouder coated, so I airbrushed then semi gloss black. I scratchbuilt those small wheeli-wheels from Evergreen tubing. Mounted with RB Motion bult, washers and nuts. Thanks for watching! / Rick
-
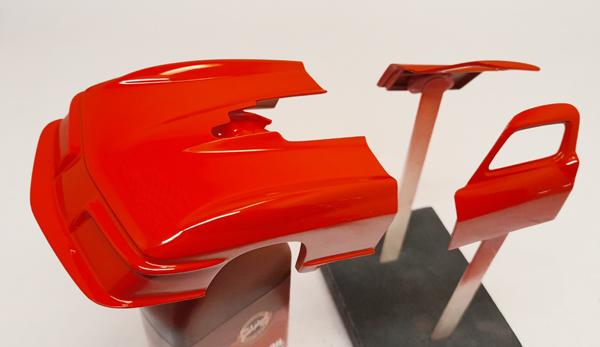
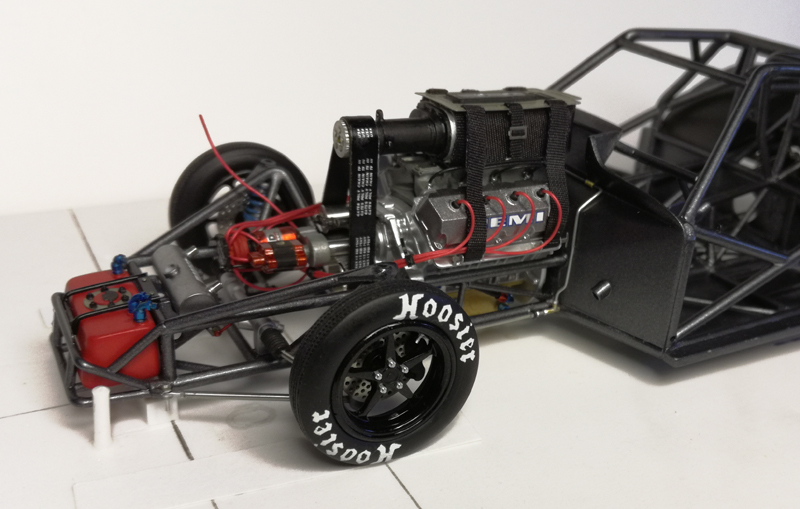
Small update. A quick mockup with the engine/injector in place.. I just hope the front will fit / Rick
-
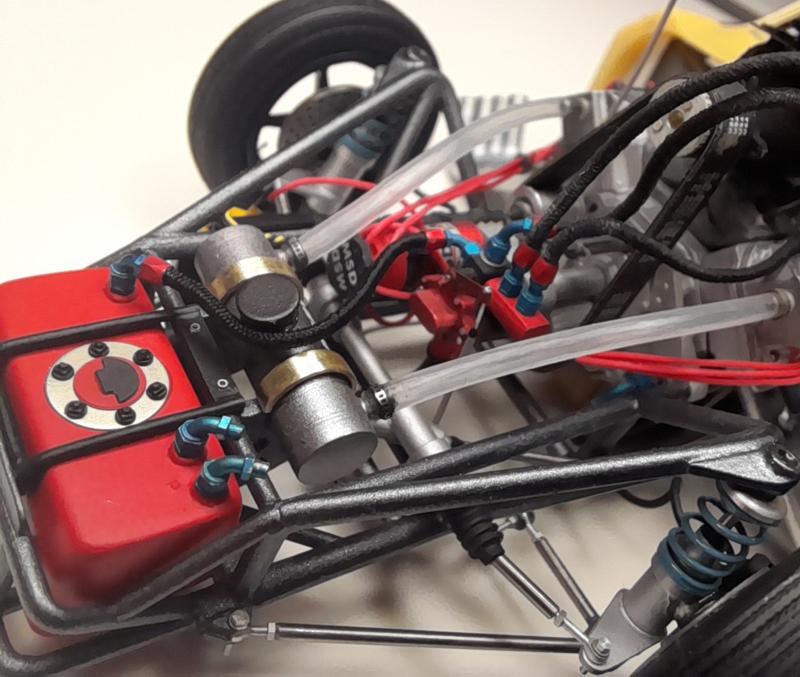
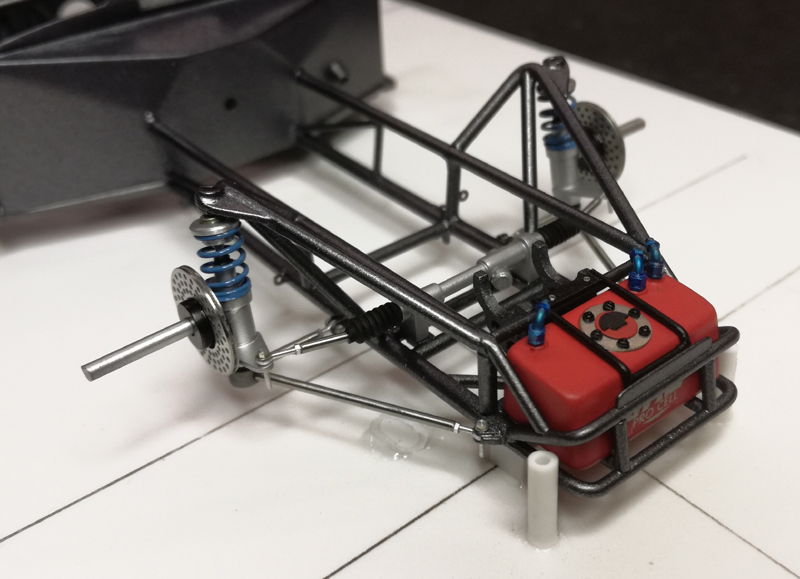
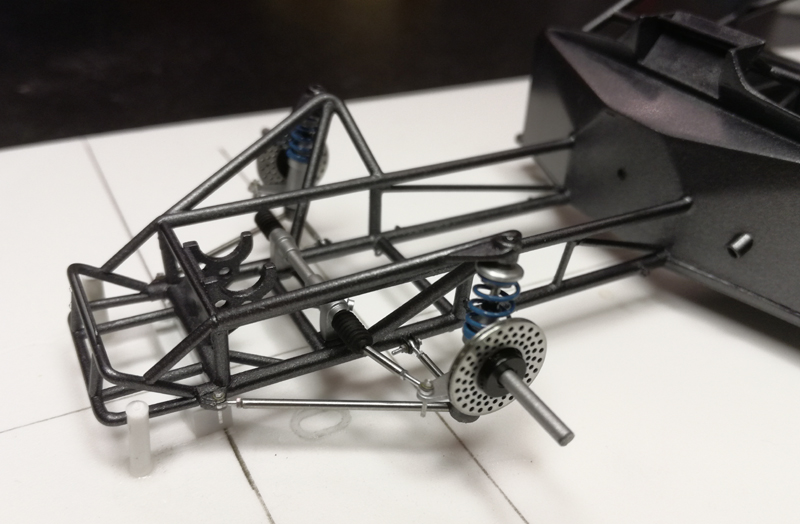
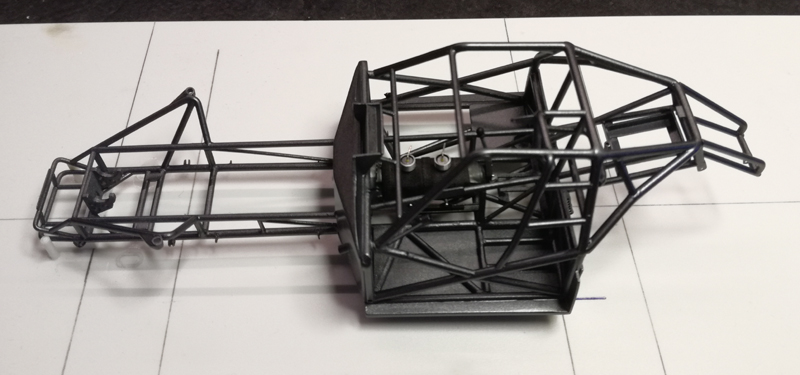
... The coilover and steering rack in place. Disc brakes from Detail Master. The progress so far. Next on the "to-do-list" : the rest and everything! Thanks for looking in / Rick
-
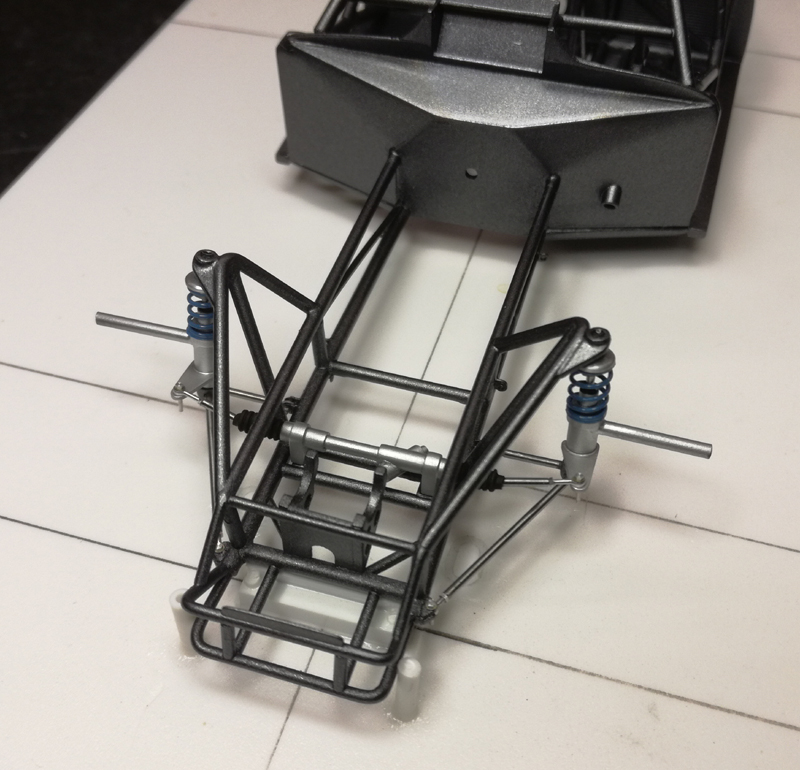
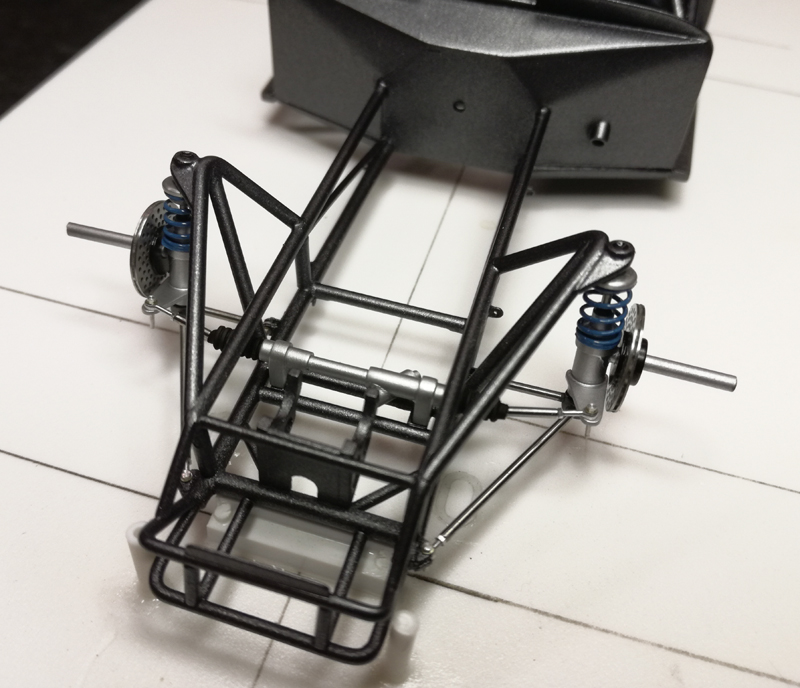
Hi First uptade 2019, and tnx for all comments...I hope the updates on this one will get more freqent ahead. The chassie are now ready for assembly. Now starts the fun First out, the front suspention. I started to build the A-arms from stainless tubing and RB Motion rod ends, washers, nuts and bolts. I used photoetch chassies tabs from Futurattraction. Evergreen rod just to check the angle... Main parts for the coilovers. / Rick
-
Tim, everything concerning this project are just flawless and mindblowing!! I Love this build!!! Happy new year from Sweden! /Rick
-
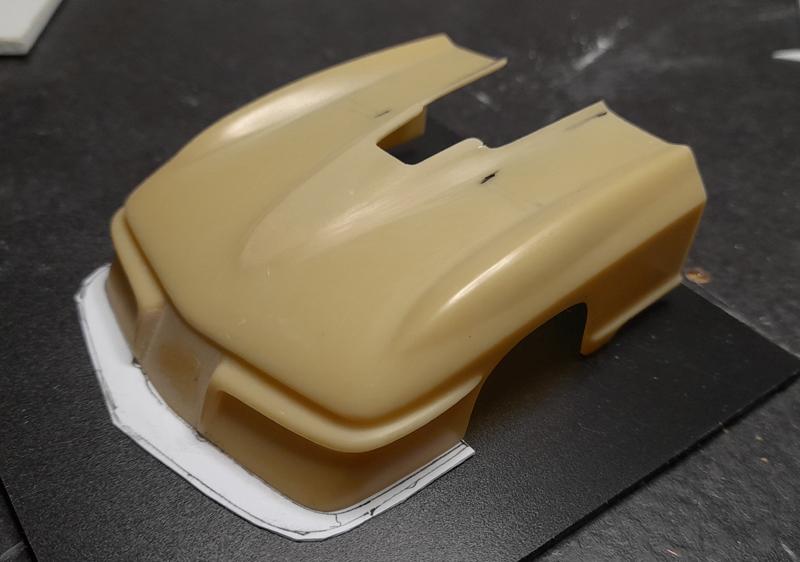
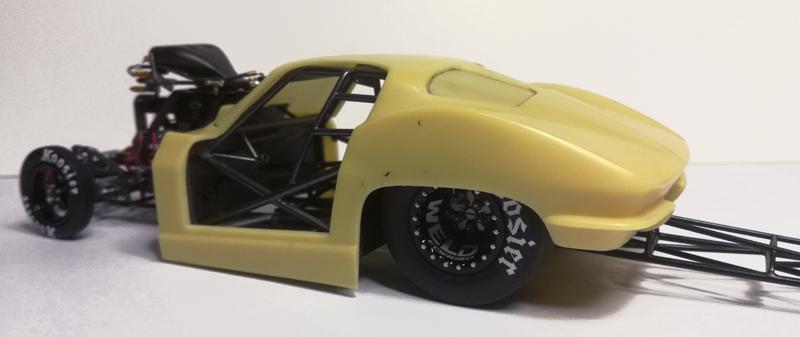
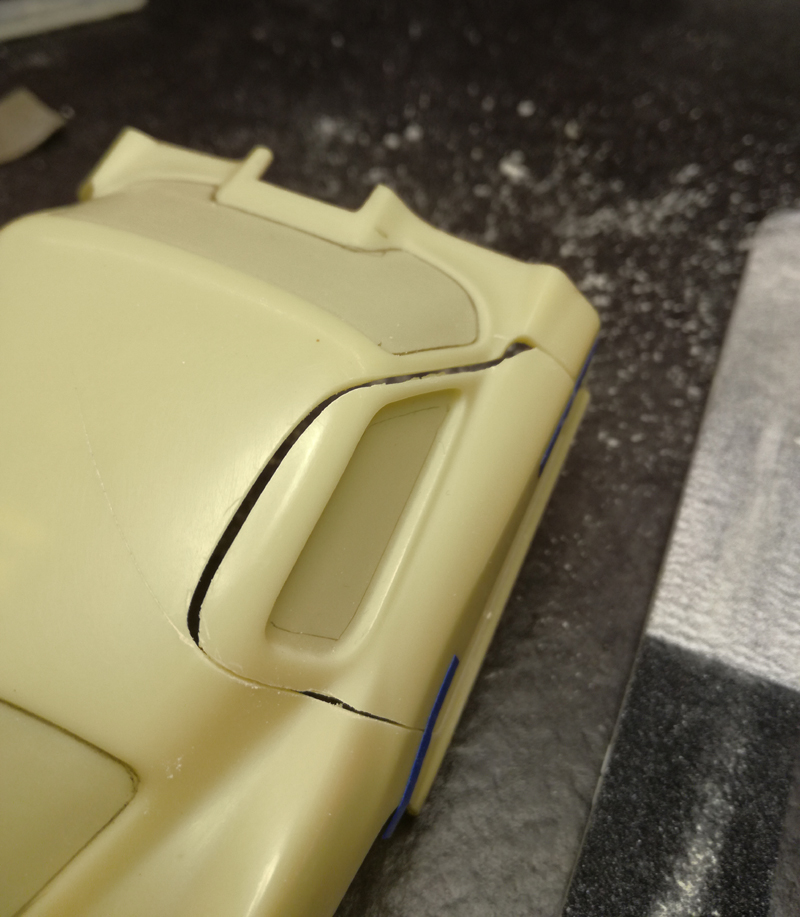
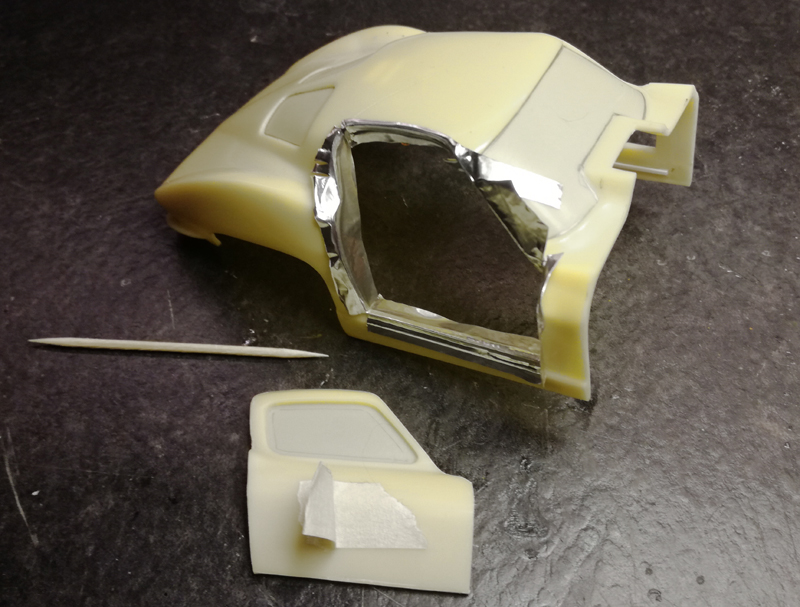
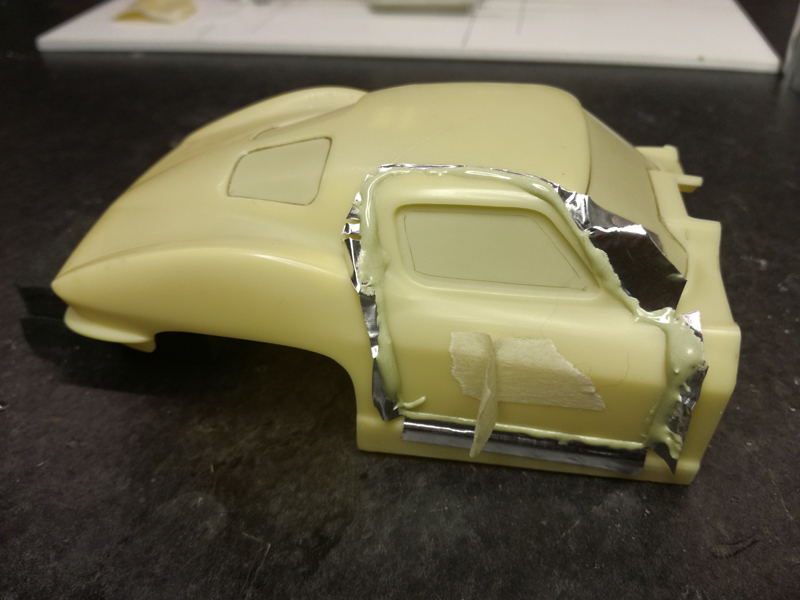
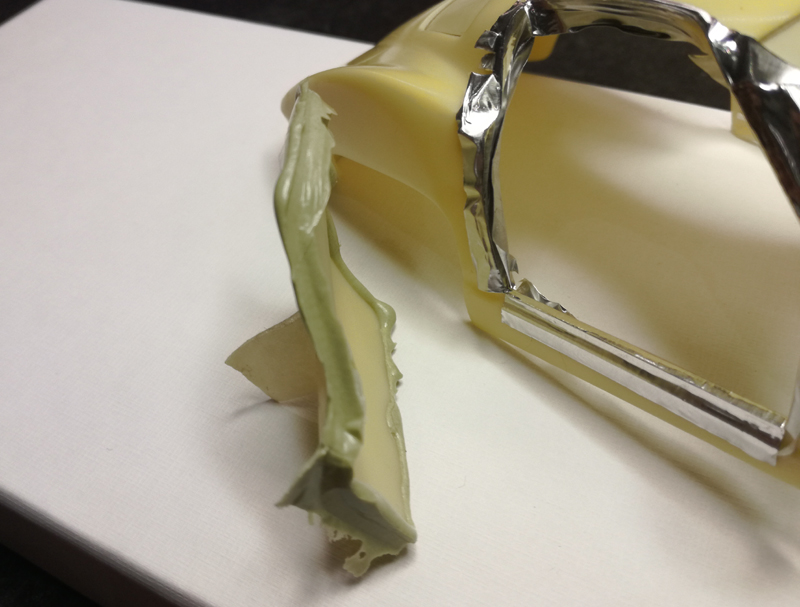
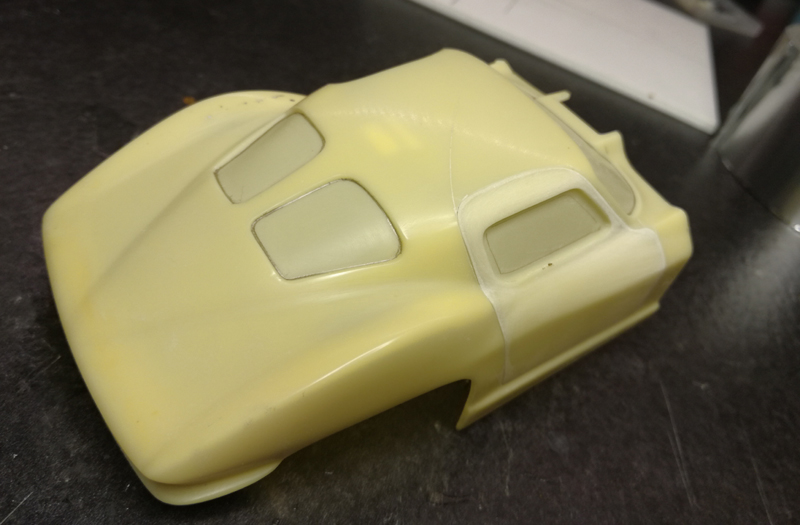
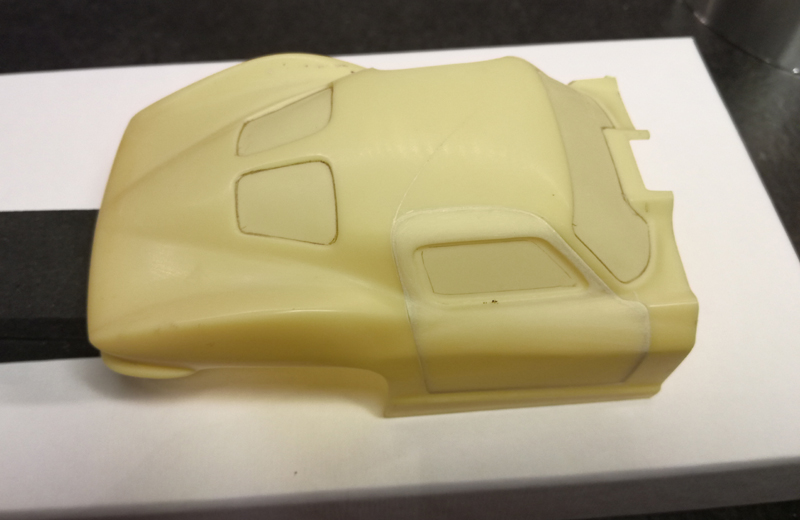
.. When I cut the doors open on the body it turned out exceptional bad and ugly. The doorgap was sooo uneven and rough. Some weeks agoe I got an idea how to fix this problem...that probably should work...bodyfiller and aluminumtape. I started to get the opening on the body as perfect as I could. I sanded the edges and curves smooth and made the opening just the way I wanted. Now I want the same shape on the door as on the opening...and all bodylines must blend in perfectly. I covered the thinn edge with aluminum tape all arround the opening. I mixed the bodyfiller/hardener and added a few drops of aceton to get the filler thinner. Then I applyed the filler on the aluminum tape and gently fixed the door in the opening. I let the filler cure about 1h before I removed the door from the tape. After some cleanup and sanding it was time to try it on. ...some minor adjustments required, but I think it turned out great... Thanks for looking in / Rick
-
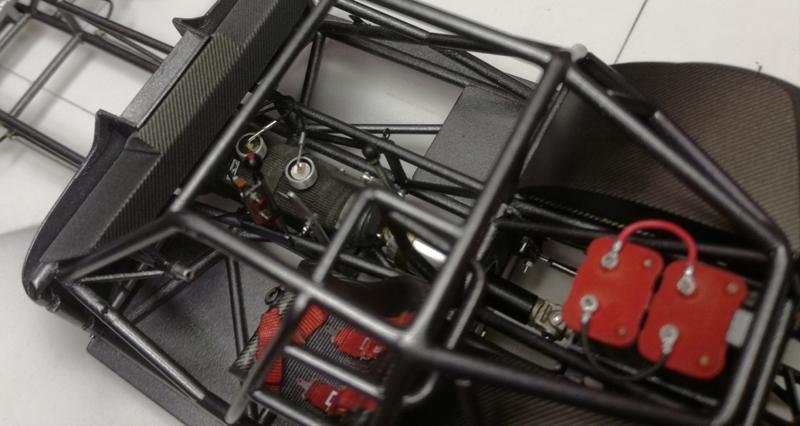
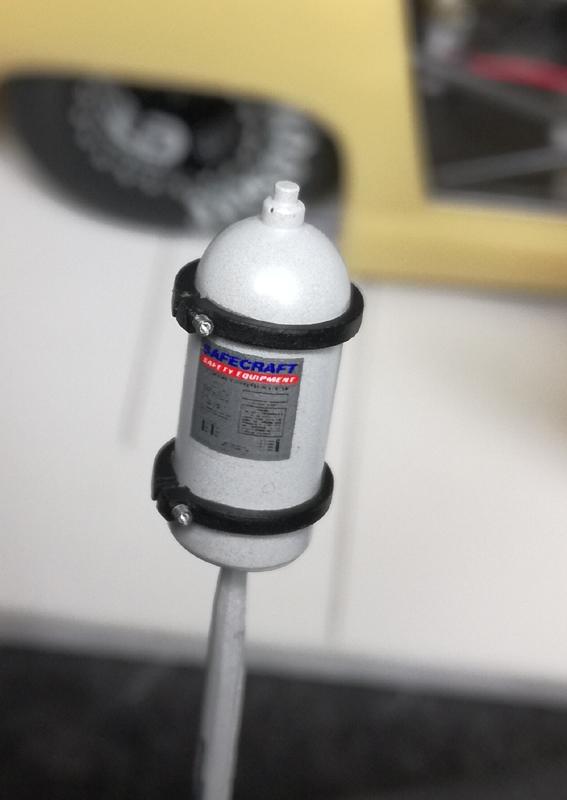
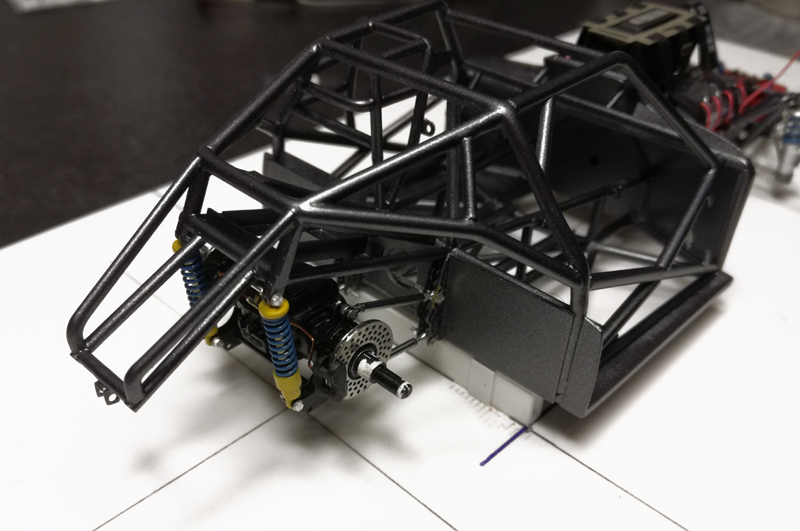
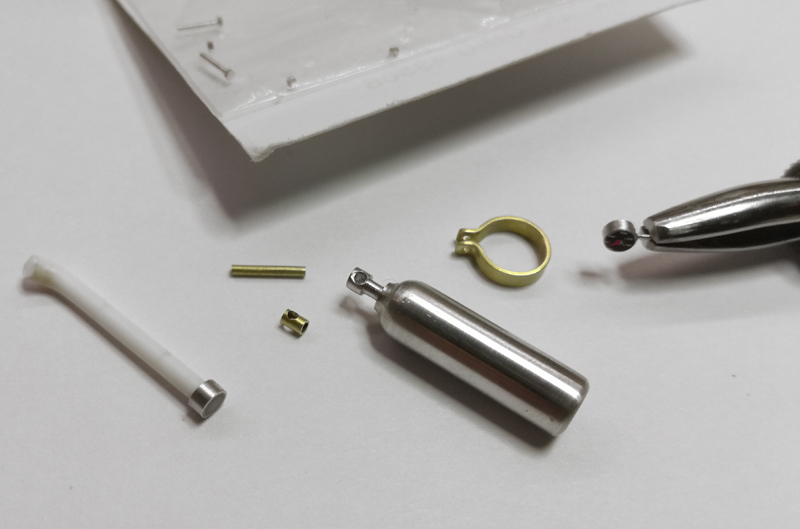
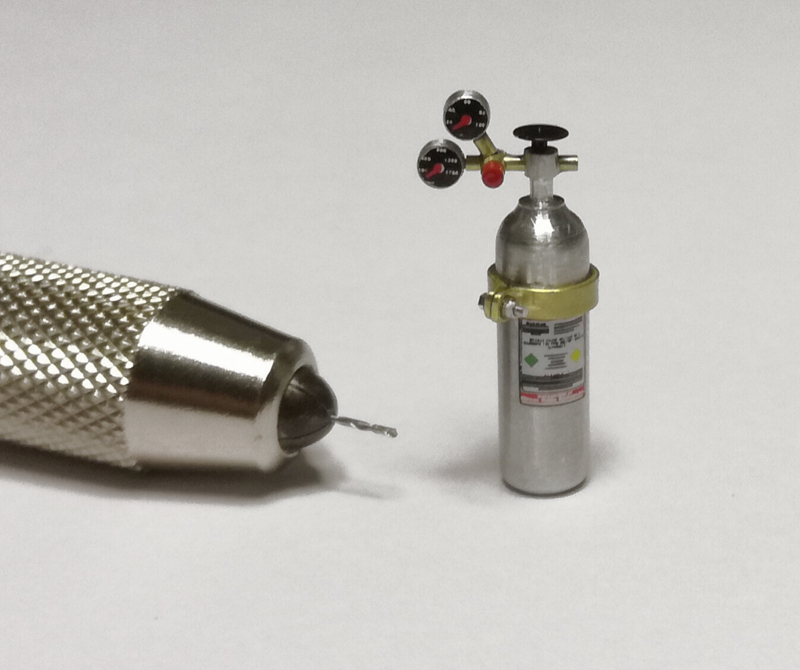
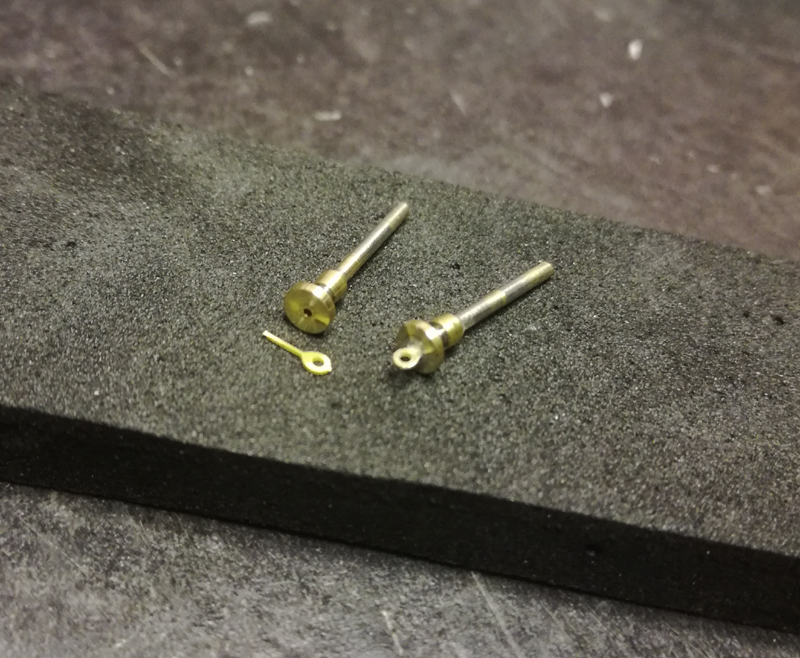
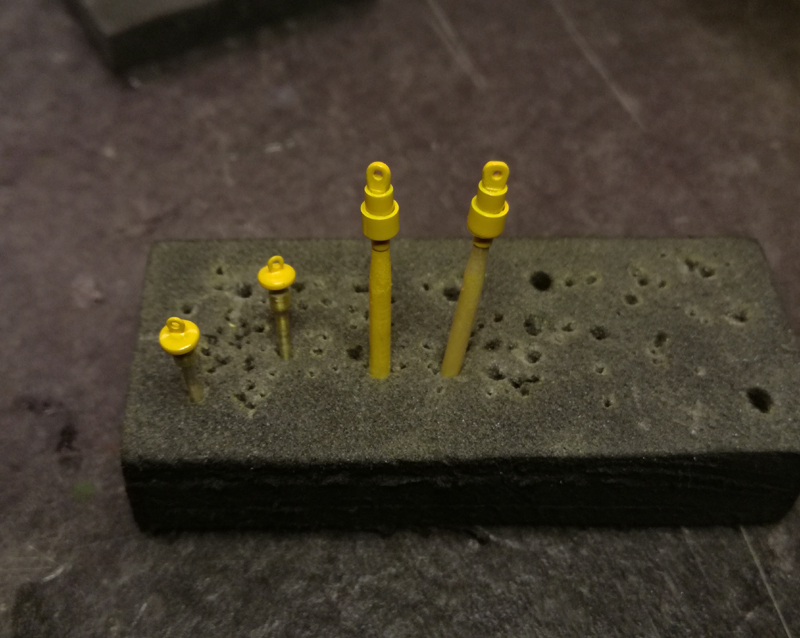
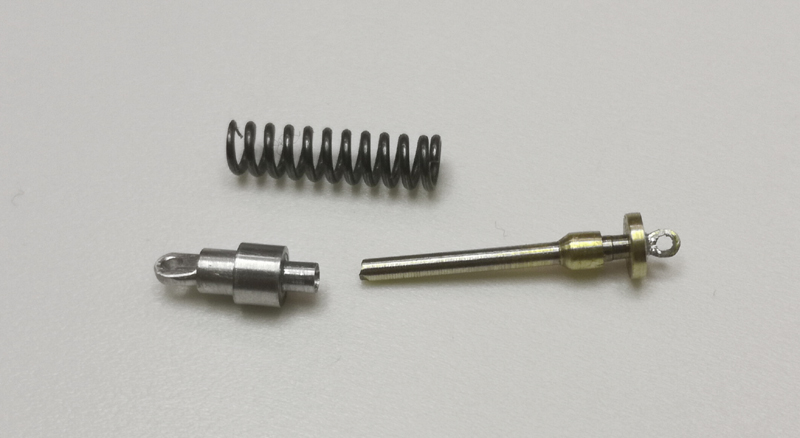
Hi all and thanks for all nice comments! Modeling going pretty slow here, but I stole some time to make some progress on this build. The regulator on this air bottle was made from small brass and aluminum tubing. This bottle are going to feed the shift system and Lenco airpods. Rear coilovers. I used the same method on this one as I did on my silver pro mod Nova. Airbrushed Koni yellow. ...
-
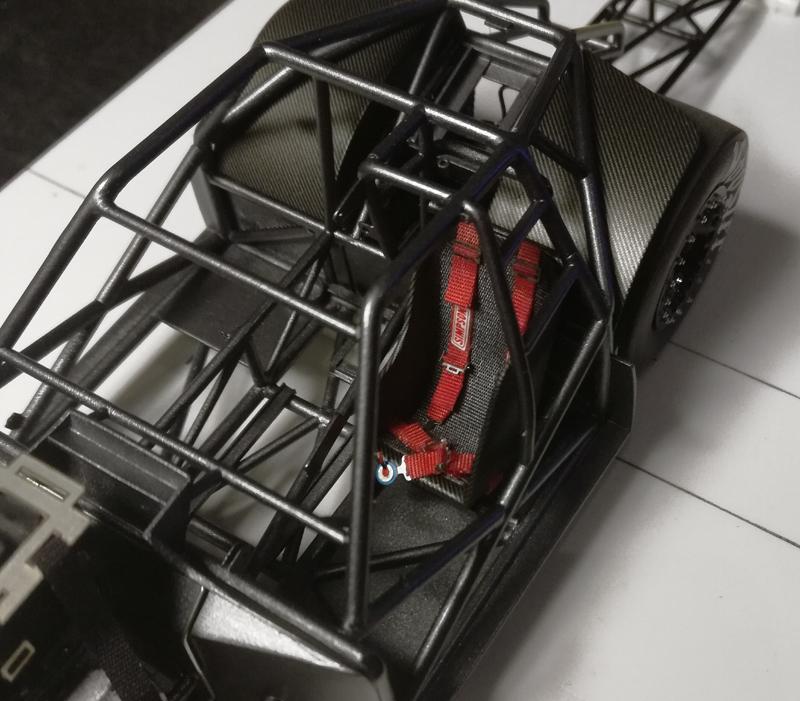
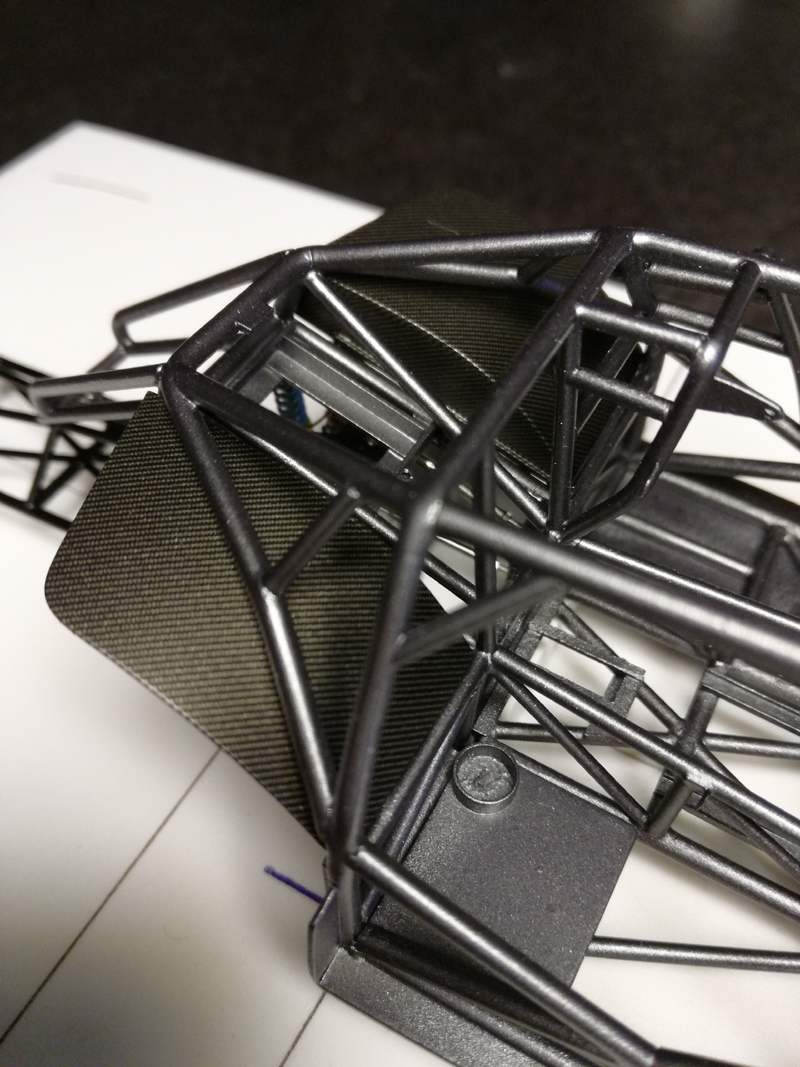
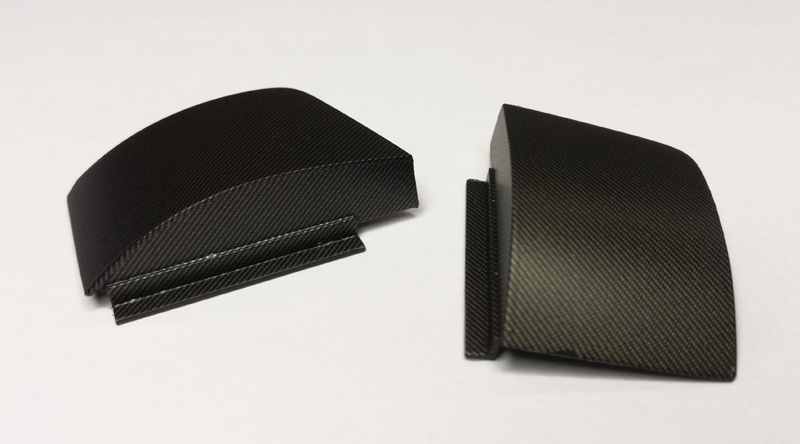
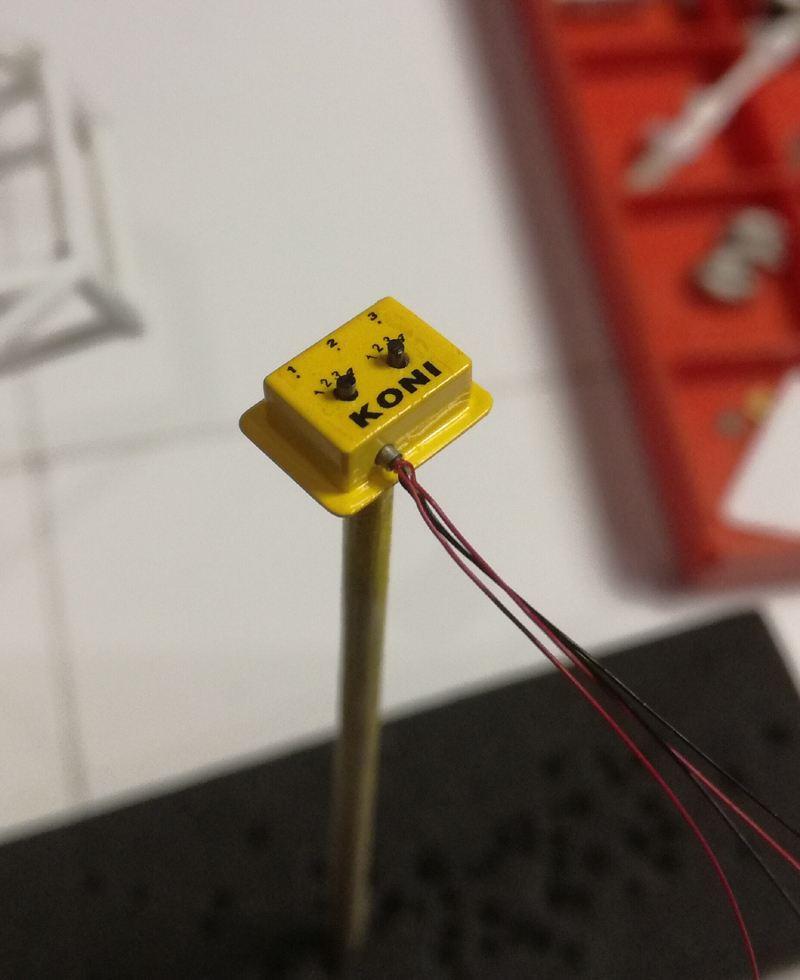
Small update on this one...and thanks for all comments! Carbon tubs made from .020" Evergreen sheet. Mockup. Koni control box. / Rick