jlucky
-
Posts
113 -
Joined
-
Last visited
Content Type
Profiles
Forums
Events
Gallery
Everything posted by jlucky
-
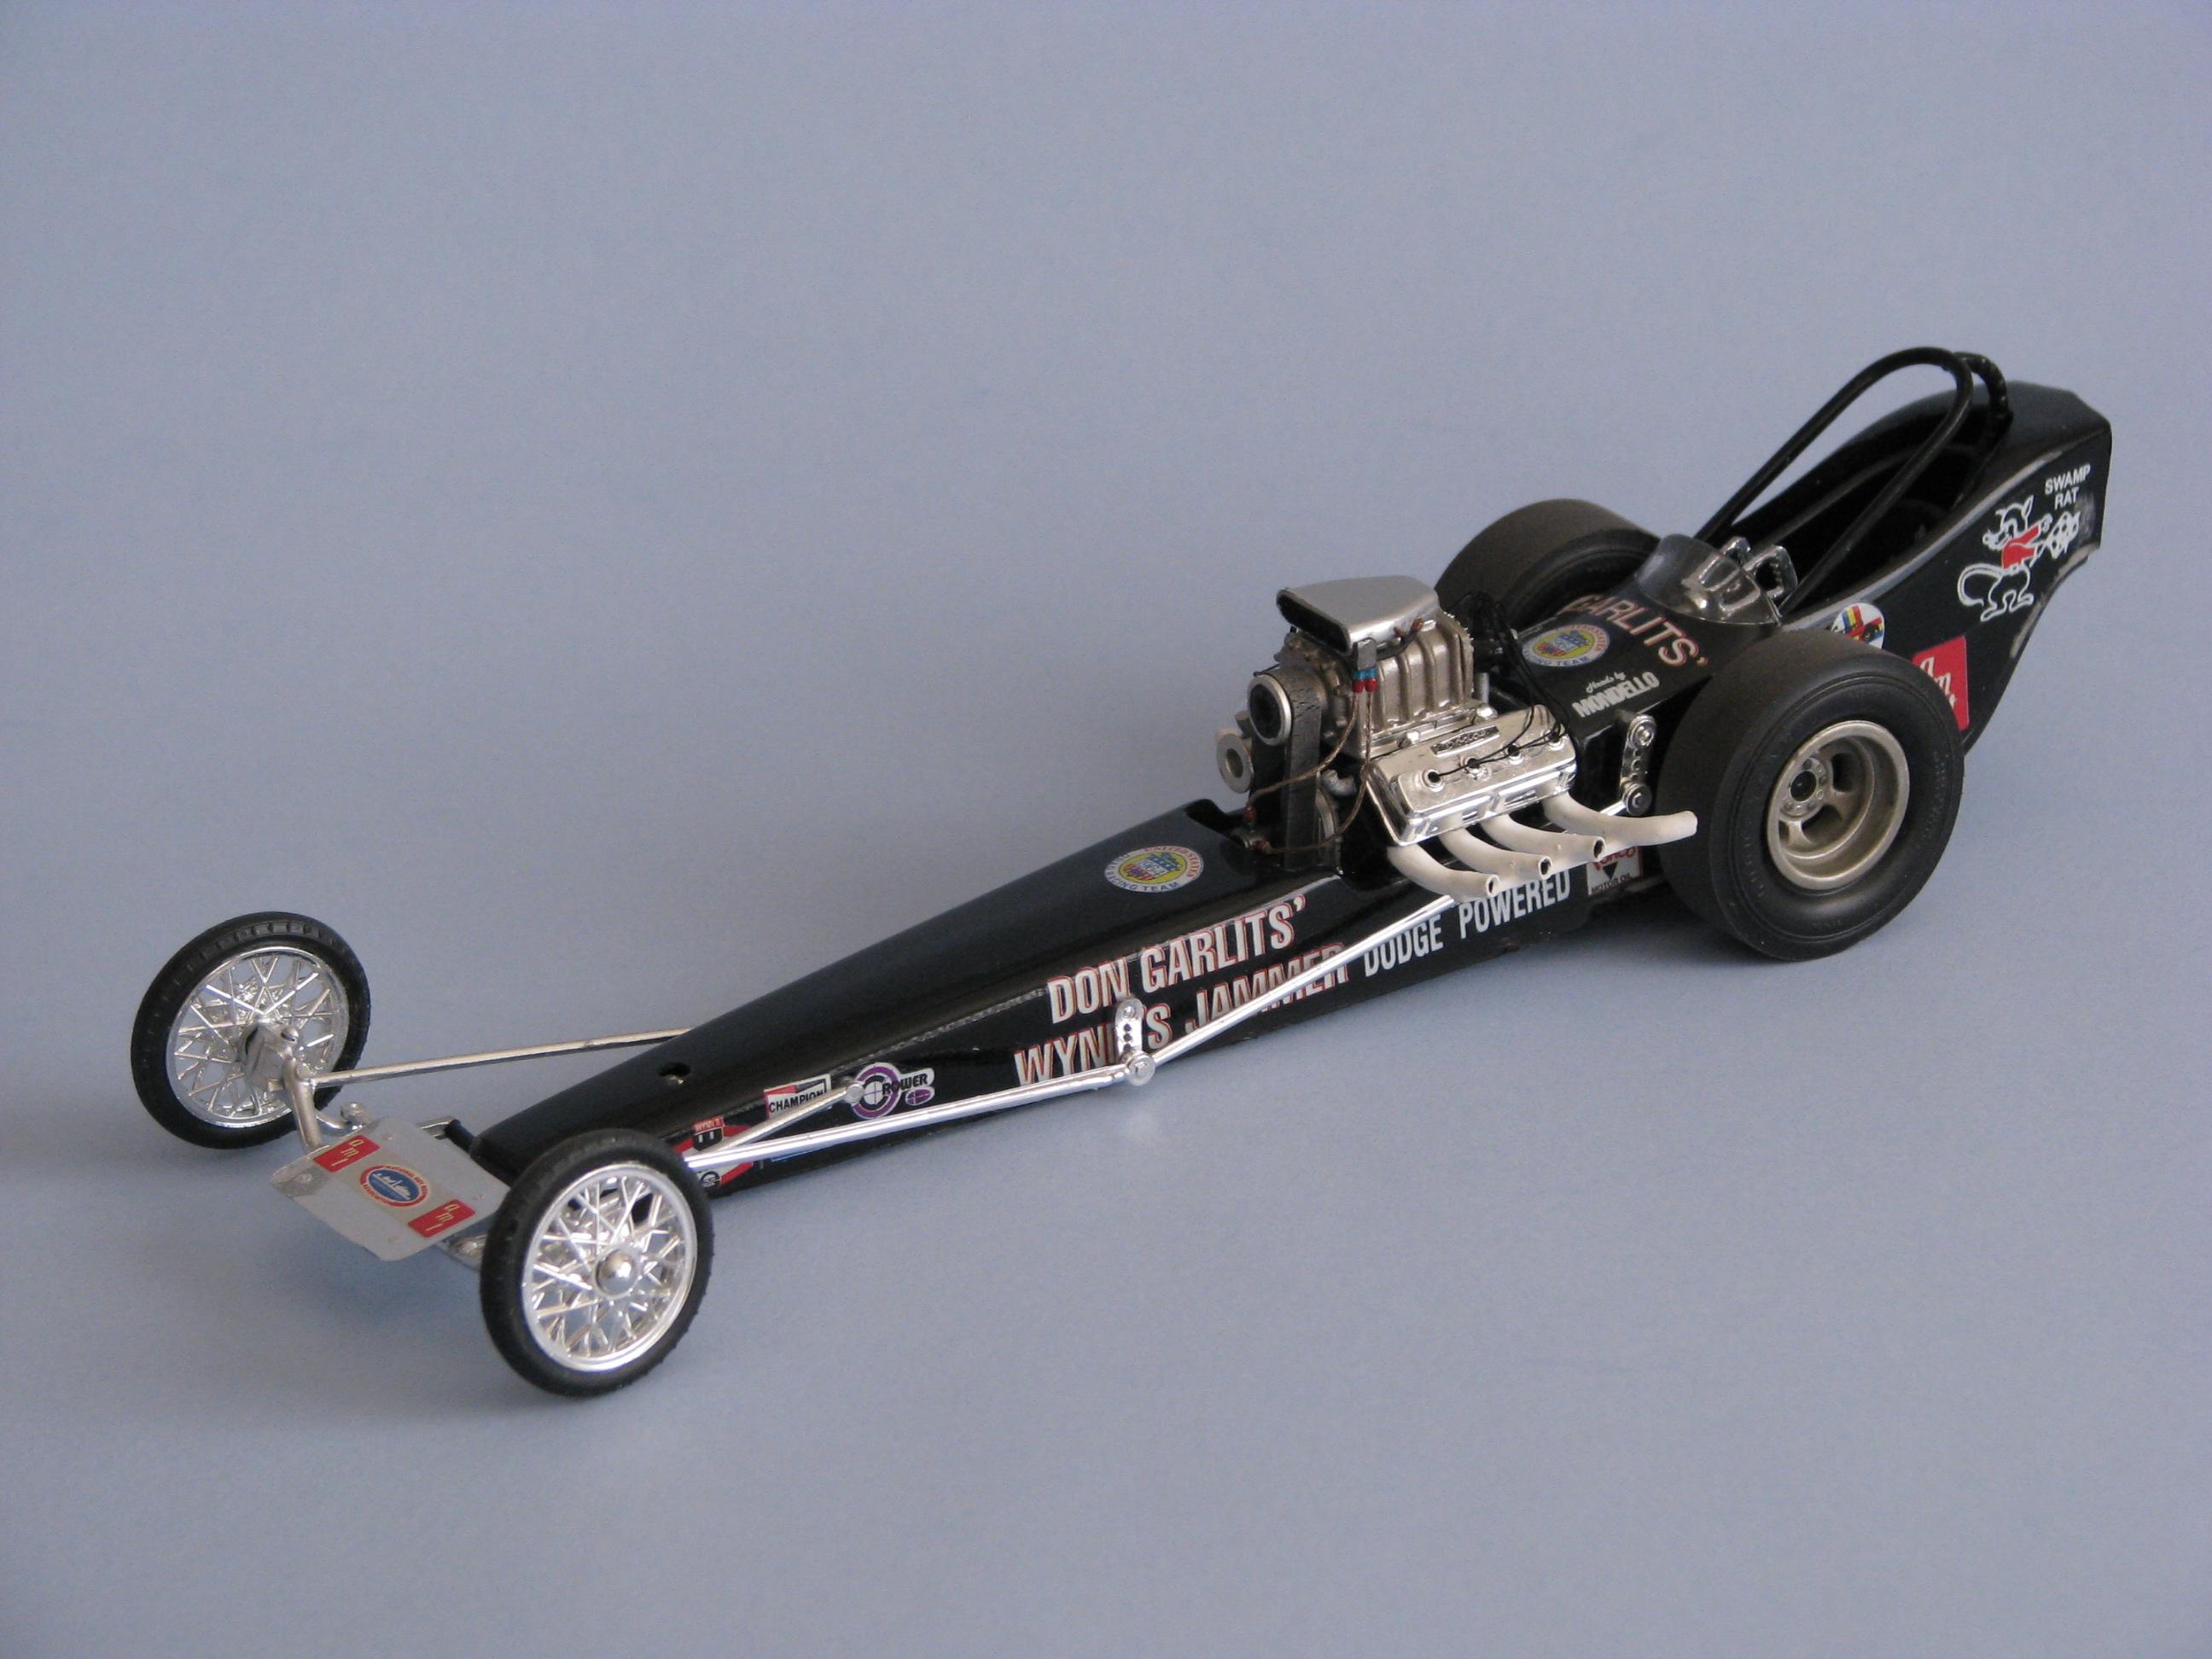
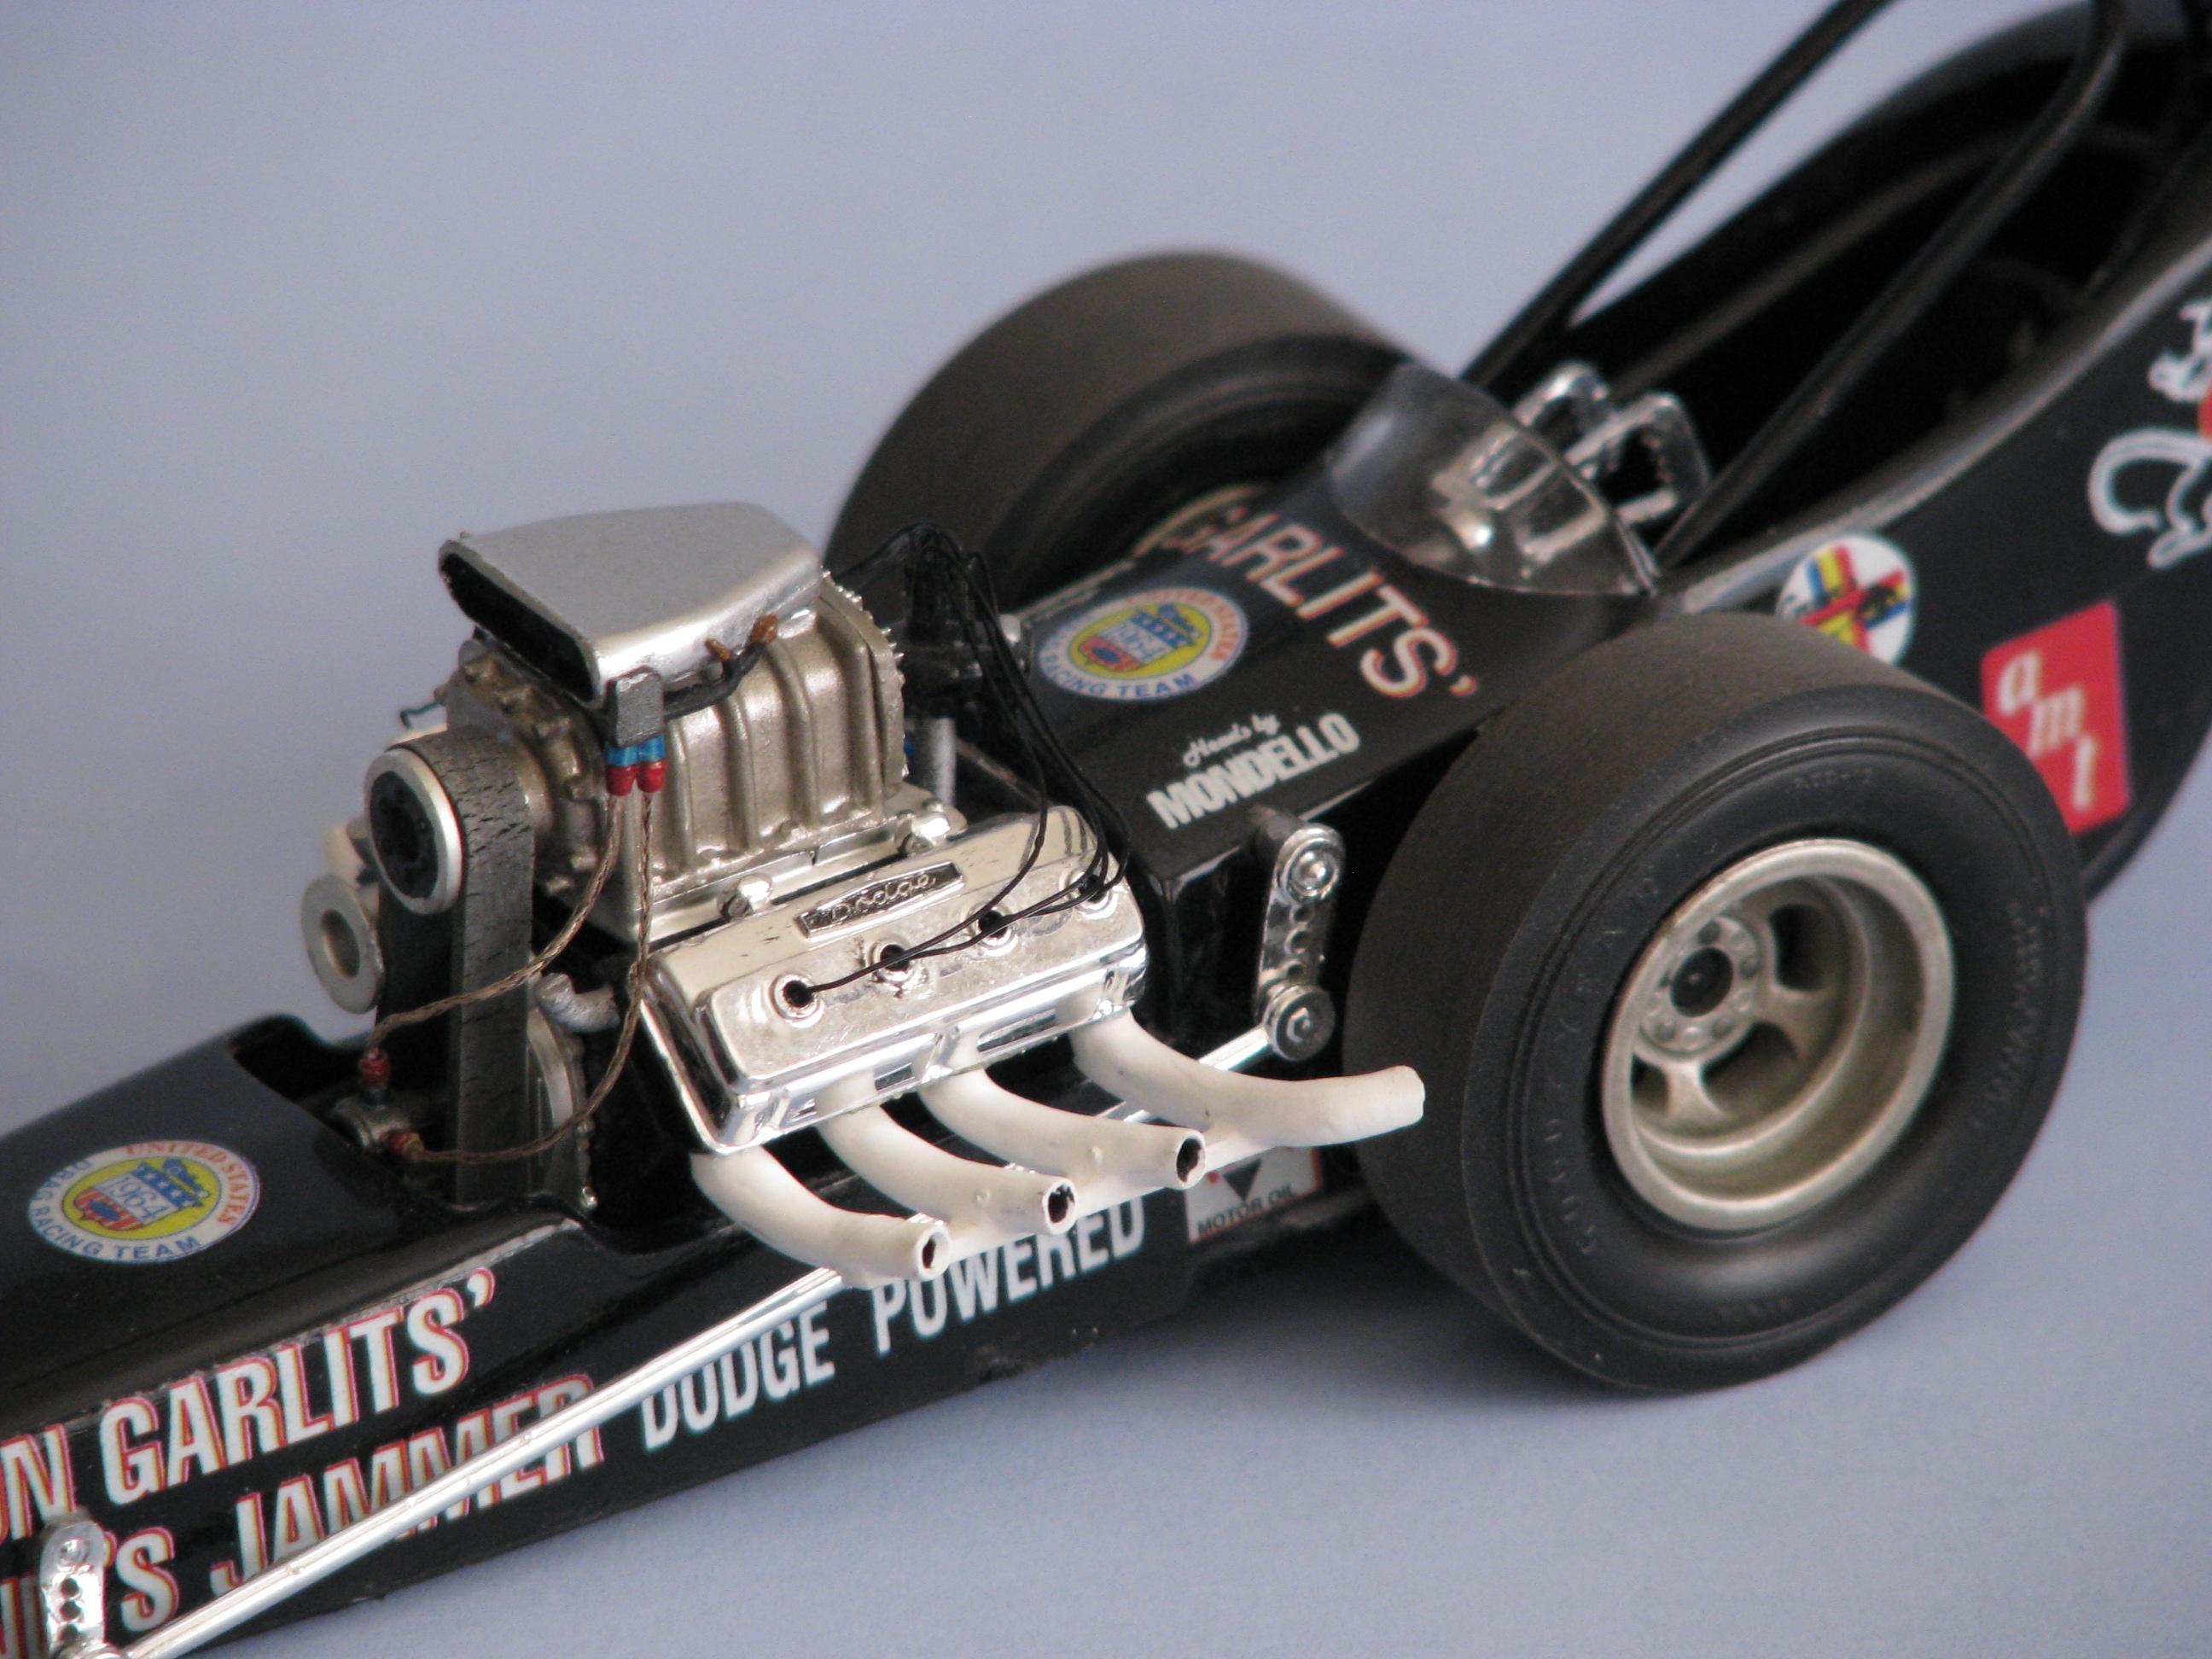
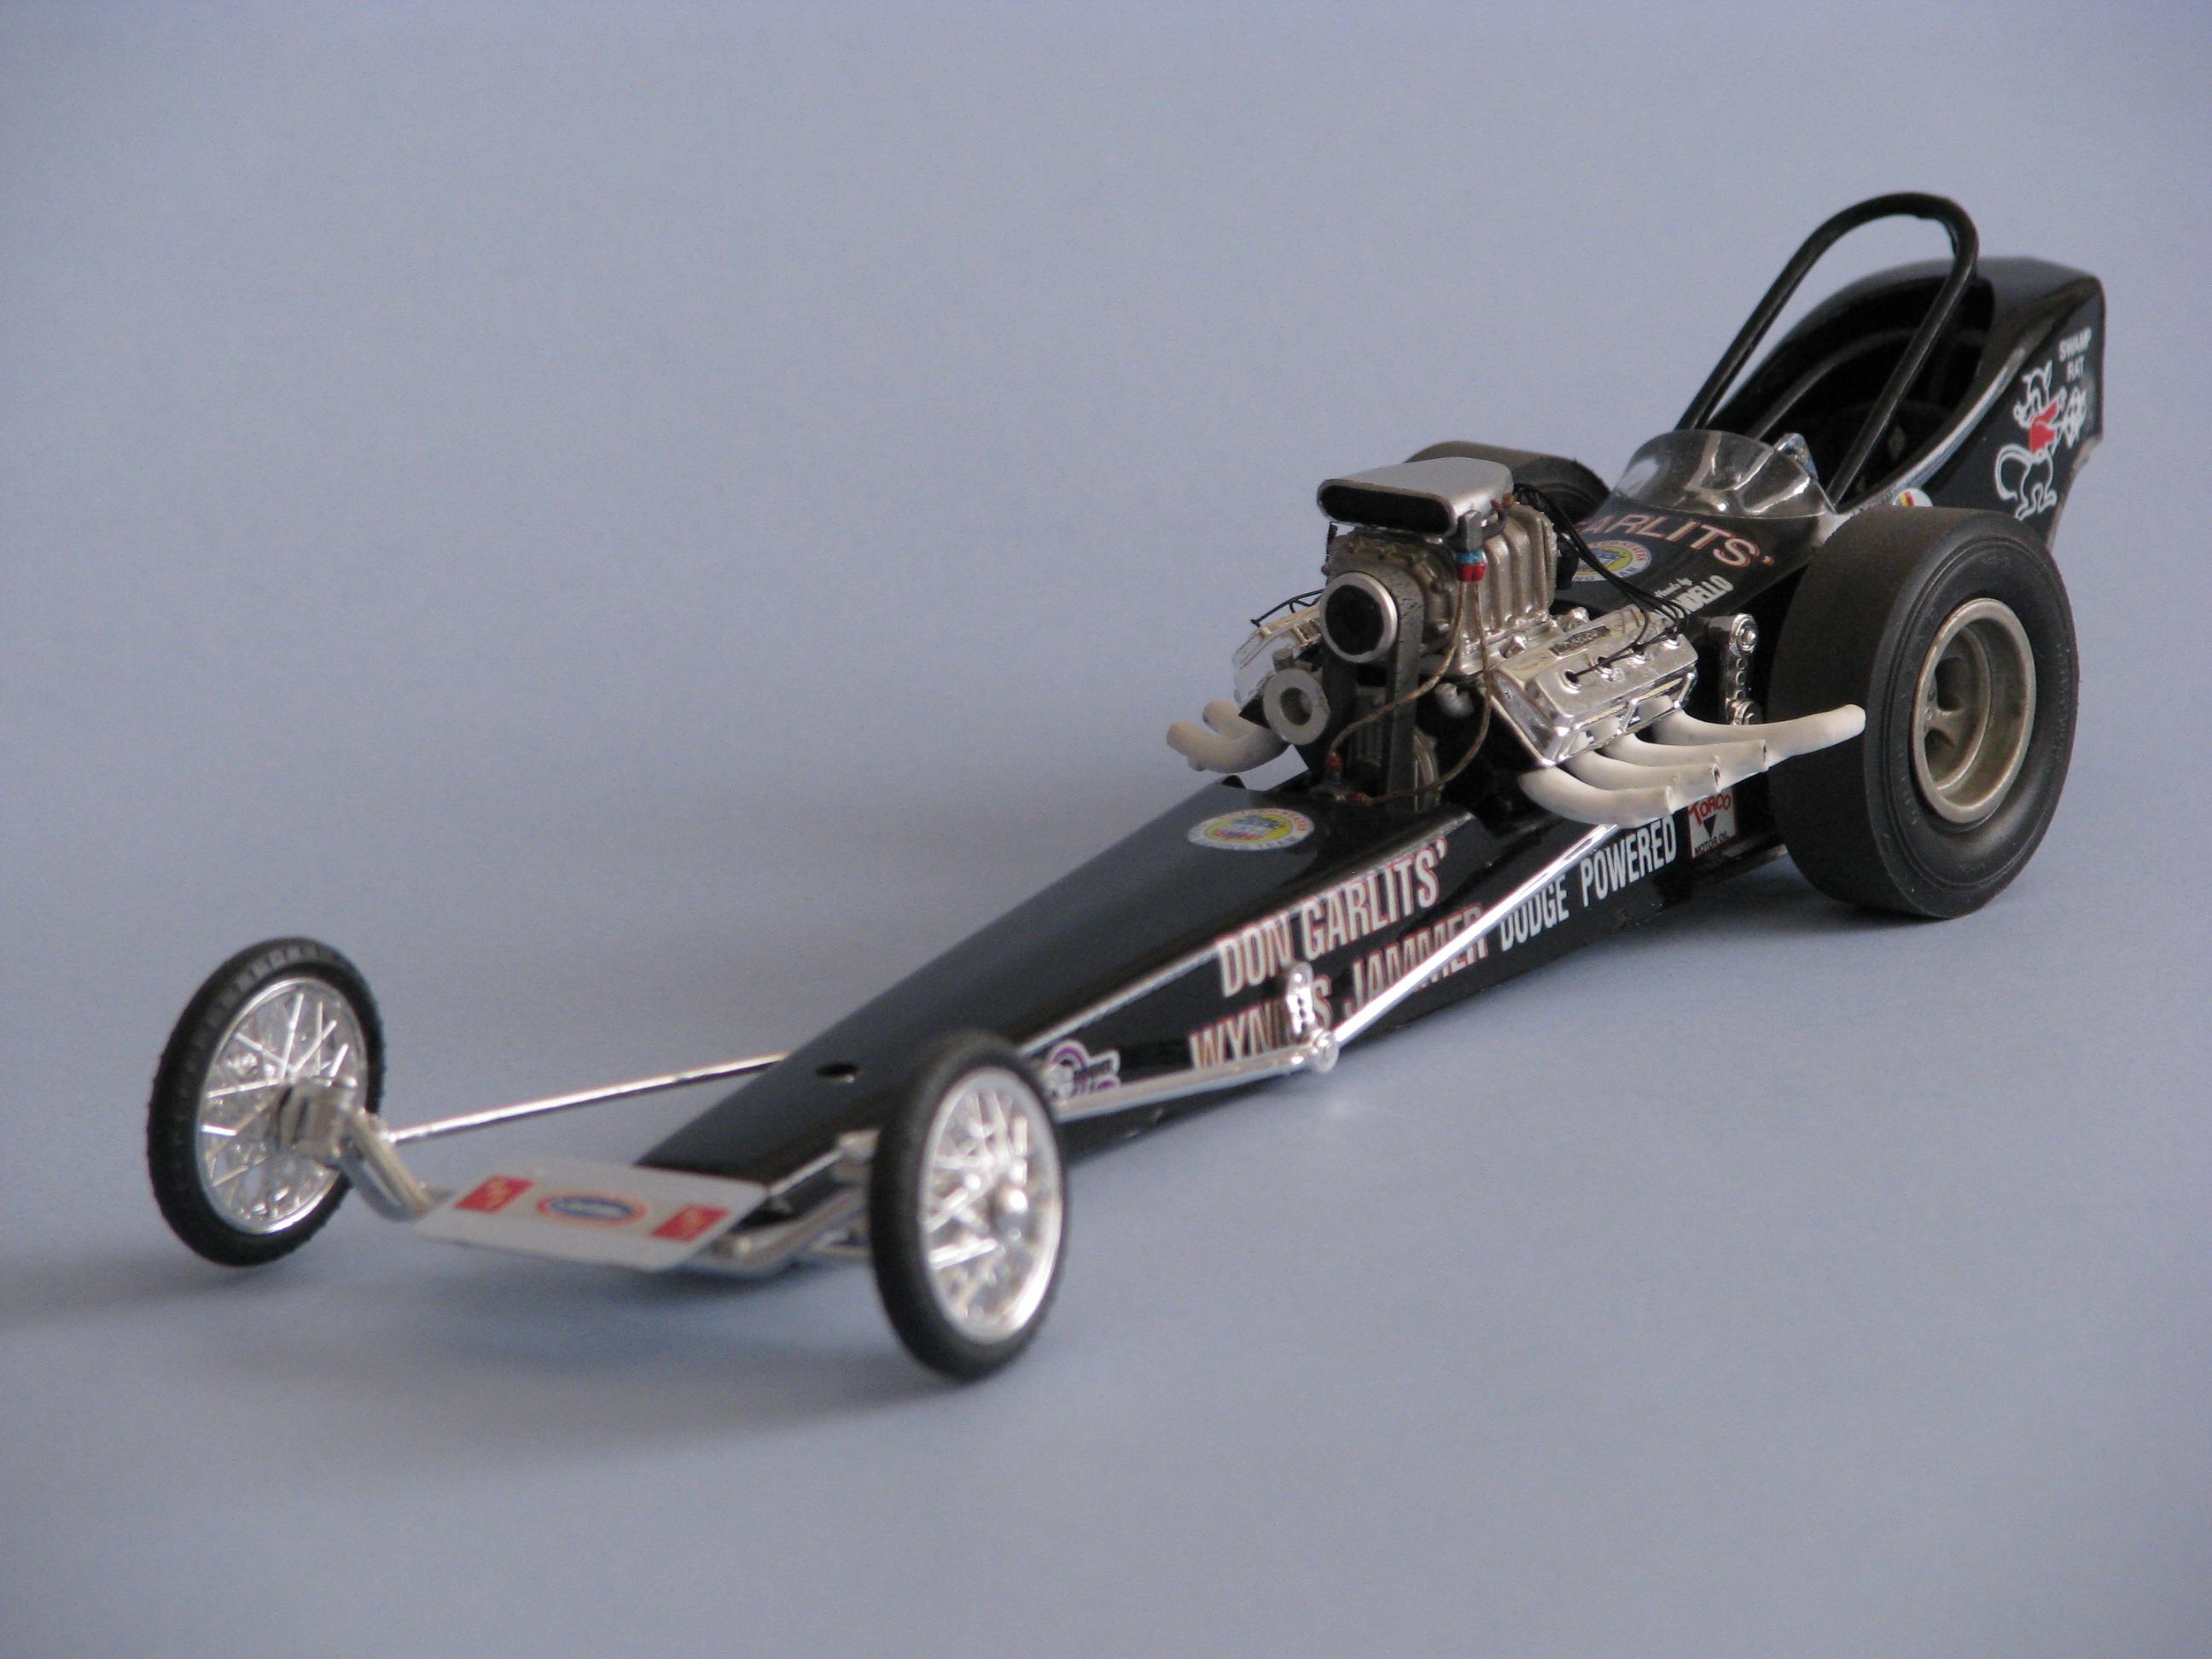
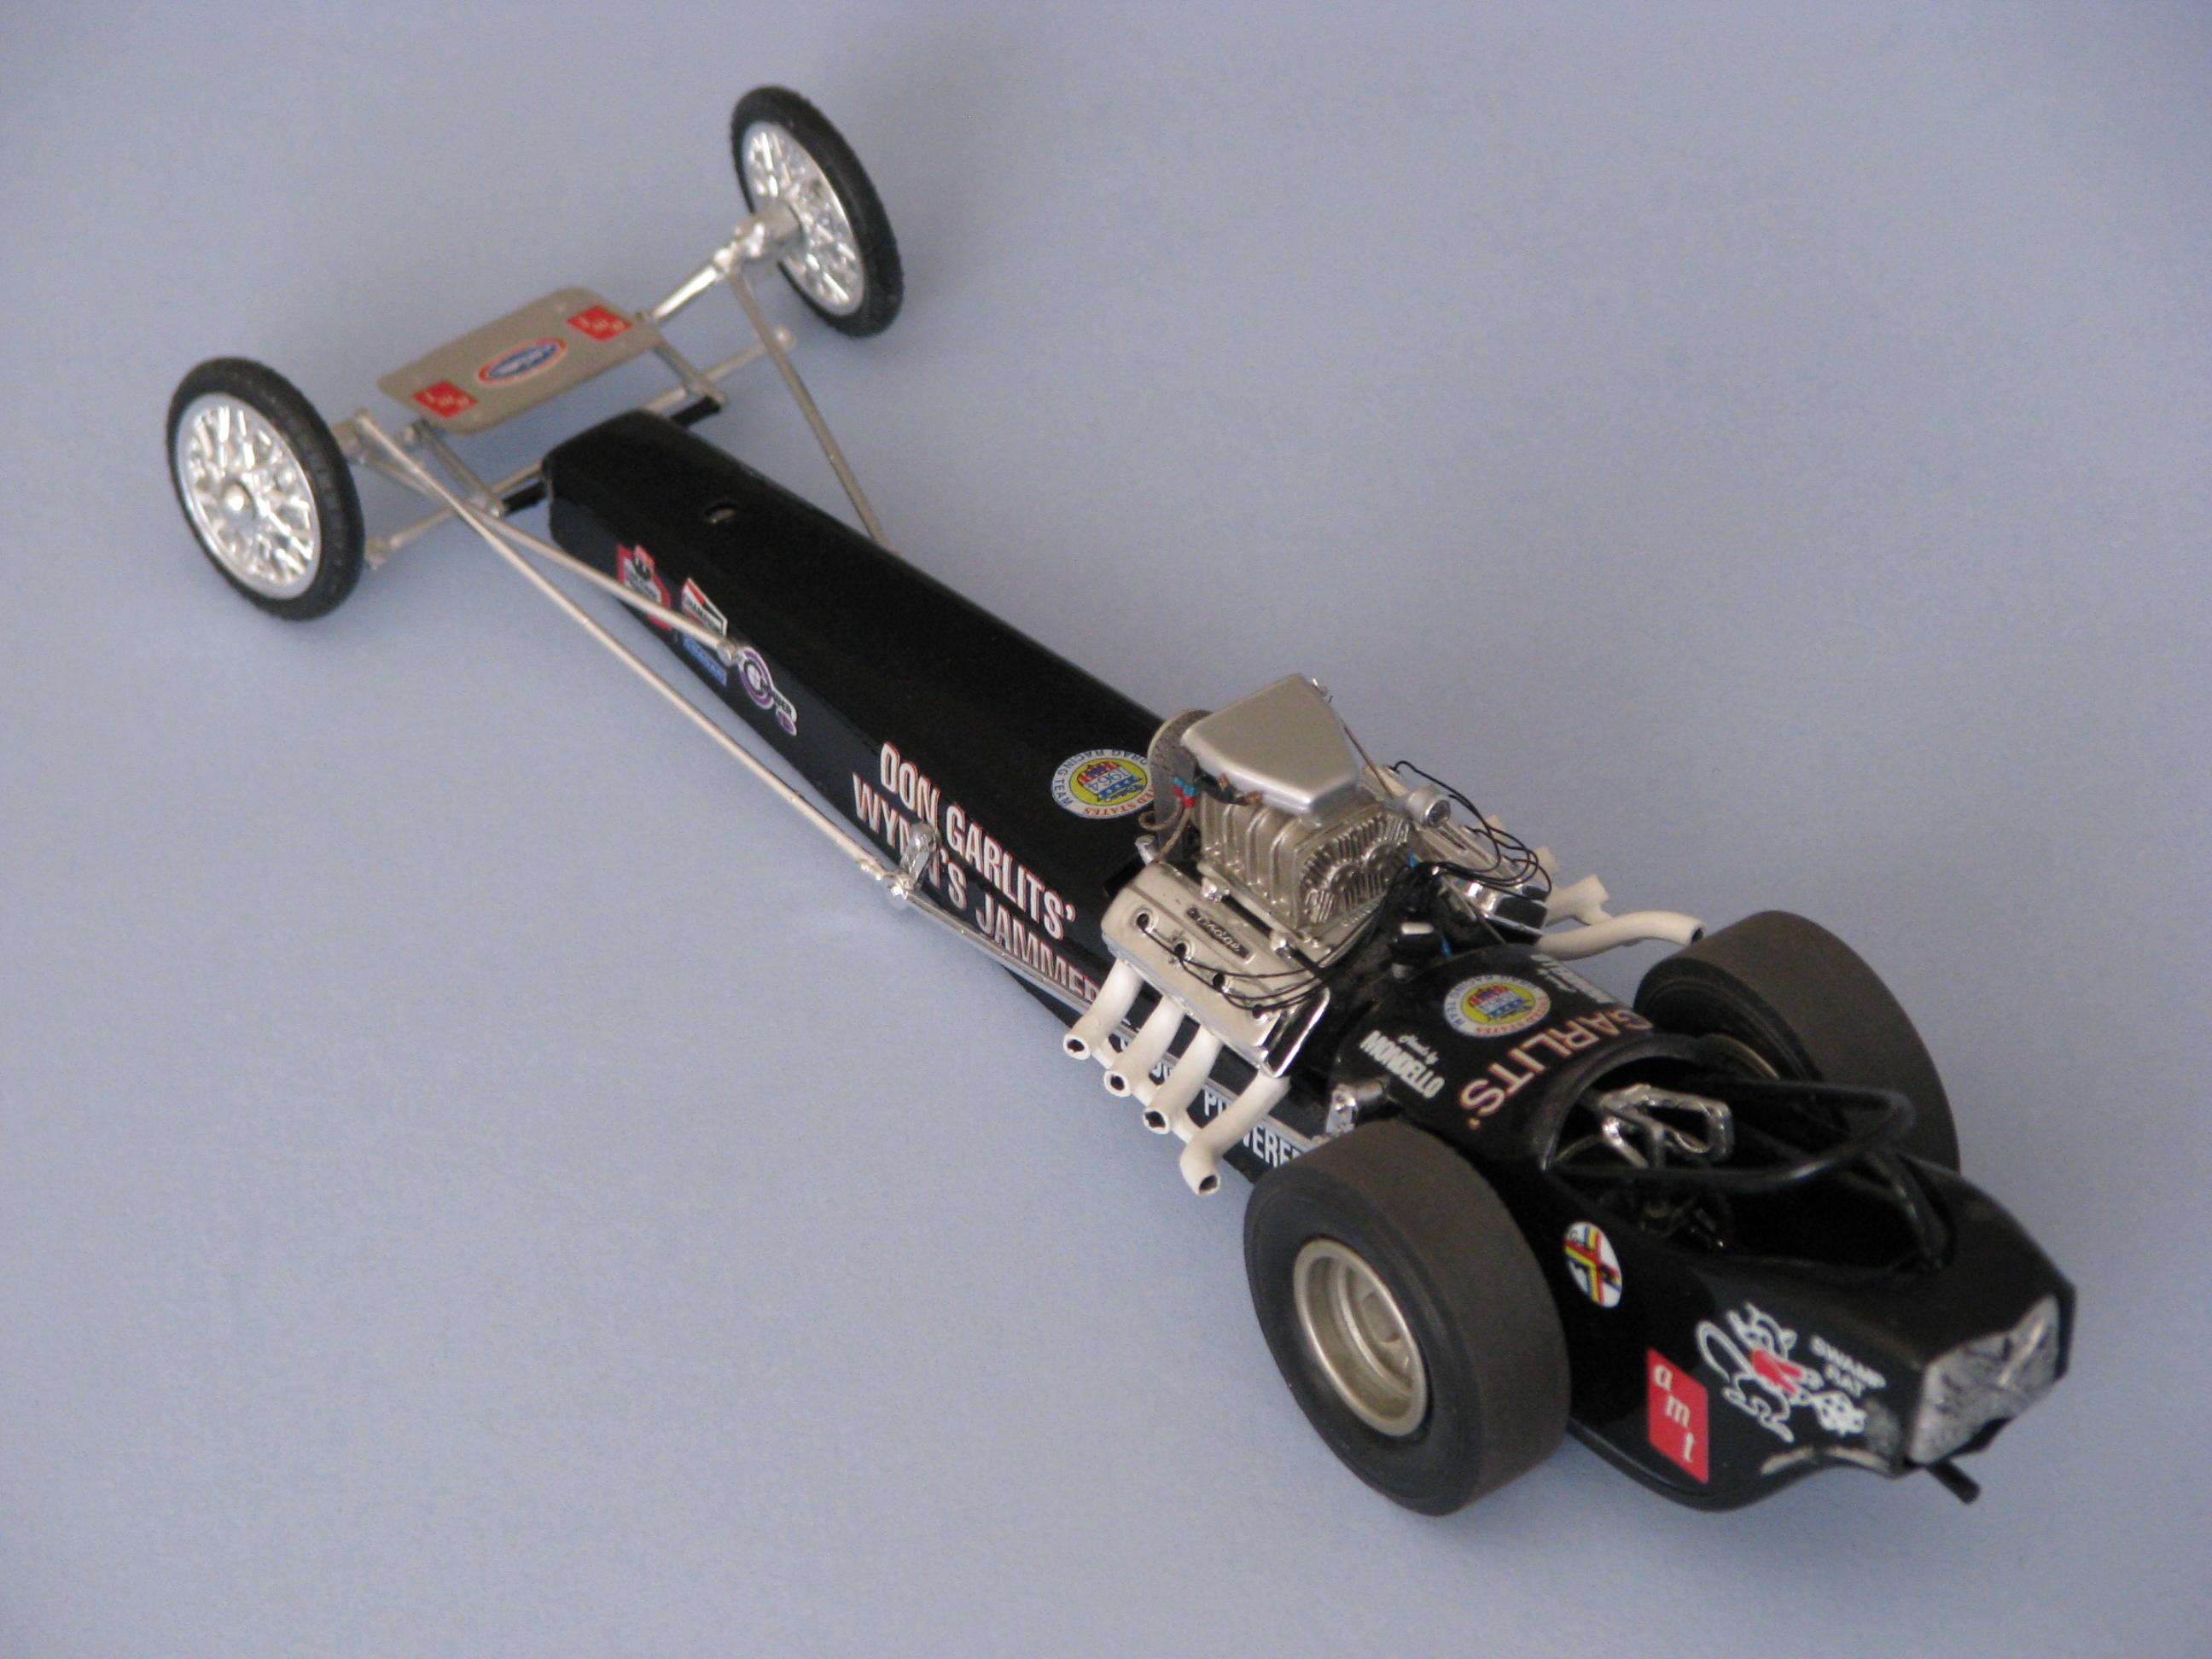
OK, this is one of those classic real scale dragsters and classic model kits. I remember building this kit in my “younger years” and it was a wonder to behold even then. Lots of great detail parts. Many, many years later I took another stab at this Garlits kit and was pretty happy with the results. The effort was made to get the proper scale wiring and plumbing for the ignition and fuel lines, plus dressing-down the chrome to give a more textured, real-world look to the model. Notice that Garlits wanted the injectors-butterflys painted black so that competitors wouldn’t be able to see his throttle action. This tied into his adding small fuel injector lines in the blower scoop to get more nitro into the manifold. He was a crafty dude, that Don Garlits.

- 1 reply
-
- 3
-

-
Holy Cow...what a sweet looking build. Congrats on a splendid job. I was planning to avoid the kit because of the use of the stock body, but your build changed my mind...it looks reeeeaaaalll nice. I gotta get me one of those.
-
 WOW...nice Find! But even nicer build. Great Job. Gotta' love those Mustangs.
 -
I can't believe you got all those pipes so straight!!! I built this a while back and it's tough. You did a great job. Am I correct in thinking those are aluminum pipes for the injectors and headers?
-
I absolutely love your theme - building the covers! What a great idea. Plus your models are spot on. Nice work.
-
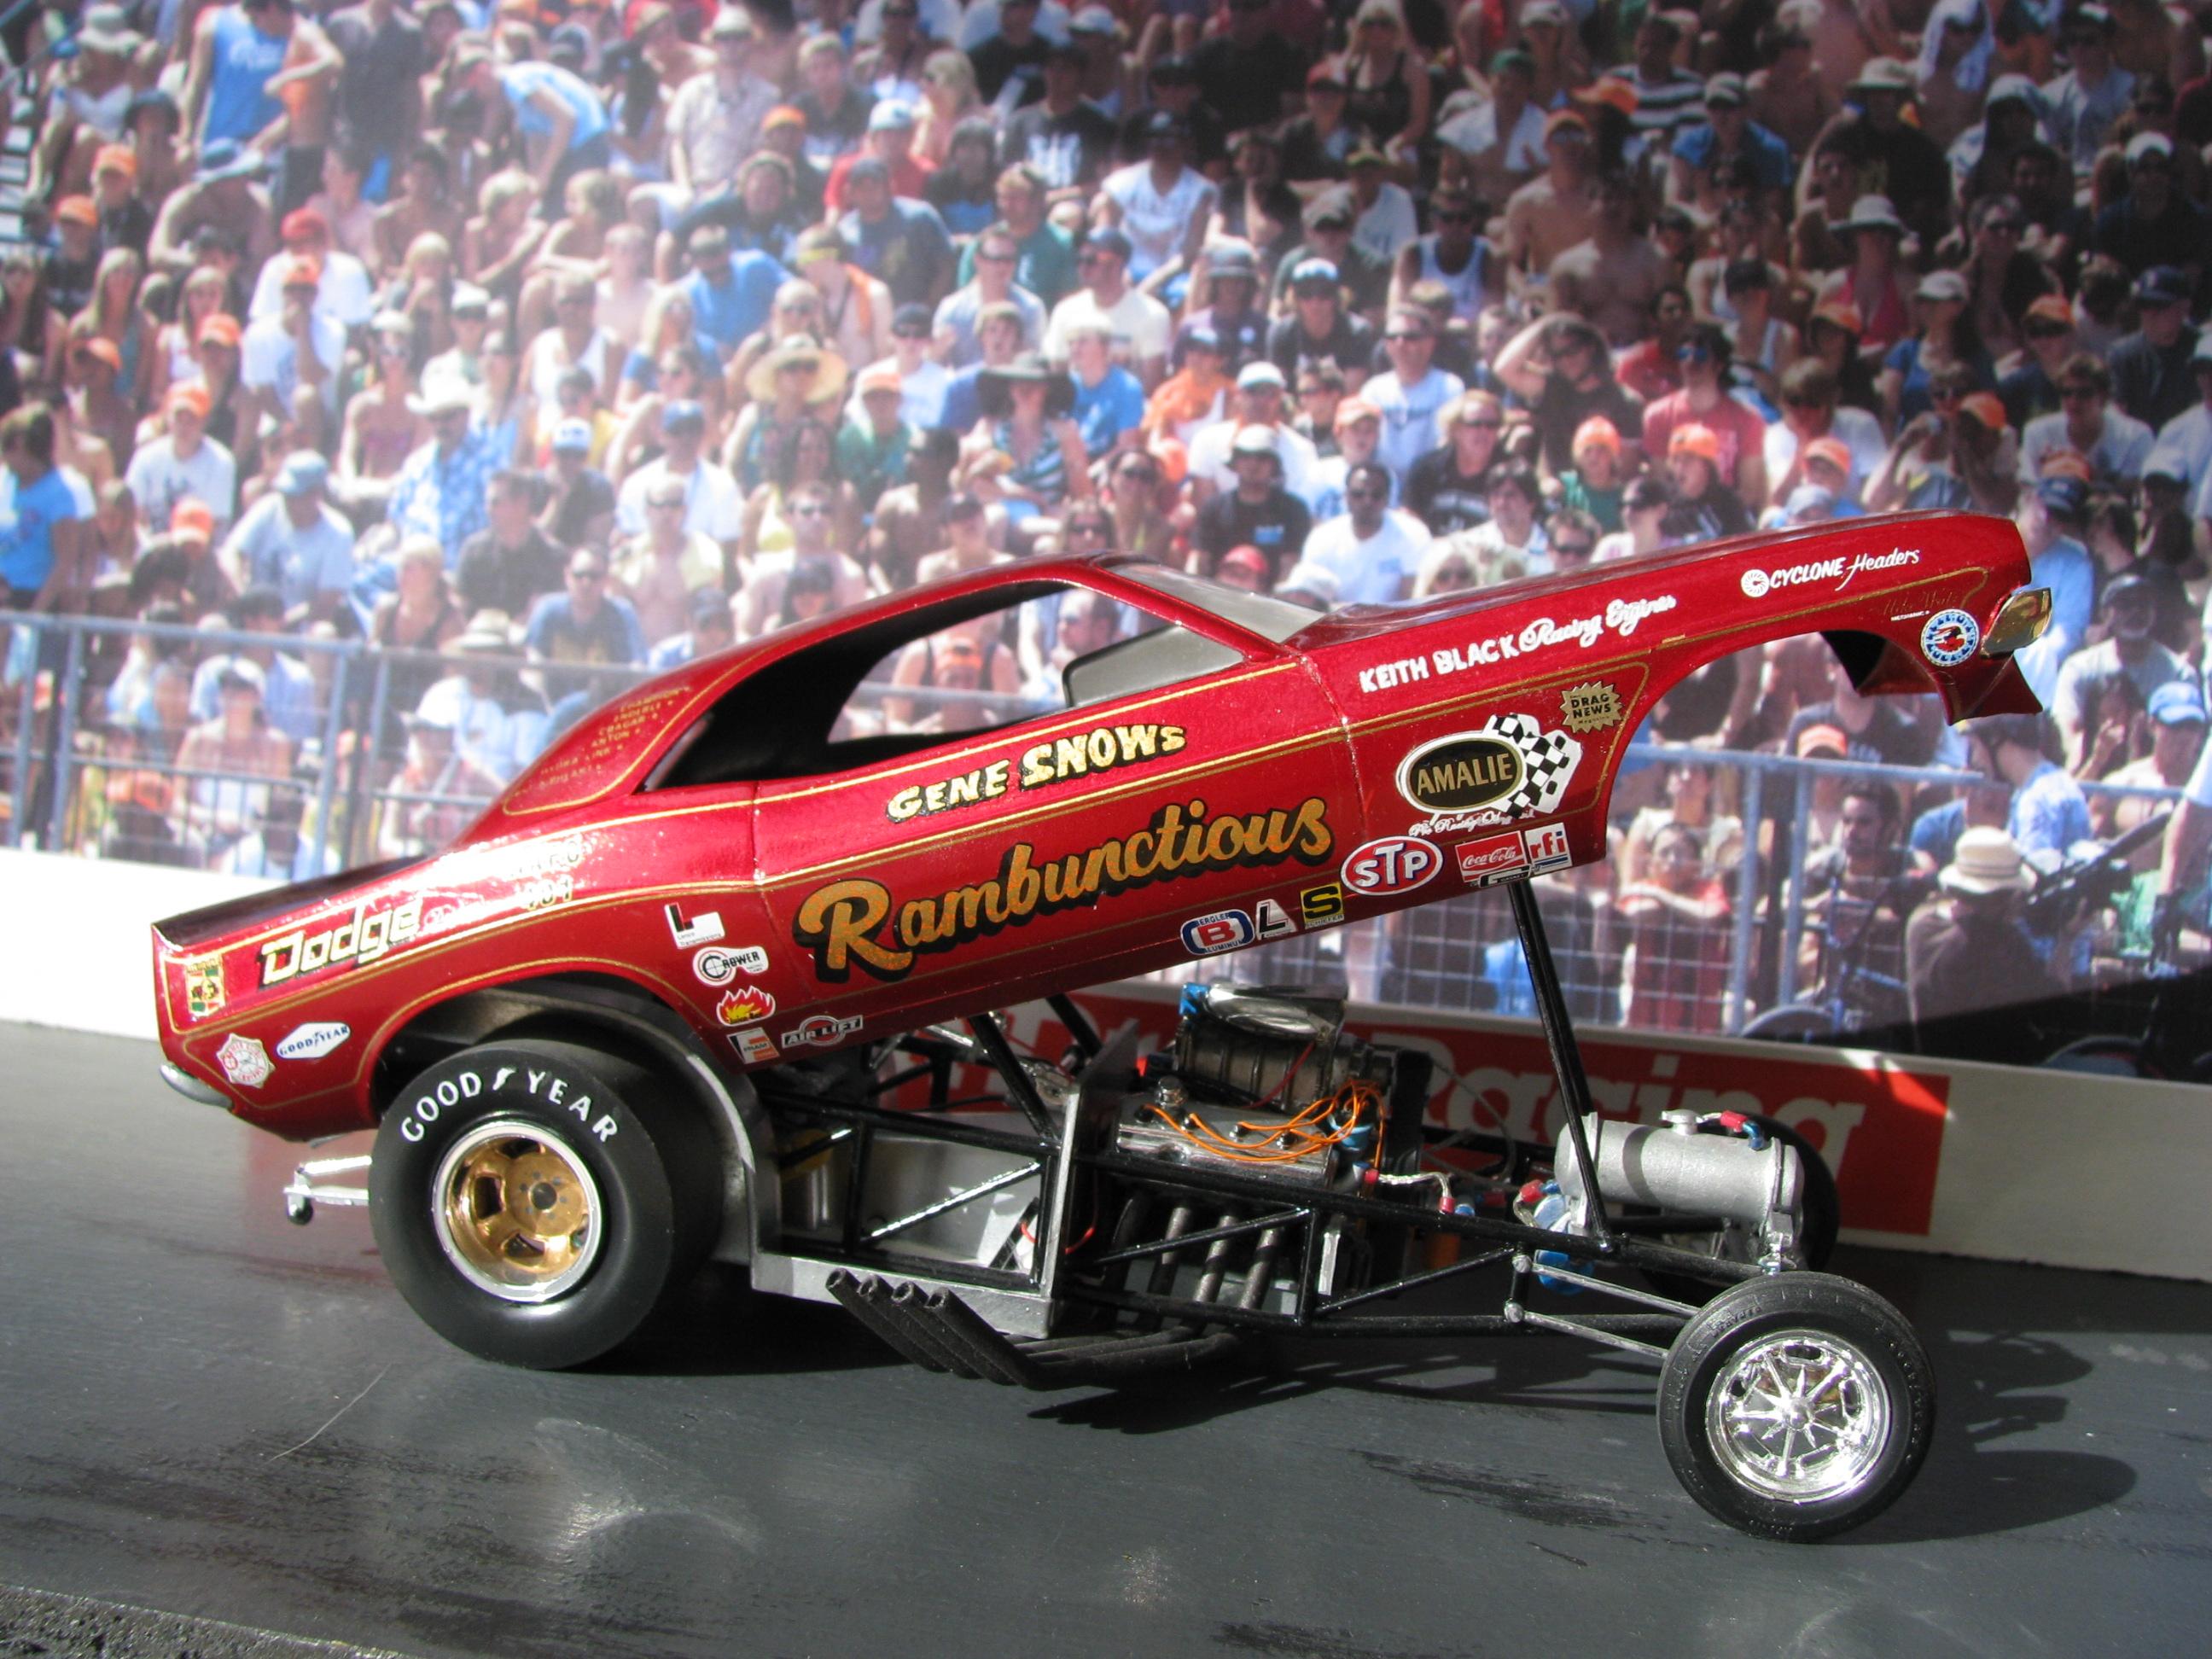
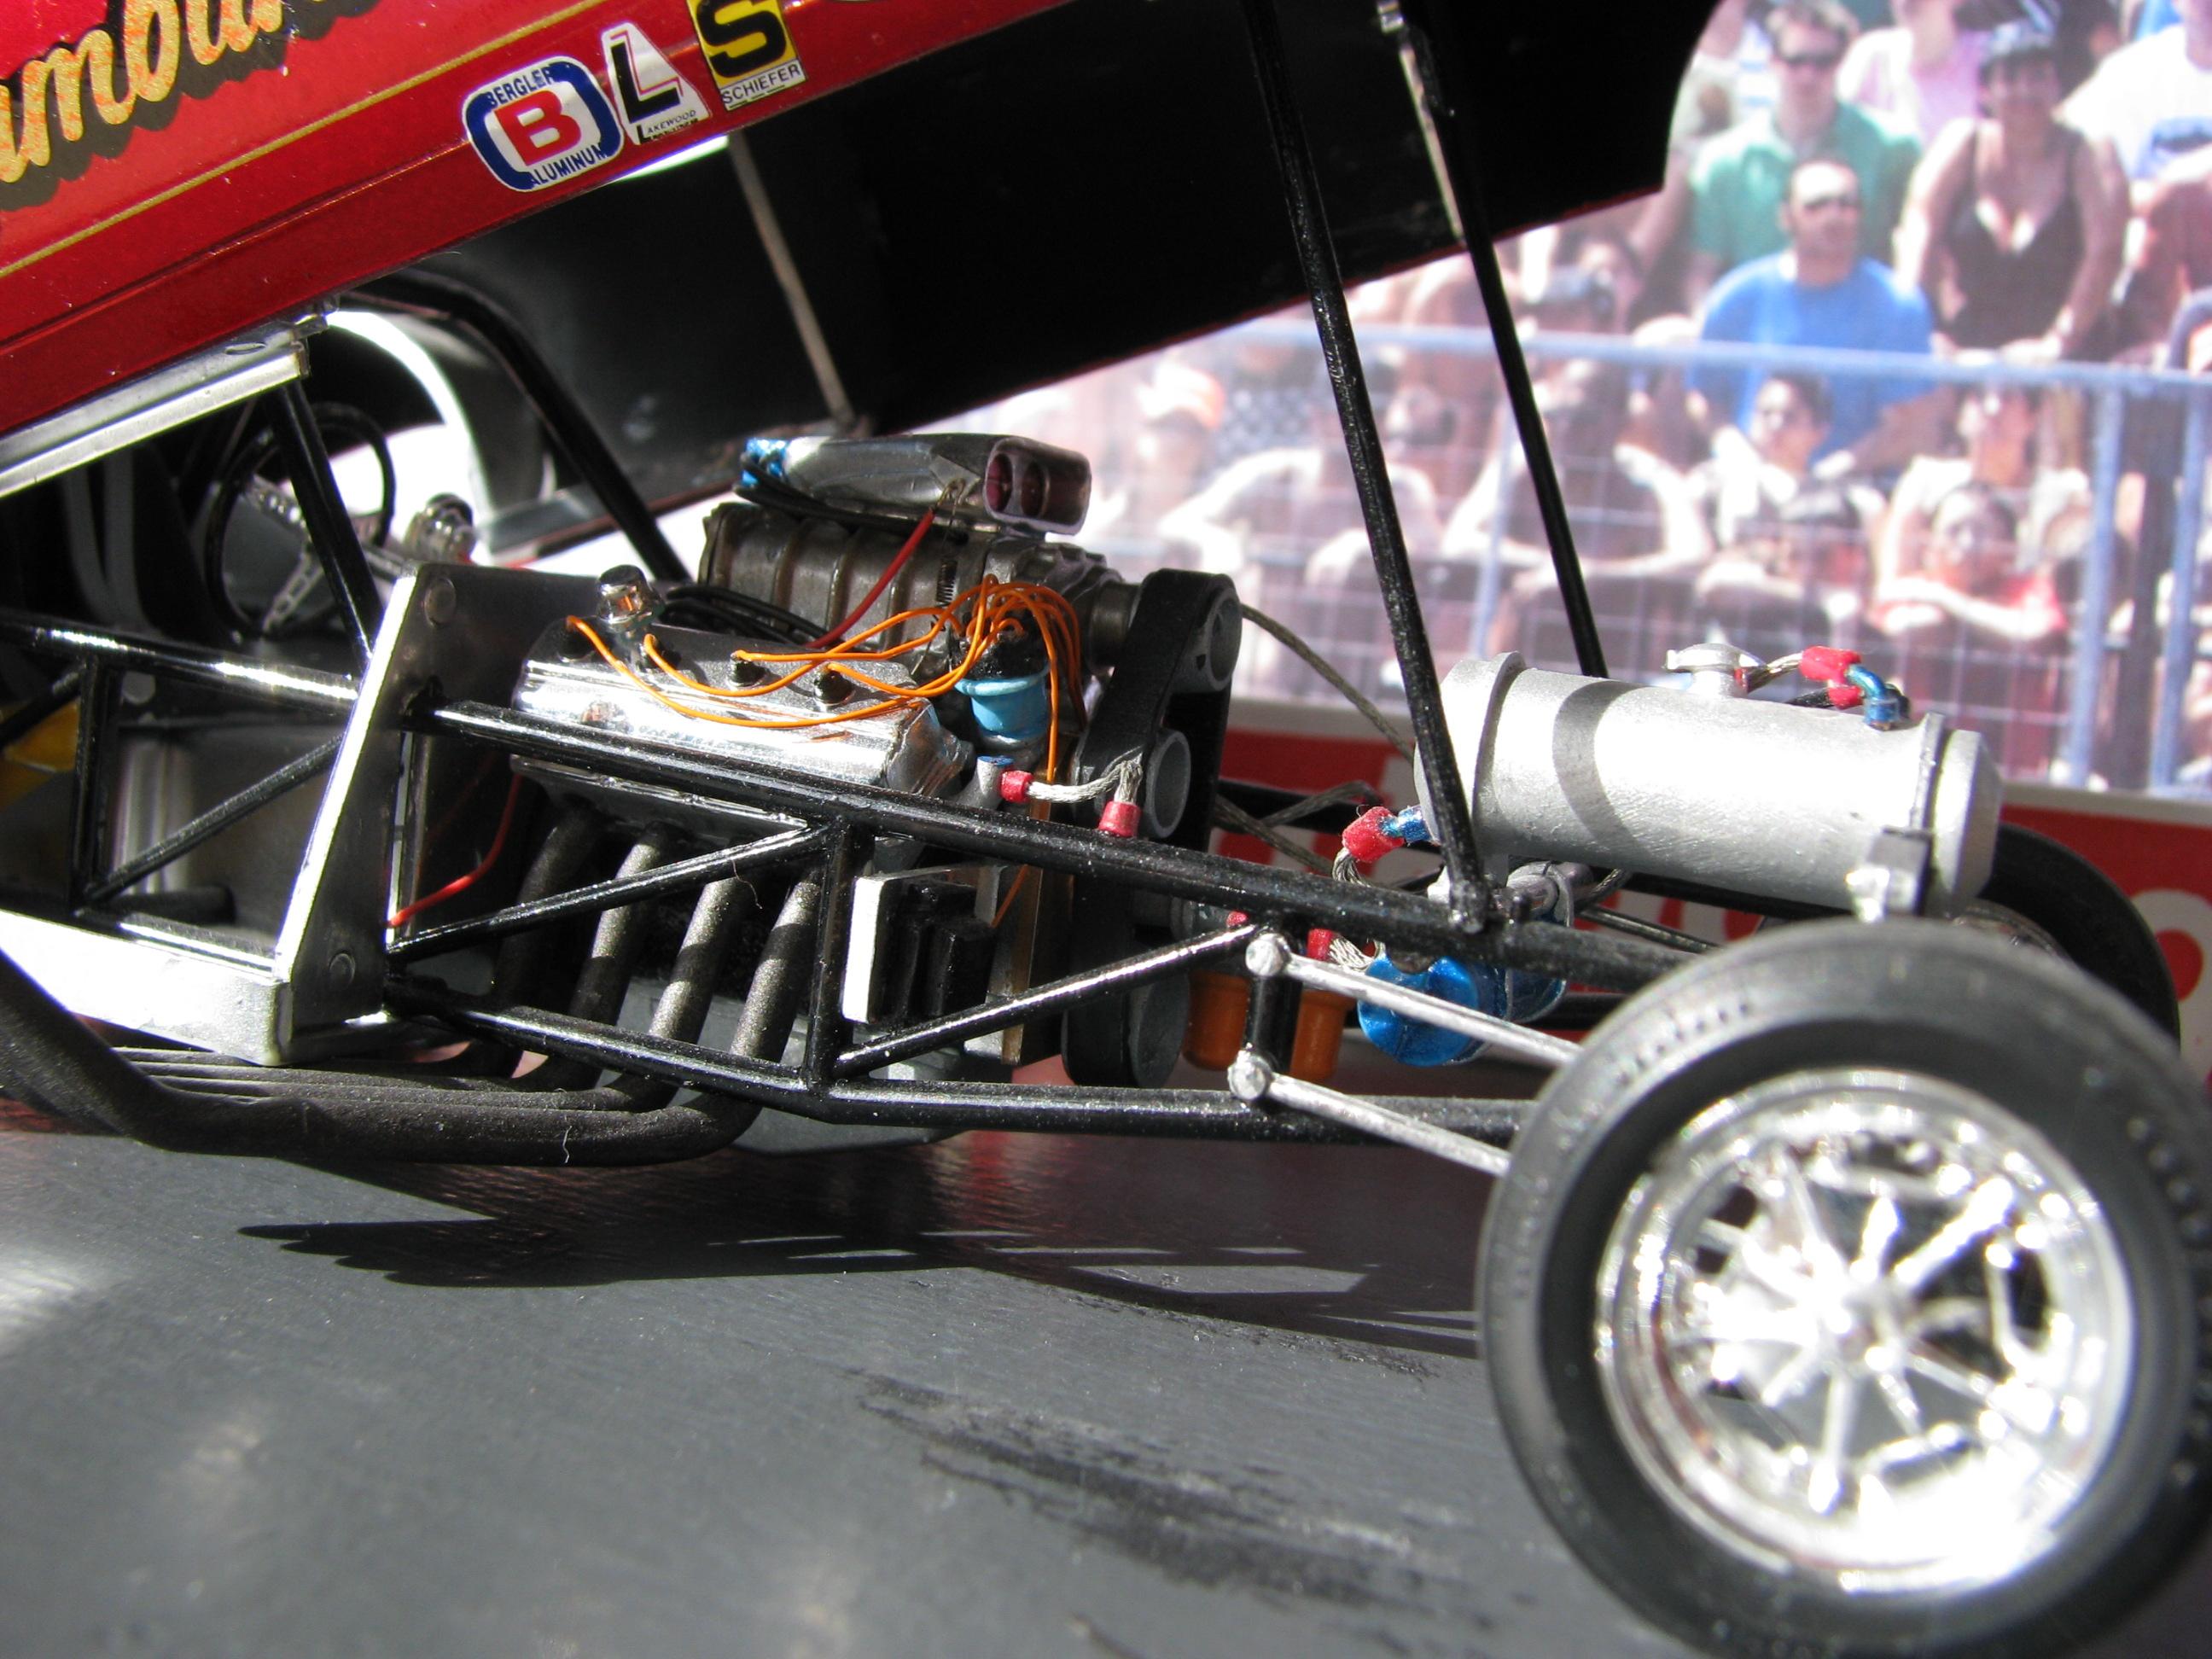
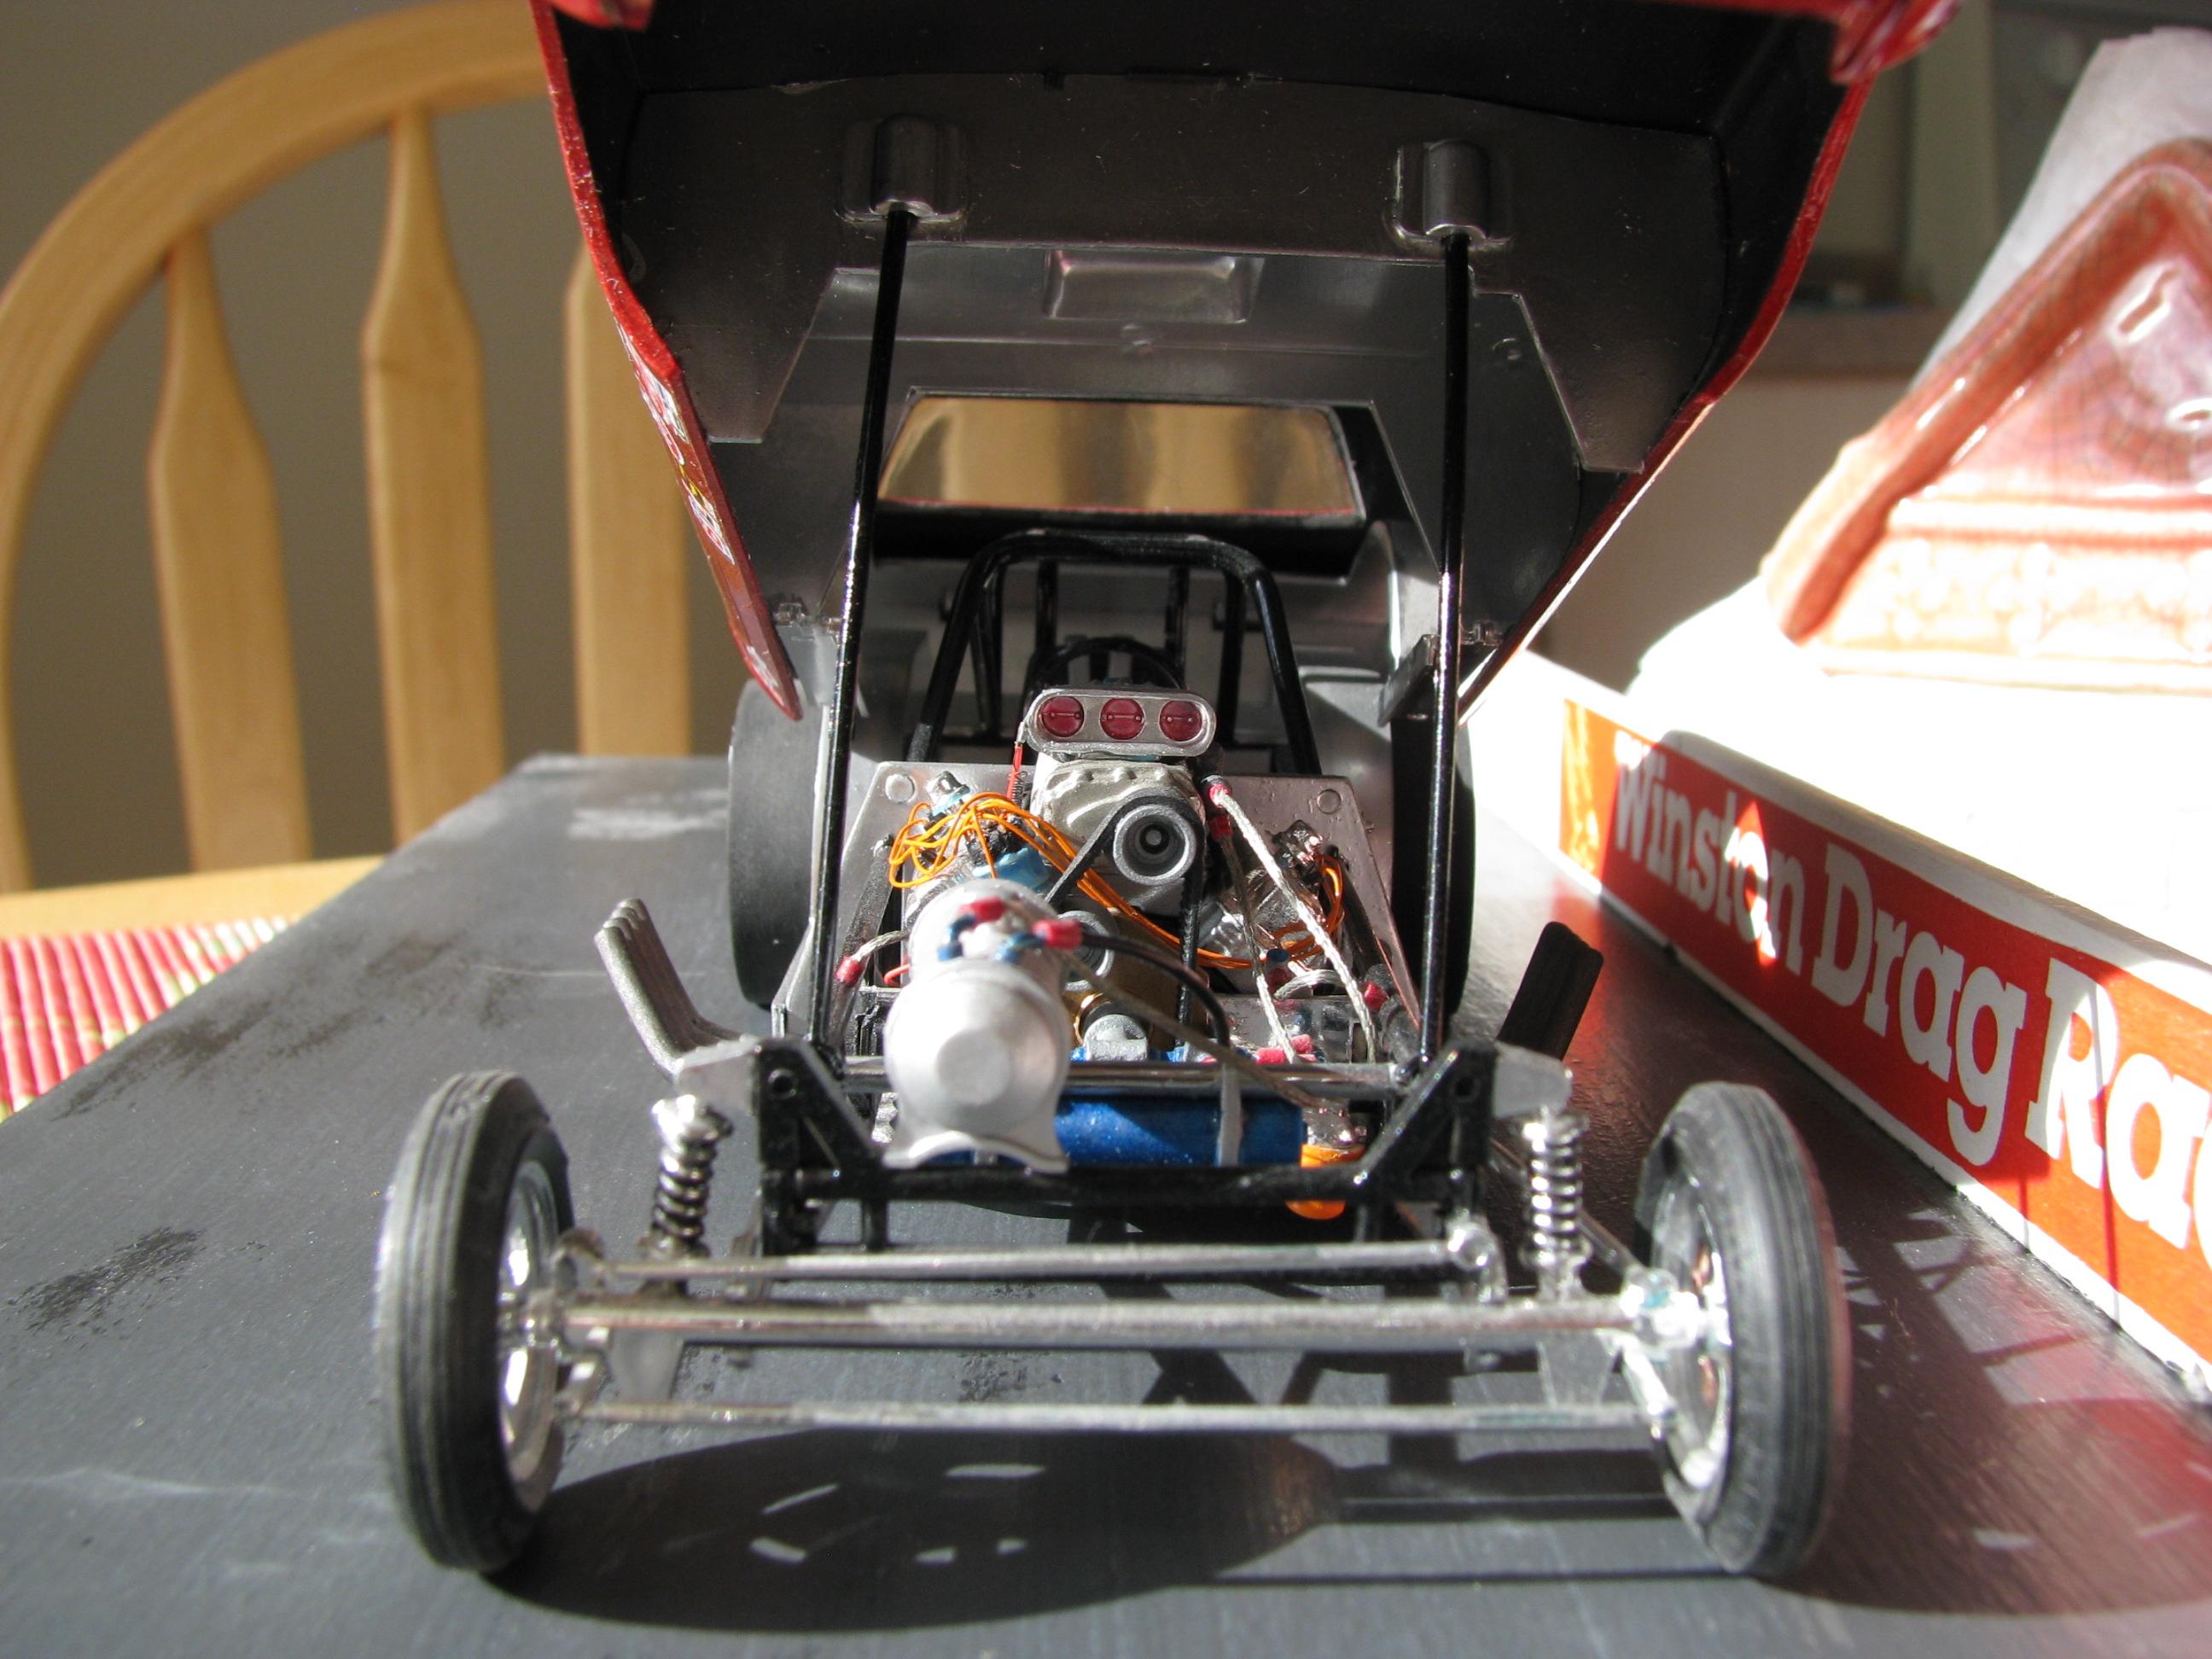
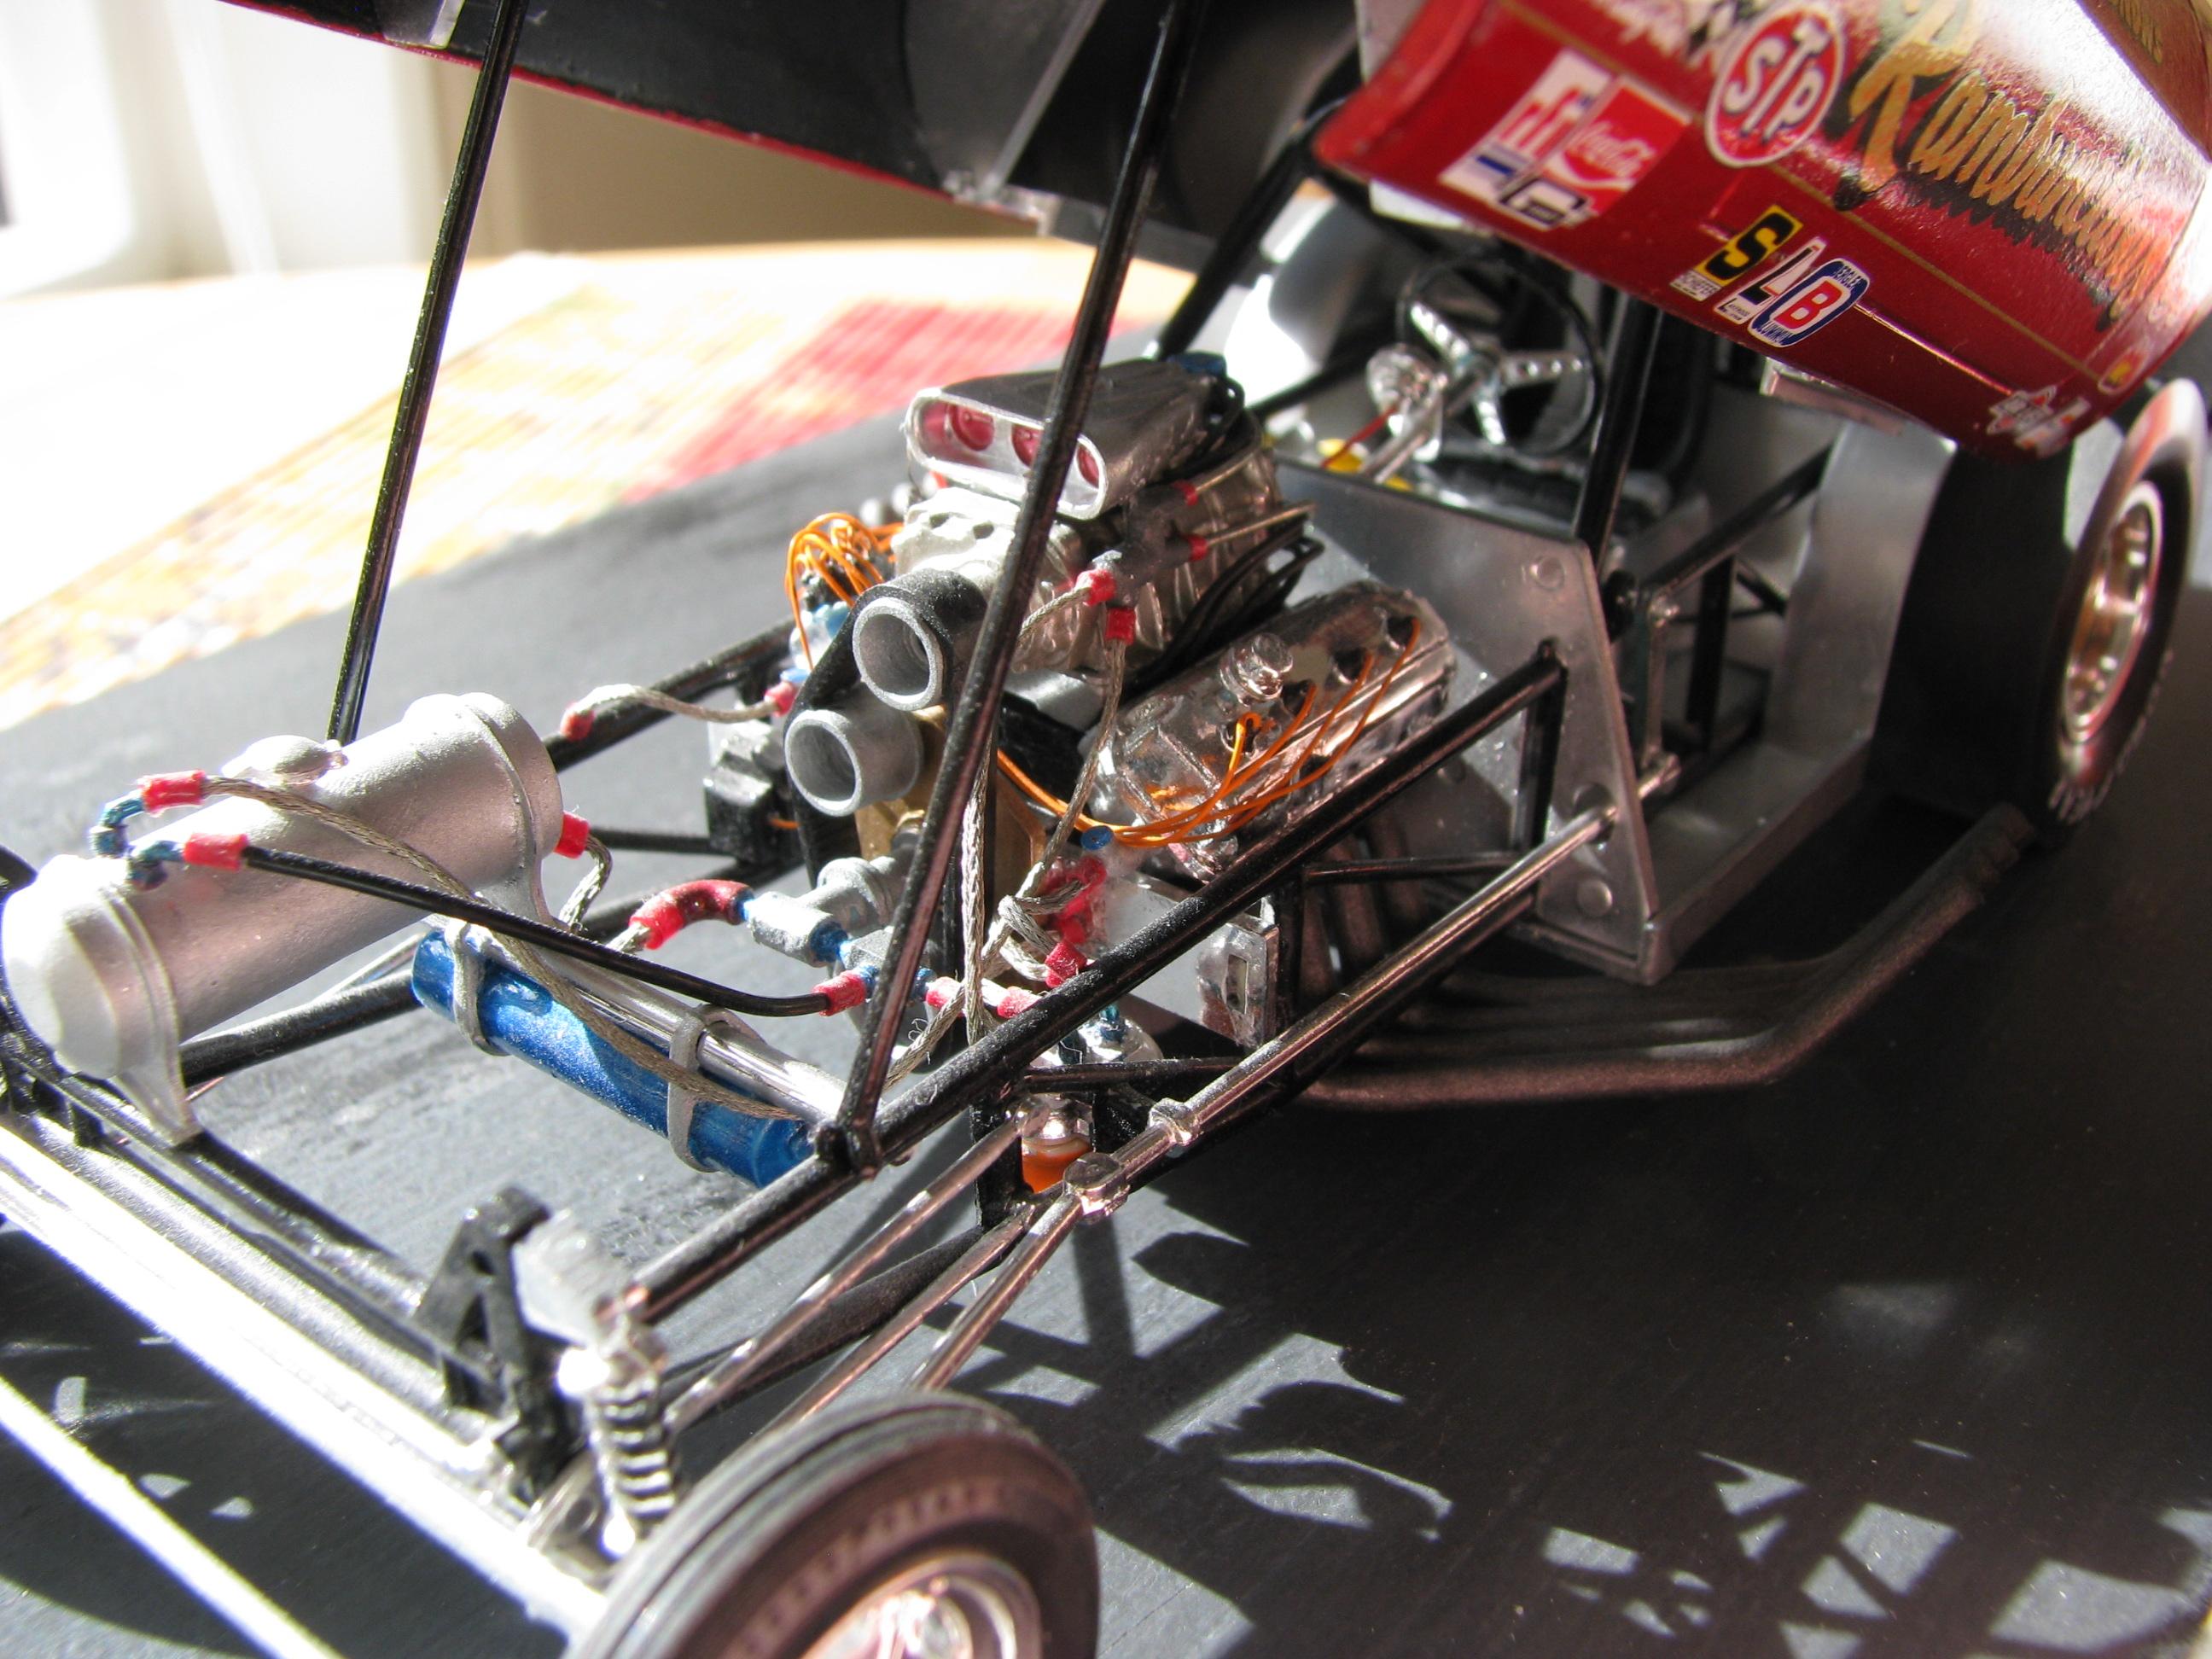
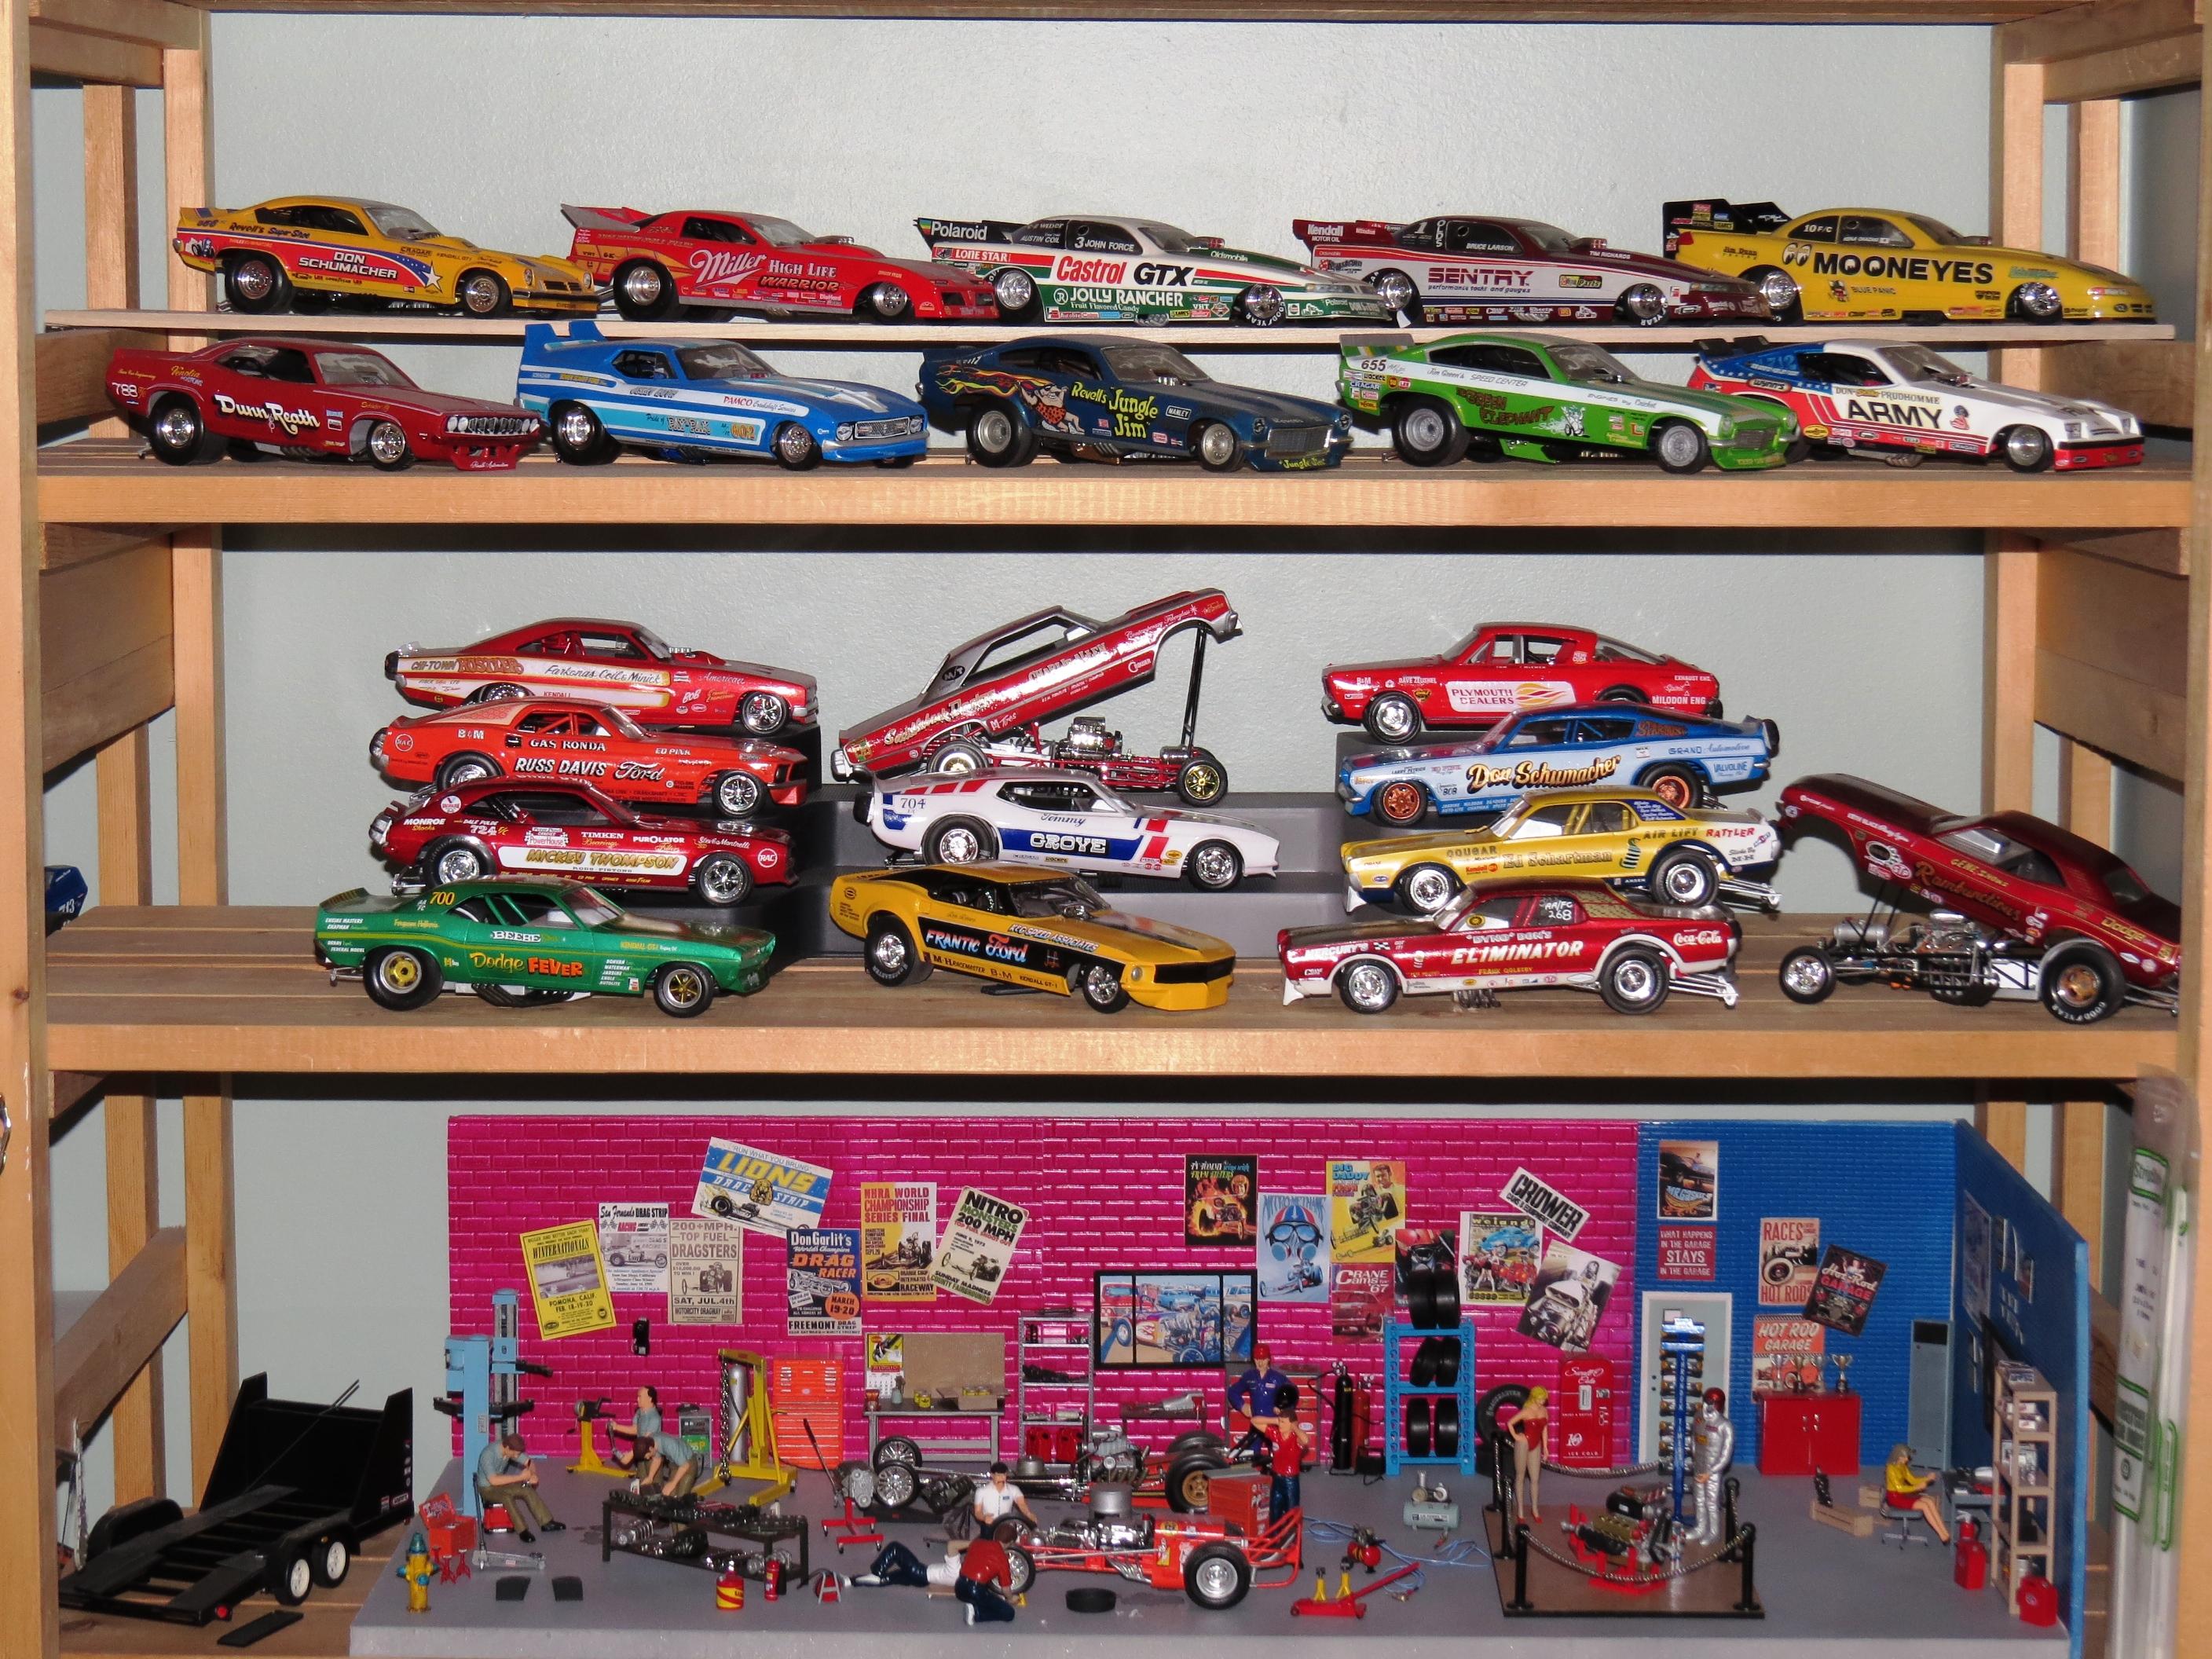
You may have noticed that all of my posts so far have been dragsters, but I do build funny cars as well, although because of the body I tend not to do much if any detailing. That said, a few years back I made an effort to build Gene Snow’s 1970 “Rambunctious” Dodge Challenger funny car with some detailing. The kit is of course the Johan Challenger. Tip-of-the-hat to Tim Boyd and his fantastic book: Collecting Drag Racing Model Kits, where I learned that the Johan body is perhaps the most accurate Challenger body based on the proper wheel wells etc. This being built a few years back, it seems that all that detailing was so much easier. Included are various fuel, ignition and gauges wiring and plumbing. The kit had the “Ram-Rod” decals but I only used the ones that worked with the real car and then waited a few years to get the final touch – a set of Slixx decals to complete the look. I’ve also included a photo of the Funny Car collection as it exists so far and the latest iteration of “the garage”, which is always a work in progress.
-
WOW...I bow to the excellence of your build Tim. Fantastic. Let's line-em up and see who gets to the quarter mile stripe first!
-
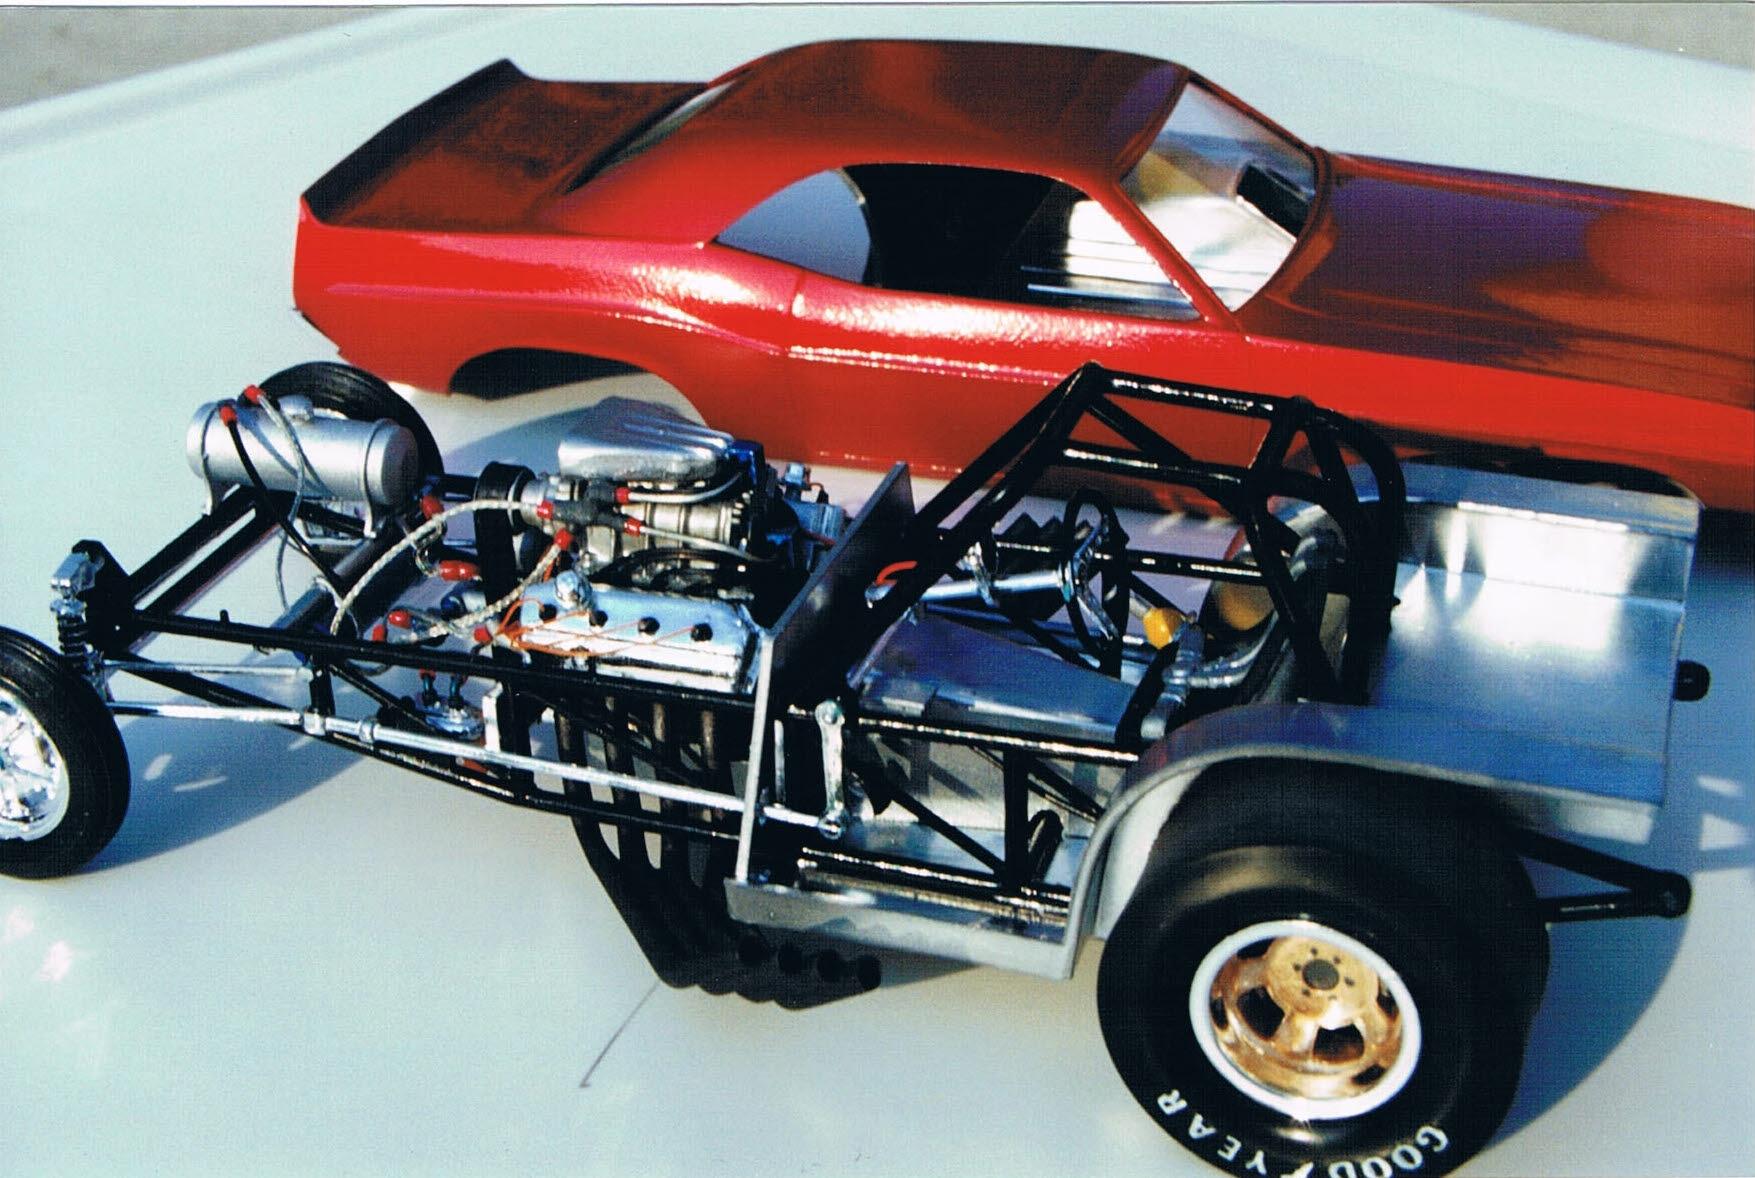
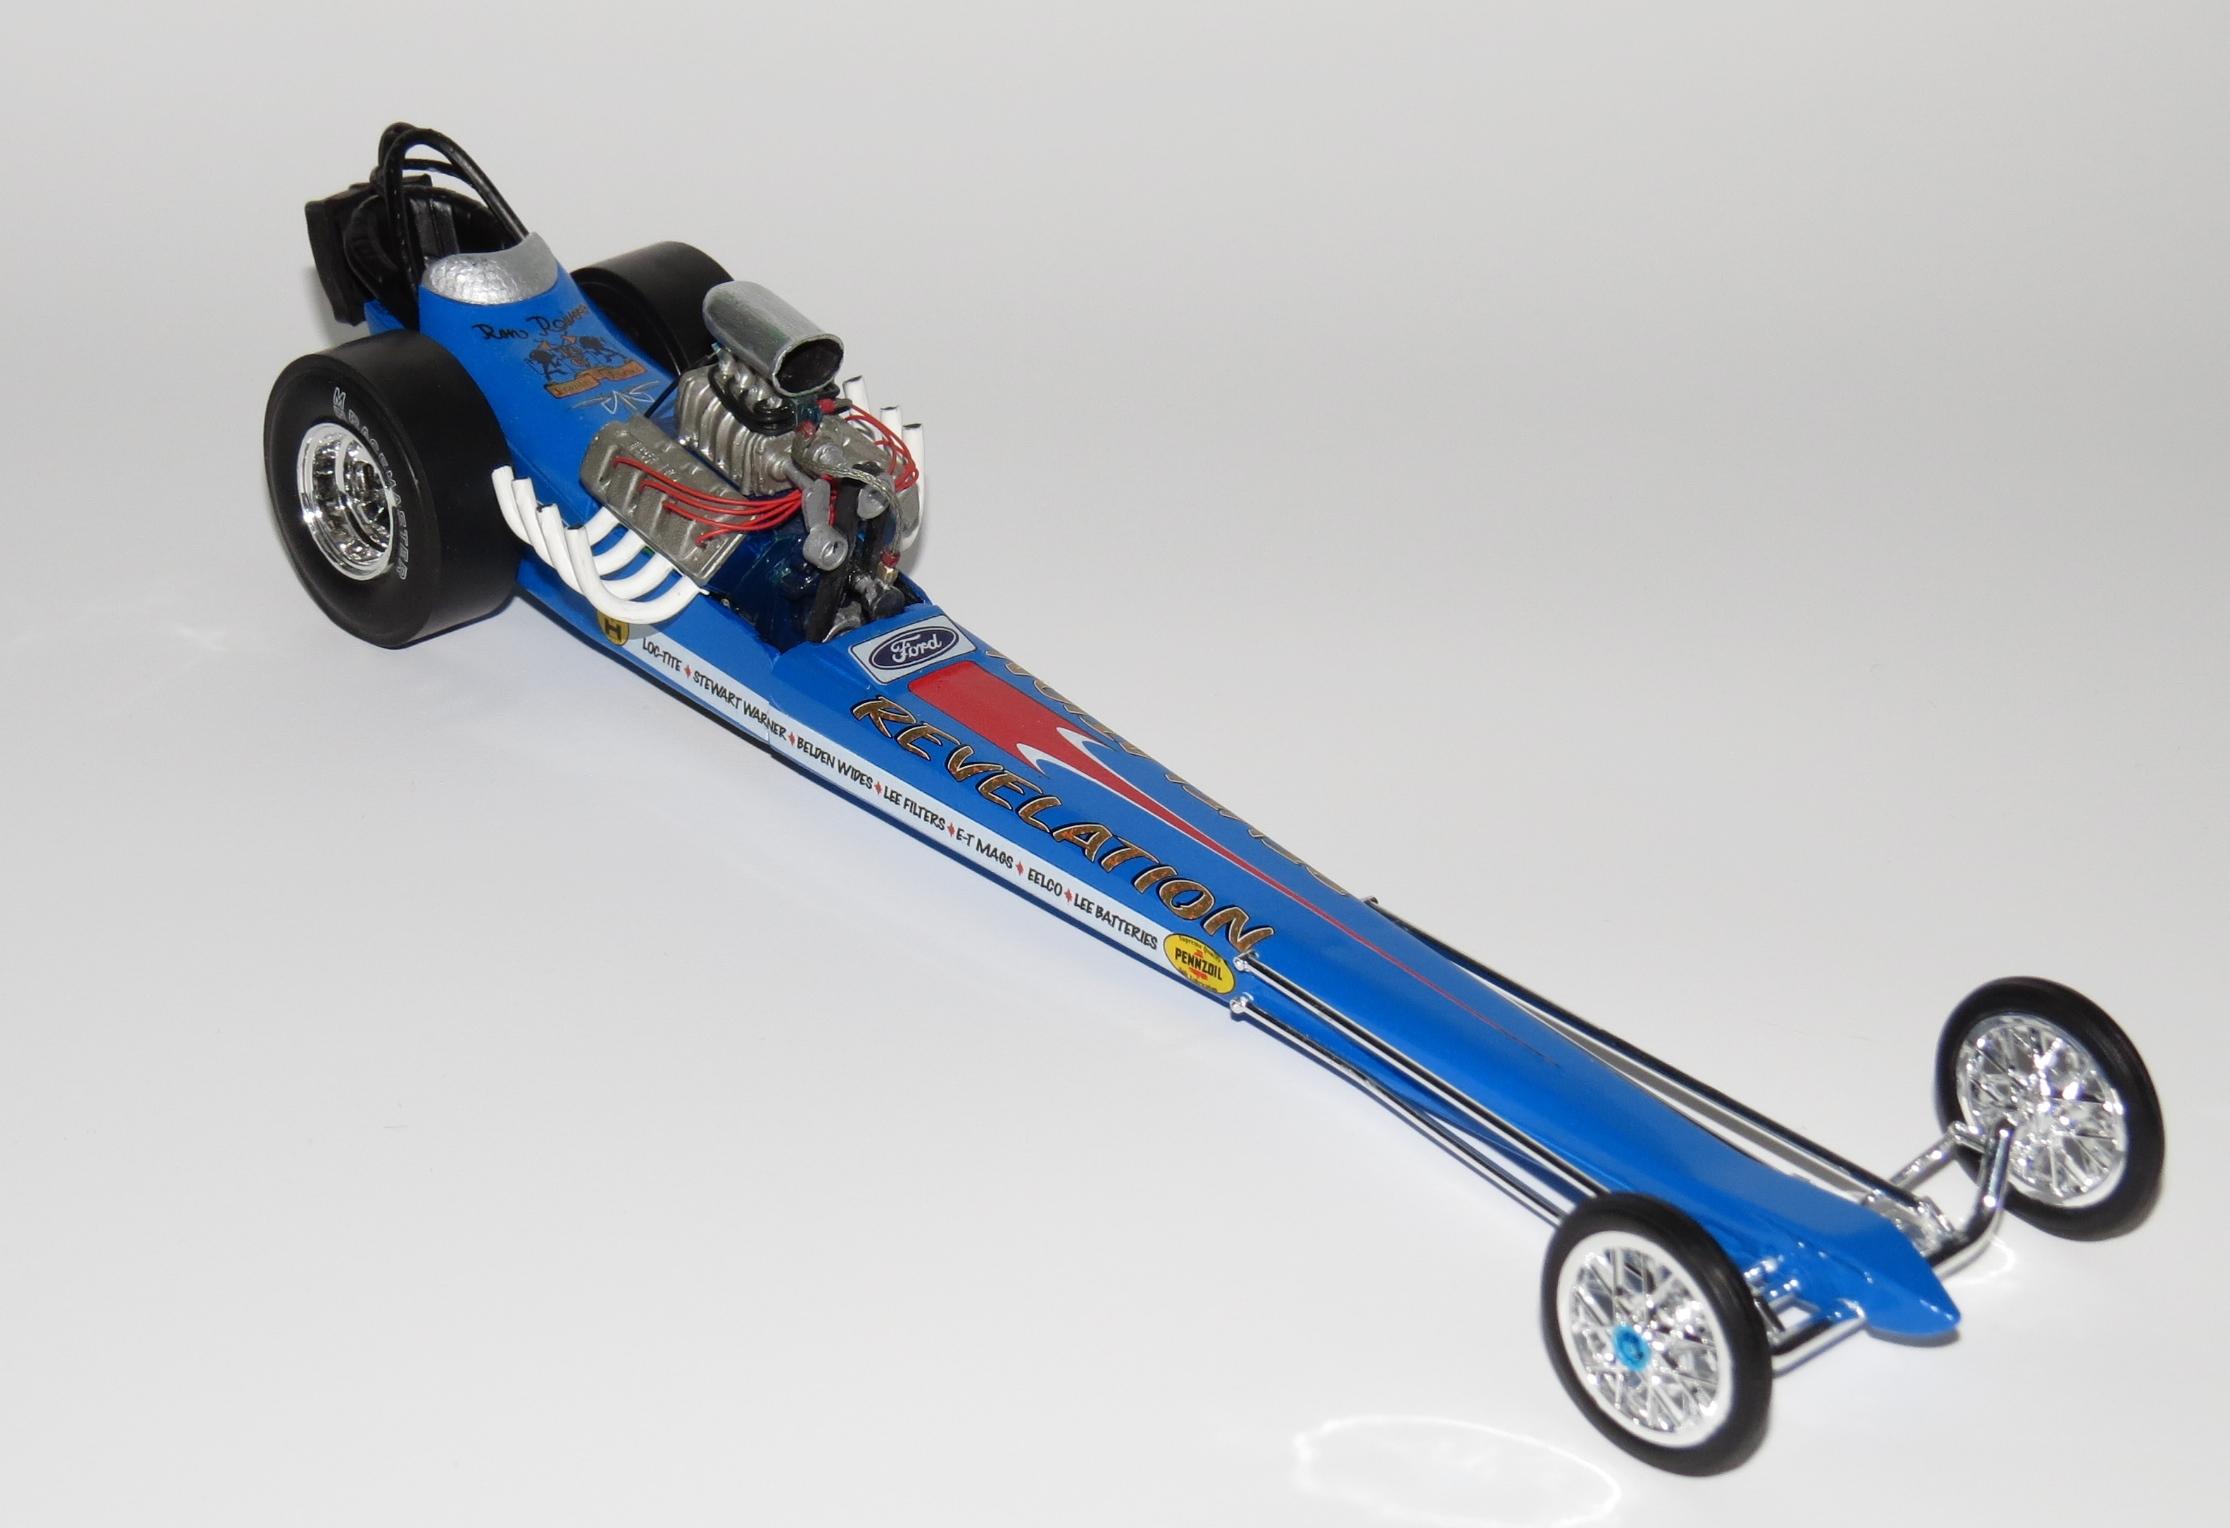
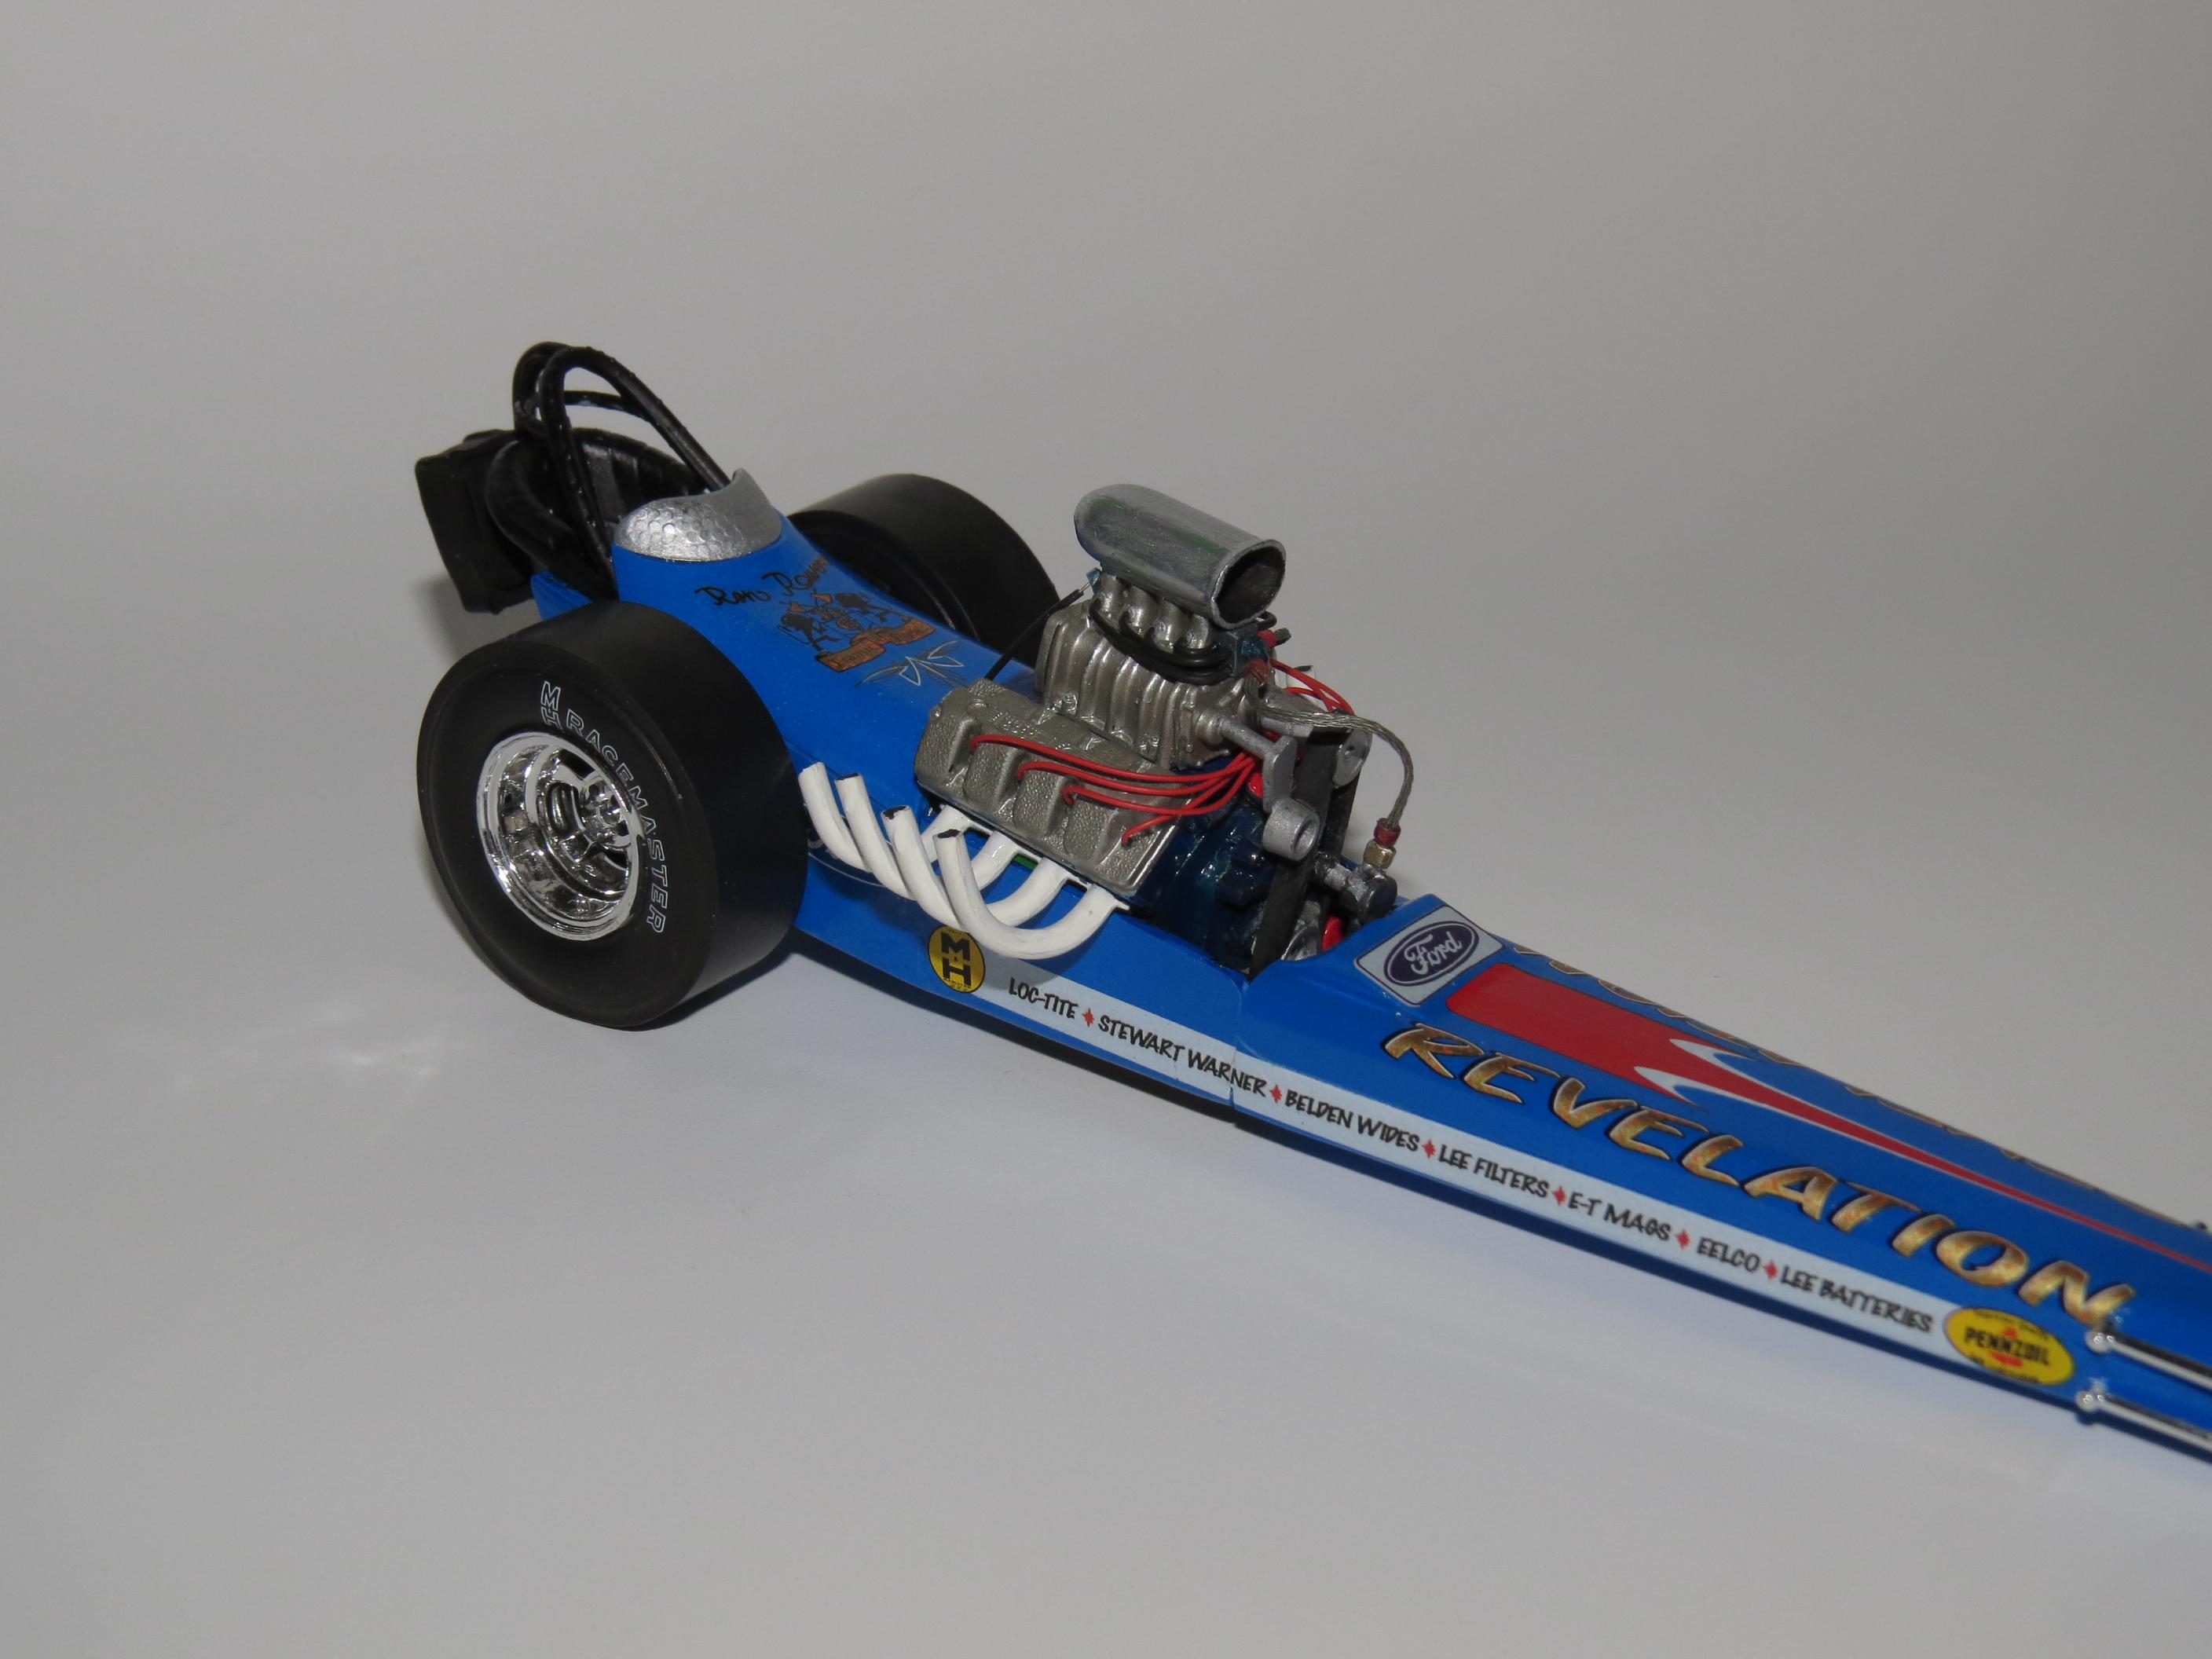
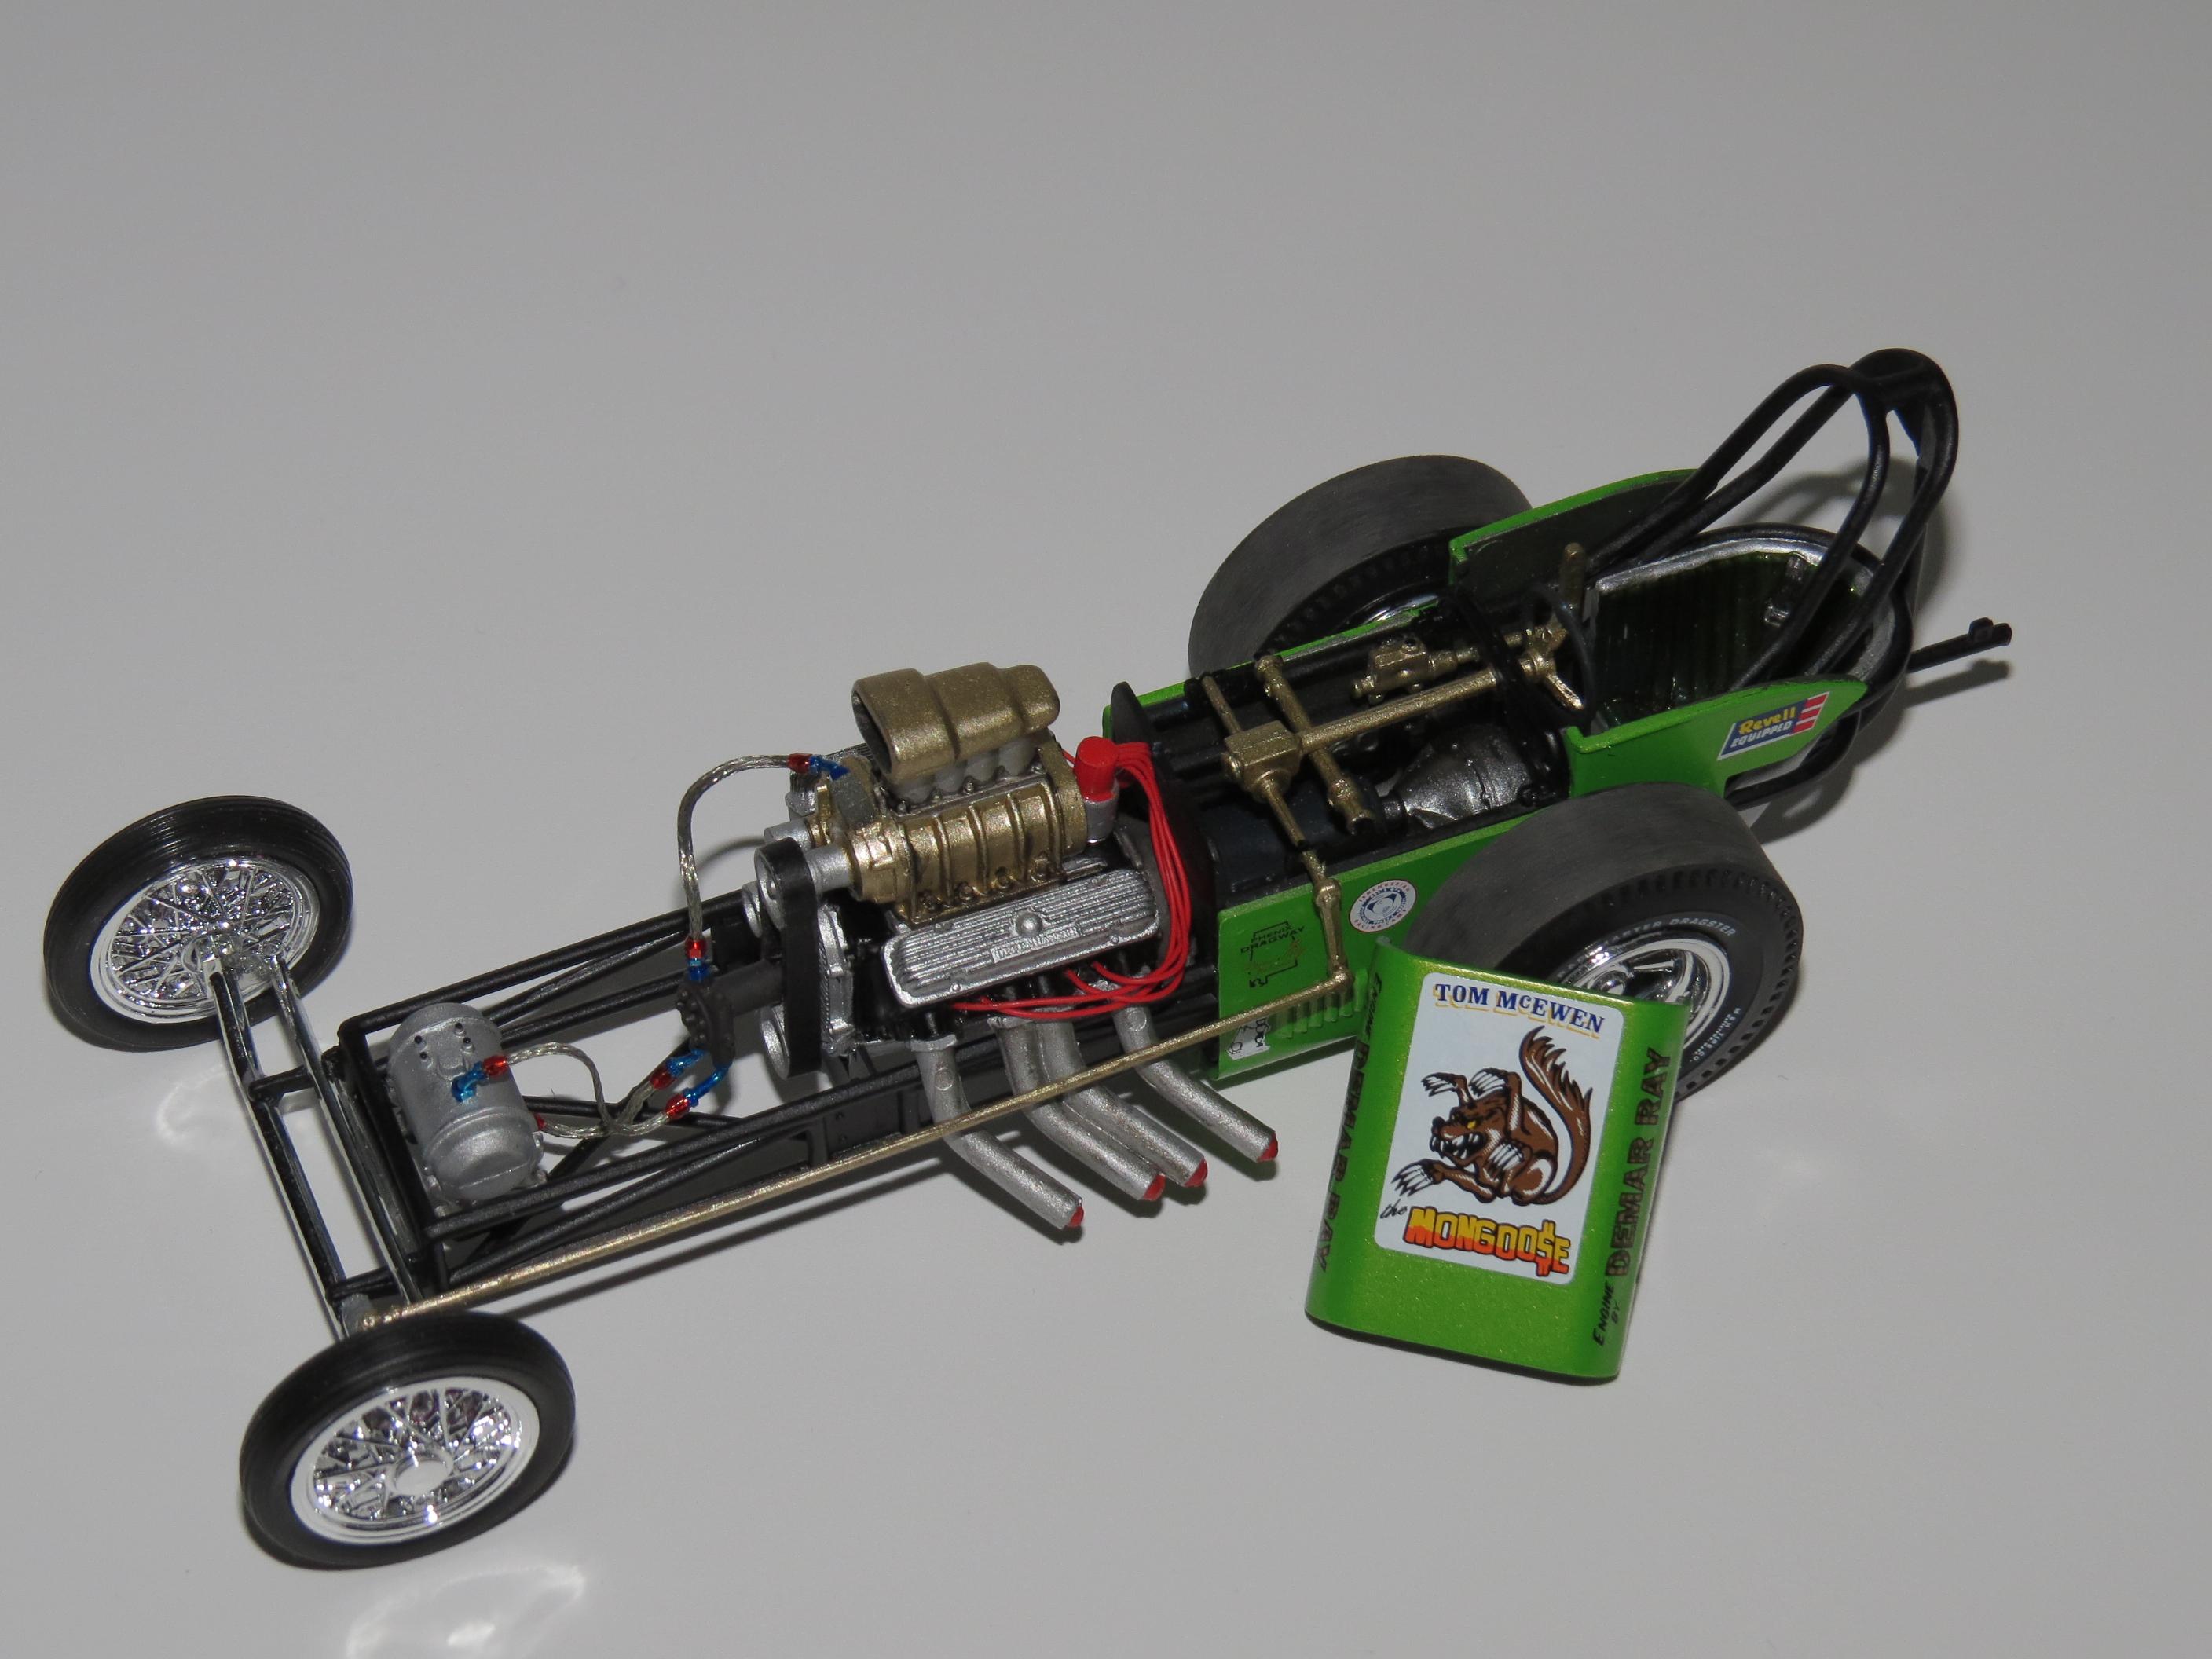
While I tend to prefer building replicas of real race cars, every once in a while I get the urge to work up some unique builds. Such is the case with this kit, built a couple years back. I had the Ford Boss 429 sitting in a front-engine kit which I took apart with a desire to build something a little cleaner. So I took that engine and proceeded to install it in a dragster that is a combination of a resin-cast back-end put together with the Mongoose Hot Wheels dragster front-end. I loved the pointy, different shape of the front end of this body style. At the same time my love of the Boss 429 led me to creating what could have been a real race car back in 1968, perhaps similar to Connie Kalitta’s car of the era. Decals are from the “spares box” and the tires are AMT pad-printed MH Racemaster’s. All-in-all I thought it was pretty representative of the era.
-
I have been working on a History of Top Fuel Dragsters in model form to show the development of my favorite drag racing class and I keep looking to fill in holes in the timeline. Here’s a late fifties/early sixties dragster I built a while back to fill one of those spots. It involved using an old Revell parts pack Dragmaster Chassis and body parts. The engine came from a completely different parts pack and had been built and sitting around for years. I finally decided it was time to put it to good use. The rear slicks came from the relatively recent AMT M&H Racemaster tires pack and the fronts and both sets of wheels were just in the regular spare parts box. Even the decals came from the spare-decals drawer. I cleaned everything up, repainted parts of the engine, added the magneto and ignition wires along with the braided fuel lines and all the usual aluminum AN fittings. All in all, it turned out to be a rather easy build but a very satisfying one. All from the parts-box!
-
Ramchargers Dragster Reissue - Rebuild Complete!
jlucky replied to jlucky's topic in WIP: Drag Racing Models
Well I'm currently blushing and flattered....at your compliments, Tim. Big encouragement to keep on, keeping on. By the way I refer to your book on Collecting Drag Racing Model Kits constantly. Wonderful reference thanks for putting it together. Jerry -
Ramchargers Dragster Reissue - Rebuild Complete!
jlucky replied to jlucky's topic in WIP: Drag Racing Models
It came from the 90's reissue. That's safe to build. -
Ramchargers Dragster Reissue - Rebuild Complete!
jlucky replied to jlucky's topic in WIP: Drag Racing Models
Good eyes....yeah it's still on the shelf waiting it's turn. -
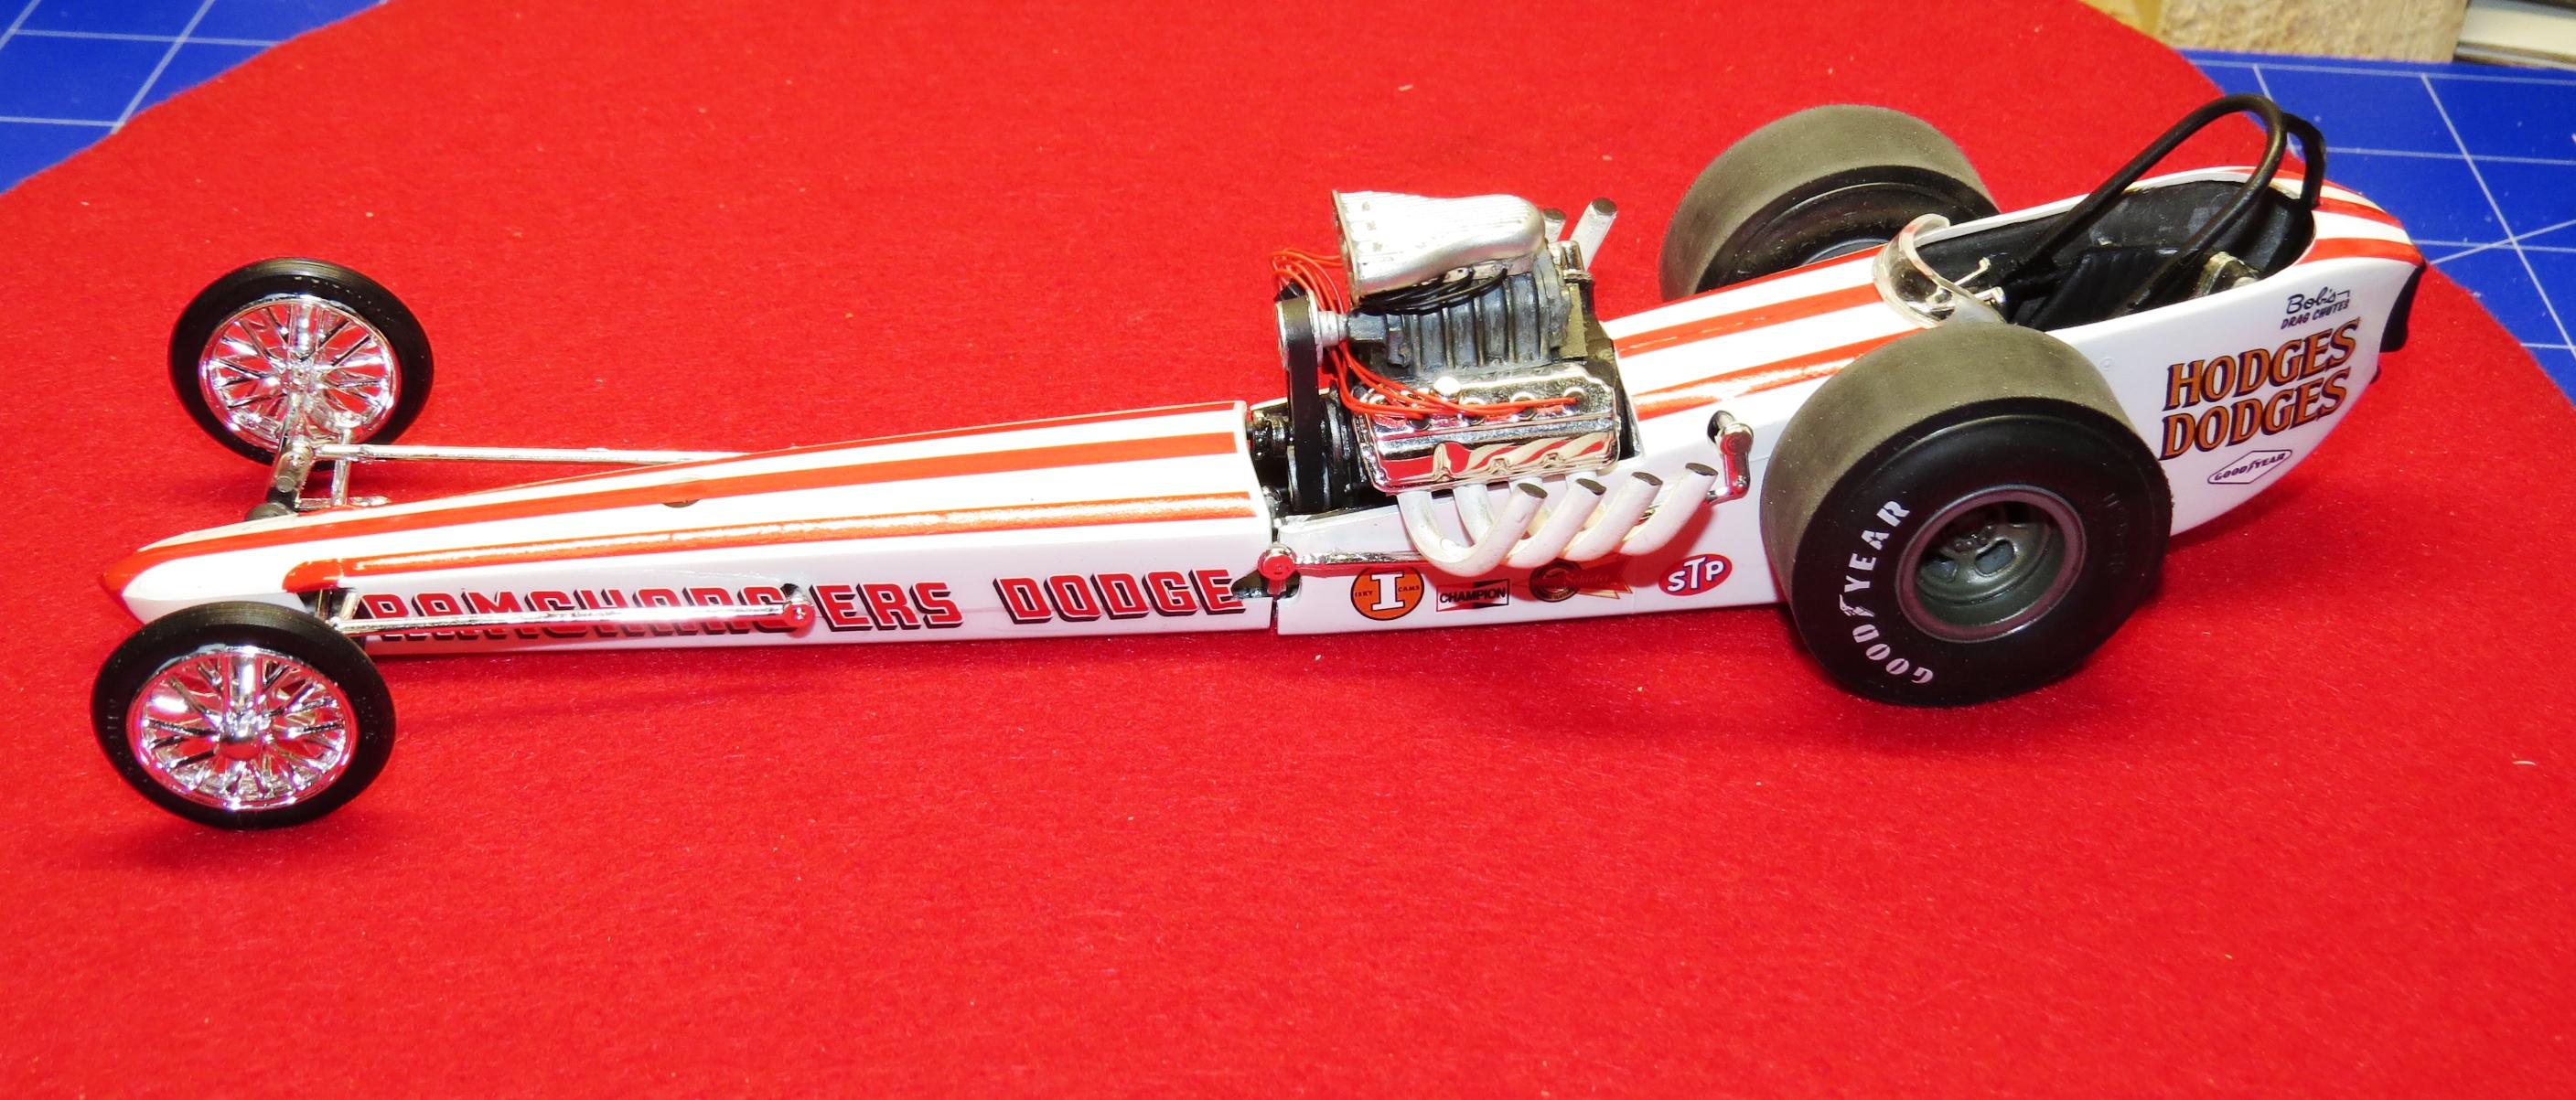
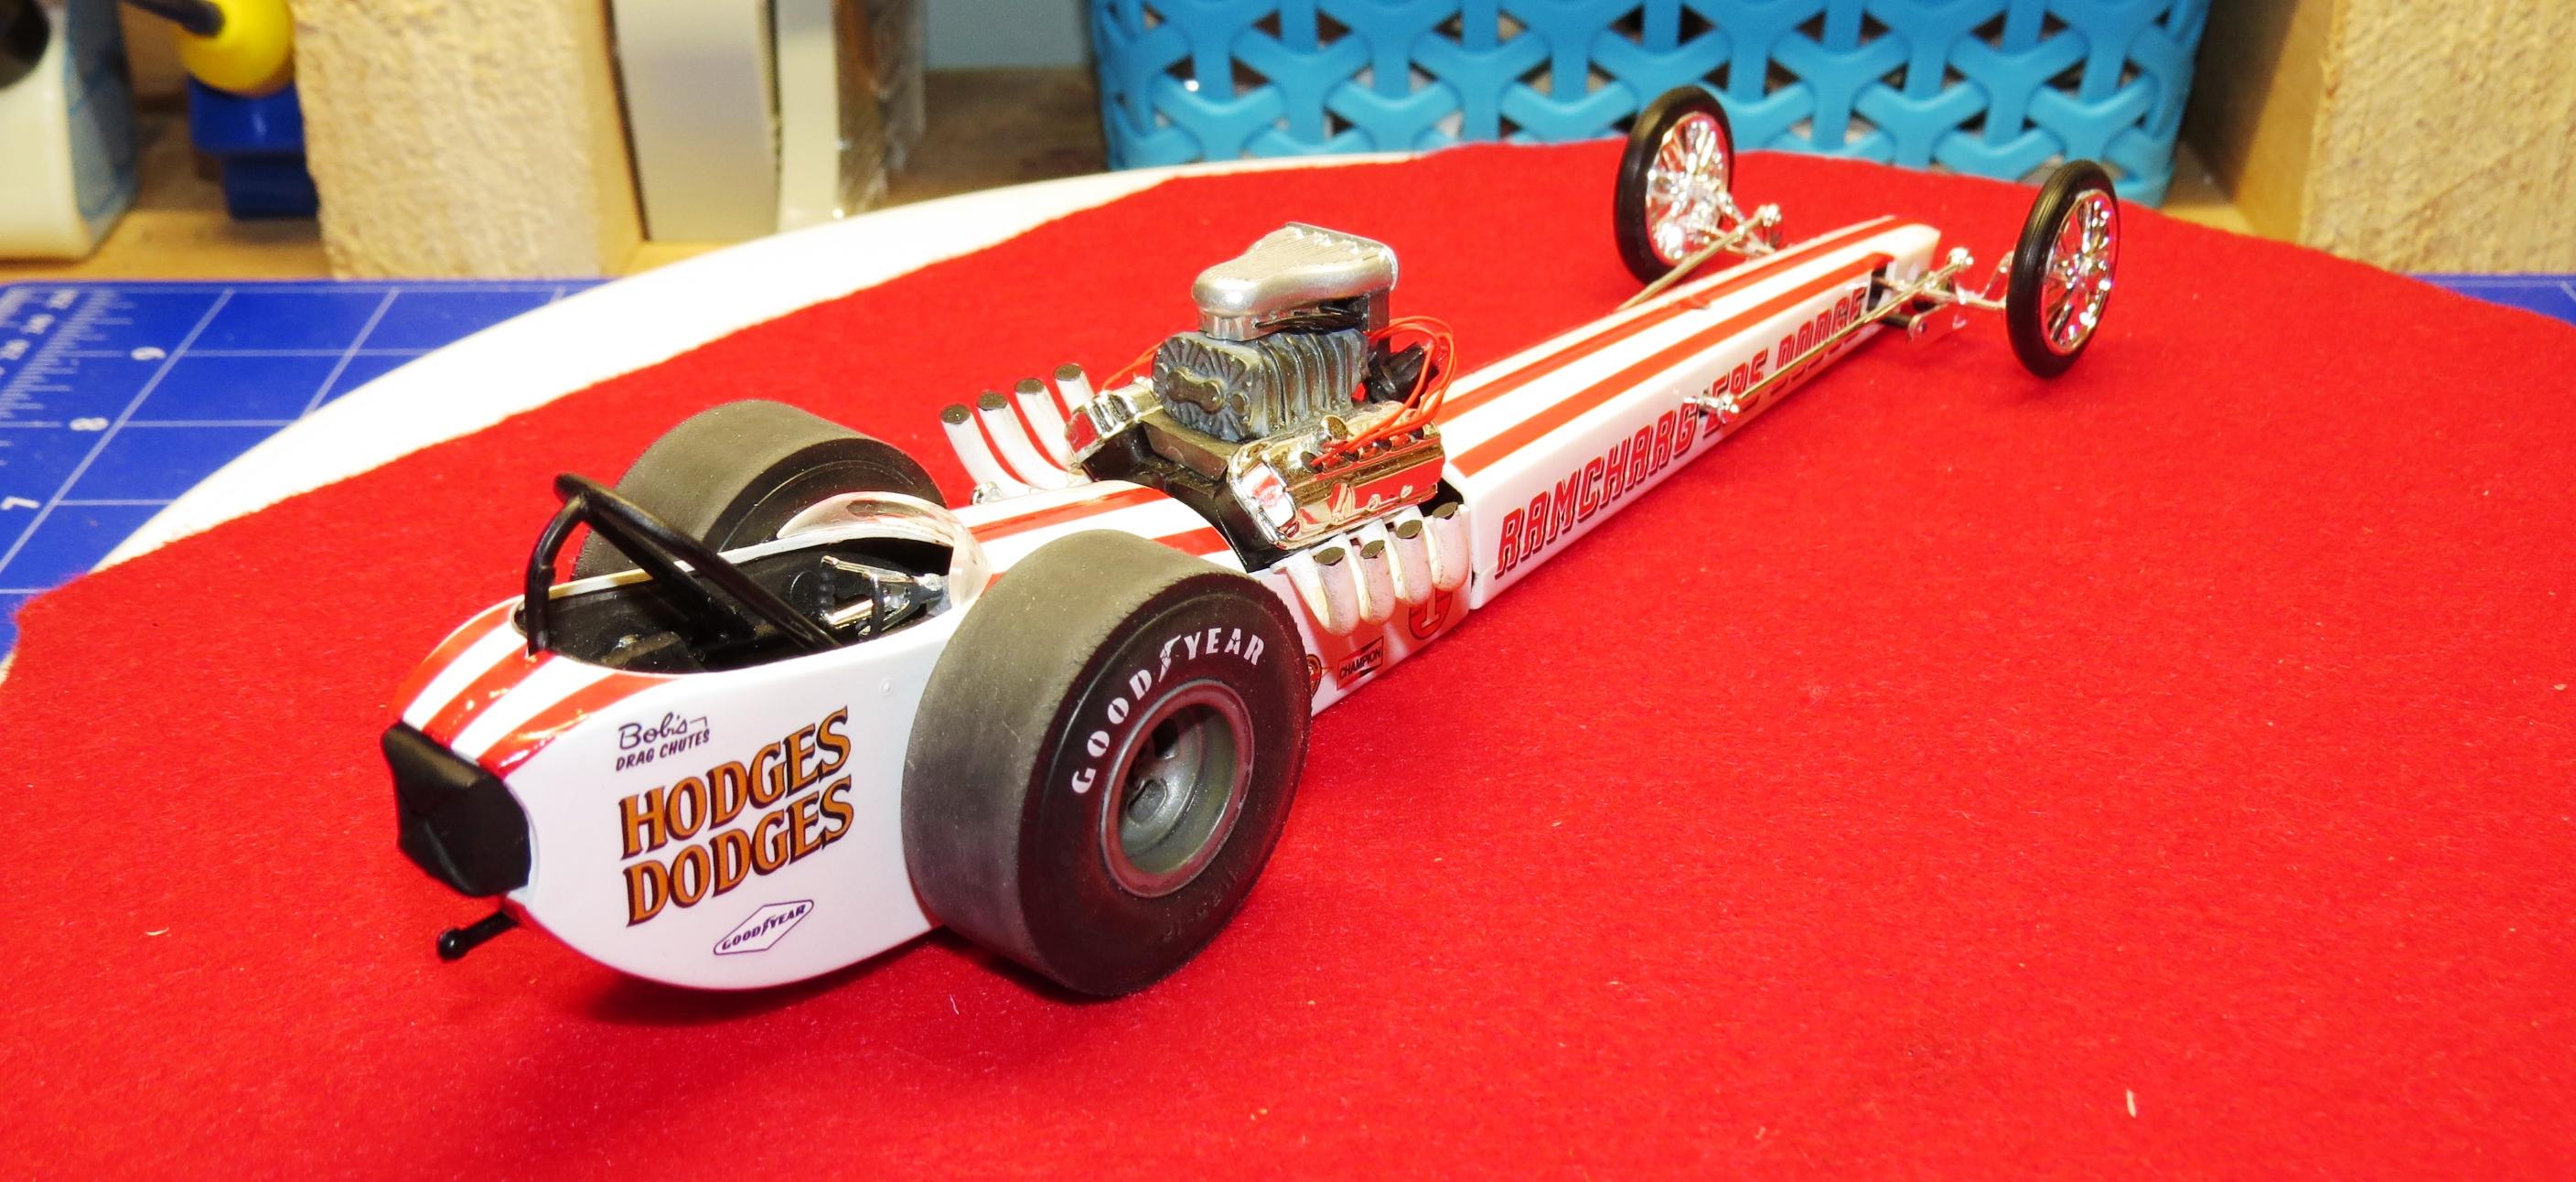
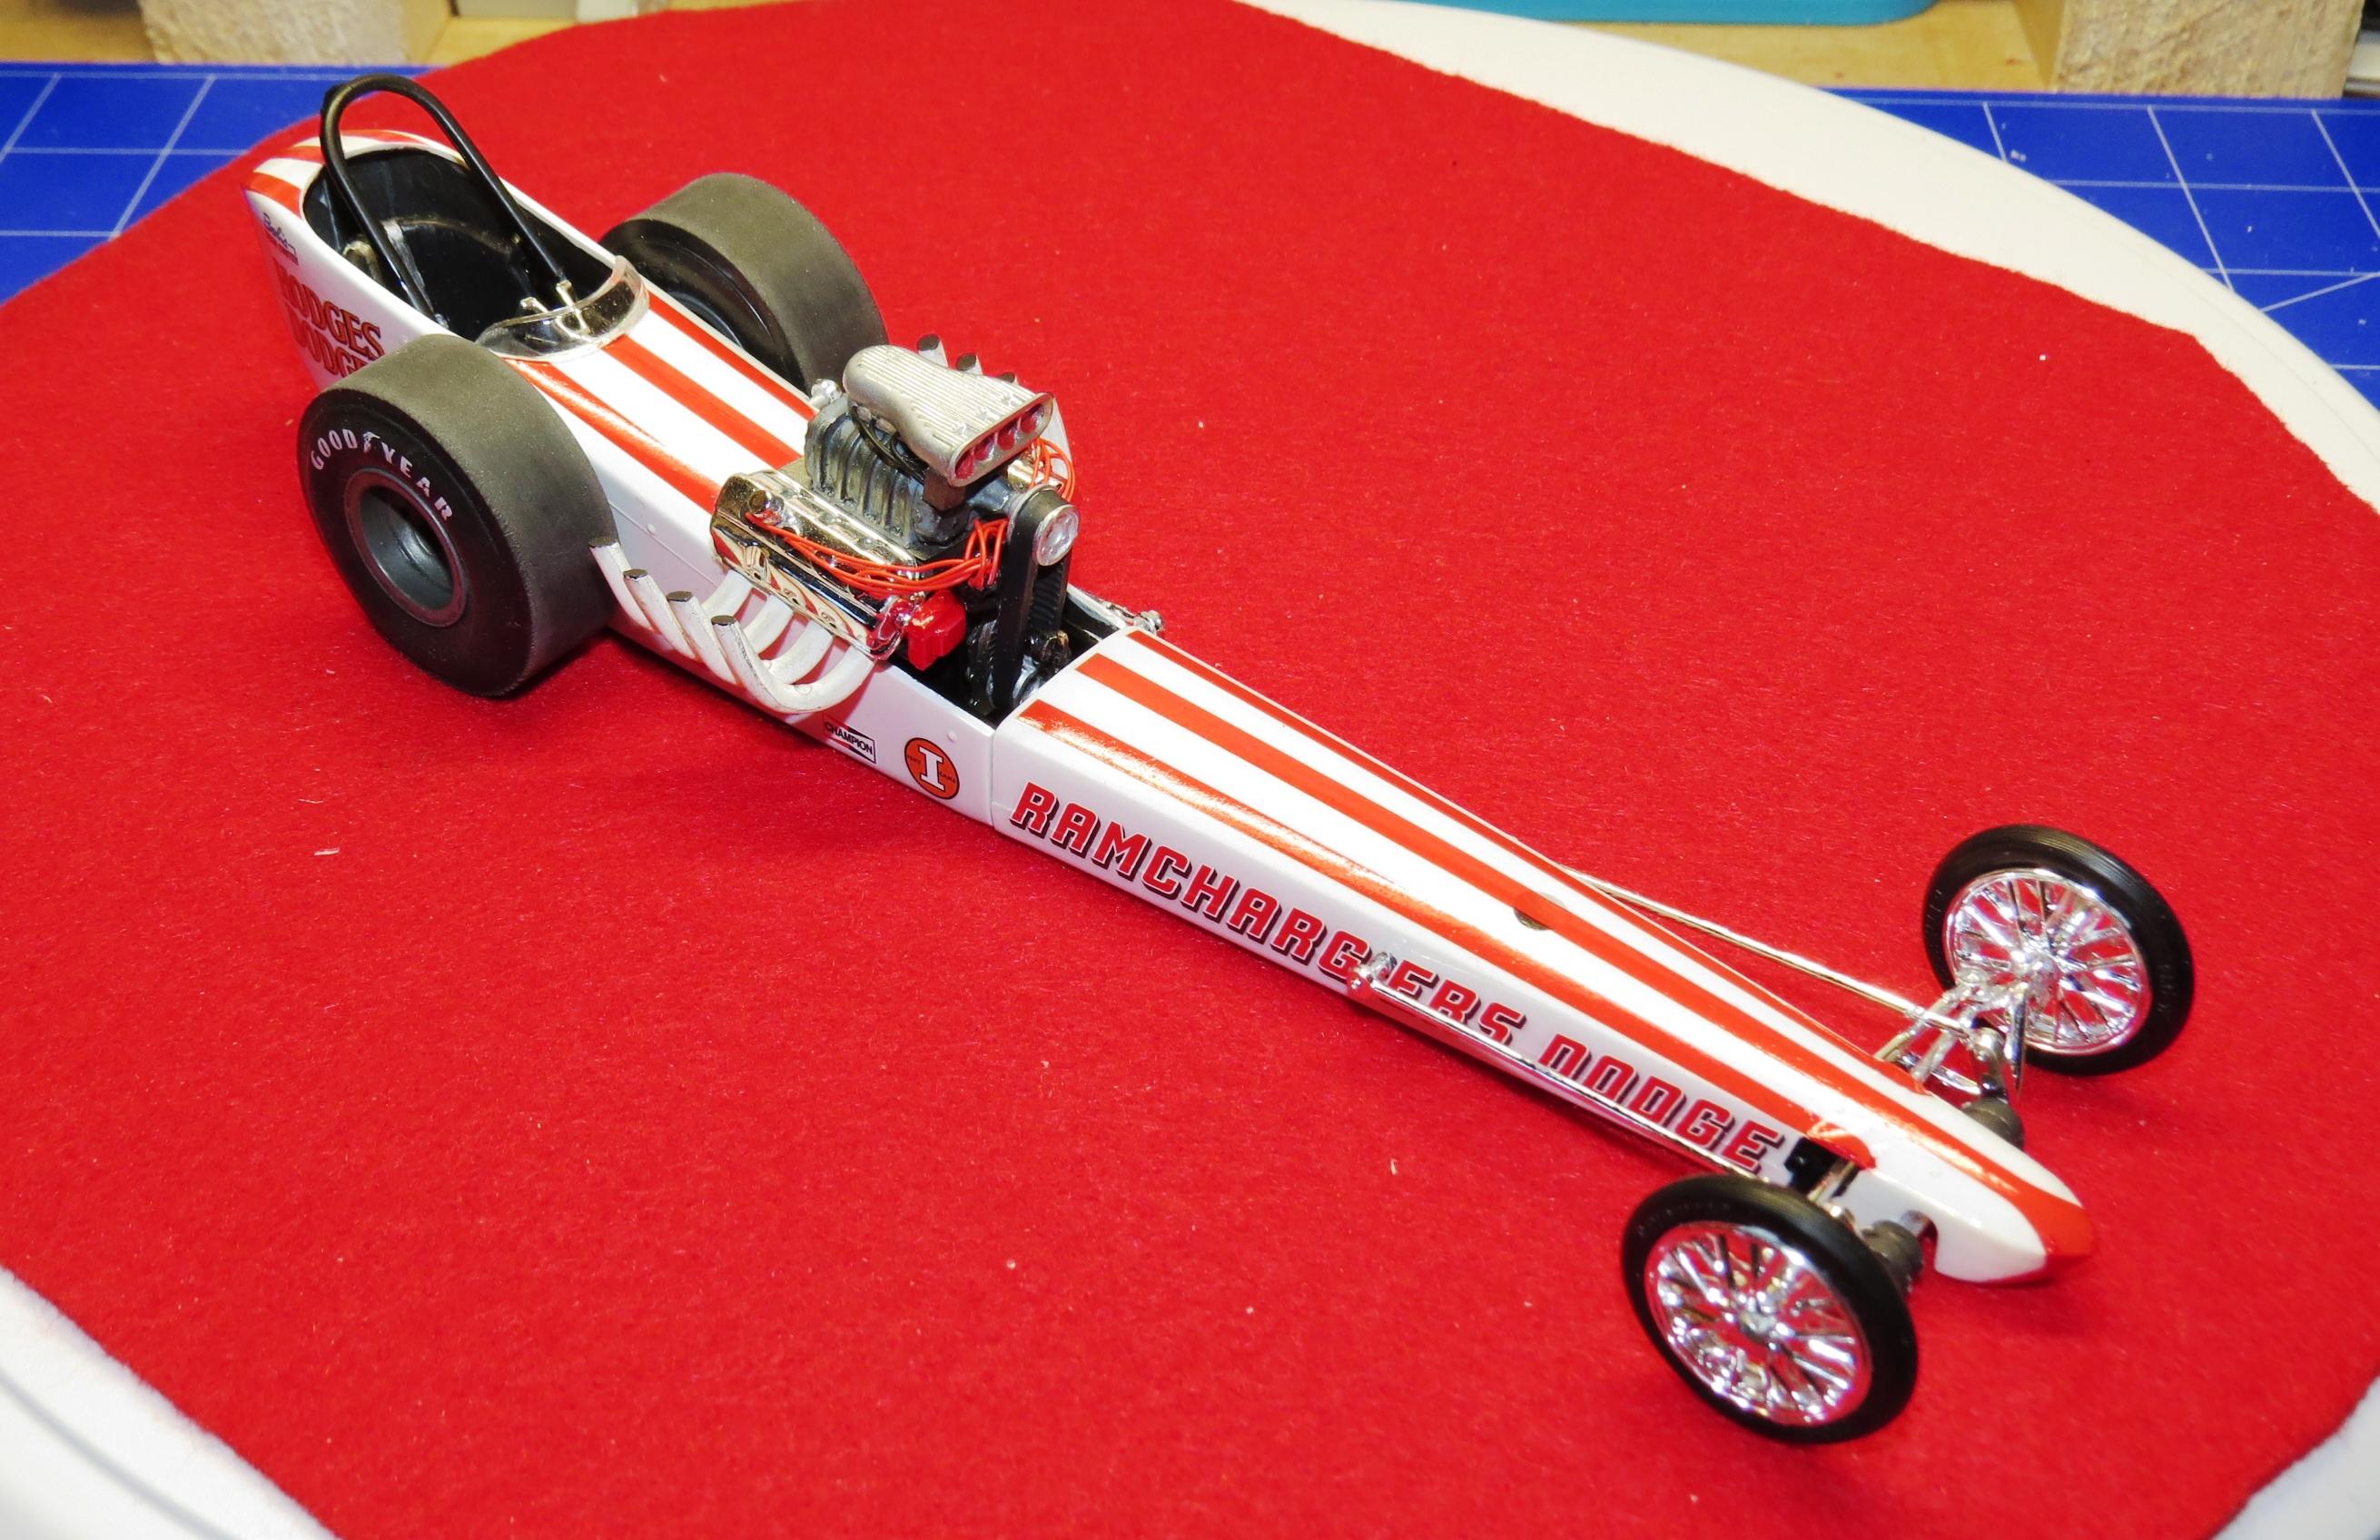
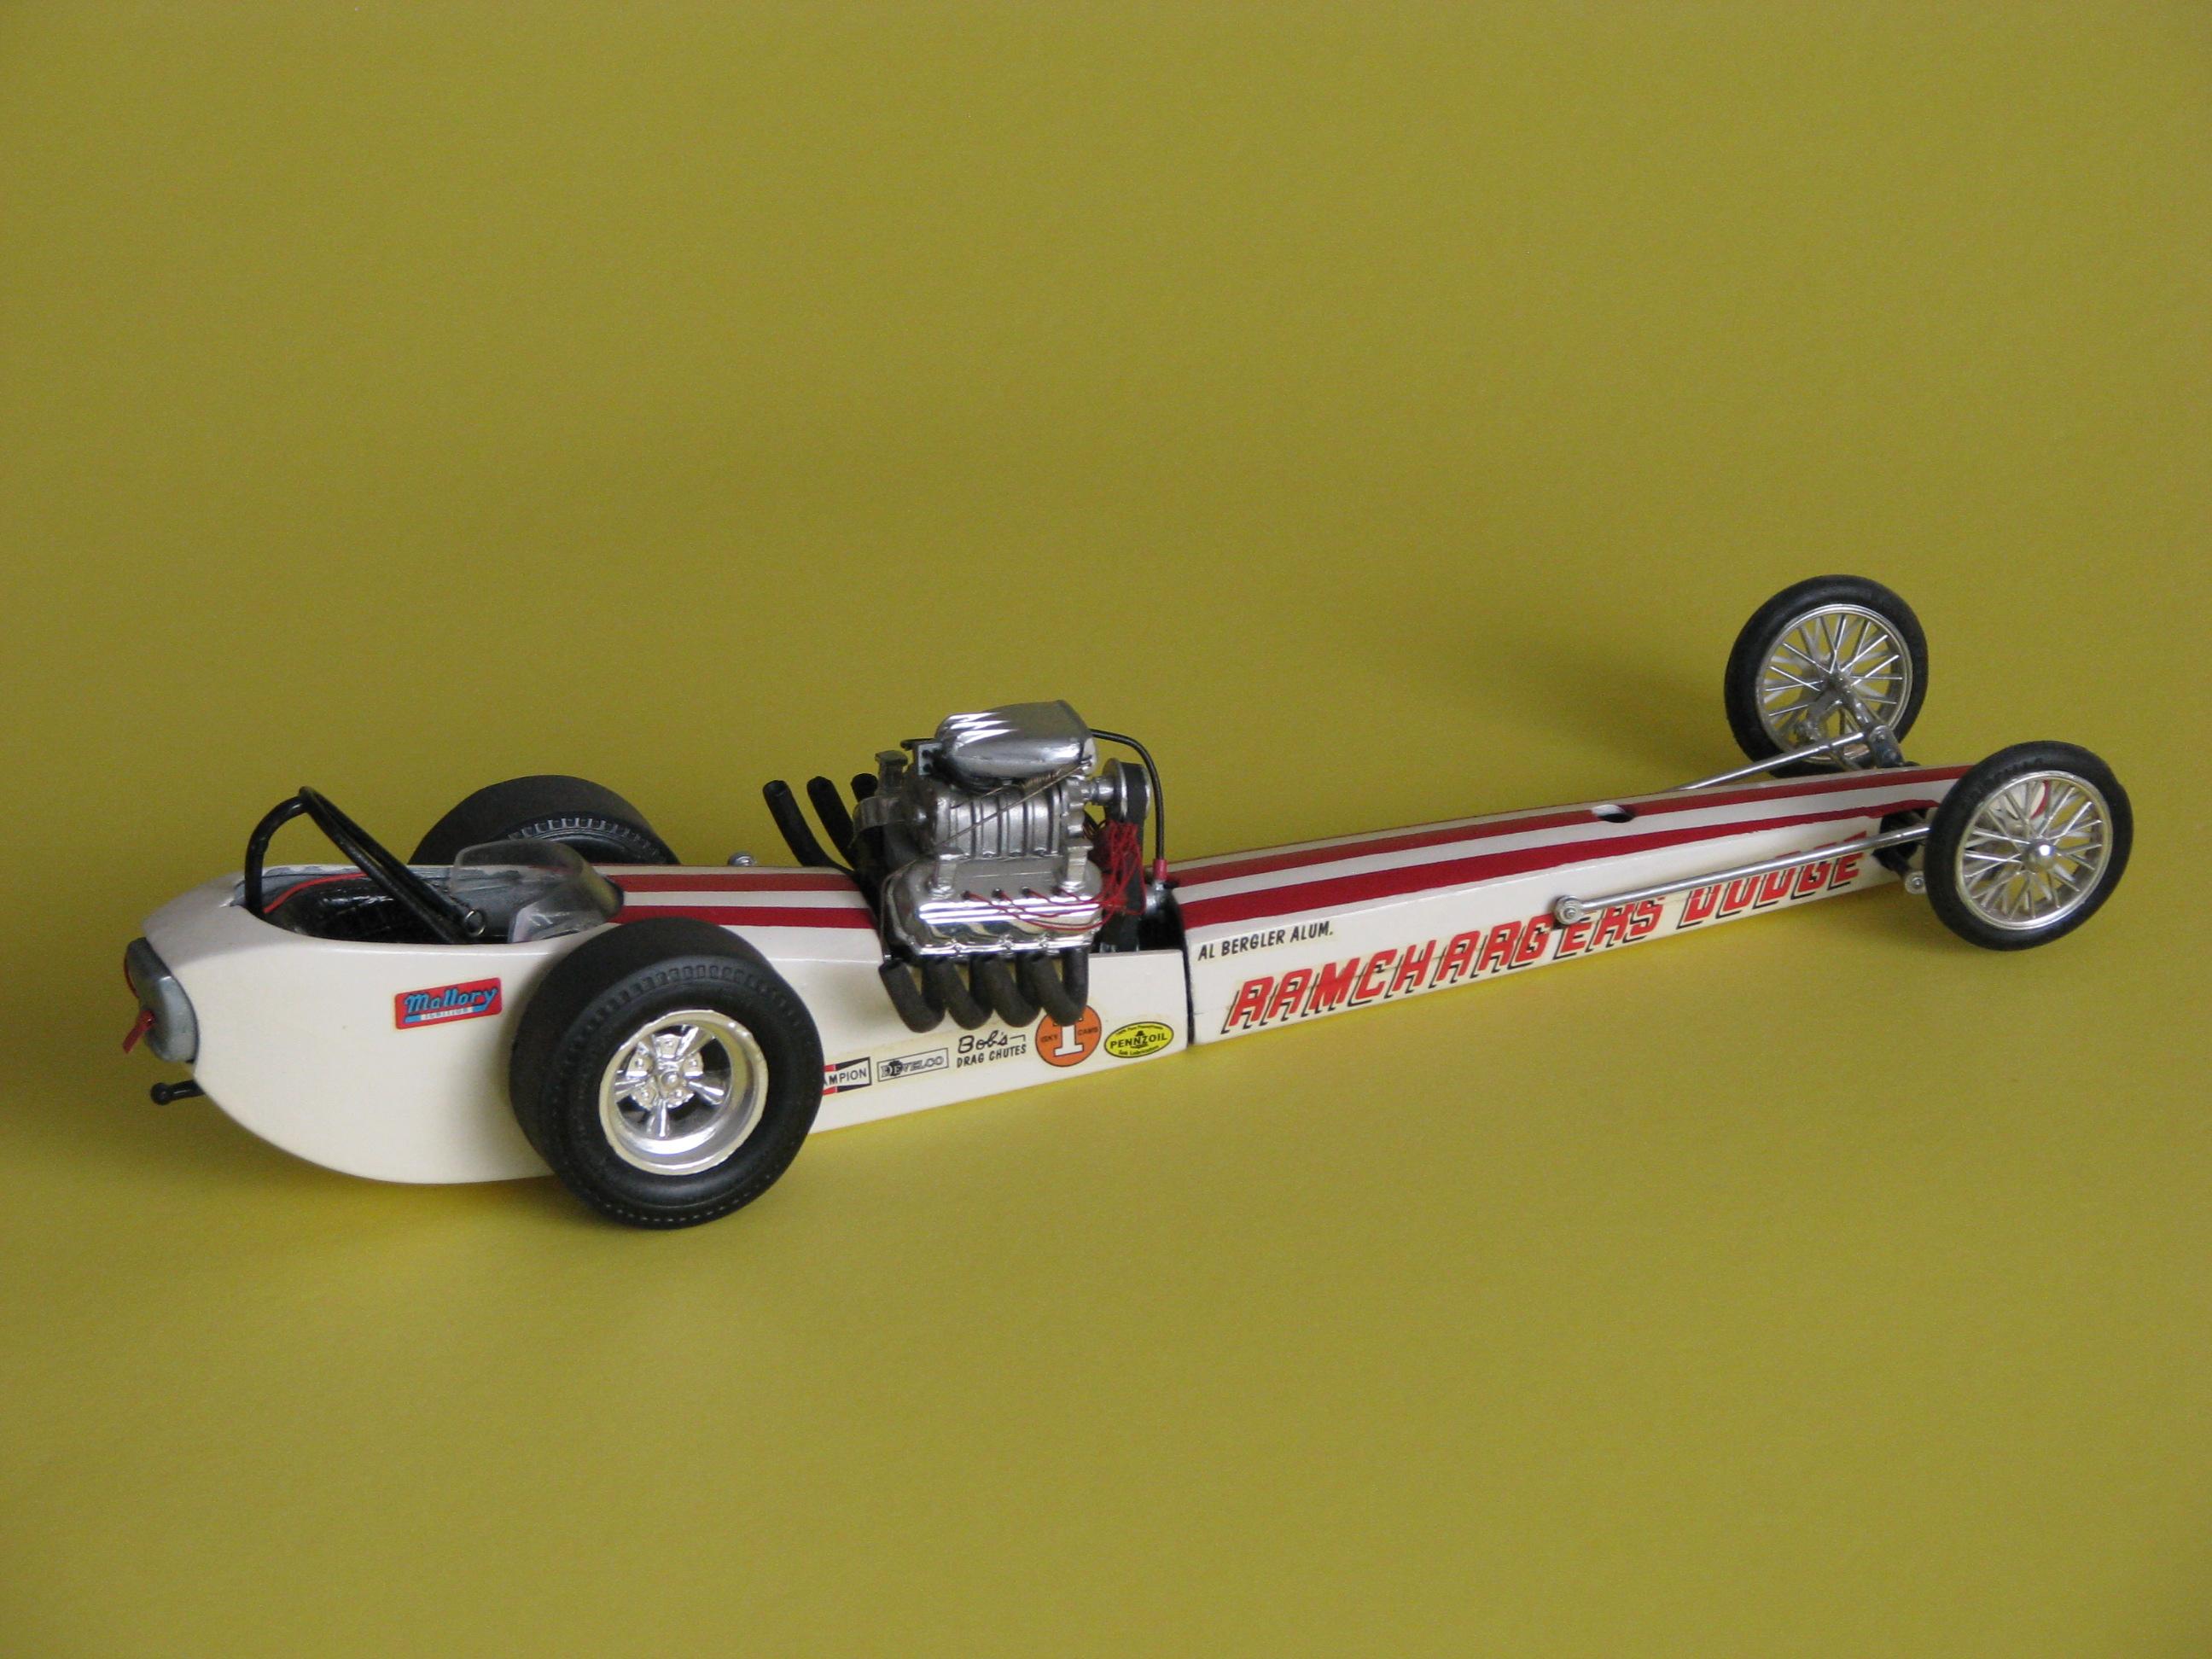
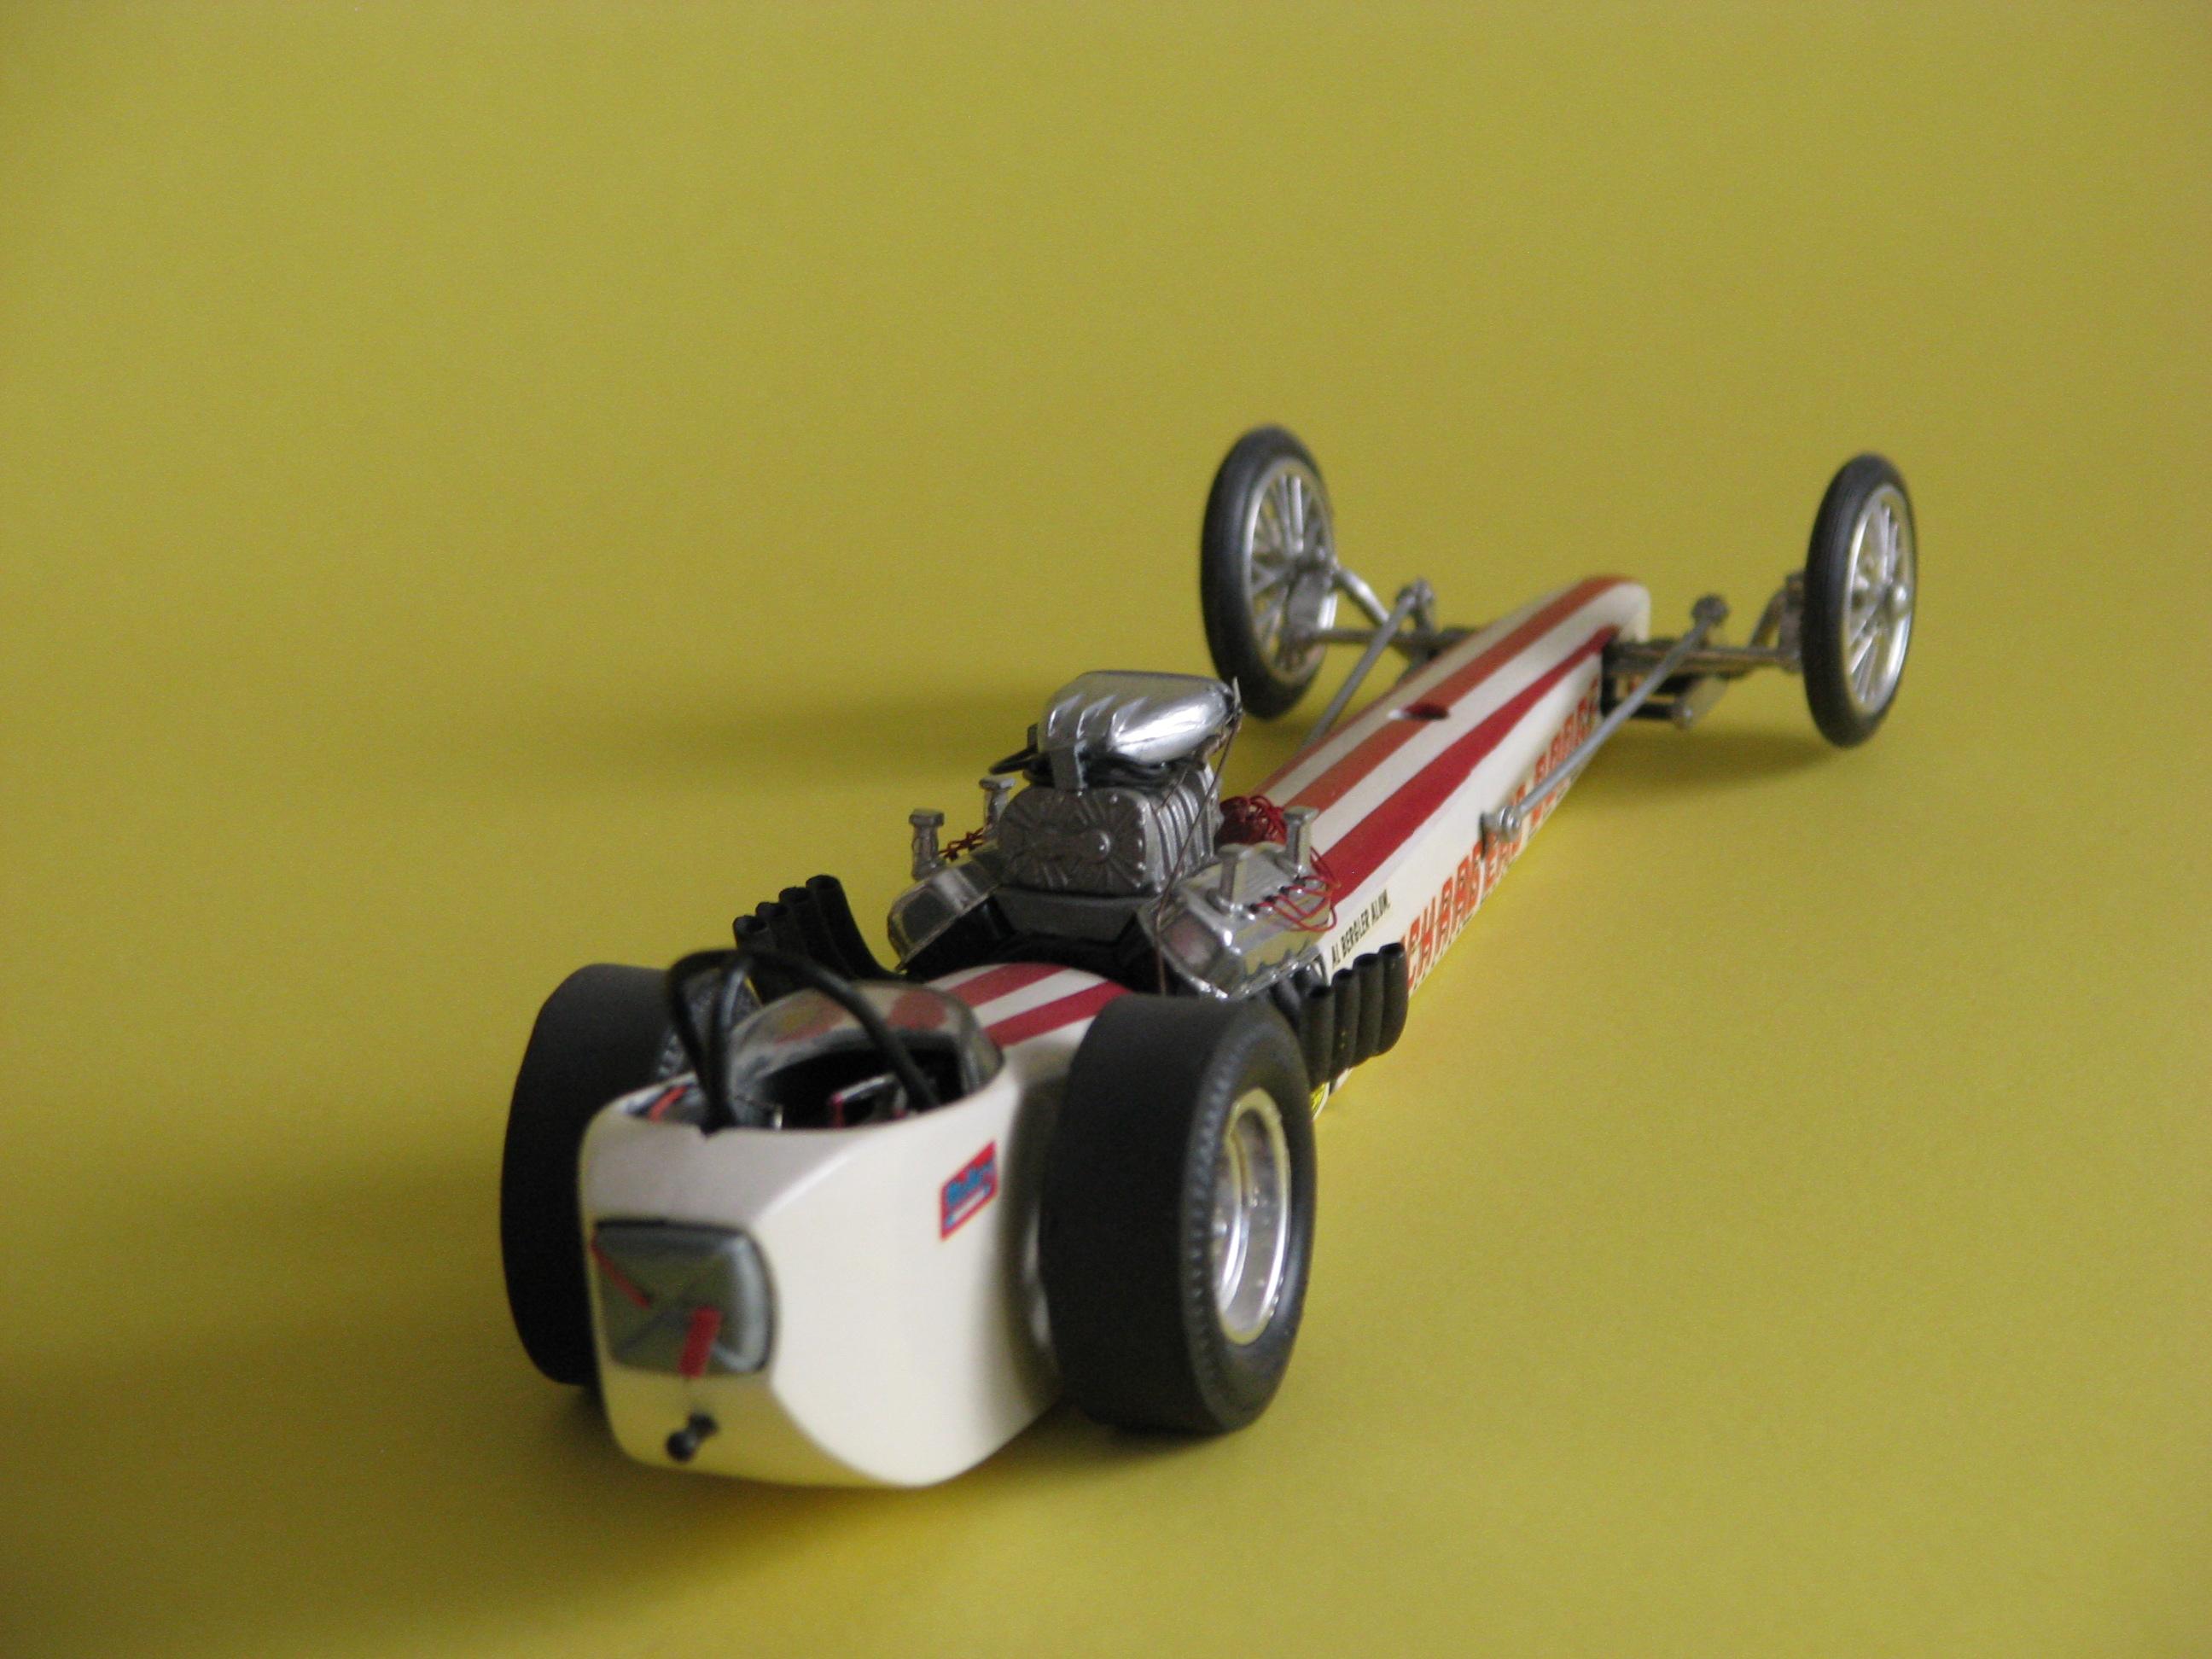
With the release of the Ramchargers which included an expanded decal sheet, I thought it would be a good opportunity to do a cleaner rebuild. I wanted the build to be closer to the 1965 version of the car as that is closer to the wheelbase of the kit. So I got rid of the old glue-bomb version and started this Ramchargers project. All was going well until I realized that the rear body panels were wrong. Even Round 2 was unaware that they had packed the John Milner tail section in this kit rather than the original rear section. By the time I noticed the problem the body had been glued to the chassis so it required some delicate de-gluing to remove the wrong panels and replace them with the original I had in another version of the kit. The motor consists of a few resin parts, nothing dramatic, a bit of fundamental wiring nothing overly fancy. I actually got tired of problem solving and chose not to add fuel lines. Finally all the chrome was touched up with my Molotow pen and some weathering was added to the headers. So there we go. The Ramchargers now takes its place in my “History of Dragsters” display…see last photo.
-
Ramchargers Dragster Reissue - Wrong Body
jlucky replied to jlucky's topic in WIP: Drag Racing Models
FINAL UPDATE! Got an email from Round 2 regarding this issue and while they were unable to provide an answer as to WHY the bodies were switched for this most recent reissue, I was told they would ensure going back to the original body in any future reissue. That's something I guess. -
Ramchargers Dragster Reissue - Wrong Body
jlucky replied to jlucky's topic in WIP: Drag Racing Models
By way of update...I contacted Round 2 yesterday and explained the situation. They seemed unaware of the change or the different body styles and asked for some photos. I'll let you know what they say. Cheers -
Ramchargers Dragster Reissue - Wrong Body
jlucky replied to jlucky's topic in WIP: Drag Racing Models
I appreciate the offer...I actually have two of the older kits in the collection...I just need to decide if I want to build a whole new proper body/chassis assembly or to try and remove the rear body panels that I've already glued together without wrecking the chassis. Delicate work. -
Ramchargers Dragster Reissue - Wrong Body
jlucky replied to jlucky's topic in WIP: Drag Racing Models
Hey guys...thanks for your observations and comments. YES it does appear that when they took out the molds for the reissue they used the American Graffiti kit. Strange since I'm sure they have the original sitting somewhere...it was last reissued in 1998...I guess someone at the plant wasn't looking closely to notice the difference. Now I have to decide what to do...take the build apart and use the original body from the older kit or leave it the way that it is and be inaccurate? Hey, as for those Moroso head covers...boy I wish I could help you out...they were just sitting in my parts box for years and I have no idea where they came from...sorry. -
Ramchargers Dragster Reissue - Wrong Body
jlucky replied to jlucky's topic in WIP: Drag Racing Models
I can't see the old short version but the reissued kit has that same Milner styled tail section when it should have the original stubby version. I've uploaded some photos of my original Ramchargers car with the "proper" body as opposed to the revised Milner body that's in the new reissue.
-
Not sure if this is the right category...but this is my current WIP. I recently purchased the newly reissued Ramchargers Dragster to replace my old glue-bomb version and also because this new kit has the expanded decals. So I'm getting to the final stages of assembly and decals and lo-and-behold I discover the body is wrong. I dug out one of the older Ramcharger kits and sure enough they seem to have replaced the dragsters original rear body section with something that looks more like the John Milner dragster kit body. I can't be the only one to notice this? What happened? why did they do this?
-
Hey guys....thanks for all the kind feedback...it's always encouraging. Perry asks the question about the "gold flake in the name" - actually I can't take any credit on that score. I simply located a useable logo from some photos I had...manipulated it proportionally and then printed it. It came out just that way. I was lucky because it does hold a bit of the gold flake colour. Thanks for noticing. Stay tuned, more dragster are on the way.
-
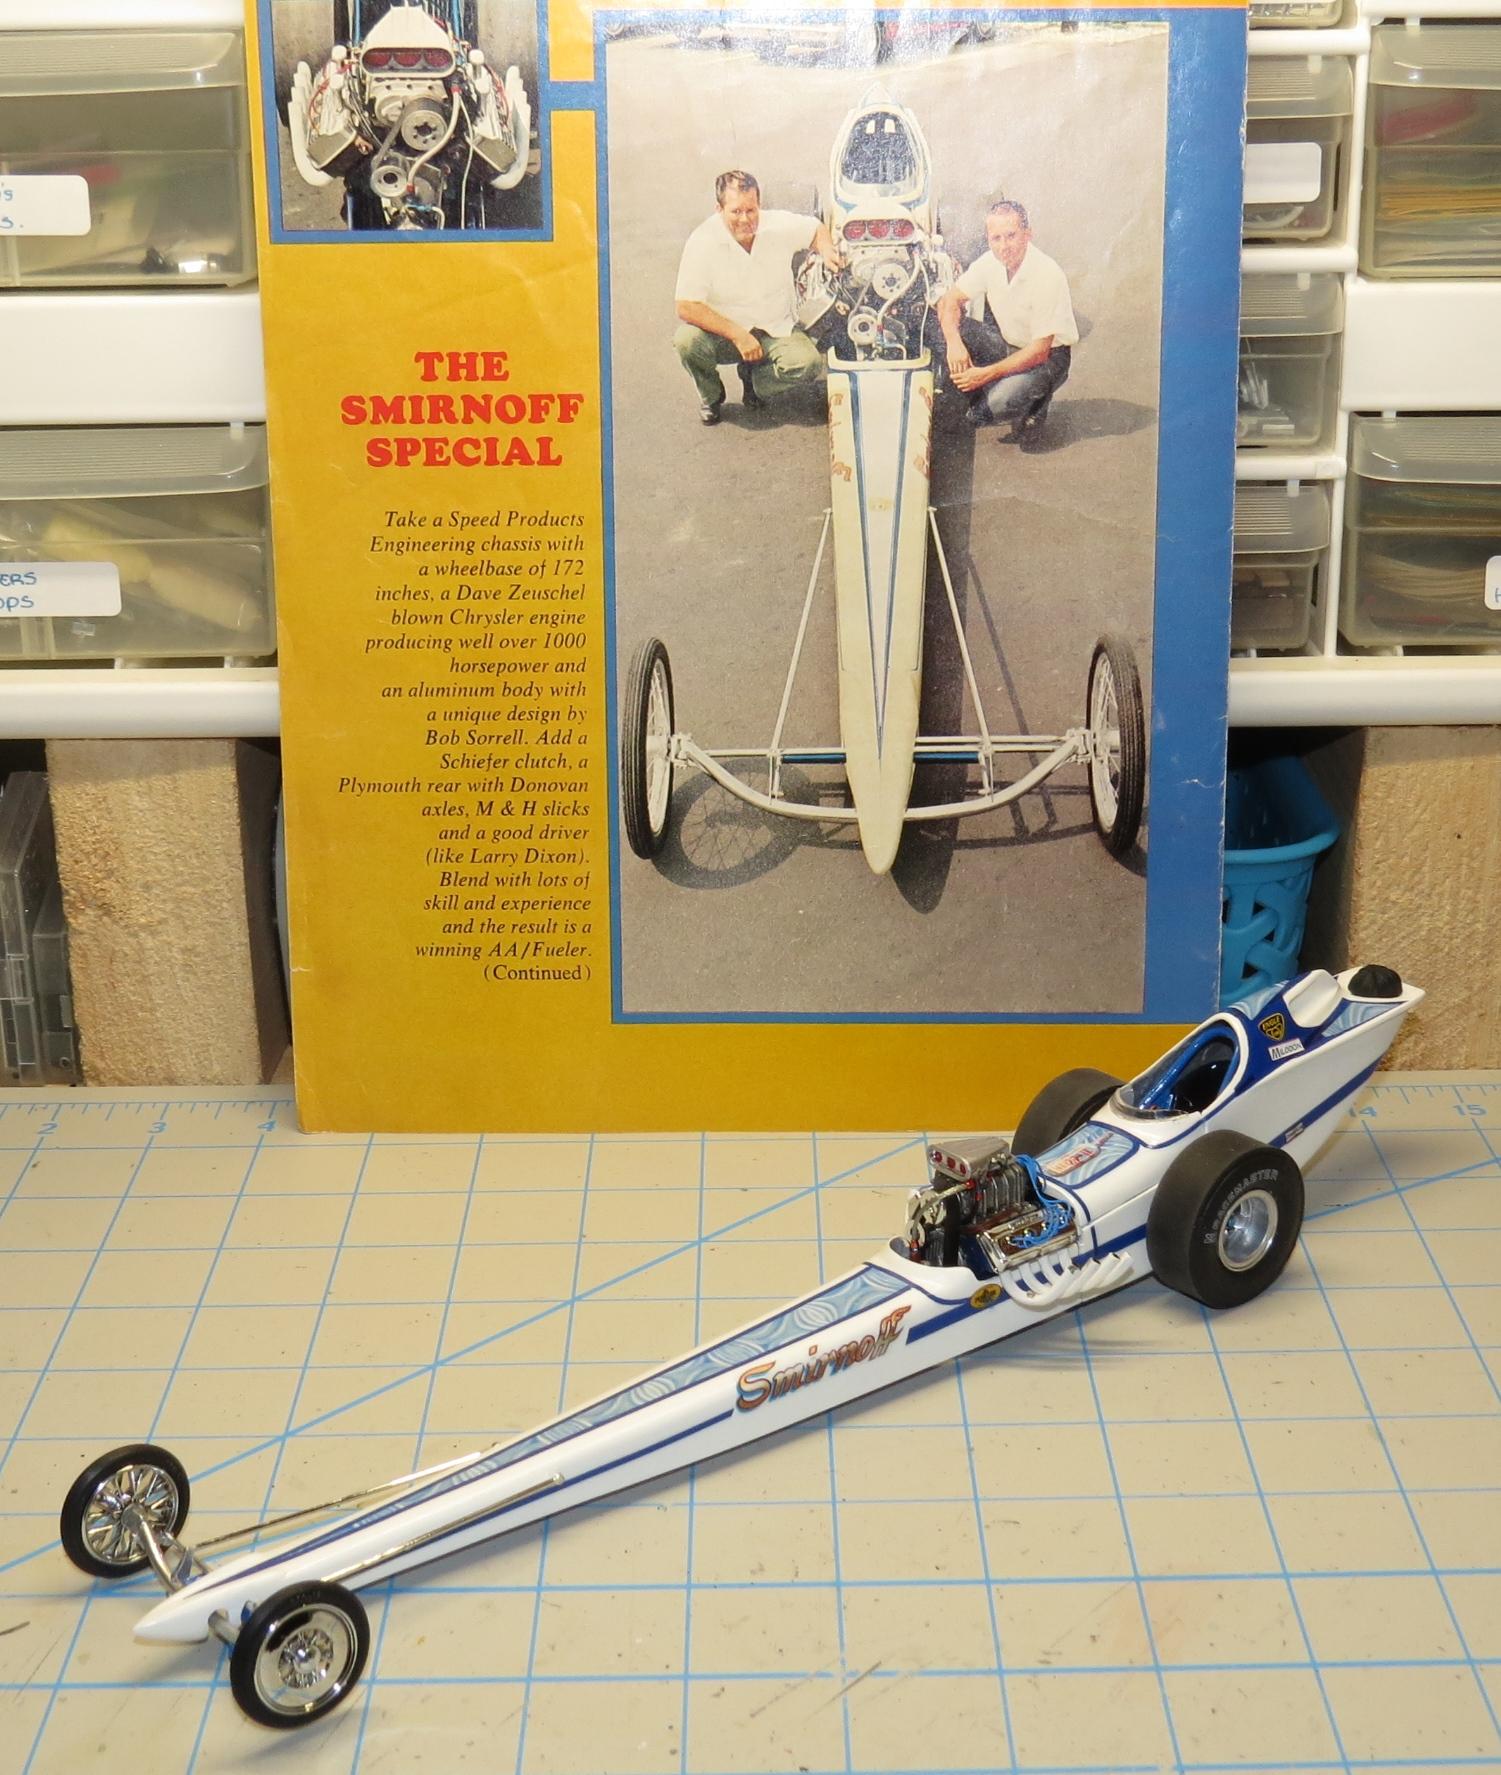
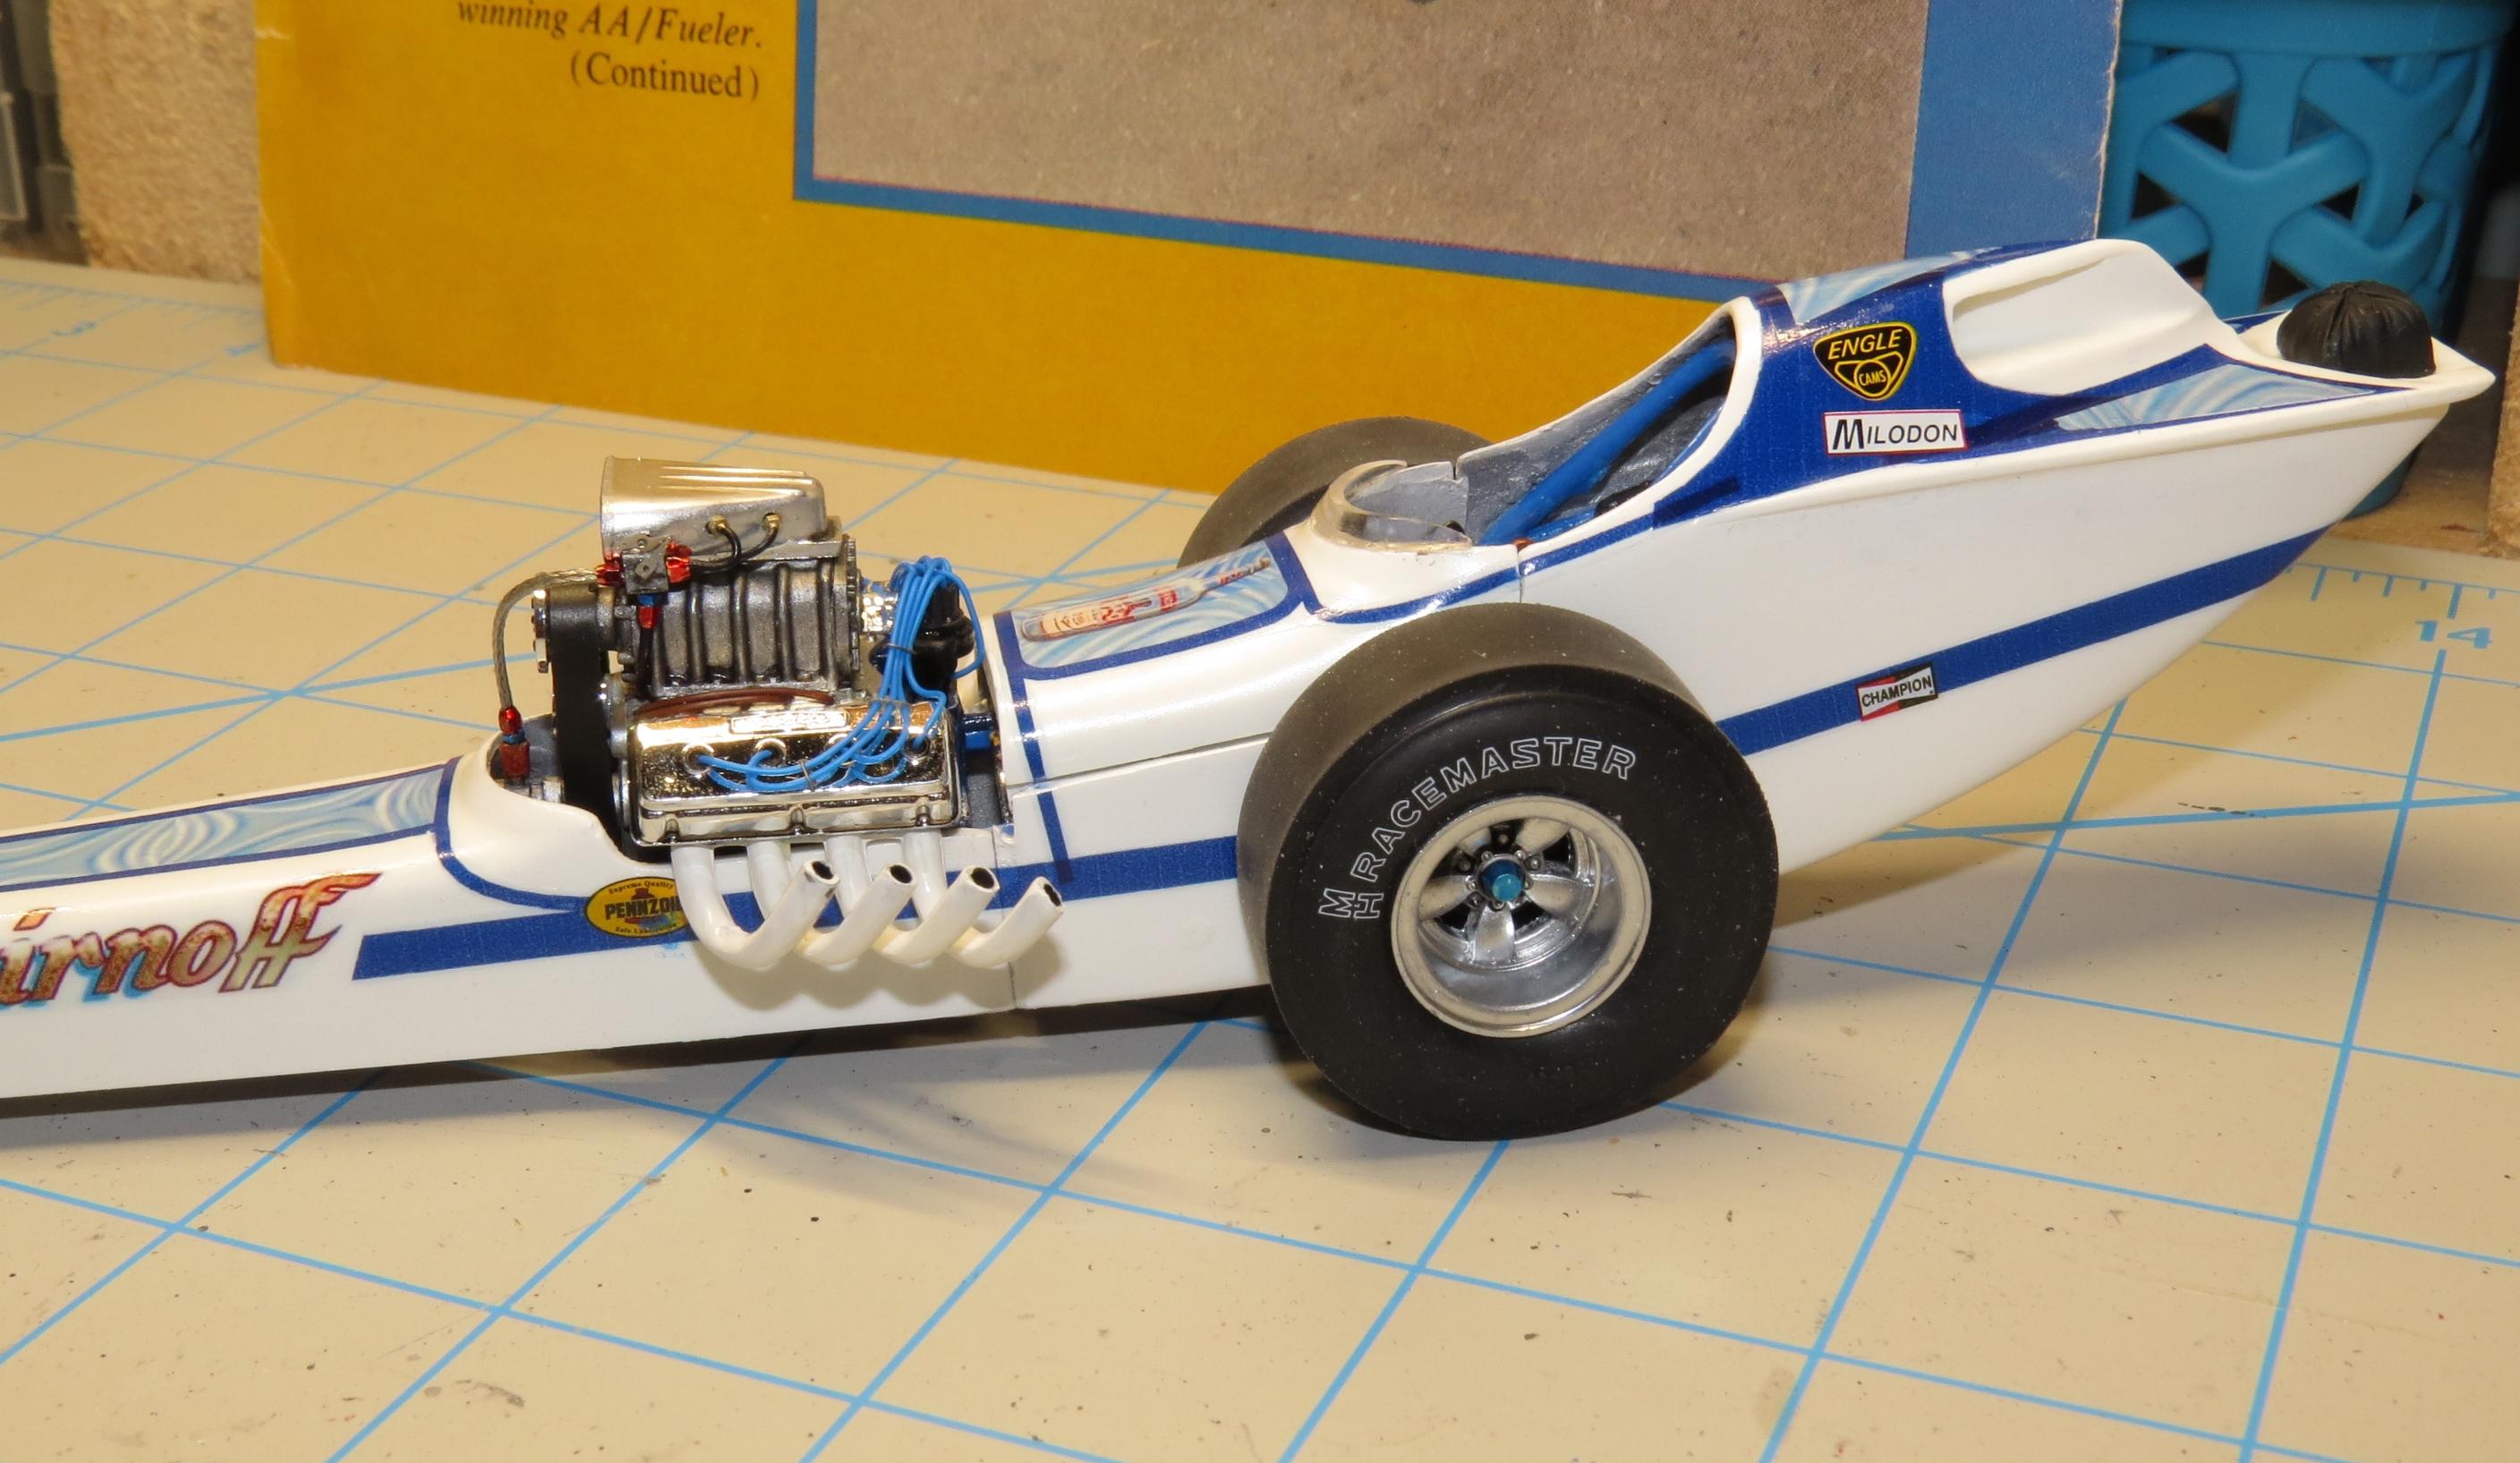
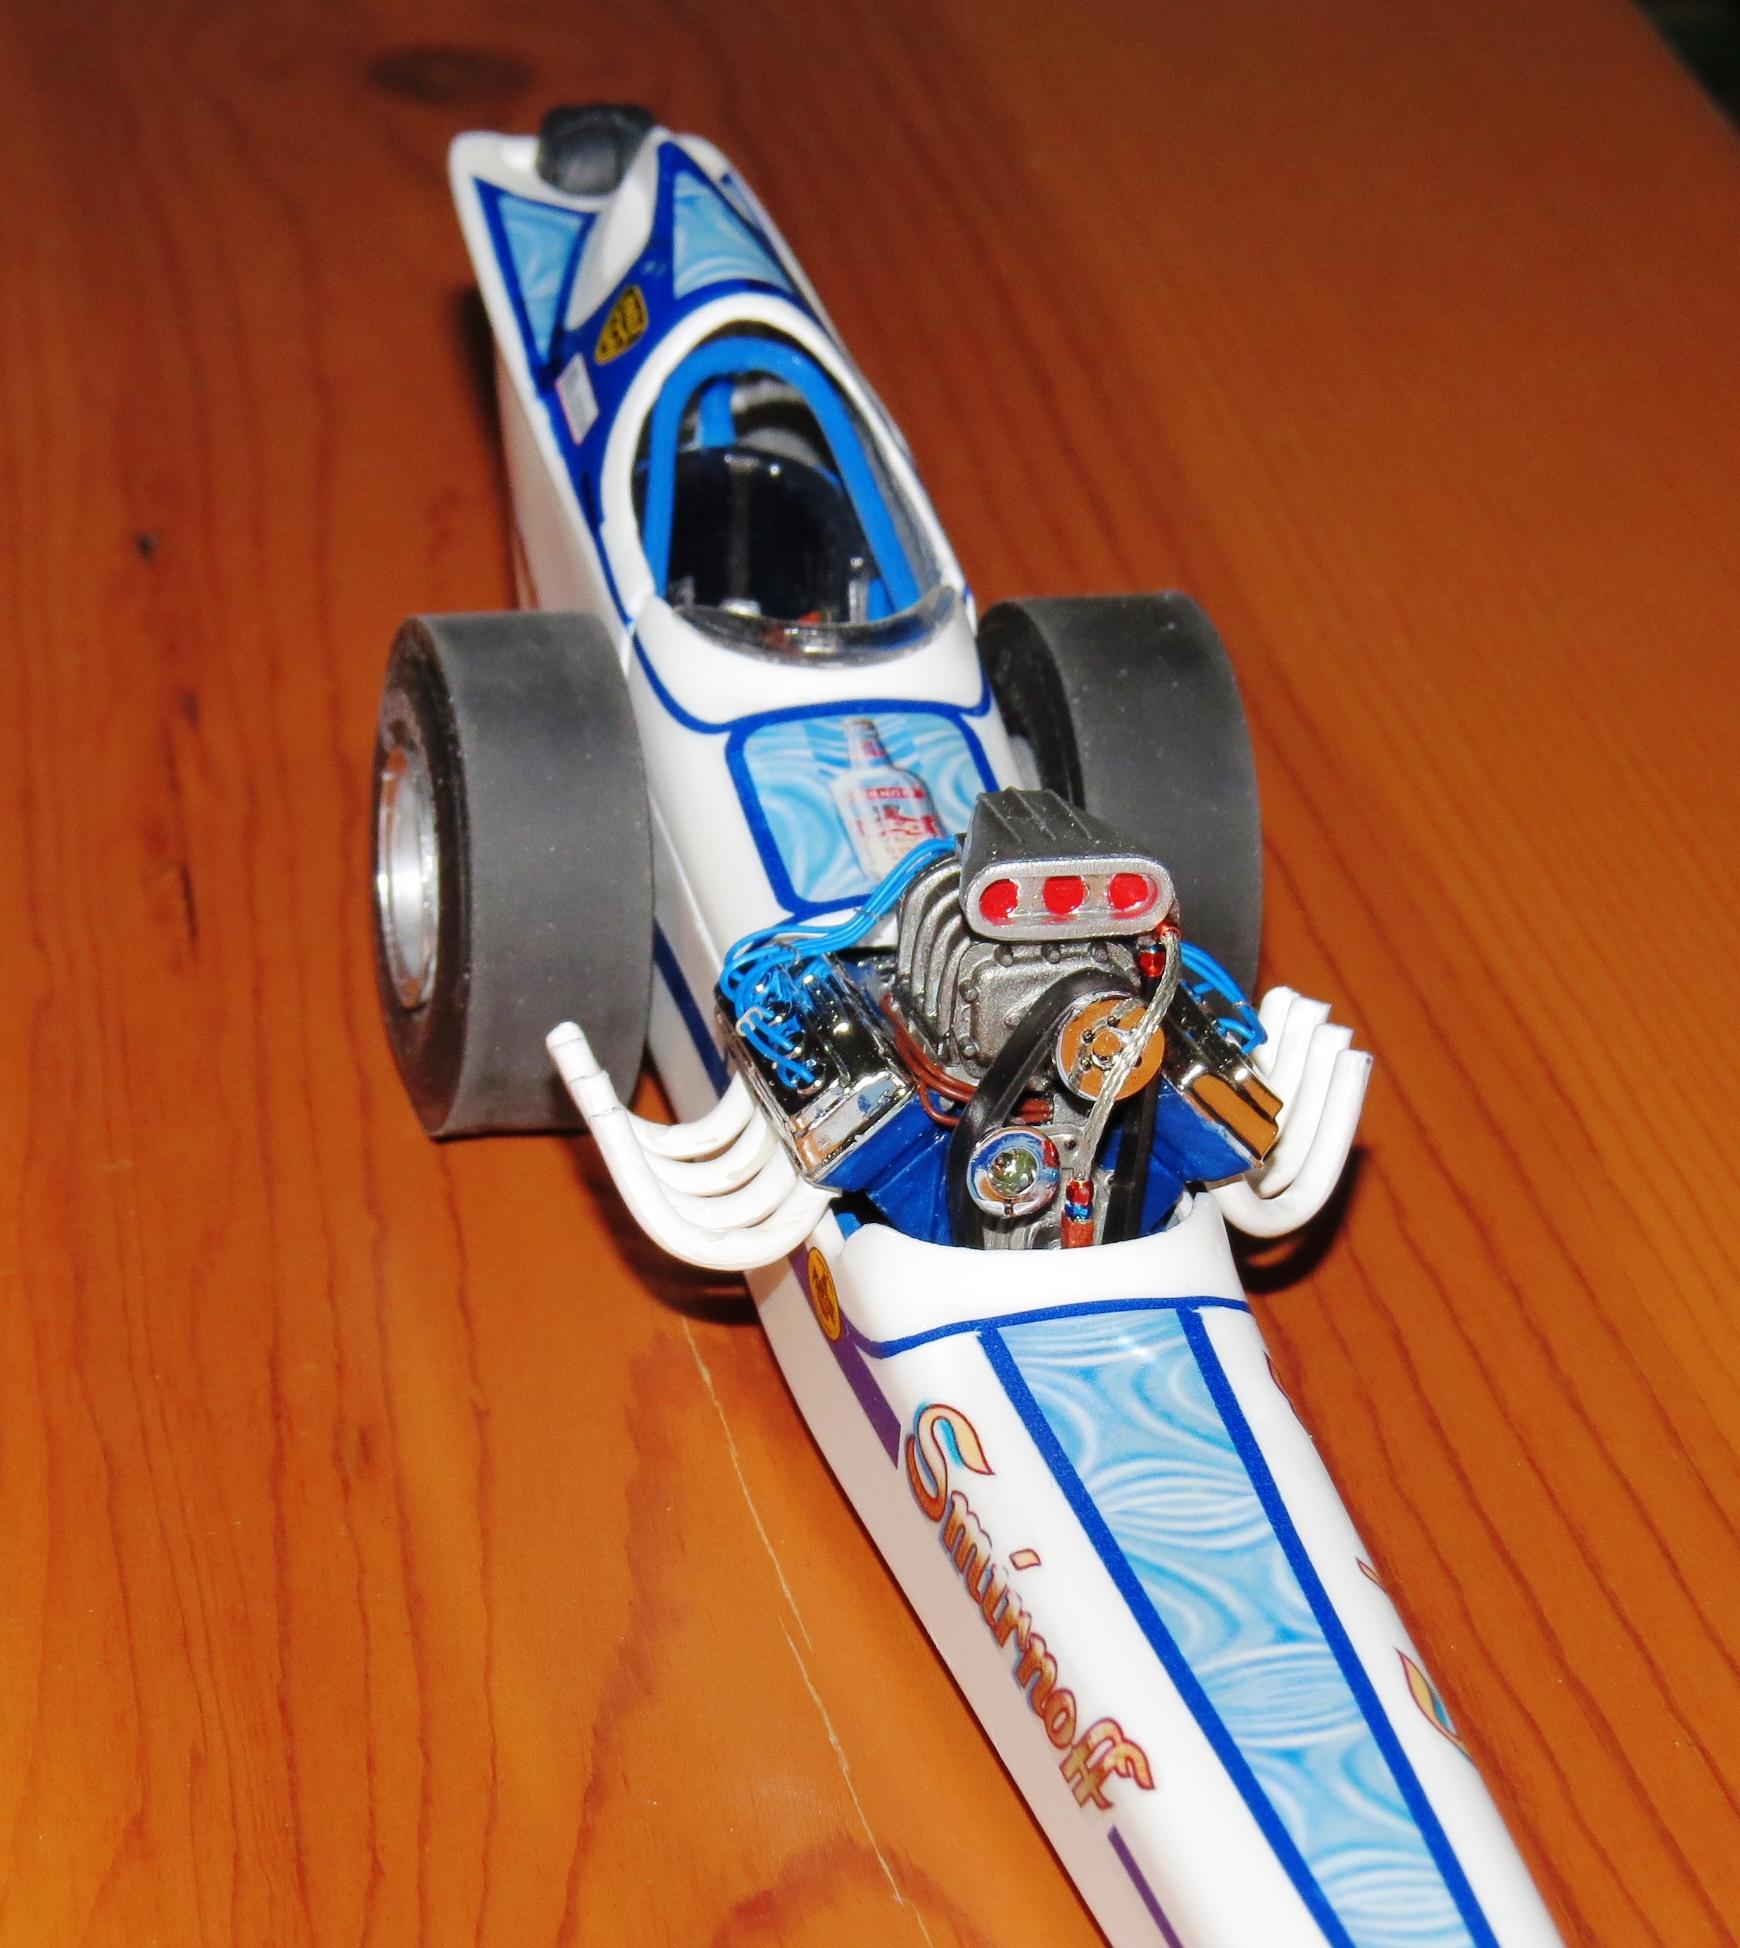
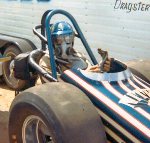
Smirnoff Dragster – 1967 Driven by Larry Dixon Sr. This was a “holy grail” build for me. I was familiar with this car from various magazines of the era and had even photographed the beautifully restored version back in 2013 at the California Hot Rod Reunion. It’s one of the most beautiful dragsters of the sixties. Years ago I had ordered the resin body but no one had made the decals. I decided to throw caution to the wind and make my own decals. This would be a first, but I wasn’t getting any younger. Initial Assembly: The resin dragster body was from Altered States and done very well with little flanges for joining the body together ensuring minimal gaps. The tail section was one-piece which meant the rear axle had to be completely refigured into the chassis and then into the body section with extensions to mount the wheels. I also had to create a new front axle assembly out of aluminum to more closely resemble that of the real car. The pre-painted chassis and pre-assembled interior were fitted into the resin body. In the meantime the motor was assembled and ignition wires, fuel lines and fittings attached. The kit’s original hemi was discarded and a period correct 392 Chrysler was used instead. Decal Creation: This was going to be a first. I had software that allowed for simple manipulation of images, creating patterns and drawing the blue stripes. Using images of the restoration I was able to secure the elements I needed including the Smirnoff logo, the blue/white swirl pattern and the little bottle for the cowl. Test pages were printed to get the sizing correct and then the “official” sheet was printed and covered by brush with Microscale decal film. Applying the decals went surprisingly well, other than having to struggle with limited decal movement. Once they went down they just didn’t want to move regardless of how much solution I used. It had to go on right the first time or else. The last hurdle was realizing that the color white is not printed. So when I went to apply the light blue swirl pattern on the tails dark blue sections – they just disappeared. In the end I had to lay down a white decal in the right spot and shape and then reapply the light blue swirl pattern for the tail. All in all, I’m reasonably “happy” with the look even though there’s PLENTY of room for improvement. Final Assembly: Once the decals were set and the rest of the body was together, I proceeded to install the motor, let that dry overnight and then mounted the tires. Voila! The Smirnoff Dragster is complete.
-
Hey Guys...thanks! I did see those photos but didn't look closely. And you are correct...they ran the car without a bumper. I may build it just like that. Again thanks for everyone's contribution.
-
Greetings, I've started building the Beebe Bros. Dodge Fever Challenger. I'm using the Johann Challenger kit and today I was working on the body and realized the kit I have doesn't have the front chrome bumper! Help. Anyone out there have a chrome front bumper the this build they can spare. Let me know.
-
Hey Ian...Great work on replicating those funny cars. I was one of the announcers at the Saskatoon International Raceway drag strip and these cars made a number of visits there. Your nicely detailed and period correct work brings back many memories.
-
Sweet build! Love those photo-etched front wheels.