1tim1
-
Posts
113 -
Joined
-
Last visited
Content Type
Profiles
Forums
Events
Gallery
Everything posted by 1tim1
-
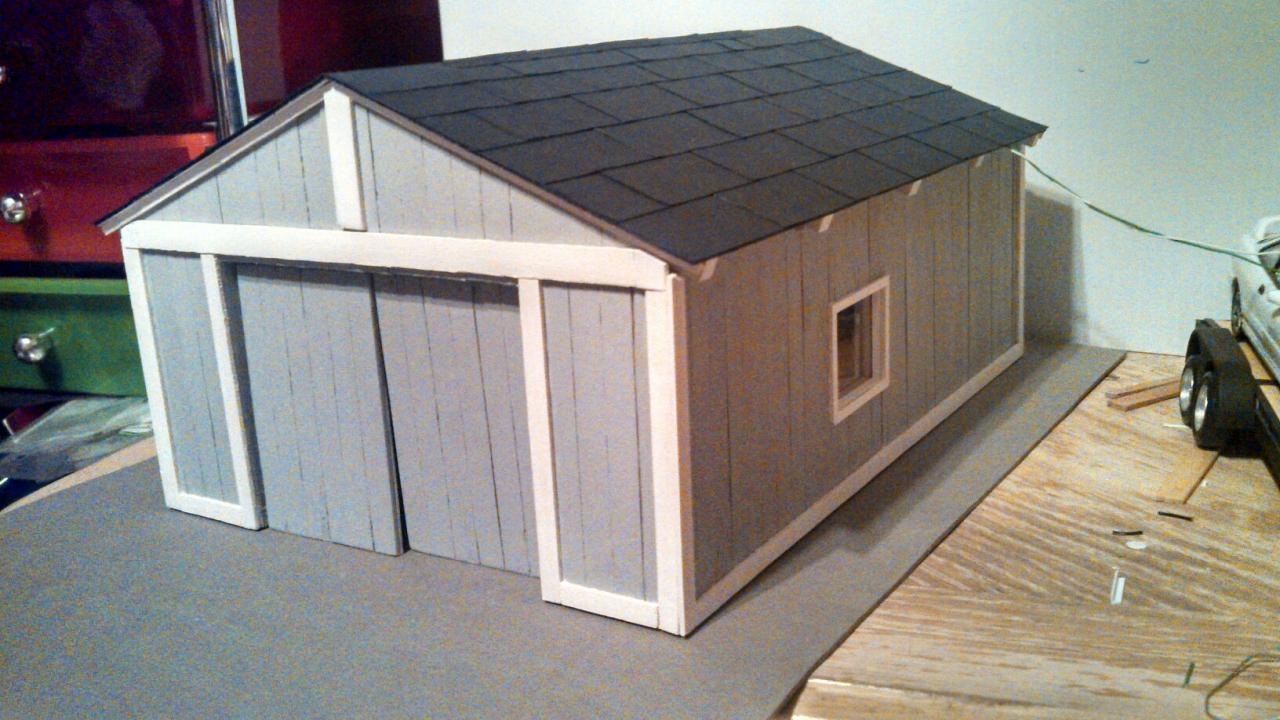
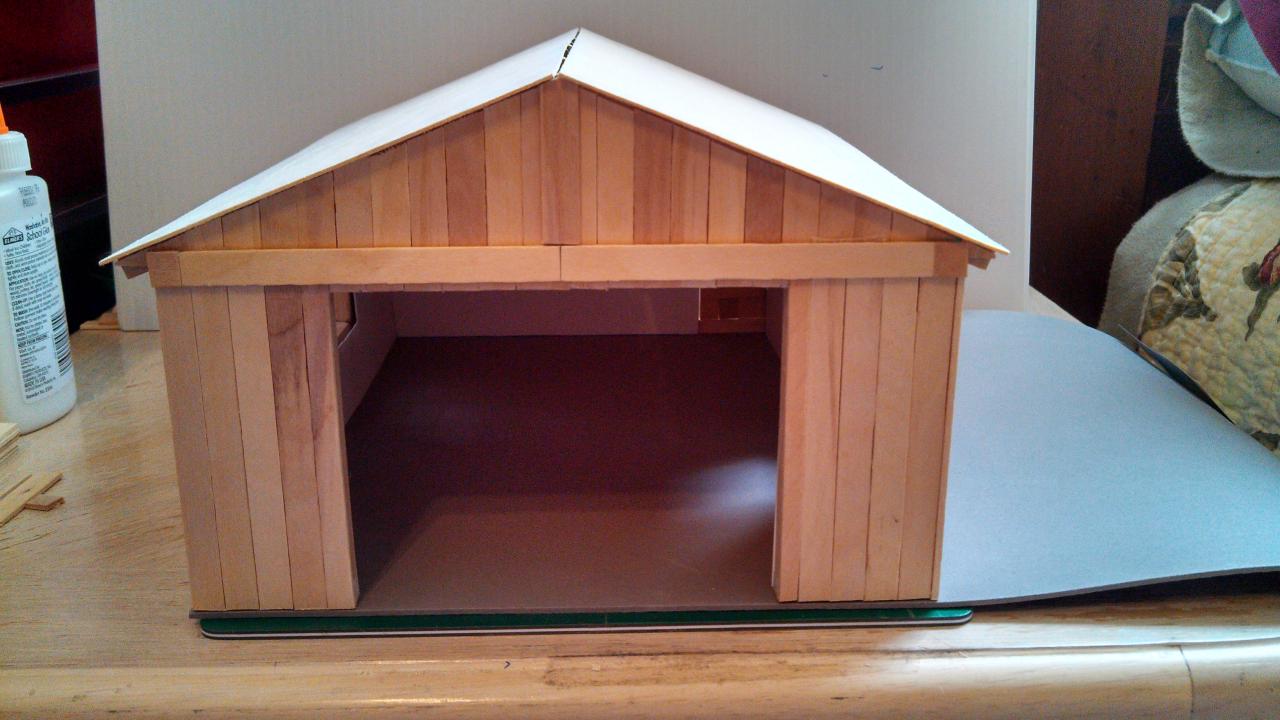
Small update. Got all of the trim around the windows, corners and along the bottom sides on and painted. Also got the doors built and mocked up, now I just have to figure out the best way to mount them. Also got the shingles cut and glued into place (I know they're not the correct scale size). Again, sorry for the poor quality pictures.

-
Thank you for the comments. The wrenches will be gone lol. They were just for decoration. Will have an updated picture of my progress tomorrow hopefully.
-
Thanks for the comments. I have already thought about building a bigger one already. Only time will tell, its like a virus that keeps spreading, lol.
-
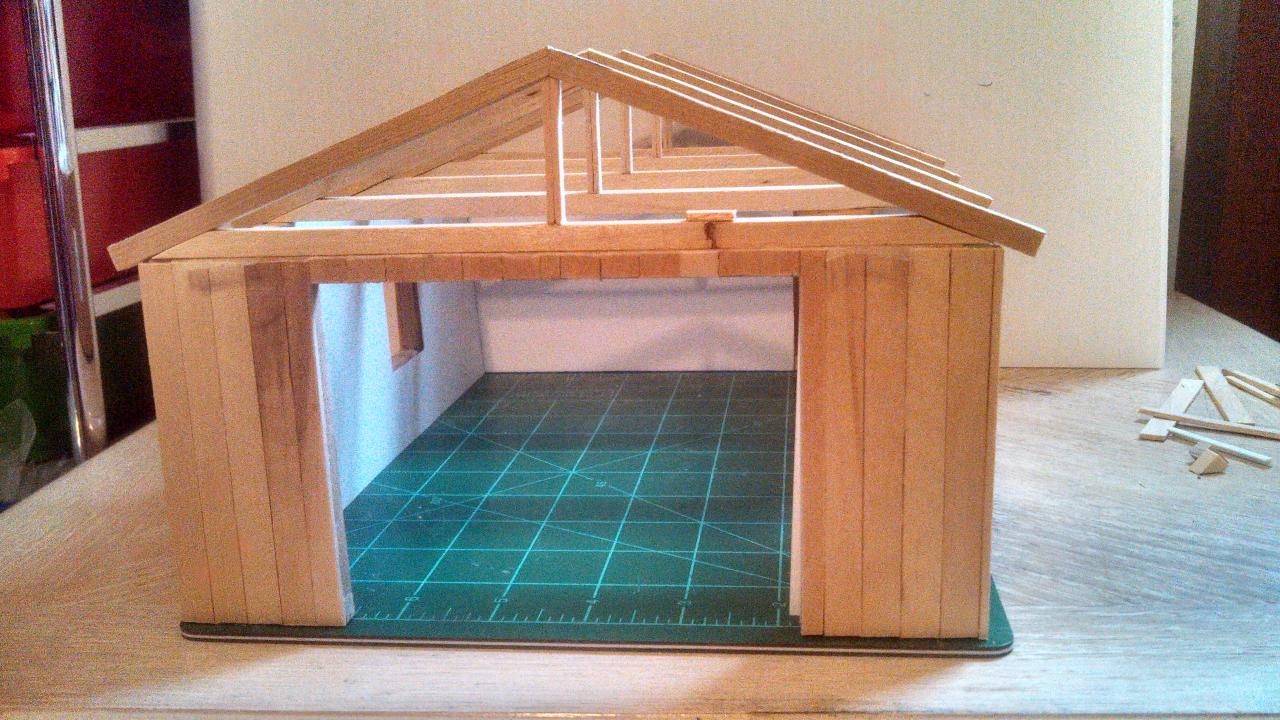
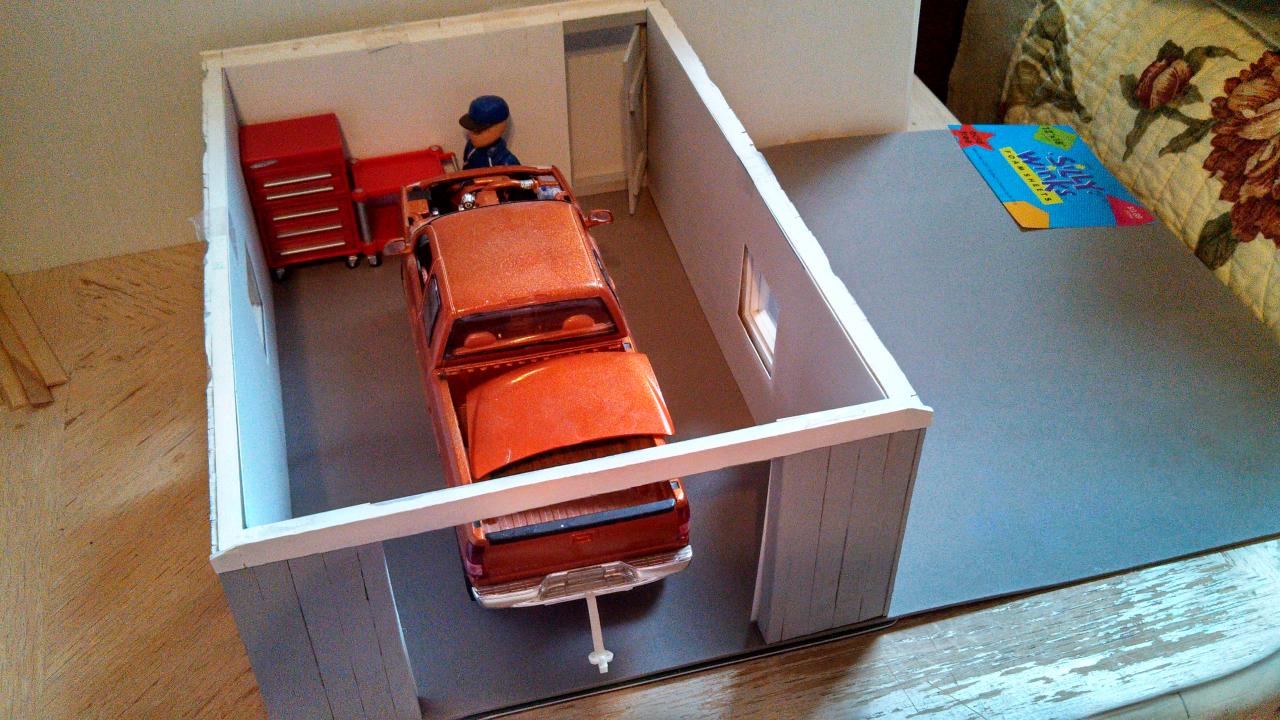
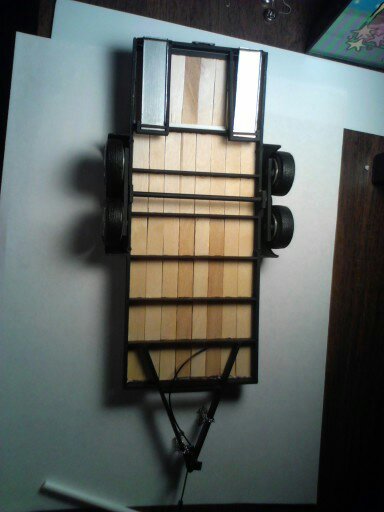
This is my first time ever building anything like this. It is not "structurally" correct i guess i could say, but i like doing things as cheap as possible. The framing is 1/4" square wooden dowels that scale out to be 6x6, even used them to build the rafters. Exterior walls are popsicle sticks, walk in door is made from popsicle sticks as well, although I'm not happy with it and may end up changing it. The interior walls are sheet styrene and the ceiling is sheet styrene as well (actually a private property sign). For the roof I used basswood and will be using textured cardstock to cut into desirable lengths to simulate shingles. When i had this garage in mind, I told myself that i wanted it to have a roof that was removable. So i think i managed to do well enough with making that happen. Then i decided I wanted to put lights in this thing, so i went to the local Radio Shack looking for budget friendly 5mm LED lights with no luck since our local store is small and has limited inventory. I got the LED holders while i was there and put 4, 1/4" holes in the ceiling for the LED holders and looked online for some lights, i found 5mm frosted lens LED lights with a 70 degree viewing angle at ledsupply.com and only took them 2 days to come in and i installed them immediately. The flooring for this garage is some type of foam sheet that i found in hobby lobby for less than a buck. I made the windows with a clear sheet laying around and basswood for the framing of the windows. The tool box, tool cart and the oversized wrenches laying in the floor is a Mighty World mechanic set that my wife bought at a toy store that was going out of business, i think she gave $2.50 for. I thought it would look ok in there for now for reference pictures I'm still a long way from being finished but wanted to show you guys what I have done so far and want to know what everyone thinks. Here are some pictures, sorry for the cell phone quality, the phone is always so convenient to grab and use. Hope you all enjoy, comments and complaints are welcome.
-
any one have any dodge dakota builds?
1tim1 replied to racer98's topic in Model Trucks: Pickups, Vans, SUVs, Light Commercial
Lindberg sells a 1/25 Dakota. It is mostly snap fit and is more of a promotional style. -
Stance looks perfect on it like that
-
underside
-
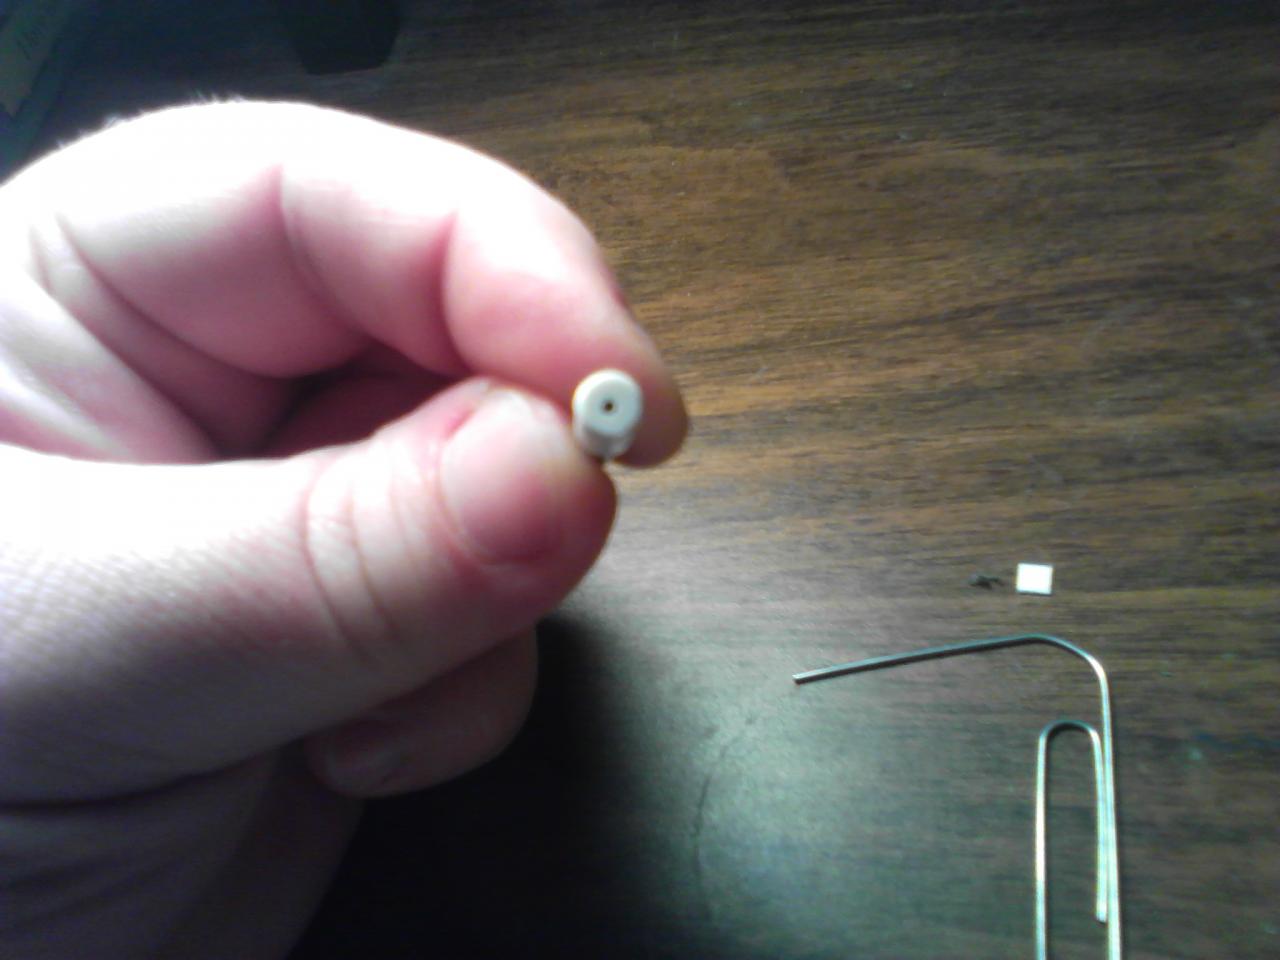
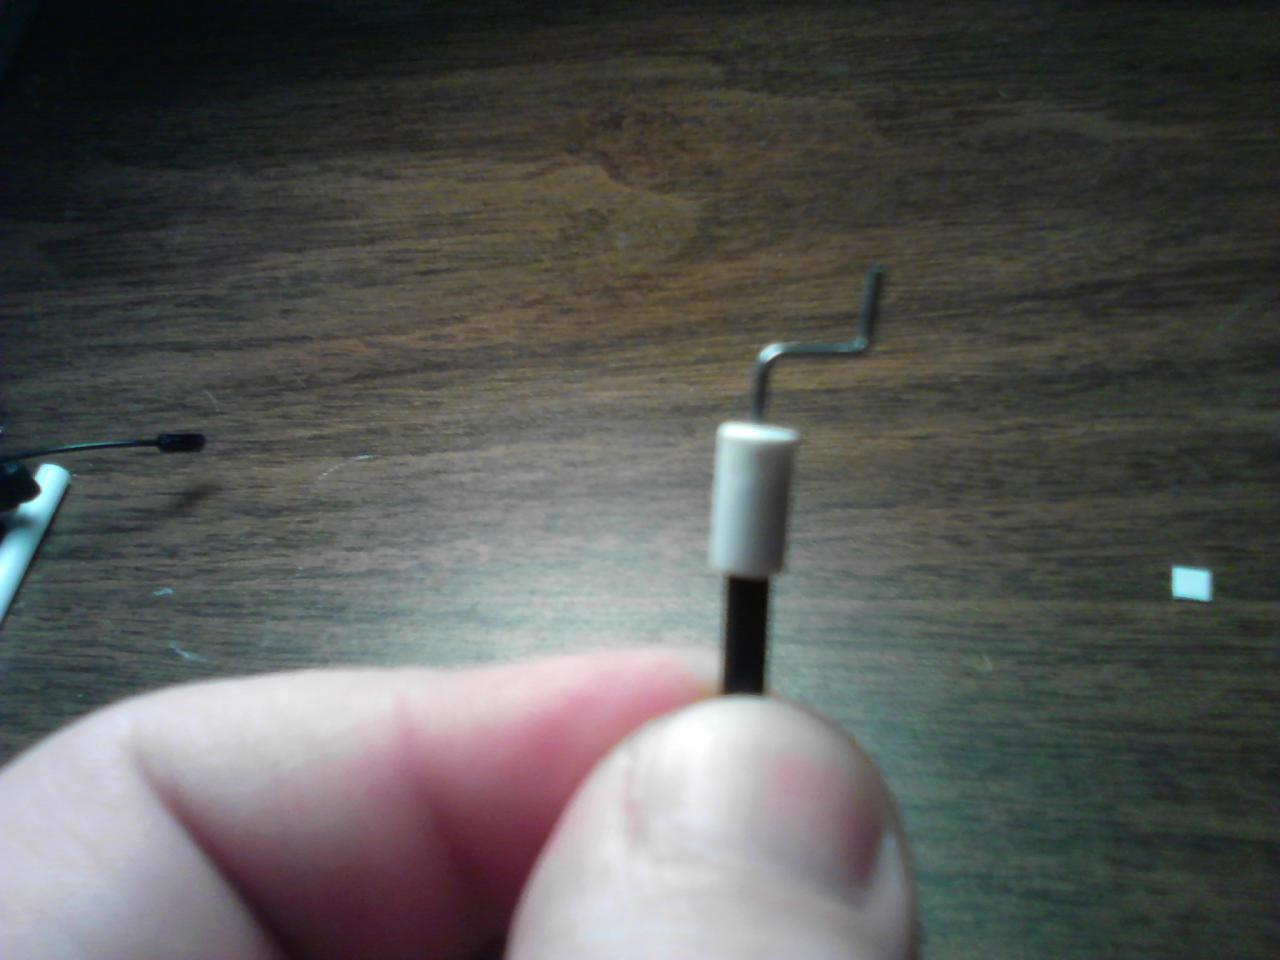
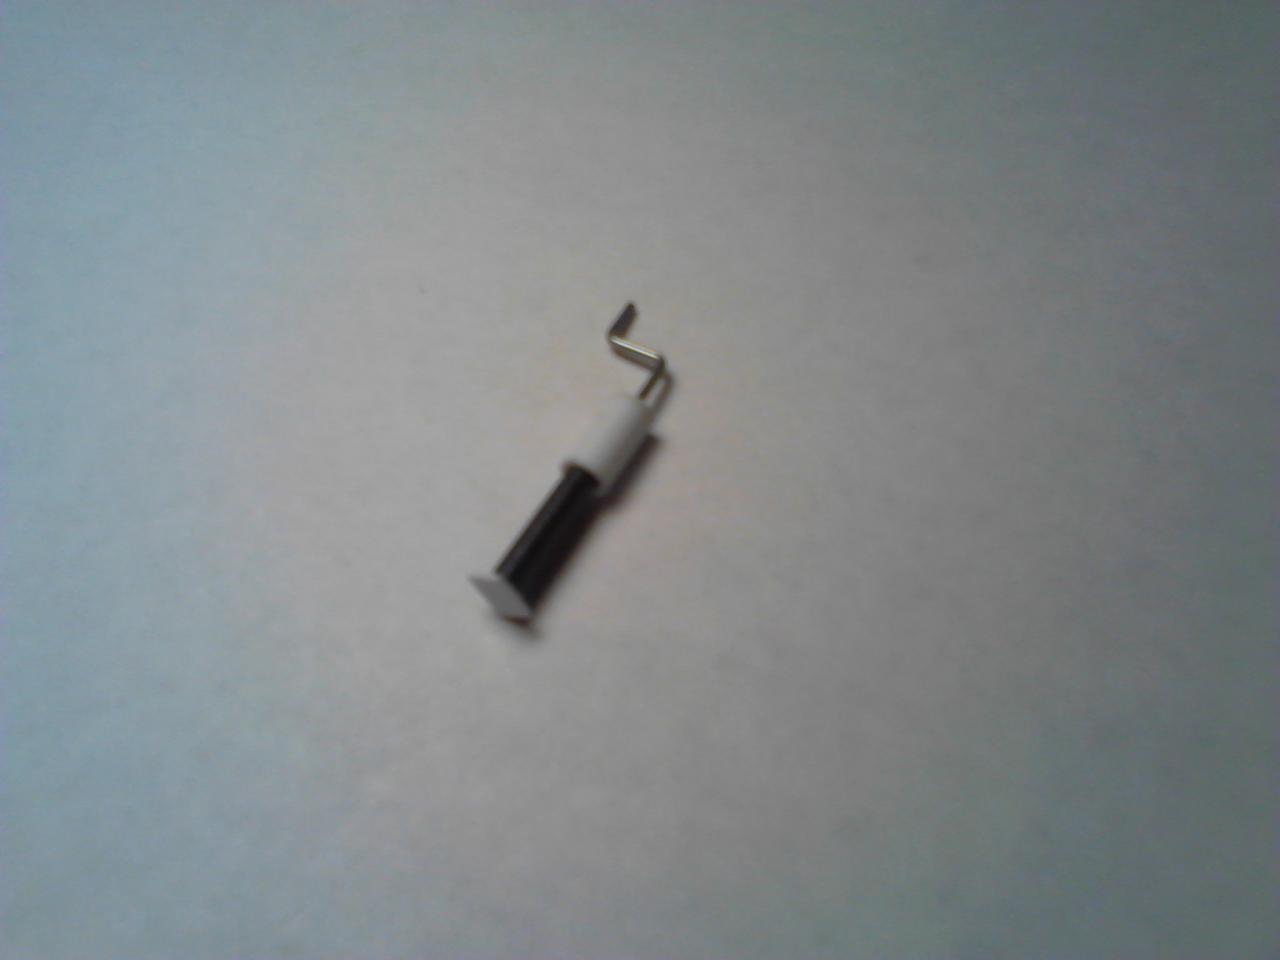
1. cut a piece of styrene tube about 3/8" long 2. cut a piece of styrene sheet the same diameter as the tube, glue it on one end (i use superglue gel) 3. file the piece smooth 4. the black piece i used was a piece of sprue, insert it into the tube then drill a hole in the center 5. i used a paper clip, bend it to simulate the shape of a trailer jack handle (i used a surgical staple removal tool to bend the paperclip, it's much easier) 6. use superglue gel to glue the paperclip to the black piece (or whatever color you use). don't glue it to the tube if you want it to slide up and down 7. cut a square piece from styrene sheet to use as the foot for the jack 8. paint, test and install, enjoy! note: the black piece can be cut to any length, so can the tube depending on however long you want your jack, the only downfall is the "handle" will look unproportioned to the rest of the piece
-
thanks everyone for your comments, i really appreciate them. Rob, feel free to use my idea, i don't mind at all.
-
no shots of the underside yet, i will work on getting some though, and i will try to explain how i made the jack with pictures when i get a chance
-
i have no idea where to get one like this, it looked like it had some age to it thanks
-
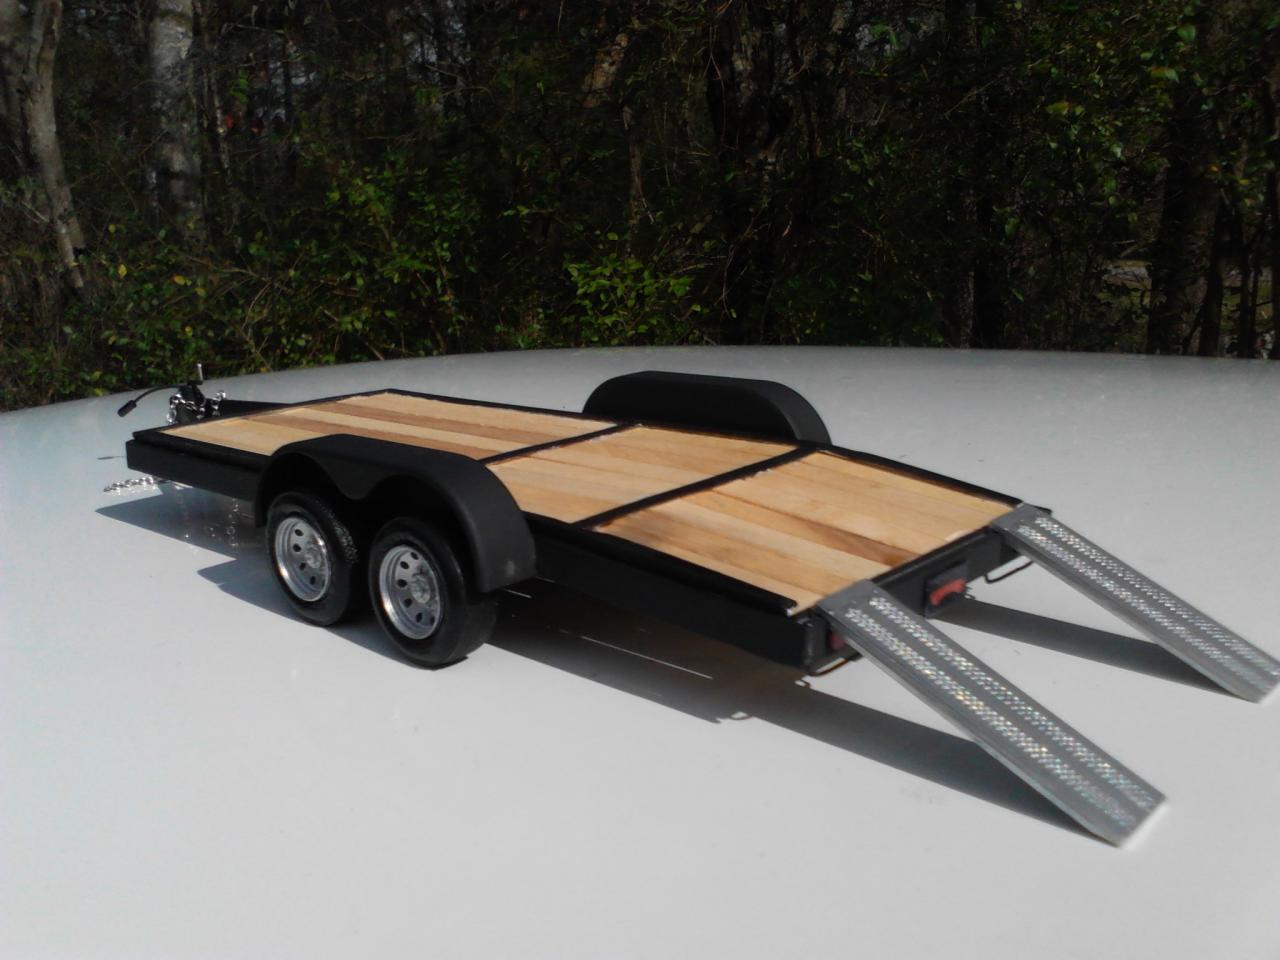
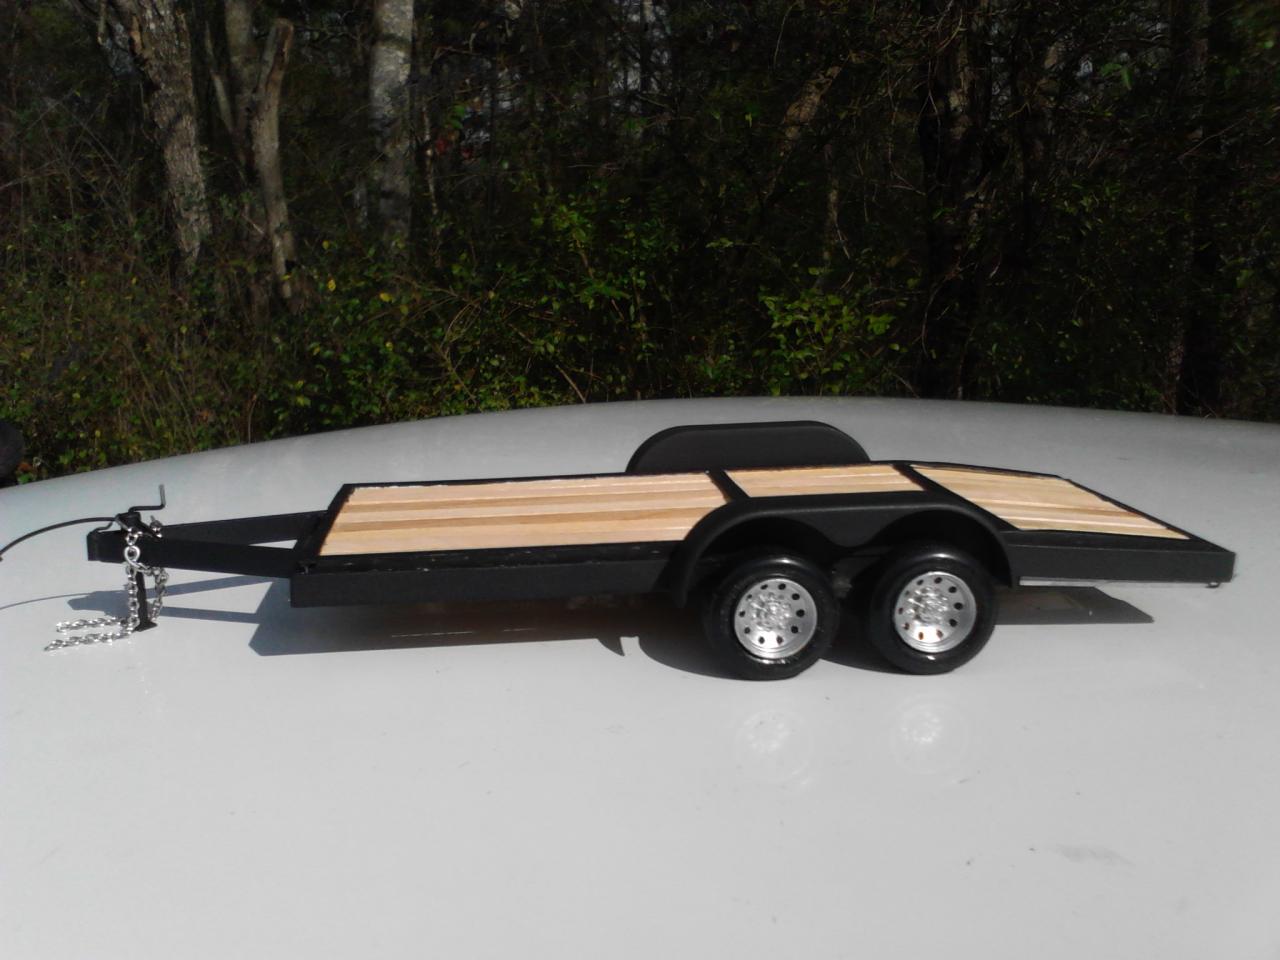
hey all, i'm not very active on here but i do enjoy reading everyone's posts and seeing the awesome builds you guys do. i thought i would show off my car trailer that a friend gave me, i didn't like how it looked. it was painted a light blue, had a broken tongue, broken axles, the wheels he used on it didn't look right, and it had an ugly tire rack on it. so, i stripped everything down to just the trailer frame and fenders, made a custom triangulating suspension so that no matter how high or low the vehicle was that i hook it to, all 4 wheels would be on the surface. i also redone the tongue from styrene, made a functioning jack (can be raised or lowered), put a wooden floor made from popsicle sticks, wheels are from an old toy i had about 20 years ago and painted silver, the trailer itself is flat black. the tail lights are old cell phone buttons that i painted stop light red, tag plate and tag decal from parts box, safety chains is jewelry chain. here are a couple of pictures, sorry for the poor camera phone quality, hope you enjoy!
-
hey guys, i don't think i've posted on here before, but i wanted to share my experience. i went to the local hobby lobby today and this kit was on clearance for $26.99! i think this kit normally costs $74.99 at hobby lobby. maybe other hobby lobby stores have the same one on clearance and you guys could probably luck up on it, here's a picture, sorry for the poor camera quality