

Tony Bryan
-
Posts
367 -
Joined
-
Last visited
Content Type
Profiles
Forums
Events
Gallery
Posts posted by Tony Bryan
-
-
Dave
With the casting work and your masters, this engine came up a treat, the white metal really works out nice
i think I want one now, maybe two
take care
-
Ben
These are real nice,
Now when are you going to do a set of 1/16th Alcoa's??? I'll have a few

-
Nice Sergey
Now, how did you do your photo etch? did you do it yourself?
-
I personally don't see what's so special about this build? It's nice but I have seen many other builds that have much more work into them and are entirely scratch built, This truck has several parts from kits. I'm not knocking his work, it's very nice but I have seen much, much better! There are some construction equipment models out there that would make this look like a snap together!
Would have to agree Ben,
Here is something that is a true scratch build in every sense of the word, by a master craftsman, and he sure is a clever man
-
Careful Bill,
With all that hard work, You may just about be come a TRUE scratch builder
Nice work so far, that is going to look really cool when rigged,
-
Tony,
These are excellent. Let us know what you have and when you have things available. I'm interested.
Thanks for letting us know what your up to.
Dave
Dave
will be a couple of months, have a lot of 1/16th stuff that needs to be cast, and I just don't want to do it,
The Six rod needs a bit of photo etch and white metal stuff
Not that sure if I am going to cast the tyres yet, may just do these for myself
Will let you know when or if it will happen
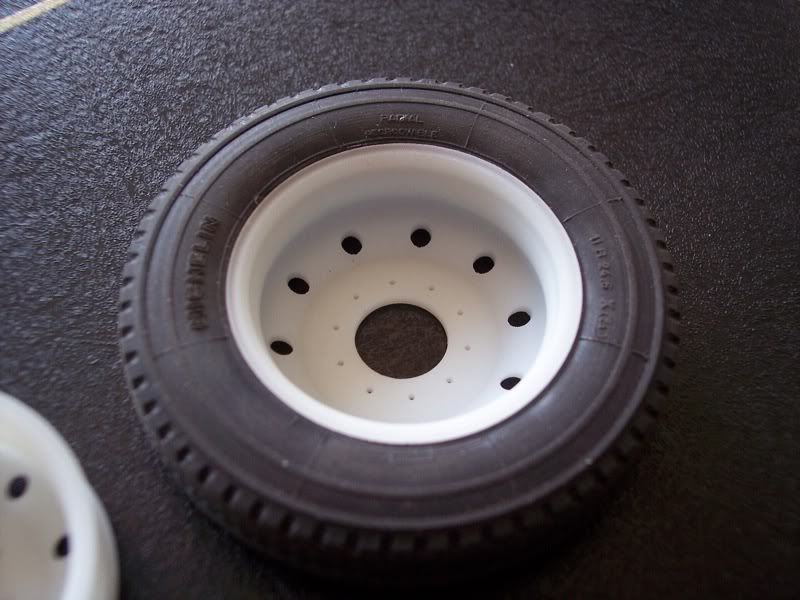
Wow! Excellent work! Are these the Bridgestone M843 and R194 tires by chance?
Bryan
Bryan
well they could be anything I want really, as they still have no label on them, I will add that detail when I can come up with something that won't get me
into to much trouble, they where actually modelled off a Bridgestone case, but I may not even have them moulded yet
-
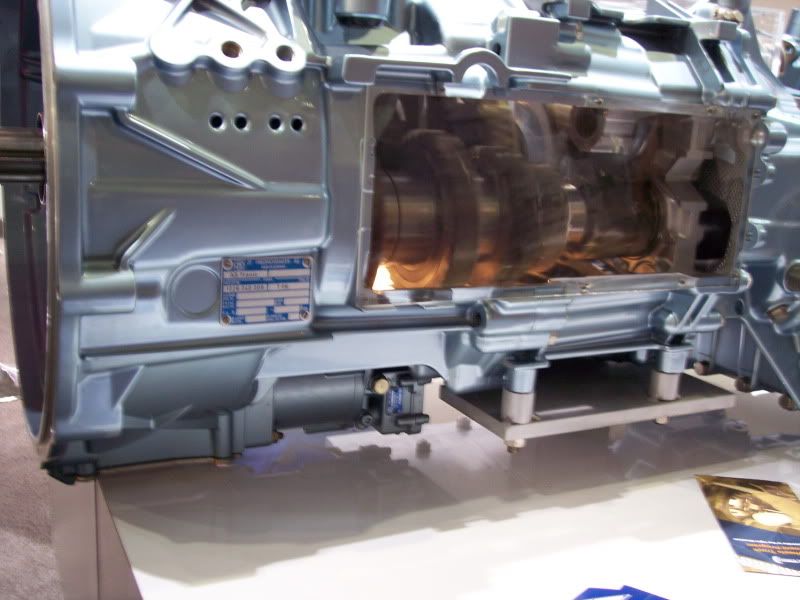
Hi, Tony!
Have you found pictures of the gear box clutch assembly? I would use it as reference.
Sergey
I have over 20,000pics, of trucks and machinery, not many are in folders, one day I will fix that
Here is the better pic I have, this shows the fork in place, what it does need is a way of engaging the fork, this is done either by air or hydraulic ram or even mechanical means
you can just see it behind the bell housing
A better pic of the ram set up
You could build what ever you like here and it would still look the part, as not many people add this,
I have other modern detailed pics of a road ranger box from a truck show if you need other detail pics
Hope these help
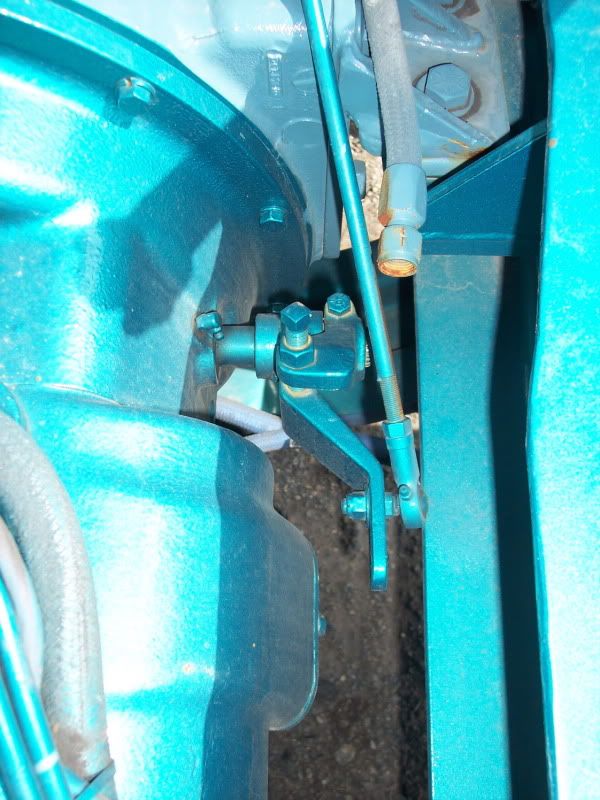
I also had the opportunity to photograph a W model Kenworth , which I took 300 pics, this was in a re build stage,
and it was a perfect opportunity to take a lot of detail shots
A W Model setup, with a series 60 engine, note how clean the joining of the box is to the engine, and the Mech clutch
Hope these help
Tony
-
Tony..Super nice....the 22.5's will be a must have for my SAR project later this year........Matt
Matt,
A SAR mmm, interesting, I have a couple of photo's of one, What rear end are you going to be using?
I have already done a 6 rod as well as a henrickson HAS460, The 6 rod I set up to use the existing holes in the diff, so it lines up better, the main frame sits where the original air glide sits,
I have also done the intercooler and radiator to suit the 3406B, and the roof console and floor console for the SAR, also the 36 in high rise sleeper for the Gold nugget,
Here is a pic of the 1/16th Six Rod, the coloured parts I am changing for a photo etch fret , these won't cast to well
and the HAS460, still need to do the torque arms and air bags, the KW ones are a little small
they will all go to the casters soon,
-
Tony.Very Nice............Be sure to send all of your spares to me!!! LOL matt
Matt,
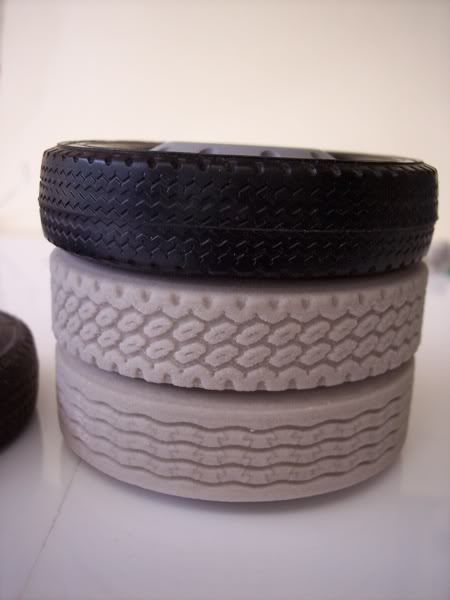
Going to do another 2 patterns, and split them of the rims,
I want to cast these in rubber, and the rims in resin
Hey Tony, I am a truck wheel fanatic and I think they look great! I sure hope you'll be offering them for sale!!!!!!!
Ben,
I don't know if I will sell them yet, I want to add the photo etch labels on the side walls, but am reluctant to brand them with Bridgestone,which these are,
I can how ever label them something else but it does take away the realism of the whole effort
-
Randy
That is some of the most amazing model work I have seen, this is real engineering, and the skills to put it together is ........ brilliant
look forward to an up date
-
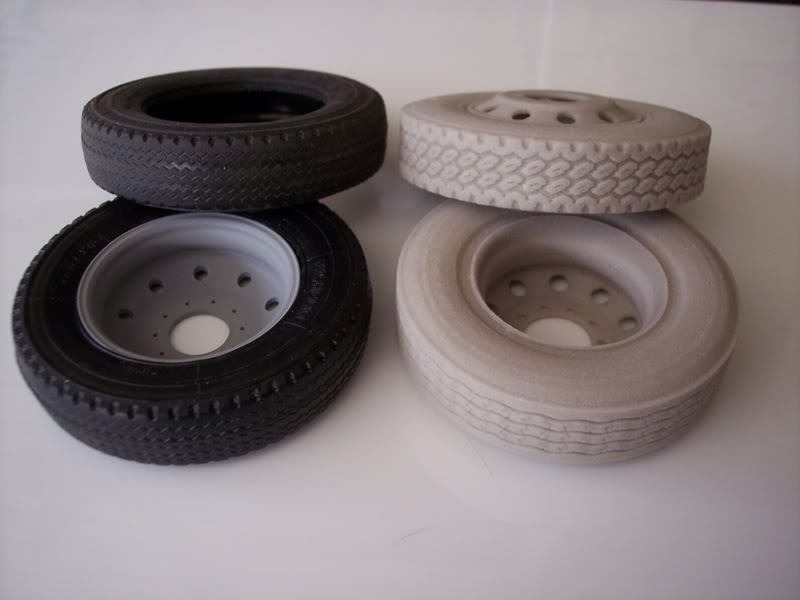
In Australia, we don't use the 24.5 inch rims, instead we opt for the 22.5, so with that in mind,
Here is a sample of what they will be like
These are fitted with a true Alcoa rim
Do they look better than the kit rims and tyres????
the drives will suit logging, and off road etc
I also have the Alcoa rim in 24.5 to replace the kit rims which are less than accurate these are with the kit tyres
-
Sergey
There is some very clever engineering you are putting into this, great detail,
Look forward to another update
-
Thank you Tony. Do you mean a rim around engine/gear box joining? Thank you again. I was not sure about it. I guess I should file the rim off?
As for the straps - they will be made using black and chrome vinyl tape.
This picture was kindly granted by Don Schumaker, Mack Museum Curator
Thanks to every one.
Sergy
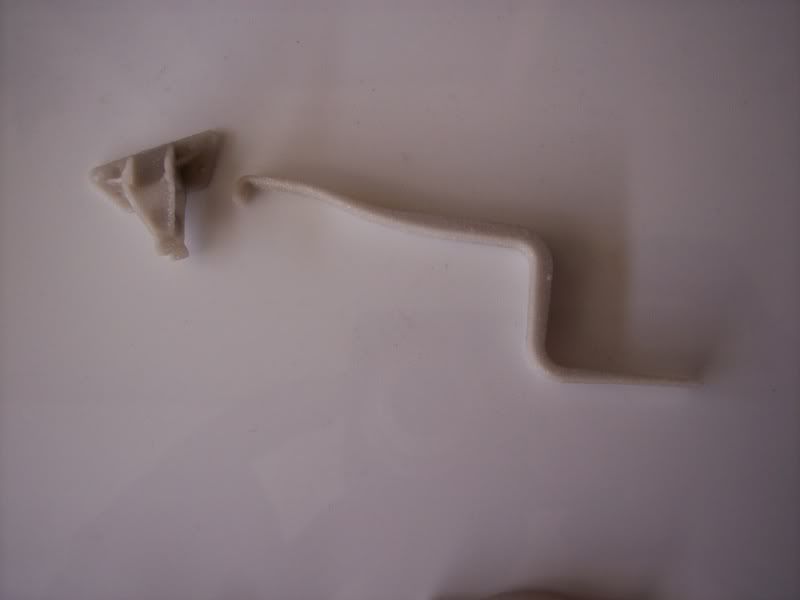
The rim around the gearbox is fine, as it has some of the bolt detail, I would whoever fill the gap between the box and the engine to smooth it off, as between both is a flat area, if you can understand that, will see if I can find a picture,
as for the gear box clutch assembly, that is the fork that operates the clutch, it has a hydraulic line that runs to it, and a slave cylinder that operates a fork arrangement will find that pic to
Build is looking great, and the detail is very well done, I am looking forward to an update
-
Real nice build, love the colour you have used, really suits it
-
Those mounts to look good, keep up the good work
-
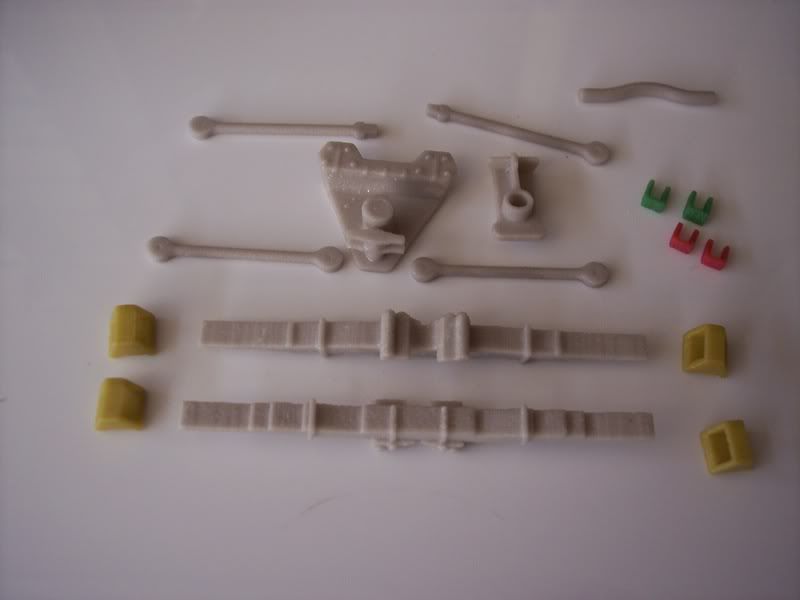
Sergey
Nice detail happening here, with some nice attention to detail
One thing most people leave off when detailing a engine is the clutch assembly on the gear box
and when you do the tank straps for the tanks, they also have a rubber moulding under the strap in most cases, some custom trucks don't have these
I attached a pic of the KW version of these straps, and a pic of the 1/16th version that I cast in rubber so you could see the result
I really like the pulley detail, they really come up great, will have to use that idea myself
Look forward to another update
-
Dave, still enjoying every minute of this.
Showed the thread/build to my nephew last night, he's very much a drag racing nut and crews for one of our Aussie Top Doorslammer guys. (Pro Mod equivalent)
Had a hard time getting a squeak outta him.....totally speechless.
And also VERY impressed, as I am.May I ask the source of the renshape.?? I can't find any thing remotely close down here in Aus.
Cheers
Greg
Dave,
I really enjoy how things come together, and the assembly start, frame looks great with paint, and all those aluminium parts hanging off it, look forward to another update
Stump,
renshape is available in Aust, try here My link (WA) or here My link (QLD)
but the biggest selection of the stuff comes from here My link (NSW)
The stuff isn't cheap, the best thing to do is find someone using it, and ask for the off cuts, if you want to try some I can send you a bit to carve/ play with it is really good stuff
-
Tony,
Many Thanks for posting that link. Very interesting and looks quite simple once someone tells you how to do it.
Dave
Dave,
No problem,this link was giving to me by a dear friend, but one thing to remember is to cover the rear of the etch, so that it doesn't attack the back, use primer, tape, just some to stop the etch
unless you are etching both sides, really all that etching is, is a cover to stop the etch ...... etching, have heard of people using marker pens on very thin brass
The above link is a simple way to do it, to etch properly, you need some very harsh chemicals, like ferric chloride as the etchant, and sodium hydroxide at the stripper, uv light....... and the list goes on
Have a go at it, and show us the results
-
Another show winner in progress, very nice work on the body so far,
look forward to seeing you tackle the frame some more
Here in Australia, styrene can be brought from sign writers/makers, but I buy it from a plastic supply, the full sheets are cheap around $20 for a full sheet 8x4 ft, try you local sign maker, you maybe surprised at what he has
-
This may help if you want to try it at home, My link
-
from reading the discription, it will not plate plastic or, resin. Which I assume would be an issue for most of us.
Anything can be chrome plated,
Sergey
Electro plating with this kit will work ok,here is some reading on how to do it My link
-
Nice job on the frame, look forward to seeing what you do with the rest of it
-
Now that looks cool, as does the rest of the fleet
-
Now that is a nice truck,


Stepp´s CAN DO
in WIP: Model Trucks: Big Rigs and Heavy Equipment
Posted
Welcome Jarda
I have seen this truck before and it is exceptional, glad to see it here