Geordi08
-
Posts
28 -
Joined
-
Last visited
Content Type
Profiles
Forums
Events
Gallery
Everything posted by Geordi08
-
Tamiya Calsonic Impul Z - "2004 Suzuka rd.7 Winner"
Geordi08 replied to fitforbattle's topic in WIP: Model Cars
As long as you can. I did not wait long enough before I shot clear over it and it dried, cracked and left a crazed texture, not what i wanted, but looks interesting. If you can smell the paint, its still off gassing. I usually leave my car bodies at lest 3 days, the longer the better. -
Gtx6970. You are correct, and the model does with a decal, but it looks like a sticker, so I painted, however point taken.
-
Do I presume you will be making your own decals, or are you getting the NASCAR decals from somewhere?
-
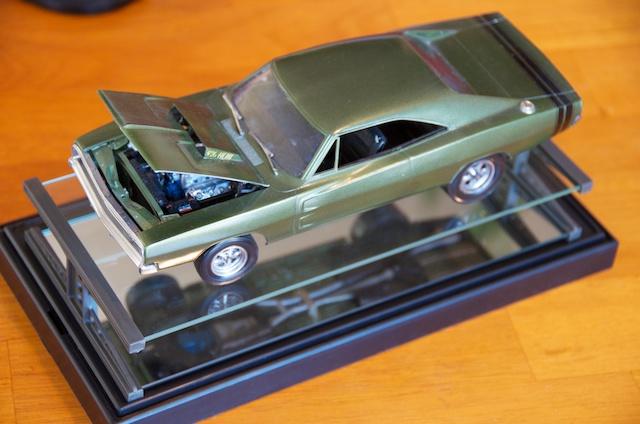
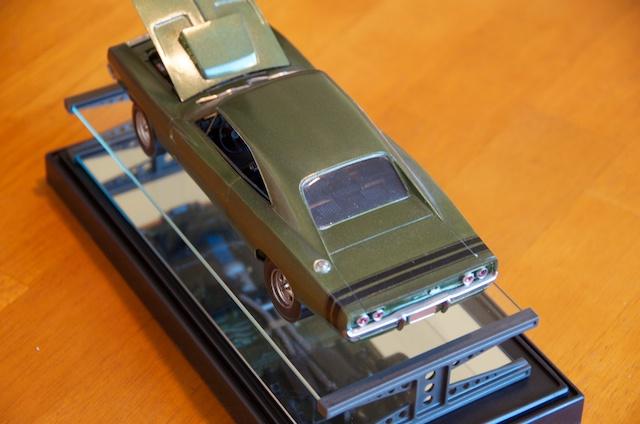
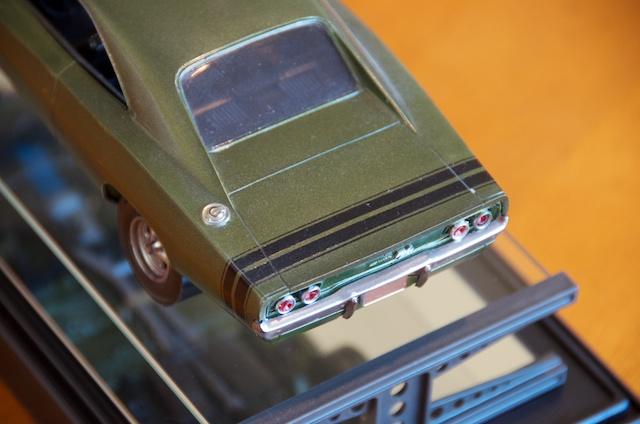
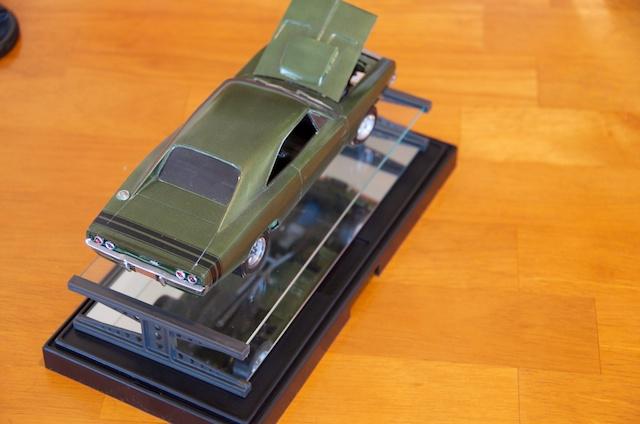
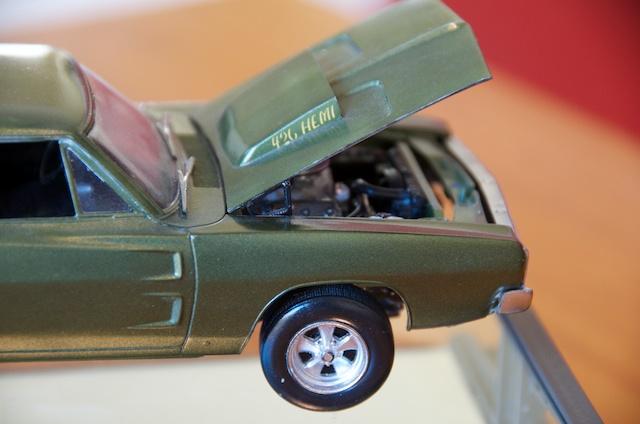
Since we are talking about converting the 1/16 charger I thought I would as my question here. The MPC charger has the frame from the NASCAR kit that the suspension attaches to, so for your conversion that's good. However I want to change mine to a standard 69 or 70 charger right off the standard assembly line. Does anyone know of a replacement engine bay that allows me to remove the engine frame? Any ideas,
-
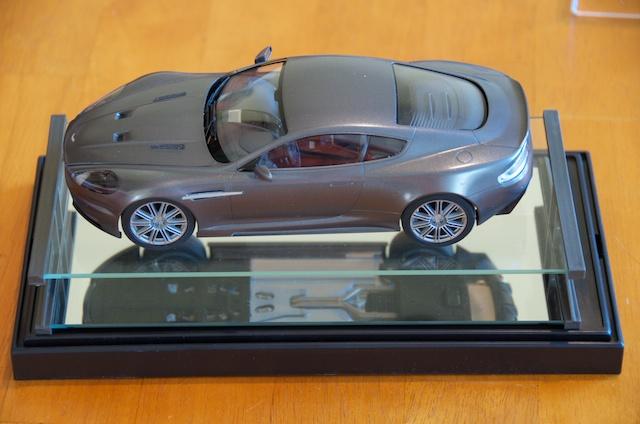
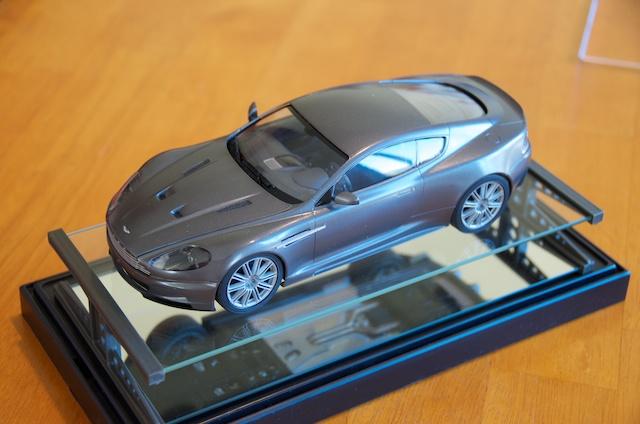
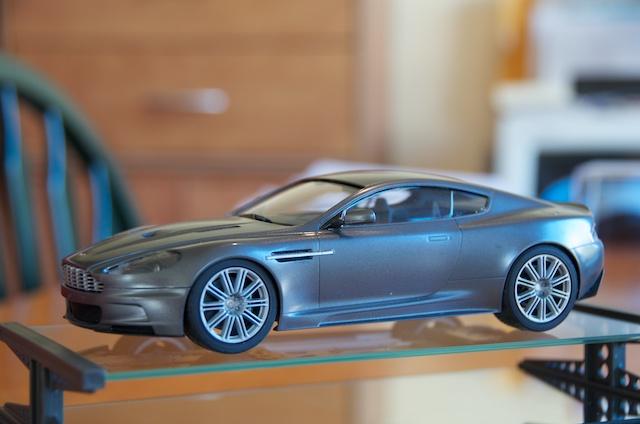
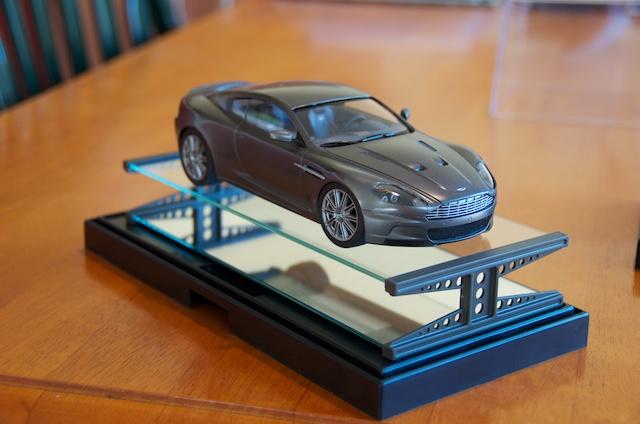
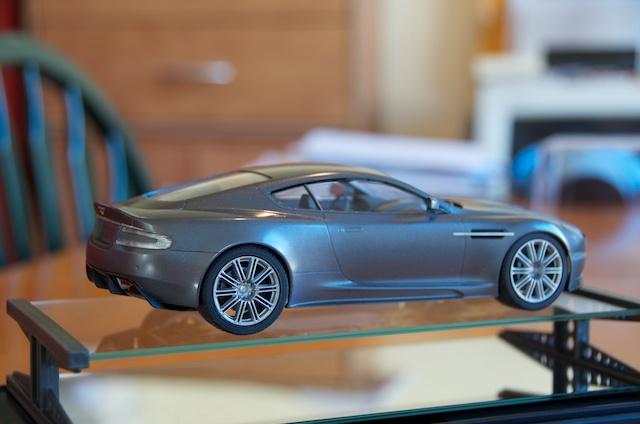
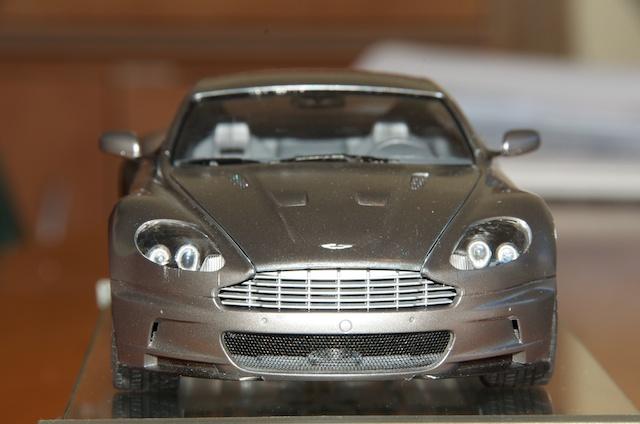
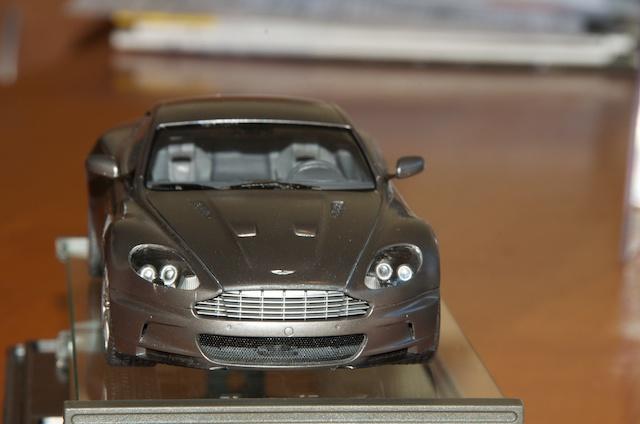
Here is the last model i finished, Tamiya's DBS in Quantum Silver. The model goes together like most Tamiya models, the only issue is that there is a lot of masking to finish the paint underneath. The color is from Scalefinishes and it lays down wonderfully. Thanks for any comments.

-
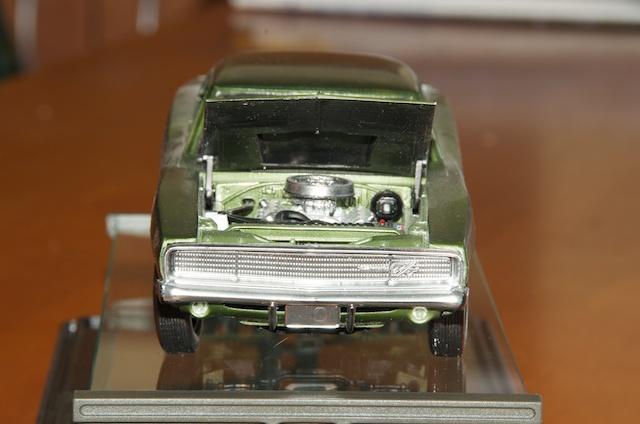
Here is a model I finished not long ago using Revel's 68 Charger. The model went together fine and I finished it with Scalefinishes OEM 661 Dark Green Metallic. I did find out on GraveyardCarz that Dodge painted the black area then masked off and covered over the green. However I did it backwards, so next time I guess I will paint in the correct order. The bright work is all all Alclad Thanks for any comments.
-
I am just about ready to start on my kit, decided to go with Gialio Modena for a change, so looking forward to this one. I notice the clamps on the wires, which make are those? Robert
-
Very nice build and love the color. As someone mentioned, subtle is not the Aventador's style but its definitely different. For some reason i think Tie-Fighter on wheels. Is there a metallic flake in the paint or am I seeing things?
-
Very nice model and cool color combo.
-
Tamiya 1/12 scale ENZO with upcoming Scale Motorsport decal set
Geordi08 replied to David Thibodeau's topic in Model Cars
If Tamiya are not on your voice mail asking you to do one for their flagship office, then they should be! If I were Ferrari, I would be also calling you up to do another one for them, and who knows, they may even create a CF version of the Enzo replacement seeing how good the small scale looks. -
Tamiya 1/12 scale ENZO with upcoming Scale Motorsport decal set
Geordi08 replied to David Thibodeau's topic in Model Cars
I was going to nit pick about the dust, but someone bet me too it, so next time take the car to a better detailer . This model is that good, that when I first saw the image at the top of this page, I thought it was the real 1:1 then it dawned on me that it was the model. I thought your FXX was the best, but you did one better. You continually raise the bar for everyone, superb job. now go do one in red -
Chevrolet 1950 Pick-up
Geordi08 replied to Geordi08's topic in Model Trucks: Pickups, Vans, SUVs, Light Commercial
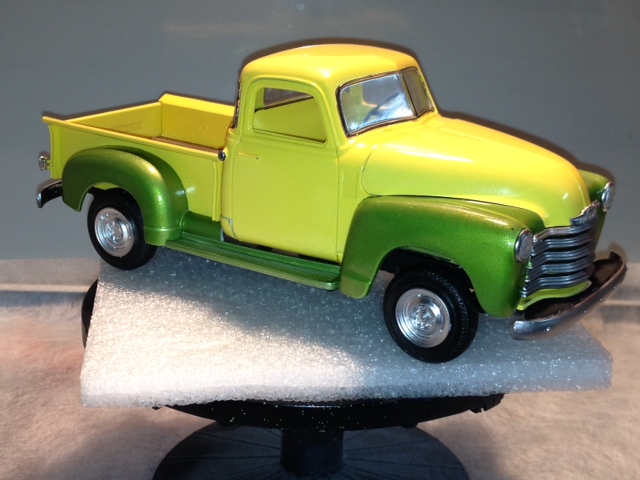
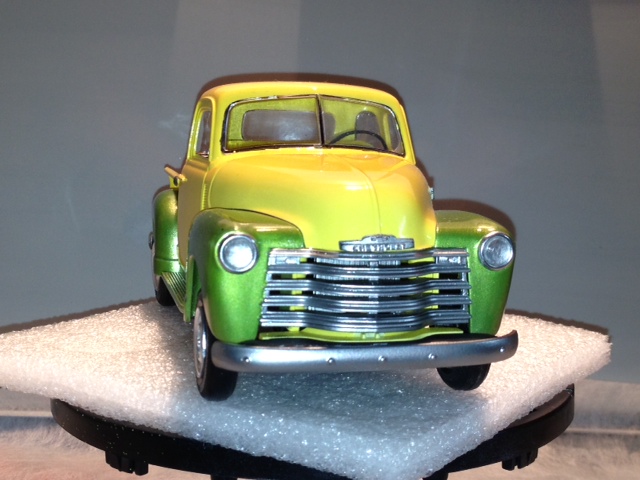
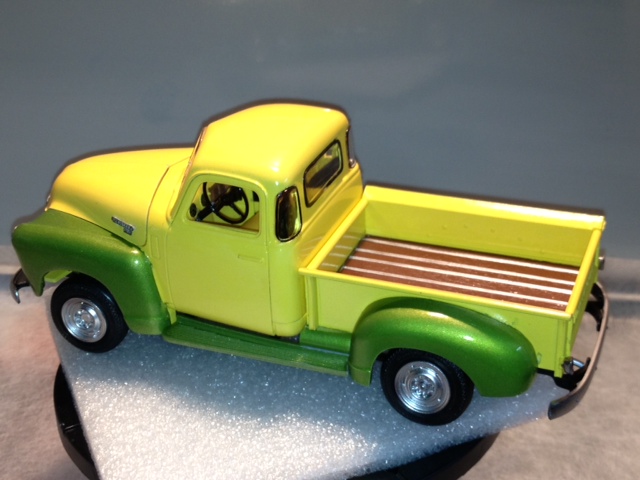
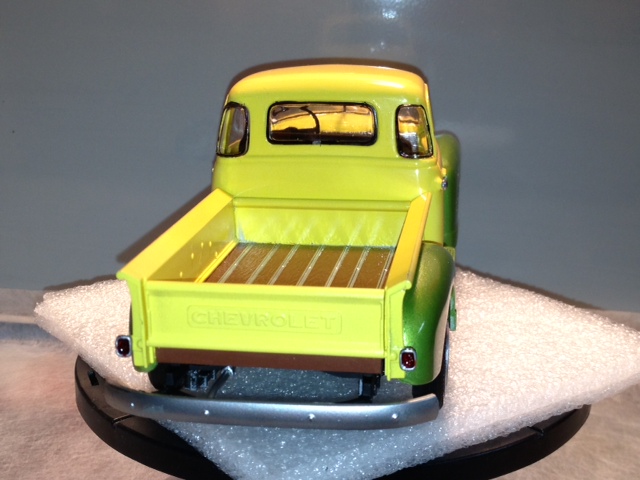
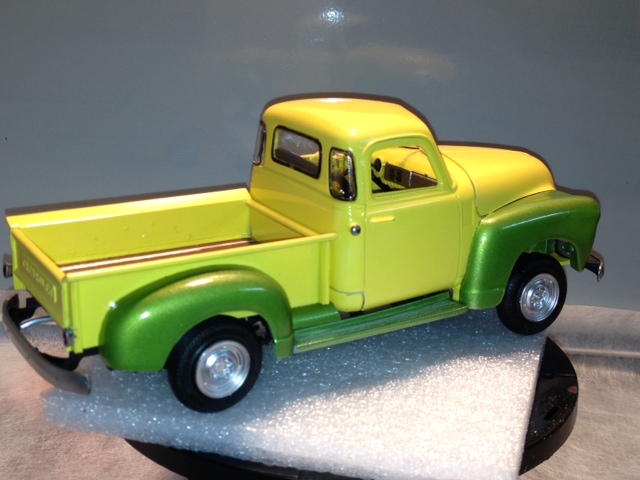
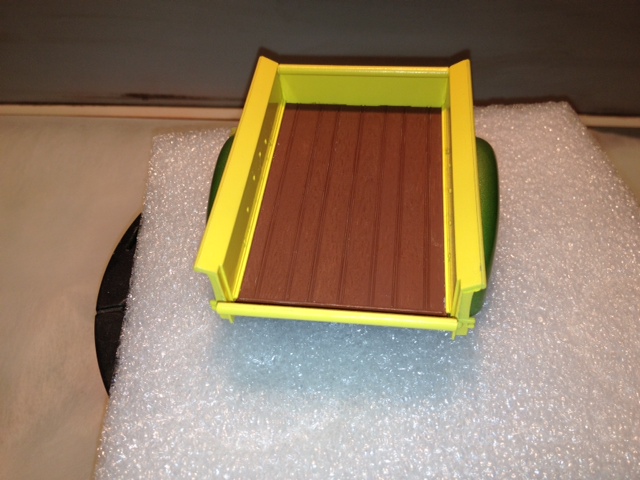
Thank you for the comments. I was thinking of replacing the bed with wood, similar to what Custom Mike has done in this thread, but i could not wait, so I finished it off with some Vallejo paints. I think i might do another one after i finish the 41 Chevy 3100 Truck but this time try my hands at some flames. -
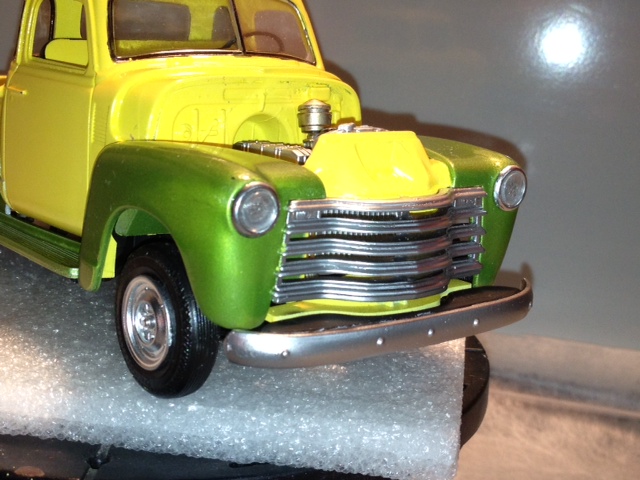
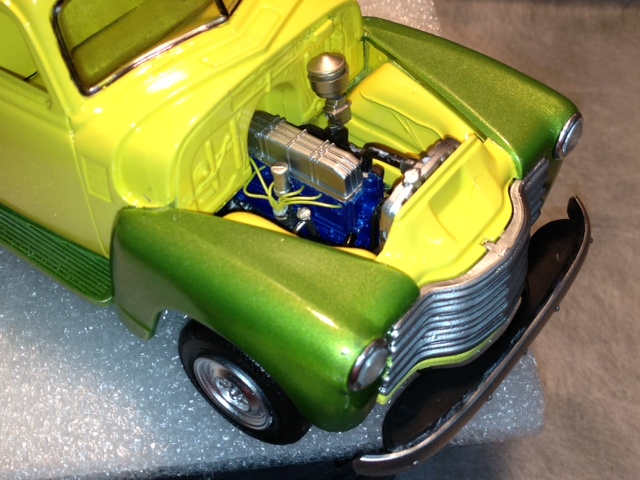
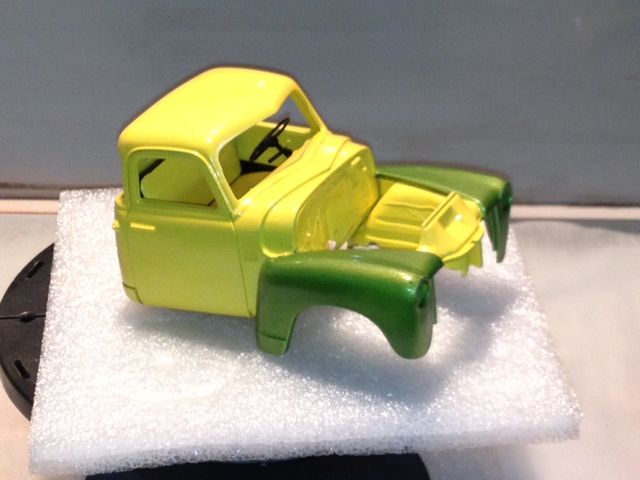
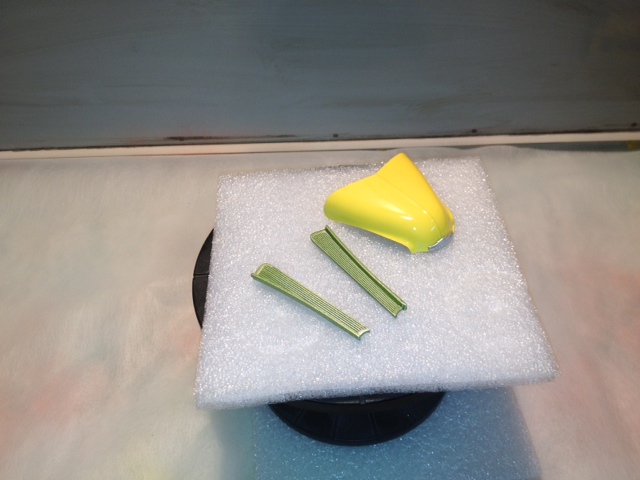
Here is the finished model of the AMT Chevrolet Pickup. I decided to do a two tone after I saw one similar on the road. All the bright work is Alclad II, mostly polished aluminum or duraluminum. The green is Testors Citrus Green Metallic and the Yellow is Testors GM Daytona Yellow covered with Testors One Coat Clear. Thanks for looking. Robert removed blurry picture
-
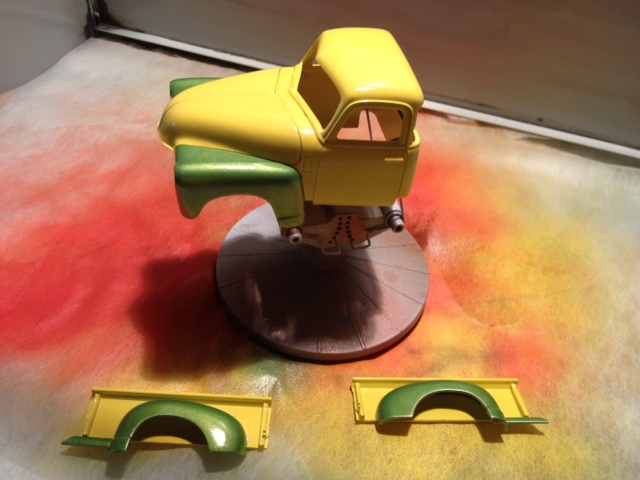
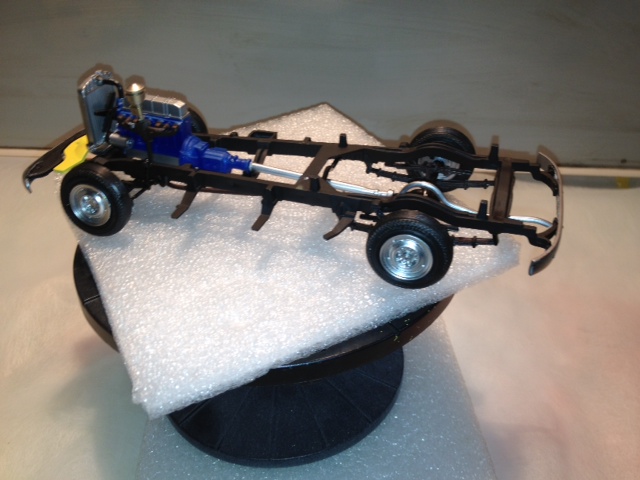
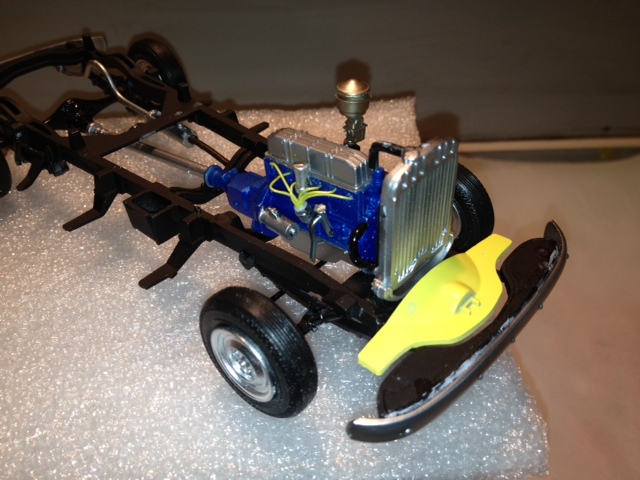
Hi Just wanted to share some pictures on the 1950 Chevy Pickup from AMT. Most of the parts are done, just putting it together and some final touch up is needed. Not happy with the fit of some of the parts, as when you line up the differential, drive shaft and engine, the cab no longer sits where it is supposed to. I still have to mask of the bed and spray the rails. The glass still has to be added and I will pick out the lettering on the chevrolet emblems and on the tailgate. The paint is from rattle cans, Daytona Yellow and Citrus Yellow Metallic with Testors one coat clear coat lacquer over that. The metal work is Alclad Duralinium or Polished aluminum. Hopefully I can finish it this weekend and post final pictures. Thanks for looking. Robert
-
Hobby design has two kits for the Enzo. A brake disk kit (HD02-0192) and a PE set (HD02-0193), not sure if the brake disk is worth it, I will have to wait until someone else pulls the trigger and posts some pics. Some parts are the same as what comes in the box but others are new.
-
Flawless as usual. If this is going to be half as good as the FXX it should be amazing. Add on the larger scale and who knows, Ferrari may come calling for a new engineer. I went back and looked at the FXX kit you completed, which btw is sitting on my shelf screaming at me to attempt start, and i noticed that the carbon fiber is much more black in color on the FXX. Is the Enzo kits carbon fiber grayer than the FXX or is the pictures? Robert
-
Nice color for the body. Have tried nail polish before, what is the color and make, did you have any issues in thinning?
-
Shame about the drop, though I think we all have been there. Looking at the damage it looks like it was the victim of a rouge shopping cart, so you could say its natural.
-
Really nice job on the model. I have struggled with the Revel model a couple of times, that said this really looks nice a crisp and the shine on the body is really good.
-
Very nice, and great choice on the color, especially like the way the seats came out.
-
Nice, especially since i have the flying version on my shelf in 1/48 scale. Just wondering, what scale are the decals, 1:32?
-
Thanks for all the comments. dragnet the color is Testor's Fiery Orange. In regards to the BMF, I have not tried that yet. I usually strip all the chrome and use Aclad II chrome in its place. I was building this on a deadline so I did not think i would have the time. That said, the side chrome is rigged so it could have been a bear to strip. I do plan on building another one as I have one more in my stash, and I have the stuff for BMF so I might give it a whirl.
-
Revell / Gearz contest question
Geordi08 replied to Bruno's topic in General Automotive Talk (Trucks and Cars)
Given that it seams that no one got a thank you email, myself included, then they are at least consistent. Maybe the question should now be did anyone get anything? -
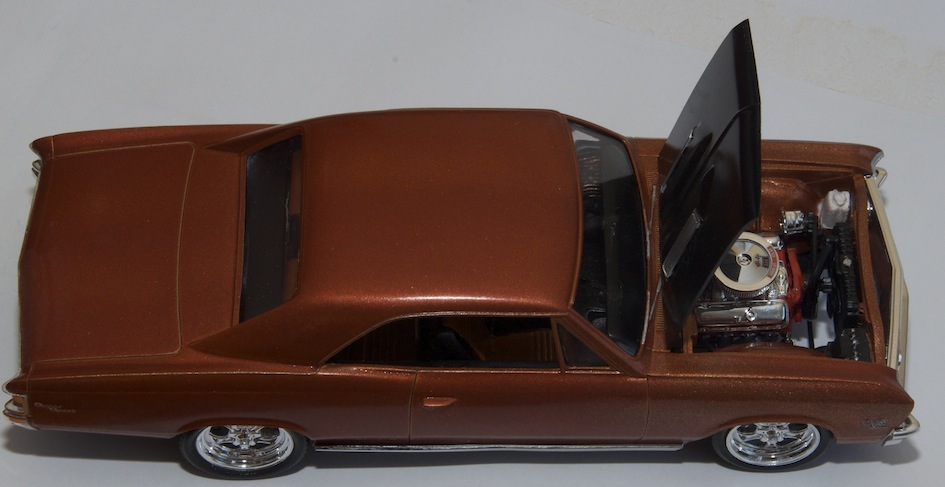
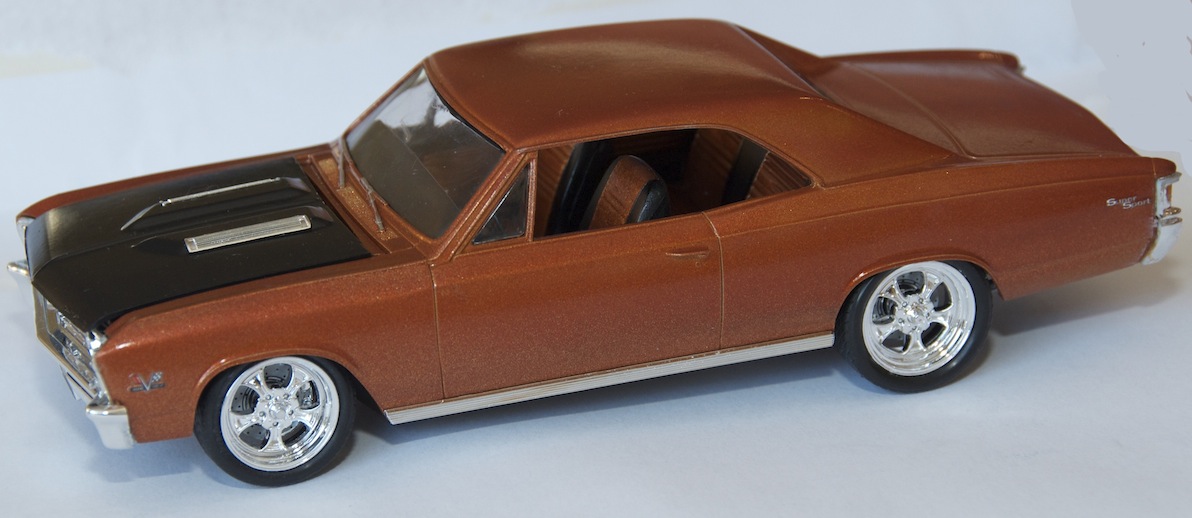
Here is my version of a classic car. I pretty sure it did not come in this color, but the rattle can grabbed me and I thought it would be a nice look in two-tone with a black accent. I am not a purest, I build models I like, so I do have cars in odd colors, planes in odd markings and tanks in odd gear, but then again its supposed to be fun. Who says you can't have a Dragon Models Panzer III F in German Team colors competing in the 1939 Paris Dakar Rally - Heavy Vehicle Class. Yes I know there was no Paris Dakar Rally in 1939, but thats the point. Anyhoo The model is nice one, however it does have its own issues. Mainly the front suspension does not fit the holes intended without bowing out the wheel alignment, and the rear bumper is too wide for the car, and just does not fit correctly. This was done right out of the box, so not wiring and, yes we do have a flying altenator. Would I do another, yes. First time with the Testors one coat lacquer, and while its not quite 1 coat for me, it does dry nicely and does not have any orange peel issues. The metal flakes are small enough to be ok in this scale. Thanks for your comments Robert
-
My Inspirational Model Car
Geordi08 replied to Romell R's topic in General Automotive Talk (Trucks and Cars)
I am still striving to build my best model, and I hope I never will otherwise it will be downhill from there. The model the I always go back to for inspiration is the Carbon FXX done by Dave T that appeared in the July issue of TMMI (165). I have seen some truly great models but I always keep coming back to that one.