
truckman1981
-
Posts
135 -
Joined
-
Last visited
Content Type
Profiles
Forums
Events
Gallery
Everything posted by truckman1981
-
 Thanks Dave and Doug.
 -
Thanks JT
-
Now thats nice!!!
-
Thanks Ben
-
It was sprayed with alclad chrome and an airbrush. Thanks
-
Little update tonight. I got to try my new airbrush out with some alcad. I sprayed these resin 10 hole Alcoas and stuck them on temporarily. I was very pleased how they turned out. I now have to strip my chrome parts and alclad them. Thanks. Chris
-
Mack Superliner
truckman1981 replied to MoparWoman Jamie's topic in WIP: Model Trucks: Big Rigs and Heavy Equipment
Wow Guys this topic has gone way off point! Tony, You need to brush up on your constructive criticism skills such as your choice of wording. Myself along with many others would precieve some of your comments offensive. There are better ways to offer tips and help by choosing your wording correctly.Honestly I would not ever go to the lenghts and meausures Jim has done on this build however I applaude him for being a fellow modeler and thinking out side of the box and making a creative build that he and his freind seem to enjoy along with many of us here following. Mardtrp with all do respect please dont stir the pot and make these threads into trash talking debates. Lets all get back on point and move on. -
Thanks Guys!
-
Thanks Robert and Doug.
-
Thanks for the tip Juroslav. I have some cleanup to do i just took a few quick pics late last night of the progress. Thanks
-
A little update tonight. I have got the Cummins plumbed but it still needs more once it is in the frame for good. I just sat it in the frame to get an idea as to how it is going to look. I used christmas tree bulb hooks for the hard piping for fuel lines and oil line to turbo. I also used baking soda and testors rust on the manifold and exhaust side of the turbo and Detail Master fittings on most of the plumbing. I plan to work more on it while off from work for the holiday this weekend. Happy Thanksgiving! Thanks
-
Sorry no not yet. Thanks
-
No nothing yet it has been a busy weekend. I hope to soon thanks.
-
Thanks Dave
-
Thanks
-
Thanks Doug
-
SLEEPER INFO NEEDED
truckman1981 replied to JARRNO88's topic in WIP: Model Trucks: Big Rigs and Heavy Equipment
I did this but I used the Revell germany 359 that originally comes with the 63 inch flat top not amt 359. The Revell Germany 359 cab and hood is more accurate than the the revell snaptite 359. Here is mine with the sleeper cut from a the snap pete matched to the the revell gremany pete. I hope this gives you a better idea. It was not hard at all to cut apart with a good sharp blade in the xacto knife.I would recommend cutting close to the cab as possible to resemble the boot between the cab and sleeper on the new truck you put the sleeper on.I also had to make a floor for the sleeper and again it was easy with parts from the parts bin or sheet styrene.I also recommend sanding and filling the interior snap holes that are visible on the back of the snap sleeper.Again I hoped this helped. -
Thanks Jarda and Tim.
-
Thanks Robert. And yes you are correct I am not a fan of Italeri Wheels especially the rears the drive hubs look horrible. I will be using wheels and tires and hubs from Jamie on this build they are very authentic.
-
Thanks for lookin.
-
Thanks Jim. Yes it is.
-
Thanks Jim I appreciate it!
-
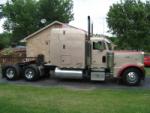
It has been awhile since I have been able to be on the bench due to just having another child and moving and starting a new job it has been a little crazy. Well here is my latest project. I just decaled it today and i need to clear coat and polish the whole thing and trim it out but I just tacked the grill bumper and visor on to kind of bring it all together to get a peek of how its gonna look. It is painted deep jewel green metalic. Decals are from Jerry. I is kinda hard to tell the color but when I clear and polish it I will get some better lighting pics of the paint. I hope you all like it I feel as if i am starting all over again lol! ;D
-
thanks for the article Jim, However do you happen to have all of the article for the 48' sprade axle flat. This appears to be the last steps and i was looking for where to make the cuts like it shows for the drop deck. thanks
-
Right on that one for sure!