

sbk
-
Posts
232 -
Joined
-
Last visited
Content Type
Profiles
Forums
Events
Gallery
Posts posted by sbk
-
-
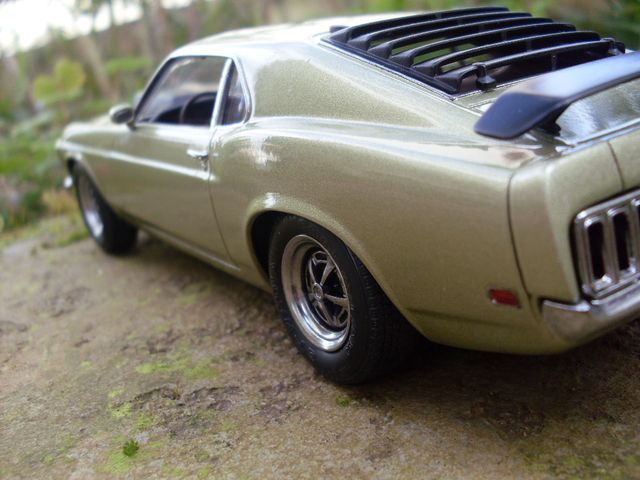
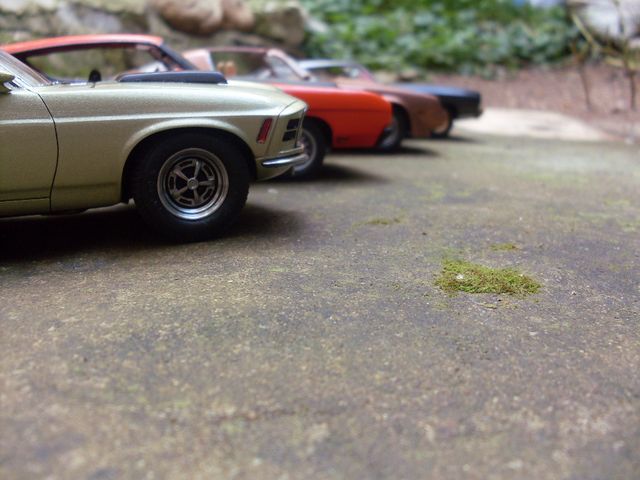
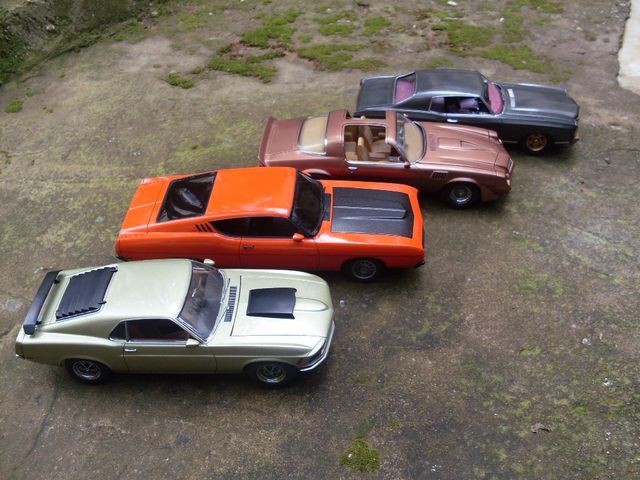
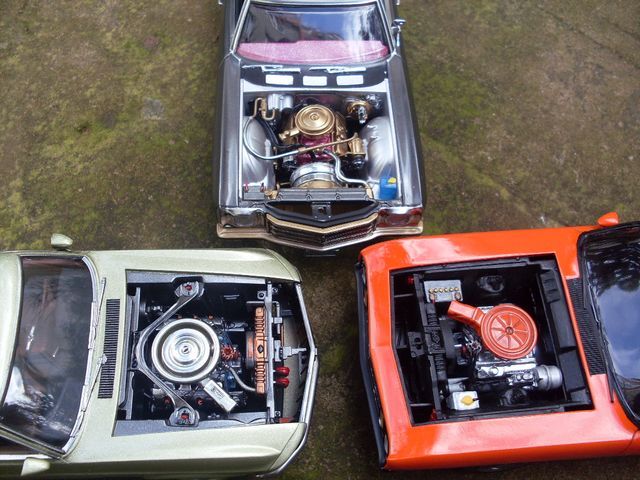
Bernard, those two pictures are amazing!
I agree!
-

These photos are really nice! The models are cool, too!
-
Really nice build! You made it come to life.
Great info on the wheels & tires, too.
-
It's odd that no-one appears to have produced weighted tyres for car models and yet they are almost de-rigeur in the model aircraft world.
So true!
-
.... I just work on the parts I want to, when I want to most of time.
The meaning of life for a model builder. Really, this is the key to keep on building. Well said, Scale Master!
-
Yeah! Great work as always, my friend!
-
Thanks, Bill, I wish would have known you were there. I didn't find out until after the show, reading on here that you were going. Nice work on the Challenger I. You had quite a few people thinking that the model was made of aluminum!
-
Great photos! It was good to meet you & see your cool builds in person.
-
I now have primer on my '50 Olds. More sanding & priming to come.
-
 1
1
-
-
Really nice work!
-
1. Great tip for the dash; I always had a problem with that on these tips.
2. Love the steering wheel. When you say you used an ink pen for the rim, specifically what part did you use and from what type of pen? I liked the shift/column, too.
3. The idea for that tuck-and-roll sheet is brilliant!
Beautifully done overall. I really like what I'm seeing here.
Charlie Larkin
Thanks! The earlier photo for the horn ring was a cut down ring from an ink pen, but the soldered joint with the straight brass pieces kept breaking. No use posting photos of the pen because it didn't work out well. This horn ring is made from thin brass sheet bent to shape. I dipped it in a solution formulated to "tin" circuit boards, & that's what make the brass a silver color.
-
Mmm....looking good!
-
Thanks for the kind words!
I have the steering assembly painted & detailed. I did a quick mock up for a photo.
This past weekend I added the tuck & roll inserts & piping. The piping & weatherstriping is 32 ga. wire painted with the same acrylic craft paint as the inserts.The darker color is a mix of Tamiya & Dr. P.H. Martin's acrylics. A few coats of Testors Acryl semi-gloss clear gives the sheen to the seats & door panels. Door handles & window cranks are resin copies of some that I scratchbuilt.
-
Looking good!
-
It's so good to see one done up this nicely, like it came from the factory!
-
Are you using rattle cans? If so, spray a little in a milk top, beer cap, or whatever & dip your paintbursh in it to apply.
-
The kit fit is totally junk. I made the trim from styrene strip & the windshield out of .007" clear sheet.
-
Yes, you can mix them. I get mine in 1 oz. jars from Black Gold. Scroll about halfway down, & the candies are split into 5 different sections.
-
Wow! Very cool!
-
Mmm... I love it all! So cool!
-
Thanks! Yes, it's a quite a bit less work than gluing down one strip of half round at a time. I've also used V-groove siding, which is easier than individual strips, but doesn't look as good.
-
Thanks!
Joker, I don't have any documentation for the armrests & door handles, but I make the patterns from styrene pieces & then make resin copies.
Here is the Chuck Easton method of making tuck & roll upholstery inserts. Squeeze some acylic craft paint into a mold made from a kit part with tuck & roll. Chuck gave me this mold, but doesn't remember which kit it came from. Another good source is the toneau cover from the AMT 59 El Camino kit.
Use a piece of cardboard or something similar to spread the paint out.
It doesn't really show too well in this photo, but the paint totally covers the mold. Put this aside to let it dry. Depending on the weather, I usually wait 2 - 3 days before handling it. Different brands & colors of paint have different drying times & some need to be thinned with water a bit before doing this.
This is what may happen if you pile on too much paint in a hurry. Air bubbles.
I make patterns out of cardstock & start cutting the "upholstery."
As you can see, it stays nice & flexible, very similar to real upholstery material.
Here are the door panel inserts in the primed door panels. The outer color will be a chocolate brown, not the greenish/tan color.
Here are the seats & the inserts.
Test fitting the inserts. Once again, for final assembly the inserts will be glued in with white glue.
Here is what it looked like when completed.
-
The interior parts are primed & ready for paint. I'll do tuck & roll inserts made from acrylic paint like I did on my last 2 builds.
I polished the MCG sombreros & added a little color to the center PE piece. I still need to paint the whitewalls & the rim that is visible behind the wheelcover.
Almost ready for paint.
-


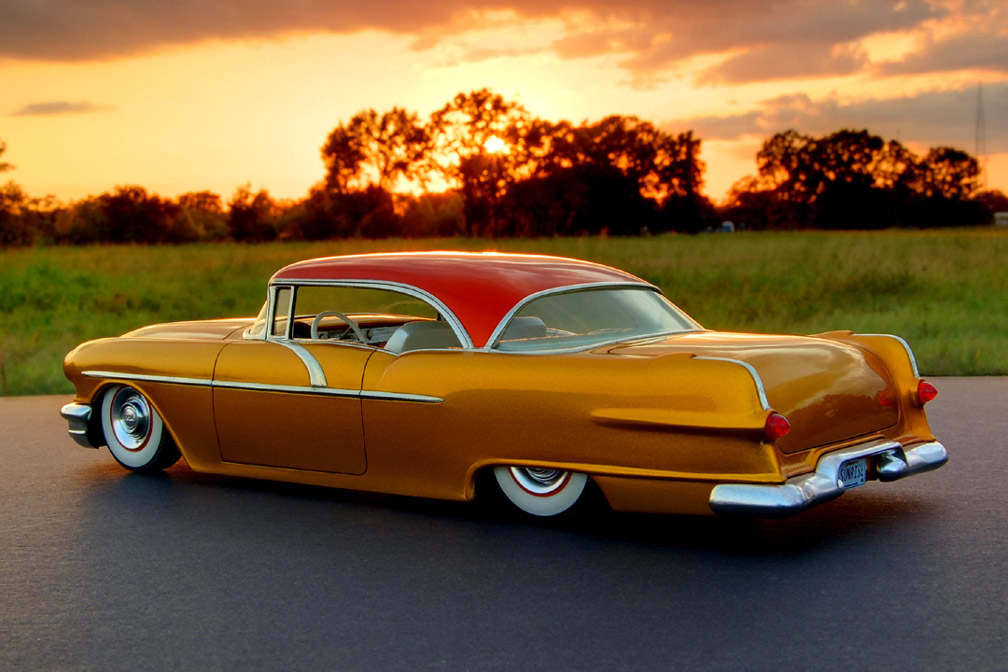
Post a cool model pic
in Model Cars
Posted
Just plain awesome building & photography!