sbk
-
Posts
232 -
Joined
-
Last visited
Content Type
Profiles
Forums
Events
Gallery
Everything posted by sbk
-
Those are the best, & use nothing else for small diameter drilling.
-
Making seats look like leather...
sbk replied to Hillbilly Deluxe's topic in Tips, Tricks, and Tutorials
Sorry for being late to the party. Those are resin copies of some that I scratch built. Thanks! -
Exactly. I bought a few sets years ago, multiples of the sizes that I use the most. I originally bought some at Harbor Freight almost 20 years ago, & have bought random sizes over the years to replace broken ones & fill in the missing sizes. I use them by hand, no pin vice. I have broken some, but it teaches you to be more careful.

-
I think the hood ornament results could look better with more surface prep. & a wetter black base coat. I could see orange peel on most of it. Still, a very interesting comparison, thanks, for sharing.
-
Yeah, so cool! Great restoration with Dennis touches.
-
Making seats look like leather...
sbk replied to Hillbilly Deluxe's topic in Tips, Tricks, and Tutorials
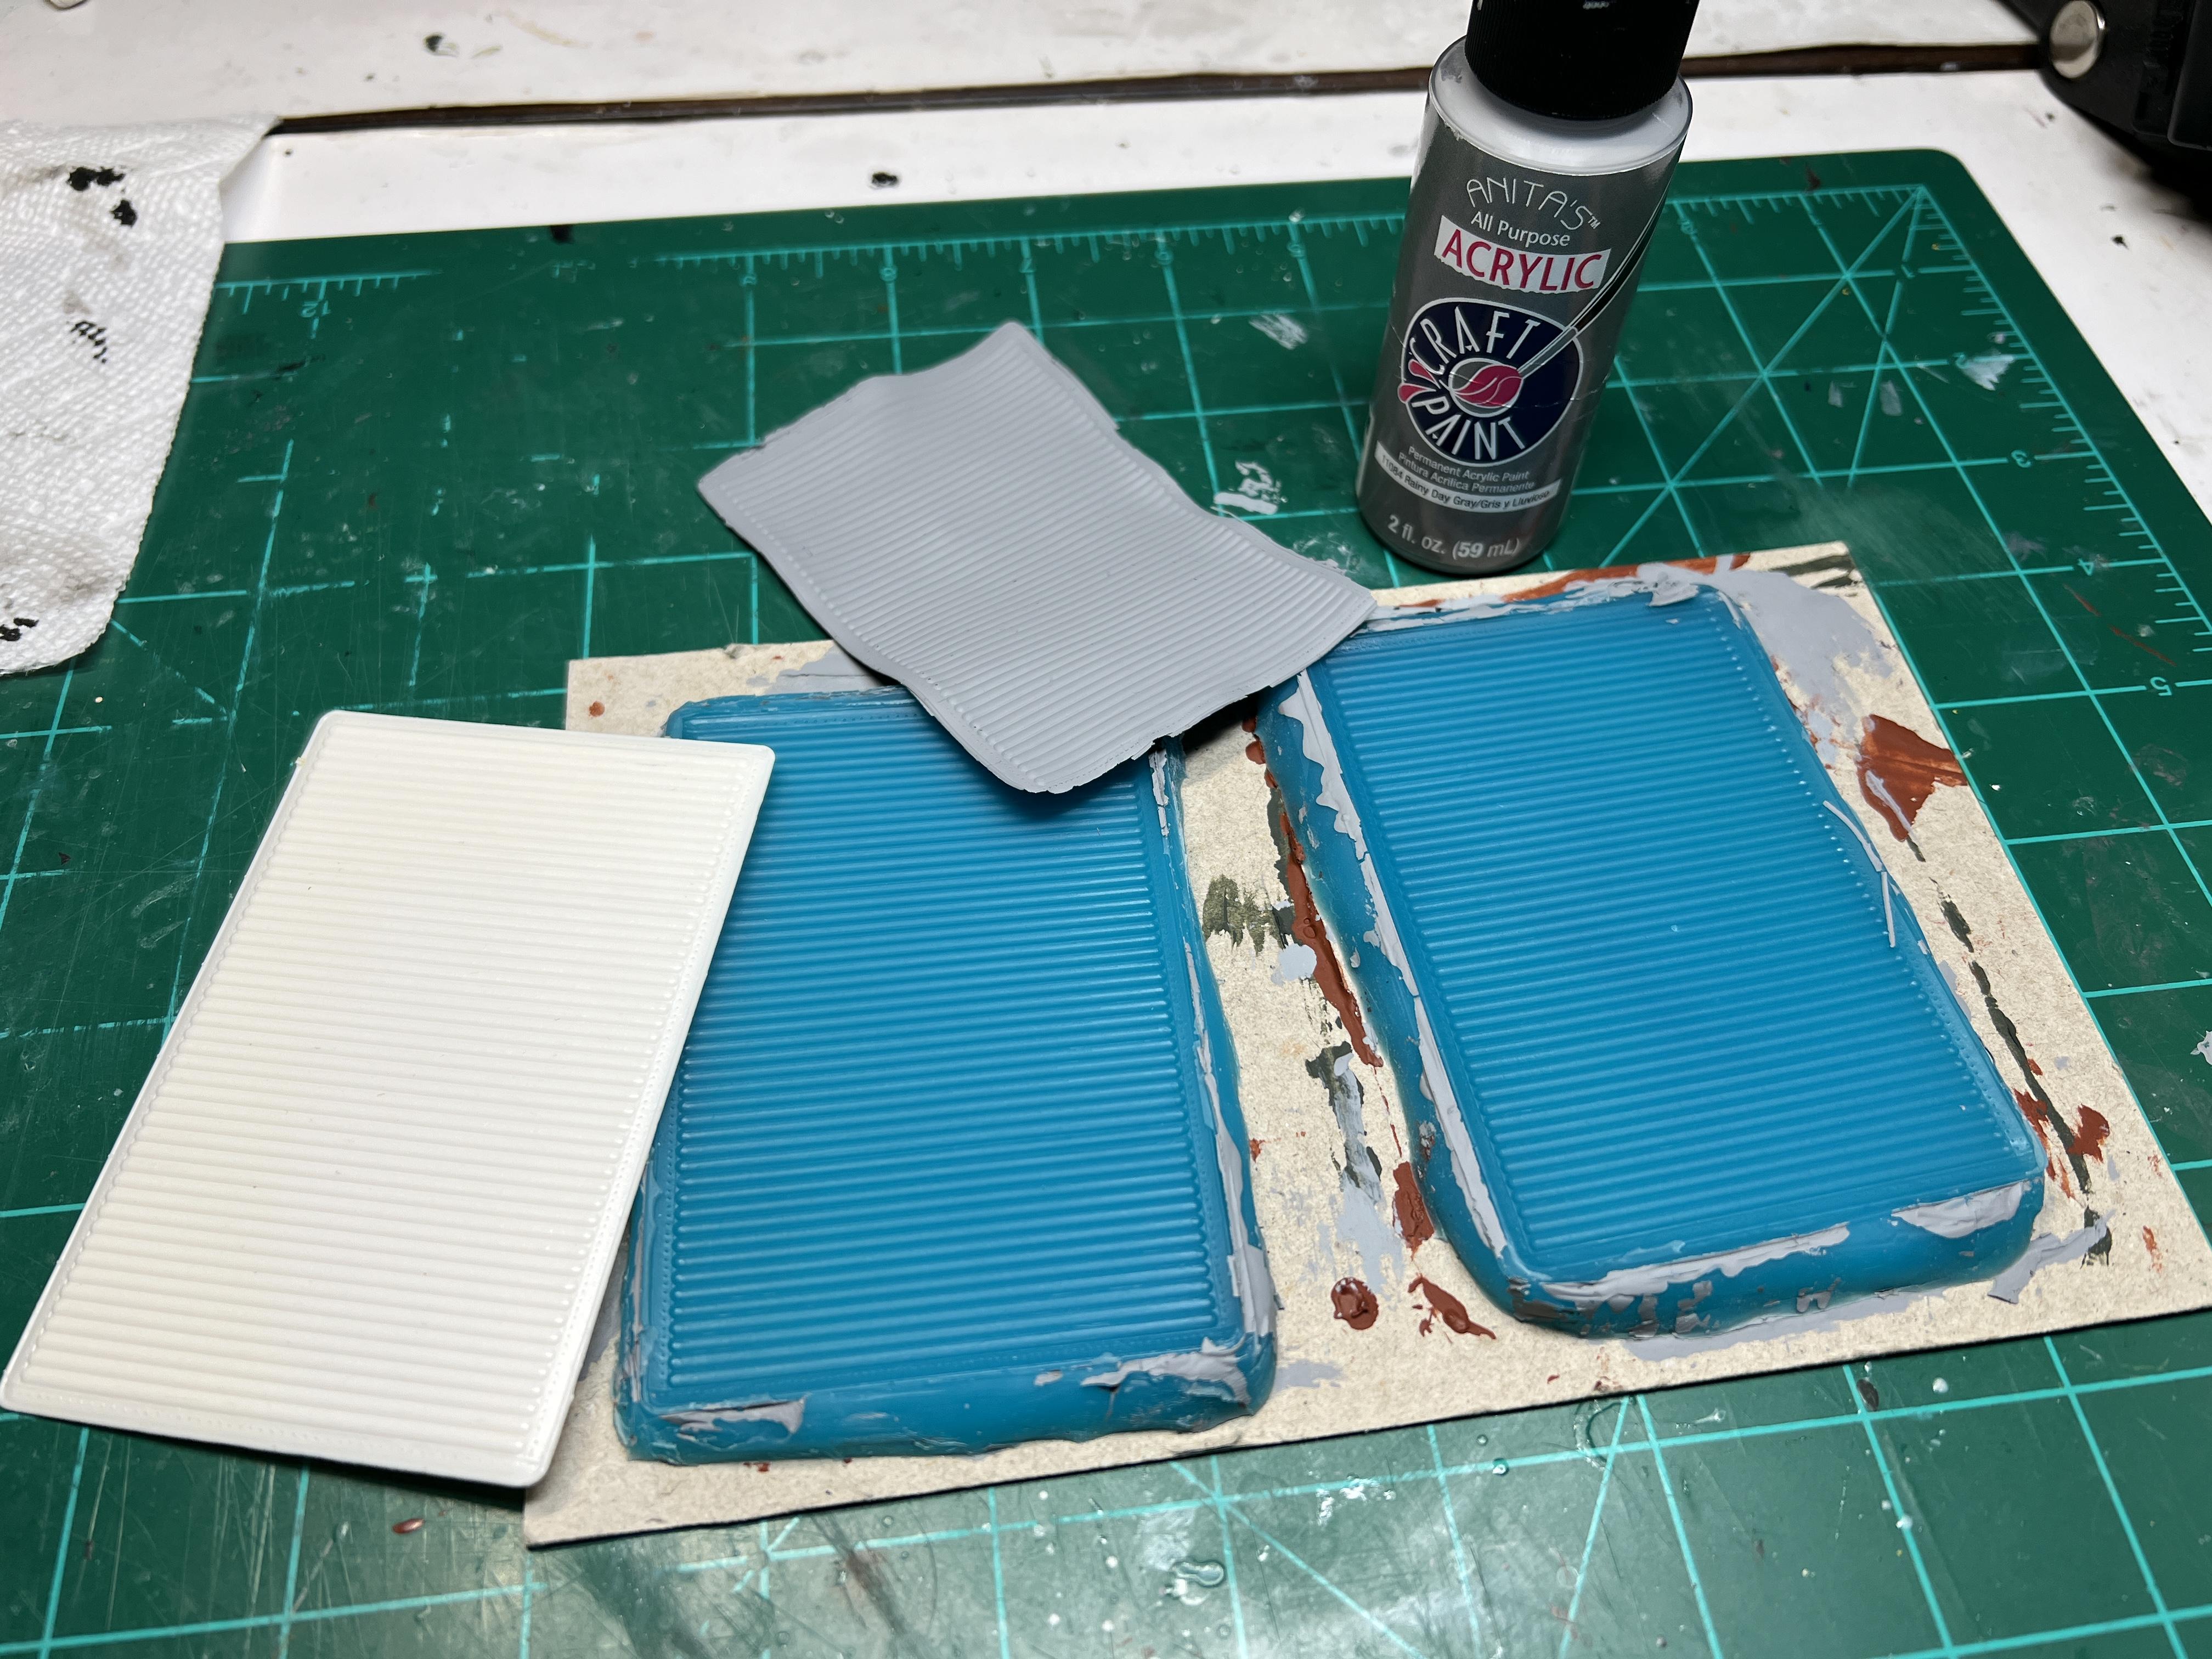
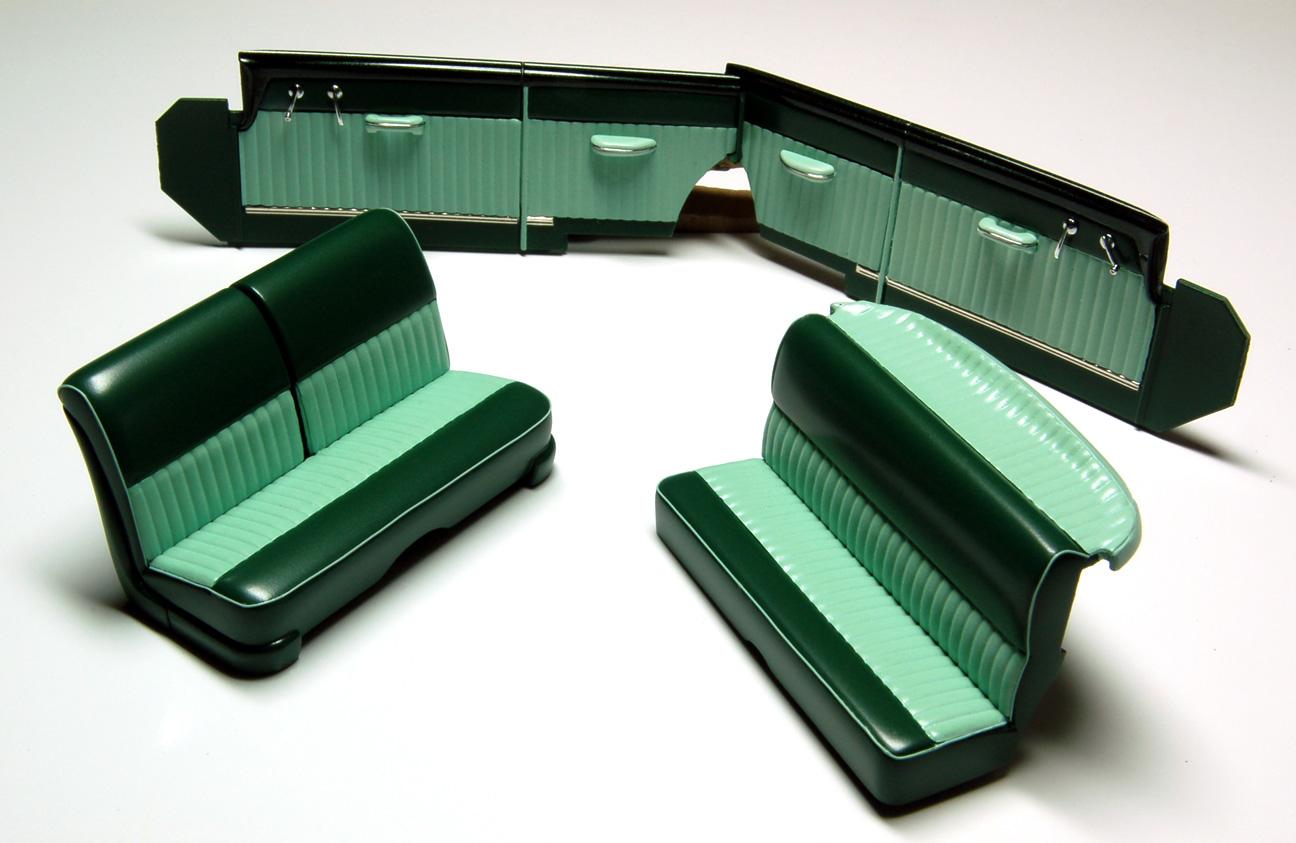
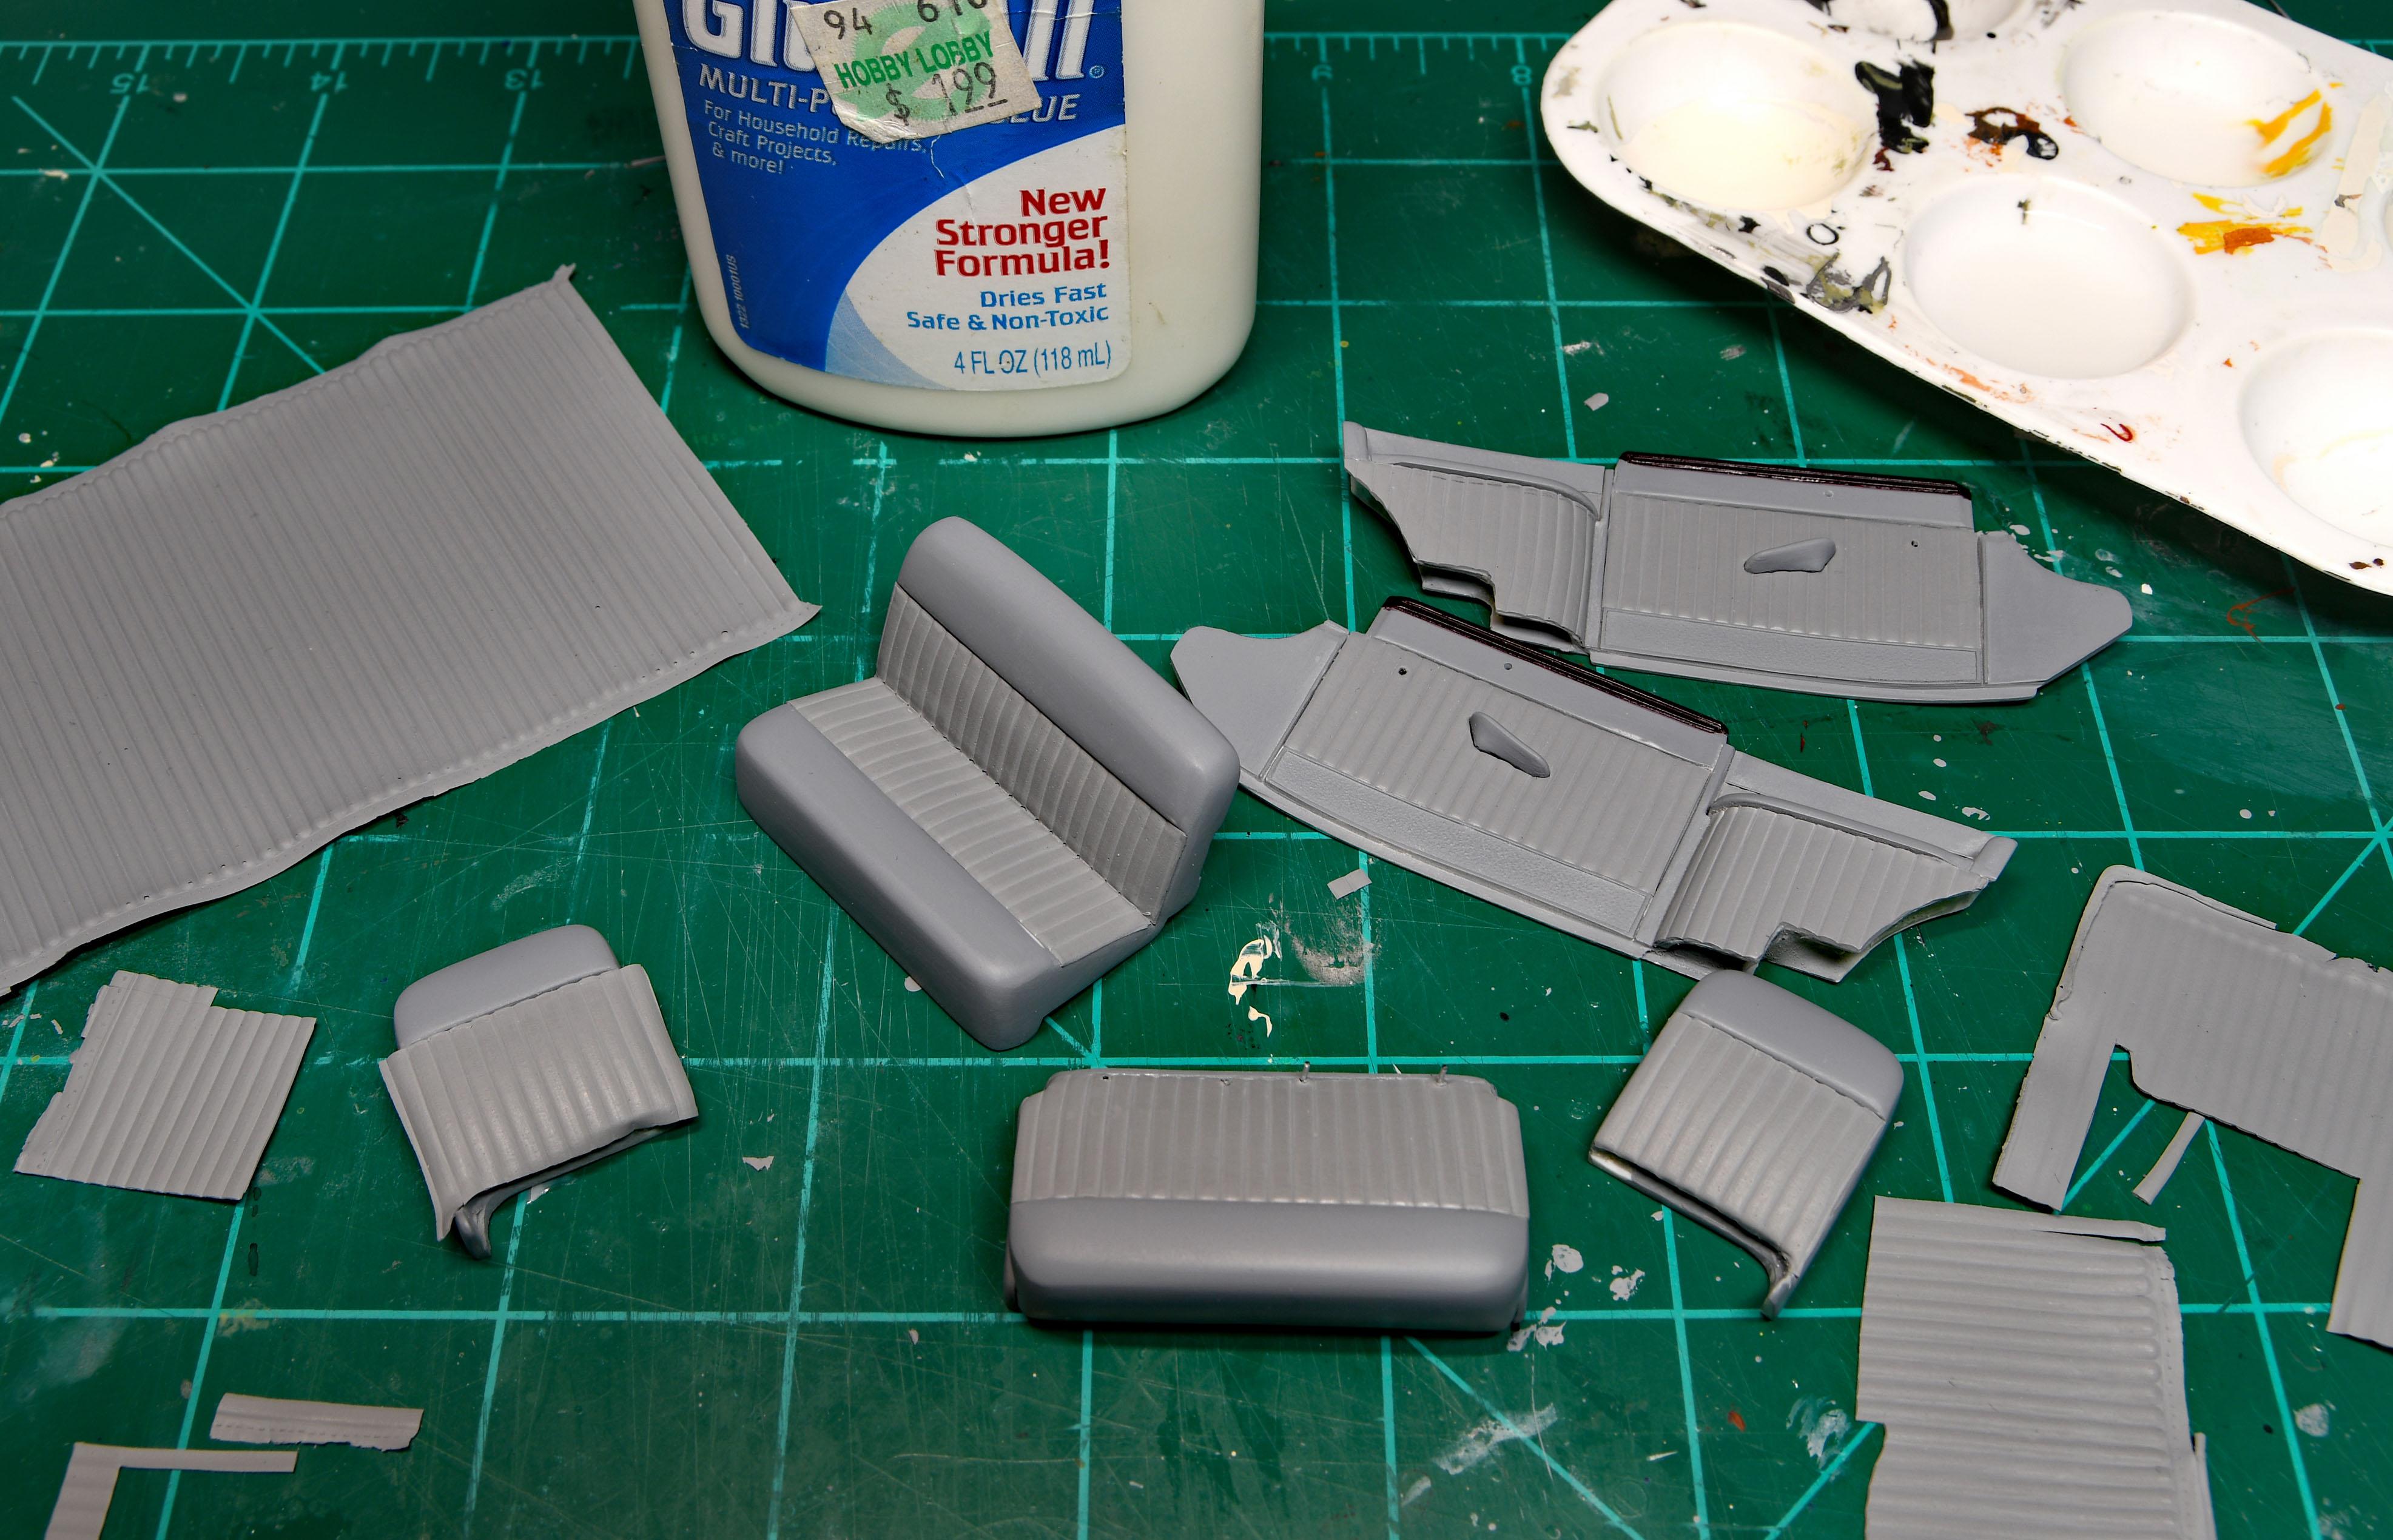
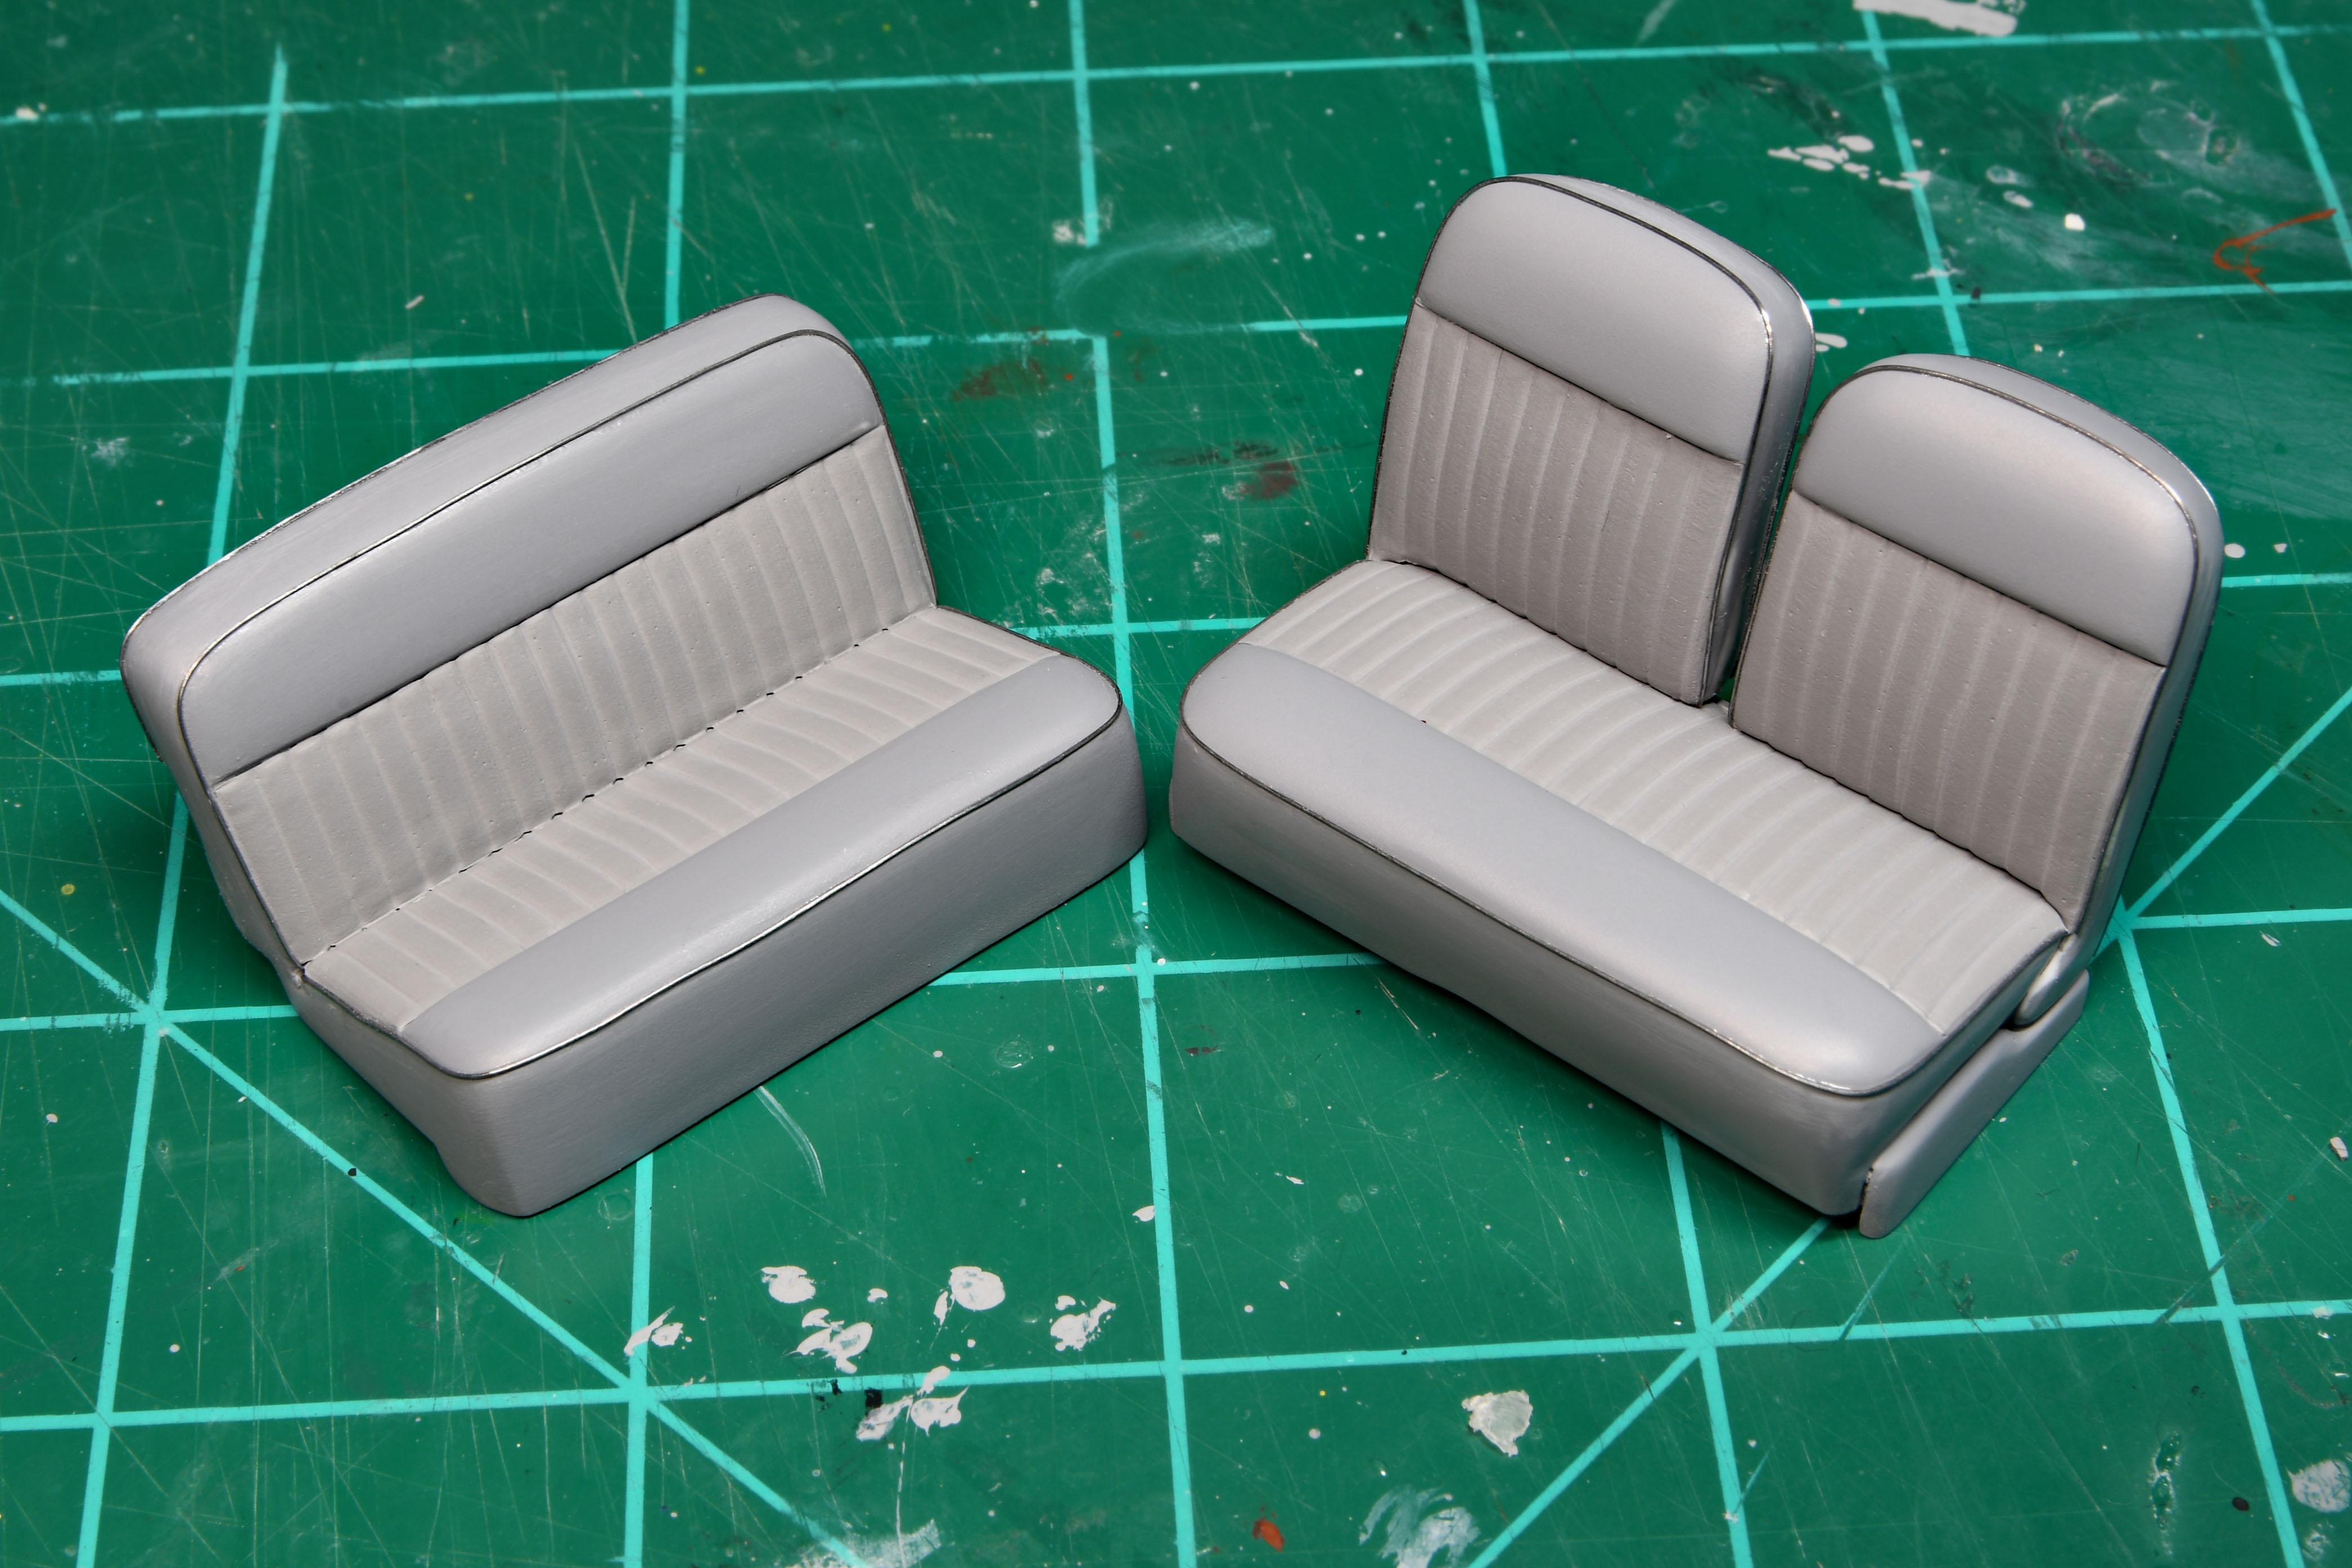
Thanks! The cover is from an old AMT Ford truck kit, ('61?) but the cover from the AMT '59 El Camino may be easier to find. The mold is made like a typical silicone mold for resin casting. I've had the best results with Anita's craft paint. Tons of colors available & pretty cheap. I pour the paint into the mold, spread it around, & try to get most of the air bubbles out. After a day or two, I remove the piece & set it aside. I pour more to have extras in case of surface air bubbles or a miss-cut piece later on. Since I was going to paint the entire seat, I used a color that was similar to the gray primer so that the paint coverage would look even. The great thing about using craft paint inserts is that it's easy to do two tone upholstery by using contrasting colored inserts. Paint the seats one color & use a different color craft paint for the inserts. If you go to FB, I have a step by step. If you start on the photo in the link, I have 9 photos with captions explaining the process. https://www.facebook.com/photo/?fbid=192070664231320&set=a.148890918549295
-
Making seats look like leather...
sbk replied to Hillbilly Deluxe's topic in Tips, Tricks, and Tutorials
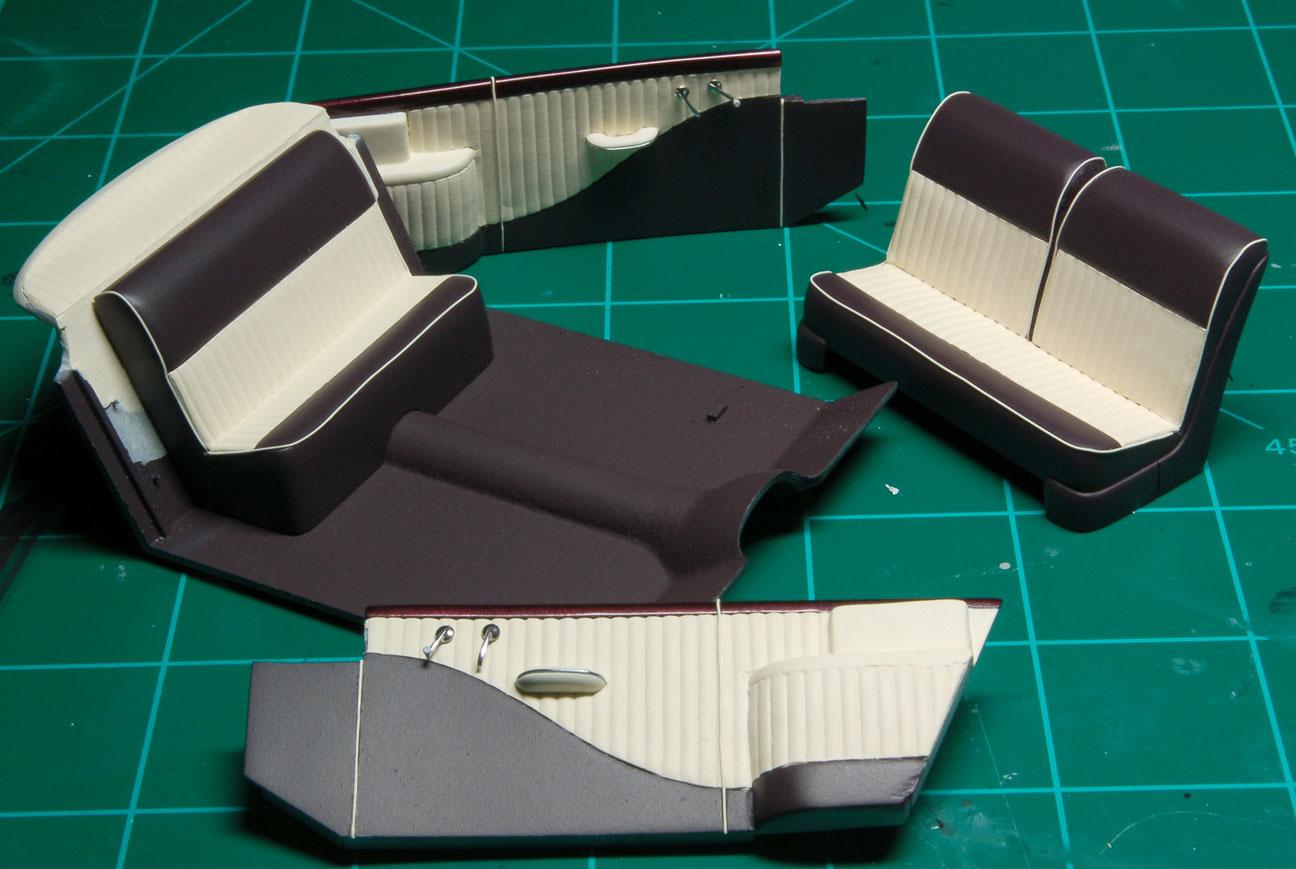
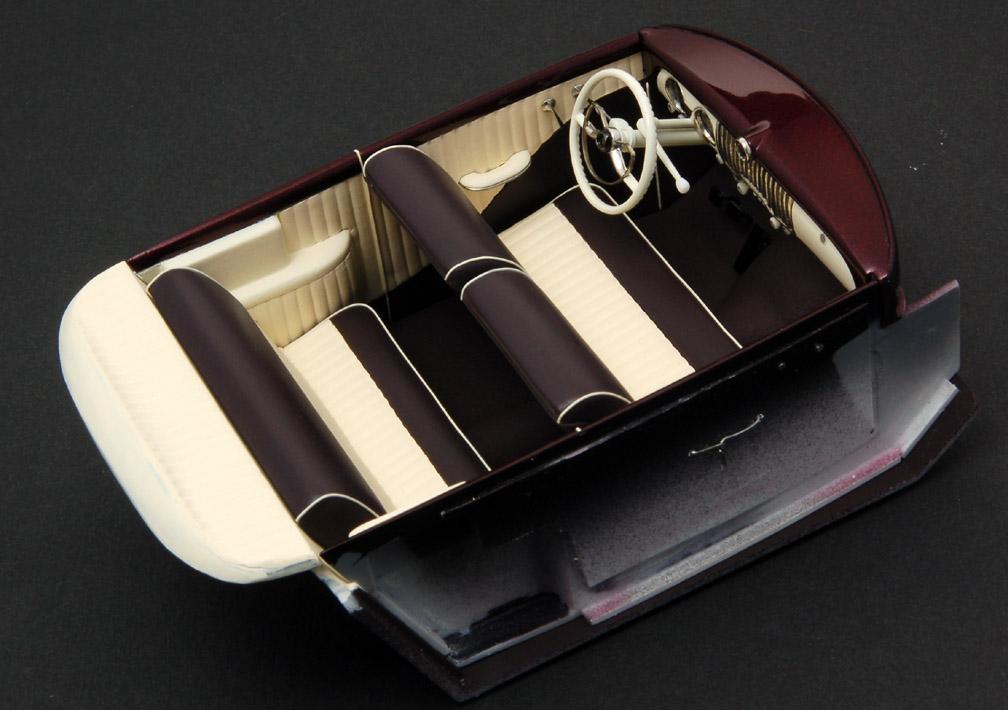
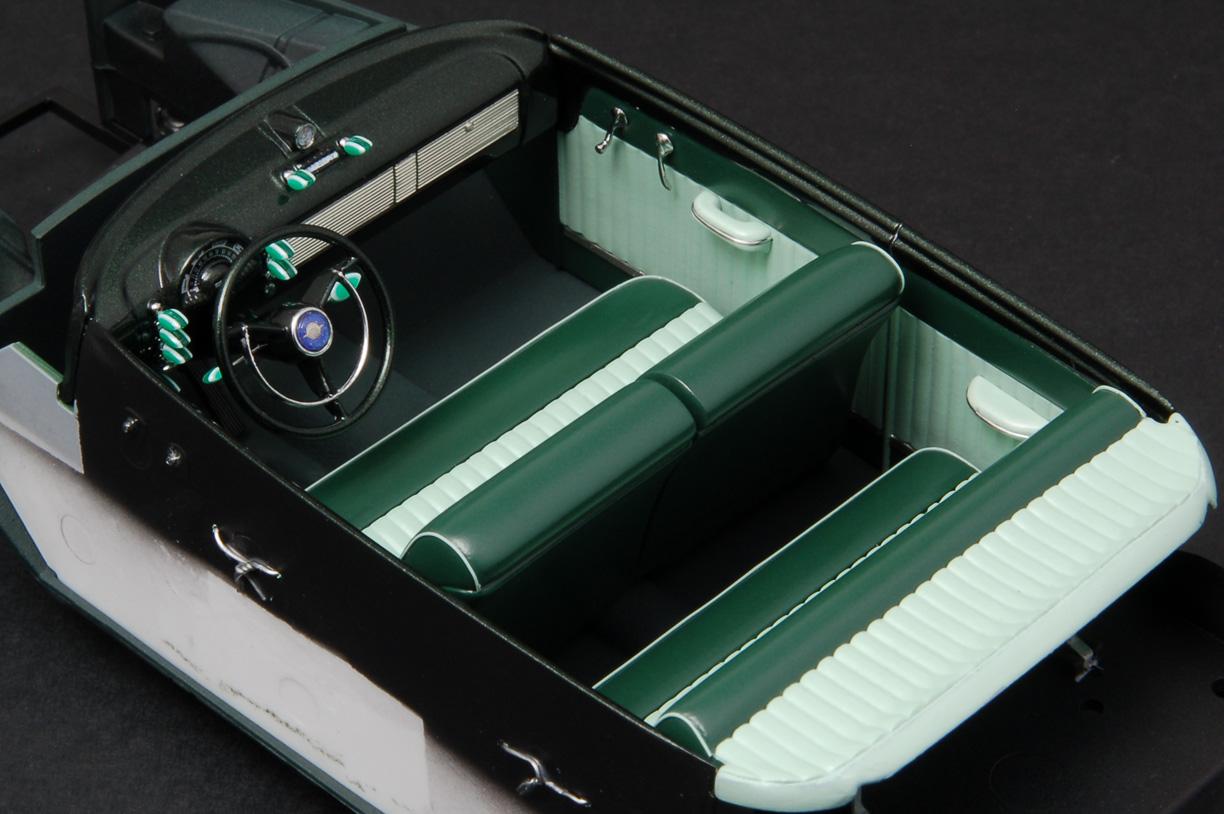
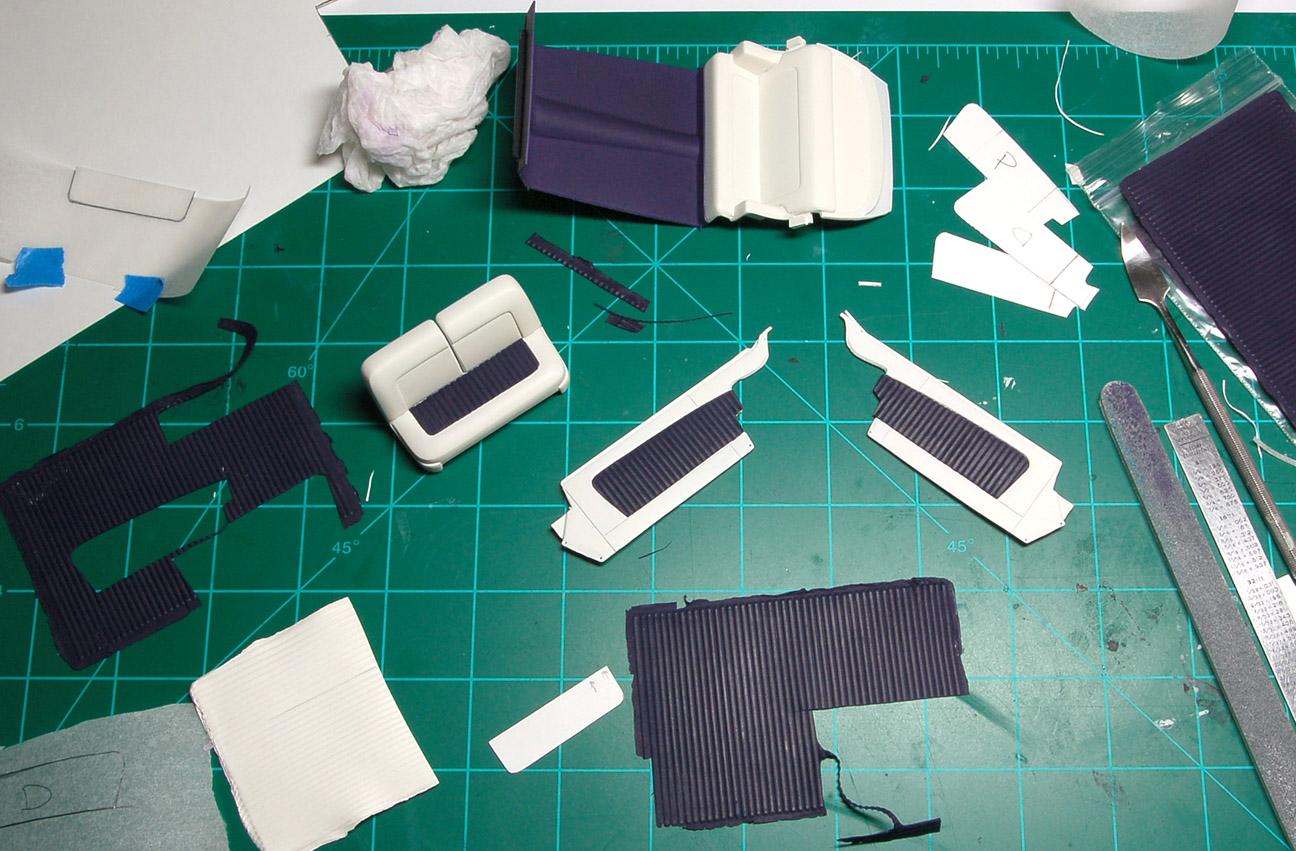
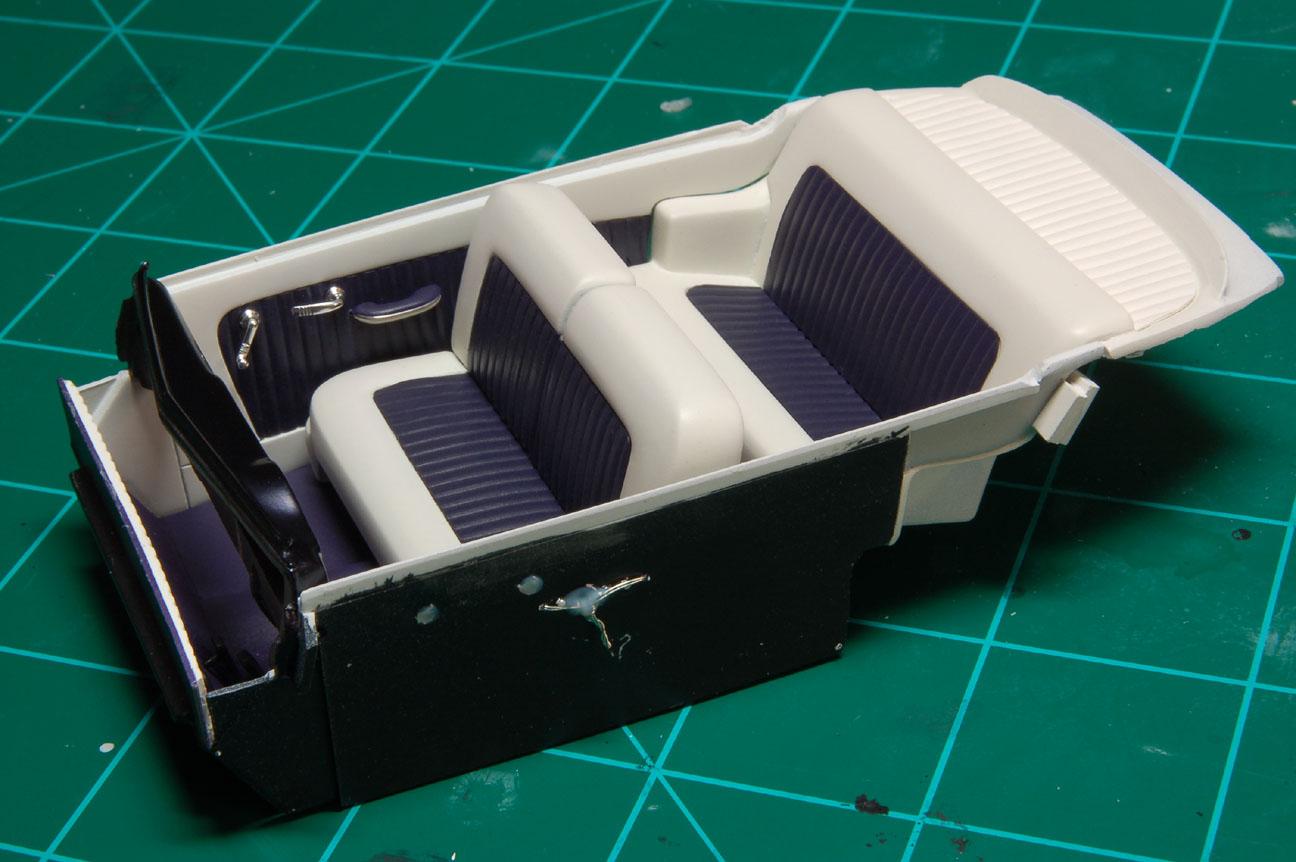
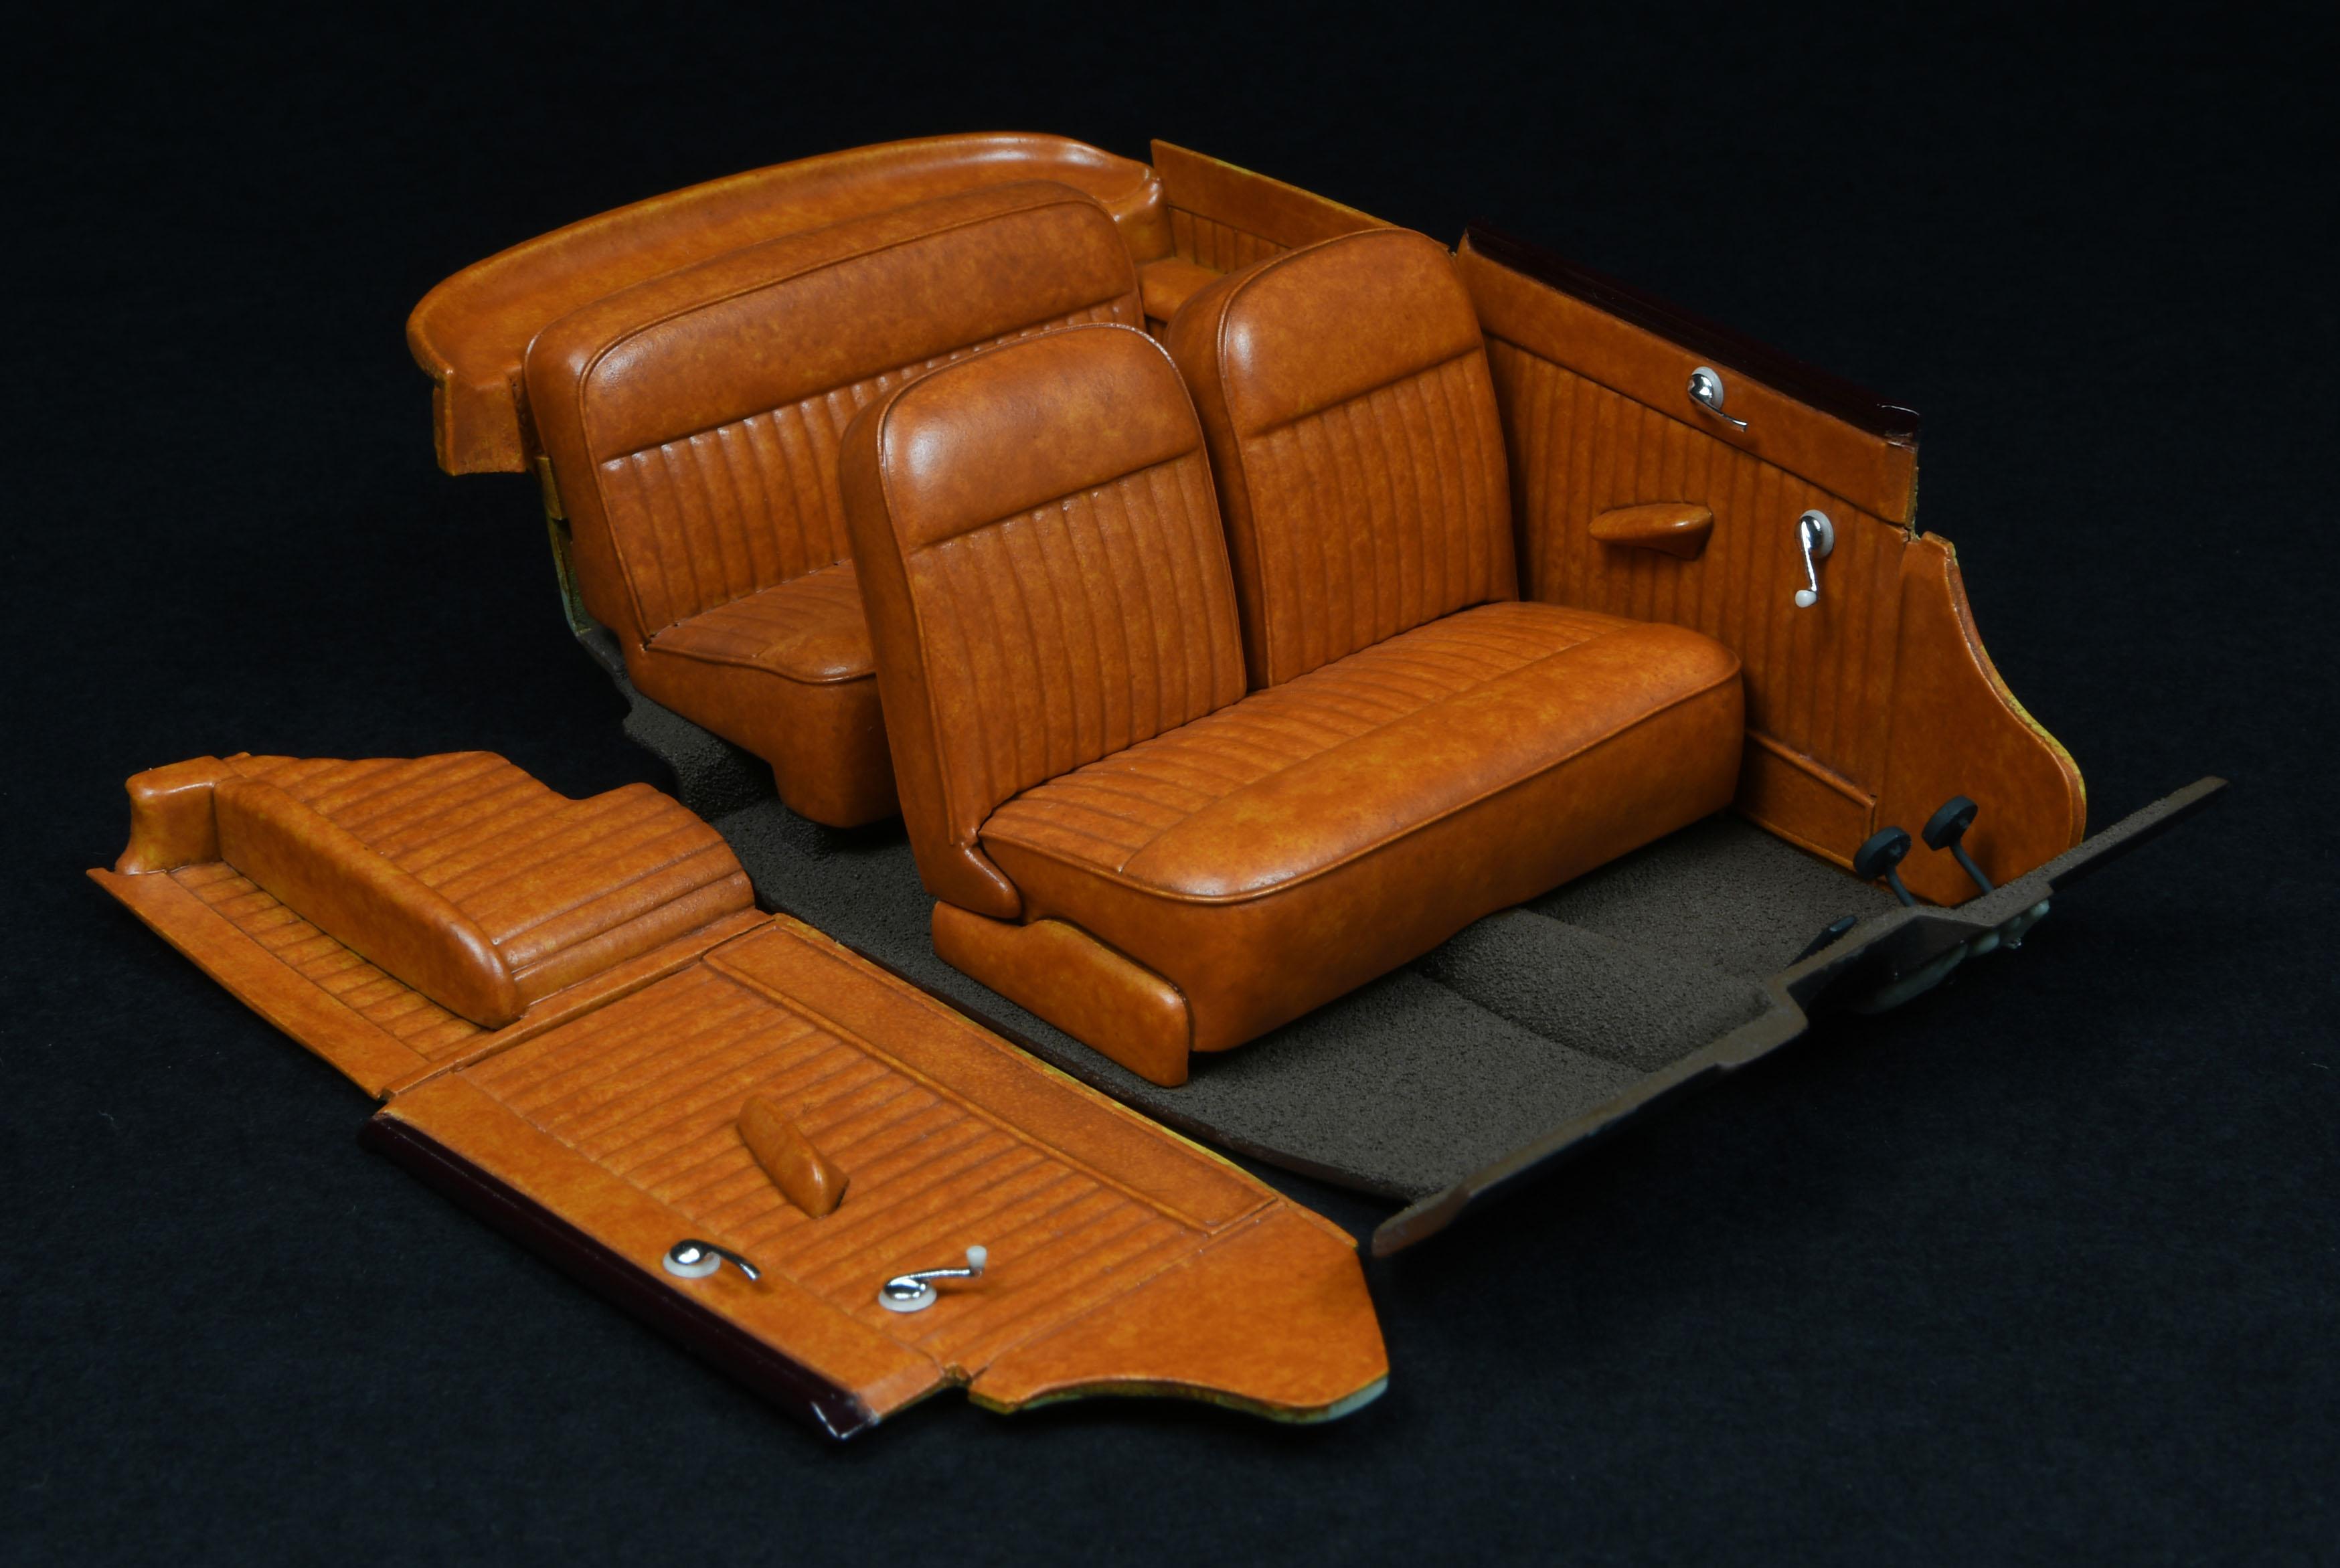
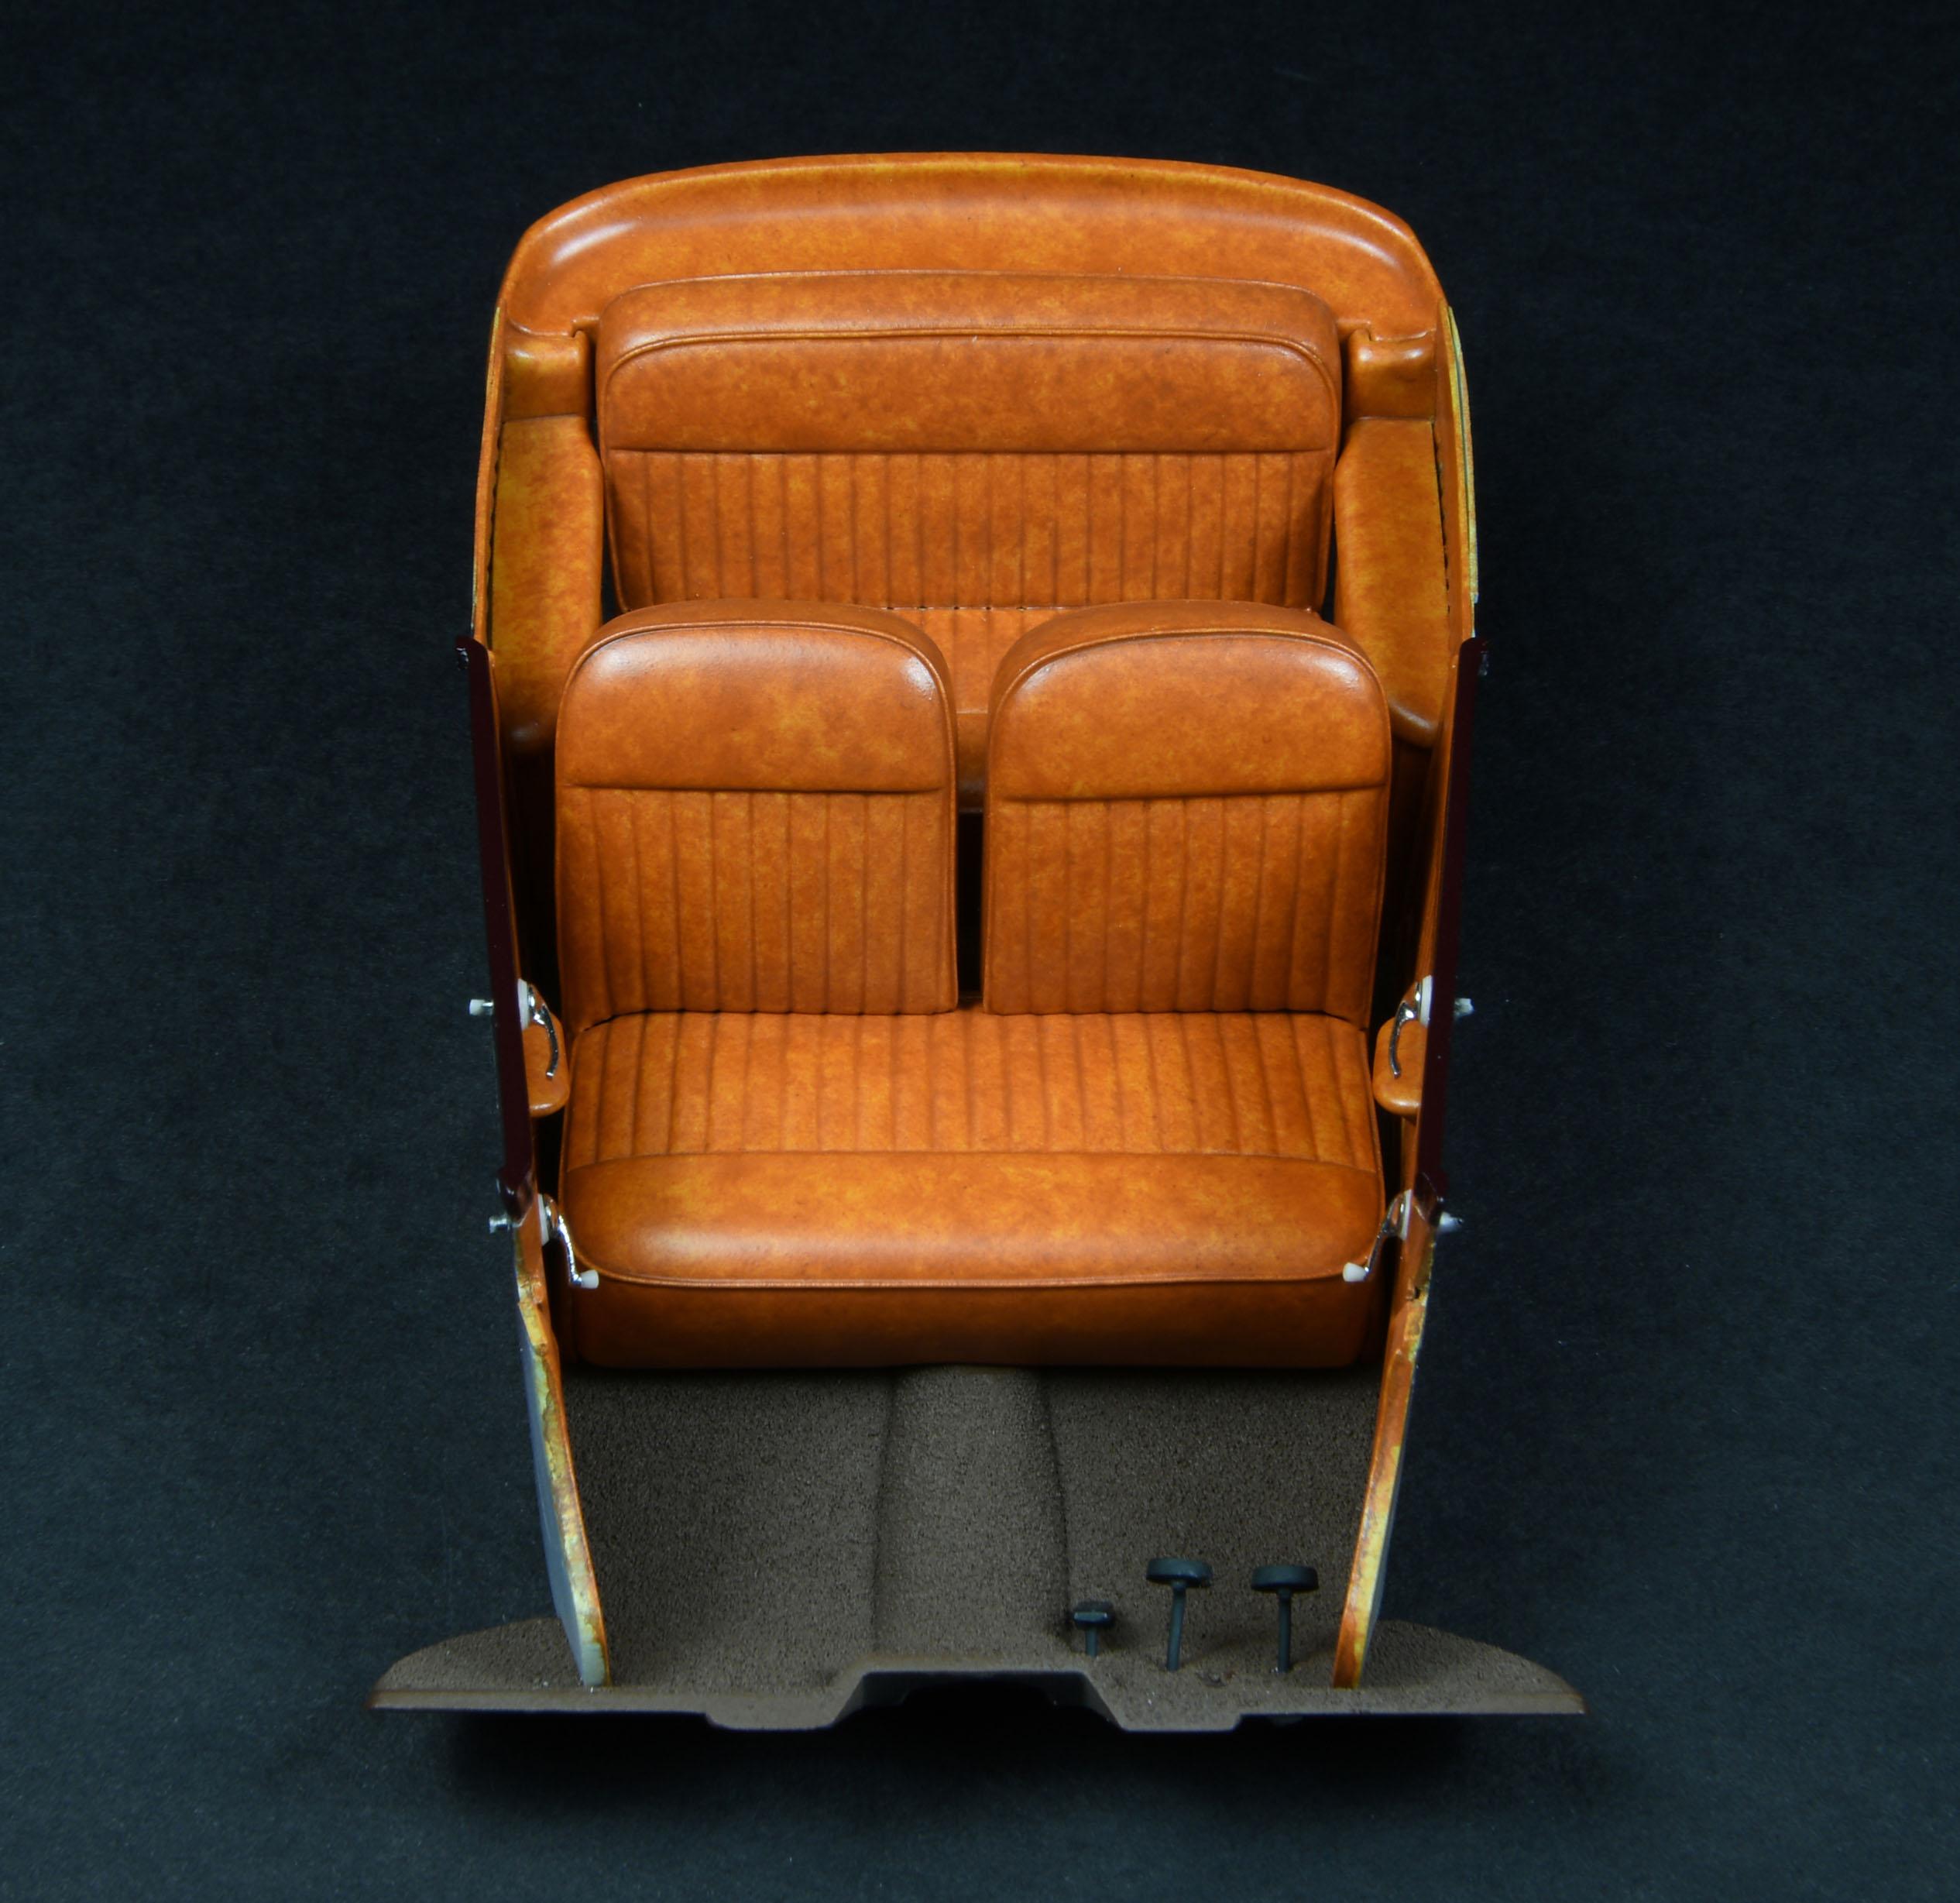
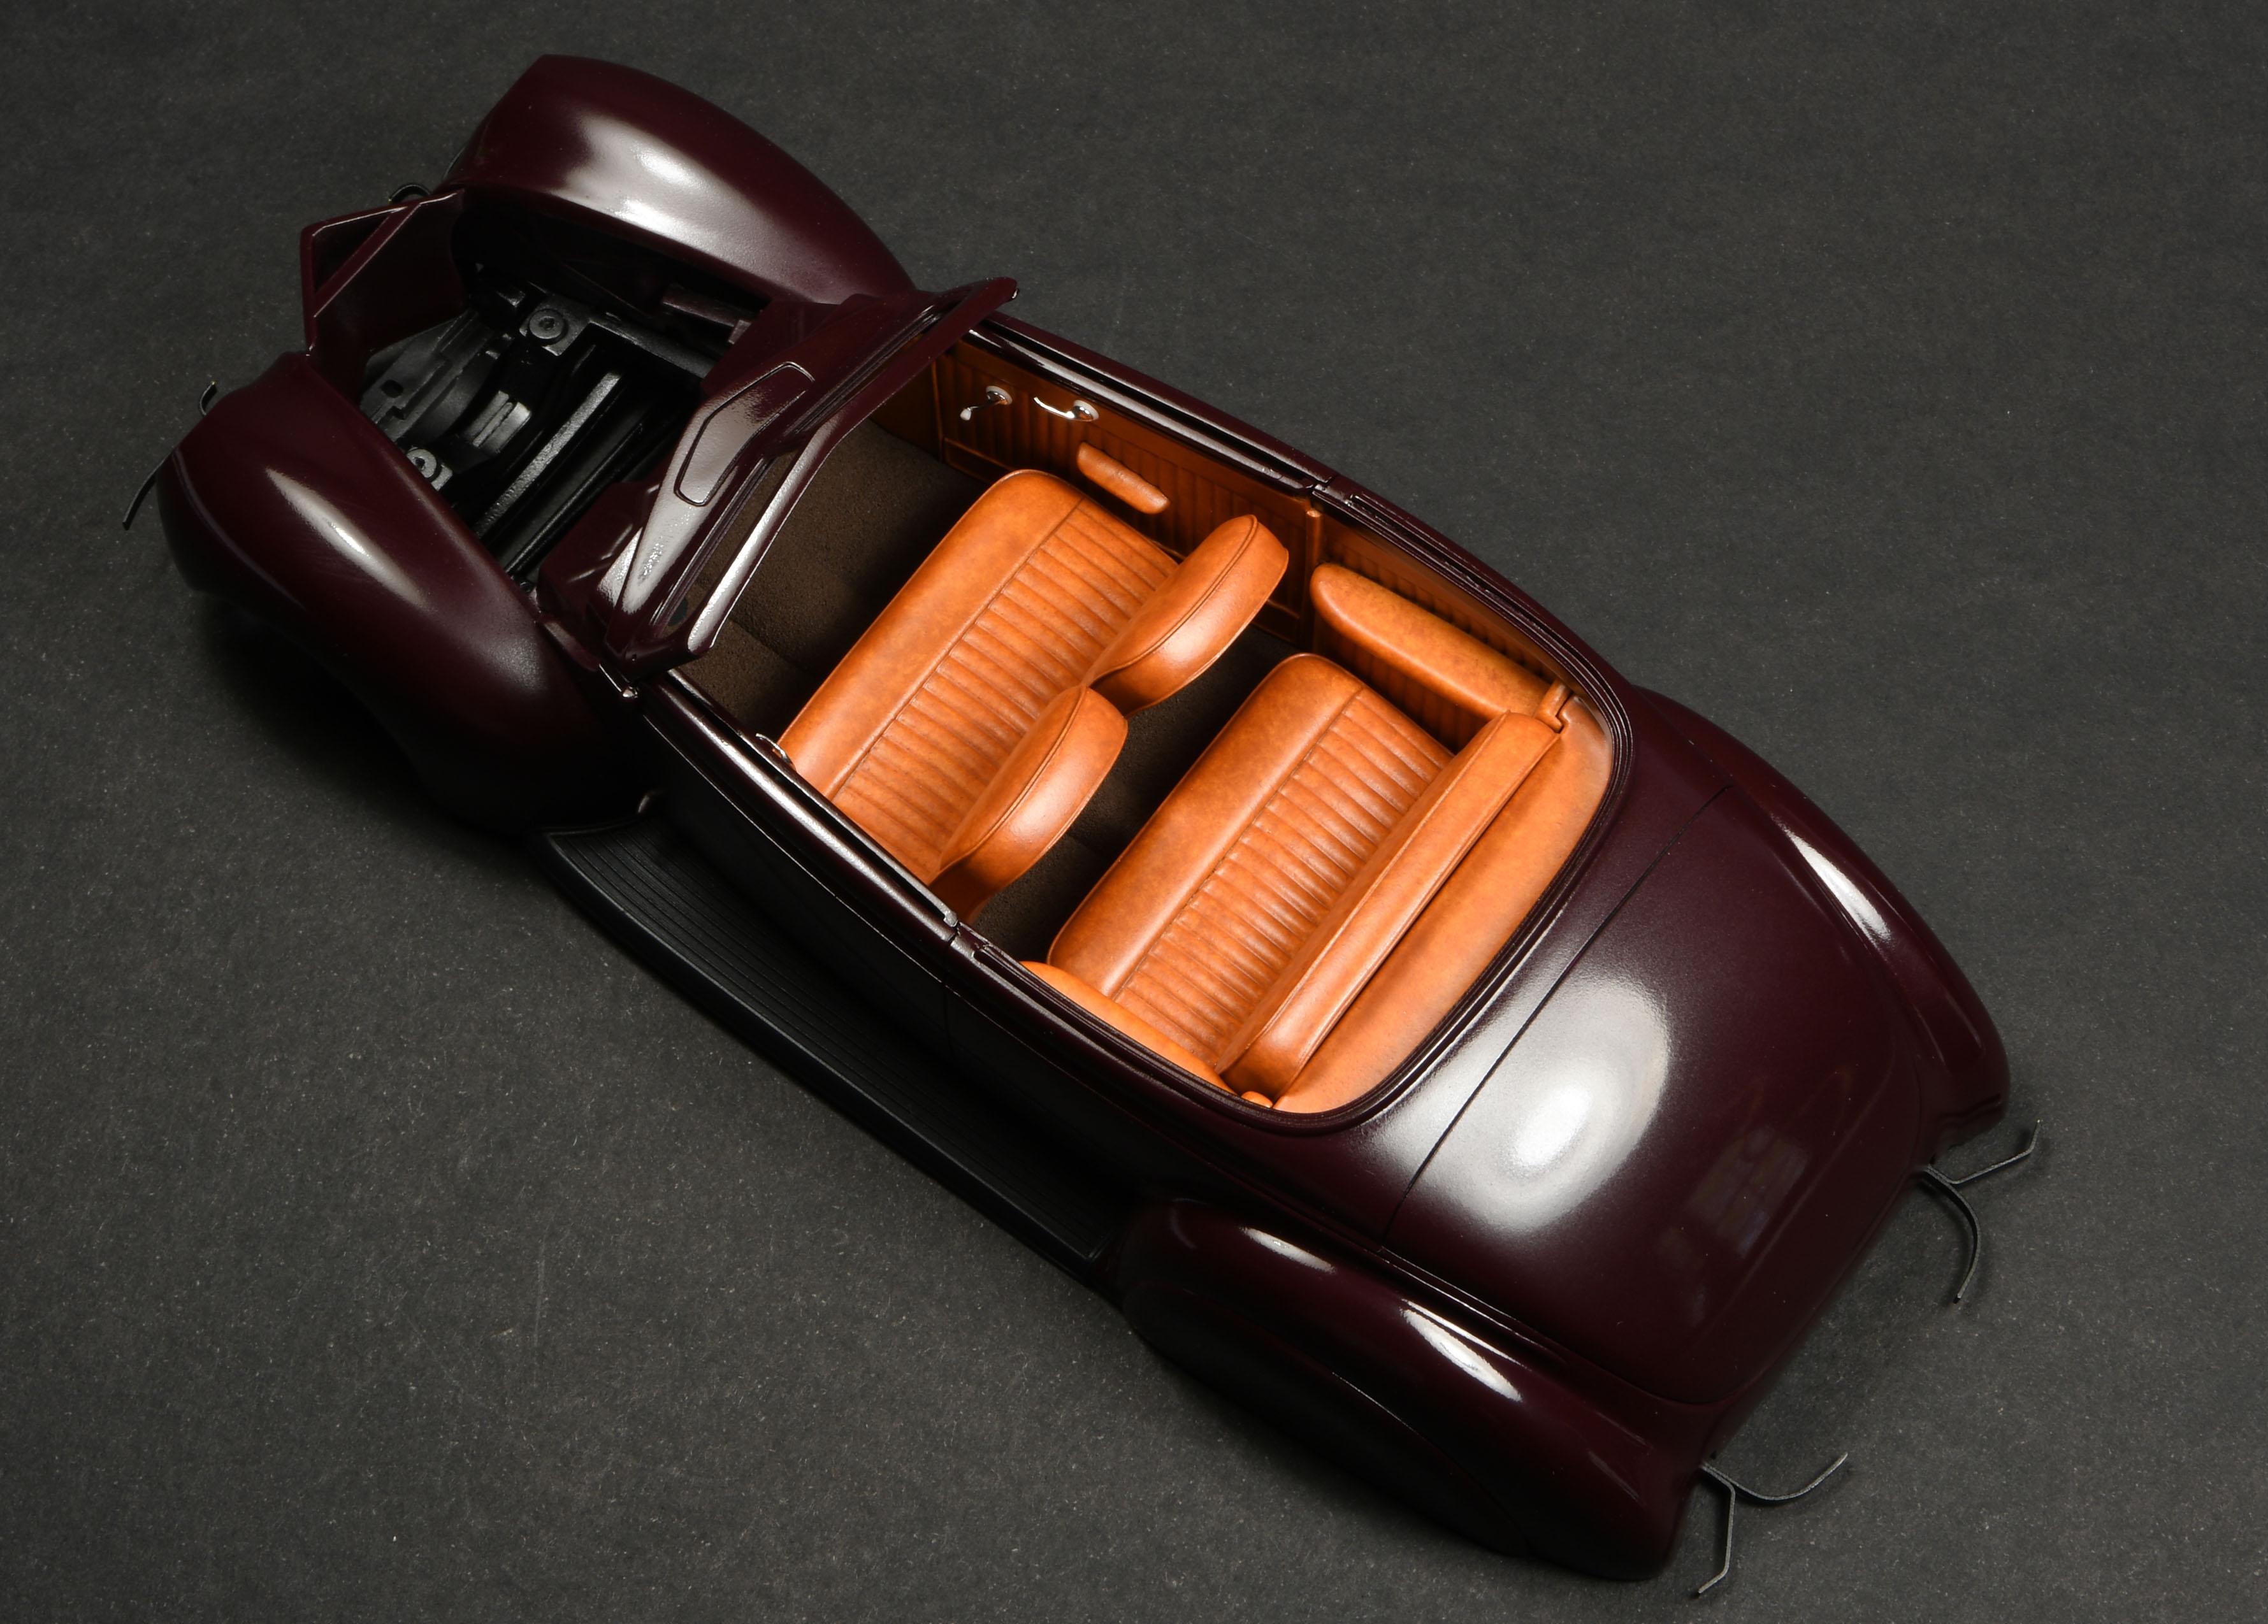
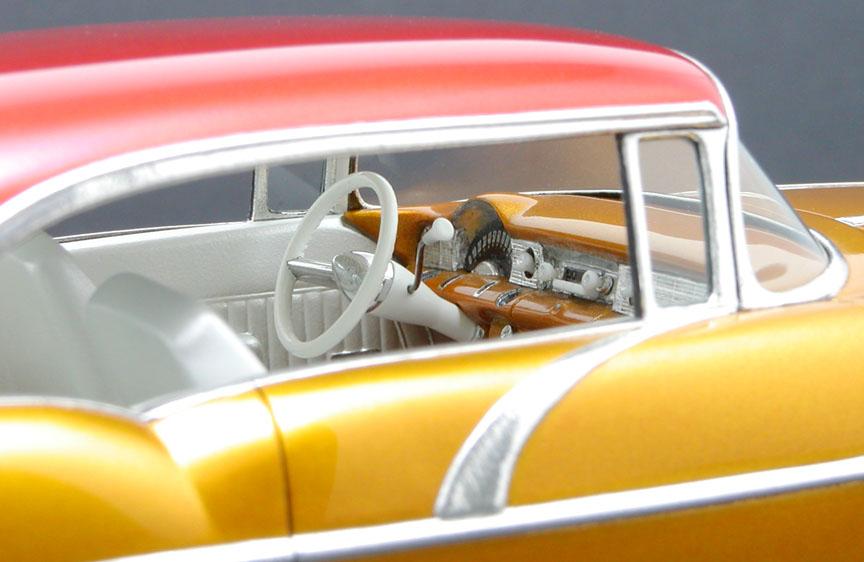
Later on I get into some of the stuff Bernard mentioned up above. At this stage, I poured craft paint into a toneau cover mold to make the tuck & roll material. Then, the various pieces were cut into shape & glued in place with watered down Elmer's glue. . 32 ga. bead wire was superglued in place to represent the piping. The leather base coat was Acryl Gelb RLM, but any sort or yellow ochre color should work. After that, I started sponging & stippling thinned layers of Americana acrylic craft paint. The colors I used were Traditional Burnt Sienna & Cinnamon Stick. Between coats I sprayed Acryl semi-gloss clear to seal the previous coats. The photo in the background shows the look I was aiming for. There's also a test seat in the background to work out my colors. That one came out a bit dark. When I was satisfied with the overall look, I sprayed quite a few more coats of semi-gloss clear. The paint on the body still needs to be polished out.
-
Radio antennas another dollar store money saver.
sbk replied to Mike C.'s topic in Tips, Tricks, and Tutorials
Wow, I've seen that image for so many years. I had no clue it was 1/32. Very cool! -
Kasey (Slowlysmodels) has a few that you may be interested in. Check it out: https://cults3d.com/en/search?q=slowlysmodels
-
HOK, DuPont, LMG, MCW lacquers, as well as nail polishes all thinned with Dupont or HOK lacquer thinner. You mentioned Testor's Acryl in your original post & that is what acrylic paint I'm referring to. I also use Tamiya acrylic, but have never tried shooting lacquer on top of it.
-
So the headlight buckets are painted with Acryl, but you want to use Tamiya on top of it instead of stripping the Acryl? I guess it depends on how many coats of Acryl are on there. It should be okay, but I don't want you to ruin your model because "Steve said it would work." 🙂
-
Try alcohol or lacquer thinner on a craft swab or toothpick like Snake mentioned. Not sure how well the 2K will hold up, but it may be okay. Once Acryl dries, it is super tough, which is why I use it as barrier coats under lacquer topcoats. Too bad the the brand is gone.
-
Good stuff! Have you done weighted tires? I have a few vintage WW tire designs that I did a while back, but wasn't all that successful at adding the sidewall bulge.
-
Lots of great stuff happening here! Very inspiring. Steve
-
Nice work! My apologies if you already mentioned it, but what program are you using for design? Thanks, Steve
-
I started sanding flat spots in tires a while back after taking some low angle outdoor photos of models, & I saw that the tires were barely contacting the ground surface. I sand them with coarse sanding sticks & gradually move to finer grits. These are both pretty subtle, but I didn't want to remove too much of the pie crust on the edges. Still, much better than perfectly round. The sidewall bulge would be the perfect touch, but until 3D printing resolution catches up with what I want to see, I'll do it this way.
-
Most realistic way of making autu glass??????????
sbk replied to doorslammer68's topic in Tips, Tricks, and Tutorials
Transparency film for copy machines. -
Most realistic way of making autu glass??????????
sbk replied to doorslammer68's topic in Tips, Tricks, and Tutorials
As others said, thin acetate or similar will work. I've used 0.010" clear styrene, .007" clear PVC, & .005" acetate on various models. My favorite is the PVC because it can take pretty heavy duty curves without crazing or clouding up like styrene does. I dig a channel around the opening on the inside of the body for the "glass" to sit in. If that's not possible, I'll glue in a strip of 0.020" x 0.020" styrene strip around the inside opening to create the channel. Sorry, I can't find any of my photos showing that. If you can get the fit of the glass tight in the channel, it should stay in place with little or no glue. But, you may have to sit there & make 5 or more windshields before you finally get one to fit perfectly. Material is cheap, it's just the time factor. The '56 Pontiac had an acetate rear glass & windshield. The '57 Chevy truck had totally messed up windshield & rear window trim that I rebuilt with styrene rod. I used PVC on this one. The fit in some places could have been better, but I left well enough alone. There's a slight distortion when looking through it, but I was also getting that with styrene. Give it a try & see what you can come up with. Steve
-
NNL Nats #40 In-Depth Coverage with all builders identified....
sbk replied to tim boyd's topic in Contests and Shows
Thanks for the coverage, Tim. Almost like being there. -
Just beautiful & very "in-scale". Nice to see how it all came together.
-
Steve, I've been going through every page of this within the last couple of days. So much good stuff in this entire series. From the reworking of the wheels to the firewall rebuilding/detailing, to the interior detailing, engine detailing, etc. So much nicely done scratch building & overall great model building. Plus, the photos are fantastic, super clear & to the point. BTW, the window gasket rendition looks really close to me, although I, too, would be concerned about the longevity of the electrical tape. Who knows, it may not be an issue. Keep pushing, very inspiring to see.
-
I've chopped a couple, but never sectioned one. I have a step by step of the chop along with other things during the building process on my FB page. https://www.facebook.com/pg/Steve-Boutte-Kustoms-136565936448460/photos/?tab=album&album_id=148890918549295
-
Flat32, I'm intrigued by your experiments, I hope you figure it out. That carb looks good, is it 1/25? Who did the printing? Thanks, Steve
-
Great tip, I'll definitely have to try it. Have you ever had your knife cut into the tape guide when you're going into a tighter radius? Thanks,
-
Looking very nice! I'm curious to see the 3D printed wheel covers. I'm always looking for ways to make some that weren't produced in scale.