sbk
-
Posts
232 -
Joined
-
Last visited
Content Type
Profiles
Forums
Events
Gallery
Everything posted by sbk
-
Chrome Chrome Chrome everywhere
sbk replied to SCRWDRVR's topic in Model Building Questions and Answers
Okay, Spaz clear didn't work out for me. Instant aluminum. Thanks, -
As Casey said, it depends on the model. I think I thinned both sides on this AMT '50 Ford. I know for sure that I used small files & sanding sticks on the back side. Also, the belts on the painted version are made from 3M fine line tape with the adhesive removed, painted flat black. This fan is from the Caddy engine in the Revell 1949 Merc. kit. This photo shows one blade at kit thickness & the others in the process of being thinned. All work was done on the backside of the fan with small files & sanding sticks. Although it's still not as thin as it should be in scale, it's much better than straight from the box.

-
Chrome Chrome Chrome everywhere
sbk replied to SCRWDRVR's topic in Model Building Questions and Answers
I agree, it looks very good, but I am not having good results with durability. I tried removing a finger smudge from a part by lightly rubbing with a soft cloth, & the chrome look turned into aluminum. I can do that on a part sprayed with Alclad with no problem. What clear coat works for you? Thanks, Steve -
-
Thanks....it's been a long day. I've been editing this post for the past 15 minutes or so. Hopefully, the version I saved is correct. Yes, I did the masters on all of these.
-
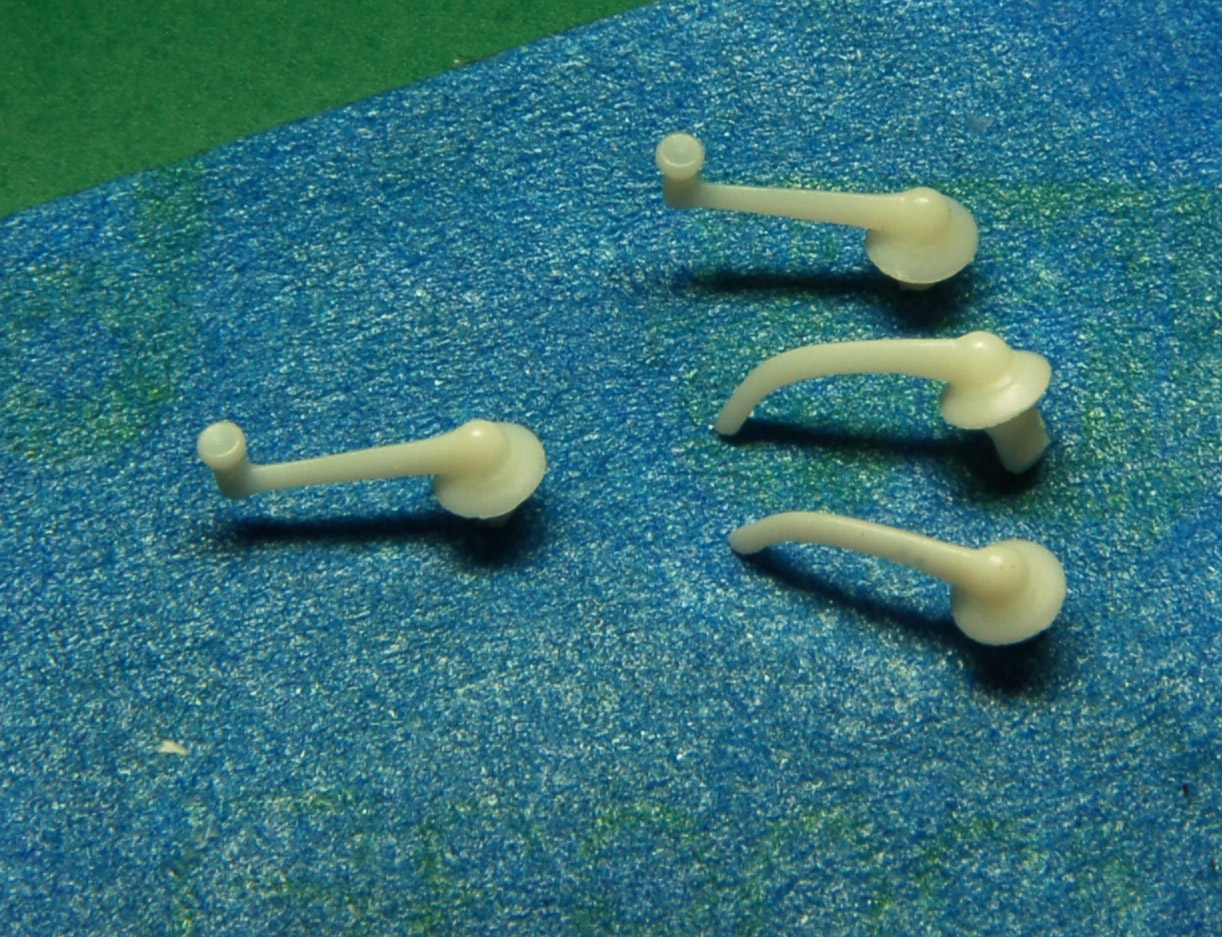
Polytek Plat-Sil 71-11 silicone & 1512X resin is what I have been using for years. Mold making & casting in a 2 gal. pressure tank, no vacuum or mold release needed. The resin is white, color differences are due to the lighting in the photo. Resin copy of a scratchbuilt 1949-1950 Merc. door handle fresh from the mold. The aqua colored thing is the mold. After a little cleanup. Resin copies of scratchbuilt 1949-1950 Ford interior parts. After black enamel & Alclad II chrome. Resin copies of scratchbuilt flipper hubcaps & 1935 Olds side hood trim. Castings come out as smooth & glossy as the patterns are. Steve
-
What paint did you use on the engine block? It almost looks like it's cast in 18k gold. Steve
-
Michael, your work is inspiring! Very nice! Steve
-
K&R Kustoms+Rods "barn find" dry lakes belly tanker
sbk replied to Rocking Rodney Rat's topic in Model Cars
Wow , very cool! -
Thanks, Bill, great photos. It must have been so cool to see Juha's work in person! Steve
-
Yep, very nice work! Those door panels had me studying them for a while.
-
I'll be there. Tomorrow, I'm meeting up with a few of my friends in TX , & we are driving up Saturday.
-
This is what I was thinking, too. But, if you do it at the prep stage, there's no turning back later on. A good way to start the scribe would be to use a set of dividers with one needle extending longer than the other. Let the longer needle follow the inner edge the wheel opening, & the other needle will lightly scribe the body parallel to the opening. Unfortunately, some wheel well trim is not parallel all the way around & gets narrower on the ends. With a little practice you can compensate by tilting the dividers a bit to decrease the distance on each end. Then, deepen the line a bit more by using an X-acto knife. Tape seems like a good idea, too. I use dividers a lot for re-scribing door lines to match the shape of a modified side window.
-
Still looks fine on mine, with quite a bit of room to spare horizontally.
-
1957 Ford Fairlane 500 Club Victoria. Class of 1957.
sbk replied to Lovefordgalaxie's topic in Model Cars
Beautiful work, as usual! The whitewalls & gold side trim inserts are outstanding! -
I'll chime in, too, gorgeous & no photo squishing on my end! I also agree about the the flake in the paint being so perfect for the scale. Very nice!
-
Nice work! What is the source of the small screw heads on the engine?
-
Eric Goodrich`s:: "IRON LUNG" - On the Workbench 2/8/16
sbk replied to John Teresi's topic in WIP: Model Cars
S-o-o-o-o-o cool! -
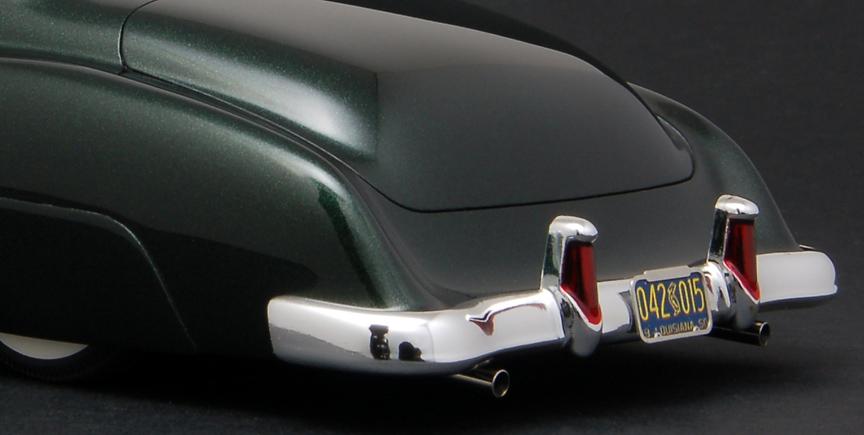
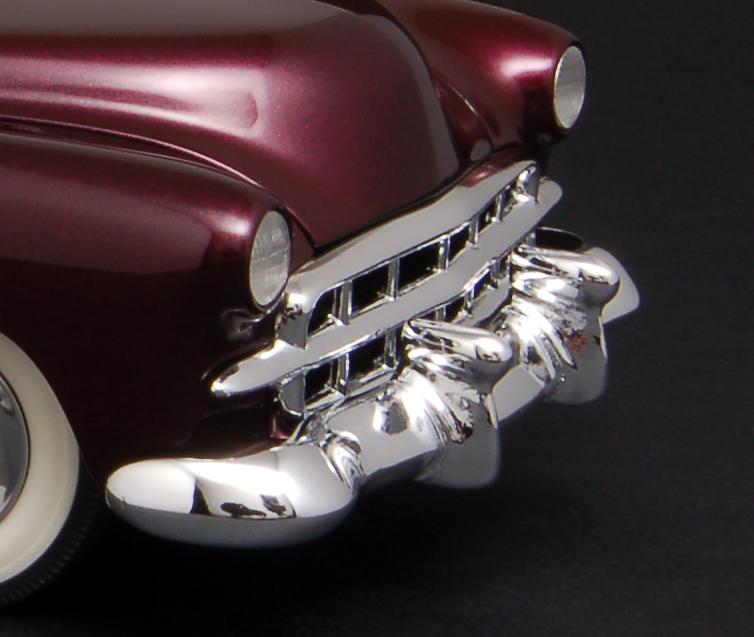
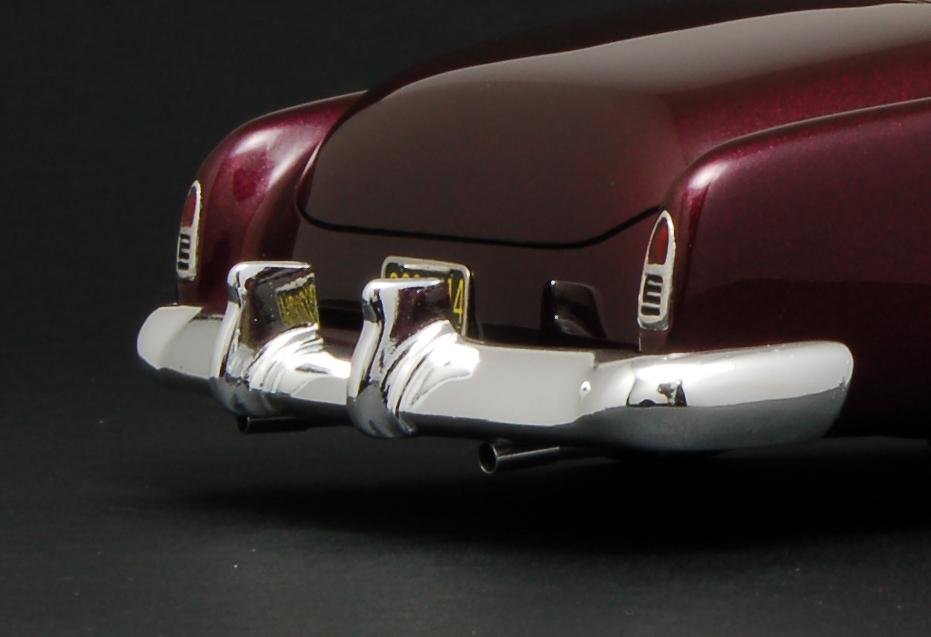
I have used Chrome Tech, LMK, & Bob's Paint "Kustom Khrome". I've had beautiful results from LMK, other times, specks under the chrome plating. Same thing with Chrome Tech USA, some parts outstanding, others with runs or specks. Didn't care for Kustom Khrome, all of the hubcaps that I sent had tiny pieces of lint or something under the chrome. Plus, no plating where it was attached to the rack with "special tape" My modified bumper came back cracked where it was pushed down on that "special tape." Never again. Whenever possible, I send multiples of a part placed on different parts of the rack to hopefully insure getting one very nice piece. Bumpers & grille on this one plated by Chrome Tech. The hubcaps were plated by LMK. Chrome Tech again for the bumpers & grille on this one.
-
Peter, One of my friends that lives in the Netherlands sends his parts to this place. I've seen photos of the parts & they look very nice. VPF FlöhaHeinrich-Heine-Str. 509557 FlöhaDeutschlandemail : info@vpfgbr.de www.vpfgbr.de
-
26 or 28 ga. bead wire works for me. I bought a spool @ Hobby Lobby many years ago & still have quite a bit. I'm not a fan of diodes or resistors for fuel filters, mainly because they look like diodes & resistors to me.
-
So nice! The build and photos are great!
-
The profile looks good!
-
Looking very nice! Is BIN thin enough to spray right out of the can? Thanks, Steve
-
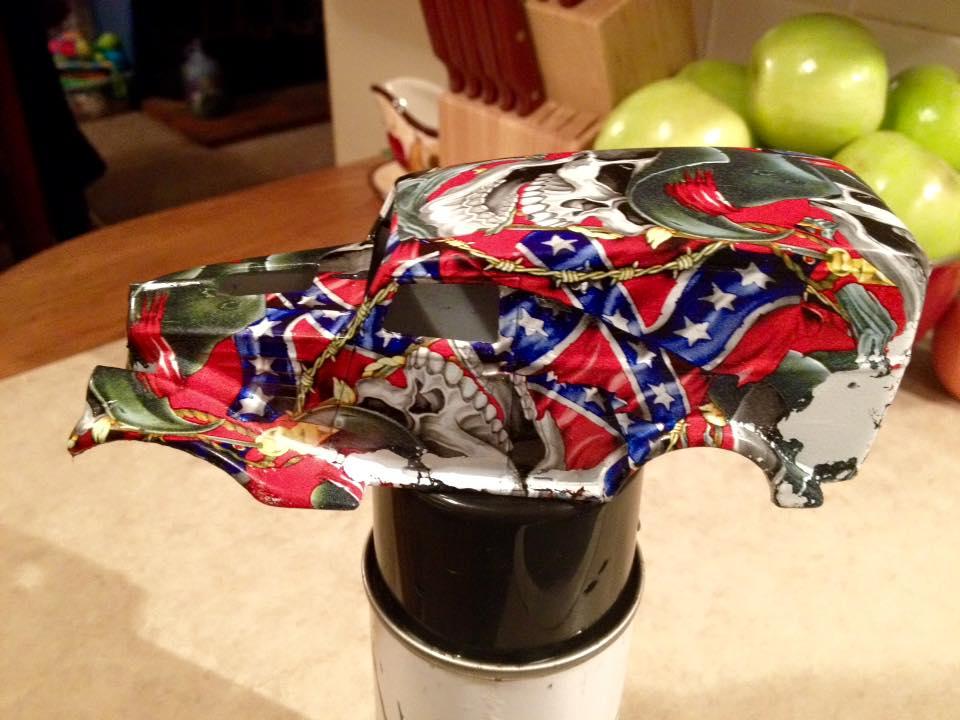
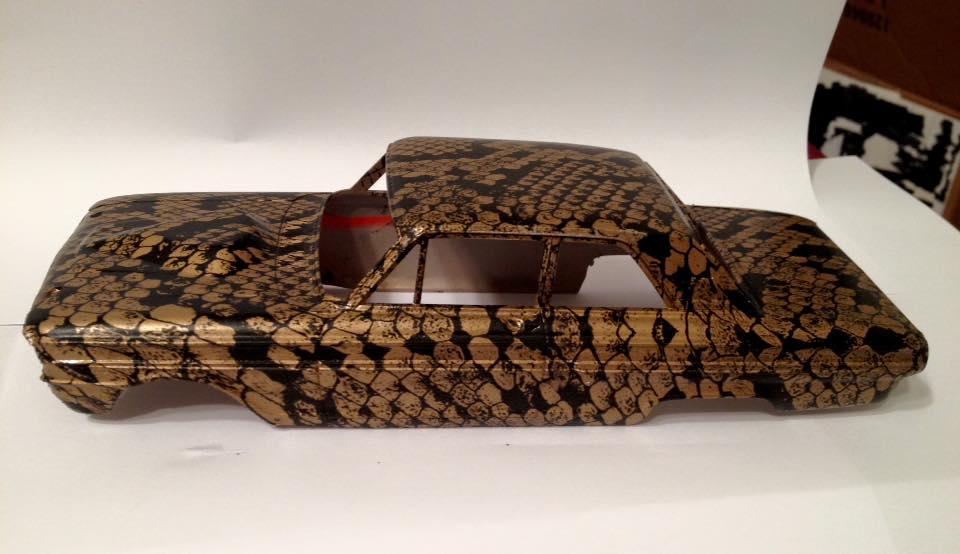
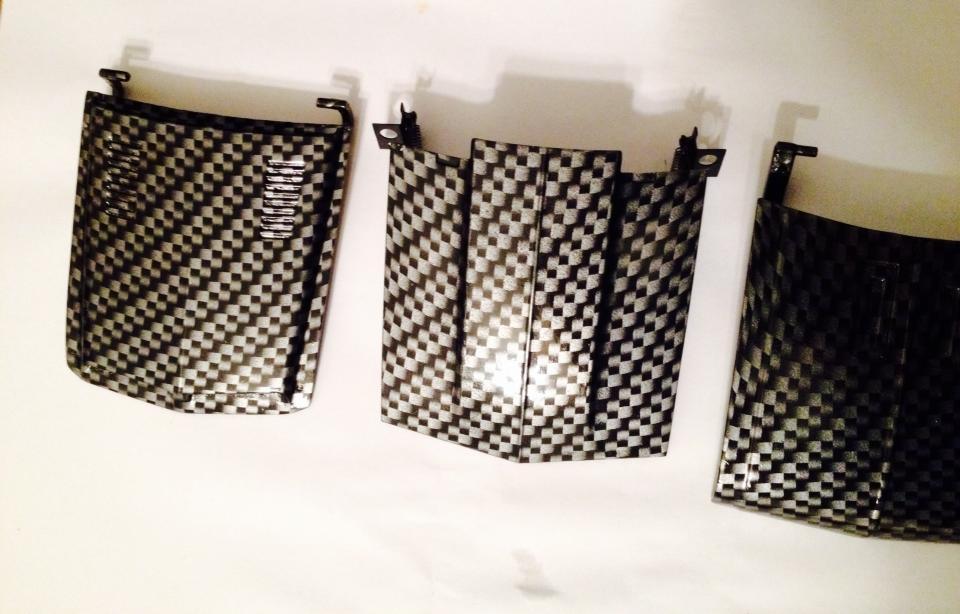
New paint application for models?
sbk replied to Jon Haigwood's topic in General Automotive Talk (Trucks and Cars)
I've seen Greg Stegall post photos on the ACME FB page. I'm not sure how he does it other than calling it "hydro dipping" Greg's work & photos, not mine.