

Aaron Corey
-
Posts
44 -
Joined
-
Last visited
Content Type
Profiles
Forums
Events
Gallery
Everything posted by Aaron Corey
-
 Thanks for the kind words guys. Originally I thought about making the hopper doors and fifth wheel workable, but I ultimately decided to keep them fixed in place. I'm not sure if these things are prone to tipping... but a lot of the load sits down at the bottom of the hopper so it probably has a low center of gravity. Aaron
 -
Micro Mark carries suitable aluminum and brass tubing in various diameters. You can get a package with just the diameter you want, or you can do what I did and get an assortment pack like this one: http://www.micromark.com/round-aluminum-tube-assortment-18-pieces-12-inches-long,8246.html
-
Great job! I like the paint scheme.
-
Thanks guys The build went quite smoothly overall. Creating the drawings first really helped me plan everything out. Aaron
-
Well, after taking a bit of a break I've finally completed this build. Here are a few shots:
-
Thanks guys The art of weathering is a difficult one to master... I usually weather the tracks slightly but leave the rest clean. My first attempt at weathering a full vehicle was the whitewahed Stug III at the bottom of my post. I used a whitewash method I saw in a magazine once - a coat of chalk powder mixed with water applied over the base coat. Then I used a stiff brush to wear off some of the whitewash (I probably took too much of it off though). I clearcoated to protect the whitewash then sprayed a light coat of brown on the lower hull to simulate mud. I was trying to depict a muddy vehicle in the spring where the winter whitewash was partly worn off. The vehicles in my post from top to bottom are: M1A2 Tiger Panzer III Panther M26 Pershing M4A3 E8 Sherman (Canadian Army, Korean war) Sherman V Firefly (Canadian Army, WWII) M923 and M35 trucks T-34 Stug III
-
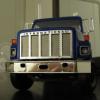
Hi all, Lately I've been into big rig models, but my primary interest over the past 15 years or so has been armor and other military vehicles. Here are a few of my armor builds I've done over the past few years: And a few more...
-
Miter Rite Feedback?
Aaron Corey replied to hooknladderno1's topic in General Automotive Talk (Trucks and Cars)
Micro Mark does carry them (that's where I got mine). http://www.micromark.com/the-dobson-miter-rite,6453.html -
Miter Rite Feedback?
Aaron Corey replied to hooknladderno1's topic in General Automotive Talk (Trucks and Cars)
I bought a miter rite last year, and I'm quite pleased with it. The saw blade is held snug so your cuts end up much more precise and consistent (compared to the aluminum miter boxes, which allow the saw blade to wiggle back and forth a bit due to the width of the slots). Plus you can set any angle you want instead of being limited to 90 and 45 degrees. Aaron -
Thanks guys Right now I'm waiting for an order of grey paint to arrive. I'm still debating whether to add extension boards around the top of the trailer - they're an option offered by the manufacturer. Anyway, here's the paint/decal scheme I plan to go with:
-
Now I've added the push block and mudflap brackets: ...and the air cylinders for the hopper doors: Now I just need to paint and decal, and this thing will be done.
-
Questions About A Paystar 5000?
Aaron Corey replied to modelmike's topic in WIP: Model Trucks: Big Rigs and Heavy Equipment
If it's the dump truck version you have, the instructions are here: http://public.fotki.com/modeltrucks25thscale/truckkit_instructions/amtertl/31007_international/ They've got quite a collection of instruction sheet scans on that site, in addition to lots of other useful reference material. Aaron -
Krupp Titan SWL 80
Aaron Corey replied to The Creative Explorer's topic in WIP: Model Trucks: Big Rigs and Heavy Equipment
This build looks amazing so far. If I didn't have so many unbuilt trucks in my closet I'd pick one of these up... I really need to start building faster than buying It's one of those kits I've been wanting to do for years. Aaron -
I've also created the artwork for my decals. It's based on the actual paint scheme used by the manufacturer.
-
Thanks for the great comments guys I've fixed the suspension. Here's a mockup to see how everthing fits together: Now, I just need to add a few more details (push block, air cylinders for the hopper doors, mudflaps etc.) and then it'll be time to paint.
-
Good catch with the backwards suspension, it was actually a deliberate decision on my part. When I was mocking up the rear suspension I discovered that I had to put the bogie on backwards in order to prevent the rear tires from interfering with the mudflaps. Now that I look at the photo, I realize that could solve the issue by trimming the front of the suspension (the part that grips the frame rails) to allow it to sit further forward on the frame rails... Aaron
-
I've assembled the suspension, and attached the frame rails to the bottom of the trailer. The suspension came from the AMT Fruehauf flatbed. The frame rails are 4 inch sections cut from the frame rails in the AMT kit.
-
Autocar Sleeper Cab
Aaron Corey replied to 20dakota04's topic in WIP: Model Trucks: Big Rigs and Heavy Equipment
Very nice, I like heavy duty trucks like this. Great tip on creating piano hinges too Aaron -
GMC General Short Hauler
Aaron Corey replied to Mopar - D's topic in WIP: Model Trucks: Big Rigs and Heavy Equipment
Nice, I like the paint scheme Aaron -
Thanks guys, I'm really having fun with this project. Now I understand why the real trailers are built the way they are: Even though I'm mainly using 0.020" styrene (which is pretty flexible on its own), the fully assembled trailer body is surprisingly strong and stiff. Aaron
-
Here's my lastest update The front and rear "bumpers": The hopper doors: Next, I'll be taking the suspension from the AMT Fruehauf flatbed trailer and adapting it for this project...
-
Transcraft 45' split axle step deck
Aaron Corey replied to Ben's topic in WIP: Model Trucks: Big Rigs and Heavy Equipment
That's an awesome looking trailer! The deck looks very realistic. Aaron -
I'll need to pick up one of those scale rulers someday. Up until now I've just been using a calculator, and once in awhile I'll mess up one of my measurements. Here's my latest progress; the hopper is attached to the main body:
-
The photo of the actual 1:1 trailer in my first post shows the 32 foot version; however, I'm building the 29 foot version (approximately 14 inches in 1:25 scale). So mine will have a much smaller gap between the hopper and the wheels compared to that photo. Midland also sells 40 and 42 foot version with tri-axle setups.
-
A little more progress tonight... The hopper: