Doctordarryl
-
Posts
160 -
Joined
-
Last visited
Content Type
Profiles
Forums
Events
Gallery
Everything posted by Doctordarryl
-
Wally Booth's ProStock Gremlin
Doctordarryl replied to Doctordarryl's topic in WIP: Drag Racing Models
Bill, The old MPC Dyno Don Pinto ProStock chassis is almost a direct replacement. Not much modification needed. Also, unlike the mustang, the Pinto had the same wheelbase as the Gremlion. The Pinto ProStock interior also fits with little modification. -
Just completed my Wally Booth ProStock Gremlin. Decals from Scale Auto Details. Airbrushed Tamiya TS paints. I combined the interior and chassis from an MPC Dyno Don Pinto ProStock with the Gremlin engine and body. The Gremlin chassis is just not up to par for a ProStock model. I think it came out okay. http://www.fotki.com'>Hosted on Fotki">http://www.fotki.com'>Hosted on Fotki http://www.fotki.com'>Hosted on Fotki">http://www.fotki.com'>Hosted on Fotki http://www.fotki.com'>Hosted on Fotki">http://www.fotki.com'>Hosted on Fotki http://www.fotki.com'>Hosted on Fotki">http://www.fotki.com'>Hosted on Fotki
-
Finally finished my Wally Booth's Gremlin ProStock. Here are a few more pictures of the finished model. I will likely have it at the upcoming NNL East in April. http://www.fotki.com'>Hosted on Fotki">http://www.fotki.com'>Hosted on Fotki http://www.fotki.com'>Hosted on Fotki">http://www.fotki.com'>Hosted on Fotki http://www.fotki.com'>Hosted on Fotki">http://www.fotki.com'>Hosted on Fotki
-
Update on the model progress. It is about 90% finished. I have to finish wiring and plumbing the chassis and engine to complete the model. Here are some mockup assembled shots. Hosted on Fotki">http://http://www.fotki.com'>Hosted on Fotki Hosted on Fotki">http://http://www.fotki.com'>Hosted on Fotki Hosted on Fotki">http://http://www.fotki.com'>Hosted on Fotki Hosted on Fotki">http://http://www.fotki.com'>Hosted on Fotki
-
Another update. The engine is coming together. The body is finished. Windows (0.005 inch thick acetate) installed and decaled. Window frames bare metal foiuled. Side marker lights done. Hood pin plates on the hood. Interior is nearly finished. Seat belt straps for window pull ups. Seats from a Monogram prostock kit (maybe the Thunderbird). Fuel cell from anothetr Monogram prostock (Camero?). Battery from Scale Auto Details. Interior side panels were from an MPC Pinto PS along with the dash. Photoetched under dash gauge panel and gauges from Detail Master. Old 60's style tach from Detail Master. Seat belts and some of the photoetched hardware were from a Meri kit set (from Italy) and Detail Master. Hosted on Fotki Hosted on Fotki Hosted on Fotki ]http://URL=http://pu.../dsc-6128.html]Hosted on Fotki Hosted on Fotki Hosted on Fotki
-
Here is the decaled body and hood. I have decals for the side windows and front windshield to apply. I'll replace the front and read windows and the side class with 0.005 acetate sheet. I have to clear the body and hood and then baremetal foil the front and rear window surrounds as well as the door handles and the rear deck emblem. I'll post more pics when I get further along with the build. Hosted on Fotki Hosted on Fotki Hosted on Fotki Hosted on Fotki
-
Let's try this again. I seem to be having problems loading images again. Hosted on Fotki Hosted on Fotki Hosted on Fotki Hosted on Fotki
-
Finally got the hood and body painted. All airbrushed Tamiya paints. I'll post more pictures once I get finished decaling the body. I finished decaling the hood. http://images50.fotki.com/v1528/photos/1/1623761/10353219/DSC_6059-vi.jpg http://images49.fotki.com/v572/photos/1/1623761/10353219/DSC_6057-vi.jpg http://images15.fotki.com/v587/photos/1/1623761/10353219/DSC_6058-vi.jpg http://images107.fotki.com/v70/photos/1/1623761/10353219/DSC_6060-vi.jpg
-
Another tip on this build. I cut ot the cowl panel on the Gremlin because the molded on windshield wipers went right over the vents and there was no way I could save the vents once I removed the wipers. I cut out the cowl on the MPC Pinto prostock body and it fit on the Gremlin with a little modification and the molded on wipers from that body did not go across the cowl vents. Problem solved!
-
I have tried to contact someone from the Long Island Auto Replicas Society (LIARS) about getting a vendor table for the show in November. Their e-mail addrss does not work (I get a message that it has been disabled). Can anyone give me a phone number or working email address so I can contact them?
-
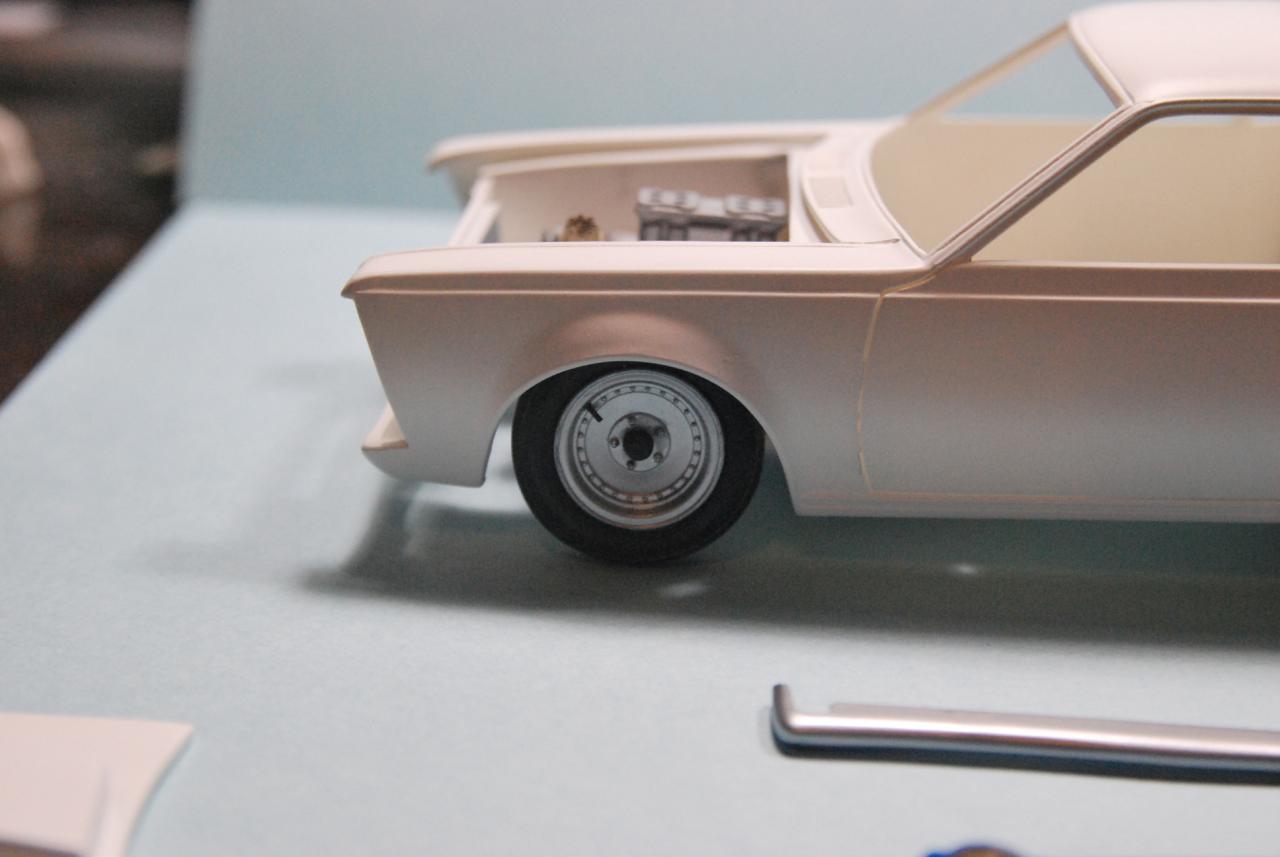
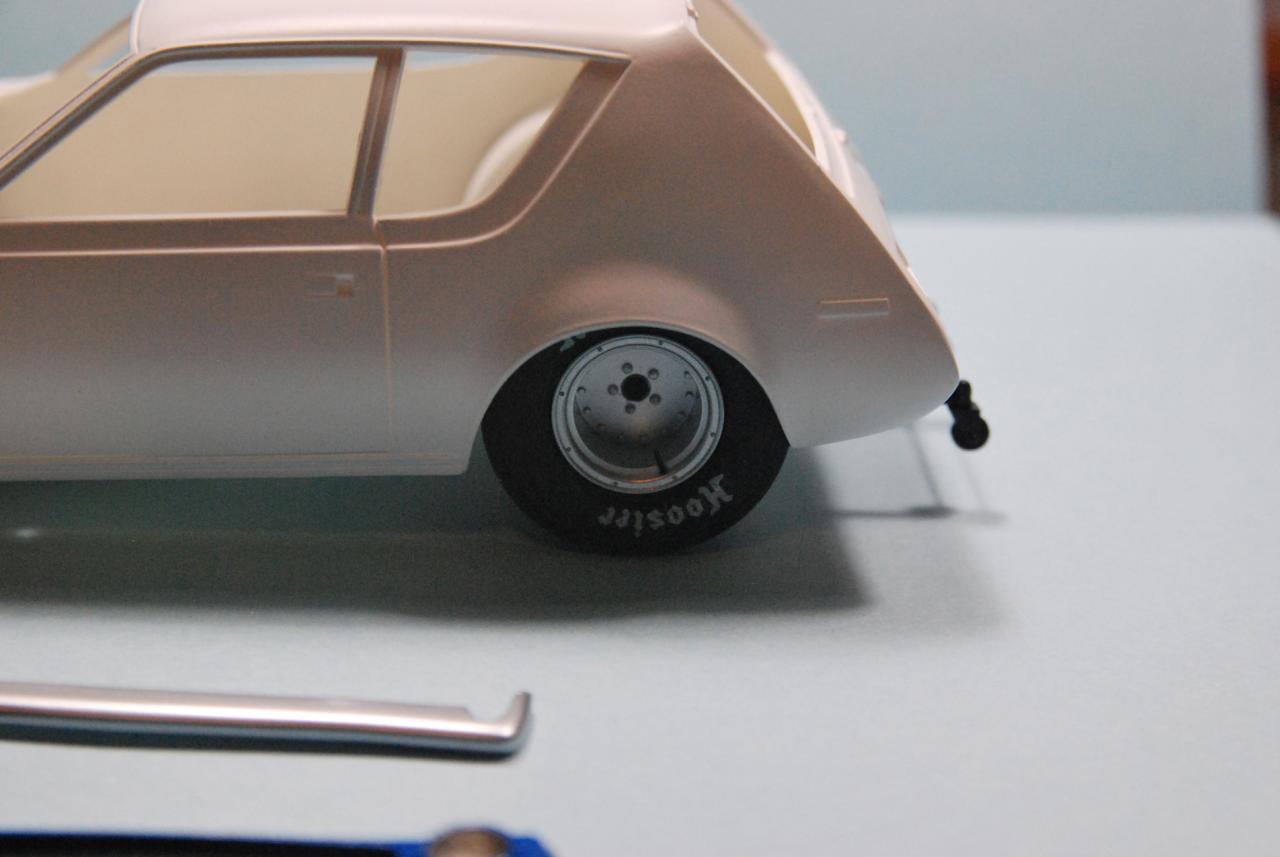
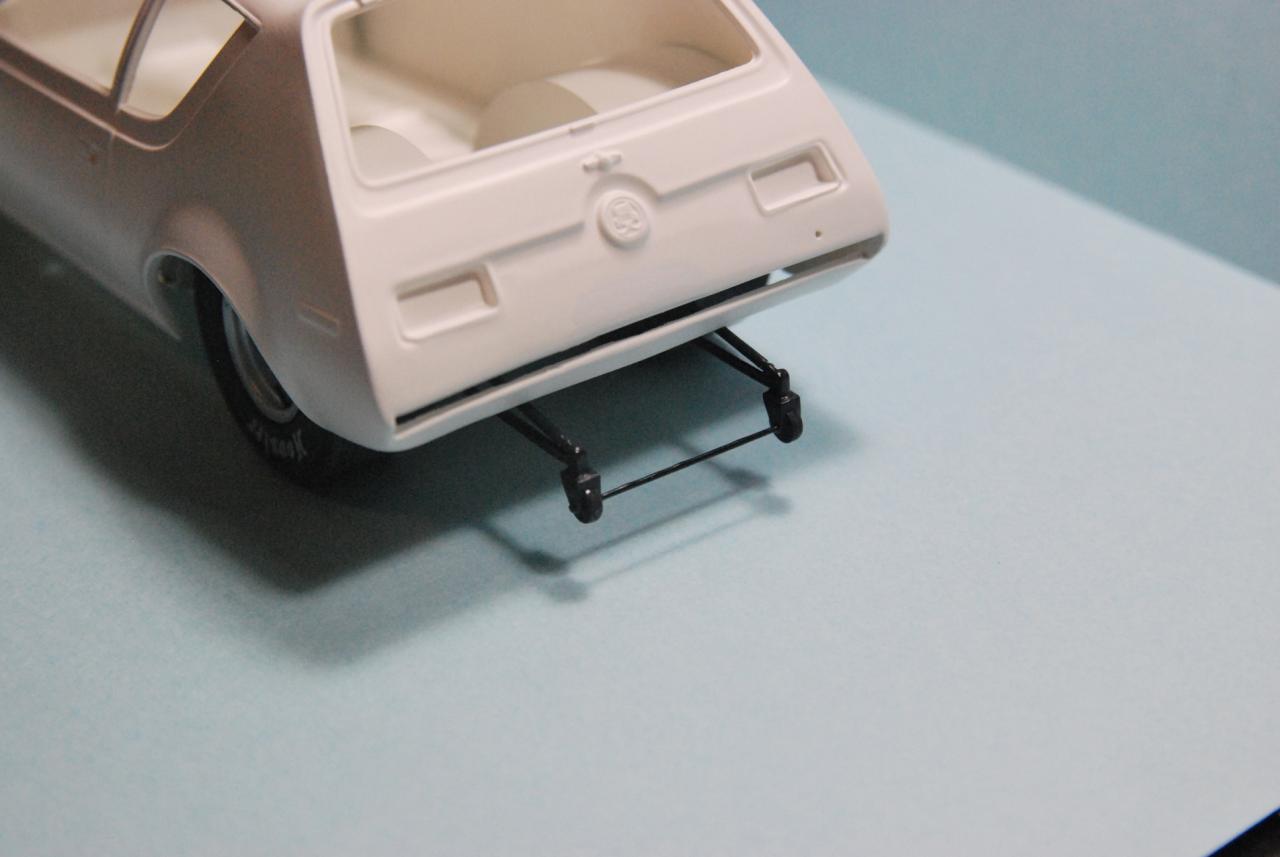
The Mustang II chassis has a slightly longer wheelbase than the Gremlin. The old MPC Pinto ProStock chassis has the same wheelbase as the Gremlin which is why I used that chassis instead of the Mustang II. I suppose one could shorten the wheelbase on the Mustang II chassis and make it work. To use the Pinto chassis only requires cutting a little off of the back and widening it with styrene strip, then it fits like a charm. I am also using the interior parts from the Pinto on this build. The rear bumper can be easily modified to mimic a 72-73 rear bumper by cutting the bottom off and molding it to the body as a rear pan. The resulting narrower rear bumper then looks like one from an earlier Gremlin. You also need the front pan from the Gremlin F/C. There may be a resin front end available to back date the AMT kit. I have not yet checked into that.
-
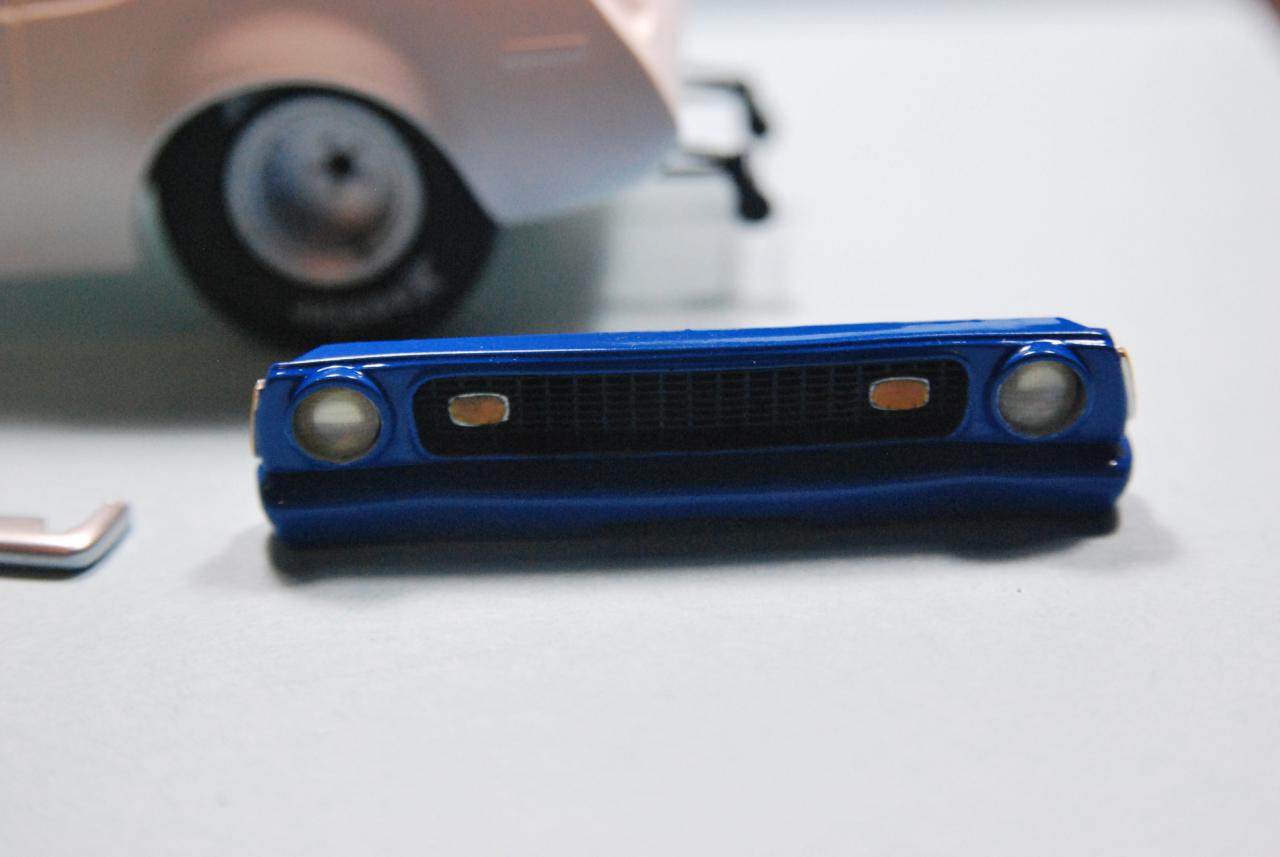
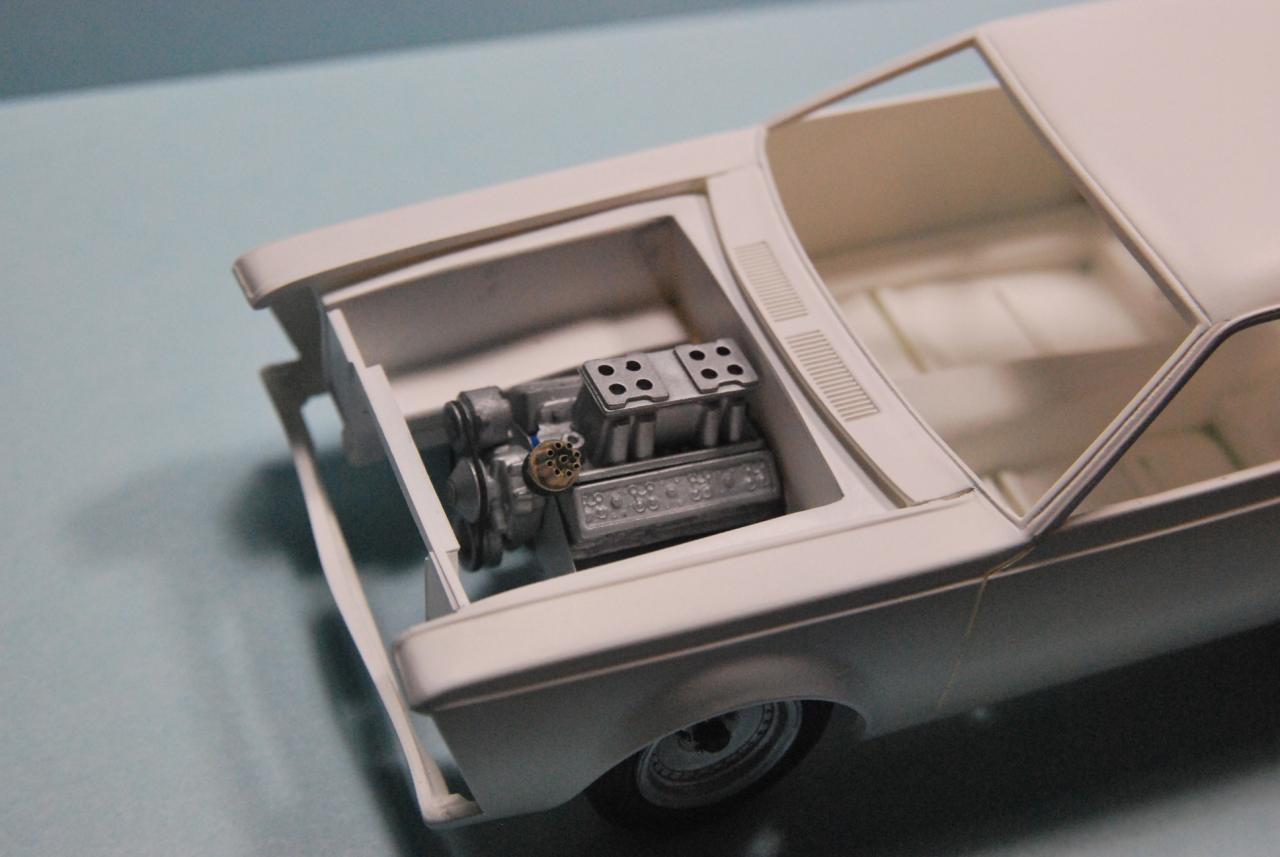
This is the Round2/AMT re-issue. I used the '72 front end from the AMT Gremlin Funny Car and modified the rear bumper to look like a 72-73 bumper. Paint will be Tamiya Pure White (TS-26), Tamiya Bright Red (TS-49), and Tamiya Brilliant Blue (TS-44) - all airbrushed. The chassis is a modified MPC Pinto ProStock. The hood scoop is a modified hood scoop from an AMT ProStreet Chevell. The engine is from the kit. The intake was augmented with an upper plenum from a Jo-Han Maverick ProStock. The carbs will be from a Monogram T-Bird ProStock. I matched the red and blue in the decals to the Tamiya paints. Decals are available from Scale Auto Details. I'll post more pictures once I make a little more progress. I saw the restored car at the York, PA show last year and had to build it. A ProStock with the aerodynamics of a brick! Go figure.

-
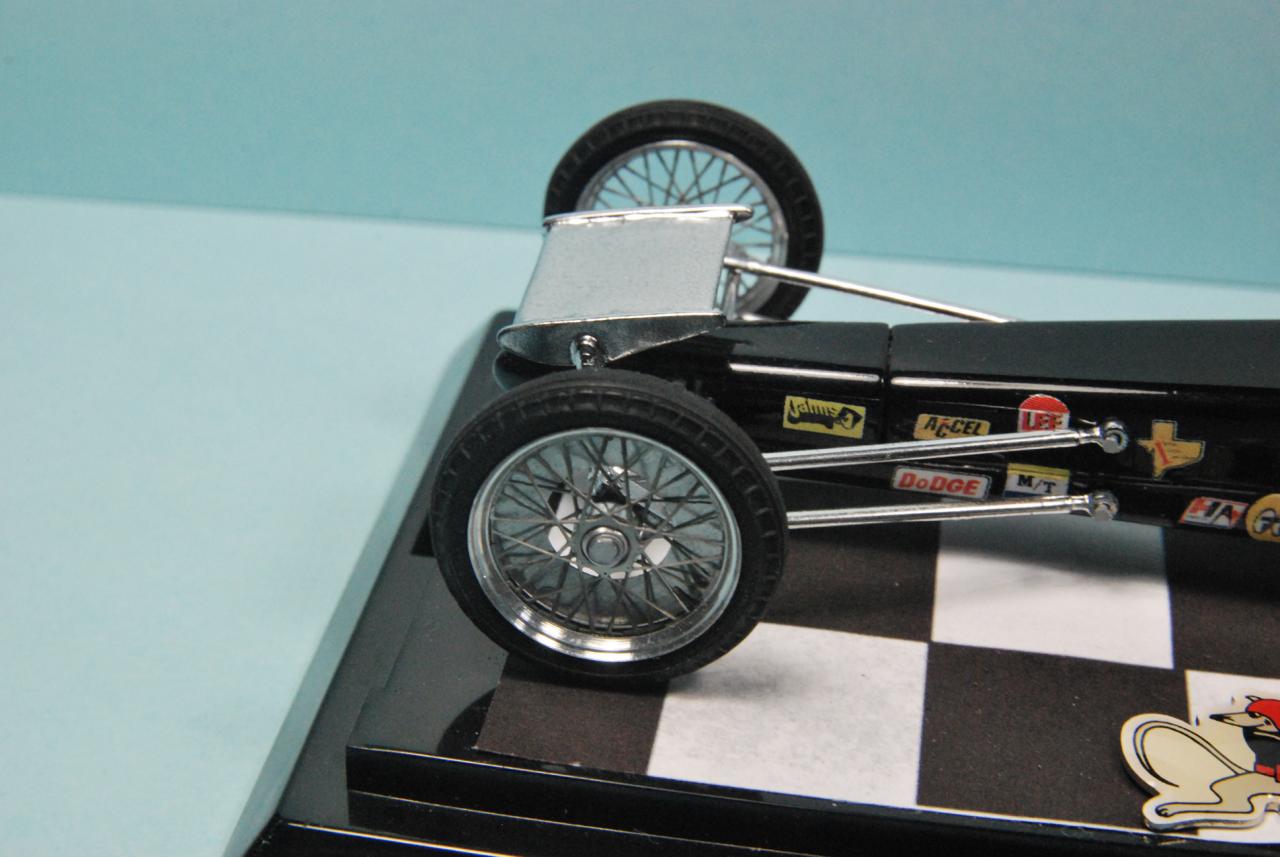
Love the 2-speed rear - that's a very nice touch.
-
Safe-Way Sandblasting '41 Willys C/GS Model
Doctordarryl replied to Doctordarryl's topic in Model Cars
I took the model to a club meeting and the sound was a hugh hit! I intend doing more of this in the future. -
I also was back to his Drag Race Museum this past June (for the 5th time). I never get tired of seeing what he has assembled there and I always see new stuff every time I go there. I highly recommend gear heads go there when near it. We were in Orlando with the family for Diseney World but I blew off a day to go to the museum in Ocala (about 60 minutes north of Orlando) as I always do whether there for Diseney World or a conference.
-
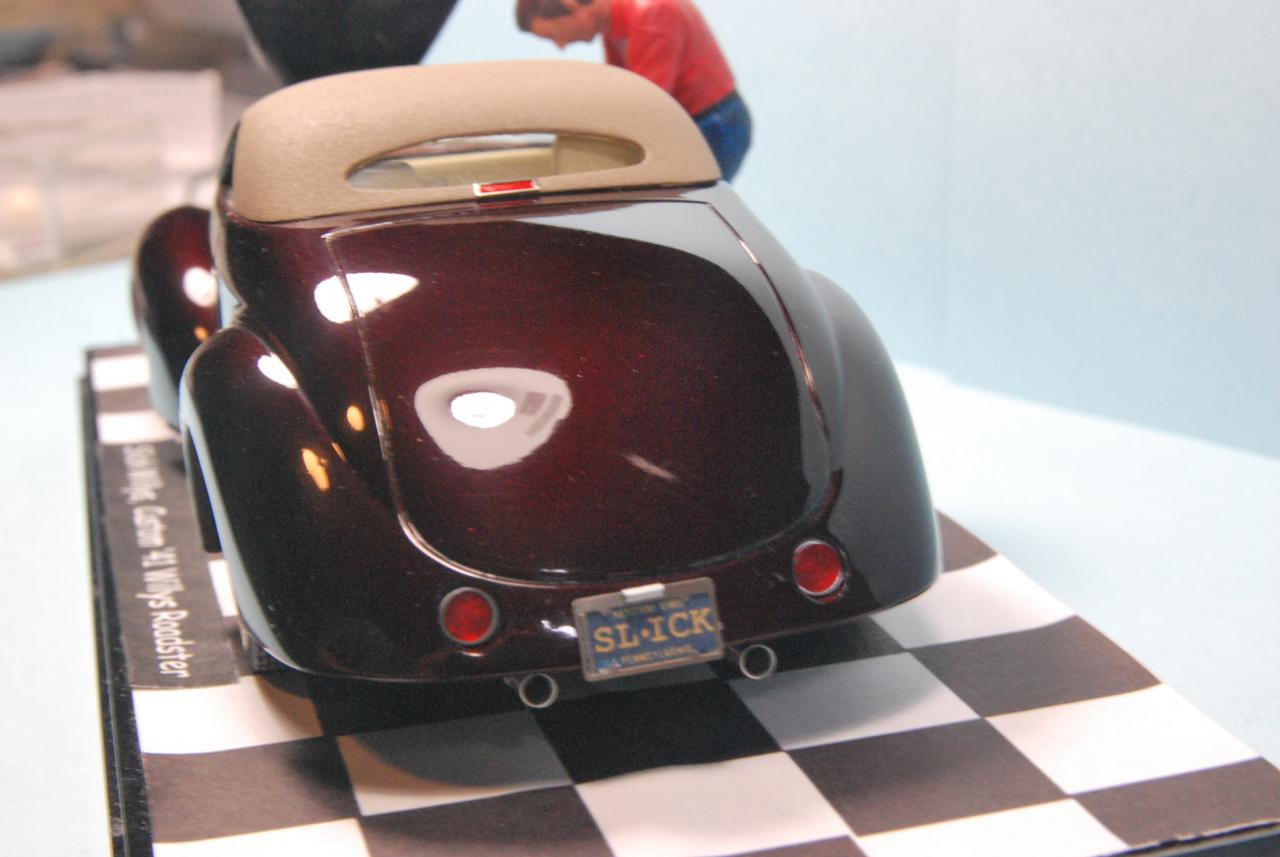
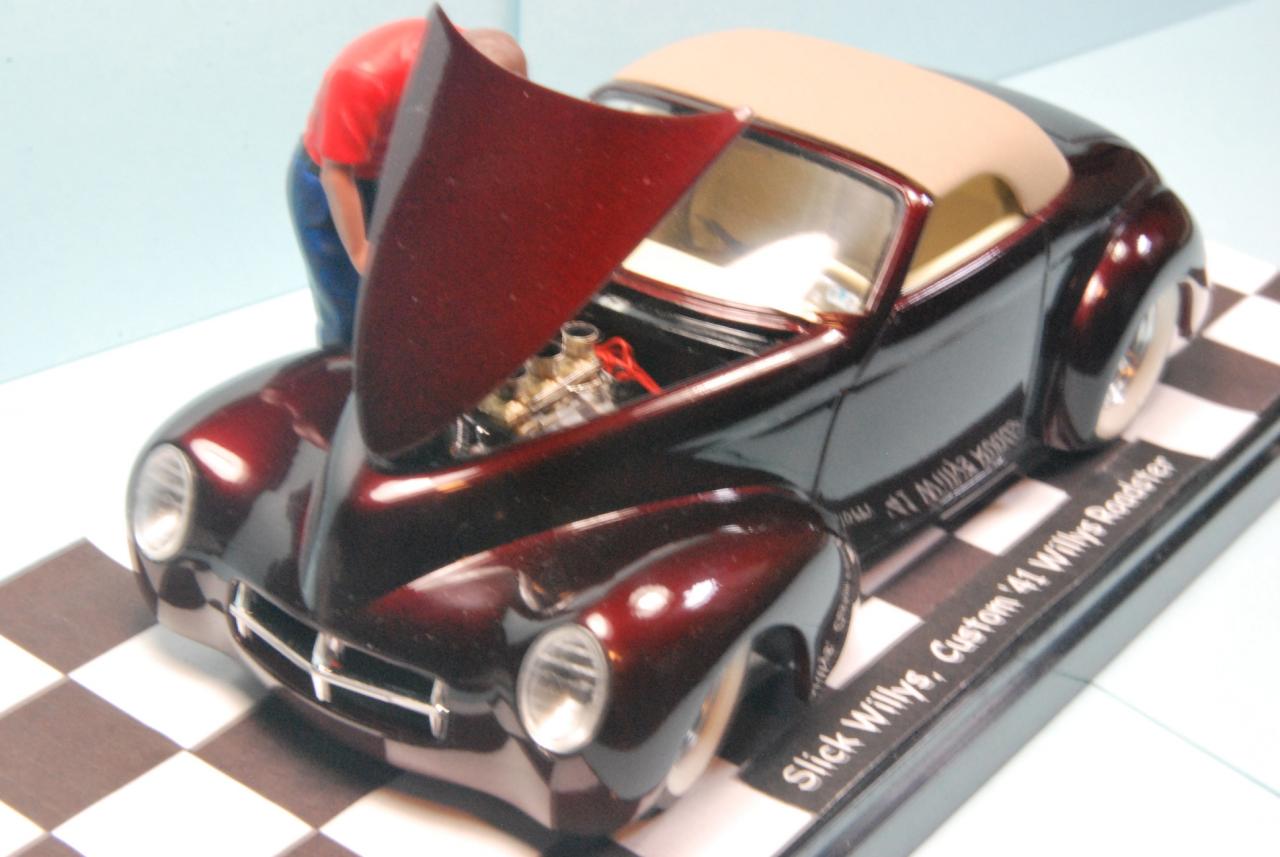
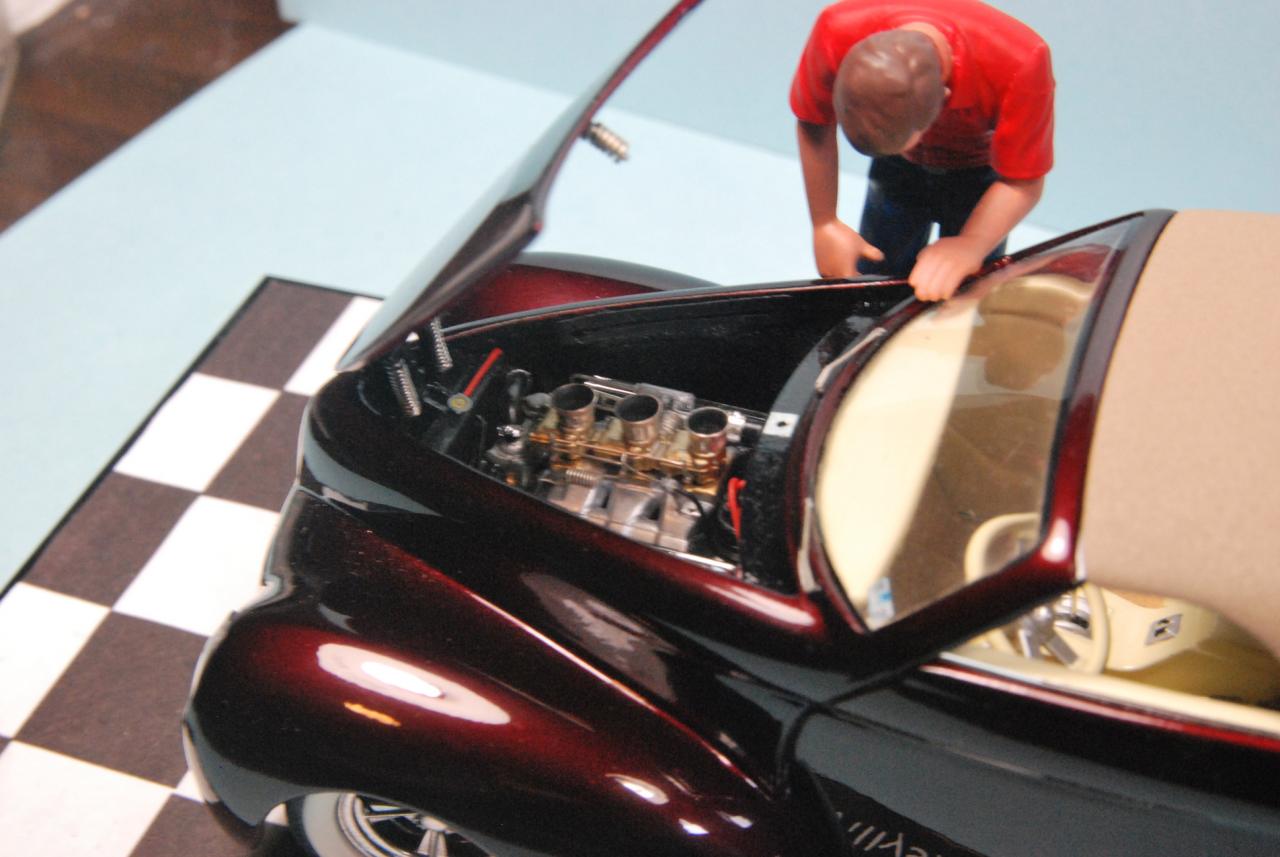
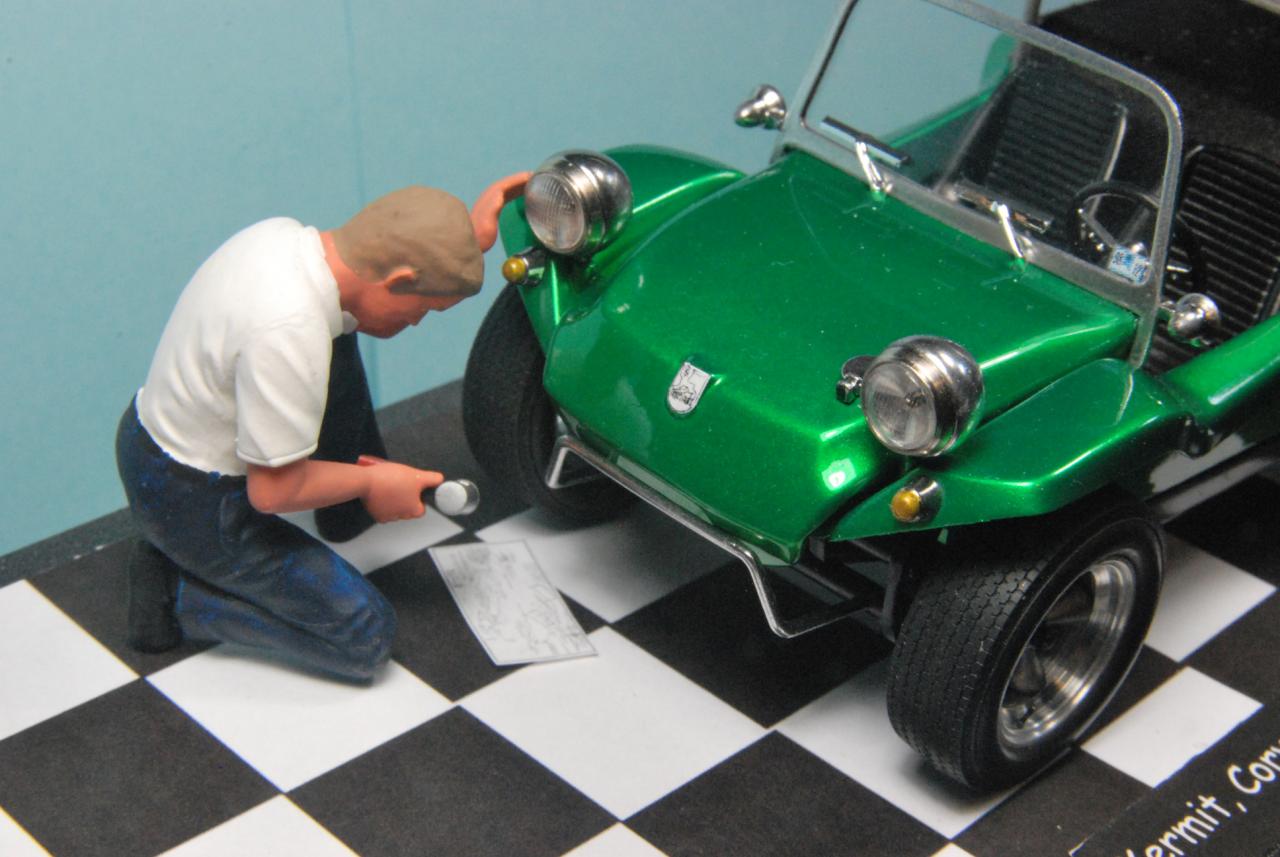
Thanks for the kind words. I do have to give gredit where it is due. The folks at RMR designed the body and top. I "just" painted them. But the use of the Mini headlights and the shortened '60 T-Bird grill bar and of course the color choices and wheels and tires were my contributions to the model. RMR has many great resin conversion kits and I intend building a few more. Their products are first class and affordable.
-
Problem with photo uploader
Doctordarryl replied to Doctordarryl's topic in General Automotive Talk (Trucks and Cars)
I think I found the problem. I can not upload pics that are larger than about 1MB even though the directions claim you can upload pics that are up to 10MB in size (maybe they misplaced the decimal point and it should be 1MB instead of 10MB?). When I reduce my image size to less than 1MB (still high resolution images) both site uploaders work great. I am not interested in Photobucket since I already have Fotki as my on-line picture storage source as well as a display "case" for my Scale Auto Details products. I do believe in the KISS principal and it is always best to use what the site offers instead of patches using other sites. No further problems posting pictures and I have a ton more to post over the next week or so. -
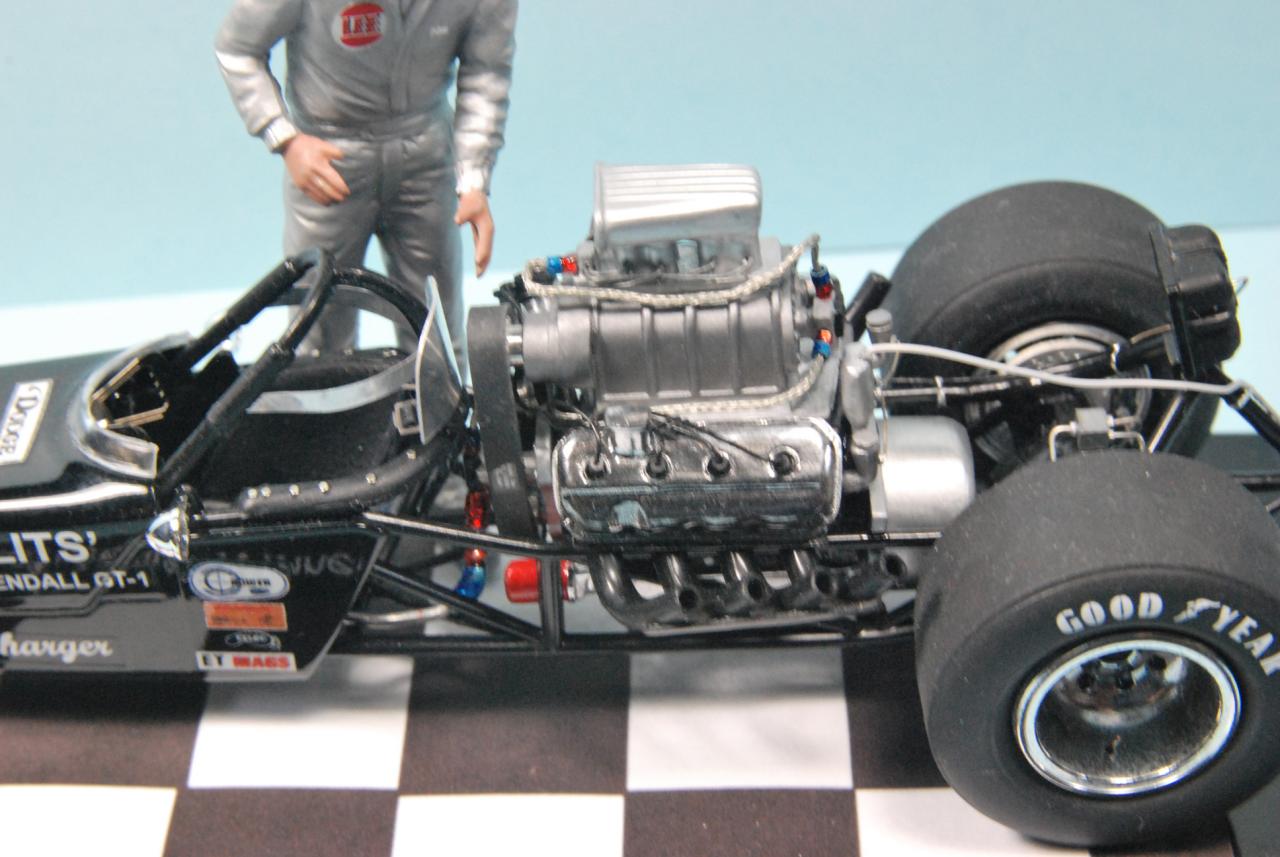
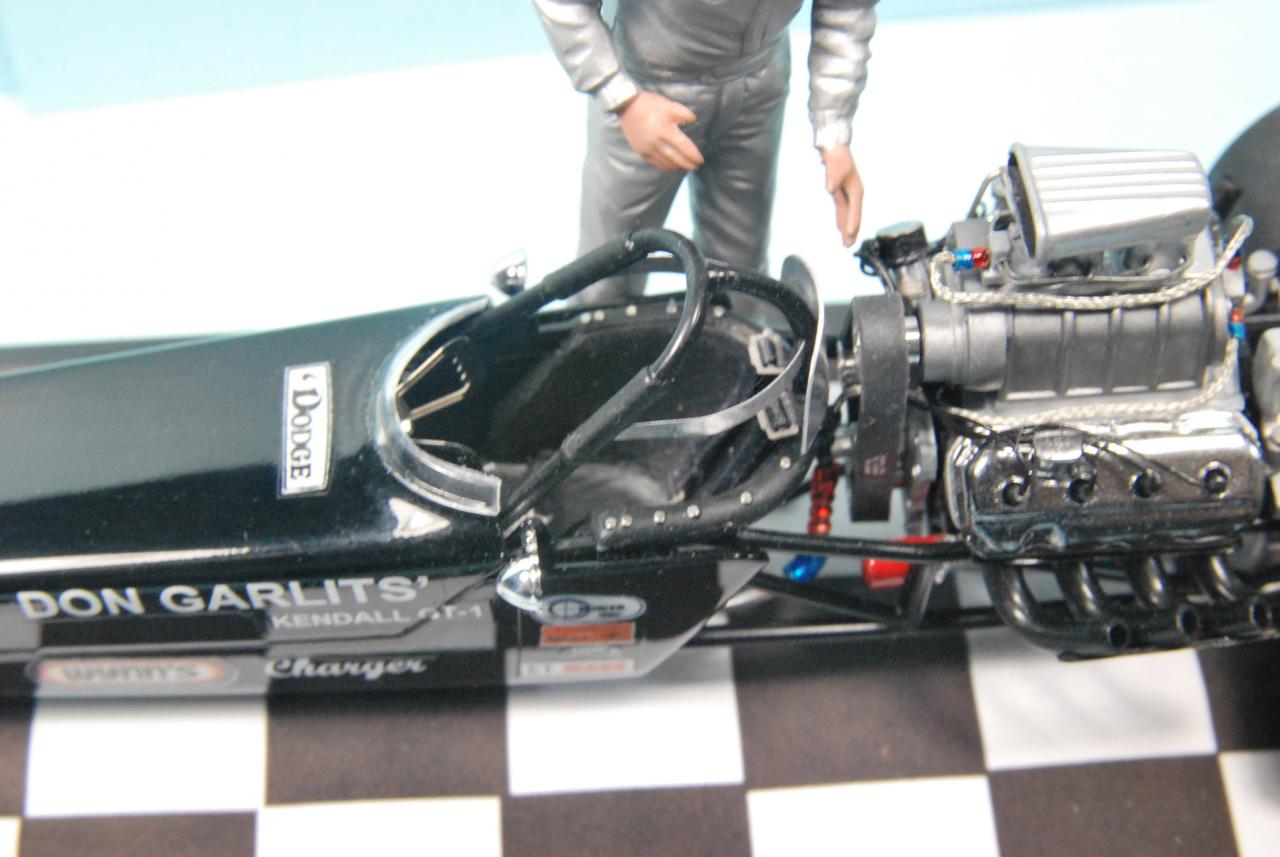
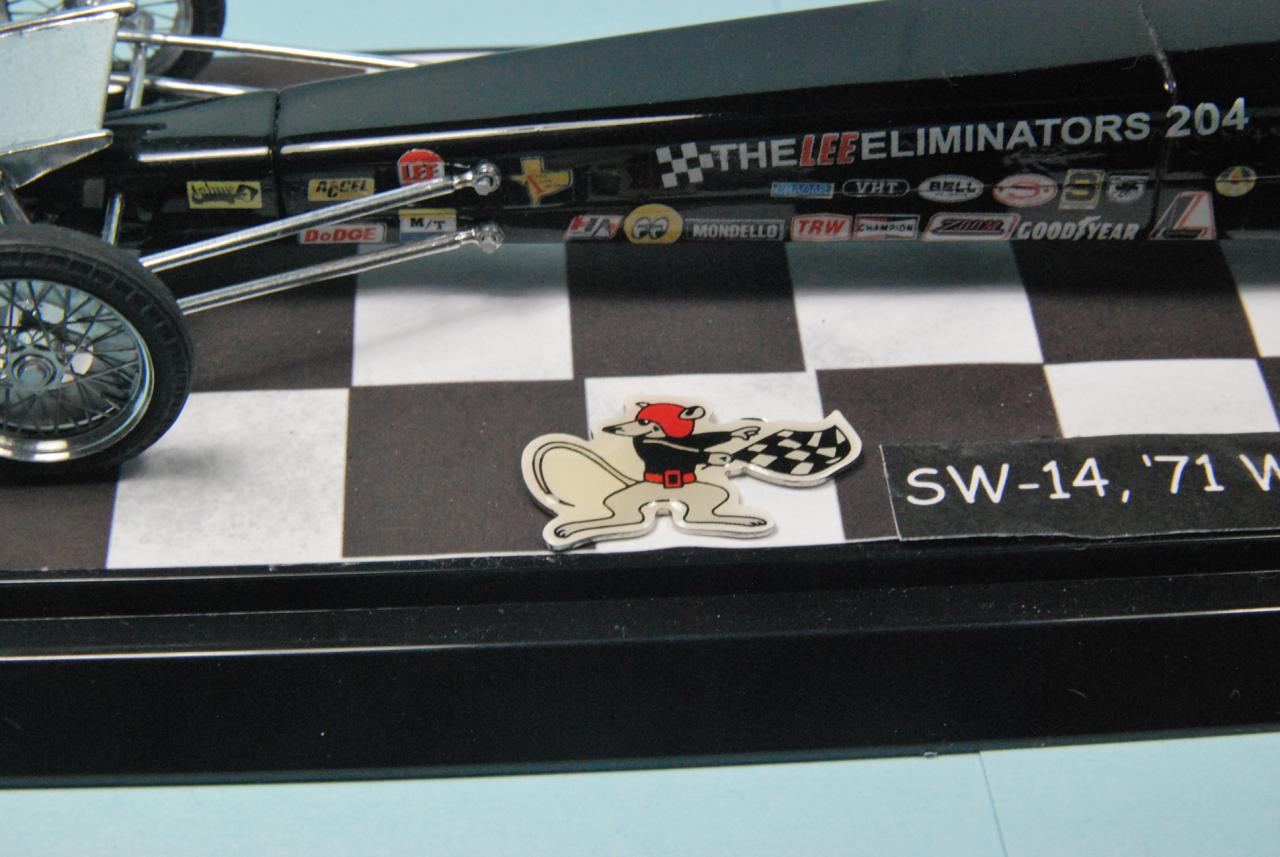
More pics since I figured out what was wrong with the site photo uploaders. The paint was airbrushed Tamiya Gloss Black cut 1:1 with Dupli-Color lacquer thinner. I use an Aztek A470 airbrush at 35psi with a 1mm nozzle. I cleared over the decals with two airbrushed wet coats of Tamiya clear. I shot a wet coat of straight Dupli-Color lacquer thinner over the last clear coat to level the finish and yield a high shine without polishing. It takes practice to know how wet to apply the thinner to avoid runs but once you get the knack for it, it's a killer way to finish off a paint job and avoid polishing! The figure was a Tamiya Rally mechanic. Check out the left breast side of the coveralls (there is a decal that says "Don"). When I sold Mr. Garlits the paint for the front bodywork, he was at Crower Cams (one of his sponsers) in Chula Vista, CA doing a tune up before going to Pomona for the '71 Winternationals. I worked at an auto parts store in Chula Vista called Cheely's and we sold Dupont paint. He had front bodywork made from sheet magnesium by a tin-knocker/fabricator near the Crower facility. He qualified the car mid-field and then stunk up the show by winning every round and the championship. The following year at the '72 Winternationals, I believe there was only one front engined dragster in the final 16. What a revolutionary dragster design!
-
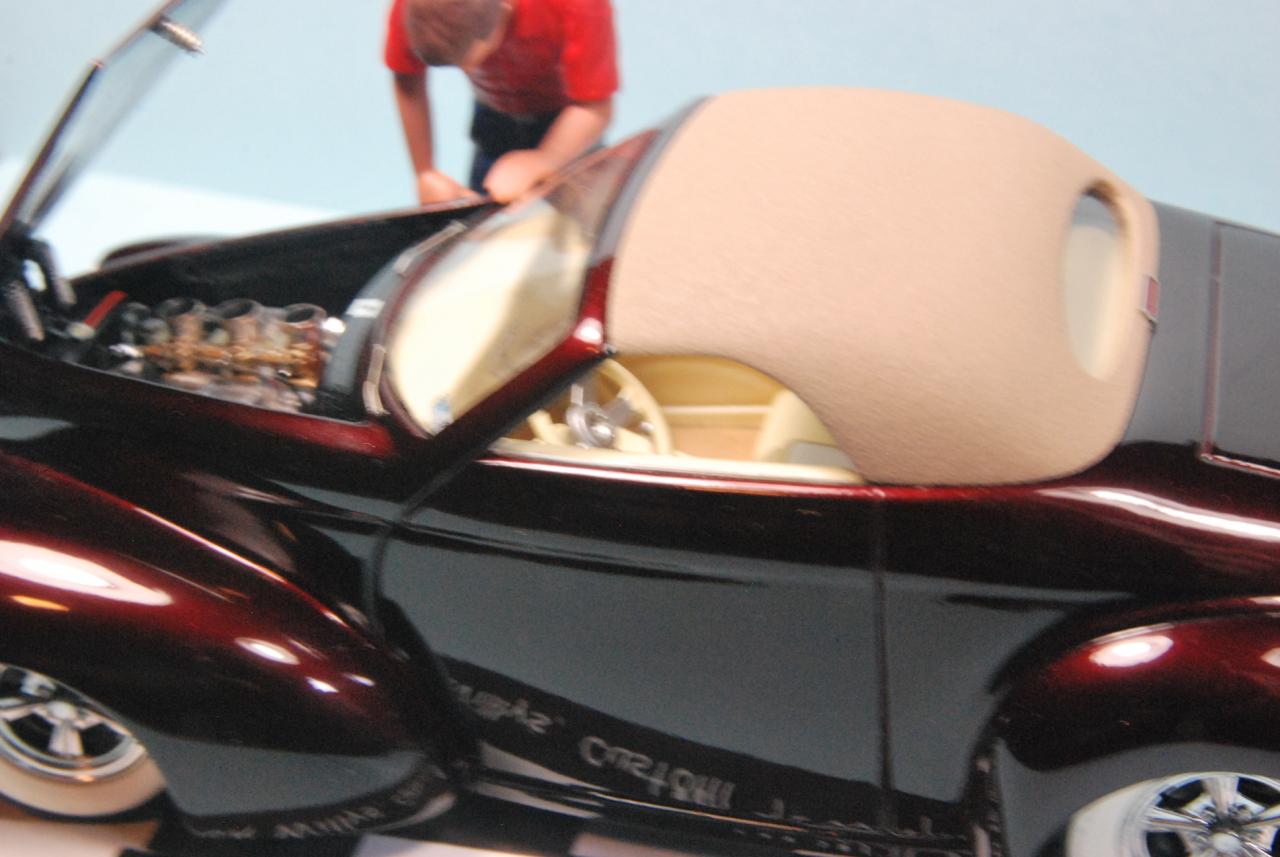
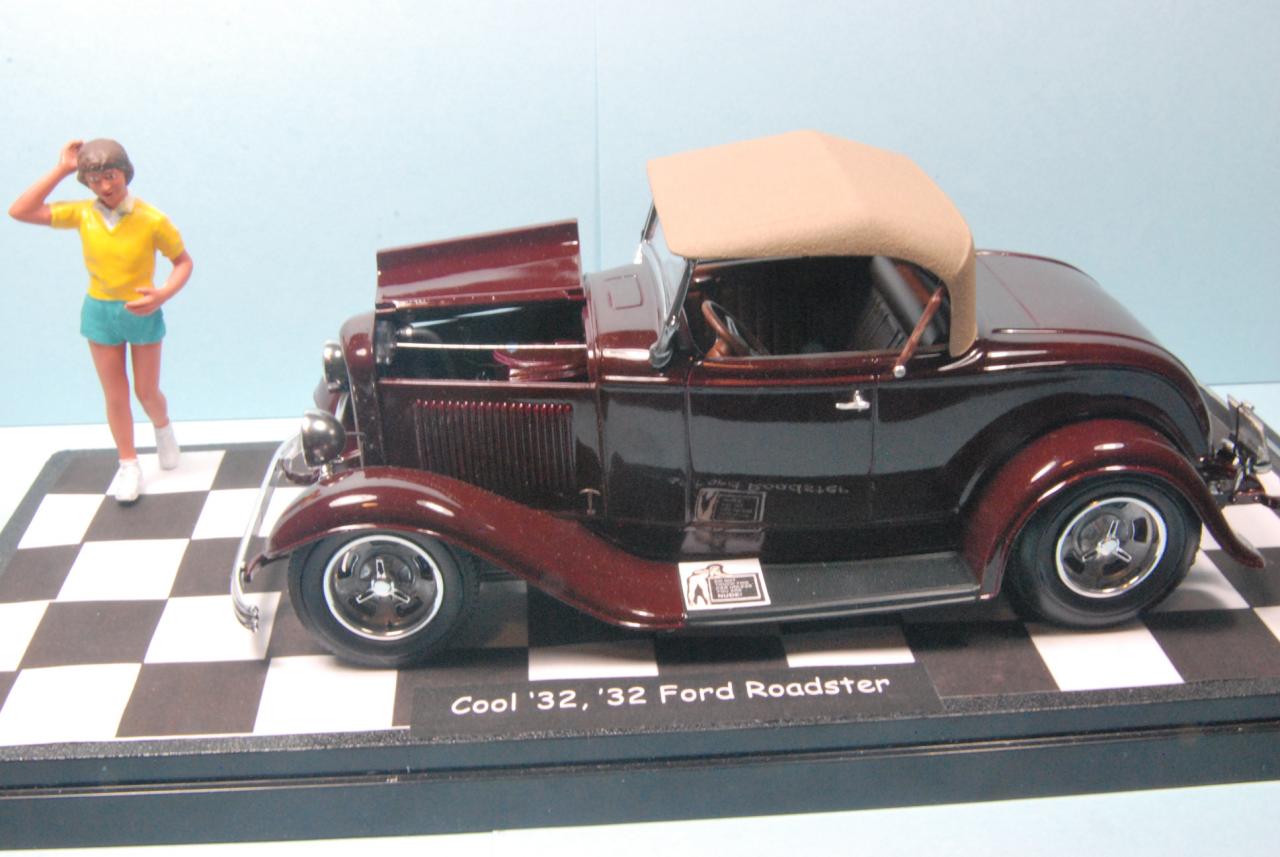
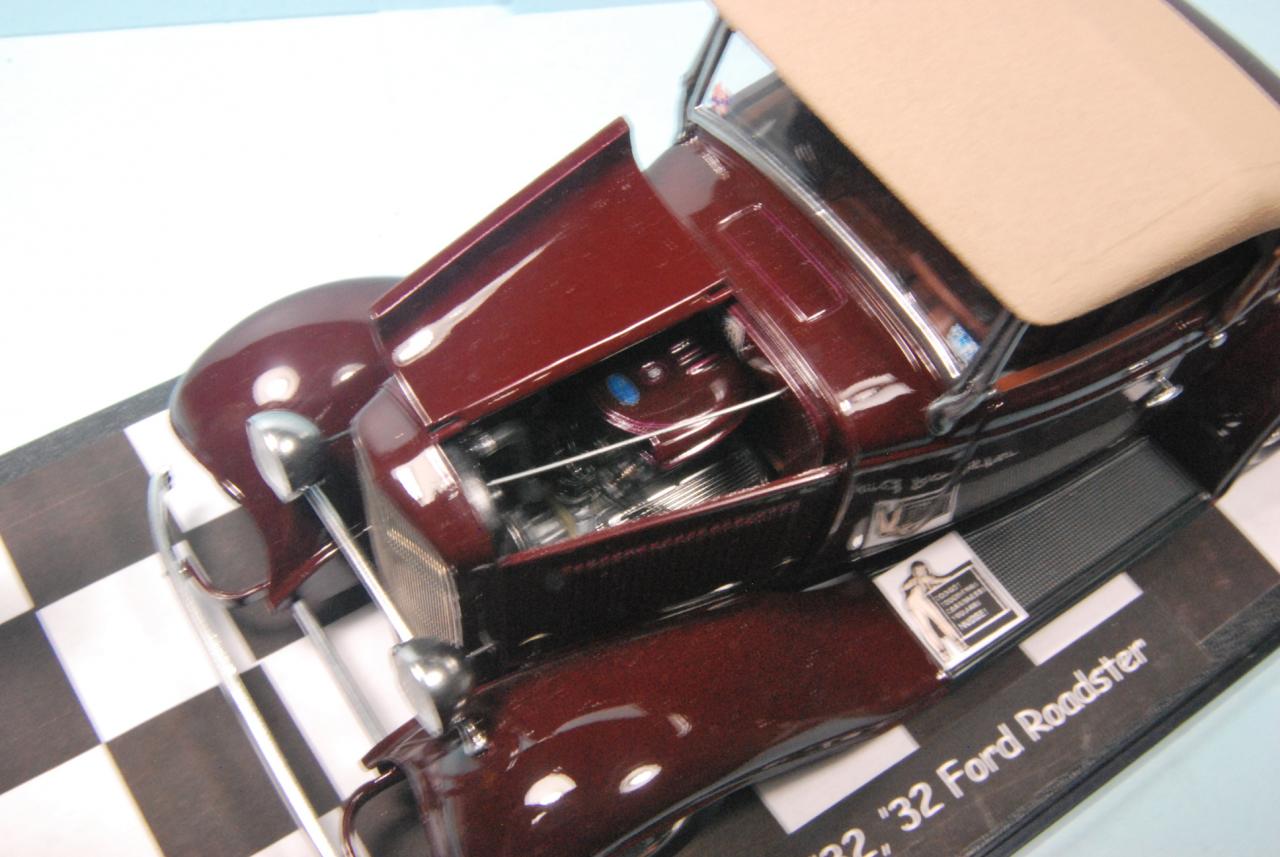
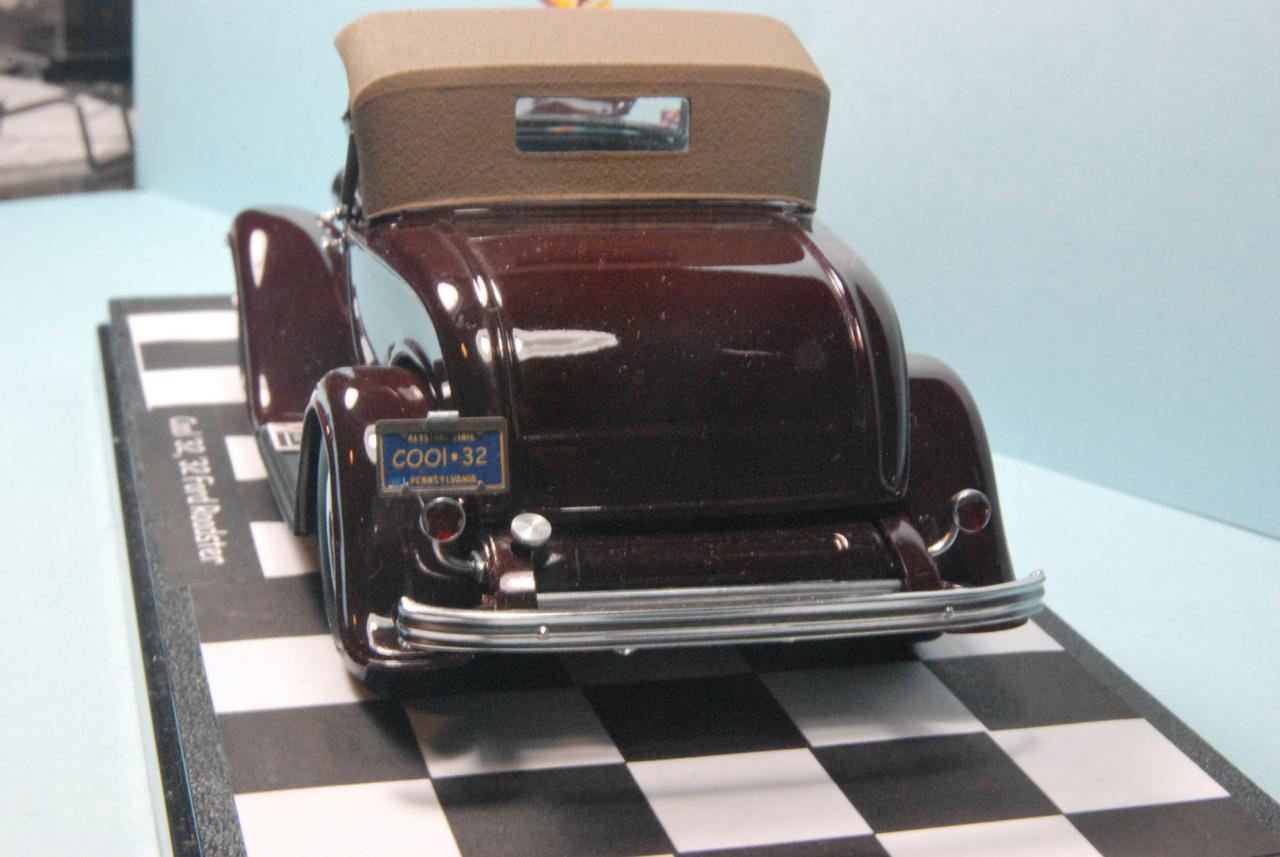
Paint was Bob Dahl's Fine Silver base and Candy Burgandy color coat (which are PPG-based) with PPG Clear. All were cut with Mar-Hyde Lacquer thinner. I use an Aztek A470 airbrush. One of the tricks I learned that allows me to get a nice glossy finish without having to polish is as follows; right after applying the final clear coat, I load a paint jar with straight lacquer thinner and apply a wet coat on top of the clear BEFORE it flashes off. I know this freaks out people when I tell them but you have to try it - it really works. I hate polishing as I was often burning through the color coat and then there was lots of repair work to do. Now I don't have that problem.
-
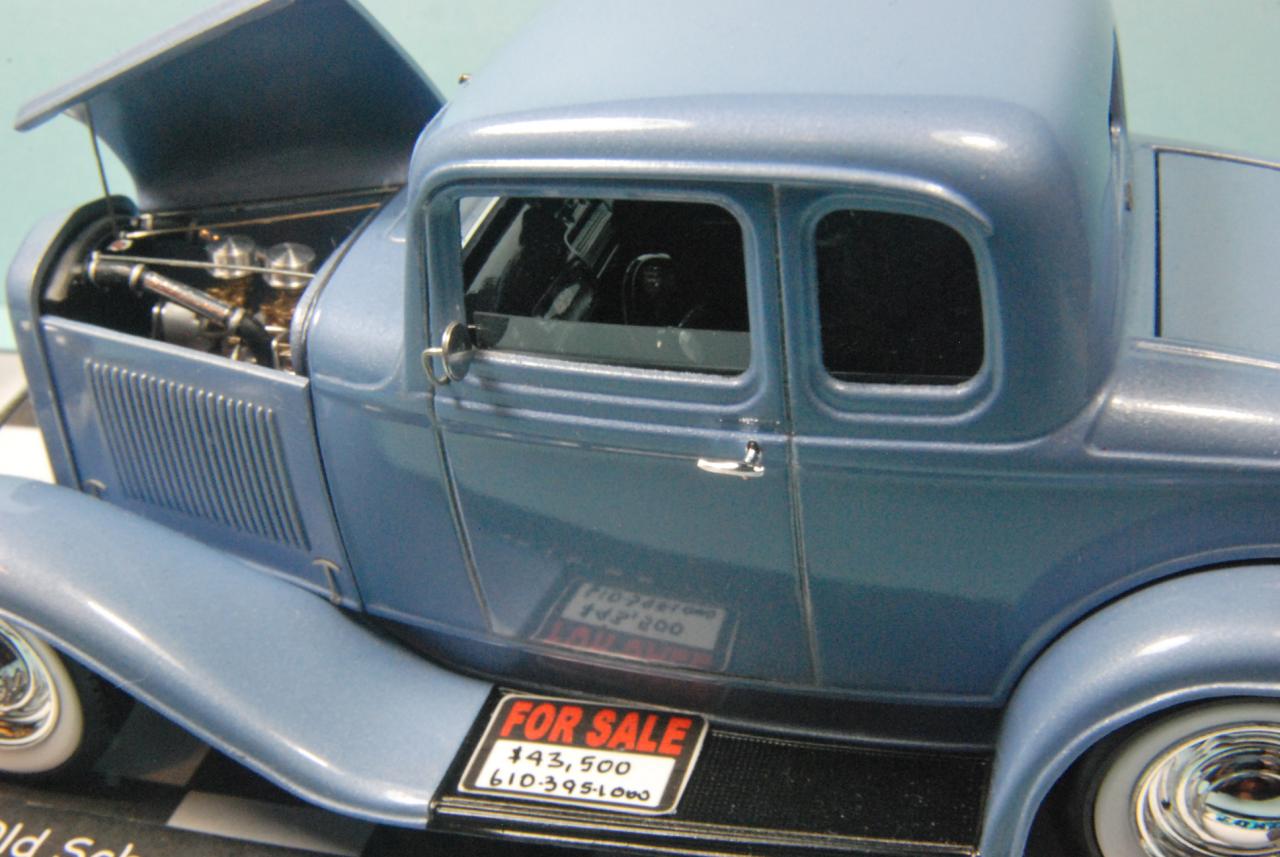
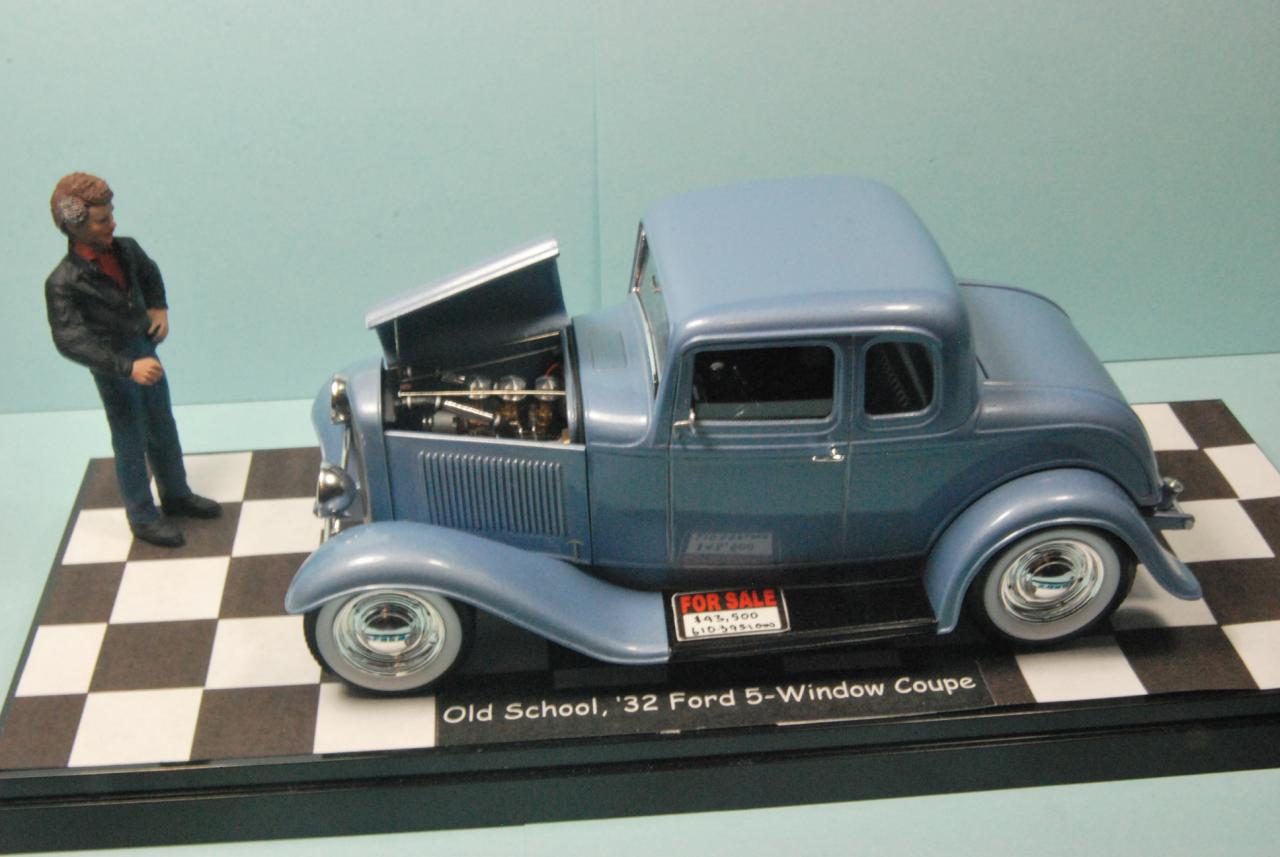
I finally figured out the problem I was having with the site photo uploaders. I can not upload images that are greater than 1MB in size even though the instructions claim files up to 10MB in size can be uploaded. No problem - an easy fix. Just use photoshop to reduce resolution so that the final JPG is less than 1MB in size. The tires were rat-rod tires and the wheels were from the Revell '32 Ford roadster kit with painted centers.
-
Another '32 Ford with a flathead. Airbrushed with Tamiya (TS-14) Gloss Black. Kit wheels with Revelkl rat-rod tires with the whitewall inserts sprayed with Tamiya Sem-Gloss Black.
-
I also love street rods, having built 1:1 cars many years ago. I will have a 1:1 street rod before I retire (or shortly thereafter). I fell in love with the Revell '32 Ford kits and have built 10 kits in different forms with several resin bodies to fill in what Revell has not produced to date (I bet they aren't finished with their line of '32 Ford kits). This is an old school 50s style build with a flathead (from the sedan kit). The model was lowered 2mm in front and rear as per Tim Boyd's suggestions.The paint is Tamiya Light Blue Pearl (airbrushed as usual). I love the Revell "rat-rod" tires and I used them here on wheels from the Revell '49 Merc kit.
-
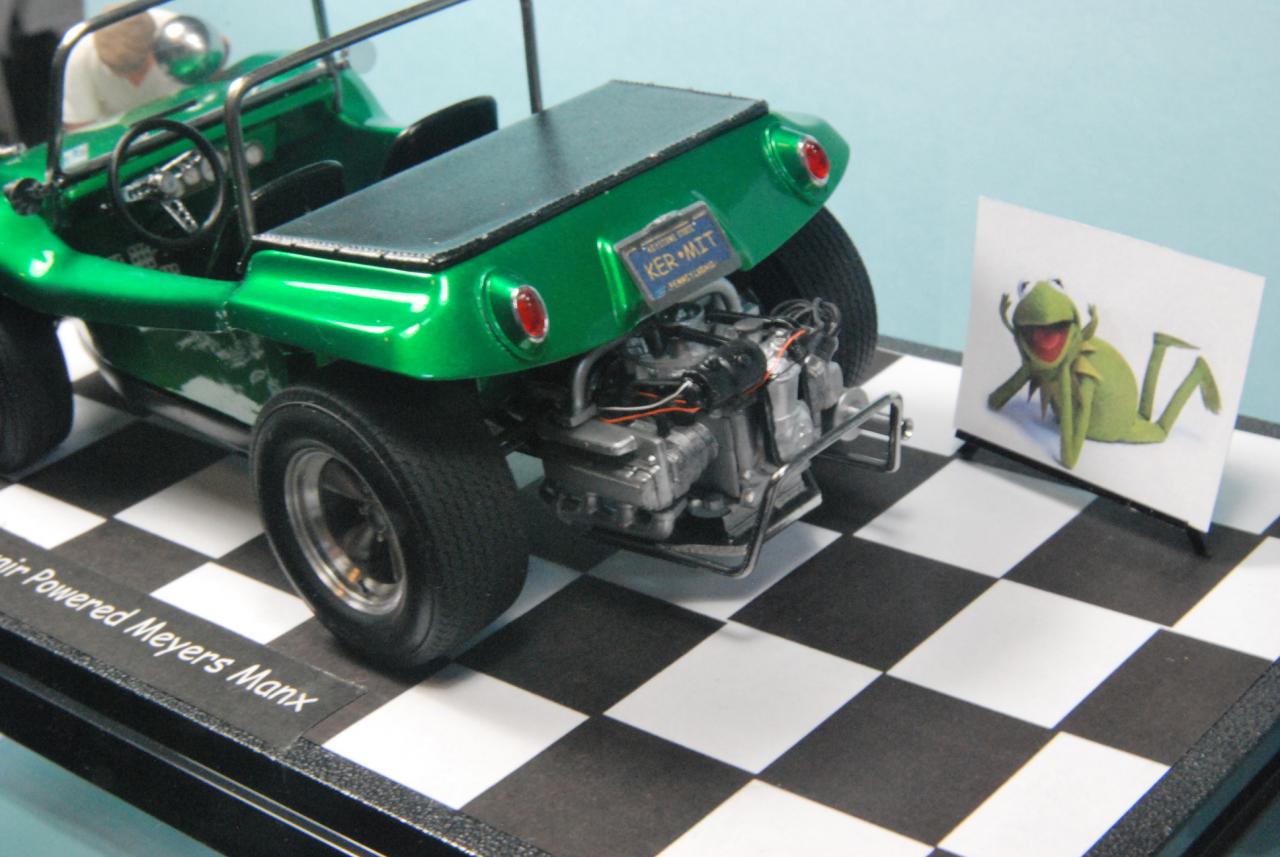
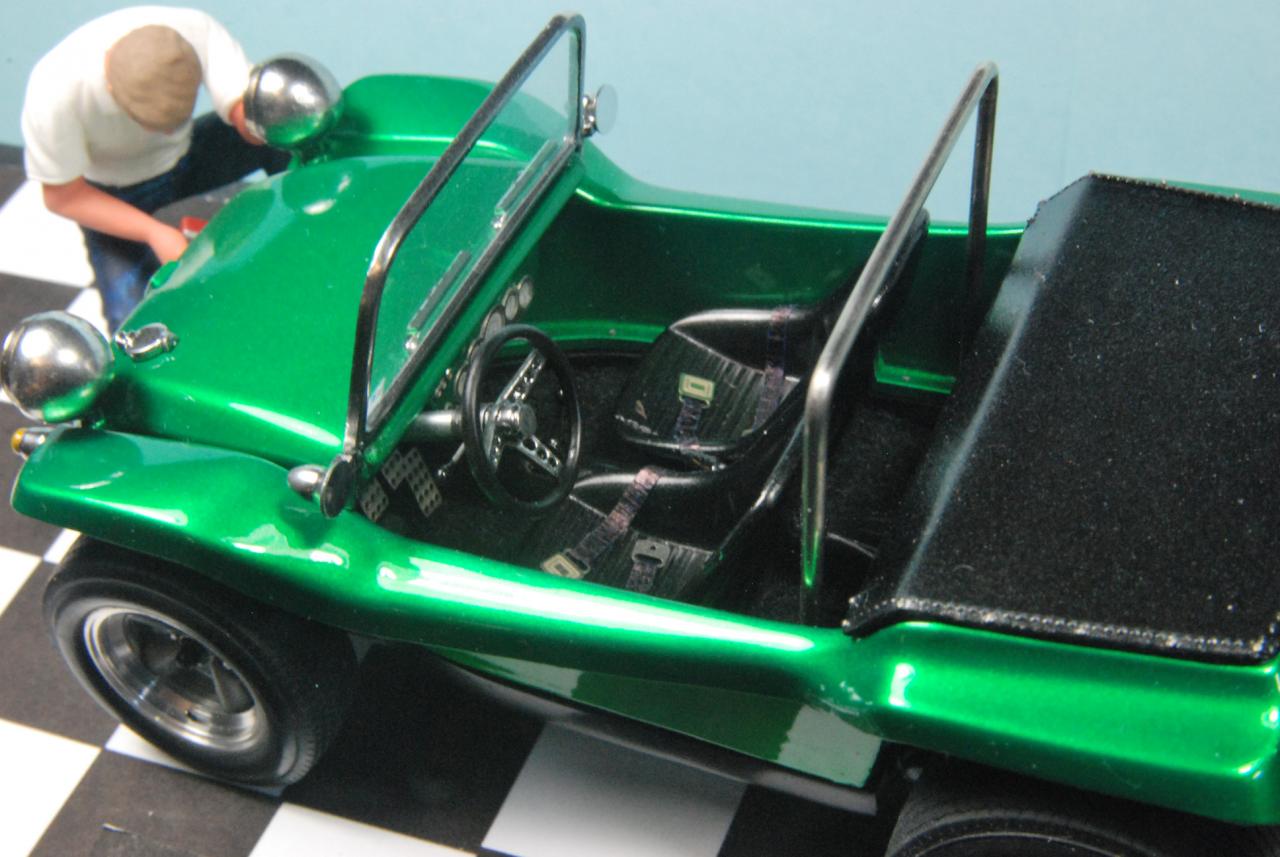
Photobucket is no different than Fotki which I already have. Let's try again. I may be on to something. Image size seems to be the major factor that causes problems with my uploads. I reduced the image size and they upload easily. I was well below the stated upper limit for size but they would not upload. Wheels were truned aluminum rims from Detail Master with resin centers from Scale Auto Details. Roll bar is polished solder. I used the turbocharged version of the Corvair engine. Rge body was airbrushed with Testor's Mystic Emerald Green One Coat that was cut 1:1 with Dupli-Color lacquer thinner.
-
Trying to post additional pictures but I don;t seem to be able to upload using the sites photo uploaders. This is frustrating. It worked yesterday but won't work today. ARGGGG!
-
Problem with photo uploader
Doctordarryl replied to Doctordarryl's topic in General Automotive Talk (Trucks and Cars)
Still having problems with the two (Basic and Advanced) photo up loaders for the forum. Has anyone been able to figure out why their computer won't up load photos using the sites up loaders. It worked yesterday but does not work today. I fdon't have all my pictures on Fotki so linking to Fotki is not a good solution to the problem. Fixing my computer so the forum's up loaders work seems to the best solution.