

Kit Basher
-
Posts
2,431 -
Joined
-
Last visited
Content Type
Profiles
Forums
Events
Gallery
Everything posted by Kit Basher
-
1990 F150 4x4 WIP
Kit Basher replied to Kit Basher's topic in WIP: Model Trucks: Pickups, Vans, SUVs, Light Commercial
Thanks Charlie, I'll keep doin' the best I can. -
Every time I look at this thing I think: "That is totally spectacular, but he's about done now." And then you do something even more outrageous! I couldn't believe it when you did the panelled front, and now the red! Just amazing.
-
1990 F150 4x4 WIP
Kit Basher replied to Kit Basher's topic in WIP: Model Trucks: Pickups, Vans, SUVs, Light Commercial
Thanks, Toby. I'm a'gettin there. -
1990 F150 4x4 WIP
Kit Basher replied to Kit Basher's topic in WIP: Model Trucks: Pickups, Vans, SUVs, Light Commercial
Yeah, that. -
1990 F150 4x4 WIP
Kit Basher replied to Kit Basher's topic in WIP: Model Trucks: Pickups, Vans, SUVs, Light Commercial
The rear driveshaft from the F250 works fine with a little alteration. The rear driveshaft from the Lindberg makes a perfect front driveshaft. The last is the steering shaft with a u-joint from the Lindberg. Here's the exhaust system. The F250 converter is a cylinder, I "sectioned" it to make it an oval. The muffler is from one of the pens I destroyed for front springs. Here is the "go" for this show. 4.9L EFI from Kitchen Table resins. This thing is a total mish mash. Tranny, transfer case, starter, and oil filler from Lindberg, alternator from the Bronco. I cut the resin intake runners apart to make them wider. Not wide enough, but the best I could do. Had to make the distributor, coil, air pump, and p/s pump, and the brackets for the alternator and p/s pump. The pulleys are from all three kits. The belt is cloth tape. The 2 bbl. lookin' doohickey attached to the big box on top of the engine (don't you just love technical talk?) is from the F250. Advice and comments always welcome. nuff for now, more later. -
That is the best idea for wood grain I have heard yet! For pictures of all kinds of wood,Look Here
-
WOW! I love this thing! With the "gill" vents on the sides and the louvers under the nose, it looks really shark-like. Super-fish indeed! I think I hear "Jaws" music playing...
-
Jeff Burton builds models ????
Kit Basher replied to slantasaurus's topic in General Automotive Talk (Trucks and Cars)
Even I don't understand that! "Those durn Virginia boys get it all screwed up???" -
Jeff Burton builds models ????
Kit Basher replied to slantasaurus's topic in General Automotive Talk (Trucks and Cars)
Wayall shore! Wah not? All us Vajanya boys lahks all kindsa cawers. -
1990 F150 4x4 WIP
Kit Basher replied to Kit Basher's topic in WIP: Model Trucks: Pickups, Vans, SUVs, Light Commercial
I really wanted to ignore these blobs of plastic on the fender. I just can't do it, they gots to go! They are gone! Filled back in. While I was at it I cut off the air cans. I will put new ones back later. You can also see part of the new heater blower. Wiped out details that don't exist on the 1:1 firewall. The cut out, set back section matches the 1:1, to make room for the 4.9L. Made a new heater blower and added a clutch master cylinder (hard to see). This stuff will show up better with paint. Advice and comments always welcome. nuff for now, more later. -
white paint question
Kit Basher replied to Kit Basher's topic in General Automotive Talk (Trucks and Cars)
Thanks Jon, that is an excellent point. I'm trying to be as true to the original as possible on this build, but I'm not being nuts about it. I am persuaded to paint it what looks good, regardless. If somebody shows up with paint chips, I will tell them to go paint their own truck! -
white paint question
Kit Basher replied to Kit Basher's topic in General Automotive Talk (Trucks and Cars)
Thanks for the suggestions guys, but I think I'm gonna have to go with Erik on this one. The 1:1 is "Colonial White", Duplicolor and Ford no longer make that color. I could have custom paint made, but like I said, the Wimbeldon white is exactly the same as the 1:1, but doesn't look right on the model. -
They are all a consistent length, (24"?), and lots of different sections, maybe even rounds. I know the R/C aircraft guys use them for reinforcements, like in wing spars. Super light, super strong. I'm not kidding about the price, tho! To return to the point of this thread, I've had good luck laminating styrene sheet to the inside of a body with liquid cement. (Like Ambroid or Testors) I hold the pieces together on one edge, so they're open enough I can get a brush between them. Brush cement, squeeze, brush cement, squeeze, and work your way across the sheet that way. If you get enough cement in there and squeeze good enough, the whole works is one piece of plastic.
-
Tadpole sanding blocks
Kit Basher replied to Davola's topic in General Automotive Talk (Trucks and Cars)
Look Here -
white paint question
Kit Basher replied to Kit Basher's topic in General Automotive Talk (Trucks and Cars)
Thanks, Mark, it's nice to have an explanation. I've got some Duplicolor white that looks really white compared to the 1:1, but I think I'll try it on the model. If I'm not happy with that I'll try the "Classic". Thanks to all. P.S. Testors over Duplicolor white made no difference. -
white paint question
Kit Basher replied to Kit Basher's topic in General Automotive Talk (Trucks and Cars)
Strangely enough, the model still looks dark when held up against the 1:1 truck, even at the spot where I sprayed the Testors on the 1:1. I'm going to try painting a spoon with Duplicolor and putting the Testors over that, see if it makes a difference. -
white paint question
Kit Basher replied to Kit Basher's topic in General Automotive Talk (Trucks and Cars)
I am using white primer. -
1990 F150 4x4 WIP
Kit Basher replied to Kit Basher's topic in WIP: Model Trucks: Pickups, Vans, SUVs, Light Commercial
Here's the interior. The bucket gets cut down pretty much the same as the cab. After I took this pic, I found I needed to cut even more. It should be cut all the way to the "pillar"(A.), and the little "shelf"(B.) is almost gone. I also raised the rear of the tunnel to clear the driveshaft by cutting on the red line and bending it up. I had to add a piece of "floor pan" to make up for what I cut away on the frame(A.), carve out a space for the transfer case, and fill in the seat depressions on the drivers side(B.). The only bench seat was the back seat from the Bronco, and it was much too narrow. So I cut it in half, and cut the center section out of the F250 seat. I cut the backrest off the center section of the F250 seat and replaced it with a piece of styrene. Glued the whole thing together. Not a perfect match for my vinyl bench seat, but it'll do. Now to make it a manual trans. The gearshift from the Lindberg is perfect, the transfer case shifter, not even close. The transfer case shifter is kinda notched into the tunnel, so I added a block to the bottom of the boot, and made a new lever. It will get a blob of epoxy to make a knob. Shift levers in place, had to add a clutch pedal, manual transmission! Now I can cut the prndl off the steering column! No power windows in a work truck! Sanded off the power controls and made some cranks. Here is the finished interior. (Yes, there is a dot of blue paint in the middle of the steering wheel. ) Sorry for the crappy pictures. Advice and comments always welcome. nuff for now, more later. -
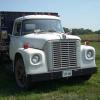
I am about ready to paint a model of my 1:1 truck, like this: Testors Wimbeldon White is a perfect match. I sprayed some on the 1:1 and you can't tell it's there. Problem is, when I spray it on a model and bring it inside, it looks really dark and yellow/brown. I'm thinking of painting the model a whiter white, just to make it look better, even tho it's not technically the "right" color. What would you guys do?
-
Stupid question #473
Kit Basher replied to Kit Basher's topic in General Automotive Talk (Trucks and Cars)
I've created a monster! -
1990 F150 4x4 WIP
Kit Basher replied to Kit Basher's topic in WIP: Model Trucks: Pickups, Vans, SUVs, Light Commercial
Thanks, plowboy. To be precise, it's sort of a bucket/bench seat. I'll be posting a pic soon. I checked out your F150 before I started this one, I like it a lot. But you never said how you cut down the cab, and I had to wing it on my own! -
My LHS has carbon fiber strips in a bunch of different sizes. The trick is to be able to afford them!
-
VWDave's method sounds good, but if you're gonna go there, why not real fiberglass? Check in the R/C section of your LHS, they should have 3/4 oz. fiberglass cloth, and various tapes. It's easy to use, cuts with scissors, and if you use 30 minute epoxy, you can lay in a bunch of layers before the glue dries. The strongest is to lay in progressively bigger pieces, so that it's thickest right over the joint, and feathers out to the largest area you can easily cover. You can do all sorts of cool stuff with fiberglass, and IMHO, it should be in every modelers tool box.
-
Stupid question #473
Kit Basher replied to Kit Basher's topic in General Automotive Talk (Trucks and Cars)
Inflation. -
Stupid question #473
Kit Basher replied to Kit Basher's topic in General Automotive Talk (Trucks and Cars)
I give up! You guys are waaaay too cool for me! B)