

Roadrunnertwice
-
Posts
67 -
Joined
-
Last visited
Content Type
Profiles
Forums
Events
Gallery
Everything posted by Roadrunnertwice
-
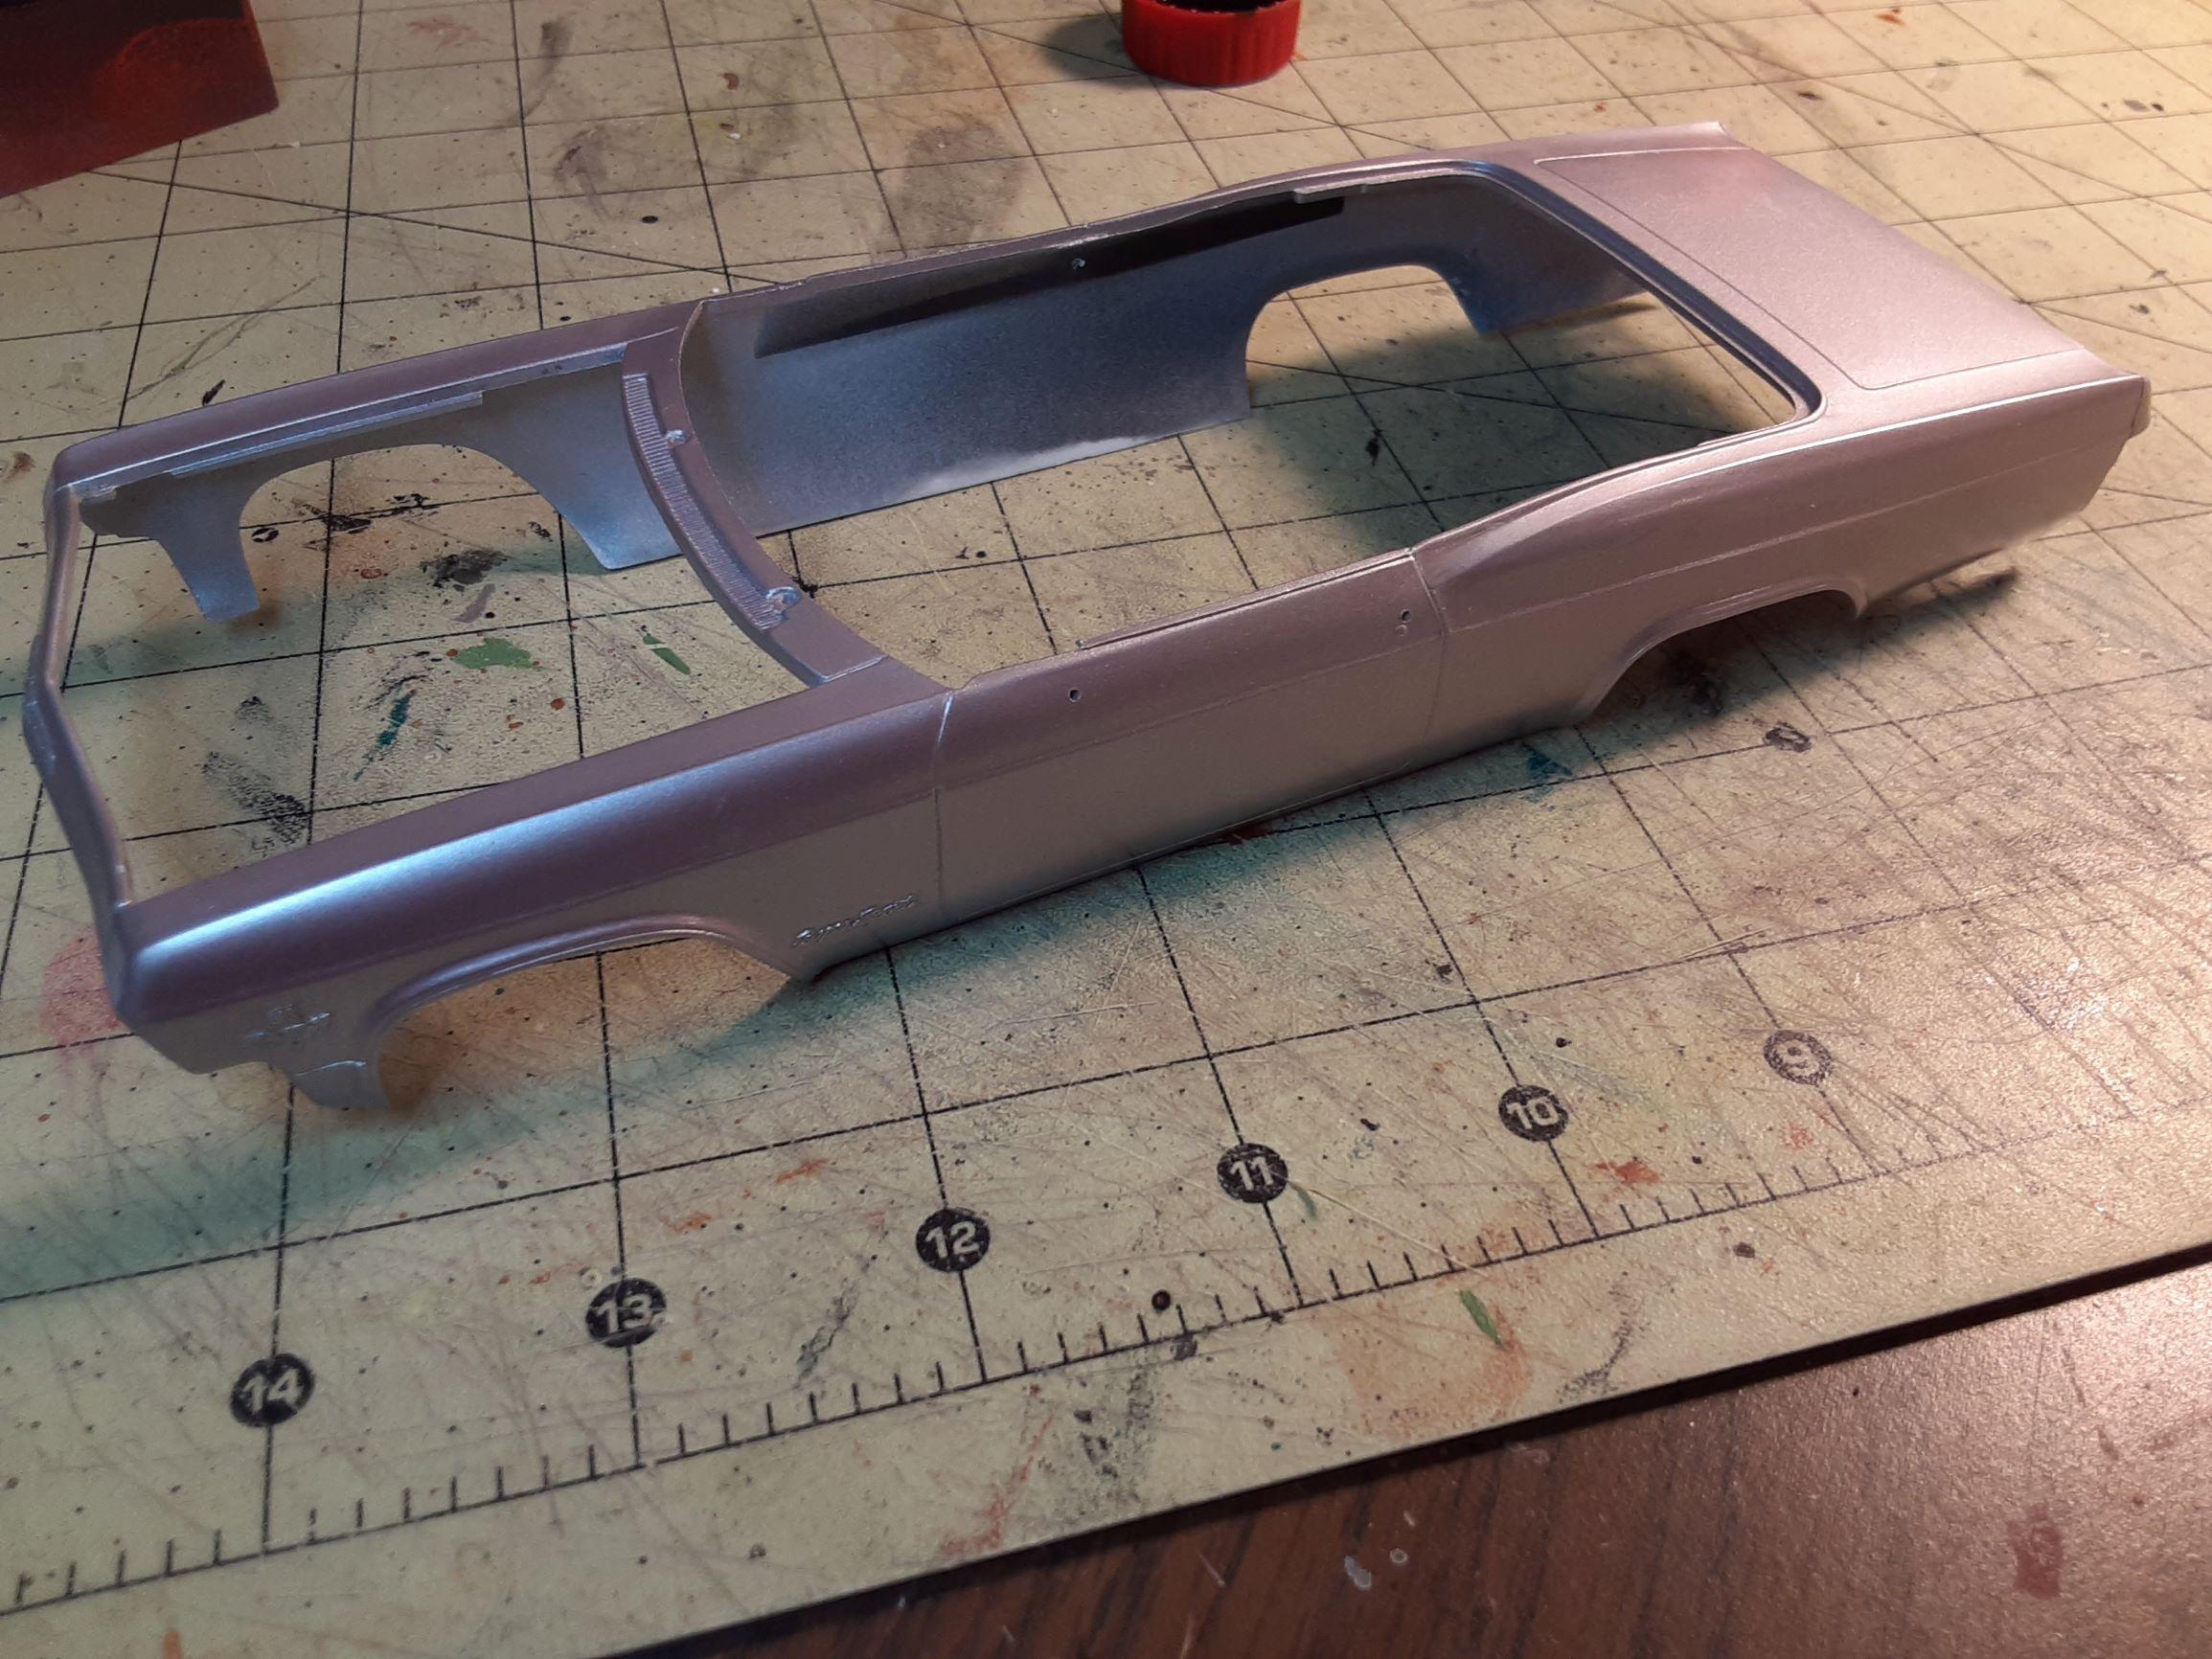
Thanks for the suggestion! I was skeptical of the foil's ability to conform to the 3-dimensional curves of these parts, but it worked well. Not only that, but I don't have to worry about excessive handing of the valve covers as I put the engine together like I would with delicate, spray-on chrome finish. I got the body painted. The clearcoat crazed the metallic paint slightly, but it's not noticeable in this photo. It's Scale Finishes topped with Duplicolor clear, a combination that worked well on previous builds (in a solid color, not metallic like this one). If a little sanding and polishing has the effect I hope it will, I'll stick with this paint job and not let perfect become the enemy of the good. On the plus side, I love how this color looks!

-
American SATCO tires - I miss that company! I still have some of their wide whitewalls. The kit tires seem better suited to an American 4x4 pickup, especially the white-letter version that came with the kit. Still, I may use them anyway - one of the builds pictured above uses them, and it looks good. I'll check my tire box when I reach that point in the build.
-
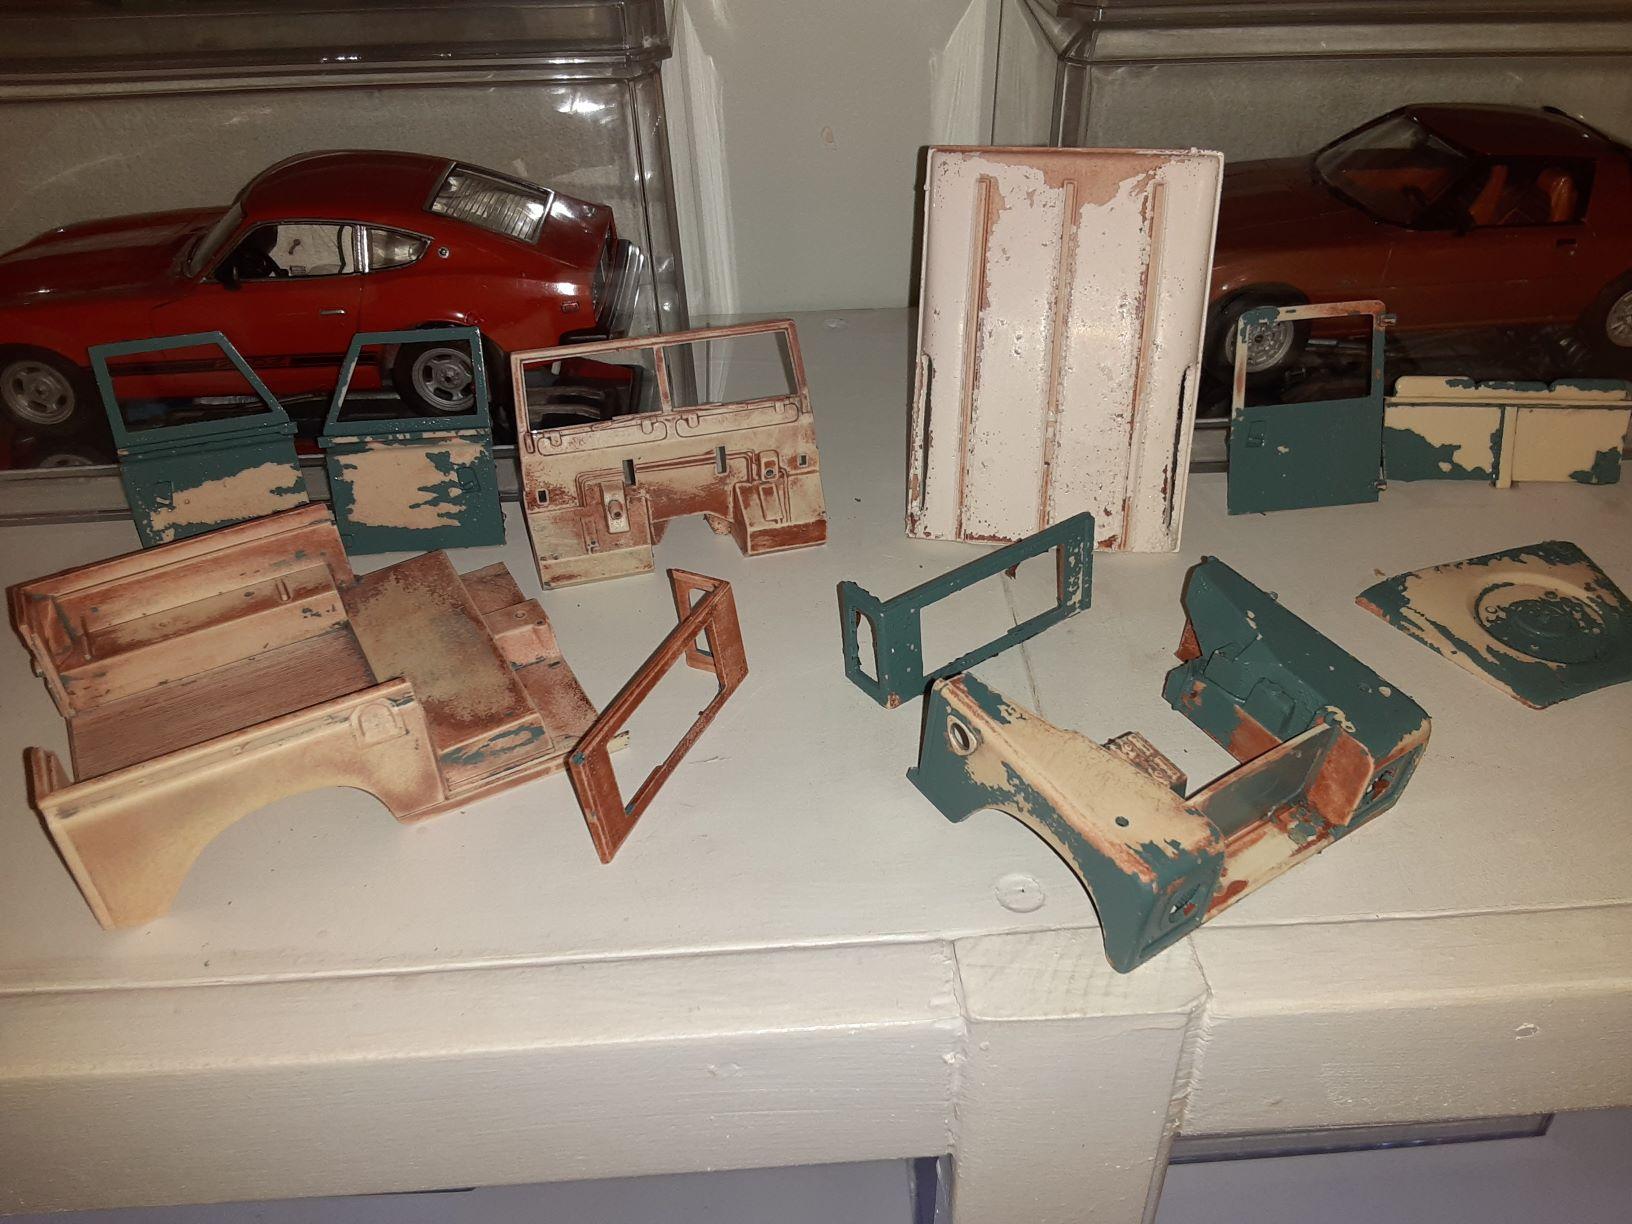
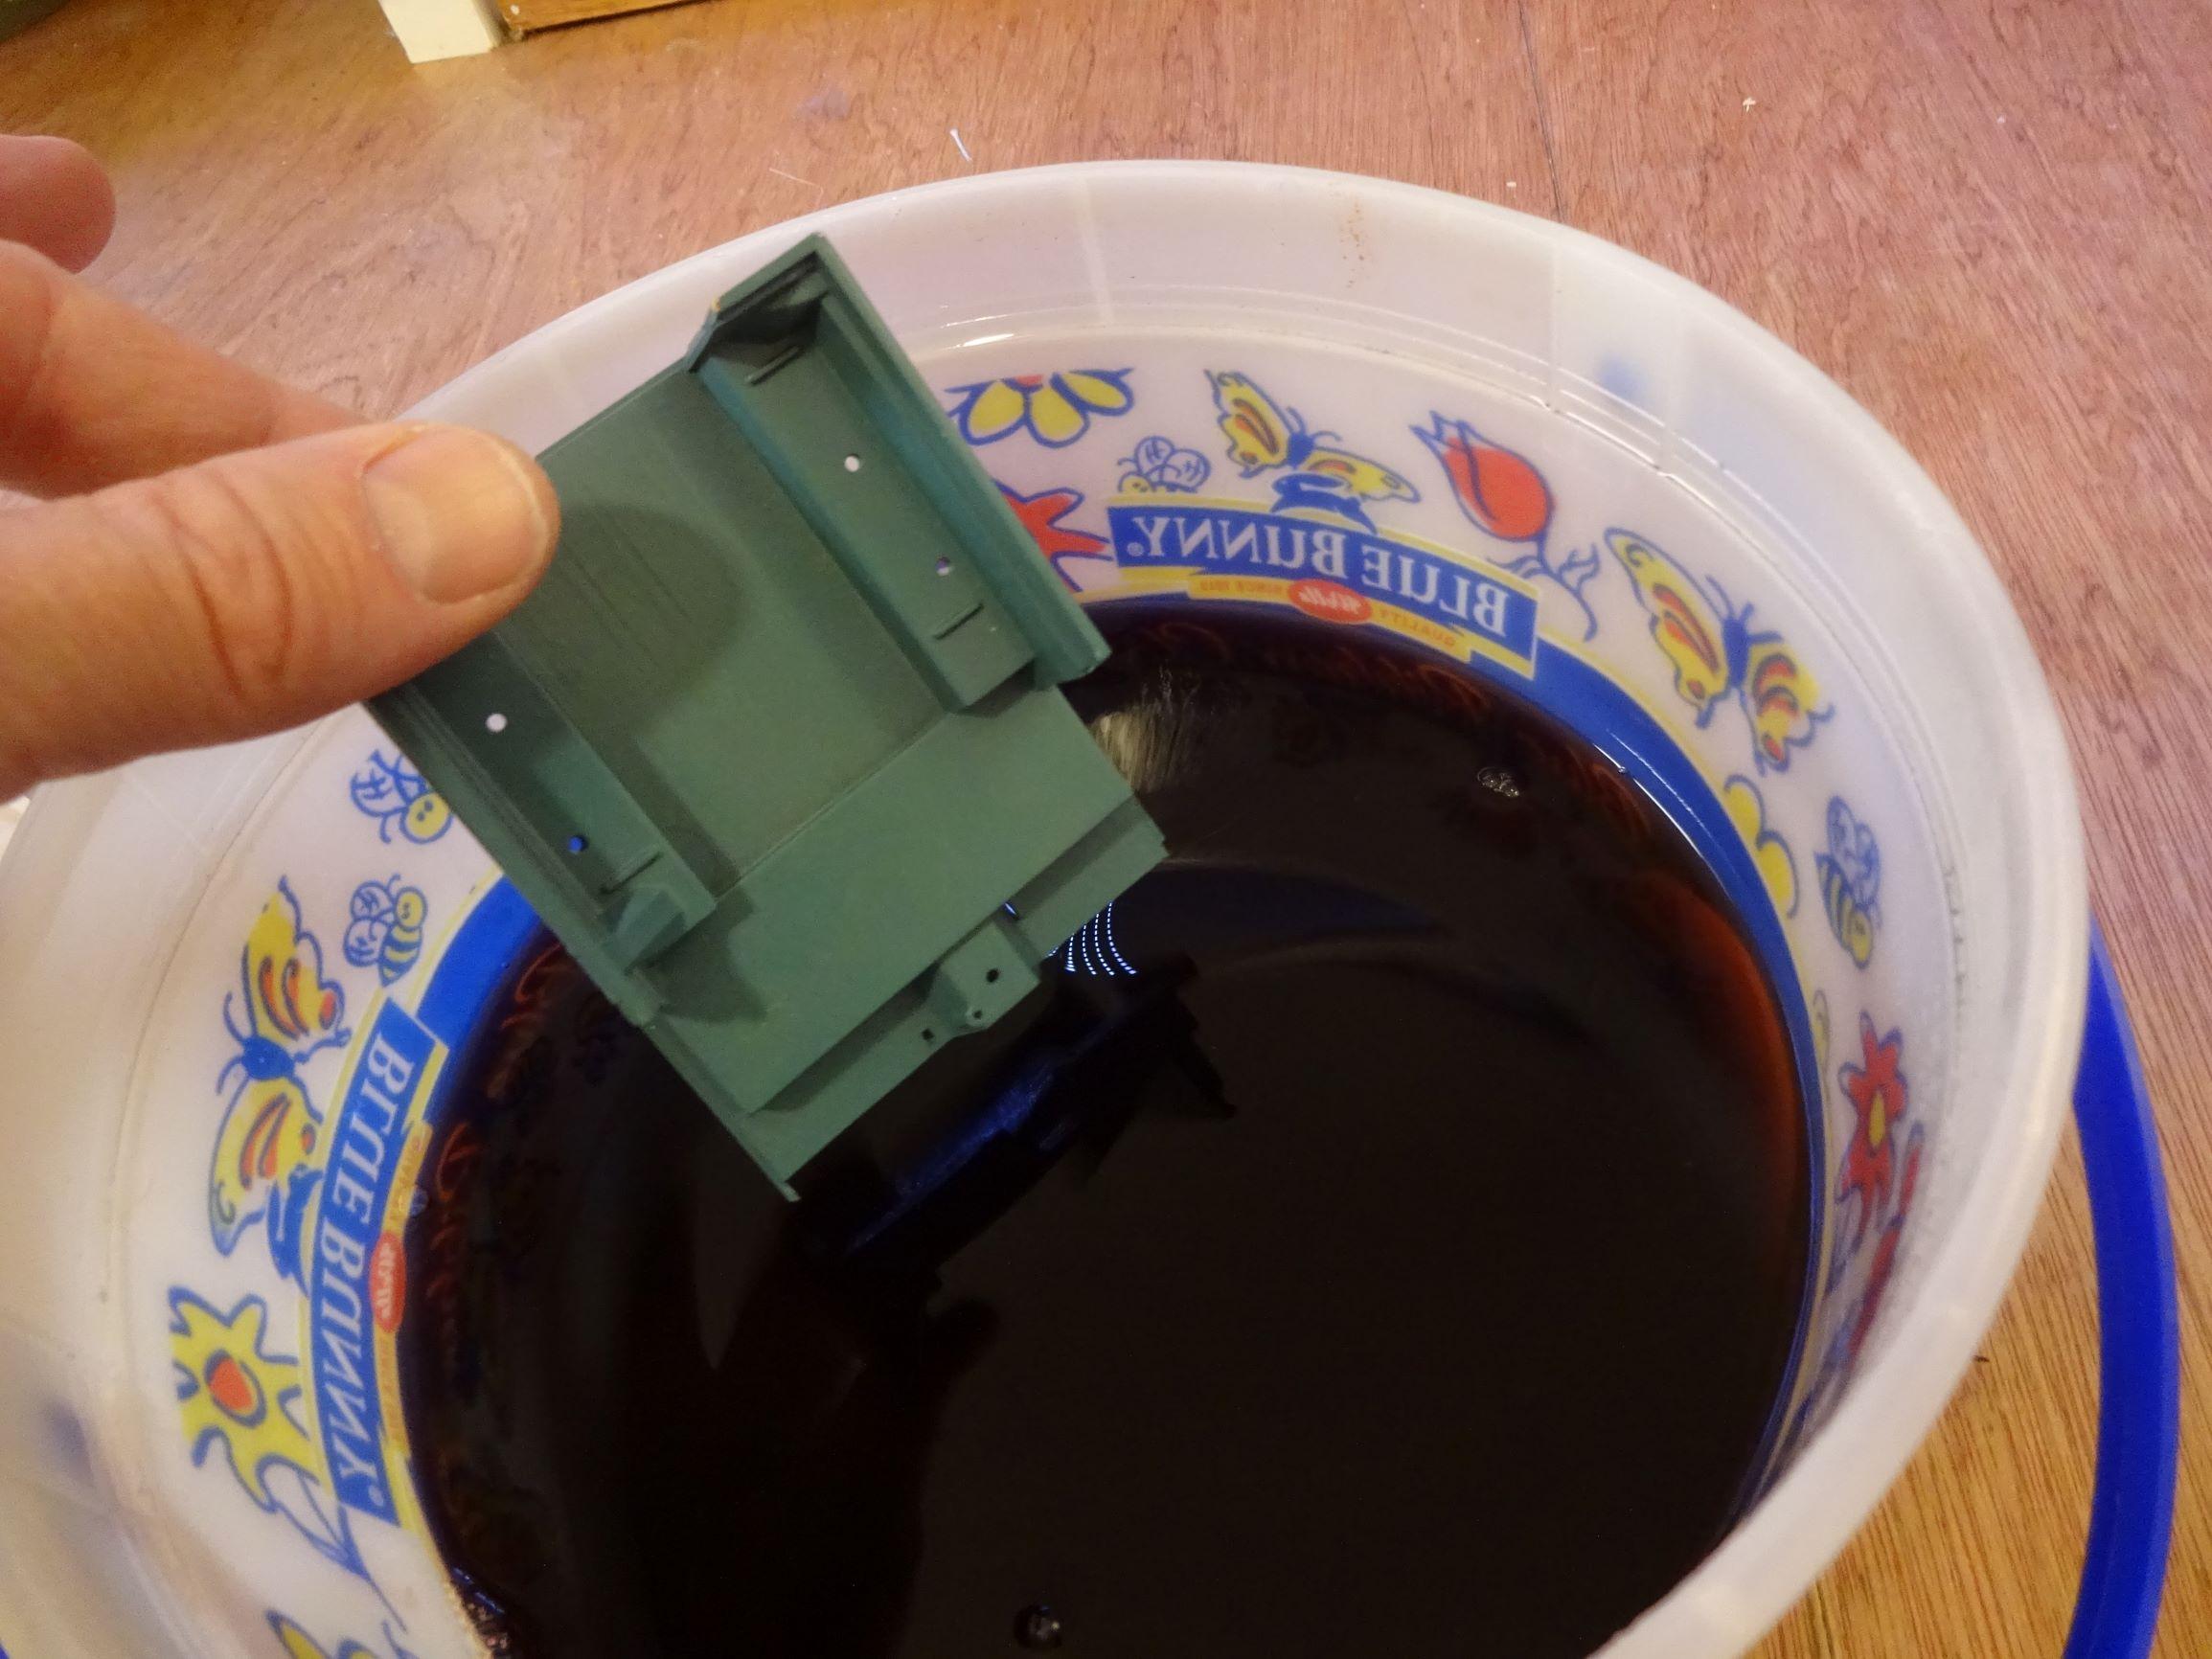
While waiting for paint to dry on my Impala, I checked on the progress of Land Rover parts soaking in Purple Power. The stuff is breaking down that decades-old paint nicely. I put the parts in the bin about 10 days ago, and progress varies across the range of parts. Not bad considering this paint has been on this Rover for decades. After scouring off the loose paint, those parts with lingering turquoise bits went back in the tub. I found an additional break on the firewall/windshield. I'm not sure if this was already broken, or if I broke it recently since messing with the kit. I don't see a glue joint surviving the rigors of painting, sanding, assembly, etc. without some sort of reinforcement. Right now, I'm thinking a paper clip epoxied to the back side of the windshield post will do the trick.
-
I'll probably chuck the unused parts into my spares box right way to avoid confusion during the build. I didn't know about standard vs. deluxe bonnets. Does the deluxe have the spare wheel mounted on it? I'm enjoying the progress on your build and can't wait to start my own. In the meantime, I've my SWB version.
-
I had a minor setback while chroming the valve covers. I ran out of Alclad, and we had this Krylon Premium chrome lying around the house left over from a picture-frame project for my wife. The Krylon doesn't look too bad, and it might have worked if I'd laid down a smoother coat. I'm hardly better with rattle cans than when I was a kid. Sometimes I get good results, other times not, and I can't tell the good days from the bad until the paint hits the plastic. I tried polishing the orange-peel chrome parts as if they were painted with conventional paint (Testors gloss black, for instance), and I ruined the finish. I wasn't surprised, but I had nothing to lose. Trying to touch up with a Moltow pen only made it look sloppier, and I could tell I was digging myself a deeper hole. Time for these pieced to bathe in a Ziploc full of Easy-Off, along with the Impala's console that needed de-chromed anyway. My local hobby shop stocks Alclad, but "local" means 70 miles away, and I doubt I'll make it there for months. I've had good luck creating convincing chrome exhaust tips with Model Master silver and a brush. When the engine parts are ready to paint again, I'll either give the Krylon stuff another shot or go the Model Master route. In the meantime, the convertible has become a coupe. I'm just a big fan of the body style, and all my enthusiasm was going in the coupe direction. I'll post more soon!
-
If the Duplicolor clear gives me much trouble, I'll make this a hardtop build. As much as I love convertibles, the 65 Impala coupe roofline is an iconic shape that epitomizes everything I like about American car designs of the last half of the 1960s. I remember admiring the Mercedes SECs I saw driving around Tulsa as a kid in the 1980s because their roofline reminded me of the Impala. Revell's convertible has a a 409 engine while the coupe kit has a 396, each with fender emblems denoting engine type. Building a 409 coupe would be fun, but in the topsy-turvy world of model cars, it sounds easier to build a 396 from kit parts than to try to replicate a 409 badge for the coupe. I could use the convertible kit's decals, if I find where I put them. I'm sure someone makes a photo-etch set with badges for every engine Chevy put in these things, but right now I'll stick with what I have on hand. But I'm getting ahead of myself. I'll let the brake fluid do its work on the convertible, and I've got plenty of Impala work to do in the meantime.
-
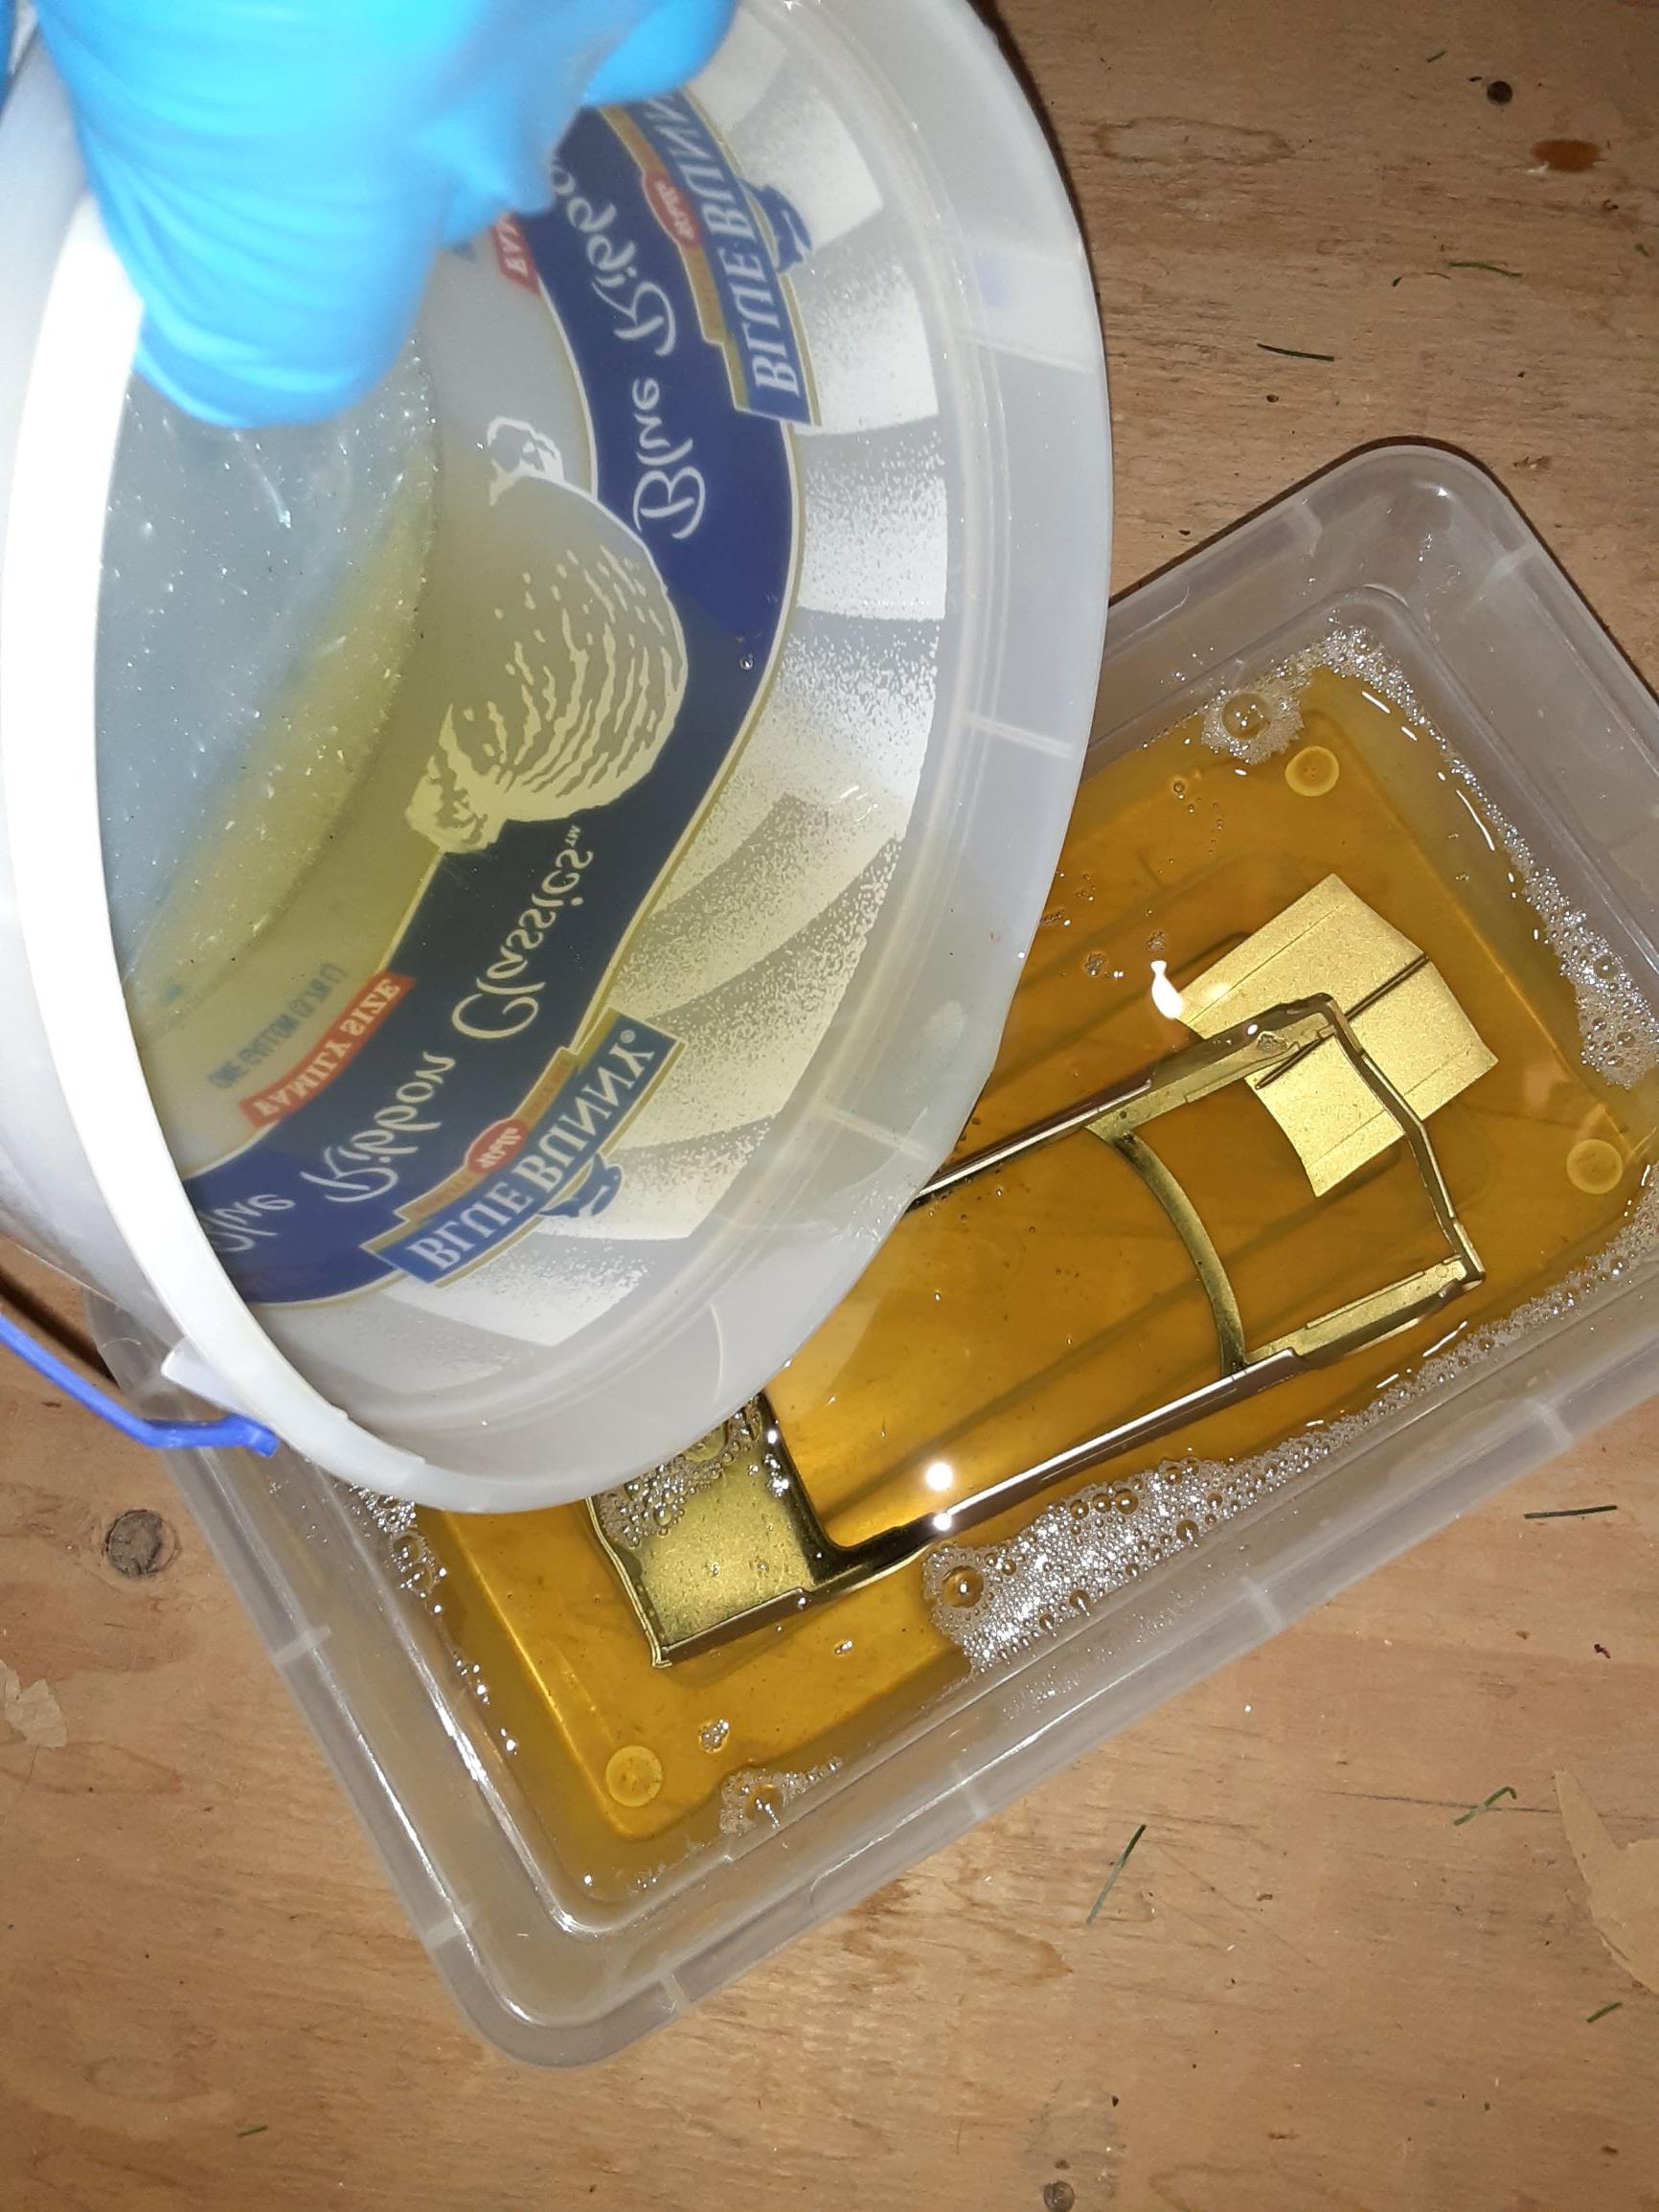
I didn't like the looks of my touch-up attempts. I decided I might as well go over the body carefully and take care of any flaw I could find. Now it's time to strip the body and repaint. I think I'll be happier with the result in the end. My tub of Purple Power is full of Land Rover parts, so I went with my backup paint stripper: brake fluid. The Impala was too big for my gallon ice cream bucket, so I found another container to get the paint to stripping.
-
Thanks, espo. Using unusual factory colors sure adds variety to the display shelf! When I was a kid, I used mainly the Testors gloss black, red, blue, yellow, etc. available in the model section of our local Albertson's grocery store.
-
Nice work on this kit. It whets my appetite to get one of m own!
-
I love the color, the scratchbuilt details, and the modification to the Plymouth engine - this is a showpiece!
-
I've gotten into the habit of paining all my black parts with DupliColor black primer and then using a variety of blacks and gray craft paints to create the impression a car is made of different parts, different materials, sourced from different suppliers, etc. Most 60s GM cars I've seen have chassis painted all black, and this is my first try of doing varied blacks on an all-black chassis like I've seen on most 60s GM cars. I painted the chassis primer gray and then picked out details in a black mixed from half flat, half gloss craft paint. Then, I thinned out some flat black until its almost thin enough for a wash like you'd do on a grille. I painted the gray parts with that to create a subtle difference between the floorboard and the frame. In person, this chassis looks like subtle variations of flat black, though the photo makes it look more like gray. I'm trying to use photography to improve my builds. The 2019 builds I posted the other day brought out flaws all but invisible with the cars sitting on my shelf.
-
Thanks for the feedback! The body color is Evening Orchid, a 1965-only color for Chevrolet and Pontiac (aka Iris Mist). I chose the color not for the box art car, which looked photoshopped, but because this book (below) reminded me of the color whenever I went by that shelf. I have enough ScaleFinishes paint for multiple cars, but I already have other plans for the '65 Chevelle Wagon and '65 Grand Prix in my stash. Meanwhile, the bulb went out in my magnifier lamp today, and so I'm making due with a different lighting setup. As I started sanding the body, I noticed some mold lines resurfaced once I got the color and clearcoats laid down. I resanded and touched them up, hoping to avoid having to repaint the whole car. In the meantime, I turned my attention to the chassis.
-
I agree about the ballistic prices for this long-discontinued kit. Back in the 80s, I remember imagining some future date when this kit was reissued and my skills were up to the task of kitbashing two of them to make a 109' 4-door version. The reissue never happened and my skills aren't up to that even now, but the 4-door is happening anyway! In the meantime, I'll settle for repairing the broken body and getting this finished after a 32-year hiatus!
-
This build is looking great, and your excellent modeling is an inspiration to improve my own skills. That gauge-bezel detail idea is brilliant! I can't wait to try it the next time I build a car with tunneled instruments.
-
Looks good! I built this kit last year, and it inspired a series of Skyline purchases that now sit in my to-build stash. I'm looking forward to seeing yours in its silver glory! I like your distributor wiring idea, and I'll try it on my next build.
-
The instructions call for orange valve covers, but every '65 409 I can find online has chrome on the covers and the air cleaner. Once this glossy black has cured, I'll give these parts a coat of Alclad. While sanding the lower valance, I got the idea to maybe try thinning out the grille from behind. I'm not yet convinced, but I've set it aside to think about the idea. If I mess it up, I have a '65 lowrider kit in my stash that could come to the rescue. Or there's always that Foose Impala... Most everything now sits in its basic color ready for detail painting in the next few days. Next comes sanding and polishing the body.
-
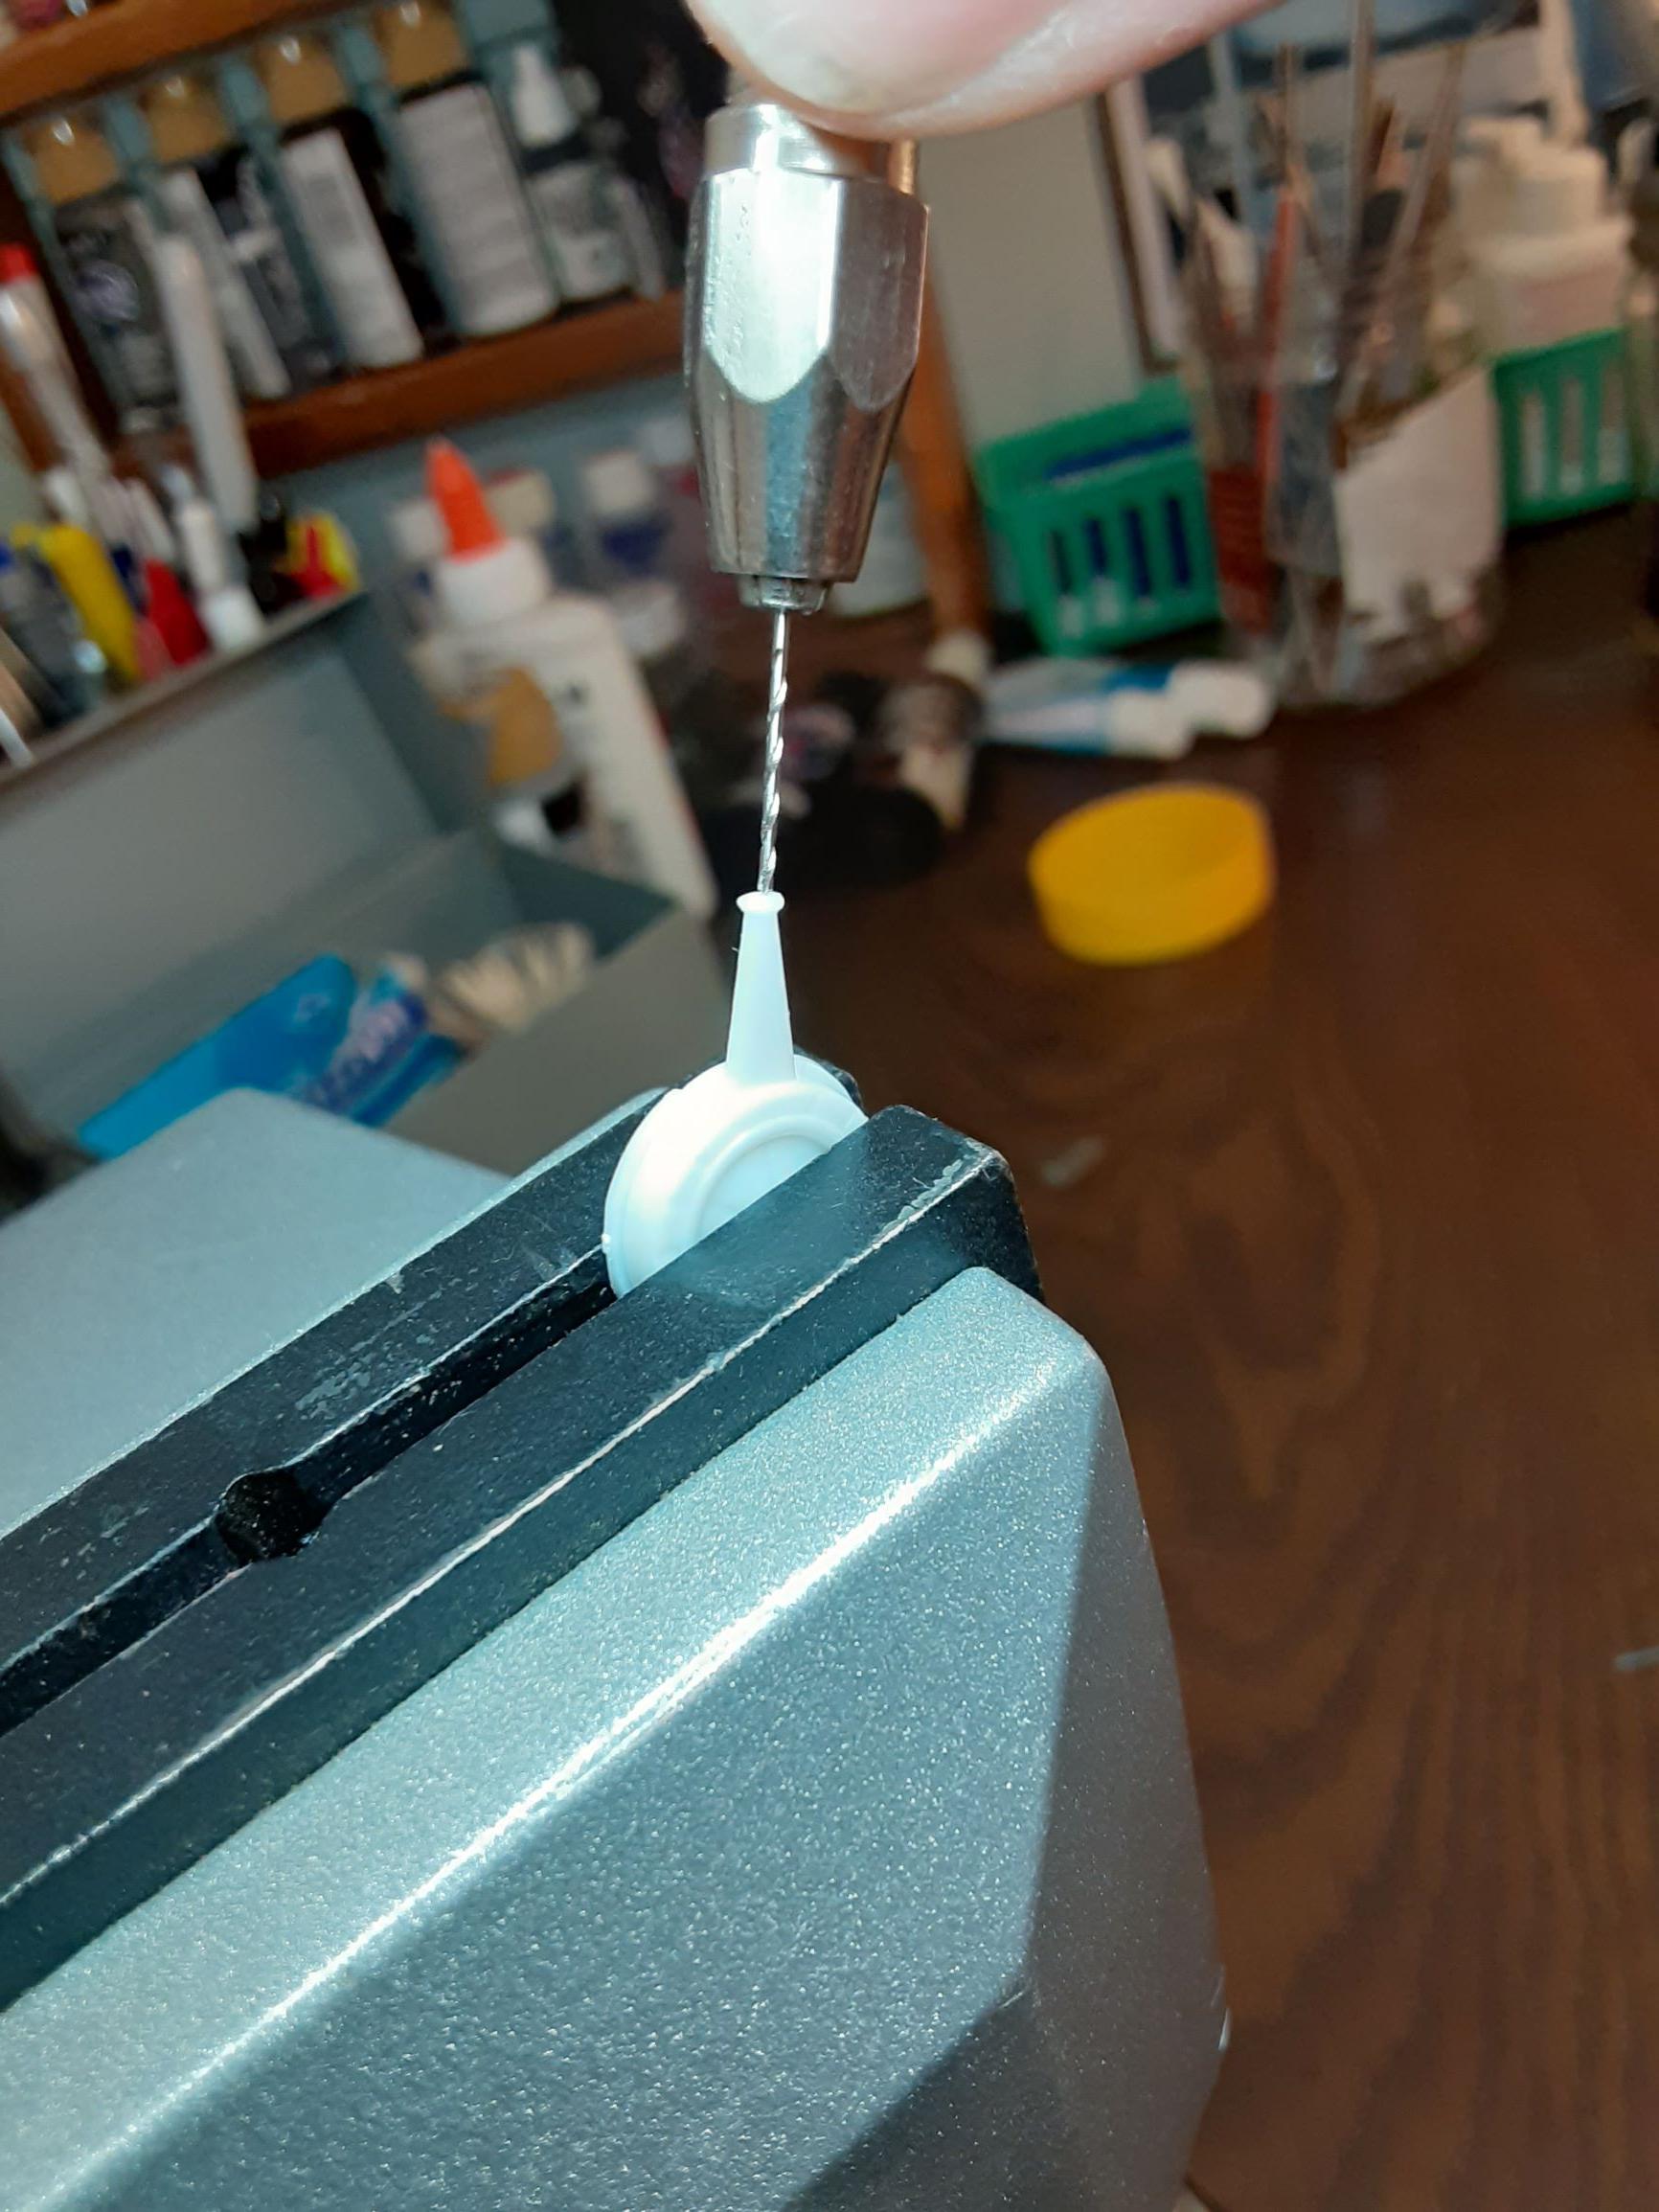
While I wait for Purple Power to soften the paint on my vintage Land Rover, it's time to build this `65 Impala convertible. The '65 Coupe is one of my favorites, and I built it during a brief model-building renaissance I had back when Revell released it in the 90s. I'd almost rather build another coupe because I love the body shape, and I may do just that if I mess up the convertible body somehow. In the meantime, this convertible offers the chance to show off what I hope will be a nice, detailed interior. Revell has upped their decal game in newer kits, but this kit came from R-M's era of clamshell boxes and decals that turn to dust. I set the decals aside months ago meaning to scan them into the computer, and now I can't find them. I think they depicted mostly badges that can be foiled for detail. On the other hand, decals are one of several reasons I'm tempted to pick up the readily available Foose Impala for parts. My brother-in-law gave me this vise from some boxes of model-railroad supplies he got recently. It's handier than I expected, making it easier than ever to center the bit on small parts. I'm truncating this post because I keep getting the 404 posting error, and I thought I might post the rest later.
-
Thanks for the link, Mike! The history behind the kit suggests that it was the wrong place, wrong time. Monogram's Rover might have hit big in the late 80s or early 90s after Land Rovers were reintroduced to the US and the Defender developed a following over here. In the early 80s, I knew LRs from Gorgi/Dinky toys, National Geographic, and Mutual of Omaha's Wild Kingdom, but I don't think I'd ever seen one in person at that point. Dennis, your LR is beautiful! I've got a similar build idea in mind, and I hope mine comes out half as good. I take it I've got some wheel-hub research to do before I really get started. Where did you get your tires?
-
Revell's new-tool Land Rover kit is a dream come true! While I give my local hobby shop (Top Shelf Models near Tulsa) a chance to get it in stock, I decided to dig this old relic out of the attic and give it a try. The Land Rover is probably my all-time favorite Monogram kit. I bought my first one at TG&Y in 8th grade, and it went through several paint/modification stages that seemed cool to me in junior-high. The kit pictured here came from a hobby shop in the mid-1980s when I was in high school. I broke the body early in the build process, and then put it in the box where it remained for decades. At first, I thought I was keeping the parts for when Monogram eventually reissued the kit. I've tried finding an unbuilt example for years, but prices are through the roof. Revell's new tool hints (in the best possible way) that Monogram's old tool is probably gone for good, and Revell's new kit probably outshines the 1980s version in every way. I can't wait to build the new kit. Meanwhile, what I have here looks mostly complete, and I'm not so discouraged by the repair as I was years ago. The Hobby Shop owner gave me some repair ideas for the broken body. But first, the old paint has to go. Time for a dip in my tub of Purple Power, where the Rover will stay out of sight and out of mind while I turn to my `65 Impala project!
-
I love these! The monochromatic style focuses attention on your customization and super-clean building. Some of these kits are very fiddly (VW Van, I'm looking at you), and monochrome would only emphasize any building flaws if they were there to see. The Chevelle looks like something out of the Jetsons or maybe Speed Buggy. Nice work!
-
These builds are outstanding! I don't know how you get the details so precise. Great subject matter, and execution!
-
Fantastic builds! The Delahaye is a gorgeous build, and I love the color on the Lincoln. I'm really impressed by the array of subjects!
-
Thanks for the kind words! The Ford's color turned out just like I hoped. The Citroen is Ebbro's recent 1/24th scale kit. I built the Heller 1/16th DS convertible years ago, and this new Ebbro kit is much nicer. I'll definitely build another one.
-
1957 Ford Del Rio 1972 Citroen DS21 1971 Nissan Skyline GTR 1989 Nissan Skyline GTR
-
1969 Datsun Fairlady roadster 2000, Fujimi
Roadrunnertwice replied to Ahajmano's topic in Model Cars
Fantastic! I've got this kit in my stash and am working on building all the Fairlady/Z-cars myself. Thanks for the heads-up on the build issues, but it looks like you conquered them well. Love the color and the detailing on this build!


.jpg.b4a014d1b839d4d08d1db4742b331ca8.jpg)
.jpg.f47487b46ef5e8d2853294bd8ff8d095.jpg)
.jpg.42da433de3e0c32b665f0f763dd12b04.jpg)
.jpg.da56f01bd567a89e24e71dc40b6ade01.jpg)


.jpg.247aa98e591b43e4c86af672d51d9024.jpg)
.jpg.7579e7e368e36dc559ddd5247b78a97b.jpg)
.jpg.83909a9f62eaf2e5aba0cf661f88e871.jpg)

.JPG.097753576e6e4e9887f292fdbc3622f0.JPG)

.jpg.ae54e62bbf6d05bafcbb998aa3895603.jpg)
.jpg.e80ac068daaf0879f38bf0b9125397bb.jpg)


.JPG.7dc9c829c4692e509557722c045fad5f.JPG)
.JPG.a0d6db0d976df14d98e52866f926c643.JPG)
.JPG.676f82fc93578b722f3913782b337a1c.JPG)
.JPG.ed155d117aa6a8e2f311730a2b7f5bde.JPG)
.JPG.fed16fc6ff46165f8f3551b8ad0eb740.JPG)
.JPG.f6e655fb21fcf5a4fadecad0e270eb86.JPG)
.JPG.4b6a46b11ac55ec135b1b815c4e866a0.JPG)
.JPG.348578139bf57acc414b4f1e045f3478.JPG)