Search the Community
Showing results for tags 'pocher'.
Found 13 results
-
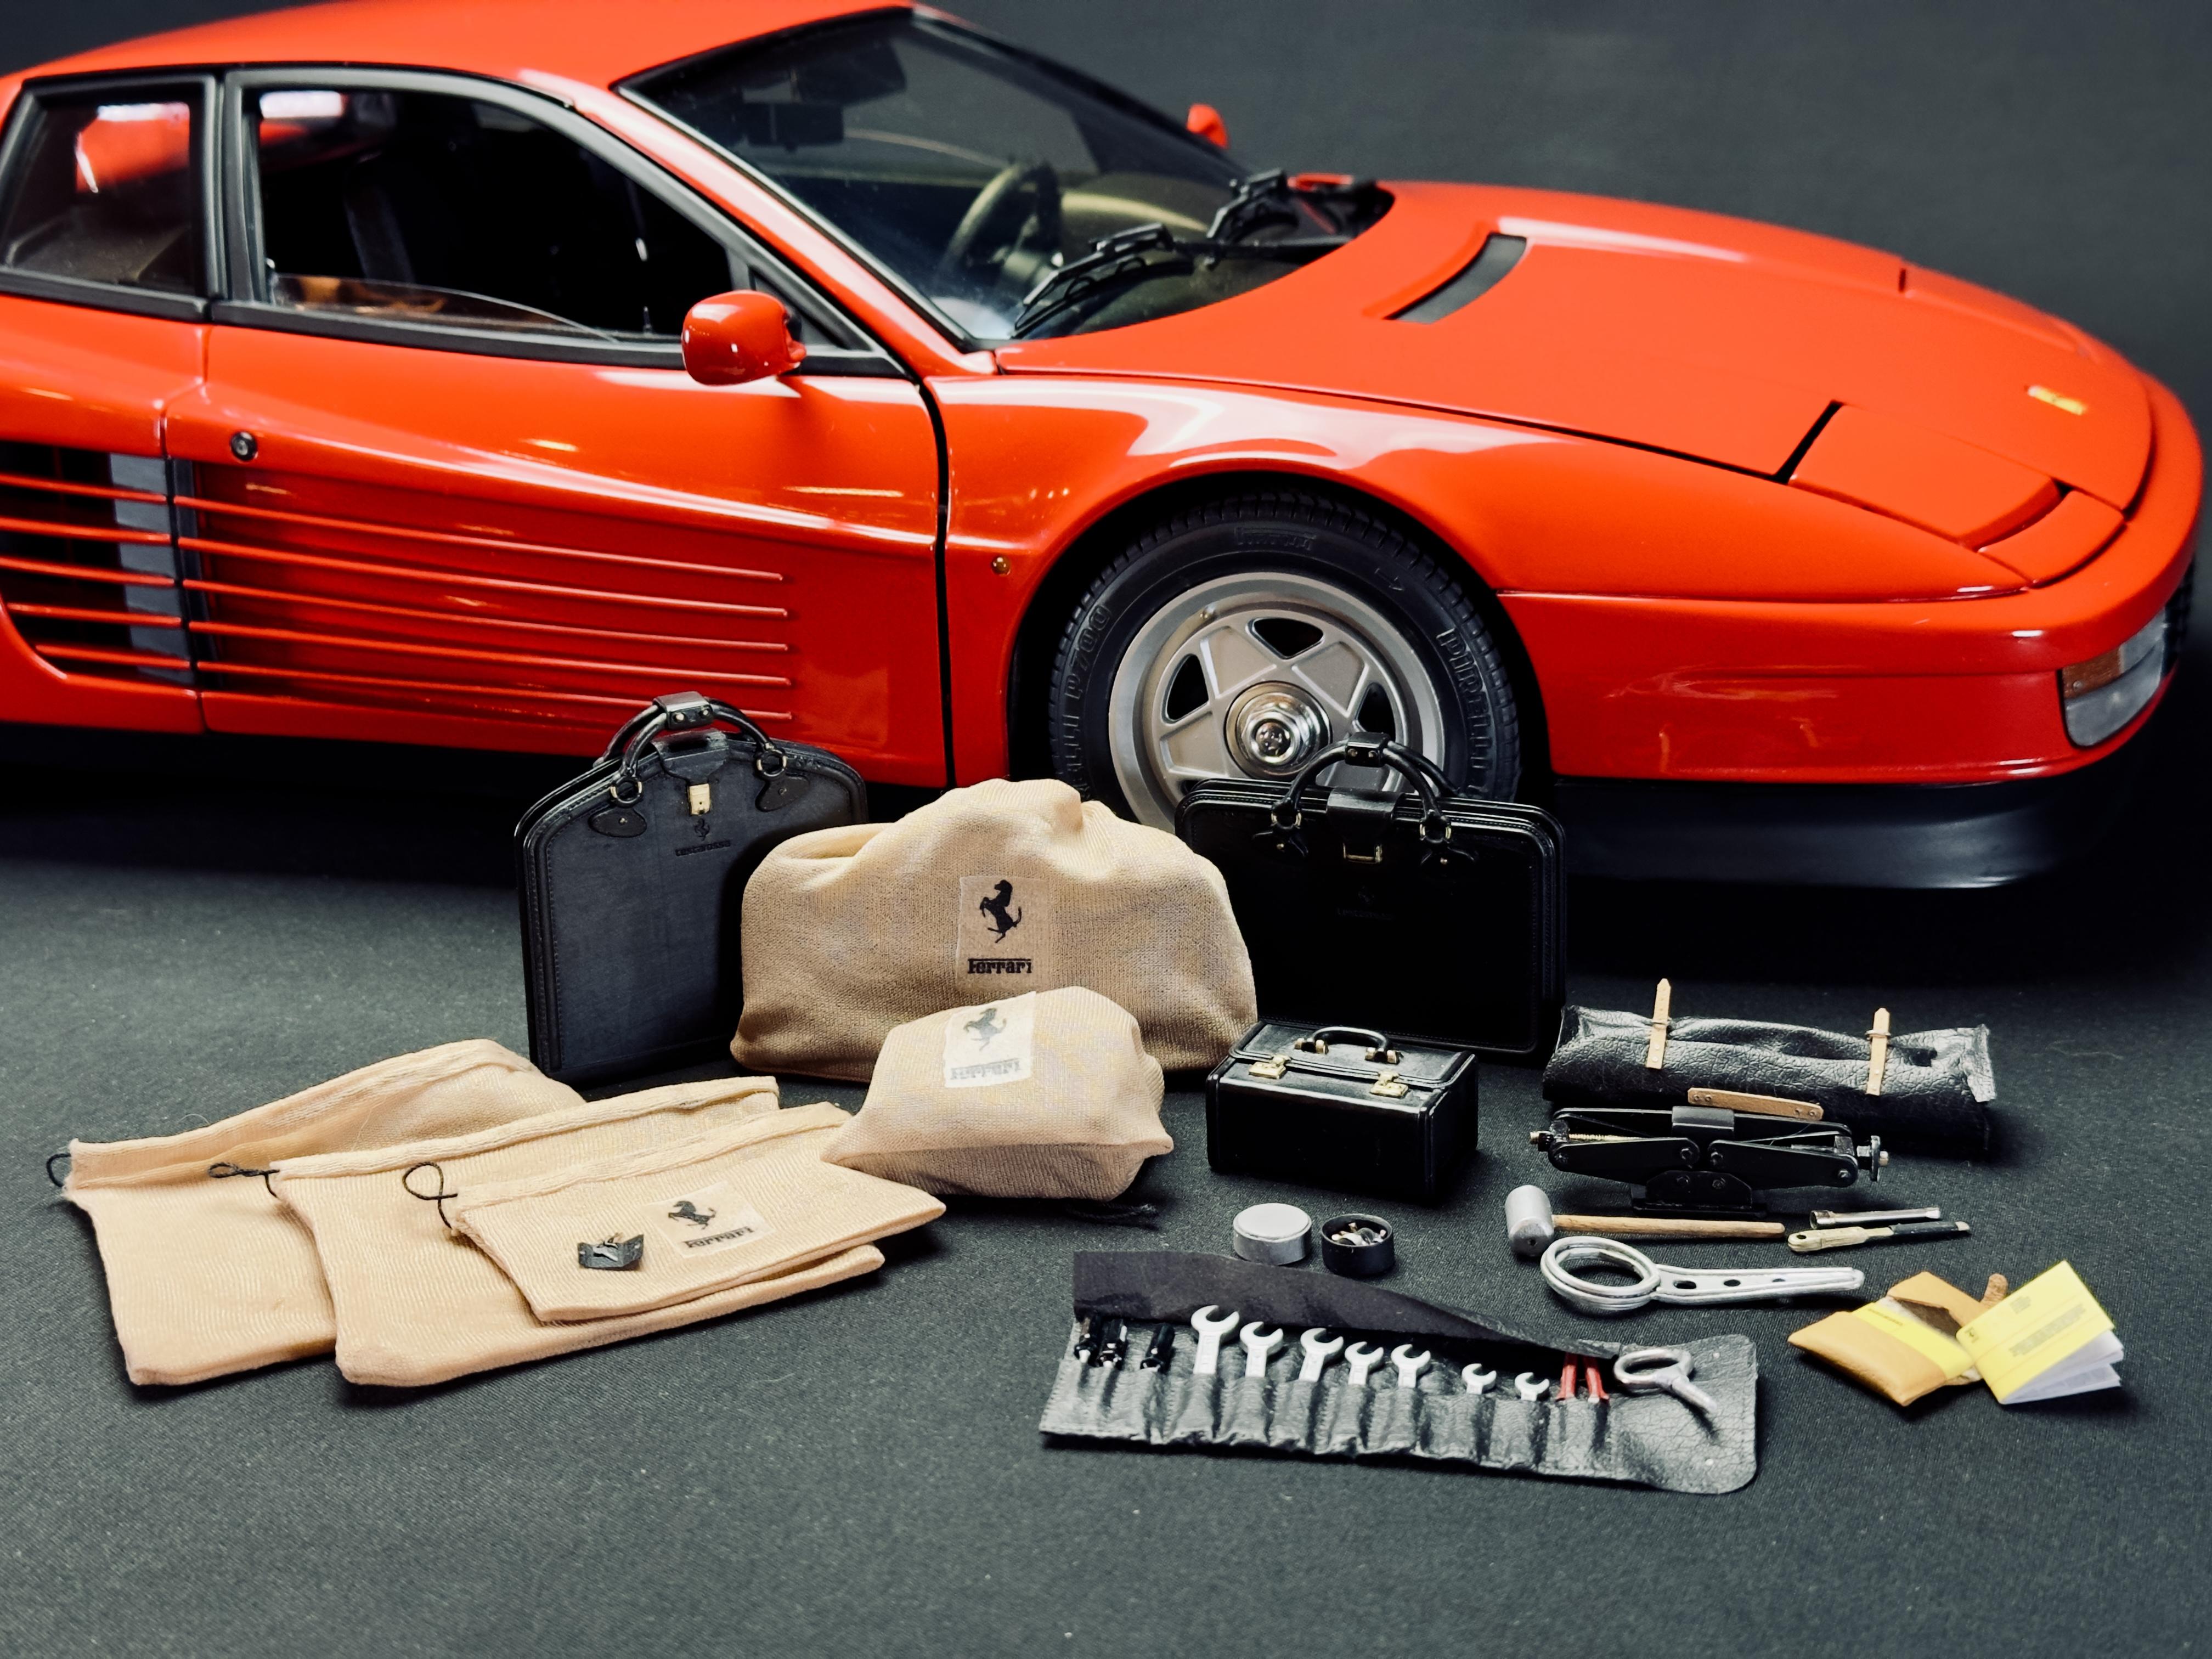
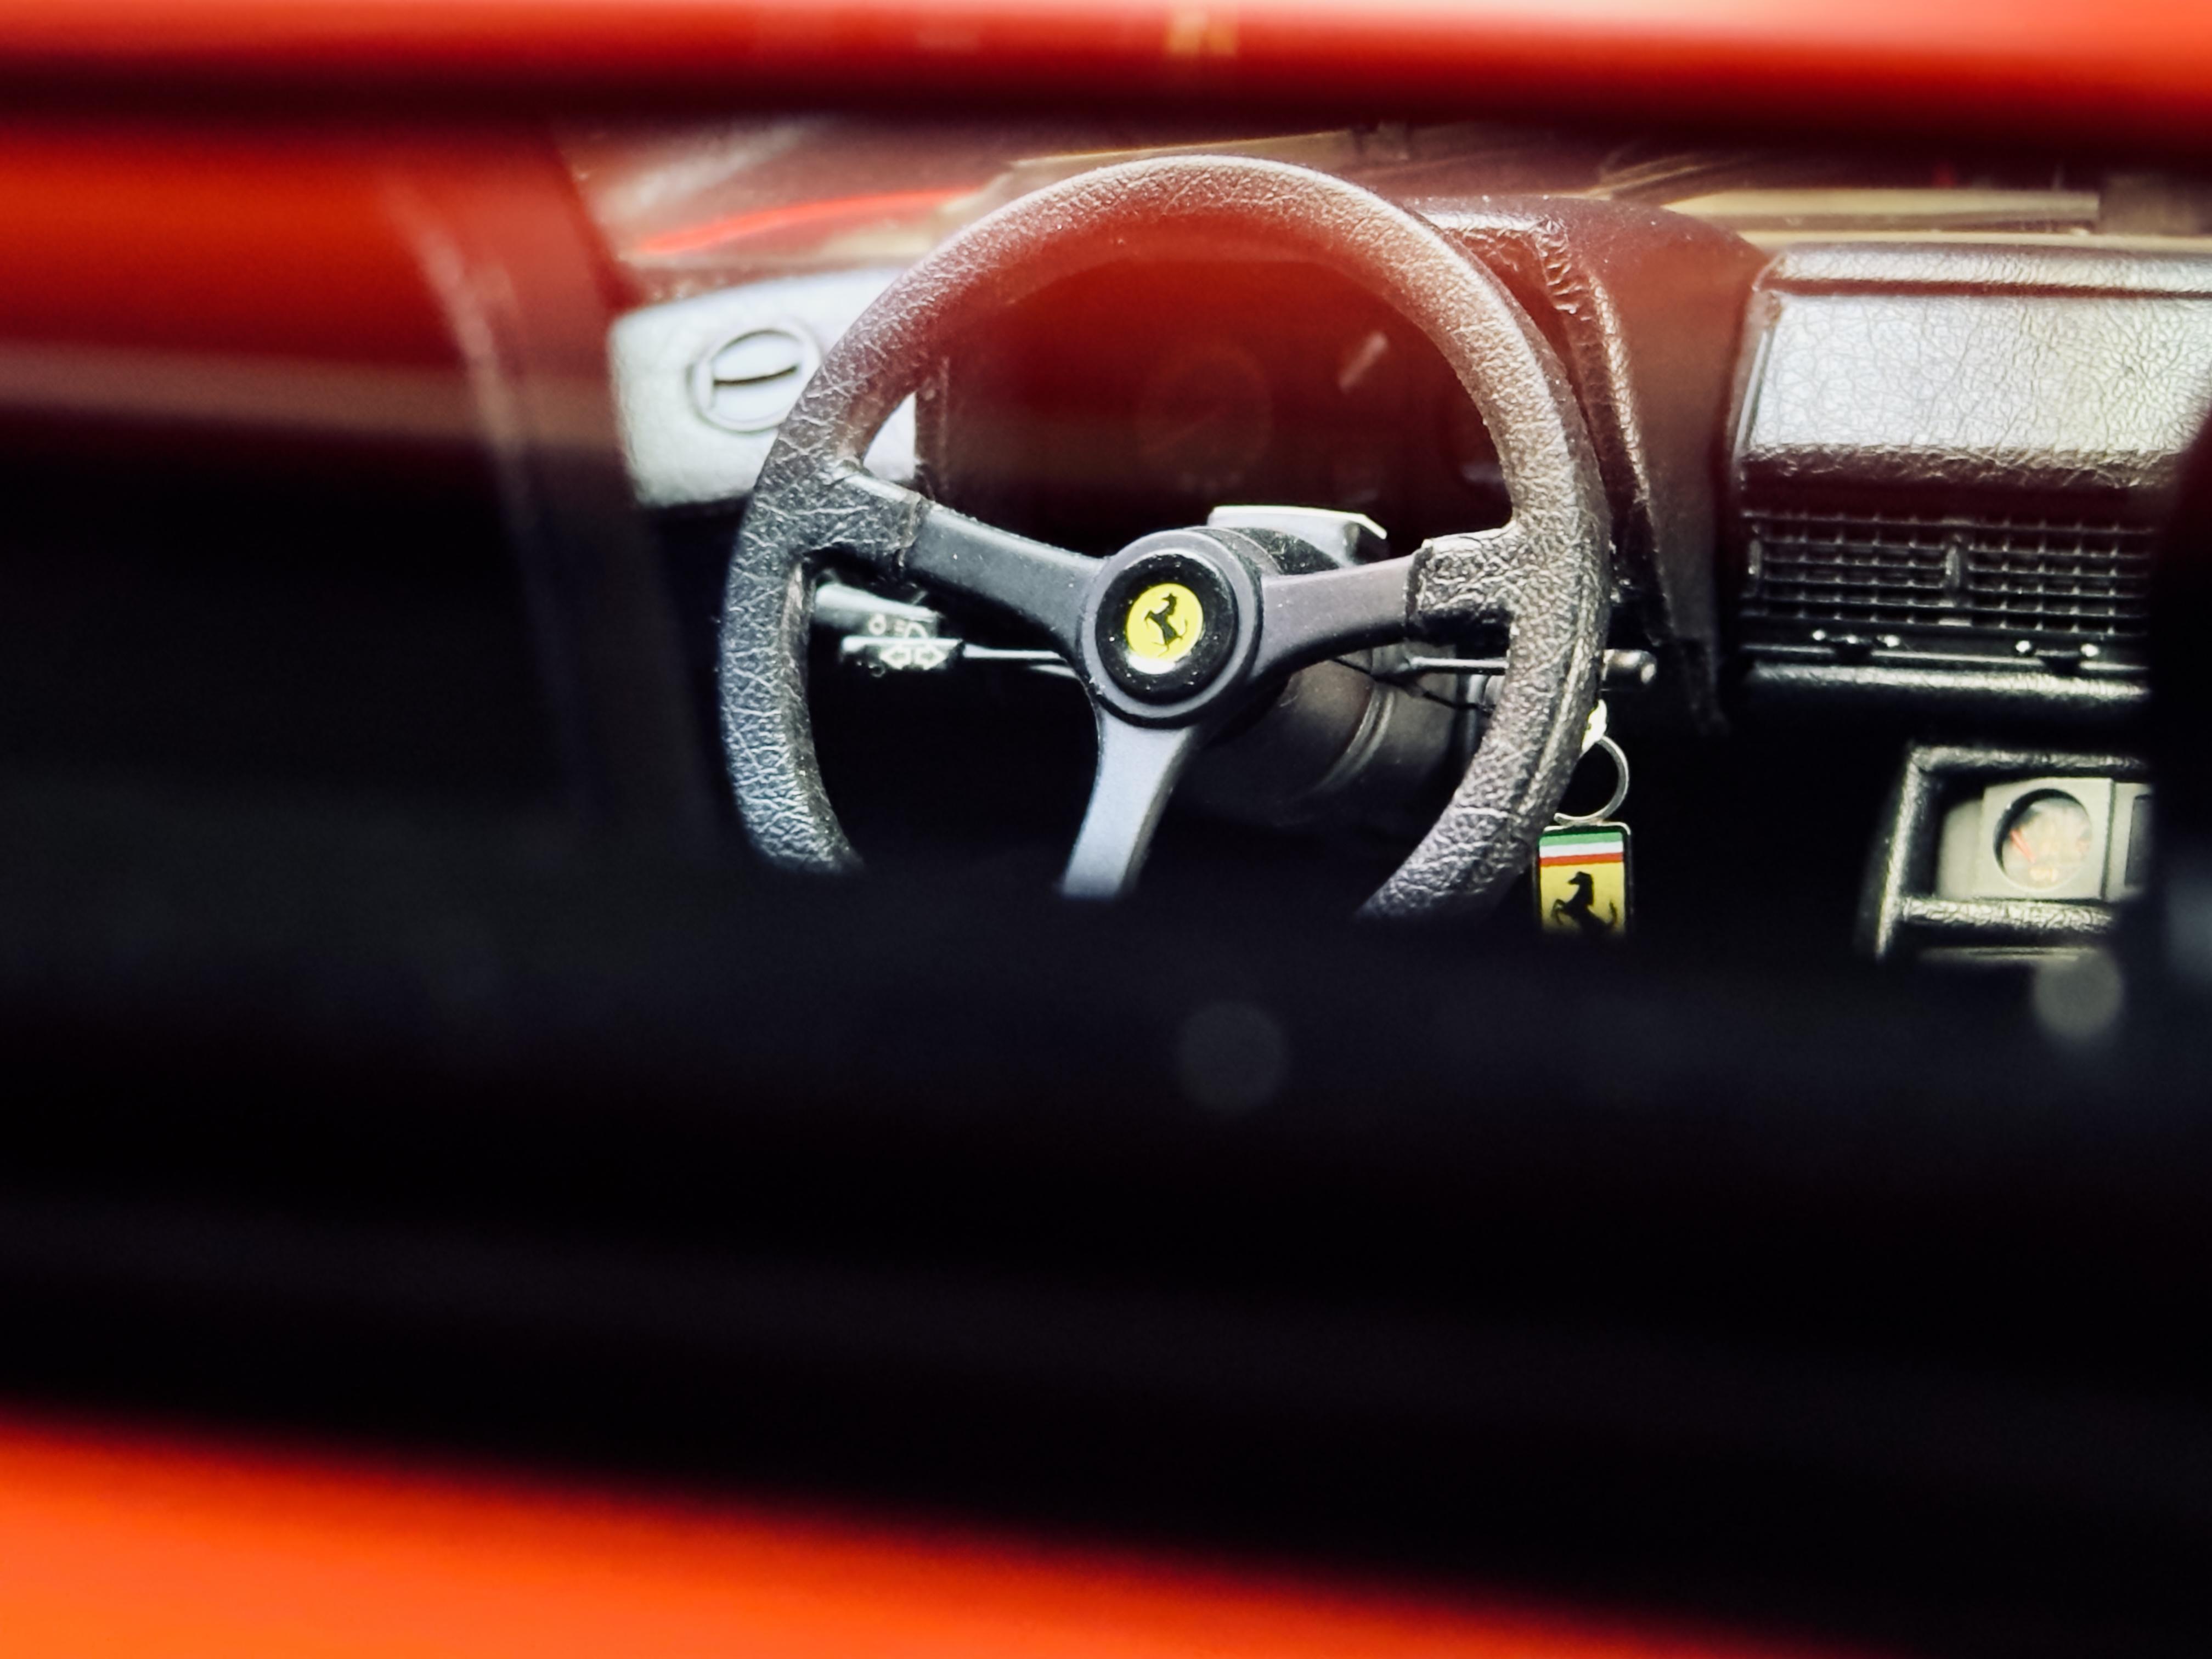
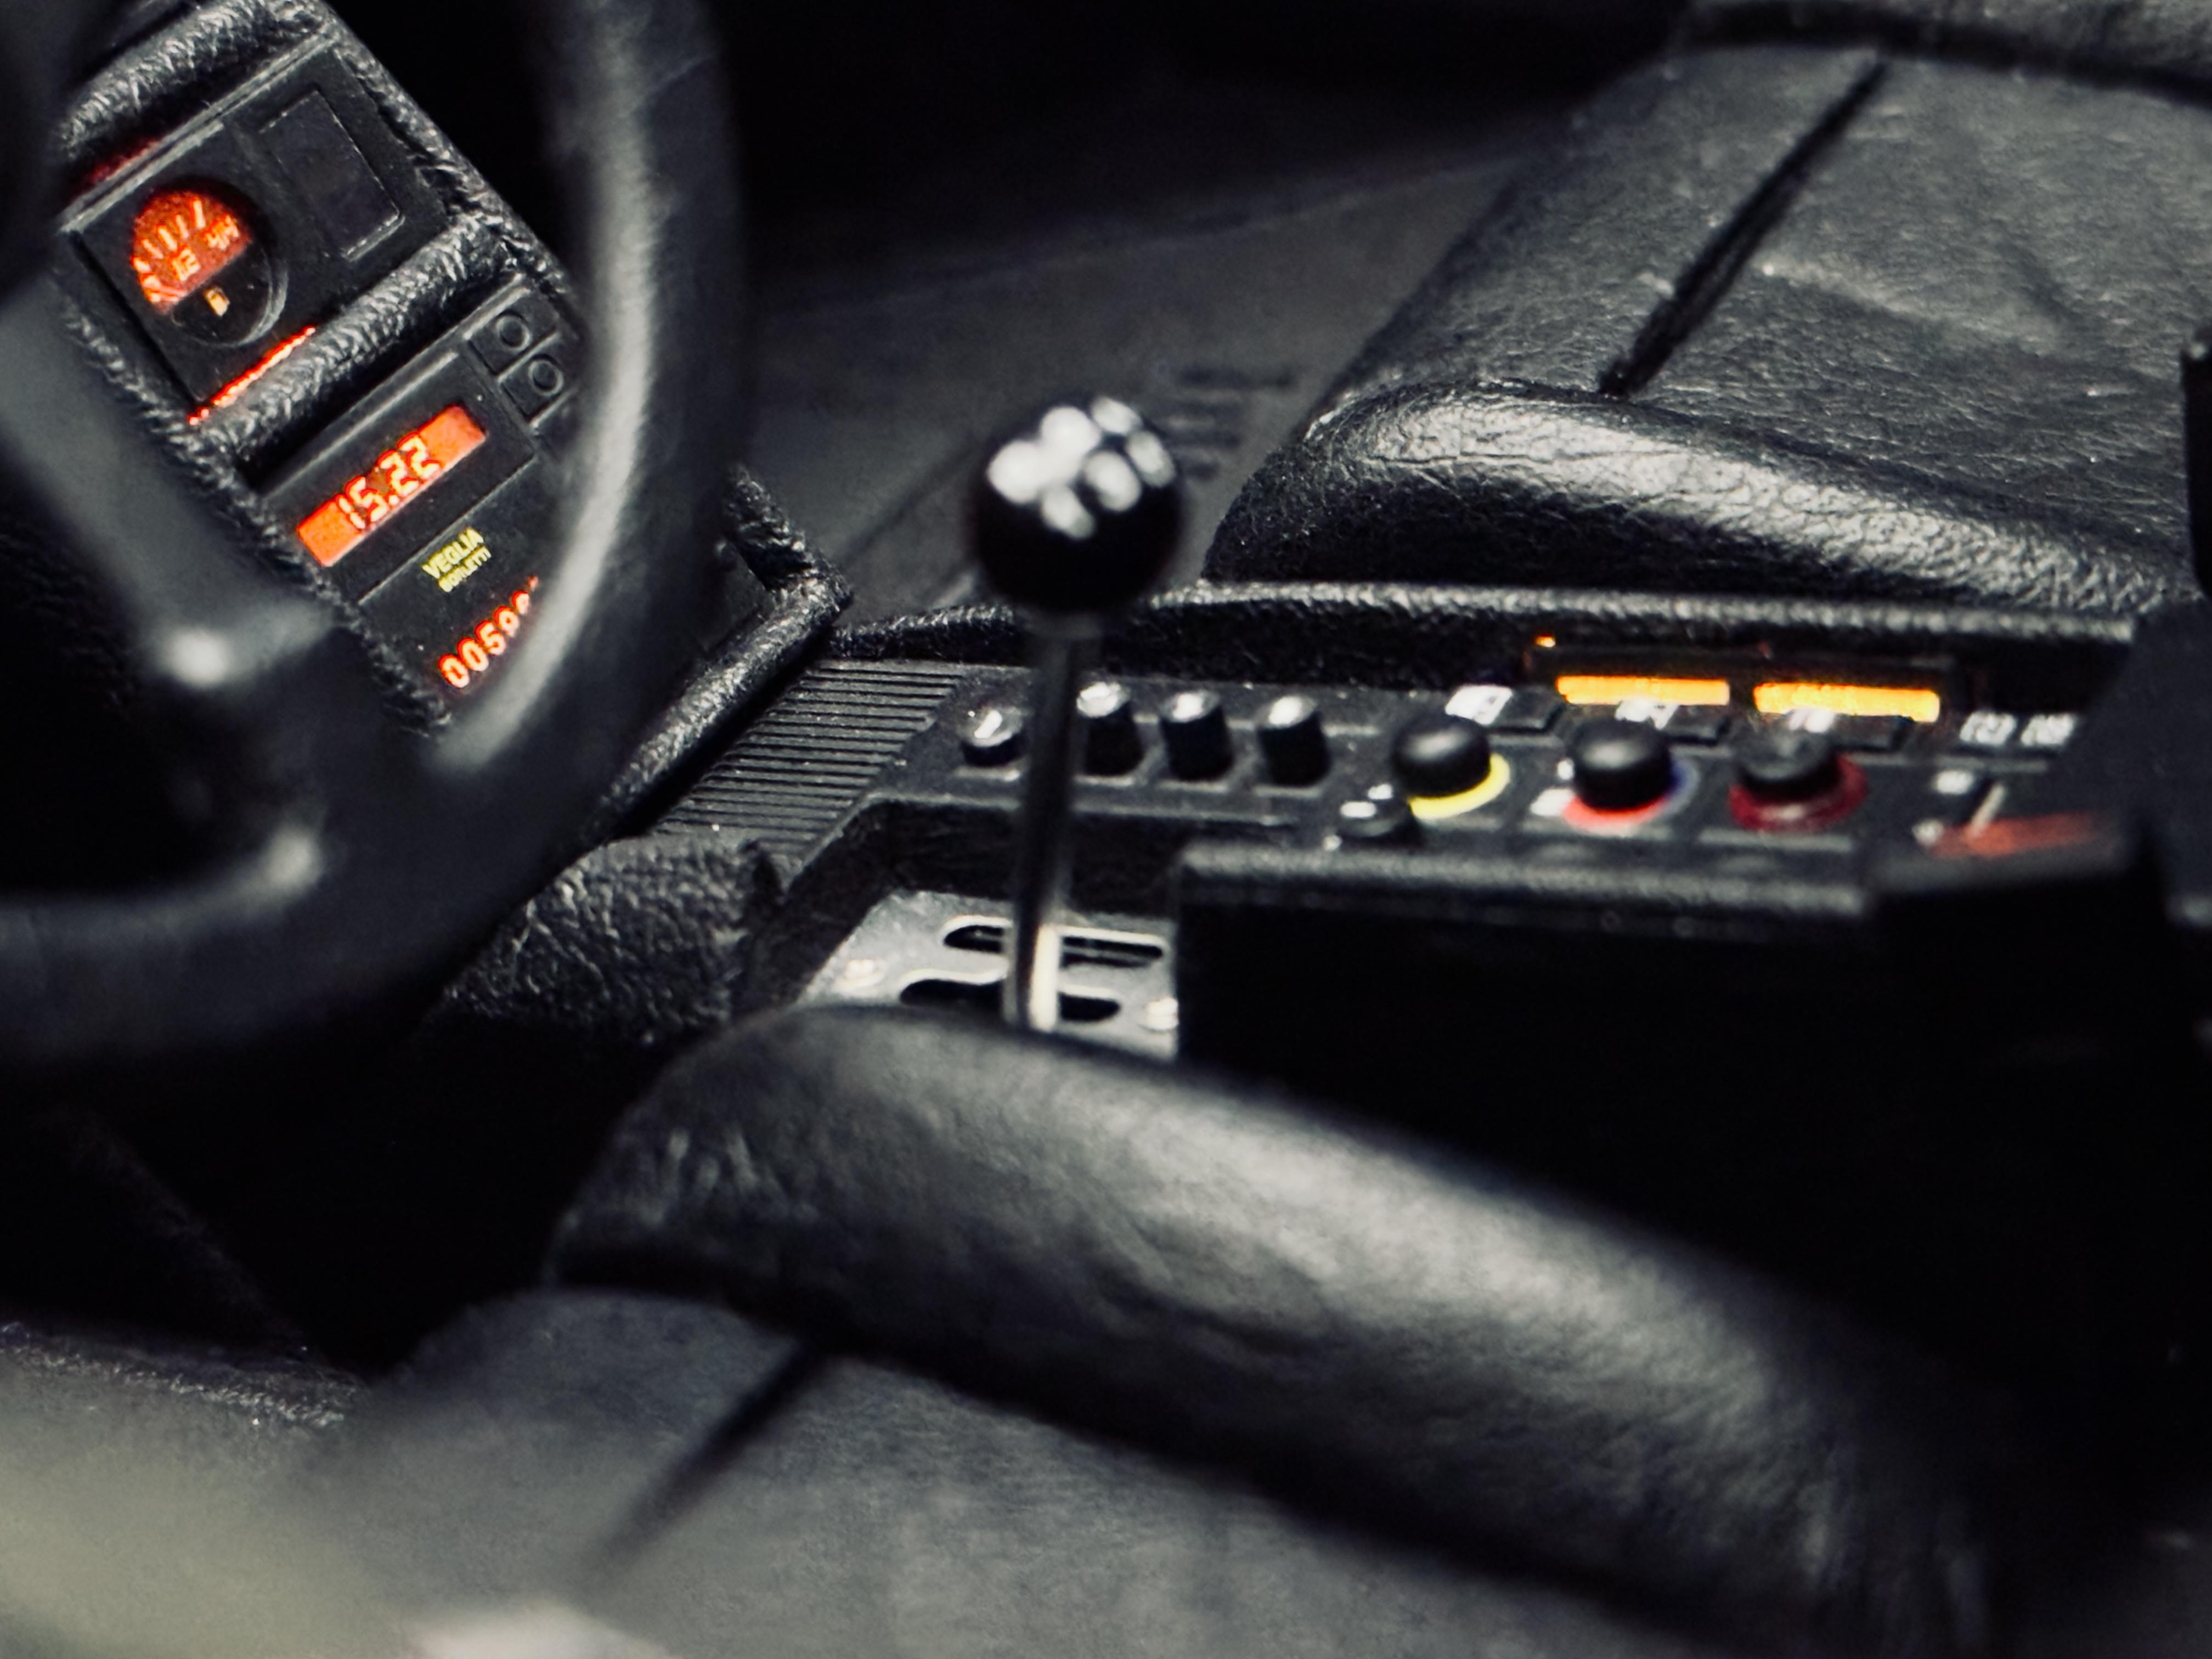
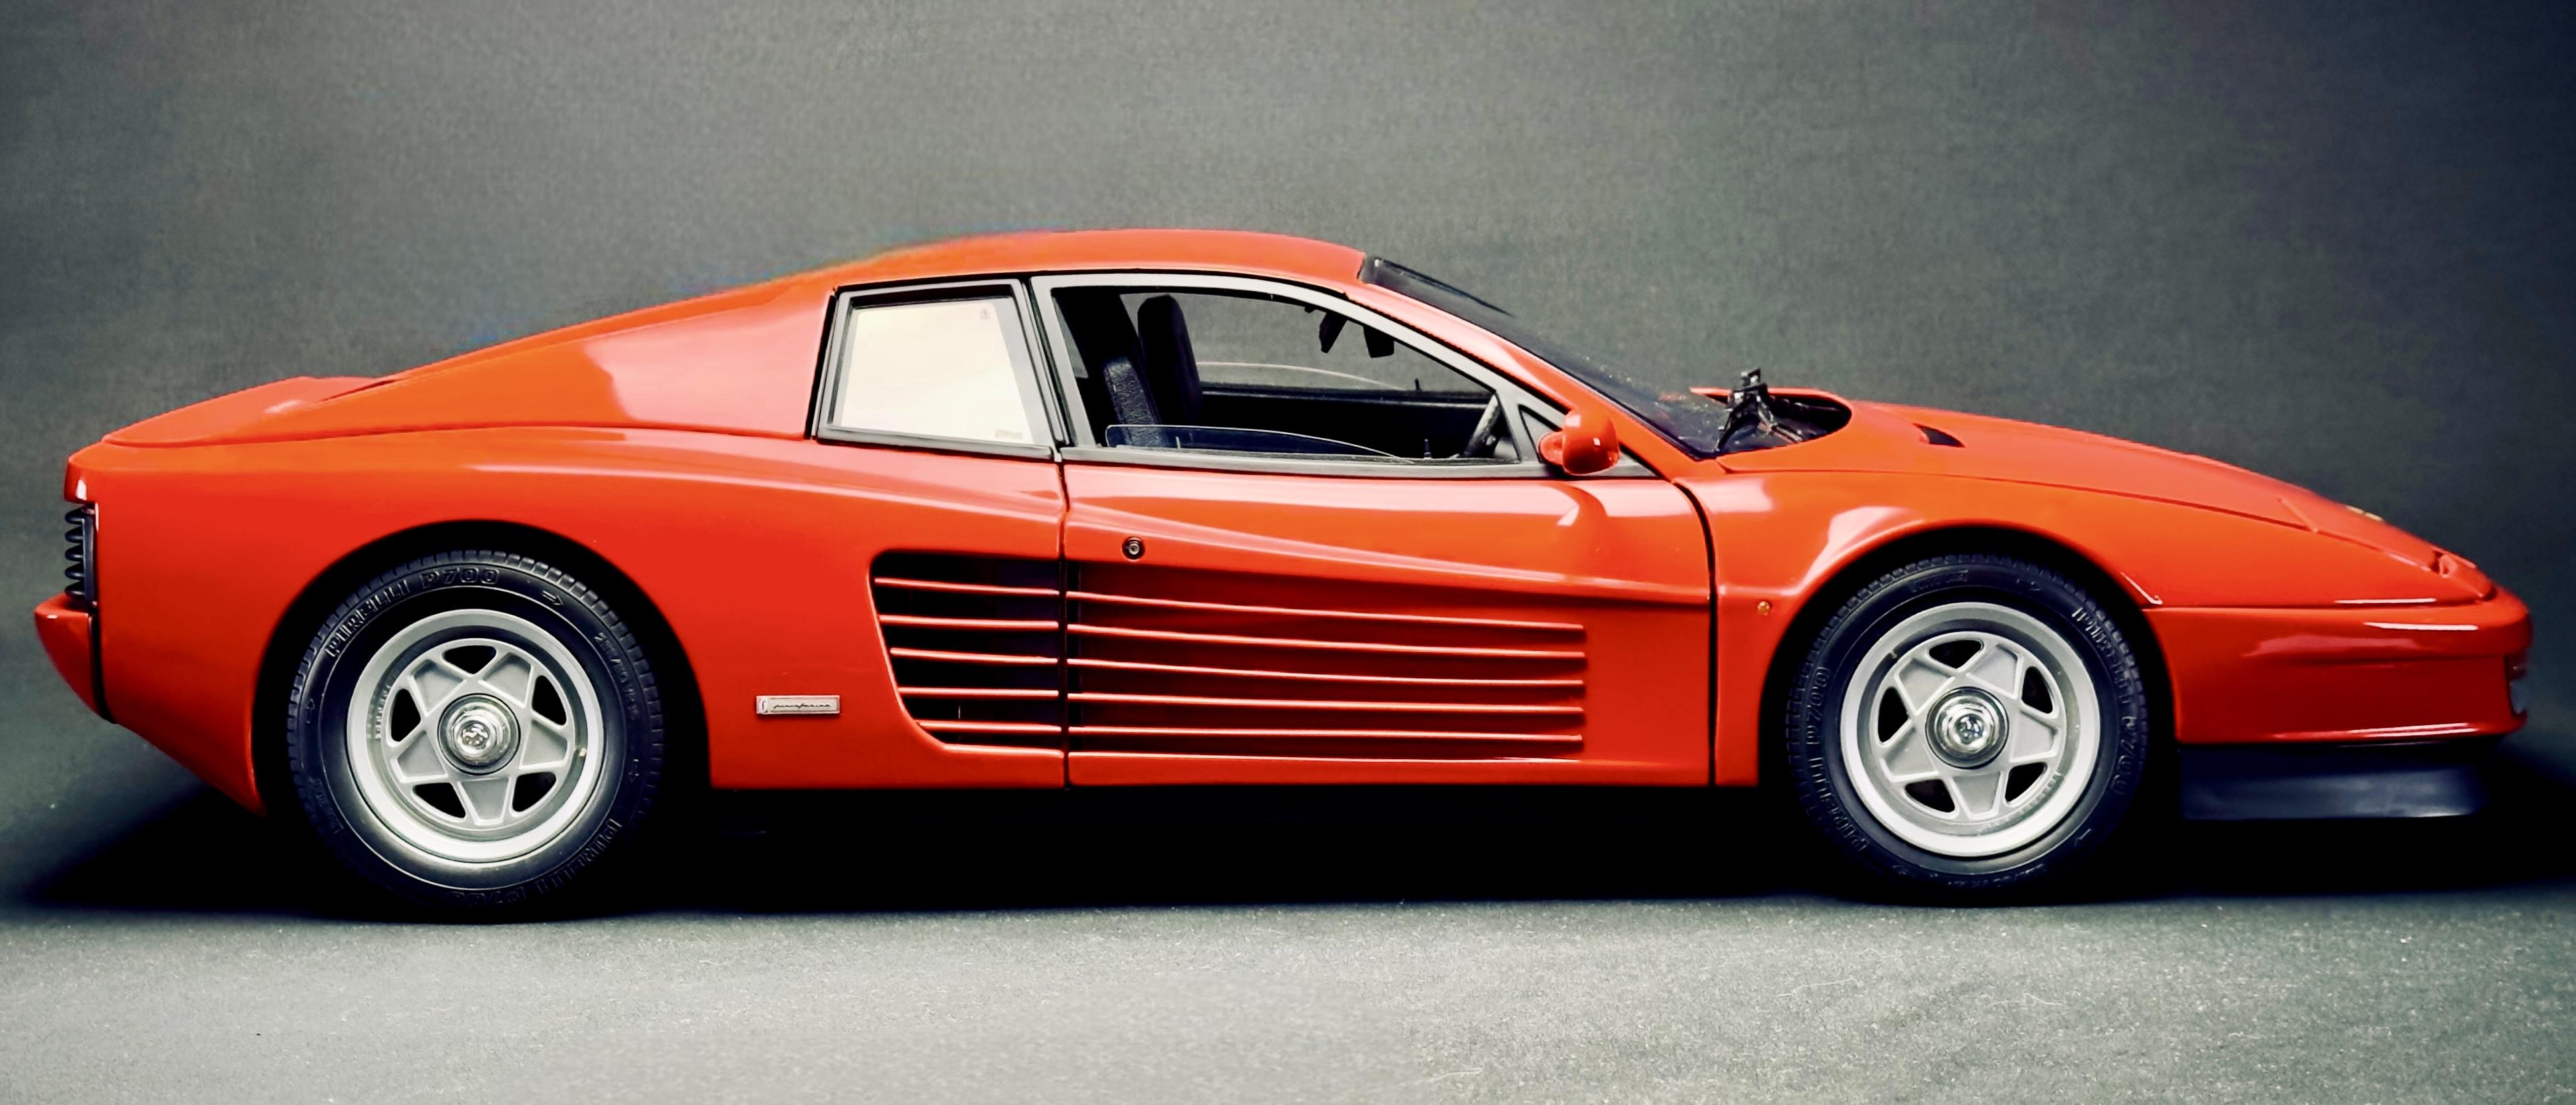
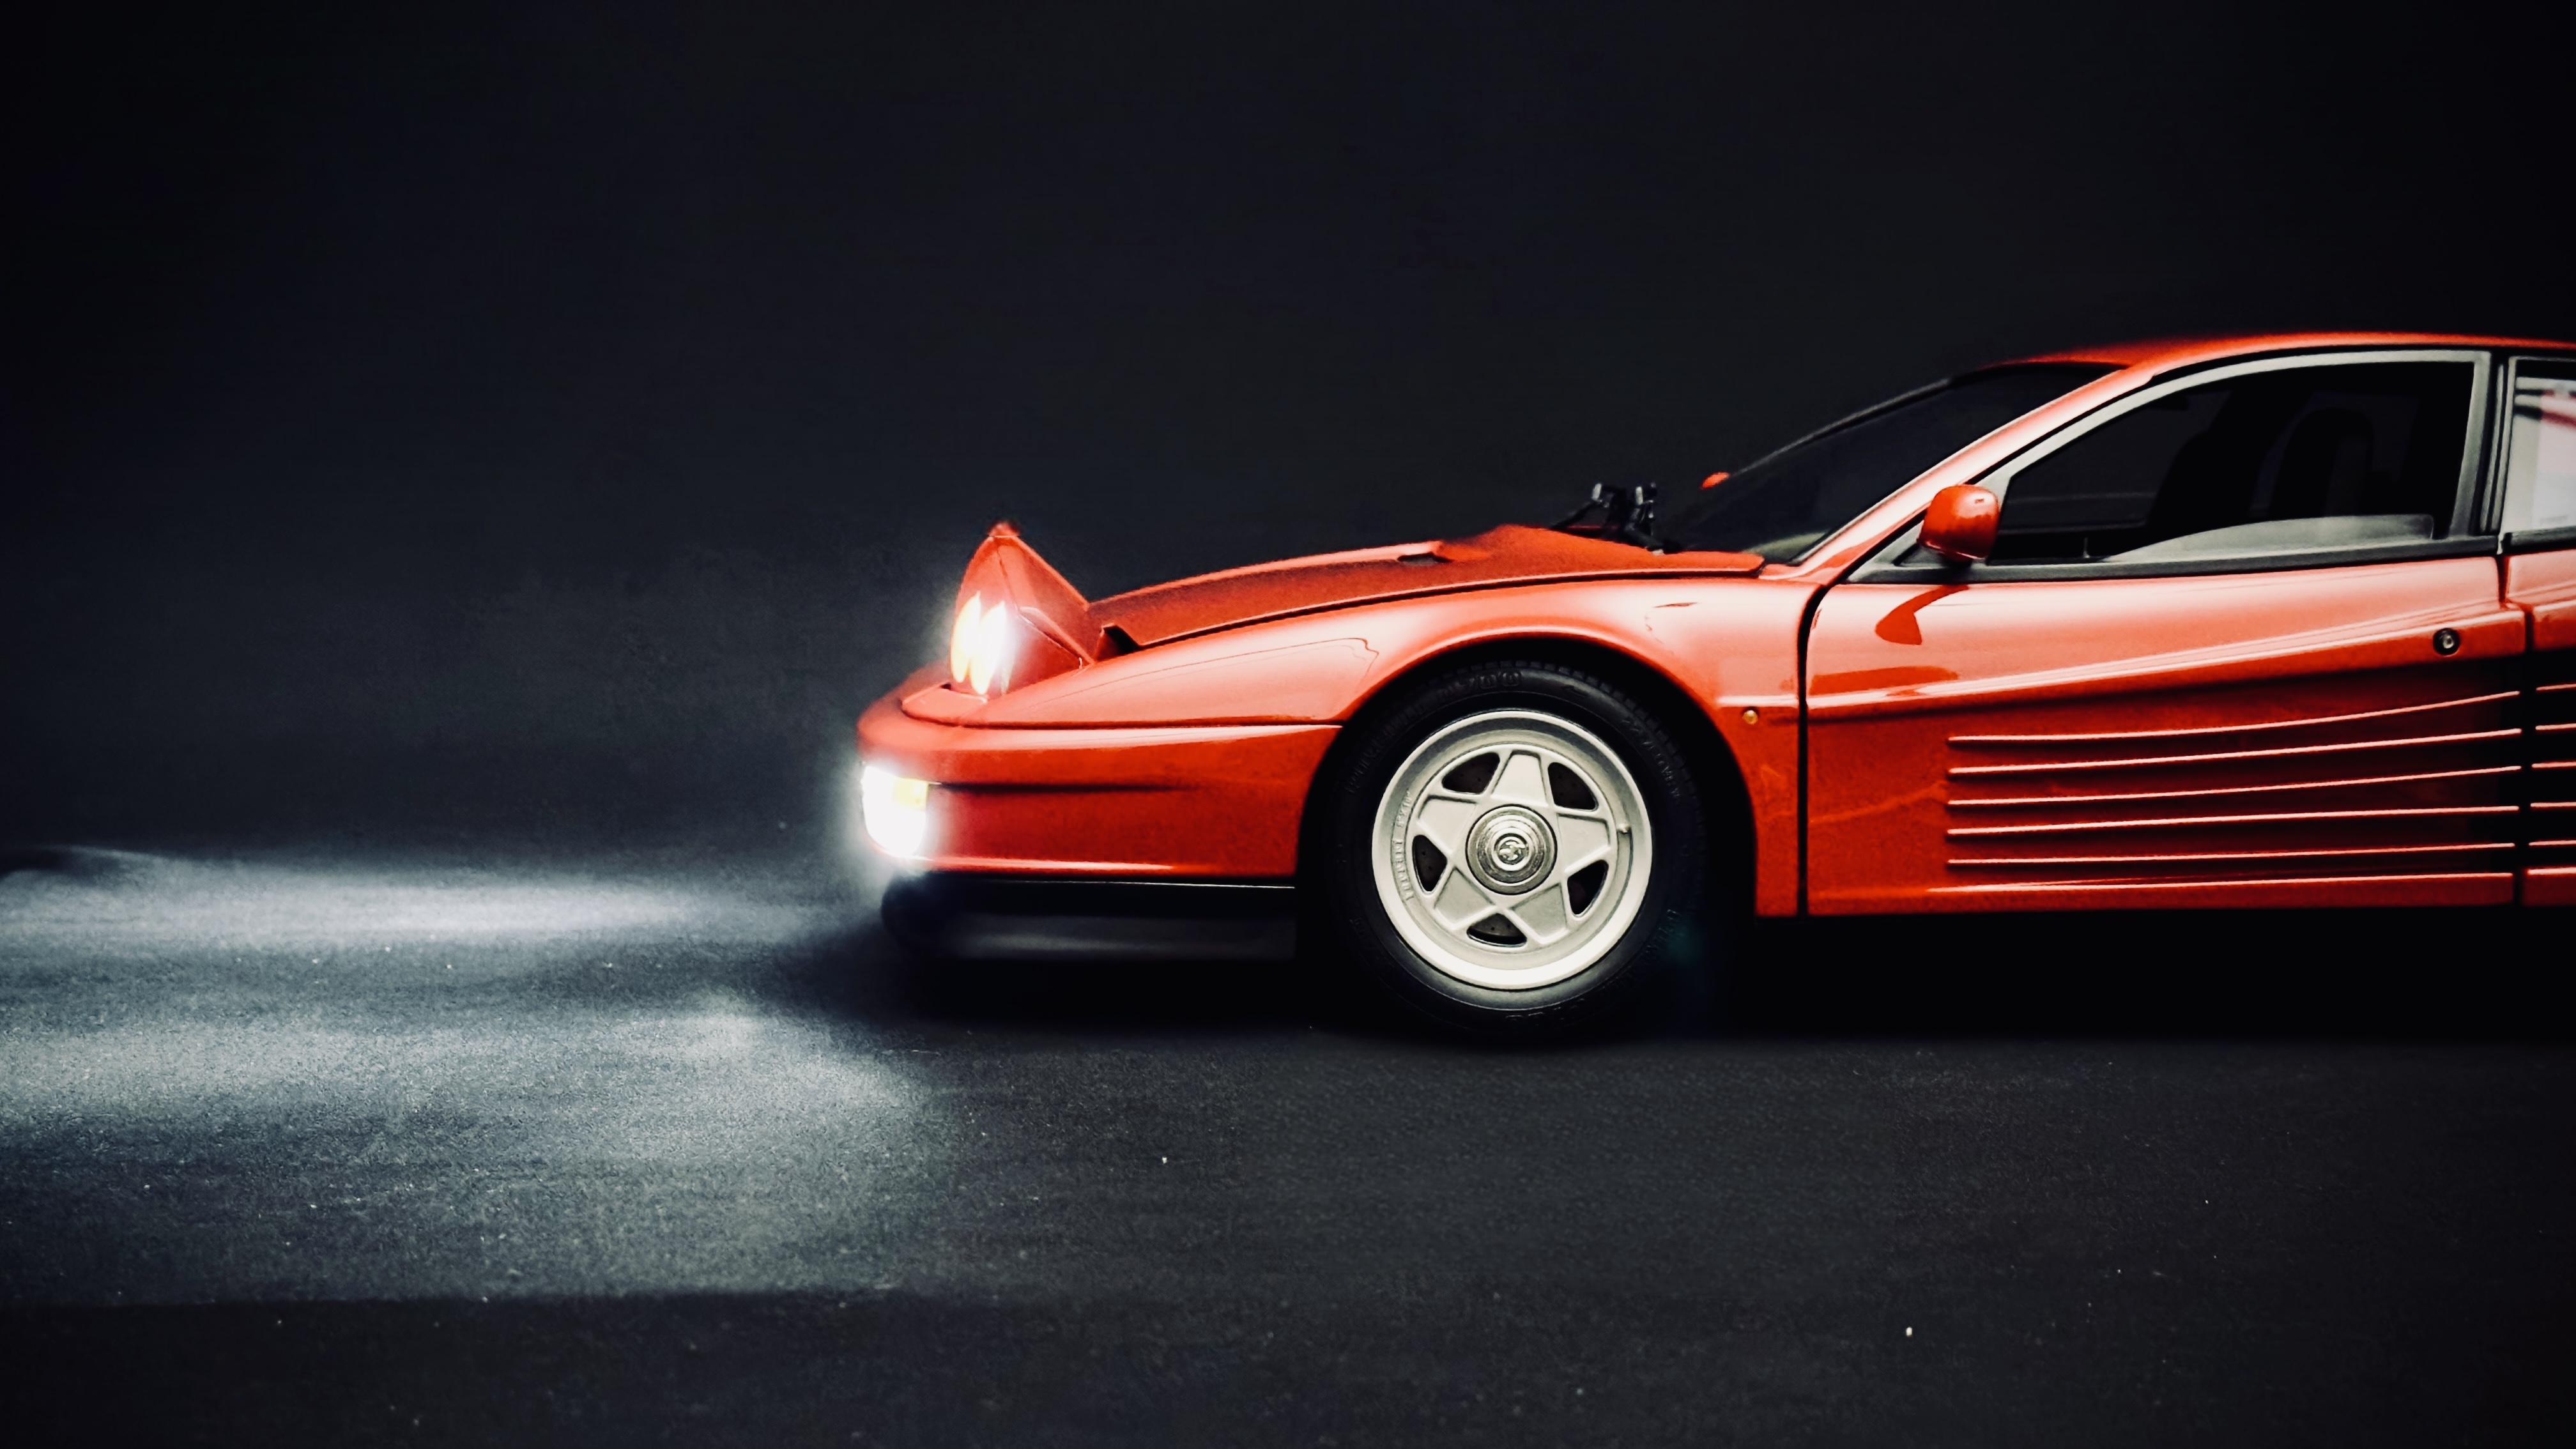
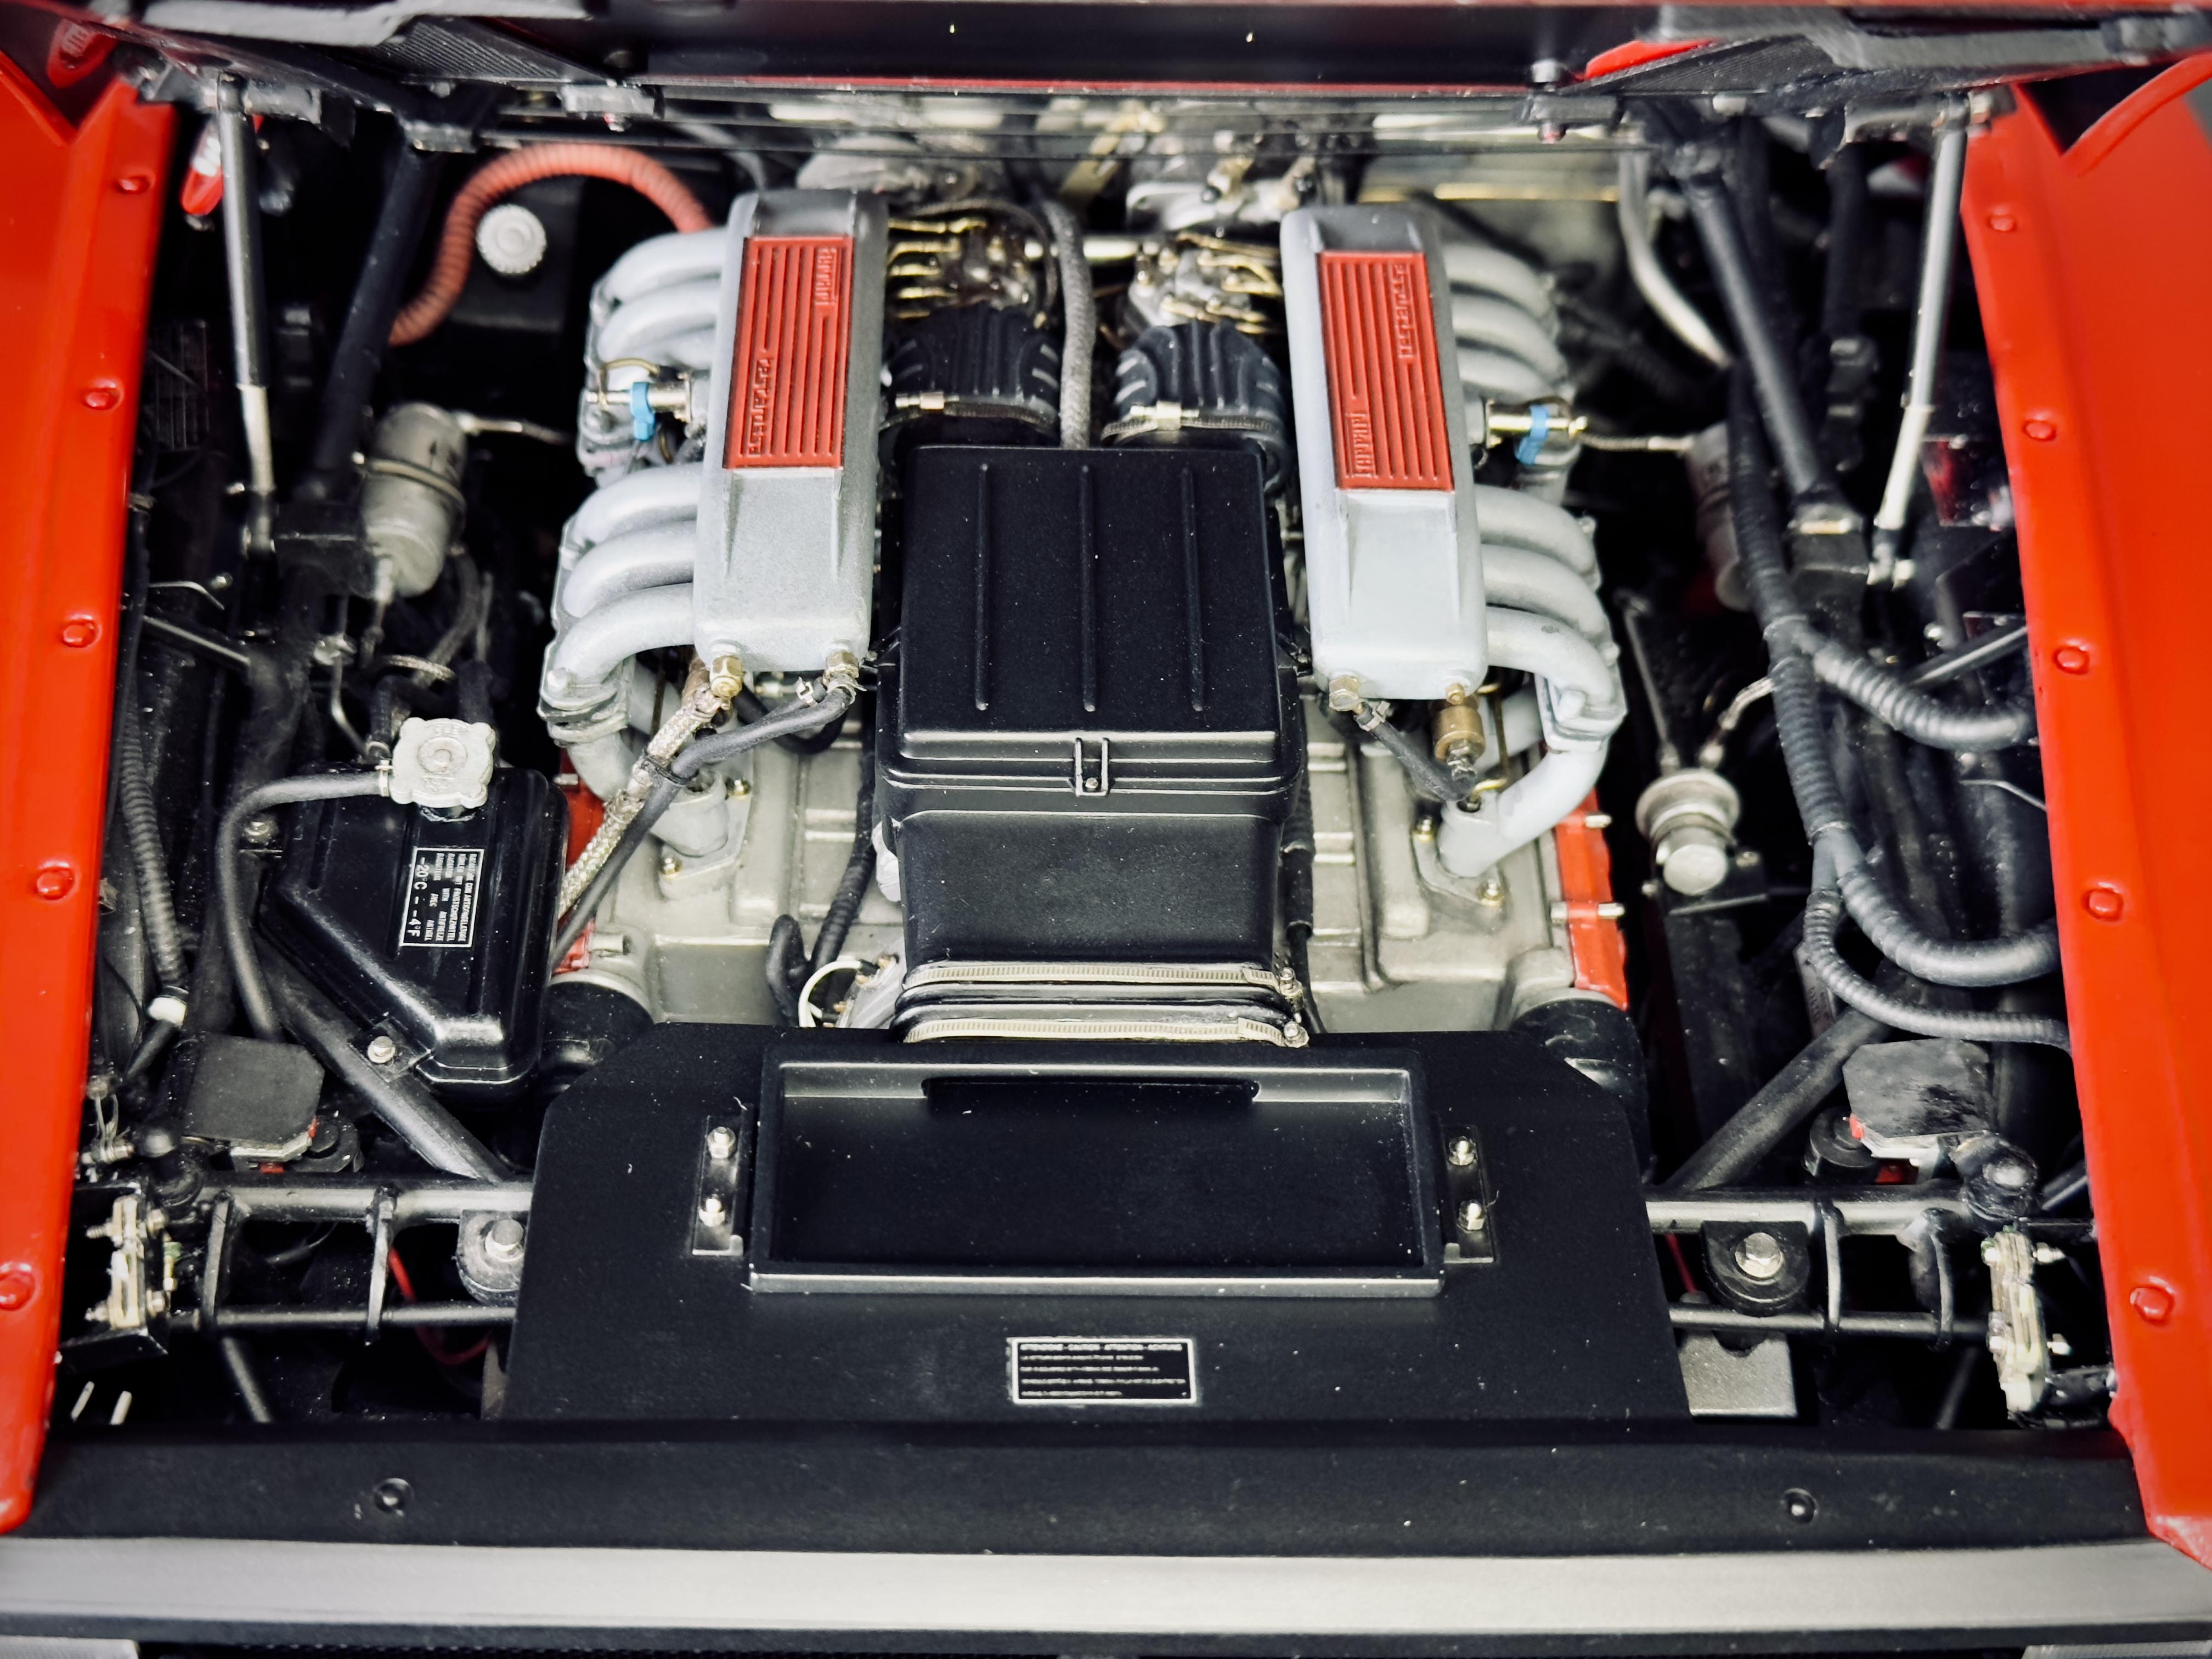
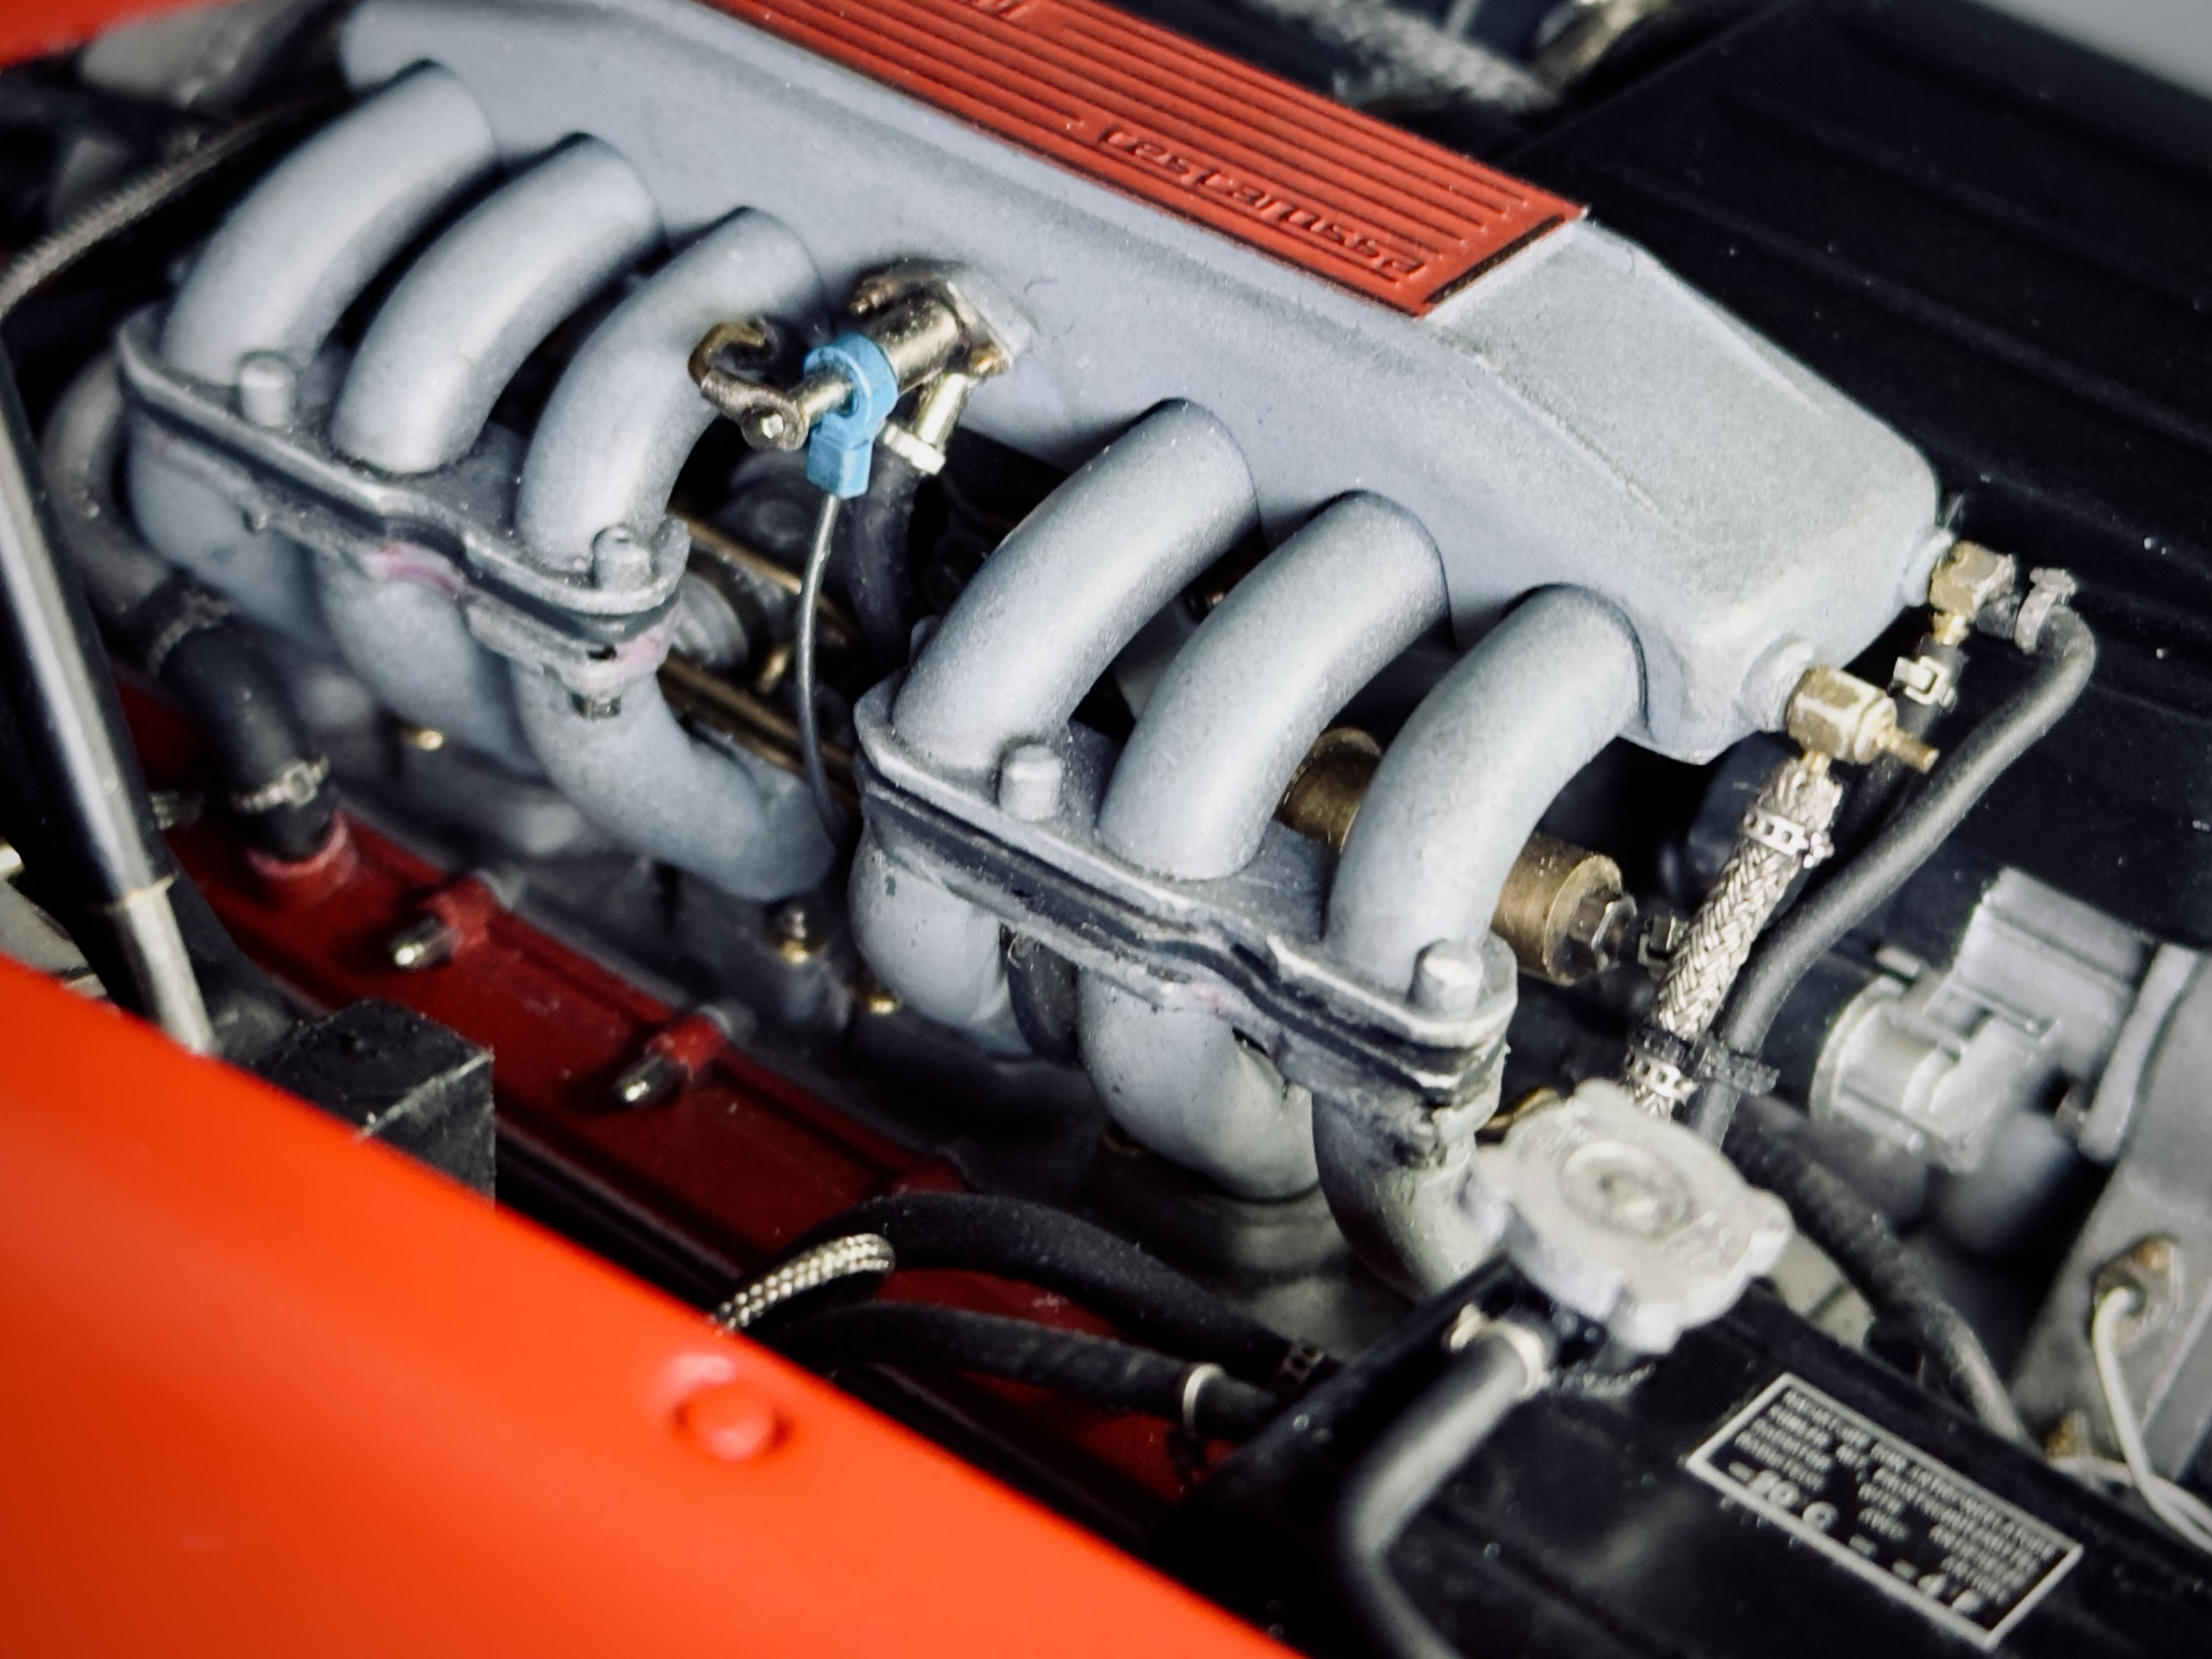
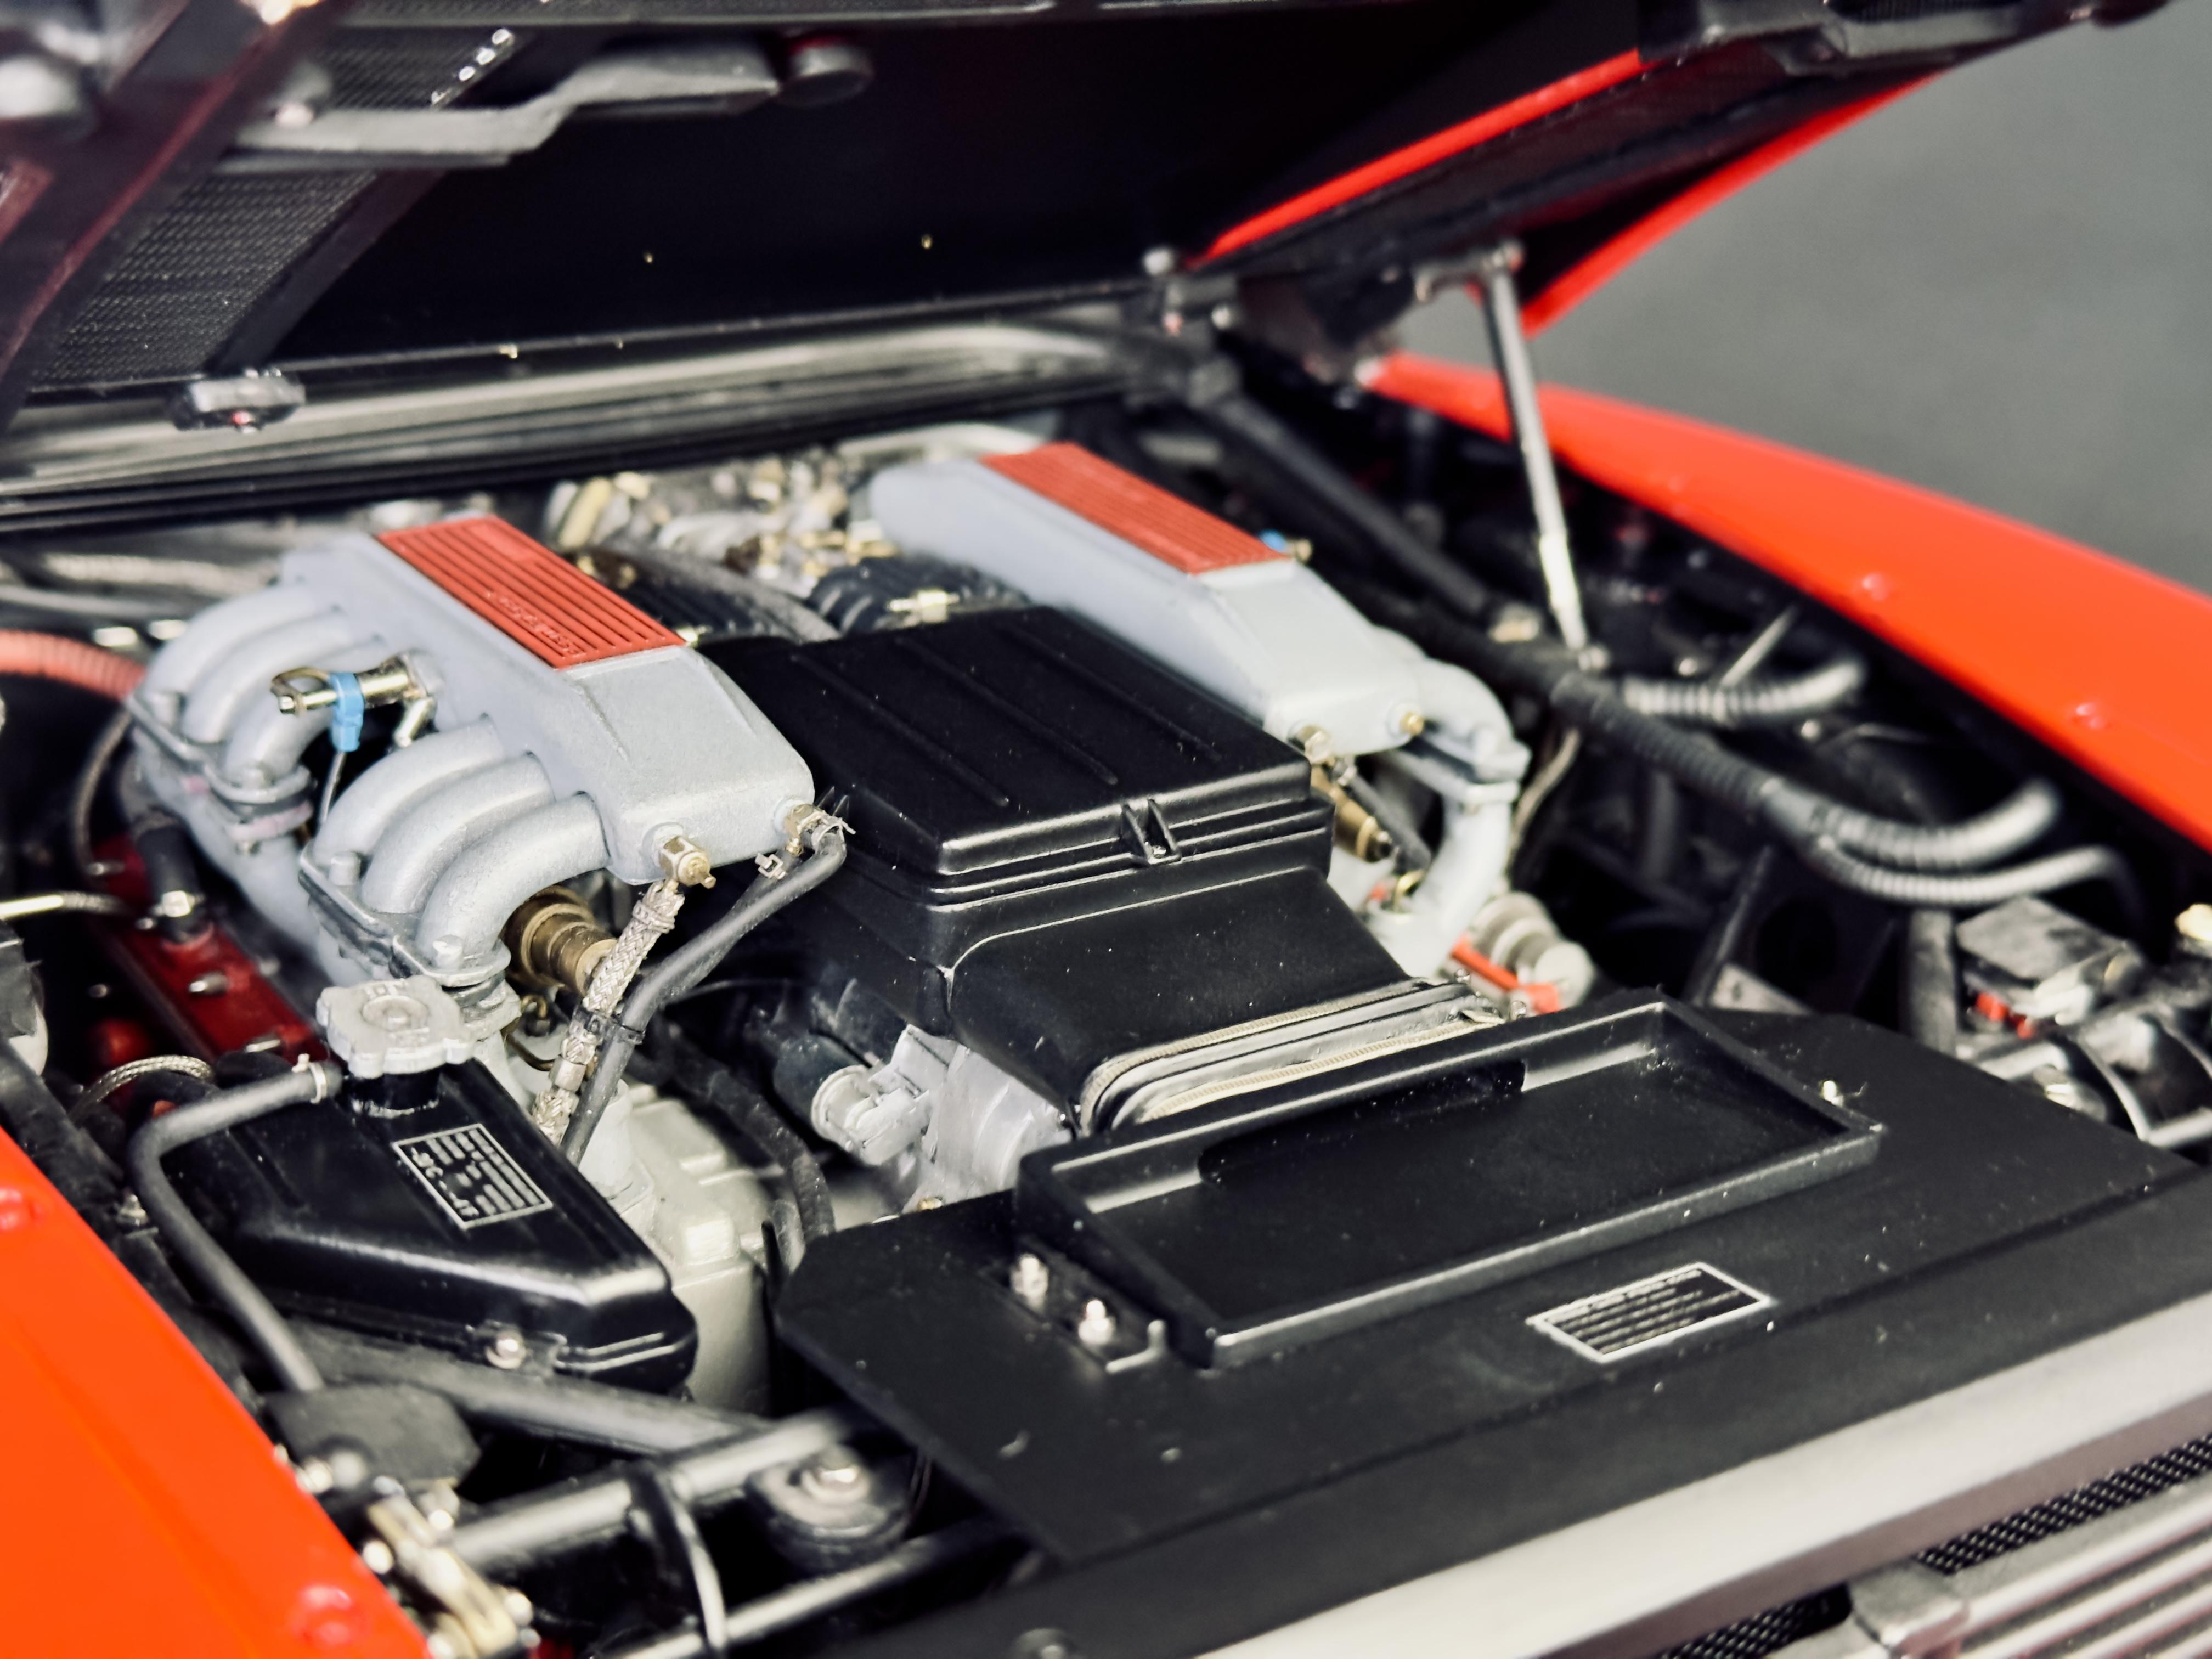
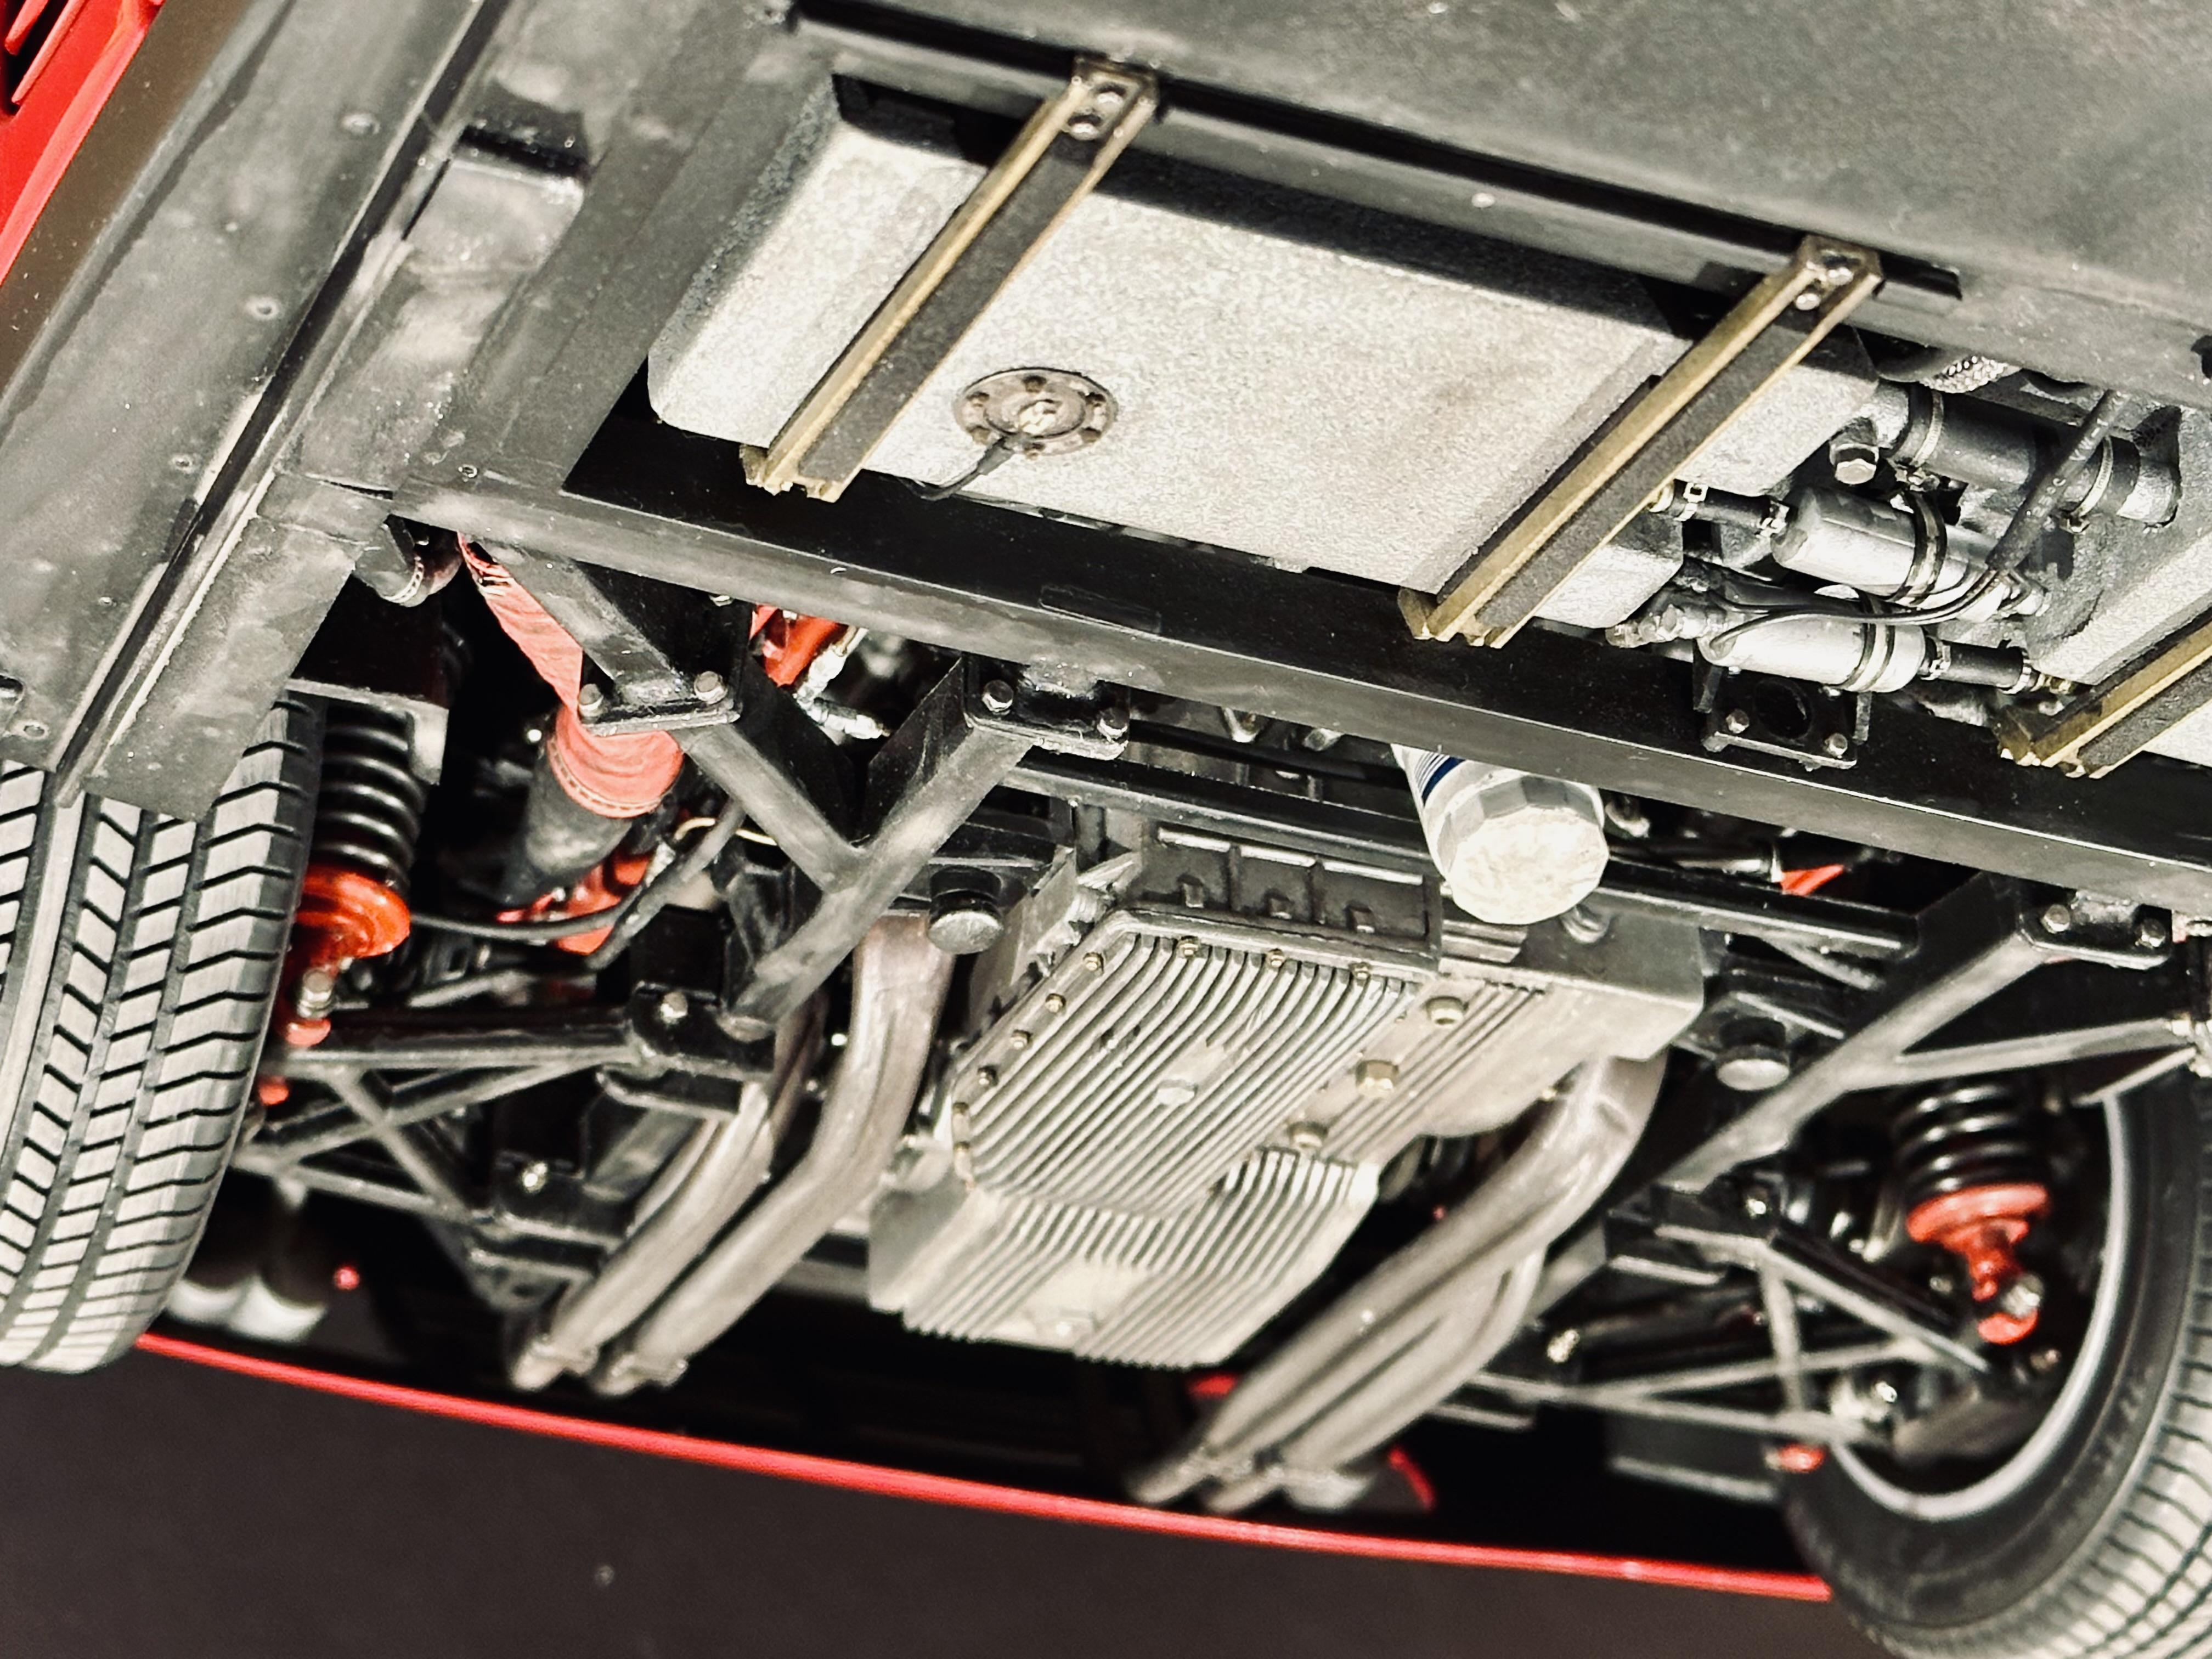
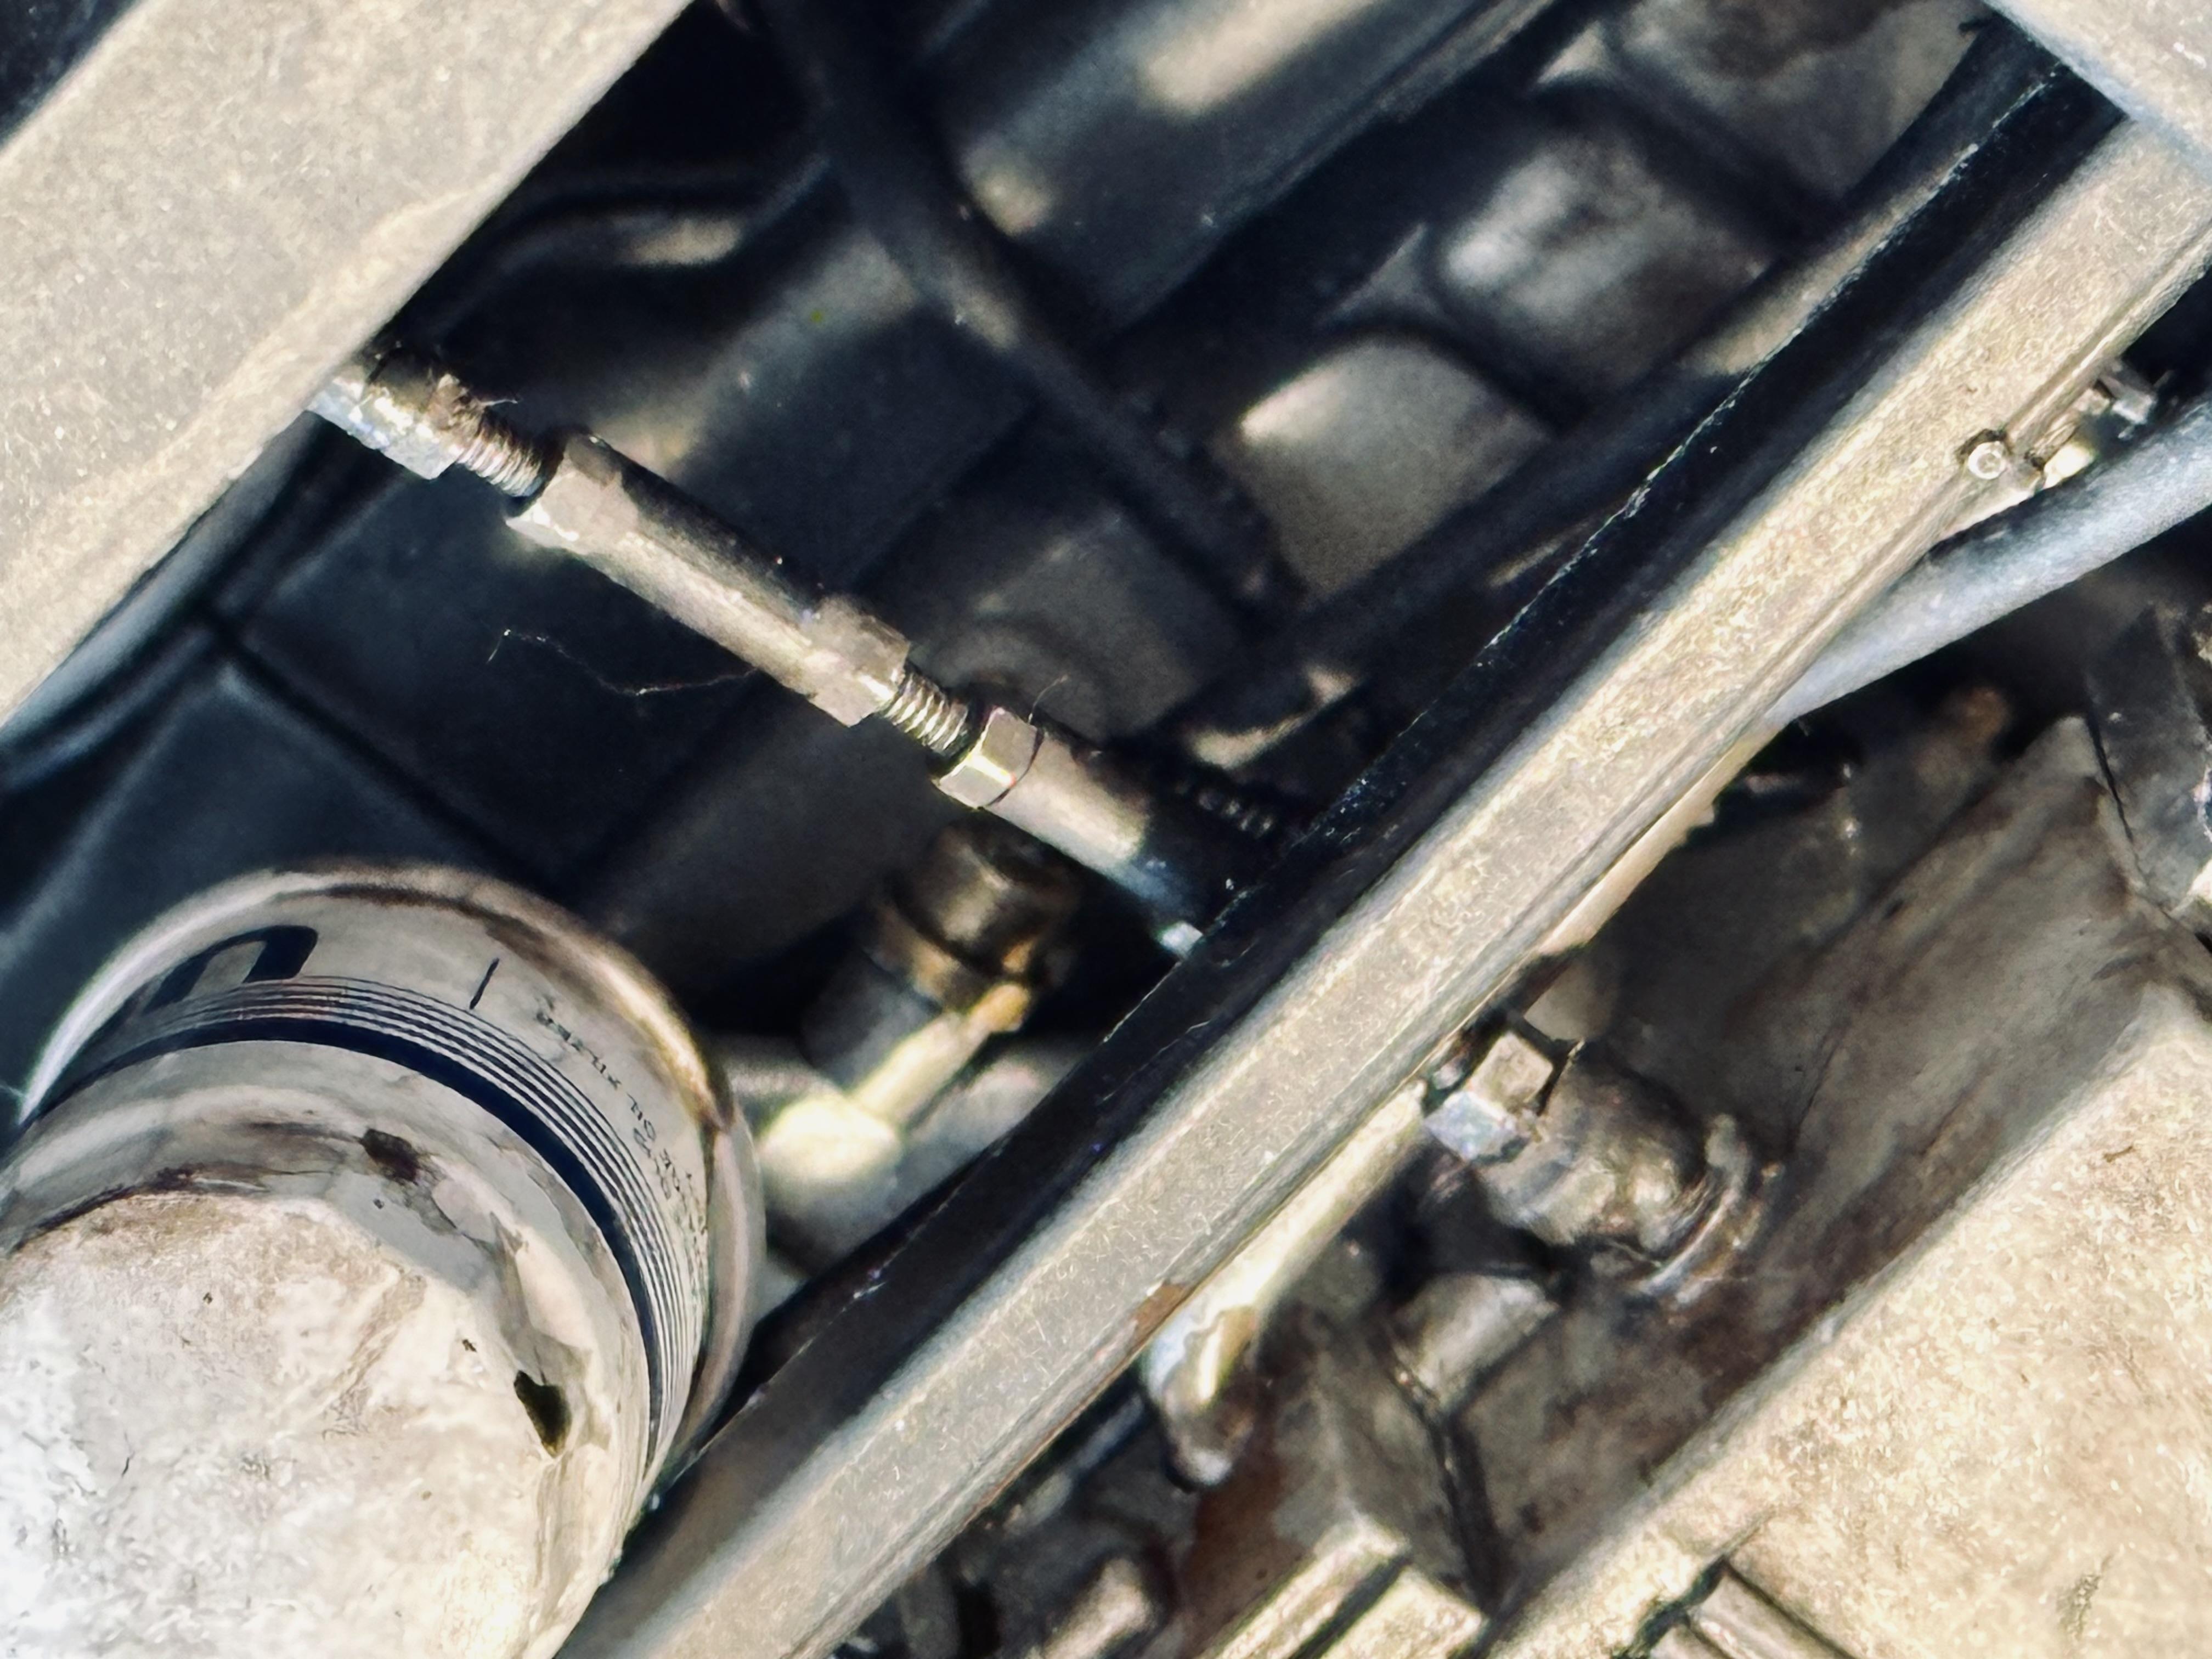
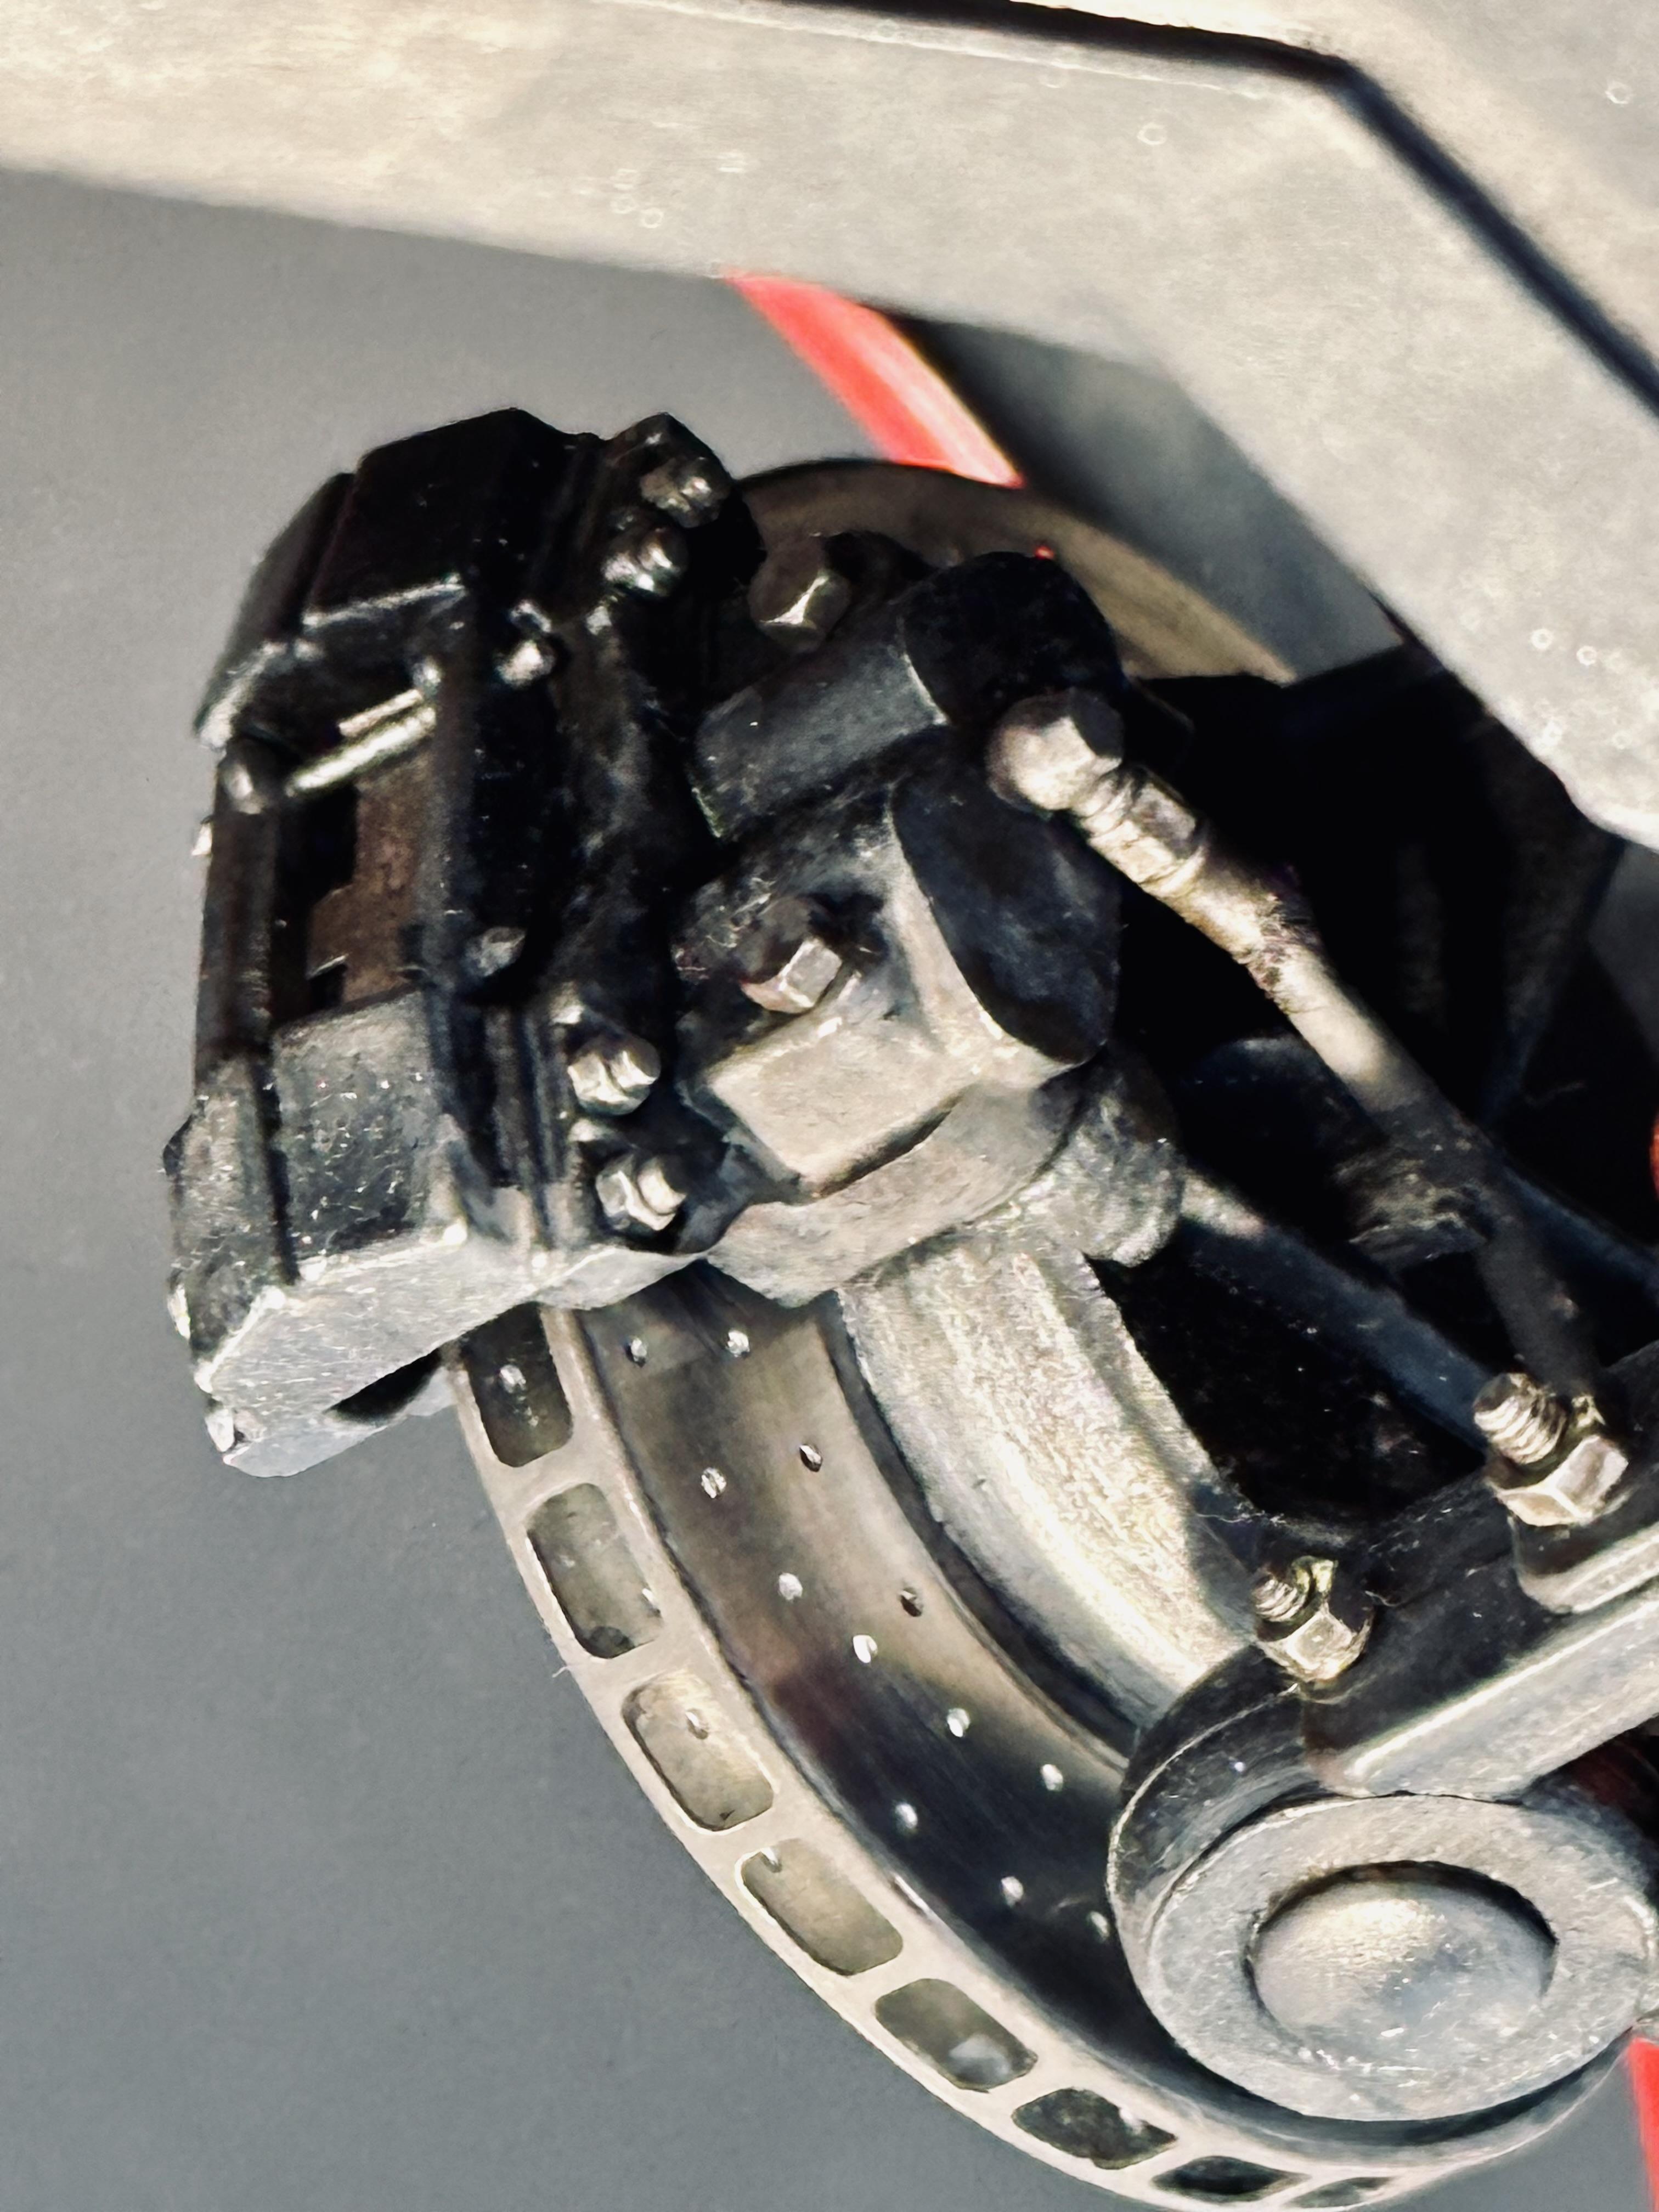
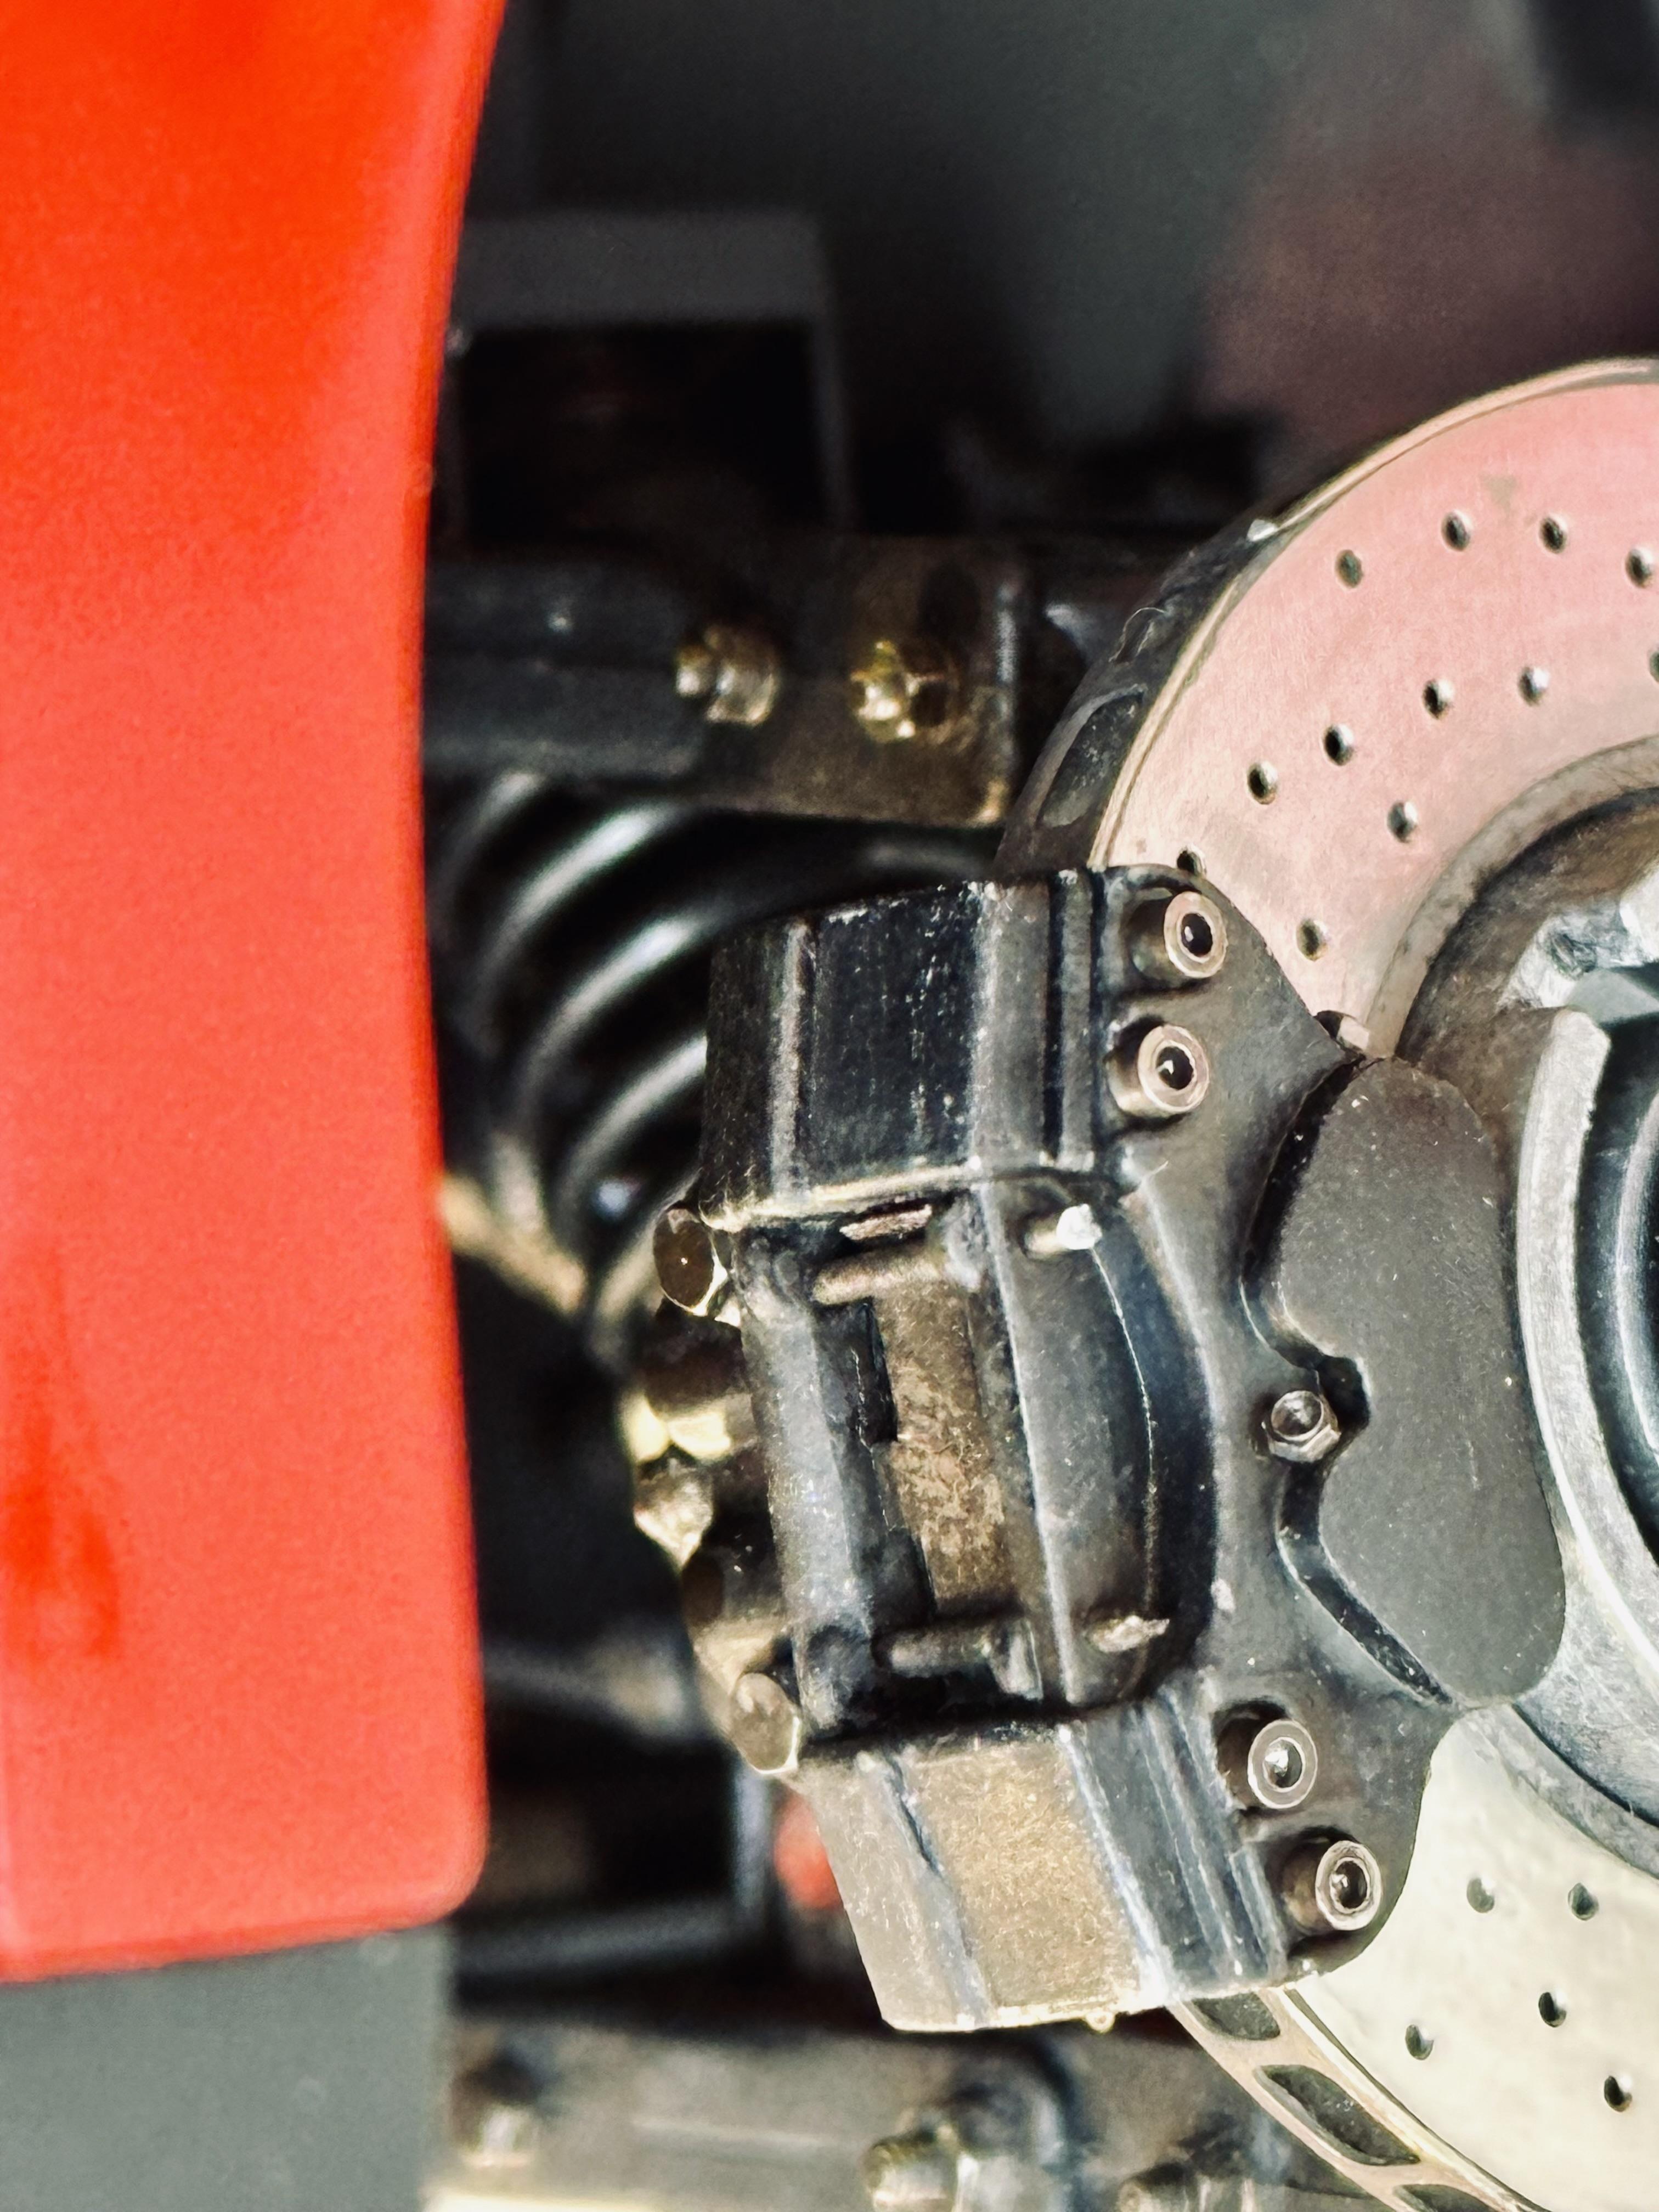
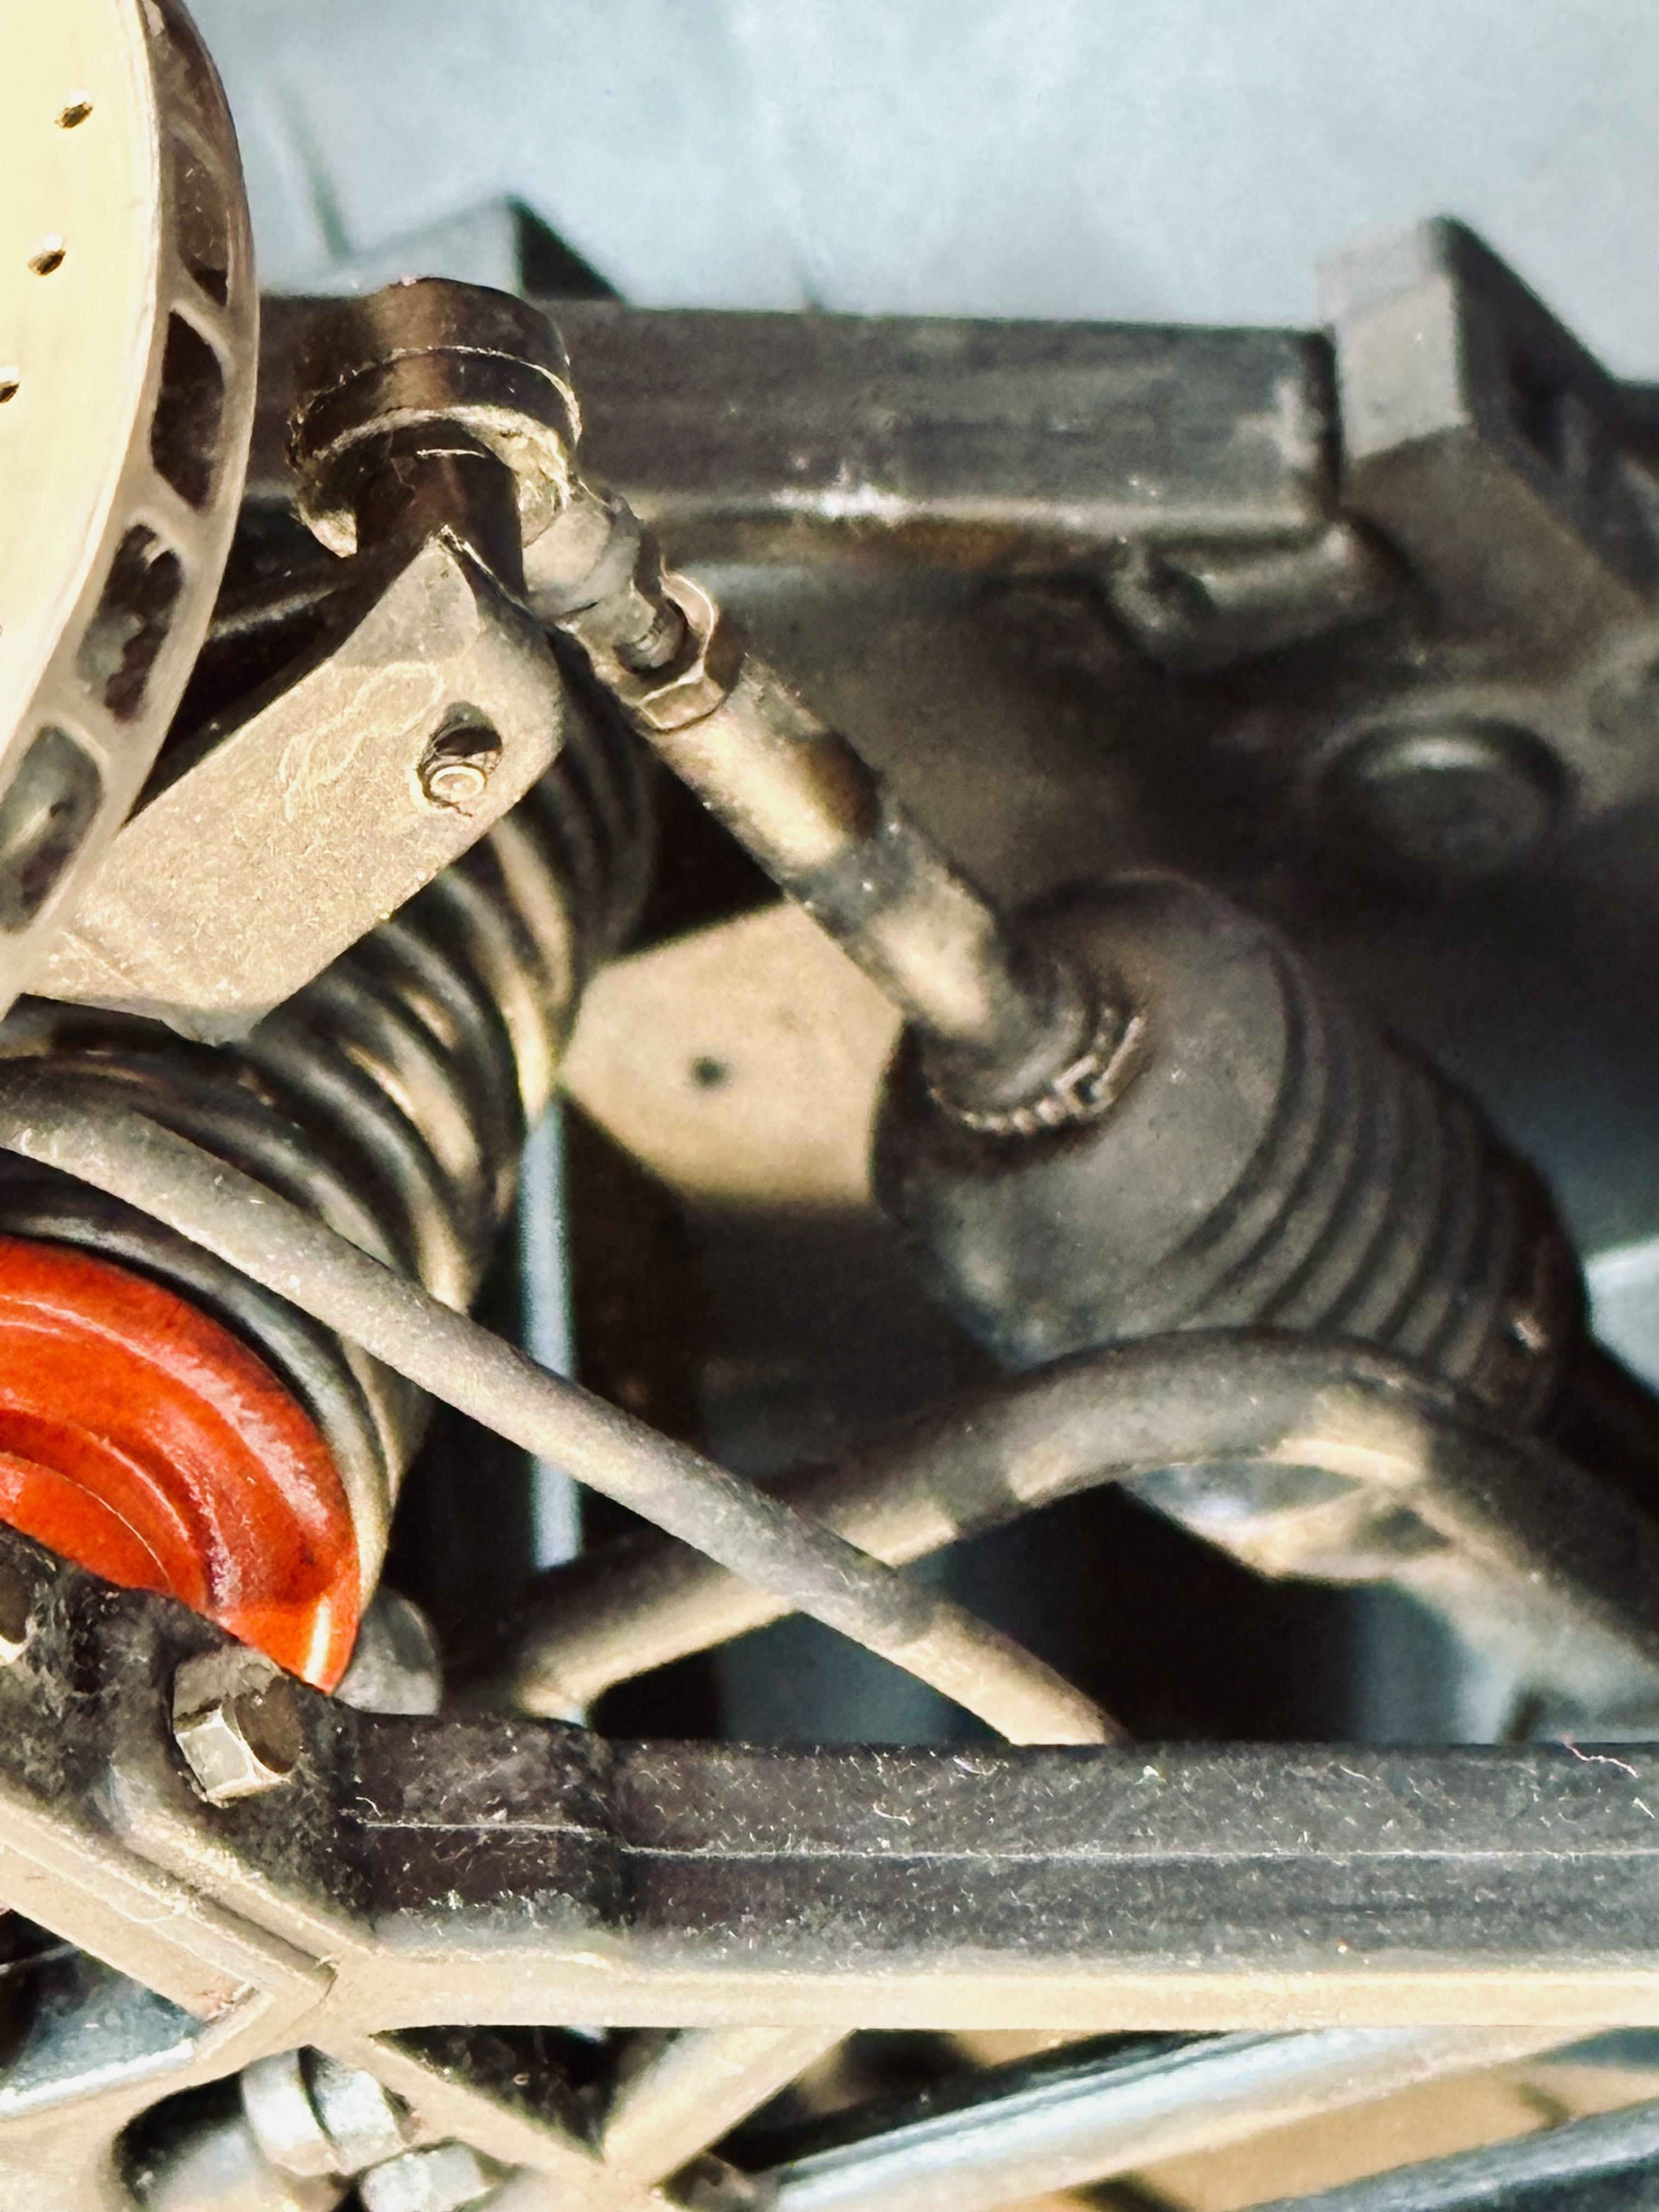
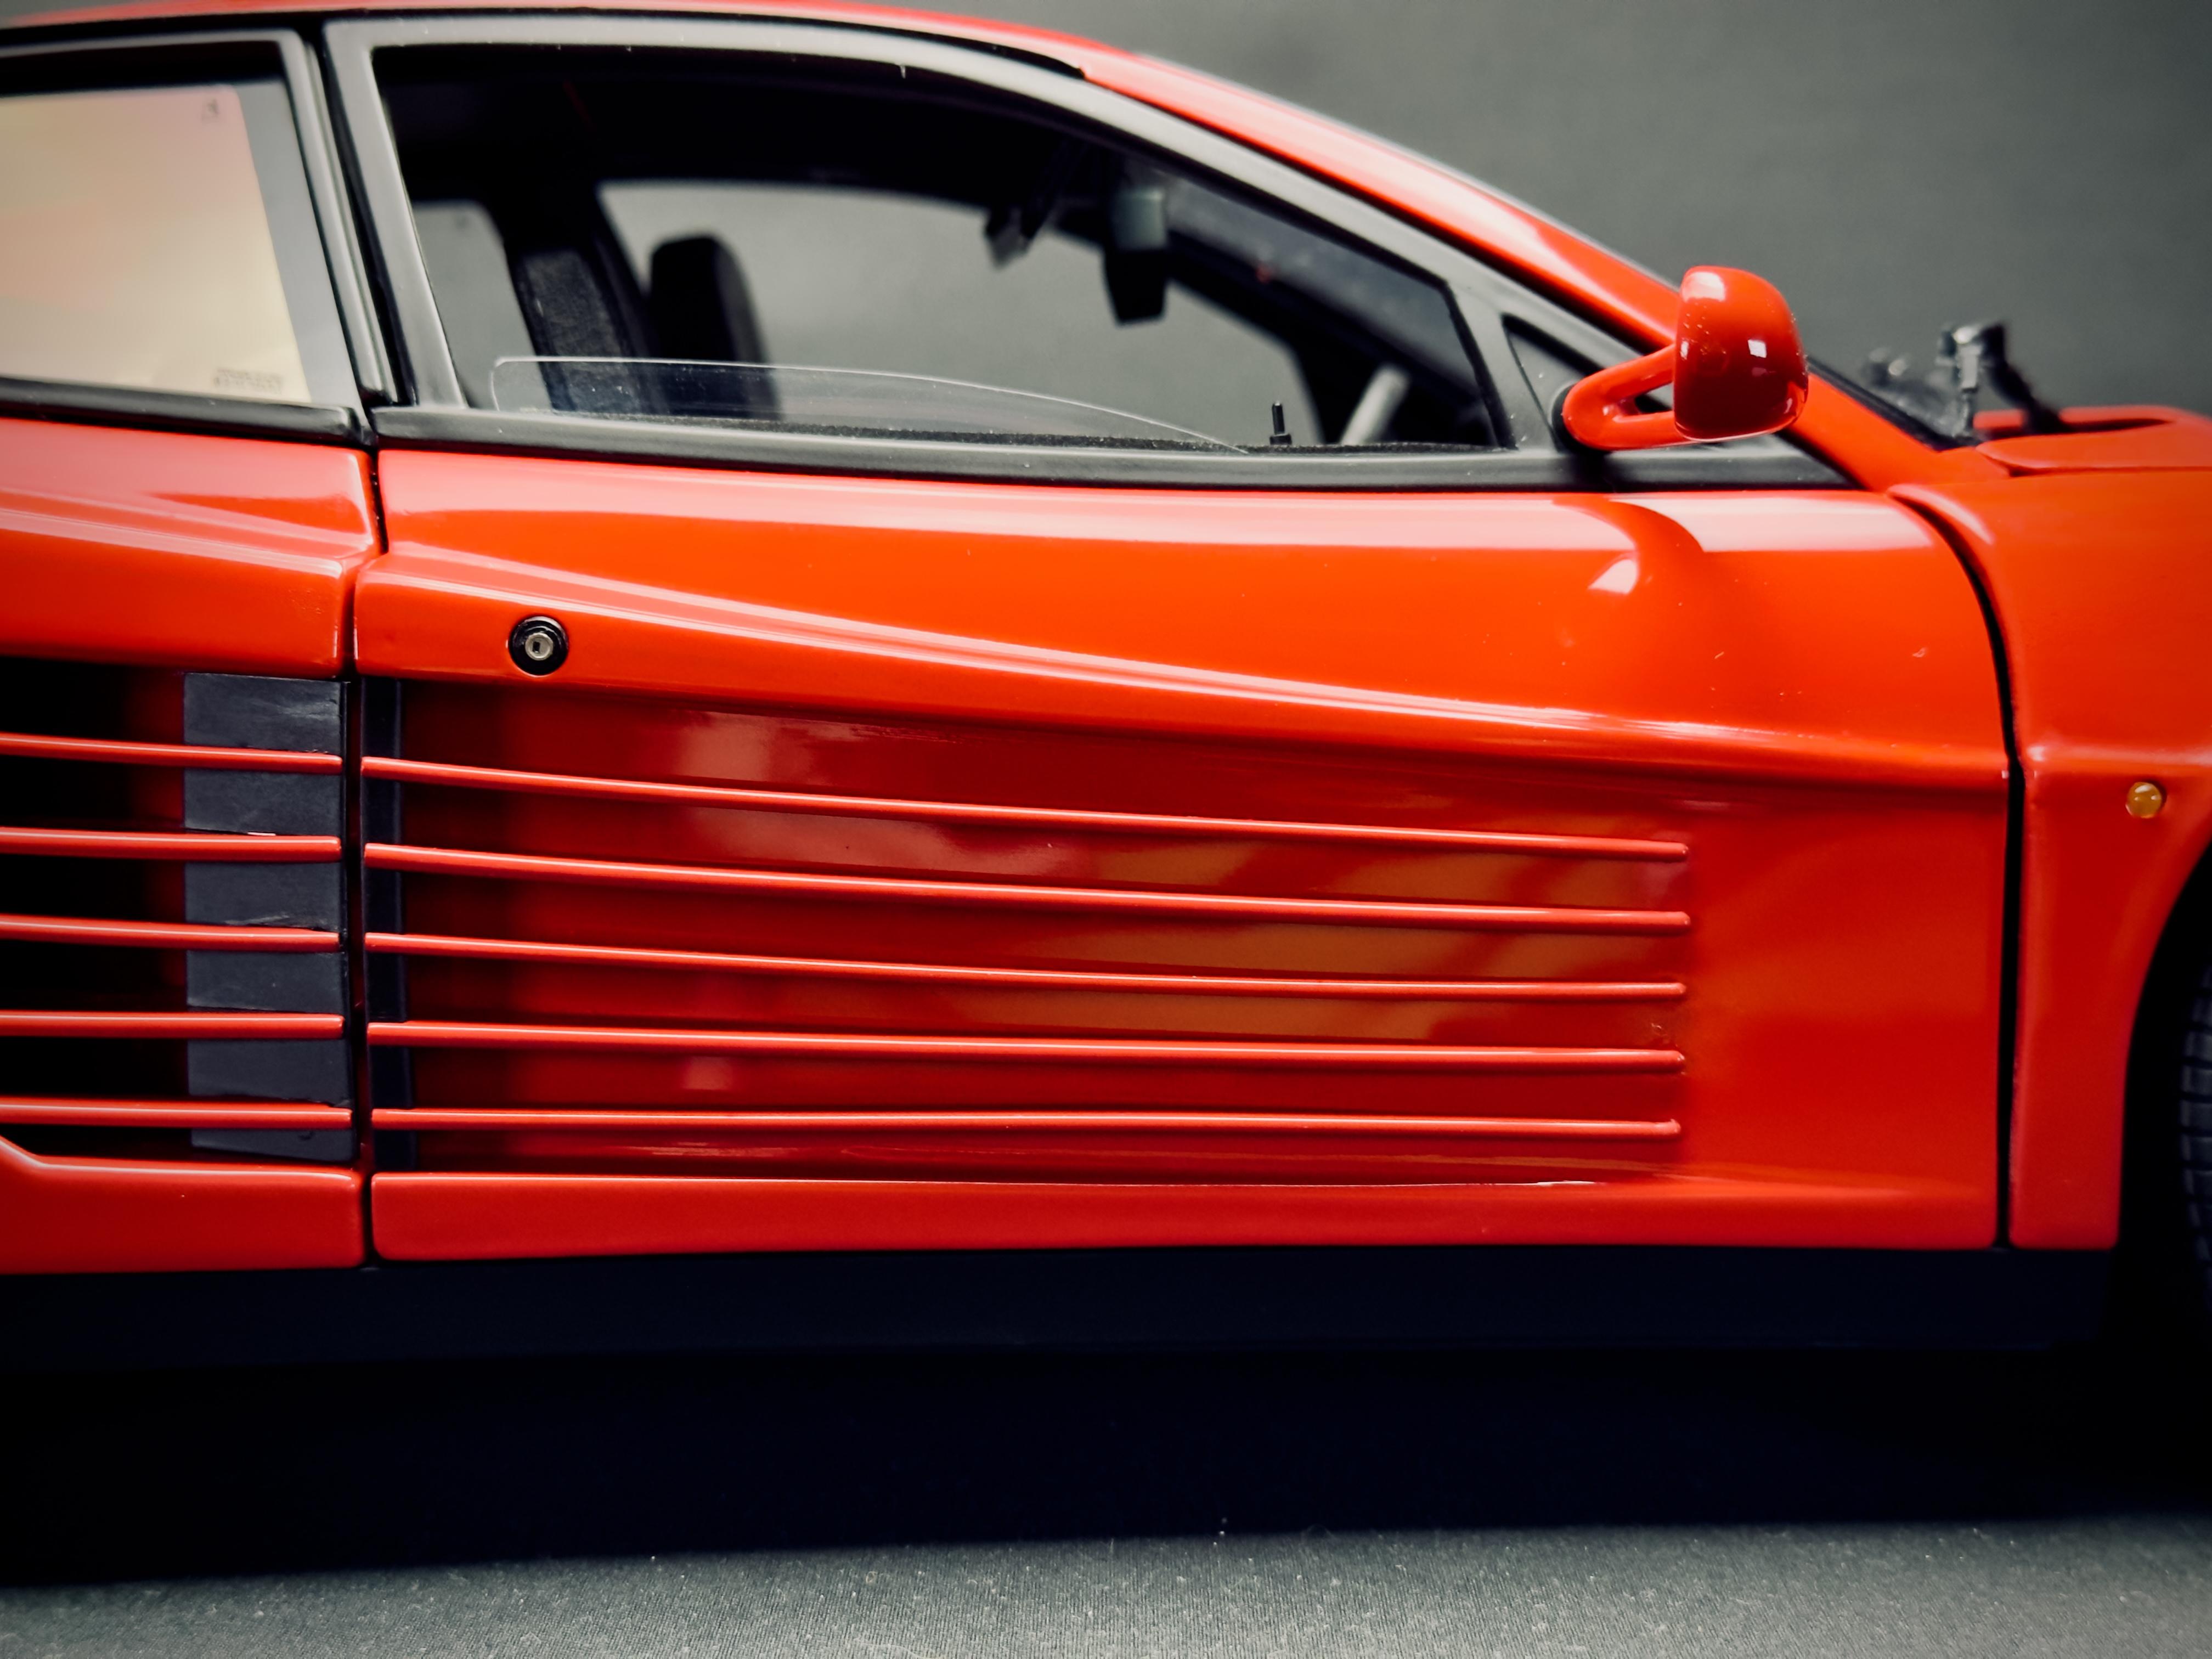
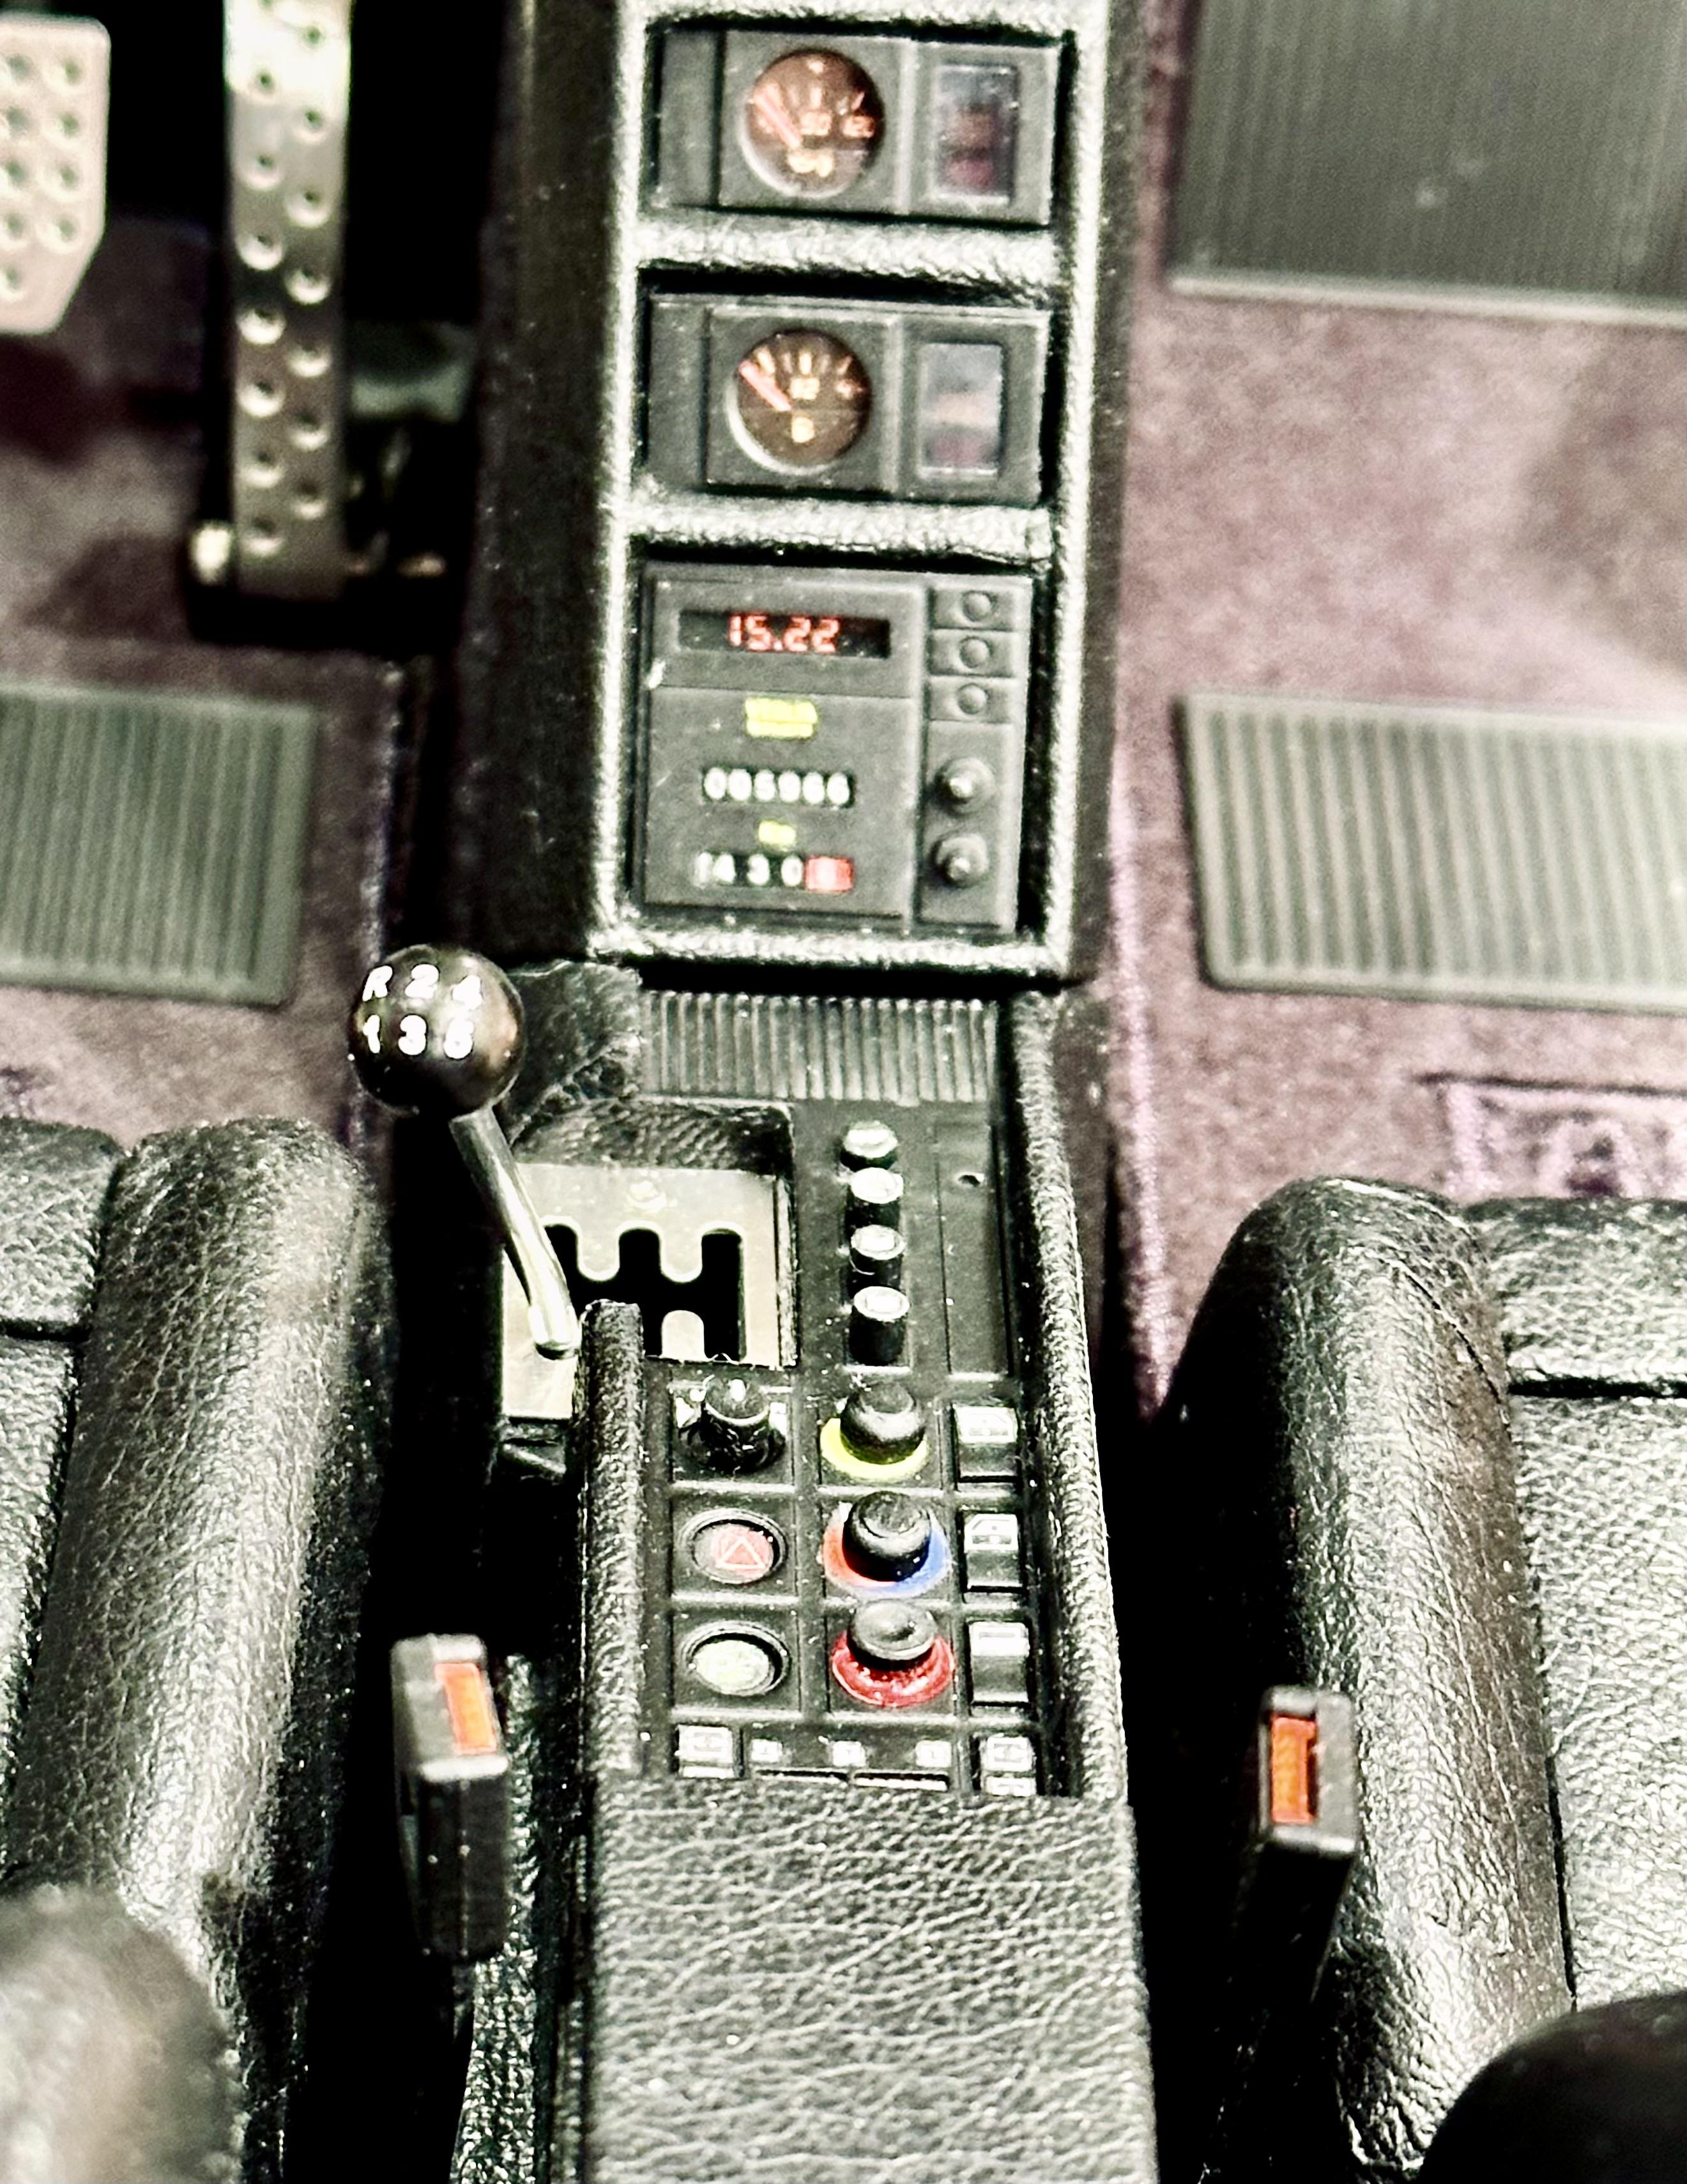
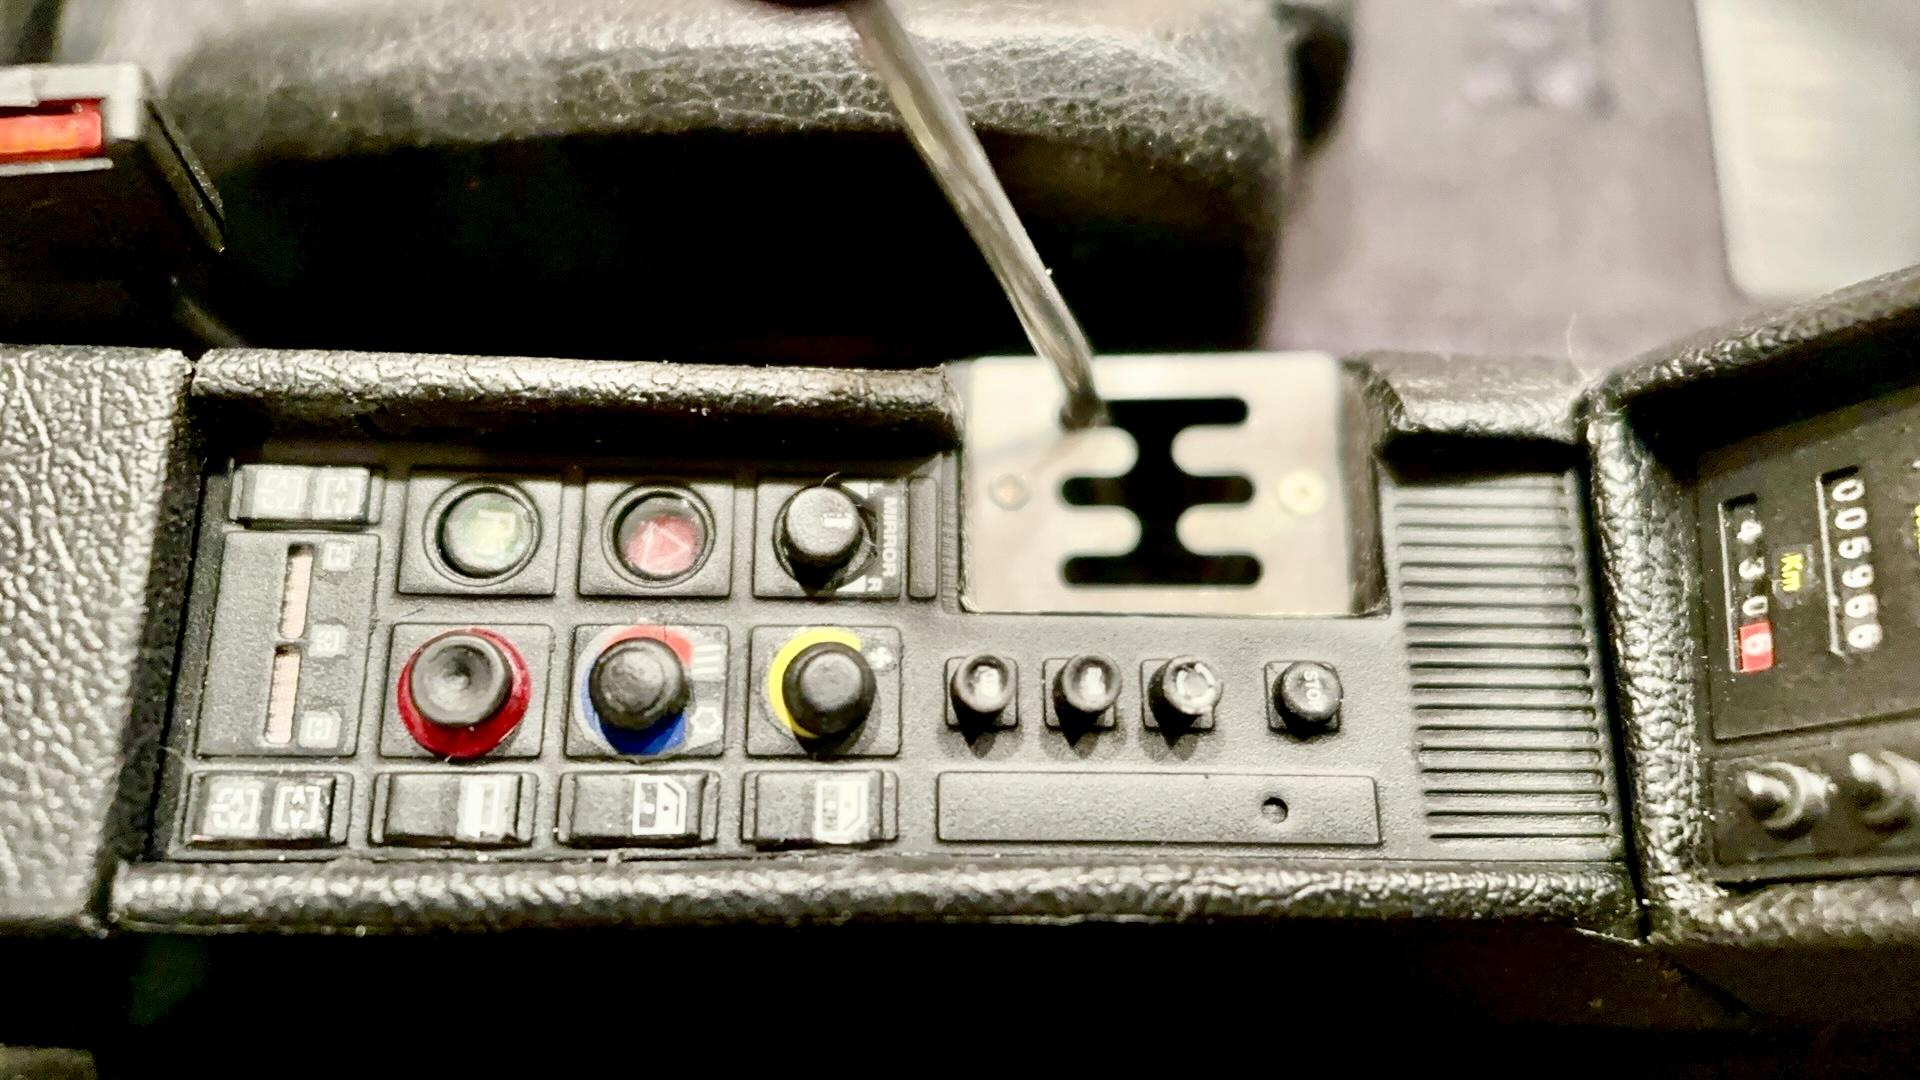
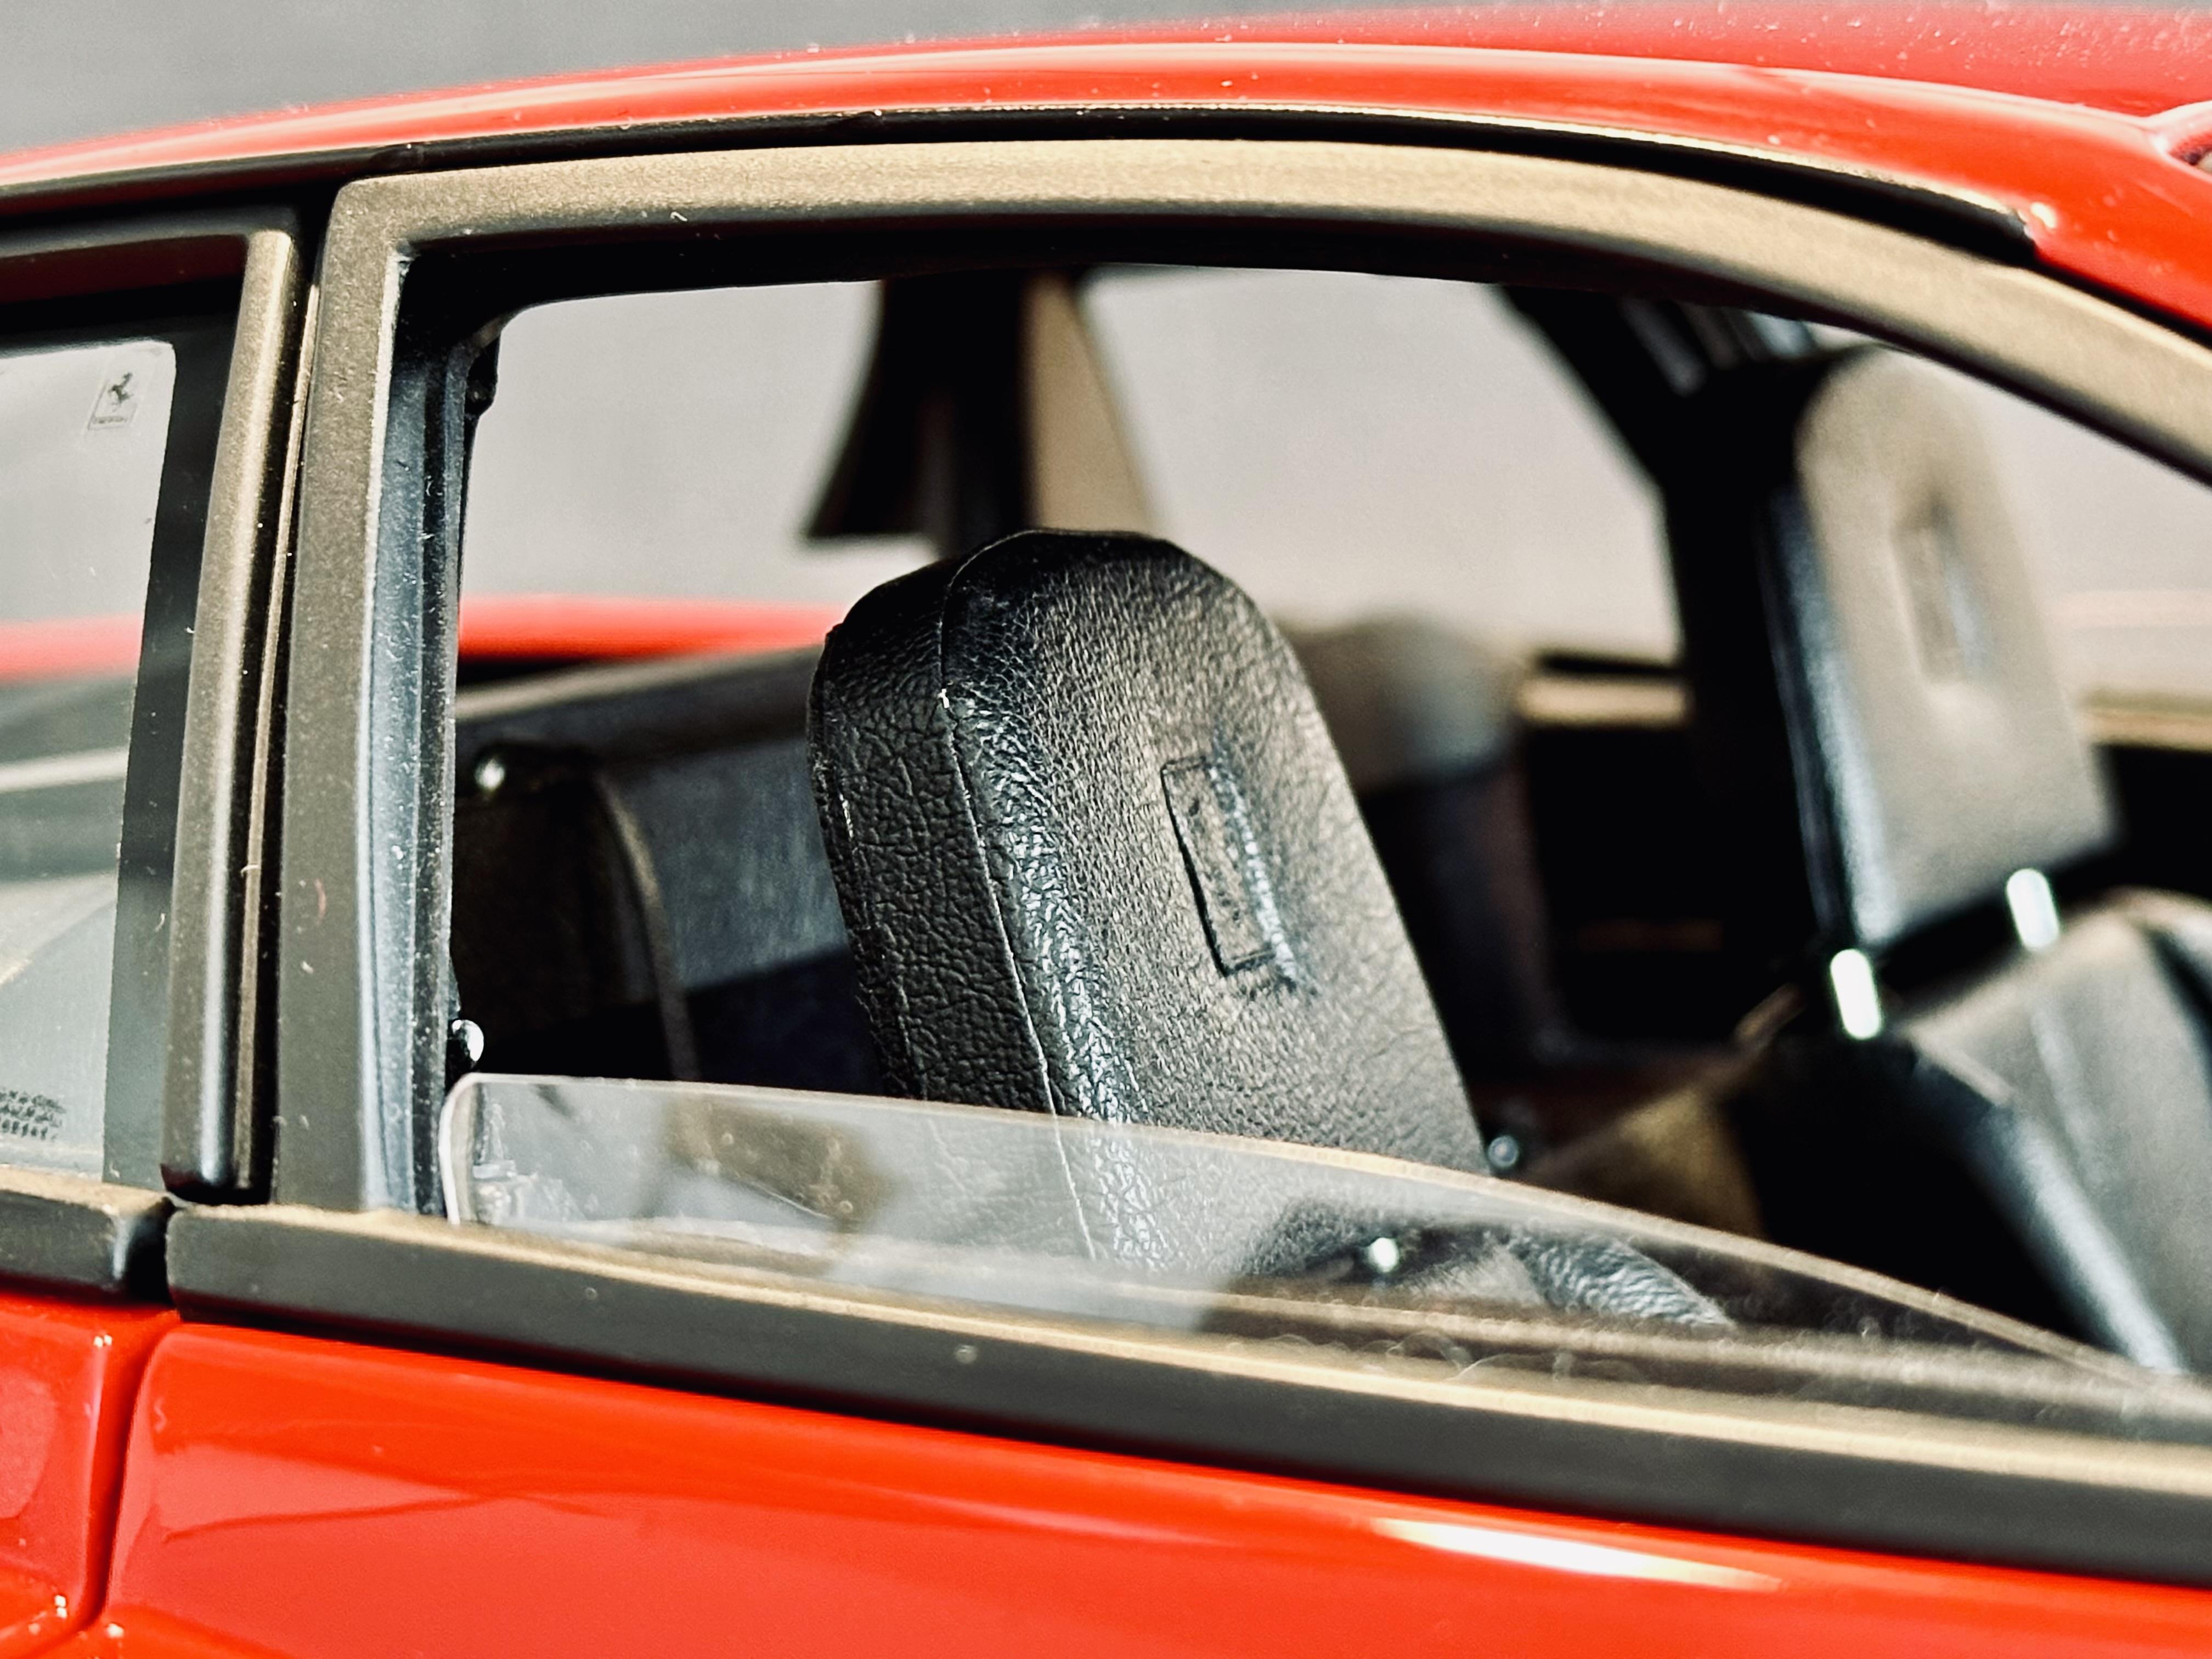
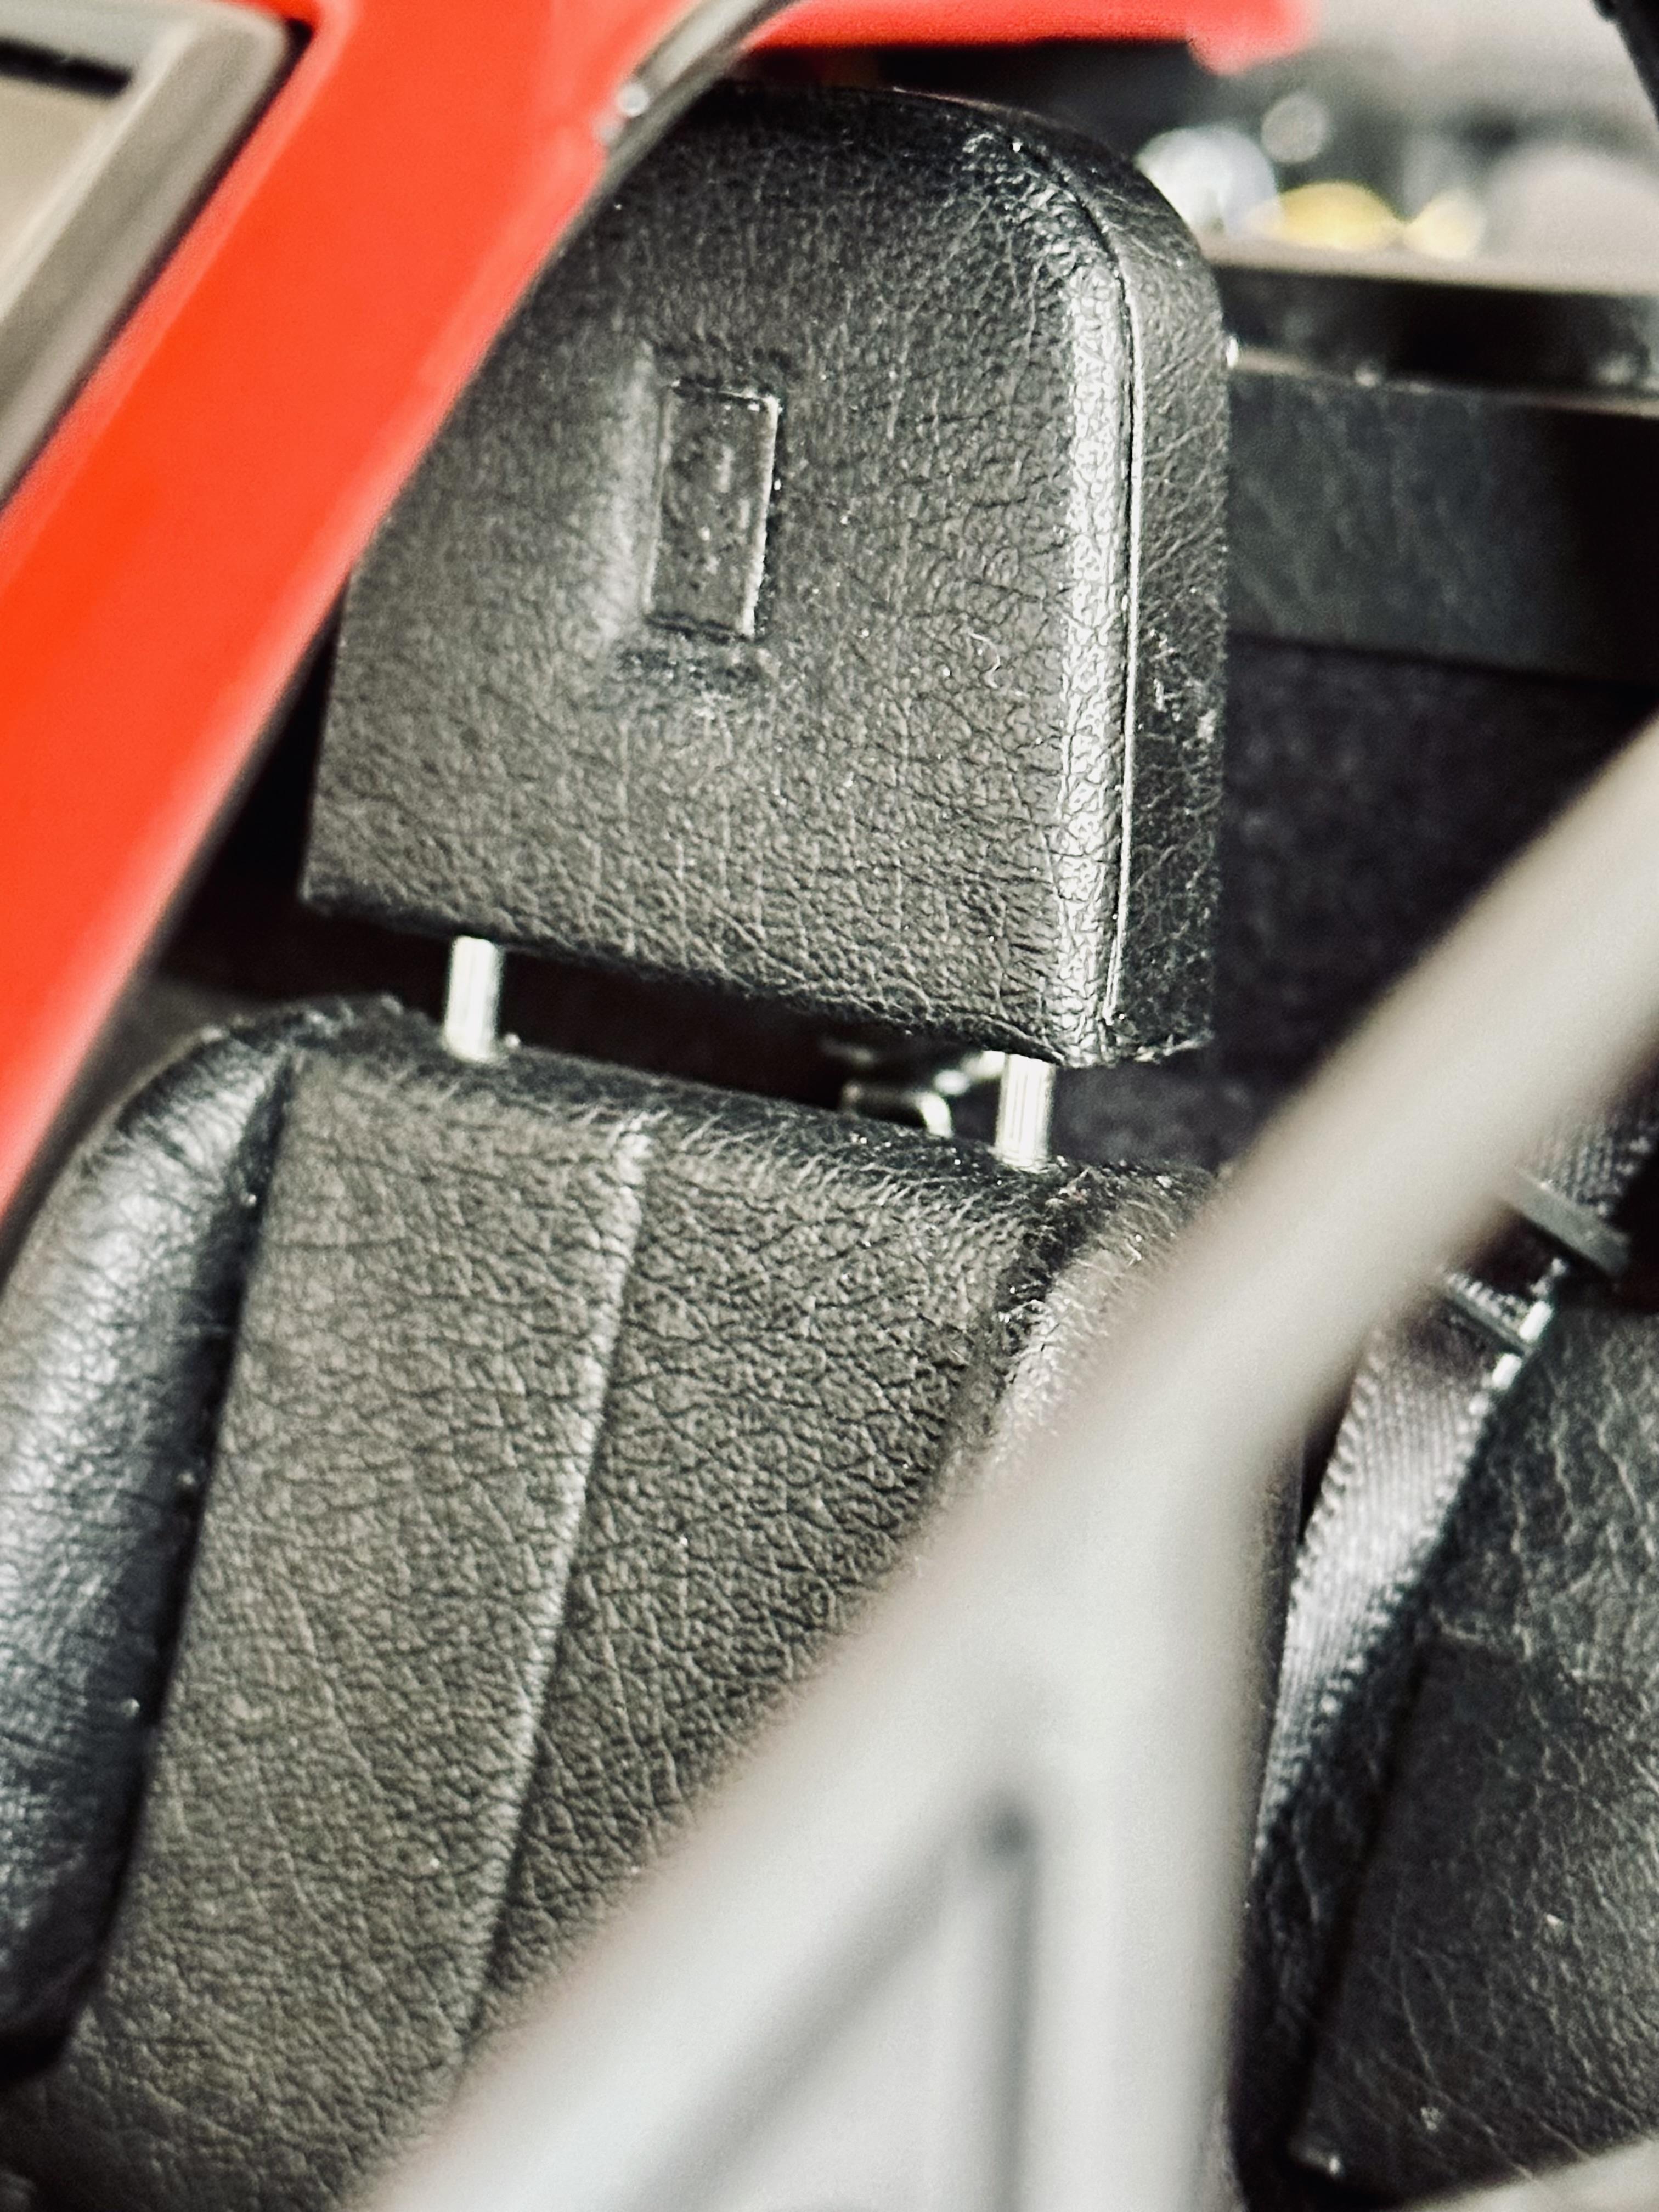
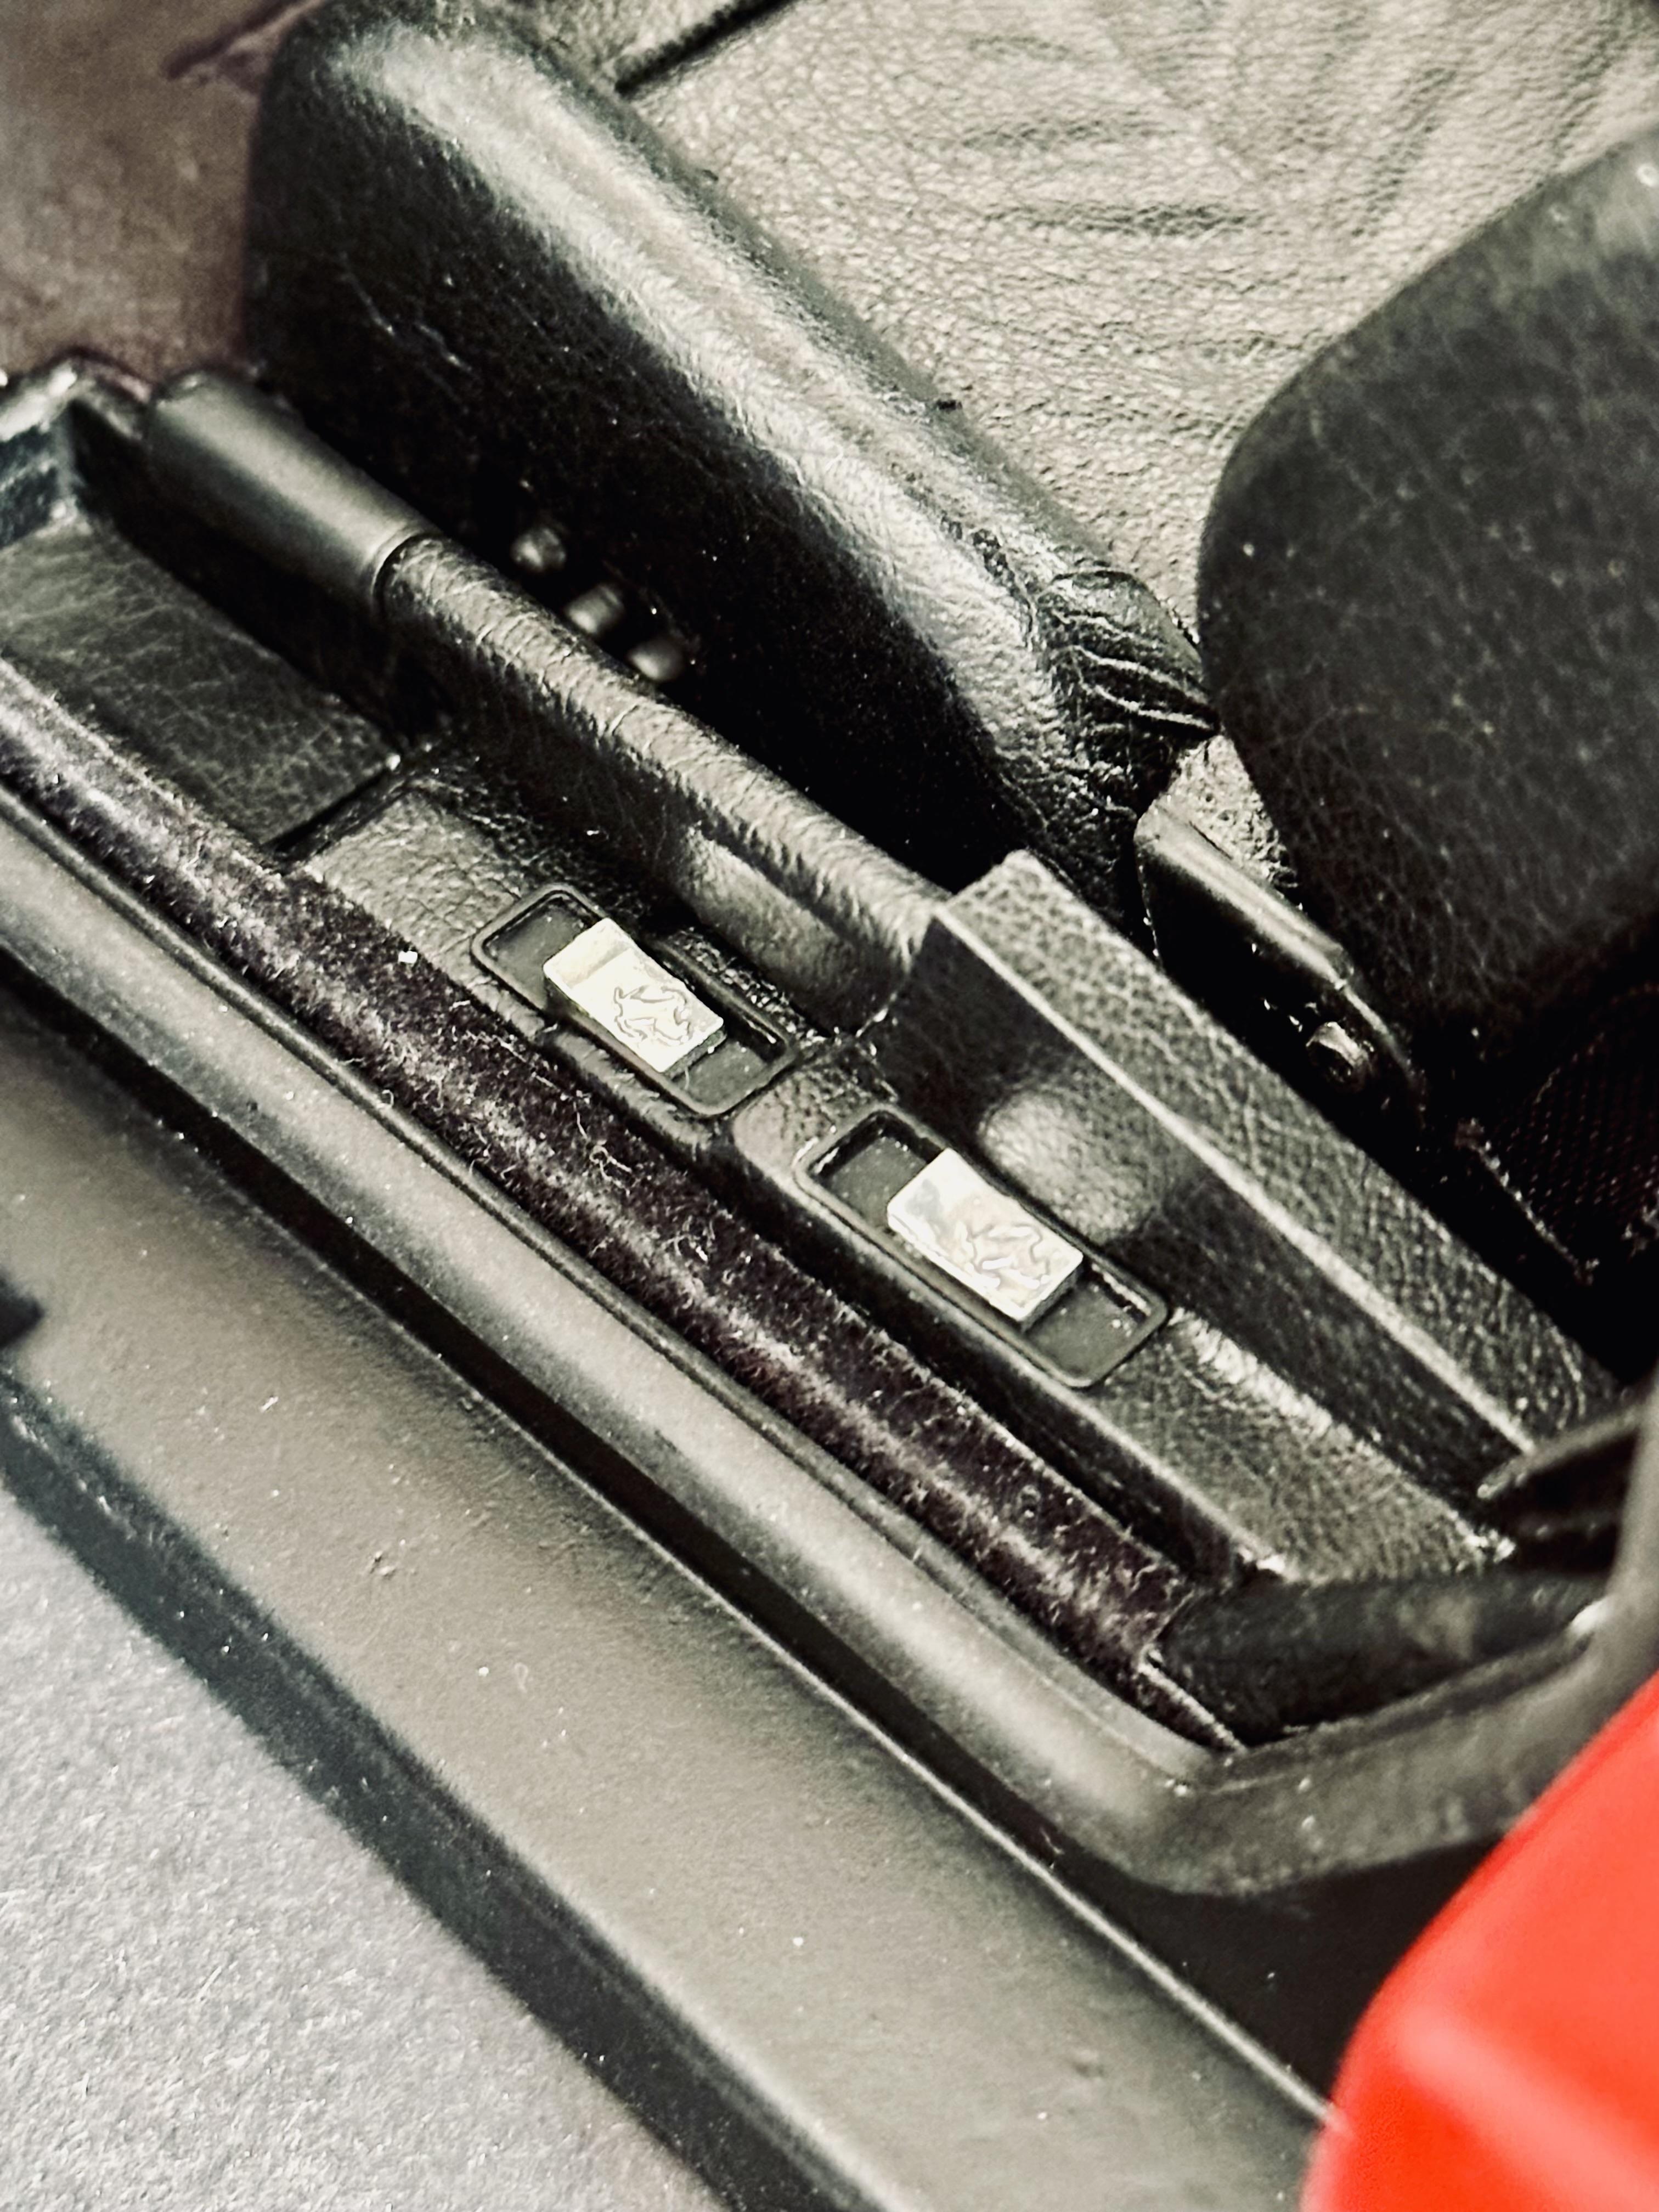
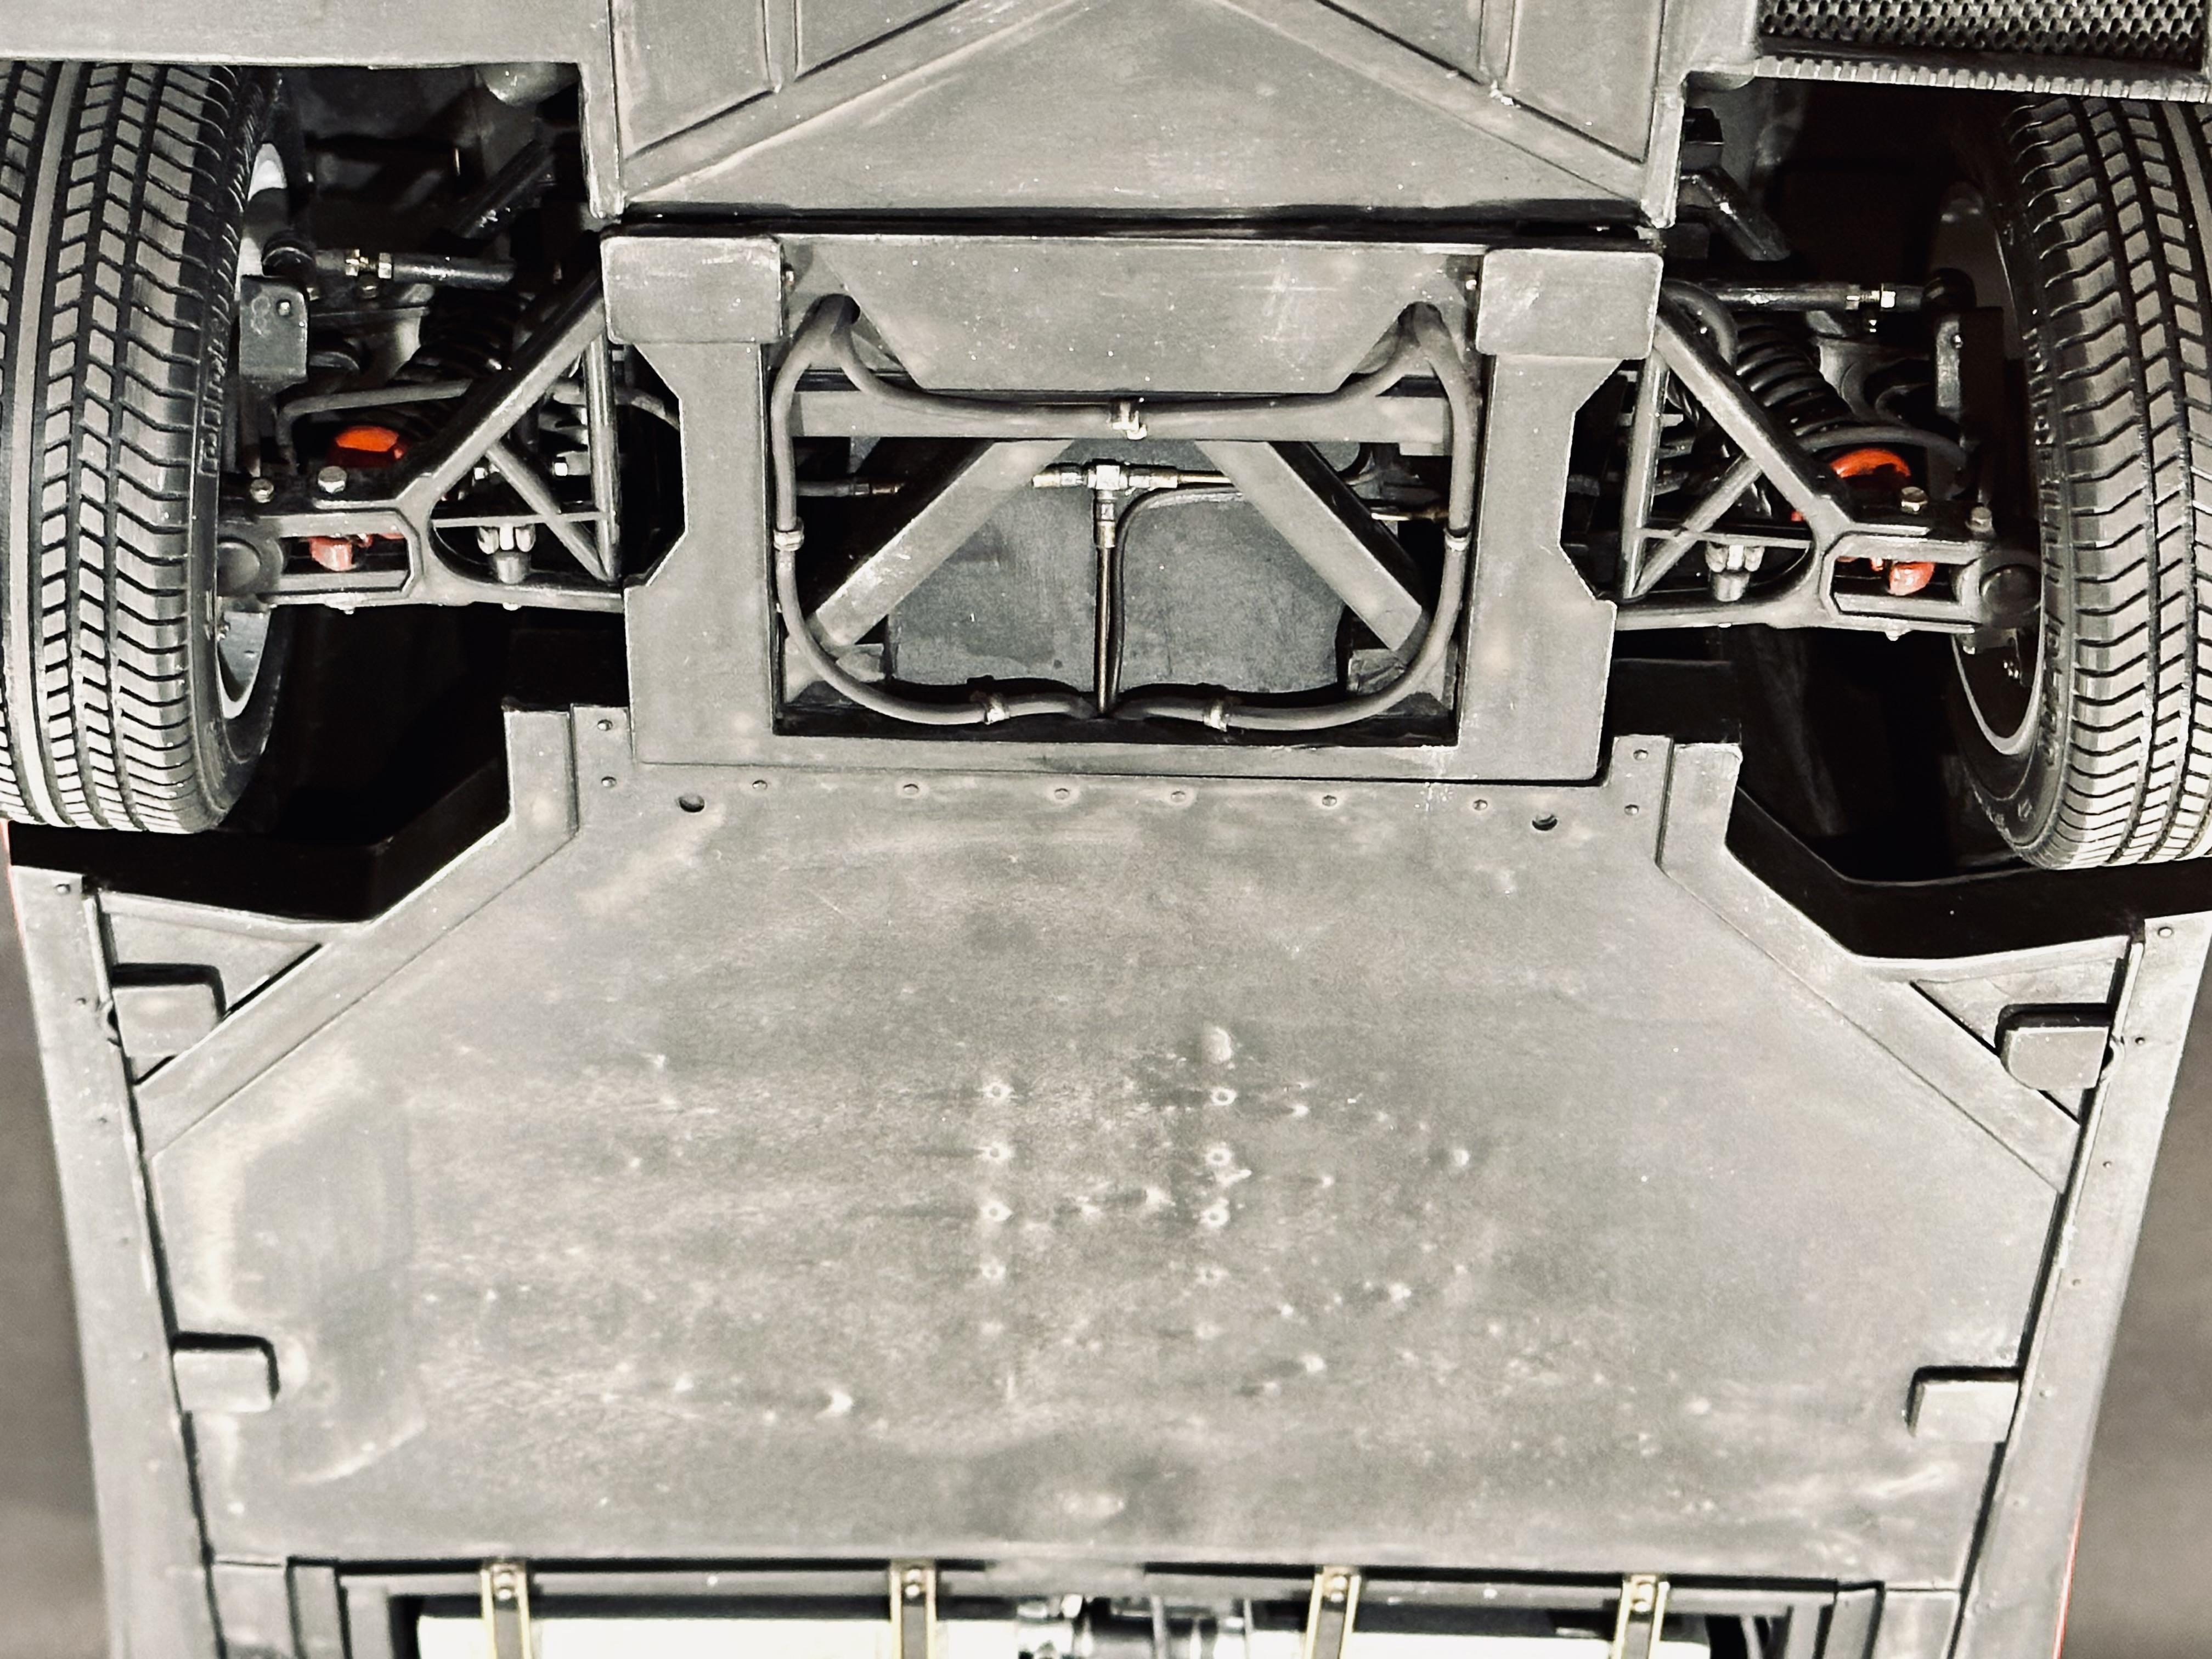
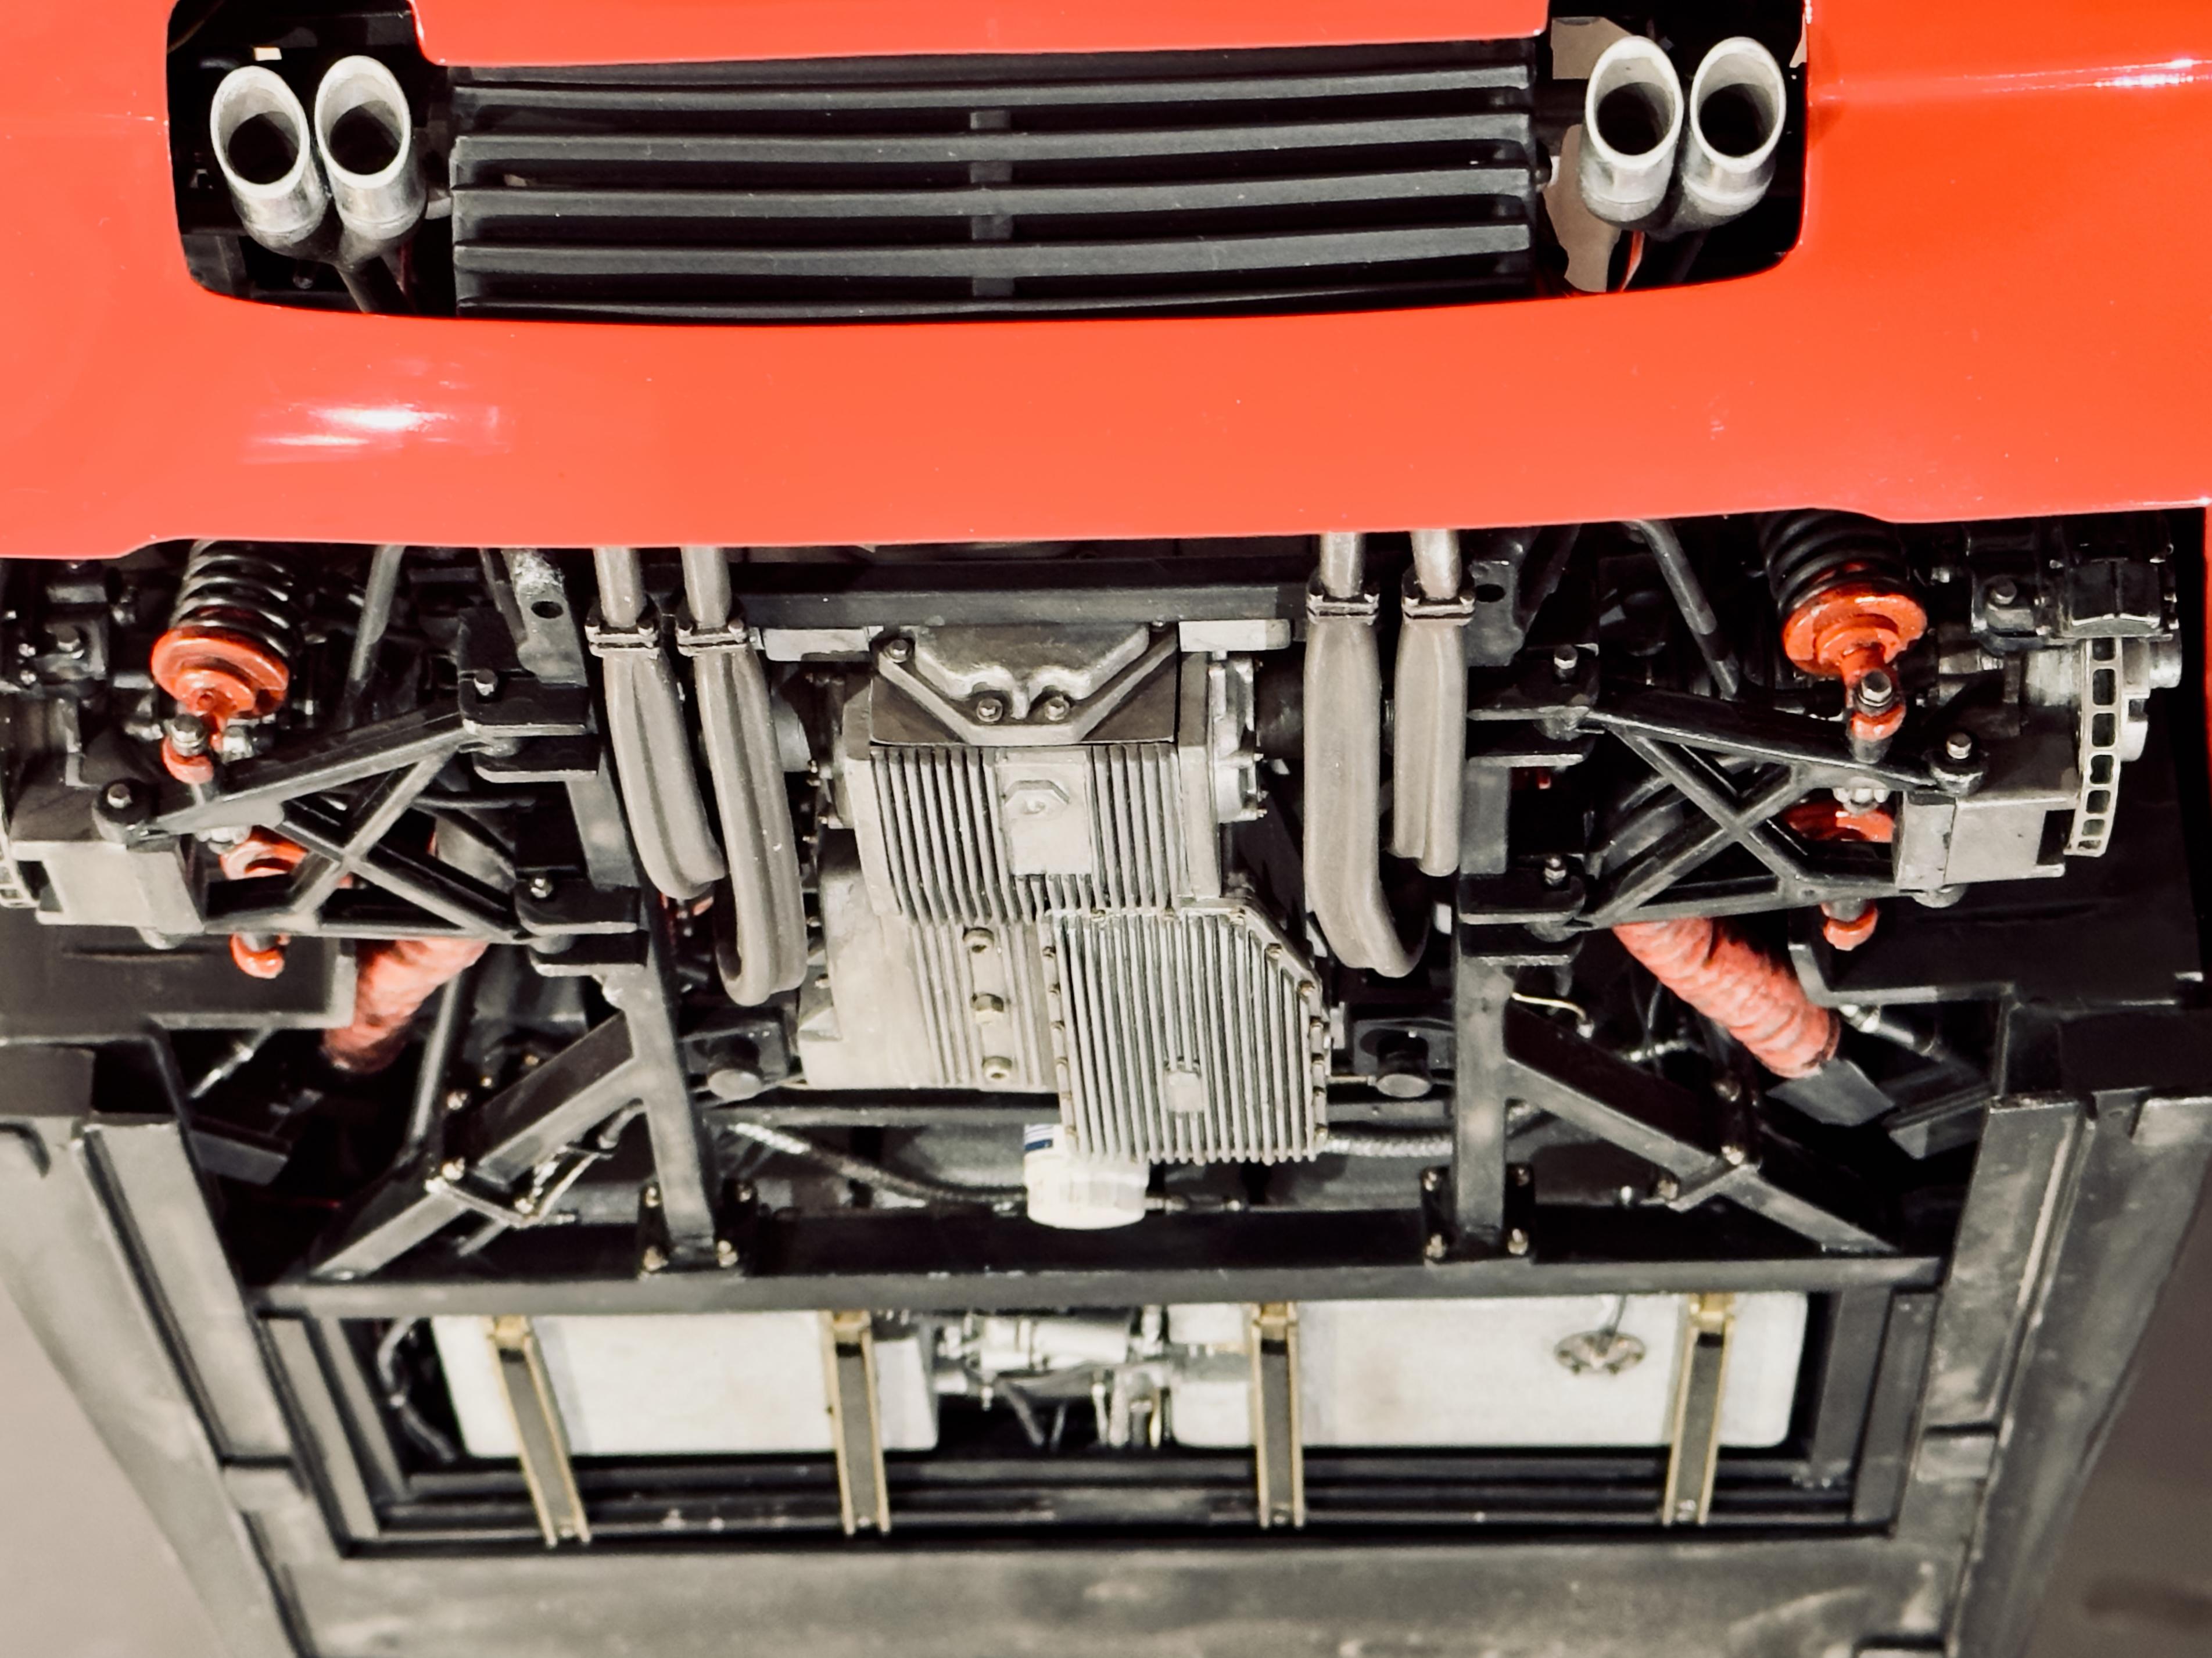
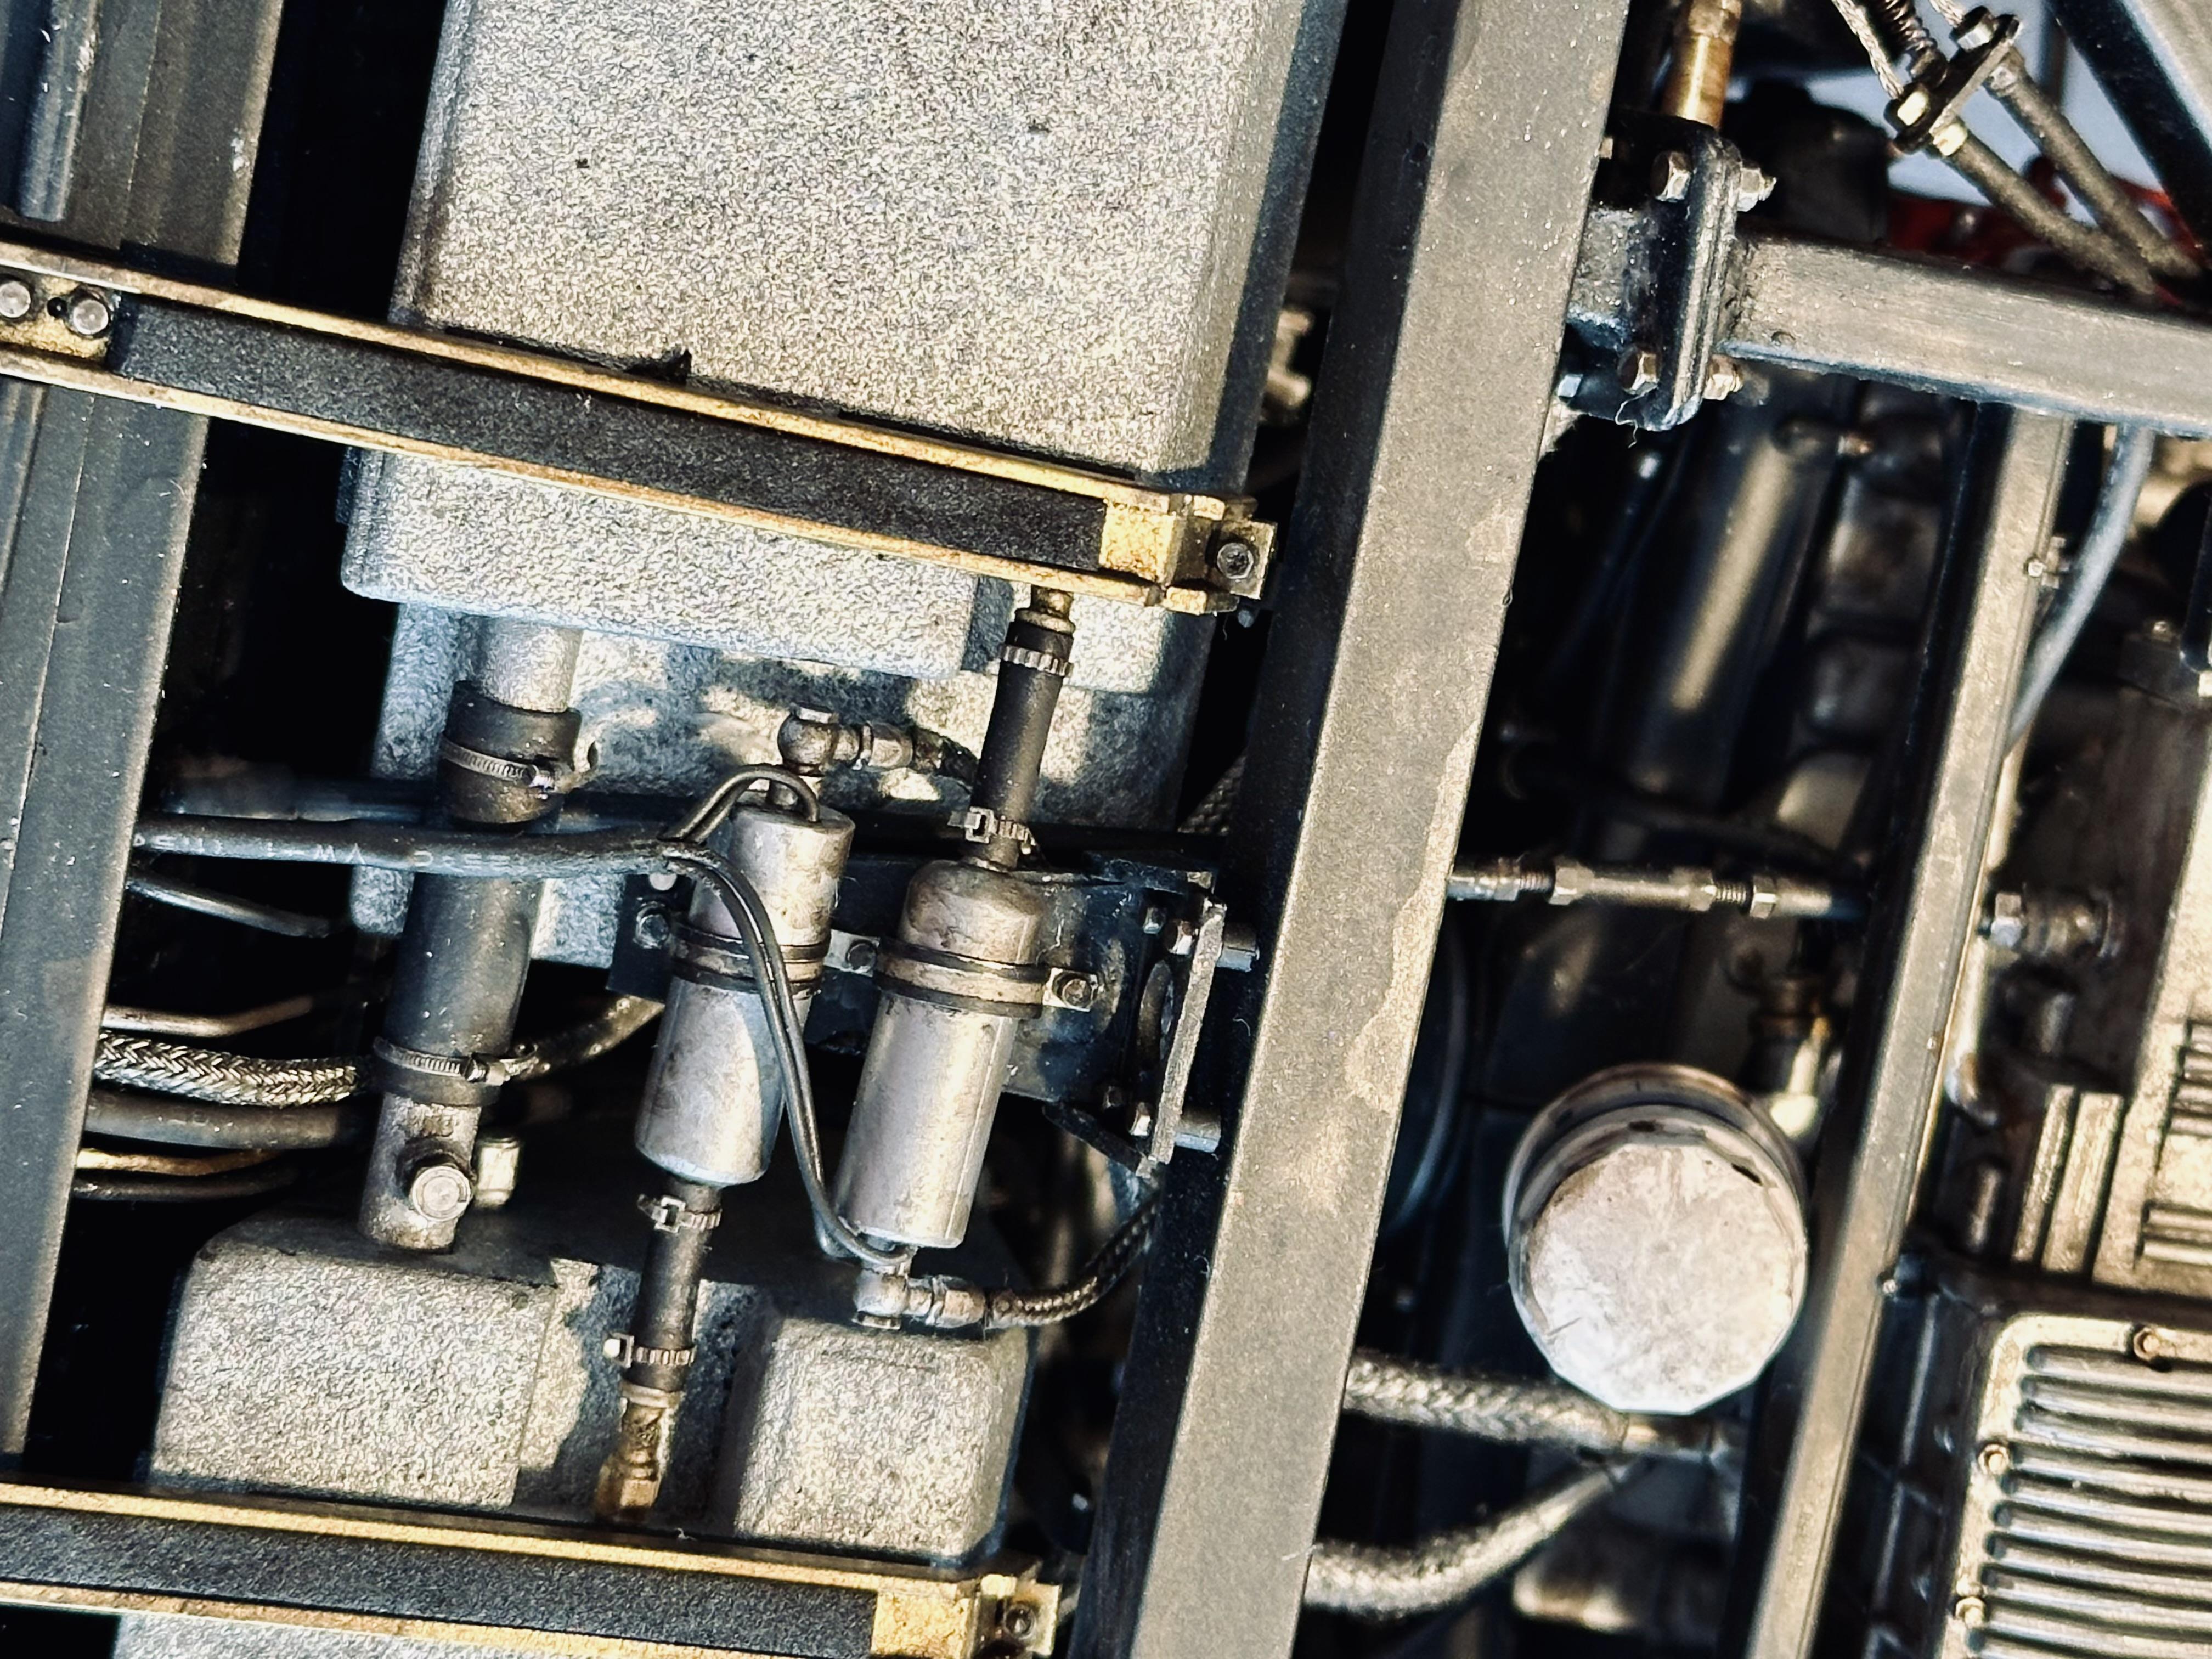
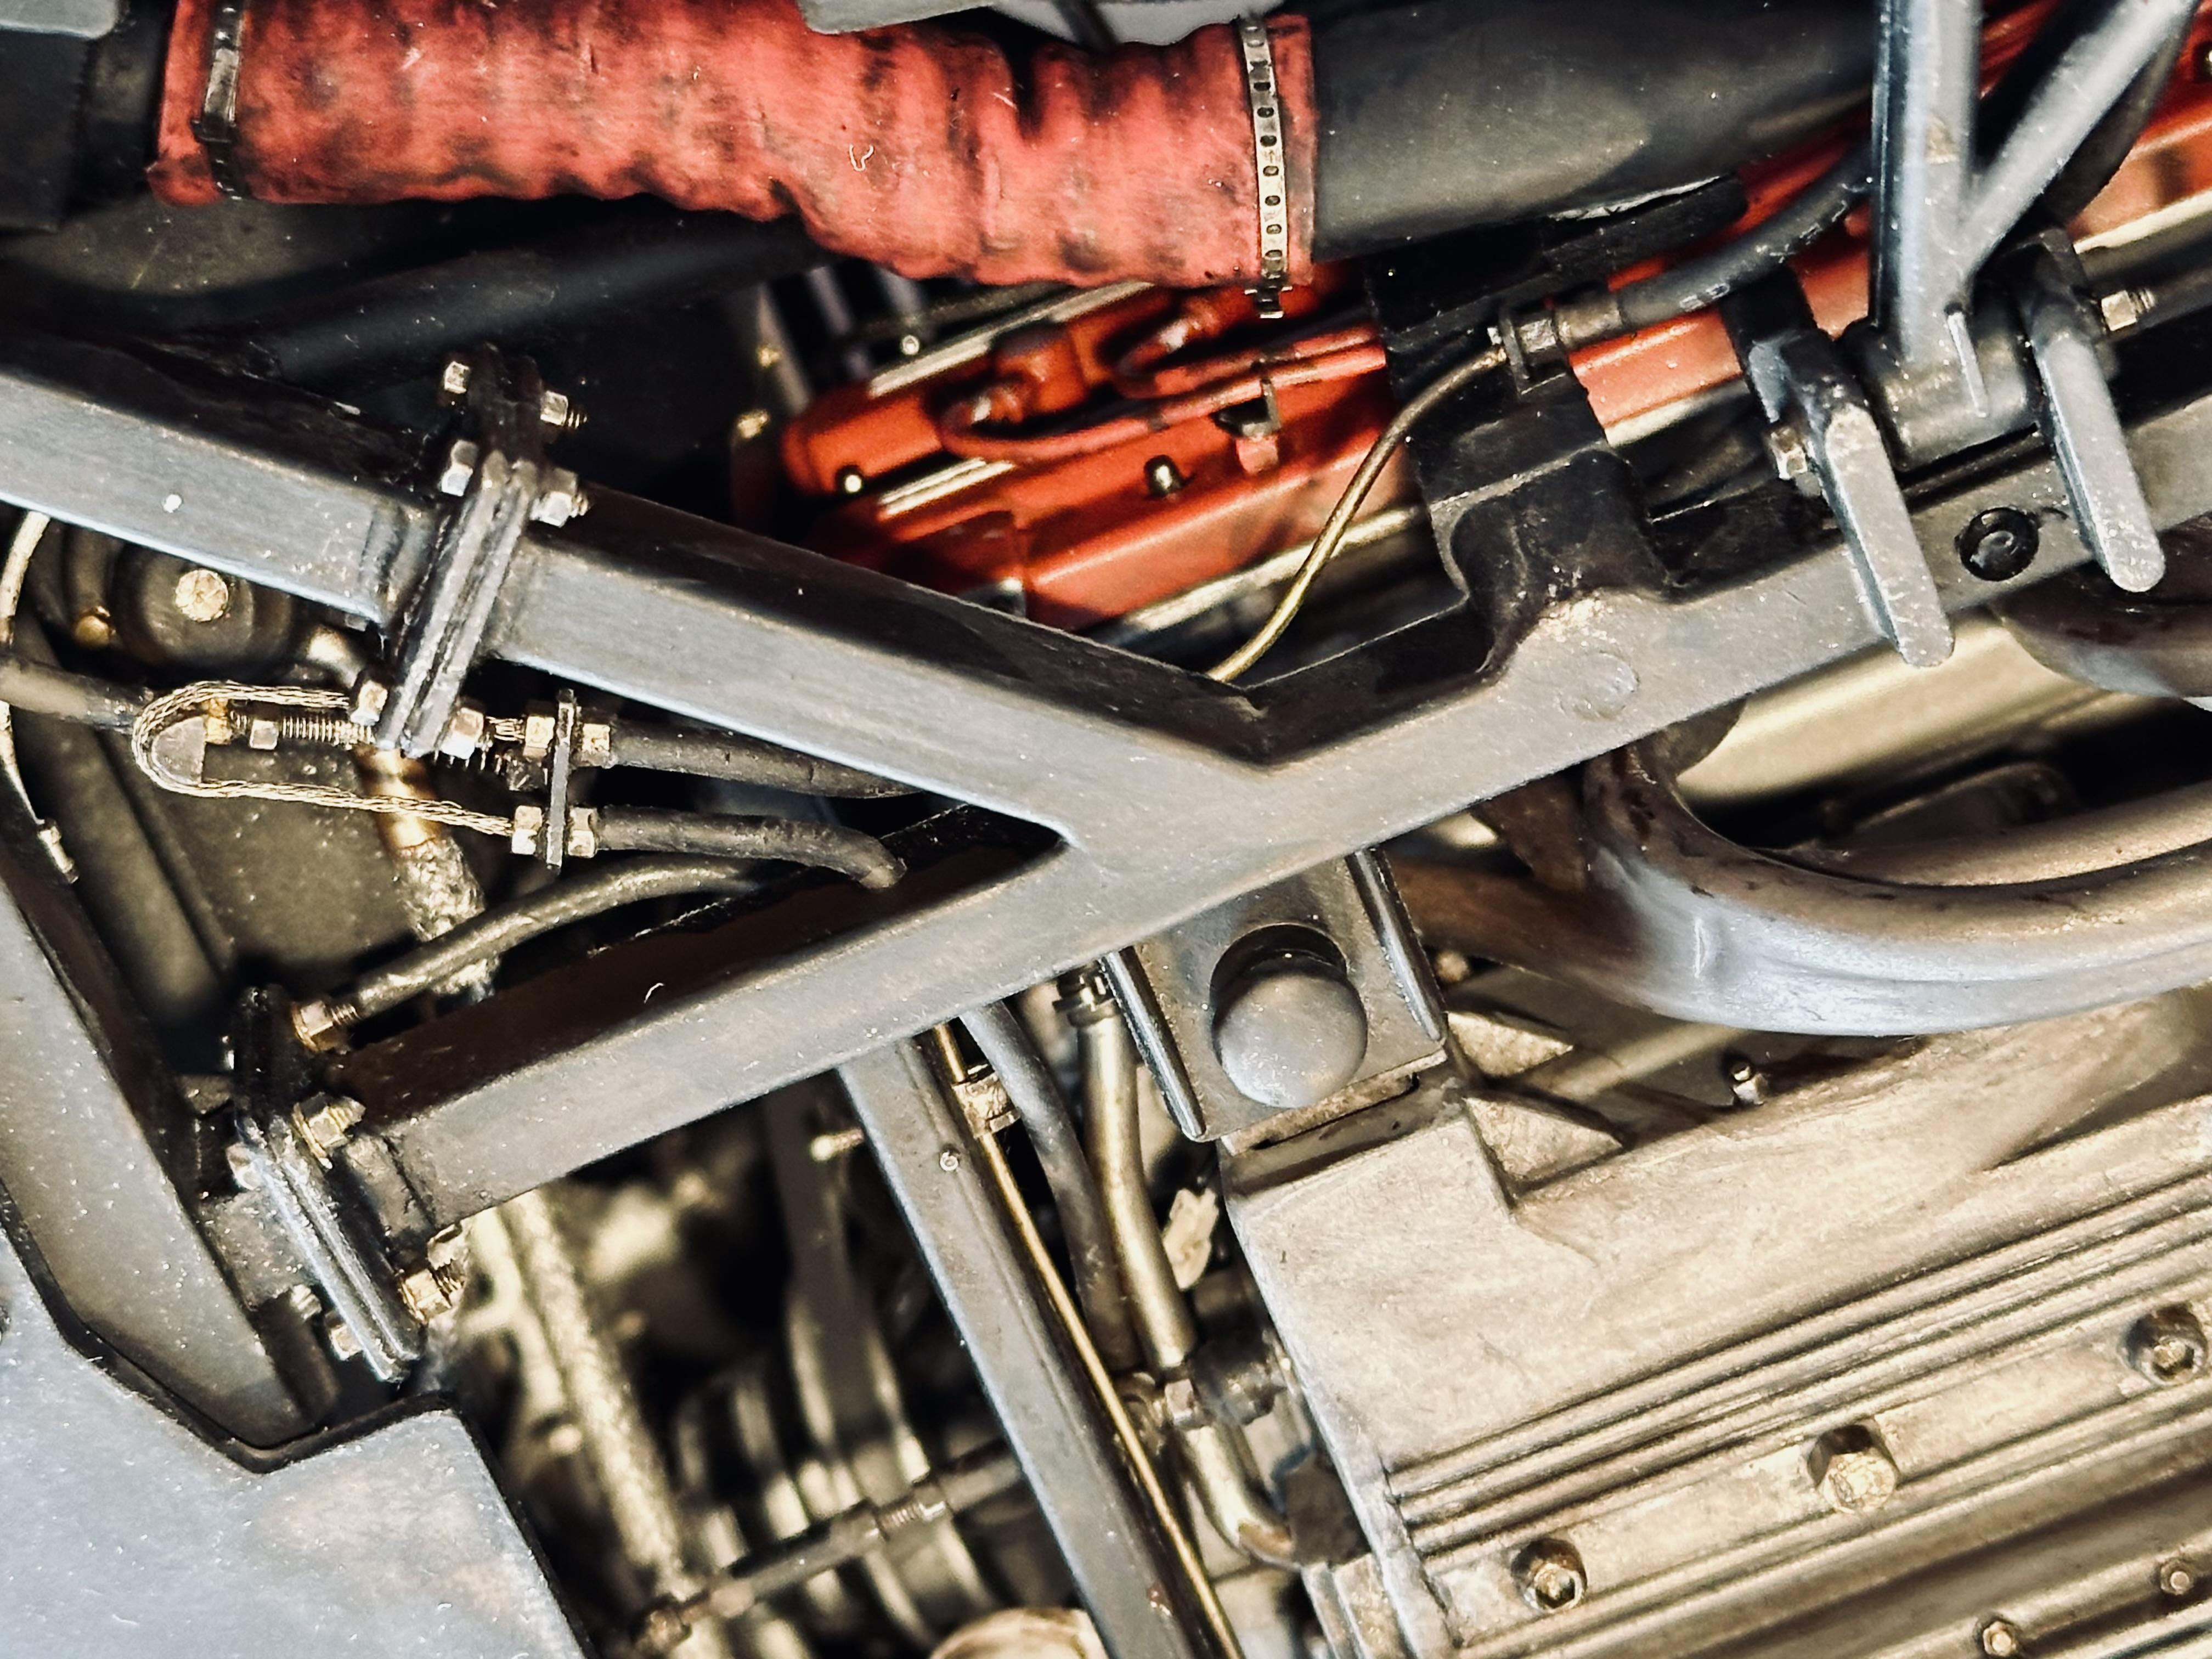
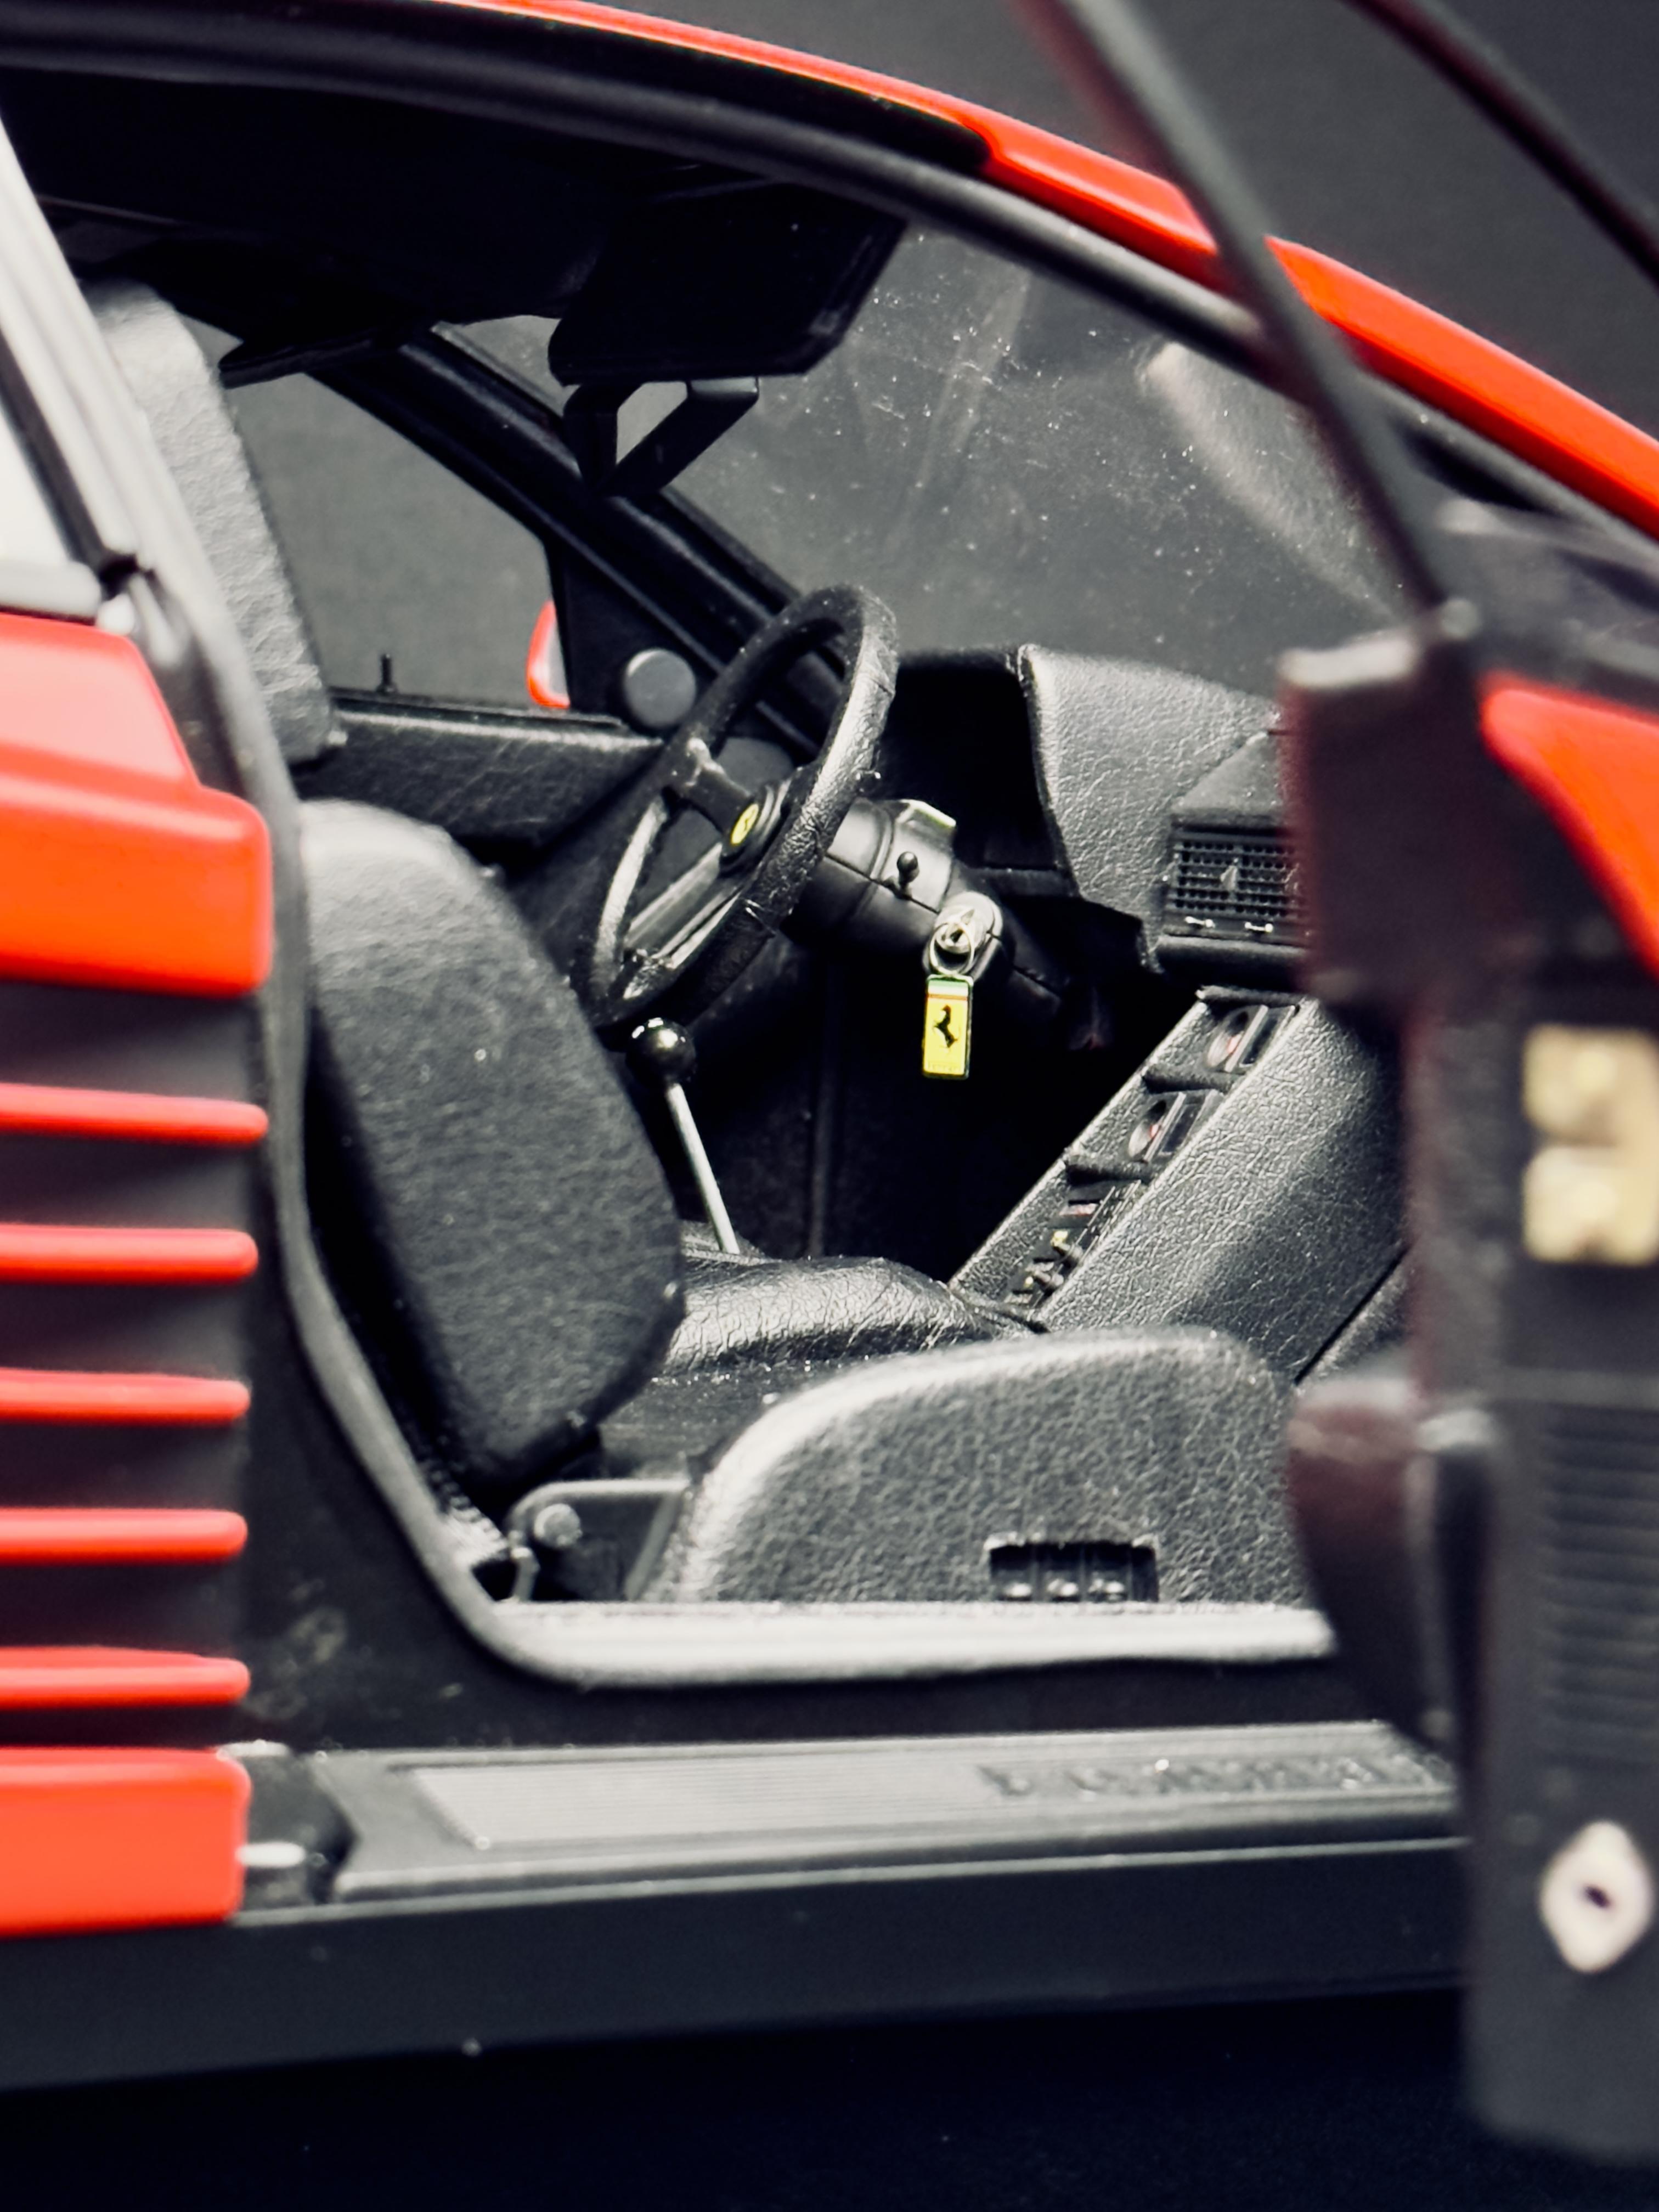
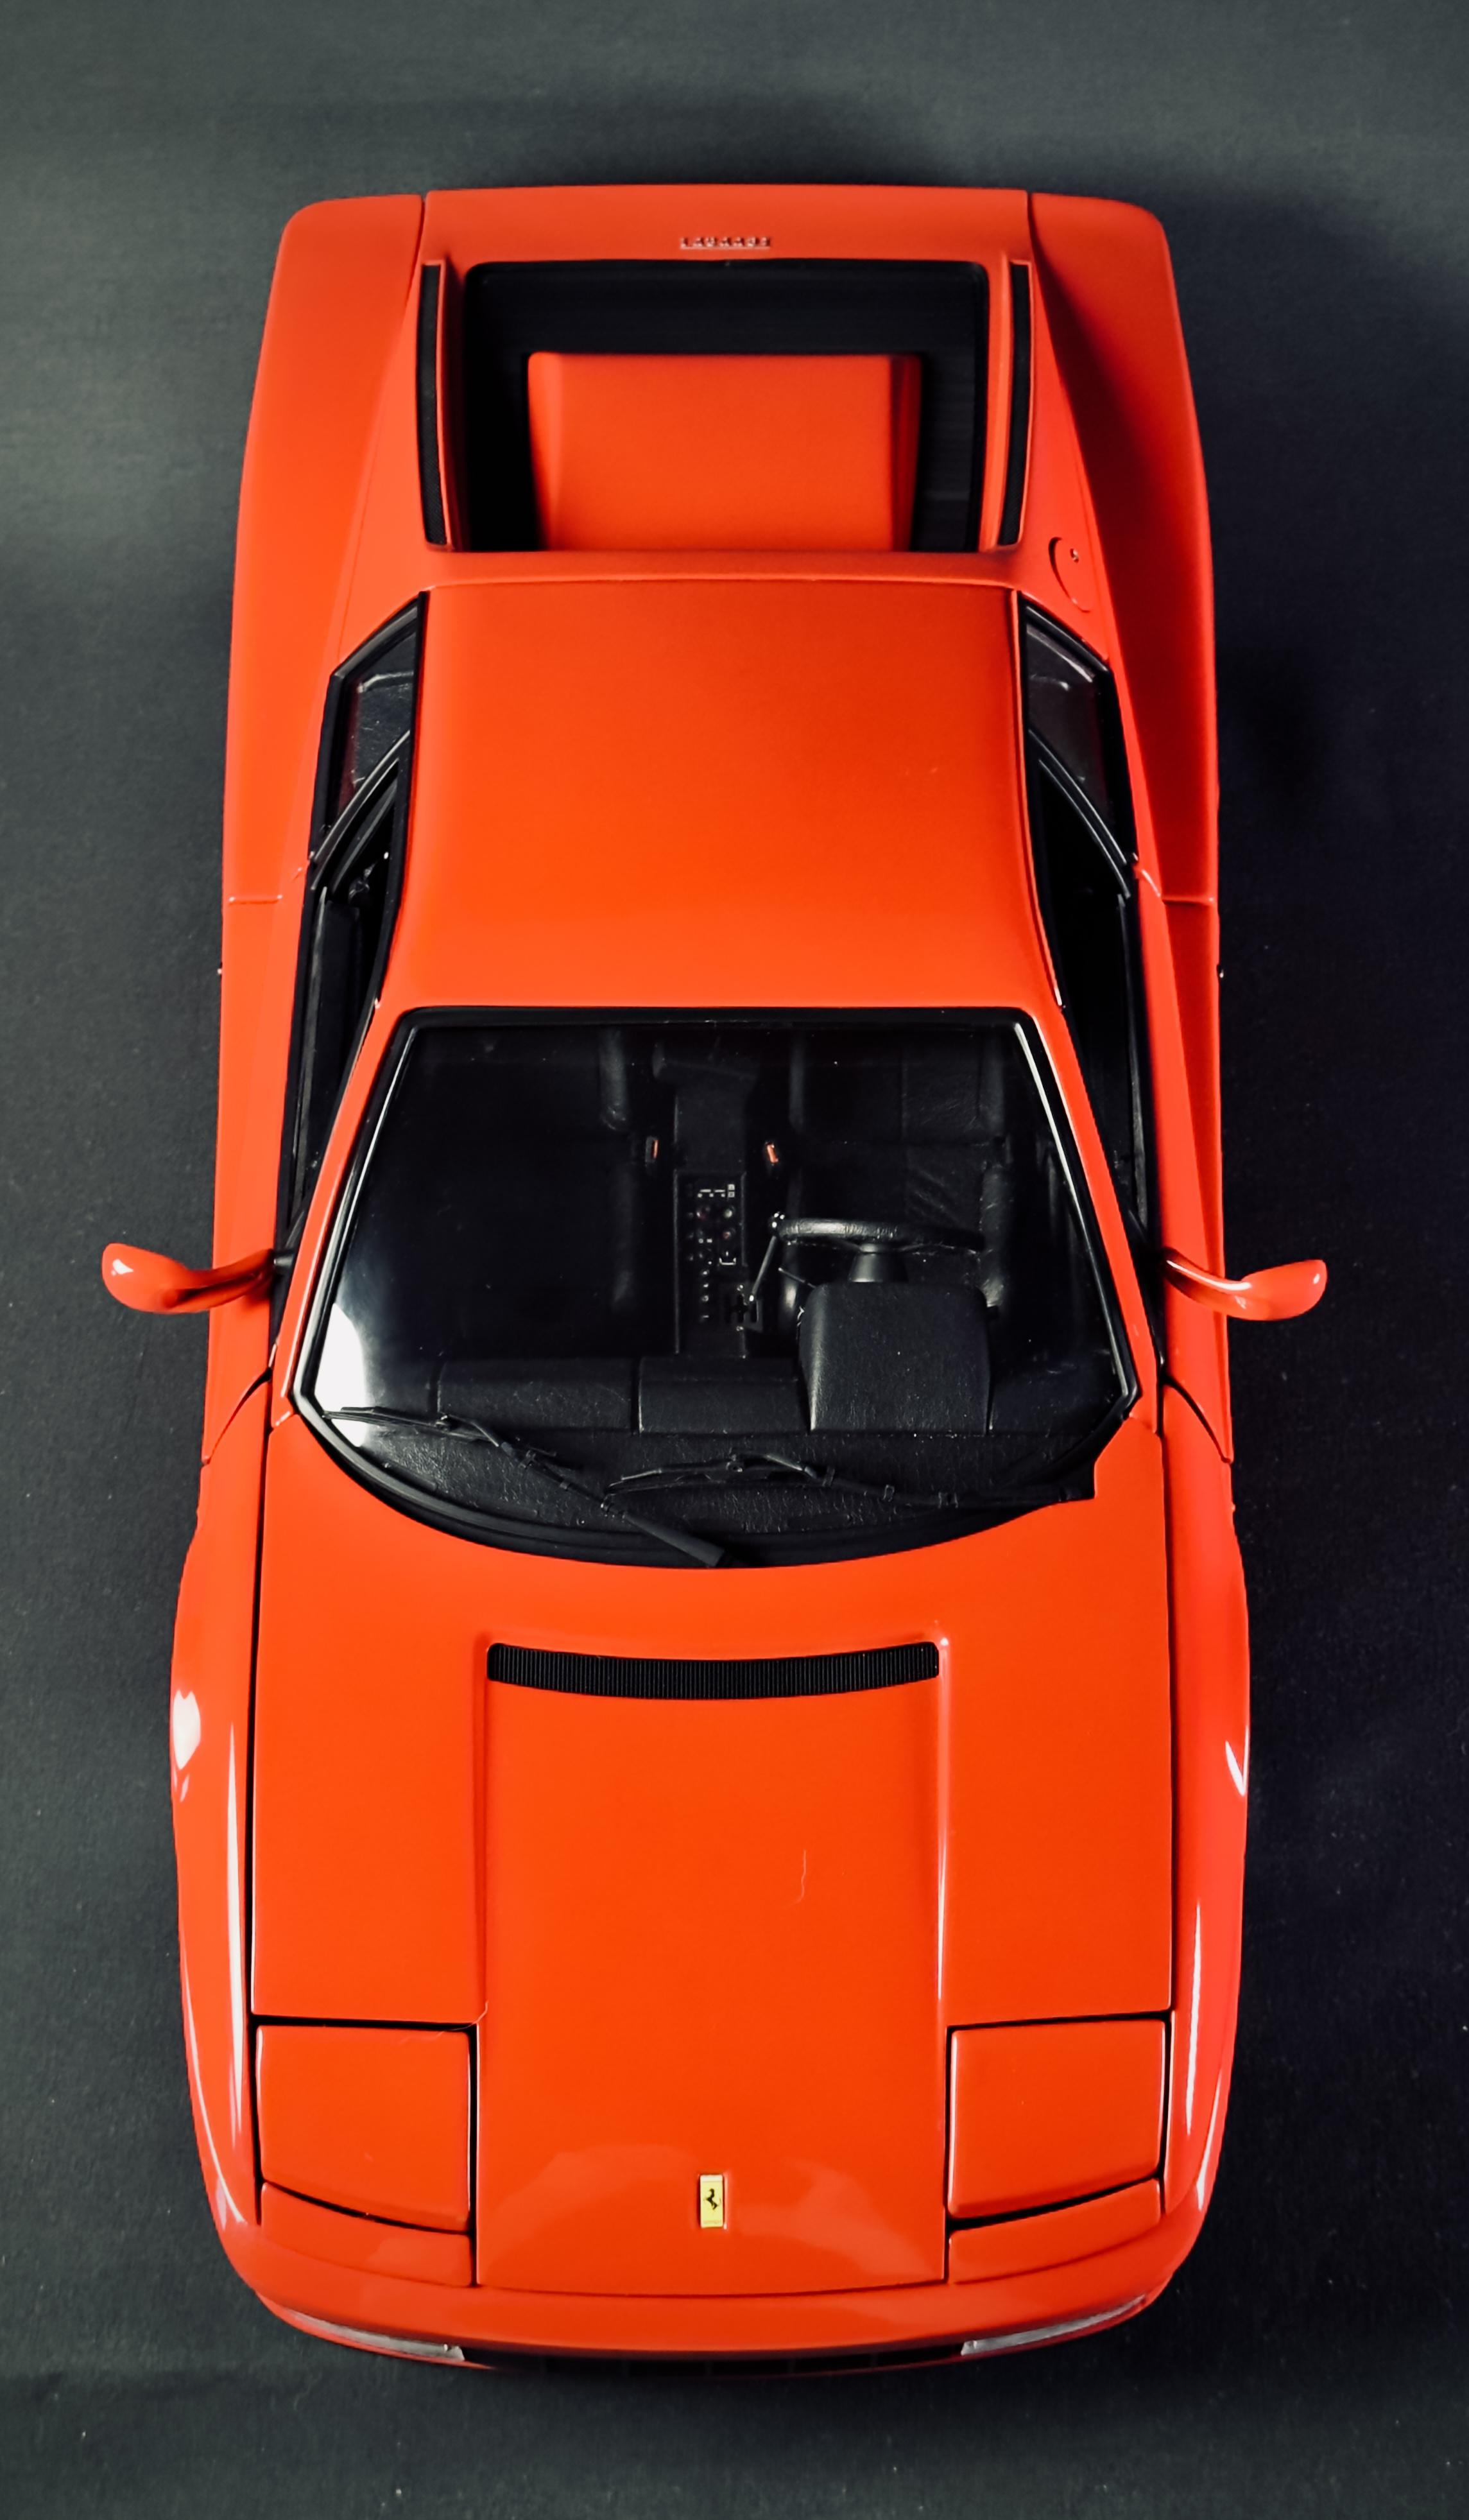
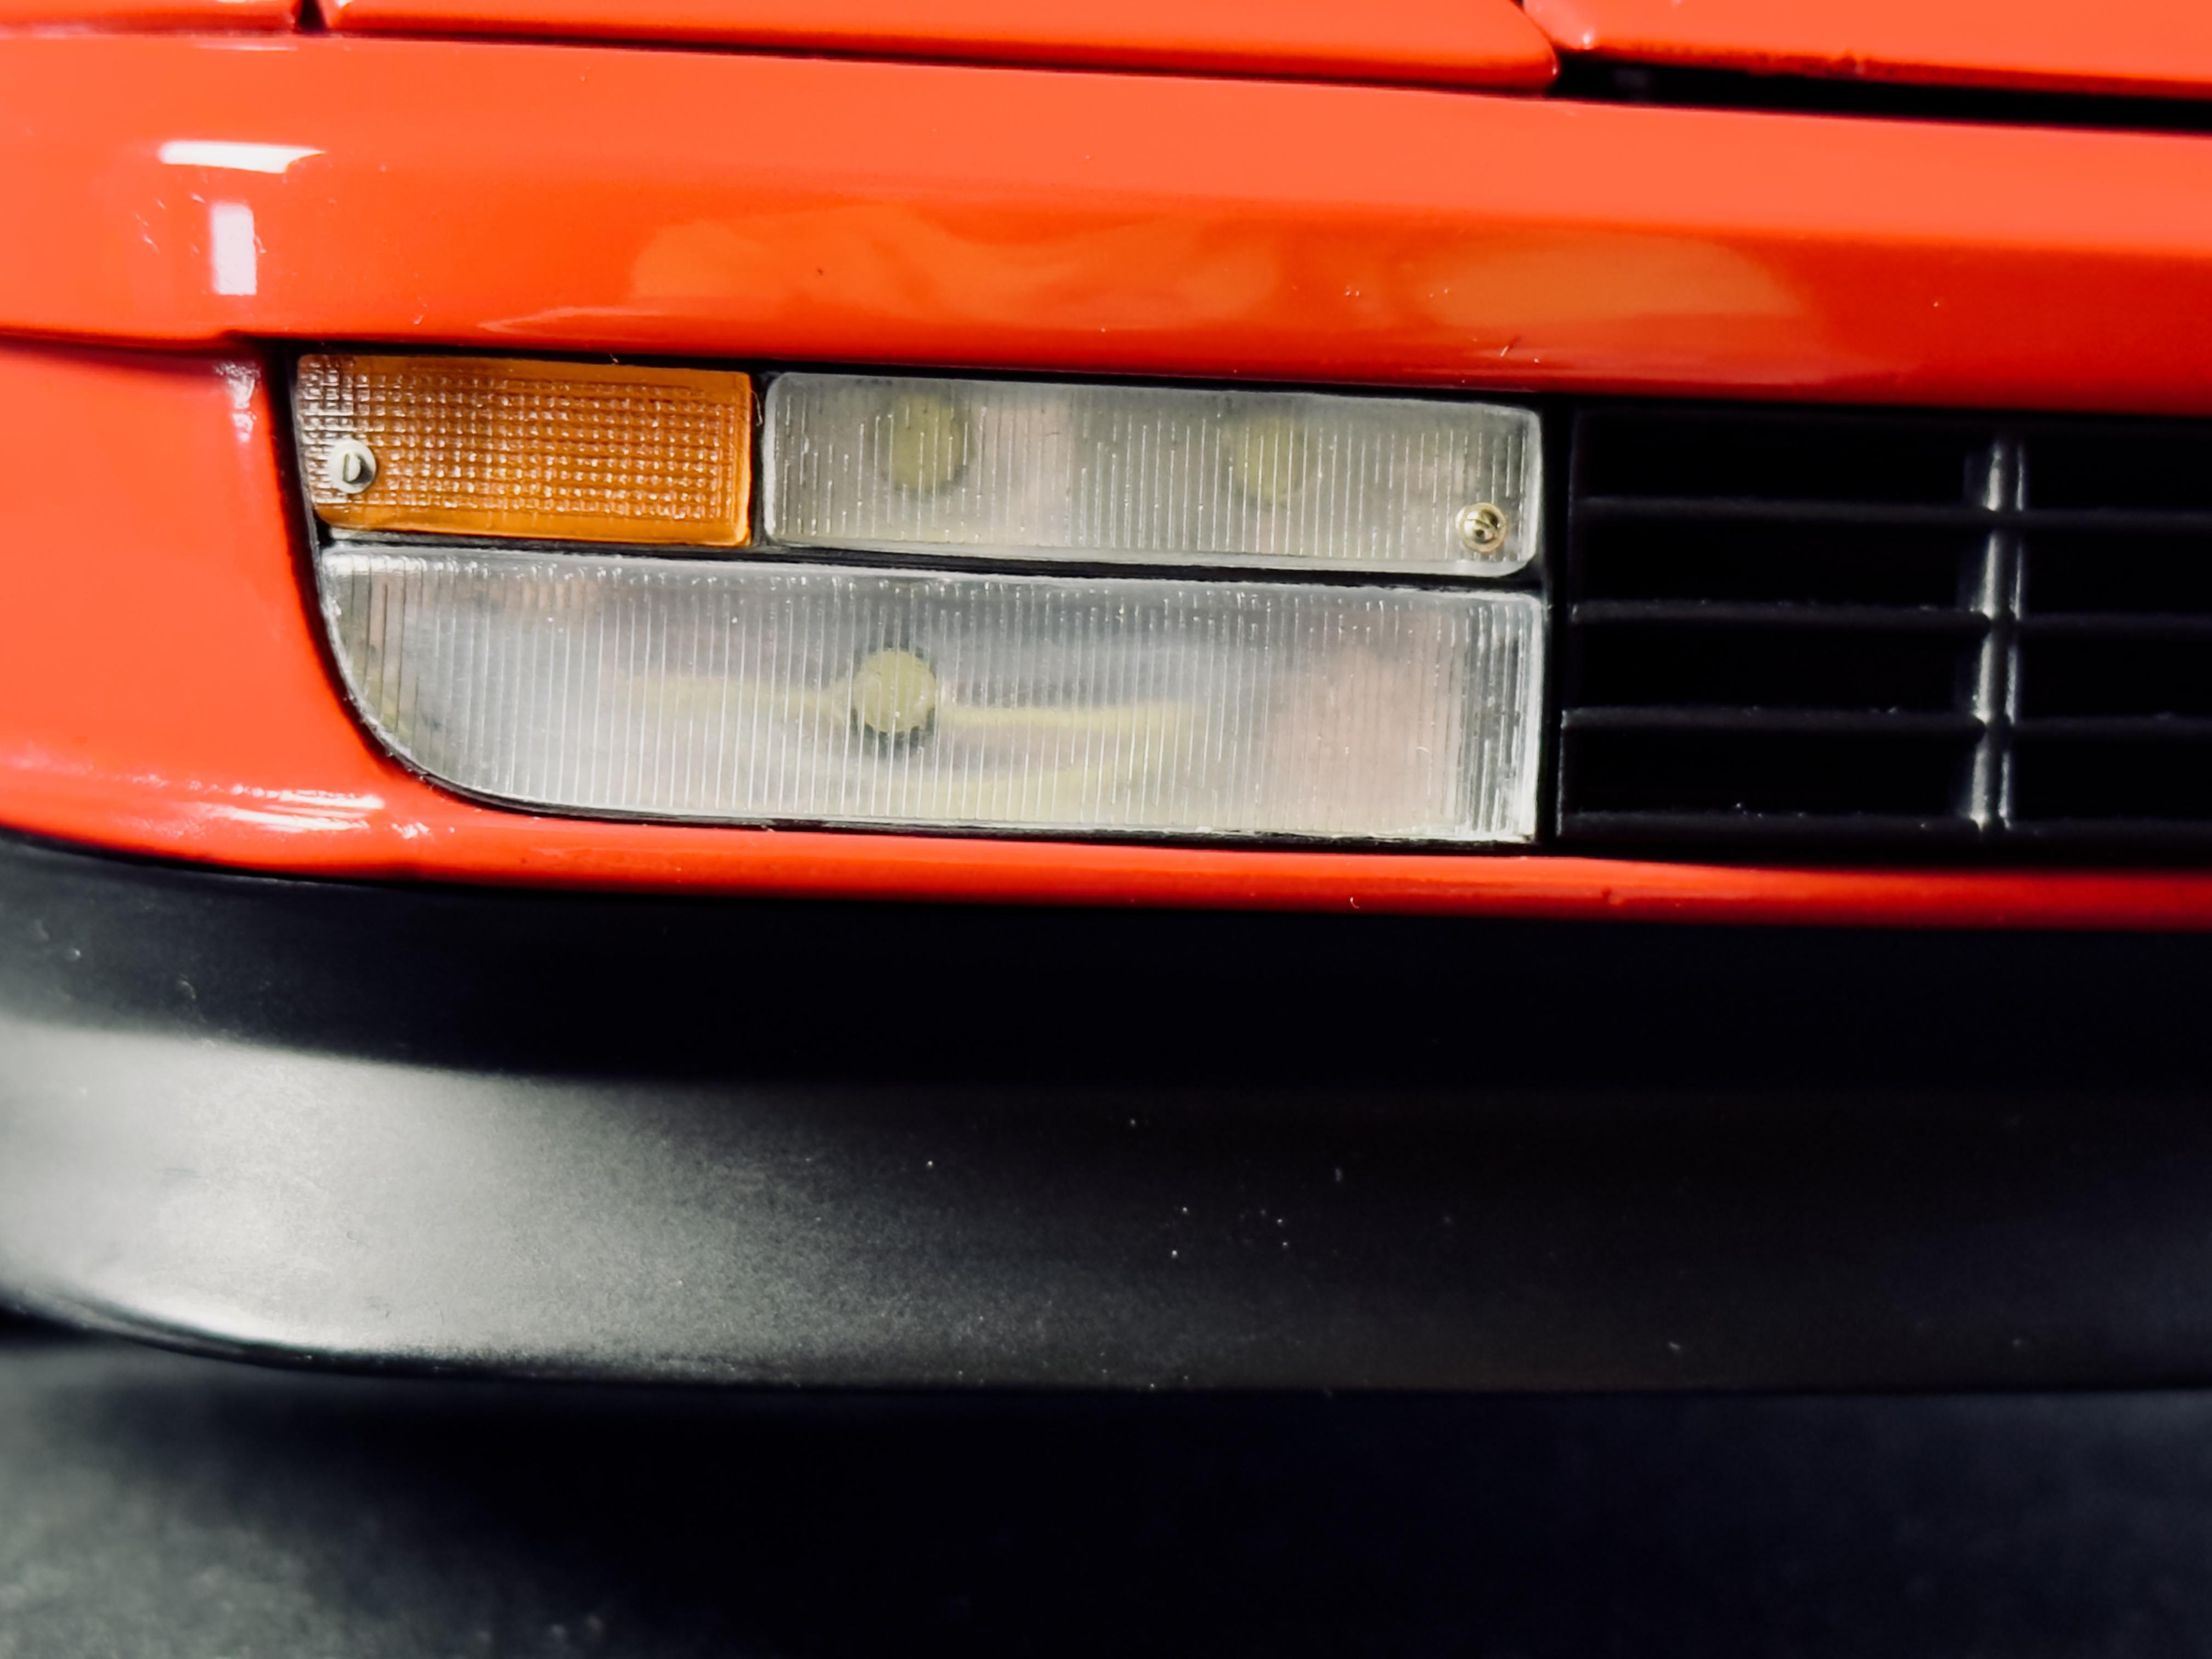
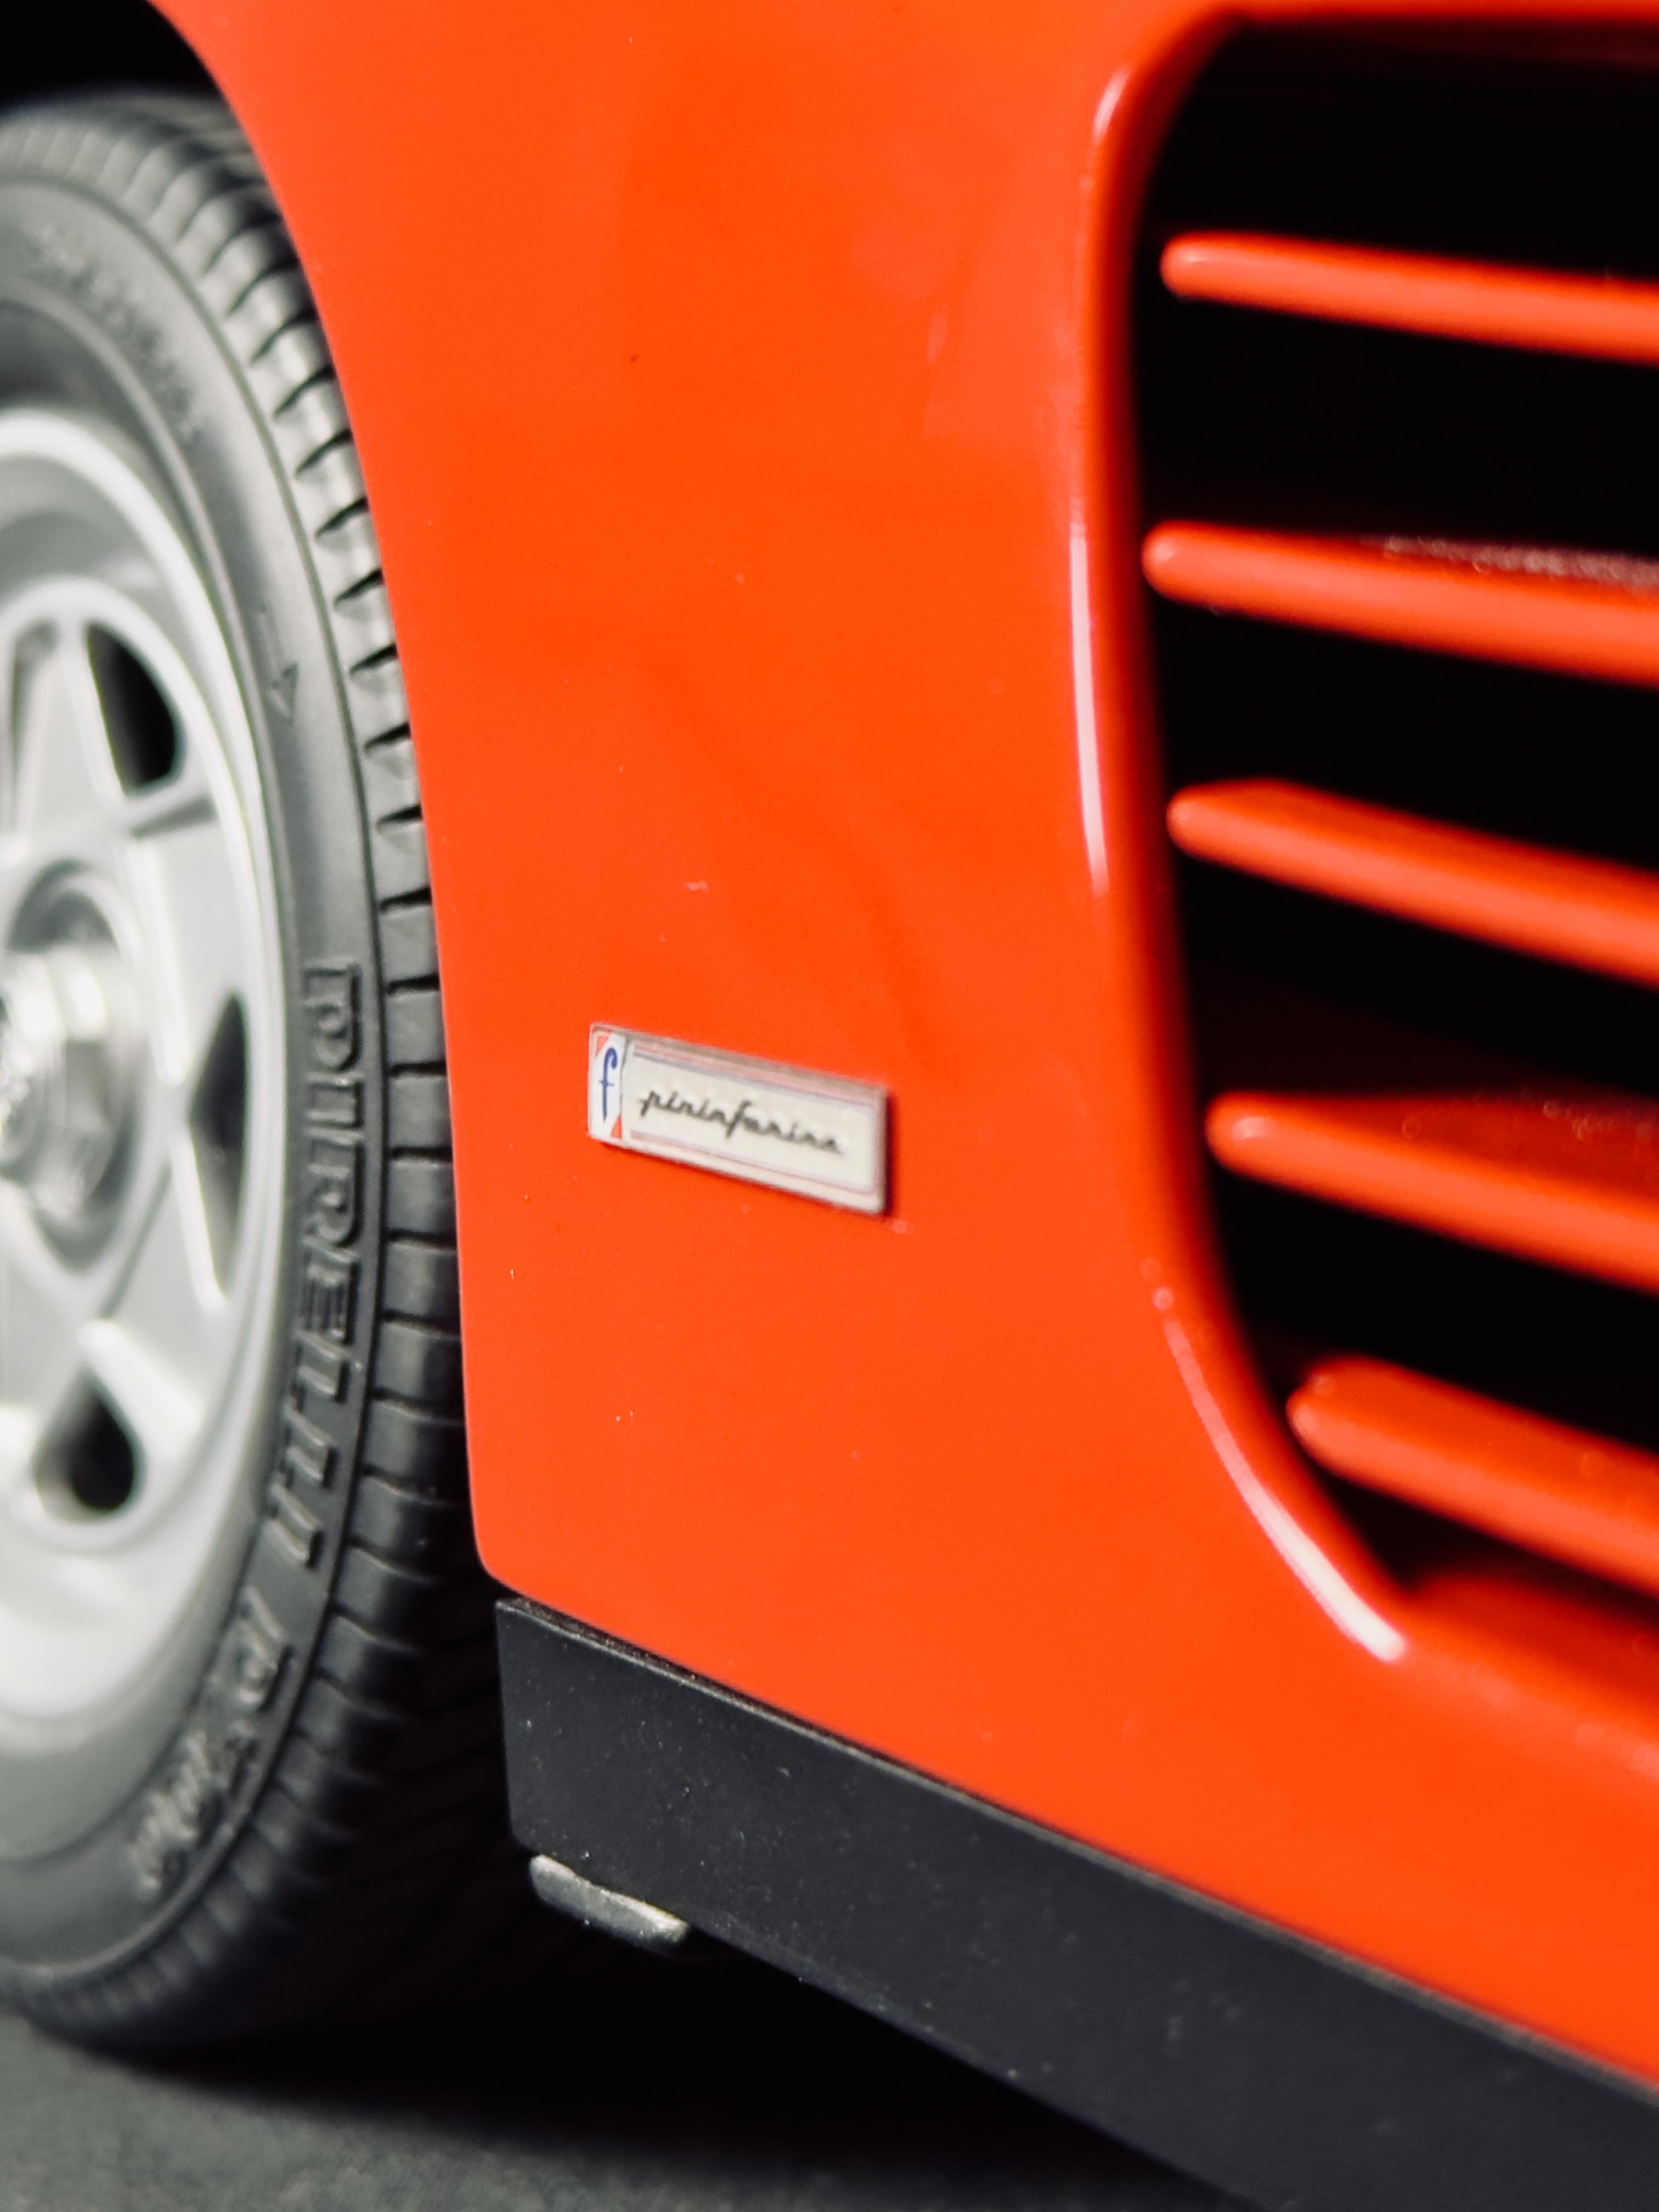
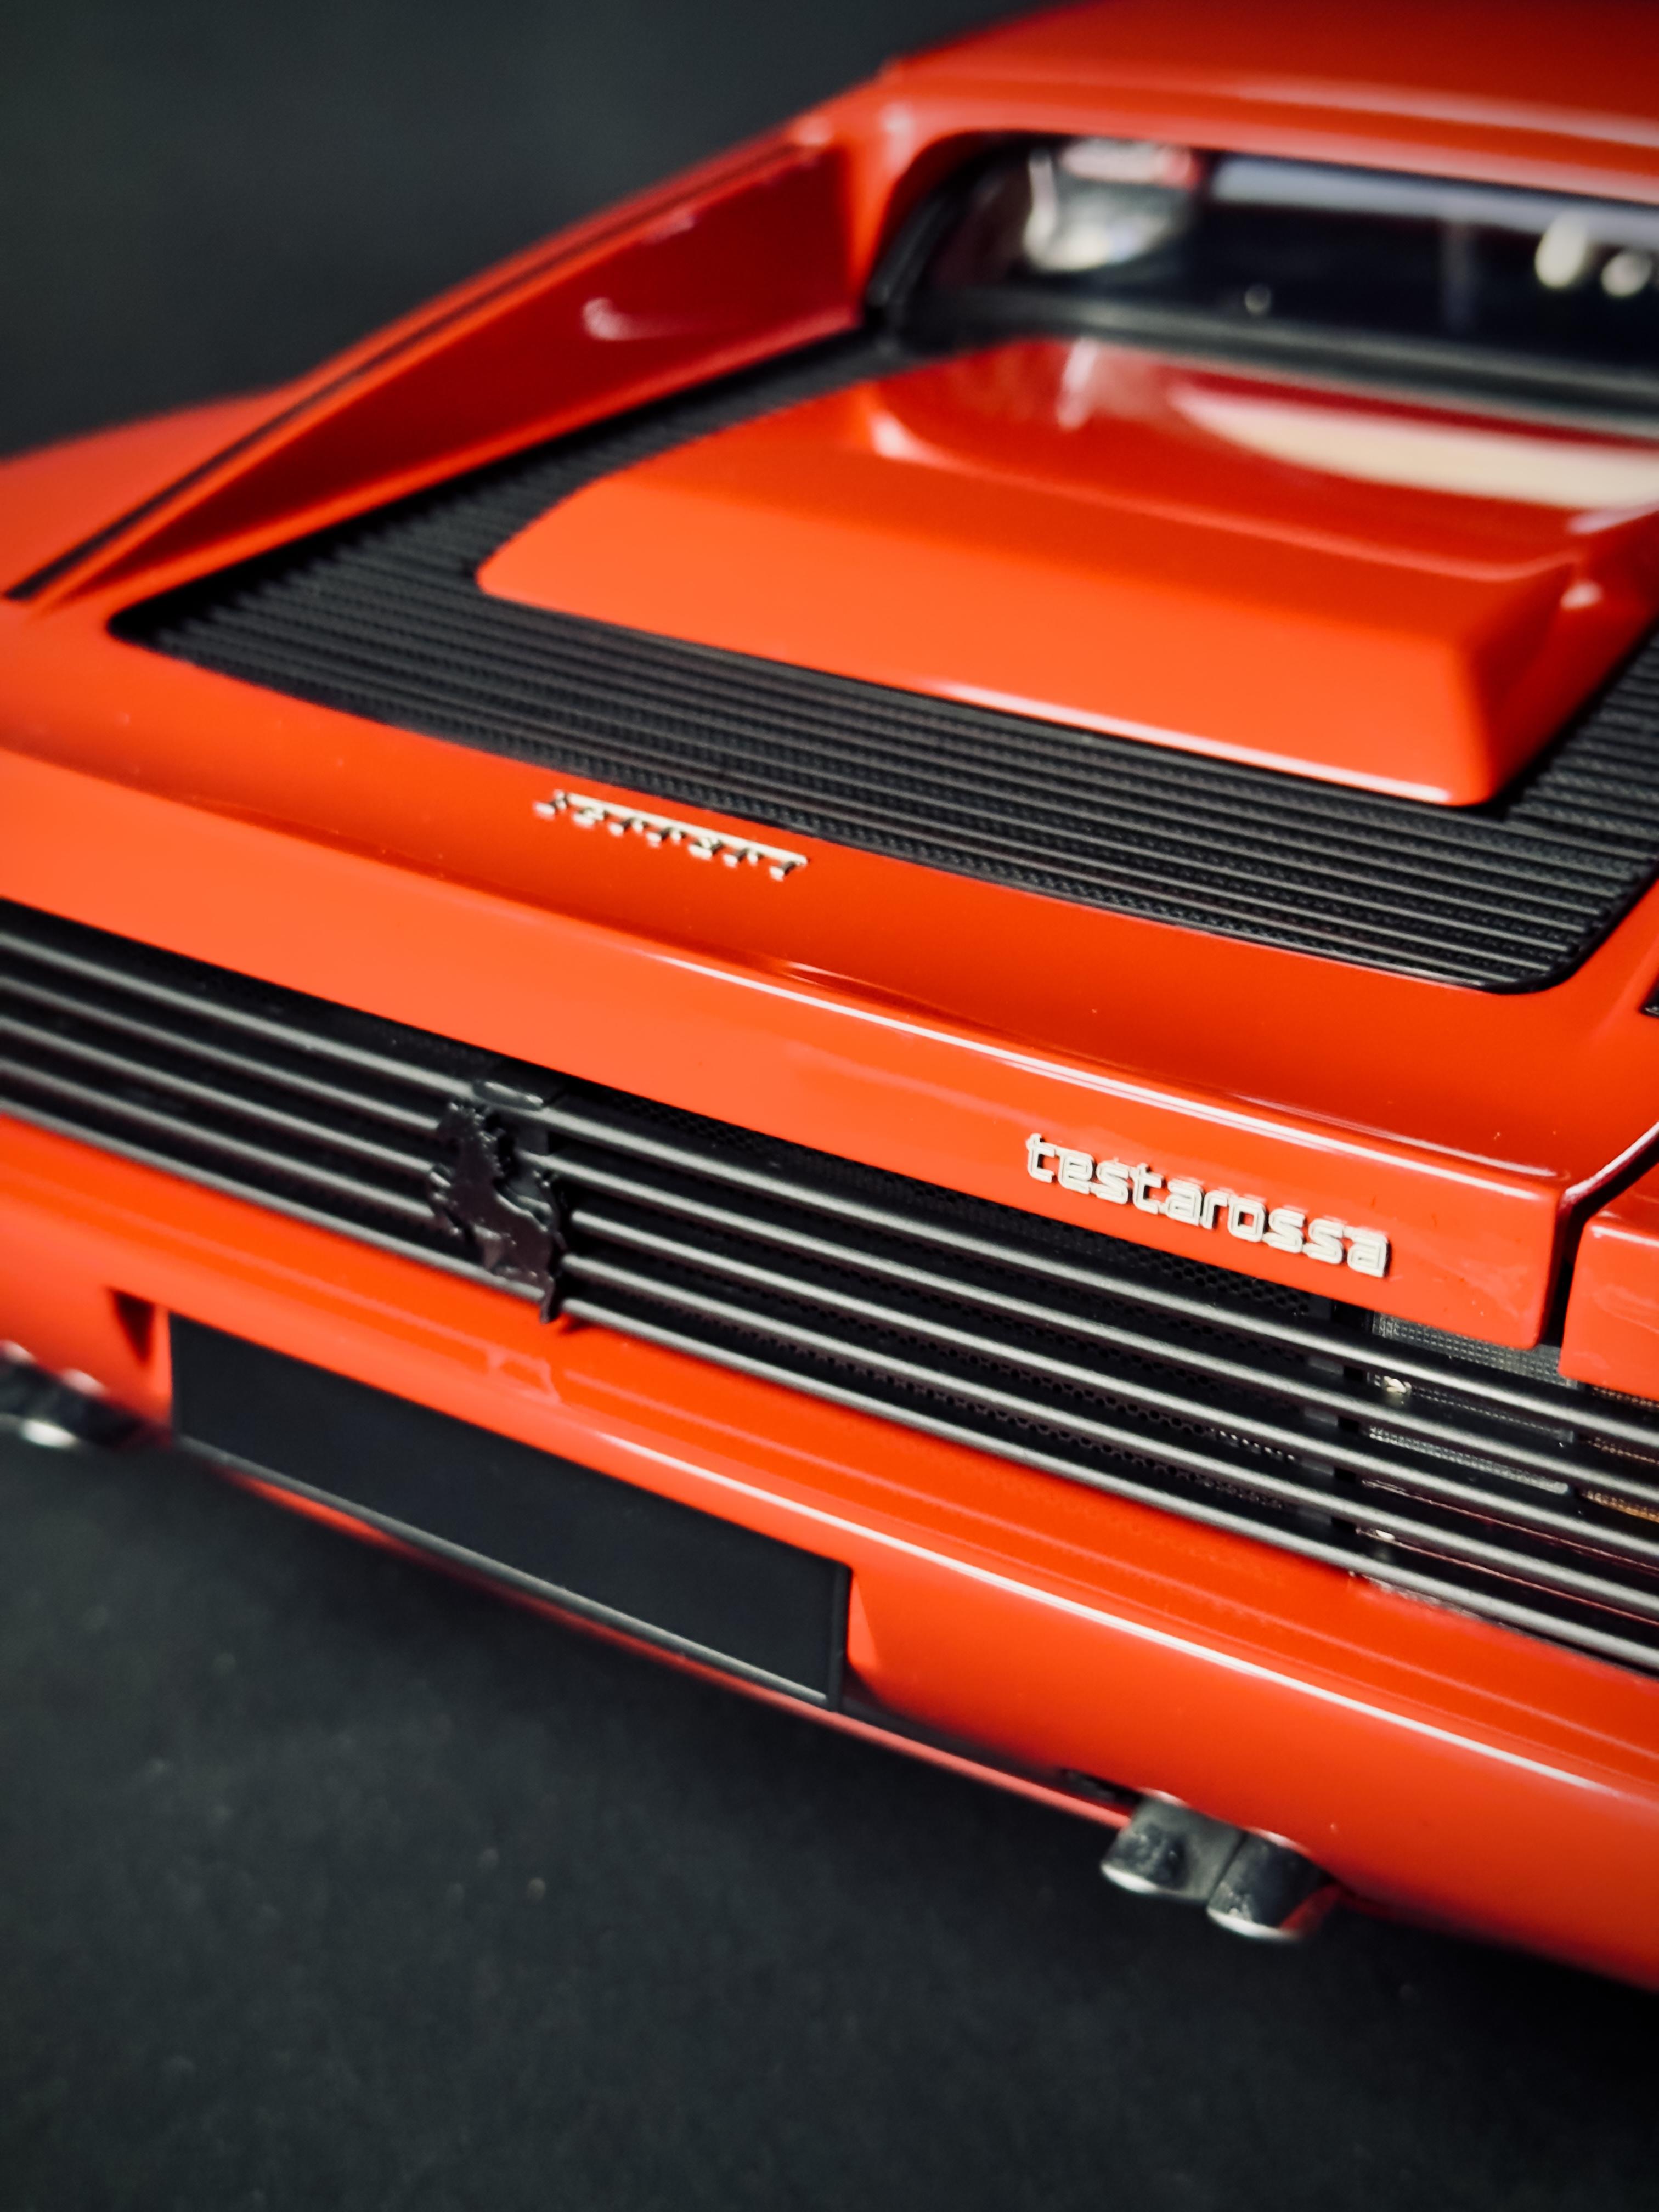
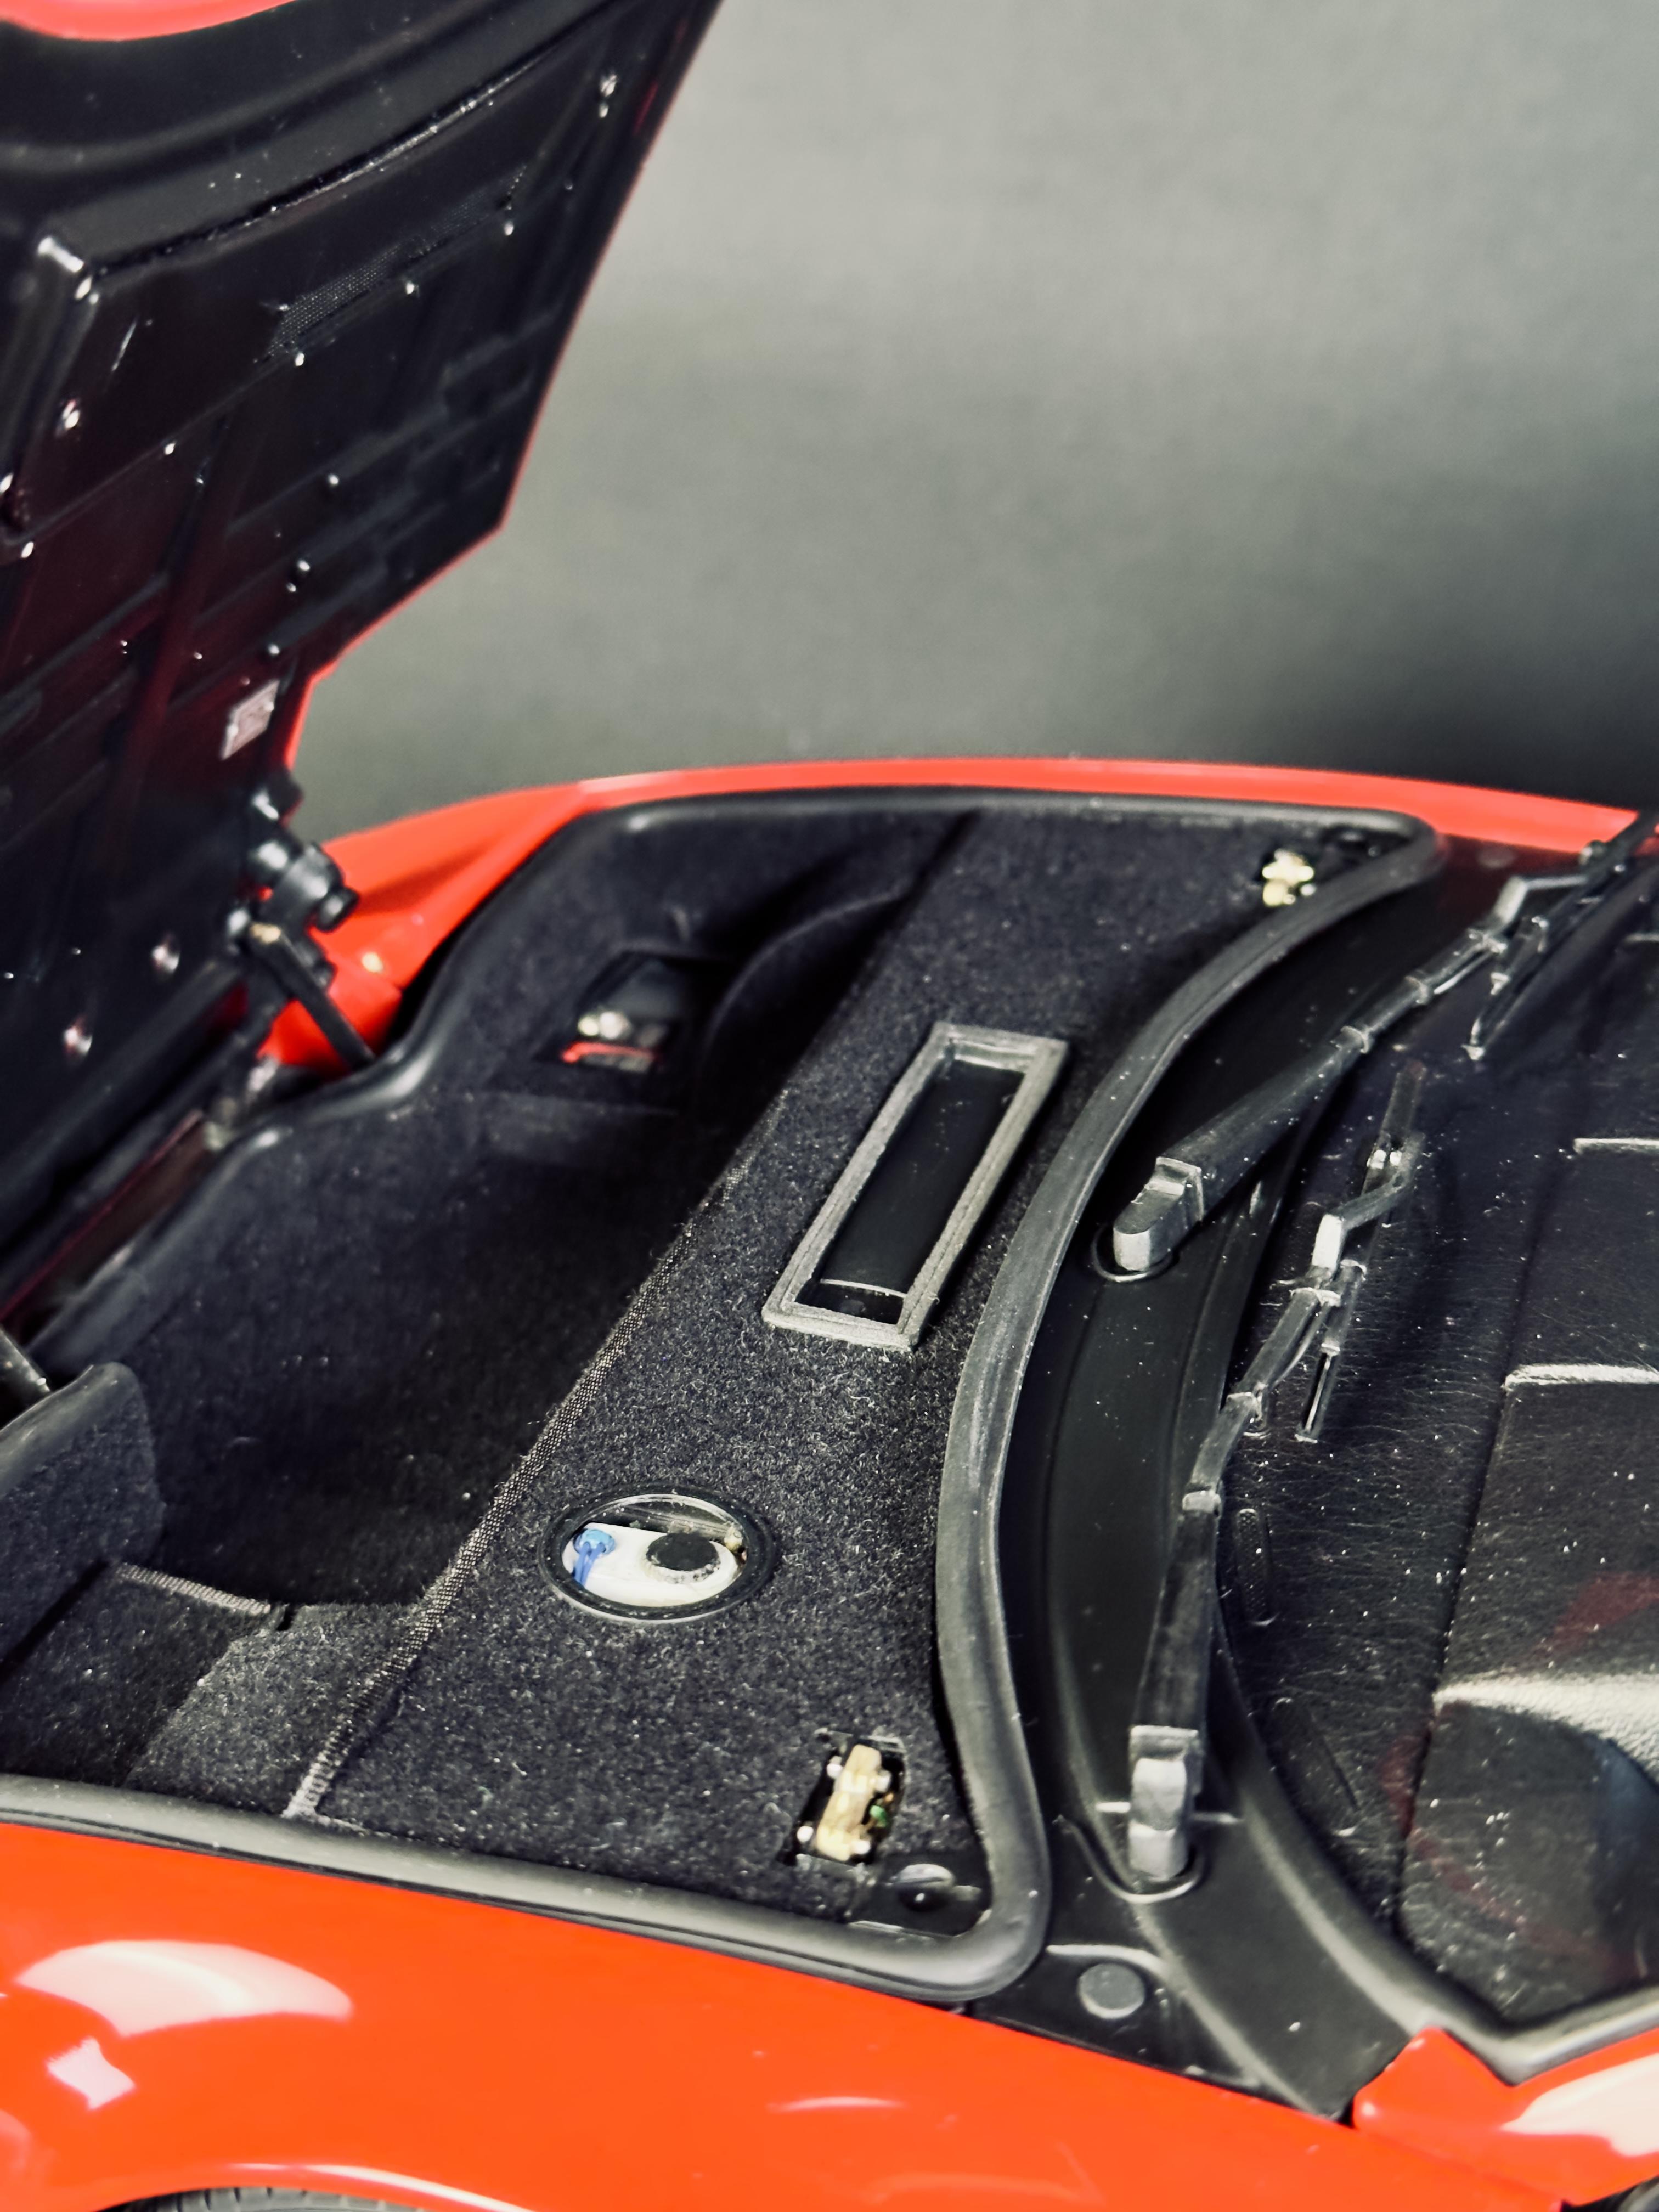
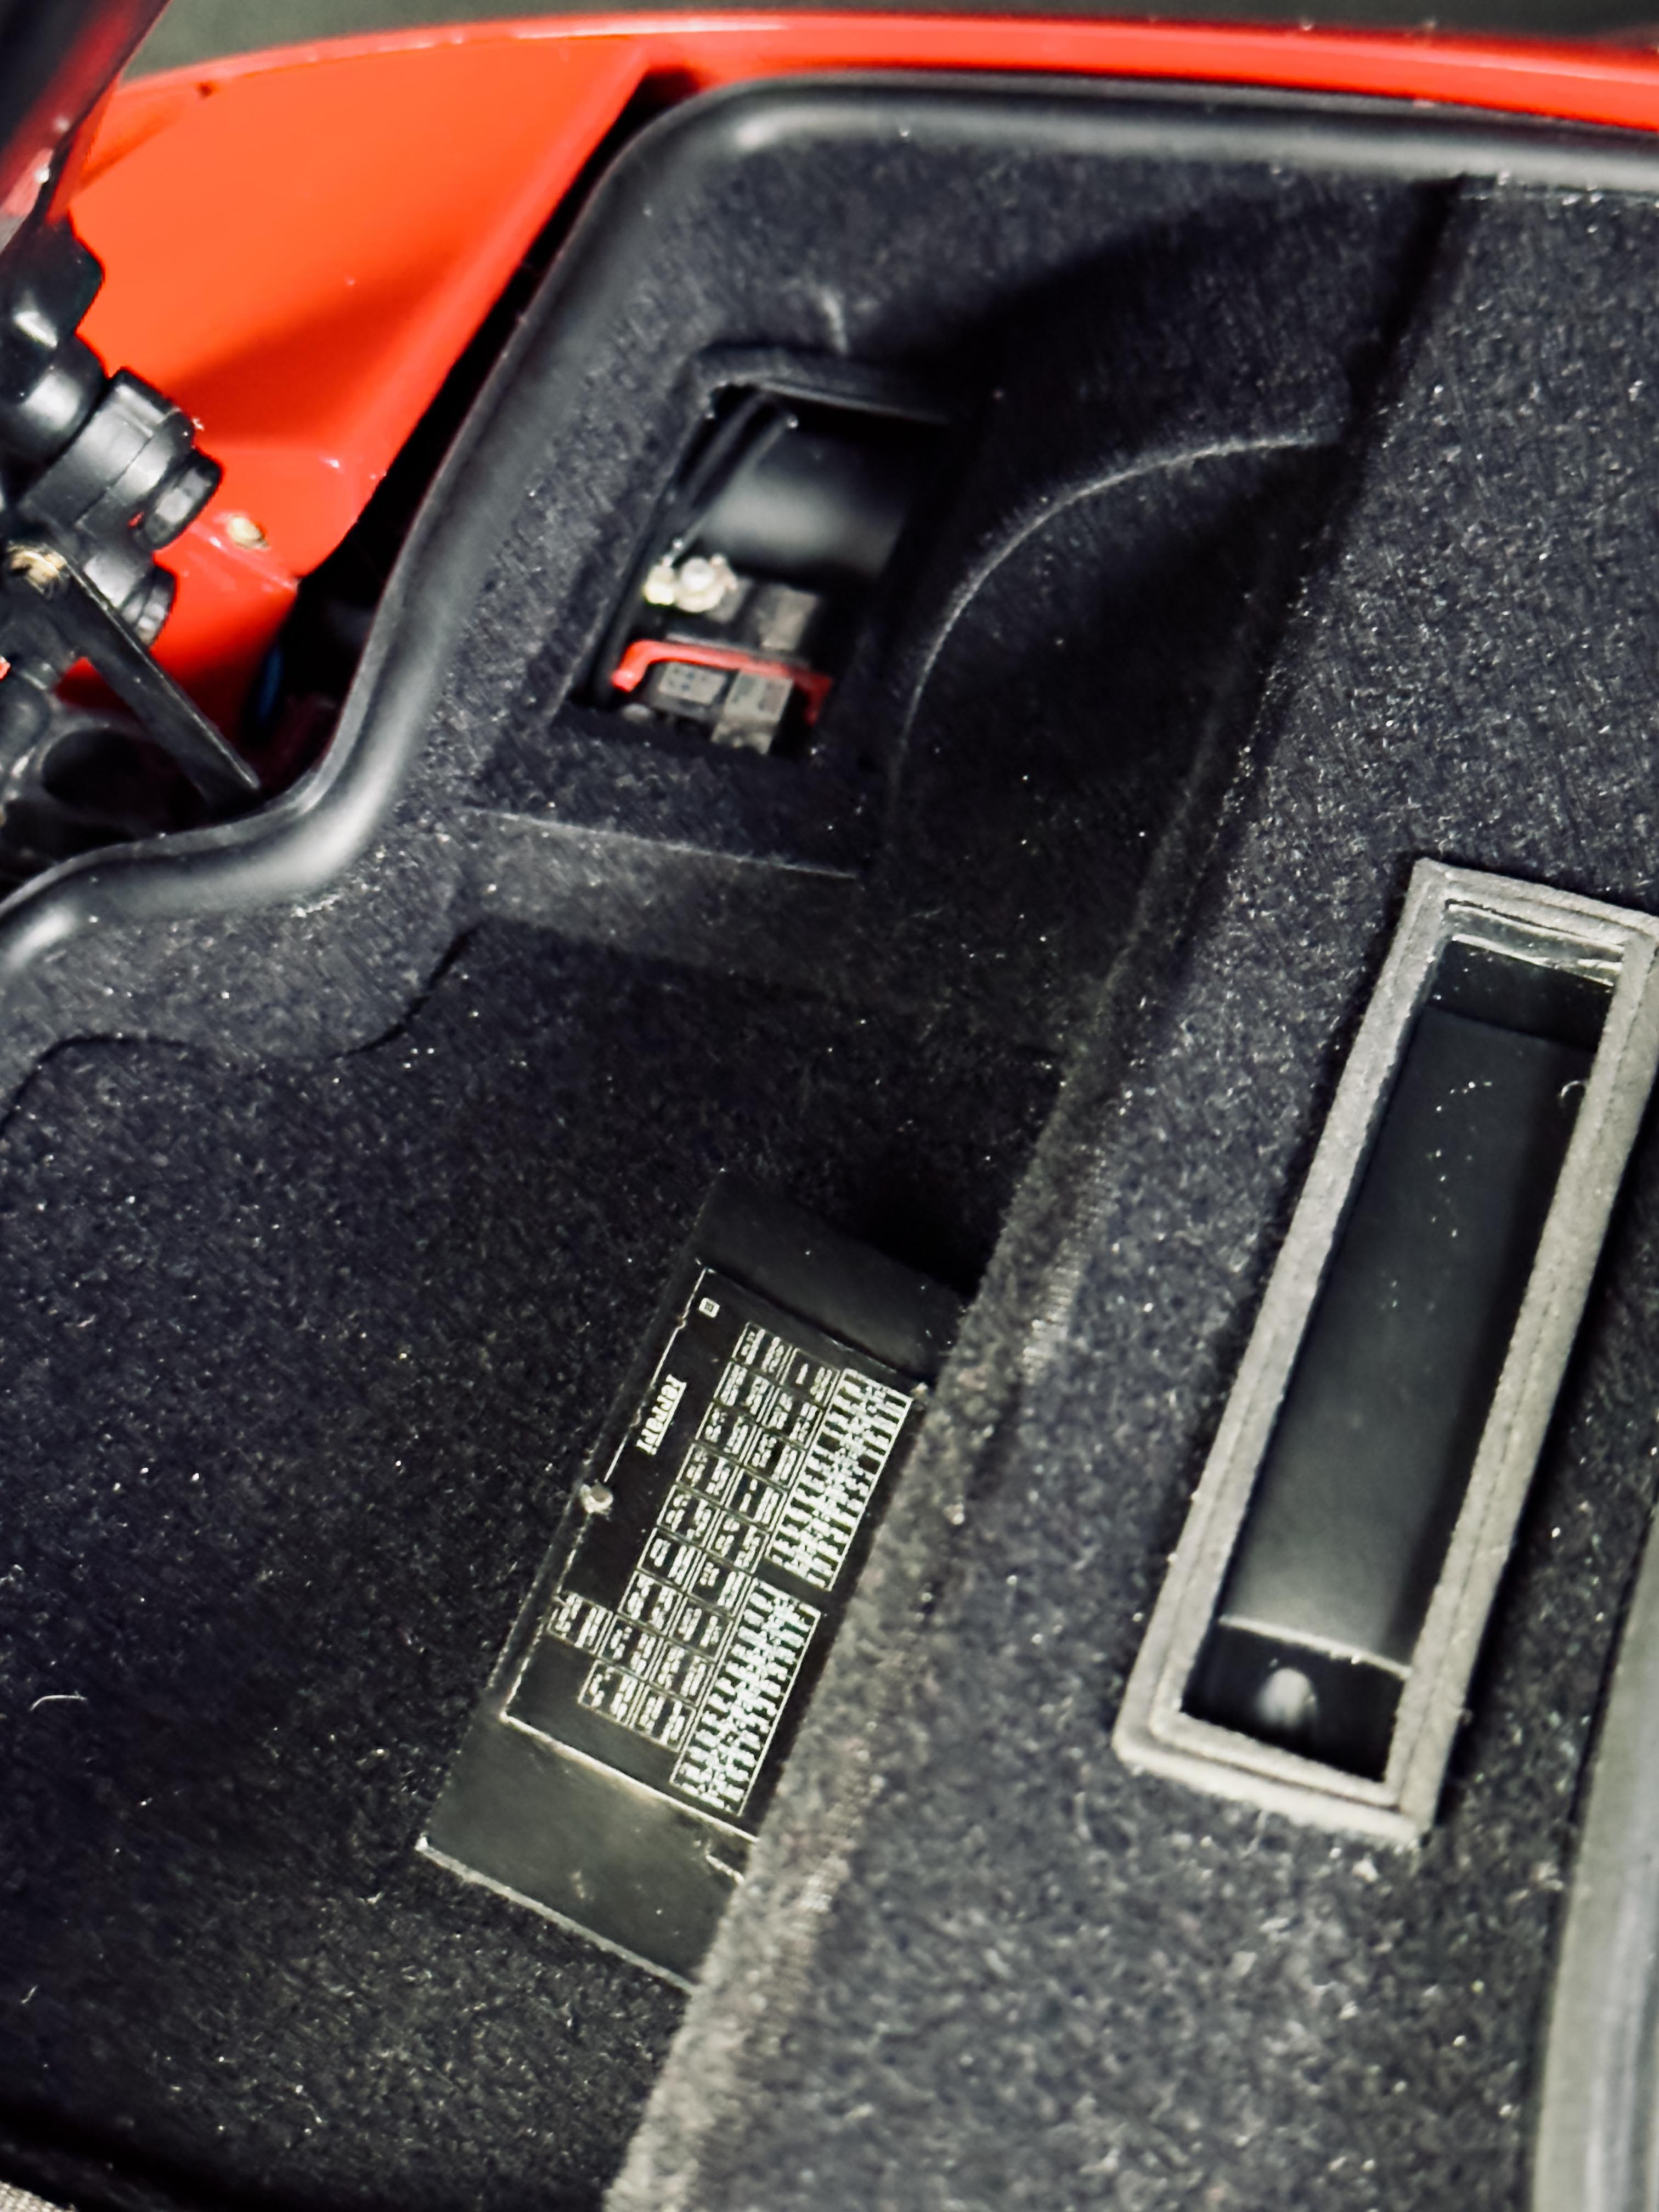
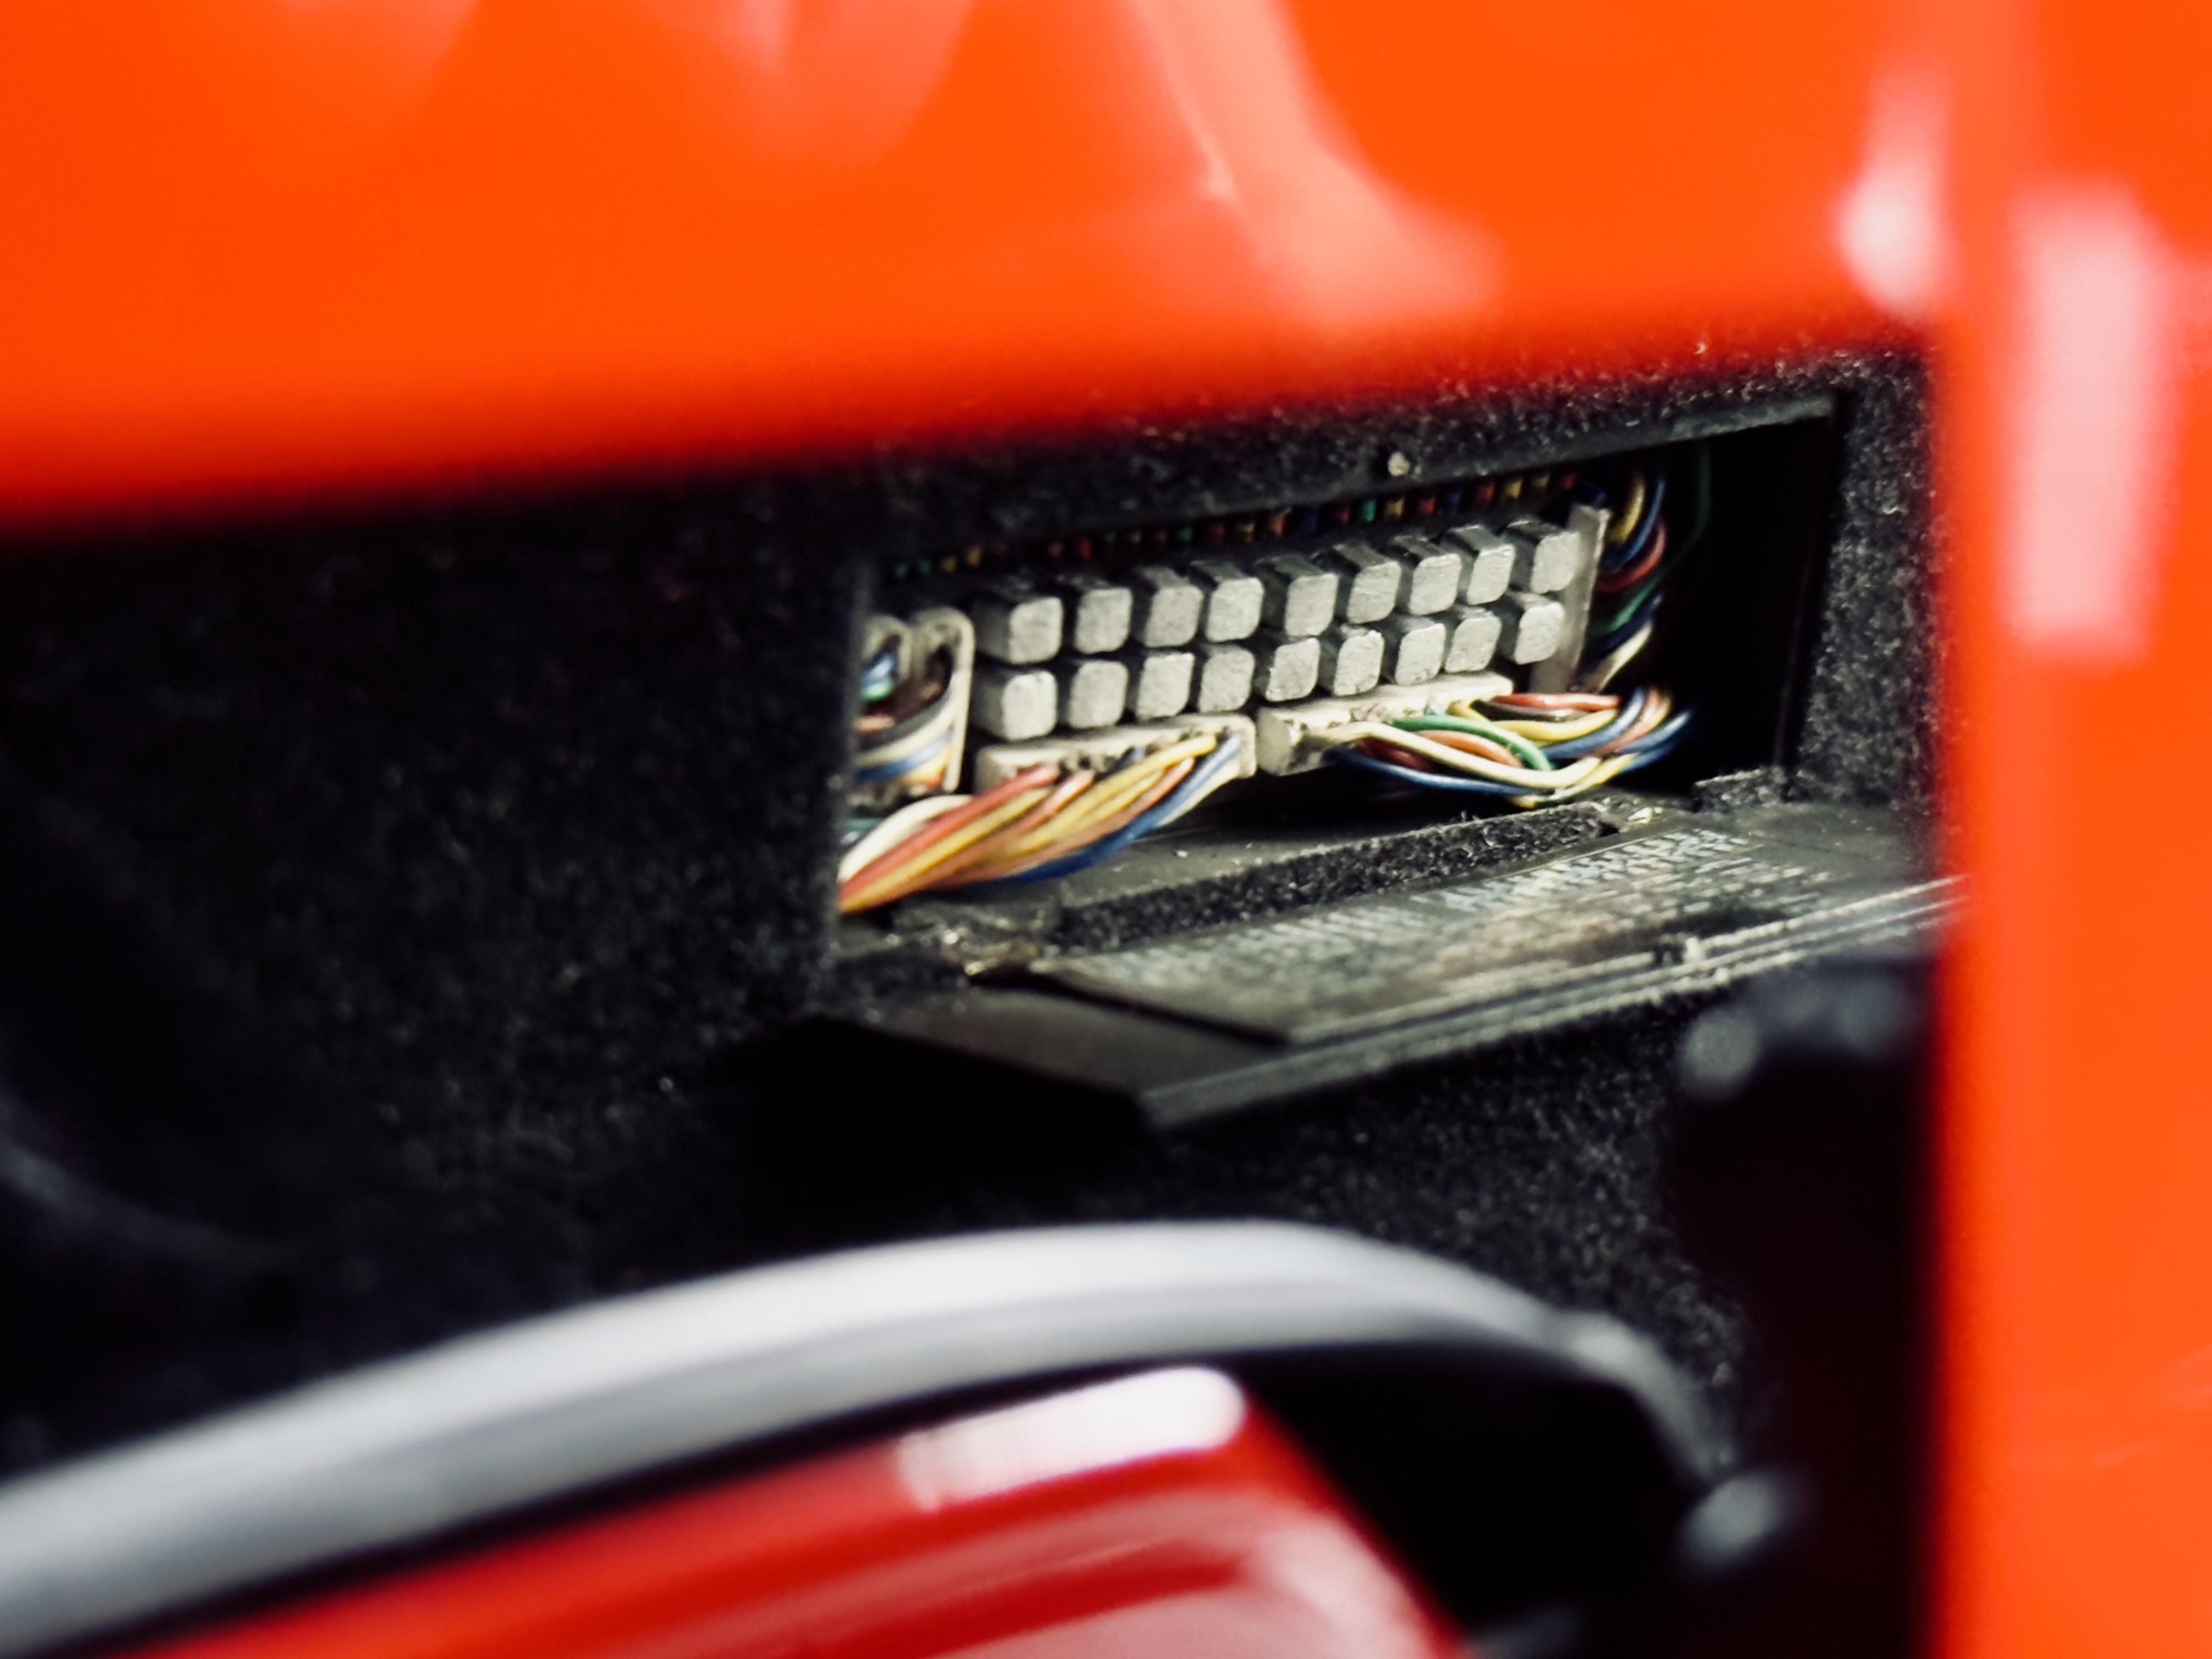
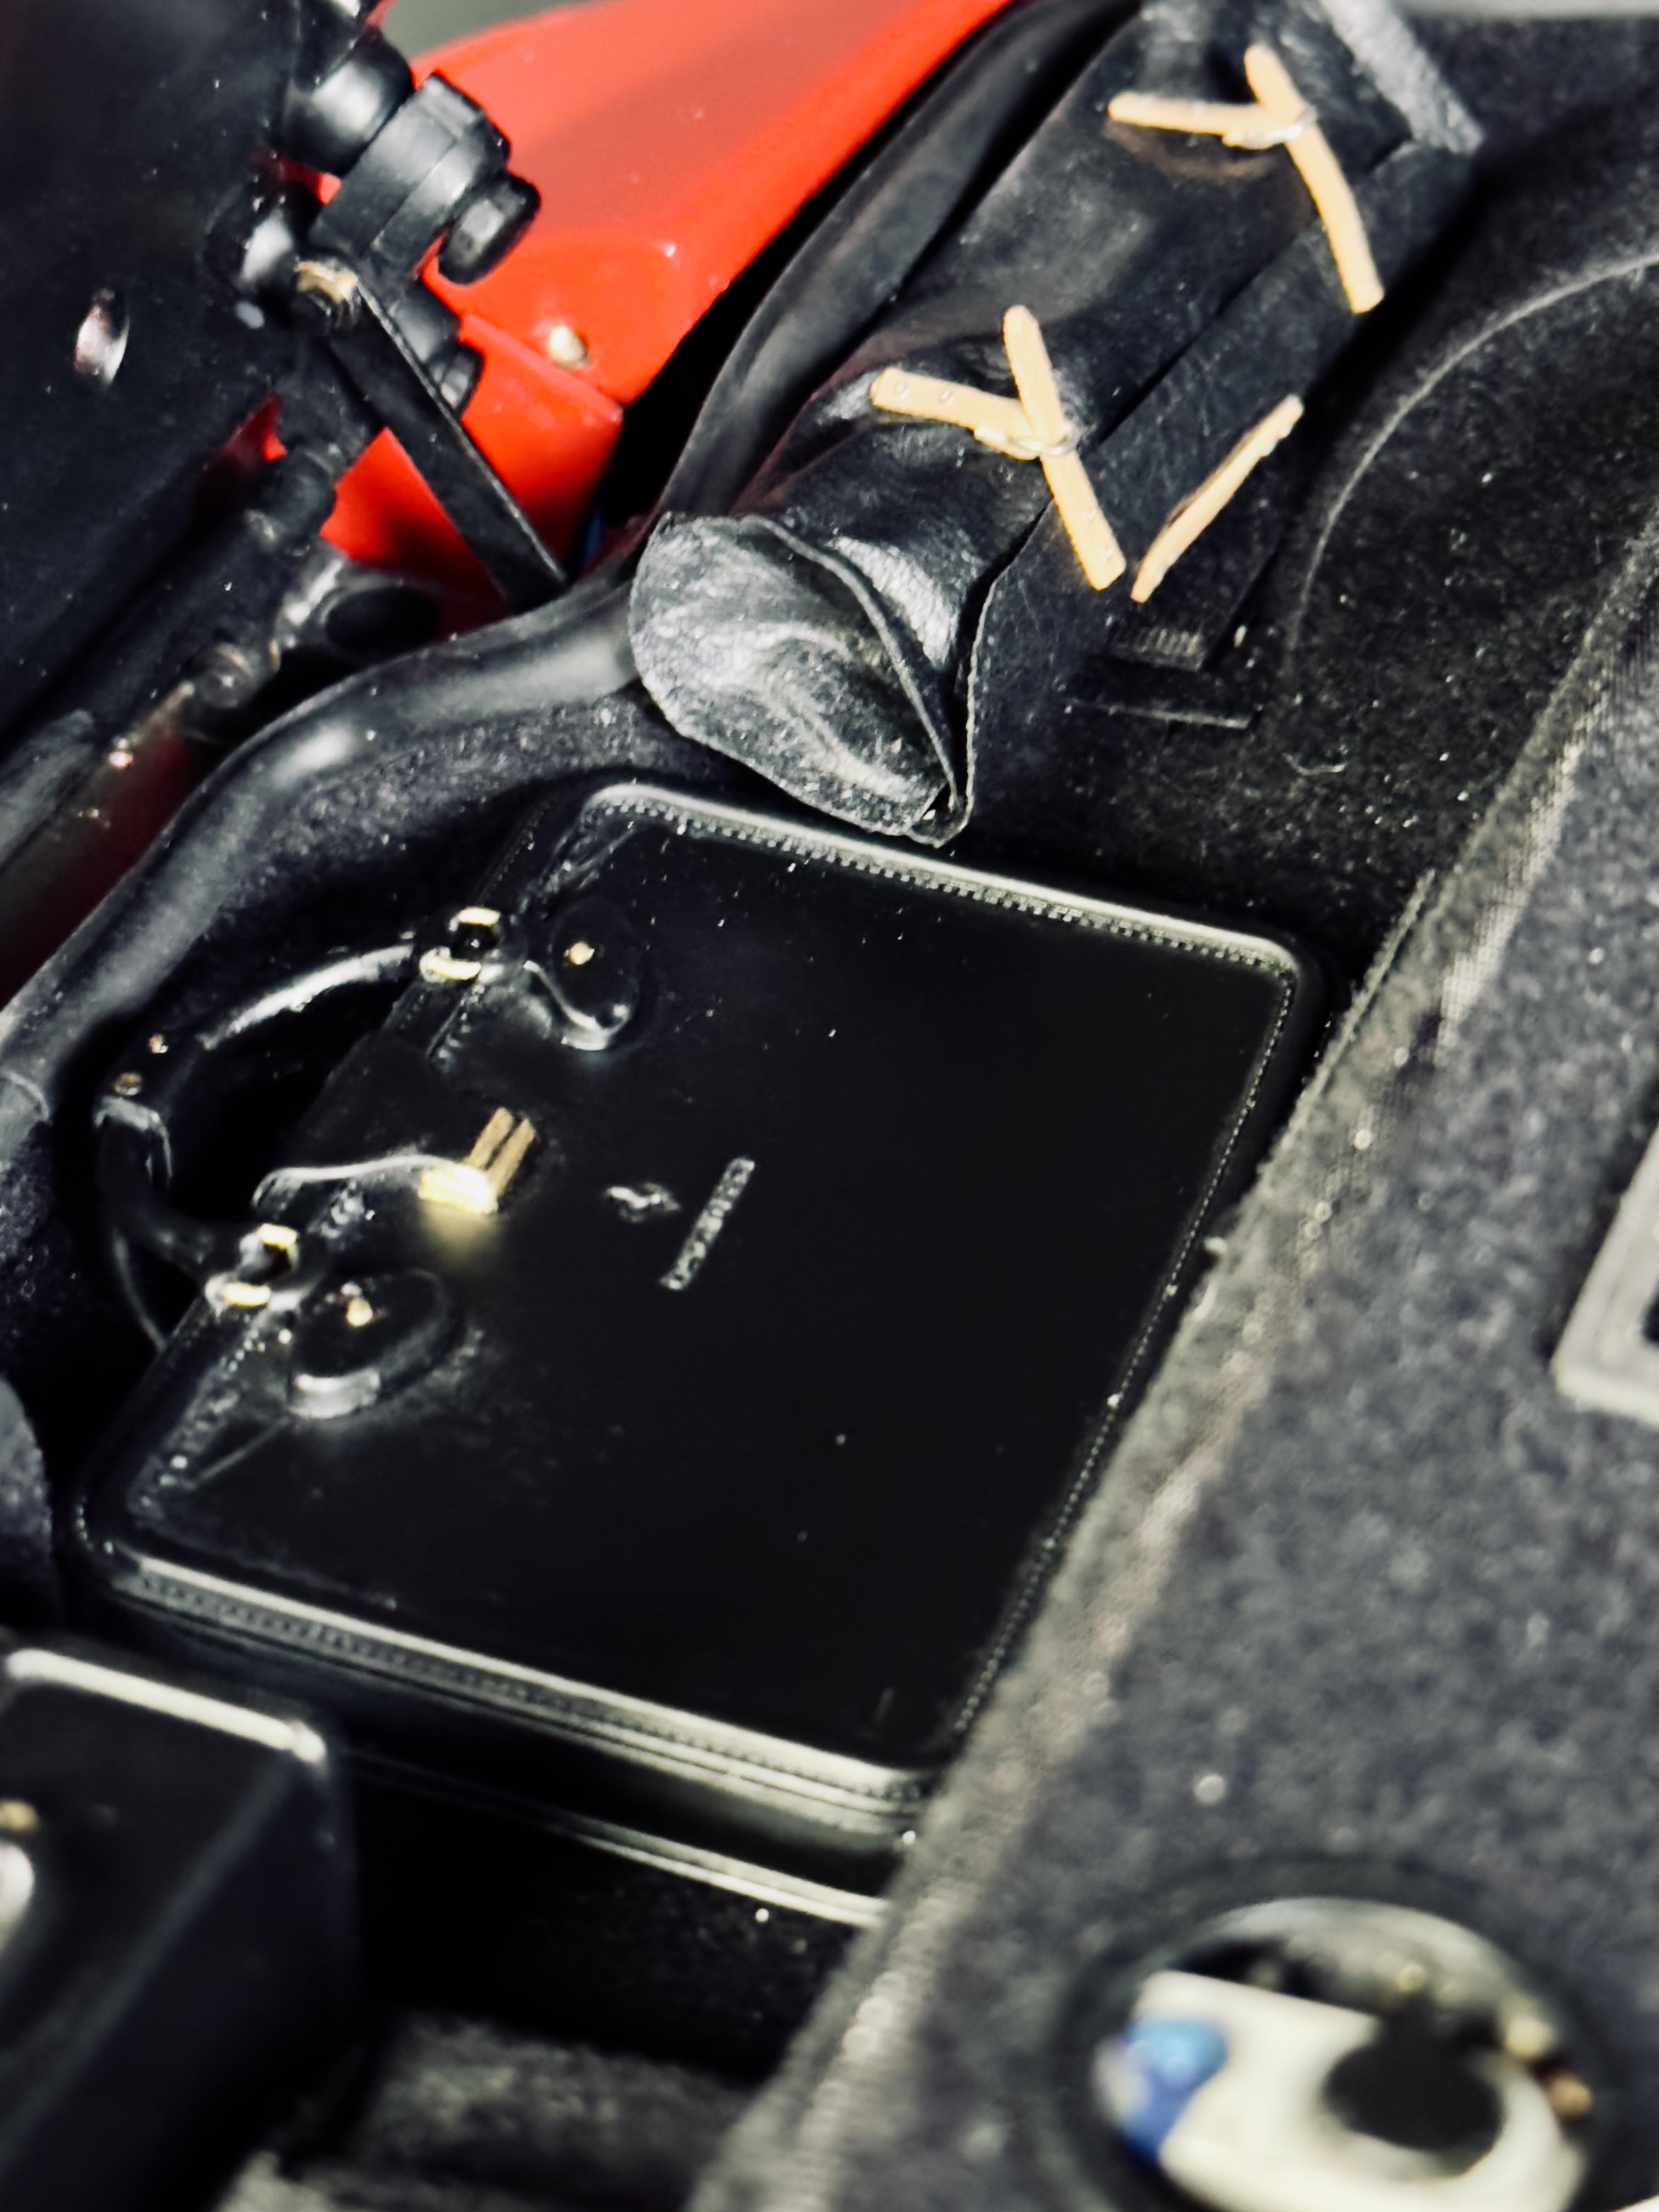
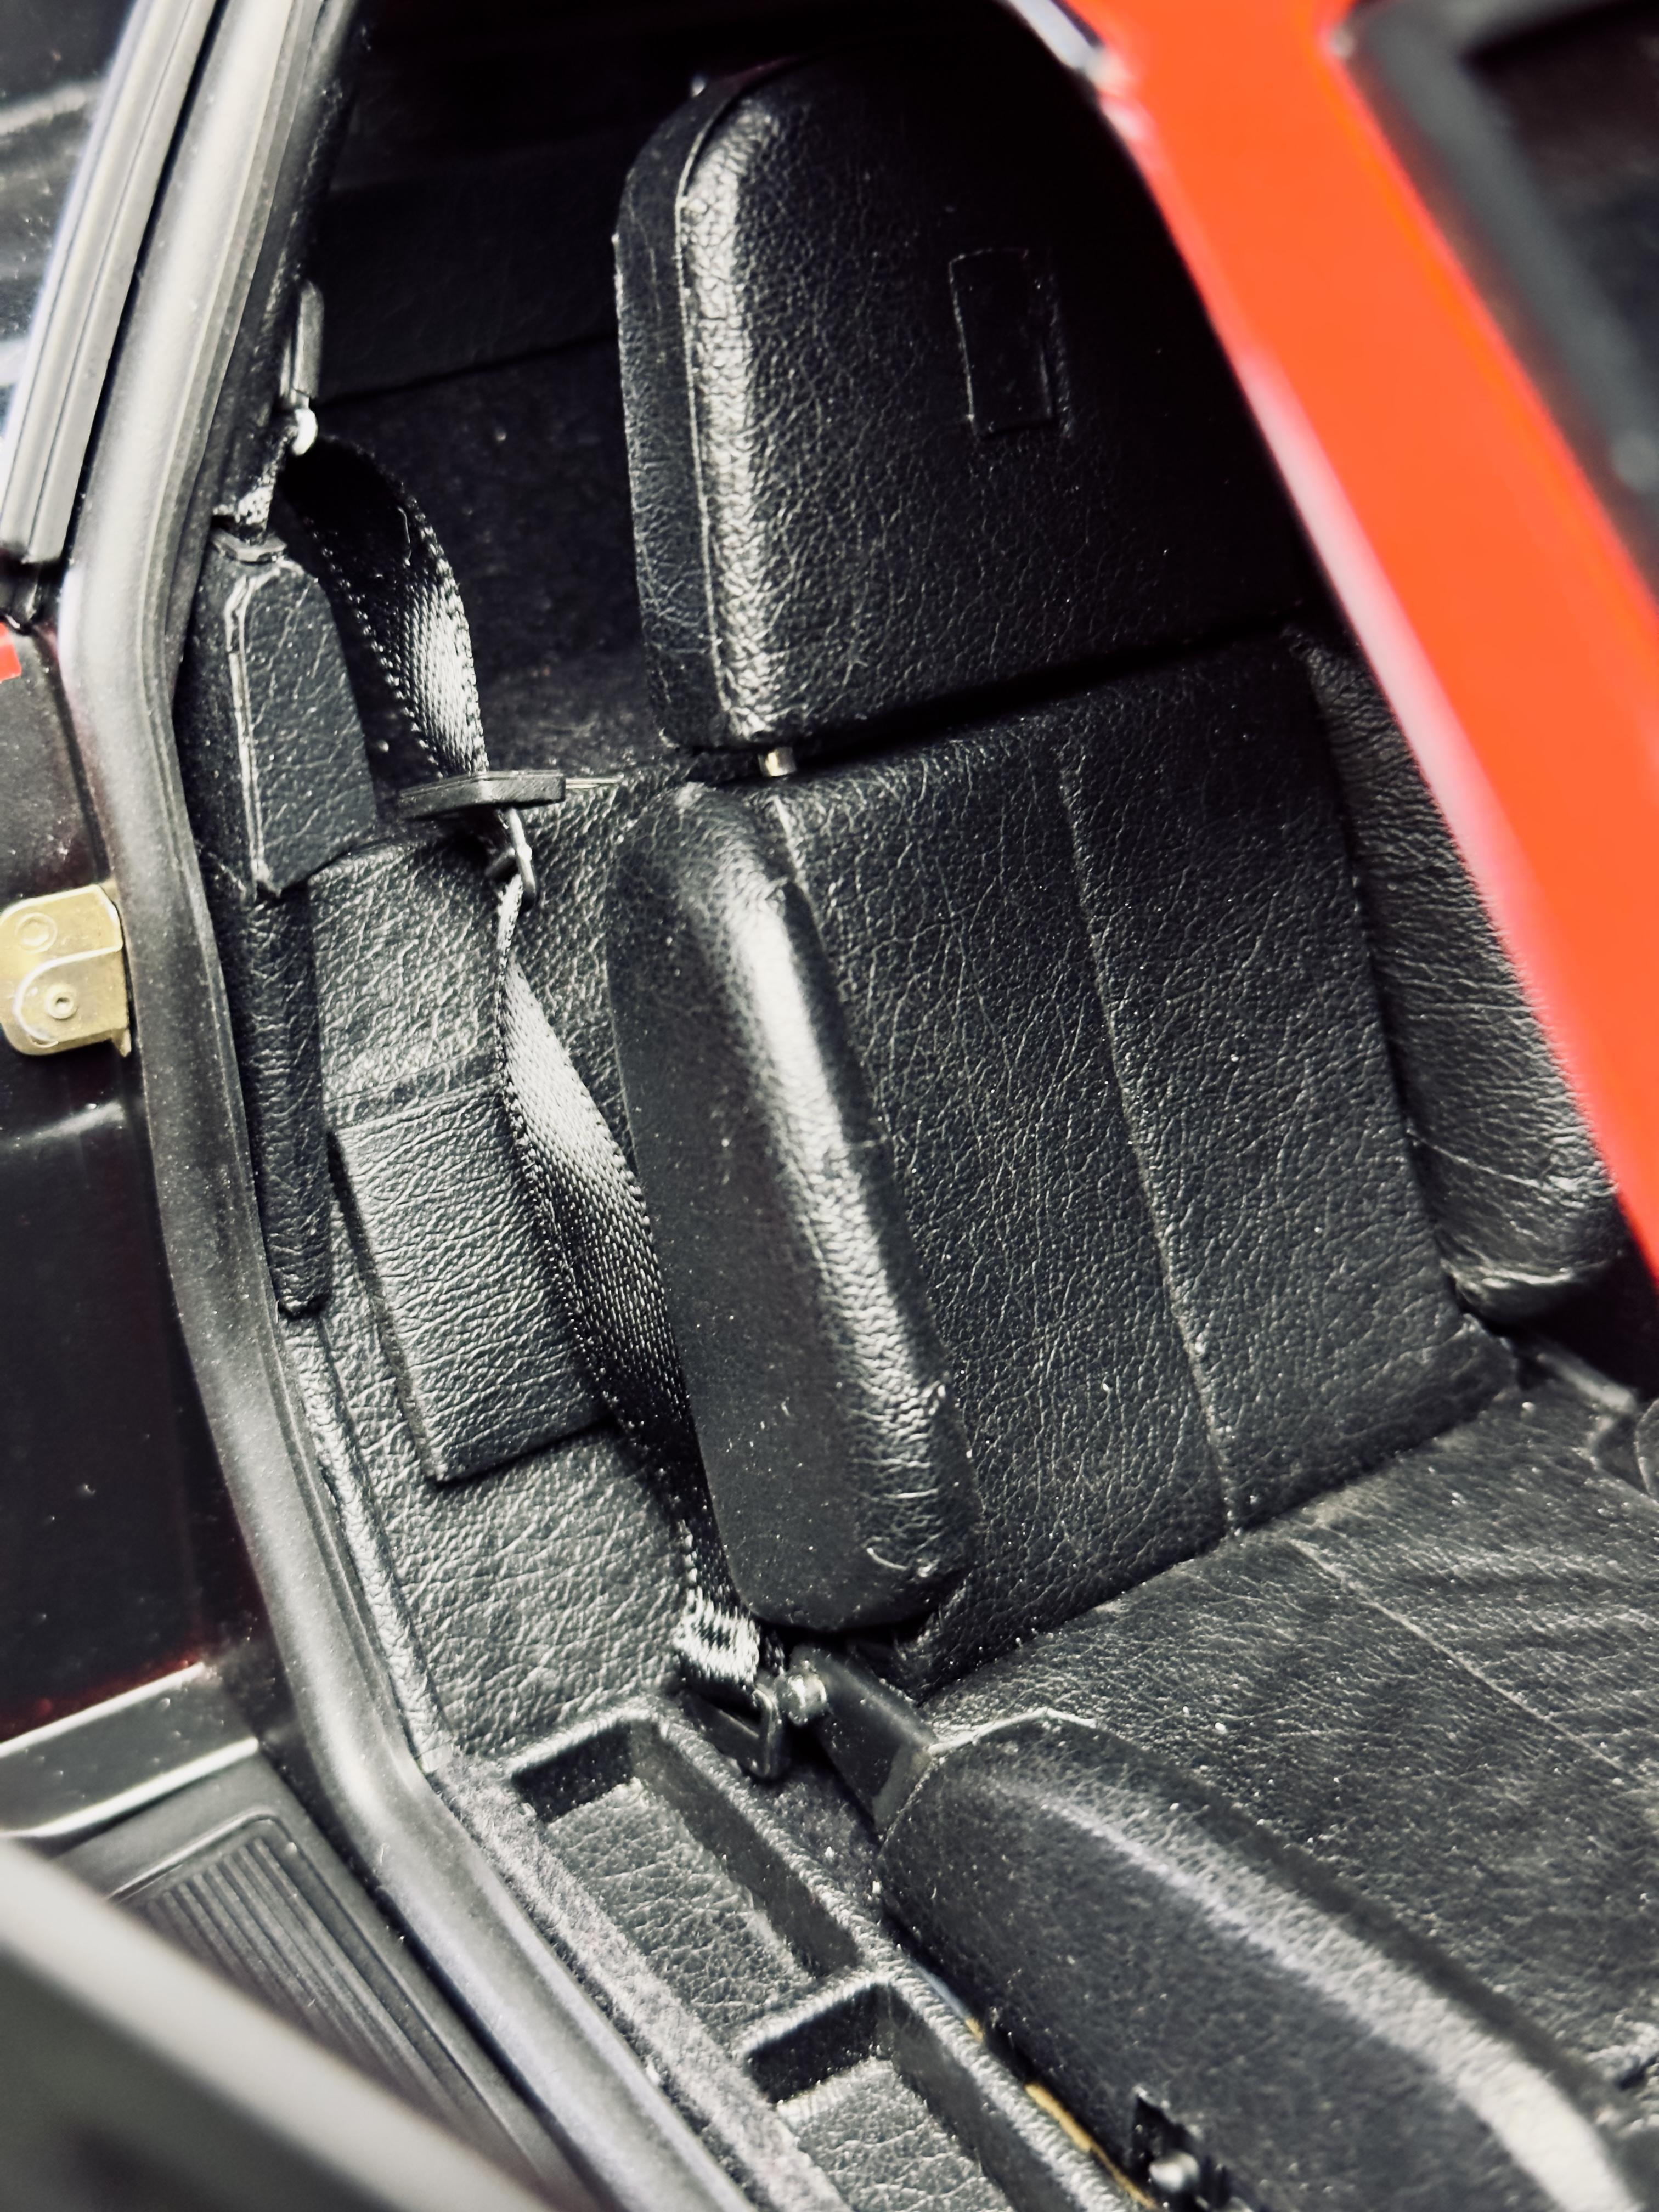
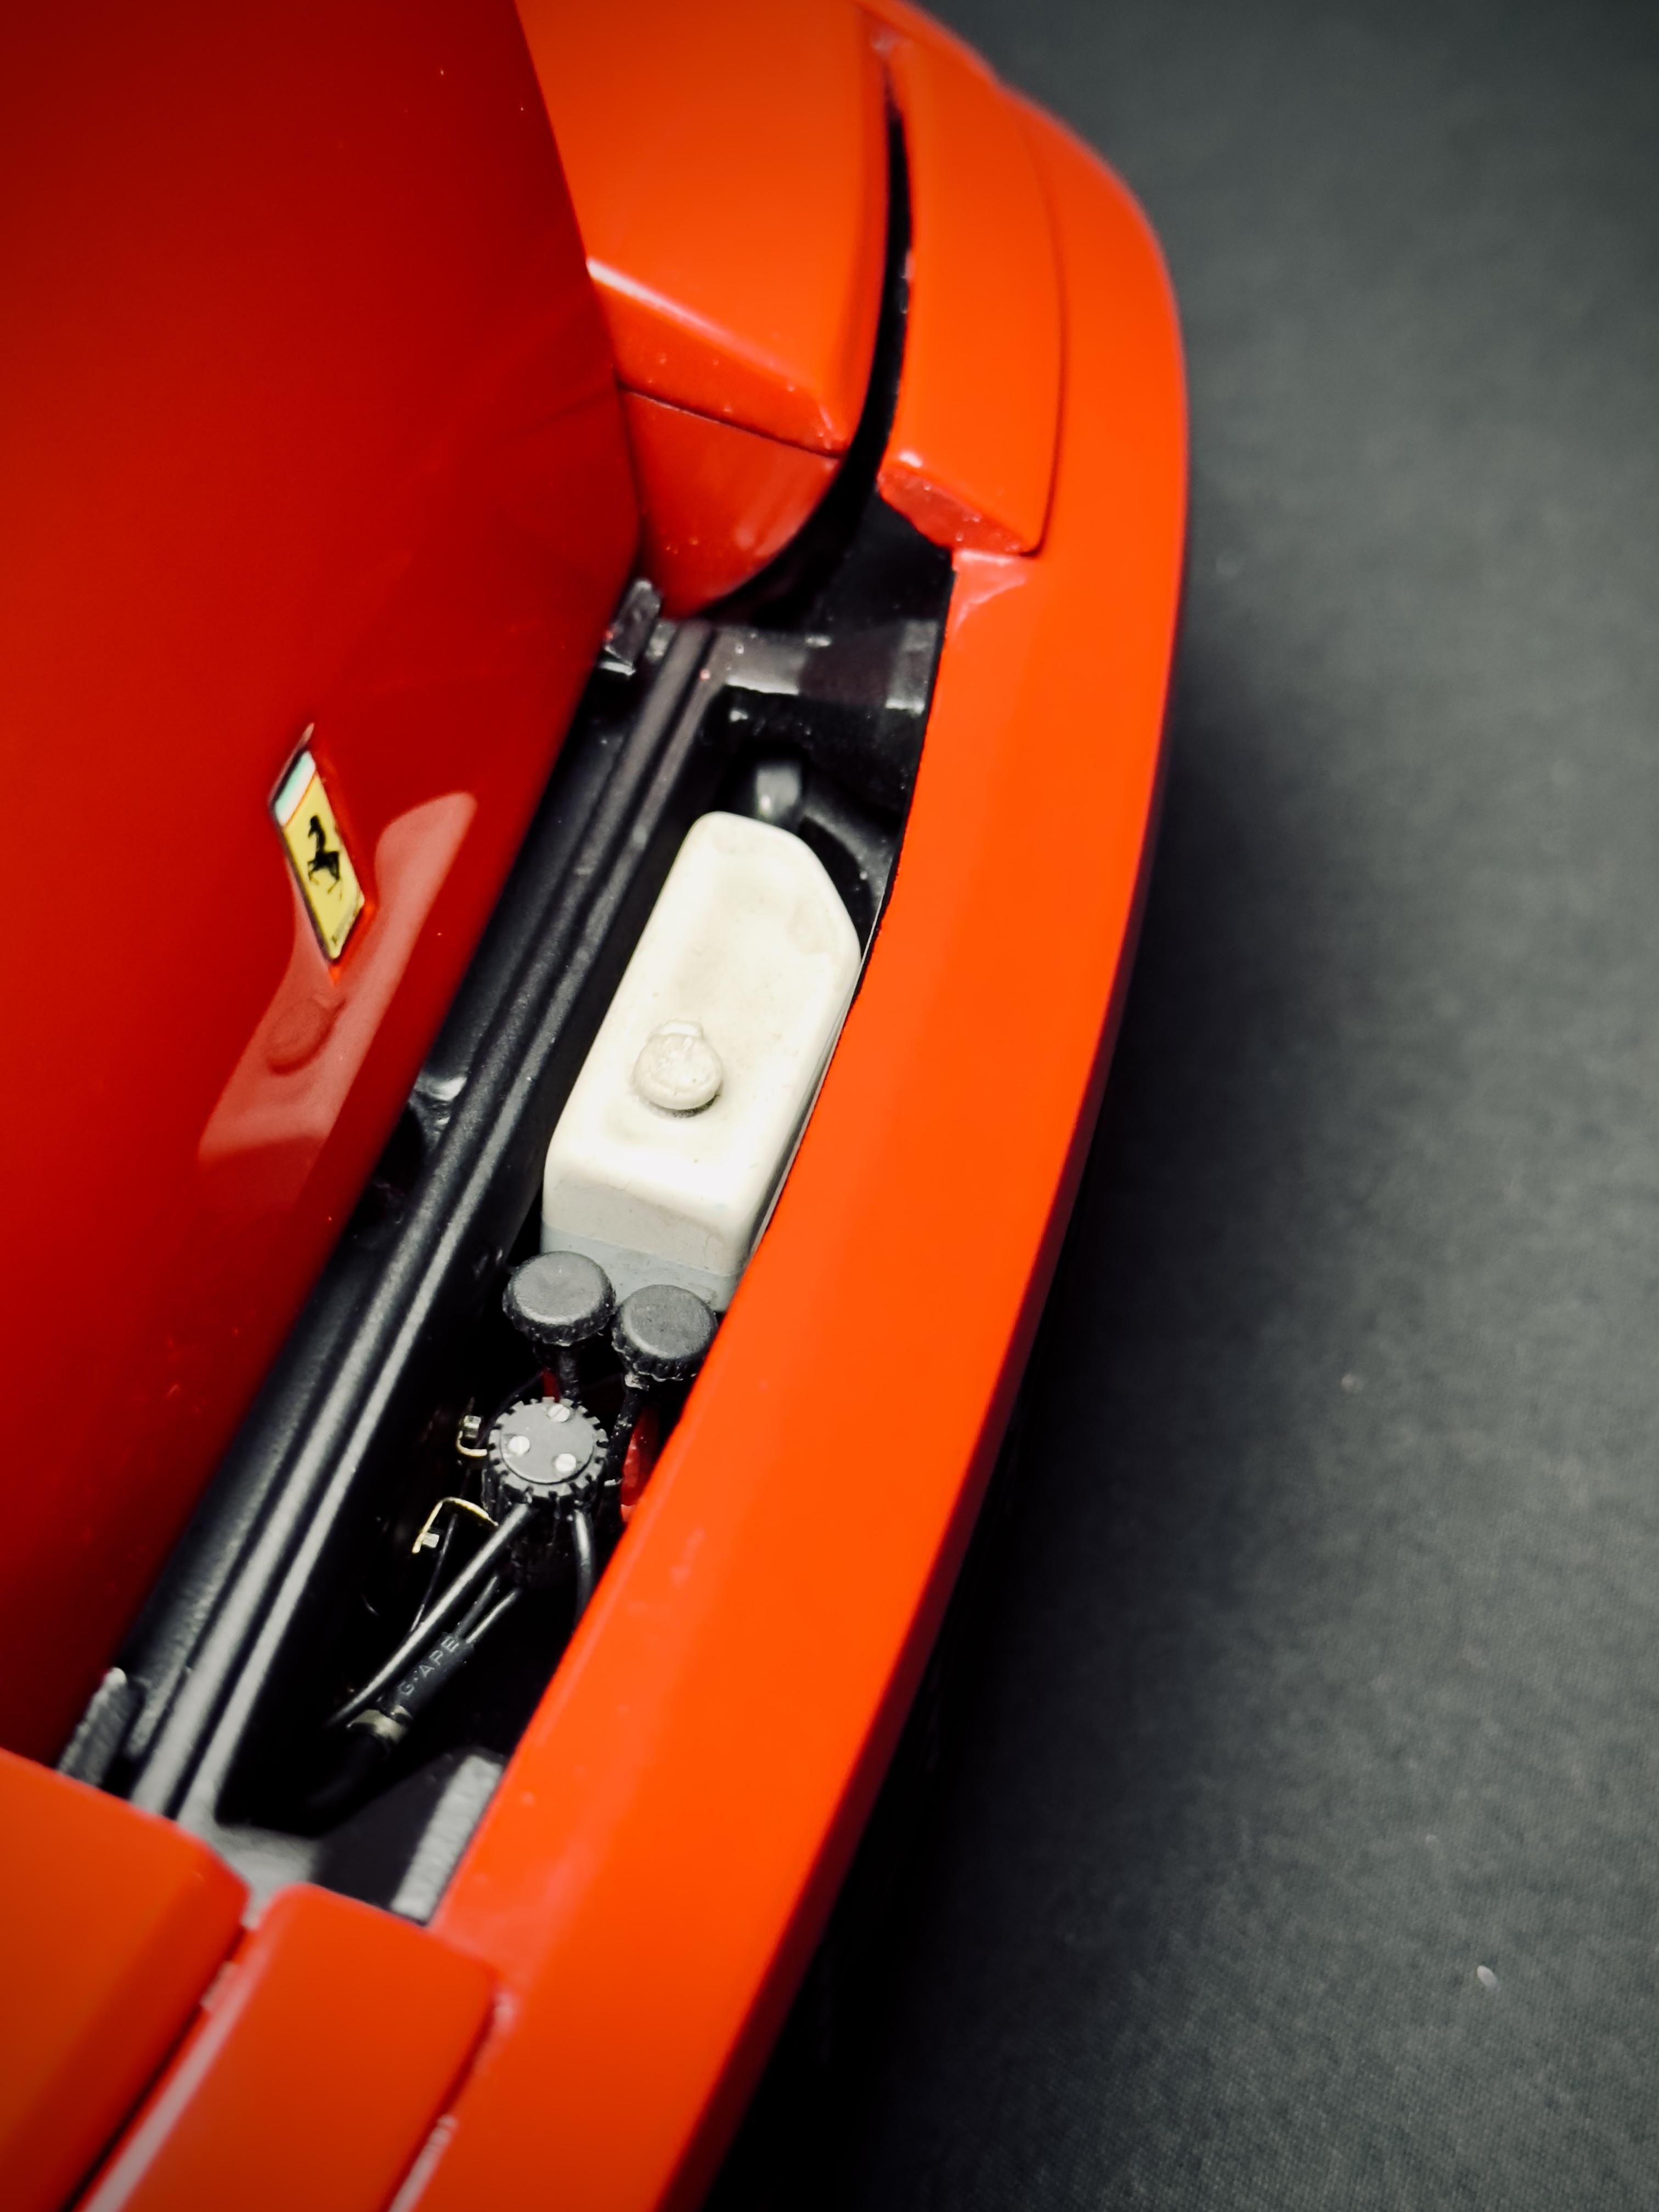
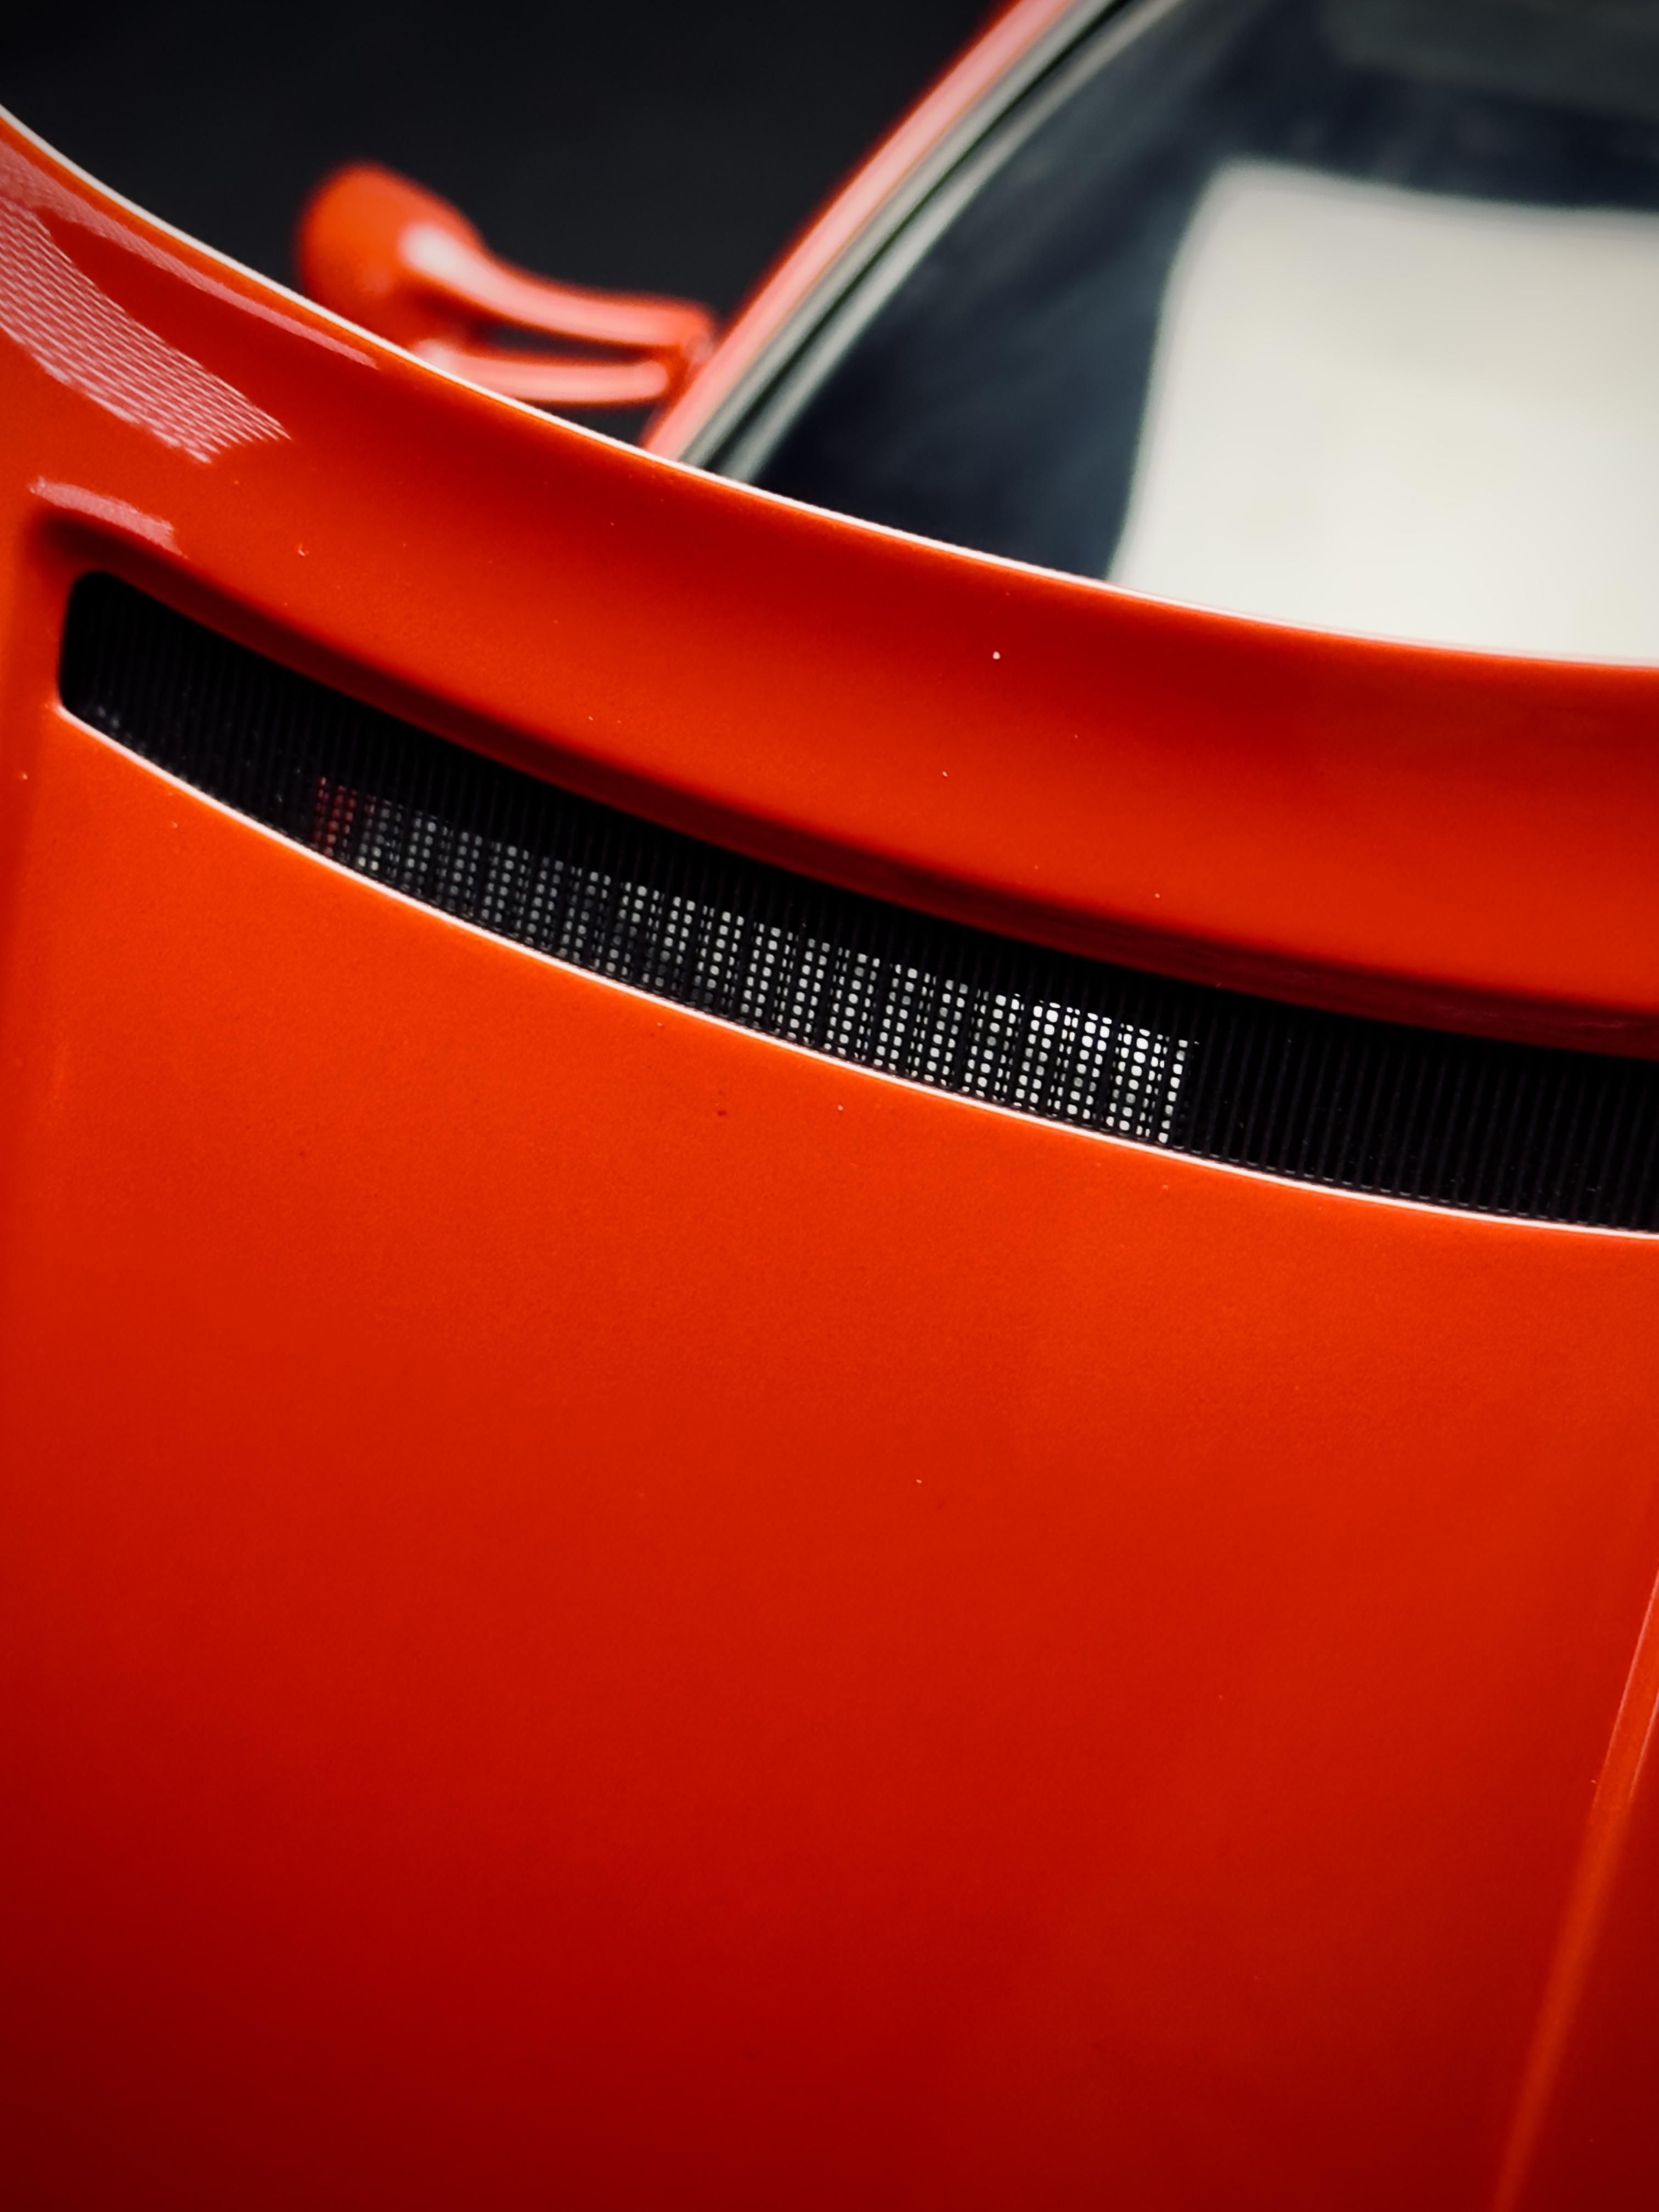
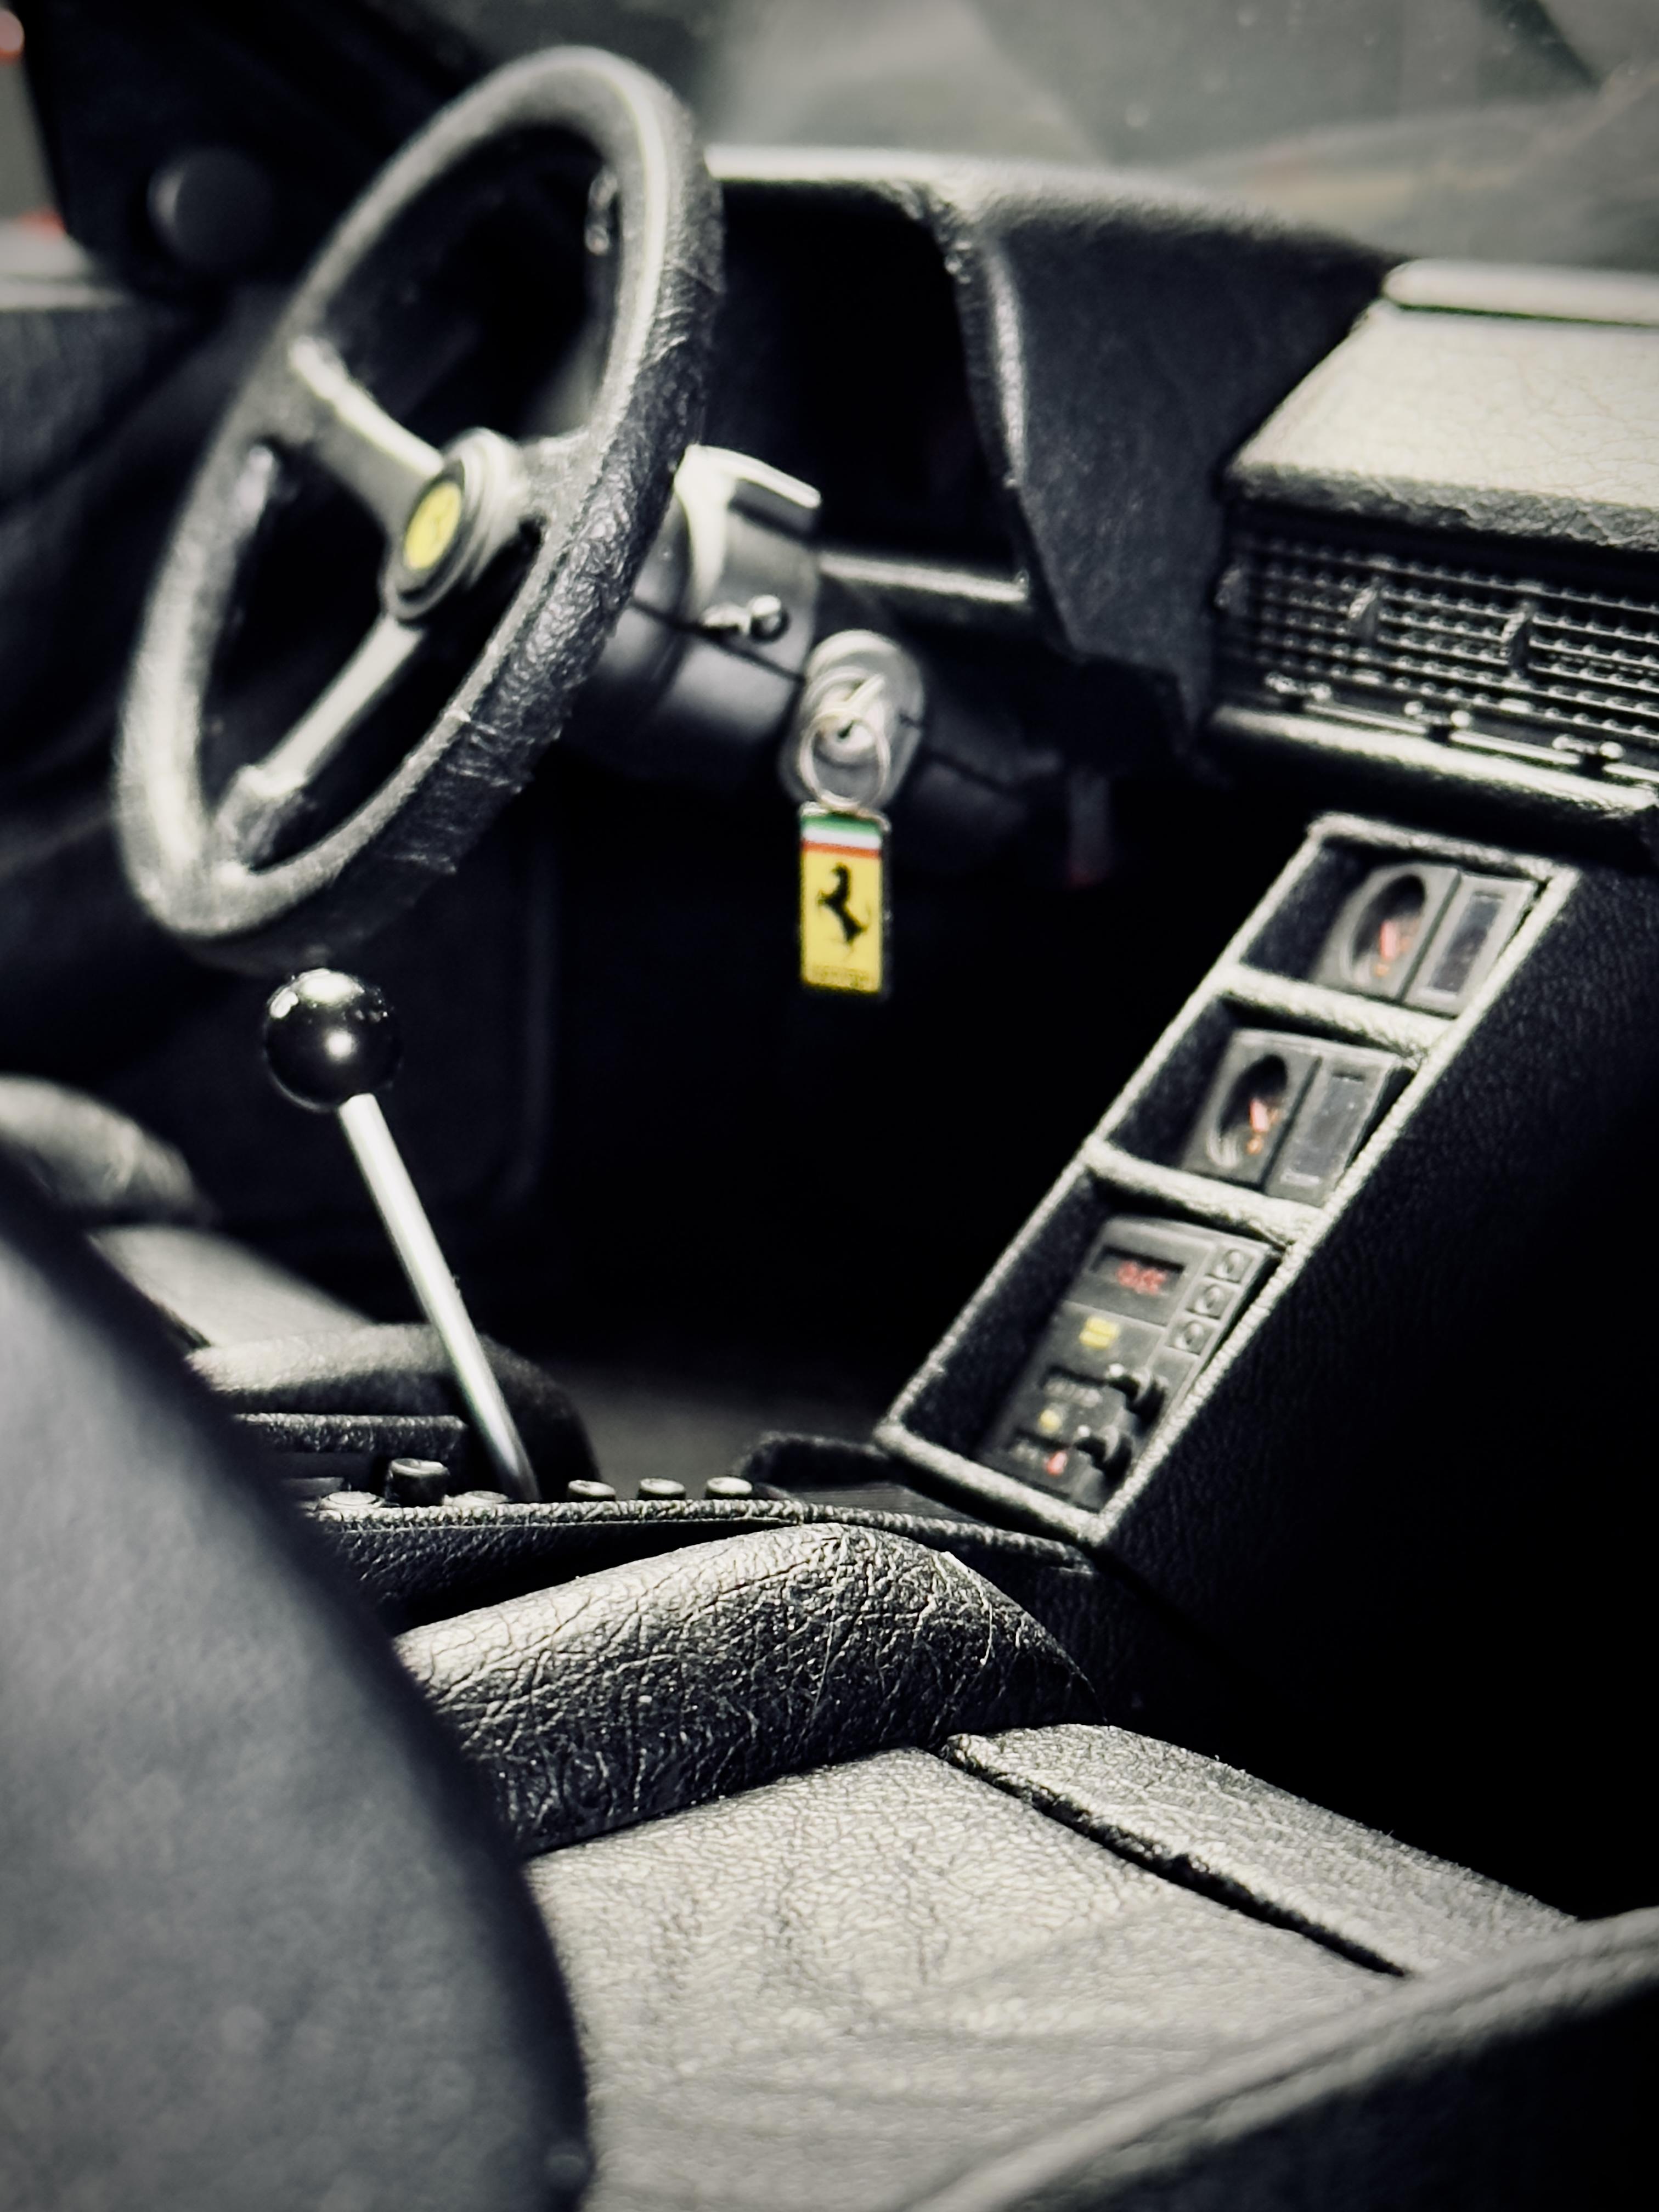
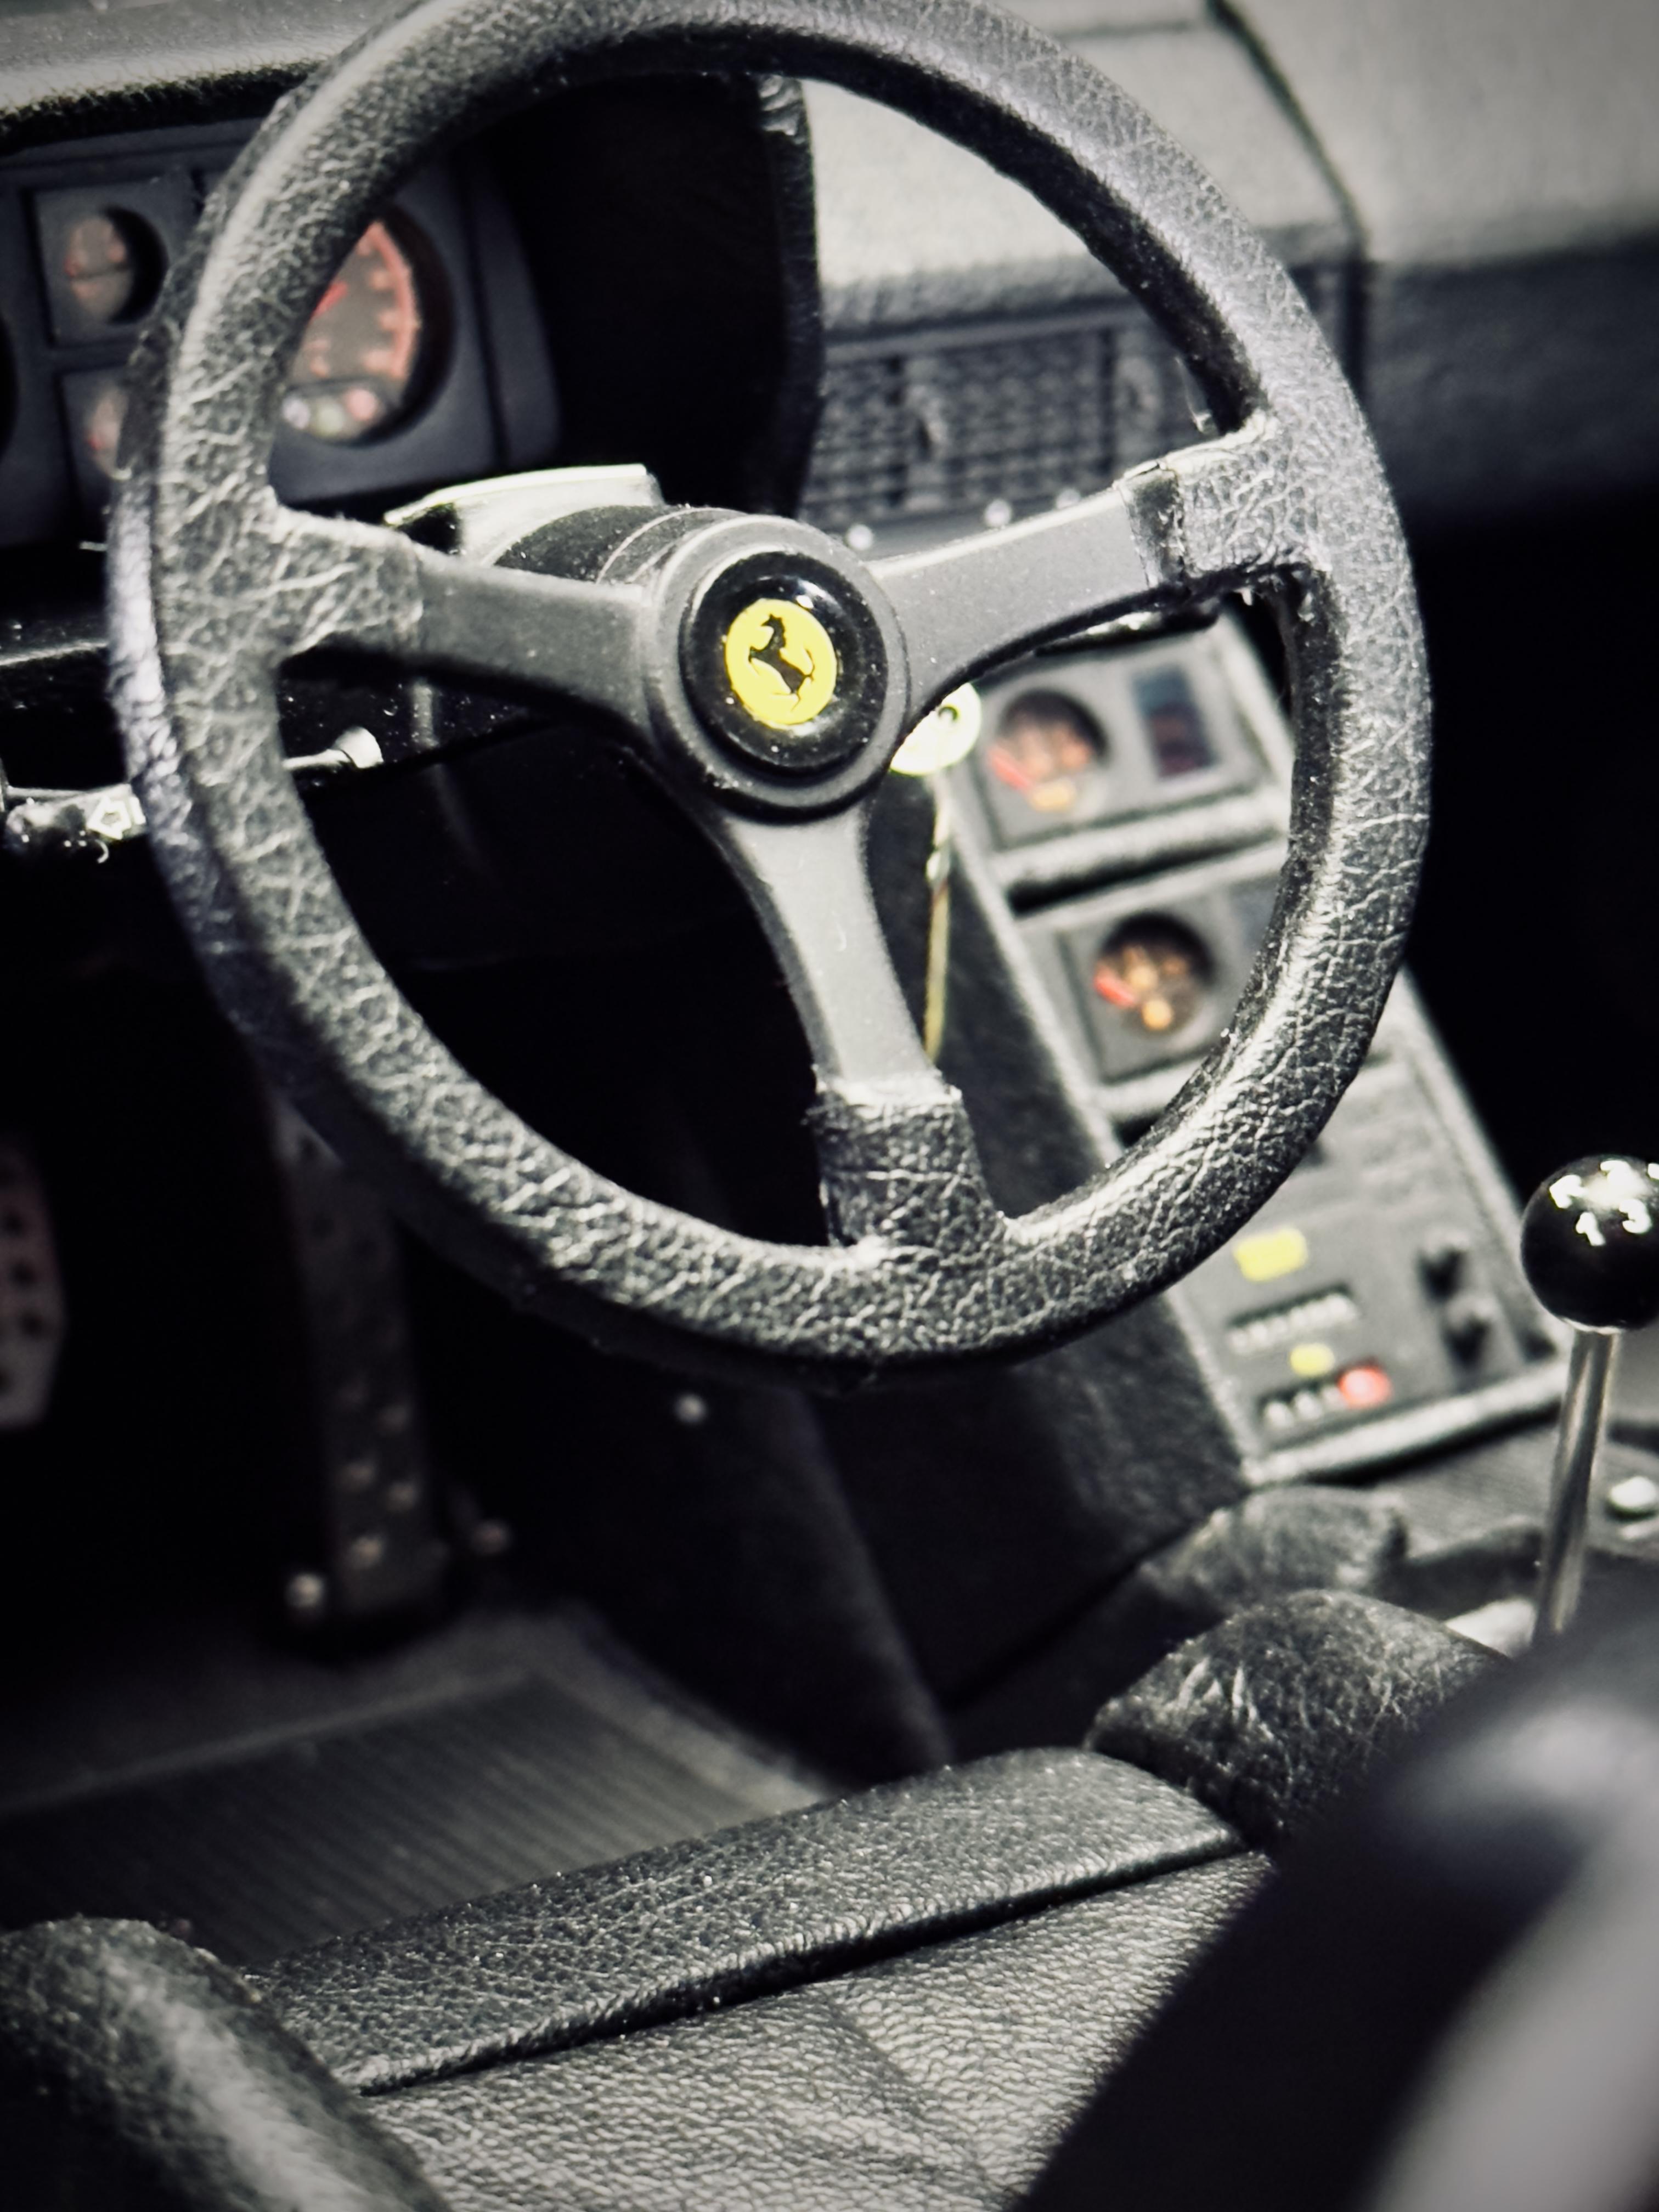
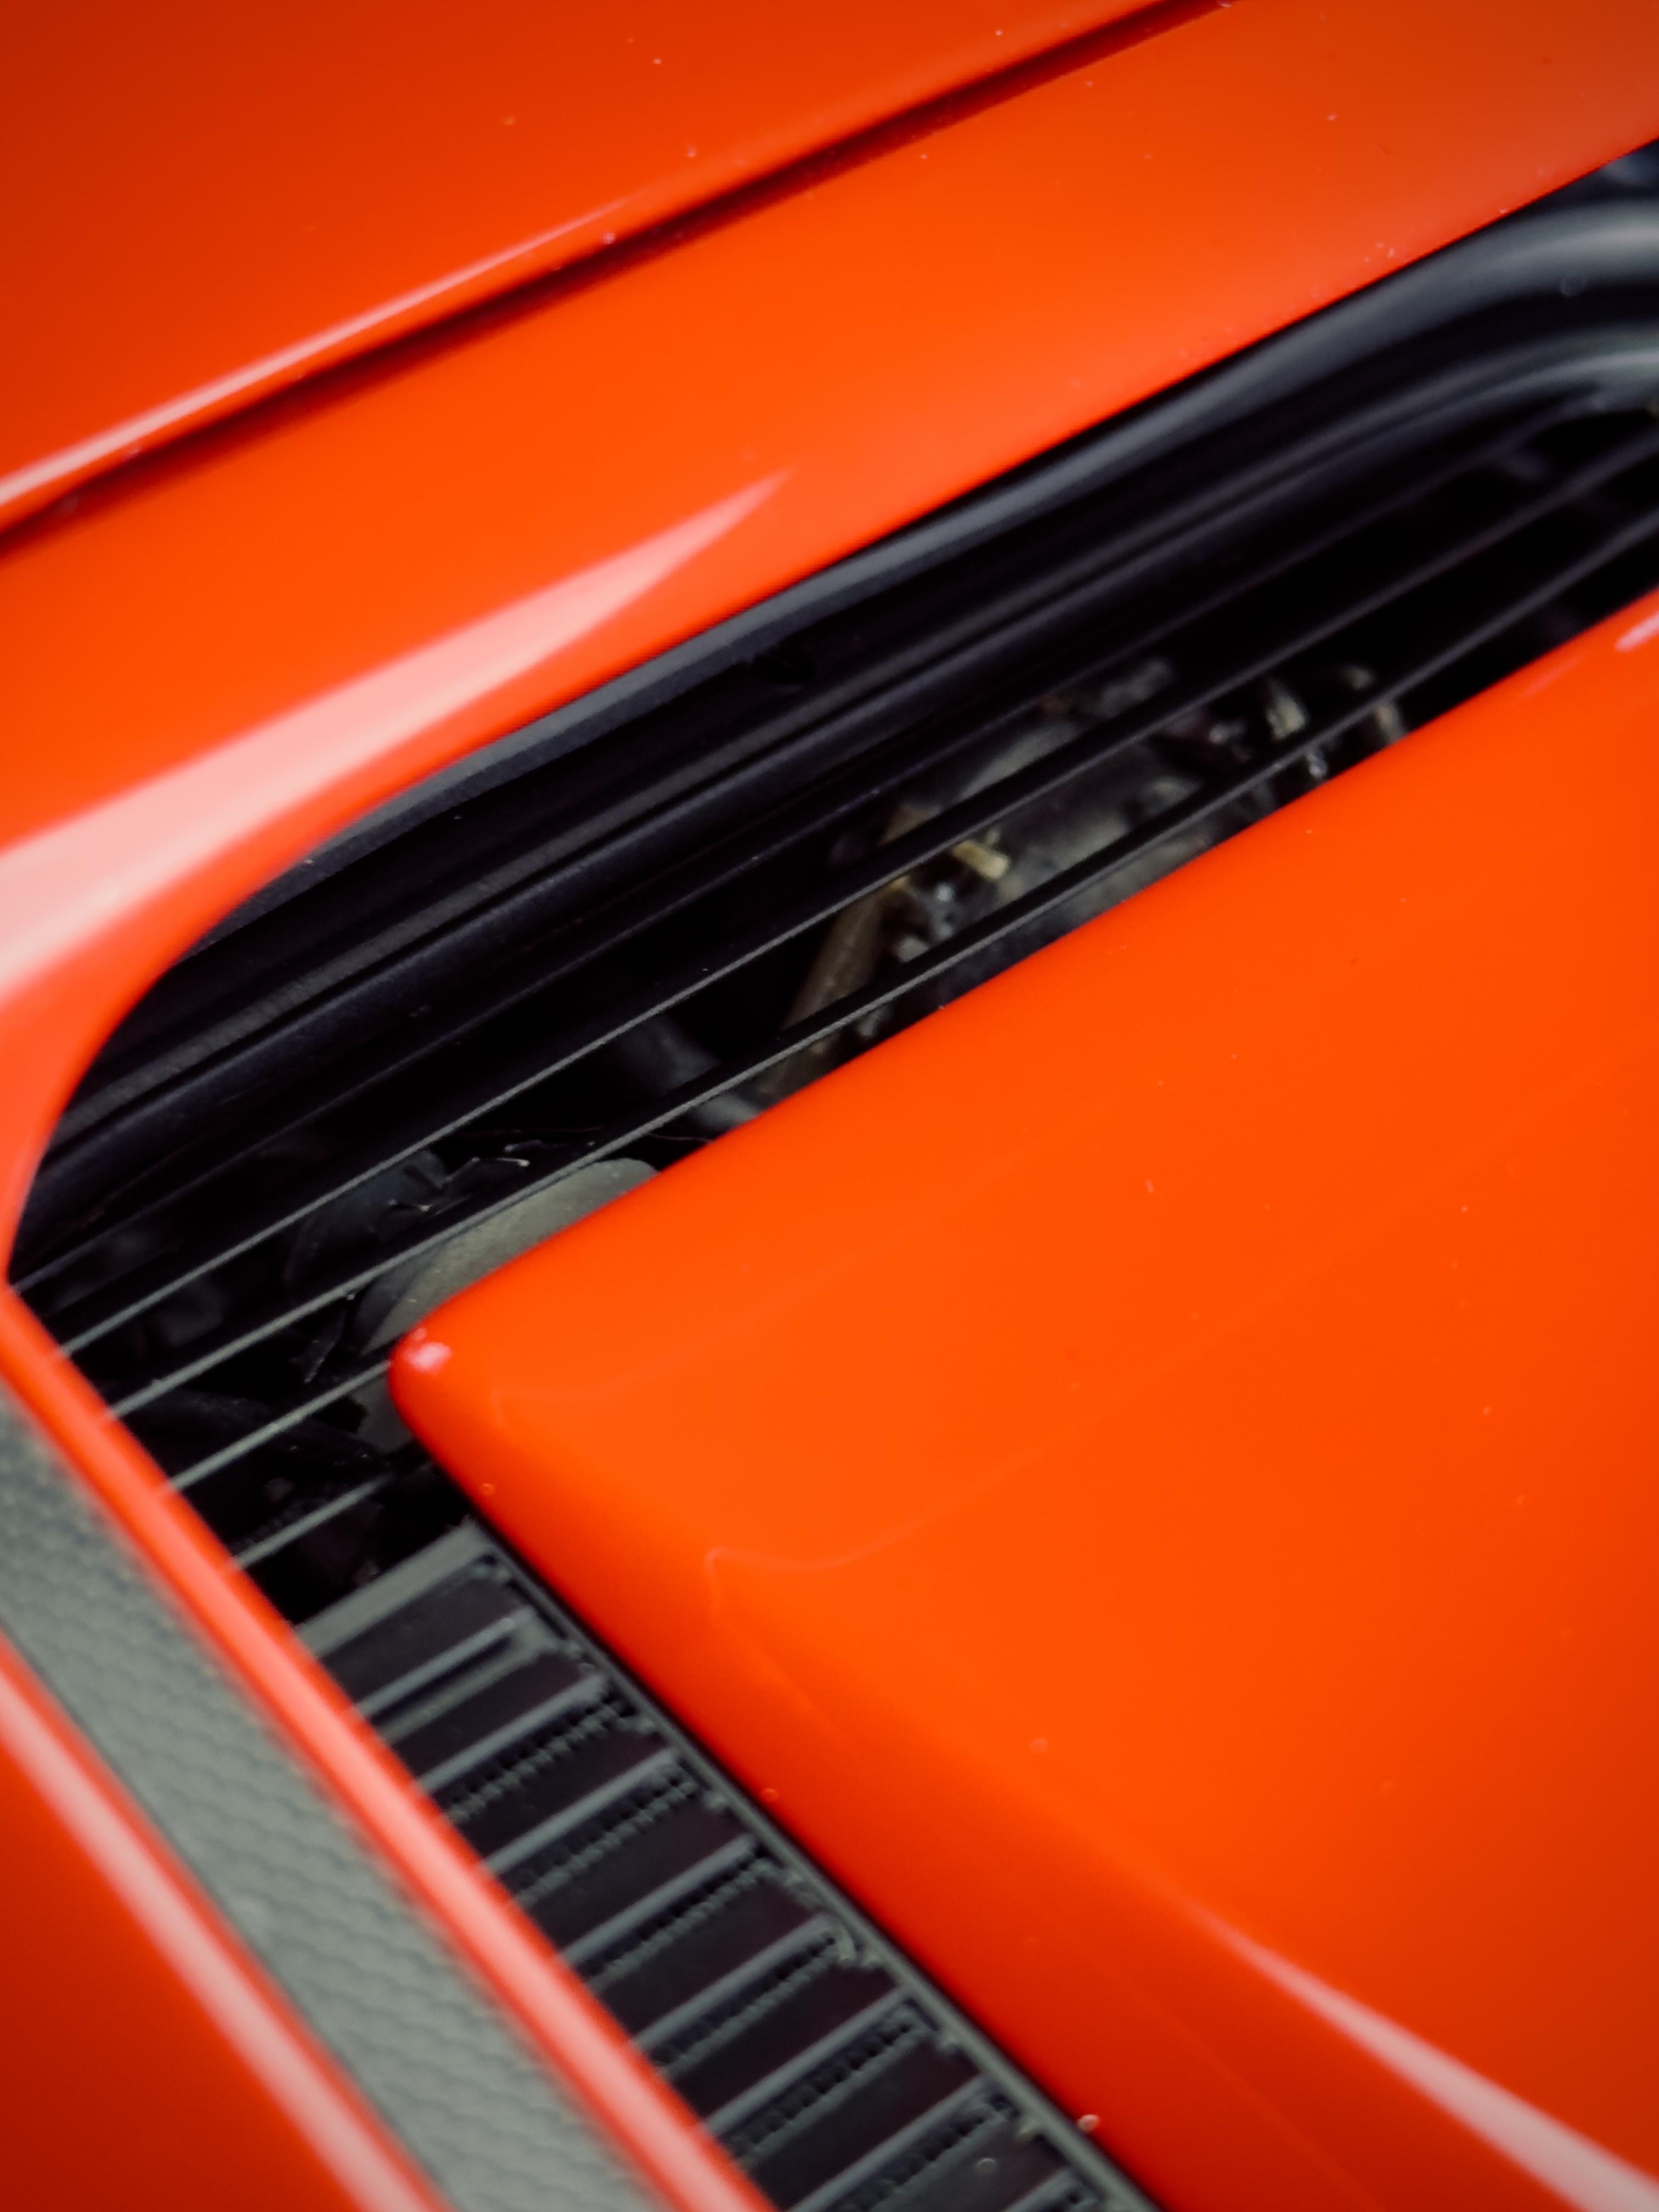
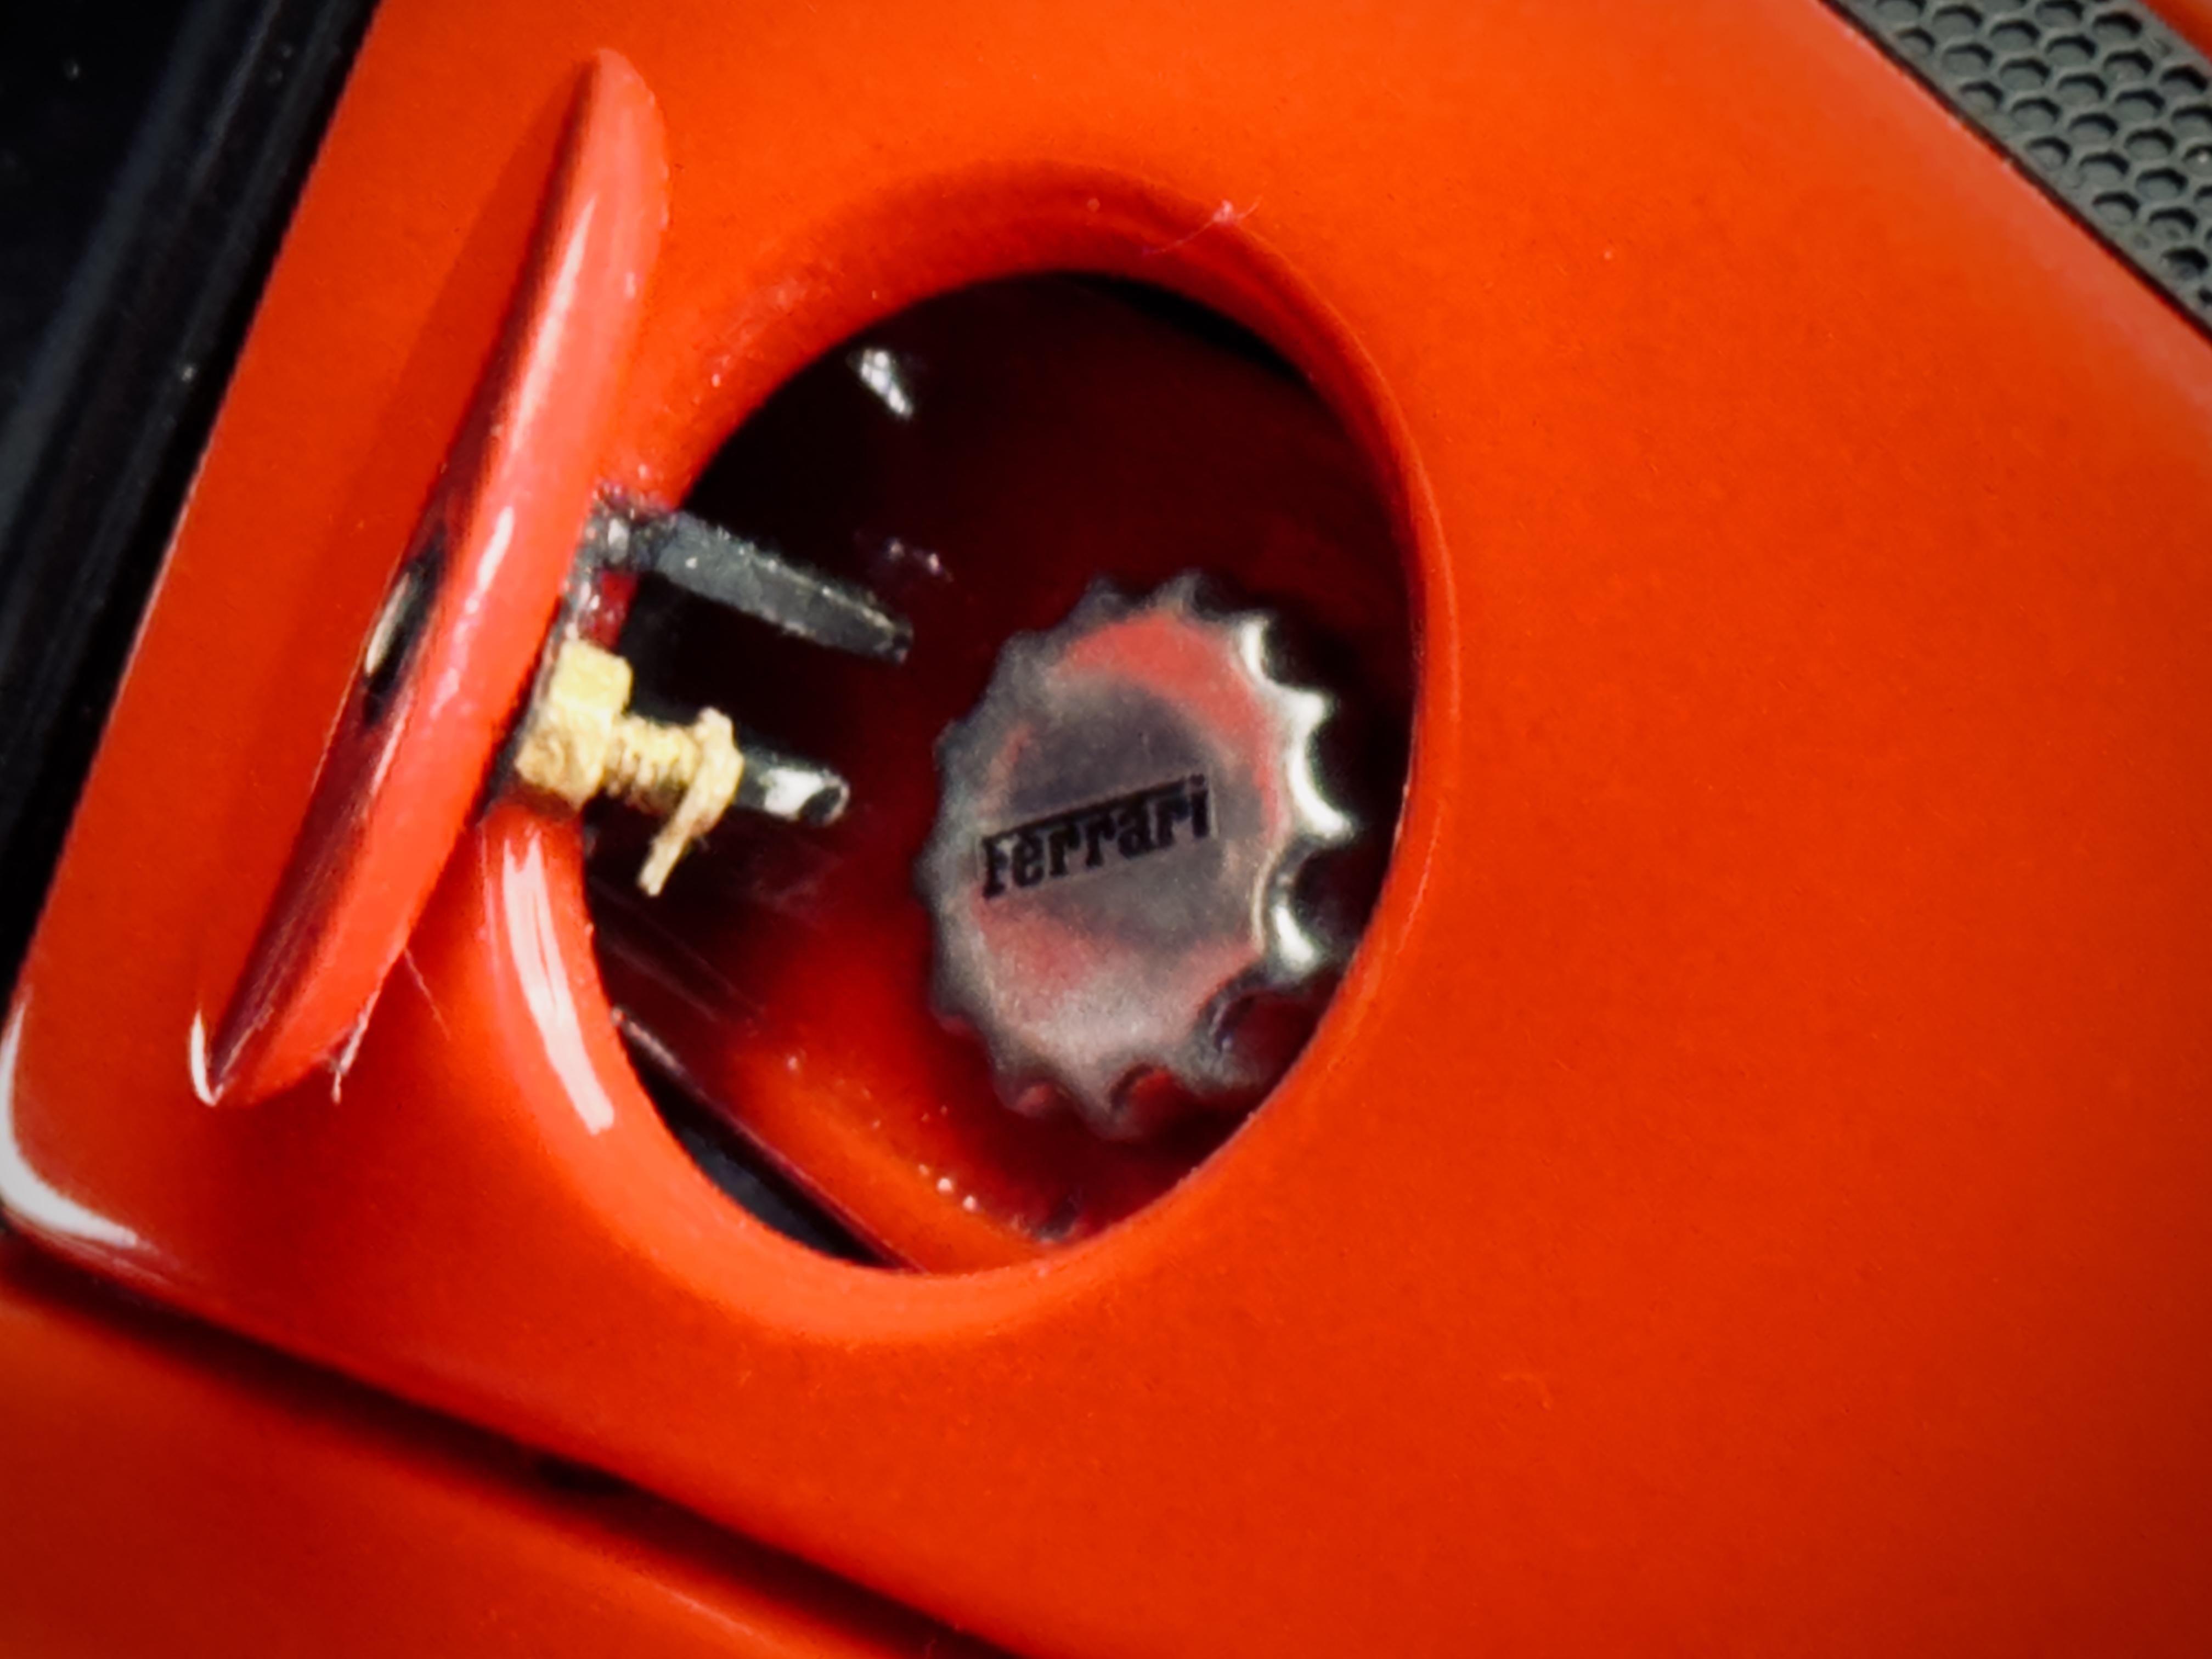
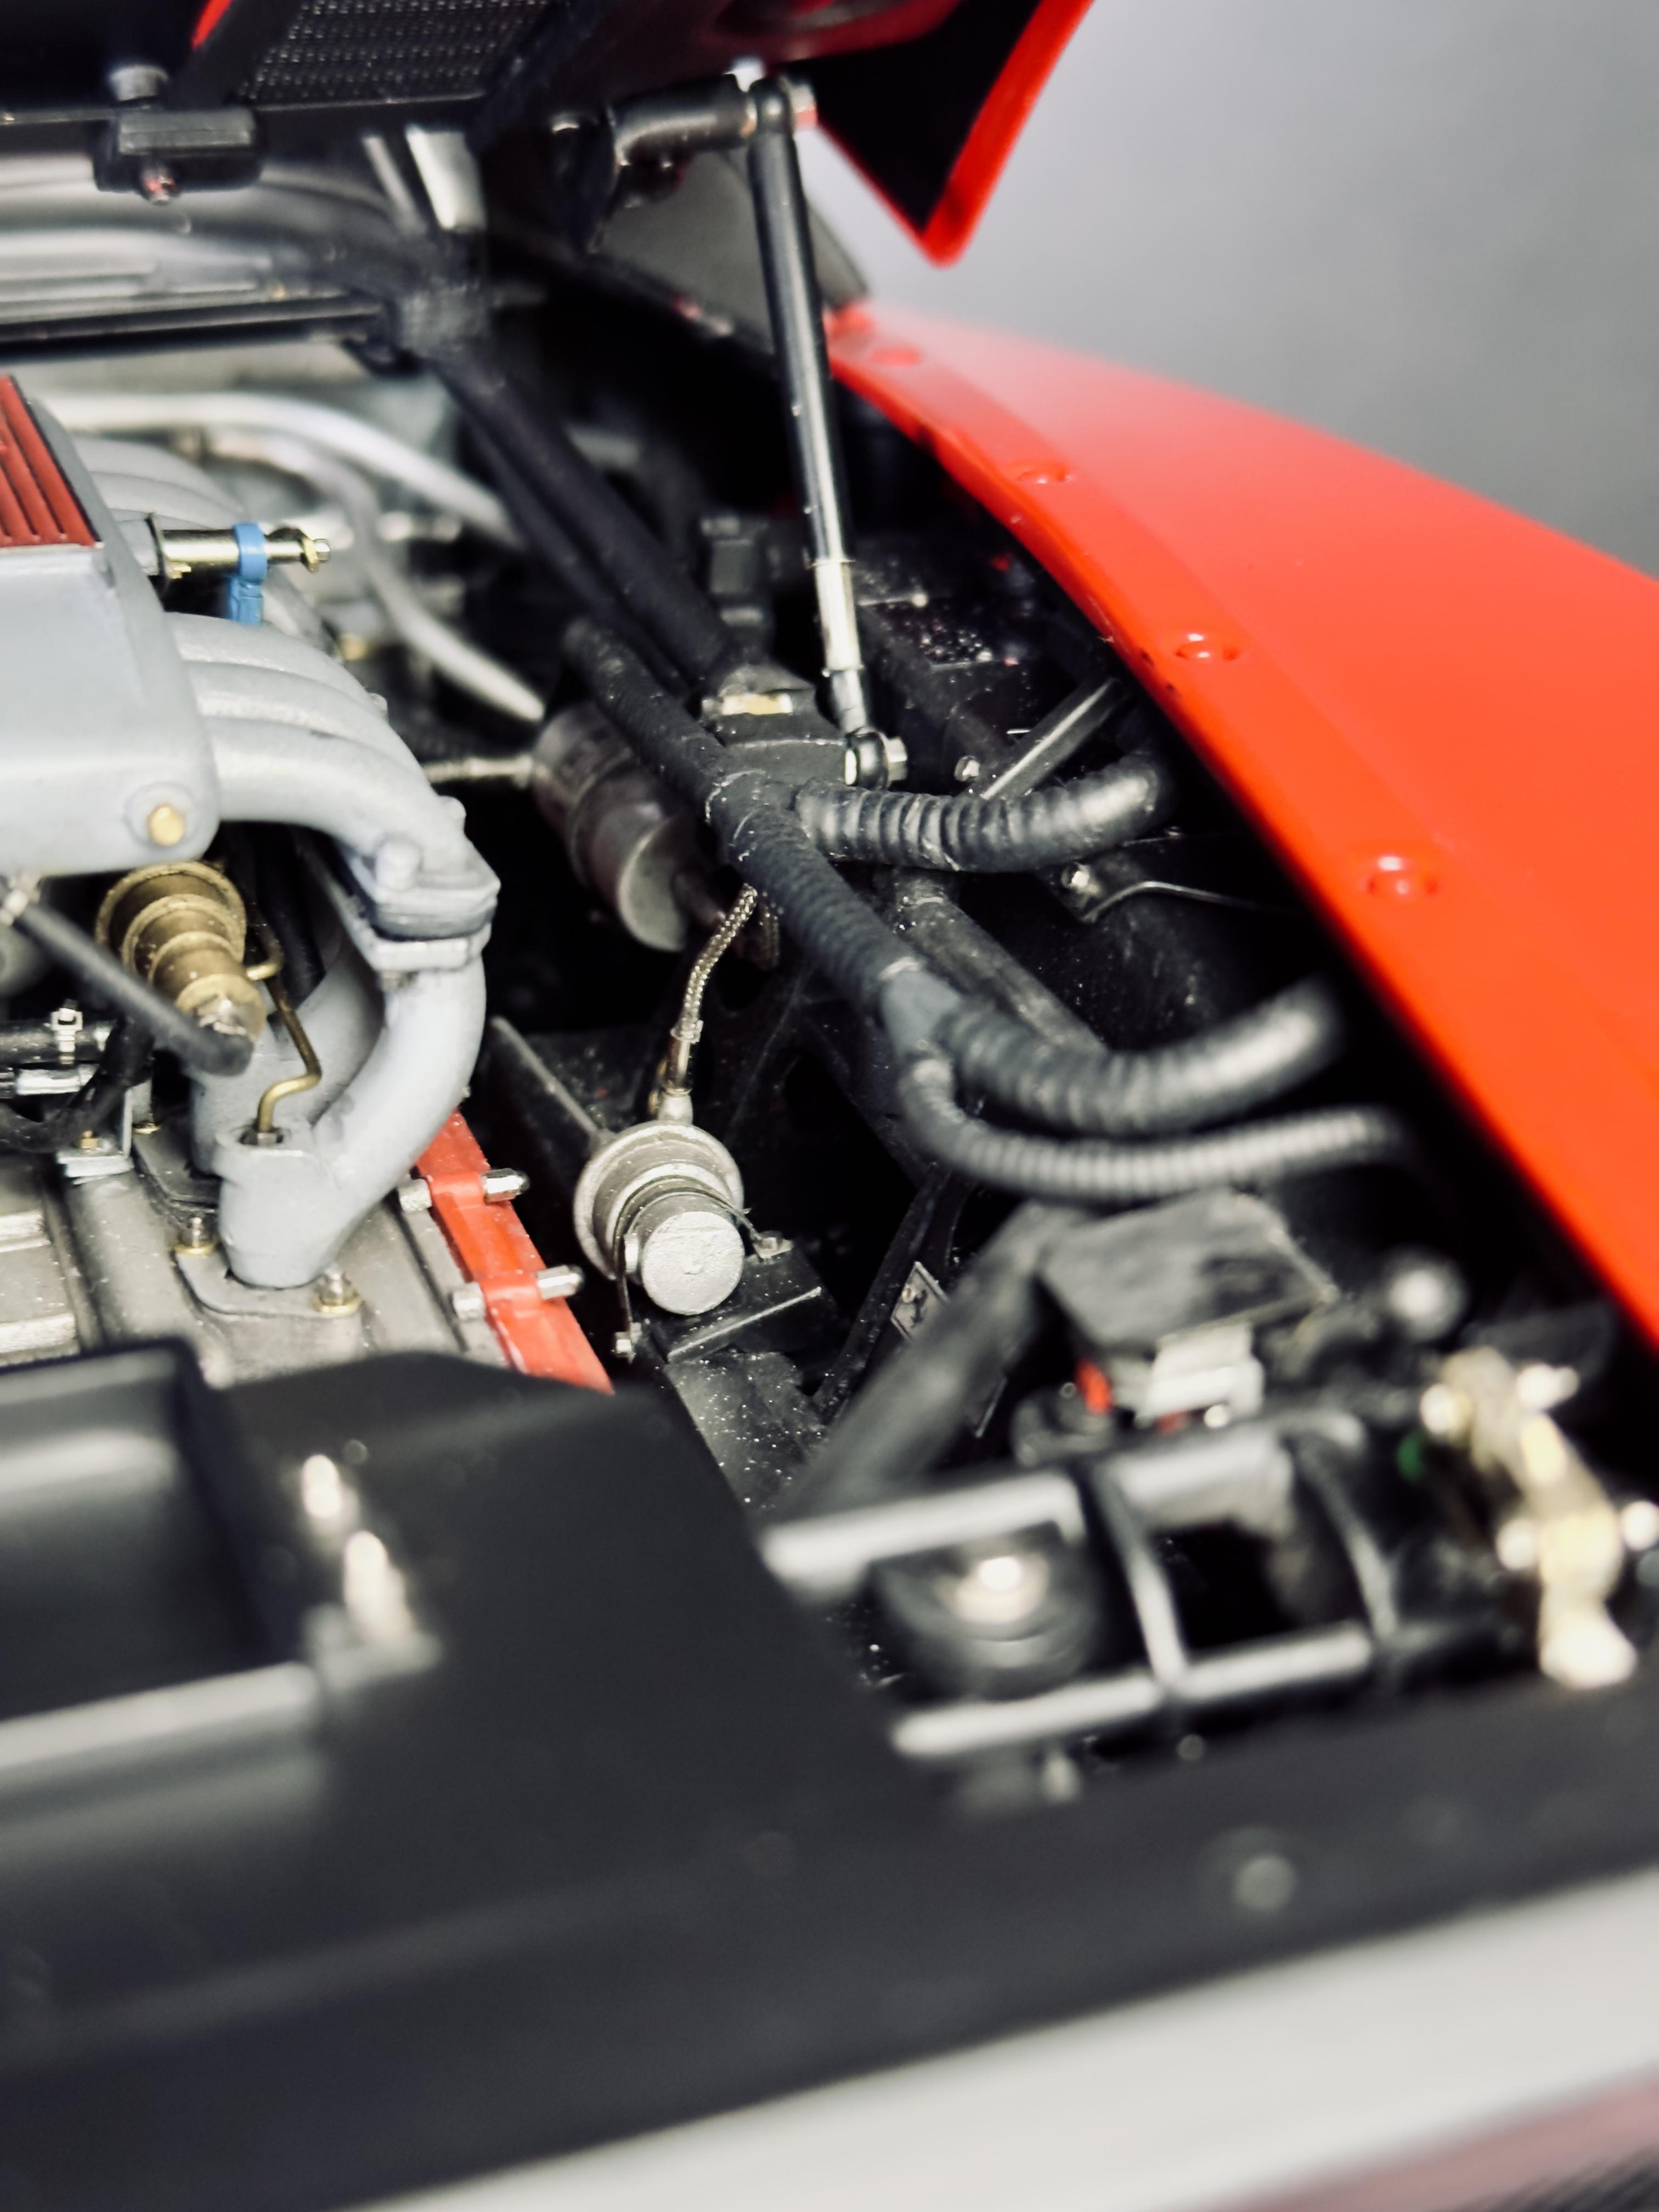
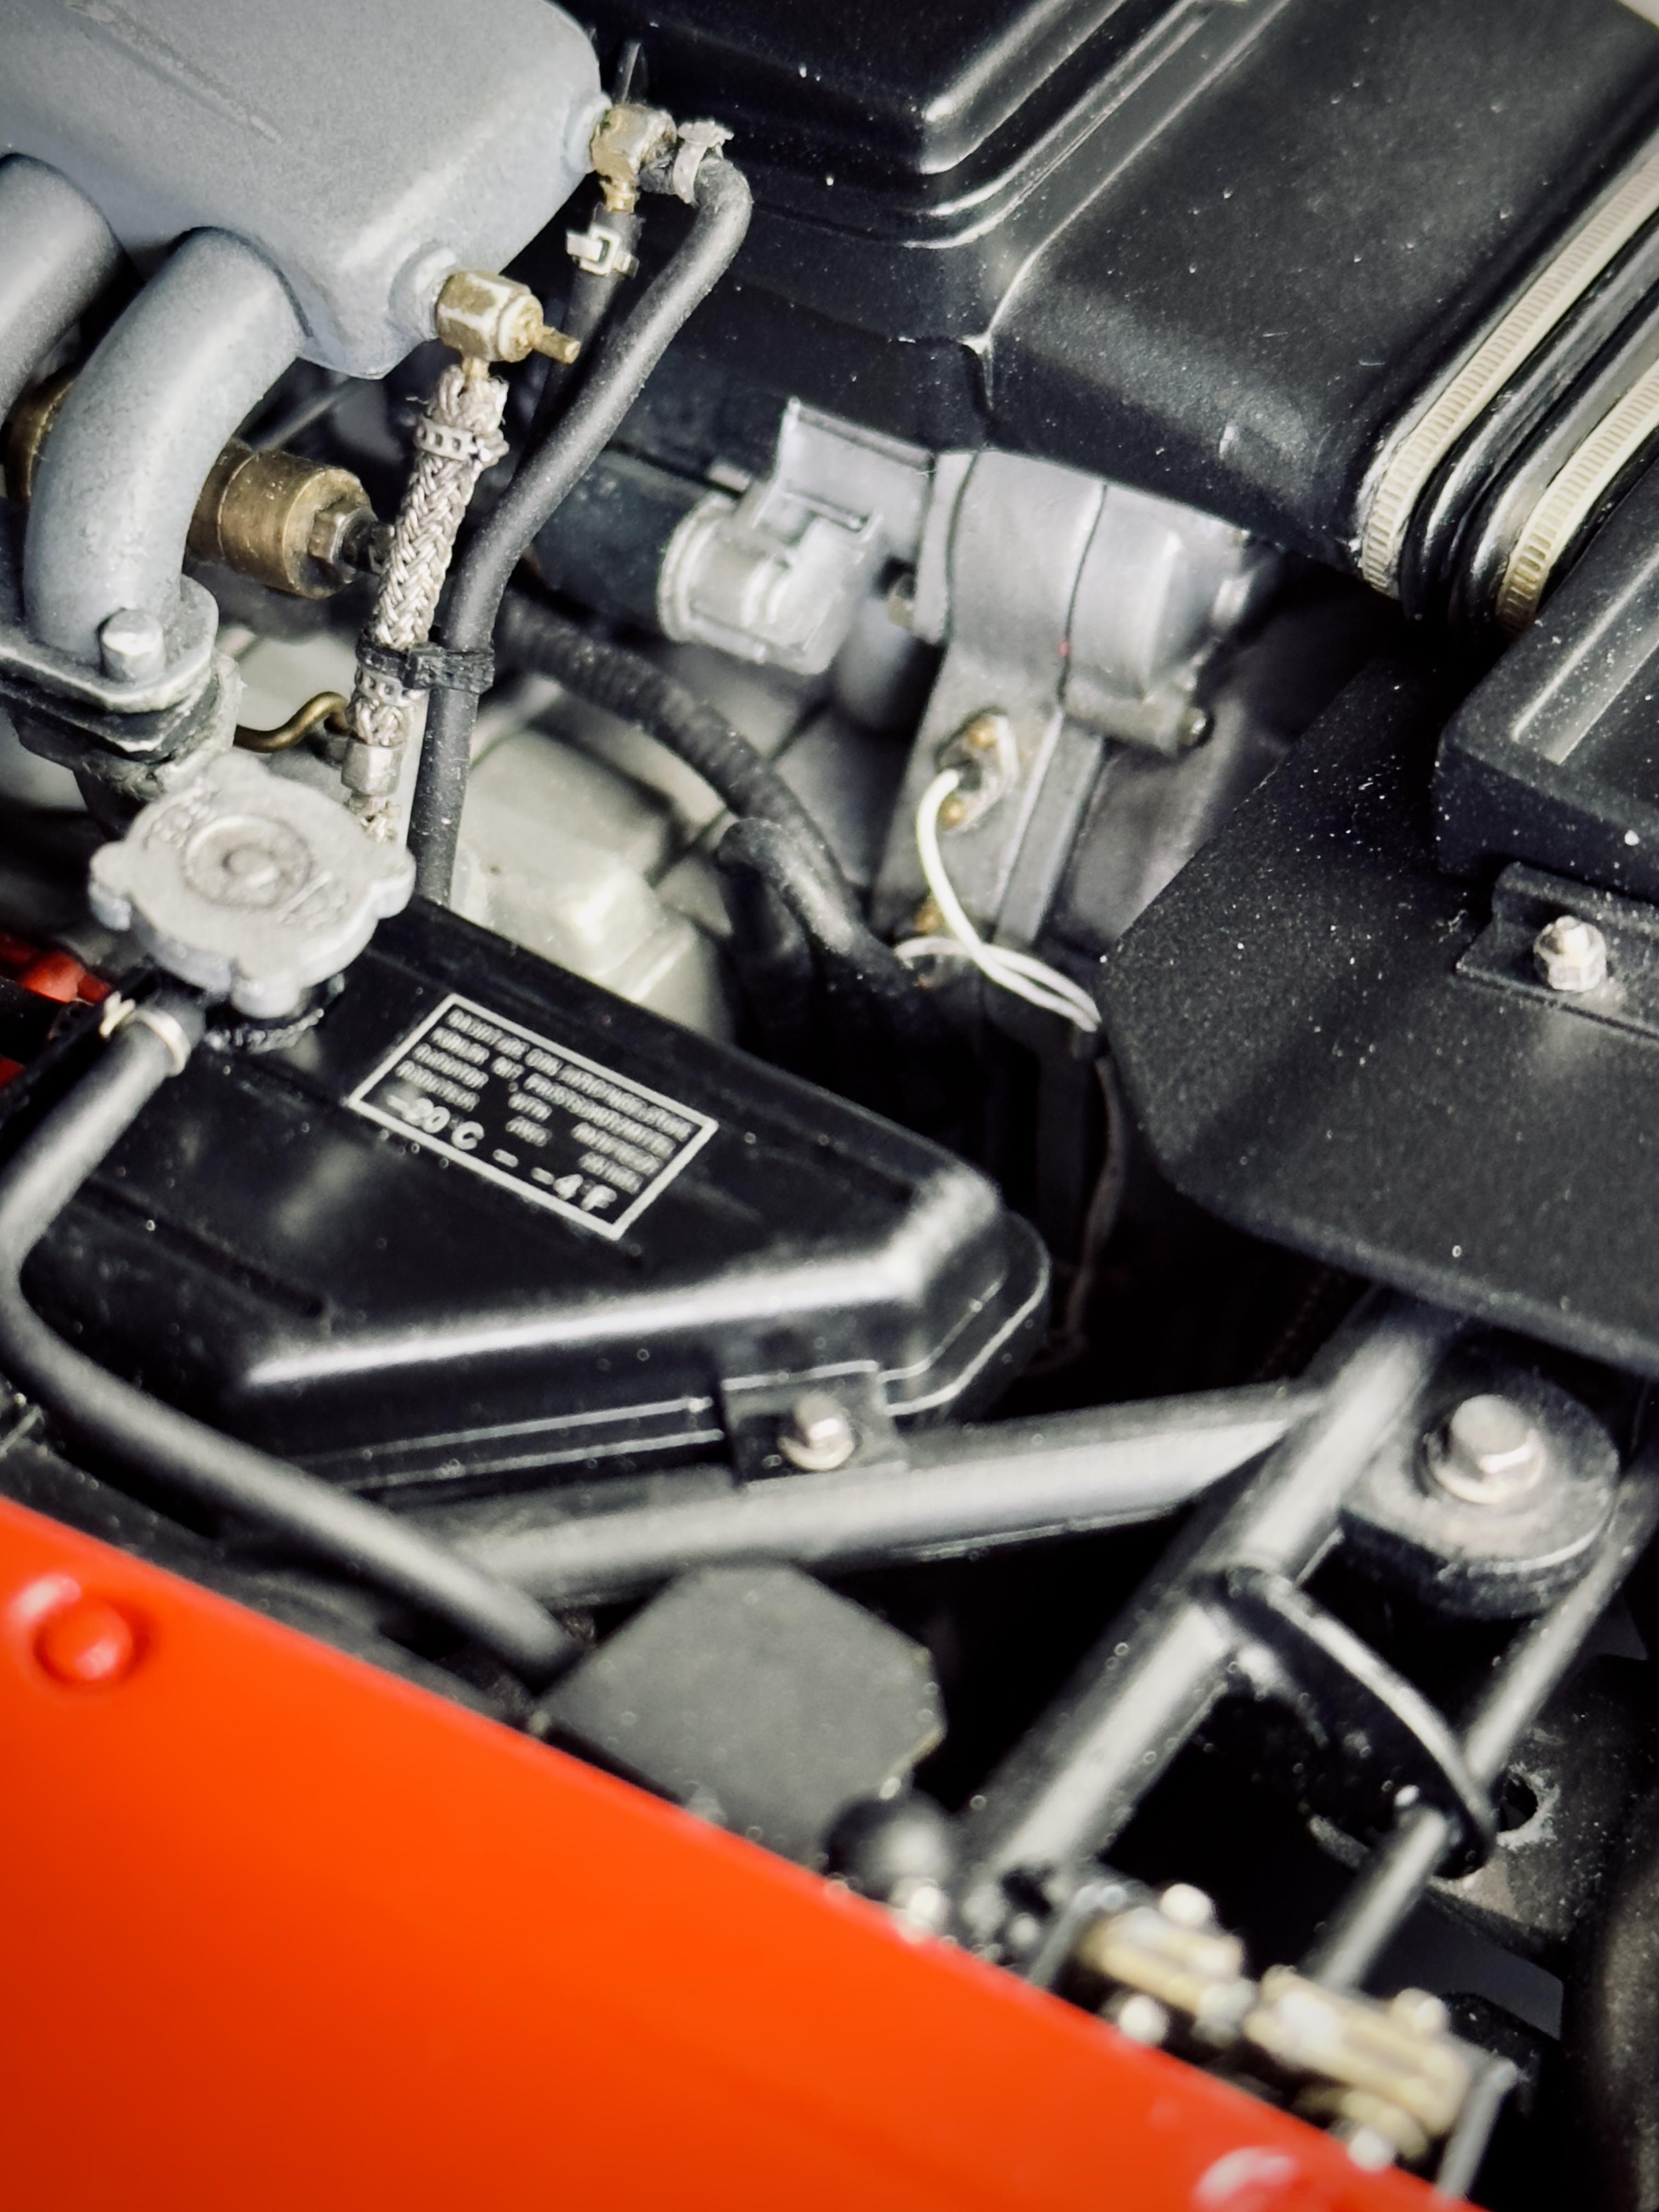
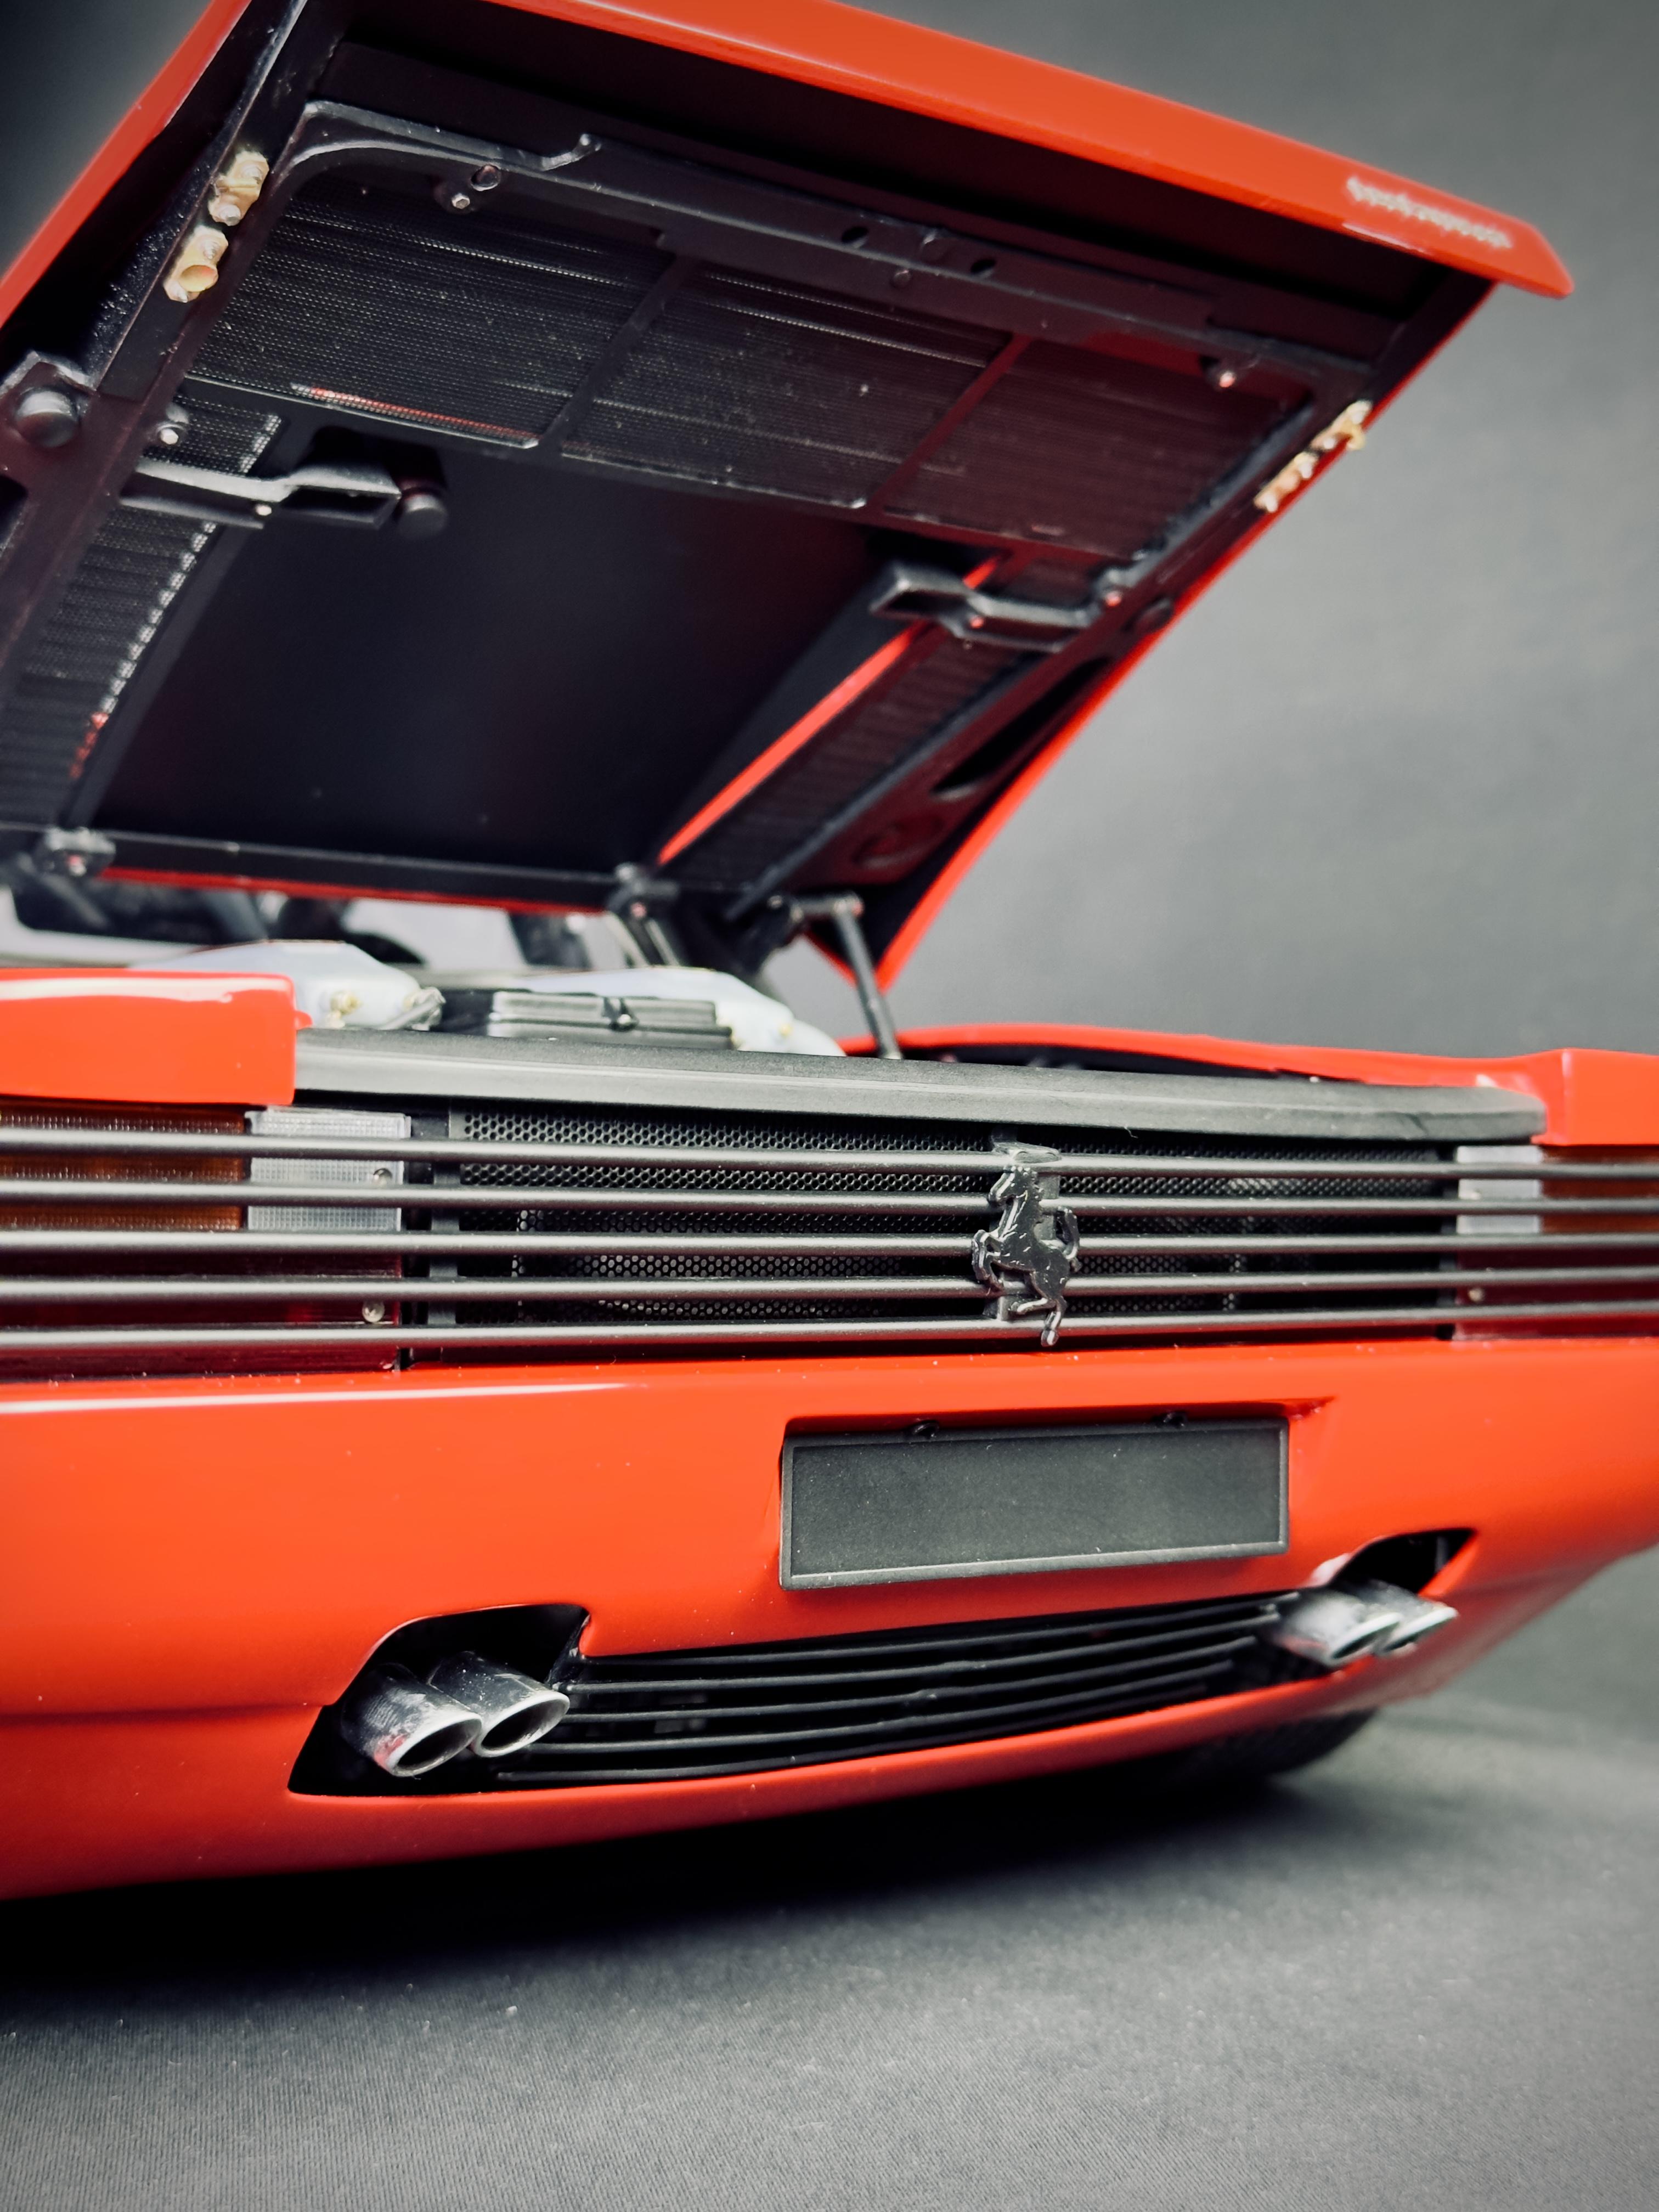
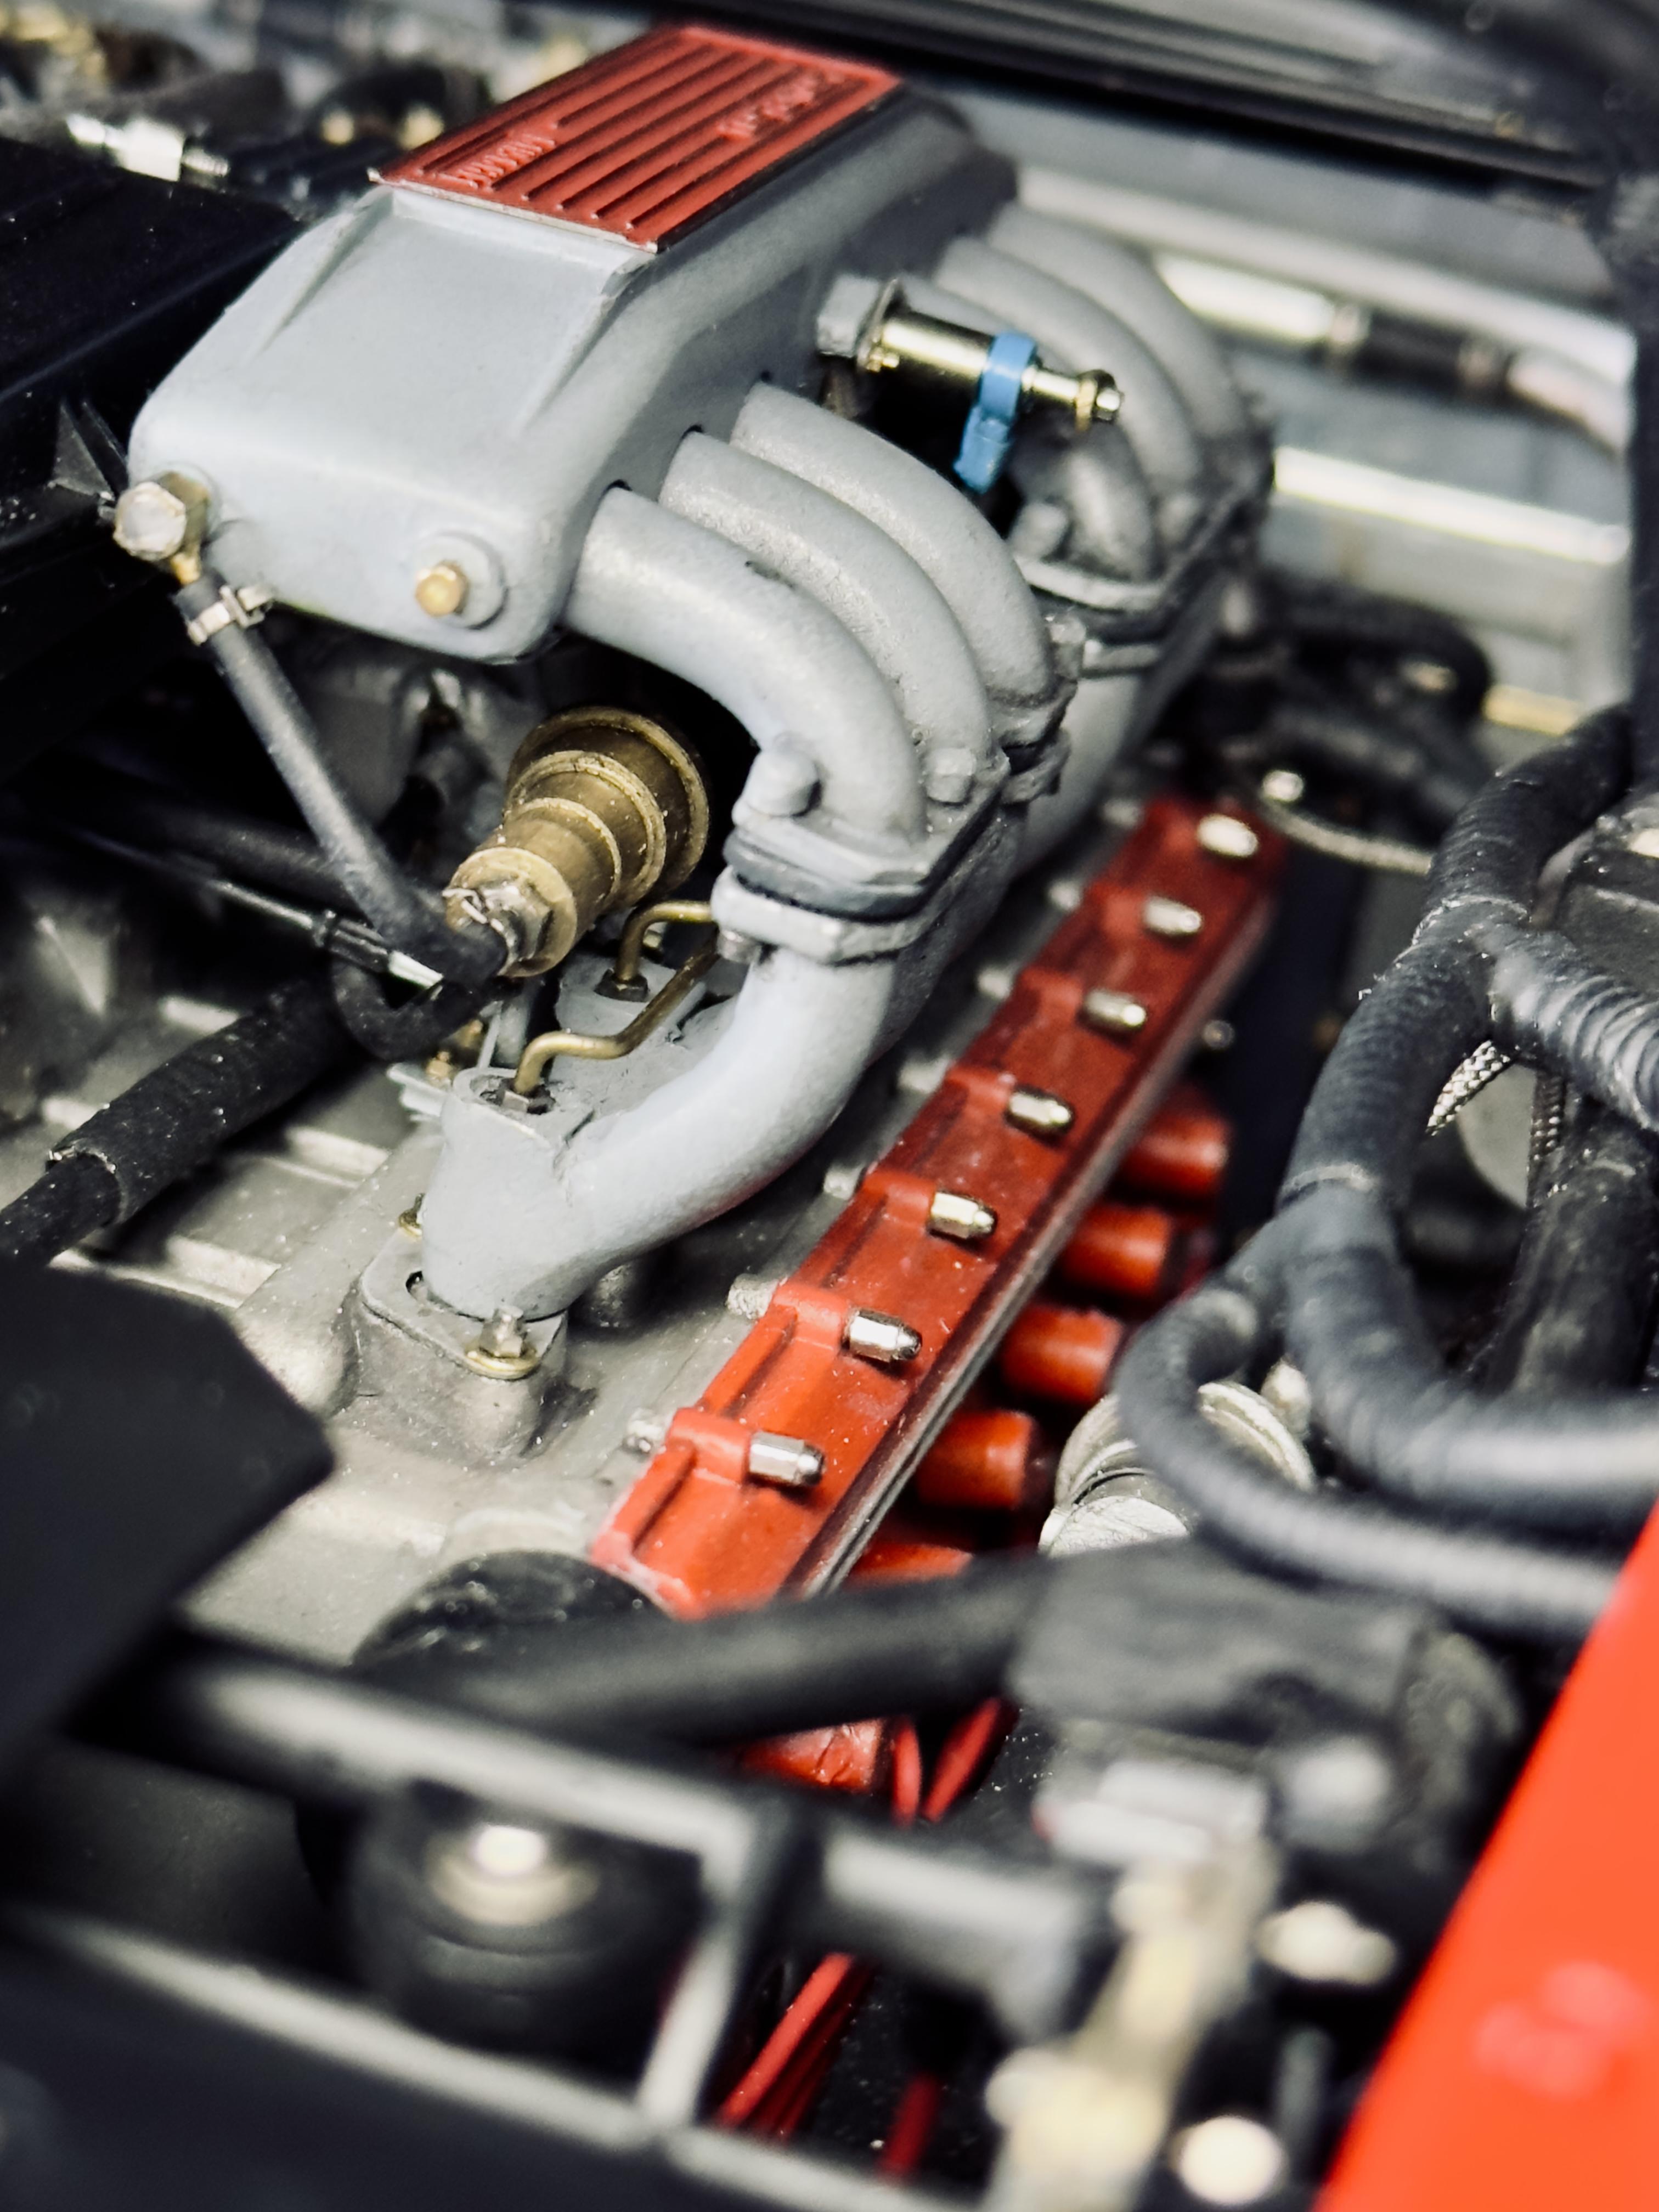
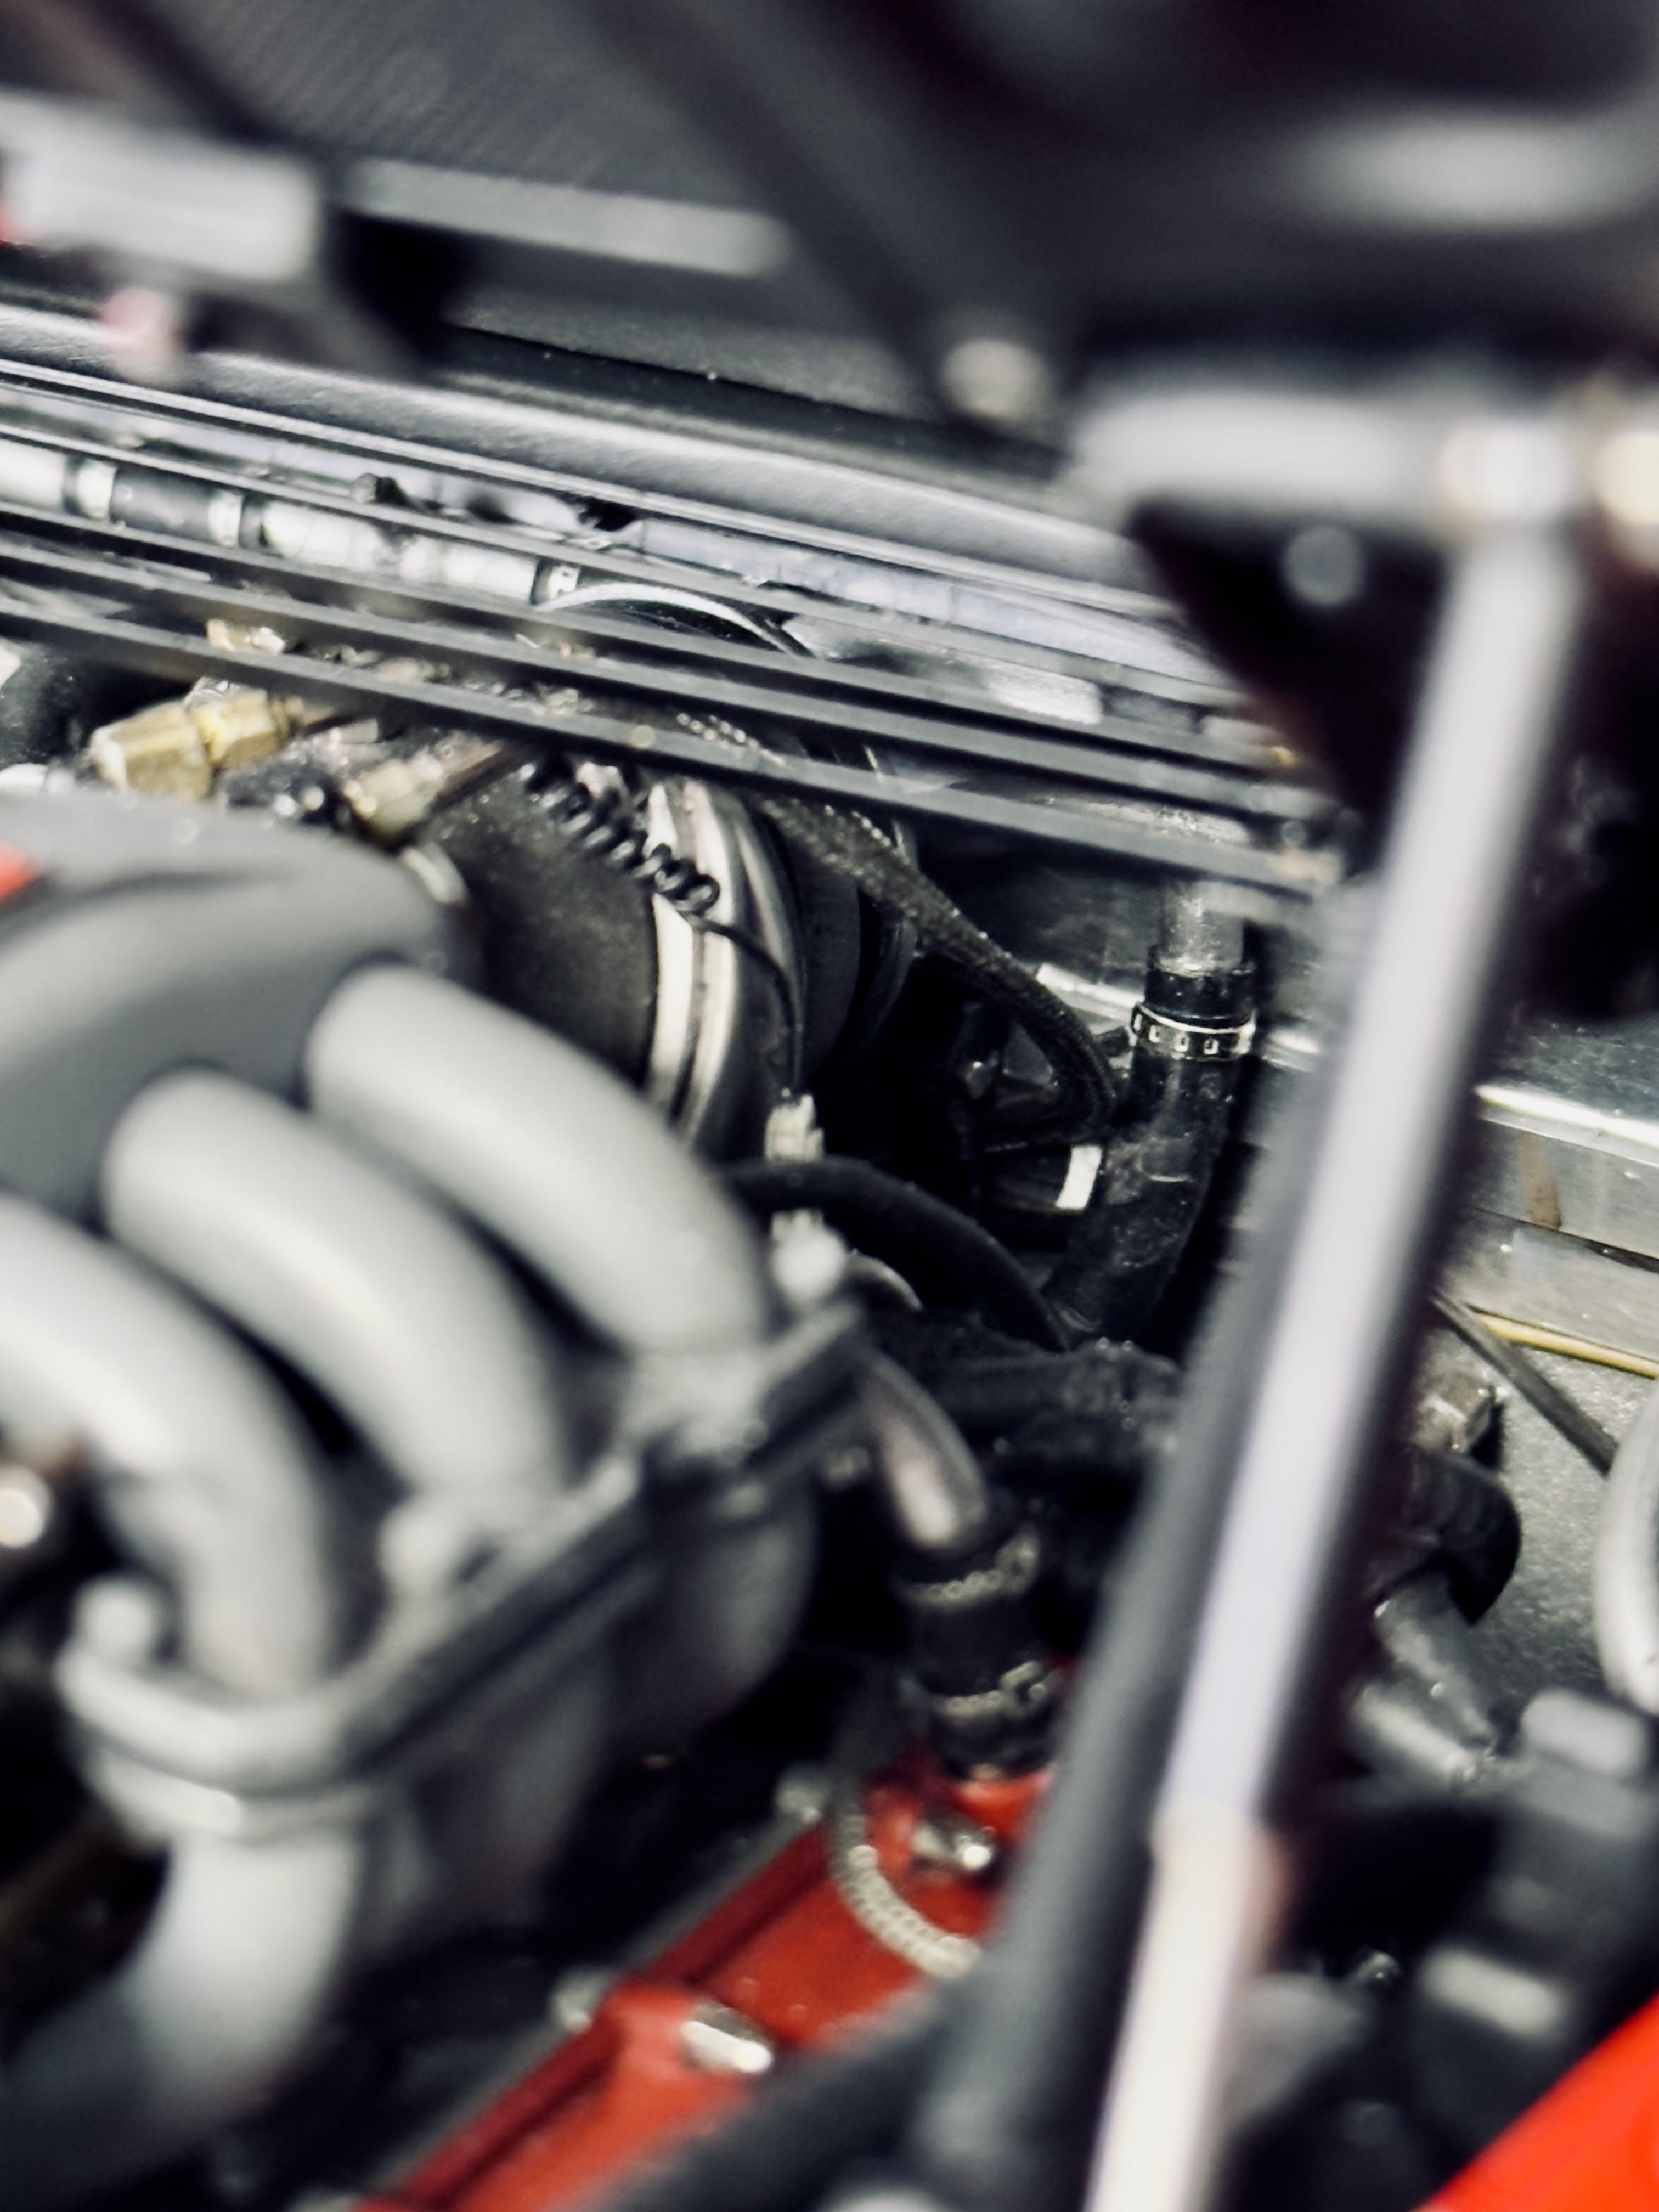
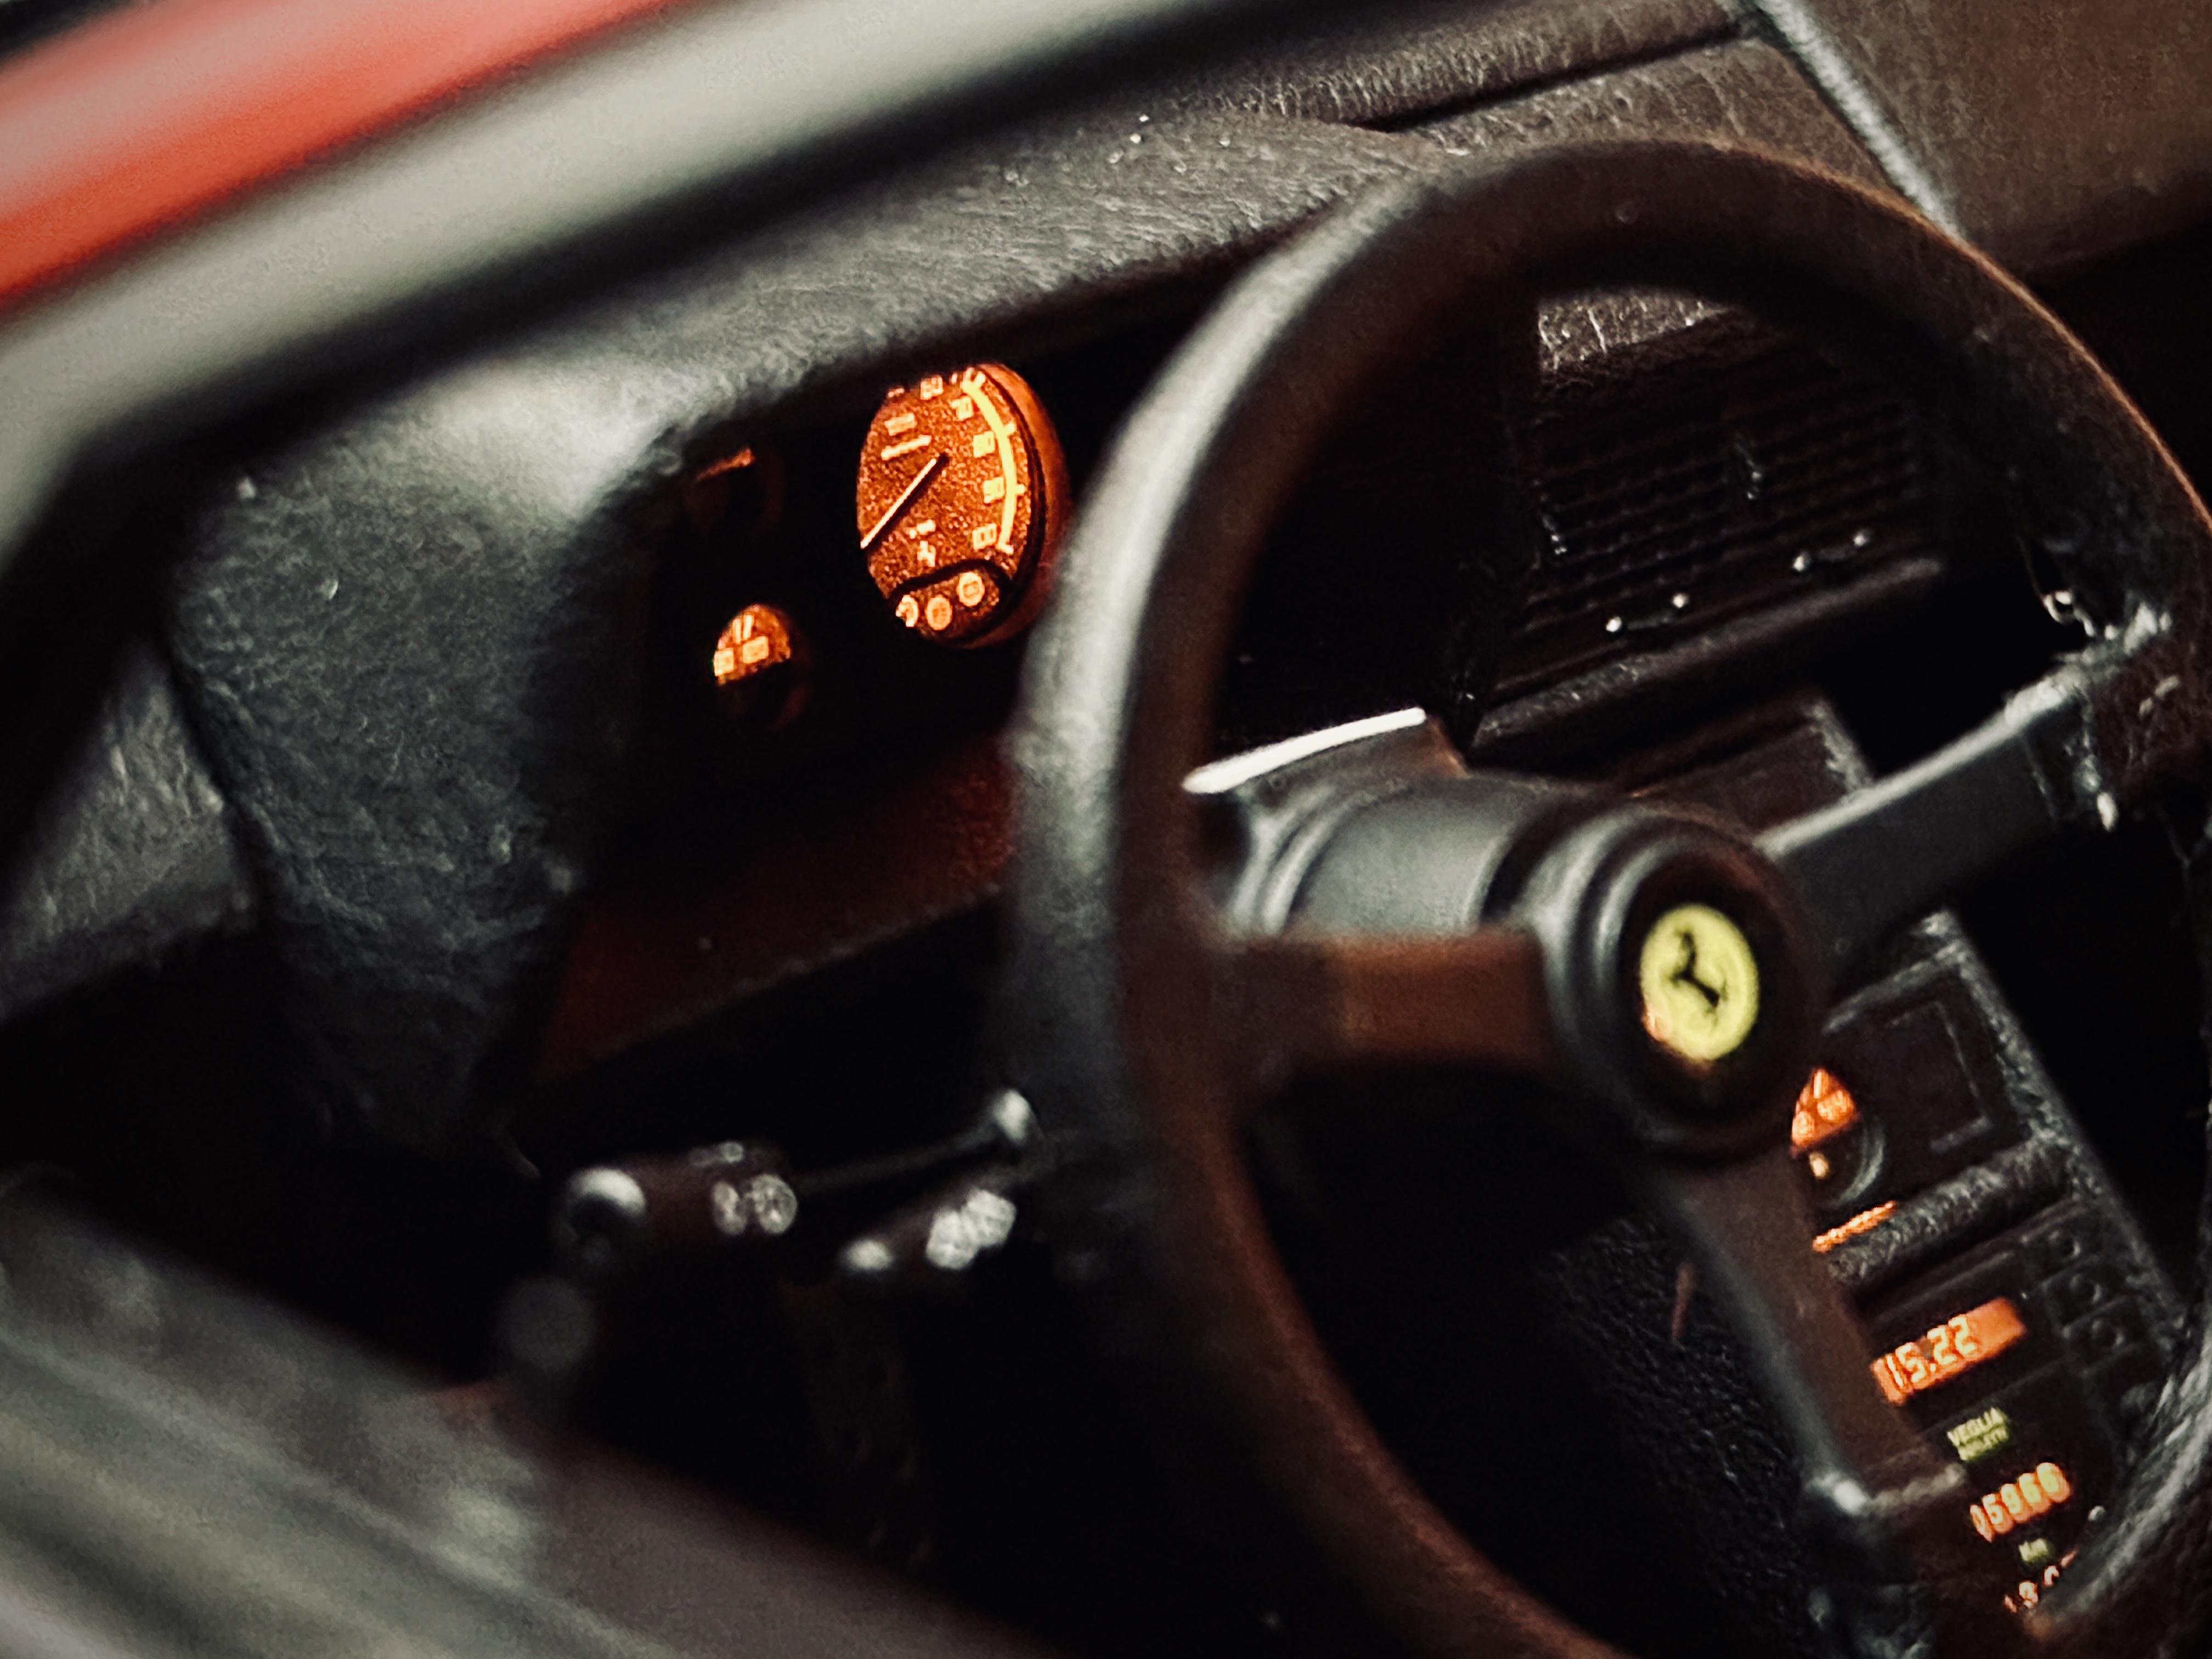
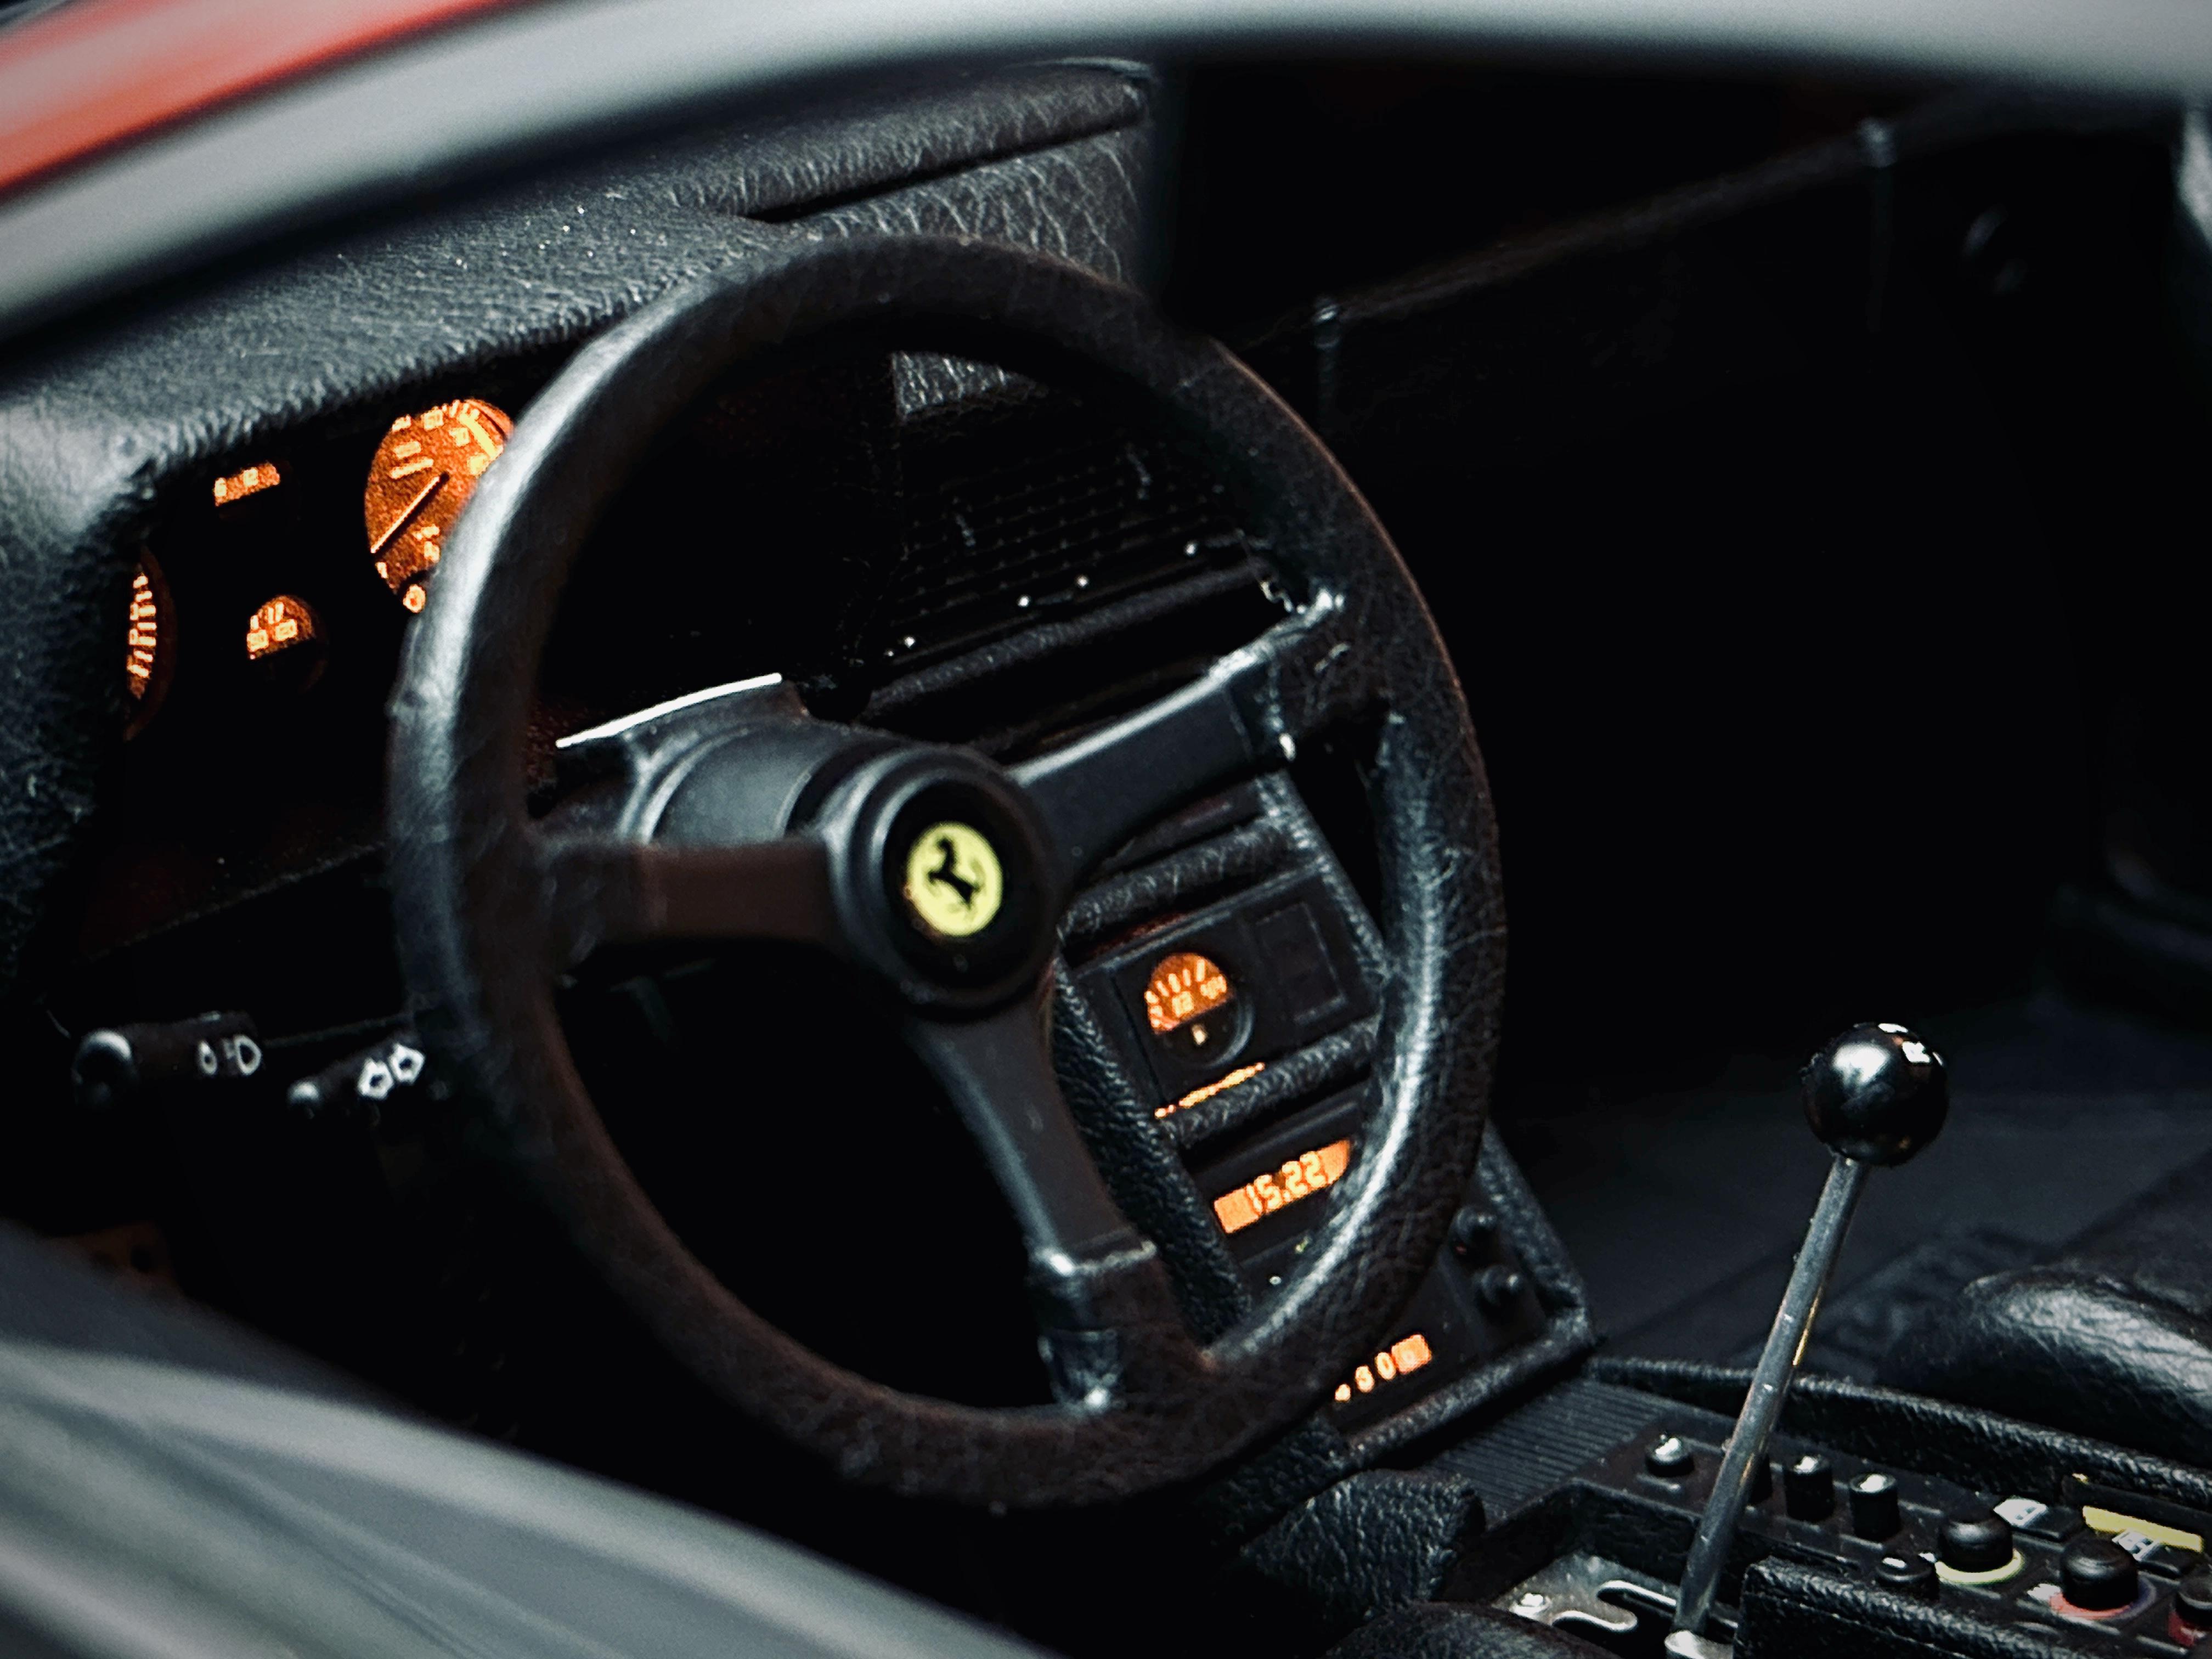
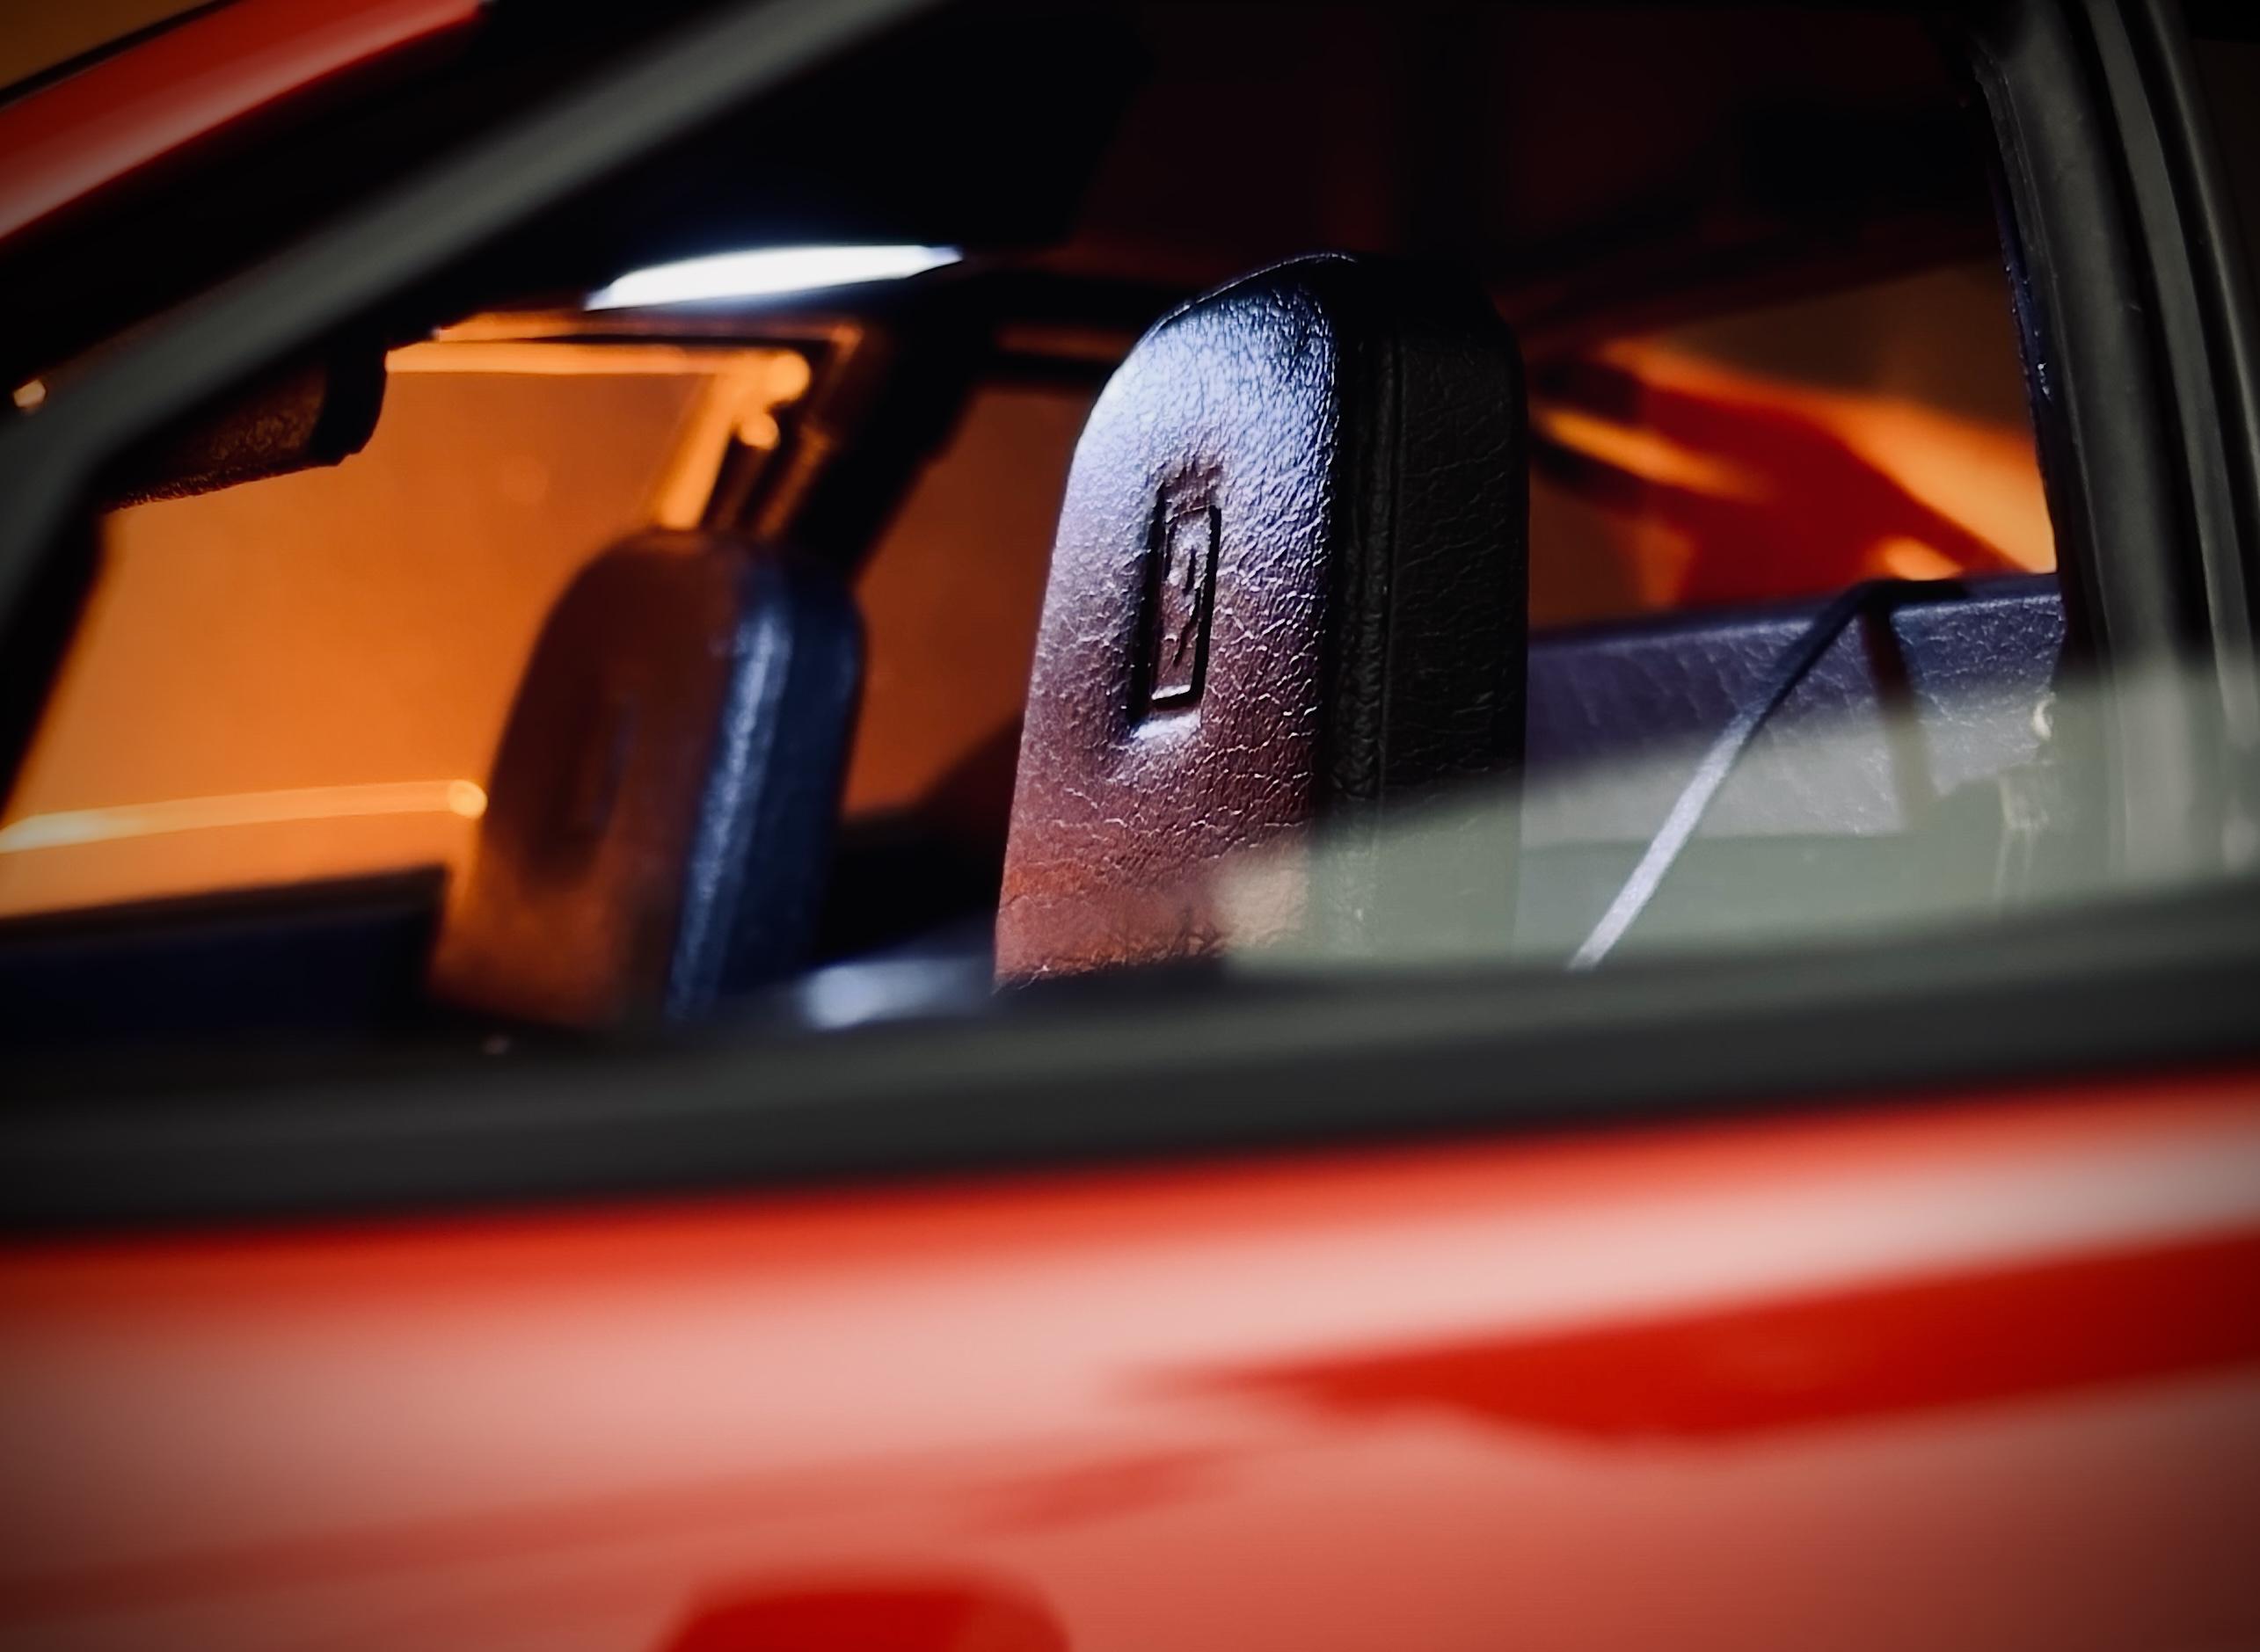
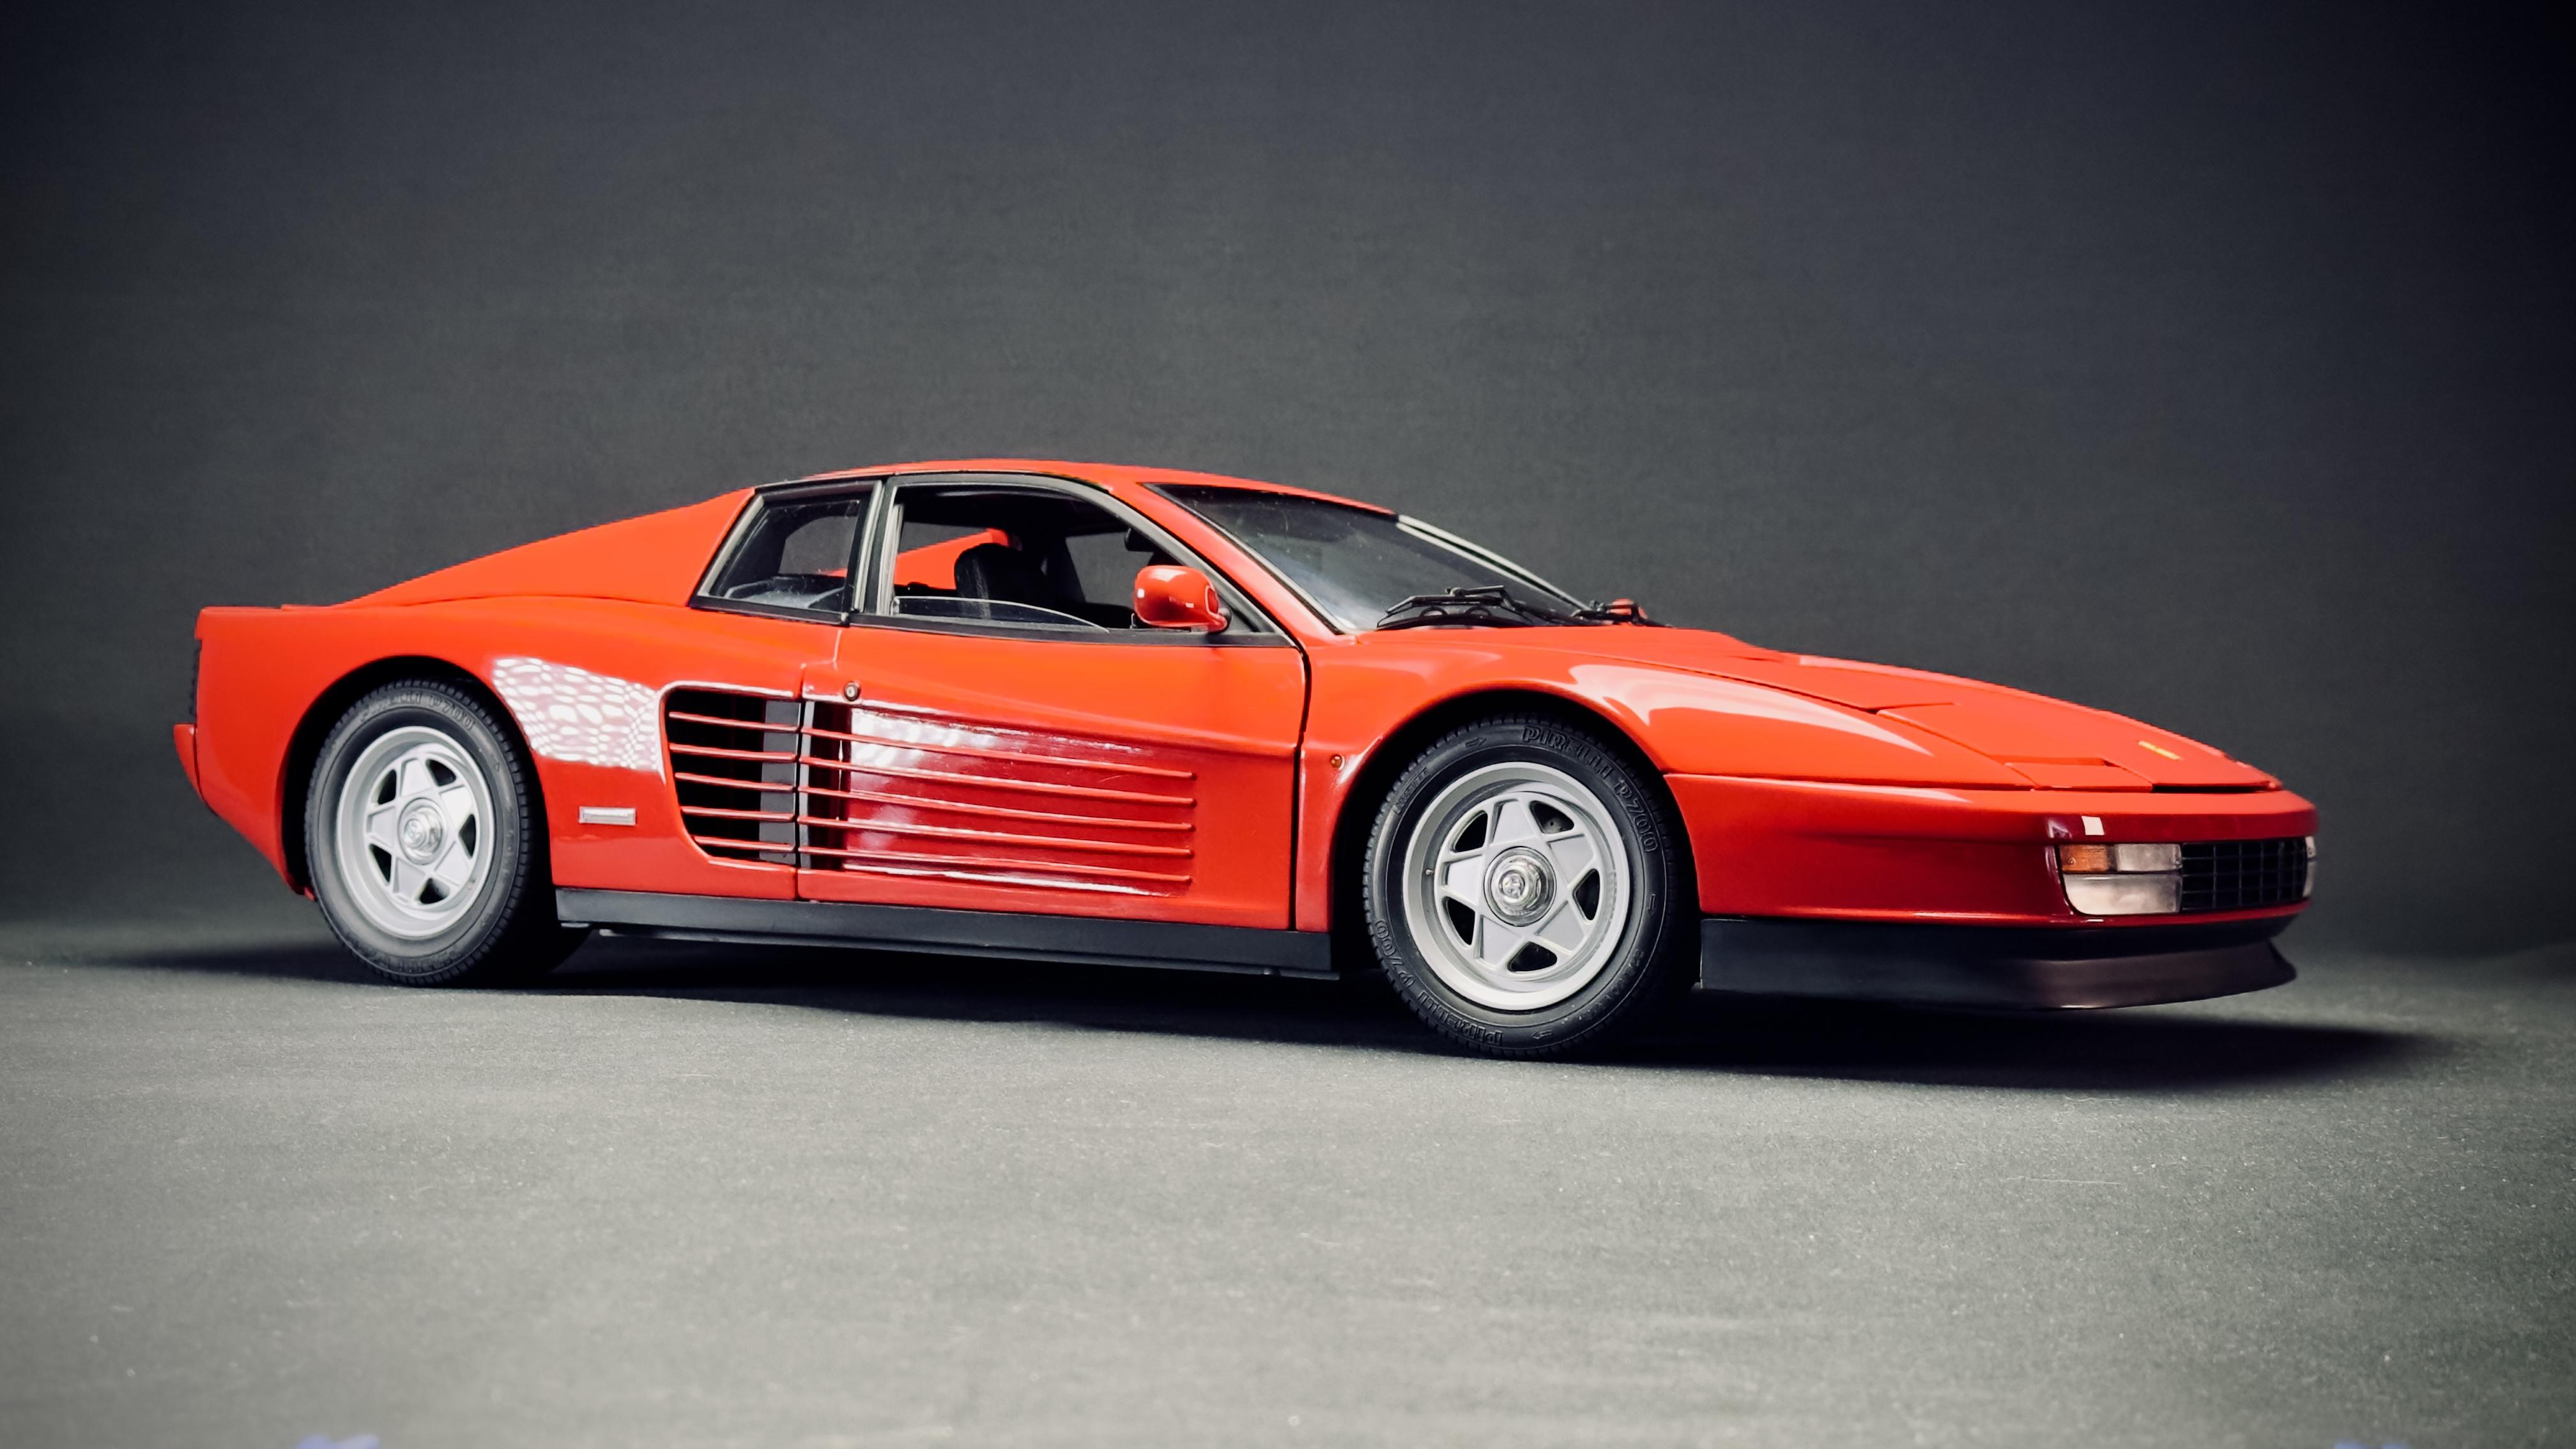
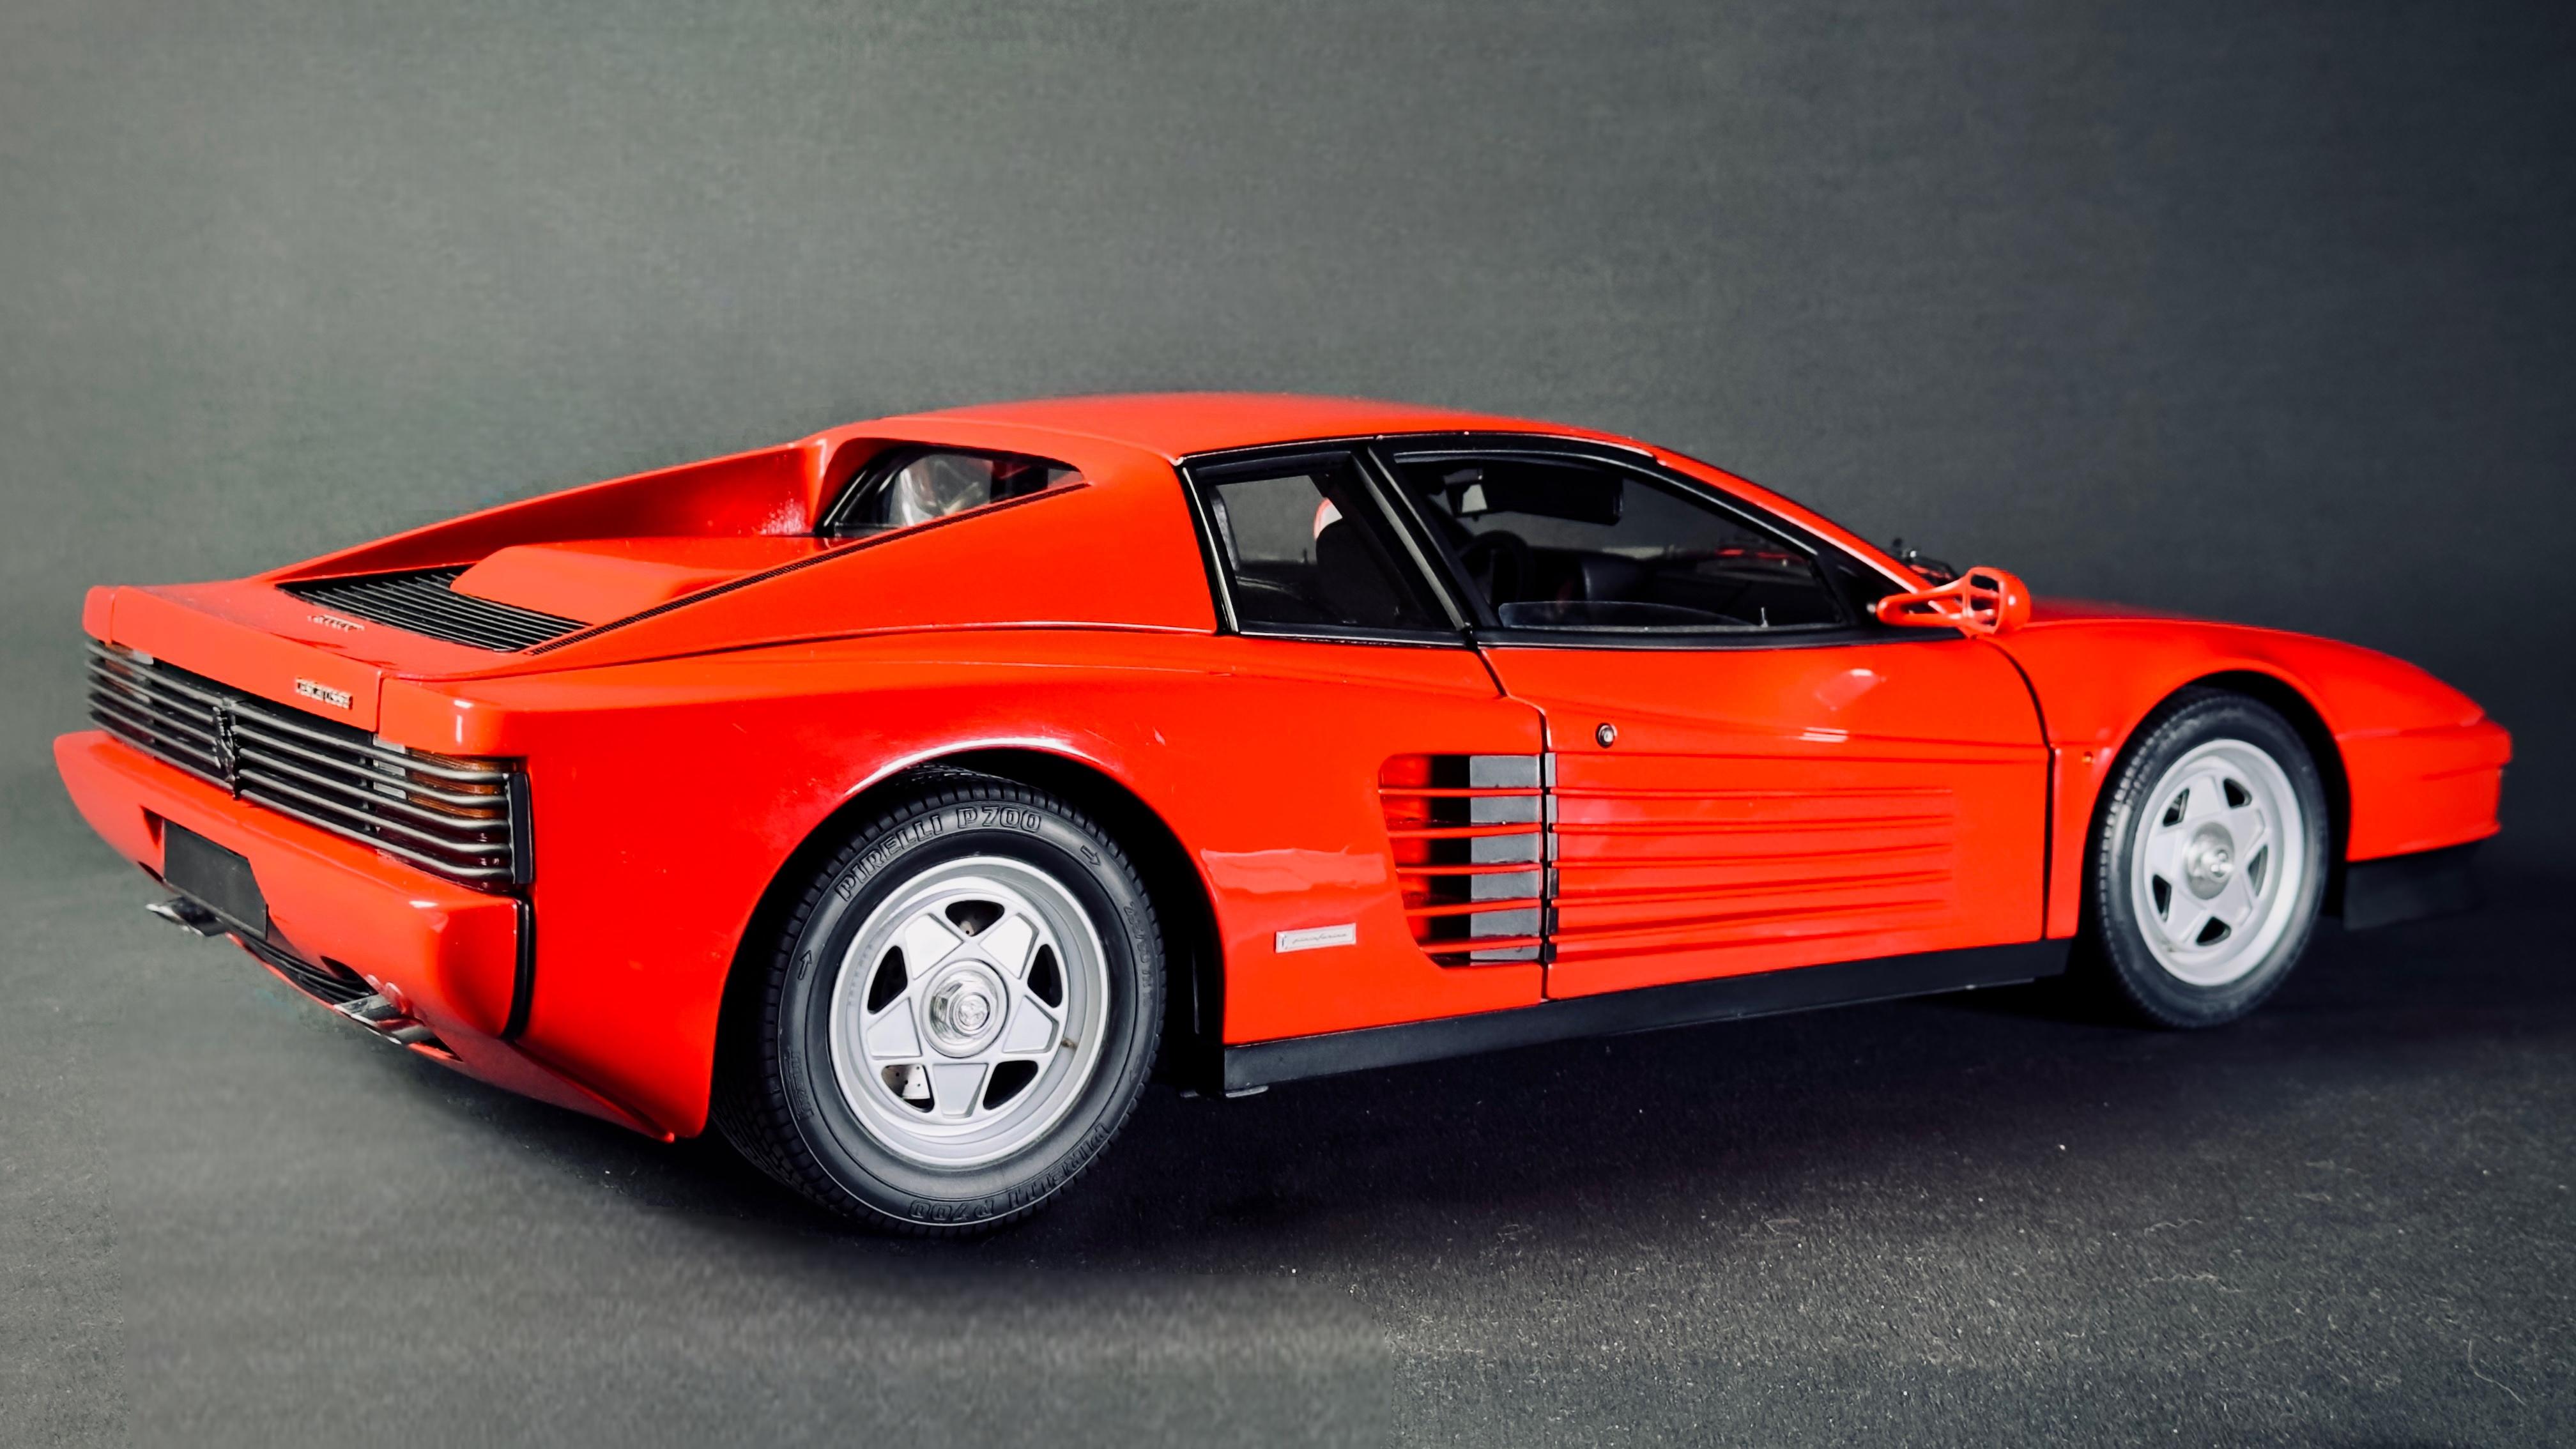
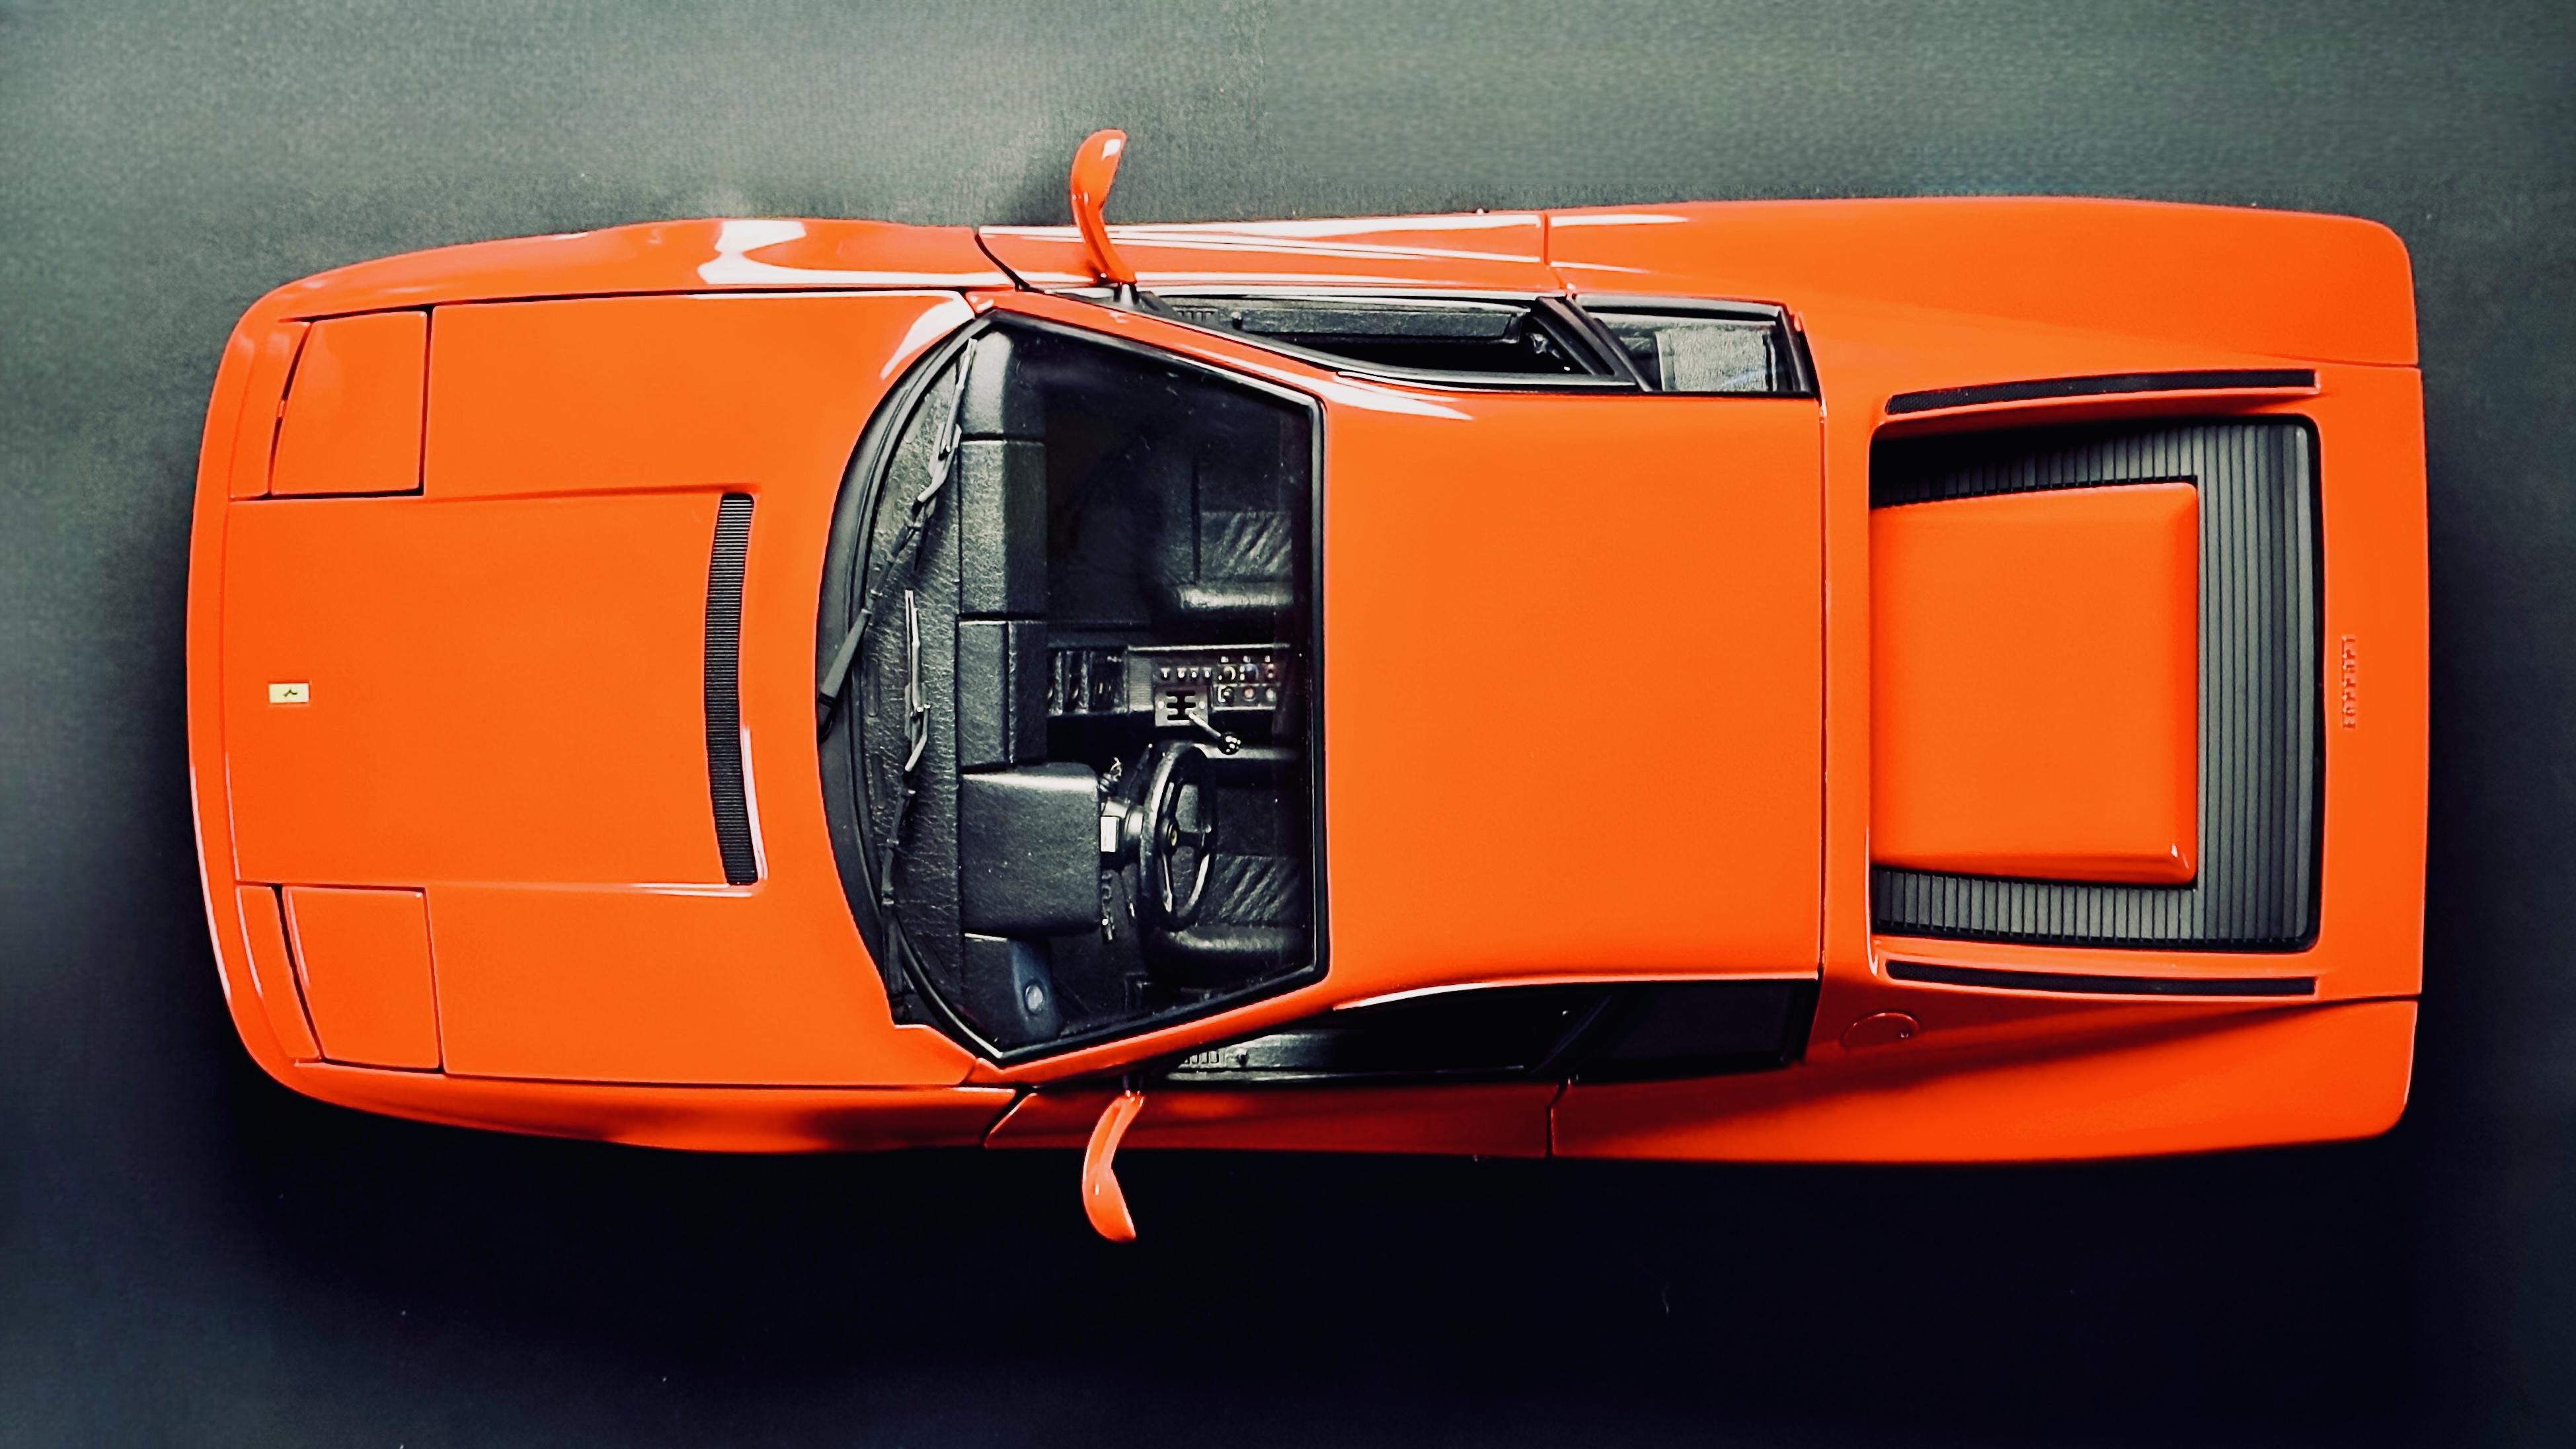
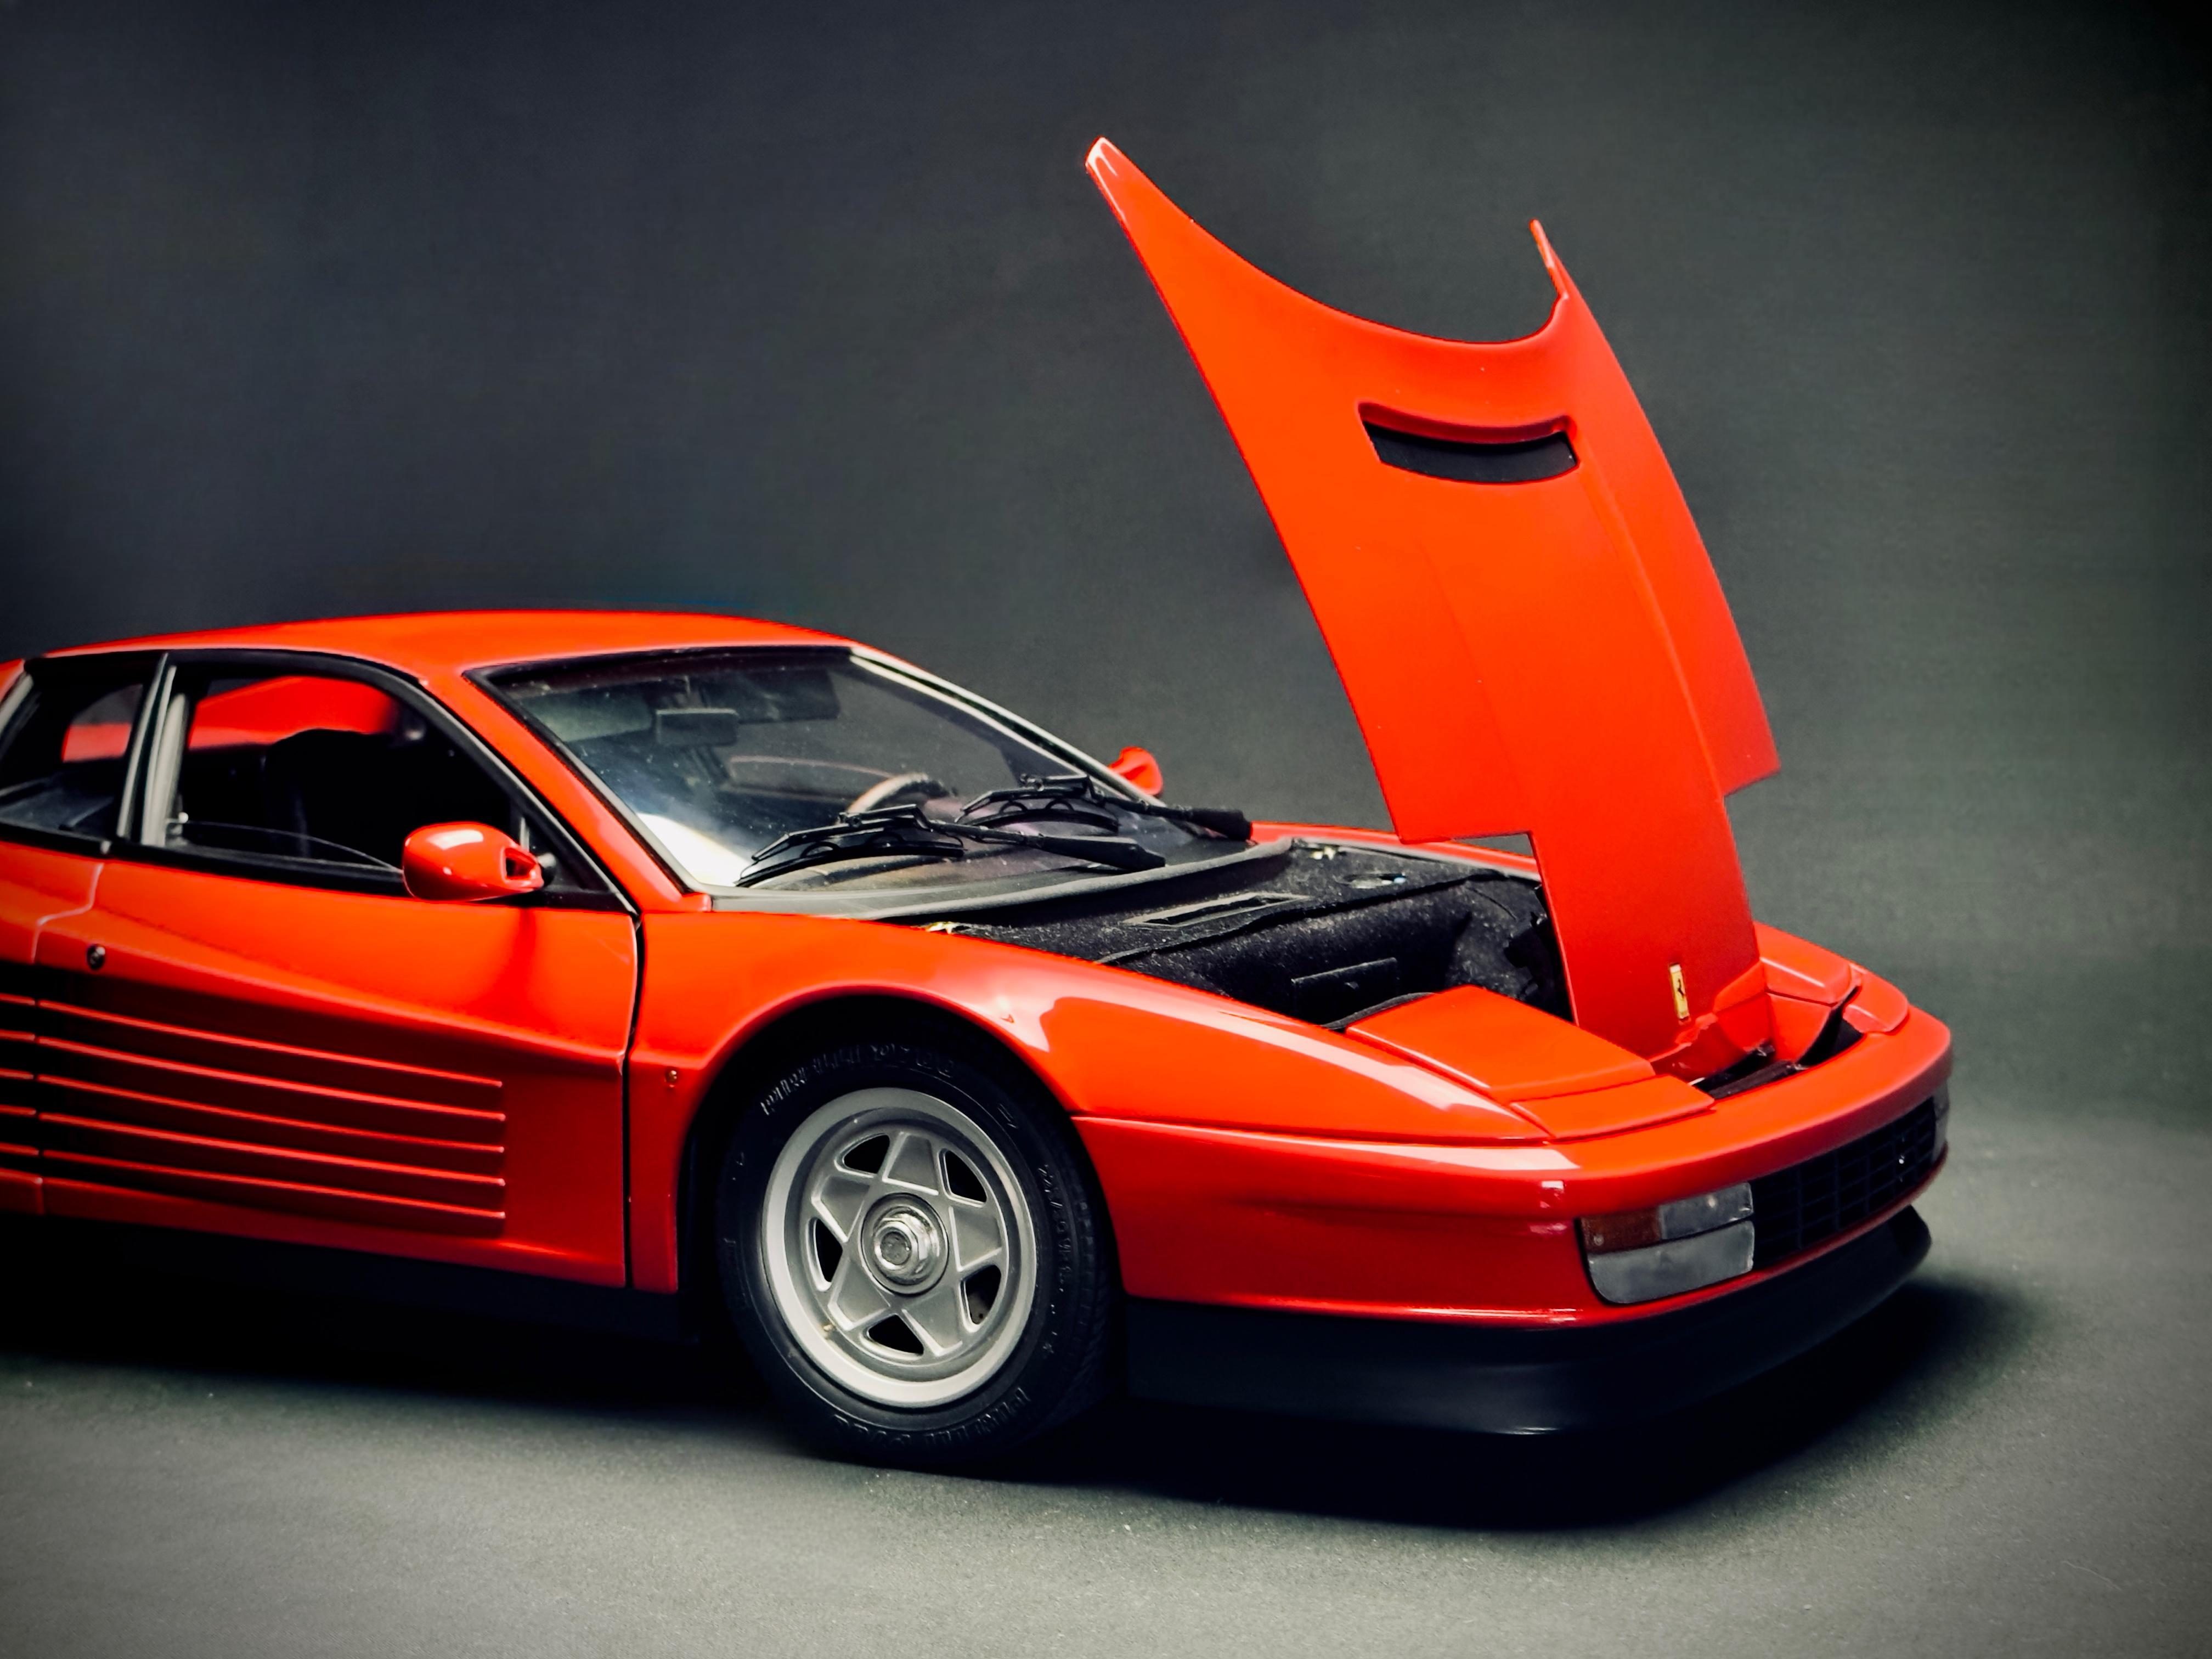
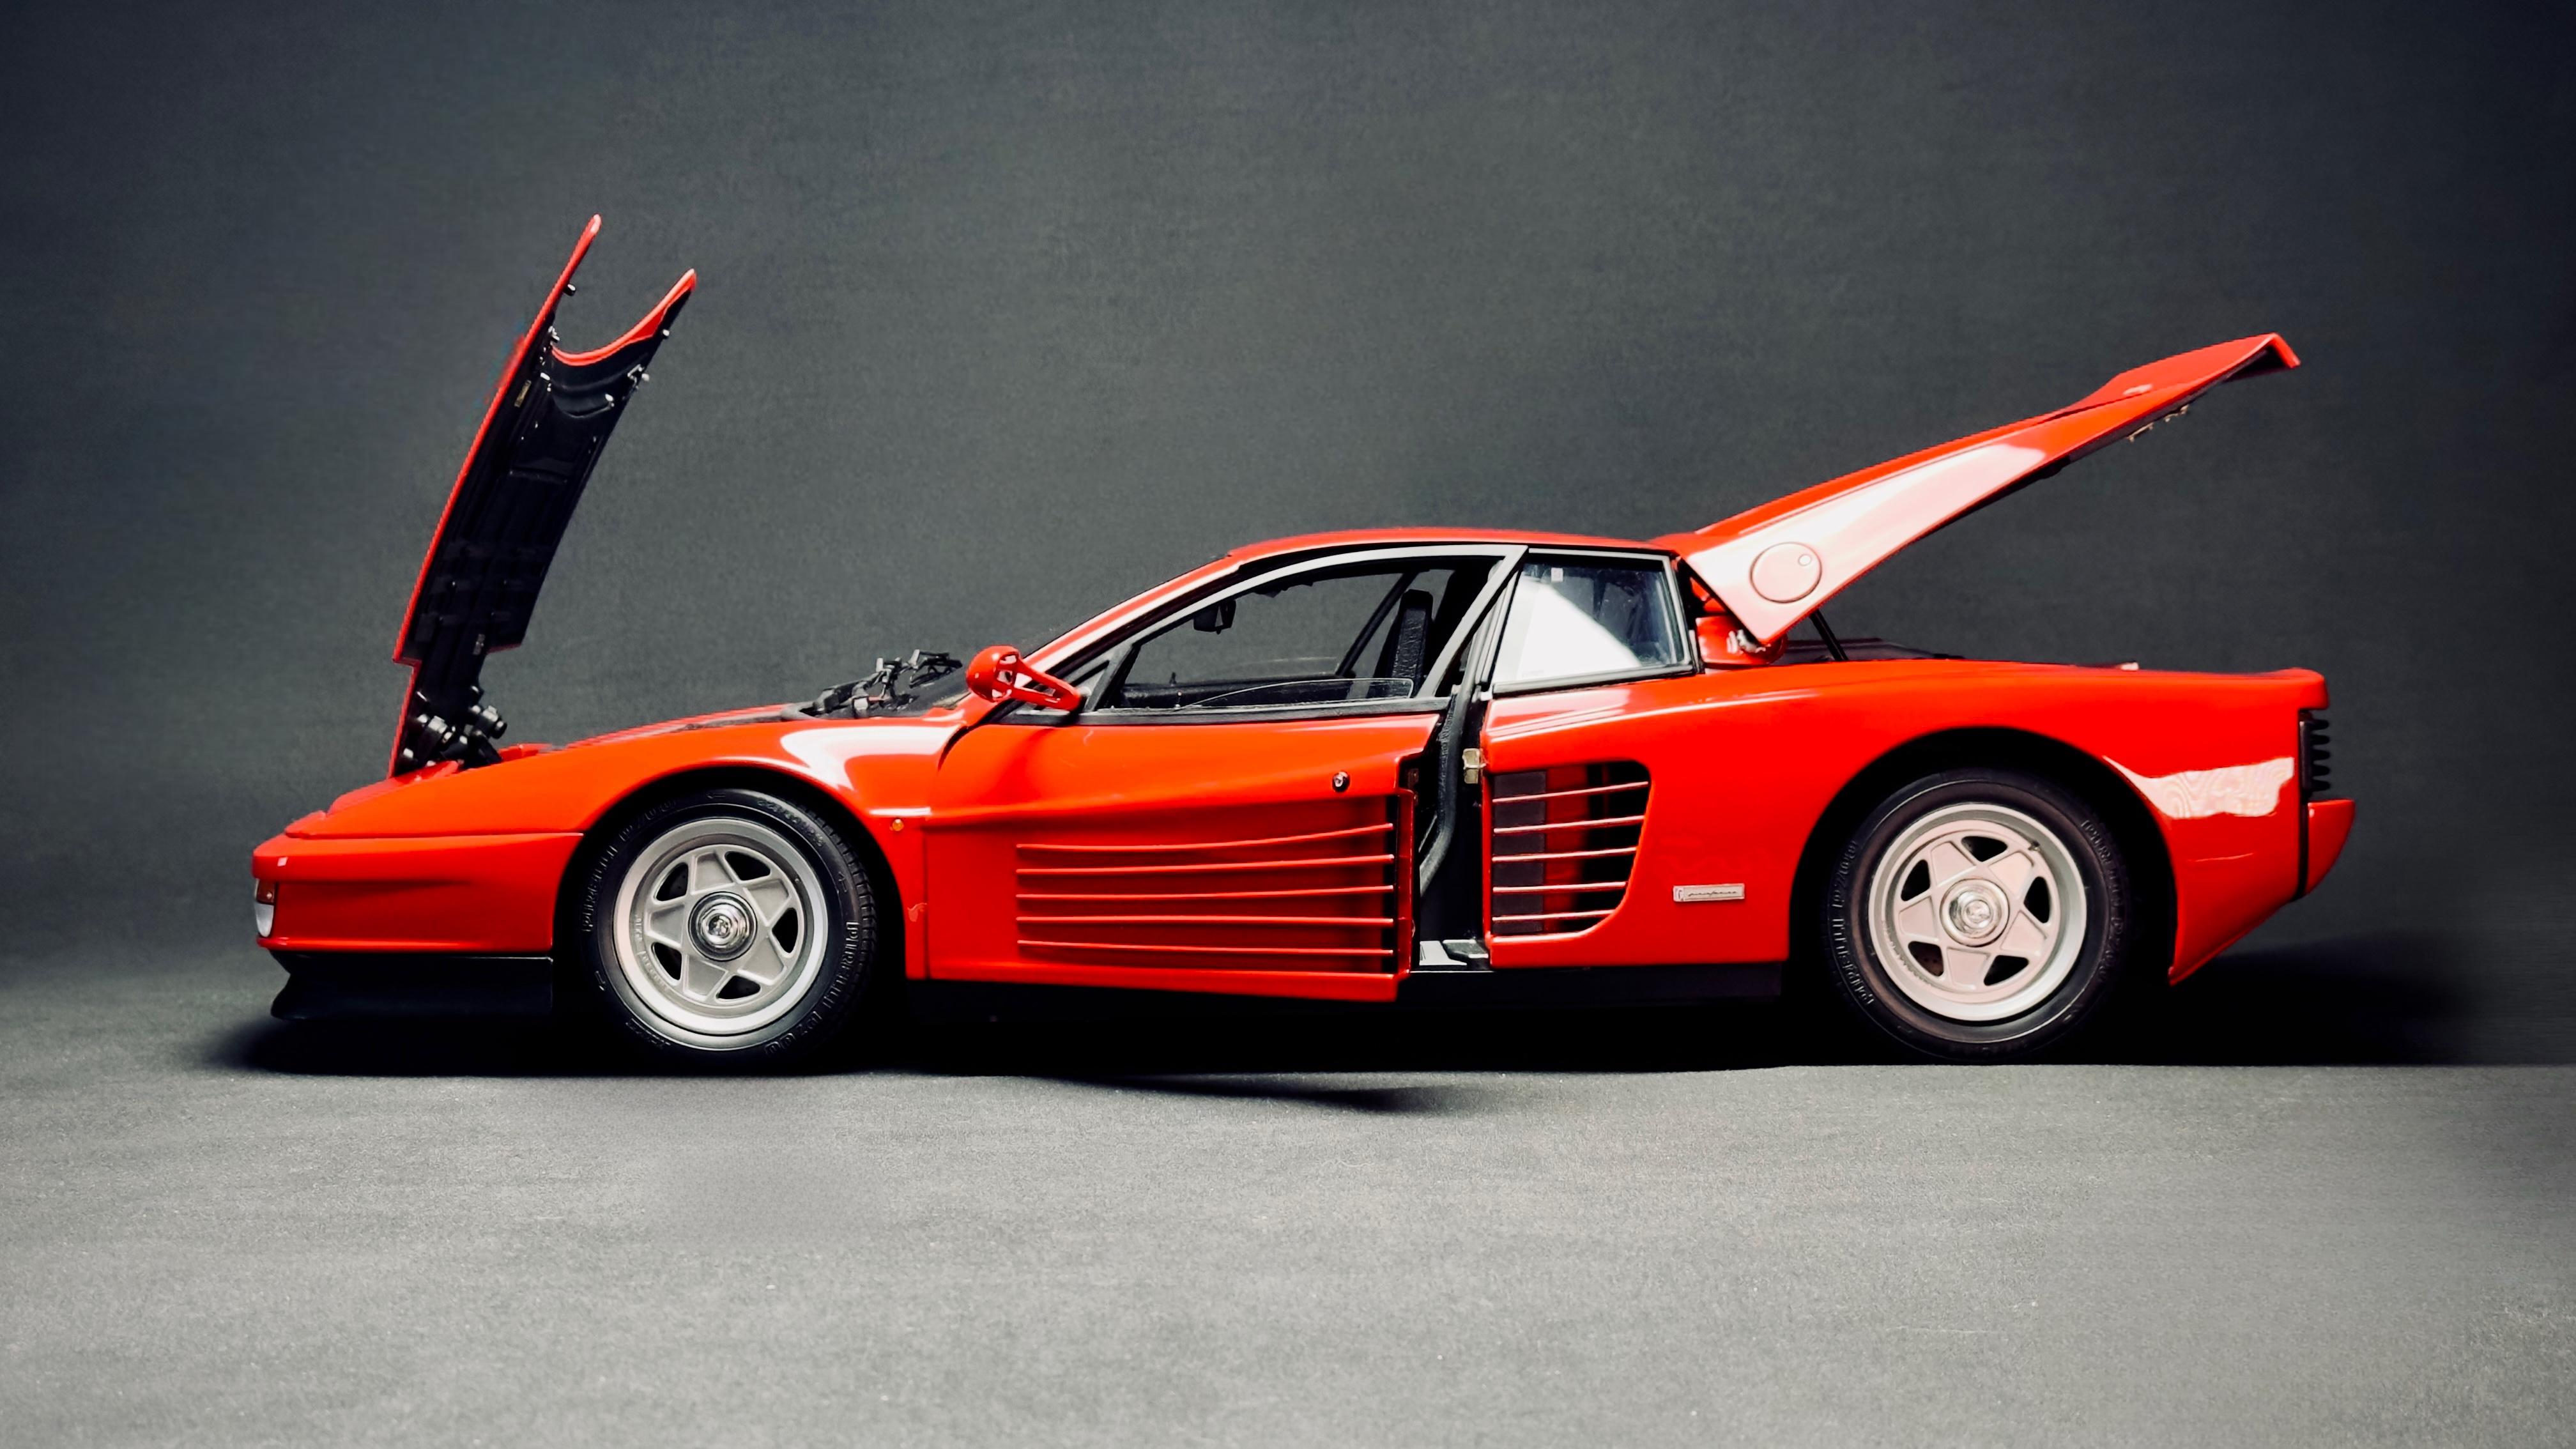
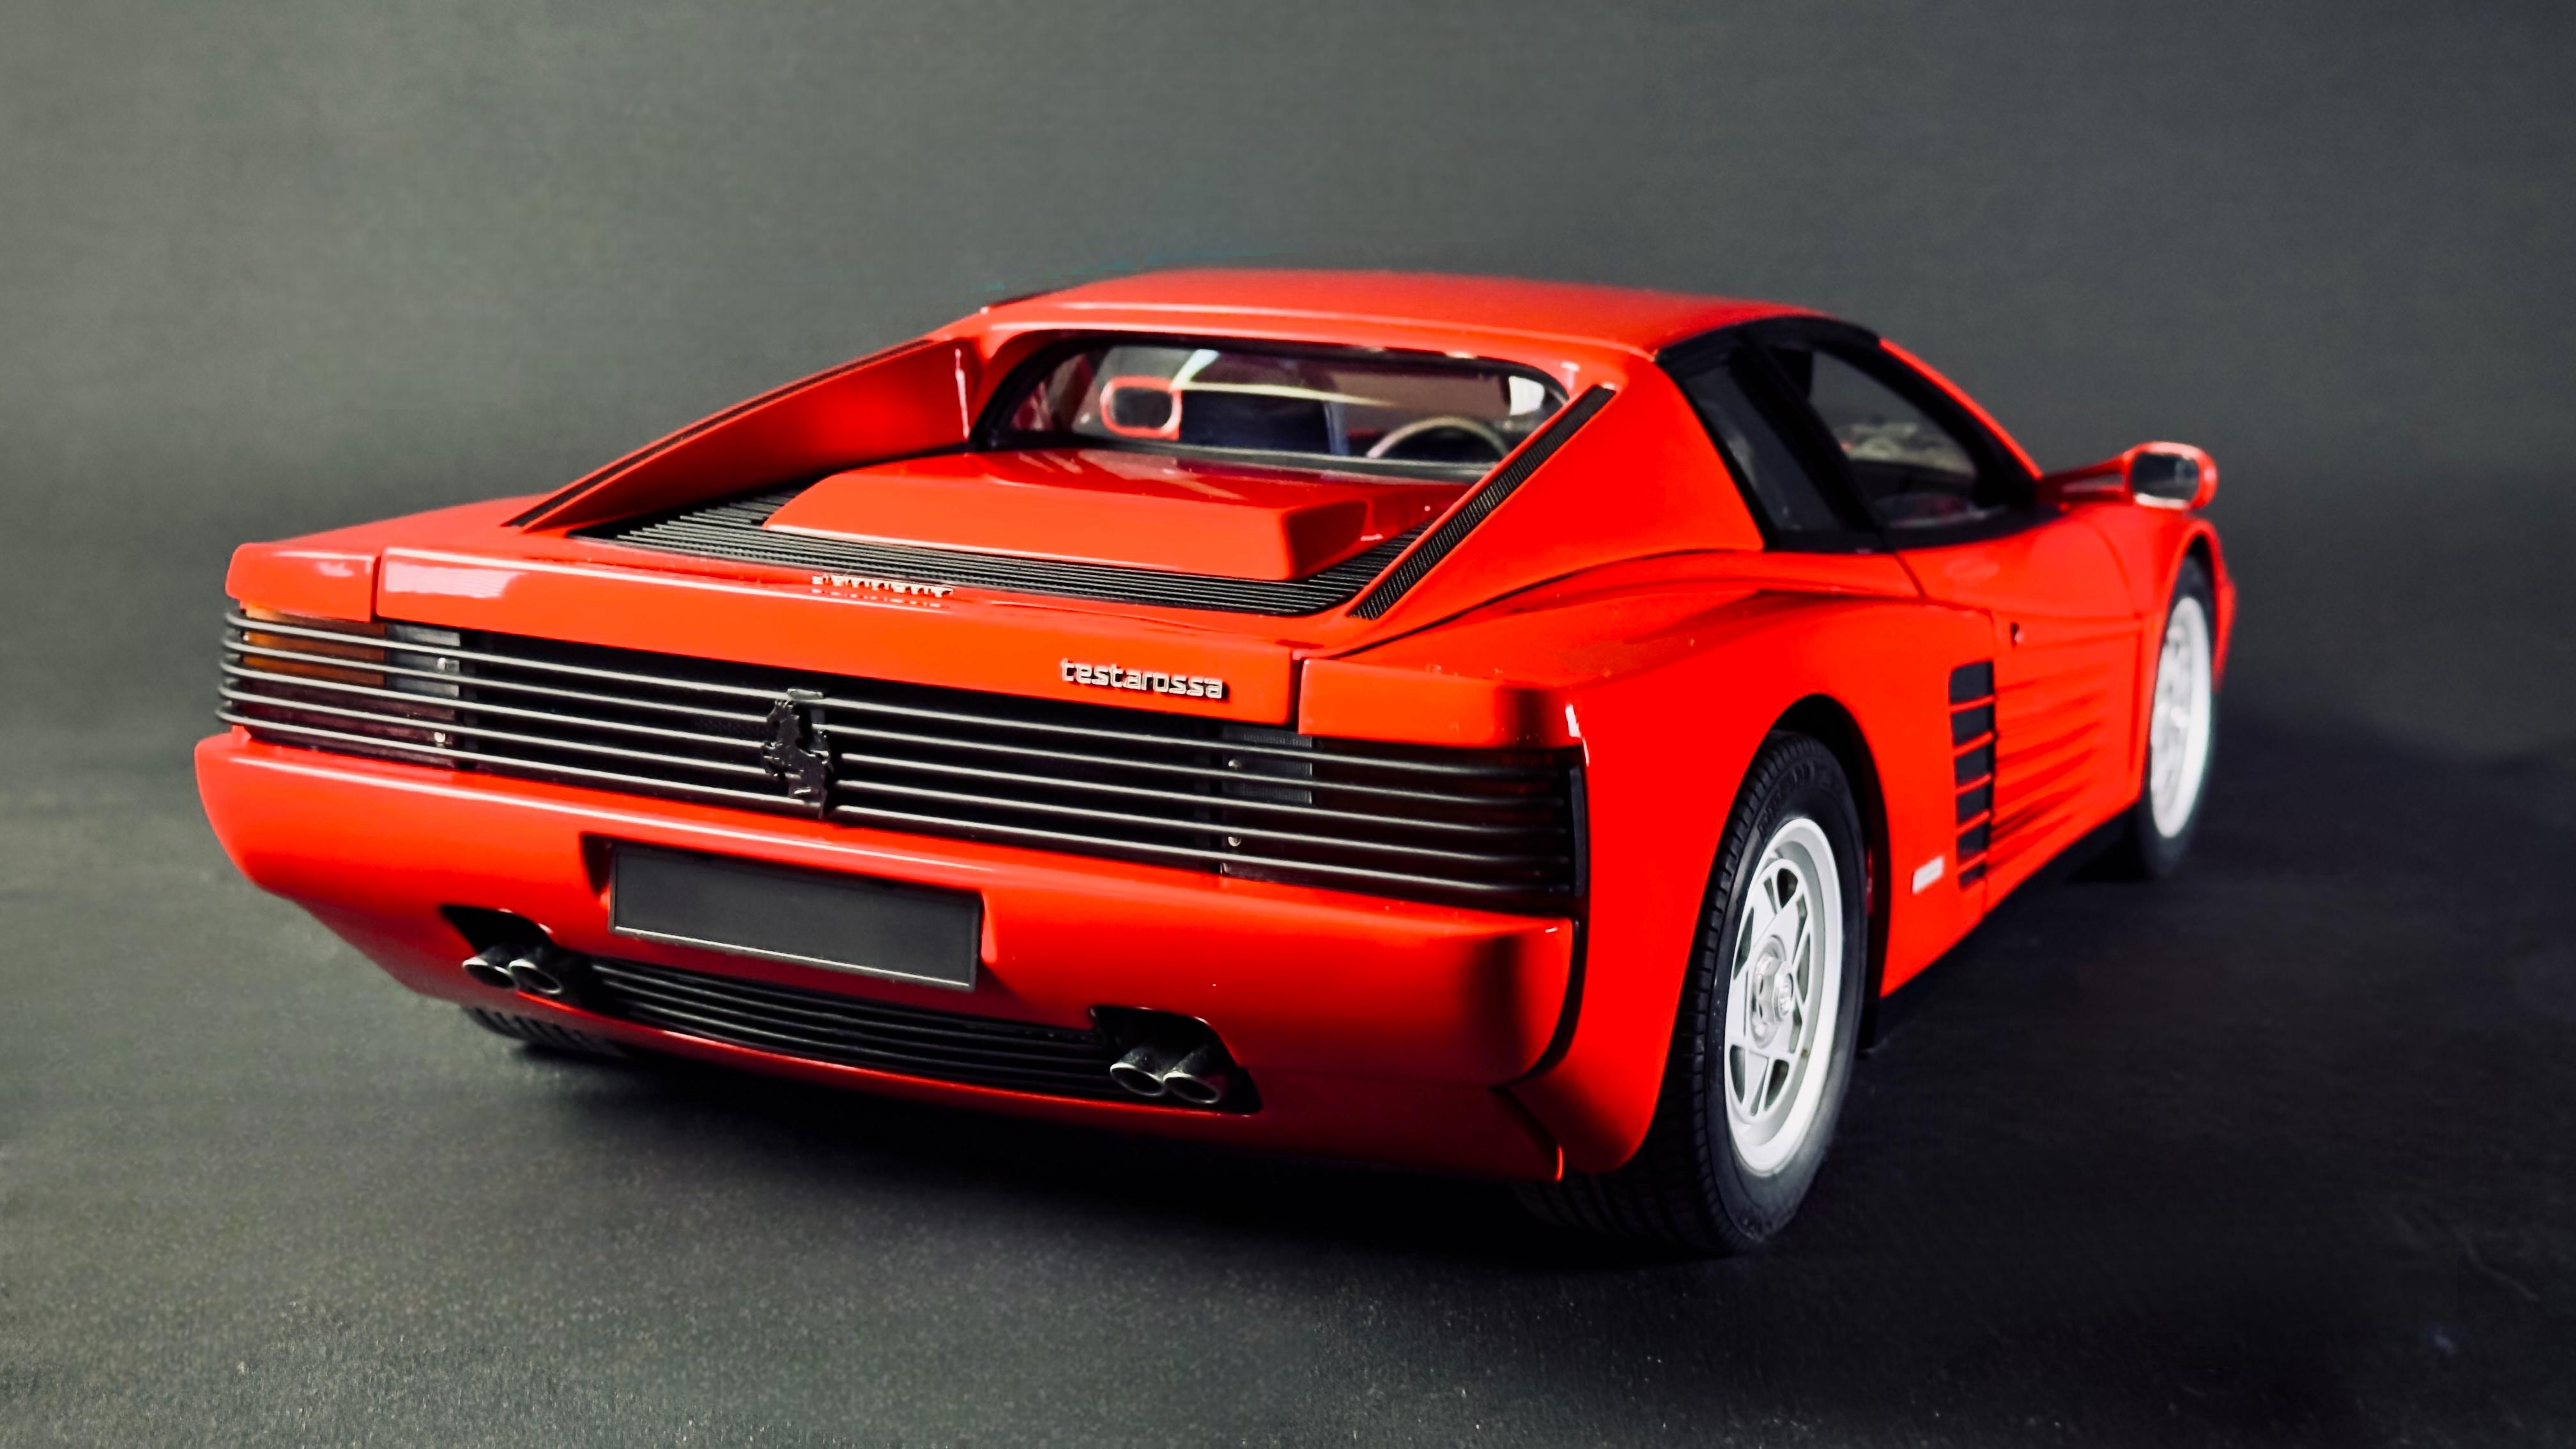
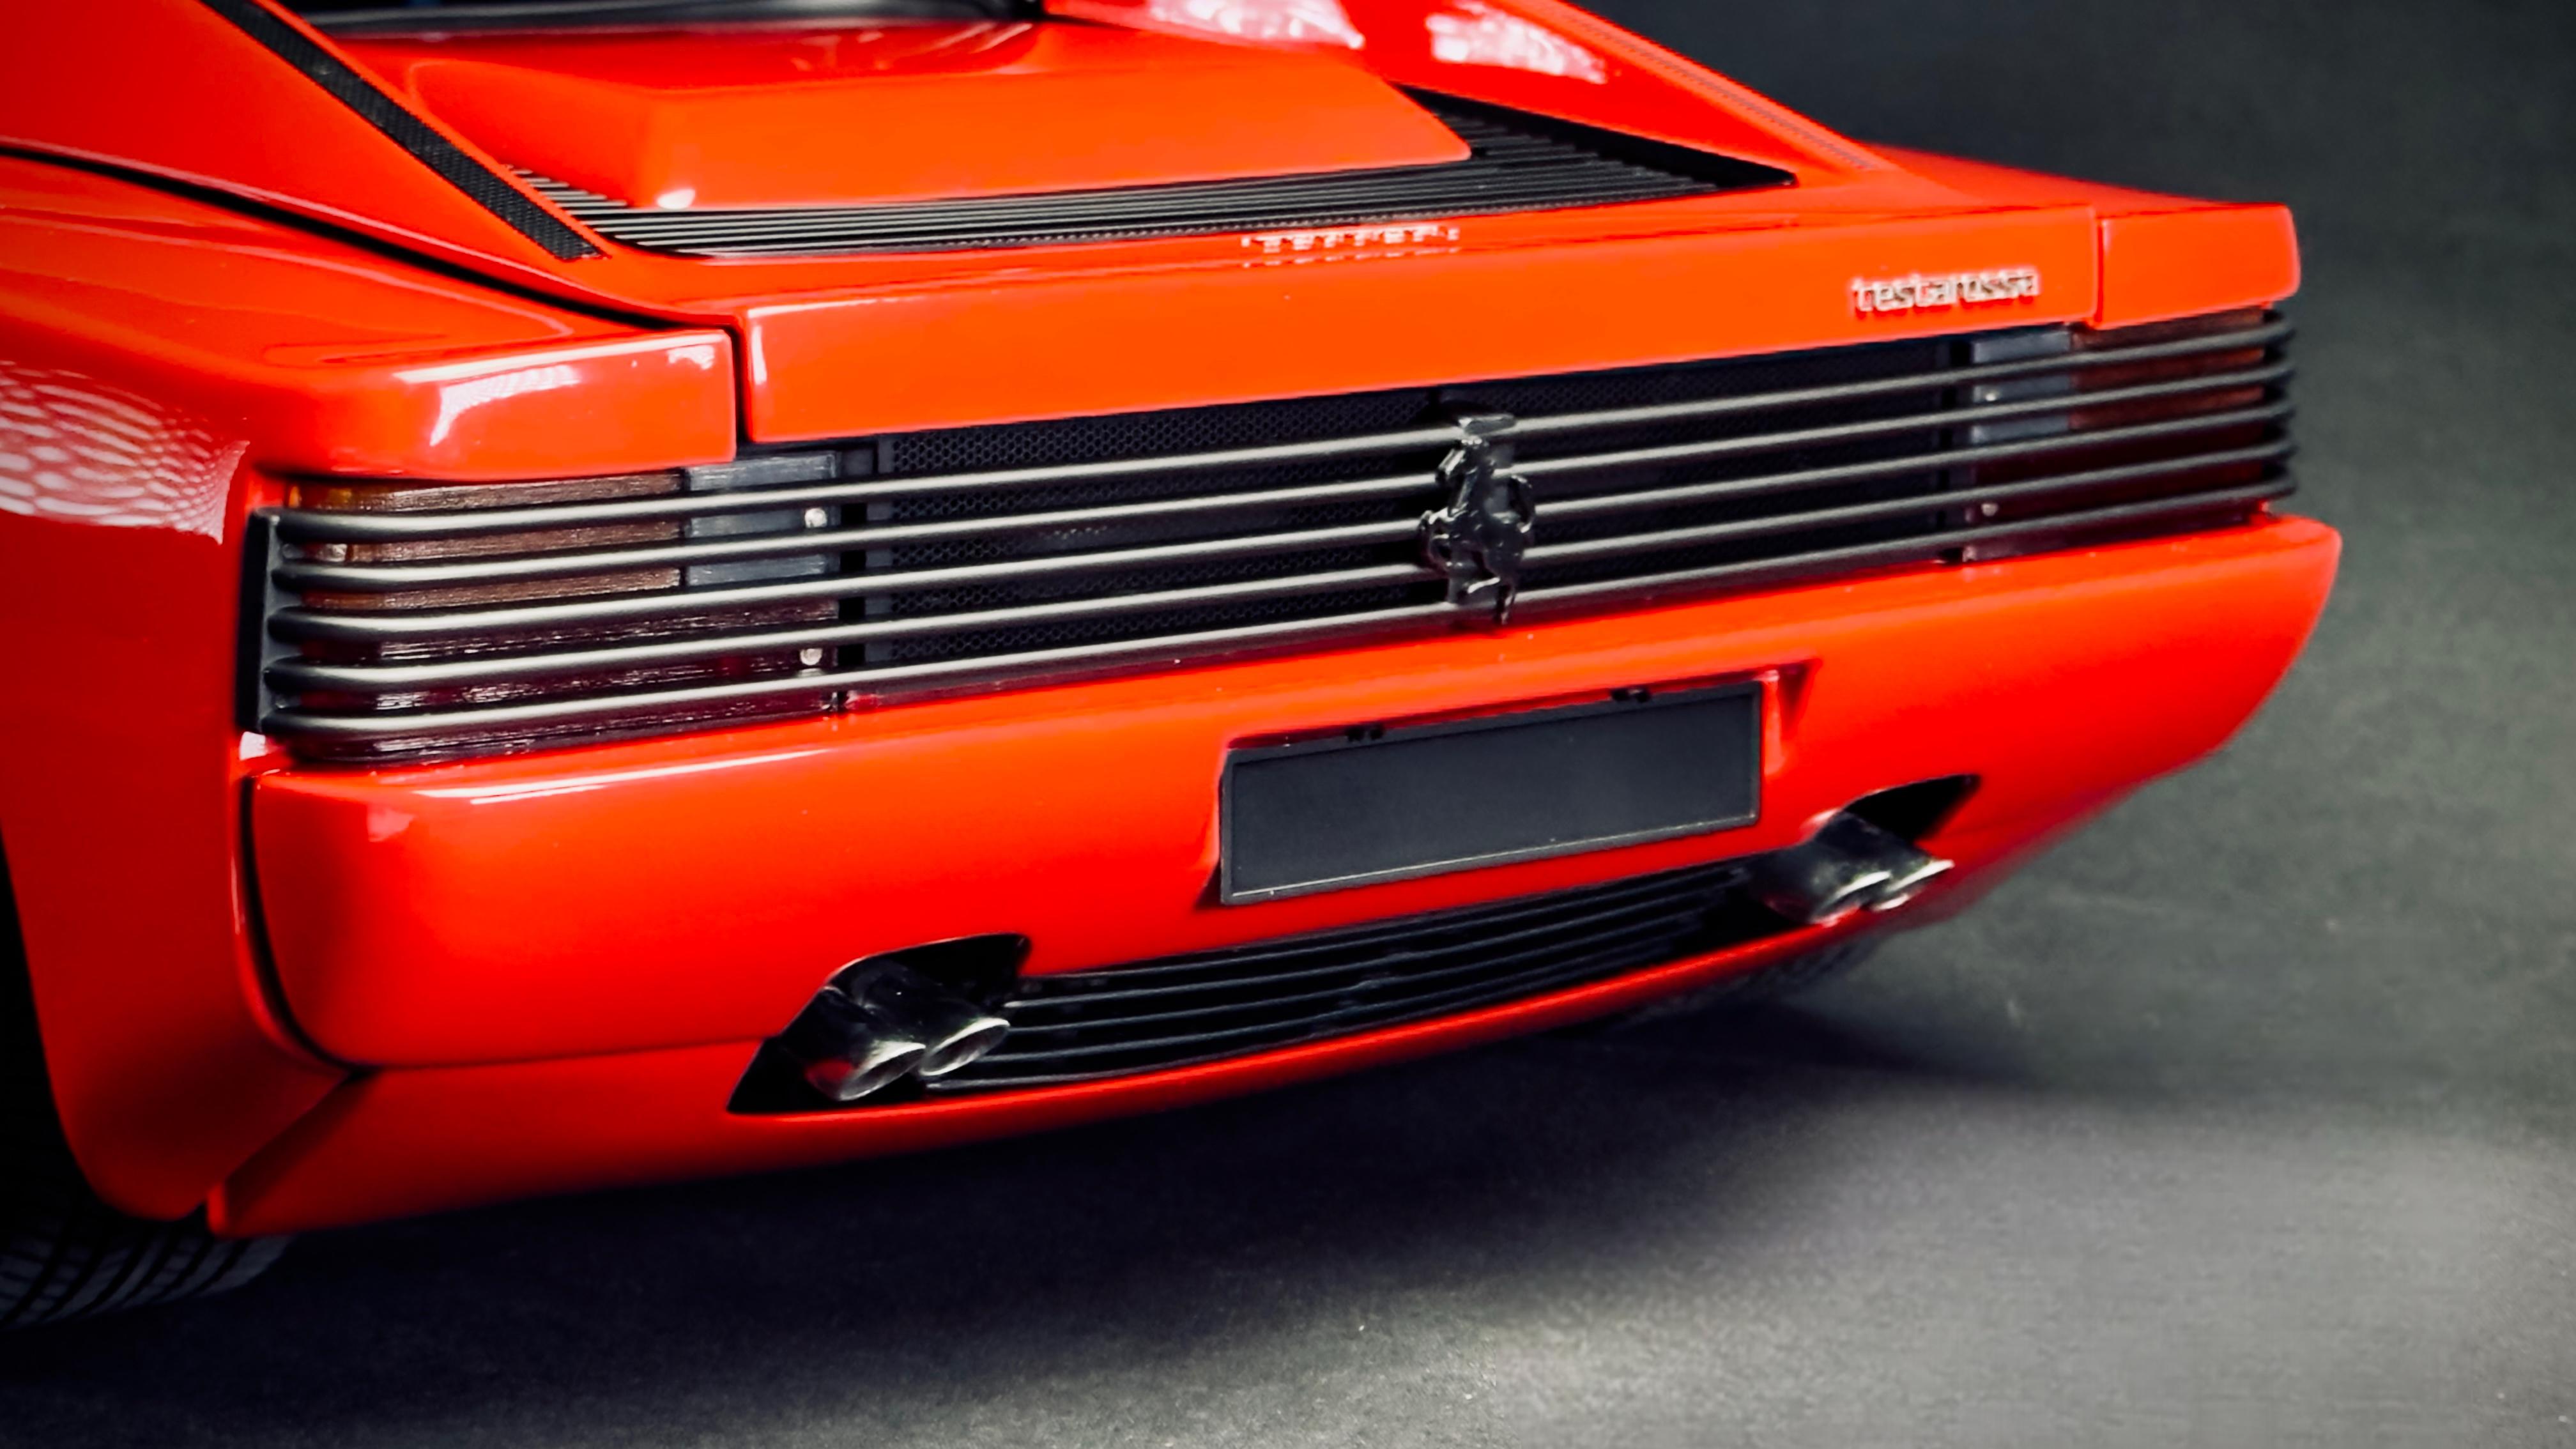
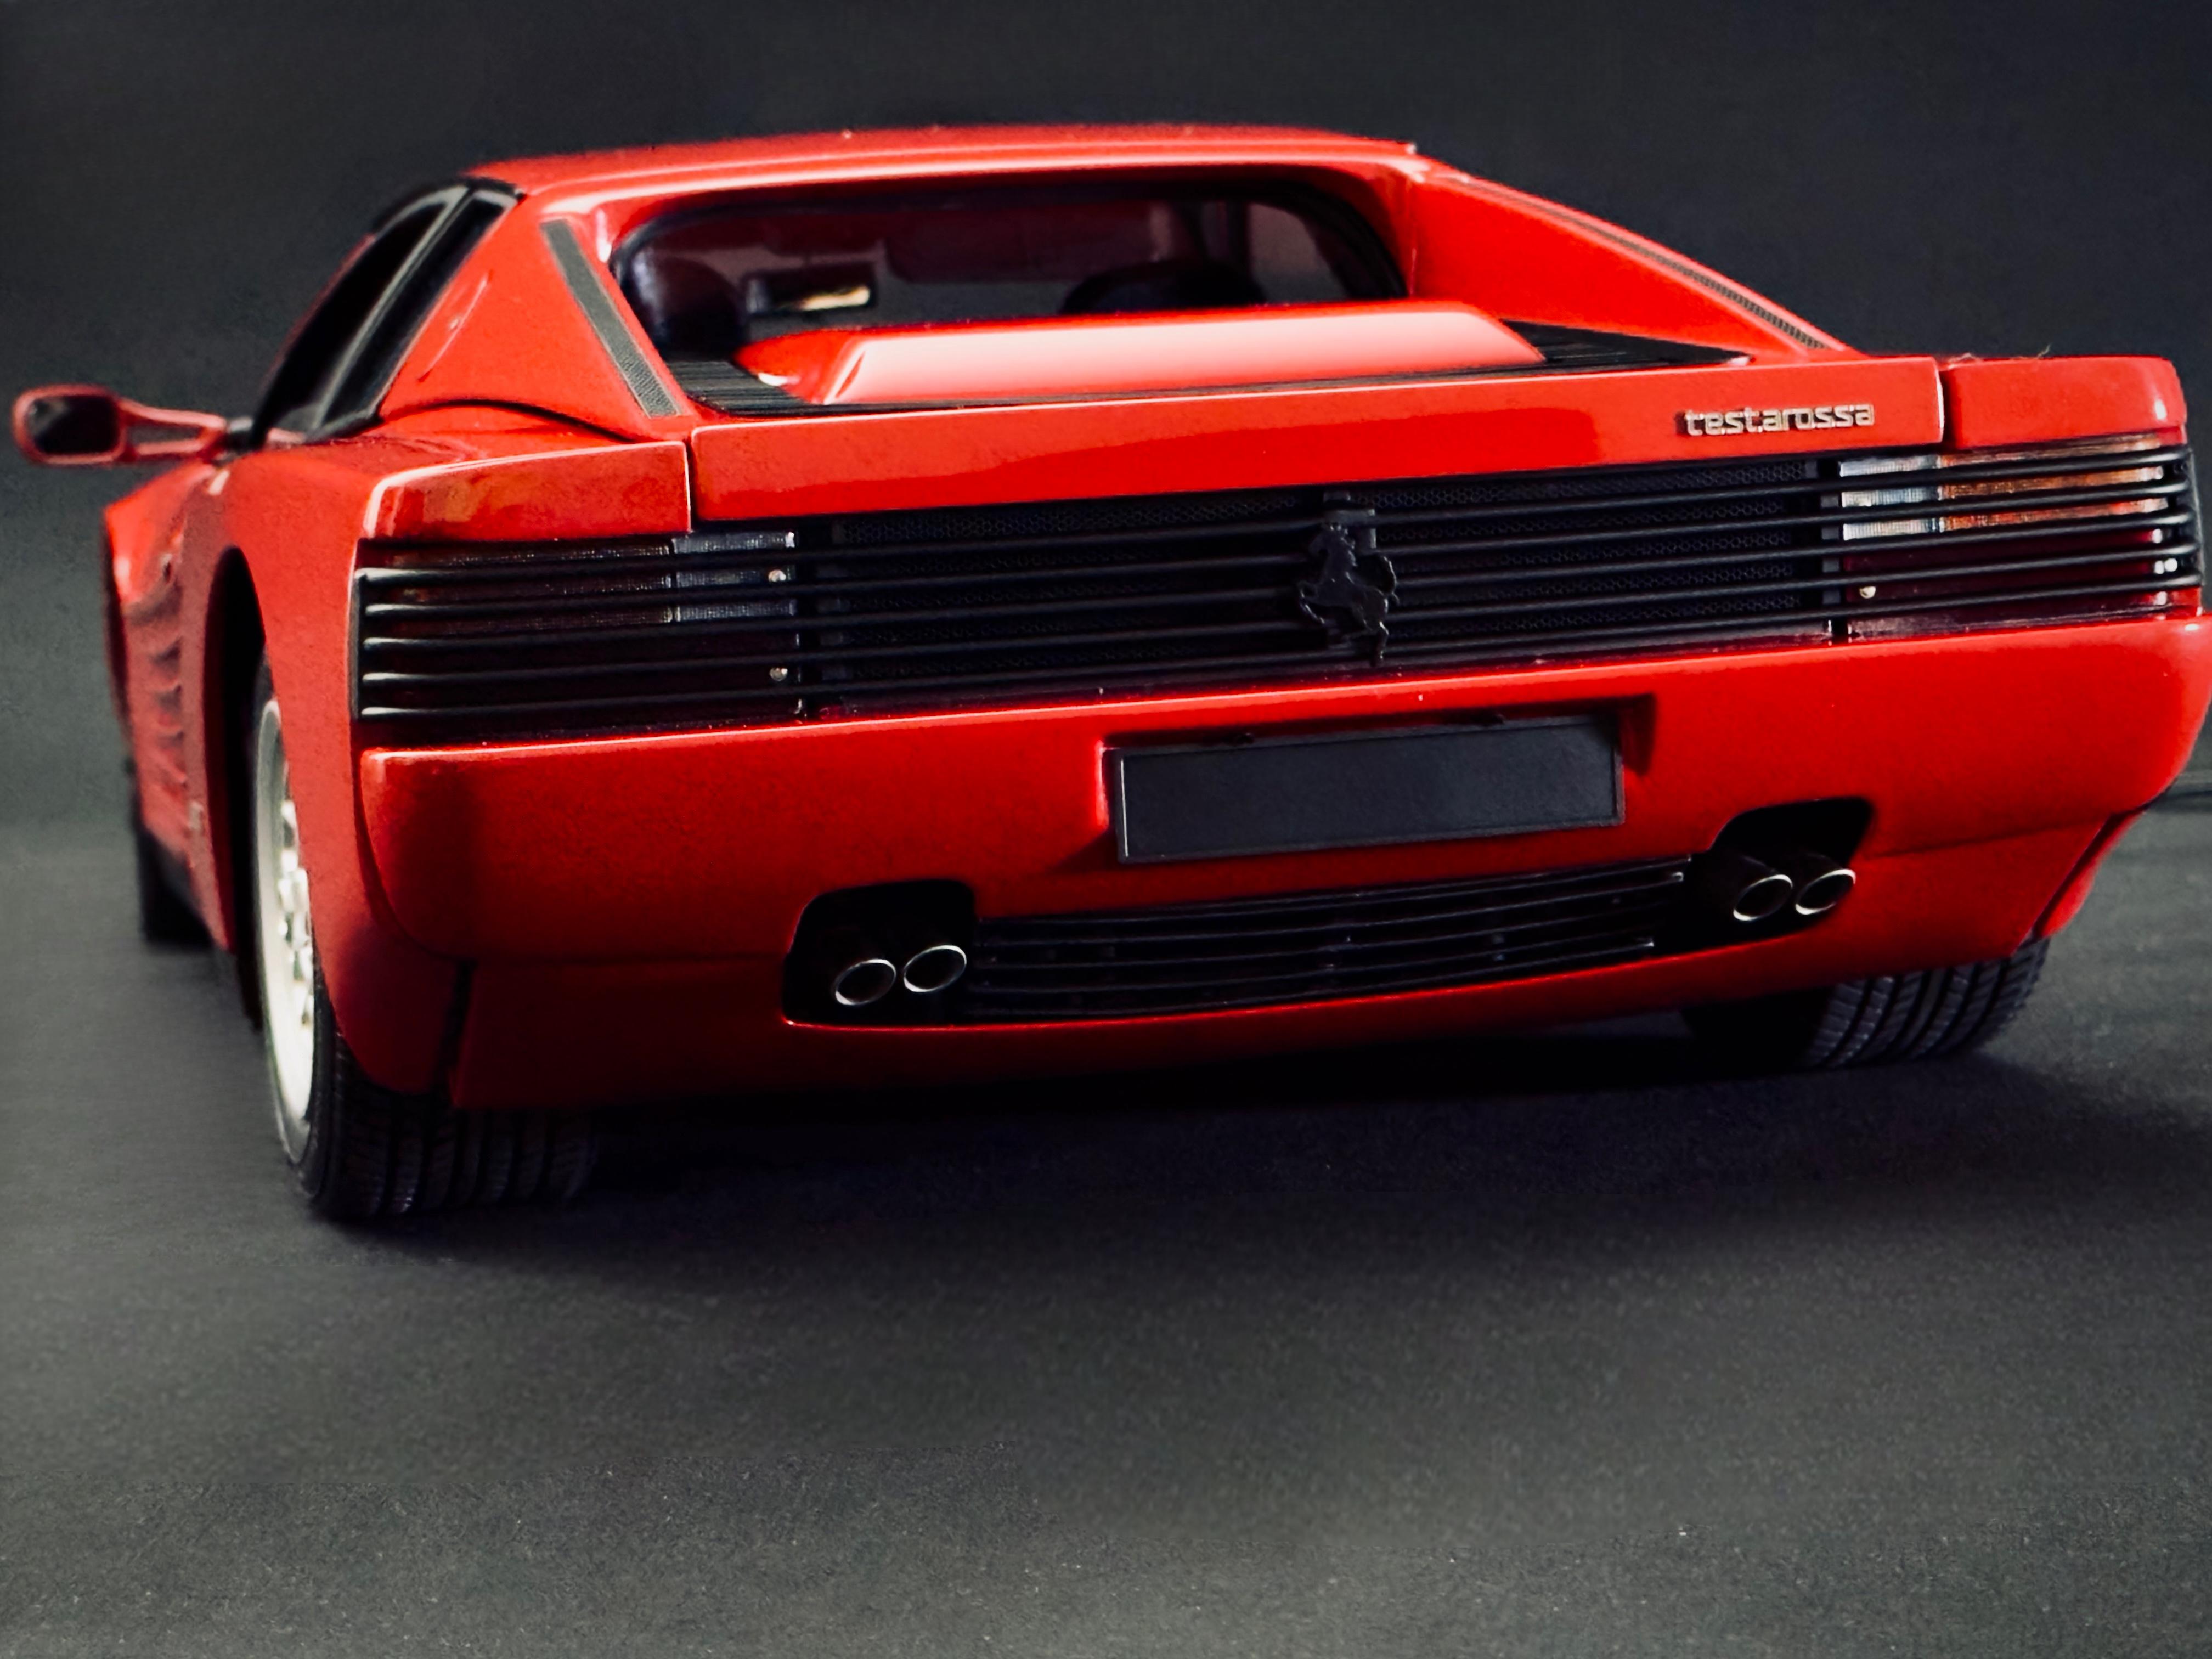
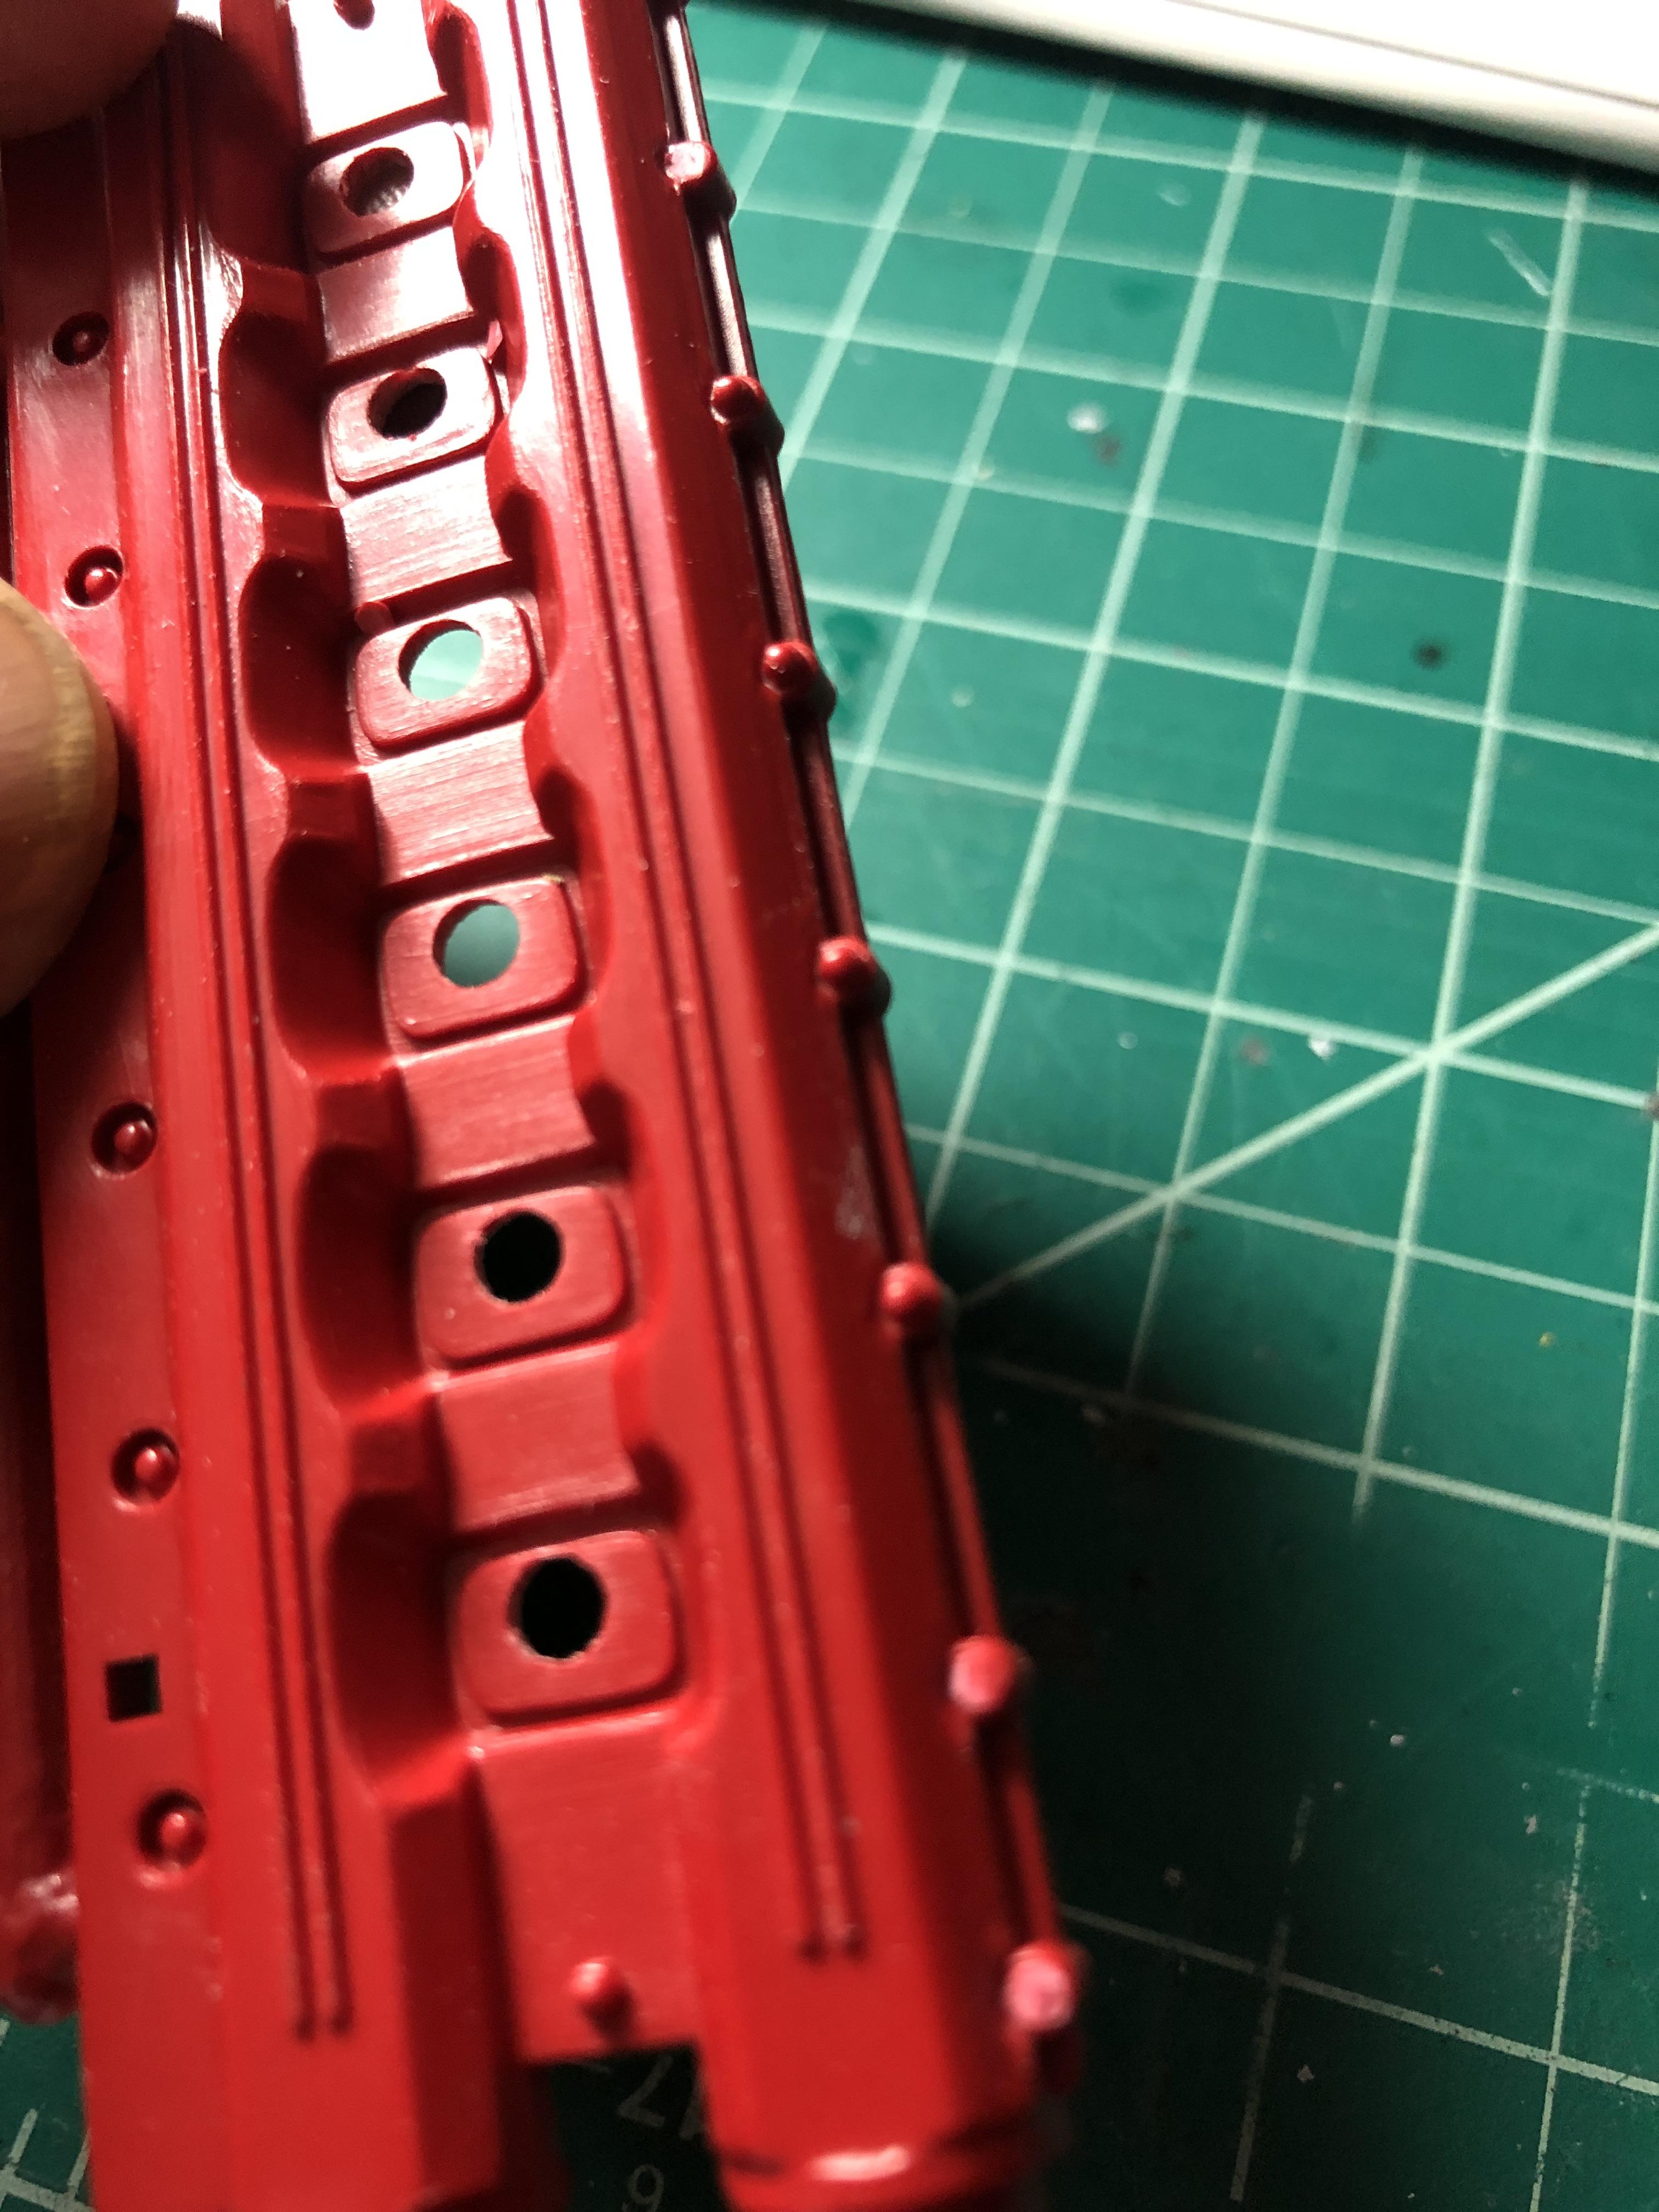
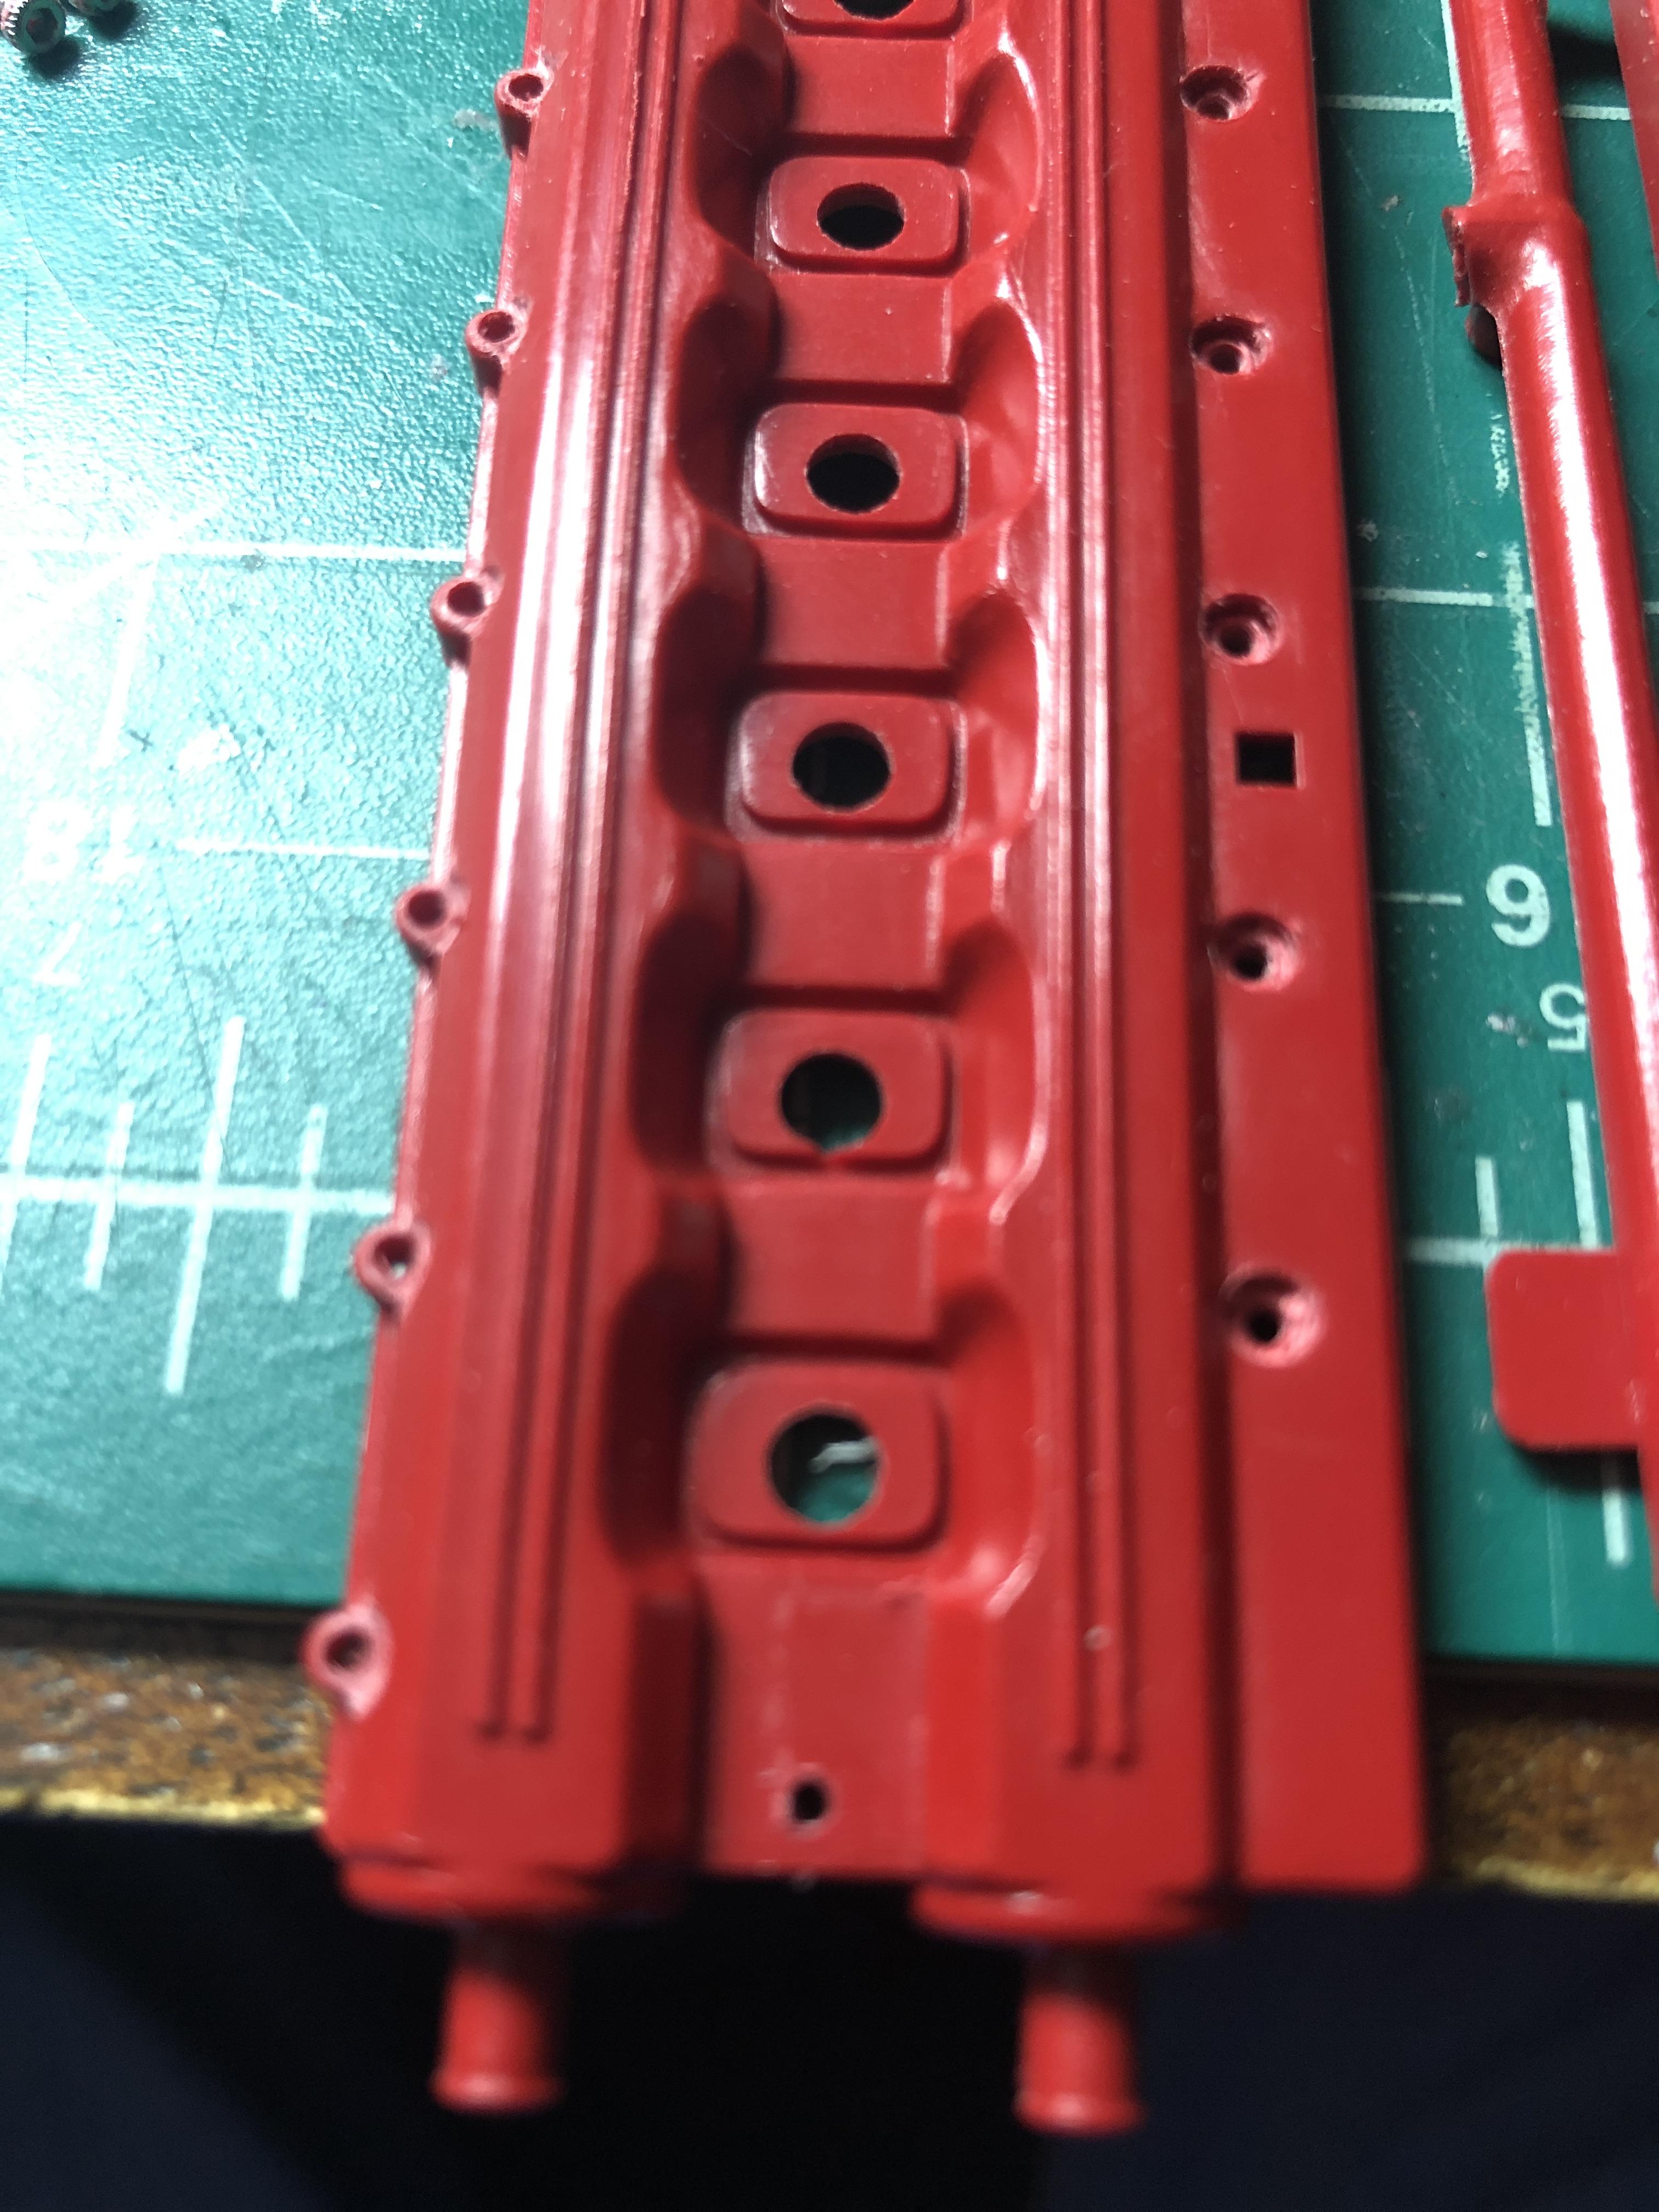
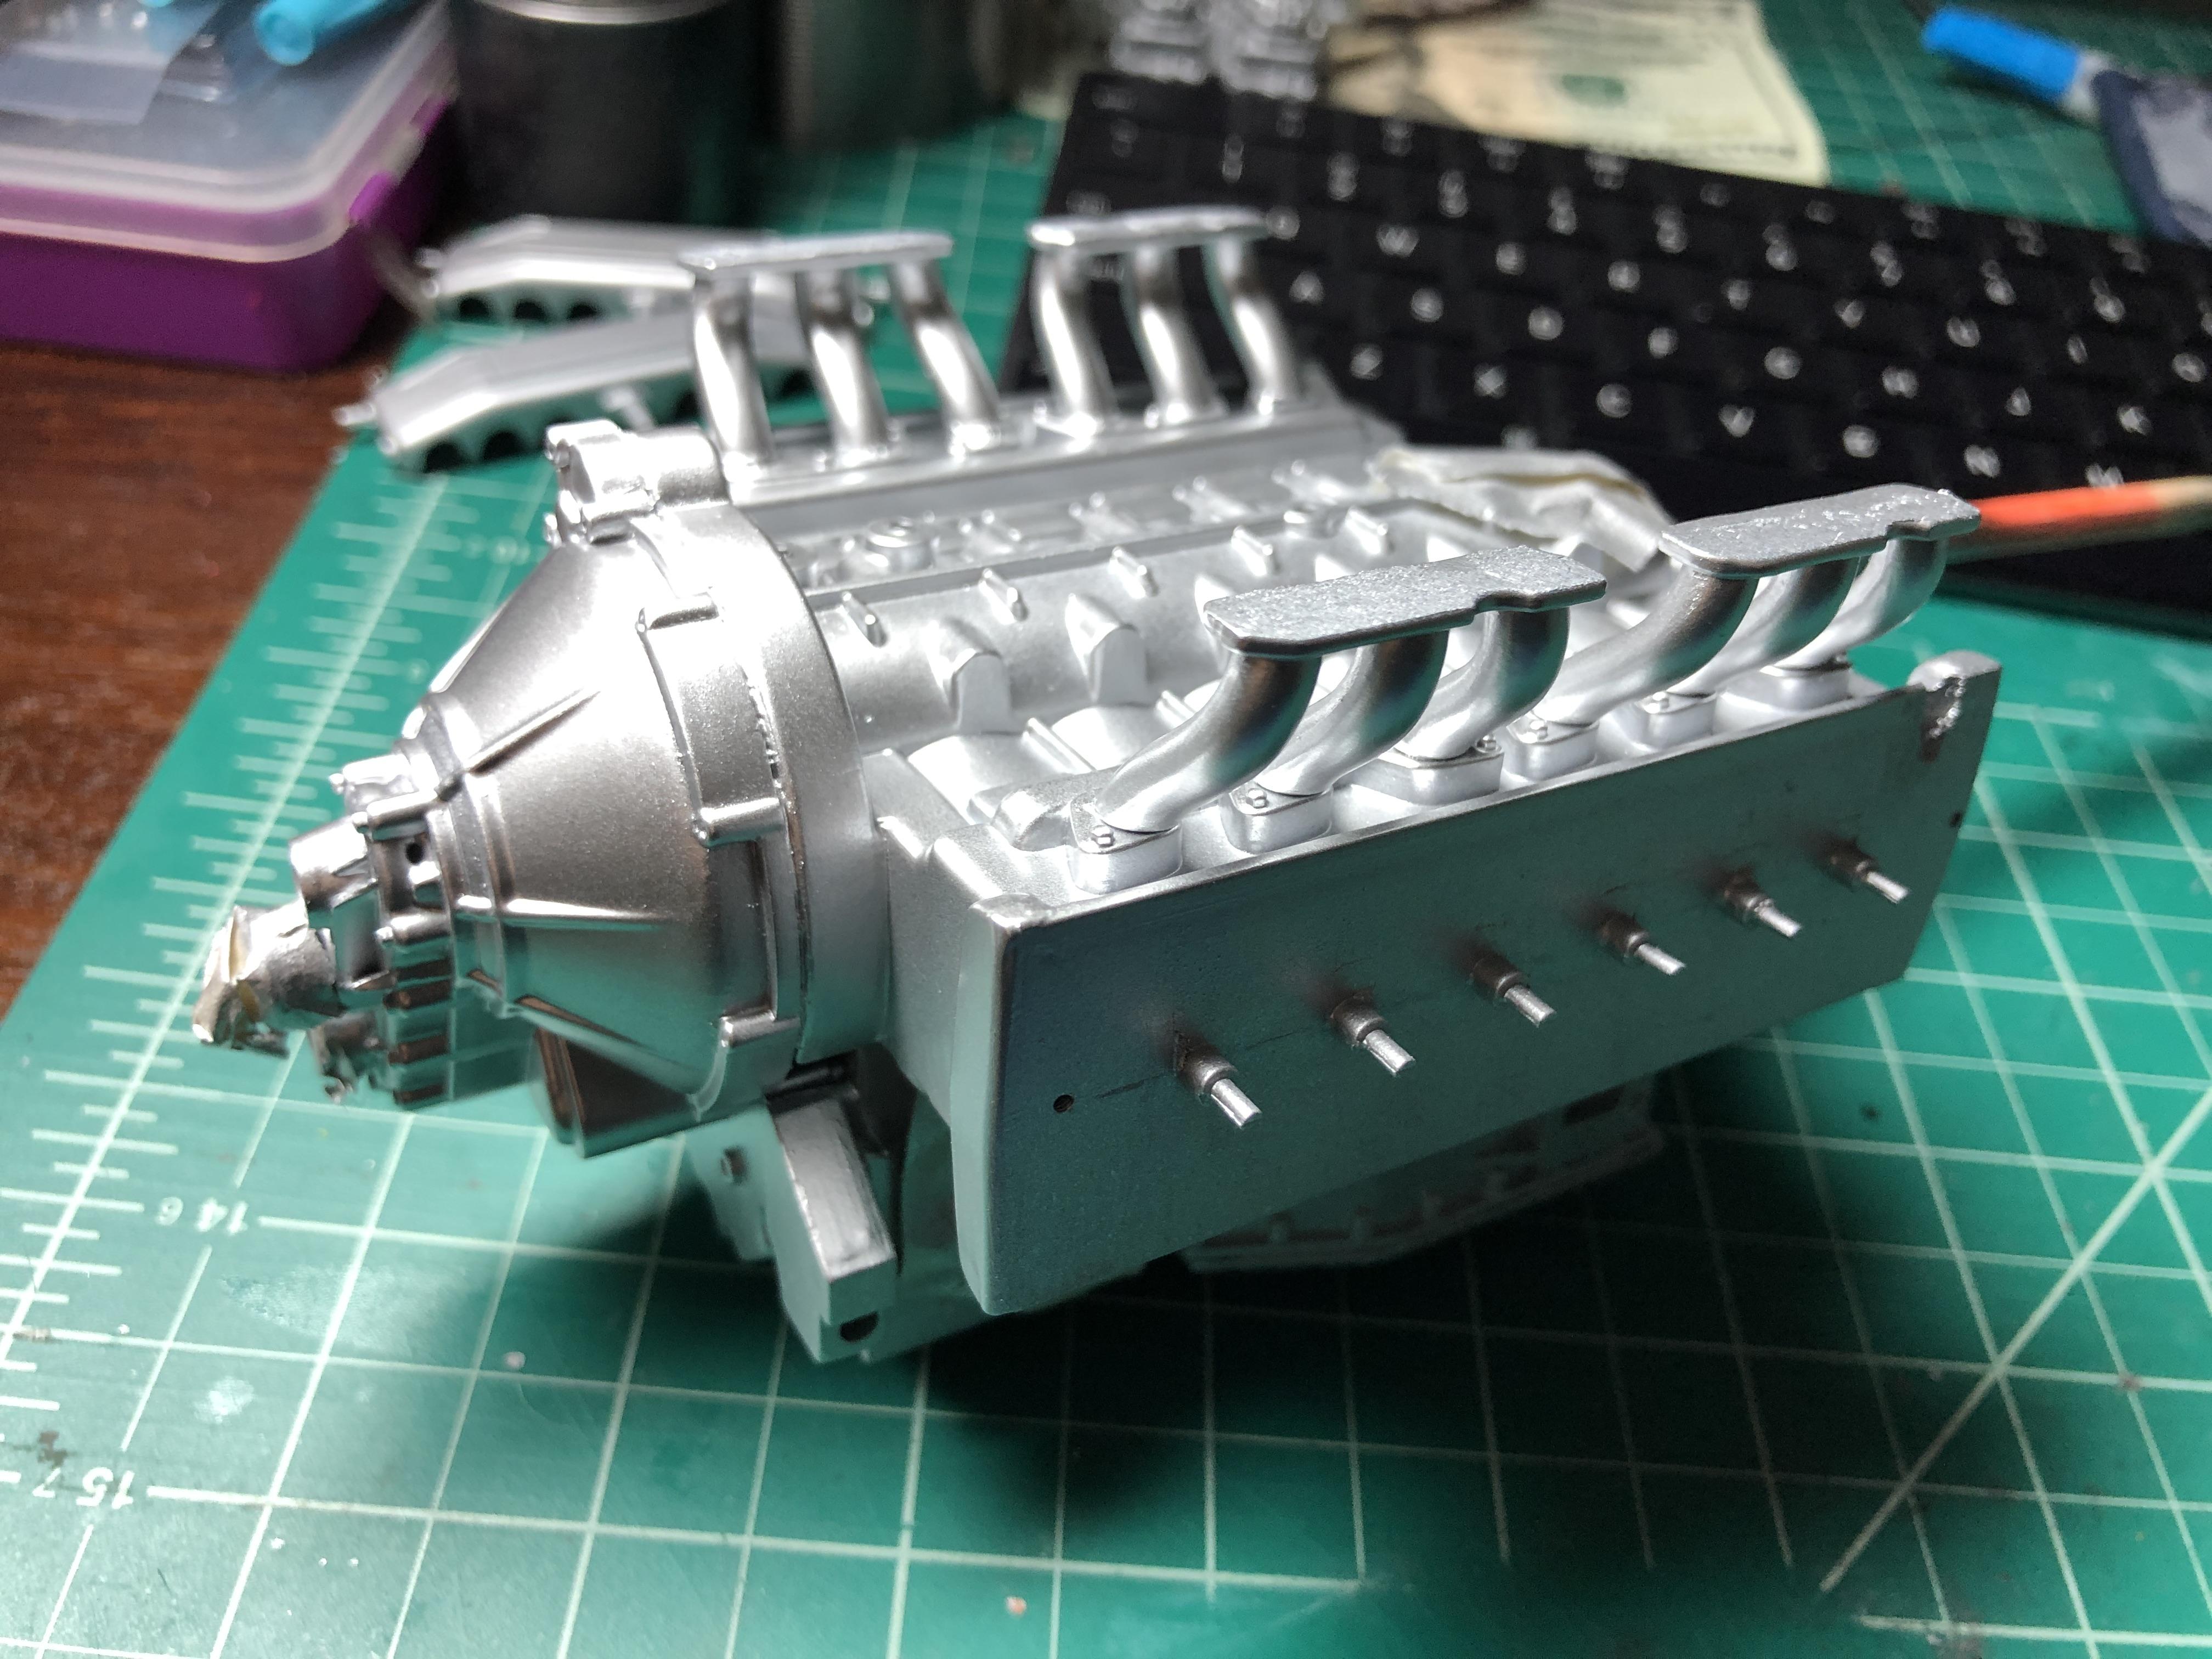
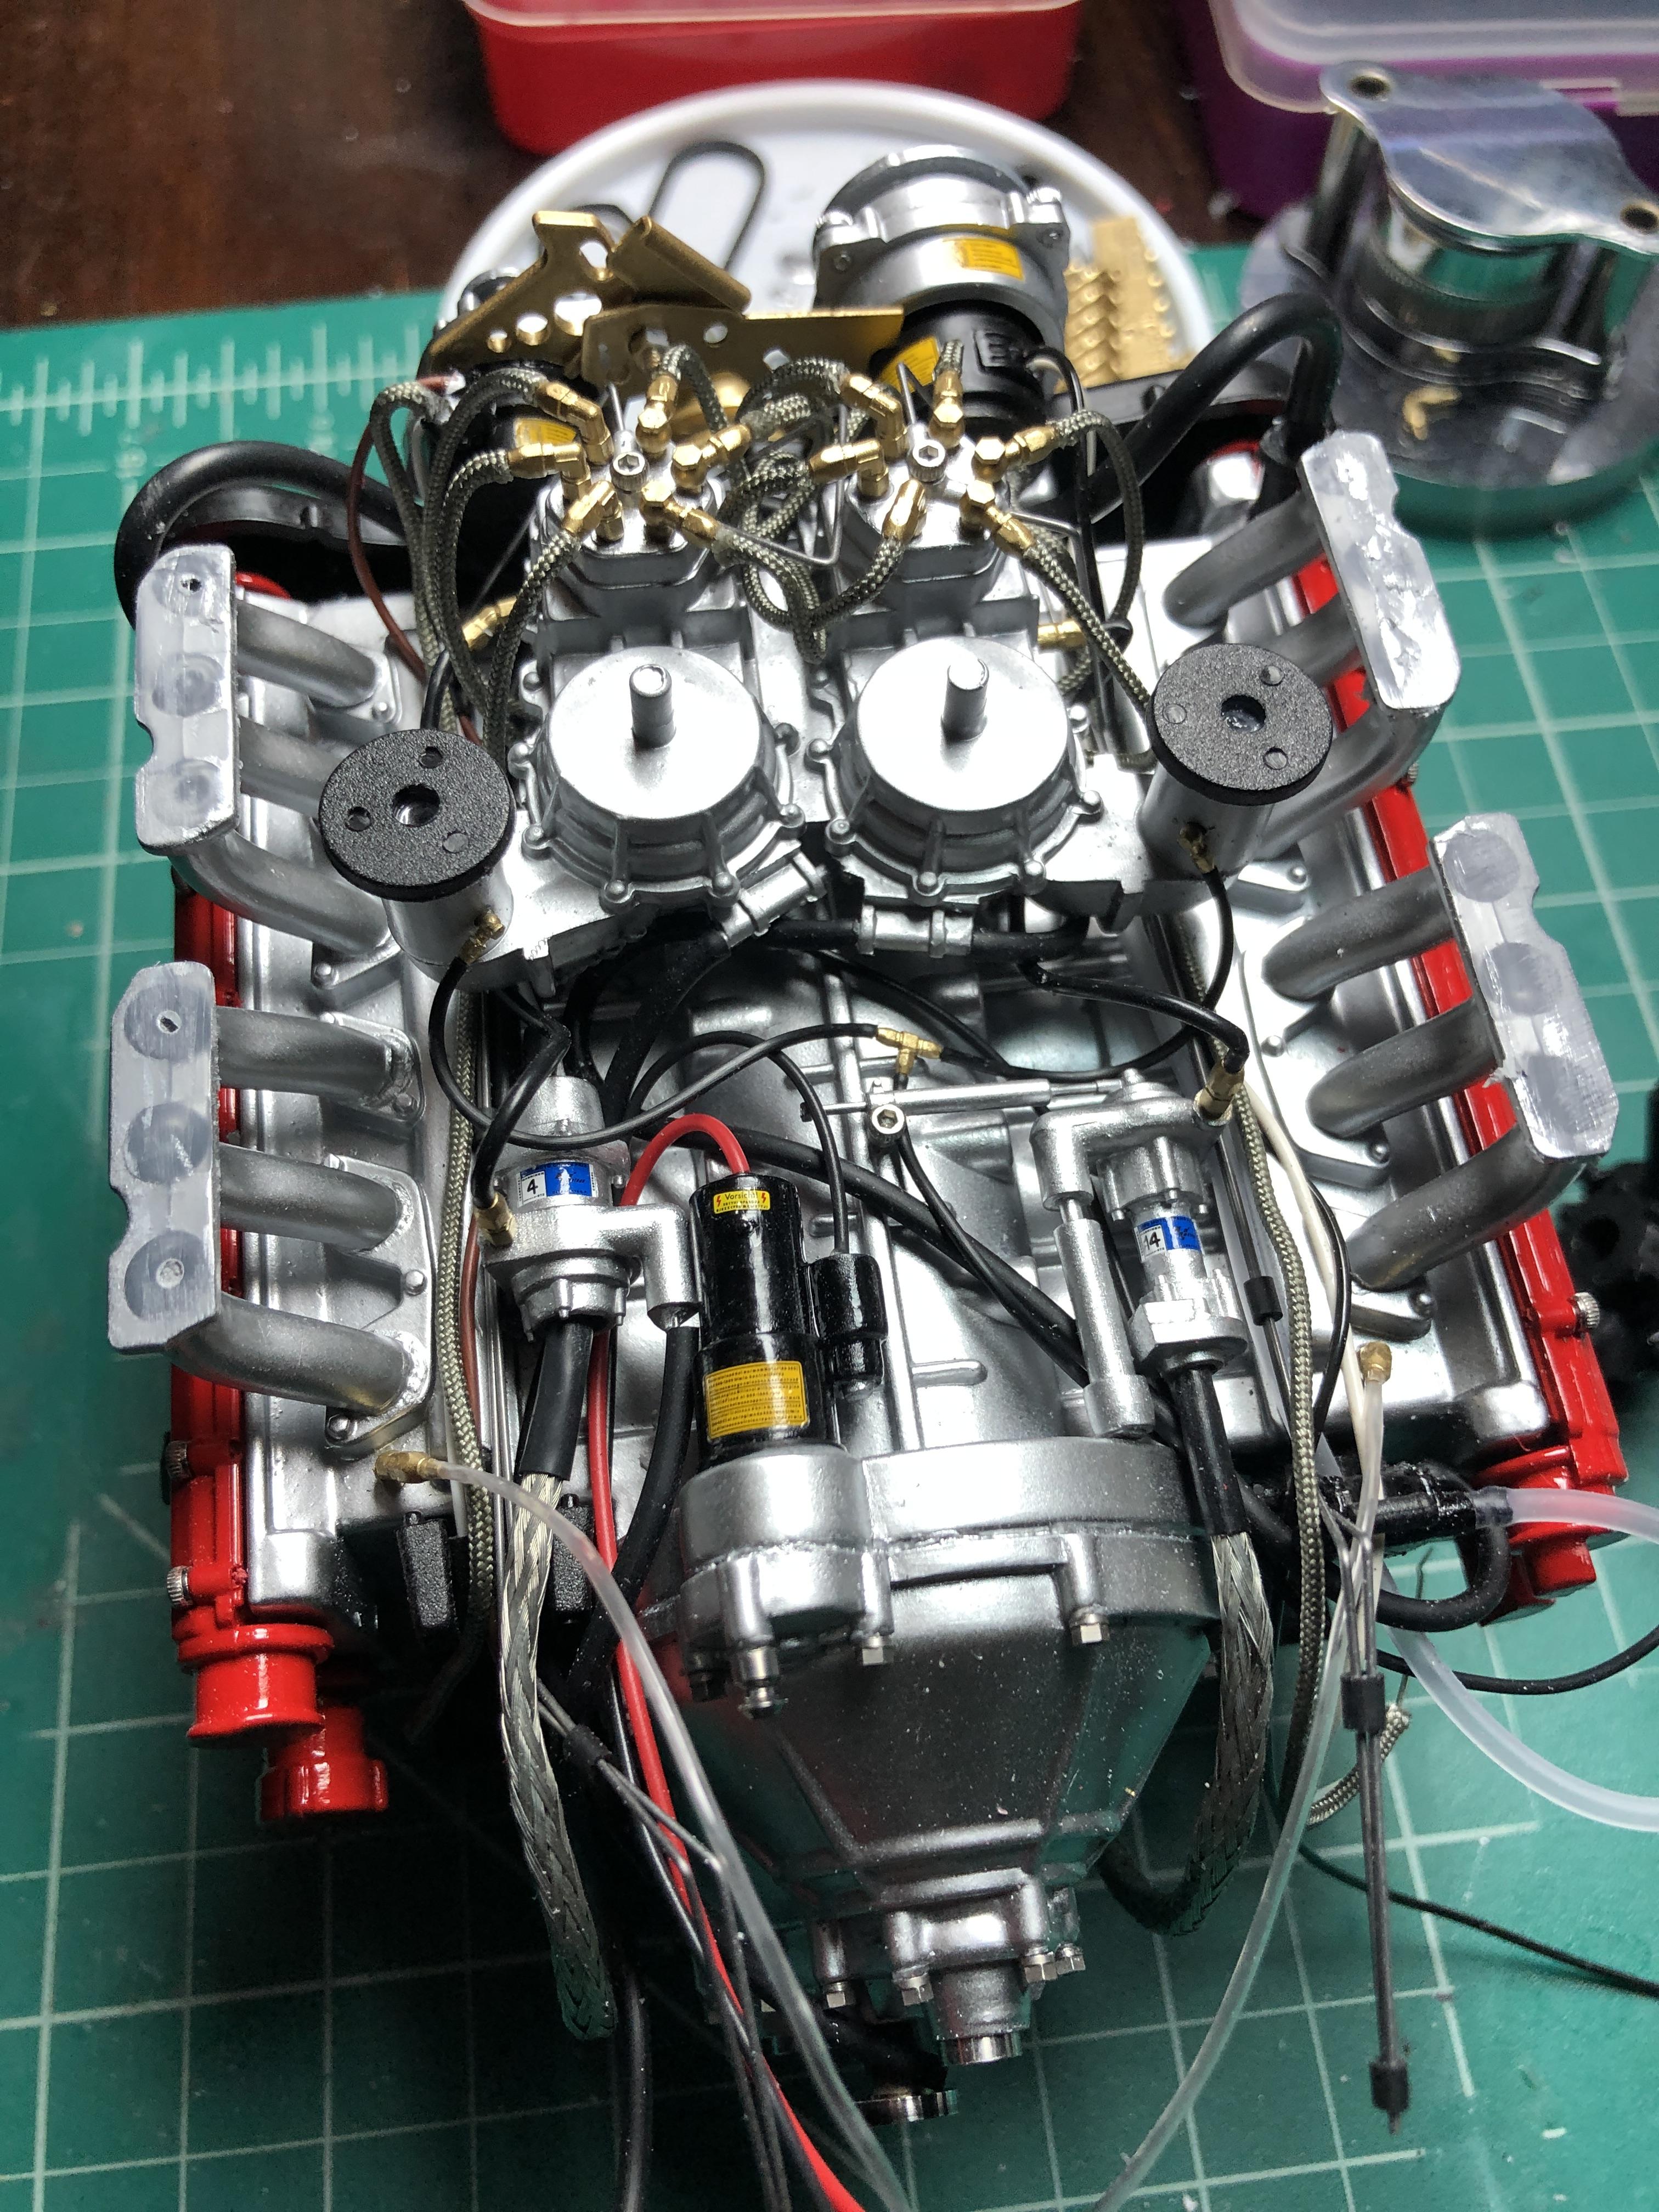
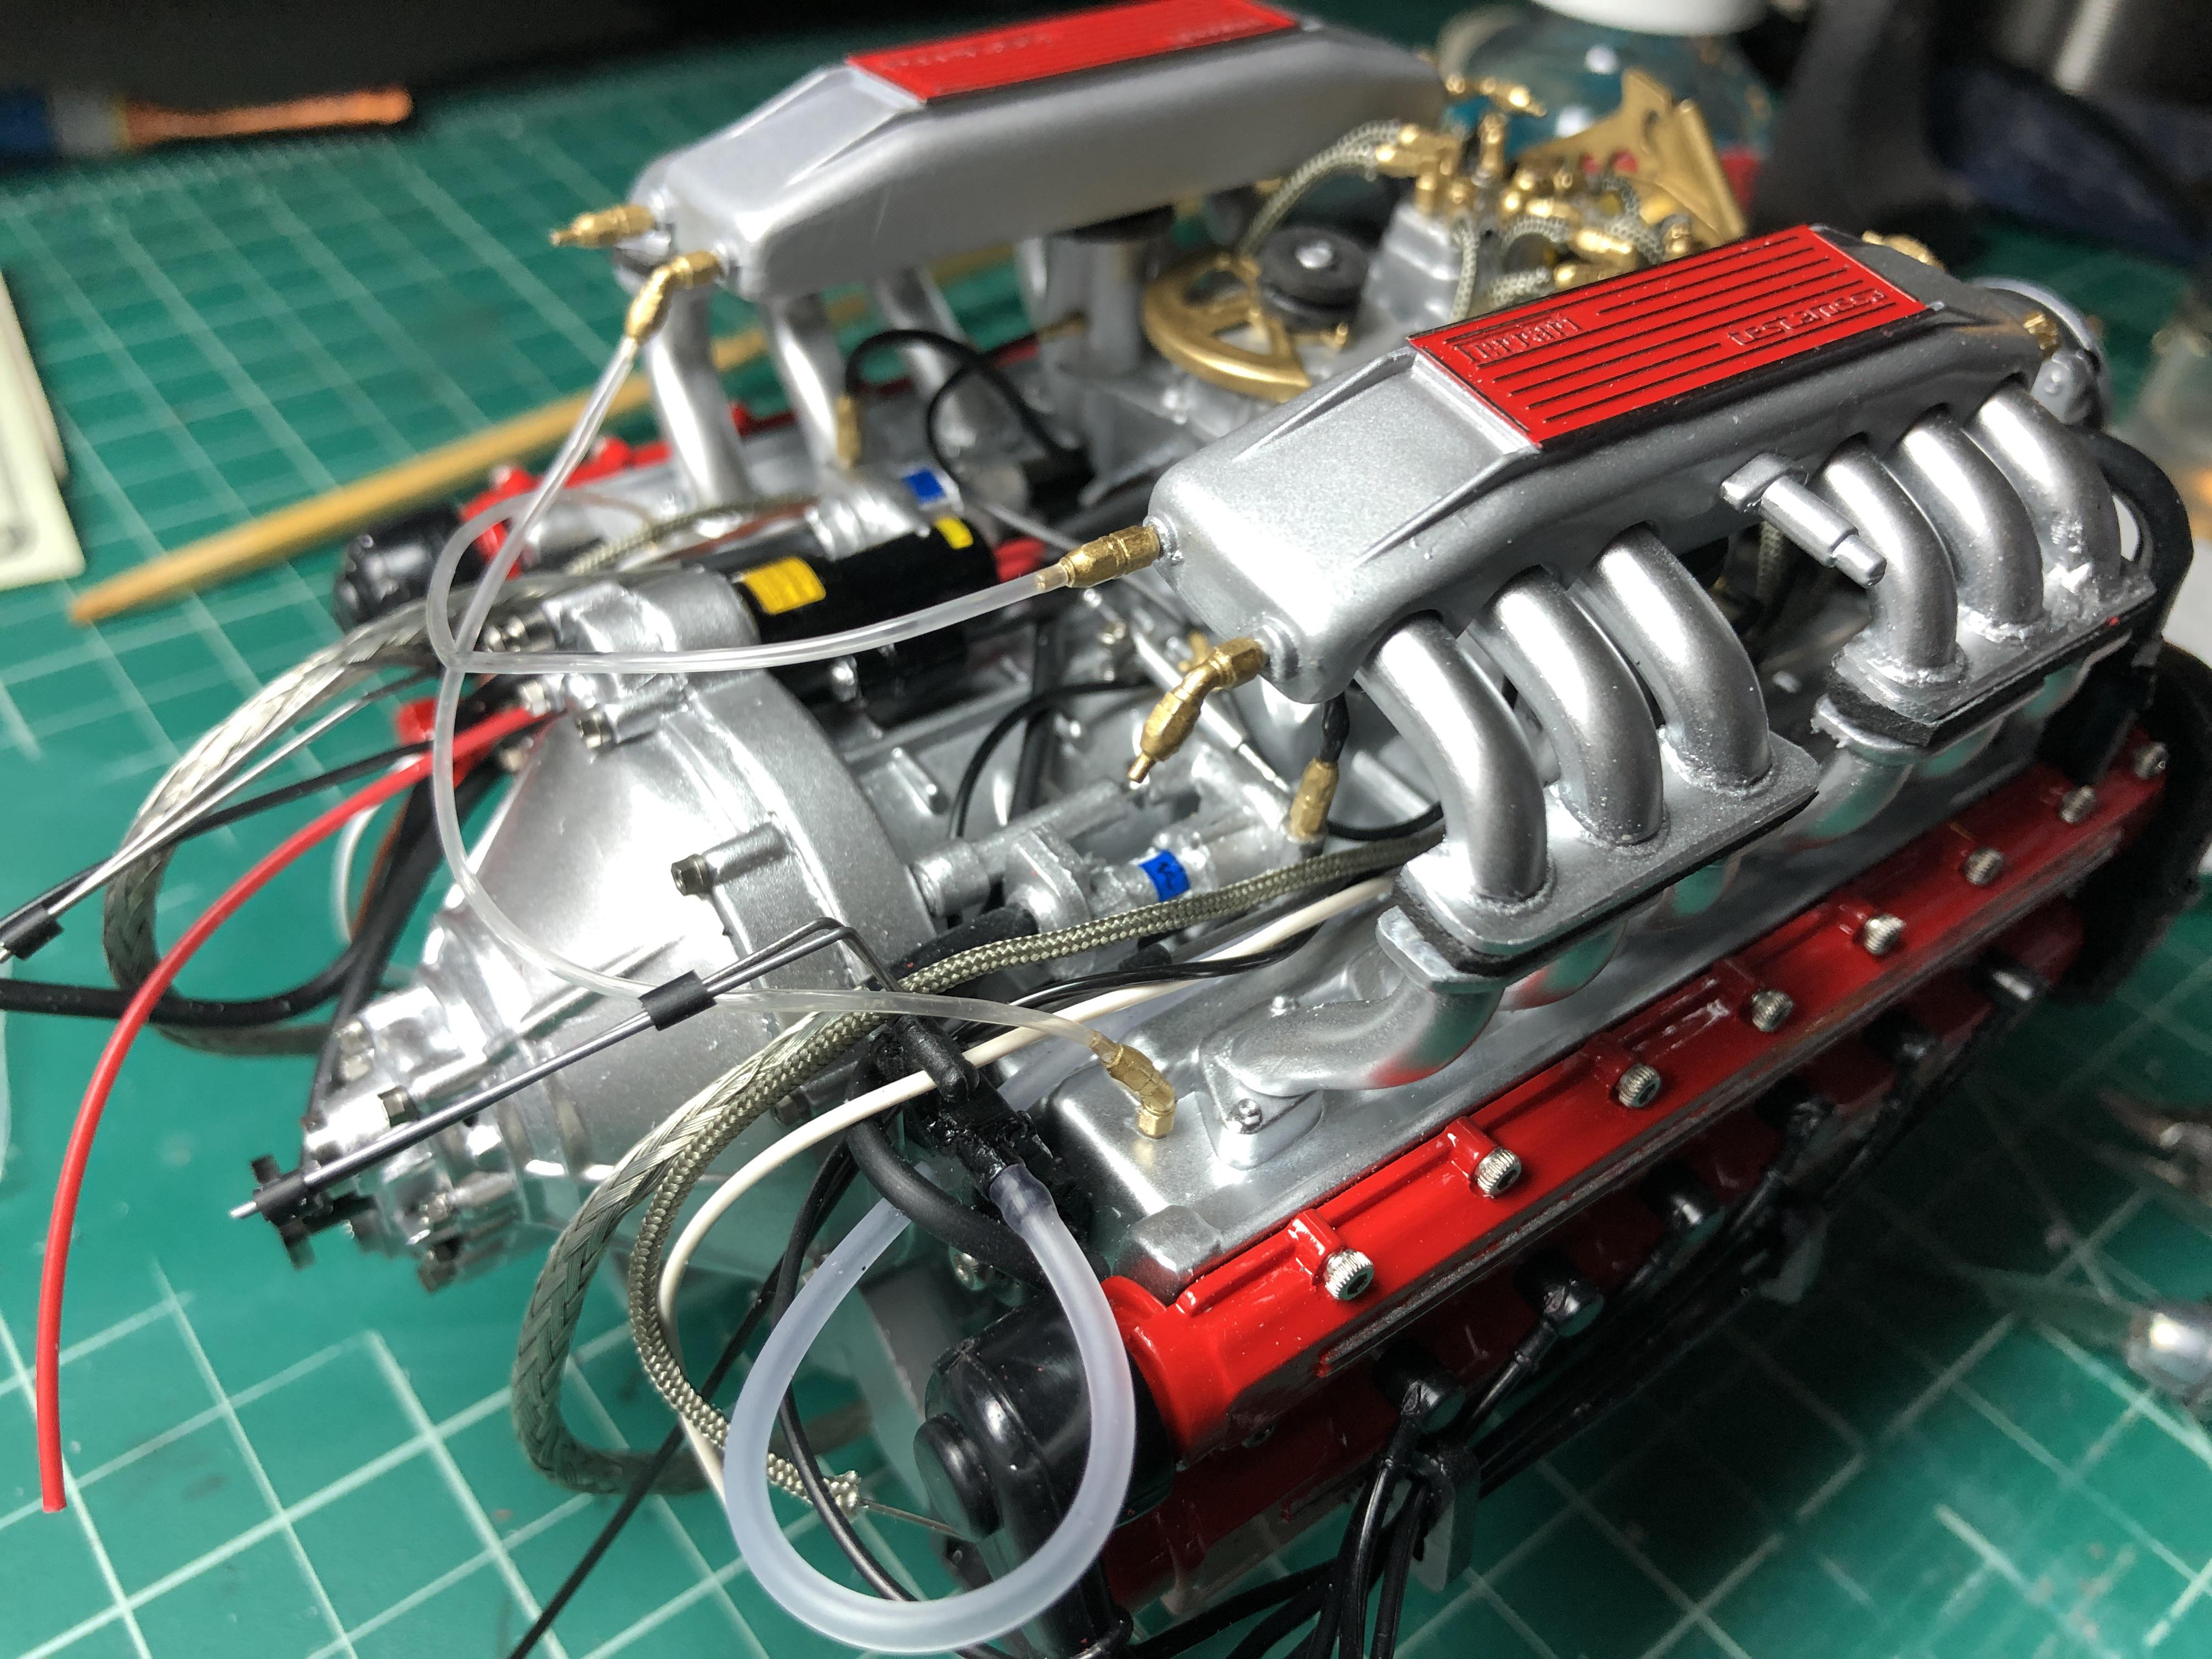
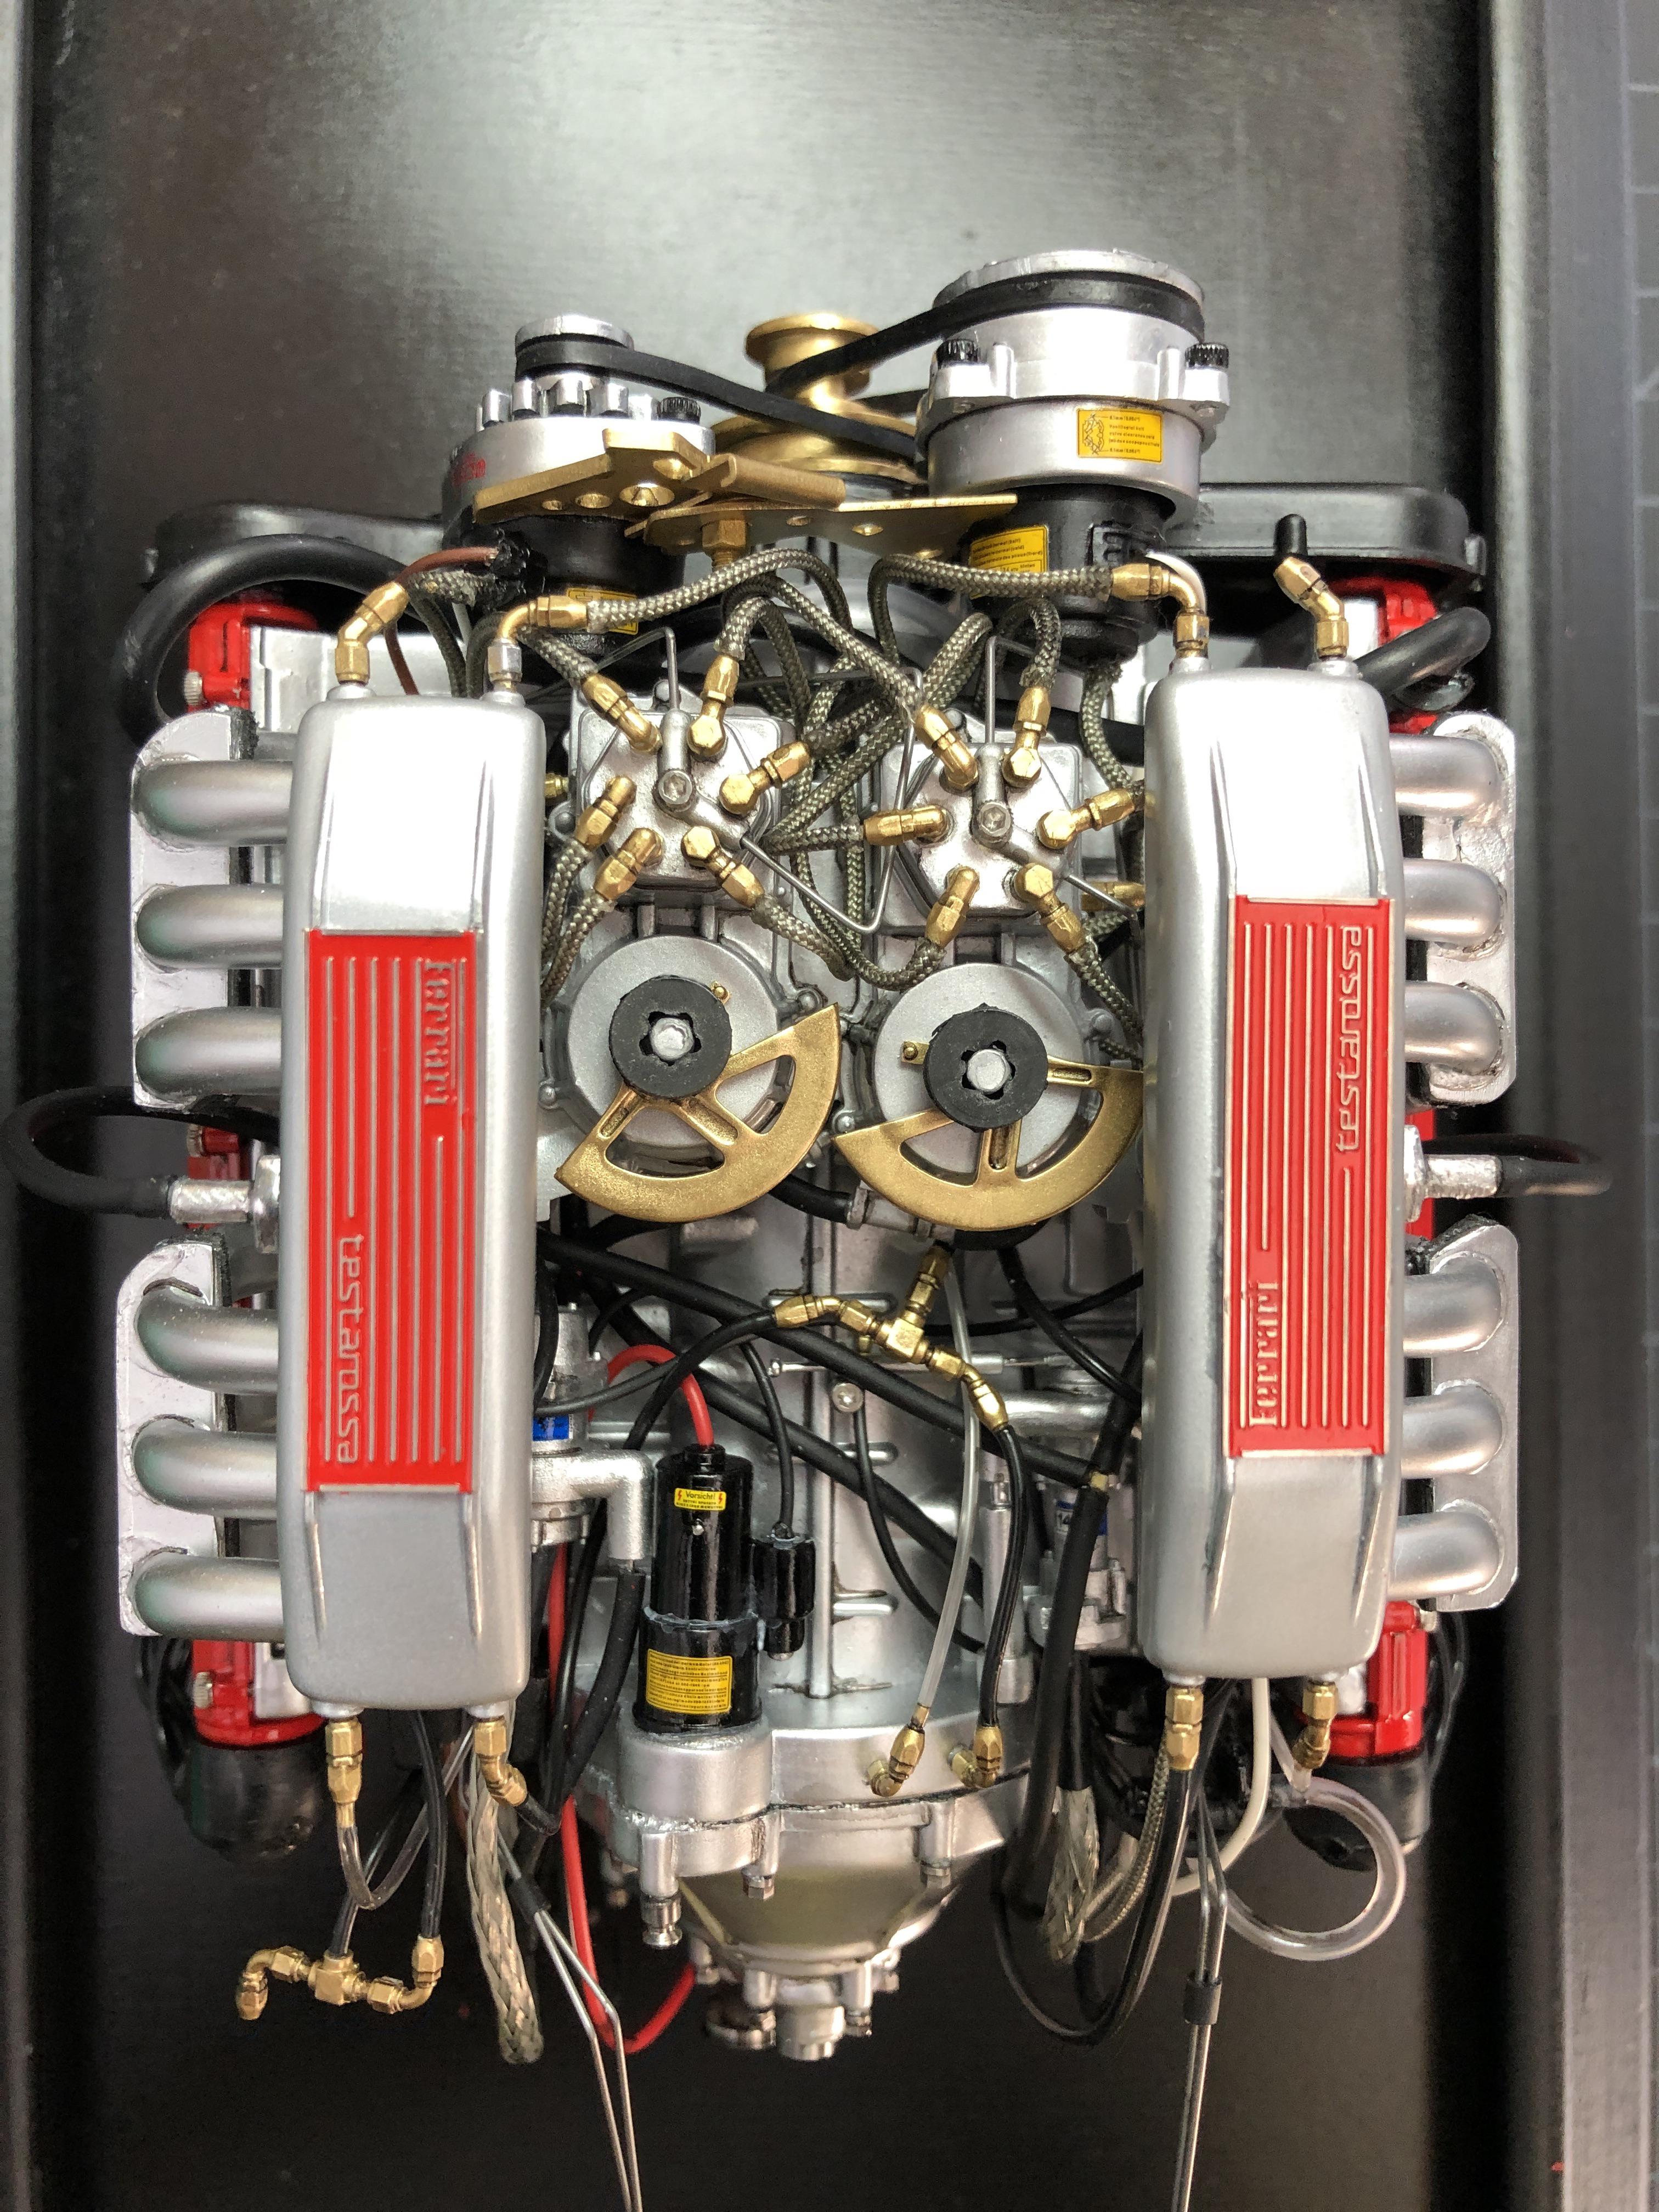
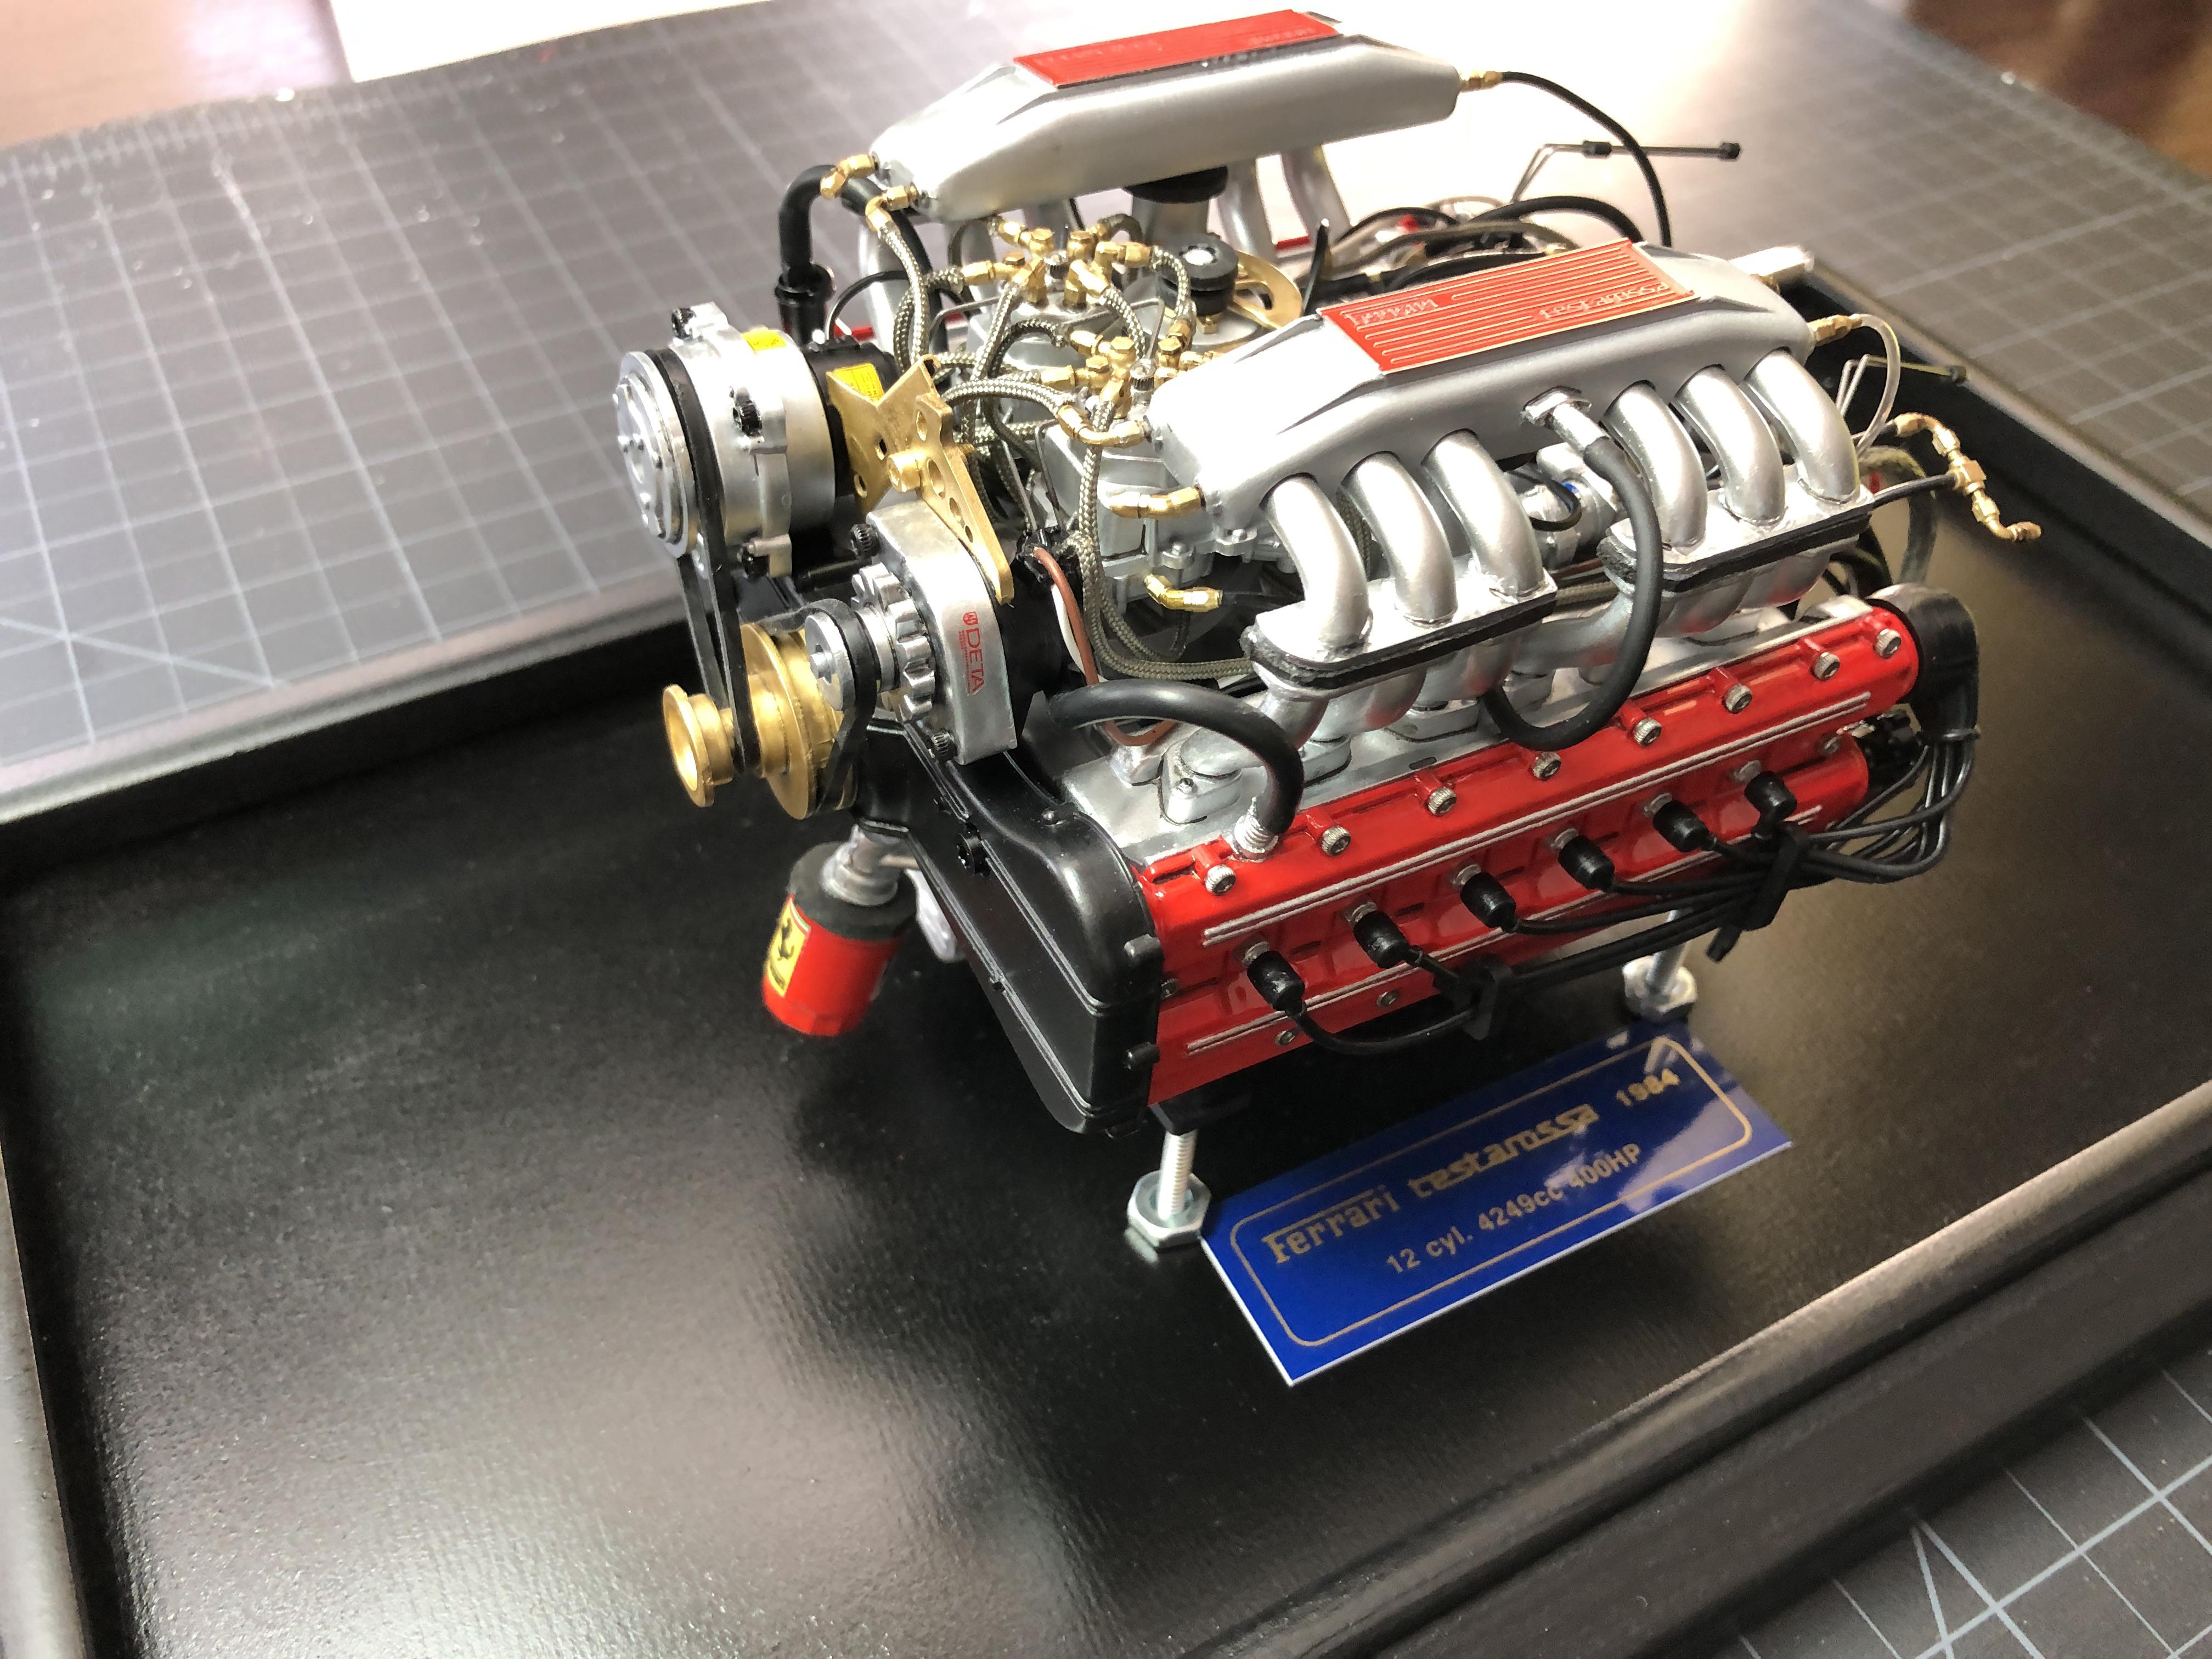
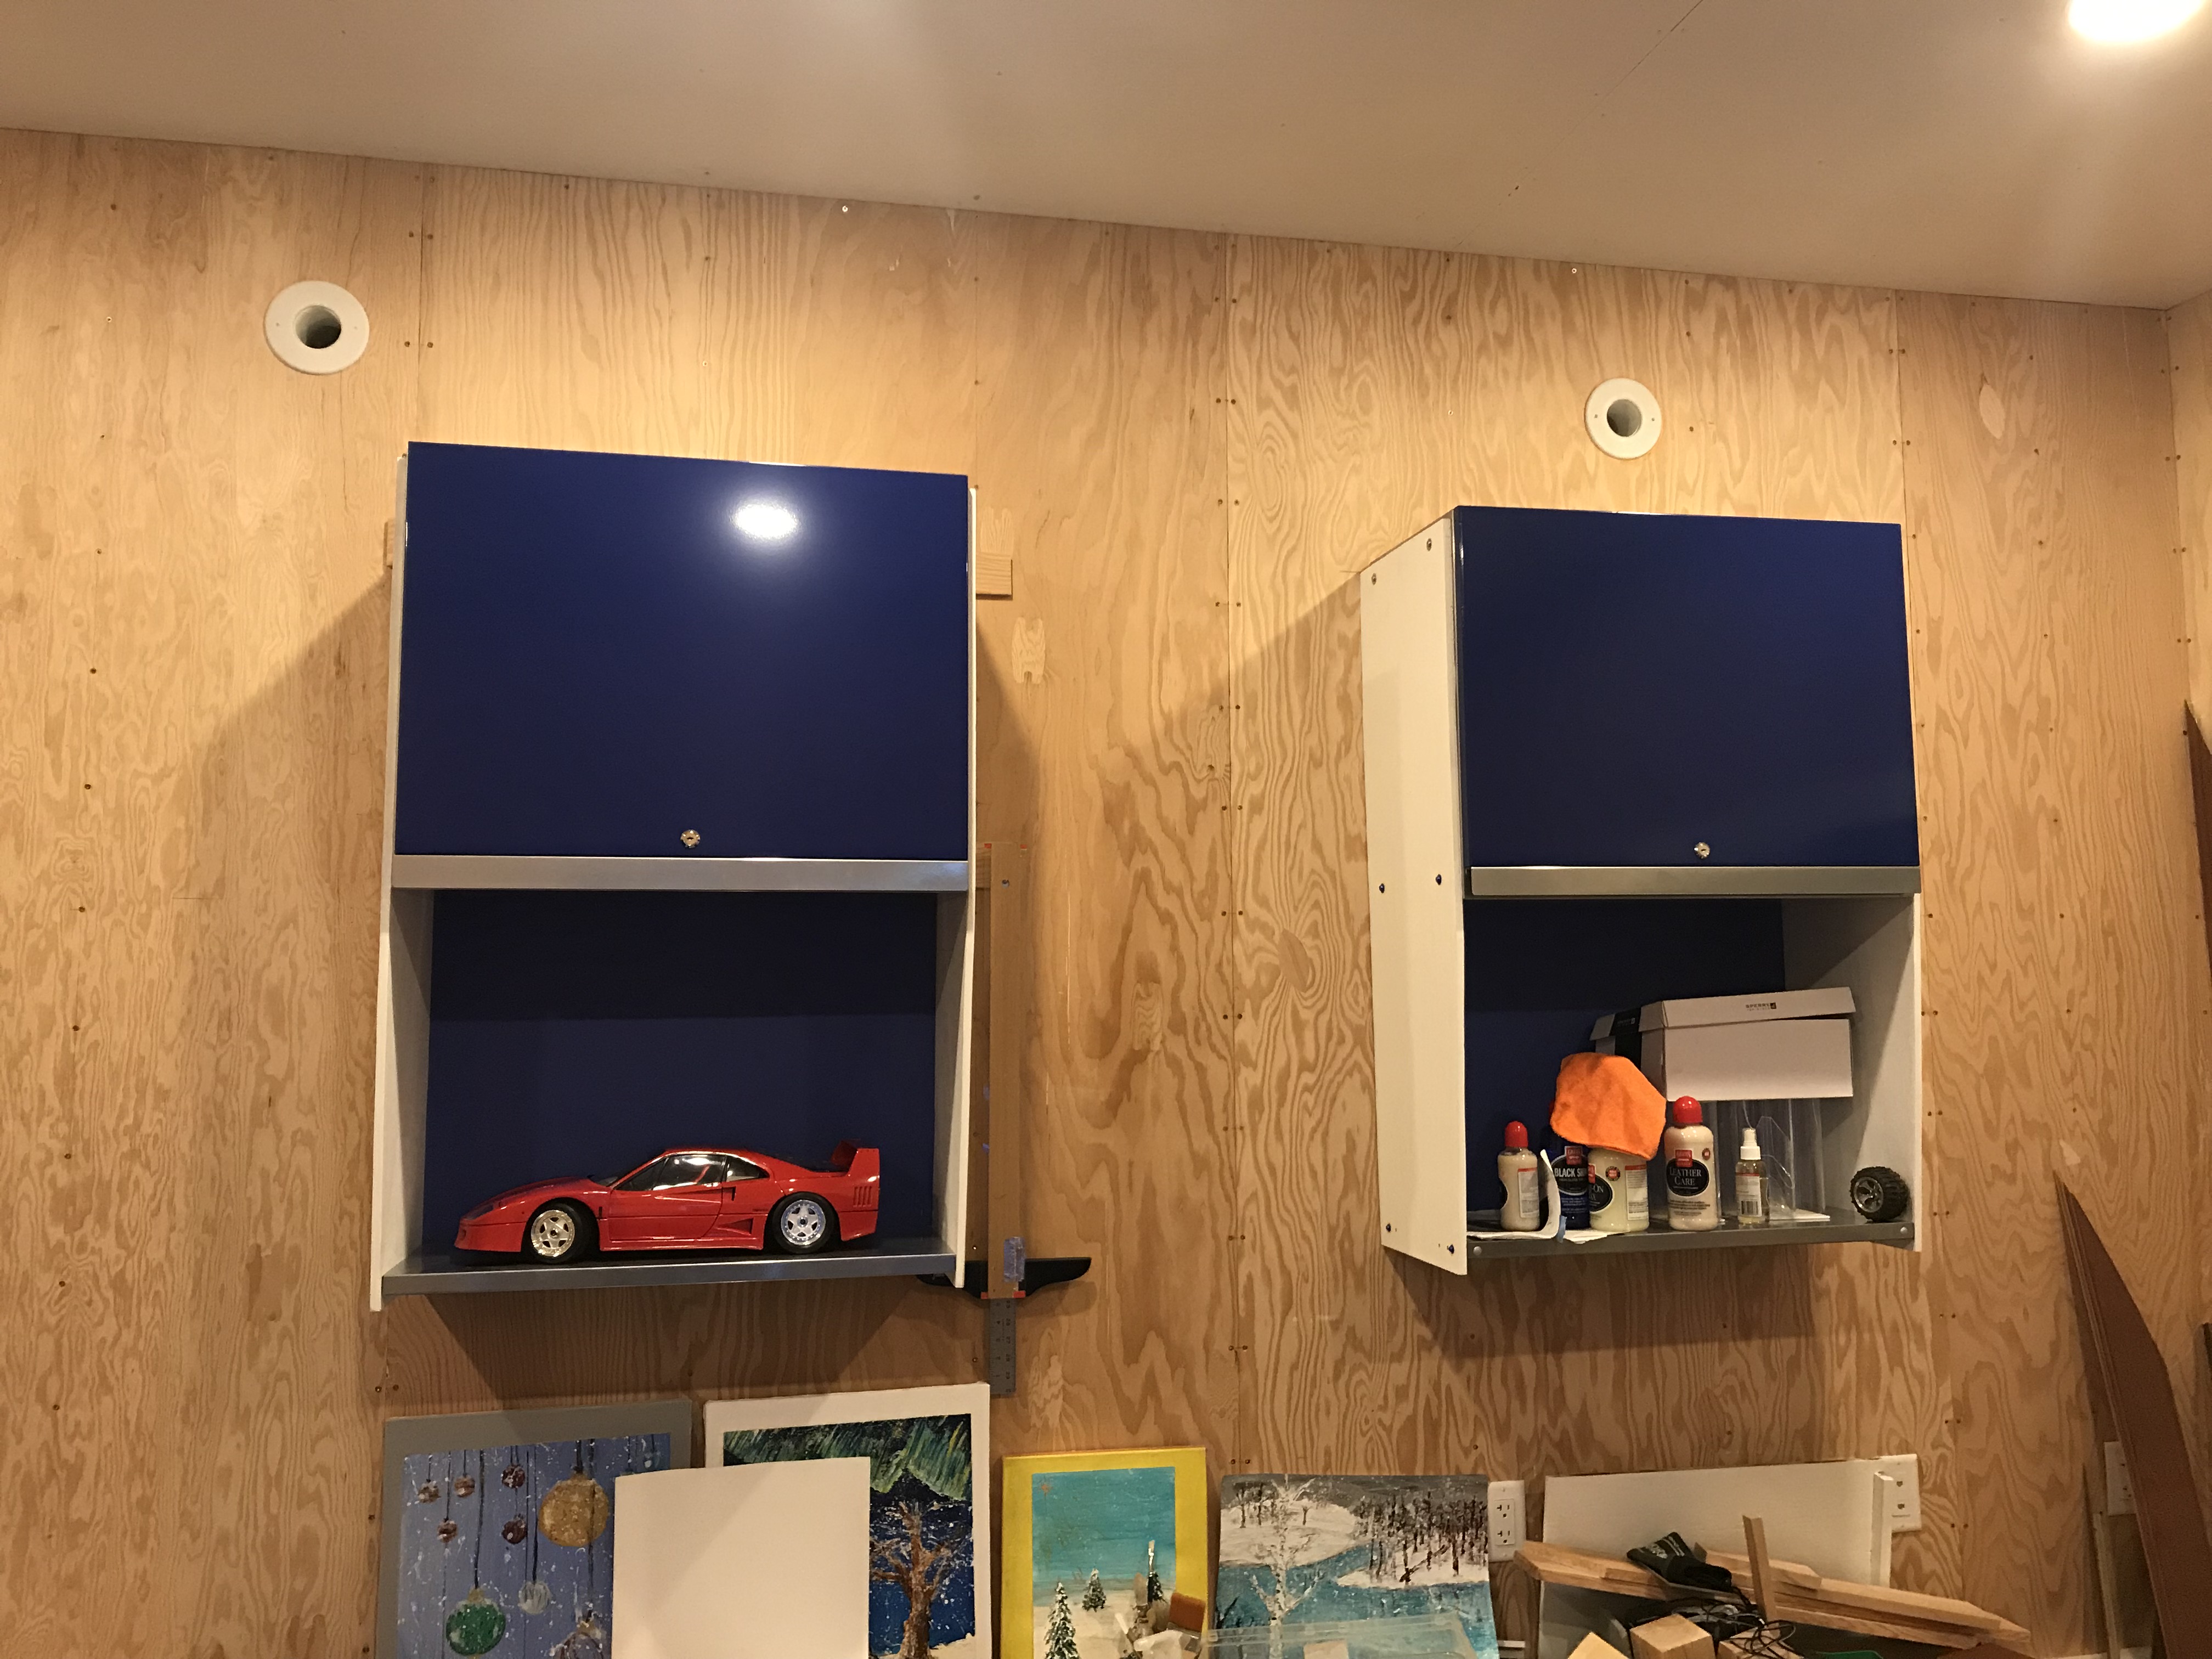
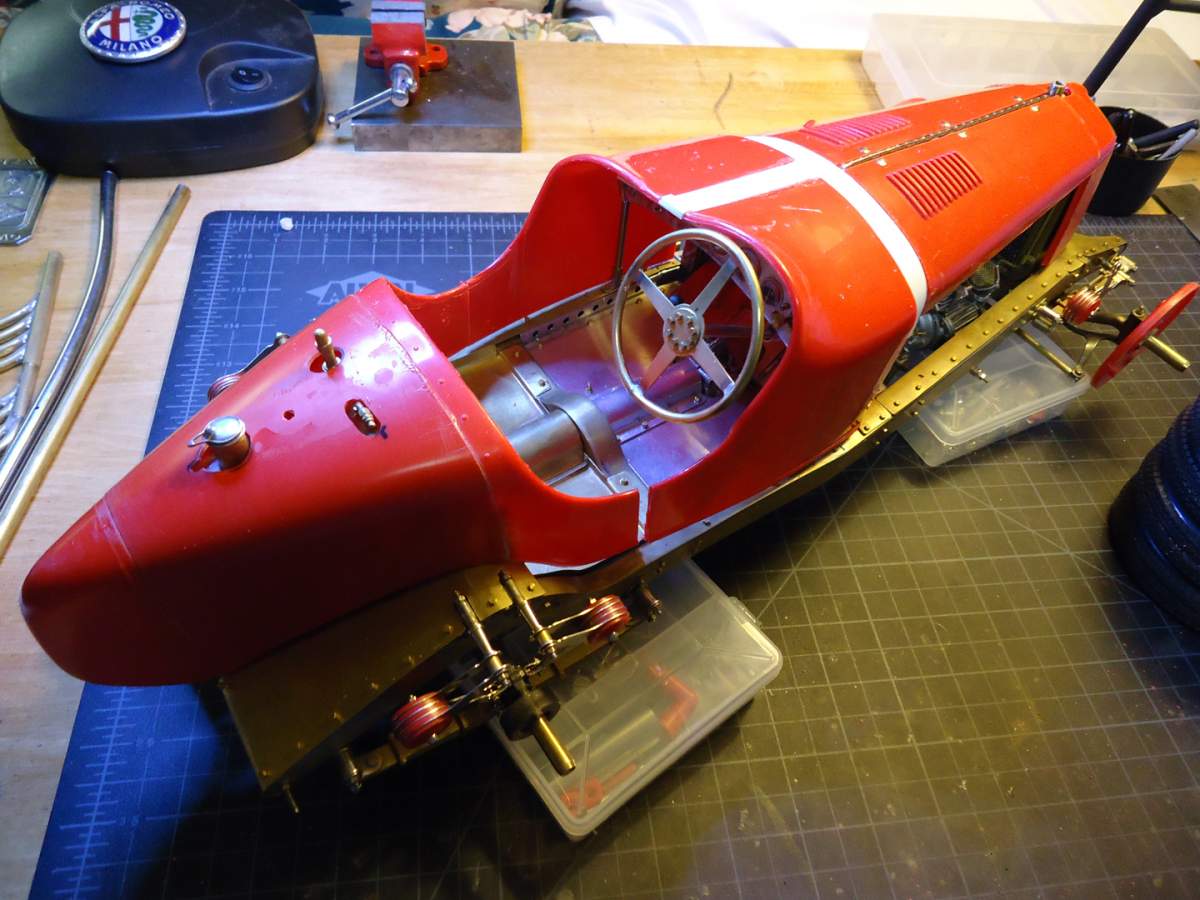
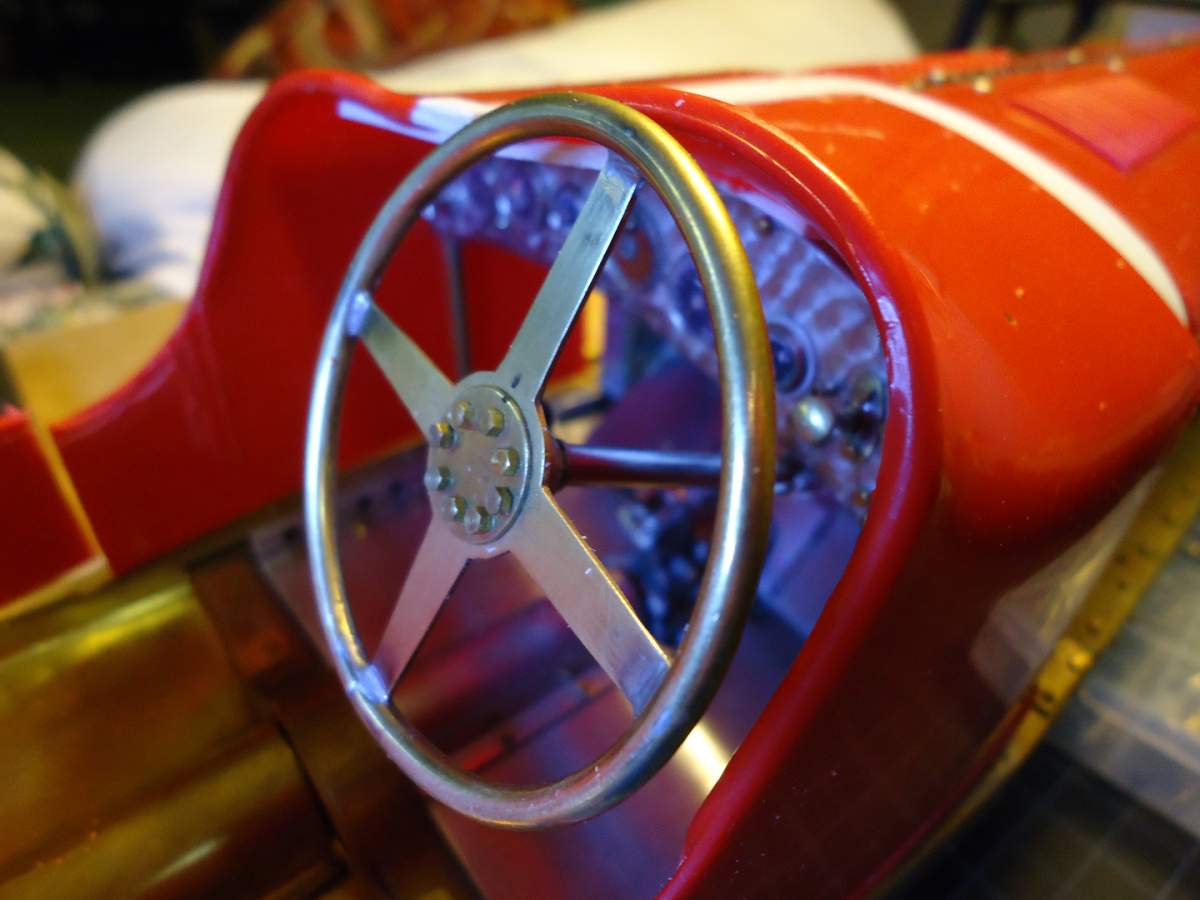
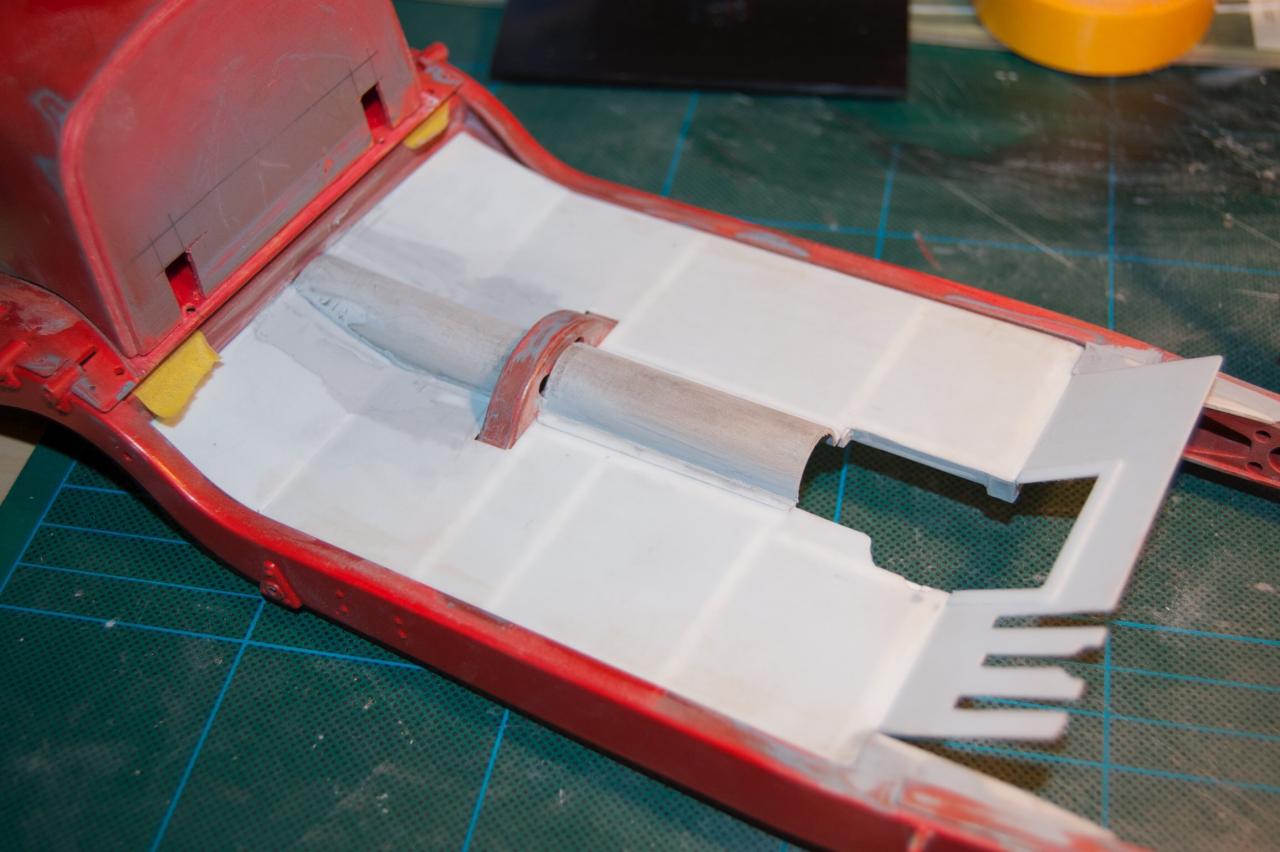
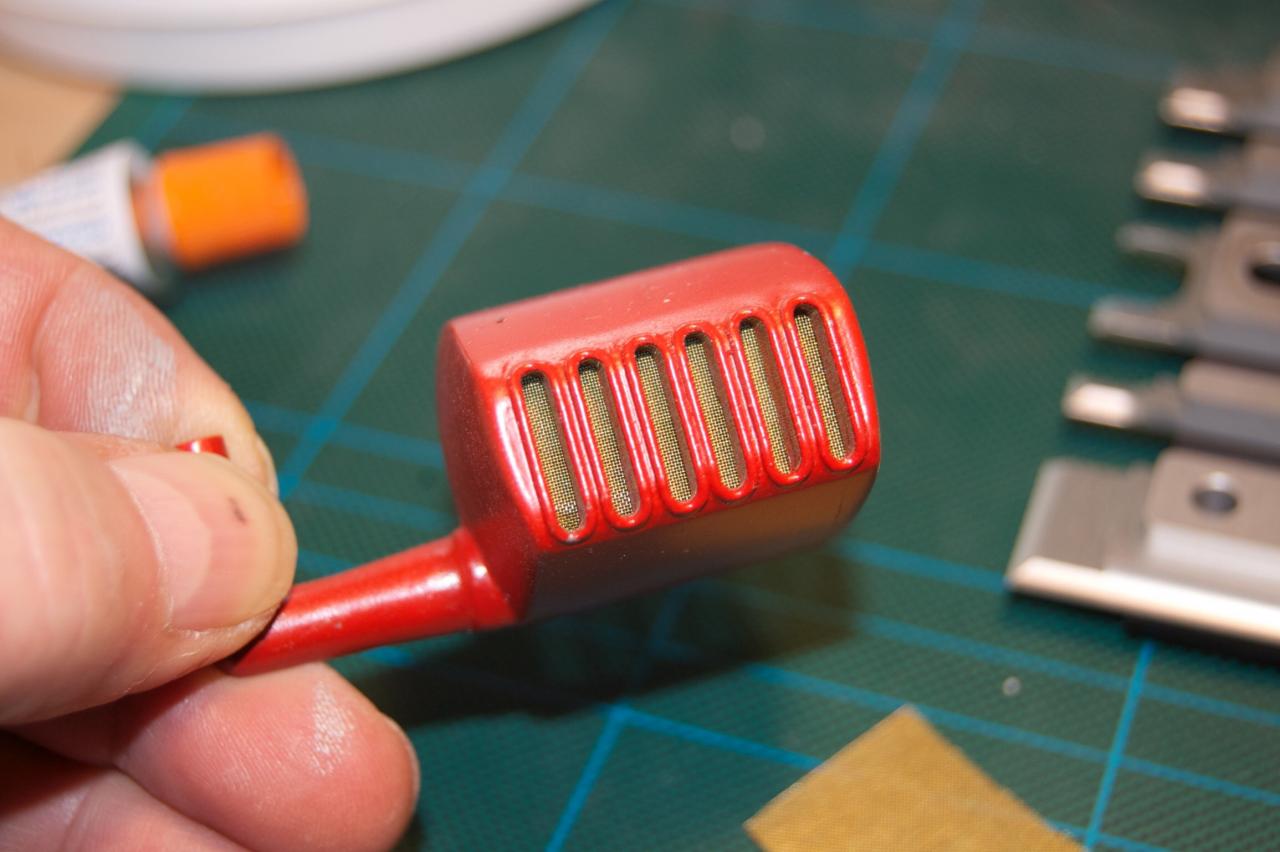
After more than 2 years of built time it a pleasure to present the pics of the finished 1/8 Ferrari Testarossa. The car is based on the kit which was release from Pocher more than 30 years ago. I used several Transkit( Transkit Modelcar, AMG, Tremonia,…) and a lot of parts from Top Studios, Autograph, Scaledetails,… I spent hundreds of hours just studying the technical documentation of Ferrari and viewing pics available on internet to make the car as realistic as possible and I added even the smallest detail. A lot of these changes were built from scratch. Just to mention a view of the changes: - realistic side fins and air inlet - realistic hood open and locking mechanism - super detailed engine with a detailed injection unit, all additional units, waterpipes, oil pipes, air pipes, wiring harness - fuel tank with fuel pumps, filters and lines - entire interior covered with leather - super detailed displays and center console - glove compartment, radio cover and center compartment to be opened - sun visors - realistic underbody - suspension and brakes with all brake lines - realistic front air intake and rear air outlet - Horn and windshield washer container - Brake fluid reservoir, batterie and main fuse box Further I added fully functioning lighting with automatic pop up lights, a sound module with realistic sound, remote control and the complete toolset and luggage. To increase the realism even more, I aged and weathered the underbody with the suspension and the lower engine section. For those who are interested. I have also made a video. Looking forward to your replies! best regards Ferraifan

- 27 replies
-
- 8
-

-
- ferrari
- testarossa
- (and 2 more)
-
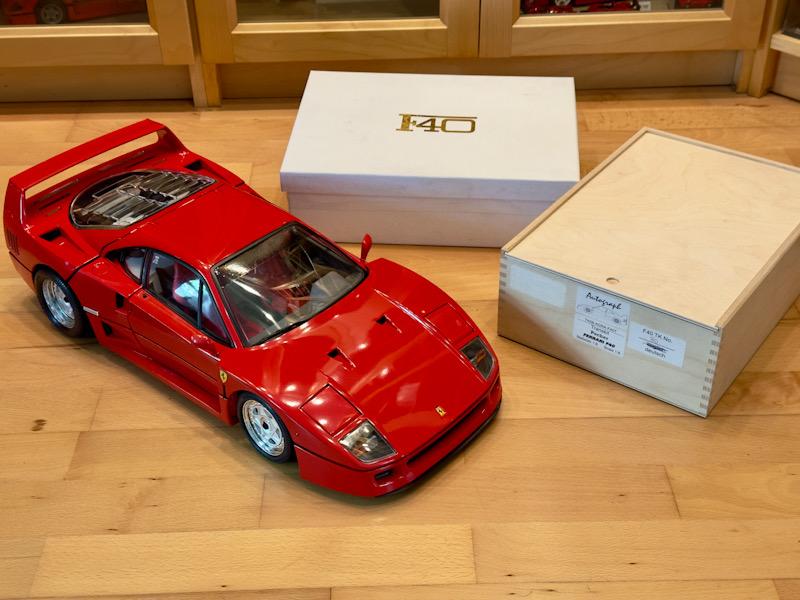
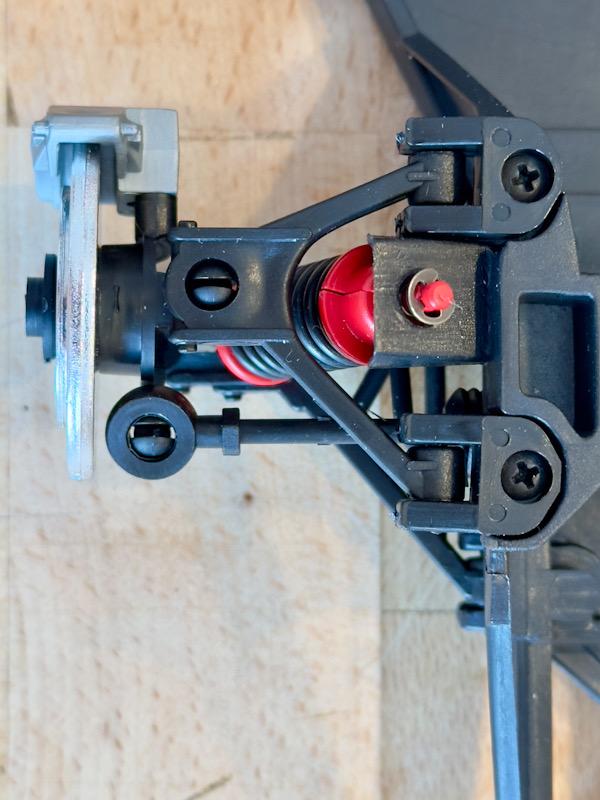
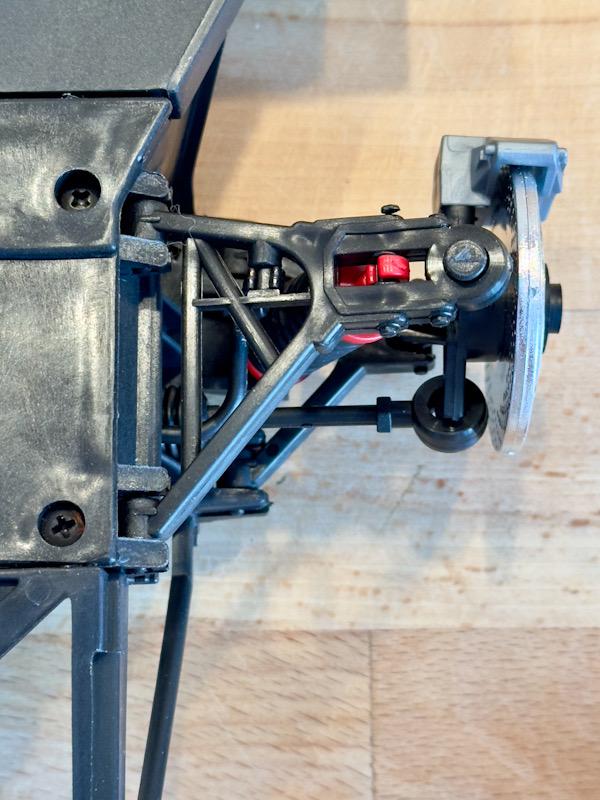
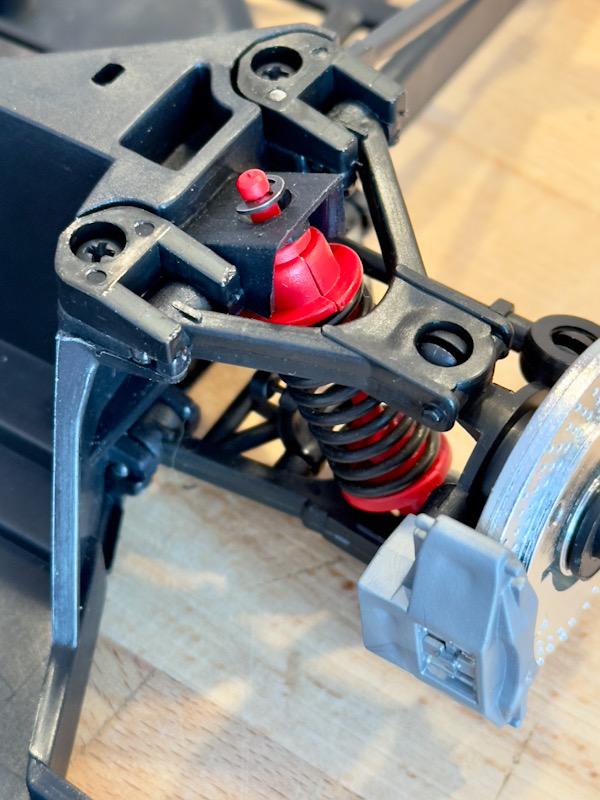
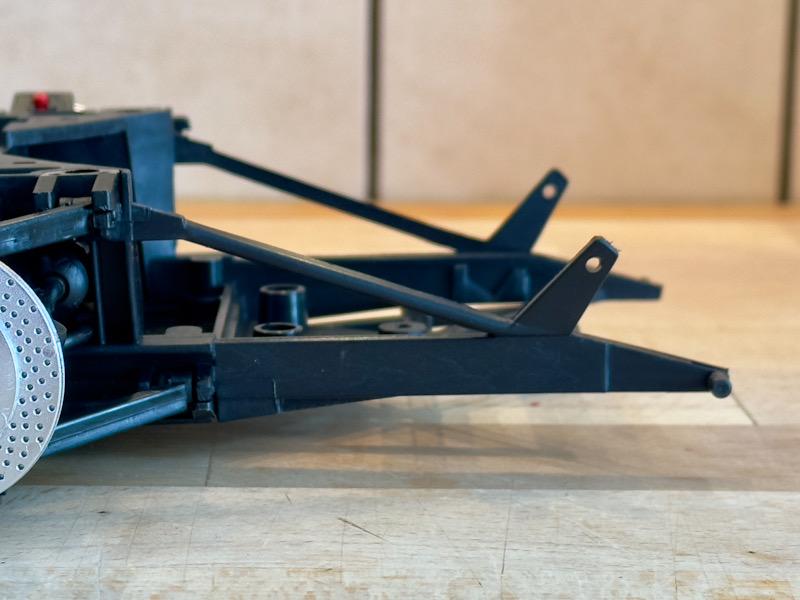
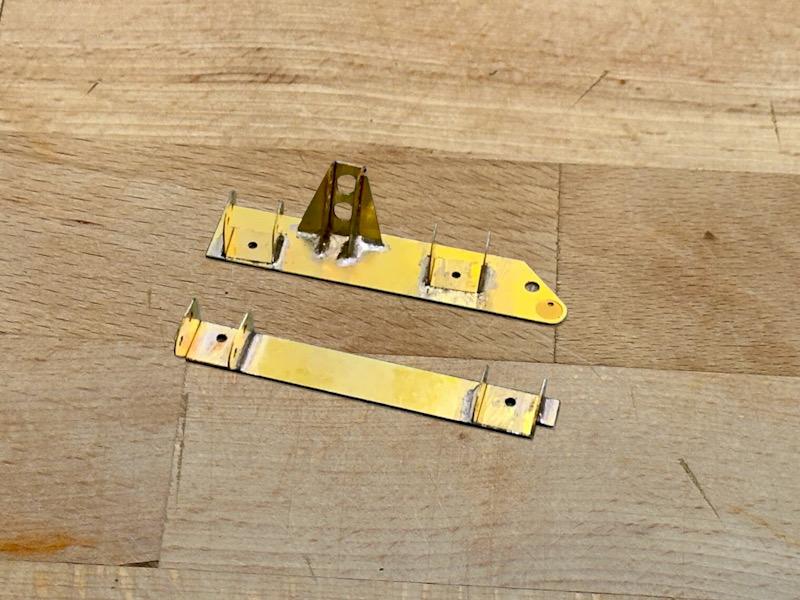
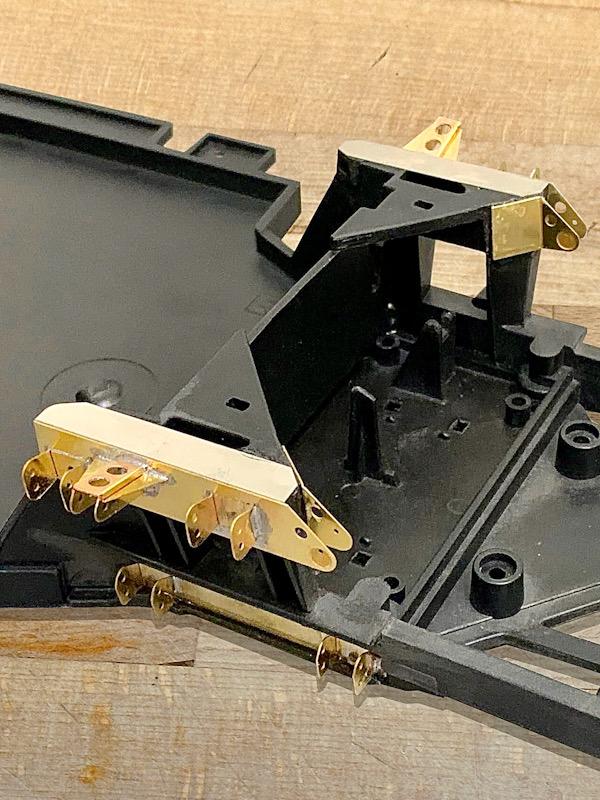
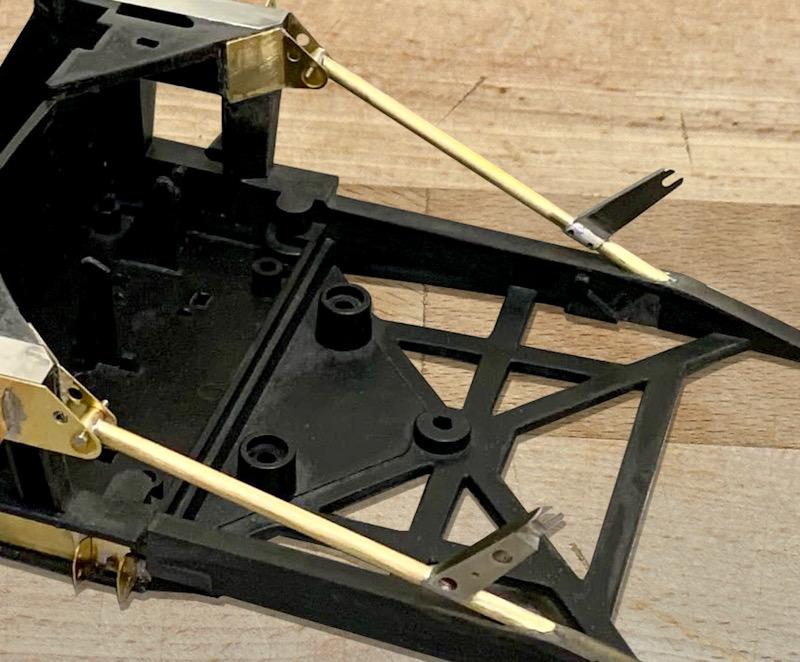
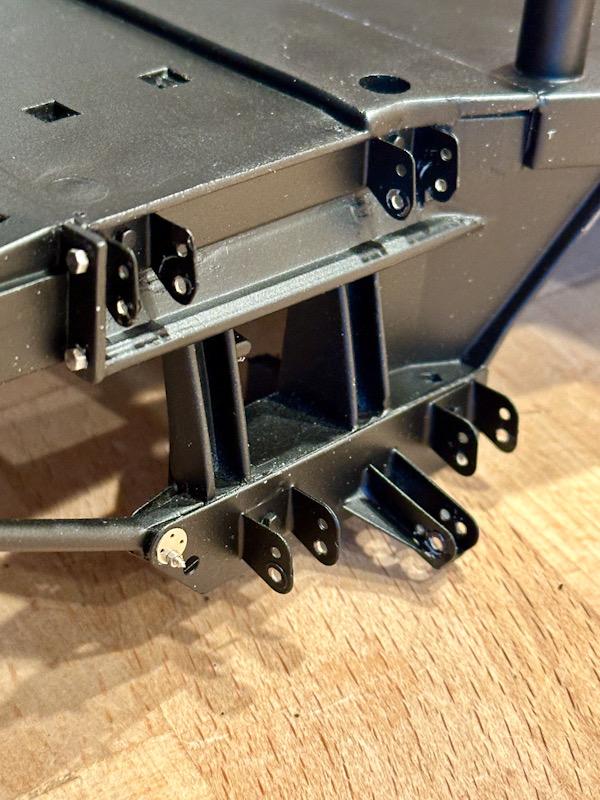
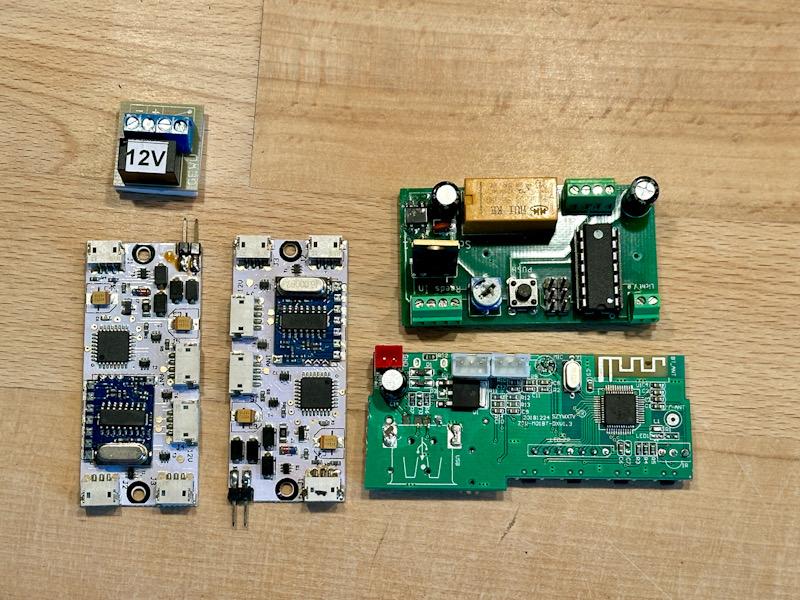
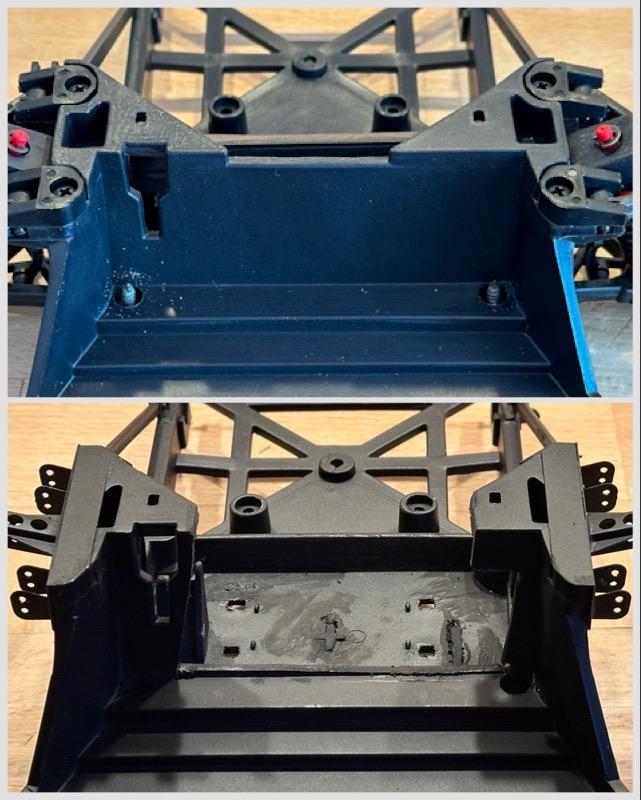
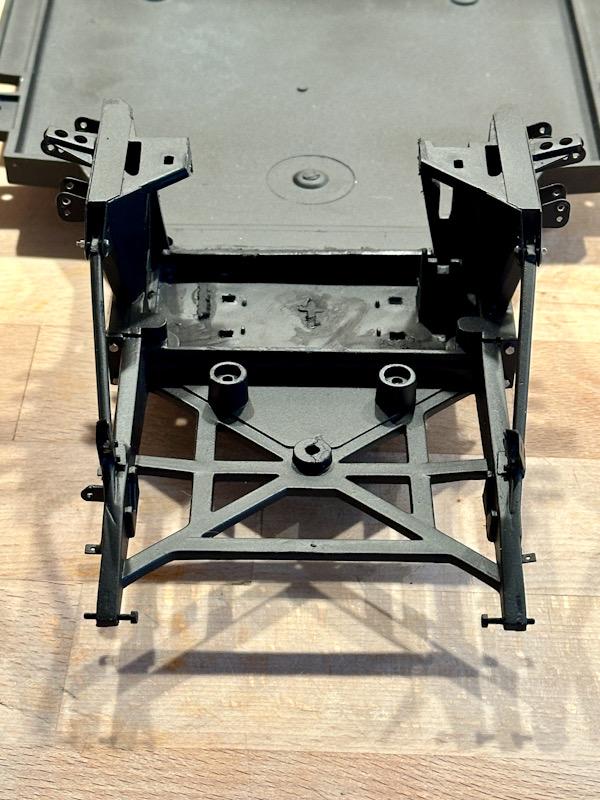
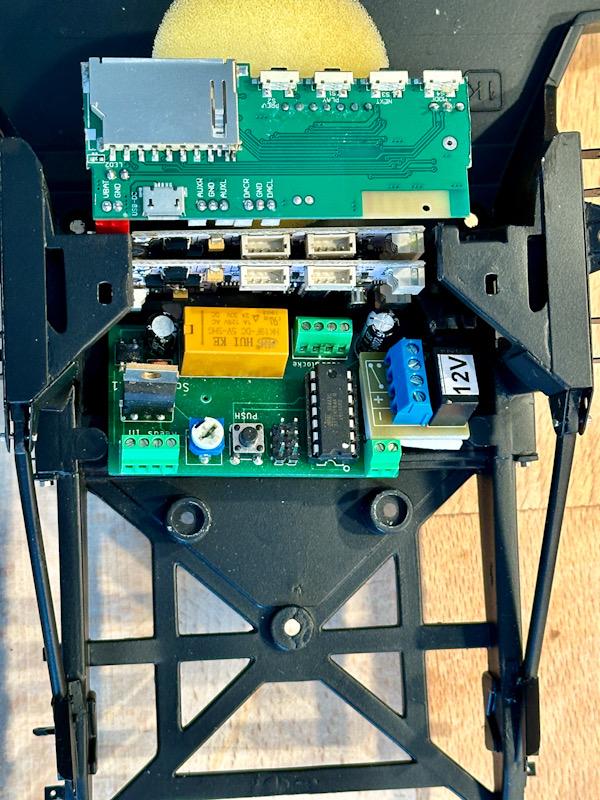
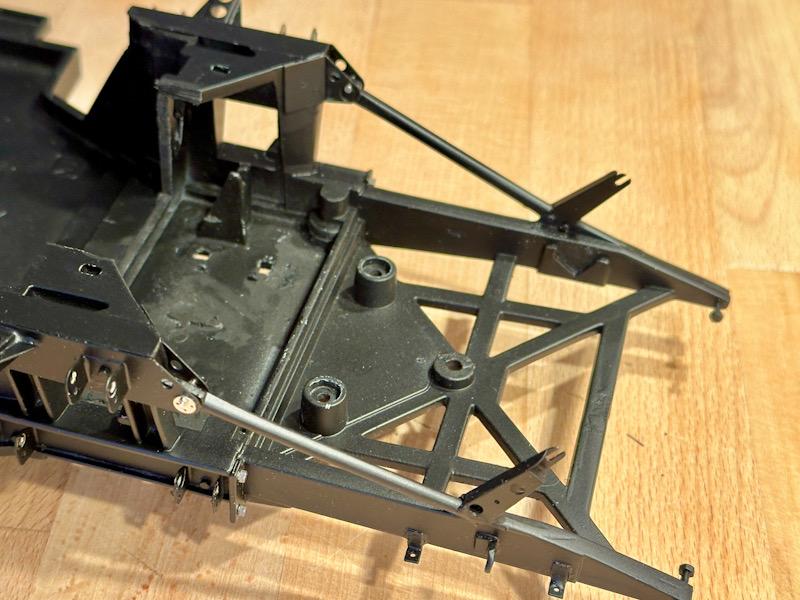
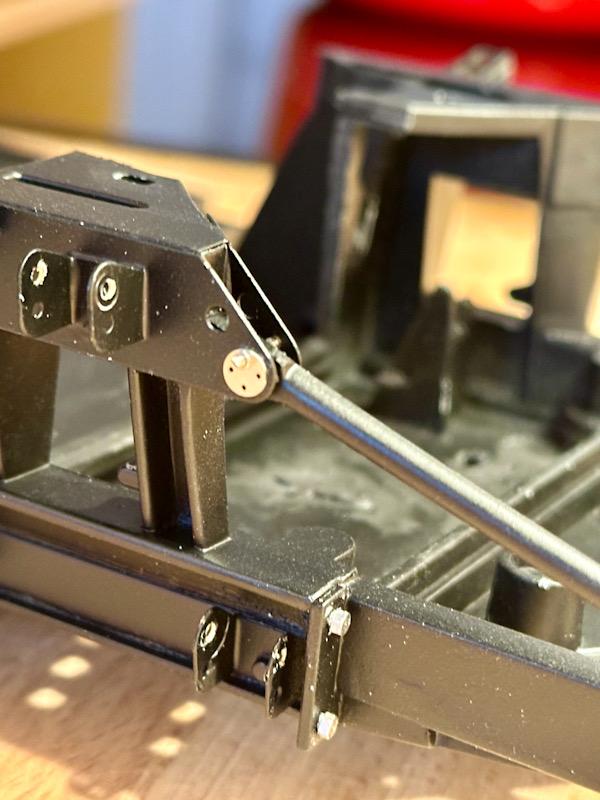
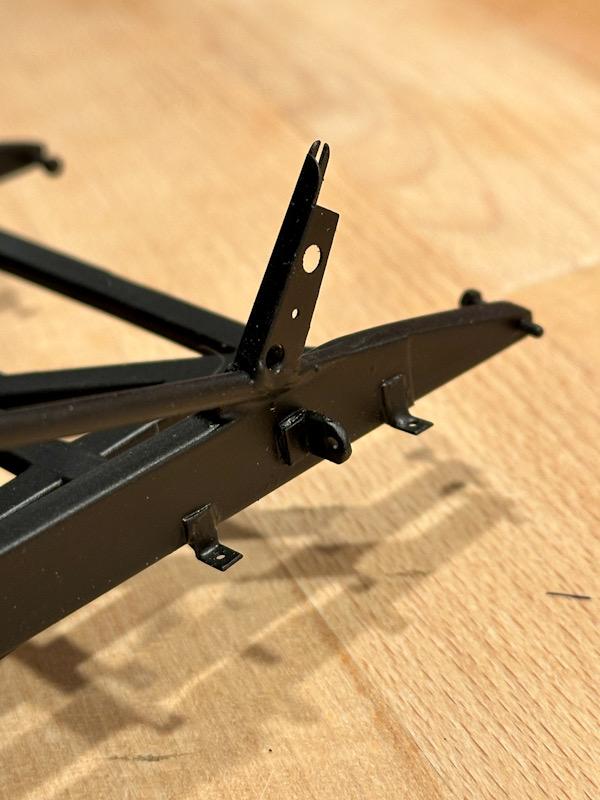
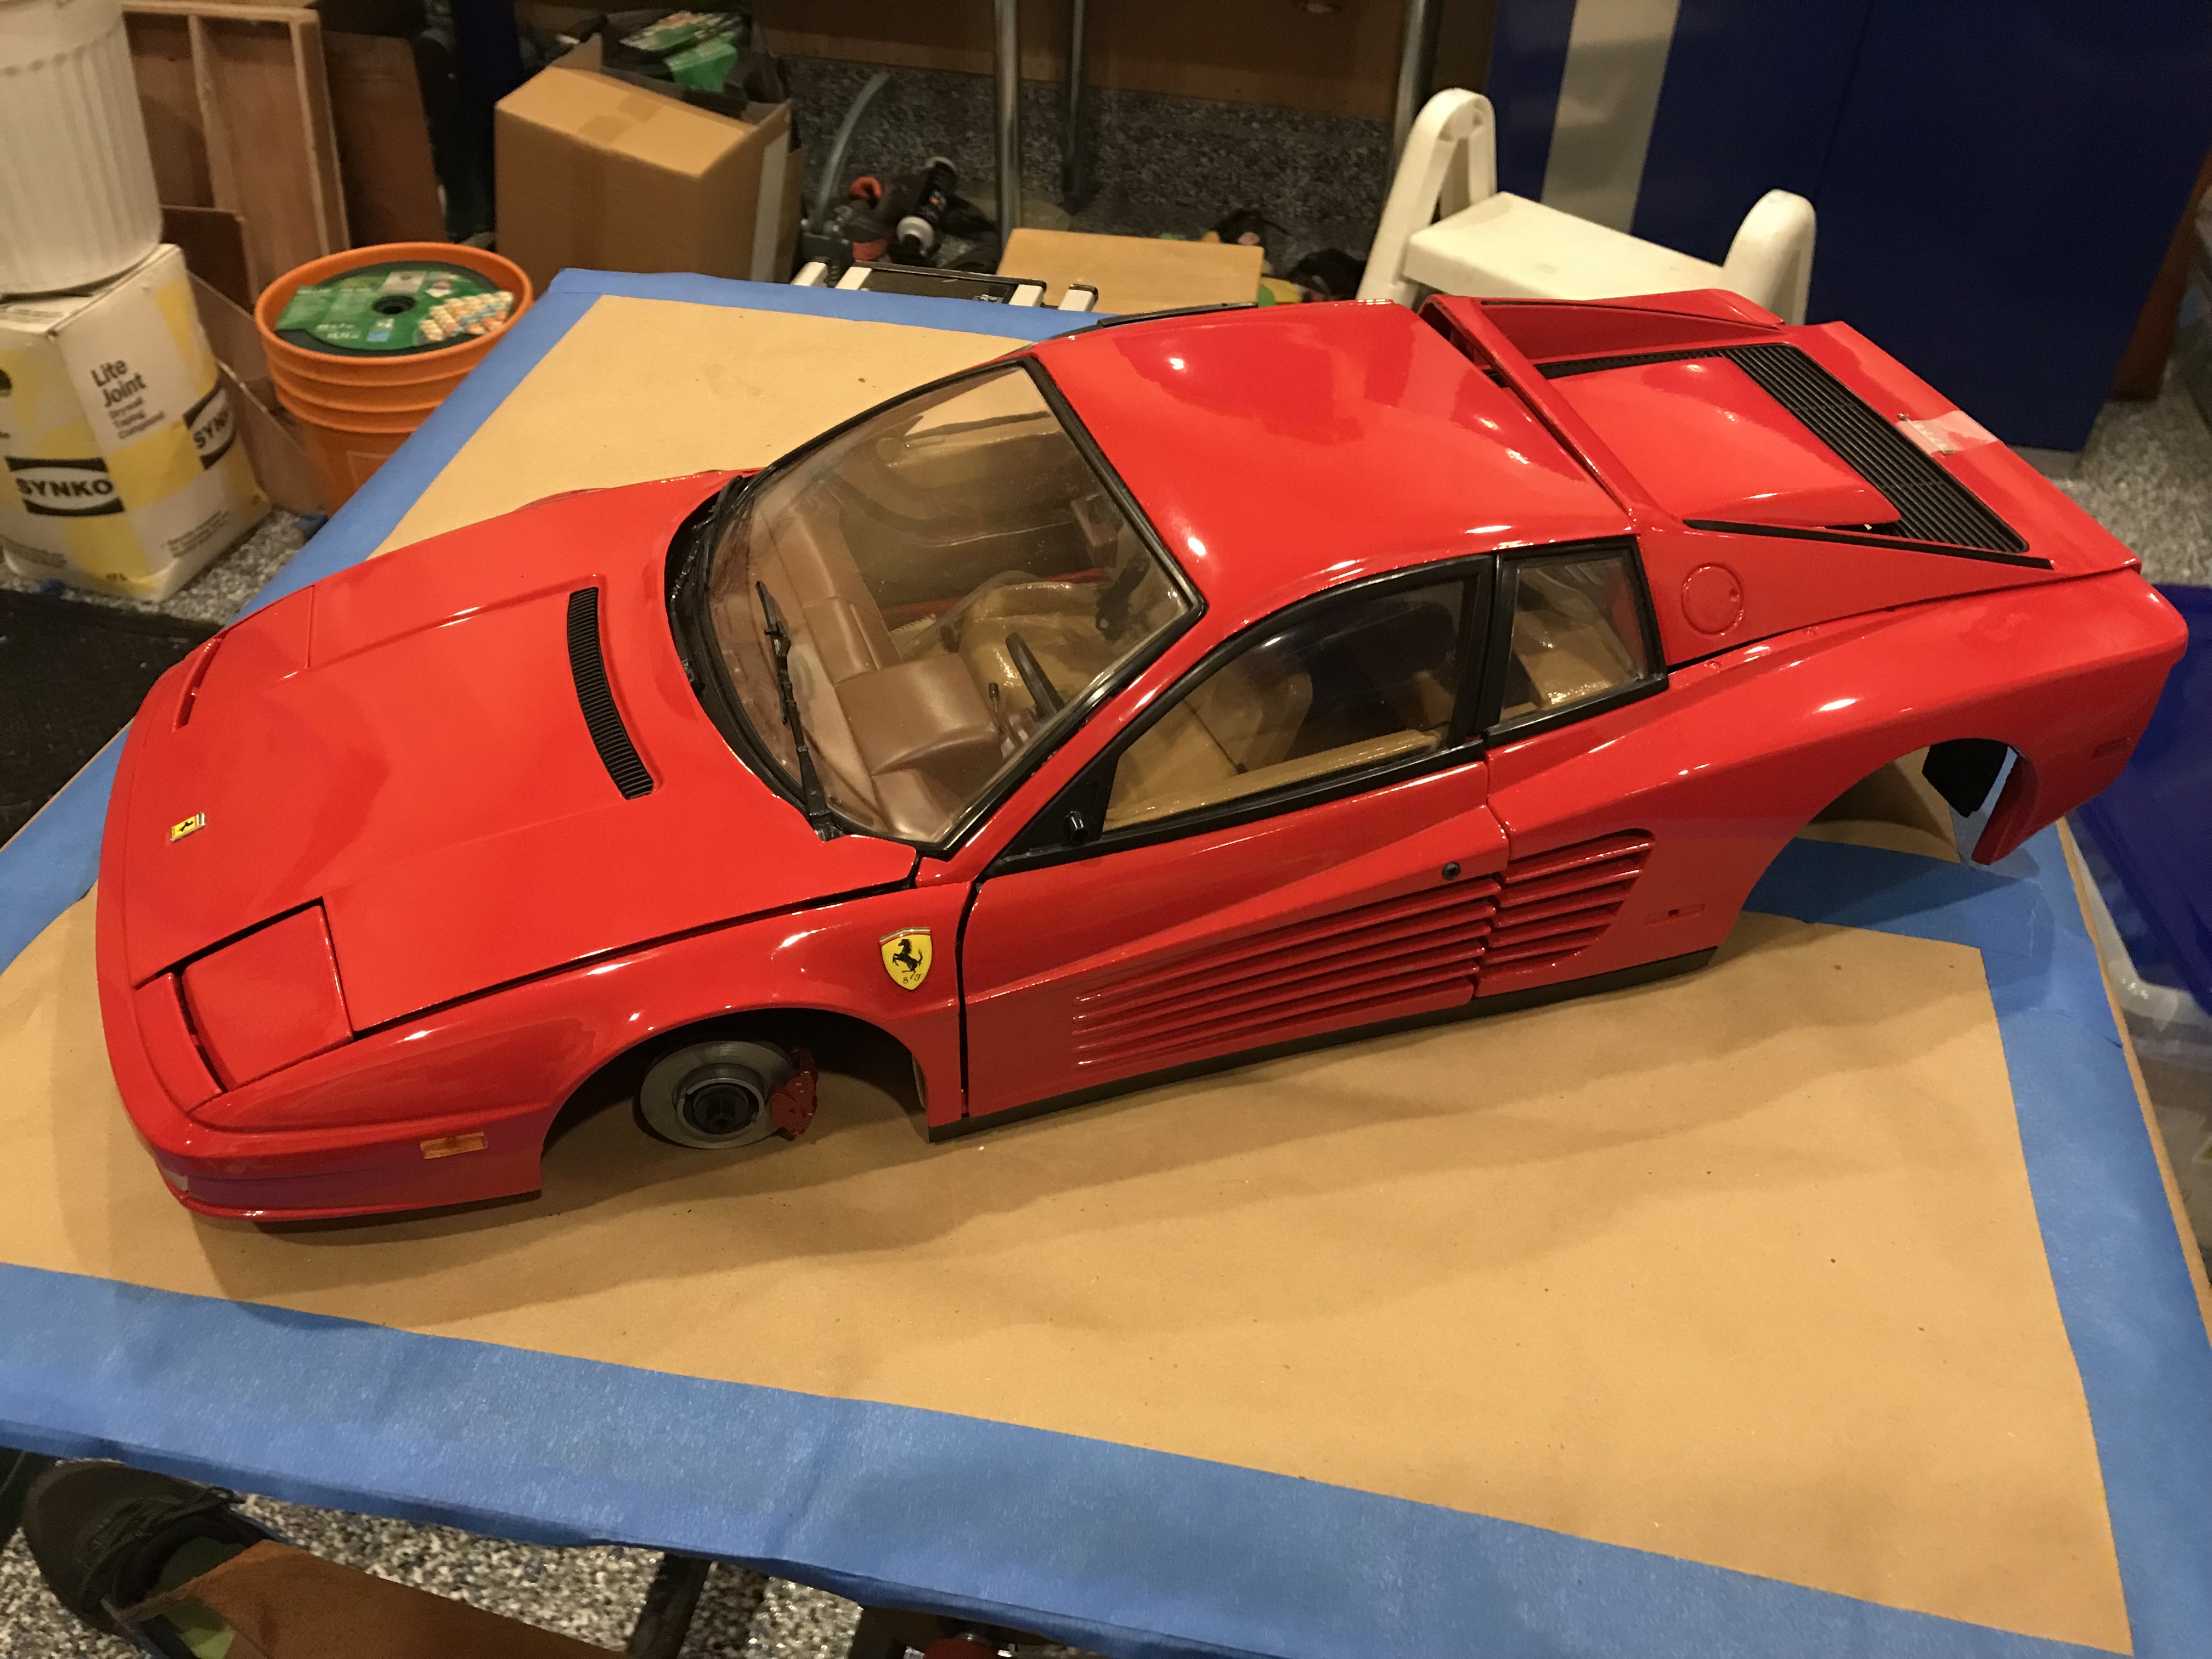
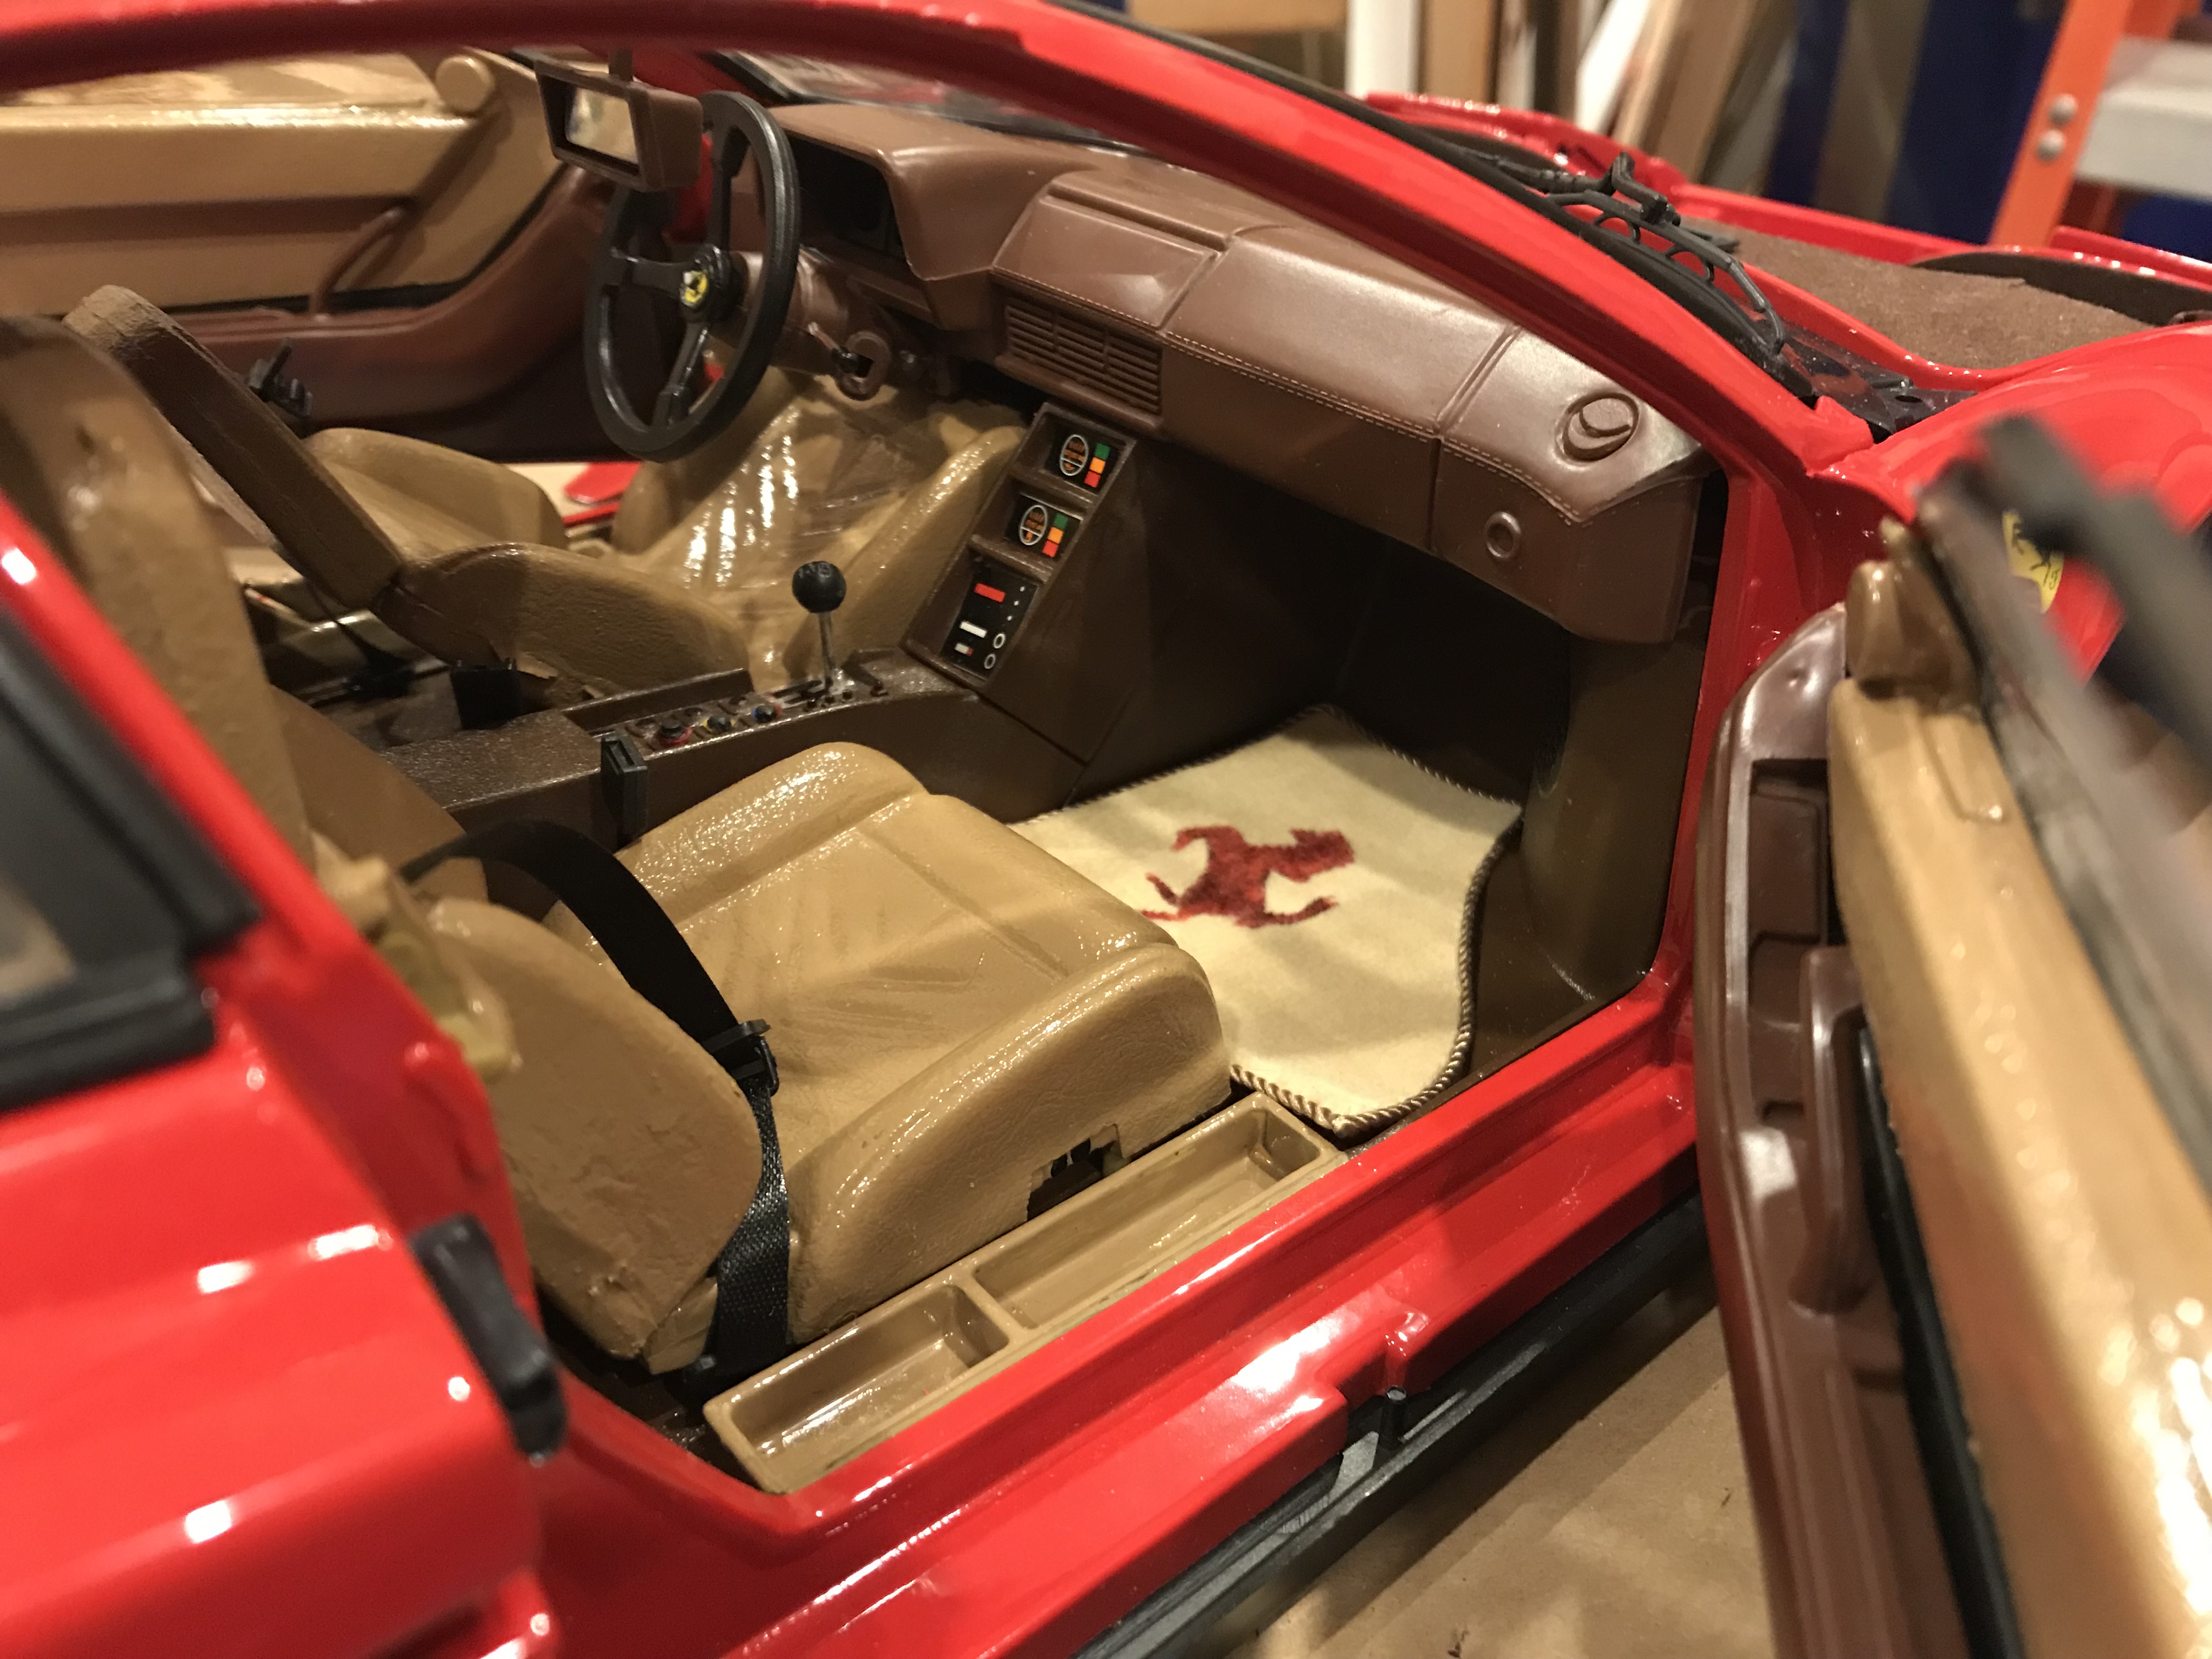
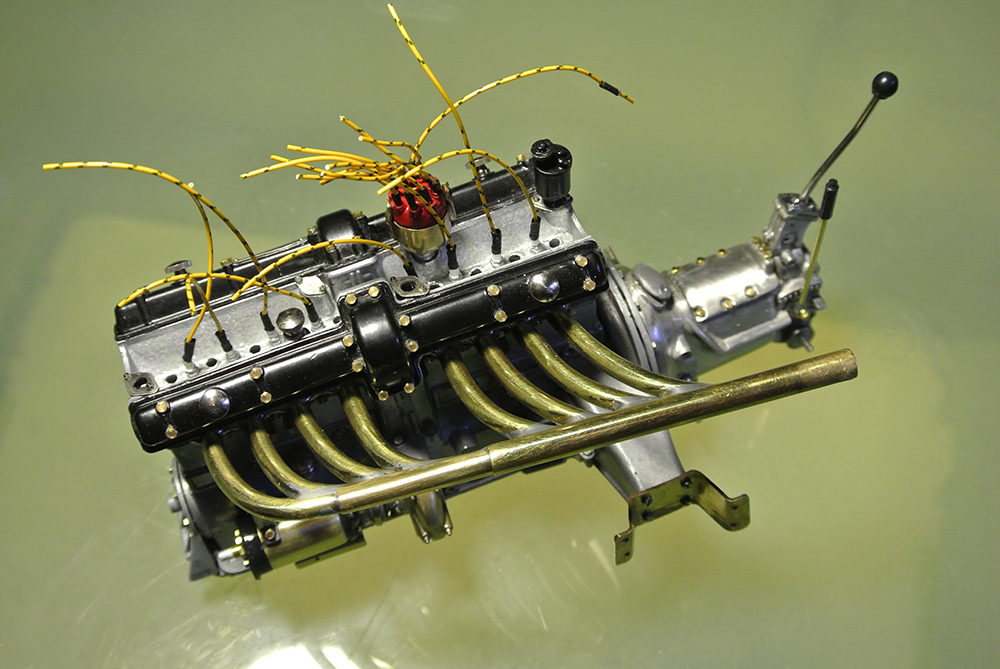
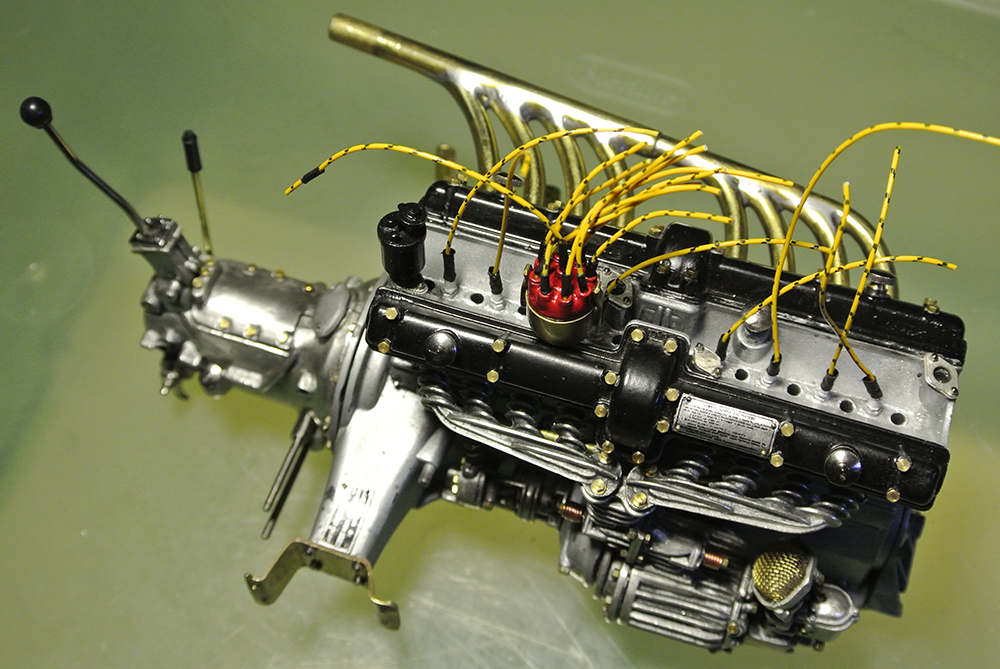
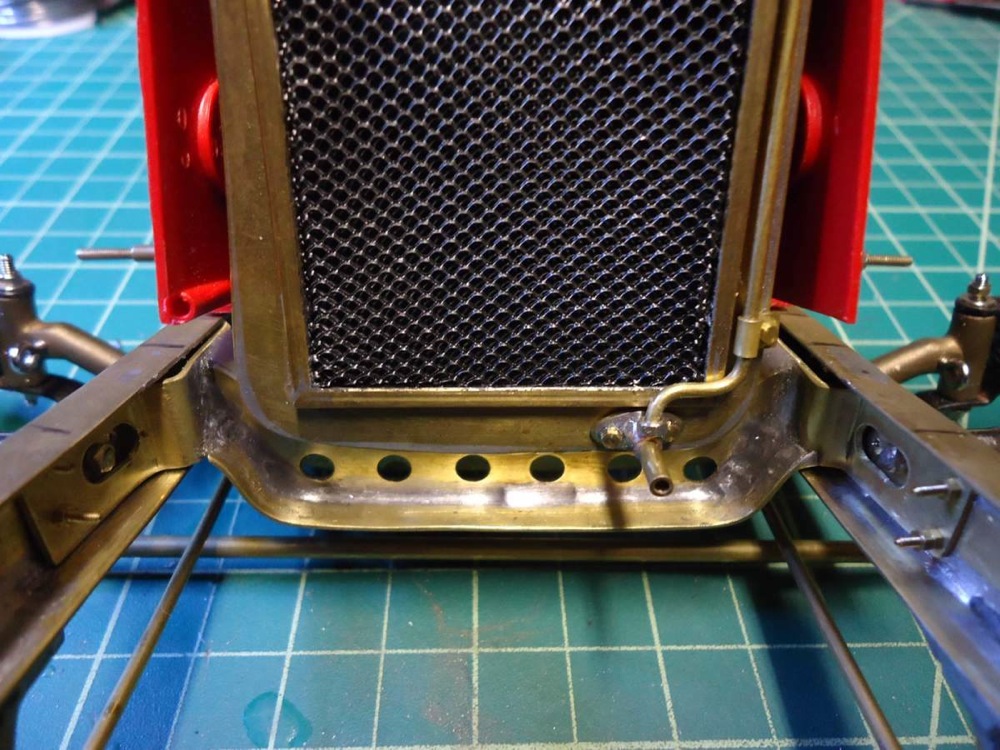
Hello model building enthusiasts! Today I’m starting the build report for my dream car, the Ferrari F40. First, here are some details about the car, the kit, and the transkits I will use. The Ferrari F40: The Ferrari F40 was introduced in 1987 as the successor to the legendary Ferrari 288 GTO. This vehicle was not only a milestone for Ferrari but also for the entire automotive industry. Developed to celebrate Ferrari’s 40th anniversary, the F40 epitomized the ultimate pursuit of performance and engineering. It was commissioned by Enzo Ferrari himself to continue Ferrari’s tradition as a manufacturer of pure racing cars for the road. It was intended to be the fastest and most powerful road car of its time and embody Ferrari’s technology and heritage. The Ferrari F40 was a masterpiece of engineering. Beneath its carbon fiber and Kevlar bodywork lay a twin-turbo V8 engine with 2.9 liters of displacement, producing an impressive 478 horsepower and a maximum torque of 577 Nm. This engine was mated to a five-speed manual gearbox, giving the F40 a top speed of over 320 km/h. The lightweight construction of the F40 contributed to its impressive performance, with a dry weight of only about 1,100 kg. During its production run from 1987 to 1992, a total of approximately 1,315 Ferrari F40s were produced. Although there were no official variants, some special models, such as the F40 LM and the F40 Competizione, were produced for racing. These vehicles were even more powerful and rarer than the standard F40. I will be building the road car in the European specification. Furthermore, I have decided not to build the version for purists (with plexiglass side windows with small sliding windows, no air conditioning), but the slightly more comfortable version with inner door panels, crank windows, and air conditioning. The Pocher Model: In 1991, Pocher released a 1:8 scale kit of the F40. Similar to the Testarossa, Pocher decided to simplify the kit compared to earlier Pocher models. The reason for this decision was to appeal to a wider audience, as the model could be assembled very easily. All parts were simply snapped or screwed together. I found a relatively well-preserved and unmodified assembled F40 on eBay, which I completely disassembled and will rebuild from scratch. Transkits: Over time, several Transkits were released to improve the level of detail. The “holy grail” among the Transkits is the one from Autograph. The Transkit was released in a limited quantity. However, due to high demand, additional runs were made. The Transkit stands out especially for its many details on the suspension and frame. It consists of 8 A4 sheets with etched parts, numerous white metal cast parts, metal rims, decals for the cockpit, carbon fiber, and Kevlar surfaces. It also includes fabric for the dashboard and seats, as well as plenty of small parts like screws and nuts. The Transkit I’m using is from the last batch, featuring Speedline rims. So, I started the build in 2021. However, since Tommaso Iuele also announced a Transkit for the F40, I stopped the build until this Transkit becomes available. To bridge the time until then, I started building the 1:8 Testarossa by Pocher, for which Tommaso Iuele’s Transkit was already available. So, I spent the last 2 years building the Testarossa. Here is the link to the pics of the finished Testarossa. A few weeks ago, Tommaso Iuele’s F40 Transkit was completed as well. The Transkit features a highly detailed engine made of printed parts. It also includes the front hood, rear wing, and rims for the LM version, as well as many other printed parts. It contains 5 A4 sheets with etched parts and beautiful decals for the road and LM versions. After examining both Transkits, the further procedure is clear. I will continue building the road version and, like with the Testarossa, make the engine by Tommaso Iuele as a standalone model. Regarding the etched parts, I will make a “best of” selection. Later on, I will build the remaining parts into an LM version. Since I’ve learned a lot about model building in the last 2 years, I will now carefully inspect and improve the already built parts step by step if necessary. Additionally, the F40 will receive a fully functional lighting system with automatic popup headlights. Let’s start with the front axle and suspension. In the Pocher kit, the parts are assembled with large screws. The shock absorber suspension is a very loose interpretation of reality. The stabilizer and steering linkage are extremely bulky. For a model in 1:8 scale, it’s a complete disaster! Especially considering that the suspension of the F40 is fully visible when the hood is open. The same goes for the two tie rods that reinforce the front axle forward. Fortunately, this was taken into account in the Autograph Transkit. For this, there are etched parts in the Transkit that are soldered together, thus redesigning the mounting geometry. The Transkit also includes solder and soldering water. Soldering brass parts was new territory for me in 2021. After some practice soldering, I got the hang of it and finished the parts for the front axle suspension. The parts were then glued to the front axle with a 2K adhesive (Pattex Kraft Mix, extremely fast, 25 mg). For this, any protruding parts of the old mounting were sawed off beforehand. The adhesive hardens very quickly. That’s why I always mix a very small amount. After the adhesive had cured, the parts were additionally secured with small screws. The two tie rods and the mounting for the radiator were also separated from the frame and replaced with brass parts. Afterward, everything was painted black. Now it looks almost like the big brother. That’s the status as of 2021. As mentioned above, the F40, like the Testarossa, will receive a fully functional lighting system. The only problem is, there’s actually no room for all the boards I need for the control. After much consideration, I found a solution. In the area of the front axle below the spare tire well, the steering rack and the stabilizer run. In principle, there is enough space, and the area is not entirely visible. However, to accommodate the boards, I would have to remove the cover of the steering column along with the mounting geometry and the reinforcement wall between the left and right sides. After I was sure that this would provide enough space for the boards, I used a small handsaw to cut away the interfering parts. Here’s a comparison to make it clear which wall I’m referring to. In the front view, you can also see the cutaway areas of the steering column cover. Here’s the basic positioning of the boards. It’s important that all connectors are accessible and that no heat buildup occurs. To conclude, here are some pictures of the finished front axle. That's it for now. Next time it will be the turn of the remaining parts of the front axle (wishbone, brake disc, brake caliper, shock absorber, stabilizer and steering linkage). See you soon Your Ferrarifan
-
My 1st Pocher-Kit built two years ago
- 23 replies
-
- 4
-
-
- alfa romeo
- 1/8 scale
- (and 1 more)
-
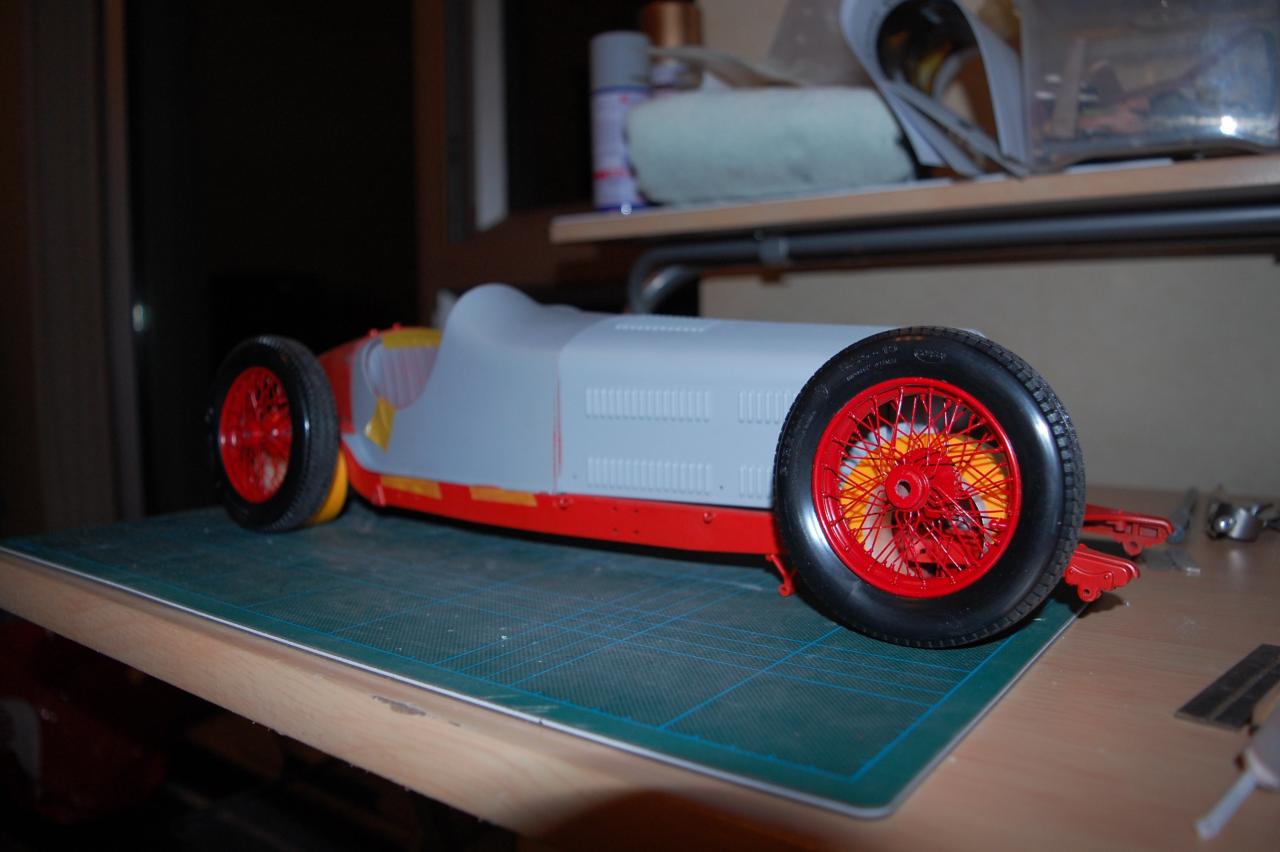
 Today I finished working on the model. I decided not to mount the fenders because I think the Alfa looks better without them. The fenders look too big in relation to the wheels and the mounting brackets in particular look very unreal, although I also painted them the same color as the car. Now the Alfa gets its place in the showcase. Maybe someday I'll get in the mood to come up with something different with the fenders. Oh yes, I see the coolant thermometer is sitting askew on the hood. The last driver probably didn't screw it on properly after the last filling... lol
- 24 replies
-
- 7
-
-

-
- 1/8
- alfa romeo
- (and 2 more)
-
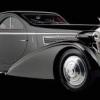
This is what i´m doing now. One of the earlier attractive Model kits by the italian producer Pocher, launched in 1968. 1,452 parts but nothing is really fitting. Everything is to revise. The most important tools are drills, thread cutter, files and sandpapers. But otherwise life would be boring, wouldn´t it?
-
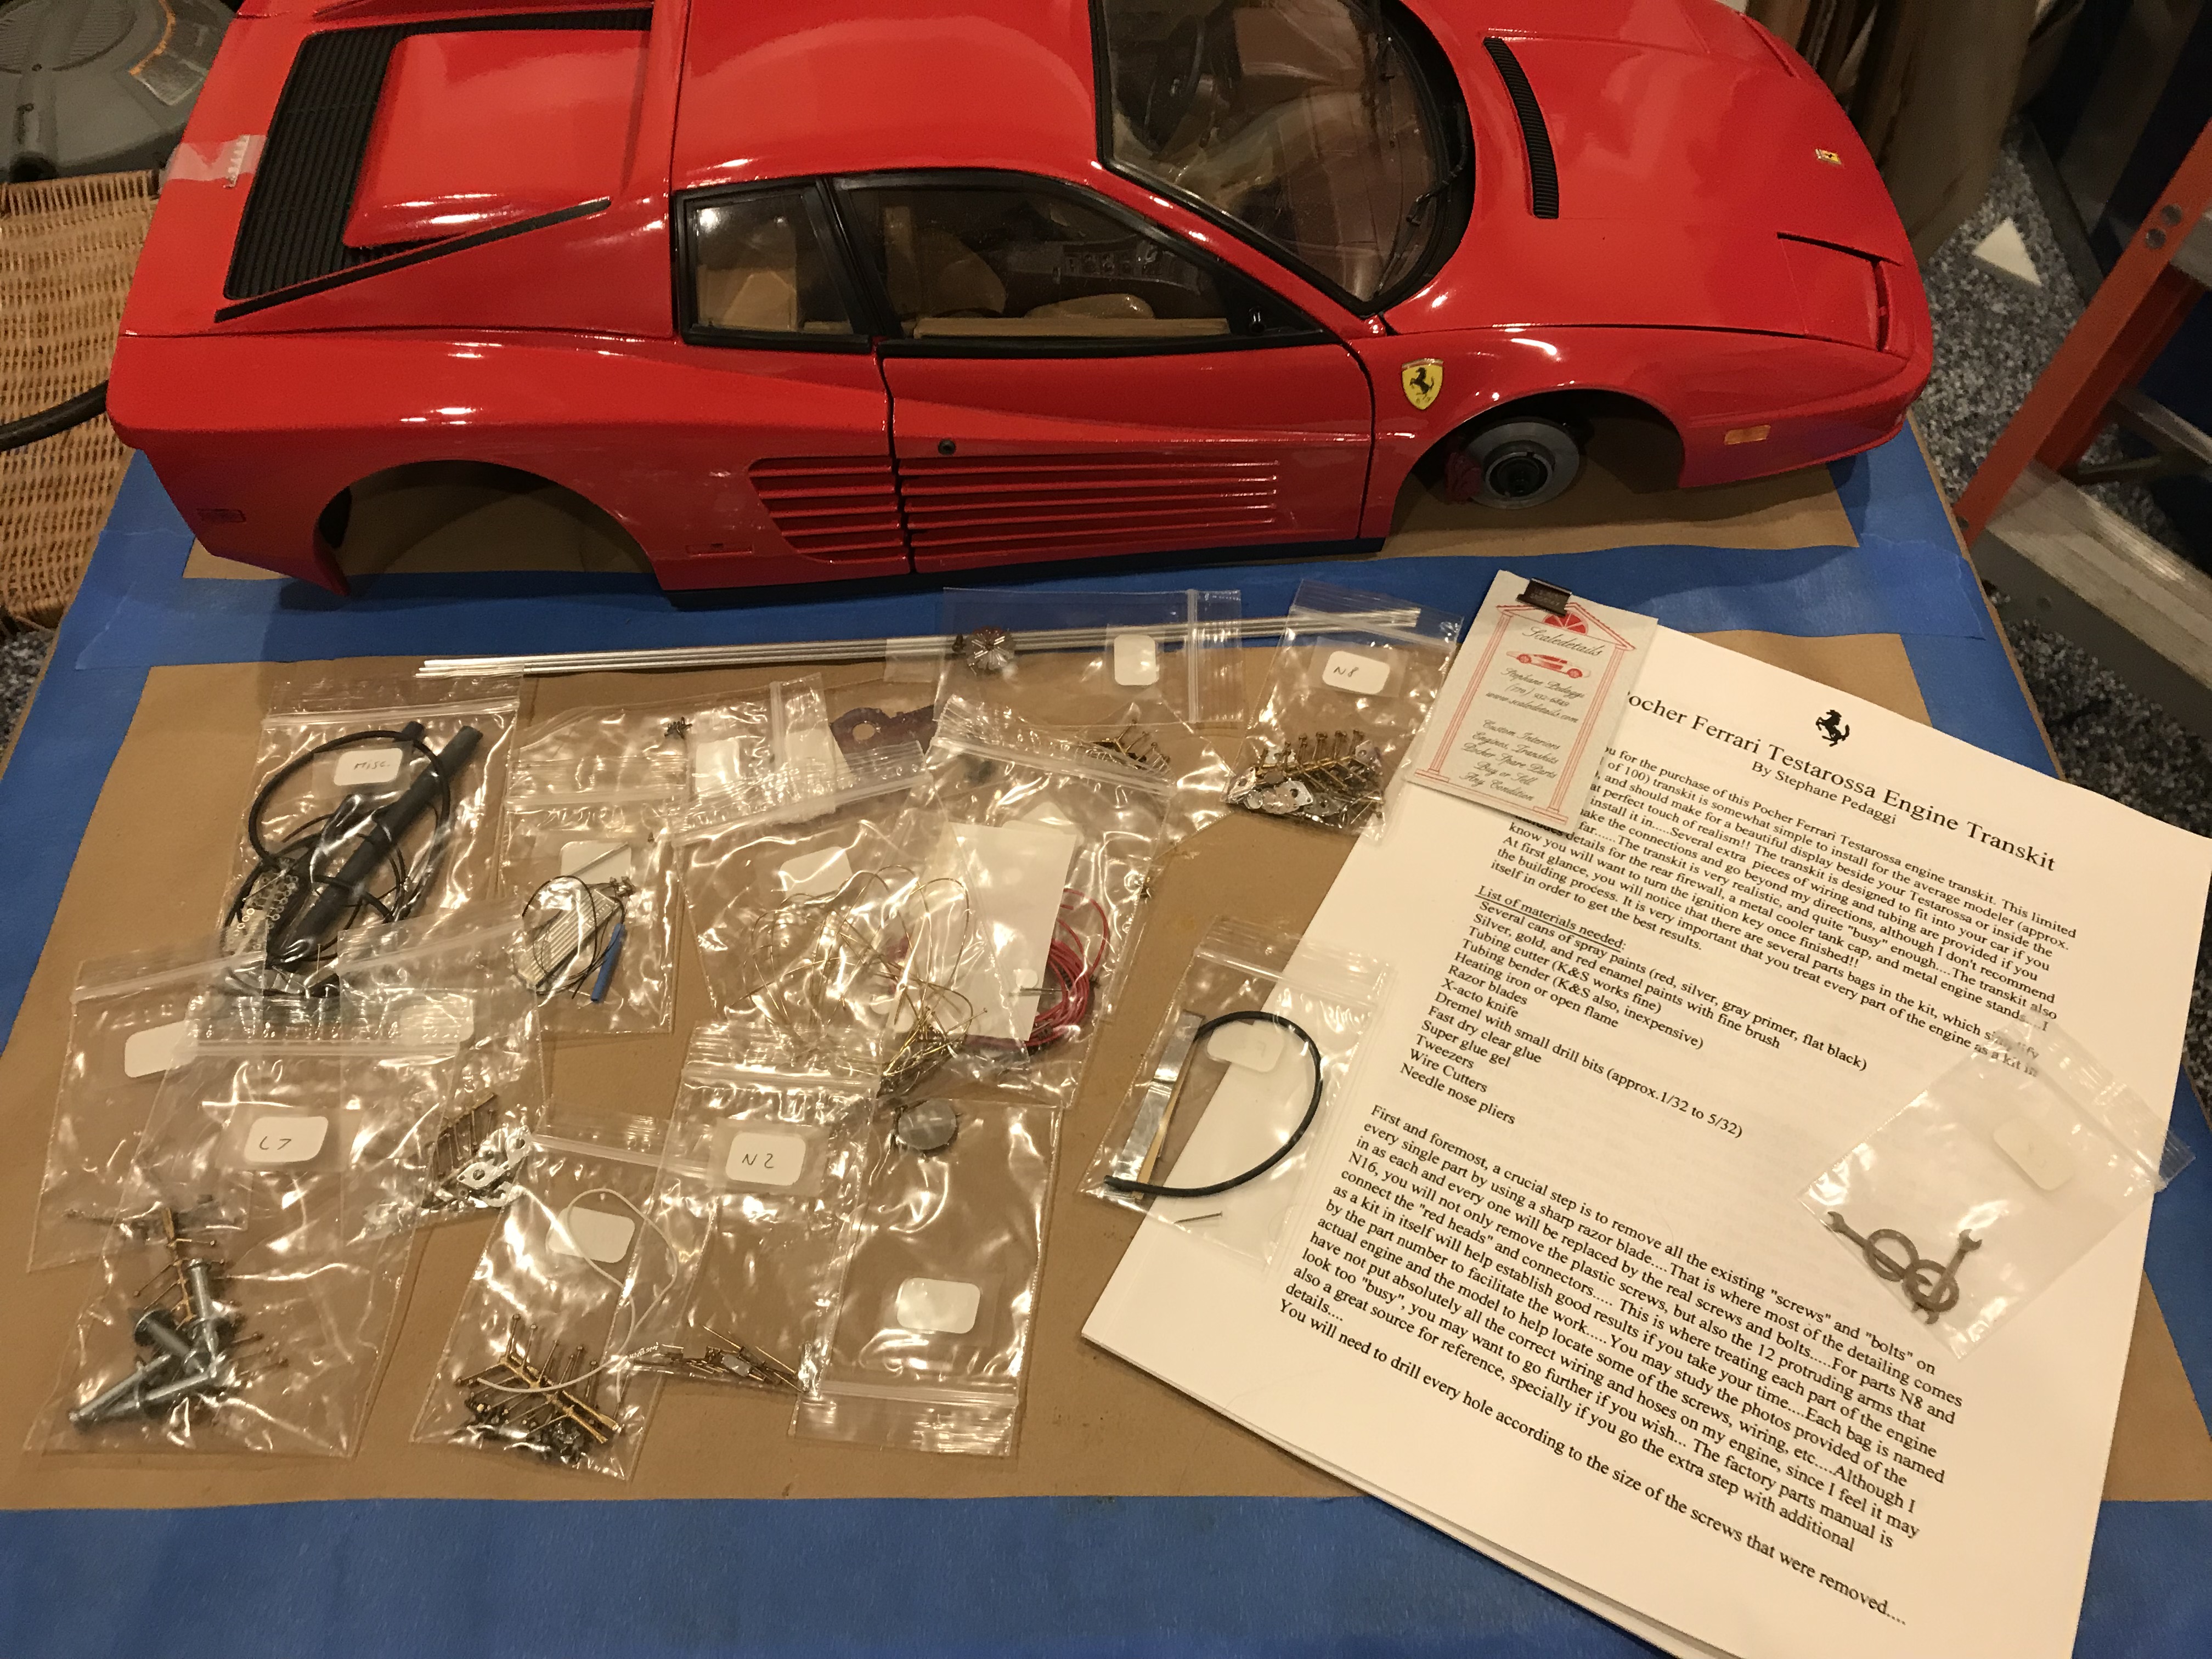
 Guys and Gals...The Pocher kit was a mere 20- 30 parts at best and it looked like a toy when assembled. Therefore I wanted to share what I did to it from a kit with some heavy modifications to attain a sense of realism. I know that a lot of this isn't exact to detail...but 90% of the people wont know the difference but its close...I wanted to capture as realistic as I could. Believe it or not...I used old MacBook Pro and Mac Pro screws, old parts from model kits, parts from a DVD player...Ethernet cables...and bits and pieces from all over to attain something a little different but close to the real engine. I'll post the top of the box so you can see what it was supposed to look like and all that I did...enjoy.
-
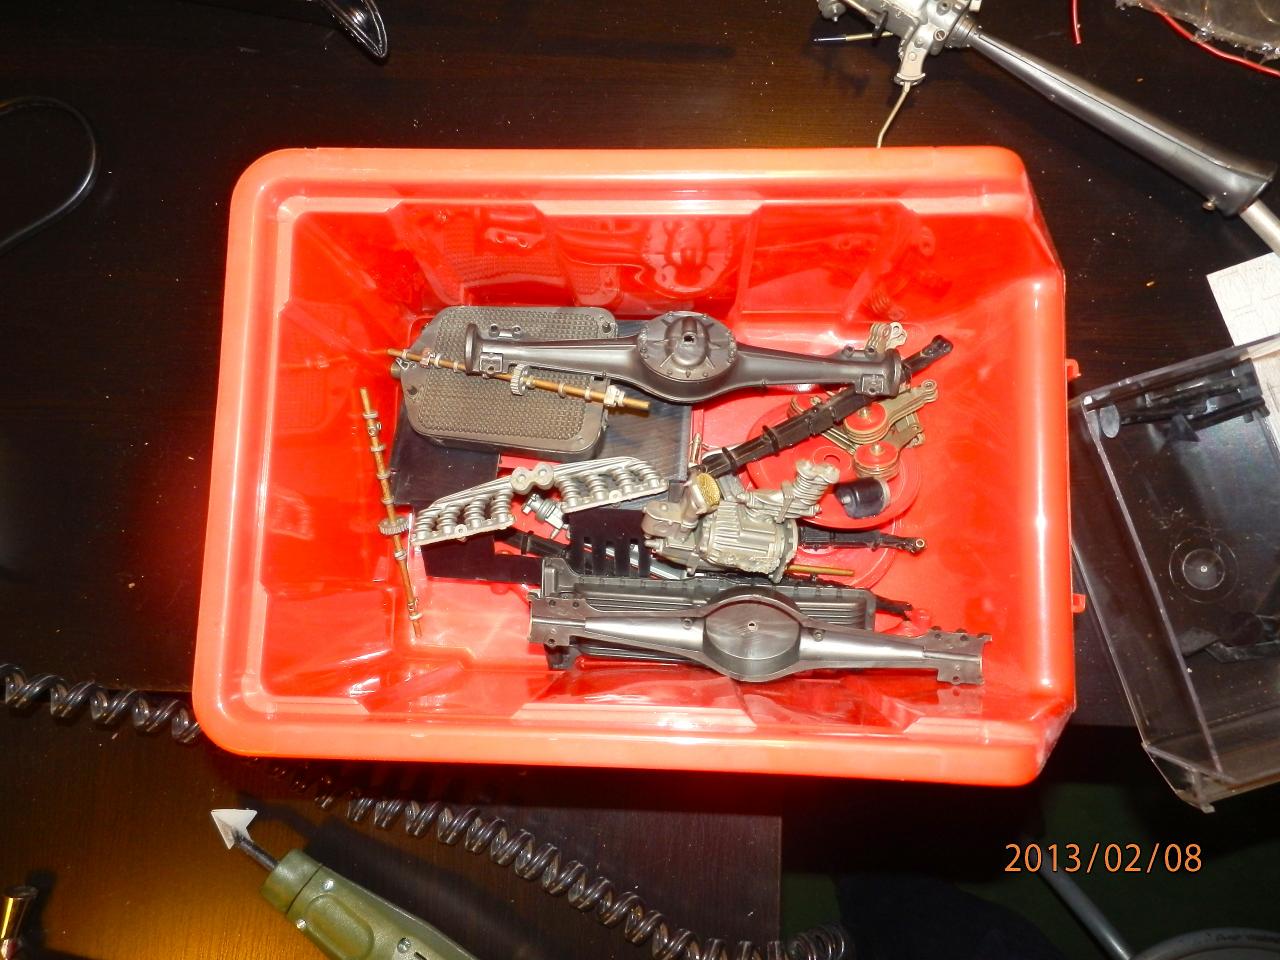
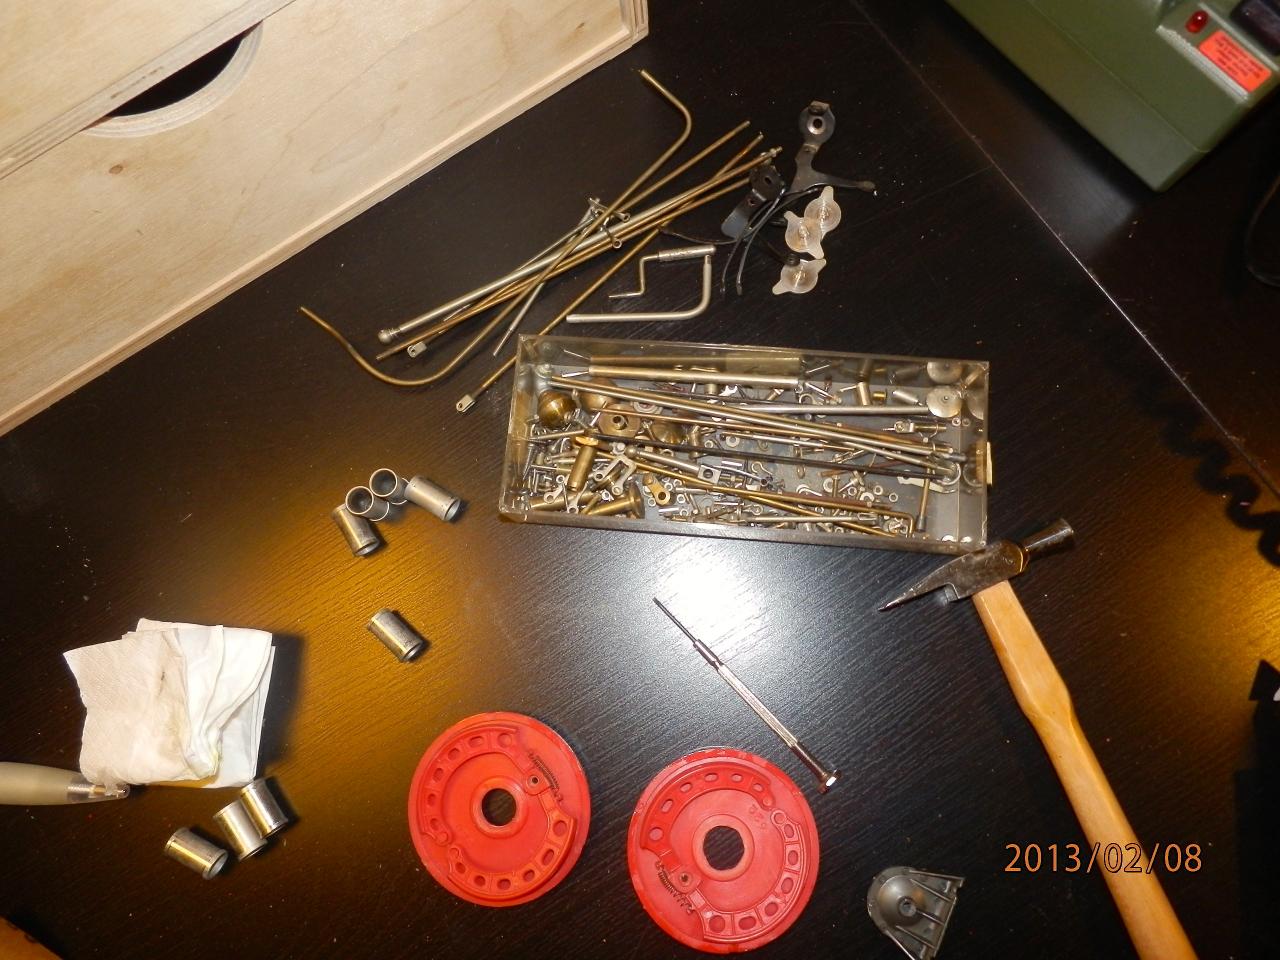
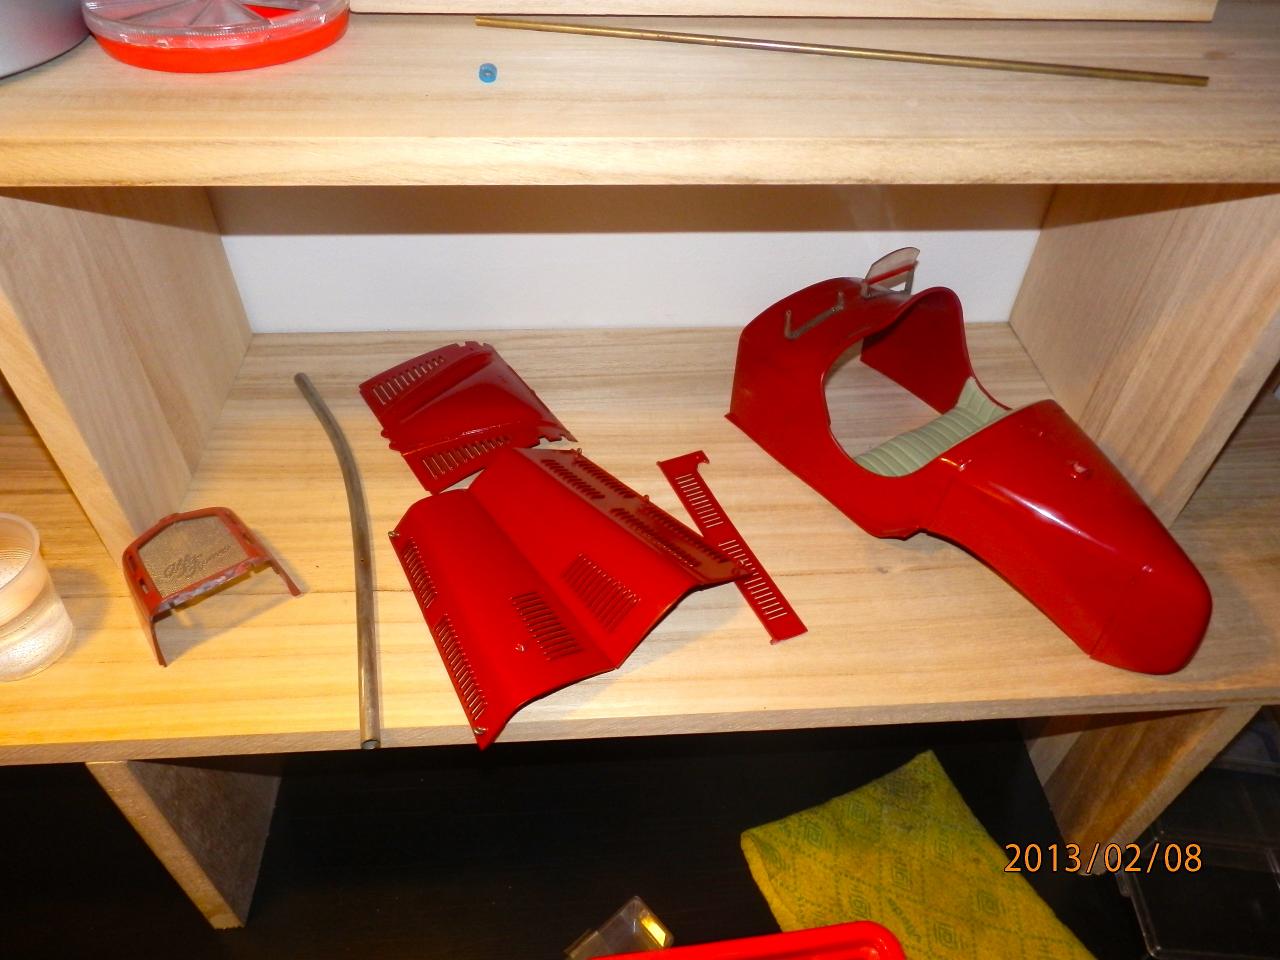
I have been building other subjects the last while and not here much. This gets my mojo running so I will post lots about it Here is my first attempt at putting together a Pocher model. Now it is a metal body/ plastic parts from the exotic collection. I can Hear Harry roll over in his grave and Cato's eyes roll back in his head, but here is where I choose to start my Pocherism So, Ferrari Testarossa, semi assembled by nice old guy in States with failing eyesight and health bought about five years ago now. Pretty clean body work and decent interior. Engine not started and a detail upgrade set provided. These are pics in my big woodworkshop as it is 16 pounds and just under 2 feet long. I plan on doing sub assembly work in my model room and put it all together in the big shop. I have an F40 that needs similar treatment and show it in the WIP display shelving for my Pocher collection....a lot messy at the moment
-
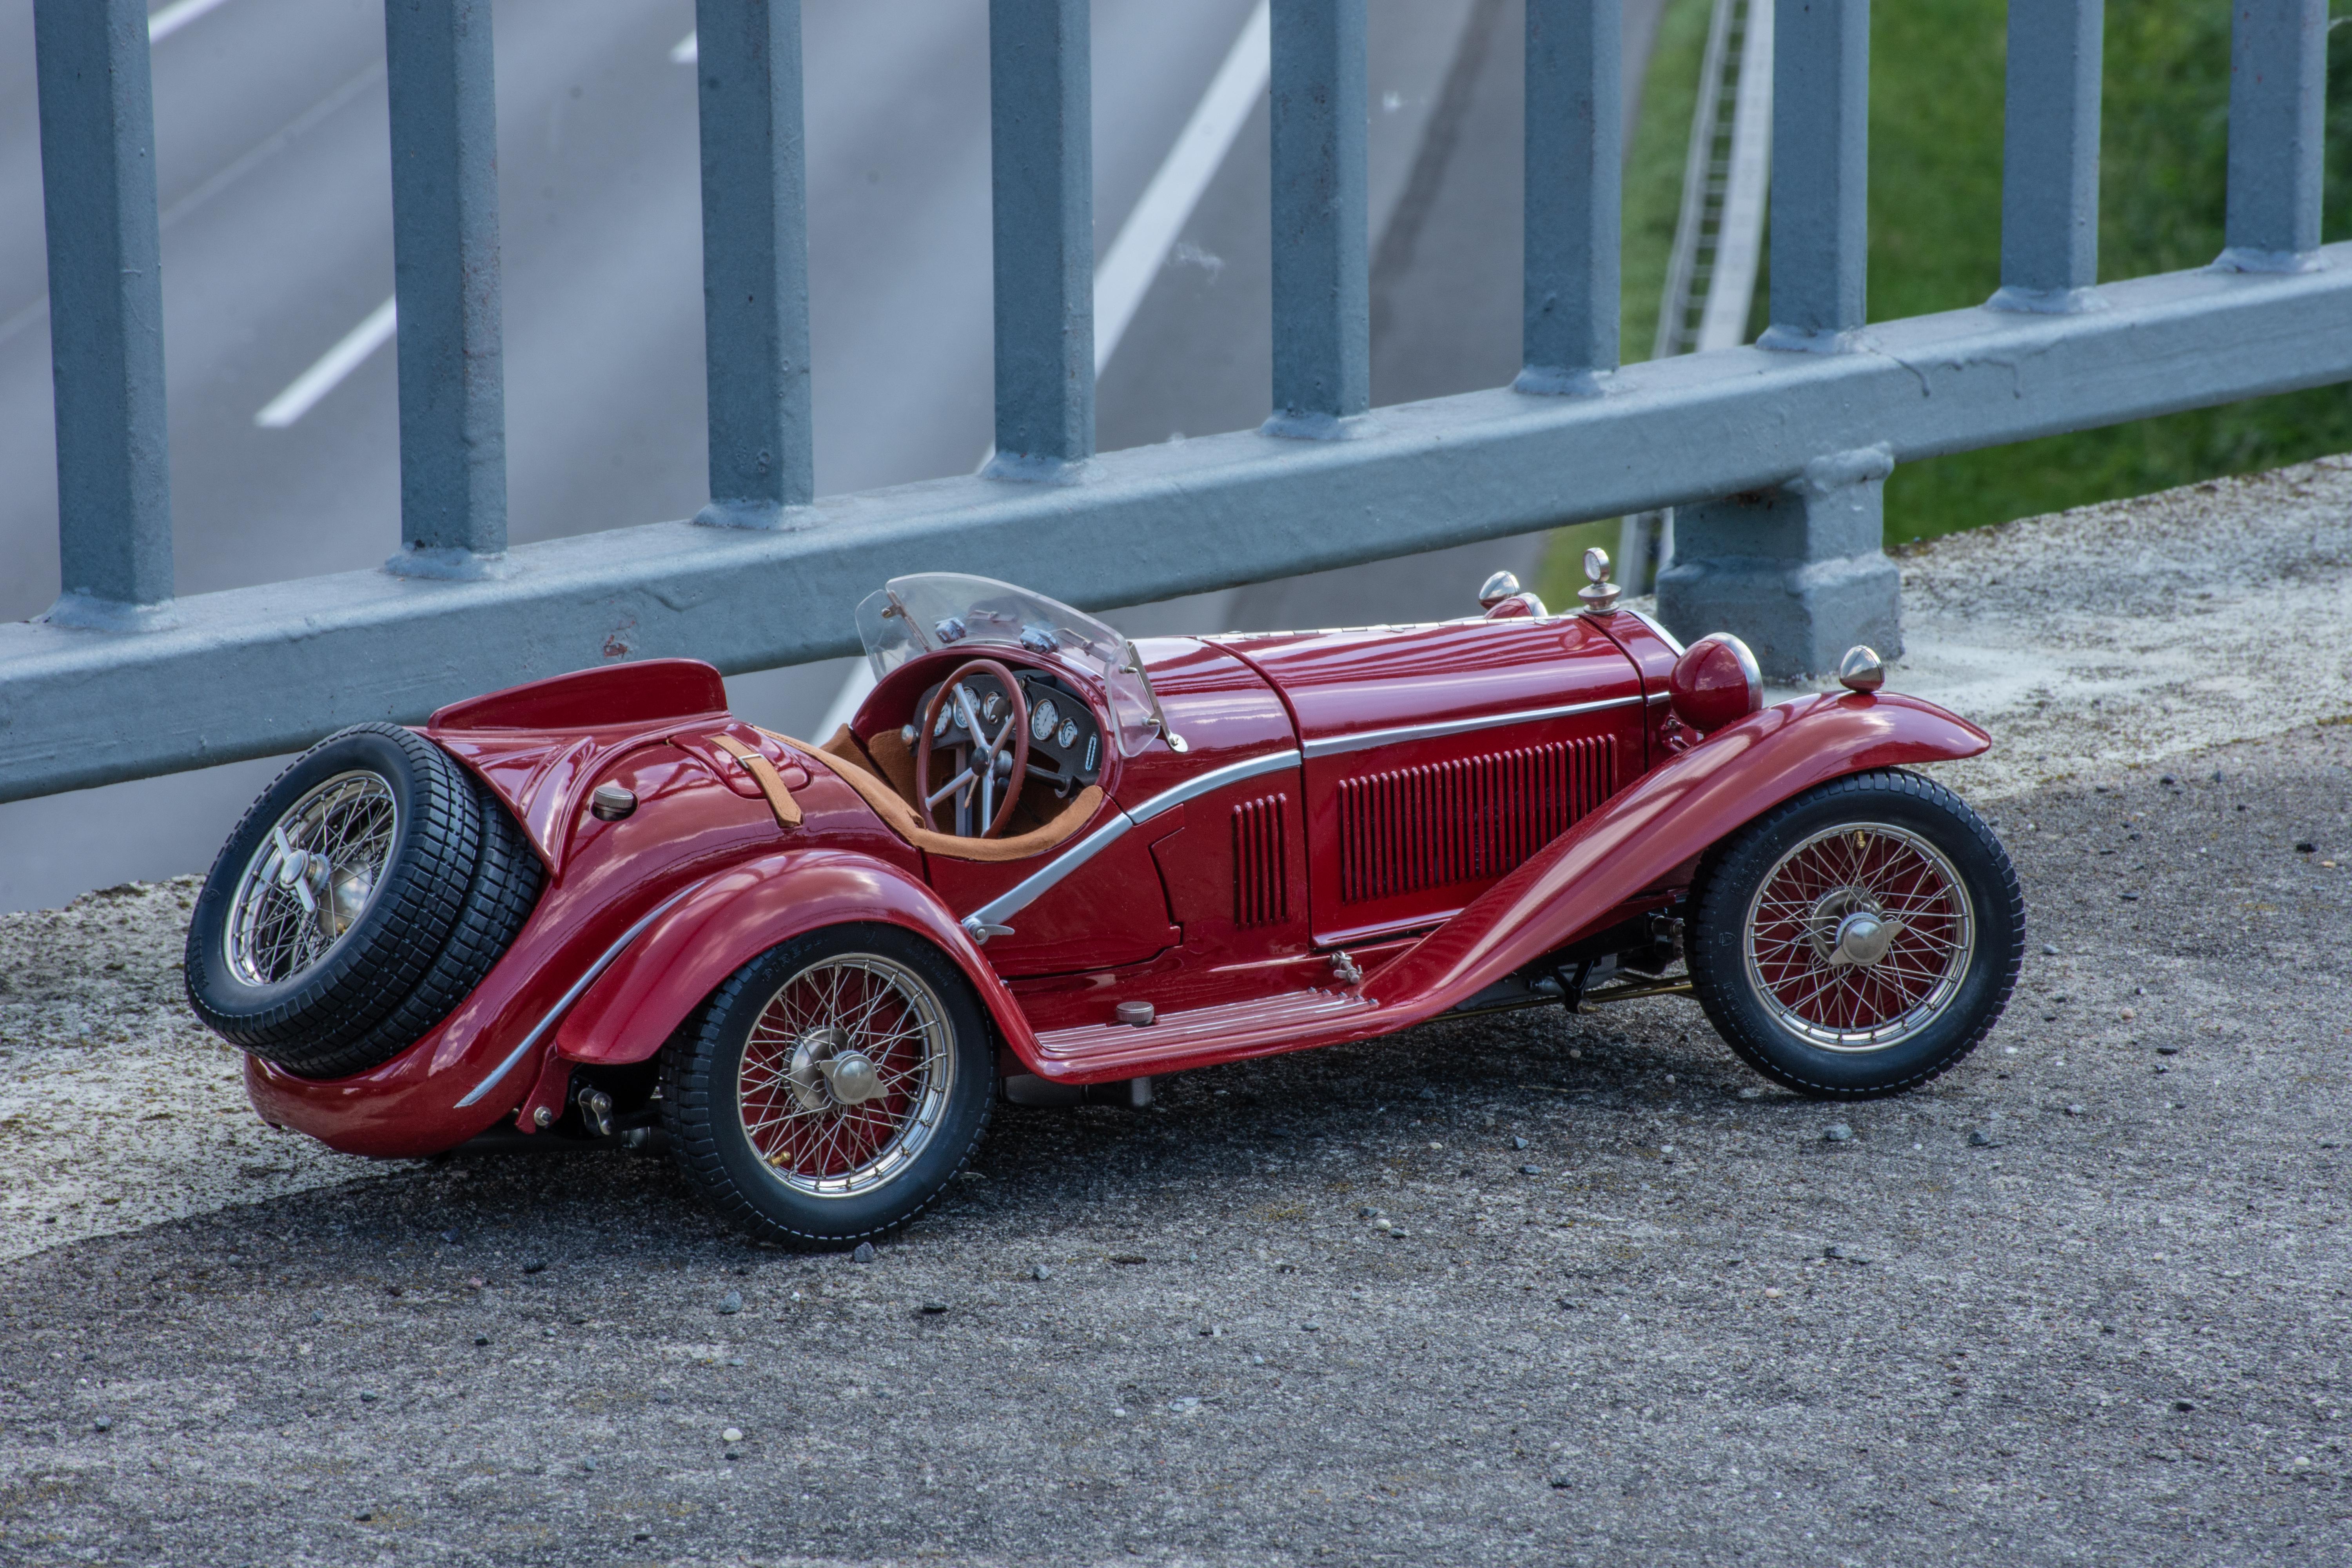
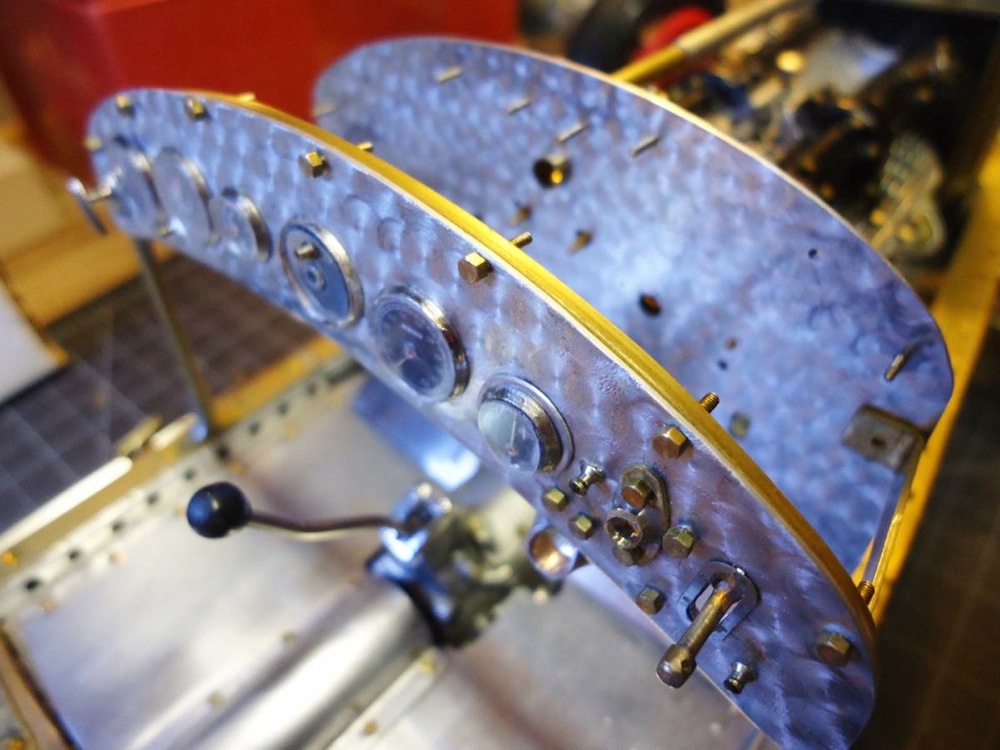
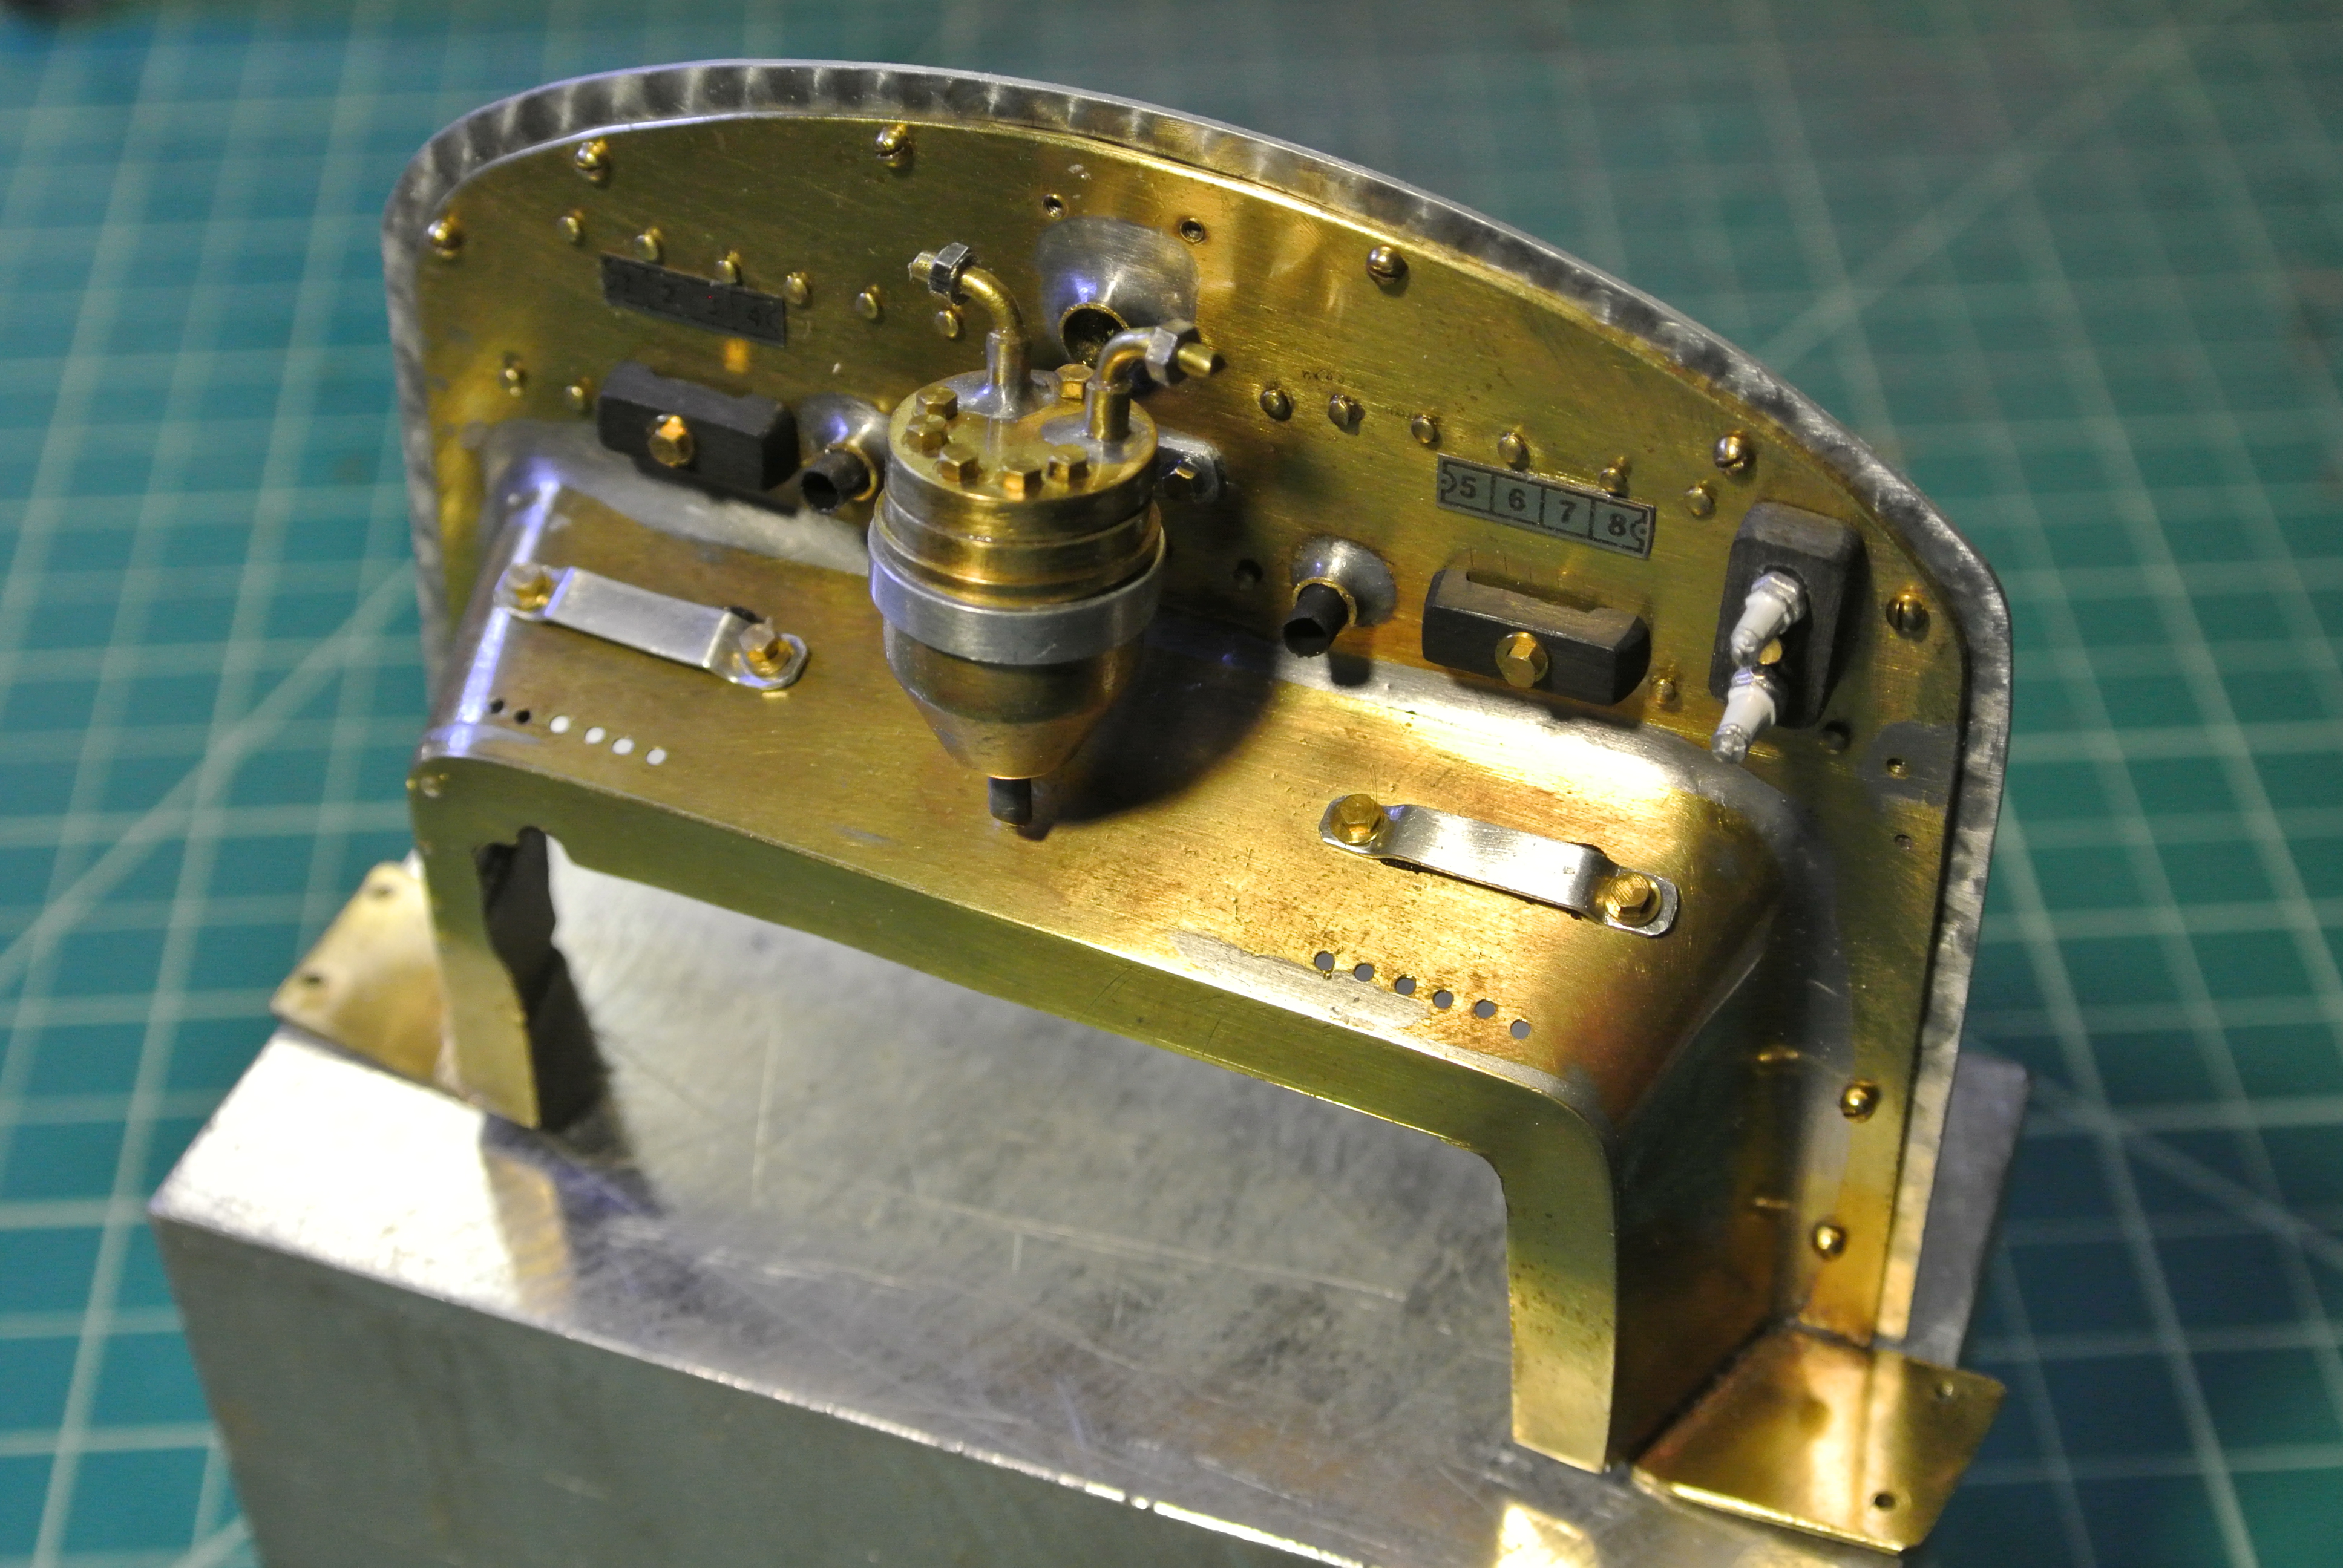
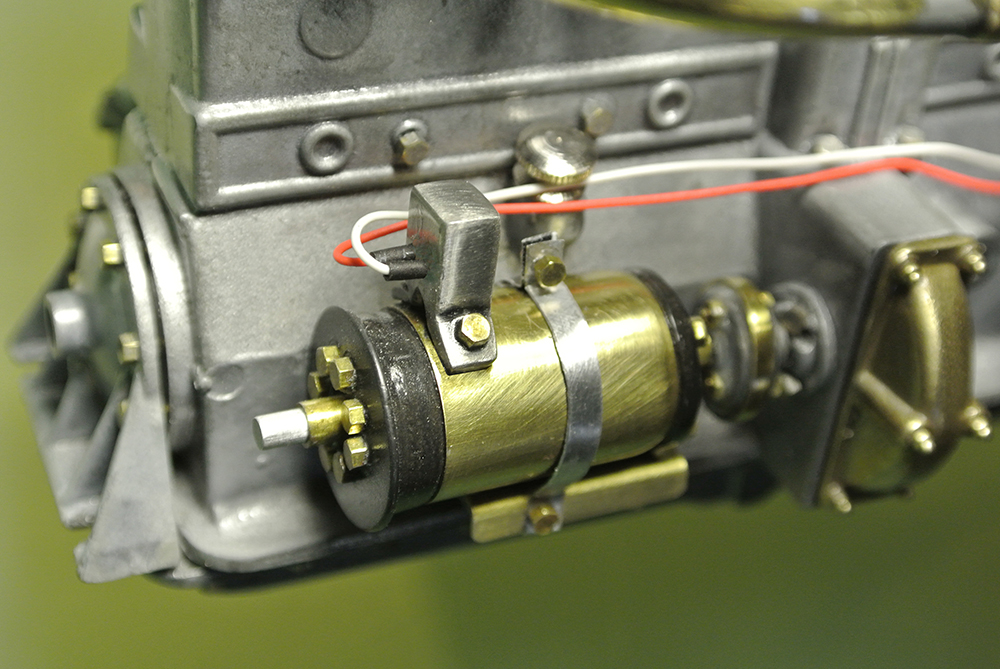
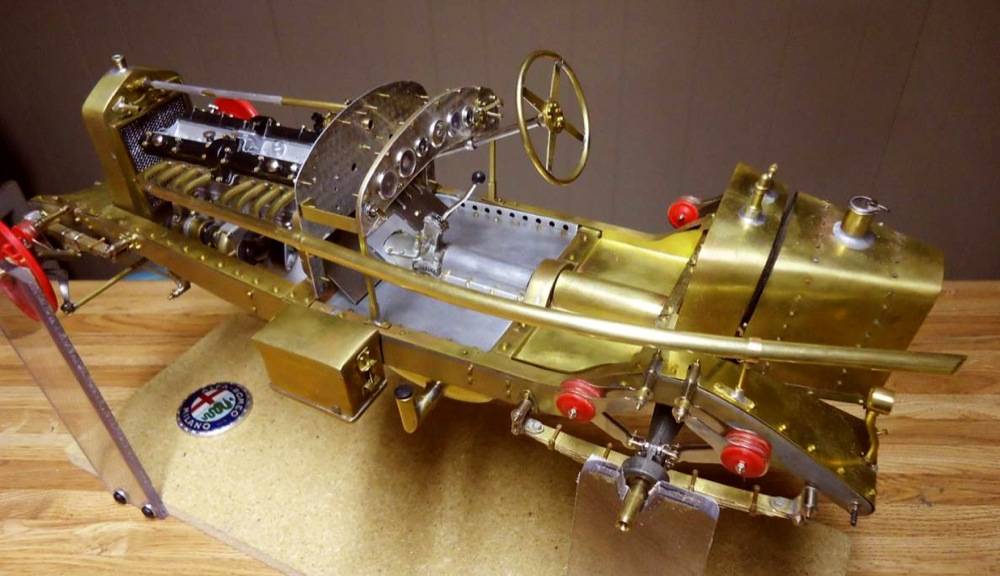
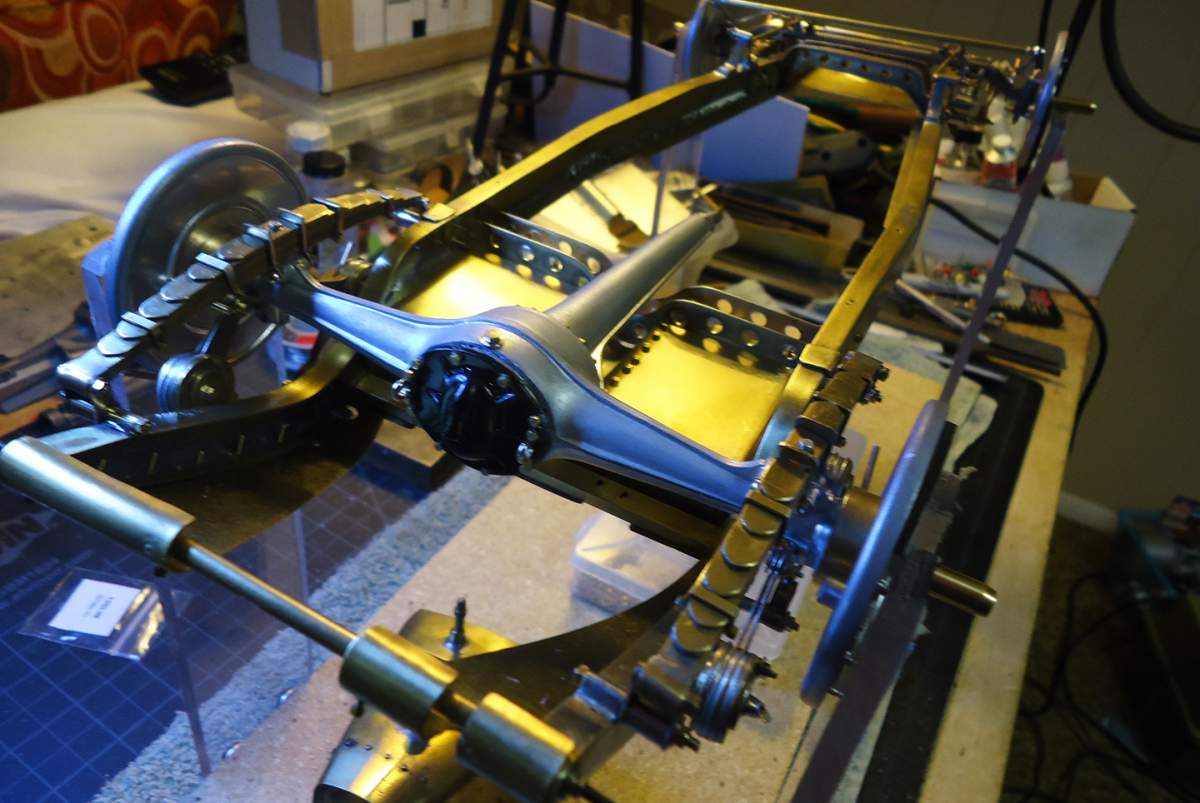
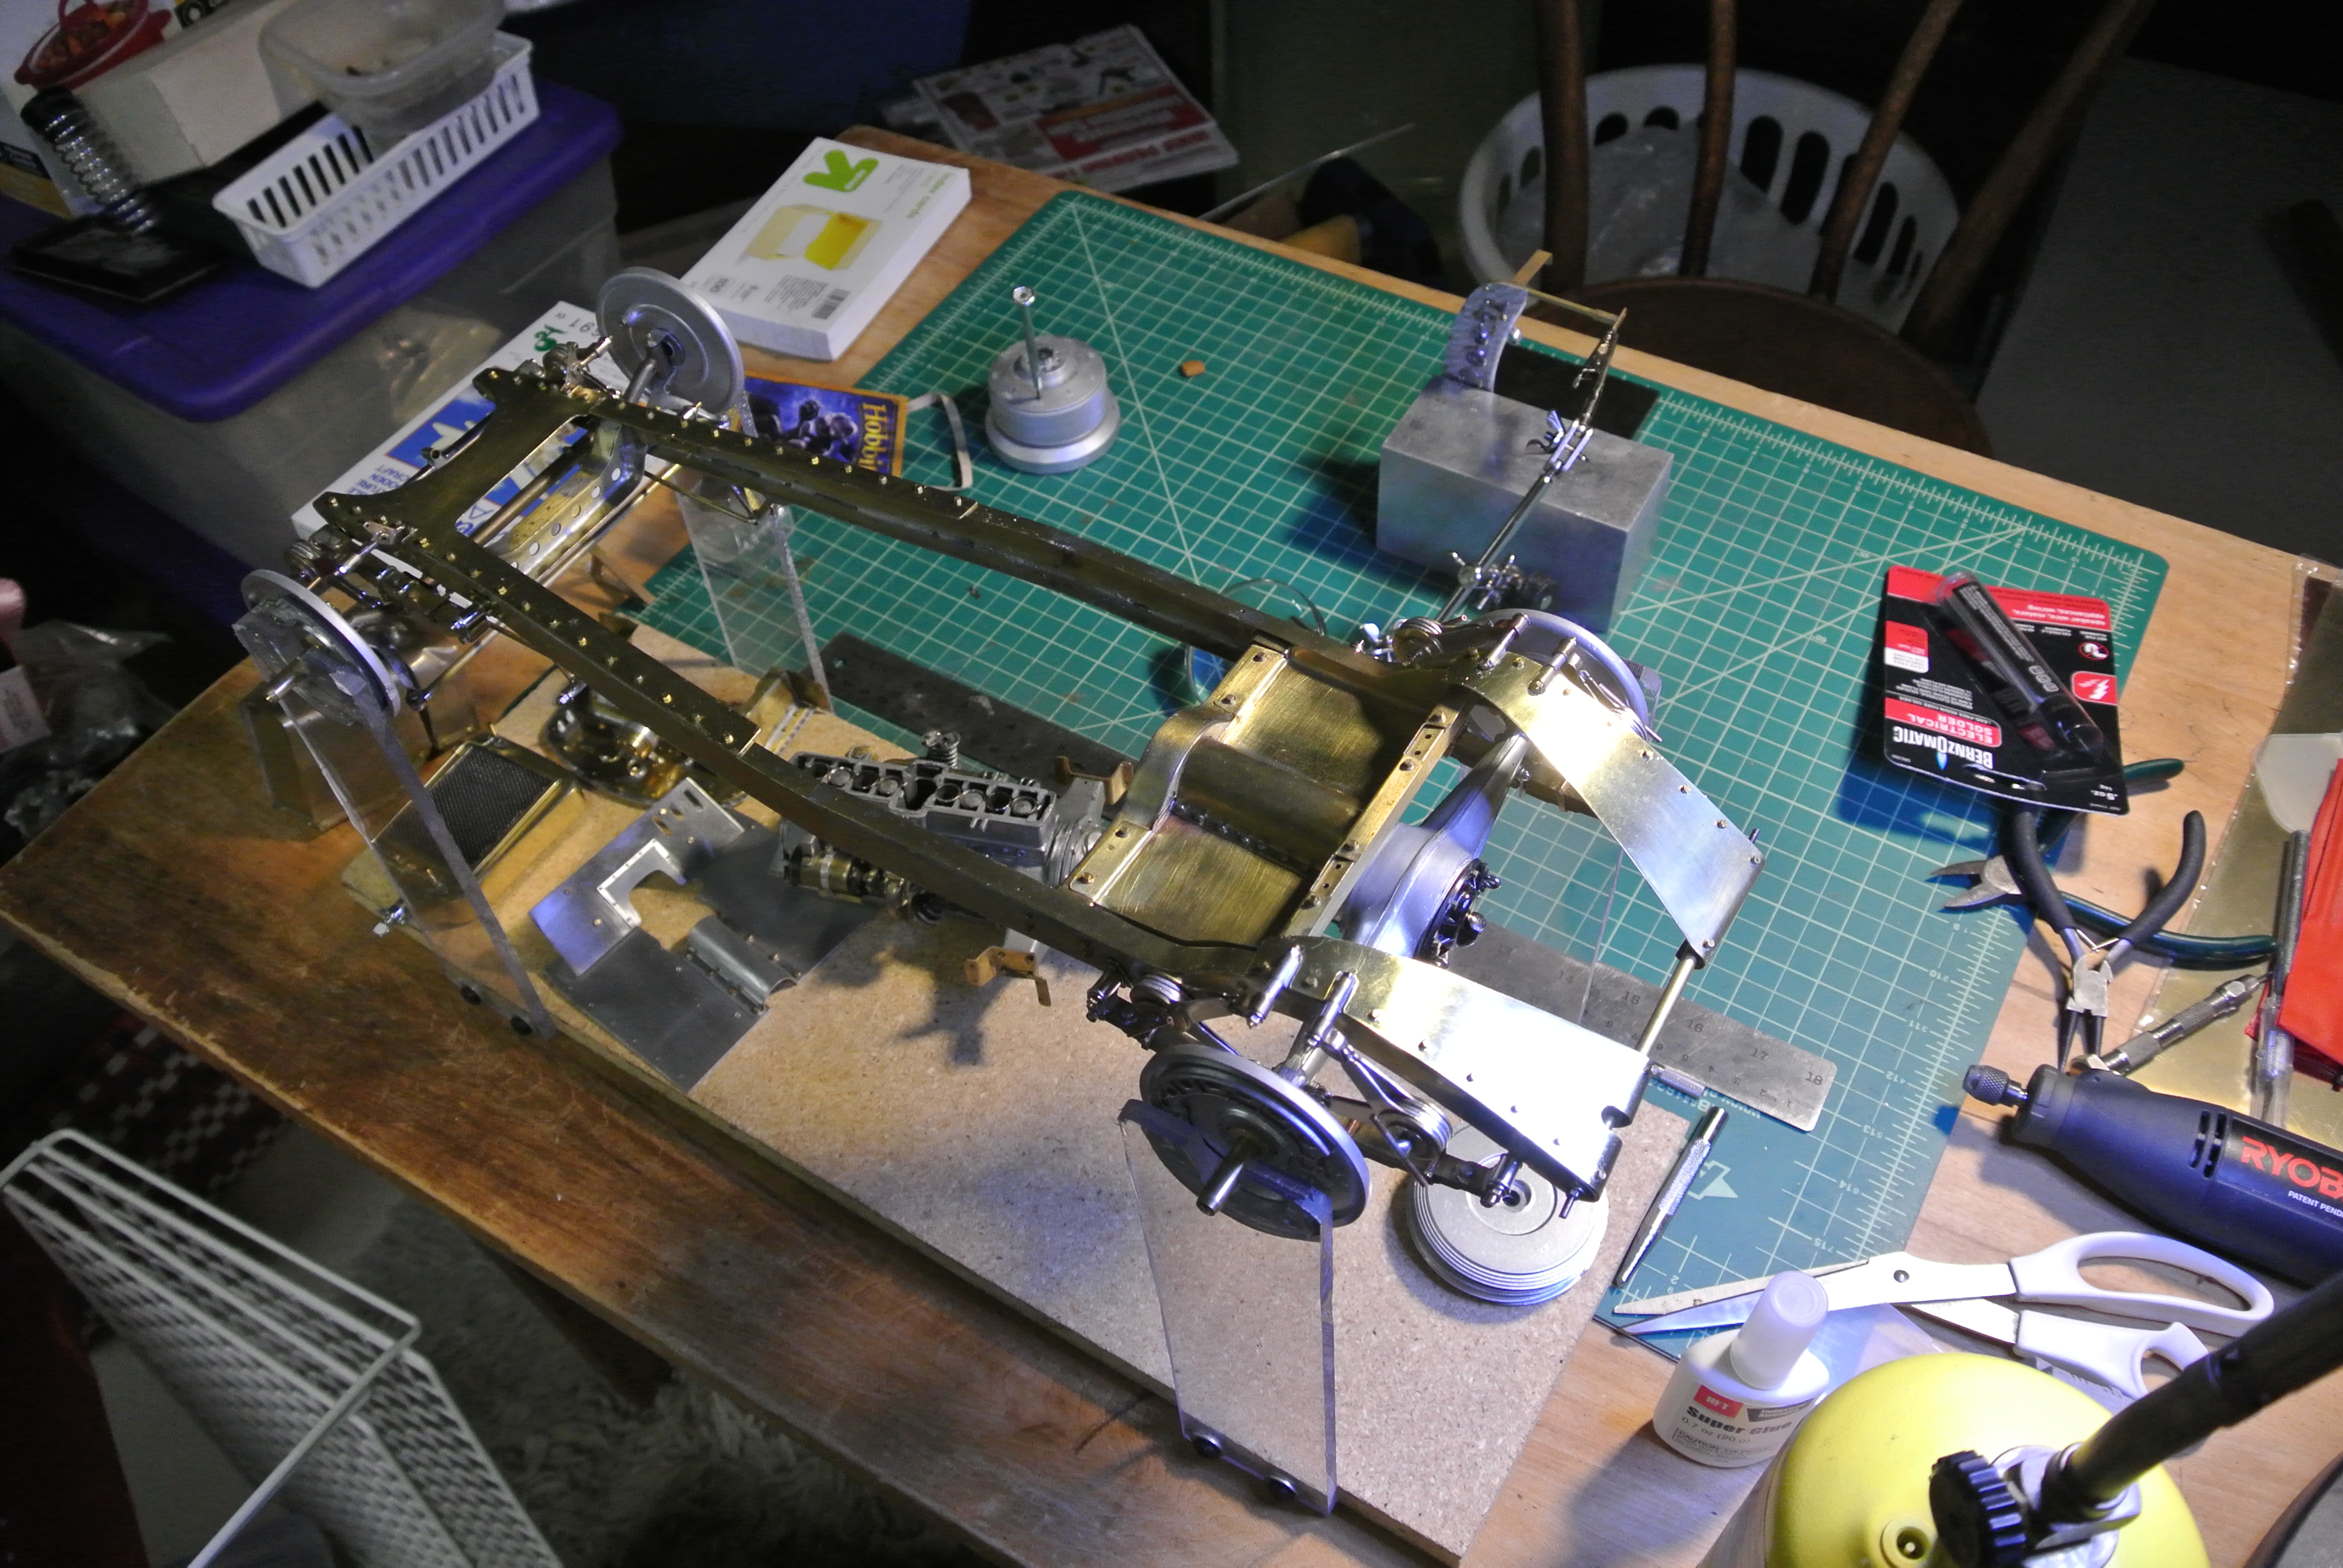
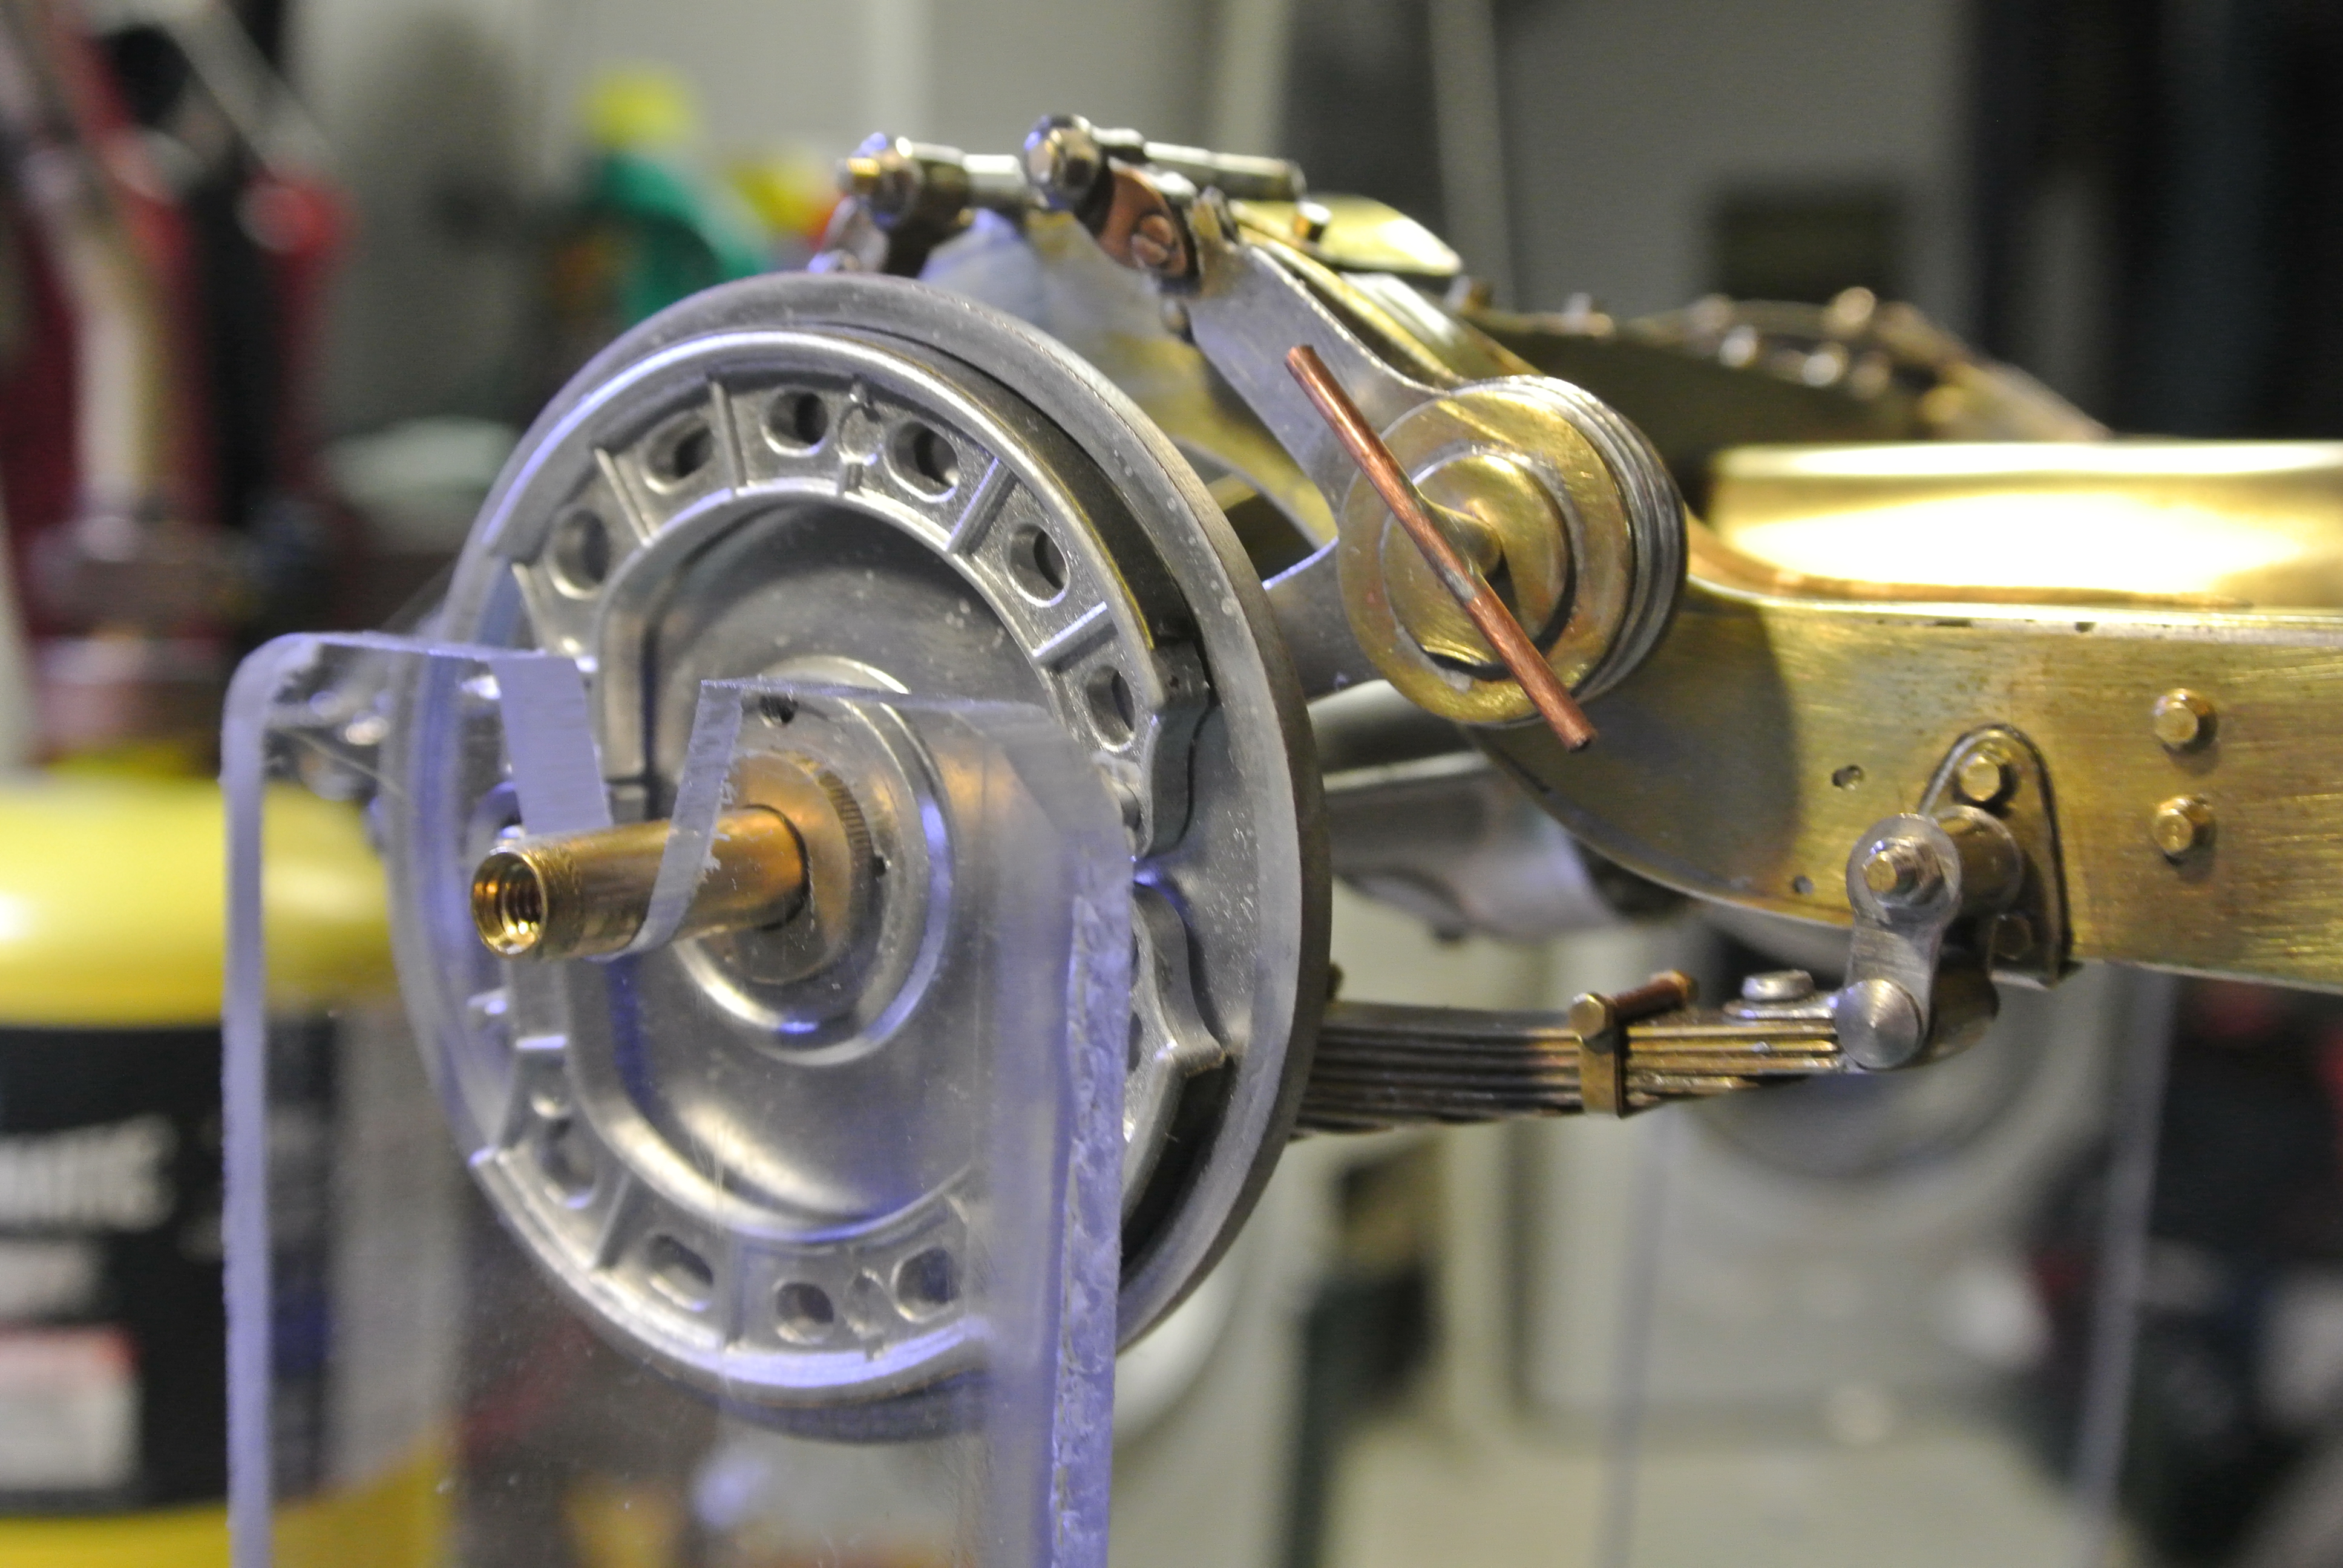
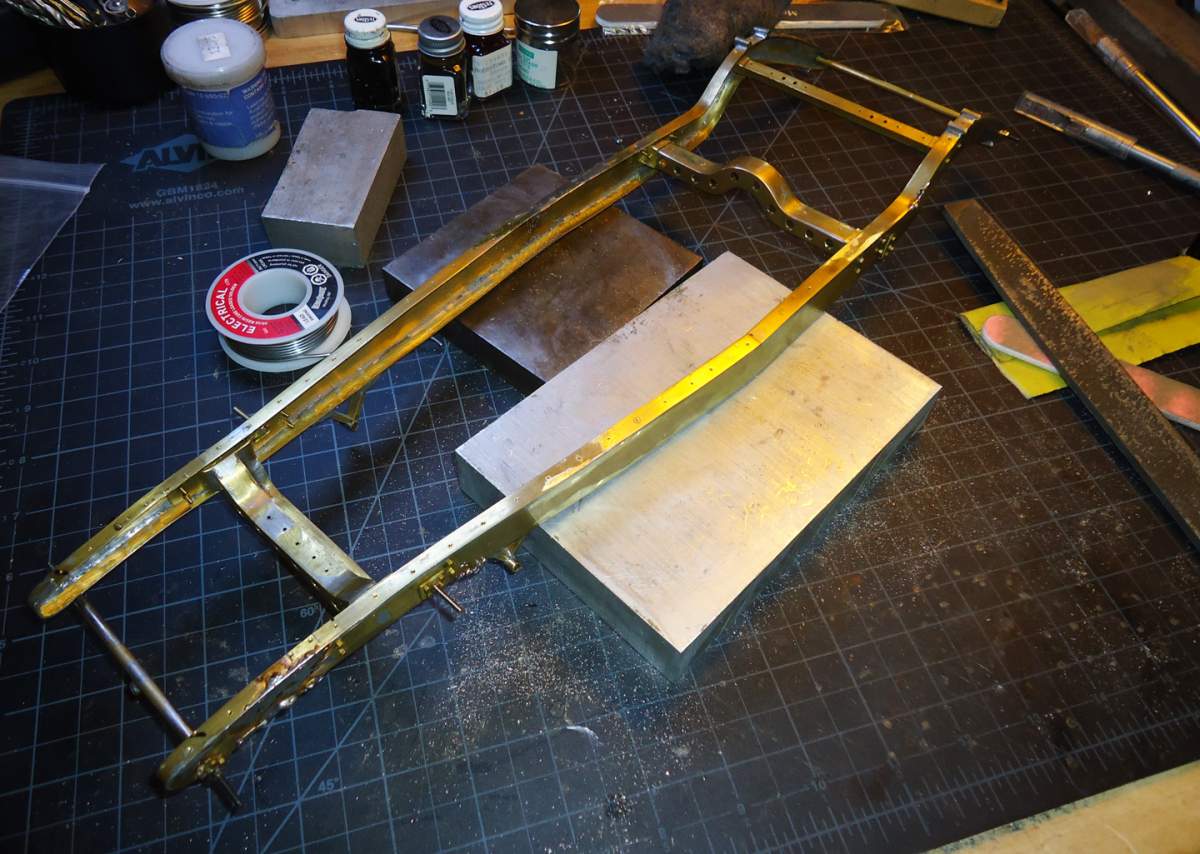
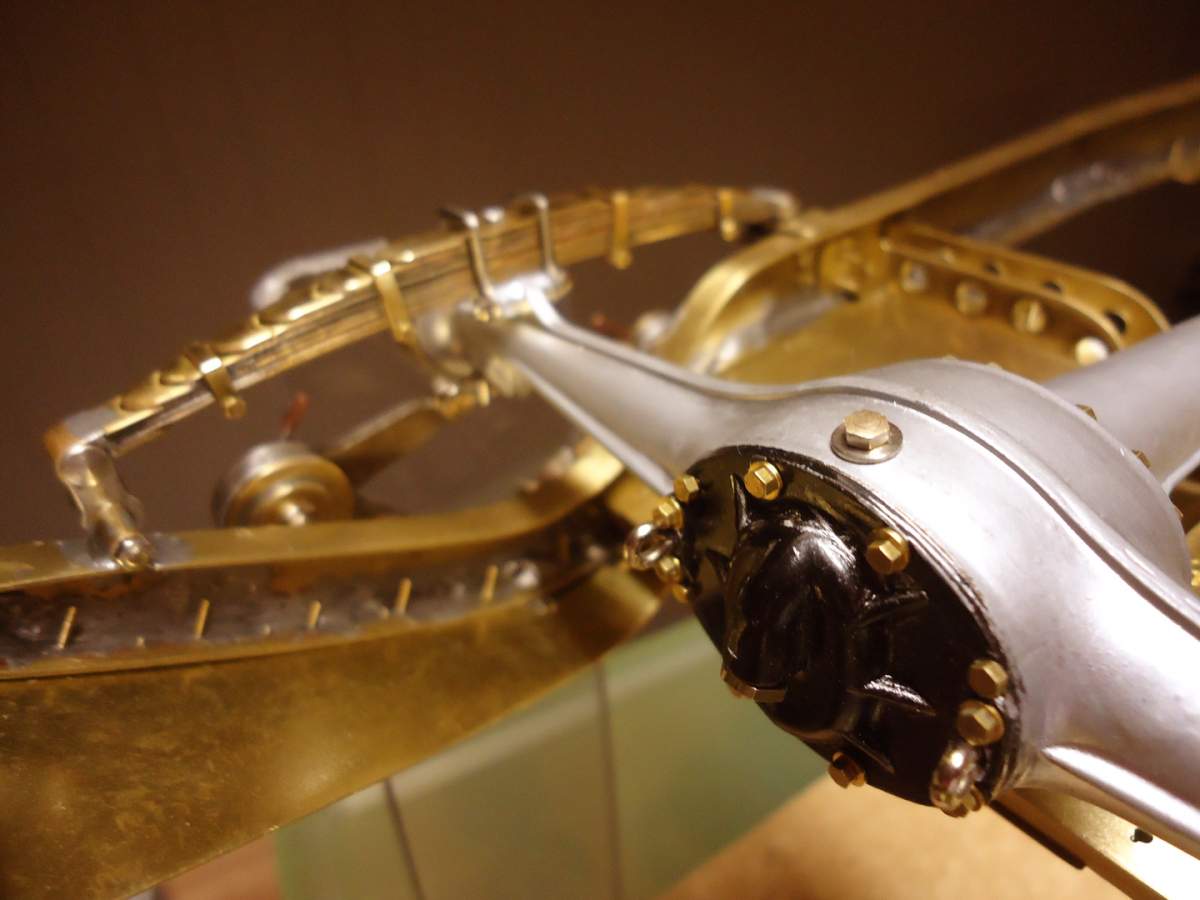
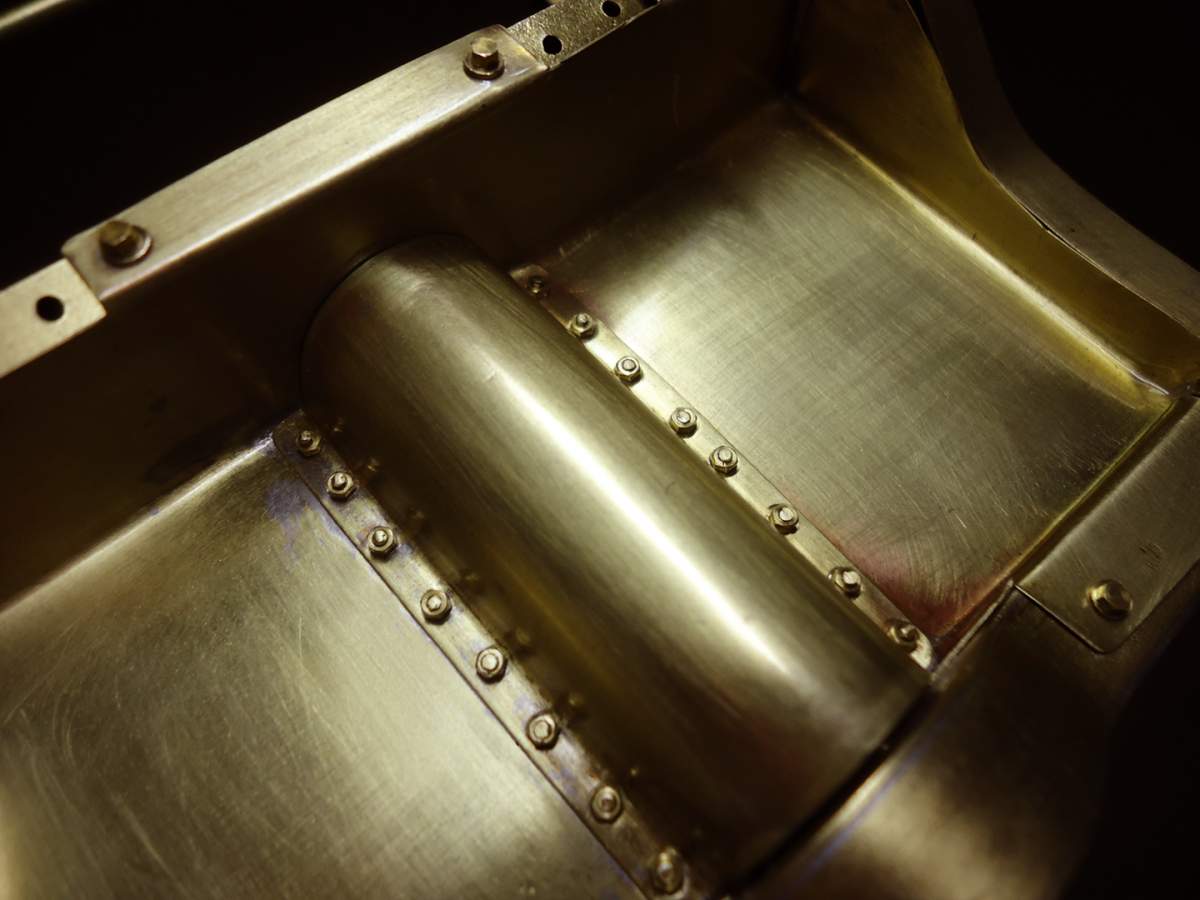
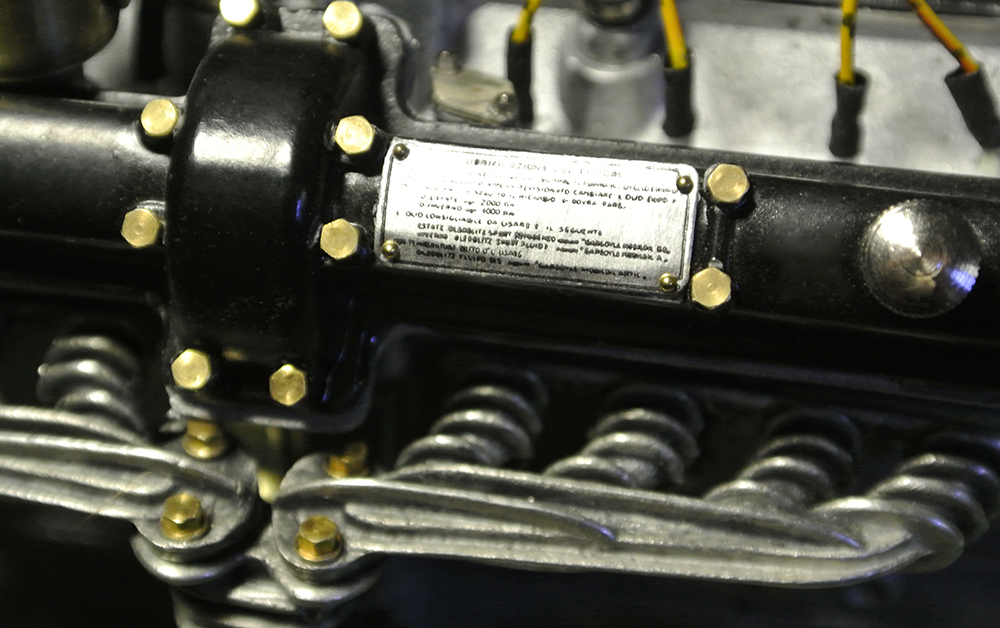
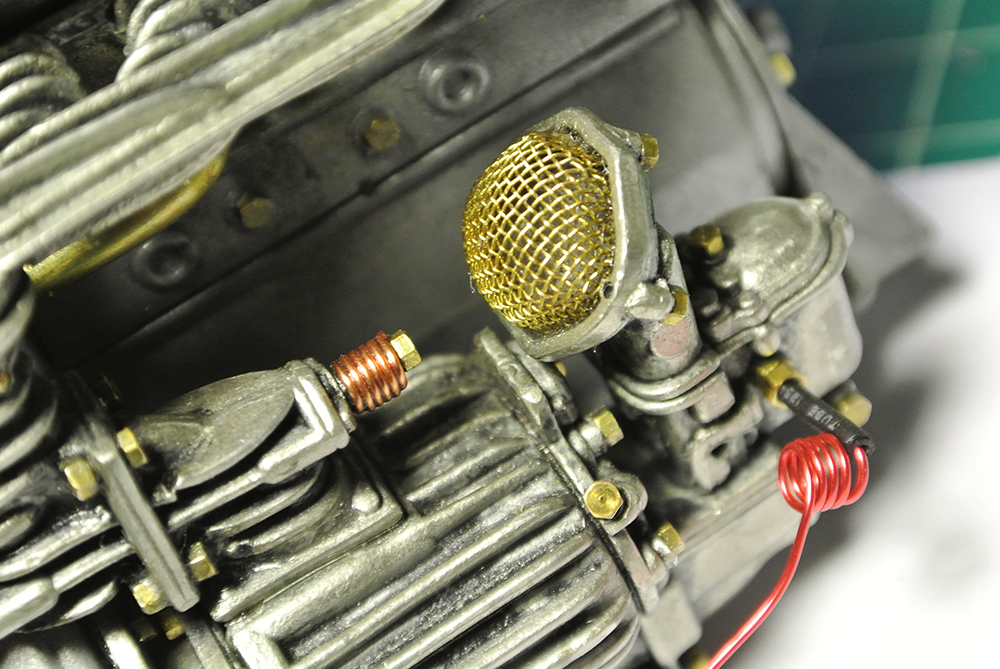
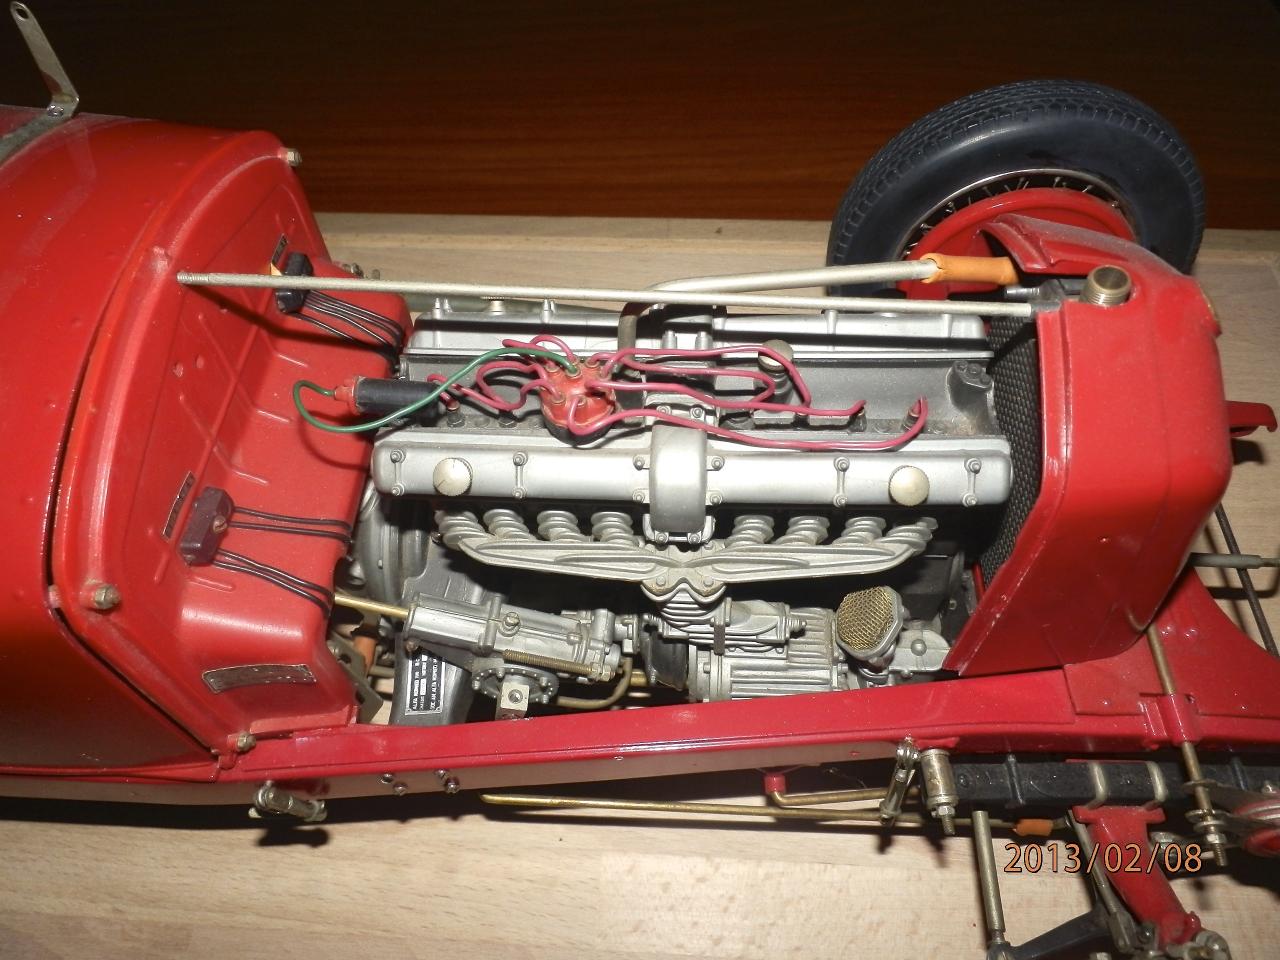
 The Project So Far... This project started as a Pocher Alfa Romeo 8C 2300 Kit in 2011, but has grown into a mostly scratch build in brass. I thought I’d post a few images of the build for the fine Modelers on this forum. Very few of the Pocher parts remain; the engine block halves are the original Pocher parts, but most other engine assemblies have been cast in white metal or built from scratch. The terrific Pocher wire wheels are being used as well as many metal fasteners. This car is an amalgam of my favorite features from several of the surviving examples. The cockpit panel is aluminum with machine turning details from a Dremel and small brush. The firewall is brass featuring a vintage Autovac unit, cast extra spark plugs, and wiring busses. The scratch built brass radiator with plumbing. Most engine parts are cast or scratch built. A brass alternator with wiring. The manifolds are cast from white metal. Supercharger details... The start of a brass chassis... Suspension assemblies are mostly scratch builds... The brass cockpit floor with scale hardware. Leaf spring assembly... The Pocher body is used as a body buck for fitting components. Brass steering wheel... The chassis is assembled. I will next add wiring assemblies a construct a metal body.
-
 I was looking on a Dutch online marketplace and found me this kit for 25 dollars! Most is in the bags as it should be But the engine was put together, considering I paid 25 dollars for it, I can live with it haha.
 -
 I bought this big Ducati last week, the metal parts are very nice but the plastic looks really cheap so that will al be painted. Im also not a fan of the black screws in the engine so I will try to find some replacement for that also. To be continued
 -
Greetings all, First, thanks for the add. I'm a car interior design director for a major automotive supplier here in Michigan. I've been doing models since I was a kid, back in the twentieth century. I stumbled across this site while looking for information about building large scale models. What a gold mine of info, especially the BigBoyz section! I've been working on a pair of Pocher 1931 Alfas for....wait for it...25 years (off and on). I got them from a friend who, at the time, said "build both, keep one". So, I've just pulled them out after a several year hiatus and decided to "enhance" them with some scratch-built parts while on assignment in Shanghai, China. Here are a few shots of the work on #1. Although they may not be "pure", I'm interpreting them as if they might have been. After seeing a version of this model done by a guy who basically duplicated he plastic parts in brass, I was inspired to try some of his ideas in styrene as my ability to do metalwork is nil. I'm happy with the updates so far and am interested in any critique of the work so far. I admit, up front, that I'm going to steal as many great ideas as possible for this site. Thanks again for accepting me.
-
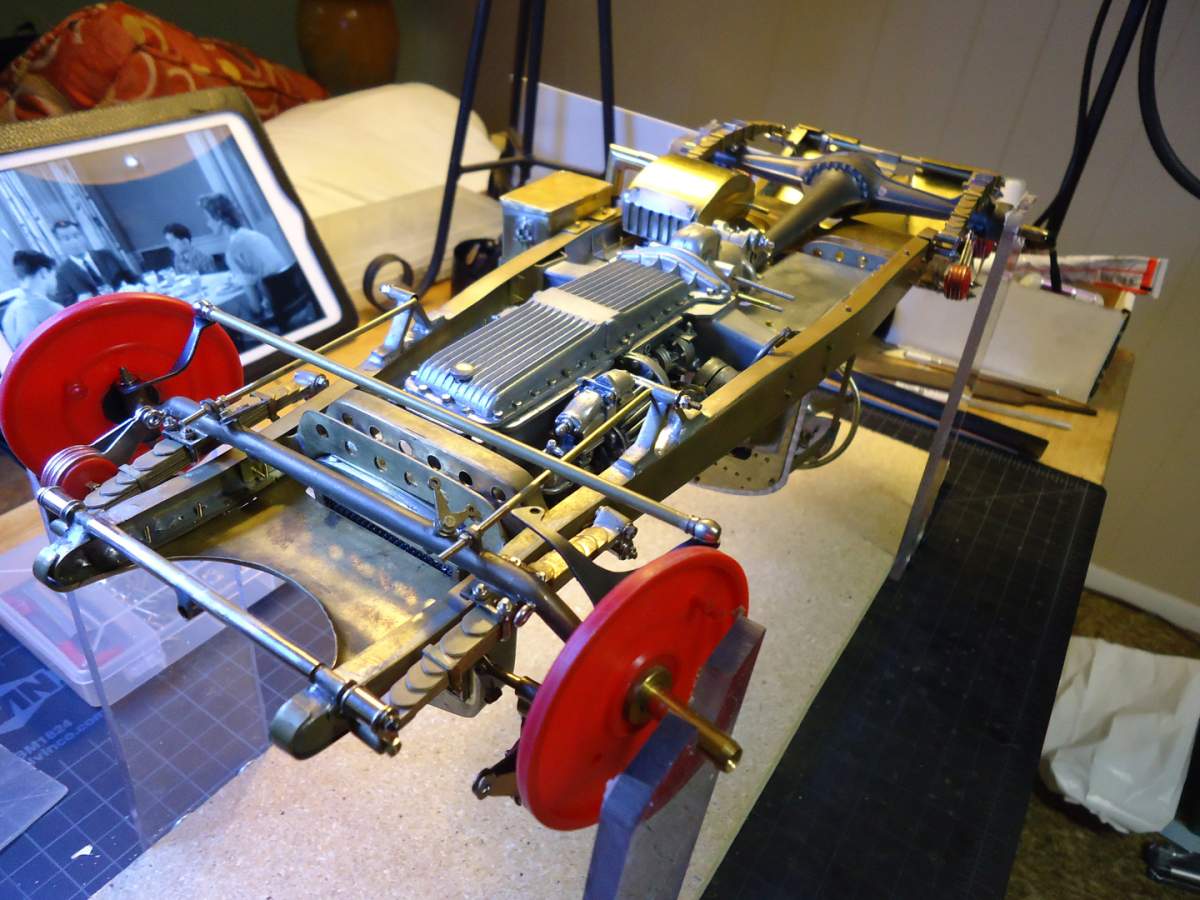
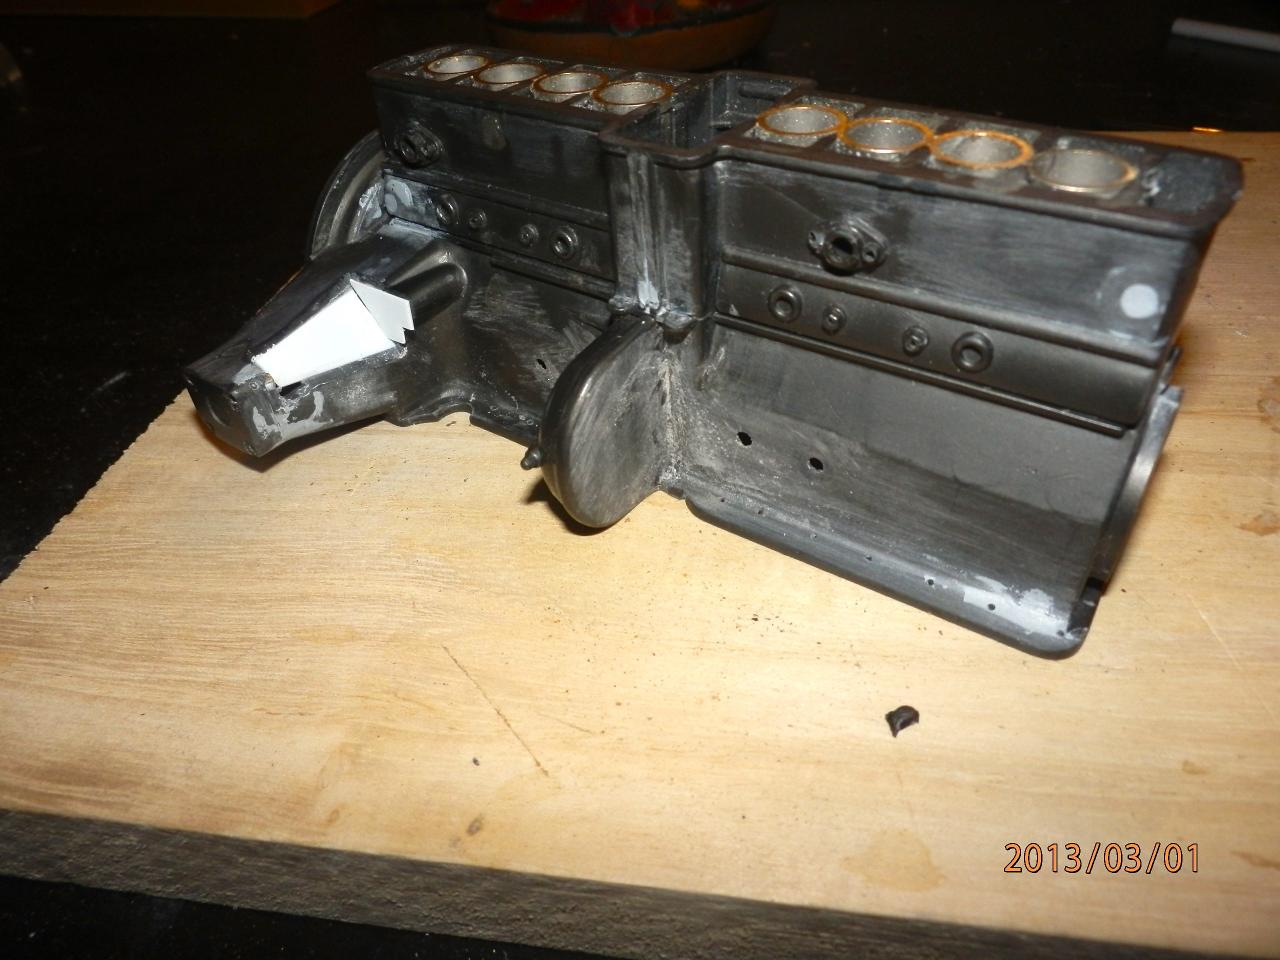
Hi everybody, I am a fan of 1/8 scale, new to this forum and I would like to share with you my restoration project of a badly assembled and even worse restored in the 90's Alfa Romeo 8C2300 Monza from Pocher As you can see from the pictures of the model before the beginning of restoration the conditions where very bad. disassembling the car The engine is the first part being taken care. Pocher models are fine but they have many imperfections in shape, mould, wrong components and so on. If you have ever built a Pocher you know how painful can be to get the parts to match. All the cast on nuts and bolts have been removed and 1mm holes have been drilled. Brass hex head screws have been used. The engine mounts have been modified to correct shape so the steering can be mounted correctly and the ugly pocher screws recess filled with putty and also the engine halves have been joined and filled with putty then sanded The oil pan with brass hex nuts and copper rivets The exhaust modified as a two piece
-
 Hello everybody, while surfing on ebay I found this auction for a set of 4 aluminium brake drum rotors for the Pocher alfa romeo. It looks interesting, they also say that they have more parts to come. here is the link http://www.ebay.it/itm/POCHER-GENUINE-ALUMINIUM-BRAKE-ROTORS-1-8-/251281640292?pt=Modellismo_Statico&hash=item3a818d8b64&_uhb=1#ht_500wt_1414 Best Marco