Search the Community
Showing results for tags 'scratchbuilding'.
Found 10 results
-
 In 1991, I scratch built a snowplow truck, using a 1/25 Kenworth T600 cab and chassis, loosely based on one of the trucks in our fleet. Since then, I’ve often thought about building a second, with greater detail, but never got started. I did find MCM Forum a few years back and have been inspired by all the great modelling presented, to give the new model a go. I started on the frame in 2010, but never got back to it till last year. This model is based on a 2010, Western Star 4900FA, which was one of the new trucks in our fleet at the time. Lots of pics and measurements were taken (I could have used many more!) and I started the build in March of 2023. I’ve never posted any of my progress pics anywhere along the way, but like I said in my Intro, I felt MCM Forum was a great place to do that. I’ll start posting pics from back at the beginning and catch up eventually! I needed two kits for the cab and chassis – Italeri’s WS Constellation for the cab, and Italeri’s WS Alaskan Hauler for the hood (the hood will need to be widened from the cab to the grill, to be similar to the 4900FA). The engine in the real truck was a Detroit 60 Series and I started with a version of that from Auslowe. The truck’s attachments will all be scratch built, with extra detail from all the amazing after market items that weren’t available back in 1991! Using a Hum3D, WS cab and chassis, I made a Sketchup, 3D model of the truck in early 2022, and have used various scale printouts from that to make patterns for the truck attachments. A note to the keen observers out there – I didn’t anticipate building the level of detail I found myself doing, once I got going in 2023. The frame was started back in 2010 and the rear drives/suspension are not specific to Western Star – I choose it for the airbags – it was close to a Neway, but not identical. Along the way, the overall level of detail increased, but I could not bring myself to start the frame over again after all this time, so I just carried on. I am not totally conversant with all parts and pieces I’m making here – I was company’s financial guy (couldn’t repair them but did need to know how much they cost to buy and operate!). I may name some items incorrectly but I learned lots along the way and will do my best to get it right. Your comments are welcomed! Sketchup model of the truck – I only have one pic of my bench from my first attempt to start a new version of the plow truck in 2009 – you can see the 1991 model at the back of work area First thing I chose to do with the new model, was to make the cab’s rear, air bag/shock support and cross member. Re-worked the radiator, increasing the top tank height, adding PE mesh from CTM, the air conditioning receiver/dryer, and the charge air cooler inlets. Added fittings to the power steering racks(?) - there was one on each side of the real truck - and the power steering fluid reservoir and fittings A brief start - lots to follow - want to make sure I've posted properly before continuing. thanks for checking in.
-
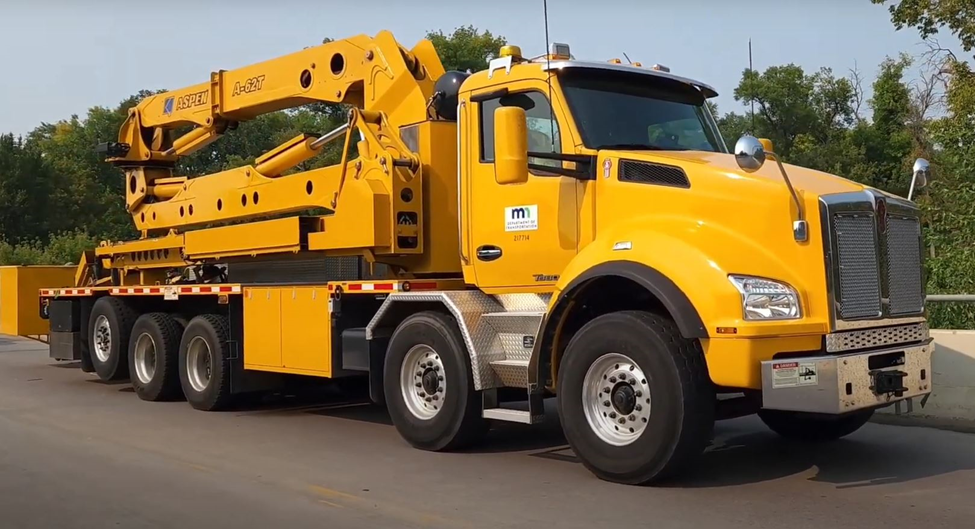
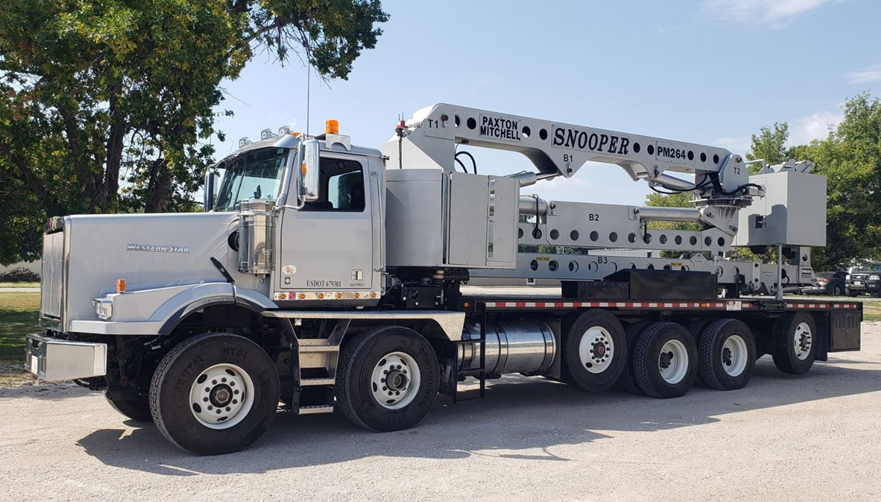
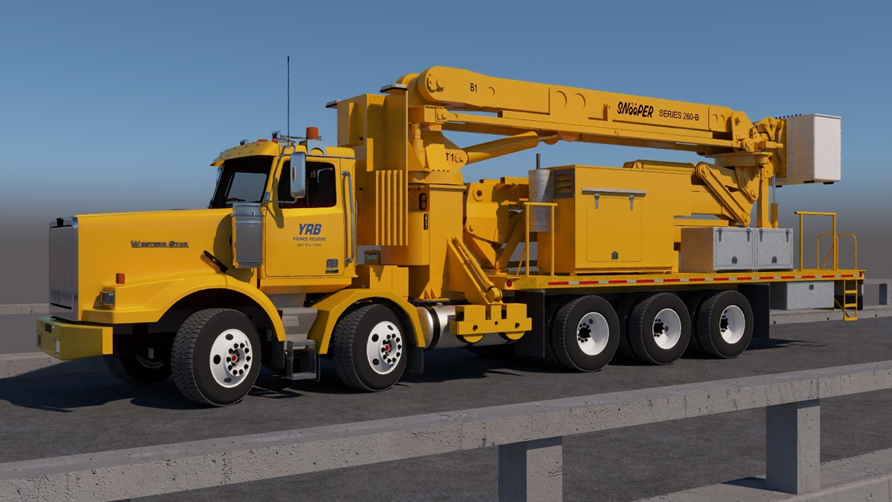
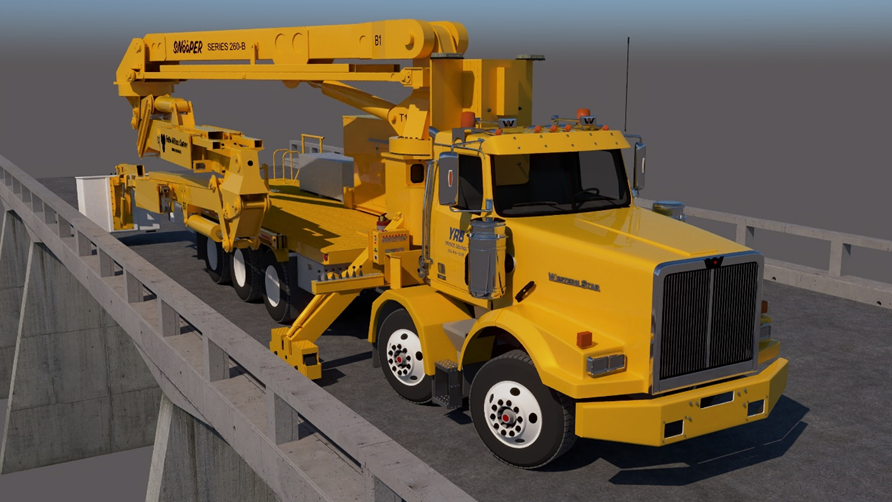
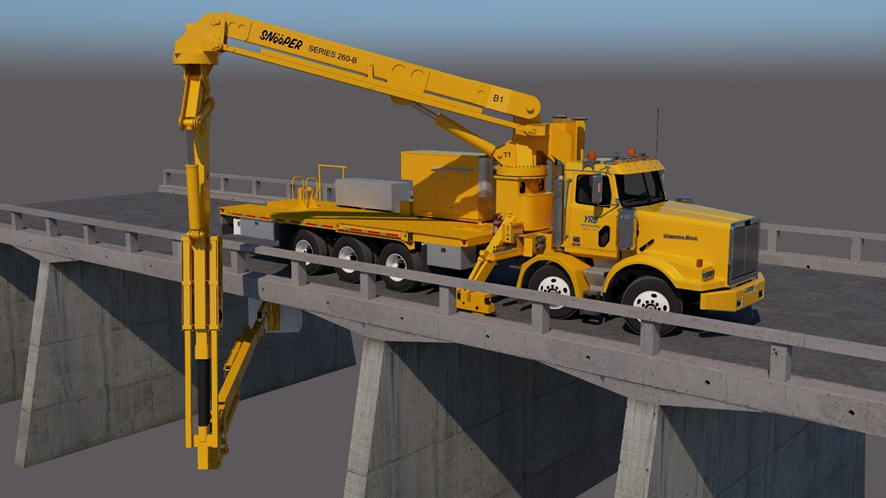
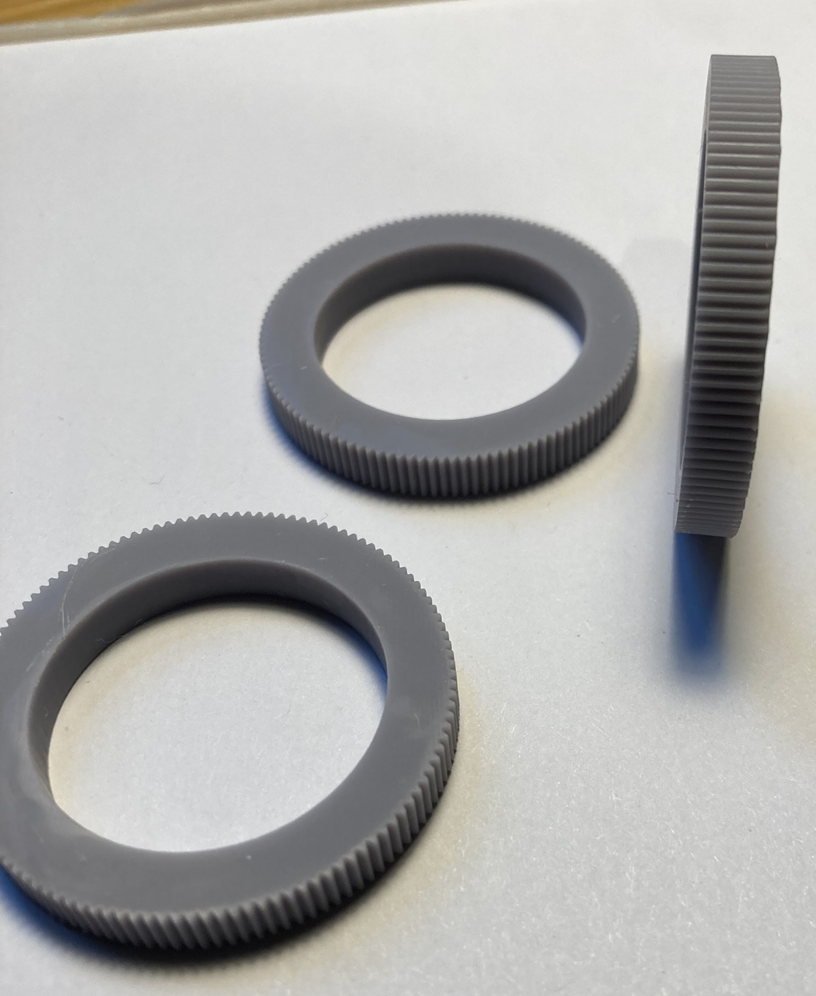
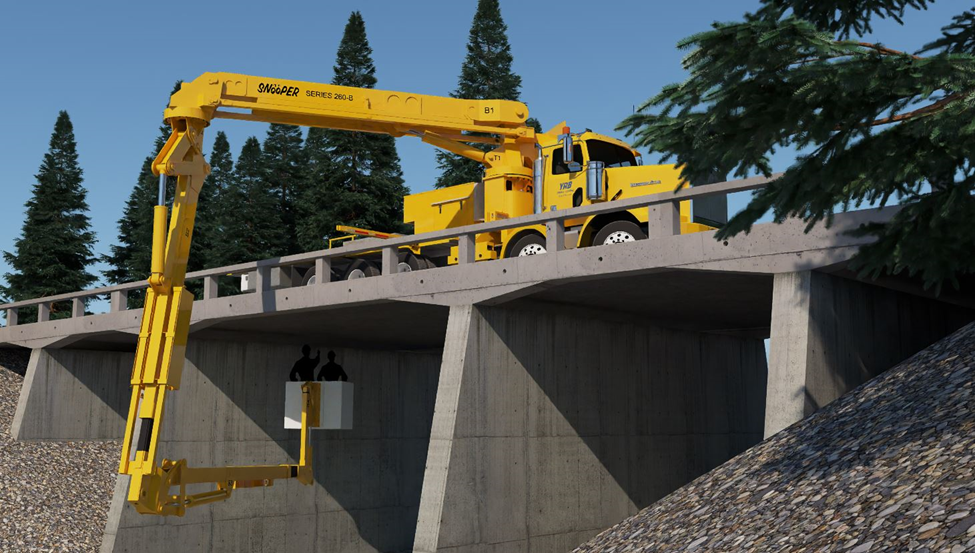
A next project is not far off! I do, however, need to finish the plow truck first, before I get fully into a new build. I’m thinking I couldn’t manage two at the same time. My paint booth is out of commission for a week or two, so I thought I’d share my idea for this next project. Going to be another highway maintenance vehicle for the scale, YRB fleet. I’ve long wanted to build some kind of twin steer crane or boom truck, but they don’t really fit into the kind of equipment that YRB has. The company does have hiab deck trucks, for smaller bridge work, but not any bigger boom trucks. A few months ago, I was going through the company’s web site and saw a pic of a bridge inspection truck, owned by the Province of British Columbia, and that helped make the decision for my next project: The equipment attached to the truck is a Paxton-Mitchell, PM-260B, ‘Snooper’ inspection unit. The model number indicates it can reach, horizontally, 60’ under a bridge. The truck that Paxton-Mitchell used, mostly, for this unit was a single steer, tri-drive, Volvo. I have also seen quite a few similar inspection units online, and in particular, one made by Aspen Aerial – a model A-62T, on a Kenworth T880, twin steer, tandem drive plus a tag. This unit can reach 62’ horizontally under a bridge, with no outriggers - One of the searches also led me to this unit on Paxton-Mitchell’s website – a prototype Snooper, the PM-264 (64' horizontal reach under a bridge) - I contacted the company to see if they would share any information or cad drawings on the PM-264, but they said it was a ‘one of a kind’, prototype vehicle, built in 2019, and no information could be shared. So, back to looking for info on the PM-260B. The unit on YRB’s website is owned by the Province of British Columbia and, back in June, I found out it was going up for auction soon. I was fortunate to be granted access to the unit, about 45 minutes from where I live, to take pics and measurements, and I spent two days gathering a bunch of details (700+ pics, lots of measurements and several short videos!). Given the similarity of the Paxton and Aspen twin steer units, I decided to combine some features from each, into an inspection truck in YRB livery. I want to make my cab and chassis based on Paxton Mitchell’s - a Western Star 4900 SB, twin steer, but with a tri-drive – no pusher or tag - and model the slightly smaller PM-260B (I did ask Paxton-Mitchell if a manual for the 260B was available – I was told I would need to own a Snooper before I could get a manual!). I found it was extremely helpful to have designed my plow truck in Sketchup before building it, so, during the month of June, while the memories and pics were still fresh in mind, I made a Sketchup model of my vision for this build – Outrigger down and booms lowered to basket 'entry' position - Inspection underway! - I have some parts already in hand – same two, Western Star kits I used for the plow truck, the tires and some steel, 2 and 5 hole wheels from M & R Wheels. I am hoping that a bunch of what I learned doing the front end work on the plow truck will make the going much easier for modifying the hood for the set back, twin steer configuration of this truck. Many other parts of this build should also be easier because of the plow truck build – that’s another reason to stick with the Western Star theme. The Sketchup model’s parts are made as separate ‘groups’, so almost all the components – boom sections, hydraulic cylinders, outrigger arms, deck equipment, etc - are able to be isolated from all the others, and viewed from all angles (and posable for different renders, too). I’ve spent a lot of time looking at the Snooper and complicated as it looks - from the tower support, the counterweights, to the boom sections - most pieces are made of lots of rectangular plate (need to get more styrene sheets!), square and round tubing, and lots of pins for pivoting parts. I am hoping to use the 1/24th scale 3D model for dimensions and template patterns for cutting out parts from those styrene sheets. I’ve not designed most of the Sketchup model to be printable – that’s a much more involved process - but some parts are. The Snooper unit has two towers that rotate, to get the man basket under a bridge. More thanks to @Bren, who agreed to do a test print for me of a sample outer ring gear of the slew ring that rotates the main tower behind the cab (the test ring gears below are 1.5 inches in diameter, with 120 teeth) – The outer gear sample, which bolts to the lower, support portion of the main tower, needs to be modified to add the inner portion of the slew ring, which the upper tower portion bolts to, so the drive motor can rotate the rings around each other. I just needed to see how the gear teeth would turn out on the test ring and they look good from the pics Bren emailed me. He has sent me the actual rings, so should be able to check them out up close in a few days. I’ll admit this will be a very challenging build, and maybe as long as the plow truck build. But doing more practice builds isn’t going to help. Time is marching on and I can only hope that I maintain the ability to at least give this build a good go! So, as soon as the plow truck is finished, I’ll start in on this one. I’ve learned a bunch about these trucks, from the few month’s research I’ve done, from the time spent going over one in person and from making the digital model. Lots of ‘how to’ stuff is figured out for the model already, but lots more to figure out yet. And speaking of the Sketchup model, it’s also been fun to add a few other items to the model before rendering. An ‘on the job’ situation – I’m looking forward to getting started on modeling my version of the ‘Snooper’ - back in a few weeks!
-
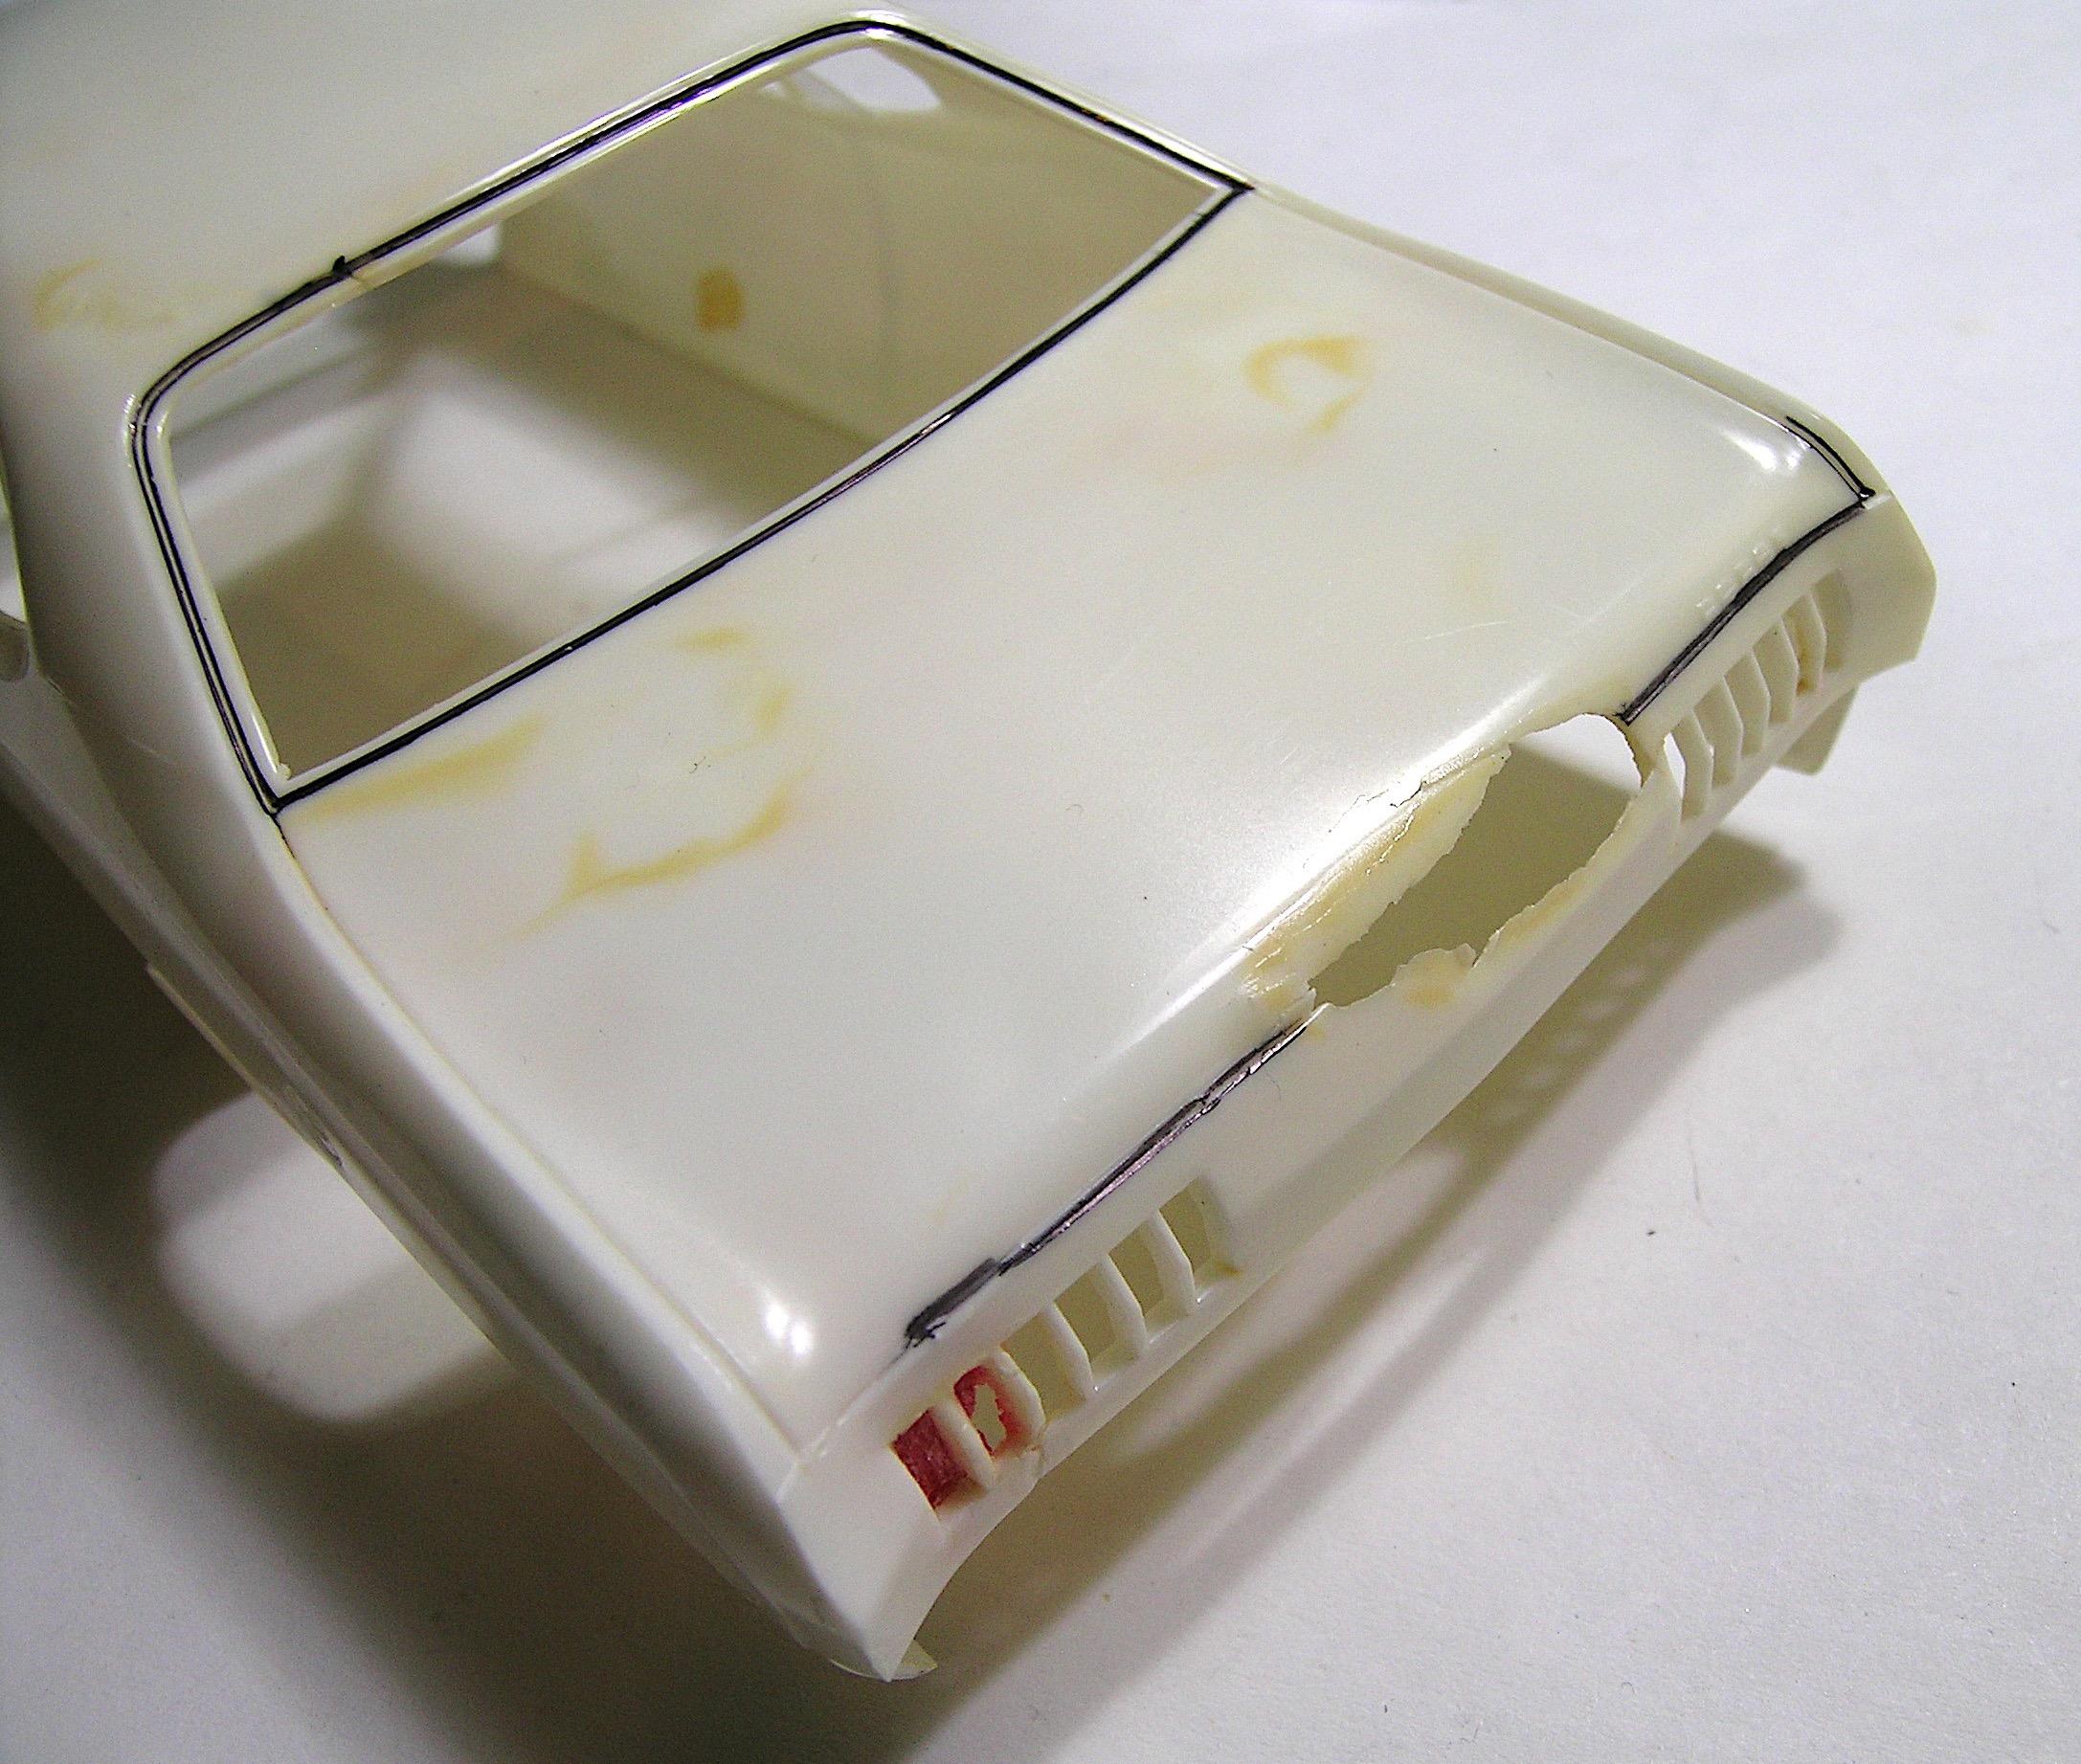
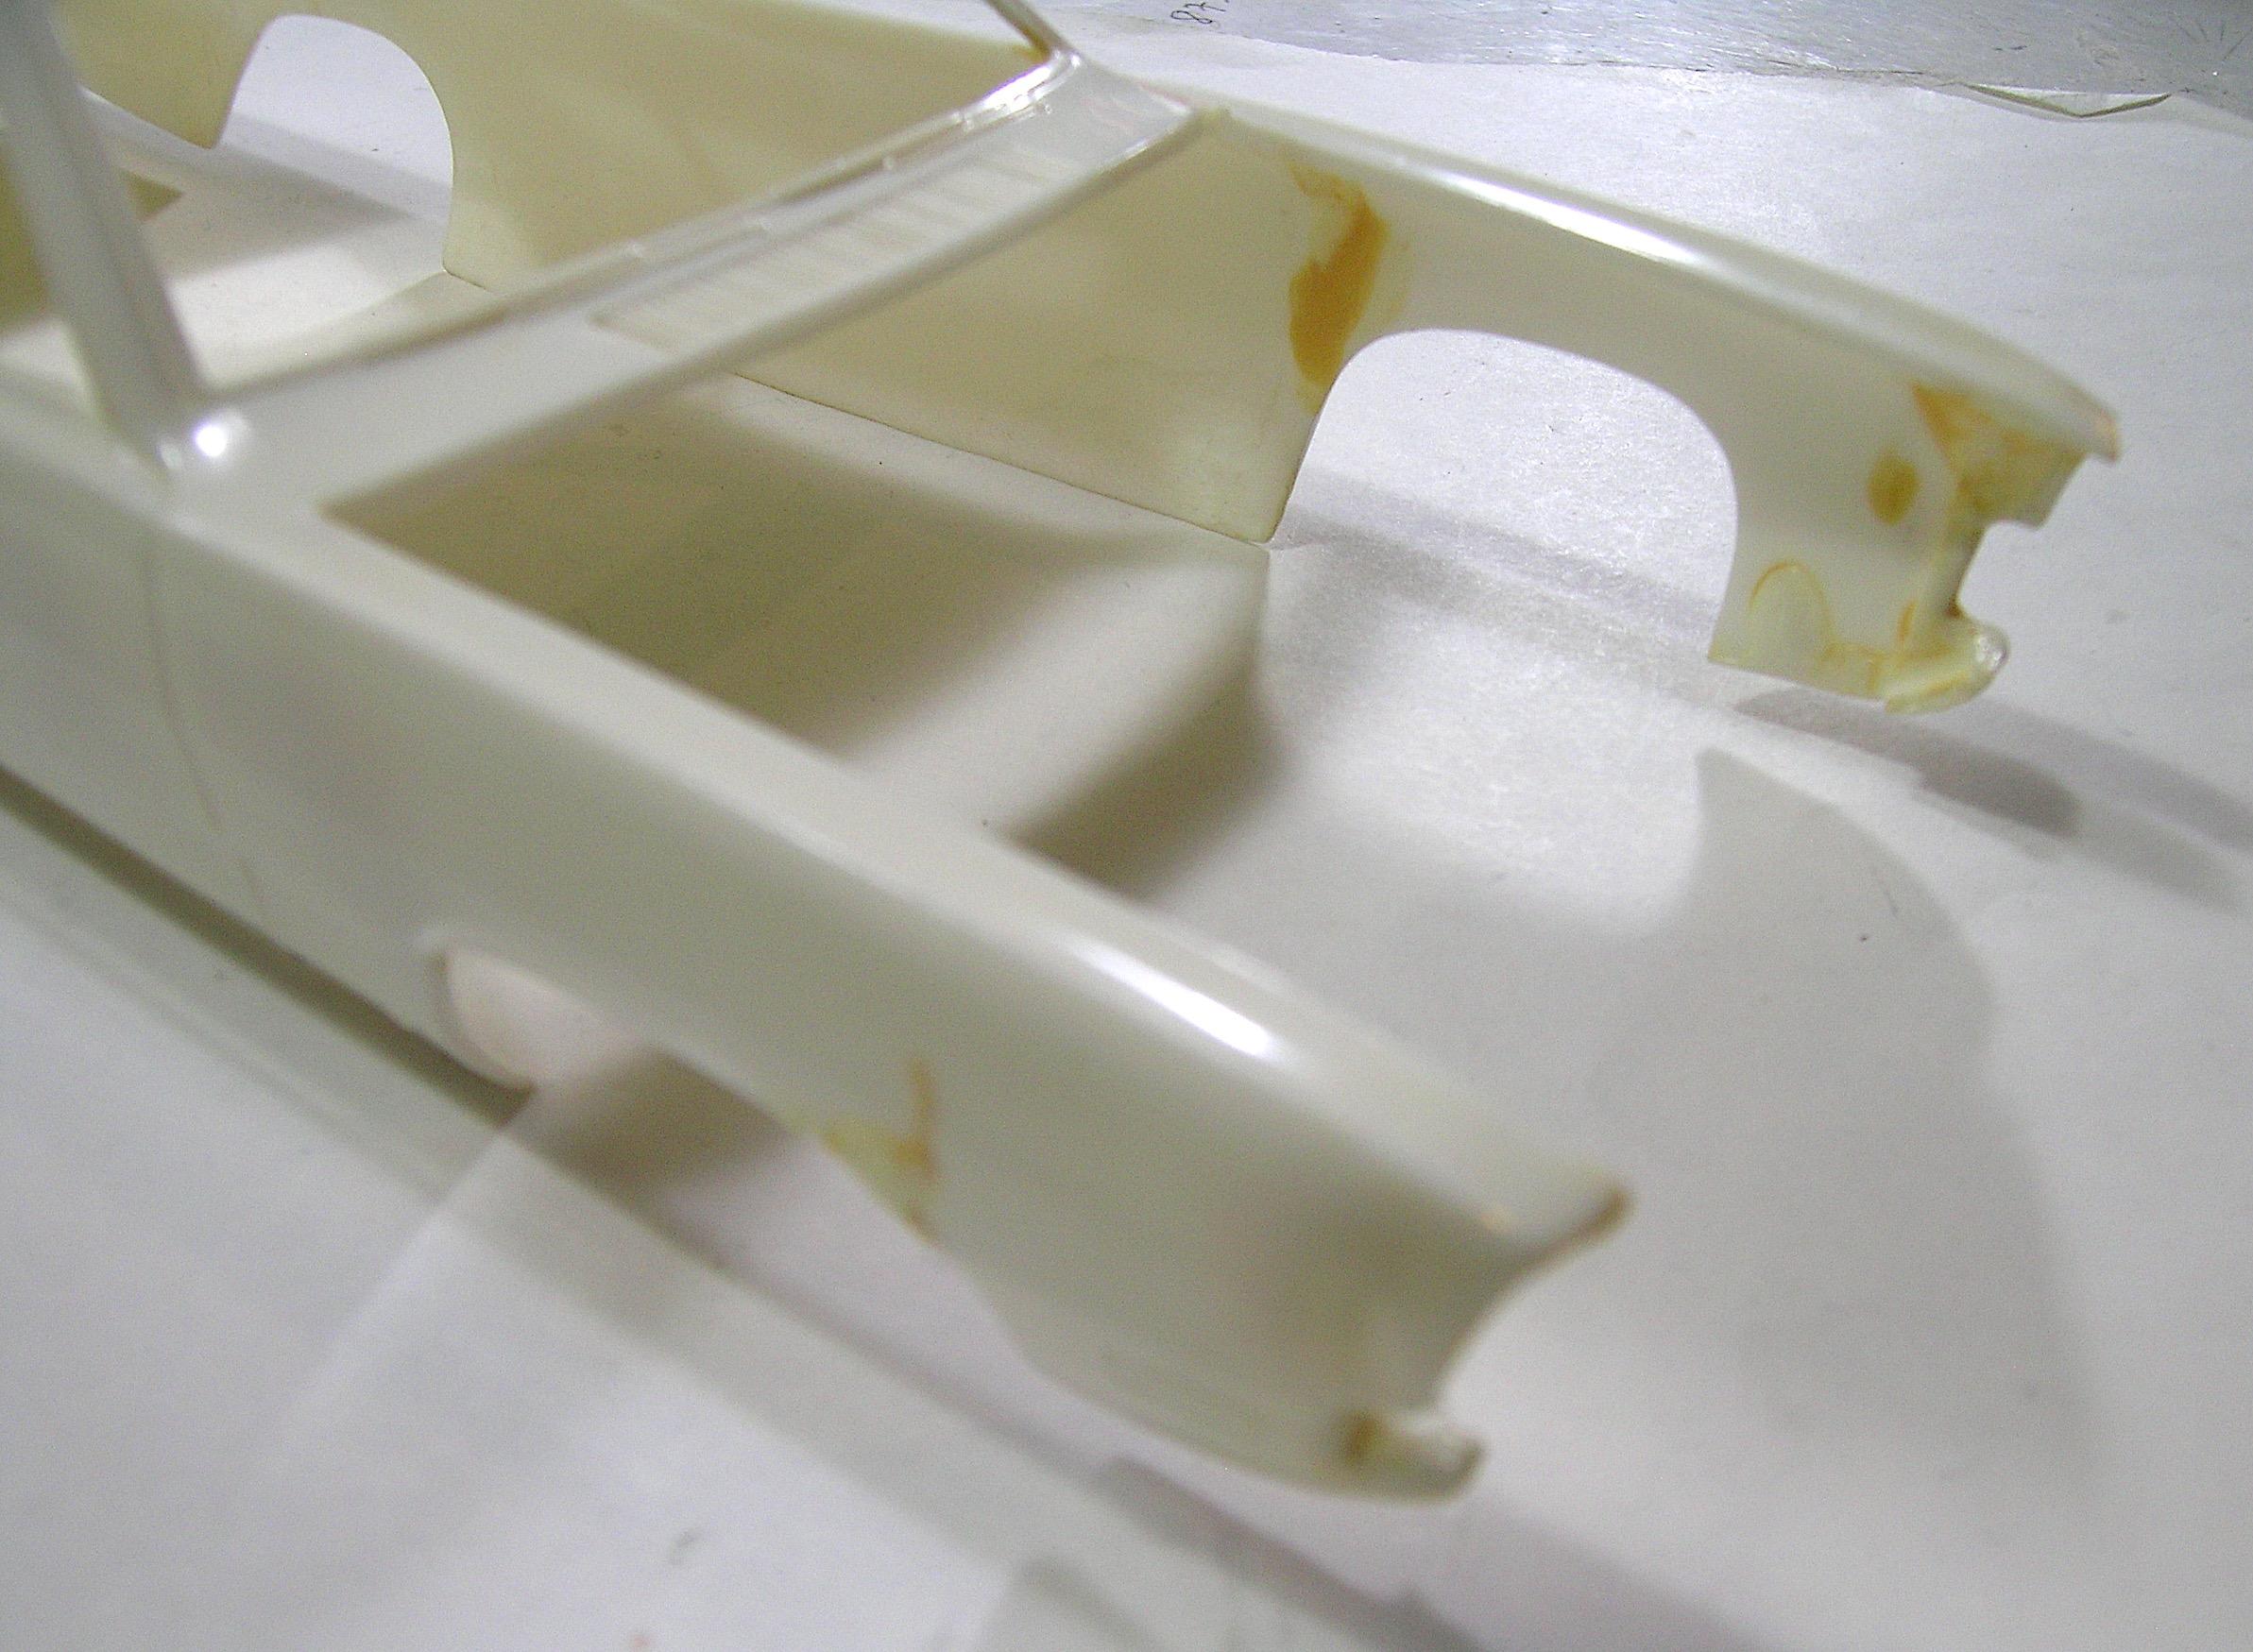
Hello Everyone! The time has come to start a new project, cold weather and the first snow covered the ground here in the province of Quebec, so nothing better than a little good time making models to get through these cold days. I must say that I had a hard time deciding on my next project simply because I had 3 or 4 subjects that really interested me to build and I thought for a long time about the pros and cons. As we often say, too much choices but not enough time to make them… My next subject will be a 1972 Dodge Demon drag racer, YES, another Mopar... did I mention I'm a Mopar fan? ? I must mention that didn't put "Pro Stock" in the title simply because I want to keep some freedom to do things my way and there are too many details to respect to recreate a correct historical car of this class. Also, it's very hard to find good close-up photos of many of the critical details of these cars and I'd be quite happy not to take another 4 years to build this one even if I don't give myself a date to complete it. Note that I have several sheets of Slixx decals of well-known Pro-Stock cars from that era, so the project could go that direction if I change my mind, we'll see. Before I started, I bought and read an excellent book called "Chrysler's Motown Missile" and I was very impressed with the quality of this publication and the incredible dedication, determination, ingenuity and of all the challenges they faced during the years their cars were campaigning, never giving up was obviously part of their philosophy!!! That being said, the team, with the exception of Don Carlton himself, never used the ’72 Demon body, so my current choice would not be correct for a tribute car of the "Missiles" team but rather a good match for the "Billy the Kid" car… ? I have in my stash the ’73 Duster, ’71 Challenger, ’72 Barracuda or ’74 Dart kits for a more accurate build but I really want to build a Demon and preferably a 1972 because it has never been done in kit form and the challenge of trying to make the front grill is irresistible, not to mention I really like that A-body. ? I have a new sealed MPC '71 Demon kit and a good old built kit that I bought about 20 years ago, so I'm going to start with the latter since the damaged areas on the body shell are exactly the parts I want to try to improve on the original kit. The taillights on the MPC kit are not well represented in my opinion and can be improved, this very damaged area on the body will be a good opportunity for me to try the exercise without much guilt. I'm also going to use the recent ’71 Duster as a donor for some of the body parts, the trunk panel obviously and some of the more modern and detailed components of it. I must confess that I had a good and constructive discussion with one of the masters on this forum regarding the new kit I have and despite my choice I really think he’s absolutely right and the new kit should be build instead of sitting on my shelf. I feel like I have to try to save this rare body and I will have a good "plan B" if something goes wrong with this used body that would be sleeping in a box if I didn't use it. Anyway, only the body shell would have been used for this build so it would be a waste in my opinion. The sealed kit will keep its value and I could probably sell it at the end because I don't think I will build it anyway, I have way too many ideas for other subjects. Tim (Codi), I hope you'll forgive me someday but rest assured that your way of seeing things has still made its way into my head! The first part of this WIP thread will be primarily devoted to body modifications and I will incorporate aluminum and brass structural and mechanical components later in the build. I hope you're not in too much of a hurry because this is going to be a slow moving build, I don't know if I'll post as many updates or pictures as I did for my ’64 D100 pickup but I'll try to show the basic, especially if I find any new tricks to share with you. Unlike my D100 pickup, I don't have to create the body from scratch so I'll have more time to work on some of the details for this project and I have some new construction ideas to put to use. Note: I started working on the project a few days ago, so I'll post some pictures of my first surgeries soon. It starts today… the thread, I mean… but I hope you'll be along for the ride! I'll be back soon, Francis First pics: The donor in all his splendor before going to the scalpel... or the Dremel! All this part of the body will be modified, including trunk which will open of course. The rest of the body shell is very nice and the front wheel openings will be adjusted to look more like the real car.
-
 In A4 Garage's most recent post, about scratchbuilding materials, he displays some nickel silver strip. The label shows KS (not K&S). The lettering on the package is in Japanese. He uses it to make window frames/trim. I'd really like to try his method, but haven't been able to find anything similar. Everything is too wide. Sure, I could cut it, but that would be more labor intensive than I want to get! Especially knowing the material exists--somewhere. I am guessing the dimensions are about 1.5mmX.5mm, or thereabouts. Anybody know of a source?
 -
Hi guys, I bought this model some time ago (2021) and I had it on reserve/sale until now, it has some flaws from when I received it, the largest crystals are torn from the tree and the most compromised is the hood. Presentation Box (battered) And as with the first one I built, it comes with a hole in the chassis where the engine block should be, so let's get to work, that's where I started. I have not decided if I will open the hood, I will study it later. This is how everything is presented seen from below Exploded view painted Greetings, Germán.
-
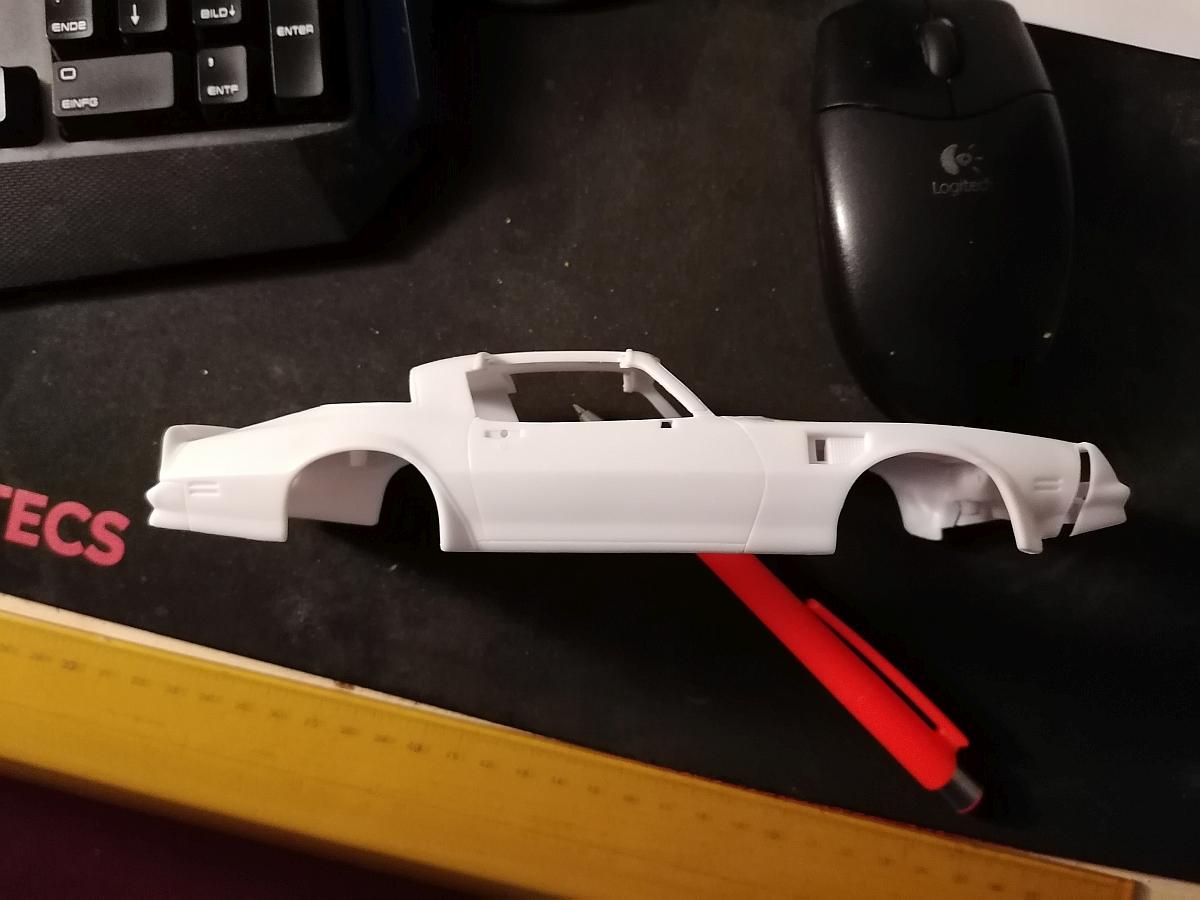
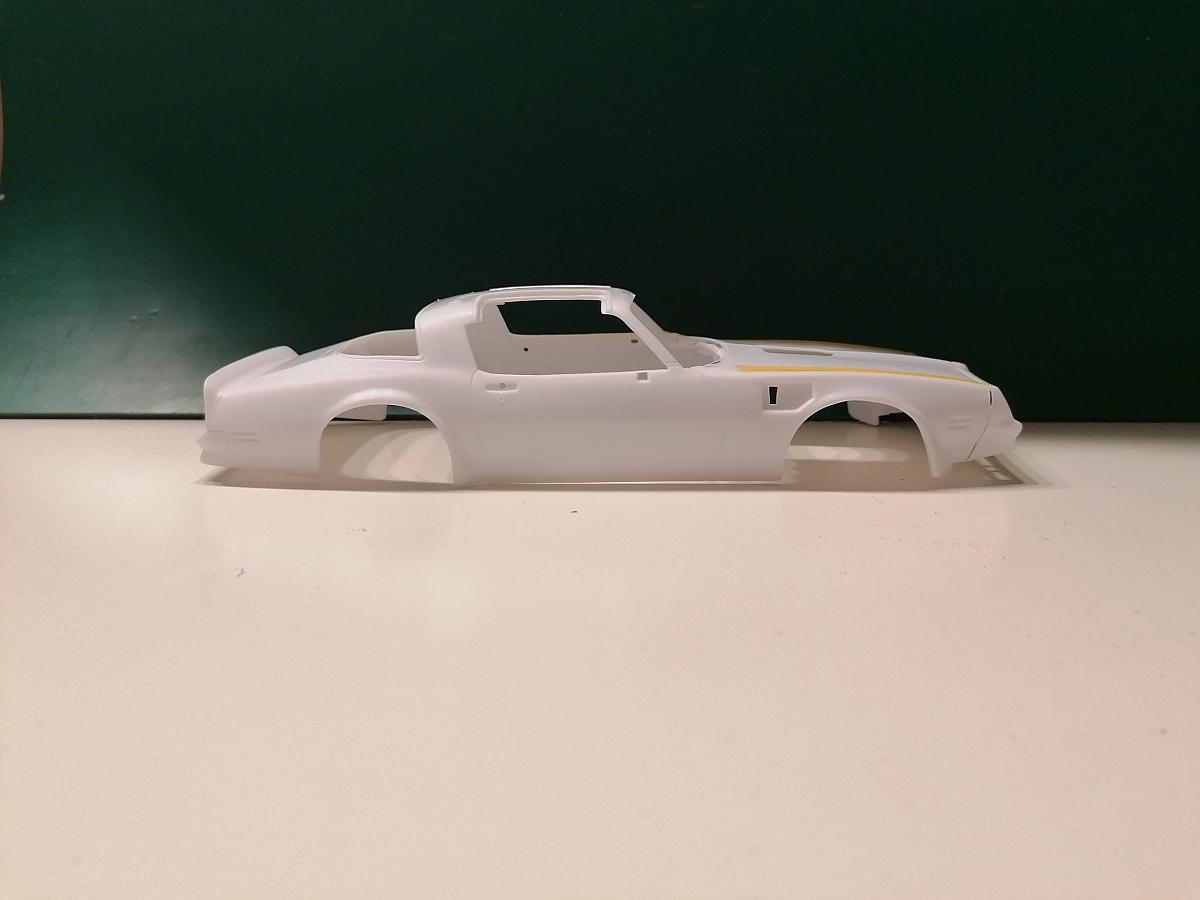
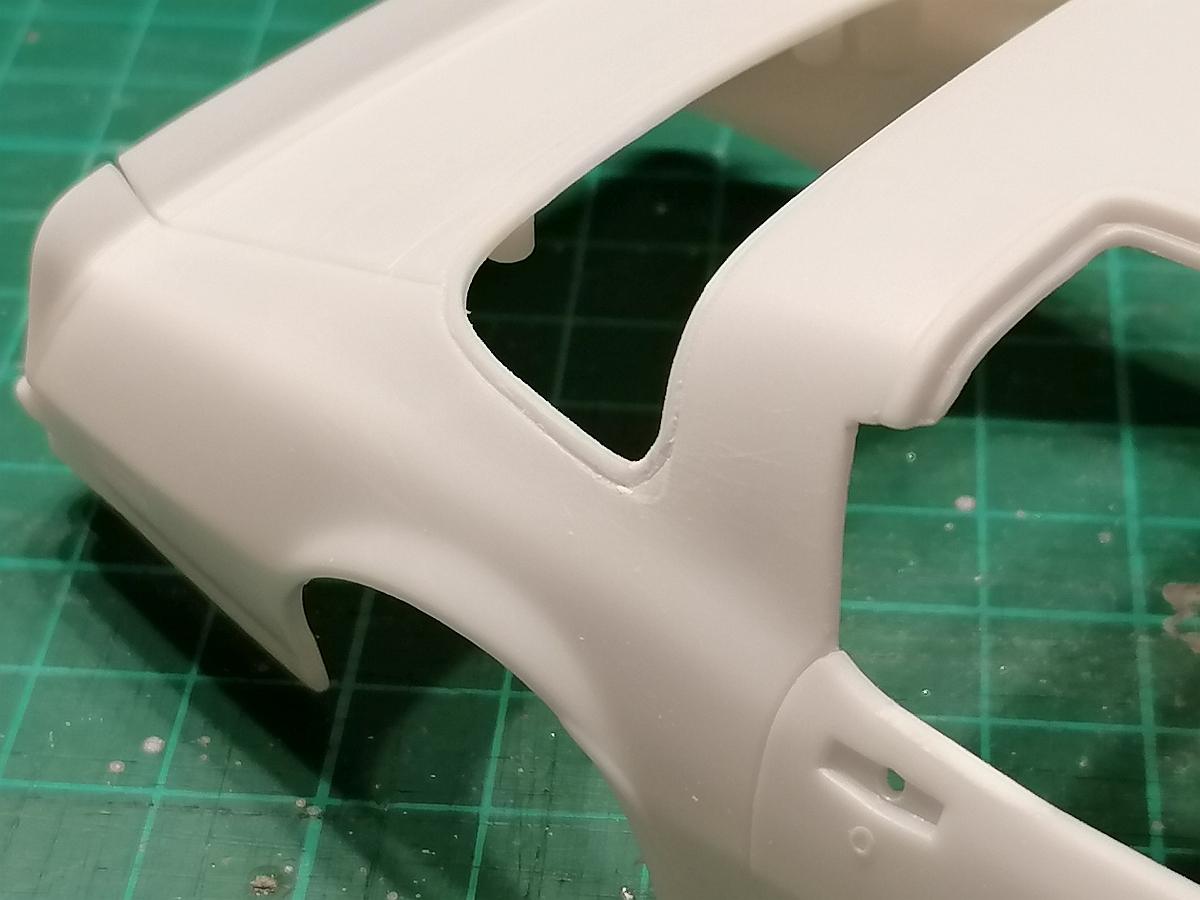
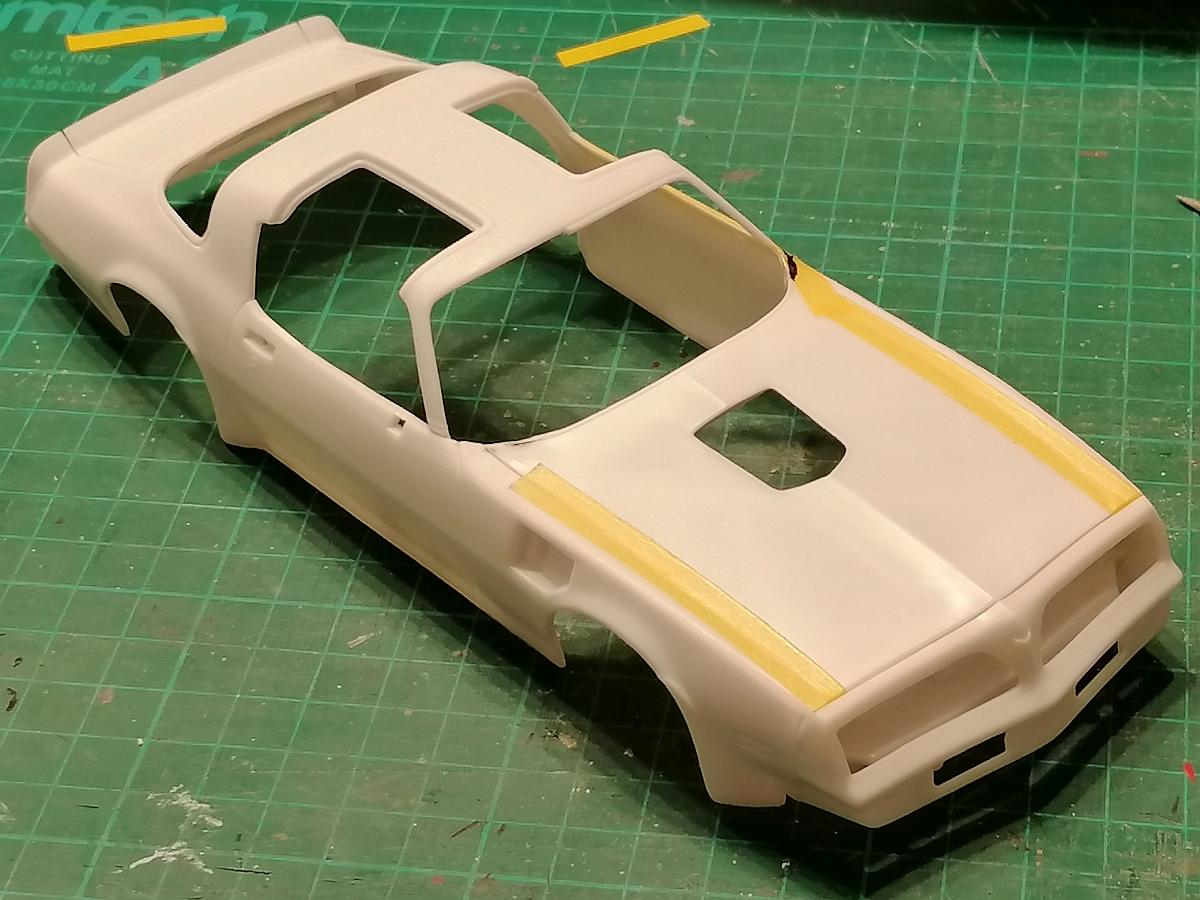
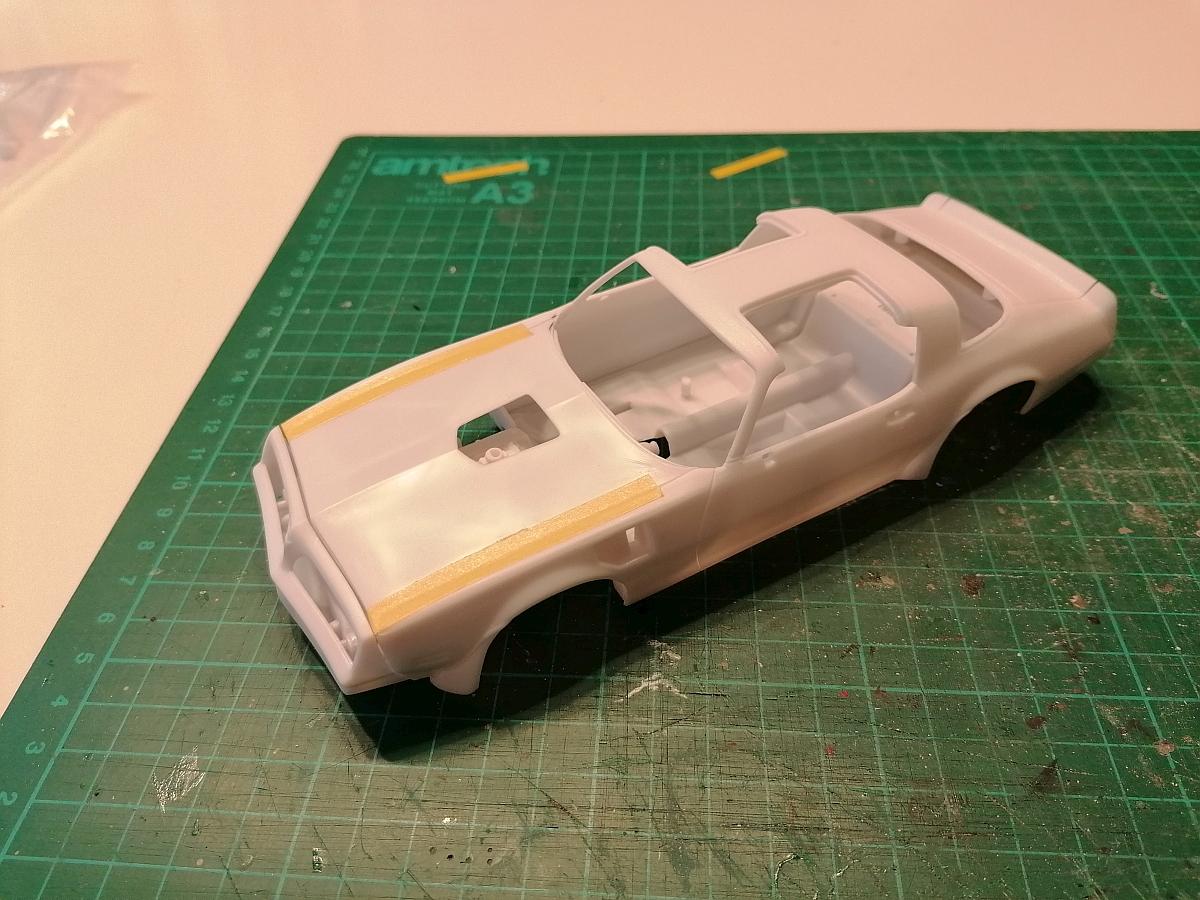
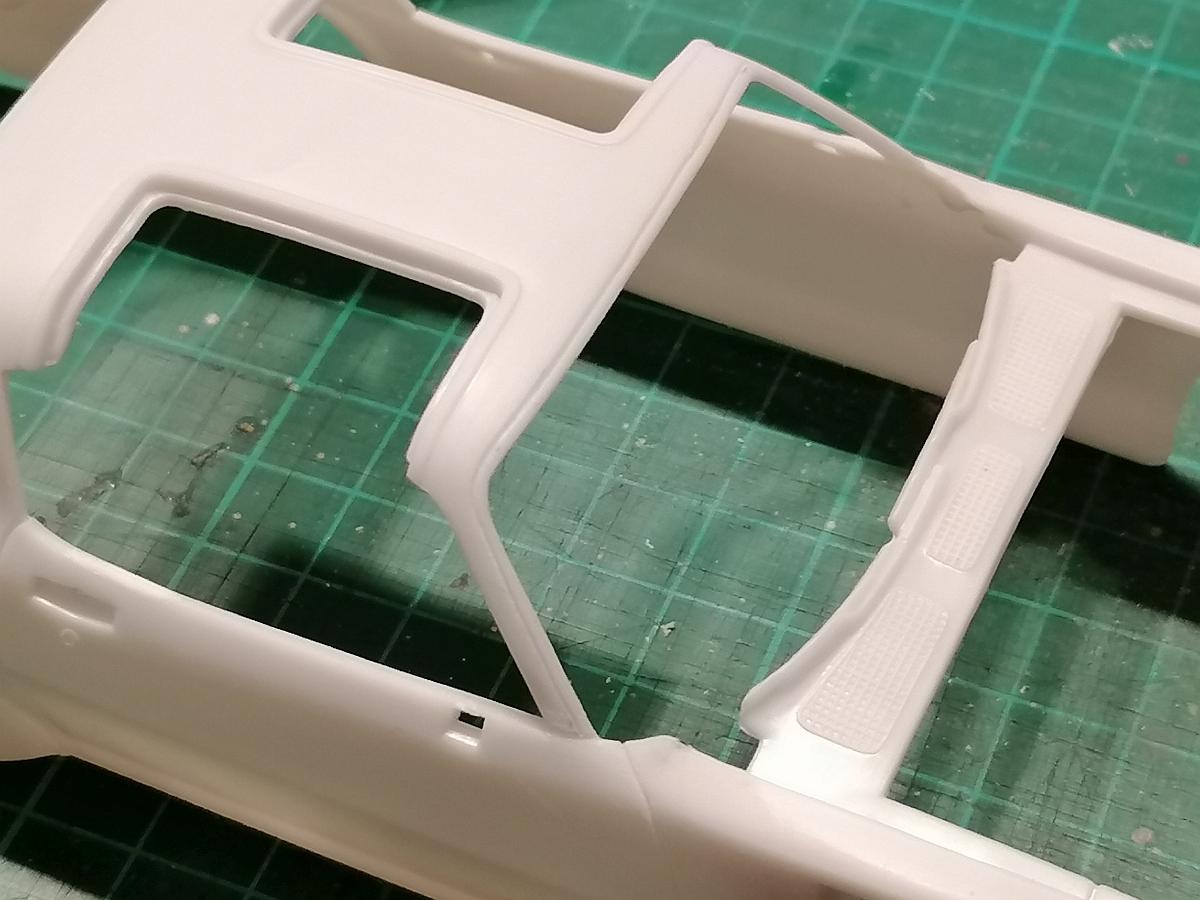
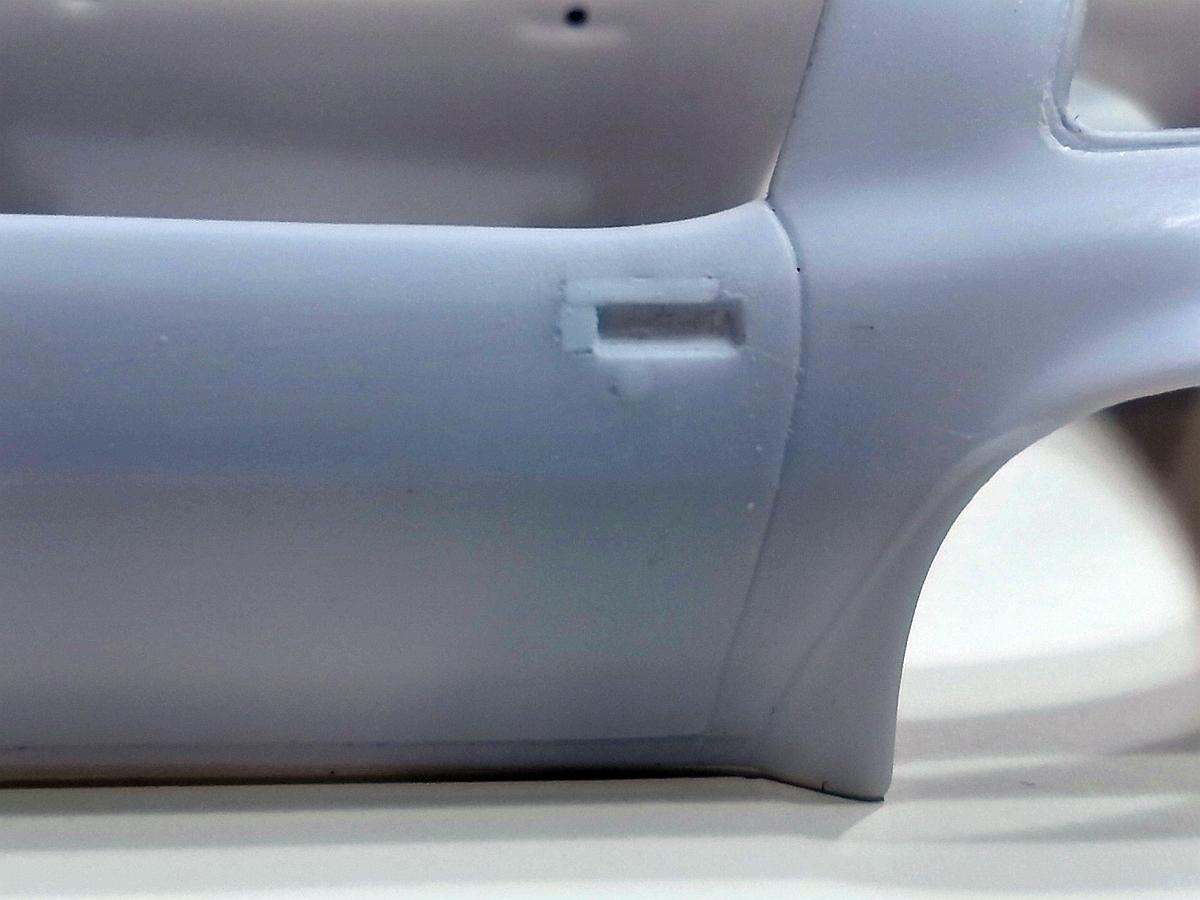
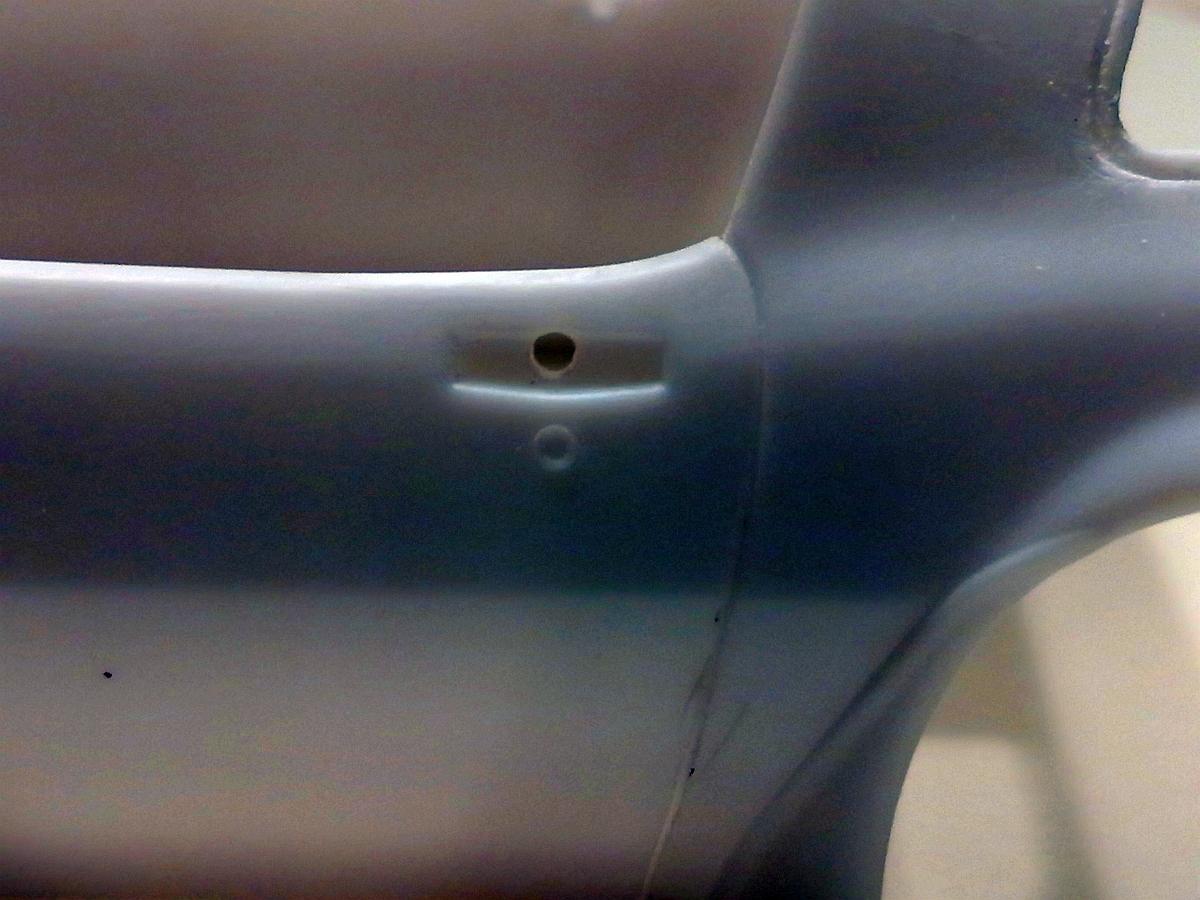
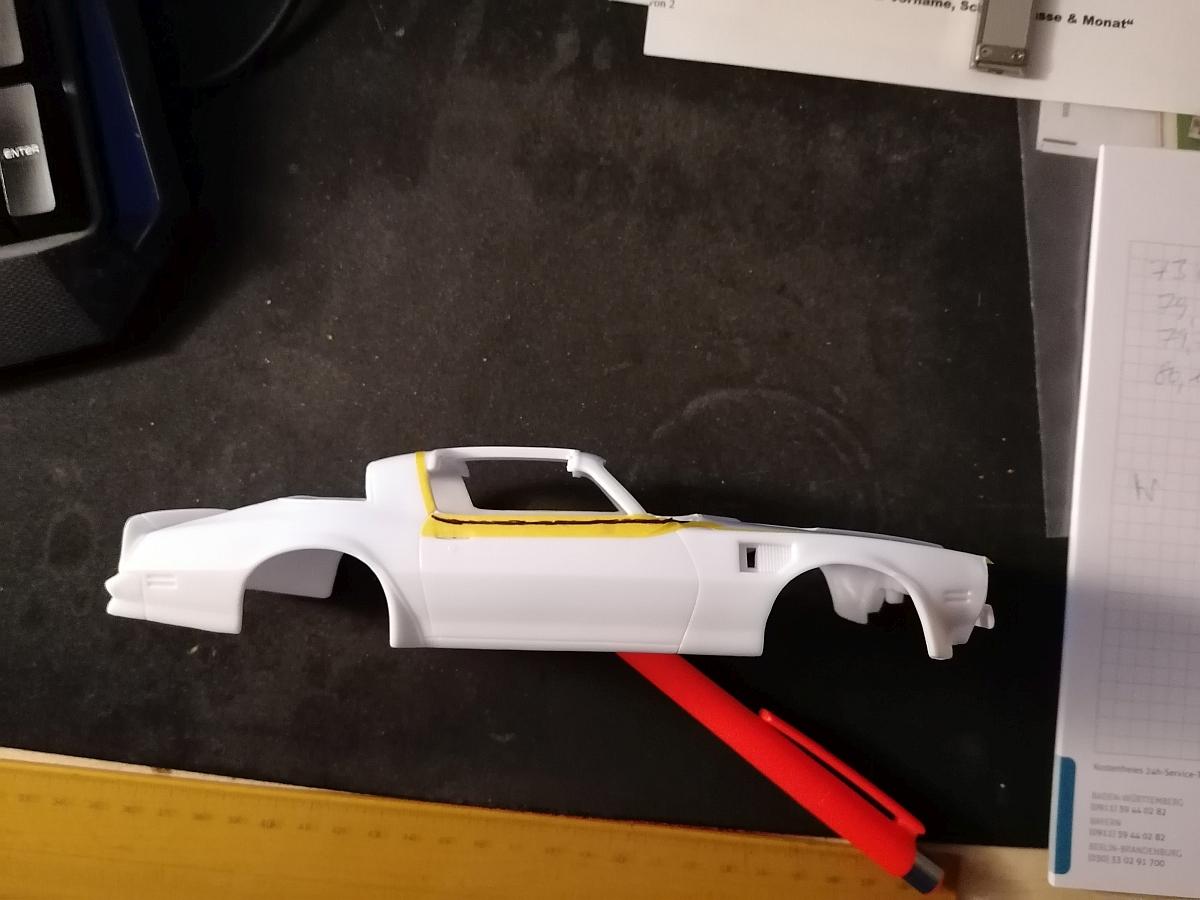
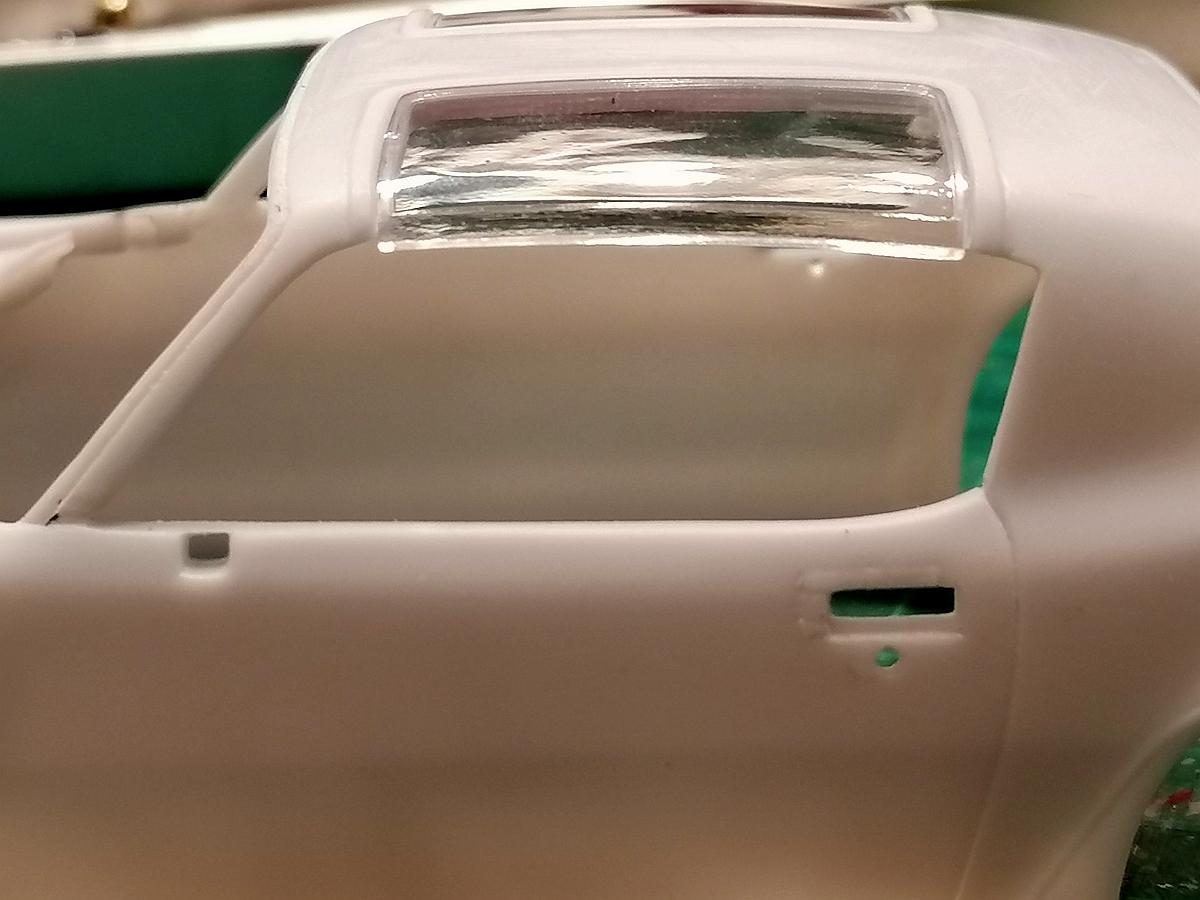
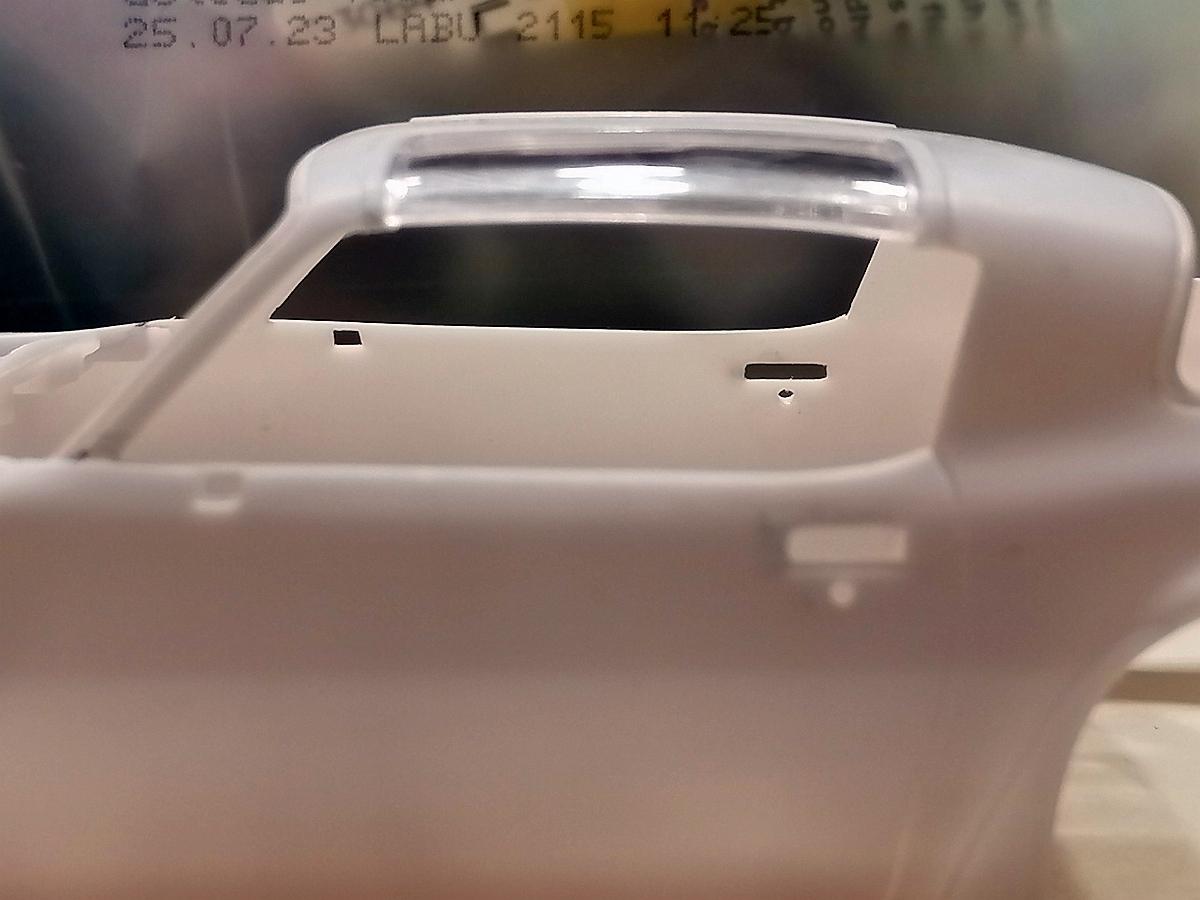
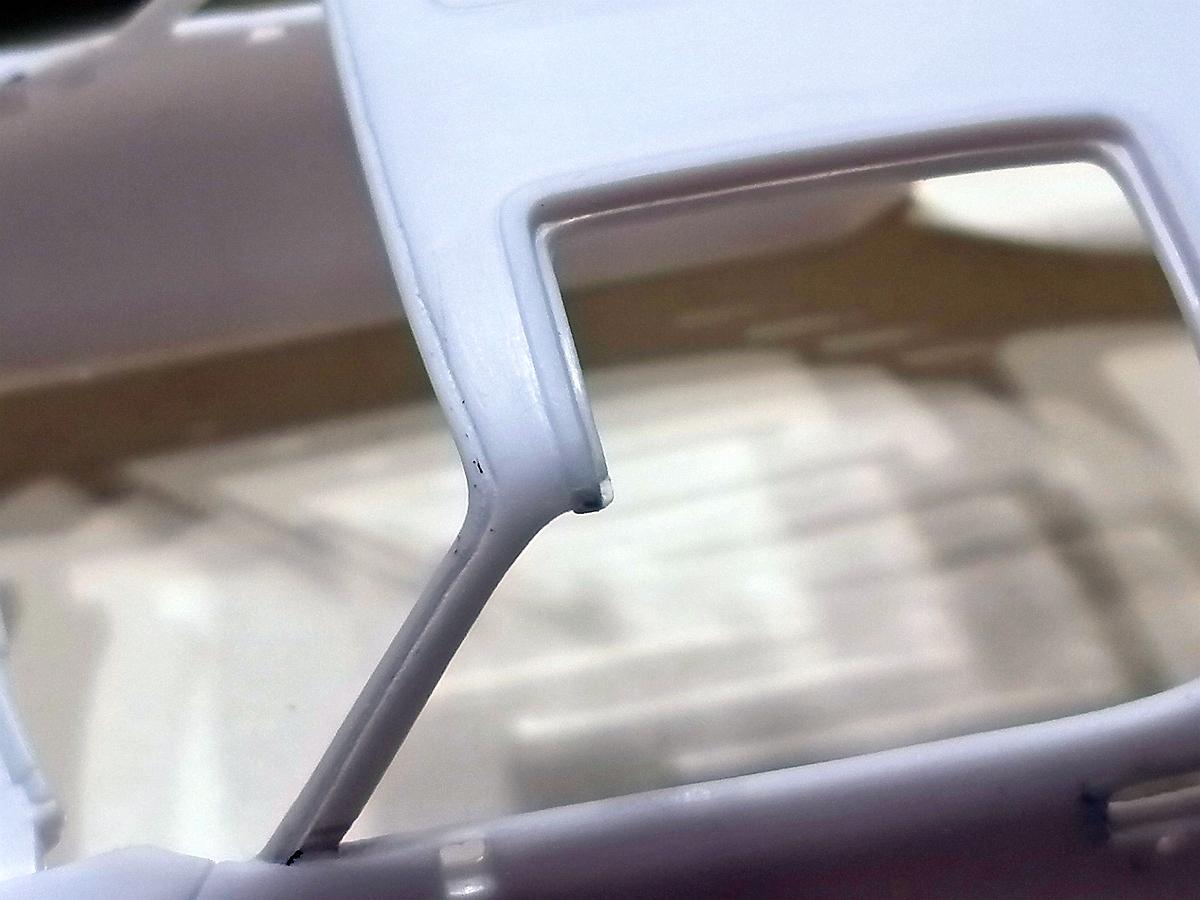
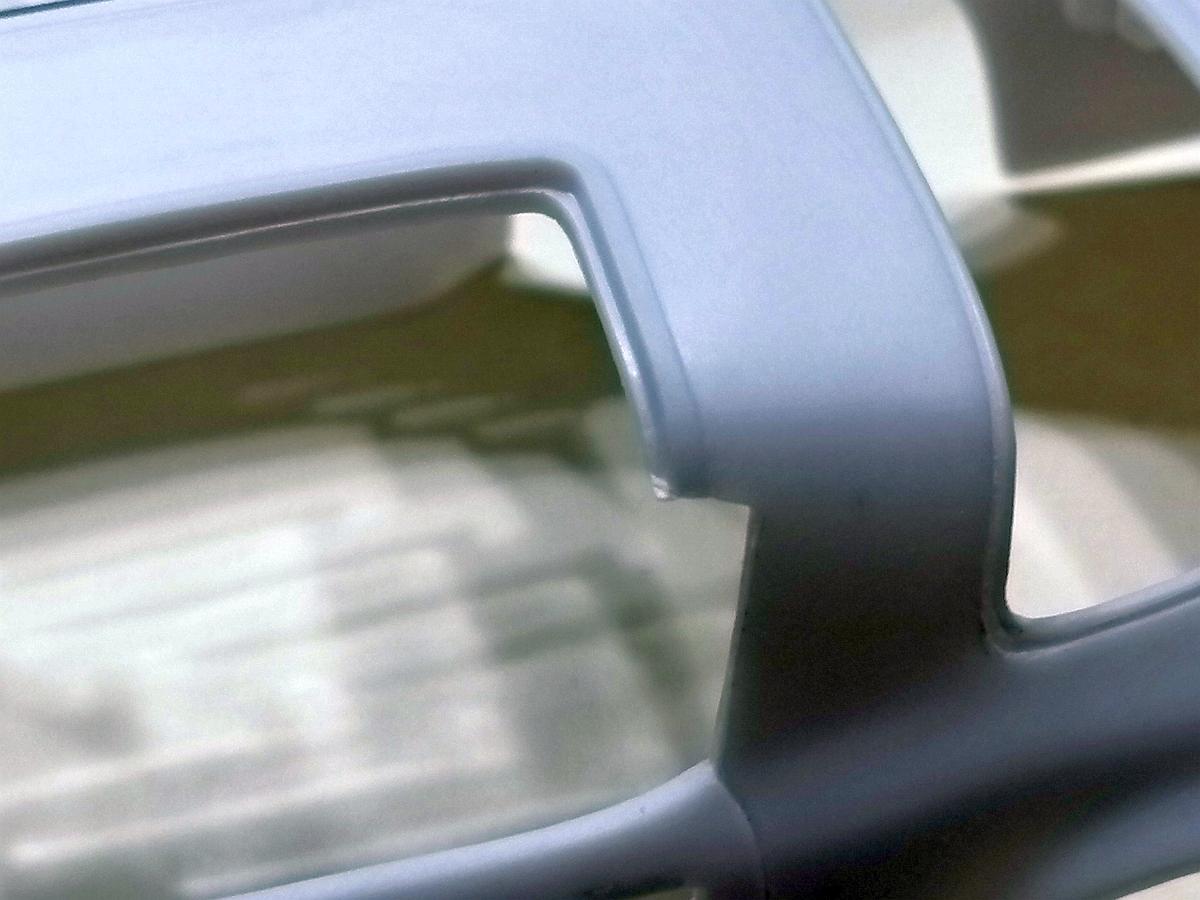
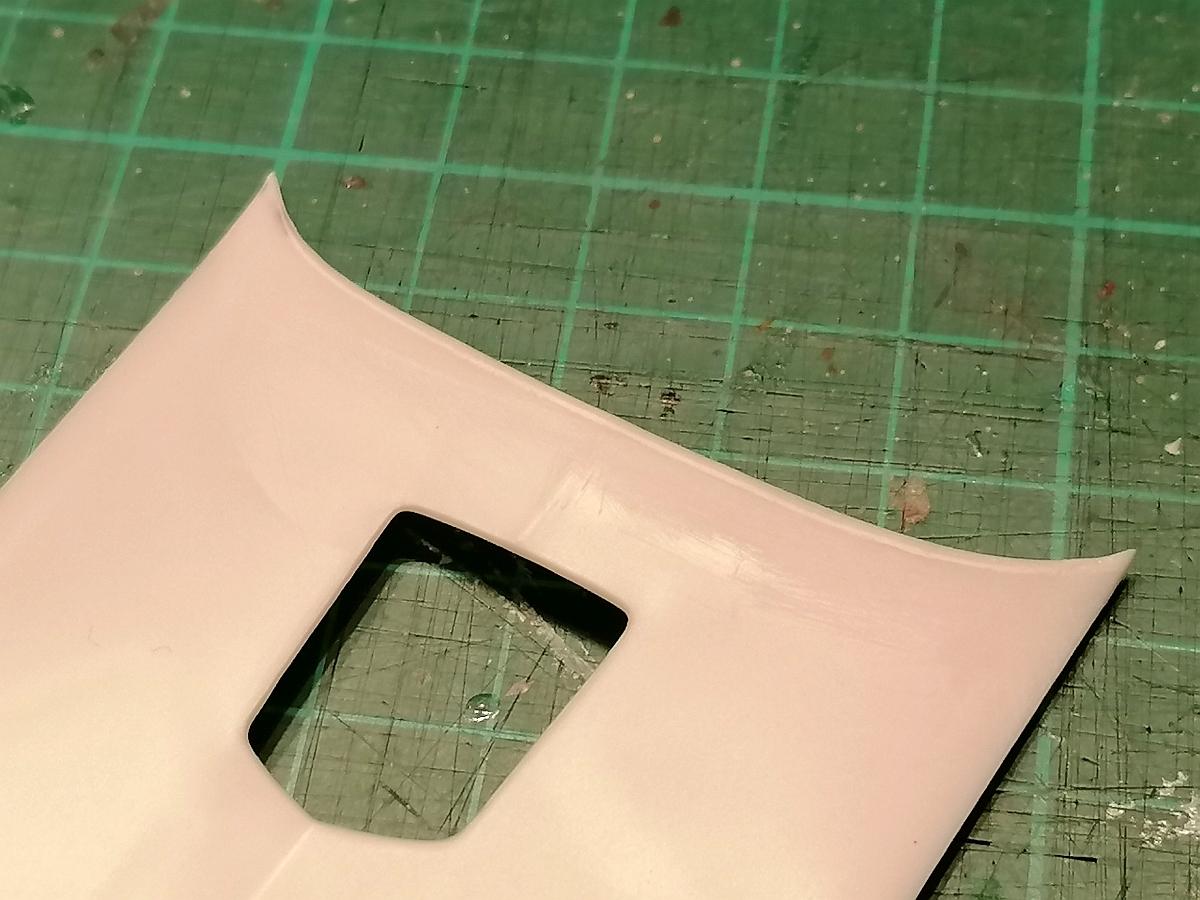
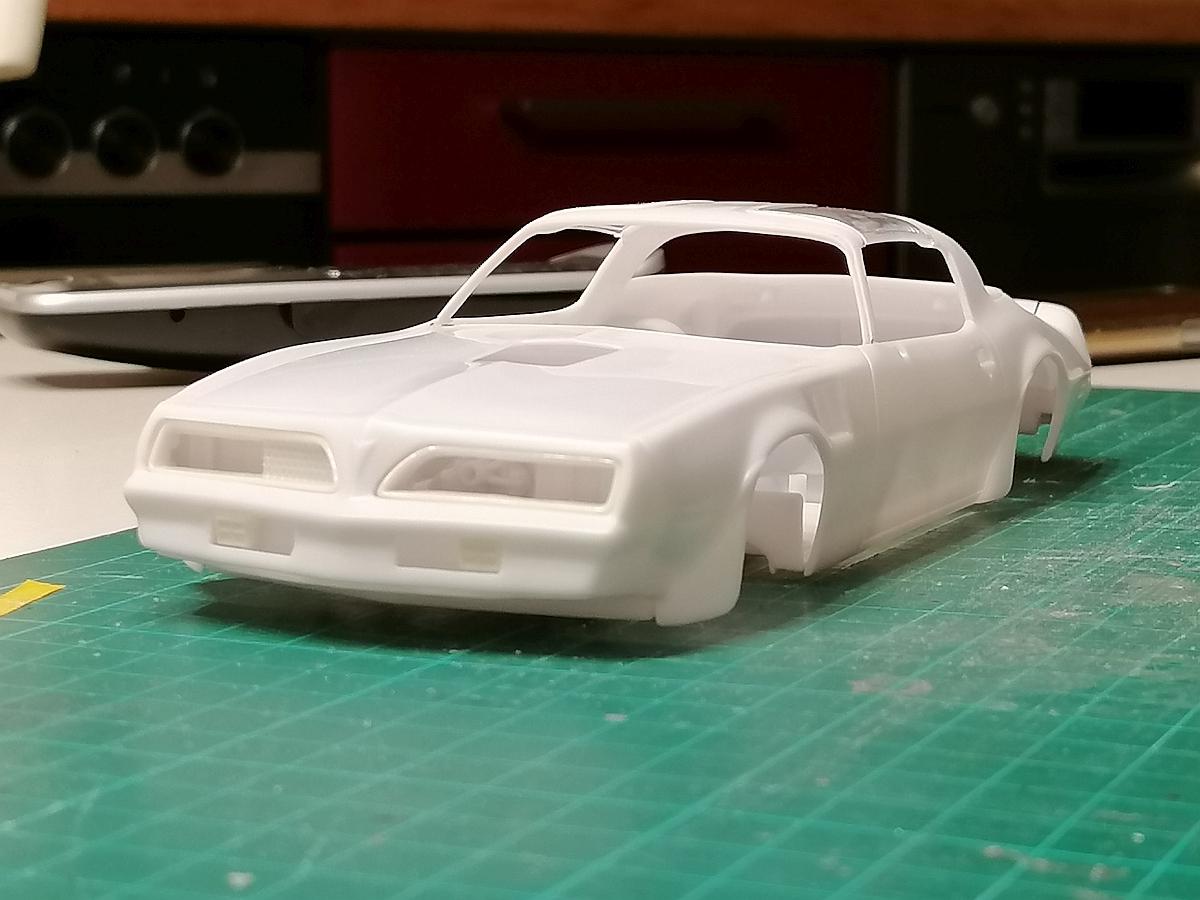
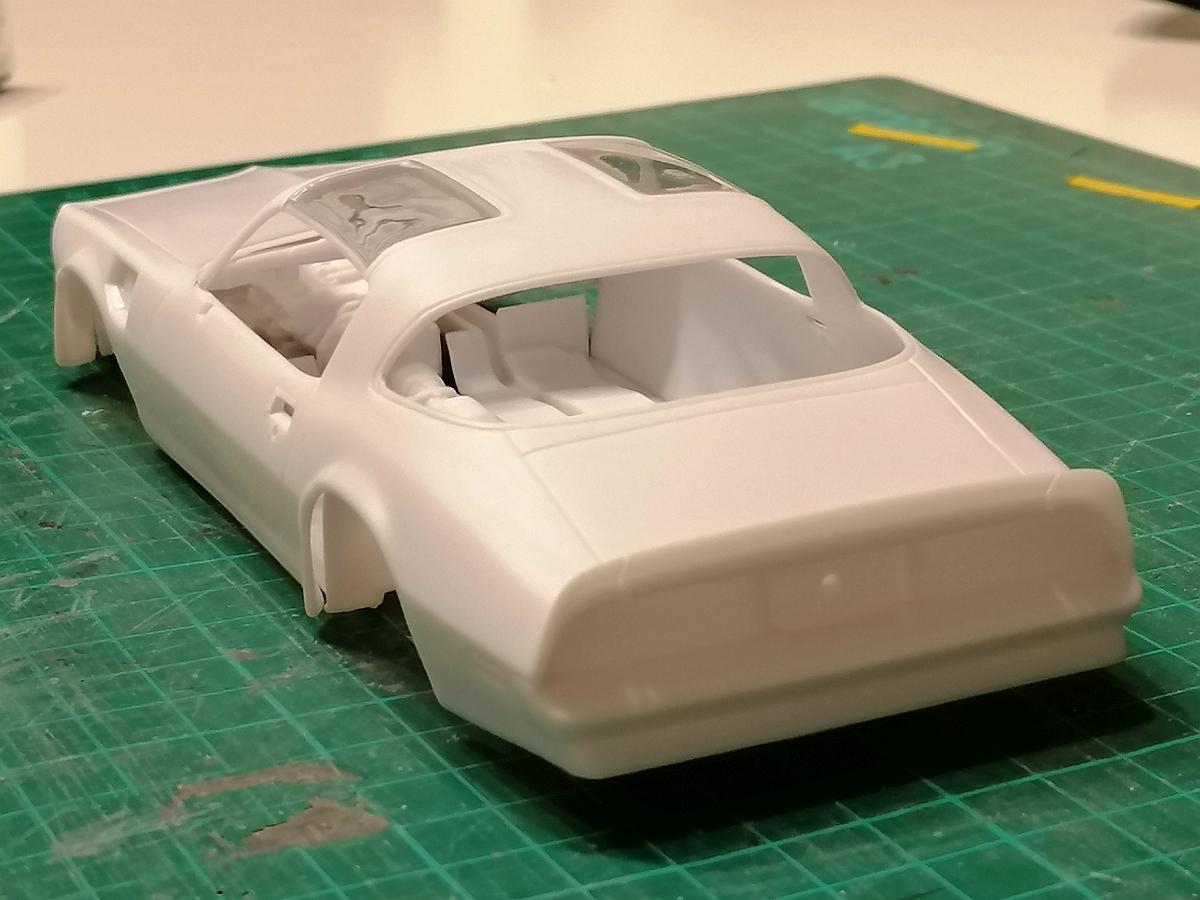
Hello fellow modelers, as posted in Car Kit News & Reviews section nearly a month ago that I tried to correct most of the body issues this kit came with (because it was a kit with a metal body before) I thought it would be time to start this WIP thread. Started this one already on November 5th. I noticed the most issues without having seen the thread from sledsel before. Now lets start with it... Part 1 - first body corrections First of all I flattened the rear spoiler because it´s much to high (sorry no pic from that). Then I noticed the incorrect window openings and shape of the hood. So I marked the areas on the doors and B-pillars that have to be removed and started with cutting and filing these away. Important notice: "If you´ll try to do this to you have to change the inner door panels too because they won´t fit anymore." Marked areas here... Passengers side window opening done... Here you can see the difference between the done passenger side and the undone drivers side... The A-pillars are also to wide and the windshield opening to small in heigth so I filed away the windshield molding first on the passengers side... then on the drivers side too... then I scribed in the new windshield surround moulding... The rear window surround is also wrong shaped on the bottom of the B-pillar. I added small styrene pieces and rounded the corners. Because of removing nearly 1mm from the top of the doors the door handles looked like they are wrong placed. Looked on many photos before changing the position for the door handle recesses. Before... After... Next were the T-top glasses. Without modifications they look horrible as you can see here... After filing some material away from the bottom and adding some small styrene pieces to the roof where they sit it looks much better... Here a complete view from the left front and back corner. The shape of the outsides of the hood are already corrected. Photos from November 19th... As you can see I started opening the grille. Will add photoeched parts here. Because I´ve seen many T/A´s without chrome molding on the hood I removed the groove by adding styrene and grinding it down to the hoods shape. That´s for today. More coming soon. Hope you´ll enjoy this. Any questions, comments and critisms are much apprecciated. Rico
- 6 replies
-
- 4
-

-
- scratchbuilding
- body mod
- (and 1 more)
-
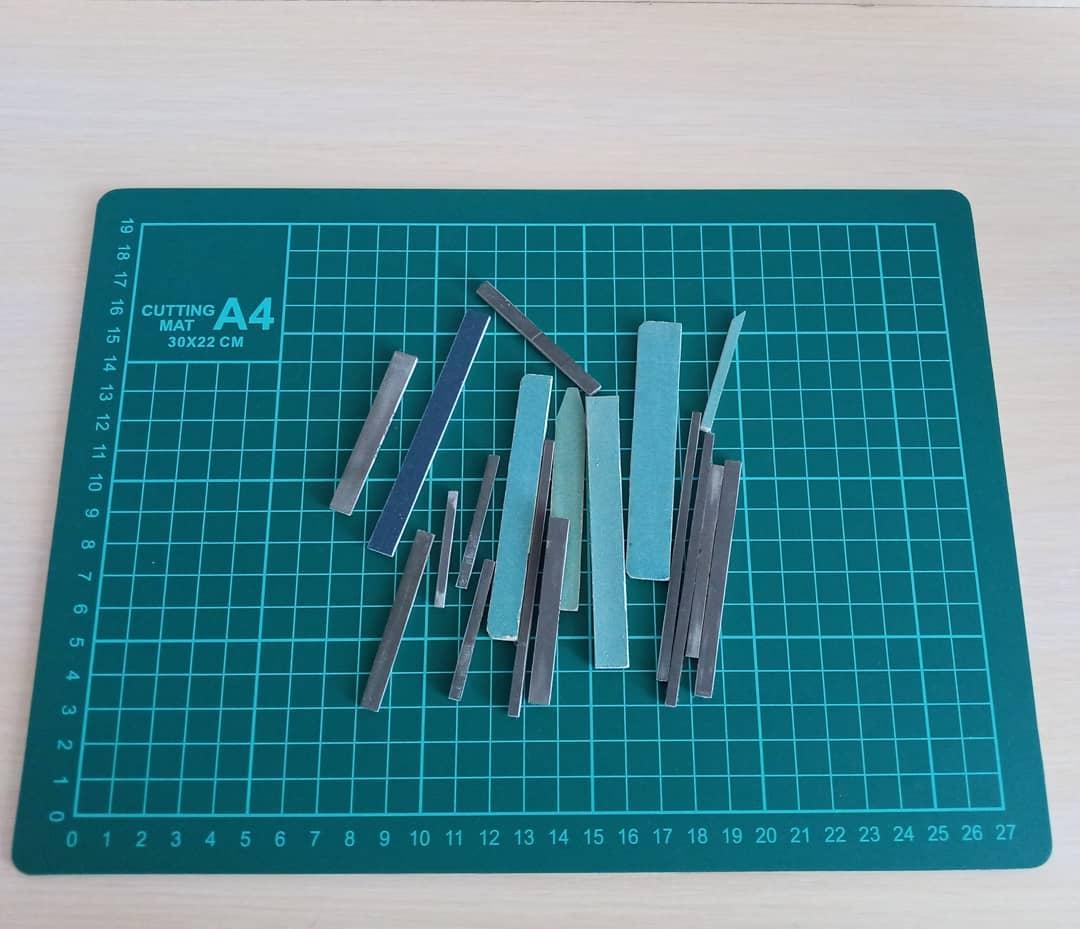
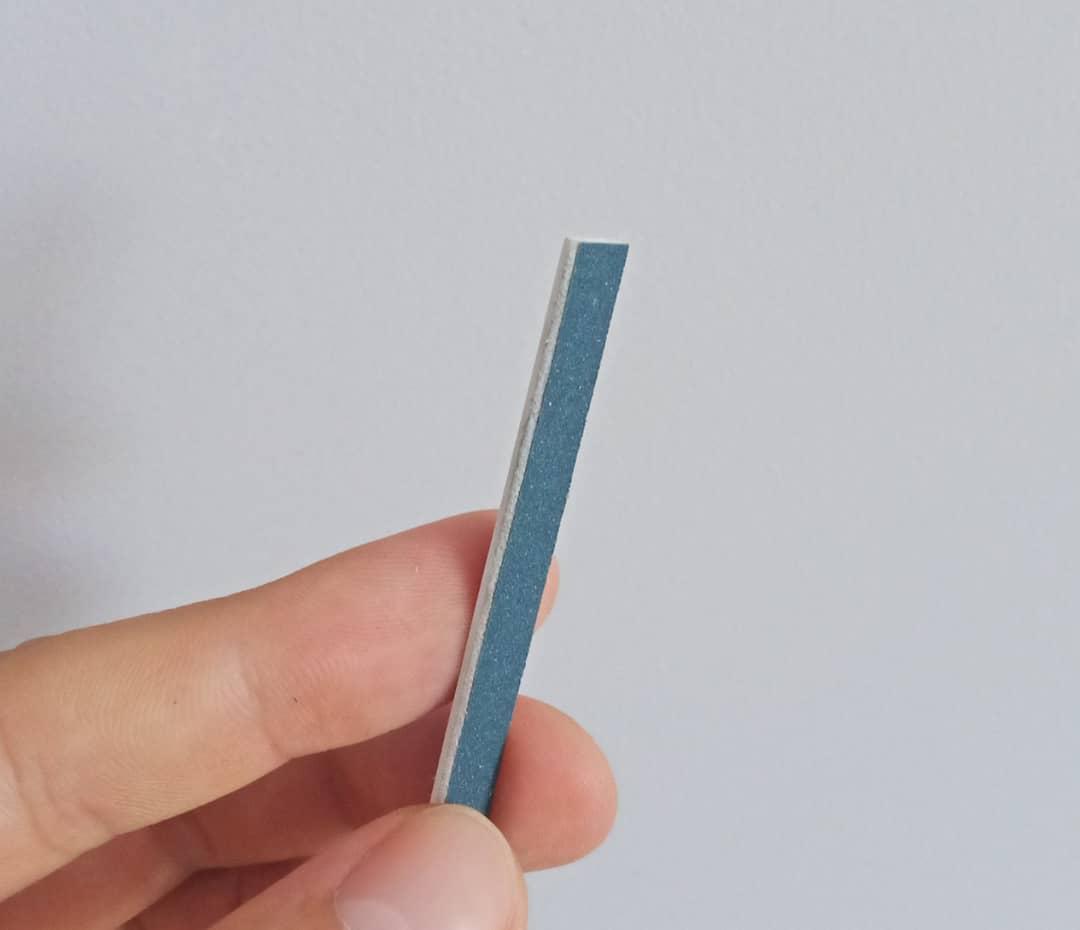
Hi there! #DIY Sanding stick. During building my models I need to sand plastic. Sanding sticks are the best way to do this. I make them myself. For this you will need: -sanding paper(any grit you need) -double side foamed tape -plastic card or any piece of plastic -sharp knife -ruler First cut strip of plastic and sand edges to make them smooth. Then cut a piece of foamed tape and glue to plastic strip. Cut off excess tape. Cut necessary strip of sanding paper and glue it to the stick with tape. If you need double side sanding stick then glue sanding paper from another side.
-
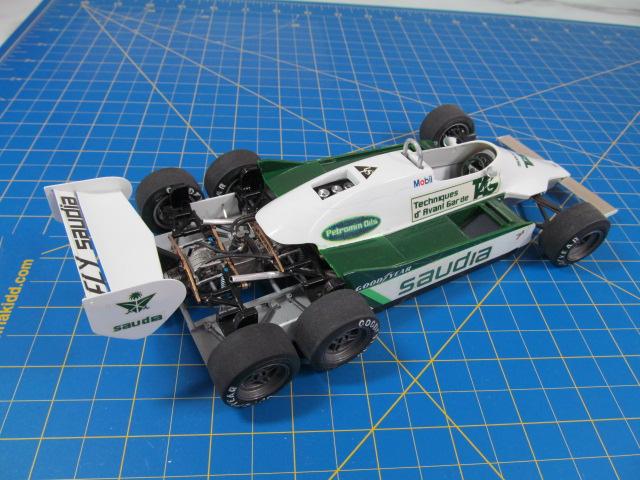
Williams Fw-07 as produced and the experimental 6 wheel version that ran but was never allowed to race both, stem from the same kit
-
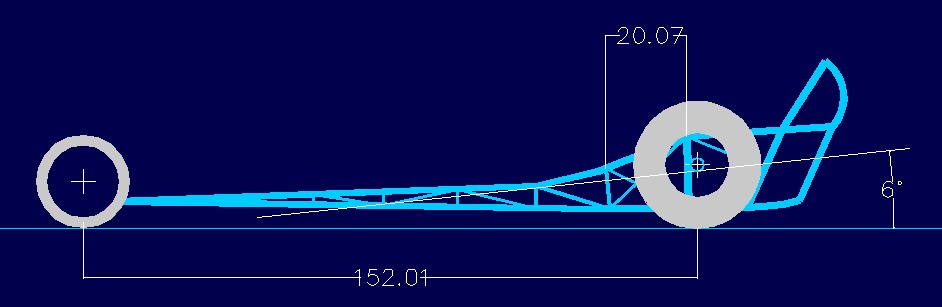
For over twenty years, I have been pondering and preparing to build a replica of The Surfers dragster. I have now been educated by one Roger Lee as to why my two initial attempts to build the chassis were not right. Turns out that the things I'd read, and heard about the chassis, over the years, didn't provide the whole story. The plans from the old Popular Hot Rodding article are only useful for the front-half of the car, and for the roll cage, itself. The back-half, previously unbeknownst-to-me, was actually a copy of the chassis that Rod Stuckey built for Karamesines (not, as is most commonly written, an RCS/Frank Huszar chassis). Roger provided me a plan for that chassis, along with a couple of notes regarding the chassis. The car was front-halved by RCS, and they moved the differential uprights forward four inches--so, that's where that all came from. Armed with the two drawings, I used my favorite photo program to scale the drawings to one another, gave one some transparency, so I could see what I was doing, and overlaid them. I then imported that composite into AutoCAD, and drew the attached plan, using only the sections of each drawing that were pertinent to the Surfers car. I submitted the new drawing to Roger, and now my chassis drawing is "Riceman certified"! I'm about to head out on a couple of quick errands, but, I'll be melting solder, later this evening. I mentioned that I have been planning this project for many years. I wanted to make this my best piece. I have several new things I want to try with this project, not the least of which is to complete a project with a brass chassis, and an aluminum body. Now, I have done a body in aluminum, and a couple of "playing around" chassis, and I feel confident that I can put it all together!
-
 Looking for some ideas and advice here - what do you guys like to use to widen a set of wheels for a wider tire? An identical wheel makes sense - but it seems a waste to slice up perfectly good wheels if there's a scratchbuilding material that would work. Anyone ever seen a hollow Plastruct bar or similar that's a large enough diameter to help with a job like this? Any good ideas that you all like to use if you need to add some width to a rim?


RCprofile.thumb.JPG.1691ea753d0f0897fdc1b2510cf06775.JPG)