Lunajammer Posted November 15, 2016 Posted November 15, 2016 Amazing work Misha. You demonstrate a profound knowledge of your subject and superb execution.
Jantrix Posted November 15, 2016 Posted November 15, 2016 Amazing work Misha. You demonstrate a profound knowledge of your subject and superb execution.Indeed.
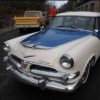
MLMDesign Posted November 15, 2016 Posted November 15, 2016 Great work Misha. I had to do some gap filling to the side walls so it would line up with frame. I also got the frame painted.
TFchronos Posted November 17, 2016 Author Posted November 17, 2016 (edited) Nice! Due to the look and design I'm going with it's become painfully apparent that 4x4 isn't going to work out. So I'm just going to keep it rwd, beef up the frame, suspension and scratching some independent rear suspension as well. Might a little to late in the game for it but I'm going to try anyway. Current color scheme, not sure I like it so I'll likely just go full satin black. Also got the new tires in. Though they look small to the Jeep's tires I think they'll work out very nicely for the Coronet. Edited November 17, 2016 by TFchronos
Misha Posted November 17, 2016 Posted November 17, 2016 (edited) Thank you all for the comments! Extra encouragement at this stage is very good to hear. Since we are a bit low in the final entry tally at this point, would a suggestion to extend the deadline by fifteen days due to the more "out of the normal", dare I say "out of the box..." style of theme that has us building to a different standard, be possible? We would still be done with voting by New Year's. Nonetheless the deadline approaches! Been busy outside the house past couple of days, so a bit behind. It is beginning to look like was meant to be. More work tomorrow night! Cheers Misha Edited November 17, 2016 by Misha additional info
JTalmage Posted November 18, 2016 Posted November 18, 2016 Did a small amount of work to my Bronco yesterday. I got the basic design of the front tube bumper finally done. I still need to make the downtubes and side tubes, and a skid plate setup for it. Also got my dual shock mounting bar setup glued to the frame. I still need to create my shocks and coil springs still. Any tips for doing so? I want to create a few other bits for it too, in time. Hopefully before it's too late! here's how it sits right now Maybe I'll have paint on in this weekend?
TFchronos Posted November 18, 2016 Author Posted November 18, 2016 (edited) If enough people are for it then we'll do a 15 day extension. But I being one of the guilty (guiltiest even haha), personally think it should be kept to the Dec. 1st, D-date. I've had 11 months to work on mine and haven't, life has kept me away from the bench sure but that's the nature of it, if I don't make it because of that then that's on me and is something I can accept.But again if we get more yays then nays from the builders we'll do it. Jesse, if all goes well I should be making shocks and springs for the rear end of mine tonight. If I can remember I'll take some photos of what I do to make mine. Edited November 18, 2016 by TFchronos
JTalmage Posted November 18, 2016 Posted November 18, 2016 I really don't think I'll get done on time. If I can't get paint done by this evening, I probably wont make it. Today is like the last nice day we'll have here in the Cincinnati area from what I'm seeing. And here I am stuck at work. If there are enough people for it I'm totally down to extend the date. Although we probably shouldn't make it a habit.I'm finally off of working overtime (although I miss the money) which means I can finally get some building done. I'll probably be working on it all weekend. I have an idea for the paint job but if I can't lay down nice paint due to weather, it will probably get hand painted camo sadly.
MLMDesign Posted November 18, 2016 Posted November 18, 2016 Nice work everyone. I did some work the interior is done. Got the 440 built and ready to go in. Got the Duster painted i used Krylon burgundy satin and Krylon satin clear.
MeatMan Posted November 18, 2016 Posted November 18, 2016 Nice work Matthew! Looks like you're winding it down now.
TFchronos Posted November 19, 2016 Author Posted November 19, 2016 Nice work indeed! Rear A-Arms are assembled and should be ready for installation. Also started working on the springs. Should have enough room to put two on each side for endurance. Now for the springs. I guess these would fall into the "general spring category" not necessarily the best looking but they get the job done, for me at least. On the left is all the components needed for now. Top to bottom top ring top cylinder center rod bottom cylinder (spring guide) bottom cap some wire x2 two short (in similar diameter to the center rod peices) These go on the top and bottom of the spring for the mounts. (Forgot to make them) For this setup (non functioning) The center rod is full length to what I want the spring to be. The tops of the top and bottom cylinders match the ends of the center rod. Here pieces 2 through 6 have been glued together. Piece number 1 should not be installed until after painting is done and the spring has been added. For the sake of not losing it really doesn't even need to be made right yet. Also if you would like to add the beveled edges to the cylinder ends do so before you cut them. Trust me it's a lot easier. Now for the fun part, whinding the springs. For this take a decent length of the same diameter tubing as the cylinders. I didn't do it on this one but wrap a layer or two of tape around the tube to increase the size of the coil a little. It'll make it easier to slip on and hopefully prevent scratching any paint. Take your time and slowly wrap it around trying to leave as little gap between the loops. Doing so will make it a lot more easier to make even when stretched out to final length. Cut to cut this spring he was 11 loops. After its wound stretch it out to length, this really should be done after it's been clipped but before hand wont harm anything either. Mock up of end result. Hope something here helps.
Jay's Customs Posted November 20, 2016 Posted November 20, 2016 I finally got the computer working. The truck deserved a name, so it will now be reffered to as The Sergeant. Here's some of the work I've done. I decided to go with the 427 from the 1969 COPO Nova to keep Chevrolet with Chevrolet. I haven't detailed it yet, but I did add some headers. I also used the split seat from the Nova and made five-point harnesses. The Sergeant badges were painted onto the head rests by hand, hence the name I gave the truck. I'll be getting more pictures in later. Jay
Jay's Customs Posted November 20, 2016 Posted November 20, 2016 I finished up the interior with a roll cage, CB radio, and an actual map of the race that I printed out and traced by pen. As you can see the truck has been painted Olive Drab, which is why I named it The Sergeant. I still have lots of work to do, but I think that I'll make it before the deadline. Jay
Helix Posted November 21, 2016 Posted November 21, 2016 Amazing work guys, apologies for being "off the grid" the last few months, unfortunately I am pulling out of this years Cannonball due to circumstances beyond my control.....although the WRC Corolla is 95% complete, that's where it shall remain indefinitely....It's a long story......maybe some other timeGood luck to all the entries....Regards Ray.
TFchronos Posted November 21, 2016 Author Posted November 21, 2016 Amazing work guys, apologies for being "off the grid" the last few months, unfortunately I am pulling out of this years Cannonball due to circumstances beyond my control.....although the WRC Corolla is 95% complete, that's where it shall remain indefinitely....It's a long story......maybe some other timeGood luck to all the entries....Regards Ray. Man that sucks, it was so close too. Looking at your post in June I think we could all agree it looked finished. As long as there's no nays I'd let it slide at put you in for voting with that picture, if you would like. As for mine setting the A-arms is slowing me down so every single domino will need to fall perfectly in place for me to get it done in time.
Lunajammer Posted November 21, 2016 Posted November 21, 2016 Amazing work guys, apologies for being "off the grid" the last few months, unfortunately I am pulling out of this years Cannonball due to circumstances beyond my control.....although the WRC Corolla is 95% complete, that's where it shall remain indefinitely....Man that sucks, it was so close too. Looking at your post in June I think we could all agree it looked finished. As long as there's no nays I'd let it slide at put you in for voting with that picture, if you would like.Agreed. This is essentially a photo contest. Take some beauty shots that show it as complete as possible and put 'em up. The wind might be out of your sails, but you can at least feel some closure as far as this CBP is concerned.
JTalmage Posted November 22, 2016 Posted November 22, 2016 (edited) Thought I posted an update here... guess I was imagining it. So here it is. I need to keep working on this thing. But I don't think it will be done by the deadline. I built a crude but effective LED light bar for it last night. My non hazing glue, hazed the plastic a bit. Oh well. Made from right angle strips of evergreen, w/ a piece of evergreen sheet on the back. Covered with BMF on the inside and then Czech glass beads w/ chrome insides inserted into the homemade "tray" then a sheet of clear plastic glued over top, some bent pieces of evergreen I had laying around that I was messing with and about to throw away, those became the "brackets" So here's another mock up of this thing. I just love looking at it mocked up. This thing is gonna look sweet when it's done. If it ever gets done. I also decided it was time to finish the front bumper. Well, almost. A few more braces and some sheet for a skid plate and it's done. So I started on a rear. I used a roundfile to shape the rear frame rails to accept the tube bumper. Sits in there perfectly. I saw a bumper on the internet that I loved, and so I decided to replicate it. more to come Edited November 22, 2016 by JTalmage
Intmd8r Posted November 22, 2016 Posted November 22, 2016 Really like the modern 4x4/off road parts you’re throwing on that ‘ole Bronco JT. Can’t wait to see the final product.
JTalmage Posted November 22, 2016 Posted November 22, 2016 Thank you. I'm getting excited about it now. I wasn't at first after I started it, but now it's starting to get a personality.
Jantrix Posted November 23, 2016 Posted November 23, 2016 Agreed. This is essentially a photo contest. Take some beauty shots that show it as complete as possible and put 'em up. The wind might be out of your sails, but you can at least feel some closure as far as this CBP is concerned.Ray, I quite agree with Mike. I did that very thing a few years ago with my Studebaker.
TFchronos Posted November 23, 2016 Author Posted November 23, 2016 (edited) Nice work Jeremy and Jesse! That light bar looks killer Jesse! I finally got the rear A-arms in last night with the springs setting right now. Should have the fronts in later today with the hopes of being on all fours for the first time since starting. Front A-arm rods. Right one broke last night but it was the bottom arm so I can re-glue it after setting the top to the frame. Current color, all satin black. I'm kinda at a toss up between this murdered out look (fear everything will just blend together into one giant blob) or another color I have that's almost impossible to to spray on smooth. Could always use the "Painted Rhino Coating" excu.... I mean for extra protection. Today is pretty much the last day to consider a body color change so I'll think real hard about it. Edited November 23, 2016 by TFchronos
JTalmage Posted November 23, 2016 Posted November 23, 2016 My Bronco will probably not make it into color... It's been so cold here. Plus I'm going to be busy literally all weekend. So hopes of getting it done are doubtful. Working on it just to work on it at this point.
MLMDesign Posted November 24, 2016 Posted November 24, 2016 Nice work everyone. I got some more work done the glass and interior are in forgot to add seat belts i guess i don't need them. I hand painted the trim need to do some clean up work on it. The 440 is in i decided to change the air cleaner i had to cut a hole in the hood. I had to do this for both air cleaners. The frame is glued on.
TFchronos Posted November 25, 2016 Author Posted November 25, 2016 Just wanted to poke in a wish those that celebrate a very Happy Thanksgiving. Also wanted to note that we are in our final week of this years cbp. After 10 odd months next Thursday will mark the end of the 2016 Aussieball, we all need to get cracking. And finally, for the first time since starting mine is finally on all fours. Even if it's just the frame it's still a nice moral boost for me, the start line looks a little more reachable right now.
Recommended Posts
Create an account or sign in to comment
You need to be a member in order to leave a comment
Create an account
Sign up for a new account in our community. It's easy!
Register a new accountSign in
Already have an account? Sign in here.
Sign In Now