Cato Posted February 6, 2016 Posted February 6, 2016 Good choice; K & S makes quality stuff.Very valuable for your Pochers too -----hint, hint.
Twokidsnosleep Posted February 6, 2016 Author Posted February 6, 2016 Thanks bud, I have been oogling these for a while in the hobby shopMy pop had a great tap and die set that I fooled around with as a kid. I showed my son this stuff and let him do a few threads as well.This opens up making connections for brass and aluminum rather than using just telescoping tubes and solderSee, I really am trying to skill build before I kill a classic Pocher
Twokidsnosleep Posted February 7, 2016 Author Posted February 7, 2016 (edited) Up on her wheels for the first time, hubs are screwed on and functioning Edited February 10, 2016 by Twokidsnosleep
Twokidsnosleep Posted February 8, 2016 Author Posted February 8, 2016 (edited) Been making more parts. The starter crank now in brass and aluminum And painted up Edited February 9, 2016 by Twokidsnosleep
Belugawrx Posted February 8, 2016 Posted February 8, 2016 Scotty ,... divin' right in... Looking great so far,...don't forget your meds.. Cheers bro
Twokidsnosleep Posted February 9, 2016 Author Posted February 9, 2016 Thanks Bruce,I will be sure to stay continuously sedated while working on this project
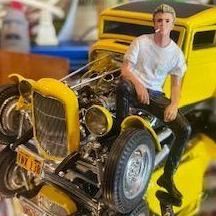
Twokidsnosleep Posted February 11, 2016 Author Posted February 11, 2016 Bad pic of body try on with front grill, long crank handle and seat placement
sjordan2 Posted February 11, 2016 Posted February 11, 2016 What does the front wheel camber look like?
Twokidsnosleep Posted February 11, 2016 Author Posted February 11, 2016 (edited) Ohh, good point, you are waaayyy ahead of meWe are testing with them on pretty loosey goosey here as if I tighten them up fully it is a bugger to get off the hubsThese cars had a weird camber on the front wheels, have that research somewhere. Not straight up and down for sure, look at the photo a couple posts above of those old cars in a row...looks "toe in" I think it is calledI am just happy the darn wheels stay on at this point Edited February 11, 2016 by Twokidsnosleep
Cato Posted February 11, 2016 Posted February 11, 2016 These cars had a weird camber on the front wheels, have that research somewhere. Not straight up and down for sure, look at the photo a couple posts above of those old cars in a row...looks "toe in" I think it is called This Bug has 'positive camber'; the tops of the wheels tip outward when viewed from the front. Largely because of such narrow tread width. All race cars and many street cars today have 'negative camber' where the wheels tip inboard at the top. This plants wide tires more upright under hard cornering, increasing the contact patch. All are measured in degrees. Street cars are all less than 1 degree neg and racecars can be as much as 4 -4 1/2. They don't care about tire wear, only maximum cornering traction. 'Toe in' is when viewed from above, the front edge of the wheels point towards each other. This is measured usually in fractions of an inch. Neutral or 'Toe out' is used on race cars to help turn-in ability. And take better pictures so we can throw stones at your work !!!!
sjordan2 Posted February 11, 2016 Posted February 11, 2016 (edited) For those who aren't into these kinds of cars, race cars of most marques of the era had positive camber that looks like this... But the box art tells me this part is taken care of. Edited February 11, 2016 by sjordan2
Twokidsnosleep Posted February 11, 2016 Author Posted February 11, 2016 Ya, see there you go I knew you guys would chime in But chill out a little, she is still pretty wobbly on her new feet and I don't have the camber dialled in yet nor anything tightened up Gheeze, rough room in here
Cato Posted February 12, 2016 Posted February 12, 2016 Ya, see there you go I knew you guys would chime in But chill out a little, she is still pretty wobbly on her new feet and I don't have the camber dialled in yet nor anything tightened up Gheeze, rough room in here Heh, heh, heh...all just preparation for the Pocher Beatings....
Twokidsnosleep Posted February 12, 2016 Author Posted February 12, 2016 The Pocher Beatings...sounds like a horror movie So the kit beats you up and then you guys pile on top???
Twokidsnosleep Posted February 23, 2016 Author Posted February 23, 2016 (edited) Making parts...copper firewall refined, spark plug wiring and apparently a new tube wiring harness from aluminum and copper as the kit harness is as solid as a wet noodle in a wind storm i am settling on black wires as I don't want to get into fabric ones at this scale...1/8 absolutely. A reference engine picture. I am making the up shaped fuel lines now...bit of soldering to do Edited February 23, 2016 by Twokidsnosleep
LaughingIndian Posted February 23, 2016 Posted February 23, 2016 Great project Scott ... I now clearly understand your idea of using this as a warm-up to your Pocher projects. Are they next, or do have another "warm-up" before you pull the trigger? Im not anticipating that as much as I can't wait to see your work on this nice little Bugatti ...
Deathgoblin Posted February 23, 2016 Posted February 23, 2016 Curious... Wonder why they moved this to Big Boyz. The kit is only 1/20.
Twokidsnosleep Posted February 23, 2016 Author Posted February 23, 2016 (edited) Great project Scott ... I now clearly understand your idea of using this as a warm-up to your Pocher projects. Are they next, or do have another "warm-up" before you pull the trigger? Im not anticipating that as much as I can't wait to see your work on this nice little Bugatti ... No, I am a ways away from the Pochers yetBut in a new workspace maybe a Pocher to christen it properly??This kit has been a real bugger. I have had to alter, modify or outright make a new piece for EVERY part I have touched so far. I coined the adjective "Pocherous" to describe such a kit Edited February 23, 2016 by Twokidsnosleep
Twokidsnosleep Posted February 23, 2016 Author Posted February 23, 2016 (edited) Curious... Wonder why they moved this to Big Boyz. The kit is only 1/20. Is it a big deal?? Anyways, found some great reference pics of a 1/8 scale handmade model will use these to get some more engine details..like the brass "U" shaped fuel lines I am currently working on Very uniform engine block colour...mine will be a bit more 'used' looking and I will do BMF on the cylinder head to make it shiny, but not machined. and another one..this image looks like it has been reversed to me Edited February 23, 2016 by Twokidsnosleep
Twokidsnosleep Posted February 24, 2016 Author Posted February 24, 2016 (edited) Wiring harness and plugs, radiator upper tube and block attatchment, back of radiator screen(was missing from the kit)....everything left a little long so a can adjust it on final assembly Edited March 21, 2016 by Twokidsnosleep
Twokidsnosleep Posted February 24, 2016 Author Posted February 24, 2016 Looking good!Thank you Bo, I appreciate the encouragement.It is a bit of a mess still and I am all over the place in sequence, but it is moving forward.I think I have gone far enough into test assembly and that it is time to focus back on the engine block and get it detailed and completed. So, I am going to take things apart!
Cato Posted February 24, 2016 Posted February 24, 2016 I think I have gone far enough into test assembly and that it is time to focus back on the engine block and get it detailed and completed. So, I am going to take things apart! Perfect Pocher training. You will do this hundreds of times then... It is looking better than a stock Revival kit has a right to - great job Scott and don't be concerned about going back / forth between different assemblies. Again, it's good training for any used to the 'step by step' instruction sheet method.
Twokidsnosleep Posted February 24, 2016 Author Posted February 24, 2016 (edited) Perfect Pocher training. You will do this hundreds of times then... It is looking better than a stock Revival kit has a right to - great job Scott and don't be concerned about going back / forth between different assemblies. Again, it's good training for any used to the 'step by step' instruction sheet method. Thaks Cato, those are well timed words as I have never built like this...entire assembly before detail; very much a step by step builder before this challenge Chomping at the bit to detail up the engine Edited February 24, 2016 by Twokidsnosleep
Twokidsnosleep Posted February 29, 2016 Author Posted February 29, 2016 Soldering the brass 'T' for the fuel line loop Set up for solder of tube 0.3 mm I think it was Rough fitted and ready to be trimmed and placed.
Recommended Posts
Create an account or sign in to comment
You need to be a member in order to leave a comment
Create an account
Sign up for a new account in our community. It's easy!
Register a new accountSign in
Already have an account? Sign in here.
Sign In Now