espo Posted June 12, 2016 Share Posted June 12, 2016 I like your hinge for the hatchback, while not to scale and I don't think that it could be, that is basically the way Chevrolet did it at that time. A thought on hiding the hinge from view. First paint the exposed hinge either black or the color of the interior. With that and possible tinted windows I don't think it would be noticed. Quote Link to comment Share on other sites More sharing options...
disconovaman Posted June 12, 2016 Author Share Posted June 12, 2016 I like your hinge for the hatchback, while not to scale and I don't think that it could be, that is basically the way Chevrolet did it at that time. A thought on hiding the hinge from view. First paint the exposed hinge either black or the color of the interior. With that and possible tinted windows I don't think it would be noticed. I agree, I tried a couple different set ups but I couldn't get it to work properly. It hangs down but the function is great like a toy and I want people to question if it is a toy. I'm painting it red to match and be less visiable from the quarter window. It looks rough now but hopefully it'll start taking shape soon. Quote Link to comment Share on other sites More sharing options...
disconovaman Posted June 14, 2016 Author Share Posted June 14, 2016 More progress on the nova, Painted the interior. I will flock the carpet to get rid of the mold circles for a more realistic look. I'm working on trimming the body with the Concours option. I'll post pics of that soon. Quote Link to comment Share on other sites More sharing options...
disconovaman Posted June 16, 2016 Author Share Posted June 16, 2016 Slow goin, Sorry for that... here's some more progress. Quote Link to comment Share on other sites More sharing options...
disconovaman Posted June 16, 2016 Author Share Posted June 16, 2016 (edited) I shot some primer on it to see where I am, lots of wet sanding and smoothing to do. Edited June 16, 2016 by disconovaman Quote Link to comment Share on other sites More sharing options...
disconovaman Posted June 18, 2016 Author Share Posted June 18, 2016 (edited) More progress on my replica, after letting the primer cure for about 24 hours I wet sanded and smoothed all the dirt out and shot some flat red on the inside, let that dry then taped it up for a coat of diamond dust silver on the body. I'll have to wet sand that so it'll be ready for clearcoat. It doesn't look to bad but I want the silver to shine so I'll have to do alot of sanding between coats. Edited June 18, 2016 by disconovaman Quote Link to comment Share on other sites More sharing options...
crazyrichard Posted June 18, 2016 Share Posted June 18, 2016 nice ! Quote Link to comment Share on other sites More sharing options...
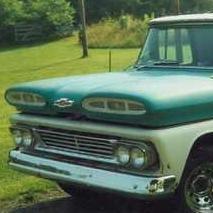
Reeves Racing Posted June 18, 2016 Share Posted June 18, 2016 (edited) You are doing great on this. I always like to see 1 to 1 models. Be careful about sanding on a metallic paint, some times you change the way the metallic looks. When spraying the final coats of a metallic paint the bits of metal will settle in with the base color of the paint and usually float up to the surface a little. If you sand on it, the metallic deeper in the paint may not look the same. Its best to get a good coverage of the metallic color and then put an extra coat of clear on than what you normally do and polish it up real good without going through the clear. The only other suggestion I would give on an otherwise outstanding model is consider making the hinges on the hatch a little smaller. Because of the short angle needed for it to be open I don't think they need the big droop you have right now. I built a model of my Nova and now I am painting the big one to look more like the model. Edited June 18, 2016 by Reeves Racing Quote Link to comment Share on other sites More sharing options...
disconovaman Posted June 18, 2016 Author Share Posted June 18, 2016 I notice the silver doesn't take clear as well but if you clear and wetsand between coats and polish at the end it comes out way shinier. The good thing about the hinges is when the hatch is open the hinges don't hang down, and on display it will always be up.Nice Nova, the color is spot on! Quote Link to comment Share on other sites More sharing options...
cobraman Posted June 18, 2016 Share Posted June 18, 2016 I like your progress. I didn't notice the hood on your paint job. I have found that with some metallic paints that if you do pieces separately they never match well. Quote Link to comment Share on other sites More sharing options...
Intmd8r Posted June 18, 2016 Share Posted June 18, 2016 I like your progress. I didn't notice the hood on your paint job. I have found that with some metallic paints that if you do pieces separately they never match well. That could no be more true! Quote Link to comment Share on other sites More sharing options...
disconovaman Posted June 18, 2016 Author Share Posted June 18, 2016 I'm gonna have to take a break on the nova for a week or so. My club meeting is coming up and I have to finish up the club challange the next couple of weeks. The Theme for the next club meet is the Optmia Ultimate street car challenge, Type of builds based on the MAV TV series. So in the words of Arnold moments before he stuck a 4th gen into a police precinct... I'll be back! Quote Link to comment Share on other sites More sharing options...
disconovaman Posted July 5, 2016 Author Share Posted July 5, 2016 Alright, so I've been back to work on the nova, I started the BMF stage and it was kinda a waste of time and materials. The silver is so bright that the foil is almost unnoticeable. I did polish the paint pryor to adding BMF, but l desicded to "Dull" it down some to make the trim more noticeable. I planned on doin light weathering on the engine and frame but I'm not sure I want to involve myself anymore. Nevertheless I need to get rollin on it agian. Quote Link to comment Share on other sites More sharing options...
KWT Posted July 6, 2016 Share Posted July 6, 2016 Wow, this cool! I'll be following along on this.. I'll have to find me one of these kits. I used to have a 78... man I miss that car. Quote Link to comment Share on other sites More sharing options...
espo Posted July 6, 2016 Share Posted July 6, 2016 Glad to see that you are able to get back to this build. Quote Link to comment Share on other sites More sharing options...
disconovaman Posted July 6, 2016 Author Share Posted July 6, 2016 An Idea I've had rolling around in my head for awhile, maybe you guys may have already done this... Painting Bare metal foil. Since my bumpers have the impact strips, I thought I'd paint the foil and apply that to the bumpers to give them the rubber look. Turned out ok. Also, I've added some detail to the interior. Quote Link to comment Share on other sites More sharing options...
espo Posted July 7, 2016 Share Posted July 7, 2016 Great looking rub strips and I like the door trim. It may be a little expensive but Bare Metal Foil used to offer a semi shinny back foil. Quote Link to comment Share on other sites More sharing options...
disconovaman Posted July 7, 2016 Author Share Posted July 7, 2016 More detailing progress... Quote Link to comment Share on other sites More sharing options...
disconovaman Posted July 7, 2016 Author Share Posted July 7, 2016 I took out some extra Old Pro/ BHC nova wheels that I had and started working on pairing up different trim rings that appear most like of the 1.1 car. & I've come up with the rings from the 69 Revell Z/28 to pair with the nova Rallys from the Amt 72 nova. I'll get started on detailing them now. Quote Link to comment Share on other sites More sharing options...
disconovaman Posted July 19, 2016 Author Share Posted July 19, 2016 So I'm still trucking along on this build, trying to stay focused and finish strong. Got the chassis built... just box stock.... metal rear axel, weird front A arms etc... added some light weathering to make it stand out a bit. I did use a different engine/trans because the Pontiac 400 with the kit just wasn't gonna cut it. Sorry for the lack of updates, just not alot to report and I have other projects goin too. Here is a progress report and some pics. Thanks for the patience. Quote Link to comment Share on other sites More sharing options...
disconovaman Posted July 21, 2016 Author Share Posted July 21, 2016 I have an old paint stencil for white walls but I can't get the thing to work right. And other than decals (which I don't have) I don't really know what to do. Any suggestions? I would be grateful. Also I did some engine bay weathering and I moved the firewall closer to the engine (pics to come of that later). I'm gonna make a list of things to do to this kit when I get it built. I'm thinking one of them may be to replace the chassis with the 69 Revell nova? With this kit being reissued in August I'm excited to see if anyone will be building it. MPC kits of the late 70's are pretty crappy but I think it has potential to be pretty cool. Quote Link to comment Share on other sites More sharing options...
Reeves Racing Posted July 21, 2016 Share Posted July 21, 2016 If you did those white walls by hand I think that is outstanding work.I have chucked up the tire on an old wheel in a drill and stabilized it on the bench and barely pulled the trigger to turn slowly. Then braced my arm off the bench with and Xacto knife and scraped the edge to clean it up. It turned out pretty good.You could always go put black wall or white letter tires on the real one LOL... Quote Link to comment Share on other sites More sharing options...
disconovaman Posted July 21, 2016 Author Share Posted July 21, 2016 I've been busy trying to get this project done, still alot left to do but I've come along ways also. I had to move the firewall forward and it still isn't as close as I'd prefer but way better than the box stock look. Also I finished up the shocks on the hatchback they are removable so I can pose it up or down. I tried to make them as realistic as possible. Not perfect but good enough. I'm trying to stay optimistic... Anyway, here are some pics. Thanks for sticking with me on this build. Quote Link to comment Share on other sites More sharing options...
disconovaman Posted July 21, 2016 Author Share Posted July 21, 2016 Quote Link to comment Share on other sites More sharing options...
disconovaman Posted July 21, 2016 Author Share Posted July 21, 2016 Another small task I did was cut the back glass and quarter windows for the opening hatch, the kit's glass is too thick so I used clear styrene I've polished that for a cleaner look. Thanks agian for looking... Quote Link to comment Share on other sites More sharing options...
Recommended Posts
Join the conversation
You can post now and register later. If you have an account, sign in now to post with your account.
Note: Your post will require moderator approval before it will be visible.