JerseeJerry55 Posted November 7, 2016 Posted November 7, 2016 Morning all.Hope everyone's well. Have a question which is the easier build. The AMT Peterbilt 352 or the White Freightliner Dual Drive? I heard negatives on both. The 352 supposedly has issues with the cab and the exhaust stack alignment in addition to the frame needing to be pin straight in alignment with the front bumper cab hinge pins. The Freightliner with its 3 piece cab and the sanding the interior to fit in addition to sanding the front and middle pieces flat to get a proper seam fit the possibly using a filler to eliminate the seams. If anyone has built either or both I'd love to hear about your experience's positive and negative in addition to any pictures you may have of completed works. Thank you as always.JerseeJerry55
Pete68 Posted November 7, 2016 Posted November 7, 2016 I've built both for many years I would say the Freightliner is easier after you get pass the cab. I never had a issue with that either. The Pete on the other hand always had problems with the cab and the front wheels never looked right to me. The best way to mount the cab is like my brother Bill showed me glue the hinges to the bumper first and glue them to the cab set the cab where you want it and glue the bumper to the frame forget the cereal bowel method they show you that's a nightmare that's just my opinion on the two kits.
JerseeJerry55 Posted November 7, 2016 Author Posted November 7, 2016 Lee,Good morning. Thank you for the tips. What somebody told me was the following. Block sand the mating pieces all around on the front and middle of the cab. Then glue and fill the seams will plastic filler (don't know which one to use) and sand flat. I will lose some of the riveting but can be replaced with rivet decals (microscale or such). Then install interior tub at front of cab and then the bunk tub after that although not sure if I have to sand the sides of either the cab tub or the bunk tub or both.If you can provide some direction to the above I'd really appreciate it. Thanks.JerseeJerry55
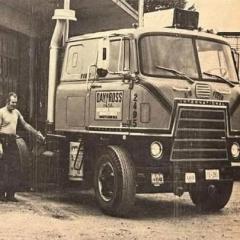
Pete68 Posted November 7, 2016 Posted November 7, 2016 This is how I done mine I used the testors liquid glue in the red and black bottle it kinda melts the plastic a little to give you a good weld. I glued the right side first held in place and adjusted it and then I glued the left side adjusted it and I had no problems but sand edges a little bit before you glue all the pieces together I never used any body filler I will show you a picture of the cab done last year when I get home today sometime here's a pic of the single drive I did when I was 16 years old I'm 48 years old now I still have this truck hope this helps
JerseeJerry55 Posted November 7, 2016 Author Posted November 7, 2016 Thanks for the reply and picture. That's a great build. No filler but is the seam visible at all?
Pete68 Posted November 7, 2016 Posted November 7, 2016 I can't remember I will check it out and send you a pic of it when I get home
JerseeJerry55 Posted November 7, 2016 Author Posted November 7, 2016 Pete thank you so much. Enjoy the day.
Superpeterbilt Posted November 7, 2016 Posted November 7, 2016 To offer a very non-helpful answer they are both equally easy and equally a pain! I think the FL is a little bit of a better kit though. The best thing to do is as you said, sand off the rivets. They are very incorrect and there are way too many of them. What I find helpful with these multi piece cabs is lapping the back of the joints with a very thin strip of styrene. This really helps hold the joints together and keeps them from popping back apart while your doing all of the body work on the cab. I usually use Evergreen styrene .020 x .250 to lap these joints. One side of the back cab wall needs to be shimmed as it to not wide enough to fill the gap. The cab can be squeezed to fit it, but this will distort the cab. Other than the cab, the FL kit builds nice. The frame mounted exhaust is easier to fool with than the Pete, and less bad fitting parts in the rear suspension than the Pete. There is a nice Photo etch set out there for the FL that has accurate cab hinges(that hinge to the frame and not the grill) and other nice peices.
JerseeJerry55 Posted November 7, 2016 Author Posted November 7, 2016 (edited) Thanks for the tips? I guess I cut the styrene to size and attach them to the inside of the cab at the seam line. When you say shim the back wall do you mean the tub or the wall itself? Edited November 7, 2016 by JerseeJerry55
Mike77 Posted November 8, 2016 Posted November 8, 2016 Not trying to hijack the thread, but does anyone know why the Freightliner is a multi-piece cab? As far as I know it's the only kit COE that's like that, all the others that I know of are one piece.
Andrew Howard Posted November 8, 2016 Posted November 8, 2016 I have done the freightliner,the frame is good,but the cab is a lot of work,but worth it,you just have to take your time,not done a 352 yet Jerry.
JerseeJerry55 Posted November 8, 2016 Author Posted November 8, 2016 Not trying to hijack the thread, but does anyone know why the Freightliner is a multi-piece cab? As far as I know it's the only kit COE that's like that, all the others that I know of are one piece.Good morning Mike,The reason I have found out is that AMT didn't want to do separate tooling for a day cab and a sleeper cab.
Pete68 Posted November 8, 2016 Posted November 8, 2016 Another issue the Freightliner has is the headlights it has the high eyebrows look like it seen a rat. There just a little too high that's just my opinion
Mike77 Posted November 8, 2016 Posted November 8, 2016 Good morning Mike,The reason I have found out is that AMT didn't want to do separate tooling for a day cab and a sleeper cab.Ahhh...that makes sense. I never thought about it from that angle. Thanks!
Fat Brian Posted November 8, 2016 Posted November 8, 2016 I've built the Freightliner, it's not bad but take the time to true up the frame crossmembers. The mating surfaces are a little wonky out of the box and some time with a sanding stick makes a huge difference. What I do is once I have all the crossmembers and frame rails ready I tack the crossmembers in one rail with tube glue and then pop the other rail on and soak both sides in Tenax or Tamiya thin then sit it on a nice flat surface and square it up to dry.
Superpeterbilt Posted November 9, 2016 Posted November 9, 2016 Thanks for the tips? I guess I cut the styrene to size and attach them to the inside of the cab at the seam line. When you say shim the back wall do you mean the tub or the wall itself?Im referring to the single flat sheet back wall that fits inside of the back half of the cab. This is the piece with the cutout that exhaust runs through. If you dry fit it, you should see the gap Im talking about. Maybe youll get lucky and not have a gap, but all if mine have. Ill try to take a pic later.
angelo7 Posted November 9, 2016 Posted November 9, 2016 (edited) . Edited November 17, 2016 by angelo7
Goodwrench3 Posted March 5, 2017 Posted March 5, 2017 The big thing on the Freightliner is the front axle. You'll have to do something so that the front wheels don't stick out past the cab (like they will if built per instructions). I think many have cut a section out of the front axle to narrow it up.
Recommended Posts
Create an account or sign in to comment
You need to be a member in order to leave a comment
Create an account
Sign up for a new account in our community. It's easy!
Register a new accountSign in
Already have an account? Sign in here.
Sign In Now