ibj40 Posted September 9, 2018 Posted September 9, 2018 I was looking through some old photos, and found a picture of 1971 Mustang Trans Am and IMSA racers, and thought I'd try my hand. My version is going to be a cross between the one raced in Trans Am and the one raced in IMSA, neither of which were very successful. Here are early shots of the chassis/body blending. The chassis donor is a much-maligned (by me) Welly Trans Am Boss 302 Mustang (in this case, the wrong color yellow #15) and a SunStar drag racing version (I bought the body through an eBay auction). I had previously shown this in the "What's On Your Bench" thread, but suffice it to say, quite a few Dremel wheels were sacrificed to take these two pictures. I thought as a variation to my prior induction correction process, that I might try to see if this one could accommodate a high rise intake manifold. Here is the rough results to date, adding in a fabricated cold air box. And it fits nicely under a custom hood created by blending a Z28-style scoop from a GMP '69 Trans Am Camaro into the Mustang hood (which came with a hole in it for some reason). Sorry about not having progress photos, but again, numerous Dremel cutting wheels died to make this hood a reality. Plenty more detailing left to do, such as blending in firewalls between the two donors, raising the A-pillar cross bar on the cage, and fabricating a front spoiler, just to name a few.
ibj40 Posted September 9, 2018 Author Posted September 9, 2018 So, when blending major pieces, such as a body and a chassis in this case, we all hope for uniformity, but as most of us who have tried to build custom models know, that is rarely the case. Here's a photo of the bottom of the model, chassis fit up snugly into body. The object, for me initially on this build, was to have at least two mounting locations line up, so that I could secure the model together. Here's a picture of the bottom of the SunStar body (admittedly with the Welly interior installed), notice the two screw mounts. The notches in the interior are the giveaway. In my efforts to have the mounting locations to line up, I had to move the chassis back, causing me to have to remove some of the rear of the chassis (as seen by the multiple saw cuts that I have tried to cover with filler and paint) in order to reduce the interference with the molded in rear of the SunStar body. Here is how much misalignment there is between the two manufacturers. In reality, the solution was to create a relief in the chassis so that the wheelbases aligned. And once I made this reliefs, I got to glue the back of the chassis back together. Again, we are still in the prototyping stage, and things will be cleaned up for the final, but just wanted to give an update, and show what it takes to pull one of these off.
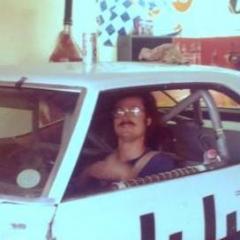
ibj40 Posted September 9, 2018 Author Posted September 9, 2018 Here are a few more pictures. So, as the Brits post in the Tube stations, "Mind the Gap". Well, I had a similar problem between the Welly engine compartment firewall and the base of the SunStar windscreen. Fabricated up a piece of Styrene angle, carved it to fit a curvature in the SunStar firewall where the molded-in brake master cylinder unit was, and here you go. Going to paint the new piece silver to match the Welly color. Notice, also, between the two pictures, the front windshield is in place, as is the dashboard from the Welly. To make a lot of this work I had to take a Dremel to the dogleg door hinges, and skinny them up by about half for clearance. Will have to remind my driver to not slam the door when he enters (although us real men climb in through the window). Also added the Welly front spoiler under the nose of the SunStar, however this front shot shows me that my cold air box may be just a little too tall.
ibj40 Posted September 9, 2018 Author Posted September 9, 2018 (edited) And here are a couple of updated pictures of the engine compartment. I think I made an improvement to the intake manifold appearance. Fitted up an engine compartment export brace. Some of the Welly's came with them, some didn't. My donor chassis for this model was a mid-term (when they put the cold air box on to fake a conversion to proper carburetion), and when they did the "fix", they deleted the export brace because it interfered. As you can see from the pictures above, there are no mounting holes drilled in the shock tower, so I had to drill them to make the brace fit. Edited September 9, 2018 by ibj40
ibj40 Posted September 9, 2018 Author Posted September 9, 2018 Still some detailing to do, but pretty pleased with where it is right now.
ibj40 Posted September 9, 2018 Author Posted September 9, 2018 Some interim refinements as I do a walk-around the model. Front Ride Height. As opposed to the "stock" Welly Boss 302, the SunStar body sits much higher on the chassis. The first picture has one front adjustment washer in it, the second one not only has that one removed, but also the mounting spindle was shaved. Rear Hatch Gap. The Welly interior interfered with the hinge mechanism of the SunStar body, so a little more Dremel action, and it's all good! Still some more to go, including finishing up the roll cage installation. The Welly interior has a horizontal door bar that I haven't installed yet.
ibj40 Posted September 9, 2018 Author Posted September 9, 2018 Adding an oil cooler to the front. As you can see from the photos, required quite a bit of Dremel effort (actually more than what the photos show). Also adding a little more detail to the trunk. The Welly chassis donor has a sealed deck lid, where the SunStar body donor has an opening one. Going to paint the new floor Flat Black, and then thinking about plumbing. There will definitely be a fuel filler tube running from the back of the car into the fuel cell, but not sure how much further I will go with the other detailing.
ibj40 Posted September 9, 2018 Author Posted September 9, 2018 Since this is a from-scratch build, I don't have a lot of precedent to rely on, so creating some techniques along the way. Hopefully the pictures speak for themselves. The trunk configuration of battery on the right rear and dry sump tank on the left rear duplicates the set up we used on the '86 Trans Am-spec Camaro my partner and I built. Before dry break, we simply put the hose from the dump can over the stock fuel filler. Here I tried to create a fuel cap to finish the look. Not fully satisfied, but as I noted, this is a work in progress. Still needs a fuel vent line, and working on a couple of ideas for that. Stay tuned, there's still a lot to be done, such as a rear view mirror and window net, to mention a couple of details.
ibj40 Posted September 9, 2018 Author Posted September 9, 2018 Done! I hate decaling, it is the most stressful (for me) part of modeling.
ibj40 Posted September 9, 2018 Author Posted September 9, 2018 Here are some final pictures next to one of the "stock" Welly/GMP/ACME 69/70 Boss 302 Trans Am racers.
randyc Posted September 10, 2018 Posted September 10, 2018 Dang nice! And an intimidating amount of work. Congrats on it all!
Recommended Posts
Create an account or sign in to comment
You need to be a member in order to leave a comment
Create an account
Sign up for a new account in our community. It's easy!
Register a new accountSign in
Already have an account? Sign in here.
Sign In Now