whale392 Posted March 10, 2010 Share Posted March 10, 2010 Nice. I want to start my rail soon, but too many other projects in the way. Quote Link to comment Share on other sites More sharing options...
dwc43 Posted March 14, 2010 Author Share Posted March 14, 2010 (edited) Well, here's a little update. Still waiting on some parts to show up. I drilled the fuel tank and added a mount to glue the AN fitting and braided line to and painted it aluminum. Got the barrel valve and linkage painted. Need to mount it, but I'm going to wait till I have the injector lines run first. It might get in the way of that. I added two lines to the top of the dual oil filter set up to make it look more like the real thing that I have used before. The AN fittings will go on the side with the longer pieces on it. Also got the AN fittings painted with some help on picking the correct colors to use. They look great too. Most realistic looking thing on the car so far. Going to work on the side skirts that fit inside the frame that protects the drivers legs and lower body from the frame work and tires. I am most determined to finish this one before I start anymore projects. Next one will be the '65 'vette from the '80's tv show "Stingray" thanks to a trade with Phil. Edited March 14, 2010 by dwc43 Quote Link to comment Share on other sites More sharing options...
whale392 Posted March 14, 2010 Share Posted March 14, 2010 Some nice looking parts sitting there. Quote Link to comment Share on other sites More sharing options...
dwc43 Posted March 14, 2010 Author Share Posted March 14, 2010 (edited) Thanks. I finally got off the net and got motivated last night to make the sides to protect the drivers legs in the tire area. Got them cut out and the holes punched for the axle to fit through. Need to file an trim a bit and paint and install them. Going slow, but at least it's going. Determined to finish it before I start another one. Edited March 15, 2010 by dwc43 Quote Link to comment Share on other sites More sharing options...
whale392 Posted March 16, 2010 Share Posted March 16, 2010 Wish I had your determination! I have 20 projects going at once....makes for a lot of stalled builds! Quote Link to comment Share on other sites More sharing options...
dwc43 Posted March 16, 2010 Author Share Posted March 16, 2010 Wish I had your determination! I have 20 projects going at once....makes for a lot of stalled builds! I have several too. And I'm tired of posting up the beginning on here and not getting to the end so you can ooh and aah or bash it. I think either way is good. If it's bashed, makes me try even harder to do better and further my skills. If aahed then I did something right. Both means it can use improvement. I'm going to try to start completing mine one at a time. I'm going to finish this one and then do the vette that I traded with Phil on cause I said I would. Then I'm either going to do some more race cars or some tv cop cars. Quote Link to comment Share on other sites More sharing options...
straightliner1 Posted March 16, 2010 Share Posted March 16, 2010 Can't decide on the rims for the slicks. ET Sprints or old steel ?? With a chassis that long, you'll want more modern tires. Slicks from one of Monogram's Show Rods or 3 in 1 kits will be perfect. Those old piecrusts were long gone by the time wheelbases were that long. Quote Link to comment Share on other sites More sharing options...
Reliable Resin Posted March 31, 2010 Share Posted March 31, 2010 (edited) we offer a much more DETAILED vintage driver figurine , the image on the web site , is out dated ... the new dr fig has the corrcet driver face mask ( see image ) & we also offer an optional w/ optional "#1 Finger" ( LOL ) left hand Edited March 31, 2010 by Reliable Resin Quote Link to comment Share on other sites More sharing options...
dwc43 Posted March 31, 2010 Author Share Posted March 31, 2010 Nice, but he does not look as laid back as the other one I pictured. I had one similar to the one I posted with the wrong helmet though. IT fit perfect in the seat. Is it jointed at the waist and arms so you can adjust it? And what's the cost with ship to Tn. 37160. Thanks for posting it. I have not made a lot of progress on it yet. I've been a little busy with other real world things ... lol. Quote Link to comment Share on other sites More sharing options...
Reliable Resin Posted March 31, 2010 Share Posted March 31, 2010 OURS ... is a 4 piece figure , Body Torso/ Head 1 piece , Wasit legs 1 piece & 2 arms , which makes it easier to adjust & fit ANY seat / set up that you choose ... you can "shave" the butt , angle the body back & b/c the arms are separate ,, you can adjust / set them where ever , what ever angle , placement that you want I've seen guys use this in the Wild Willy Brosch , w/ Willy's signature Left Hand on the body ,,, hanging on ! See the image , I have it laid'd way back in the Harrell car ( mock up ) Quote Link to comment Share on other sites More sharing options...
Reliable Resin Posted March 31, 2010 Share Posted March 31, 2010 Nice, but he does not look as laid back as the other one I pictured. I had one similar to the one I posted with the wrong helmet though. IT fit perfect in the seat. Is it jointed at the waist and arms so you can adjust it? And what's the cost with ship to Tn. 37160. Thanks for posting it. I have not made a lot of progress on it yet. I've been a little busy with other real world things ... lol. Here's the link > http://www.reliableresin.com/rrpt009.html Note that this image is the Old fig... Have to update the site w/ the new fig imnage Quote Link to comment Share on other sites More sharing options...
Reliable Resin Posted March 31, 2010 Share Posted March 31, 2010 Here's the link > http://www.reliableresin.com/rrpt009.html Note that this image is the Old fig... Have to update the site w/ the new fig imnage Quote Link to comment Share on other sites More sharing options...
Reliable Resin Posted March 31, 2010 Share Posted March 31, 2010 Quote Link to comment Share on other sites More sharing options...
dwc43 Posted April 1, 2010 Author Share Posted April 1, 2010 Thanks for the pics and info. I'll have to look into picking one of those up. Quote Link to comment Share on other sites More sharing options...
dwc43 Posted April 21, 2010 Author Share Posted April 21, 2010 (edited) I finally got some parts in and made some progress. The aluminum pulleys are from Scale Repo. It uses pretty much a black rubber band for a belt, but it looks good and fits well too. Got the engine installed in the chassis, the oil lines run from the filters to the block, the fuel tank is installed and lines run to the fuel pump. Just need to install the barrel valve, lines and hat, and steering and wheels and I should be done with it. Hopefully by this weekend it will be finished for good. Edited April 21, 2010 by dwc43 Quote Link to comment Share on other sites More sharing options...
AMT Pacemakers Posted April 22, 2010 Share Posted April 22, 2010 Looking pretty good.... CCSS Quote Link to comment Share on other sites More sharing options...
dwc43 Posted April 22, 2010 Author Share Posted April 22, 2010 Thanks. Now on to the hard part that I have been dreading. I have to build the injector lines to the hat and bend them up and try to get them all straight. Think I'll cut four grooves under the hat and lay four very long bare wires in place and CA them in place then try to bend them and cut them to fit. Sounds like plan. Quote Link to comment Share on other sites More sharing options...
AMT Pacemakers Posted April 22, 2010 Share Posted April 22, 2010 Just wondering, are you going to be using any type of body work, or is it going to be an open rail? CCSS Quote Link to comment Share on other sites More sharing options...
caine440 Posted April 22, 2010 Share Posted April 22, 2010 Really nice work. Outstanding! Quote Link to comment Share on other sites More sharing options...
dwc43 Posted April 23, 2010 Author Share Posted April 23, 2010 (edited) Just wondering, are you going to be using any type of body work, or is it going to be an open rail? CCSS No, I'm going to leave it open. That's why I'm trying to detail as much as possible. I'm kinda loosely building it on some pics of a car that I found on the net. He had a caption under one pic that said something like. Polish never gained you one tenth of ET. And his engine was plain. No polished blowers or hat, or valve covers or anything like that. So that's why mine is all dull looking aluminum painted instead of chromed up like others build. That one was backyard garage built and so is mine. lol. Really nice work. Outstanding! Thanks. I just hope the injector lines work out. Some of this stuff I am doing I have never tried before, so I am pleased with it so far. Edited April 23, 2010 by dwc43 Quote Link to comment Share on other sites More sharing options...
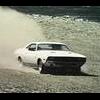
dwc43 Posted April 23, 2010 Author Share Posted April 23, 2010 (edited) Here's a pic of the plain jane engine and the open chassis in the background that I kida patterned my build after. No polish at all. I painted my block and heads factory red though instead of Keith Black black like he did. lol Edited April 23, 2010 by dwc43 Quote Link to comment Share on other sites More sharing options...
Dragline Posted April 23, 2010 Share Posted April 23, 2010 (edited) This is coming along quite nicely indeed. I have a tip for the flat aluminum color that I use to great effect. You need. 1 jar Tamiya Chrome Silver 1 jar Tamiya Flat Grey Mix 2:1 gray/silver. It's a DEAD ringer for that finish, and lays down dead flat against the surface. Perhaps a bit of alchohol to thin. Bob Edited April 23, 2010 by Dragline Quote Link to comment Share on other sites More sharing options...
dwc43 Posted April 24, 2010 Author Share Posted April 24, 2010 This is coming along quite nicely indeed. I have a tip for the flat aluminum color that I use to great effect. You need. 1 jar Tamiya Chrome Silver 1 jar Tamiya Flat Grey Mix 2:1 gray/silver. It's a DEAD ringer for that finish, and lays down dead flat against the surface. Perhaps a bit of alchohol to thin. Bob Thanks. And thanks for the tip. I'm going to make a post it note of that to hold on to till I need it again and give it a try. To be honest, it's testors aluminum #1181. And it looks pretty good on most stuff that I have tried it on, but I'm open to something that will look better and more realistic. I don't think I have mentioned it on here before, but I'm partial color blind. Supposed to be red/green, but I don't have any trouble with those at all. I have trouble with shades or dark colors in low light conditions. A real dark maroon and a dark brown will look almost the same in low light to me. But other everyday red,green,black,blue,white or what ever looks normal to me under any light. So on some of my paint, I have to rely on the guys at the LHS to lend a hand sometimes. My hobby town guys are like my next door neighbor when I need something they are right there. A good bunch to deal with and where I get most of my paint and stuff from. So if anything looks a little off in the paint dept. you know why and feel free to drop in a hint if you have one. Quote Link to comment Share on other sites More sharing options...
Dragline Posted April 24, 2010 Share Posted April 24, 2010 I'm sorry to hear about your sight... I'm losing my close up vision myself. I need glasses, but at least I see colors in all the spectrum. That must be tough..... I personally would rather lose my sight than my hearing. I could not go without music, but I've seen plenty. Bob Quote Link to comment Share on other sites More sharing options...
dwc43 Posted April 24, 2010 Author Share Posted April 24, 2010 I'm sorry to hear about your sight... I'm losing my close up vision myself. I need glasses, but at least I see colors in all the spectrum. That must be tough..... I personally would rather lose my sight than my hearing. I could not go without music, but I've seen plenty. Bob I've always been this way. It's not getting any worse either, as far as I can tell. And it's not that tough at all. It's just shades and low lights conditions that hamper it. And sometimes certain colors might look a little off. But I can get through that. Now I can't see far away and have an astigmatism too. That's all correctable with a lens though. They do make a lens for color blind people and they are two different colored filtered lenses, but I am not bad enough to need anything like that. I think I'd rather loose my hearing. Even though I'd miss out on my fav. movies that way, I could still drive. Being that I drove a truck for year and raced cars almost all my life, driving seems to be pretty important to me. Quote Link to comment Share on other sites More sharing options...
Recommended Posts
Join the conversation
You can post now and register later. If you have an account, sign in now to post with your account.
Note: Your post will require moderator approval before it will be visible.