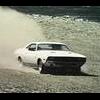
dwc43 Posted February 20, 2010 Share Posted February 20, 2010 (edited) Can't decide on the rims for the slicks. ET Sprints or old steel ?? Edited February 20, 2010 by dwc43 Quote Link to comment Share on other sites More sharing options...
Dragline Posted February 20, 2010 Share Posted February 20, 2010 Both rims are cool and correct. Looking forward to seeing it done. Old's cool.. Bob Quote Link to comment Share on other sites More sharing options...
dwc43 Posted February 20, 2010 Author Share Posted February 20, 2010 Thanks. I think I'll go with the ET's to break up some of that black. If I like it, I might build another one and do the chassis in red and use the steel wheels on it. Quote Link to comment Share on other sites More sharing options...
noname Posted February 20, 2010 Share Posted February 20, 2010 This should be neat. What kit is it? Quote Link to comment Share on other sites More sharing options...
dwc43 Posted February 20, 2010 Author Share Posted February 20, 2010 Well, it's parts and pieces from a bunch of kits. The Frame and axle are from the AMT Digger 'Cuda. The engine is a Gibson resin job. I'll never buy one again that's for sure. I got a 392 and a Hilborn stack injection 426 in a deal with someone. The 392 was the best by far, but still a pile. The 426 is split front to back at the deck making a top and bottom instead of a left and right like most engines. At least the 392 had a solid block to work with. The magneto, ET Sprints, and some other pieces are M.A.D. or Scale Models by Chris. The steels are resin that I bought off of E Models. I have a driver from Comp Resin that I test fitted in it last night and could not believe it fit in the seat. It's the wrong suit and it's for another project anyways. I'll have to order it first before I can install any of the steering cause the mount bracket is between the drivers legs. Here's a link to the correct driver for this kind of car. http://www.compresins.com/site/751597/product/CRC-222 It's hard to see in this pic, but it does have the correct filter mask for this era if using nitro methane mix for fuel. I have the fuel pump for the front of the engine, but I need the valves that go on the hat if I am going to run the fuel lines for it. I have some braided line and need some fittings for it. Also want to plumb in the remote dual oil filters that I have for it too. If you know where to find the valves for the hat, and cheap lol, I'd be grateful. Quote Link to comment Share on other sites More sharing options...
whale392 Posted February 21, 2010 Share Posted February 21, 2010 The chassis appears to be 150" or slightly longer. Most had gone to a 'Mag' or chromed styled wheel by the time the chassis grew to that length..........but it is your build and I think it would look good either way. Quote Link to comment Share on other sites More sharing options...
Smart-Resins Posted February 21, 2010 Share Posted February 21, 2010 Looks like the cool beginnings of a old skool dragster! Nice. Jody Quote Link to comment Share on other sites More sharing options...
dwc43 Posted February 21, 2010 Author Share Posted February 21, 2010 The chassis appears to be 150" or slightly longer. Most had gone to a 'Mag' or chromed styled wheel by the time the chassis grew to that length..........but it is your build and I think it would look good either way. I'm going to go with the chrome Et's. That will break up some of that all black frame. Wont be a lot of chrome cause I want it to look like it's my car built in the back garage on a budget. I have pics of two real cars that I am kinda patterning this one after. The caption under one pic says something like this. "Polish never subtracted one thousandth of a second in ET." All of the aluminum and the blower and such are plain dull satin finish in color on that engine. Looks like the cool beginnings of a old skool dragster! Nice. Jody Thanks. I hope I can get it to turn out like I have visioned for it.Still need to pick up some parts and pieces to make more progress. Quote Link to comment Share on other sites More sharing options...
dwc43 Posted February 21, 2010 Author Share Posted February 21, 2010 First off, great start to this project. Now, I have to admit to being a bit mystified by your problems with the Ross Gibson engine. I have three of his engines, two of them are his 426 Hemis, (one set up as a SS engine, with a choice of either the cross ram or the Rat Roaster intake), & the other with a Hilborn FI set up, & a 440 6 Pack of his, & none of mine look like you describe. I'm wondering if you got a bad casting? All three of my engines by him are first rate quality, & I've seen several others up close & personal, (there used to be a LHS in Charlotte that carried them, & another LHS in my hometown near Charlotte that would order them), & every one of them was first rate. The blocks are split top to bottom, but that's a non issue to me. As long as you sand the mating surfaces true, those parts line right up. His parts require some minor clean up & sanding mating surfaces flat, but no more work than most of the resin parts available anywhere. I would never hesitate to buy anything he makes. Thanks. And here's a pic of the 426. It's the worst out of the bunch.As you can see from the block and instructions it's split just at the bottom of the deck running front to rear making a top and bottom to the block instead of a right and left half like model kits are made. The fit on everything in it it just awful. Maybe this is the first proto type or something. The 392 had a solid block and only required a lot of sanding to true up the deck for the head and filing the intake to get it to fit. One valve cover had a huge high spot in it. It's the one on the right side. It was so high that the ends would not touch the head when you held it in place. As you can see in the first pic, I made it work though. It was not as bad as the other 426. Quote Link to comment Share on other sites More sharing options...
iBorg Posted February 21, 2010 Share Posted February 21, 2010 The engine and chassis are mid to late 60's. They're a great combination. The whitewalls were gone by about 1962-1963. Just a thought. Mike Quote Link to comment Share on other sites More sharing options...
dwc43 Posted February 21, 2010 Author Share Posted February 21, 2010 The engine and chassis are mid to late 60's. They're a great combination. The whitewalls were gone by about 1962-1963. Just a thought. Mike Great. I got it all in under the curve with a year or two to spare ... lol. I'll have to admit I did find more of the old truck tires without the whitewalls than I did with the whitewalls. Thanks. Quote Link to comment Share on other sites More sharing options...
Dragline Posted February 22, 2010 Share Posted February 22, 2010 You can scratchbuild the barrel valve for the hat if you have some plastruct. I made one for the first time for my Tommy Ivo car and it came out pretty well. Take a look. The distribution blocks are also easy to scracthbuild. I assume you have a pin vise drill set? If so, none of these elements are past your skills that's for certain. Bob Quote Link to comment Share on other sites More sharing options...
dwc43 Posted February 22, 2010 Author Share Posted February 22, 2010 You can scratchbuild the barrel valve for the hat if you have some plastruct. I made one for the first time for my Tommy Ivo car and it came out pretty well. Take a look. The distribution blocks are also easy to scracthbuild. I assume you have a pin vise drill set? If so, none of these elements are past your skills that's for certain. Bob none of these elements are past your skills Thanks for that vote of confidence. Anyways, I was going to use a diamond file to make four scores under the hat and strip some wire and glue those into the groves. I can leave them extra long to bend into the lines. I have a pin vise. Great little tool along with that chisel I bought some time ago too. I figured I'd tackle the distribution block, but that barrel valve, I aint so sure about. I thought I might be able to find a resin piece that looks more realistic. I did find one, but it comes with the hat and some other parts that I really don't need. Still might pick it up though. Quote Link to comment Share on other sites More sharing options...
dwc43 Posted February 22, 2010 Author Share Posted February 22, 2010 barrel valves are pretty easy to make, i used Evergreen and Tenax to build one before and it took just a few minutes. it takes longer planning your attack then actual construction! not sure why you are having issues with the Gibson engines. interestingly though you tend to hear either that they are great with no issues or that they are horrible and full of issues. i've always had good luck with the ones i've had. some details though in some cases make me laugh a bit, like the power steering on your injected 426. what do you mean by "truck" tires? Dave Yeah, the power steering is kind of funny at that. As for truck tires, back in the day the first slicks were recapped truck tires from what I have heard and read. They were taller, wider and had those cleat marks that spilled over onto the outer top edges of the sidewall. Quote Link to comment Share on other sites More sharing options...
Smart-Resins Posted February 22, 2010 Share Posted February 22, 2010 Yes, and they would grind the tread away on them to make them "slicks" Then along came the idea of pie crust slicks! LOL. Jody Quote Link to comment Share on other sites More sharing options...
dwc43 Posted February 22, 2010 Author Share Posted February 22, 2010 i know most early slicks were made by recapping and they may very well have used truck tires for that purpose in some cases. as far as grinding down tires to make slicks doing such a thing would just get you a bald tire with little to no traction improvements over a treaded tire. you'd also end up with a very thin tire in the tread area that would be prone to blowing out. it's not uncommon to shave many high performance street tires or even treaded competition tires these days but back then i'm not sure that was a common practice. the "pie crust" styling was common on tire sidewalls in the 50's too. the term "pie crust slick" is now a way to differentiate that style or era of tire over the later tires that do not have that feature. Dave I can a test to the fact of shaving tires. I think they have finally done away with out track, but I was racing a NASCAR G.N. Sportsman car on a 5/8 mile track. I built a 4 cyl car for a friend of mine to race at the same track on the inside 1/4 mile oval. They had to run a Falken track tire. We shaved 75% off of them and cut them at an angle to meet the track so the weight of the car planted them even further into the racing surface. The tires had to be shaved because the tread walks around or flexes. What this does is cause heat build up and that effects air pressures even though we tried to minimize that by using nitrogen in the tires. Shaving the tread down reduces the flexing as well and reduces heat build up even more. We ran Hoosier Comanche's on our Sportsman car which look kind of like a cheater slick. Has three rings of groves around the tire that are not very deep at all. Tires are about a 65 durometer and that's about the same as most street tires. Quote Link to comment Share on other sites More sharing options...
whale392 Posted February 22, 2010 Share Posted February 22, 2010 As you elude to, shaving the tread does two things...one: it prevents tread walk as you describe, and two: it allows the rubber carcass to heat up a little quicker FOR THE INITIAL BEDDING OF THE TIRE. This is done by completing a full run to get the tires to operating temperature and then removing them to cure back to a cool state, thereby re-aligning the rubber molecular structure and compound slightly to last much longer. This works well IN ROAD RACING.....not in drag racing. Slicks are 'burned' to get the thick rubber compound hot and sticky, not to 'bed' the rubber. Quote Link to comment Share on other sites More sharing options...
dwc43 Posted February 23, 2010 Author Share Posted February 23, 2010 As you elude to, shaving the tread does two things...one: it prevents tread walk as you describe, and two: it allows the rubber carcass to heat up a little quicker FOR THE INITIAL BEDDING OF THE TIRE. This is done by completing a full run to get the tires to operating temperature and then removing them to cure back to a cool state, thereby re-aligning the rubber molecular structure and compound slightly to last much longer. This works well IN ROAD RACING.....not in drag racing. Slicks are 'burned' to get the thick rubber compound hot and sticky, not to 'bed' the rubber. Yeah, putting a new tire through one heat cycle is what we call "scuffing a tire in". Some tracks like scuffs better than stickers or new tires. I gave up drag racing a long time ago. I could only afford bracket racing and lets face it, that aint drag racing. Only heads up first to the line is what I consider drag racing. And since I run ovals now, I get to race a lot more than 11 secs at a time. Quote Link to comment Share on other sites More sharing options...
Mooneyzs Posted February 23, 2010 Share Posted February 23, 2010 Looking forward to seeing this build progress... you have a great start so far. Quote Link to comment Share on other sites More sharing options...
dwc43 Posted February 25, 2010 Author Share Posted February 25, 2010 (edited) Looking forward to seeing this build progress... you have a great start so far. Thanks. I have a question for all. I was looking through all the pics I saved looking at the fuel systems. I ran across a pic of a magneto just like the one I am using. It has four wires in line on the bottom and a top row of four wires. Looks like this .... .... The bottom four wires went to the left bank and the top four wire went to the right bank. Is this correct for all of these magnetos? If so I'll have to look closer and see if I can figure out how the firing order is set up on that engine and duplicate it. Edited February 25, 2010 by dwc43 Quote Link to comment Share on other sites More sharing options...
dwc43 Posted February 25, 2010 Author Share Posted February 25, 2010 Here's a pic of that mag that I was asking the questions about. I have a mag for my 440, but it uses a modern day cap and external coil, so I have no real exp. with this type. Quote Link to comment Share on other sites More sharing options...
whale392 Posted February 25, 2010 Share Posted February 25, 2010 The Mag in the pic looks like a Vertex unit. Dad had one on his Hemi......I will see if dda still has it and see if he can remember some info on it. I still do drag race, and every now and then road race (HPDE). I also set up most of my street cars for cornering prowess as straight line has very limited use on the street! Your rail is coming along nicely, I look forward to seeing it completed. Quote Link to comment Share on other sites More sharing options...
dwc43 Posted February 26, 2010 Author Share Posted February 26, 2010 The Mag in the pic looks like a Vertex unit. Dad had one on his Hemi......I will see if dda still has it and see if he can remember some info on it. I still do drag race, and every now and then road race (HPDE). I also set up most of my street cars for cornering prowess as straight line has very limited use on the street! Your rail is coming along nicely, I look forward to seeing it completed. Thanks. As soon as I get some more pieces and info I'll get some more progress pics posted. I have a bored and stroked big block Duster with a tunnel ram and nitro that I have never used so far. IT uses a Mallory mag on it with a regular cap and external coil. It's way different from these older self contained mags. As for street cars, cornering and fuel millage for me. My circle track cars are limited by the rules, but I have a tendency to hang an MSD7AL2 upside down under the dash by the steering column and use a High Vibe MSD coil. They are in cased in epoxy so you can mount them in any location. I have raced some SCCA road courses in the past. Since it looks like they are going to succeed this time in getting rid of our local asphalt circle track this year, I may go back to SCCA. I really have no desire to go back to dirt which is where I started after I quit drag racing. Here's a pic of my last drag car. Quote Link to comment Share on other sites More sharing options...
whale392 Posted March 7, 2010 Share Posted March 7, 2010 (edited) '70 RoadRunner? Looks good in the pic (what I can see of it). My first was a 1965 Dodge Coronet500 convert that was originally a 318 Poly powered car. Swapped the K-Member from a wrecked 361/383 car and dropped a 69&1/2 440+6/Hemi 727 into it (Hemi and 440+6 727s had a wider first/reverse band and heavier forward drum), along with a 742 casting 8&3/4 with 4:11 gears. She would move for a big B-Body....I miss that car. I grew up with Hemi and 6pack cars.......so how I am into 302 Foxbody Mustangs now is anybodies guess! Any progress on the rail? Edited March 7, 2010 by whale392 Quote Link to comment Share on other sites More sharing options...
dwc43 Posted March 7, 2010 Author Share Posted March 7, 2010 (edited) Yeah, the 70 Road Runner was my last drag car. Big block, TCI A727 and stall, 8 3/4 with 4.30 gears and 11 inch slicks out back. Sorry, that is the only pic I have of this car. Wished I had more. And on top of that it got damaged somehow. That's where those white spots are. I got my AN fittings and finally got my paint for them last night. Got them painted. Still waiting on some pieces to arrive though. I need my resin driver so I can install the steering. I got the floor pan installed under the axle and driver area. I just need to cut and trim to side panels. Hope to make more progress between now and next weekend if some things show up. They may already be waiting in my PO box. I'll check tonight on the way to work for sure. I want to get this thing finished. On another note, I was at Hobby Town yesterday. In the bins where they keep the tubing they have some aero wedged shape pieces that would be perfect for building dragster wings. Just need to paint add side panels and your supports. Edited March 8, 2010 by dwc43 Quote Link to comment Share on other sites More sharing options...
Recommended Posts
Join the conversation
You can post now and register later. If you have an account, sign in now to post with your account.
Note: Your post will require moderator approval before it will be visible.