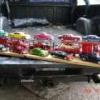
ewaskew Posted September 7, 2010 Posted September 7, 2010 (edited) Stage 1 This is my latest project. Revells Good Guys 55 Chevy The color will be Tamiya Bright Red #TS-49. Interior will be customized with Creatology fun foam from Hobby Lobby. Eng. bay details-I will scratch build a big block eng.with some aftermarket parts.The wheel wells have been smoothed,along with the body. The tires and rims are from Revells 37 Ford kit. I know there is a 3 pic.limit,the reason I put 4 up is because I plan on a step by step build if enough people want to follow along, or some builders with less experience can pick up on something that will help them out. I will be working on this one every weekend untill I finish it,and try to post photos the same weekend. I do have it listed as a mild custom because I will not be doing any major body work,just sanding the trim off to smooth the body up. Maybe if this go's well I'll do some chop top and custom bodies later. Thanks for checking it out,let me know what you think. Edited October 24, 2010 by ewaskew
Smart-Resins Posted September 7, 2010 Posted September 7, 2010 Looking smooth so far! LOL. great job!
Clay Posted September 7, 2010 Posted September 7, 2010 Theres a 3 picture limit? Since when? Great job so far!
ewaskew Posted September 11, 2010 Author Posted September 11, 2010 (edited) Stage 2 Here are the bumpers,changed to a custom design that I came up with. The stock bumpers will not fit the look I'm going for. Also built the custom tag for the trunk. Edited September 11, 2010 by ewaskew
greasezerk Posted September 11, 2010 Posted September 11, 2010 Nice start, i am interested. I will watch, like to see were this goes, and see the scratch build engine.
ewaskew Posted September 11, 2010 Author Posted September 11, 2010 (edited) Thanks everyone for the comments. I got started on building a big block for it today. Instead of scratch building the complete eng. block I just built the eng in the kit bigger. I did that because its an easy way to save the block details than to build them. I'm working on the heads and once there done I can post some photos of the mock up. Thanks again. Edited September 26, 2010 by ewaskew
crazyjim Posted September 11, 2010 Posted September 11, 2010 Looks like an interesting build. I'll keep watching.
ewaskew Posted September 12, 2010 Author Posted September 12, 2010 Stage 3 This is the first step of the engine build. I was going to scratch build one and changed my mind because it is easier to add plastic to the kit eng., by doing that saves time& some details. This is my first time doing this and it's not perfect but it looks good,after is together and painted it will not be seen anyway. I get tired of taking big block engines from other kits,and the 55,56,57 chevy kits all have small engines in a big engine bay. Also the way I did this can be done by anyone that wants a bigger engine. I did have to use the extra intake & valve covers from the 70 Chevelle kit,however I can build valve covers for that kit.
oldscool Posted September 13, 2010 Posted September 13, 2010 I love your rolled pans and if I understand things, you are converting a small block to a big block? oldscool
ewaskew Posted September 13, 2010 Author Posted September 13, 2010 Thanks everyone for the comments,yes oldschool I am converting a small block into a big block. The reason I dont just buy a donor kit is because that gets expensive after a while, and a few spare parts and evergreen plastic sheets are a good way to work it out. The eng. will have custom built brackets for the AC.ALT.PS Pump you can't get those in a kit.
vizio93 Posted September 14, 2010 Posted September 14, 2010 Looking good, I like that big block !!! It kinda reminds me of Project "X".
ewaskew Posted September 26, 2010 Author Posted September 26, 2010 Here is the eng. before puddy & paint. I'm going for the car show look.This is the kit eng. with plastic sheet cut & placed on it. Then I shaped it & scratch built brackets,AC unit,oilpan,oil filter mount,oil filter, and heads. On the kit block where the freeze plugs are I covered them with the smooth covers for the custom look. The breather is the radiator top from the parts box. The heads do'nt have the bolt detail yet,not sure if I'll do that because you can not see them after the eng. is in the car.
Jantrix Posted September 26, 2010 Posted September 26, 2010 Okay you've got my attention. Show us whatcha got.
sak Posted September 26, 2010 Posted September 26, 2010 That motor turned out pretty badass. Did you make those pulleys yourself? Jeff
Harry P. Posted September 26, 2010 Posted September 26, 2010 Theres a 3 picture limit? Since when? Great job so far! There is a 10 photo limit per post... but you can post as many times as you want within the same topic thread...
ewaskew Posted September 26, 2010 Author Posted September 26, 2010 Here's the latest. Scratch built radiator support complete with clips,the bolts will be aded before its finished. Scratch built optima style battery with tray,straps will be added later. The brake booster and electronic ignition is from the parts box. I still have to come up with an elect. fan or build one. Also need to add the steering gear box with linkage. It may look cramped but it will all work out in the end. Jeff the pulley's are Detail Master 5 pulley set,screen for the radiator came from Model Car Garage.
davyou5 Posted September 26, 2010 Posted September 26, 2010 (edited) Hey Ewaskew, This is going to good, I like all that you have done to it. I did have one quesiton though, You said you are doing the interior with some kind of material, can you explain to me how you are going to do that? I am looking to do some interior work myself on my custom 49' merc. Thanks and good luck. Edited September 26, 2010 by davyou5
BigEdsGarage Posted September 27, 2010 Posted September 27, 2010 Neat build. Should be sharp when it's done. The bumper trick looks nice and smooth. What kit was the intake manifold from? I wouldn't mind finding one of those for a project I am working on. One thing I noticed is that intake resembles the early style Edelbrock Torker manifold. They actually positioned the carb diagonally so the front bowl pointed towards the passenger side. It was a pretty unique feature for those intakes and you don't see too many around any more. Ya might want to reposition the carb for accuracy, though I guess it doesn't matter much if it gets covered up with the air cleaner.
Zhu Posted September 27, 2010 Posted September 27, 2010 A great thread for novice builders like myself. I’m with`ya all the way Earl. Davey.
ewaskew Posted September 28, 2010 Author Posted September 28, 2010 Thanks for the comments Ed the intake is a spare that comes in the revell 70 chevelle street burner kit.#85-2066 I know what your saying about the way the carb. is suppose to set,I just like it better sitting straight. I'm working on the frame now,more changes being made on it to,I'll post photos when I get it mocked up.
ewaskew Posted September 28, 2010 Author Posted September 28, 2010 Changes Front end - Kit disc brakes were cut off and the piece that connects the a-frames together was shaped into a spindle. Rearend - Replaced with one from parts box,spare tire and fuel tank area cut out and replaced with sheet plastic and custom fuel tank,the fuel tank that I built would be bolted on from the top side,thats why there's no straps. The frame will have DM. disc brakes,scratch built coil over shocks and lines for brakes & fuel tank. The front will have wire for the coil springs. The stance will stay where it is. On to the interior it will be a custom deal to. Thanks for looking
71datsun1200 Posted September 28, 2010 Posted September 28, 2010 cool project ! what kit did that rear diff come from ? nice touch !
davyou5 Posted September 30, 2010 Posted September 30, 2010 Hey Ewaskew, I can't wait to see what's in store next .
ewaskew Posted October 3, 2010 Author Posted October 3, 2010 This is the interior design that I came up with. All seats came from revells 37 ford,cut apart and open sides reshaped. The rear seats were fit into the kit seat,and part of the kit seat was left in place for trim around custom seats. The console is scratch built,the door panels are plastic sheet cut to match the kit pattern, then covered with foam and Bazzill basics paper for the bottom panel. All the details are not here,they will be finished in the final steps. It is time to break everything down and start paint and assembly.
Recommended Posts
Create an account or sign in to comment
You need to be a member in order to leave a comment
Create an account
Sign up for a new account in our community. It's easy!
Register a new accountSign in
Already have an account? Sign in here.
Sign In Now