jmpsebring Posted March 12, 2012 Author Share Posted March 12, 2012 Jack, Do you know what size of the beadalon you used by chance? I'm loooking to pick some up. Beadalon is the companies name. It was all together at Hobby Lobby though it's a common product at most big craft stores. The wire was the only style that was wrapped. It's only one size and approx a 3" coil in a plastic bag. The tubing is in little blue/white vials. in various sizes. Both brass and silverplated brass. Hope that helps. I'm 20 miles from ANYTHING. Perhaps next week I'll head back to town Quote Link to comment Share on other sites More sharing options...
jmpsebring Posted March 12, 2012 Author Share Posted March 12, 2012 It looked like this! Ain't computers wonderful. It was called German wire, I think it was fancy round. Quote Link to comment Share on other sites More sharing options...
Prostreet Posted March 12, 2012 Share Posted March 12, 2012 Thx. Jack, I'm acctually finding it in different guages. Now i just have to figure out what gauge i need. Quote Link to comment Share on other sites More sharing options...
rckymtn3 Posted March 12, 2012 Share Posted March 12, 2012 I was into the 1/12 F-1 stuff for a while....was pricey with the cost of the kits (tamiya and protar) and the p/e sets like the perfect parts f-1 specialties full sets (very nice) and the Scale Motorsports 935 and F2002 (very nice) etc....anyway, I still love F-1 racing and drag racing, but frankly, the drag crowd seems to be very innovative (both real and scale modelers alike) ....I haven't been snookered yet on a drag model or detail kits, yet the 1/12 builds soured me mostly due to one bad apple (Thundervalley F-1....that guy straight-up ripped me off, and in the end, his kits were second gen copies of perfect parts kits anyway)....lol....hmmmm....after 4yrs +, I am still a little peeved....but welcome back to drag racing Quote Link to comment Share on other sites More sharing options...
jmpsebring Posted March 12, 2012 Author Share Posted March 12, 2012 Thx. Jack, I'm acctually finding it in different guages. Now i just have to figure out what gauge i need. Even this page mentions every type except fancy round. I'm sure it's the 20 gauge. Calipers say .031"/ .80mm Quote Link to comment Share on other sites More sharing options...
eviltwincustoms Posted March 12, 2012 Share Posted March 12, 2012 Jack, I don't see anything about your Sonny's style engine. Are you building off of any dimensions you have or just building to what looks accurate? I really like your valve covers and the intake runners up to your top. Very interesting ingenuity in building what you have posted. Quote Link to comment Share on other sites More sharing options...
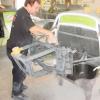
jmpsebring Posted March 12, 2012 Author Share Posted March 12, 2012 Actually I will likey use this in a Willy's curside with just nose removed. Don't feel the need to give up years of my life plus the $$$ money building a buch of full detail promods. I figure by the time I need a motor for my full detail Promod, We (dave) will have made everything obsolete. I'm just trying to make something more modern. My friend showed me a Sonny's catalog and I was amazed. As soon as I modified the valve cover..I was hooked. Building to look accurate? More like building to look cool. The rivets were from our raceshop (last job). I have 4 sizes and grabbed a handfull just for this type of problem. These are being used to set spacing. I might not use them for the real runners. Thanks for the comments, your engine block is stunning! Quote Link to comment Share on other sites More sharing options...
eviltwincustoms Posted March 12, 2012 Share Posted March 12, 2012 Actually I will likey use this in a Willy's curside with just nose removed. Don't feel the need to give up years of my life plus the $$$ money building a buch of full detail promods. I figure by the time I need a motor for my full detail Promod, We (dave) will have made everything obsolete. I'm just trying to make something more modern. My friend showed me a Sonny's catalog and I was amazed. As soon as I modified the valve cover..I was hooked. Building to look accurate? More like building to look cool. The rivets were from our raceshop (last job). I have 4 sizes and grabbed a handfull just for this type of problem. These are being used to set spacing. I might not use them for the real runners. Thanks for the comments, your engine block is stunning! Thanks for the insight and the complement on my block. I have a lot of work to go into it. Wow so your runners are rivets? They look very convincing. So is it possible to request a catalogue from sonnys? I find this is the best way to see details and such, is to request catalogues and go to the manufacturers Web sites when possible. It is very time consuming, but well worth it. Quote Link to comment Share on other sites More sharing options...
gasser59 Posted March 13, 2012 Share Posted March 13, 2012 WOW! I have some of those runner rivets around here and now I finally know what to use them for. They're a different type of rivet as they're solid and have a flat head. Your engine is looking spectacular Jack. Keep after it. Quote Link to comment Share on other sites More sharing options...
jmpsebring Posted March 20, 2012 Author Share Posted March 20, 2012 Development of the new JMP Racing engine continue's ! I have a box of spare parts (like all of us) and it has many F1 1/12th parts in it. I'm trying to block in the various drives and componets needed for a big ProMod motor. I used a 6-wheel Tyrrell front wheel hub for my Vacum pump. The pully's are modified Renault V-6 turbo drives. The rear driven belt for part of Jim's new MSD Promag is attached using a Porsche 934 rear torsion bar cap.... with a shortened thinned-out distributor drive plate also from the Renault V6 glued on. The 934 part will likely be an electric water pump attached to the dist drive part with standoffs, all driven off the cam drive. The oil tank is a slot car wheel. On the other side is another drive belt driving the dry sump. A new dry sump pan was made using mostly stacked glued plastic stock. More shots later. This was put up after the conversation about batteries. I don't claim for it to be accurate. I enjoy making cool looking things that are plausible. Plus I'm 56 years old!! It's time to use some of these fantastic shapes while I'm able to still see them. Once I settle on the parts, everything will need brackets and then I can cut down the mounting plate. With hoses, wires, paint and fittings, etc, they will look just fine... for me. What do Carb cars use for fuel pumps? sump. Quote Link to comment Share on other sites More sharing options...
vintagedragfan Posted March 22, 2012 Share Posted March 22, 2012 Jack I love what you are doing here! intake is awesome man! Quote Link to comment Share on other sites More sharing options...
rustybill1960 Posted March 24, 2012 Share Posted March 24, 2012 WOW! You Guys and the Brass working! Whoa! I am in awe of all You that work with this medium! My hat is off to You all! Thank You for sharing with Us here! Later Russ Quote Link to comment Share on other sites More sharing options...
Recommended Posts
Join the conversation
You can post now and register later. If you have an account, sign in now to post with your account.
Note: Your post will require moderator approval before it will be visible.