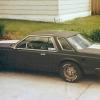
80mirada Posted December 29, 2012 Share Posted December 29, 2012 I have the remains of an original MPC Super Pak 77 Volare Roadrunner Kit. I am modifying a 71 duster street machine chassis and recreating the interior from modified duster parts, and some of the original parts. The plan is to have a fairly acurate front end under it, transverse torsion bars and all, when it is done. The body looks far better in my blurry pictures than in real life, as this will be the 4th paint job, after it is stripped. The louvers and the original front spoiler are missing, but The T-tops are intact, as are the flares and the rear spoiler. Quote Link to comment Share on other sites More sharing options...
Space Cowboy Posted December 29, 2012 Share Posted December 29, 2012 Good save of a not offten seen car..... Quote Link to comment Share on other sites More sharing options...
diymirage Posted December 29, 2012 Share Posted December 29, 2012 dont see these anywhere near enough you have my attention Quote Link to comment Share on other sites More sharing options...
Deathgoblin Posted December 29, 2012 Share Posted December 29, 2012 I like what you're doing. The Volare-based Road Runner was a rare bird. I had a plain old Volare years ago. Need to get a kit of it so I can summon the bad vibes from that car. It hated me. Quote Link to comment Share on other sites More sharing options...
wraith Posted December 29, 2012 Share Posted December 29, 2012 Very cool car and project! Can't wait to it finished! Quote Link to comment Share on other sites More sharing options...
Tom Geiger Posted December 29, 2012 Share Posted December 29, 2012 (edited) Good to see someone else working on this oldie! A few tips. First, the kit doesn't come with any pedals. You'll need to add them. Second, the trim on the interior door panels is awful faint. Here's what I did to mine. I added some Evergreen strips and a resin window crank from Miniatures & Replicas of MD. Then I carved the arm rest out of a toothpick. I may have the window louvers and front spoiler in my stash. PM me if you want them and I'll look. Edited December 29, 2012 by Tom Geiger Quote Link to comment Share on other sites More sharing options...
80mirada Posted December 30, 2012 Author Share Posted December 30, 2012 I think I have seen a pic of your interior before, it looks very good, especially the front bench. I actually cut the rear seat and console out to use, the side panels are going to be built up using the Dusters as the base, then i will be "reupholstering " the Duster seats to match the Volare pattern. But that will all come after I get the body work roughed in. Quote Link to comment Share on other sites More sharing options...
80mirada Posted December 30, 2012 Author Share Posted December 30, 2012 Some work going into the duster parts. and after a little work Fuel tank from the original chassis being fitted. Quote Link to comment Share on other sites More sharing options...
80mirada Posted December 30, 2012 Author Share Posted December 30, 2012 Adding material to raise the front to sit on the chassis right, and add a cowling. cowl vent is cut Engine bay installed, with the shock mount removed. Quote Link to comment Share on other sites More sharing options...
80mirada Posted December 30, 2012 Author Share Posted December 30, 2012 Some more work on the chassis. Started the door panels Body went in the bath (brake fluid) Quote Link to comment Share on other sites More sharing options...
80mirada Posted December 30, 2012 Author Share Posted December 30, 2012 Some serious body isues. Body is broken at the A-pillar in two places Trunk lid charactor line is mostly missing, with some of the window trim. and a strange faint hood ornament. Quote Link to comment Share on other sites More sharing options...
shafer Posted December 30, 2012 Share Posted December 30, 2012 neat build i'll be watching Quote Link to comment Share on other sites More sharing options...
ewaskew Posted December 30, 2012 Share Posted December 30, 2012 Sharp looking car man. Quote Link to comment Share on other sites More sharing options...
80mirada Posted December 31, 2012 Author Share Posted December 31, 2012 The white paint hid a lot of trouble. Can't wait to get this in primer, but I am not going to rush it. Quote Link to comment Share on other sites More sharing options...
80mirada Posted January 2, 2013 Author Share Posted January 2, 2013 I glued some .030 Styrene square stock down the middle of the trunk lid, and into the broken out trim. Cleaning up the glue damage on the sides repaired the cowl at the A-pilllar and re glued the top Quote Link to comment Share on other sites More sharing options...
darquewanderer Posted January 2, 2013 Share Posted January 2, 2013 (edited) This is, what, the third Volare I've seen since joining this board in Feb. 2007? I'll be watching. Edited January 2, 2013 by darquewanderer Quote Link to comment Share on other sites More sharing options...
wraith Posted January 2, 2013 Share Posted January 2, 2013 lots of nice work! Quote Link to comment Share on other sites More sharing options...
Tom Geiger Posted January 2, 2013 Share Posted January 2, 2013 I actually cut the rear seat and console out to use, the side panels are going to be built up using the Dusters as the base, then i will be "reupholstering " the Duster seats to match the Volare pattern. But that will all come after I get the body work roughed in. Then you must've noticed how shallow the Volare rear seat bottom is! My first attempt at creating the front seat was cutting one of those out of the tub, but it was a lost cause! Quote Link to comment Share on other sites More sharing options...
80mirada Posted January 2, 2013 Author Share Posted January 2, 2013 I added the lower section off of the Duster rear seat, and the made filler panels to hold the seat in place. The rear seat sits back further in the Volare, so I had to take the locator rib for the Duster seat off the floor. Fortunately I have a good source for reference photos on this one. Quote Link to comment Share on other sites More sharing options...
Casey Posted January 3, 2013 Share Posted January 3, 2013 That darn mid-'77 model year fuel tank change really messes with things in the trunk area, doesn't it?: I have a ton of reference pics from my F-body days if you need any. Quote Link to comment Share on other sites More sharing options...
80mirada Posted January 5, 2013 Author Share Posted January 5, 2013 SWEET! That early tank causes so many problems for guys. Is that your car Casey, if it is it is awful nice underneath. I still need to move the rear of the frame rails outboard, and move the tank over a bit more, after I get the body straightened out. Quote Link to comment Share on other sites More sharing options...
80mirada Posted January 11, 2013 Author Share Posted January 11, 2013 Time for some updates. First off, the Hood wasn't fitting well, so i have been building up its edges with .010" styrene sheet. The trunk Ridge is coming along New "T-bar", and trim for the roof. The plan is to have a small flange for the T-tops to sit on. Quote Link to comment Share on other sites More sharing options...
80mirada Posted January 11, 2013 Author Share Posted January 11, 2013 I still need to order those parts from Ma's Resin...... Quote Link to comment Share on other sites More sharing options...
80mirada Posted January 18, 2013 Author Share Posted January 18, 2013 GOt some parts ordered for this one, can't wait for them to arrive. Quote Link to comment Share on other sites More sharing options...
Sixties Sam Posted January 18, 2013 Share Posted January 18, 2013 Man, that's a lot of work, but it will be nice when it's finished! Sam Quote Link to comment Share on other sites More sharing options...
Recommended Posts
Join the conversation
You can post now and register later. If you have an account, sign in now to post with your account.
Note: Your post will require moderator approval before it will be visible.