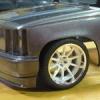
Gray Smith Posted January 7, 2008 Posted January 7, 2008 (edited) I know its not a sedan but I've been working on this one for a while, and don't want to put it down... Started out as a quickie build, then went too crazy with ideas, than back to a quickie build(albeit a longer quickie..lol)... Its been channeled via the Tim Boyd style of the black Deuce in a past issue of another mag, and uses his lowering techniques along with an upswept frame in the front, and the rear was butchered to lower it even more. <img src="http://i113.photobucket.com/albums/n225/grayelysemakalya/Models/Revell%2032%20Roadster/revell32roadster1.jpg" border="0" class="linked-image" /> <img src="http://i113.photobucket.com/albums/n225/grayelysemakalya/Models/Revell%2032%20Roadster/revell32roadster2.jpg" border="0" class="linked-image" /> motor will be the 302 from the kit with a scratched up intake manifold and intake set-up and detailed, wheels will be kit stock with 32 coupe tires, the body will have the duvall style windscreen from a phantom vickie kit, the interior will be mostly stock except for the dash. The grill is cut out to sit lower on the frame, and already superglued in place as are the front sock mounts(will get better looking shocks made from aluminum). The main thing about this is the rear diffuser/undertray that I made for it, since the gas tank is no longer on the frame, to help finish up the back end(just doesn't look right when the body work just stops). The tail lights will go into the side slots, and the exhaust will be a center exit affair. Paint will be a very bright orange nail polish that my wife picked out for the car, with maybe some purple on the motor and back end, with titanium or magnesium metalizer colored metal bits. Sorry for the pic quality and lack of visible stuff, theres alot more done than pics show, once I get further along with subassmblies i'll post pics of them. comments and critiques always welcome. Once I get this "uncomplicated and quickie" build finished I'll resume some of the other projects I started in 2007 and get them finished. Gray Edited December 29, 2009 by stryfe101
Raul_Perez Posted January 7, 2008 Posted January 7, 2008 Gray, It looks like you're off to a good start!! Personally, I don't like the look of the Duvall windshield, but I think that I'm a minority on that one. If I do anything to the stock windshield, I prefer to lay it back at a slight angle. Keep up the good work and the posts,
Gray Smith Posted January 15, 2008 Author Posted January 15, 2008 (edited) hey guys, I've been working steadily on my 32 Ford Roadster and ive got some better pics to post this time. First off we have some motor parts pics...my original plan was to build this kit with the most kit parts as possible to make the build go quickly...well I just can't leave well enough alone and wasn't happy with the pedestrian looking 302 and went somewhat whole hog on changing it up some... I tried to make something from nothing and found a cosworth valve cover from an old indy car and made a "special" intake manifold with the 2 part 4 carb(?)set-up from the new amt ala-kart. I scratched up some angle cut trumpets from various aluminum tubes and polished them up in the dremel. I added a fpr to the fuel rail and some fittings for fuel lines for an efi setup, also shown are throttle linkages(which need to get cut down the pins). I figure with an open hood street rod your going to see alot of detail...why not add some of the important stuffs. also shown is a possible spaulding flamethrower magneto. I also have another cosworth vc and will be transplanting the cosworth rib and logo like on the manifold to the kit valve covers. I wasn't going for a retro 60's speed equipment look, but I think I might have it..i'm happy with it so far. To be added are re-done pullys and belts, and some braided rad hoses. Also shown is the early start to a single guage pod dash, made from an extra smaller headlamp from the kit and some sheet styrene..much work is needed here. Here are some body mock-ups...I'm using big headlamps from another kit(amt based, dunno where they came from) mounted to the frame horns, and there will be a smaller set of fog lamps(from the kit small headlights) mounted on the insides of the frame rails. I used some beading pins for the little push bar/headlight mount as well as pinning the windshield frame to the body(some putty work needed here). Also shown is the orange nail polish my wife picked out for this ride. and here is the work done to the back to get it to sit in the weeds, i hope the pics can explain since the best way for me to explain it is I cut the area over the axle out and glued it in higher up on the frame. That work needs to be cleaned up as well as the open area left on top of the splitter going into the trunk well I hope these pics are a little better than the last ones..and I hope you guys like it! 32 fever has hit me hard, after this i've got 1 of my 32 sedans started and waiting, and the Dohc Deuce has been calling me to finish it as well. comments and critiques are always welcome. Gray Edited January 16, 2008 by stryfe101
dub Posted January 15, 2008 Posted January 15, 2008 Looking pretty cool, there Gray! I love the rear diffuser idea you came up with. I also see the grille mods you did look just like what I did on one of mine! (Mine cost me 3 stitches in my left index finger though.... ) Love the powerplant too. Can't wait to see it done!
Raul_Perez Posted January 15, 2008 Posted January 15, 2008 Gray, I really like the Cosworth idea!! You rarely see that engine built, let alone in a hotrod...too cool!! Personally, I like the smaller headlights on non-fendered cars and the big ones on fully fendered cars, but like the windshield, that's just my opinion... Keep up the good work!! I really want to see how the Cosworth engine looks finished!! Regards,
Gray Smith Posted January 15, 2008 Author Posted January 15, 2008 Looking pretty cool, there Gray! I love the rear diffuser idea you came up with. I also see the grille mods you did look just like what I did on one of mine! (Mine cost me 3 stitches in my left index finger though.... ) Love the powerplant too. Can't wait to see it done! Thanks Jonathan, the diffuser needs a little putty work, but I'm happy with how it turned out, better idea here than my first attempt. The grill lower had been opened up a looooong time ago(like 98ish) when I deeply channeled my 32 coupe(now known as the Dohc Deuce). I recently filled it with some thin styrene sheet in an attempt to drill 3 holes in it.....but that didn't work out very well(dremel and thin plastic don't mix) so I just opened it back up, still debating on putting a p/e grill in there. I hope that by sunday I'll have some more motor work done, I went home at lunch today and tried my hand at "turning" the engine pulleys with my dremel, that too didn't work very well..lol Gray
Raul_Perez Posted January 16, 2008 Posted January 16, 2008 Gray, Are you going to go with independent front and rear suspension? That thing is starting to look like an early F1 car!! I Really like it!!
Gray Smith Posted January 16, 2008 Author Posted January 16, 2008 Gray, Are you going to go with independent front and rear suspension? That thing is starting to look like an early F1 car!! I Really like it!! Raul, I'd love to make one up from scratch if I could, but my skills aren't there yet, this one will be riding on a heavily lowered kit suspension...maybe like a really early racer?..lol I figure If I ever get around to building a full scale rod i'd get an ifs setup thats looks just like a dropped tube front end that uses torsion bars, I'd do that to this but it was supposed to be a simple build..lol. I do have an ifs/irs rod in the works...built off the phantom vickie chassis with revell cobra mustang irs parts. it can be seen here.. http://s113.photobucket.com/albums/n225/gr...20DOHC%20Duece/ thanks for the kind words guys....gets me pumped up even more to work on it..tonight I got the surgery of implanting a cosworth logo on to a sbf valve cover done.. next update will hopefully show some painted and done intake parts..and maybe some more motor stuff... Gray
Raul_Perez Posted January 16, 2008 Posted January 16, 2008 (edited) Raul, I'd love to make one up from scratch if I could, but my skills aren't there yet, this one will be riding on a heavily lowered kit suspension...maybe like a really early racer?..lol I figure If I ever get around to building a full scale rod i'd get an ifs setup thats looks just like a dropped tube front end that uses torsion bars, I'd do that to this but it was supposed to be a simple build..lol. I do have an ifs/irs rod in the works...built off the phantom vickie chassis with revell cobra mustang irs parts. it can be seen here.. http://s113.photobucket.com/albums/n225/gr...20DOHC%20Duece/ thanks for the kind words guys....gets me pumped up even more to work on it..tonight I got the surgery of implanting a cosworth logo on to a sbf valve cover done.. next update will hopefully show some painted and done intake parts..and maybe some more motor stuff... Gray Gray, I know what you mean about a "simple build", but have you seen the Jaguar based IFS and IRS on the old Revell 26 Ford Sedan Delivery kits? Pretty cool stuff. Crossing it with the Cosworth and the body work you've already done would make a pretty cool model!! The Streetrod version of the AMT 34 Ford coupe also came with an interesting IFS. Hmmm....now you've got me thinking about another project... On the subject of skills, I don't know a single modeler that doesn't have a project or two that didn't end up back in the box because it didn't work out. The key to improving our skills is to continually try new things. Without trying new things we'd all be building exact copies of the same model. So, keep going on the engine!! It's looking great!! And the pics of your other model look pretty cool, too!! Regards, Edited January 16, 2008 by Raul_Perez
cruz Posted January 17, 2008 Posted January 17, 2008 I am liking this a lot, keep us posted please!!!
Gray Smith Posted February 3, 2008 Author Posted February 3, 2008 ok guys time for an update... I painted the motor the other night, as well as the axle... Paint is Tamiya Mica blue(looks good next to the orange i've mixed up) I also got the carbs painted, stacks installed and the beginnings of carb linkages done. (I know my stacks ain't perfect but it is my first time scratching these up..as well as detailing a motor like this). When I get some more pics up I'll show what I worked on tonight(intake manifold, valve covers, and finishing the fuel lines and carb linkages). I also got the body work pretty much done(not much, mainly filling the holes for the old windsheild and sink holes on the chassis sides, and smoothing up the splitter in the back. This is how it will sit when done...Primer will be soon, and hopefully paint not too long afterwards. Well thats all for now guys...Hope you all like the update..and as always comments and critiques are welcome. Gray
dub Posted February 3, 2008 Posted February 3, 2008 Looking good, man! It's coming along nicely. I really like the alternator adjuster bracket. That looks freakin' sweet! The pulleys look great too. You got the stance 100% as well. Keep plugging away, and keep us posted. I can't wait to see the next update!
Raul_Perez Posted February 3, 2008 Posted February 3, 2008 Looking good, man! It's coming along nicely. I really like the alternator adjuster bracket. That looks freakin' sweet! The pulleys look great too. You got the stance 100% as well. Keep plugging away, and keep us posted. I can't wait to see the next update! Yep, Jonathan nailed it!! The stance is awesome!! PE and machined parts are always a nice addition! I really like what you did under the rear part of the chassis!!
Paul Payne Posted February 3, 2008 Posted February 3, 2008 Gray, This project is looking great! I love the Cosworth intake manifold- modify a part into something entirely different! What kit is your windshield frame from? Do you have pix of your DOHC Deuce, or a thread I can pick up somewhere else? I love DOHC engines..... Here's a tip for cutting angles on tubing- for 4 stacks, cut two pieces of tubing longer than the combined finished length. Now, near the center, make your angled cut, resulting in 2 tubes with the same angle at the top. Now comes the tricky part- repeat the angle cut on the second piece of tubing! After that, just trim them all to the final length. If you get a minute, drop in on my double deuce project in this forum- I should be updating it soon.....
Mr. Metallic Posted February 3, 2008 Posted February 3, 2008 That's looking really nice. Great stance and nice details so far.
Gray Smith Posted February 4, 2008 Author Posted February 4, 2008 Gray, This project is looking great! I love the Cosworth intake manifold- modify a part into something entirely different! What kit is your windshield frame from? Do you have pix of your DOHC Deuce, or a thread I can pick up somewhere else? I love DOHC engines..... Here's a tip for cutting angles on tubing- for 4 stacks, cut two pieces of tubing longer than the combined finished length. Now, near the center, make your angled cut, resulting in 2 tubes with the same angle at the top. Now comes the tricky part- repeat the angle cut on the second piece of tubing! After that, just trim them all to the final length. If you get a minute, drop in on my double deuce project in this forum- I should be updating it soon..... Paul thanks for the tip on the stacks..thats actually what I did when I cut them..my thing is the lengths got a little messed up and the saw bit in a few places where cuts didn't need to be made. Next time I do something like this I'm using 5 min. epoxy to glue it in instead of zap a gap...sutff sets too quickly..thats why they lean back a bit....oh well, I'm my own worst critic. Also the windsheild comes from the amt phantom vickie kit..as well as the firewall. I like your Double Deuce project too, I remember seeing them back when you first posted...I was in a Porsche kick at the time and missed posting on them though...I look forward to seeing them now though...please keep us updated on them. Here is a link to my Dohc Deuce project...I got shelved due to some life changes and I've yet to get back on it now that I've some of my life issues sorted(and others came to mess it all up again..lol) http://www.modelcarsmag.com/forums/index.p...ic=3238&hl= Thanks to everyone else for the comments..An update will be coming soon..I did some motor work this weekend. oh and really nice stance. it looks like it is going 100mph just sitting there. love the flow of the diffuser with the body. what do you have planned for the wheels? i am thinking monochromatic look.? super cool. keep us posted, man. Yes sorta monochromatic I think..lol..the upper body is going to be a pearl orange I've mixed from the day glo orange nail polish and the frame will be black in line with the lower body, then curve down and end before the front of the frame which will be orange. the undertray and wheel wells will be carbon fiber decal(as well as some other parts) and the wheels will either be black with silver or dark silver knock offs....should have an old racer vibe to it. if I can find some roundels I'll add some numbers to the side...maybe... since this is meant for the street though. I'm still trying to figure out where I'm mounting the license plate in the back..the exhaust will exit in the center of the undertray so it won't fit there... Gray
Gray Smith Posted February 5, 2008 Author Posted February 5, 2008 alright another update..you guys tired of em yet? This weekend I got the time to finish up the fuel lines and throttle linkages on the motor(and i'm blind now..lol), plus I finished up the valve covers with some scale motorsports cf decal, I cleared them with some tamiya smoke clear brushed on. The lettering was chromed foiled and I attempted to sand the decal away to expose it but it didn't turn out so I just cut the decal around the letters and hit em with a silver sharpie..I'm happy with it considering. I did bmf the intake manifold but it just didn't look right so I peeled it off and painted some more testors aluminum on it. thats about it for motor stuff for a while, time to work on other area of the car...like the interior. I wonder...whats going into all those holes I drilled into the seats? Trying to go for an old race car look here to tie into the other stuff used on the car. I also have begun working on a cowl steering set-up using a lantern from a 25 T kit, it will be positioned under the dash in the right spot...just have to cut that column drop off of the dash...which has been modified as well. I've still got a bit to do in here..gotta set it apart from a stock kit interior somewhat.. anyway guys thats it for now, hope you like tonights update...I'll get some more work done, and get em posted for you..as always comments and critiques are always welcome. Gray
Raul_Perez Posted February 5, 2008 Posted February 5, 2008 Nope!! Not tired of seeing it!! The engine and interior is looking great!! Keep up the good work and the posts!!
jbwelda Posted February 6, 2008 Posted February 6, 2008 this is the first ive looked at this thread and man thats nice! like everyone says the stance is really great and the detailing looks like its going well too. say you dont happen to have the minilite wheels from the kit that cosworth cam cover came from do you? (i think its from the clear bodied ford escort cosworth rally car)
Gray Smith Posted February 12, 2008 Author Posted February 12, 2008 Another update time... Haven't really done much except to the motor, I was out of commission last week with the flu and it even took away my desire to build! Anyway I was never satisfied with the original set of stacks I did on the motor so I completely redid them this time taking a little more time to make sure they all matched up, and lined up a bit better. I also wired the motor(thanks Marc for the cool diz and wire) and mounted the alternator and belted the pulleys, which is done with detail master coolant hose in the smallest size. Lastly I got the rad hoses started with some cool black braided modelers hose and some aluminum tube ends. I think all it needs is an oil filter, a starter, and a decal for the dizzy and its done(i'm treating this as a model in a model thats why work as focused on it) I gotta say..props to you guys who detail at this level and more all the time...i've gotta do a quick build or 3 after this one before I start my next big project... anyway here are pics.. and speaking of a next big project..here might be the next one..one of my 3 revell 32 Sedans(so both of these could be a possibility) the first is what I was thinking up when fordsixty posted his time attack 31...this one will have widened fenders as well, but will remain streetable with some neat ideas for an idependent front suspension. The other will be a channeled and lowered highboy with widened kit wires...the tires come from the aoshima Mad Max Interceptor (great set of tires...wish I had more!) Anyway gotta go play with my little girl for a while.. comments and critiques are welcome. Later Gray
dub Posted February 12, 2008 Posted February 12, 2008 NIiiiiicccee motor work! That looks killer! Now, at least you can move on to the next part of the model to treat as a model. Both sedans are cool ideas too. The Ny-Quil bottle in the shots is a nice touch..... Sorry to hear about the influenza outbreak on your homefront. Glad to hear you're feeling better and don't get that little girl of yours sick!
Nick F40 Posted February 12, 2008 Posted February 12, 2008 oh lord, COSWORTH!!! I like those MiniLites, those kinda look like mine I got from my Tamiya 240Z, anyway it looks killer so far.
Raul_Perez Posted February 12, 2008 Posted February 12, 2008 The engine is looking pretty good, Gray!! You made the right decision to rework the stacks. They look GREAT!!
Recommended Posts
Create an account or sign in to comment
You need to be a member in order to leave a comment
Create an account
Sign up for a new account in our community. It's easy!
Register a new accountSign in
Already have an account? Sign in here.
Sign In Now