Deathgoblin
-
Posts
2,284 -
Joined
-
Last visited
1 Follower

Recent Profile Visitors
9,745 profile views


Deathgoblin's Achievements
MCM Ohana (6/6)
-
Ouch, my wallet! Need the Cerritos and the SNW Enterprise, and I'll take the Cygnus, too.
-

1962 GMC
Deathgoblin replied to bill lanfear's topic in Model Trucks: Pickups, Vans, SUVs, Light Commercial
Awesome job! Love the color. -
The Revell Impala Police car has a set of these:

-
Looks really good!
-
Revell 1971 Boss 351.... Special Order "Bright Orange"
Deathgoblin replied to DanL's topic in Model Cars
Absolutely beautiful! -
I use Testors clear parts adhesive. Clamp the part in place, then I apply the adhesive thinned with a little water around the edges on the inside with a brush and let it draw between the "glass" and body. Once it dries, unclamp and you're good to go. For headlights I just apply around where the lens is supposed to go and put the lens in place, then adjust it a little with the point of an X-Acto so it's straight. It'll stay put until it dries.
-
Actually a mix of both. The rear windows, windshield and side trim are foil, the trim around the door glass and vent windows, door handles and the tailgate are chrome pen.
-
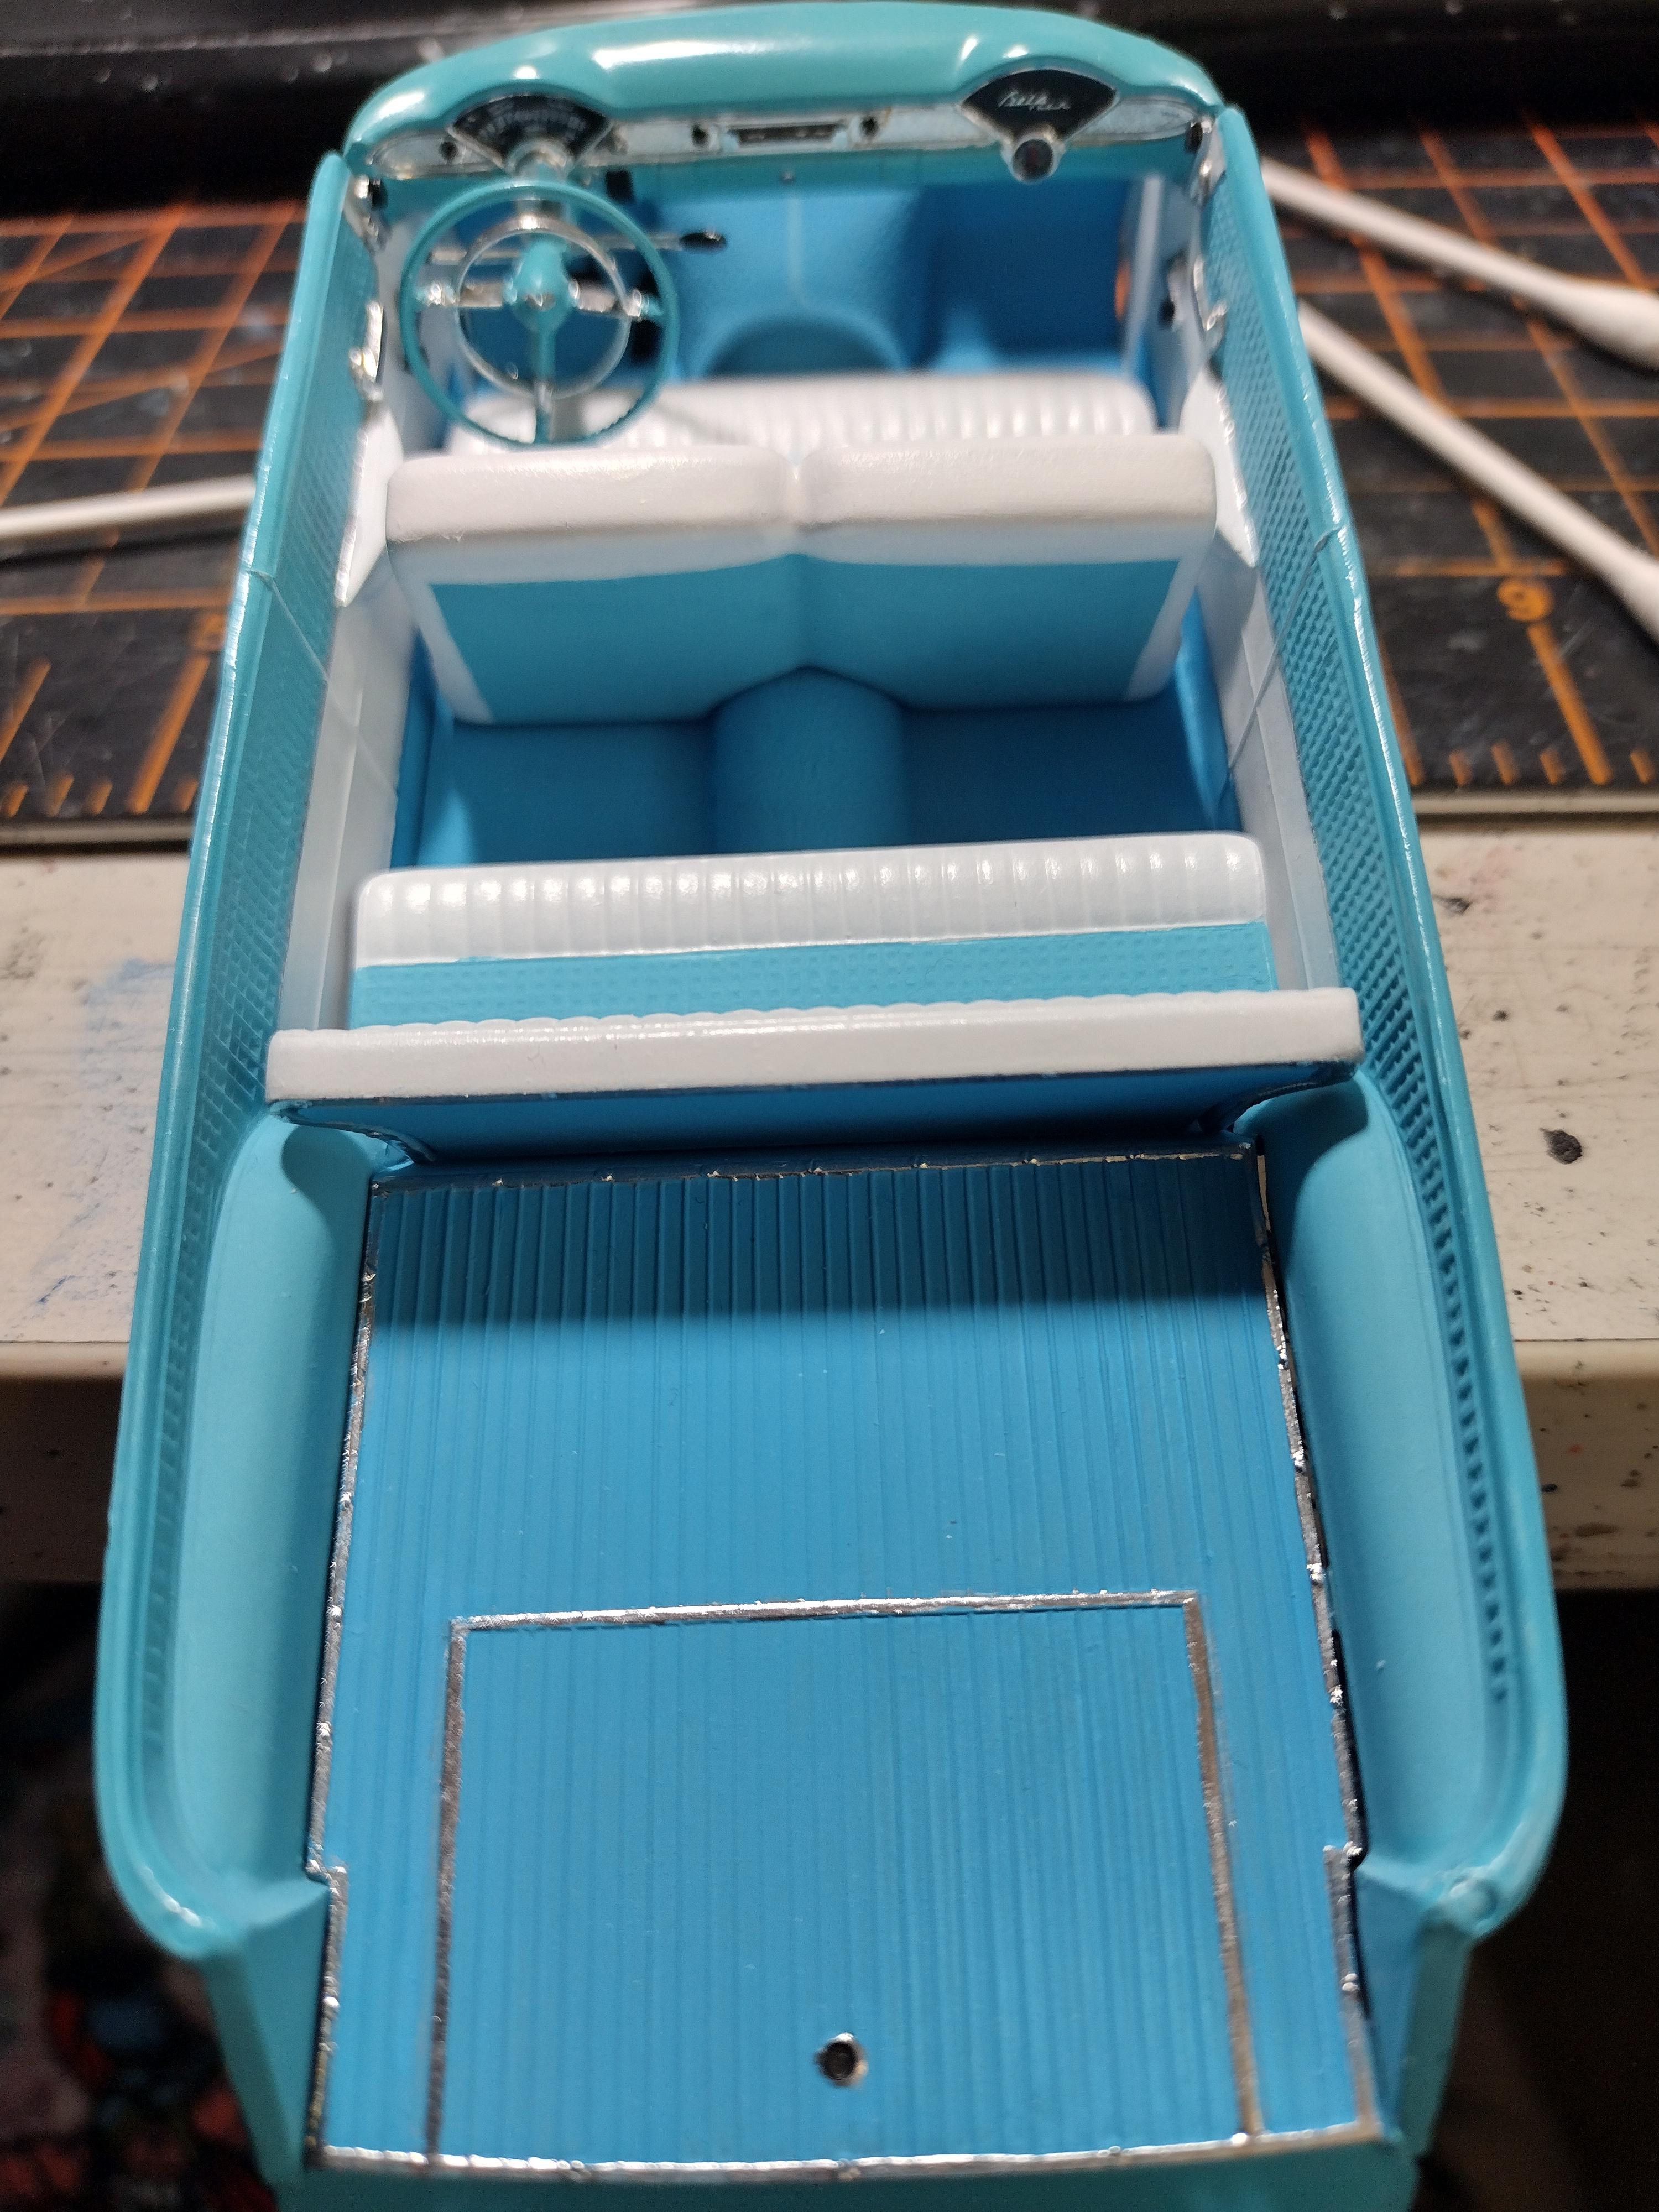
Just finished the Nomad today. I had an easier time since I had gone through the sedan recently. Steering works this time. The tailgate does open, but I'm not sure about closing it again, so I'm just gonna leave it closed. The color is Tamiya coral blue. I took the interior tub apart and improved it a little. I made window cranks, door handles and arm rests. I think I'm getting better with this kit.
- 24 replies
-
- 12
-

-
For pinning small parts, I use plastic coated flower wrapping wire from Hobby Lobby. Got a huge roll for a couple of dollars, and I use a tiny amount each time. I usually use a sharp pointed sculpting tool (more like an awl) to mark where I want the hole to go first, then drill using a bit the same size as the wire. I usually superglue the wire into the hole on the part first and let it dry, then glue it onto the car.
-
Tamiya Porsche 959, brand-new for $20 with free shipping.
- 36,190 replies
-
- 3
-
-
- johan
- glue bombs
- (and 1 more)
-
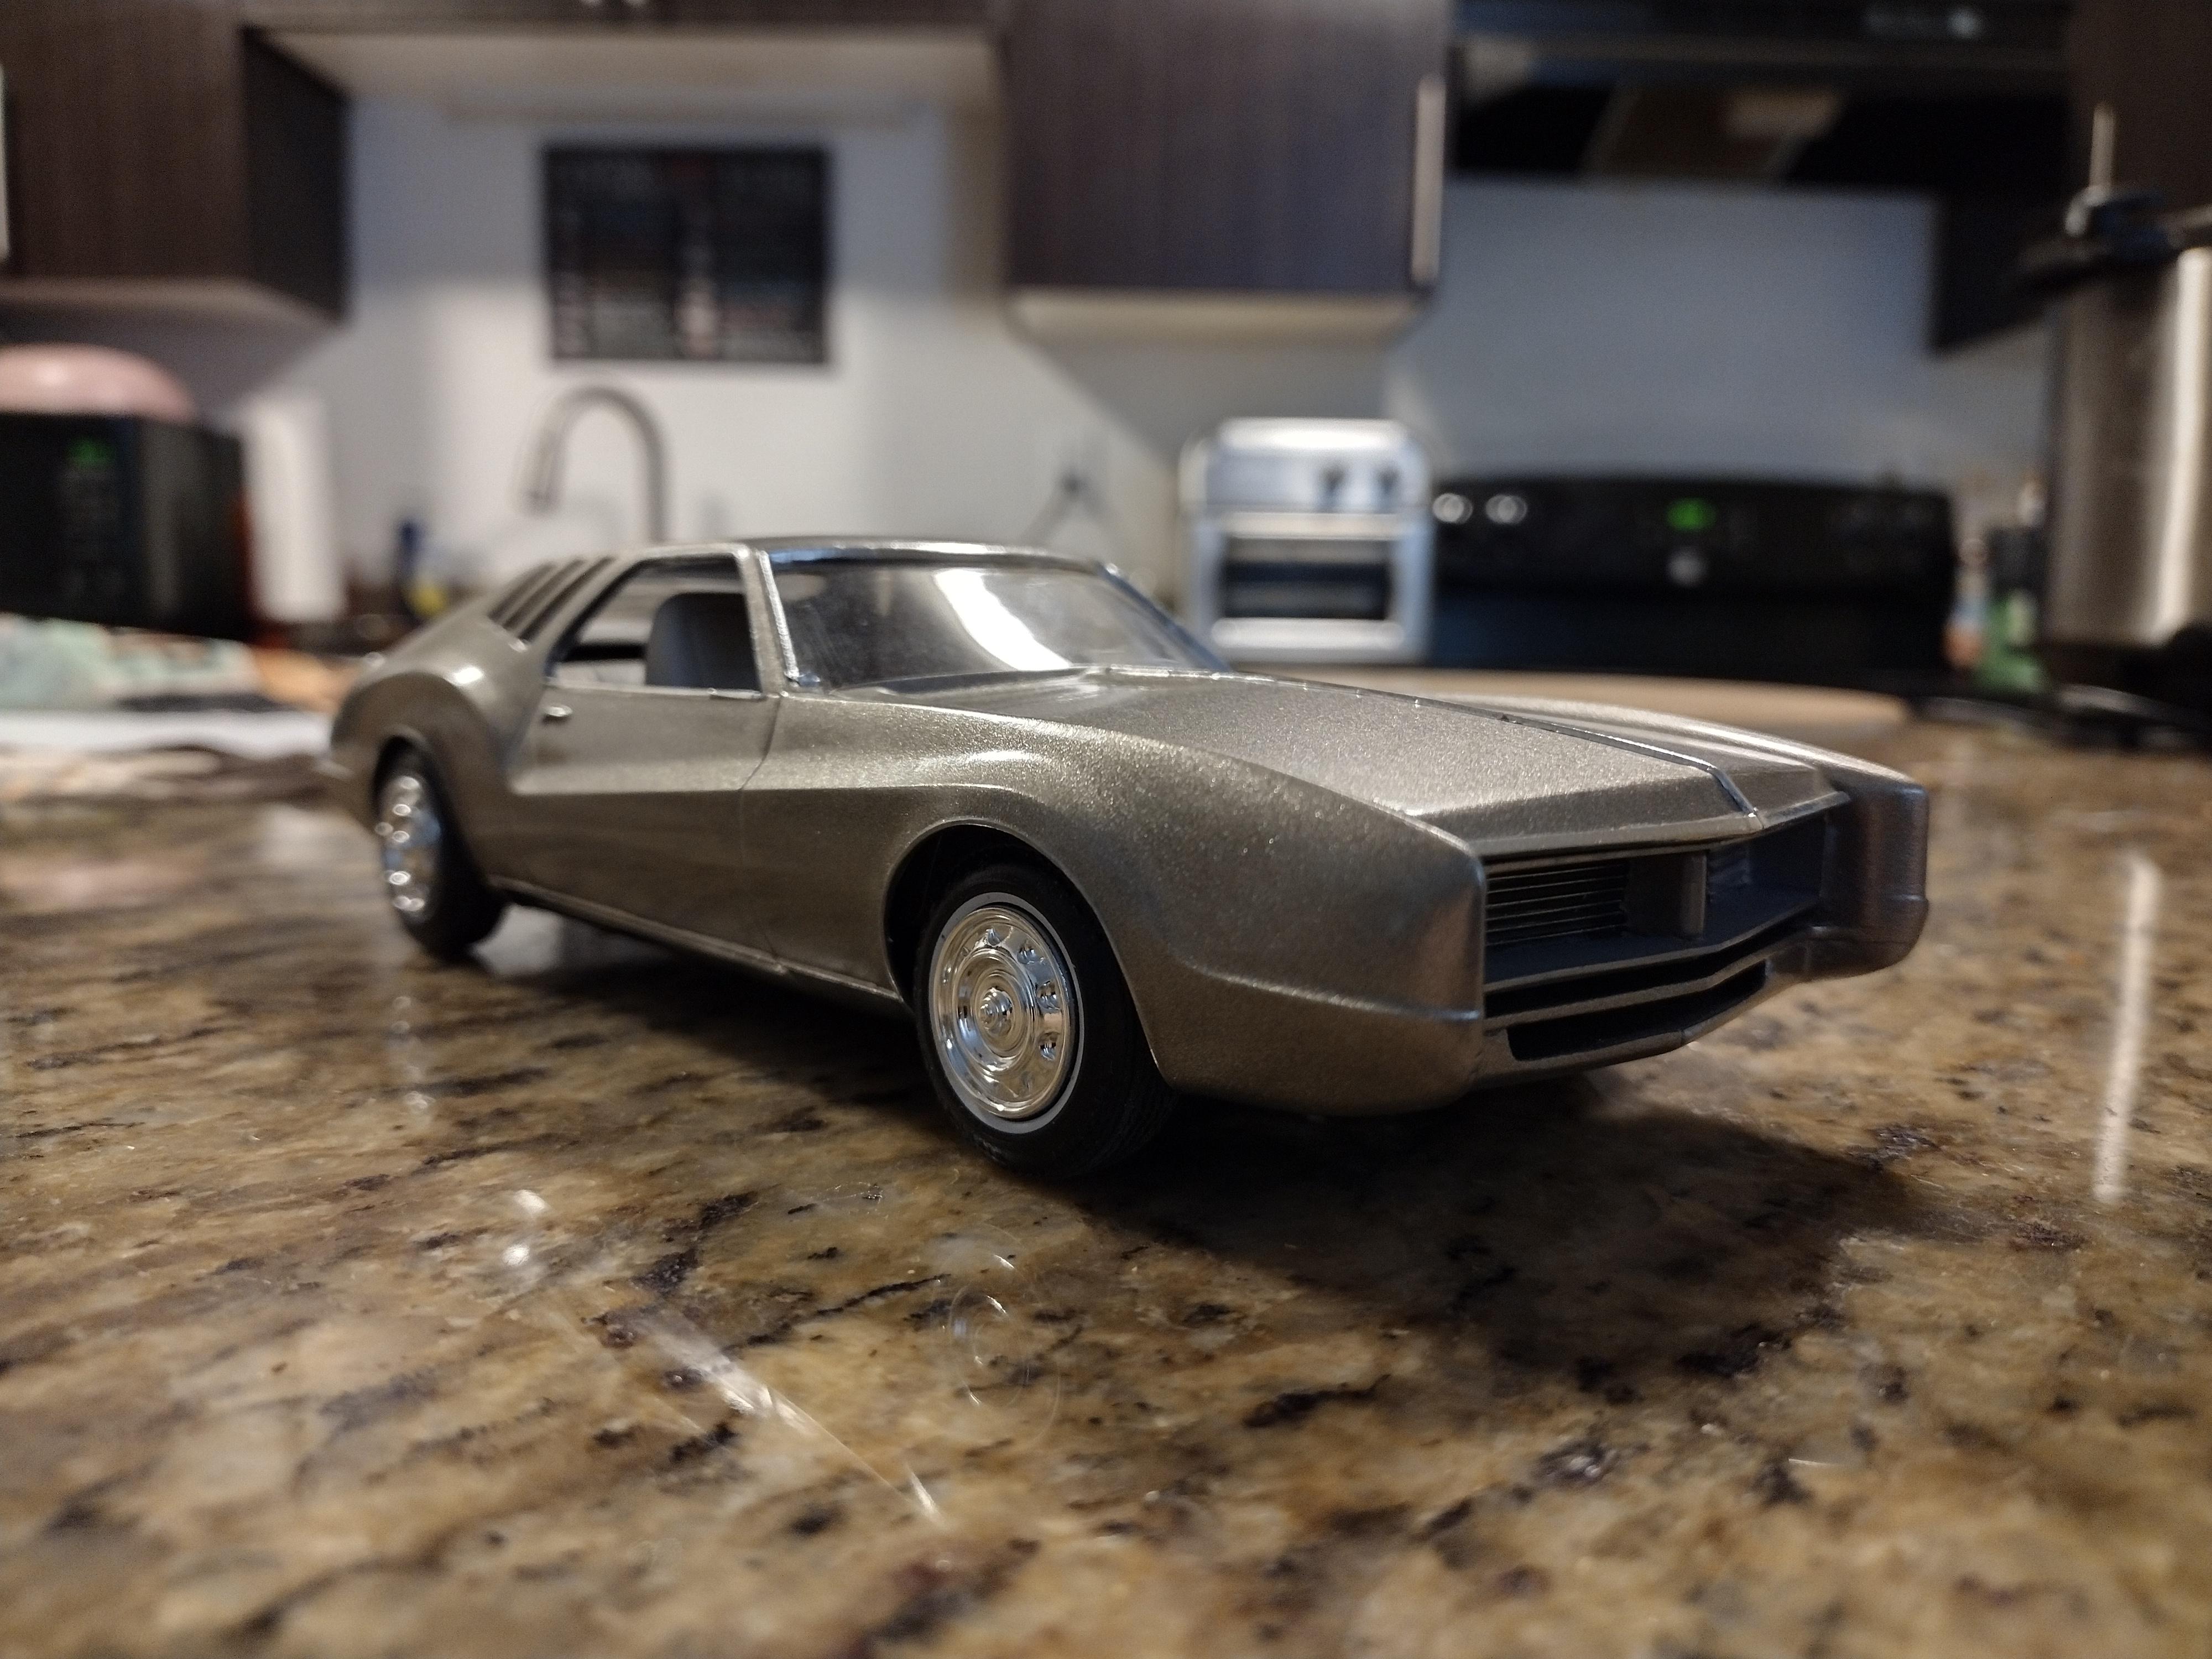
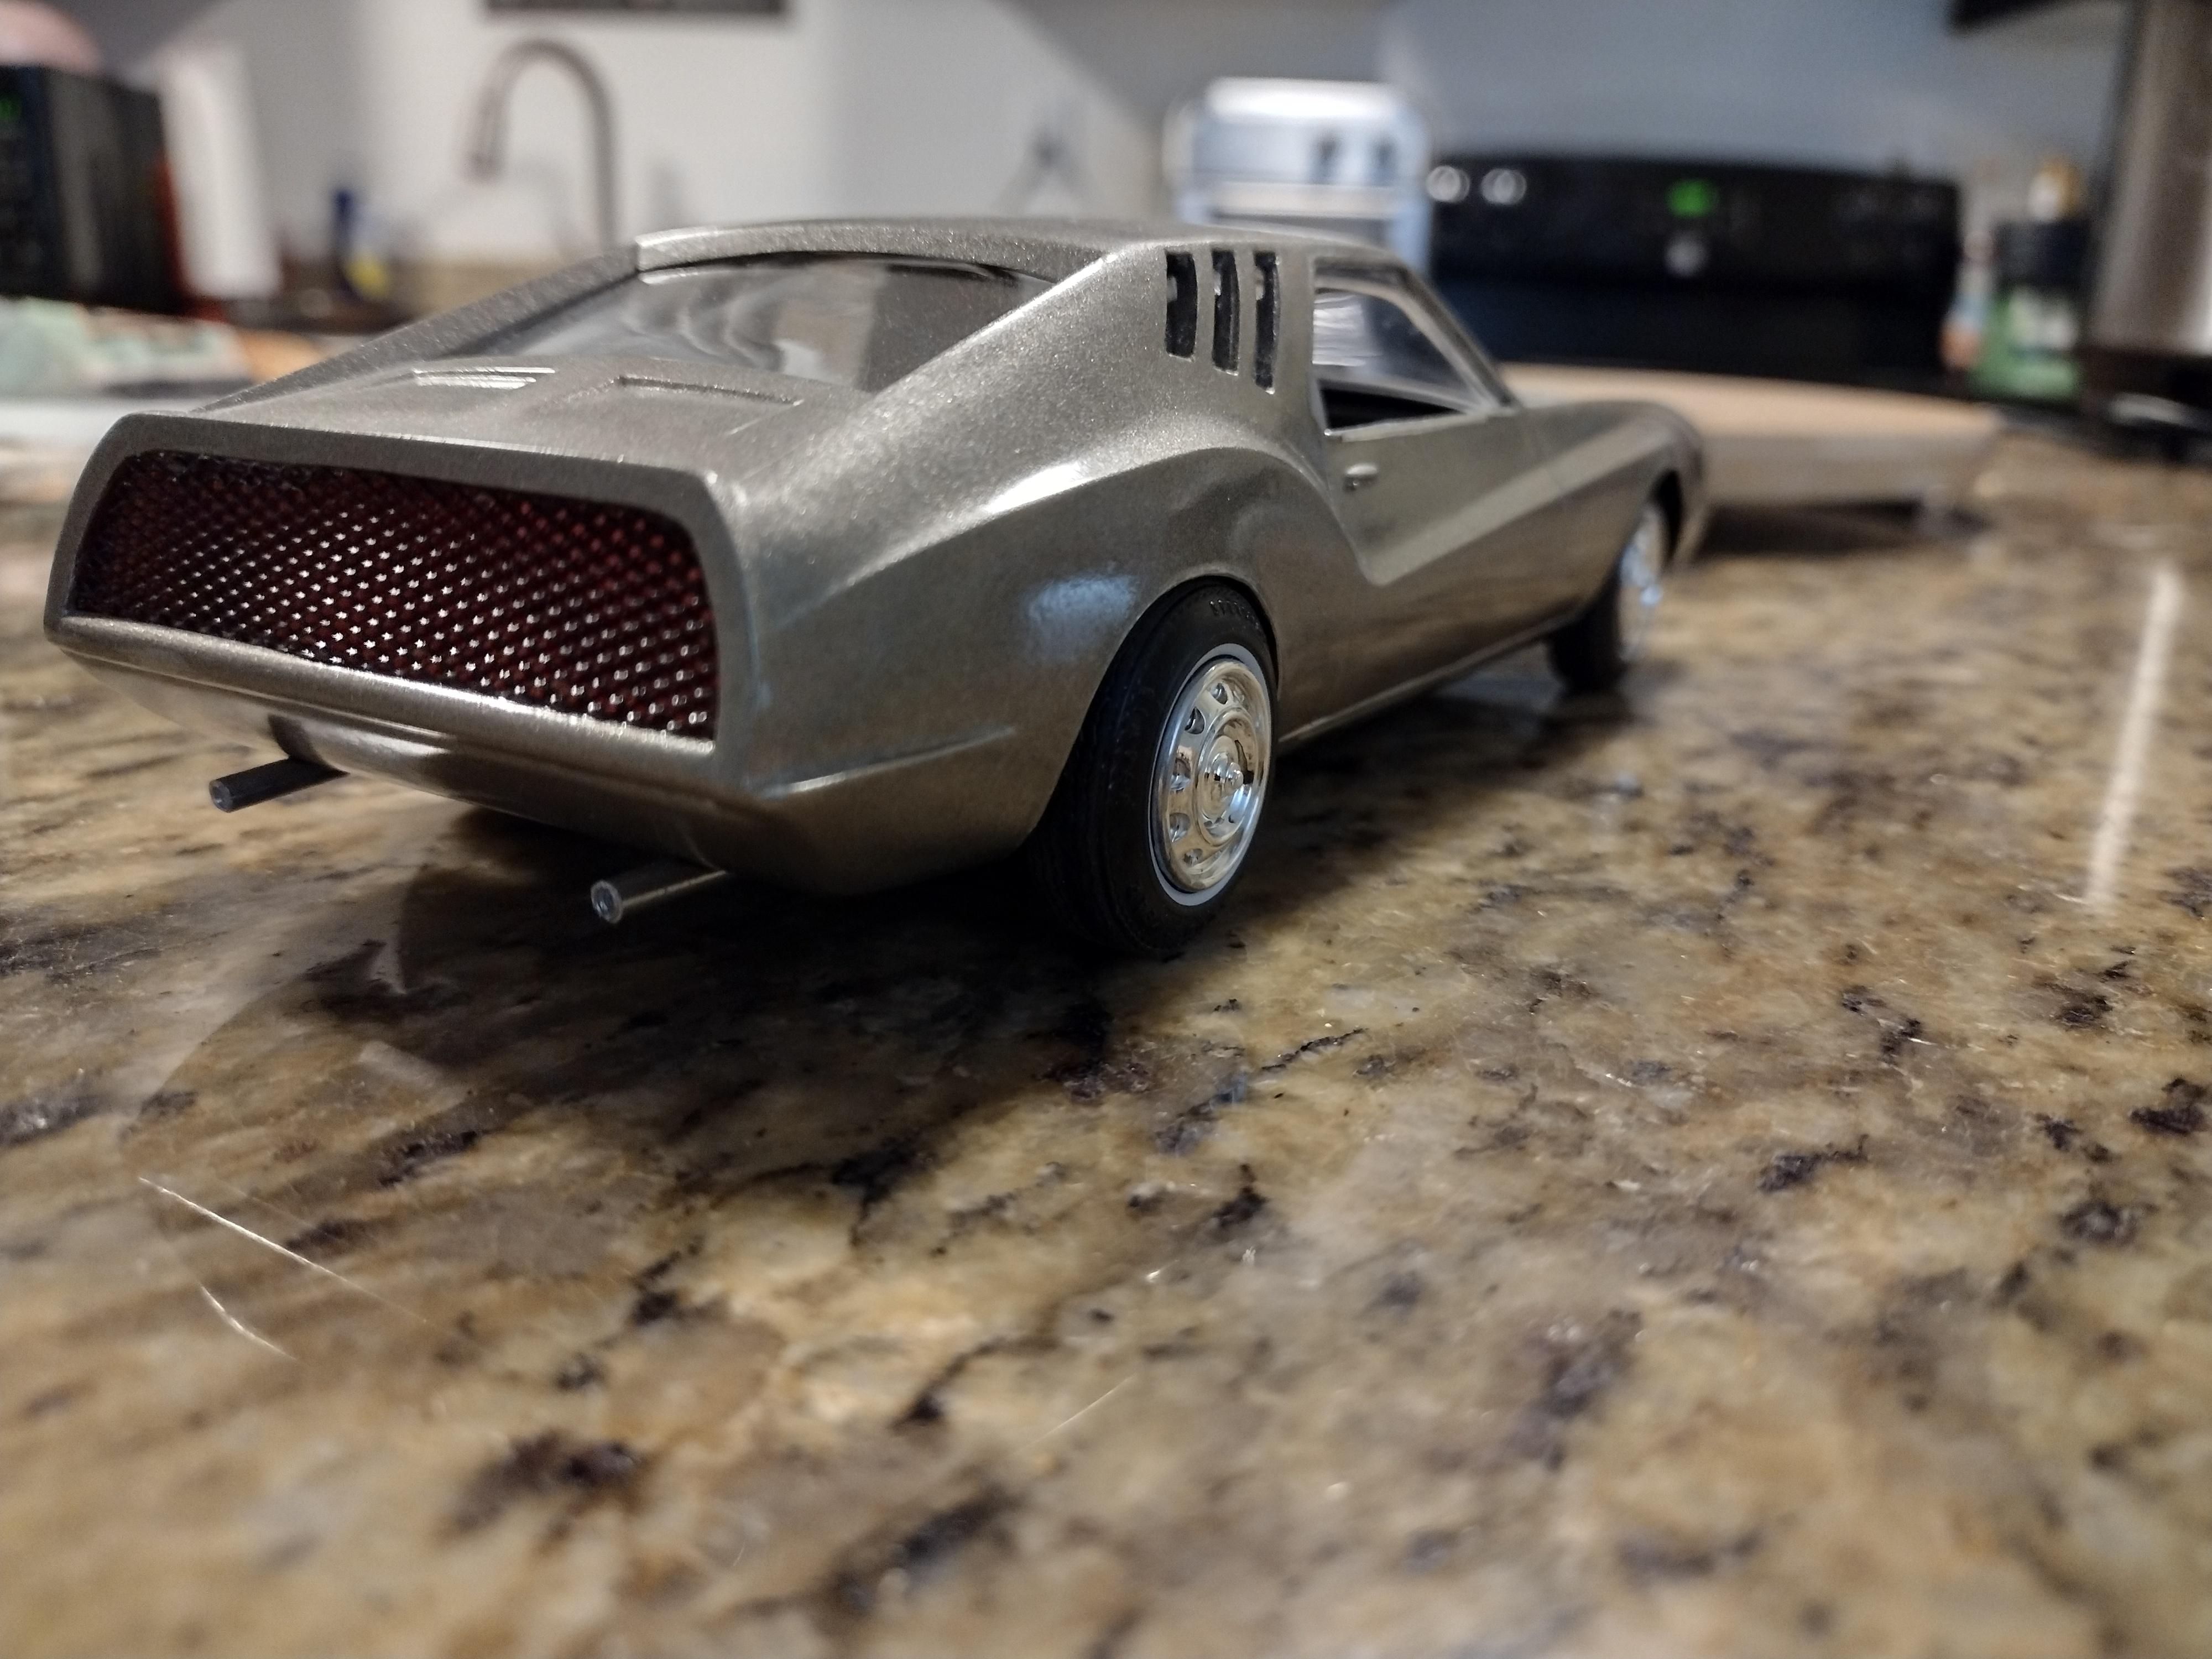
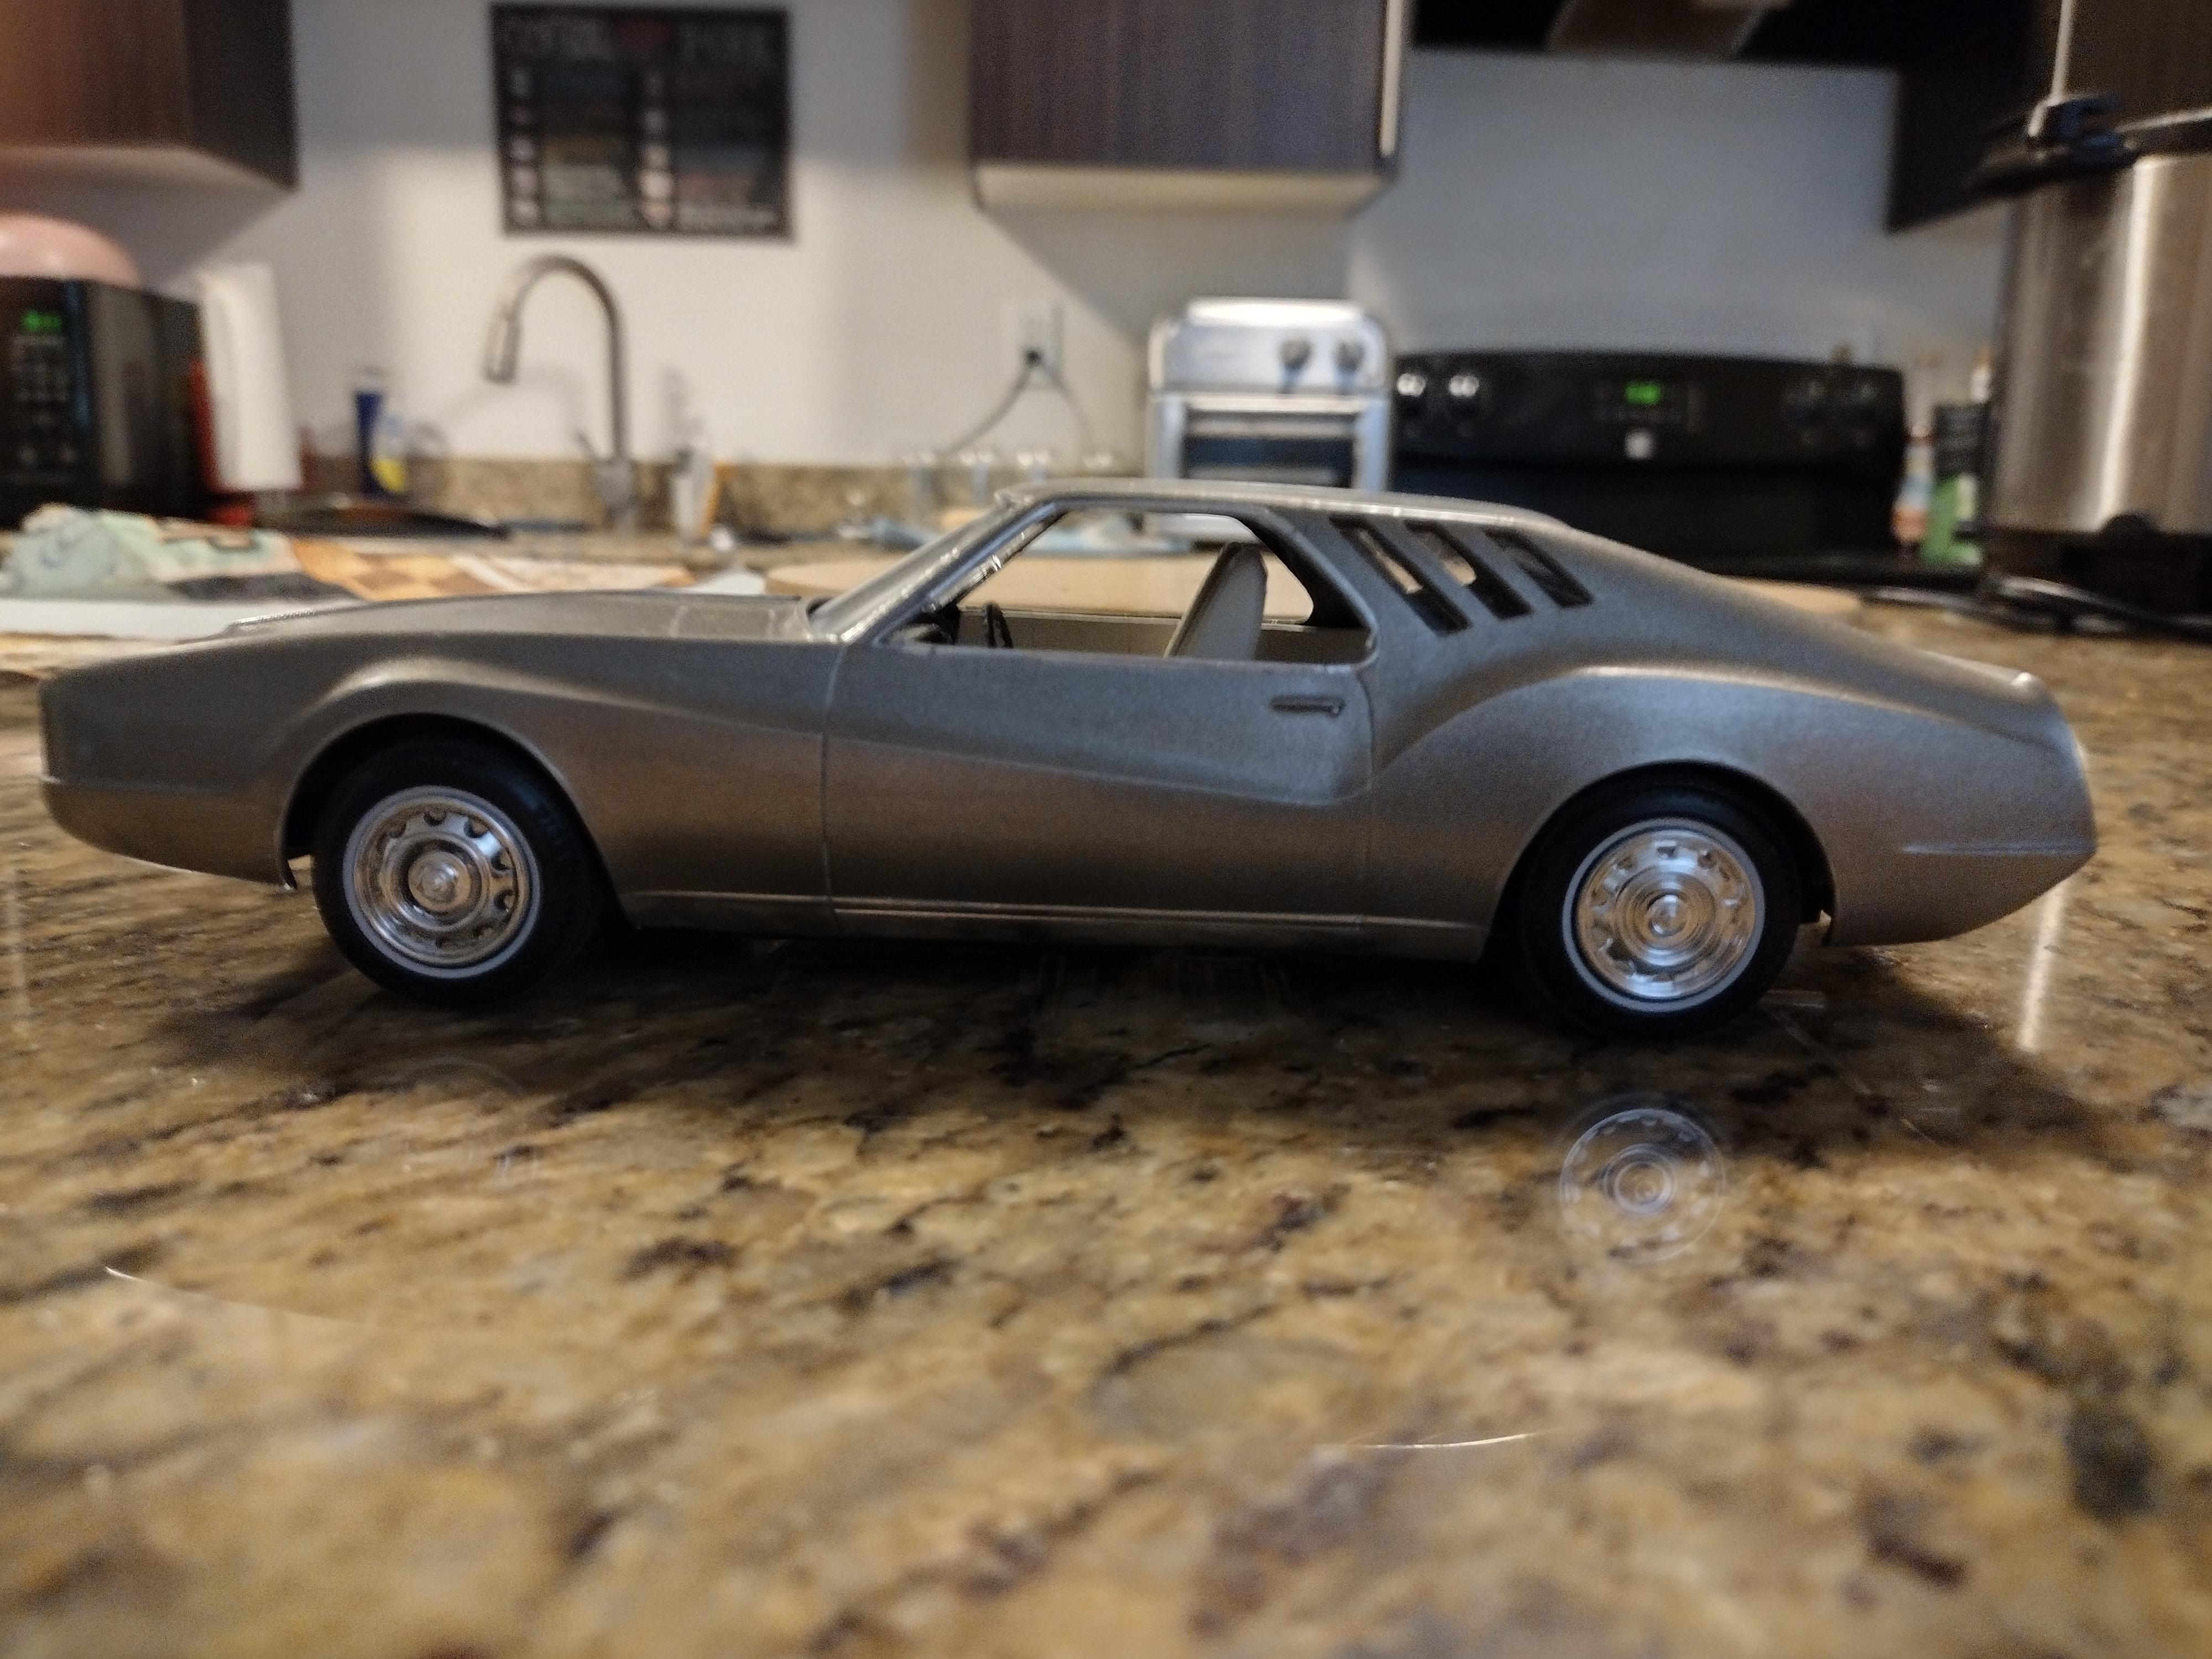
Here's my take on the Californian kit. It had a LOT of ugly out of the box but the overall shape wasn't bad. First effort was to remove the awful beak it had. Made the entire rear panel the tail lights with a grill over it and made a new rear bumper out of half-round. I filled in part of the panels that went from the quarters into the roof and cut out the side parts to make almost colonade-style quarter windows.
-
I get that all the time. It rubs out quickly with a little Novus.
-
I've been working on expanding my shelf space and cleaning, and doing some light repair as I go through. I finally got this one finished up. It came out really cute.
-
Yeah, I kinda thought about the unibody part, too. I might see about picking up another one and give it another go. Mostly what made me go with the 57 Chrysler was the engine compartment. It was the exact shape as the one for the 62. I may pop her back apart and do some adjusting soon. Once I can get some Sublime green I can work with, I'll show off my Superbird.
-
I lucked into this one on eBay some time ago. It was glue bombed and since it had been left unpainted, the plastic was beginning to crumble. The top of the windshield frame and cowl both broke while working on it.