customline
-
Posts
3,792 -
Joined
-
Last visited
Content Type
Profiles
Forums
Events
Gallery
Everything posted by customline
-
Oh I can't really blame anyone here for that, Len, there's someone in the house that is more likely the culprit ?.
-
Been there, done that, Lenny. One is enough. Nope. I might want to take another shot at a chopped kustom. Maybe sectioned....ooooo.....?

-

Is There Room For Another 41 Plymouth or Two?
customline replied to LennyB's topic in WIP: Model Cars
Rookie mistake, Len. I did the same thing. They sit there in the drawer. I'll never use 'em. But I don't want that stuff in my septic tank. They'll go to the land-fill. -
"The 777" Tasca Ford '63 lightweight Galaxie
customline replied to customline's topic in WIP: Drag Racing Models
Lenny, you can ramble all you want on my thread because nobody really reads this stuff anyway. They mostly look at the pictures and maybe hit the "heart button" and move on. I hate the idea of some ass-hat buying kits just to very cleverly break them up in a strategic manner to maximize profit. That said, they do provide a service that I'm ashamed to admit I have , on occasion, taken advantage of myself. Gotta do what it takes for those special projects. I don't make a habit of it but desperate times....well you know. -
"The 777" Tasca Ford '63 lightweight Galaxie
customline replied to customline's topic in WIP: Drag Racing Models
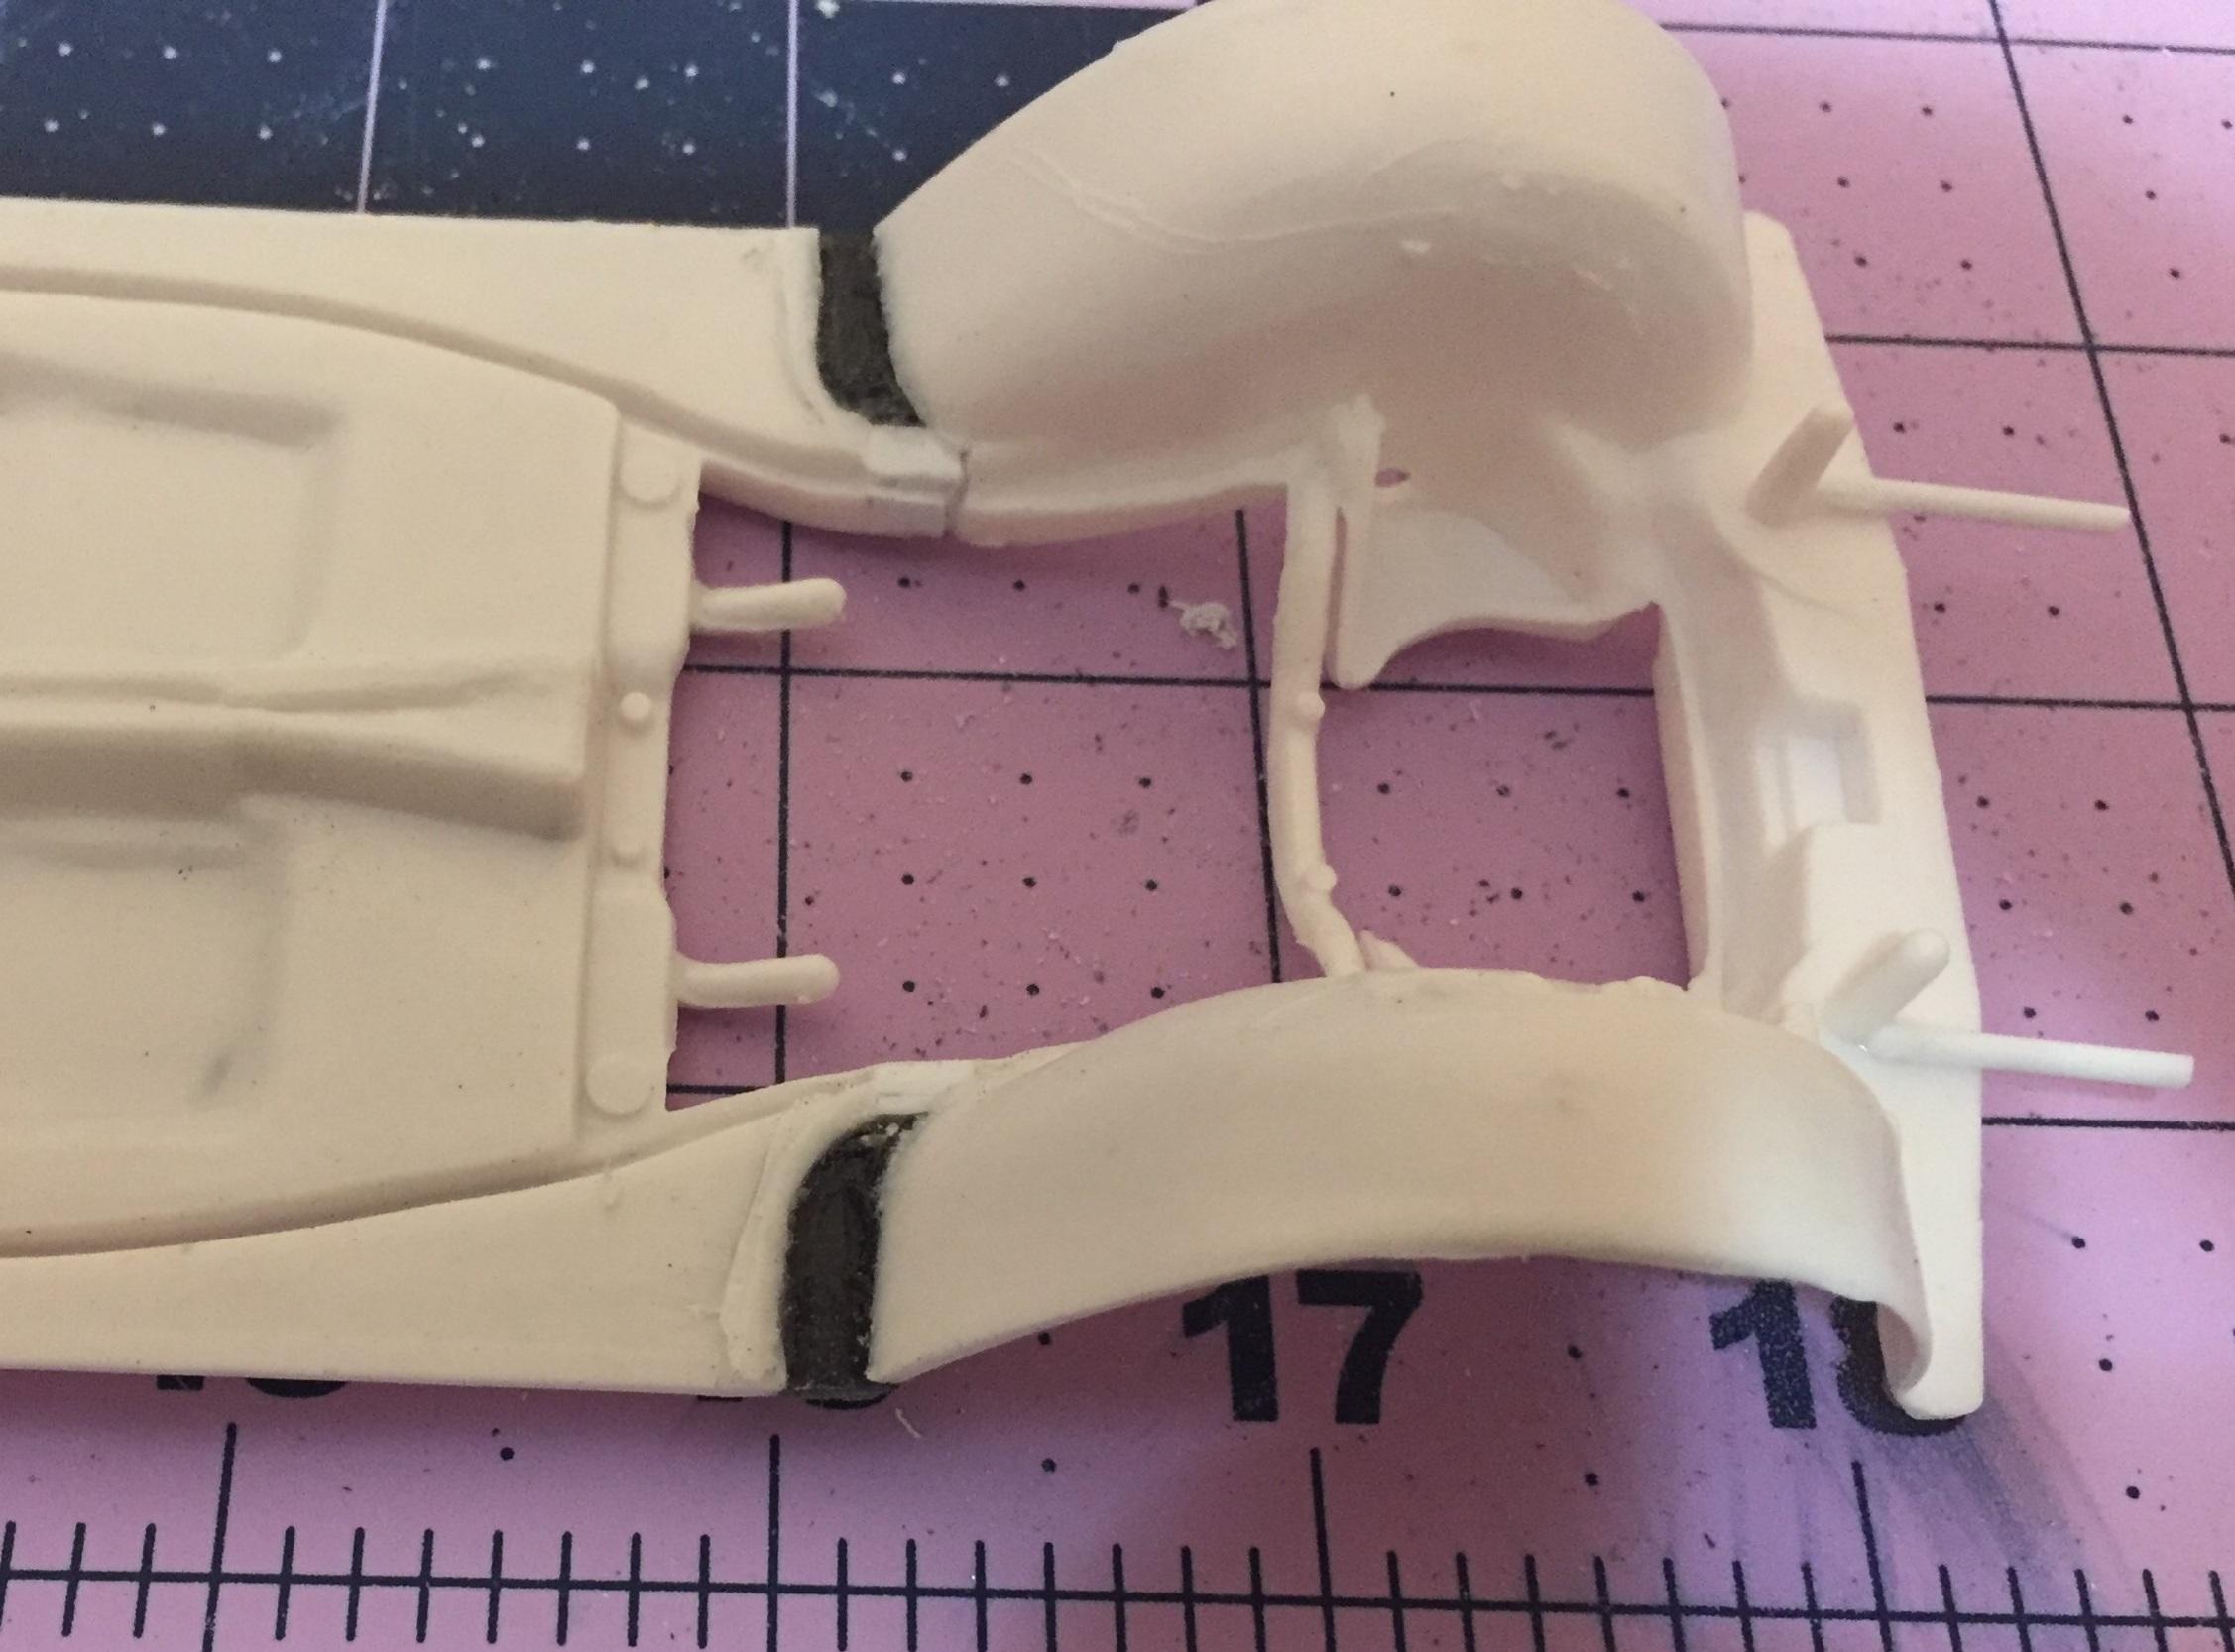
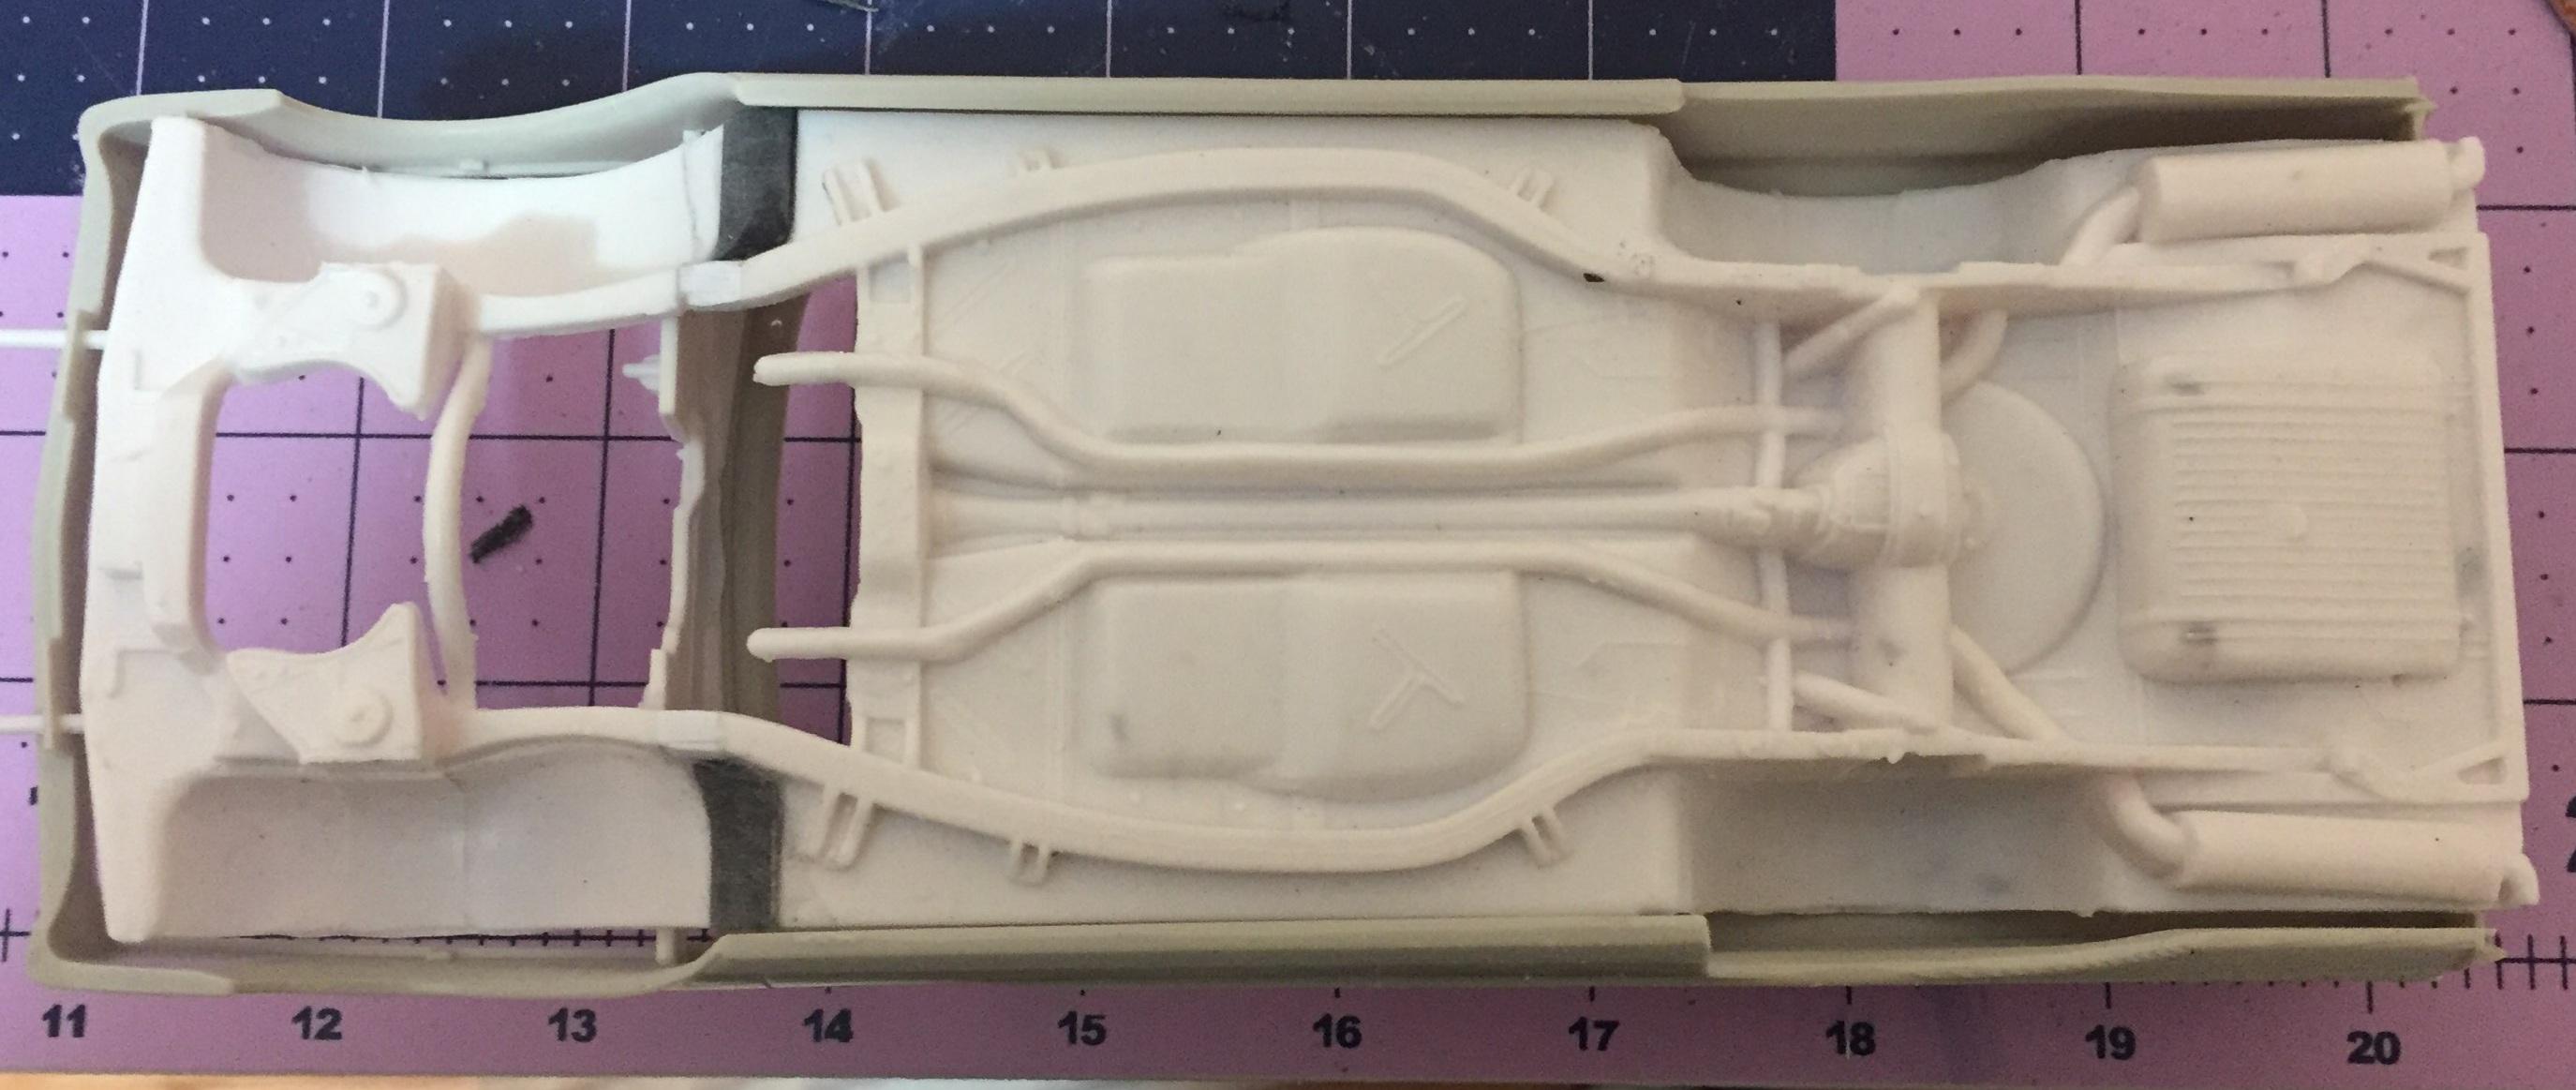
Thanks, Len, I got the basic idea from others on the forum. The desire to have a fairly accurate model of a somewhat obscure drag racer I witnessed as a child led me down this path. It has meaning for me. Others here have built lightweight '63 Gals and they differ in some of the small details. I can only hope to come close in those details that apply to the Tasca car. The actual mechanics of the build is an uncharted course. The way I do things may not work for someone else. I have a pretty good tool arsenal but nothing fancy like some here. You can have any idea you find useful and if I can help, I certainly will. I started to retro-fit the Starliner with the '63 chassis. I don't want to waste that sweet body! I'm saving the 352 engine for something else so I'm going to use the one from the '63 ?. But no metal axle in front! Here's what I got so far:
-
Ok, my first reaction to all this is "my head hurts", but then, like the clouds parting and the sun shining through, I realized "yes! AMT did produce some really good kits and they all have ERTL below the AMT logo. I think we should all be greatful for that merger. There are exceptions, of course, but most of the well detailed AMT kits I have encountered have that ERTL tag; the '60 Starliner is a good example. I hated to do what I am doing to it but maybe I can snag another one, the blue car this time. Anyway, good morning! Get busy! Build something !
-
This looks pretty ambitious.....I'm following ?!
-
Umm....yeah..but you created the problems, Dave, so you must be proud of the problems you created too ?
-
"The 777" Tasca Ford '63 lightweight Galaxie
customline replied to customline's topic in WIP: Drag Racing Models
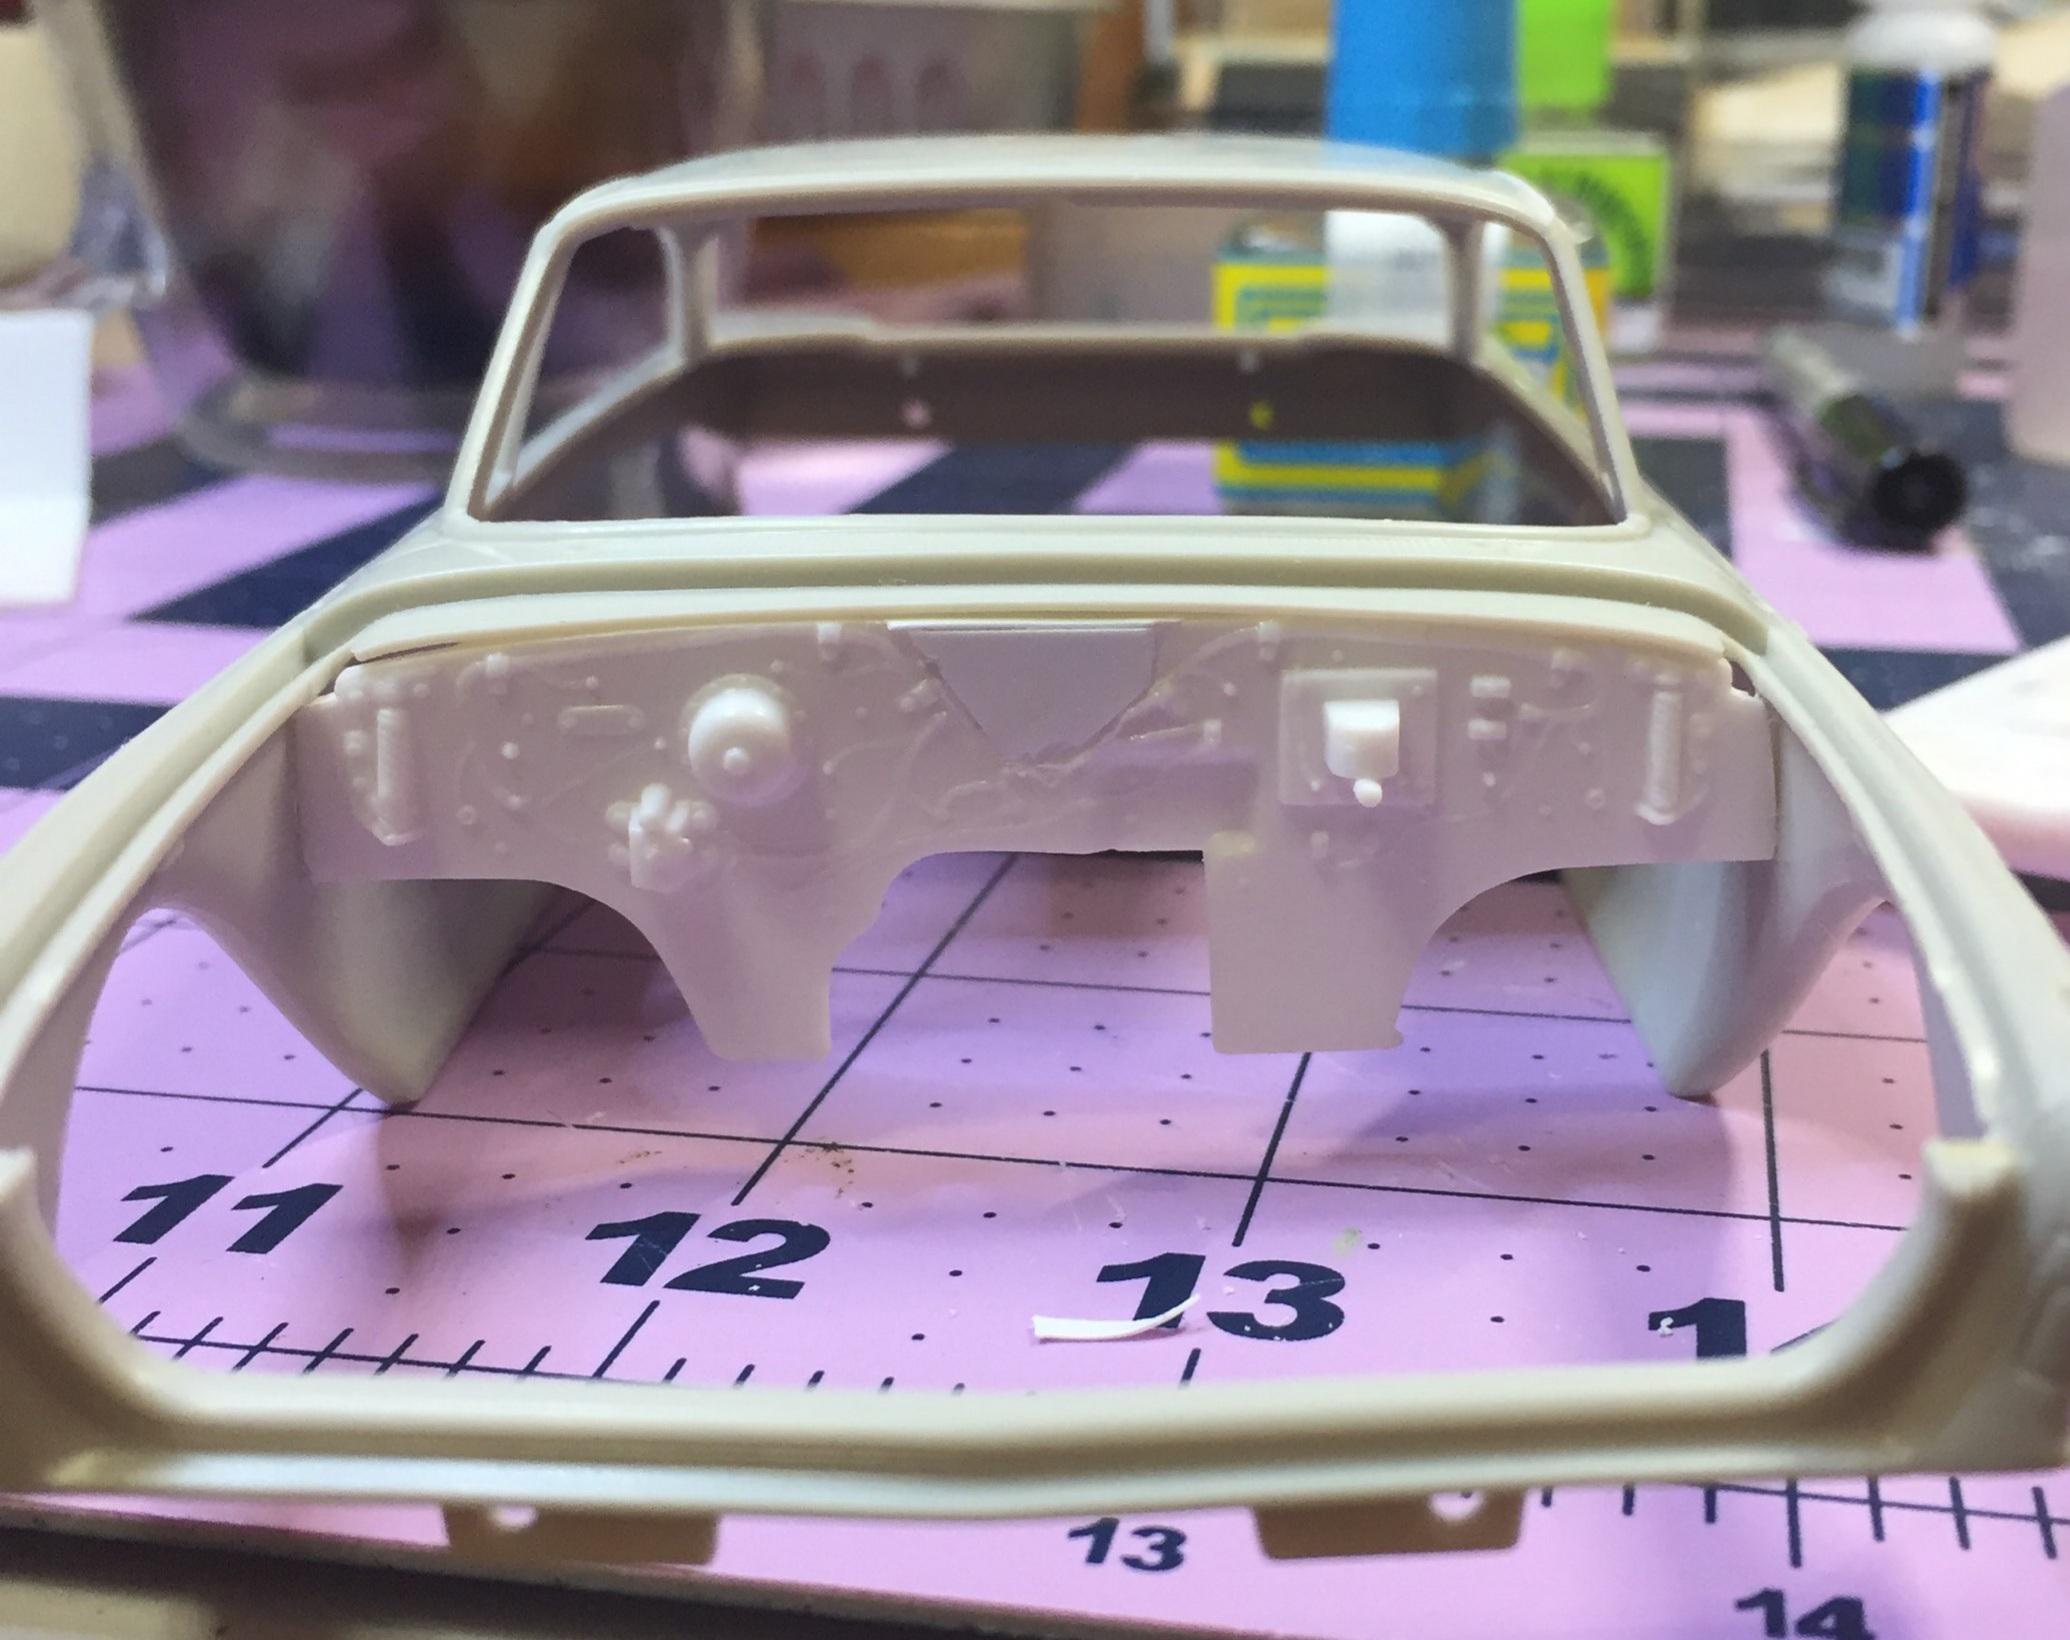
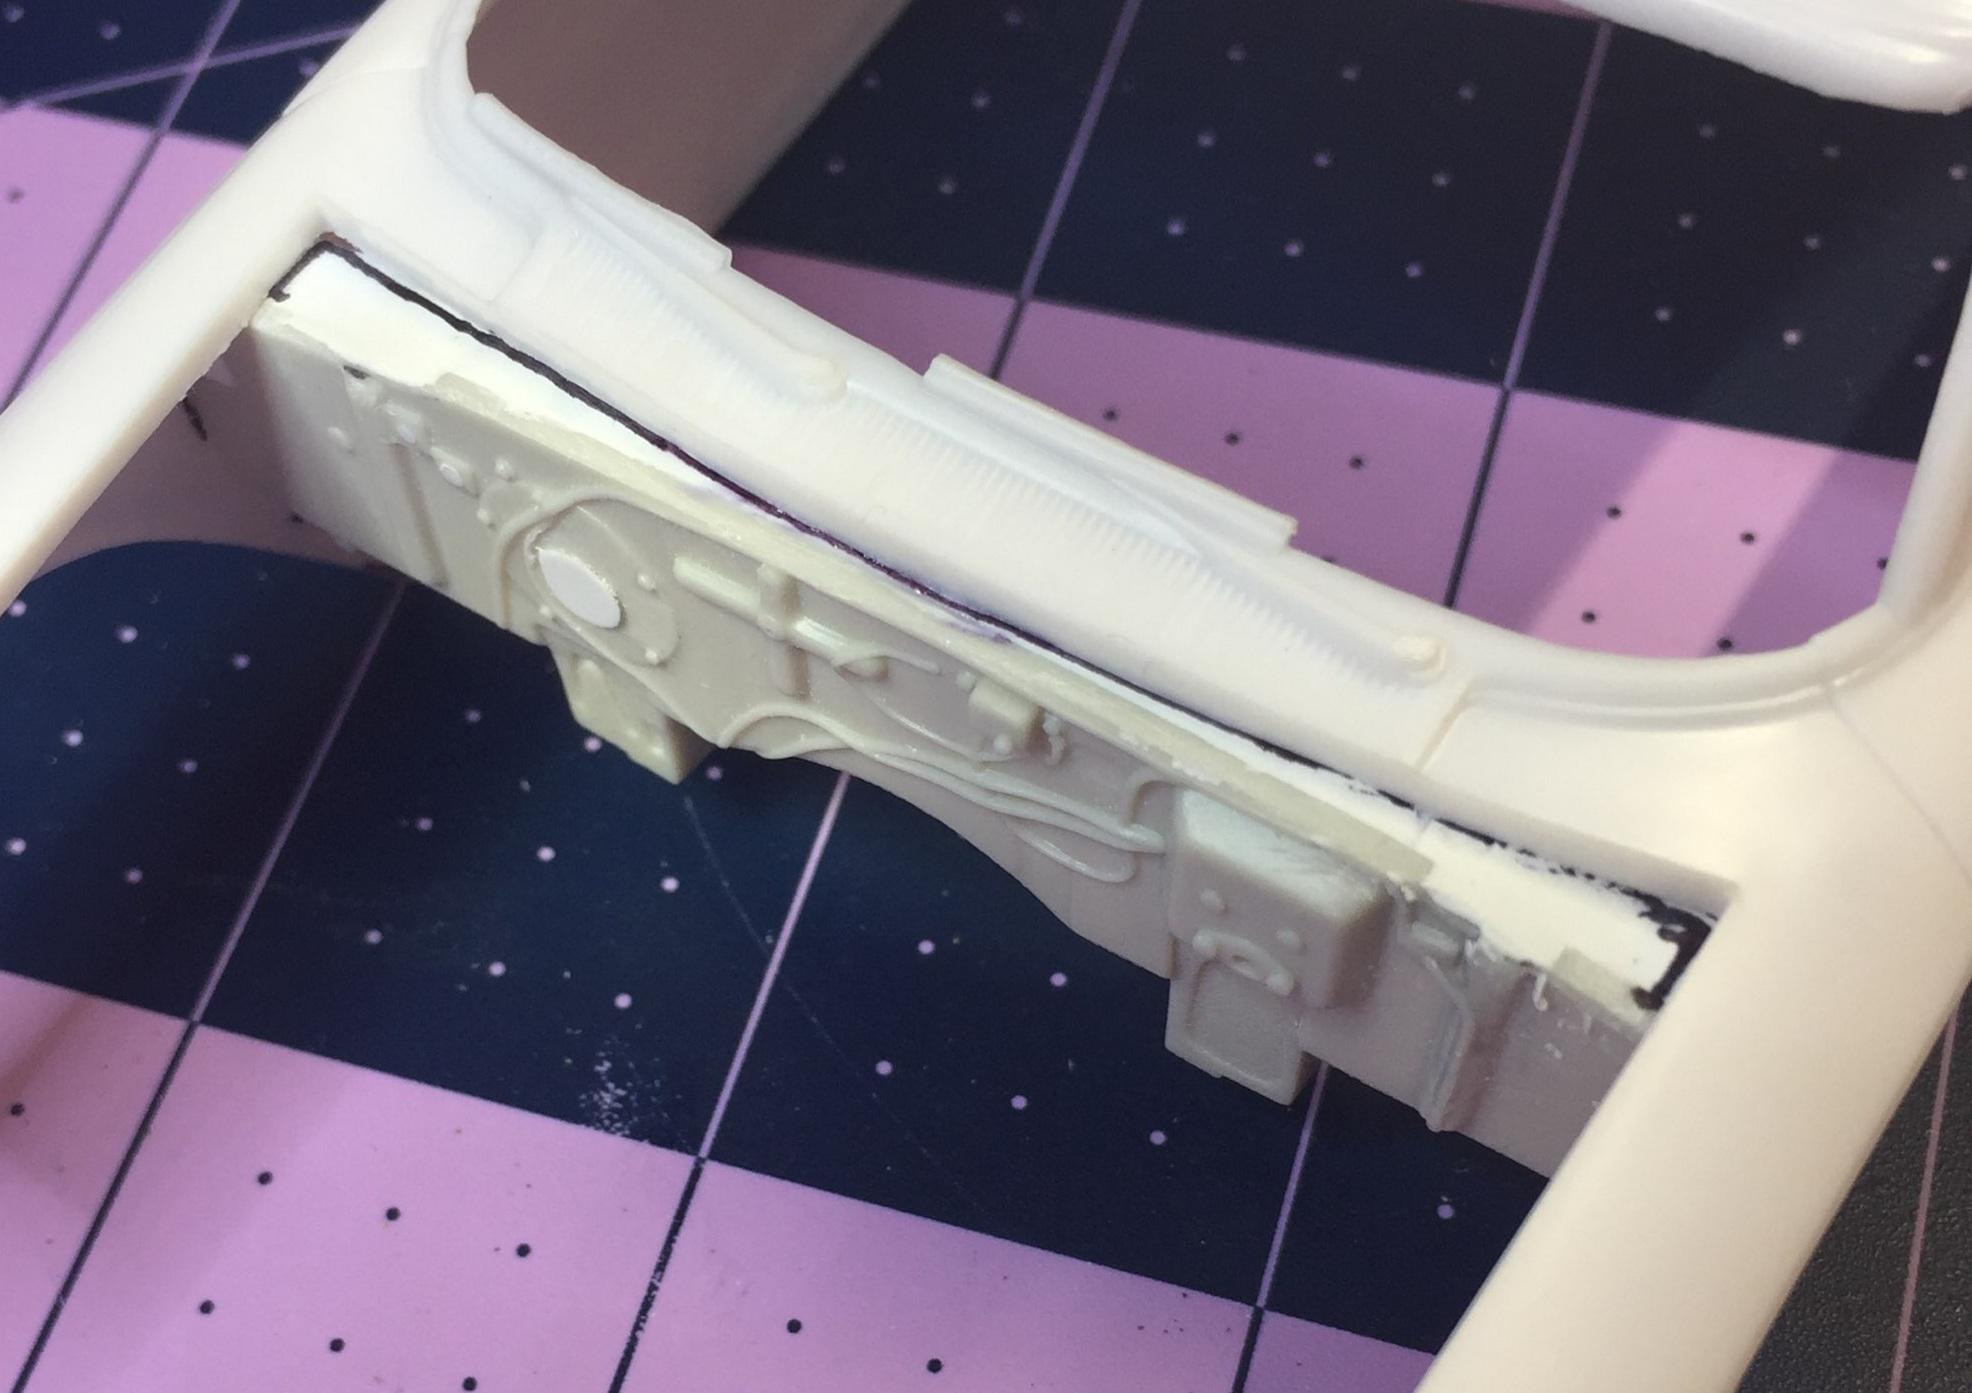
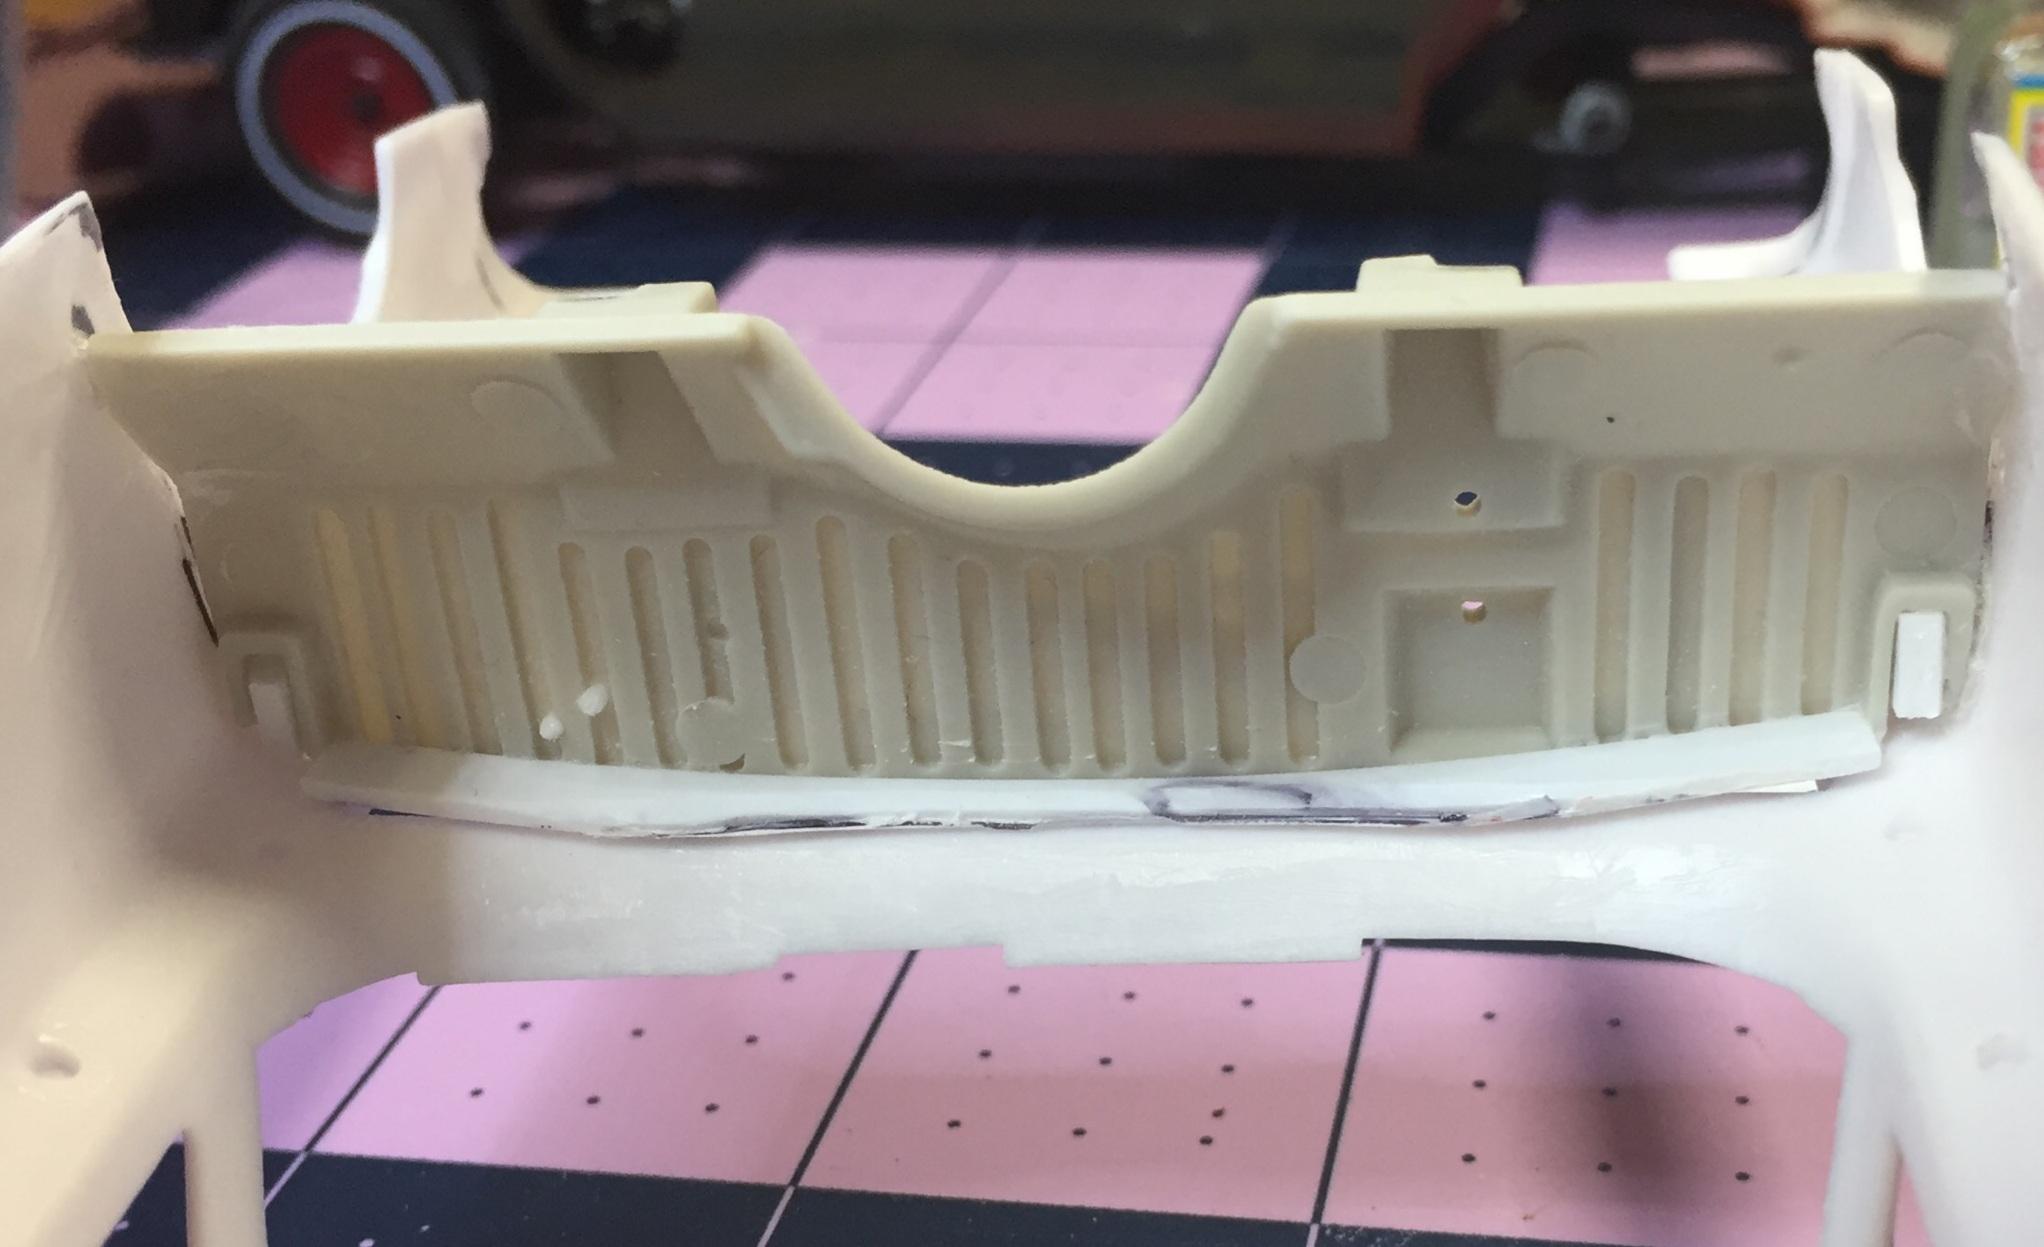
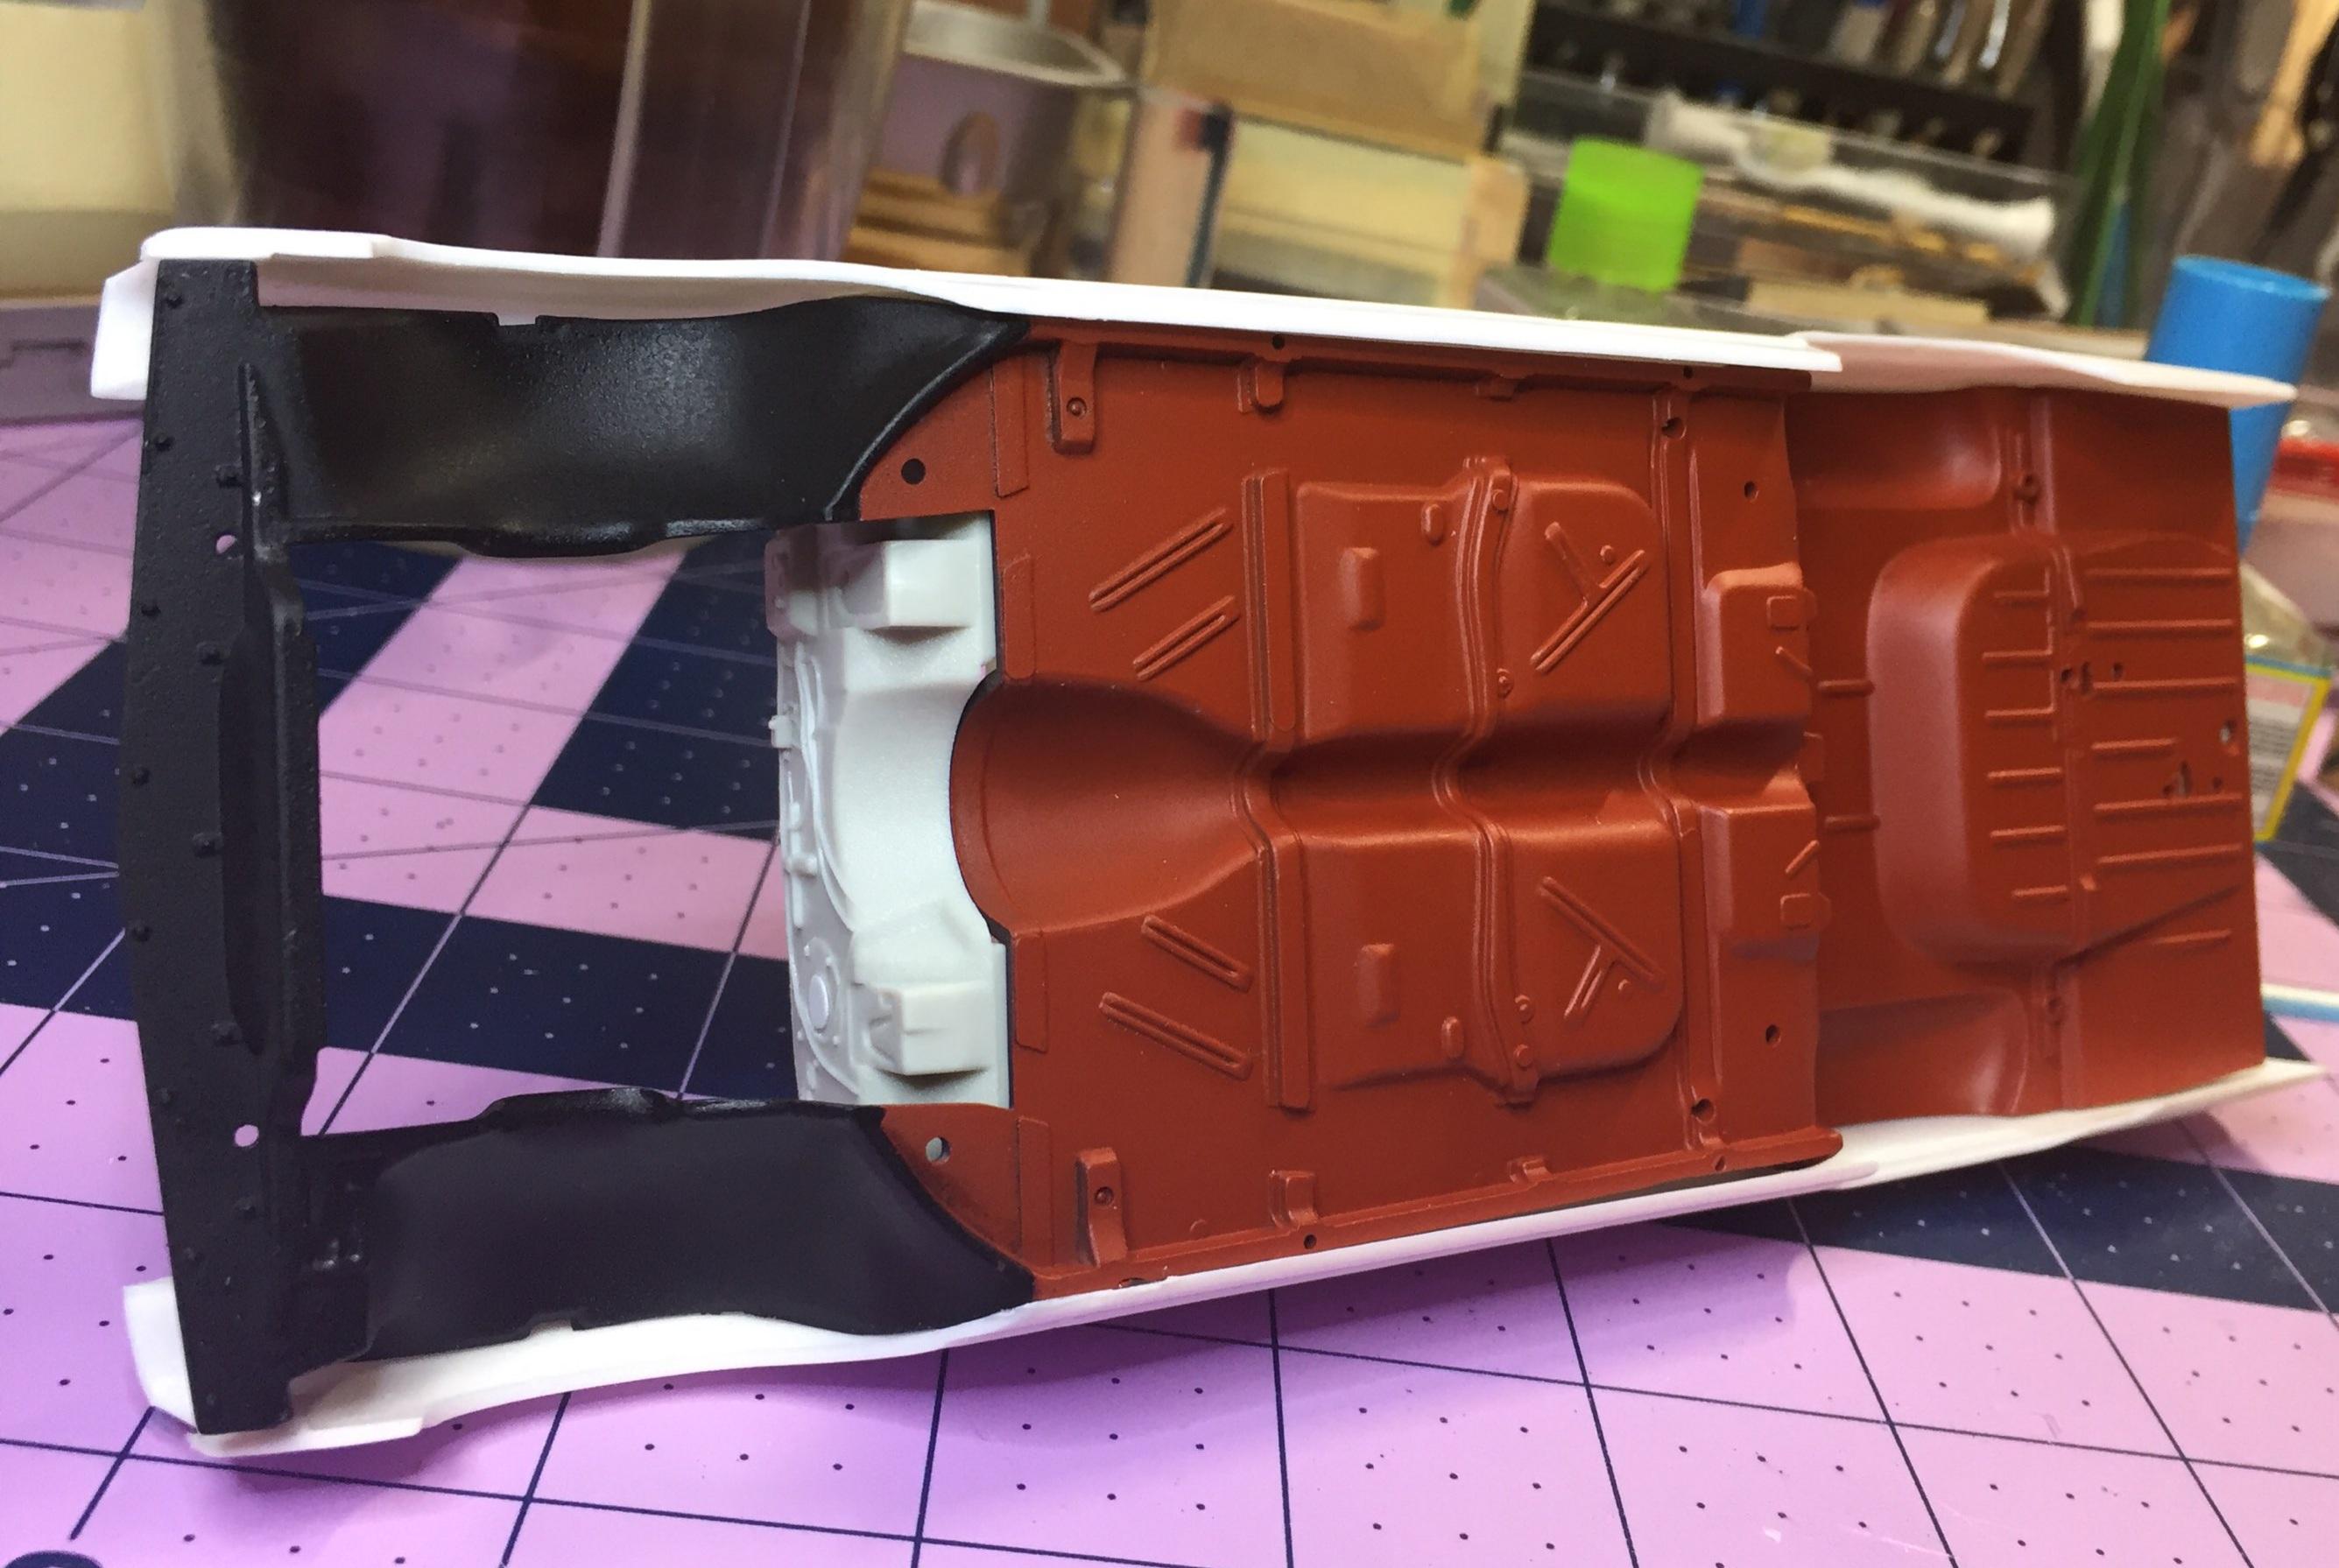
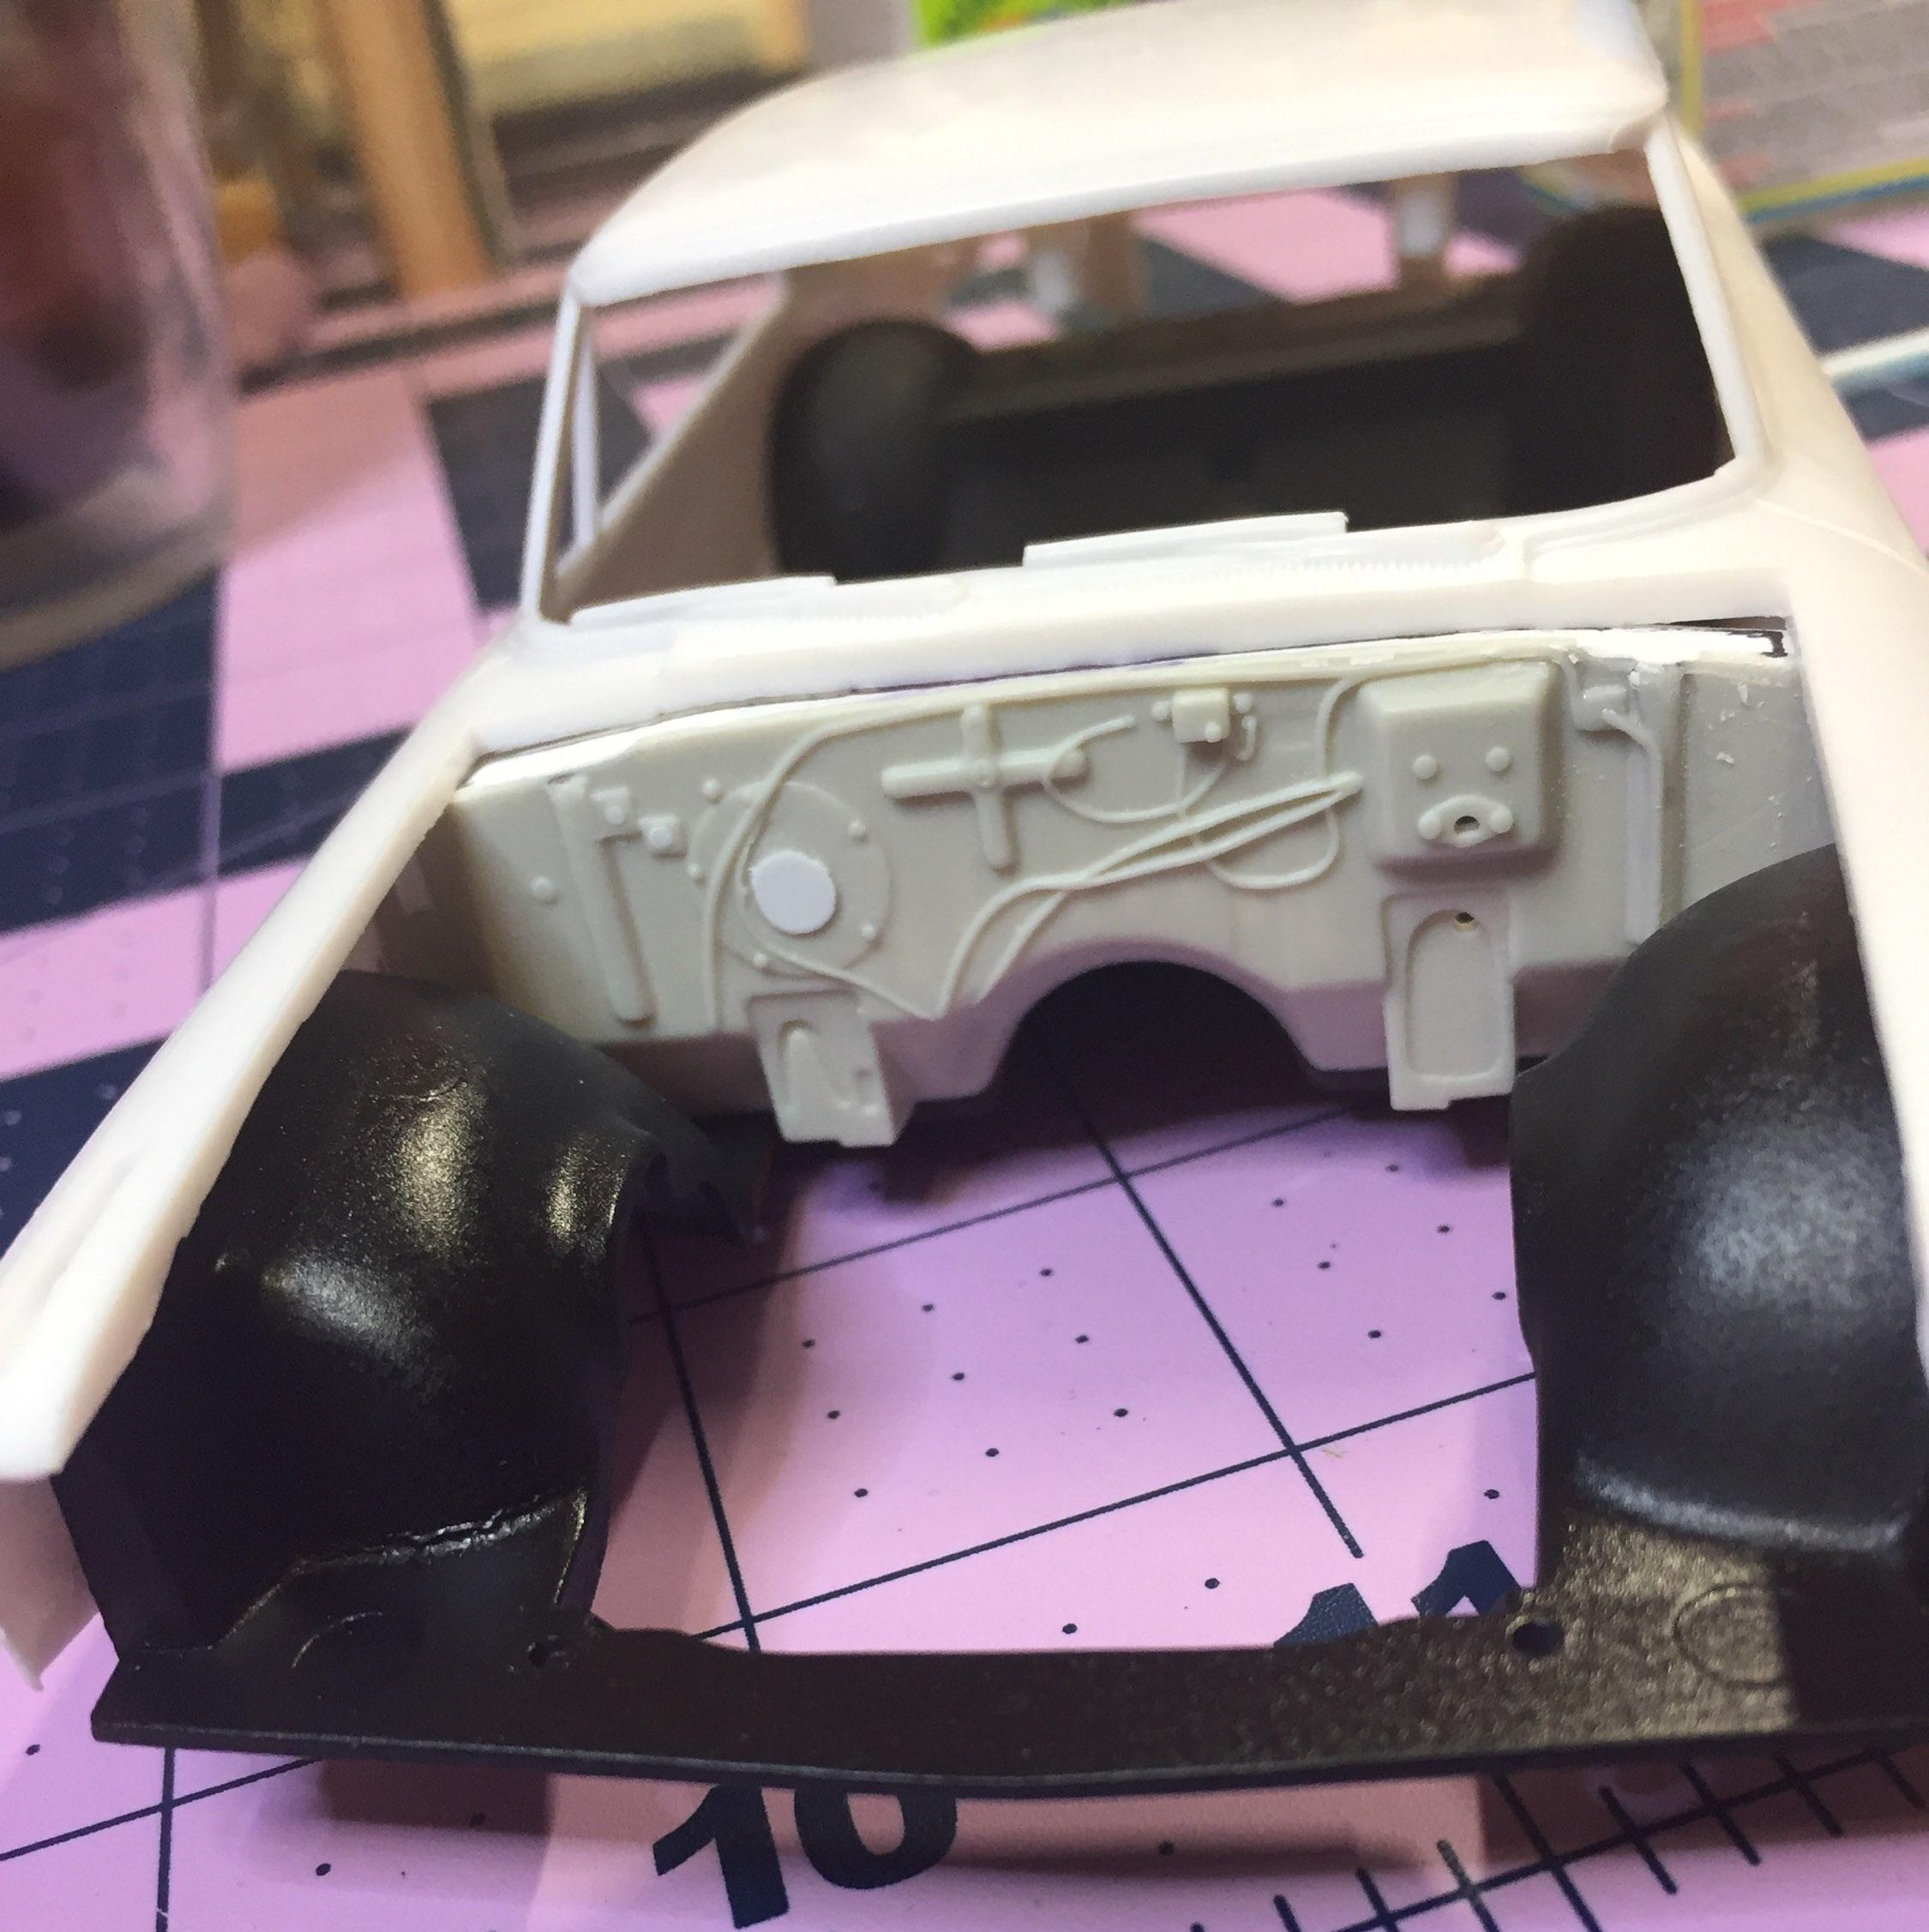
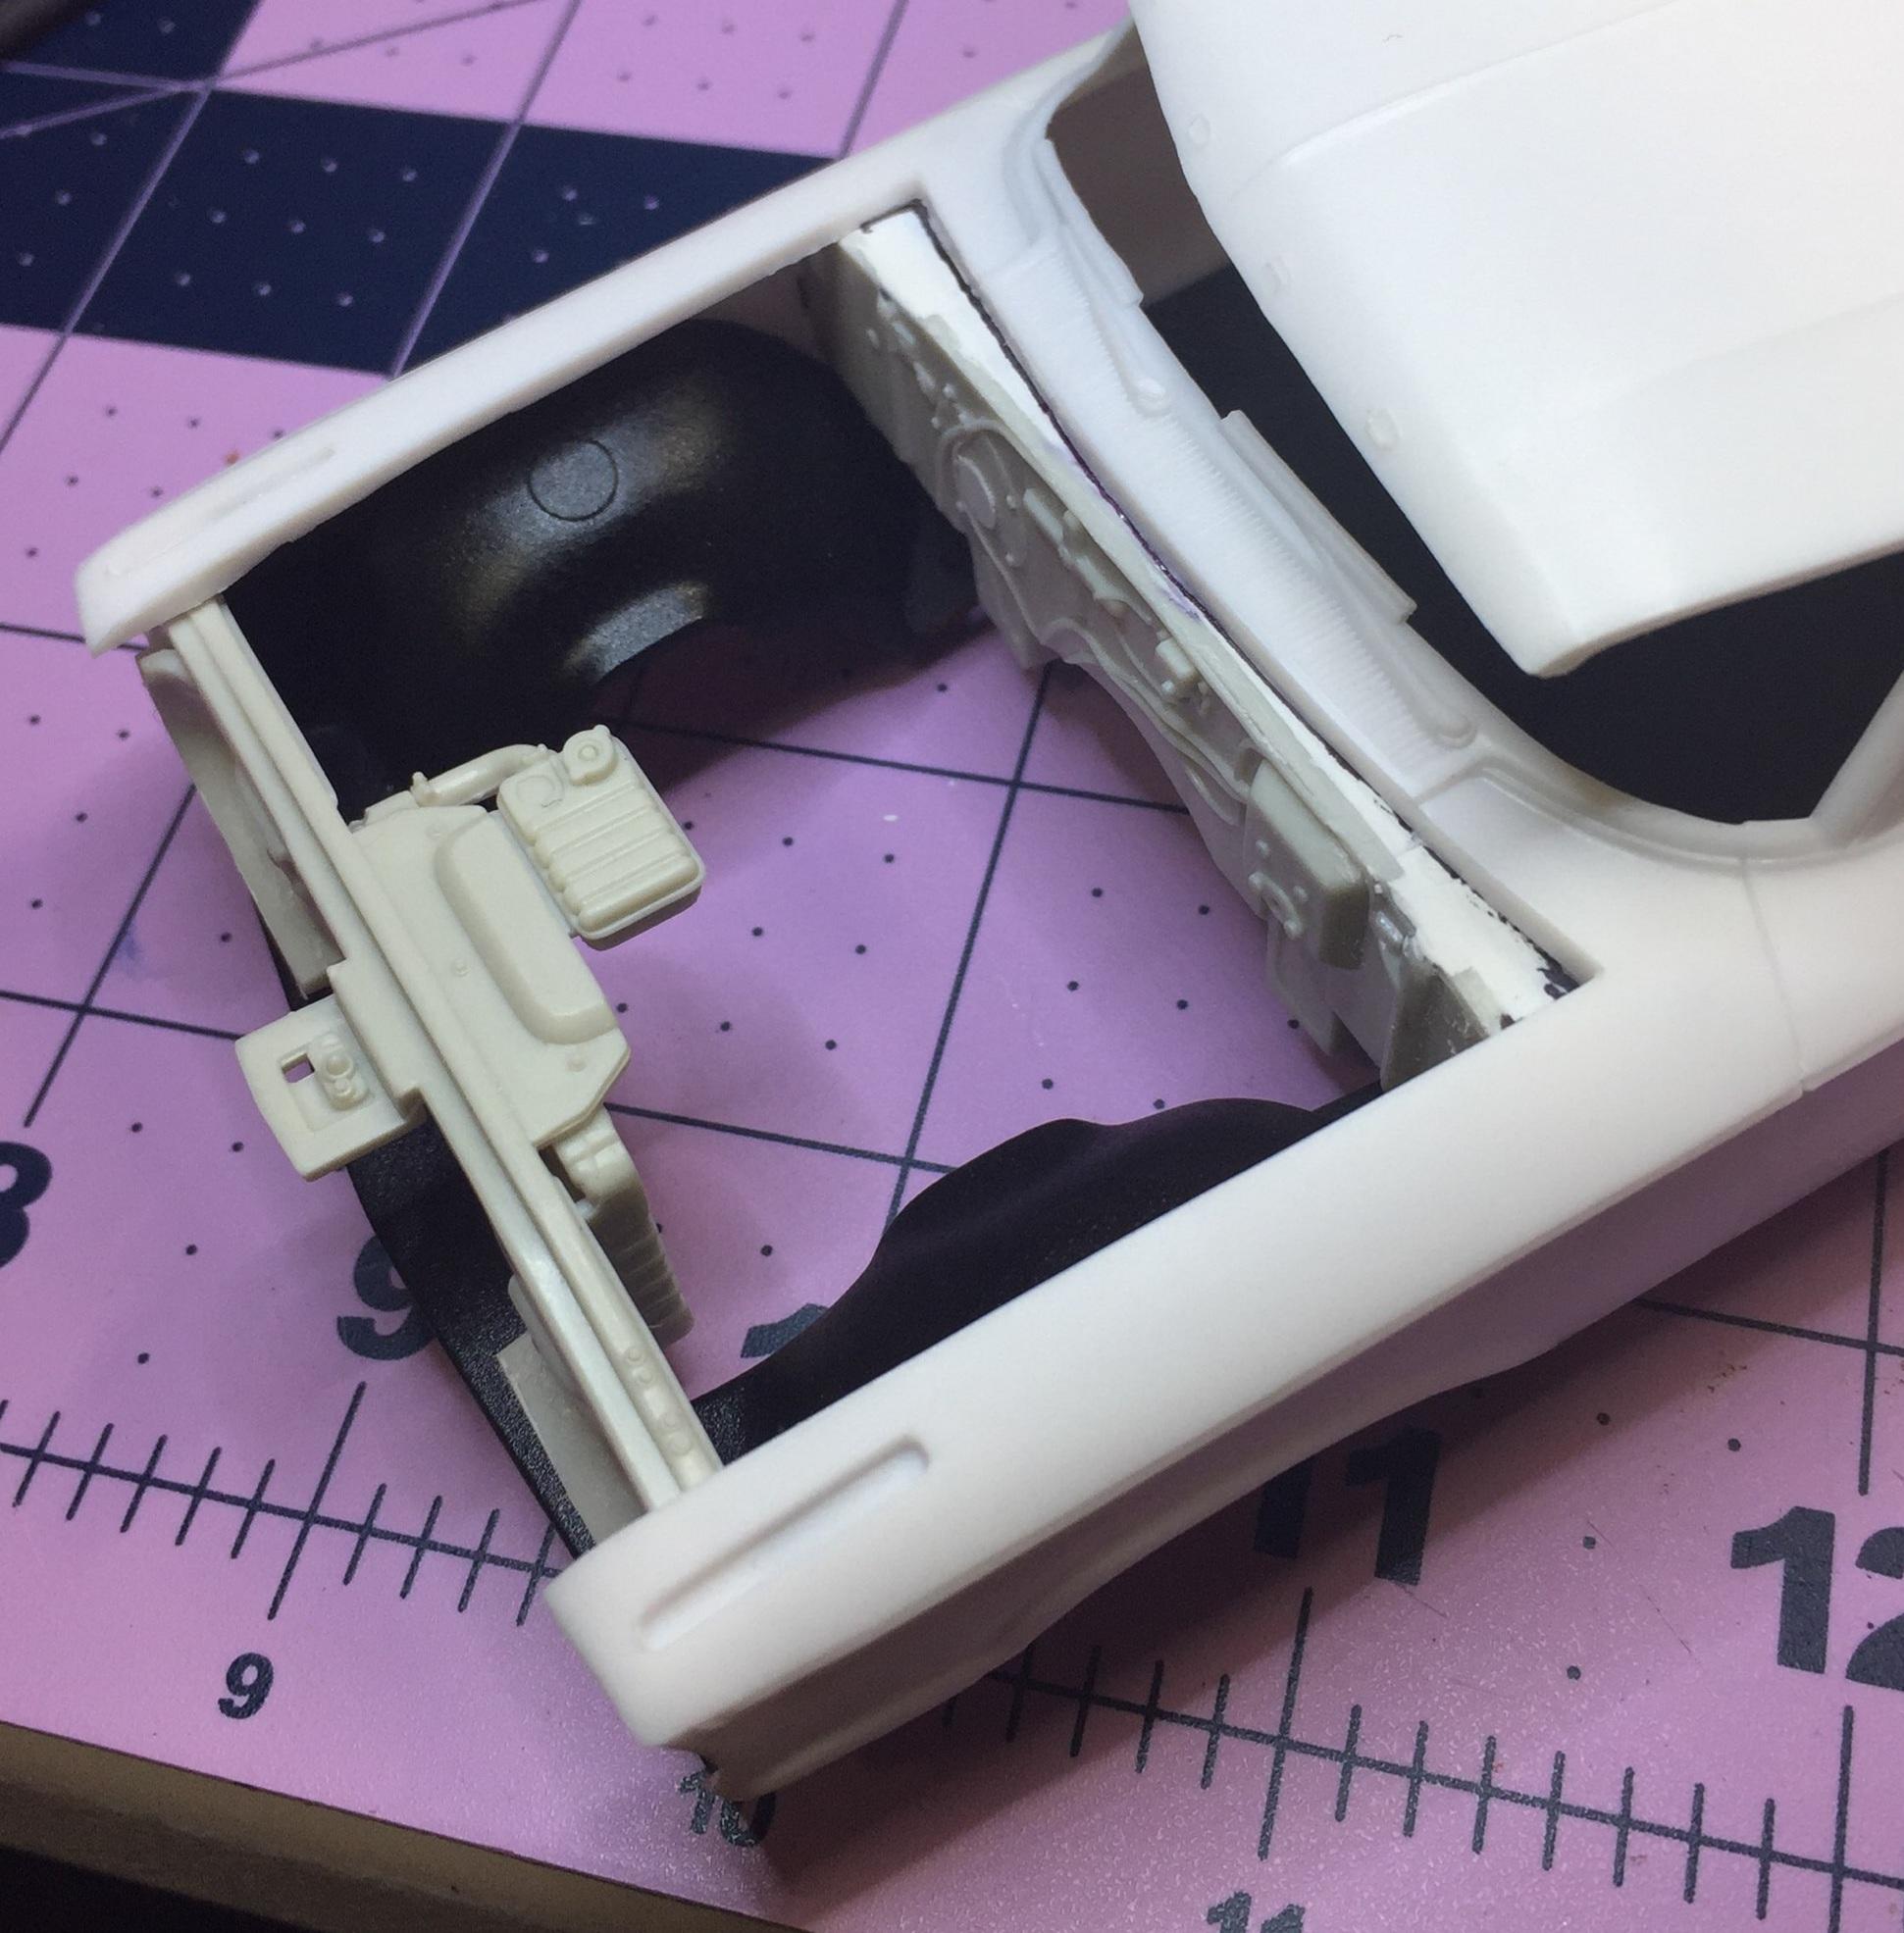
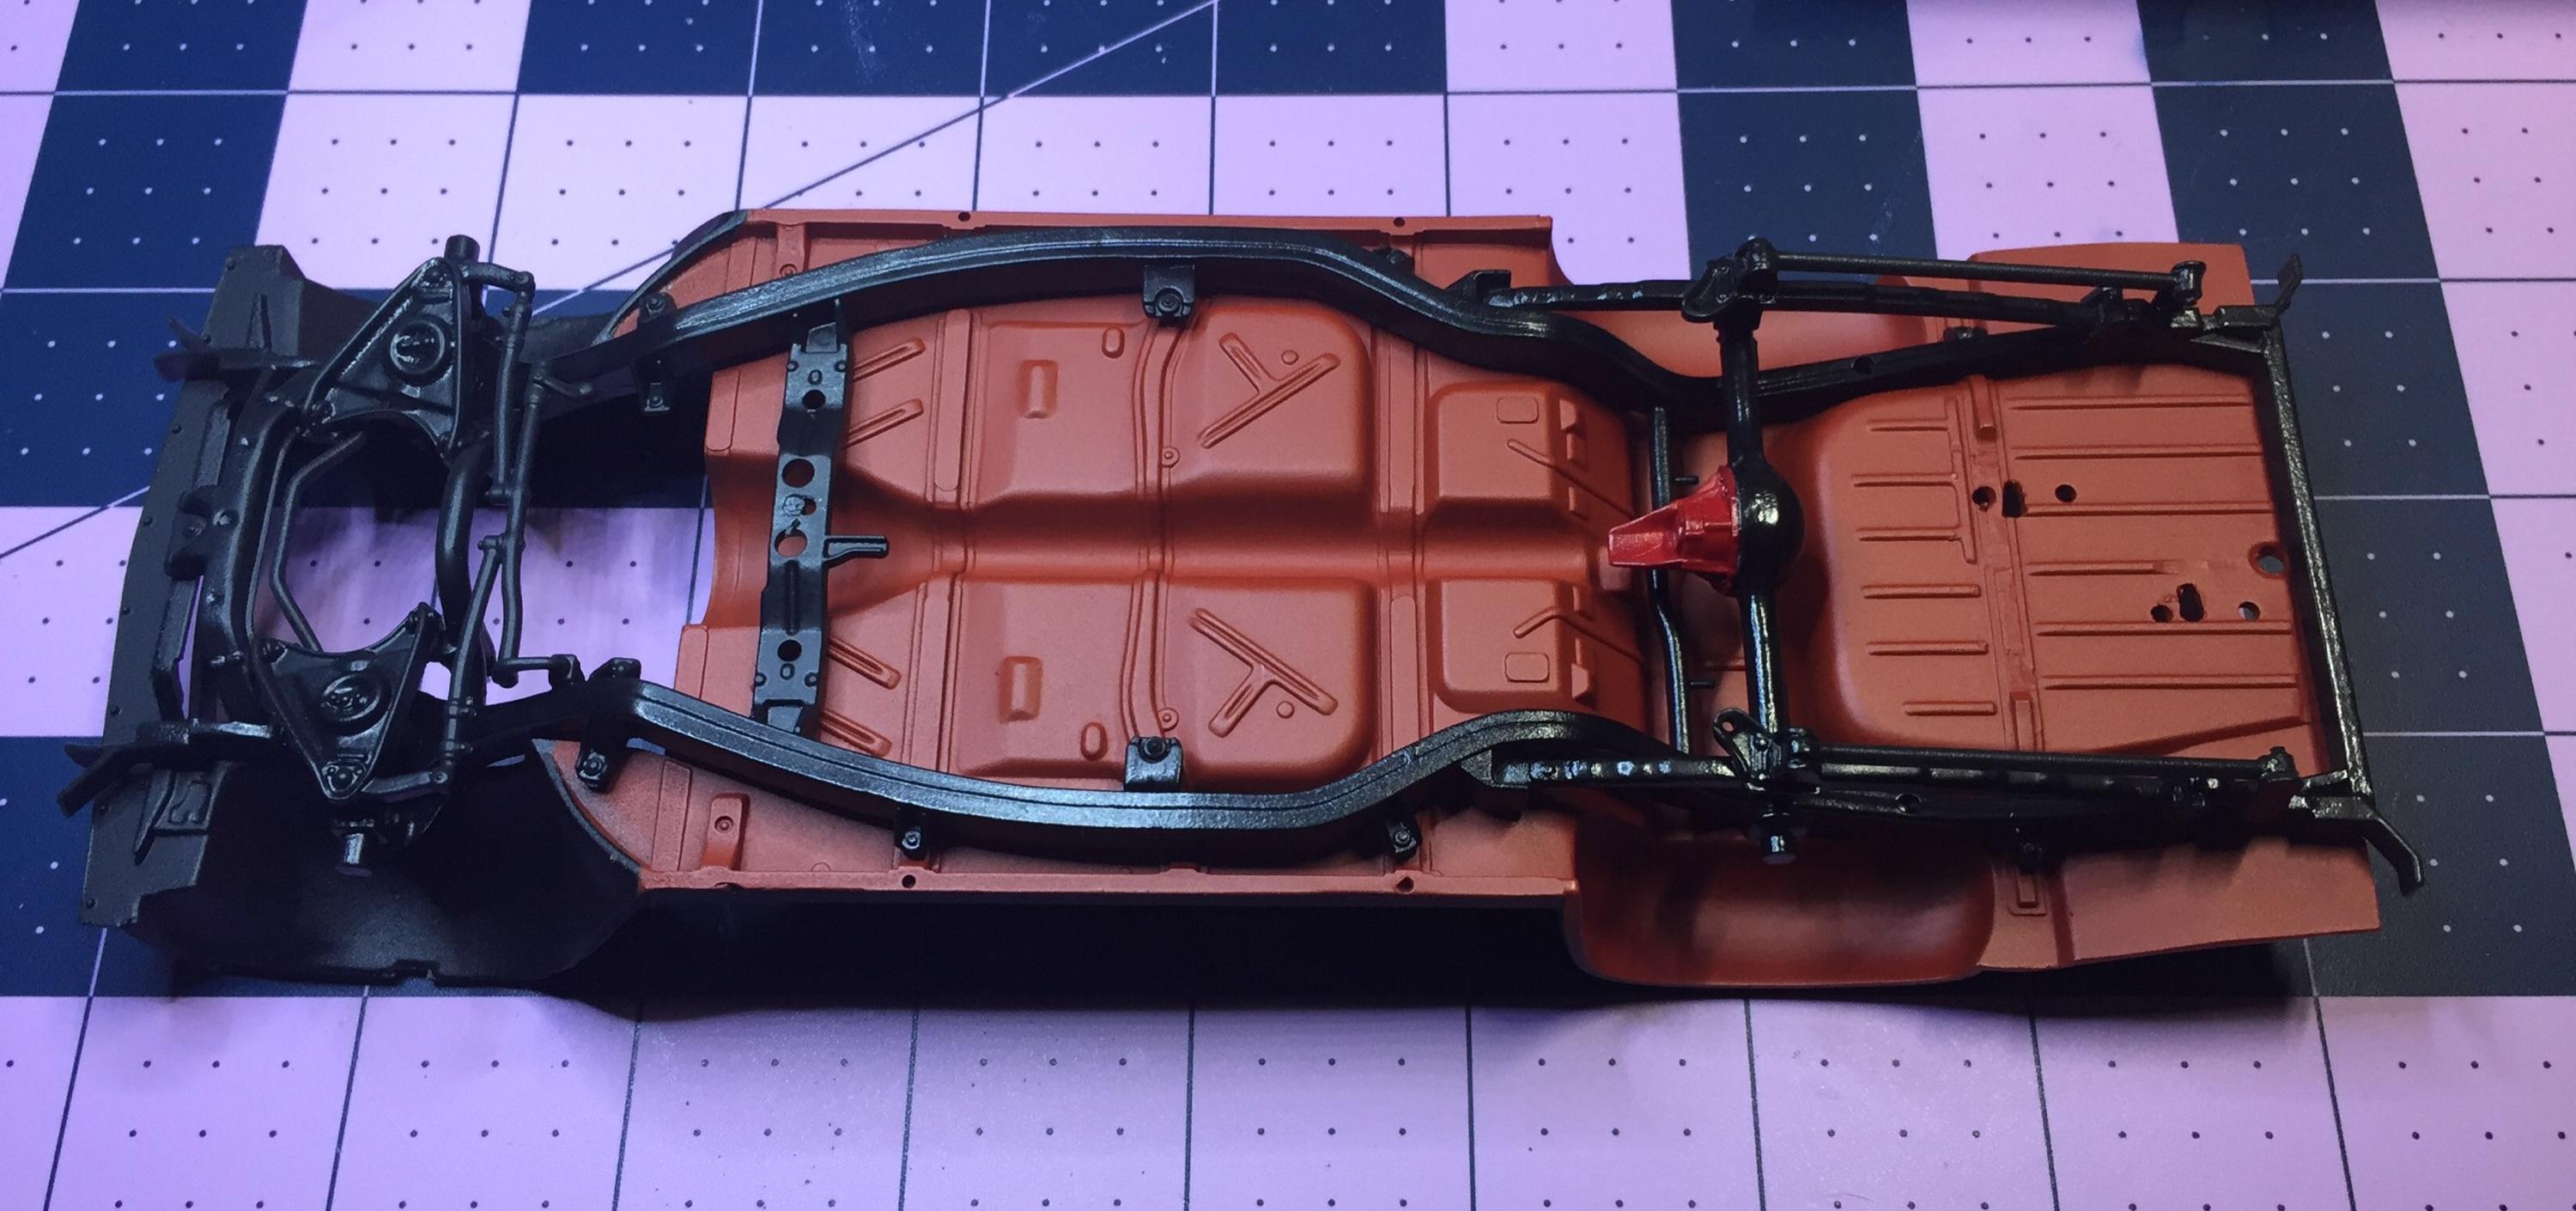
Got a bit more done on this one and started the '60 mods but I'll not go into that yet. Mainly, I have the modified '60 firewall in place in the Galaxie and test fitted it all with everything involved and it seems OK. No surprises yet. I think I will not install the radiator support assembly until final. Just a feeling ?.....everything in the engine bay is pretty tight and I hate surprises. I prepped the body and there were minimal parting lines to content with and some very faint sink marks where the old screw bosses hide below the deck lid. I spread some primer on it. I'll be ordering the Corinthian White for the Galaxie and also a bottle of Vintage Burgundy (for the T-Bolt I'm planning) from MCW Finishes. I had to add some material to the top of the '60's firewall to enable the rear edge of the hood to have a place to rest. I closed the hinge slots and blanked off the heater motor and hose ports. The body cross-sections are very close and very little trimming was needed. getting the paint correct in the firewall area will require some masking and painting after the body is painted. I will probably spray some red primer on the lower part of the firewall and then do the rest of it satin black. Thanks for stopping by! ?
-
BITE YOUR TONGUE ! ! I've got 2 of those monstrosities staring at me, beckoning, leering, "c'mon, Jimmy, I wanna be a cool street coupe".....
-
Guys, I appreciate you all contributing. Greg nailed it. I found a manual transmission I could put behind a 440 for the Revell '68 Charger. Took it from the AMT '41 Plimit( the optional V8, whatever it is...lopped it right off and threw it in the Charger box, to be dealt with at a later date. Thank you all!
-
Good info, Mark, thanks. I recall putting a starter in a 330, 65 vintage. Easy job. You got it, Greg! Now I remember. I didn't think it proper for a lead sled to have a slush-o-matic. I don't think I should put it behind that Mopar engine. Oh well. Anybody got a torqueflite they can spare? ?
-
Would an olds starter be on the left side? I should go look at the one in the weeds behind the shed ?. Thanks, Mark.
-
Thanks, Dennis, I suspected it might be GM (but not Olds.) I tried looking at photos of them but no luck. I want to put it behind a 440. I hate it when the kit's optional engine has to share a transmission ?
-
Monogram's 1955 Lincoln Futura Concept Car: WIP
customline replied to David G.'s topic in WIP: Model Cars
I've gotta say, Dave, you have your hands full on this one. The end result will be worth the work though. This is a really cool project. ? -
"The 777" Tasca Ford '63 lightweight Galaxie
customline replied to customline's topic in WIP: Drag Racing Models
Good work, Ace! -
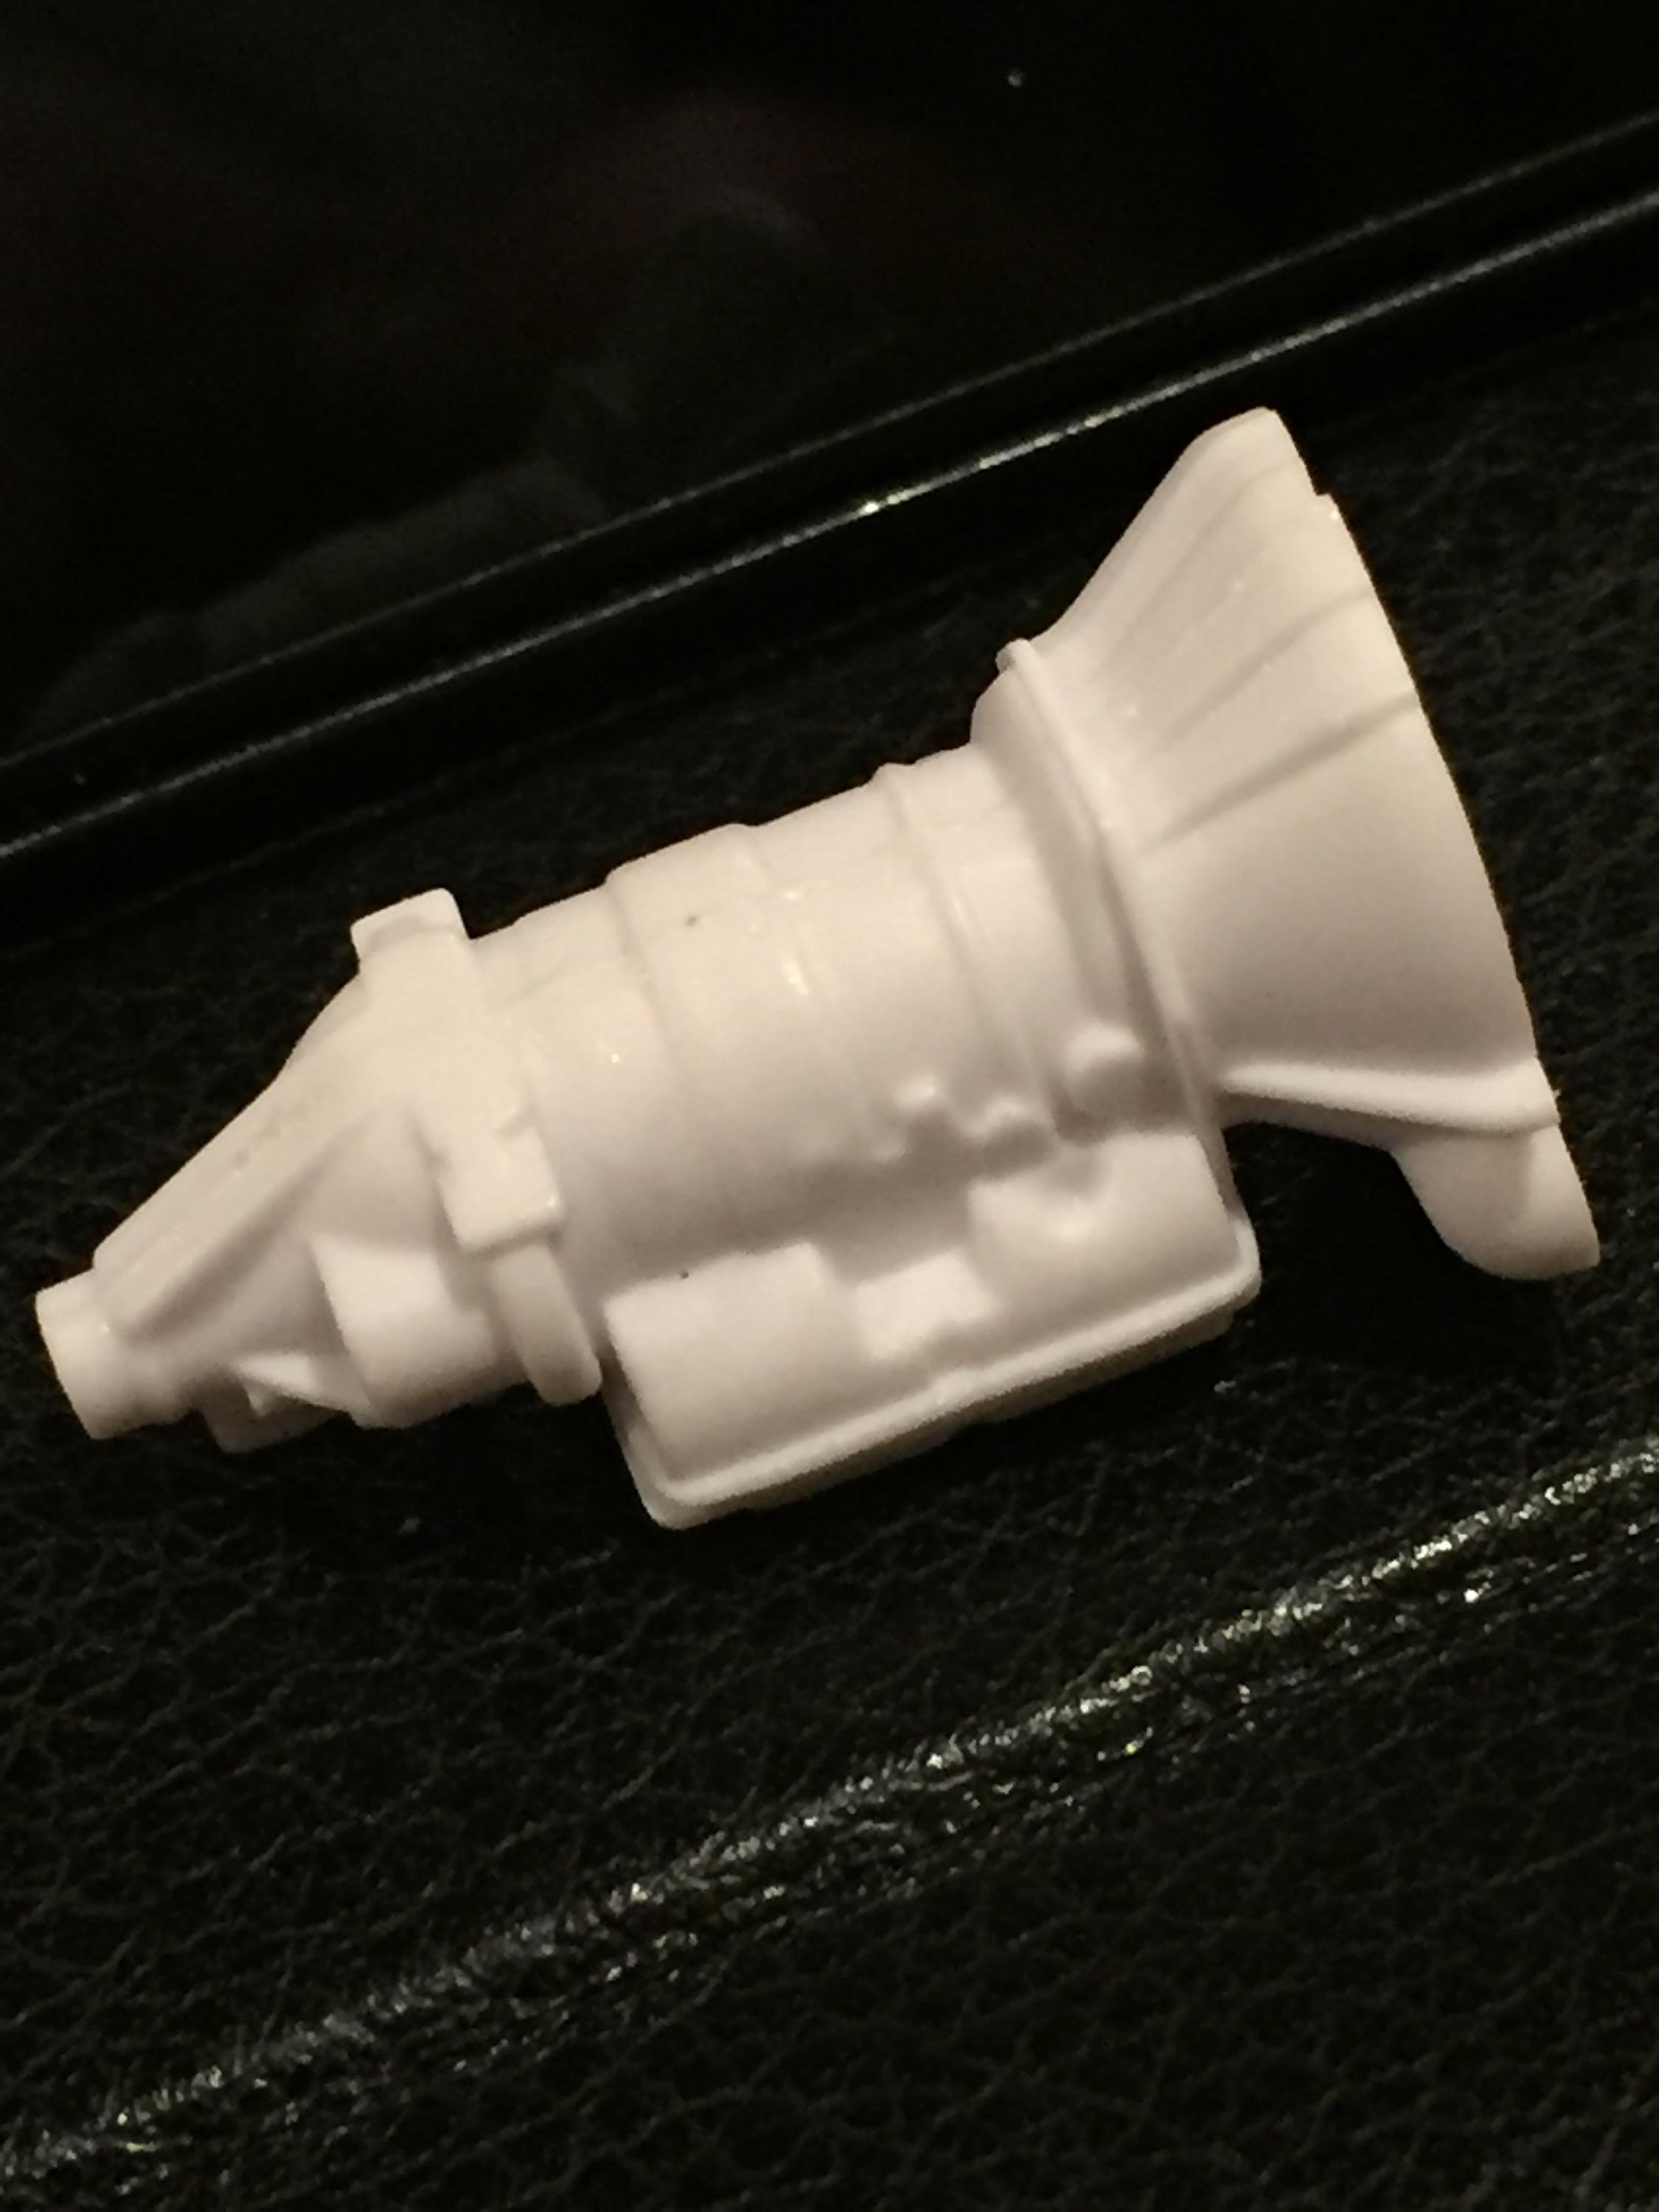
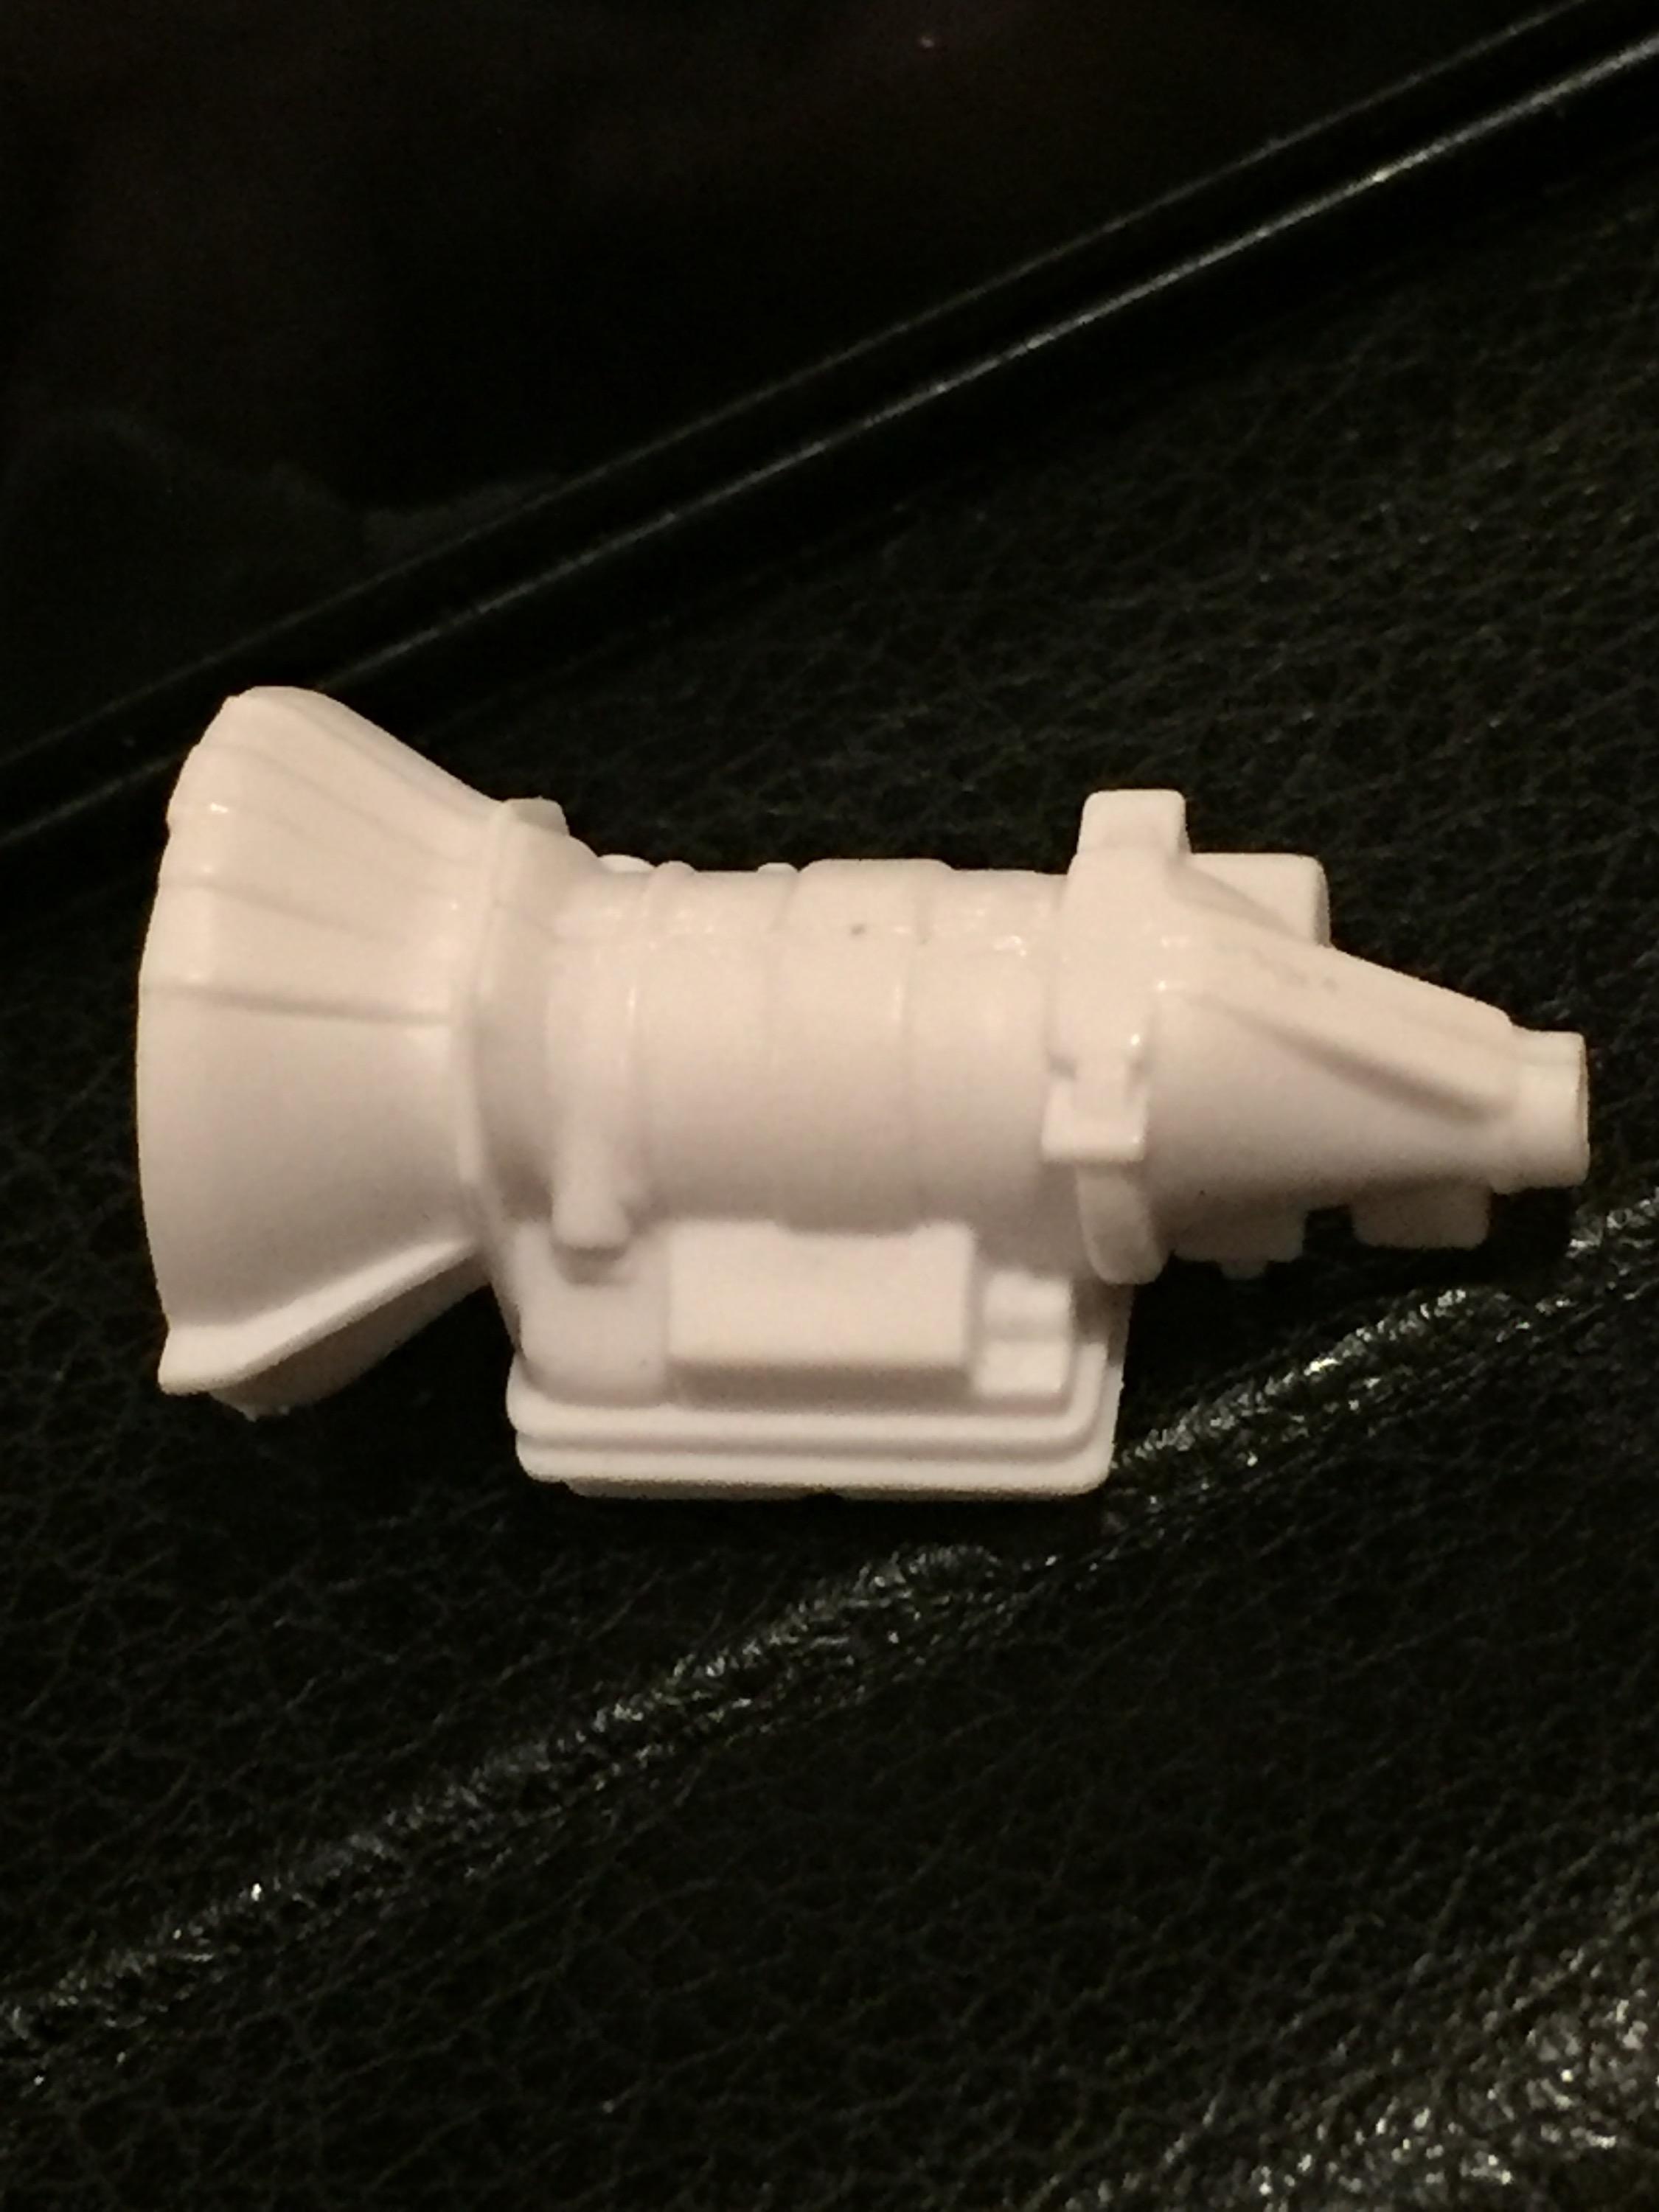
I cut this automatic off of some engine that I wanted to be equipped with a manual transmission. It was many, many moons ago ?. Can any of youz guys identify the below transmission for me? I just know one of youz does ! ?
-
"The 777" Tasca Ford '63 lightweight Galaxie
customline replied to customline's topic in WIP: Drag Racing Models
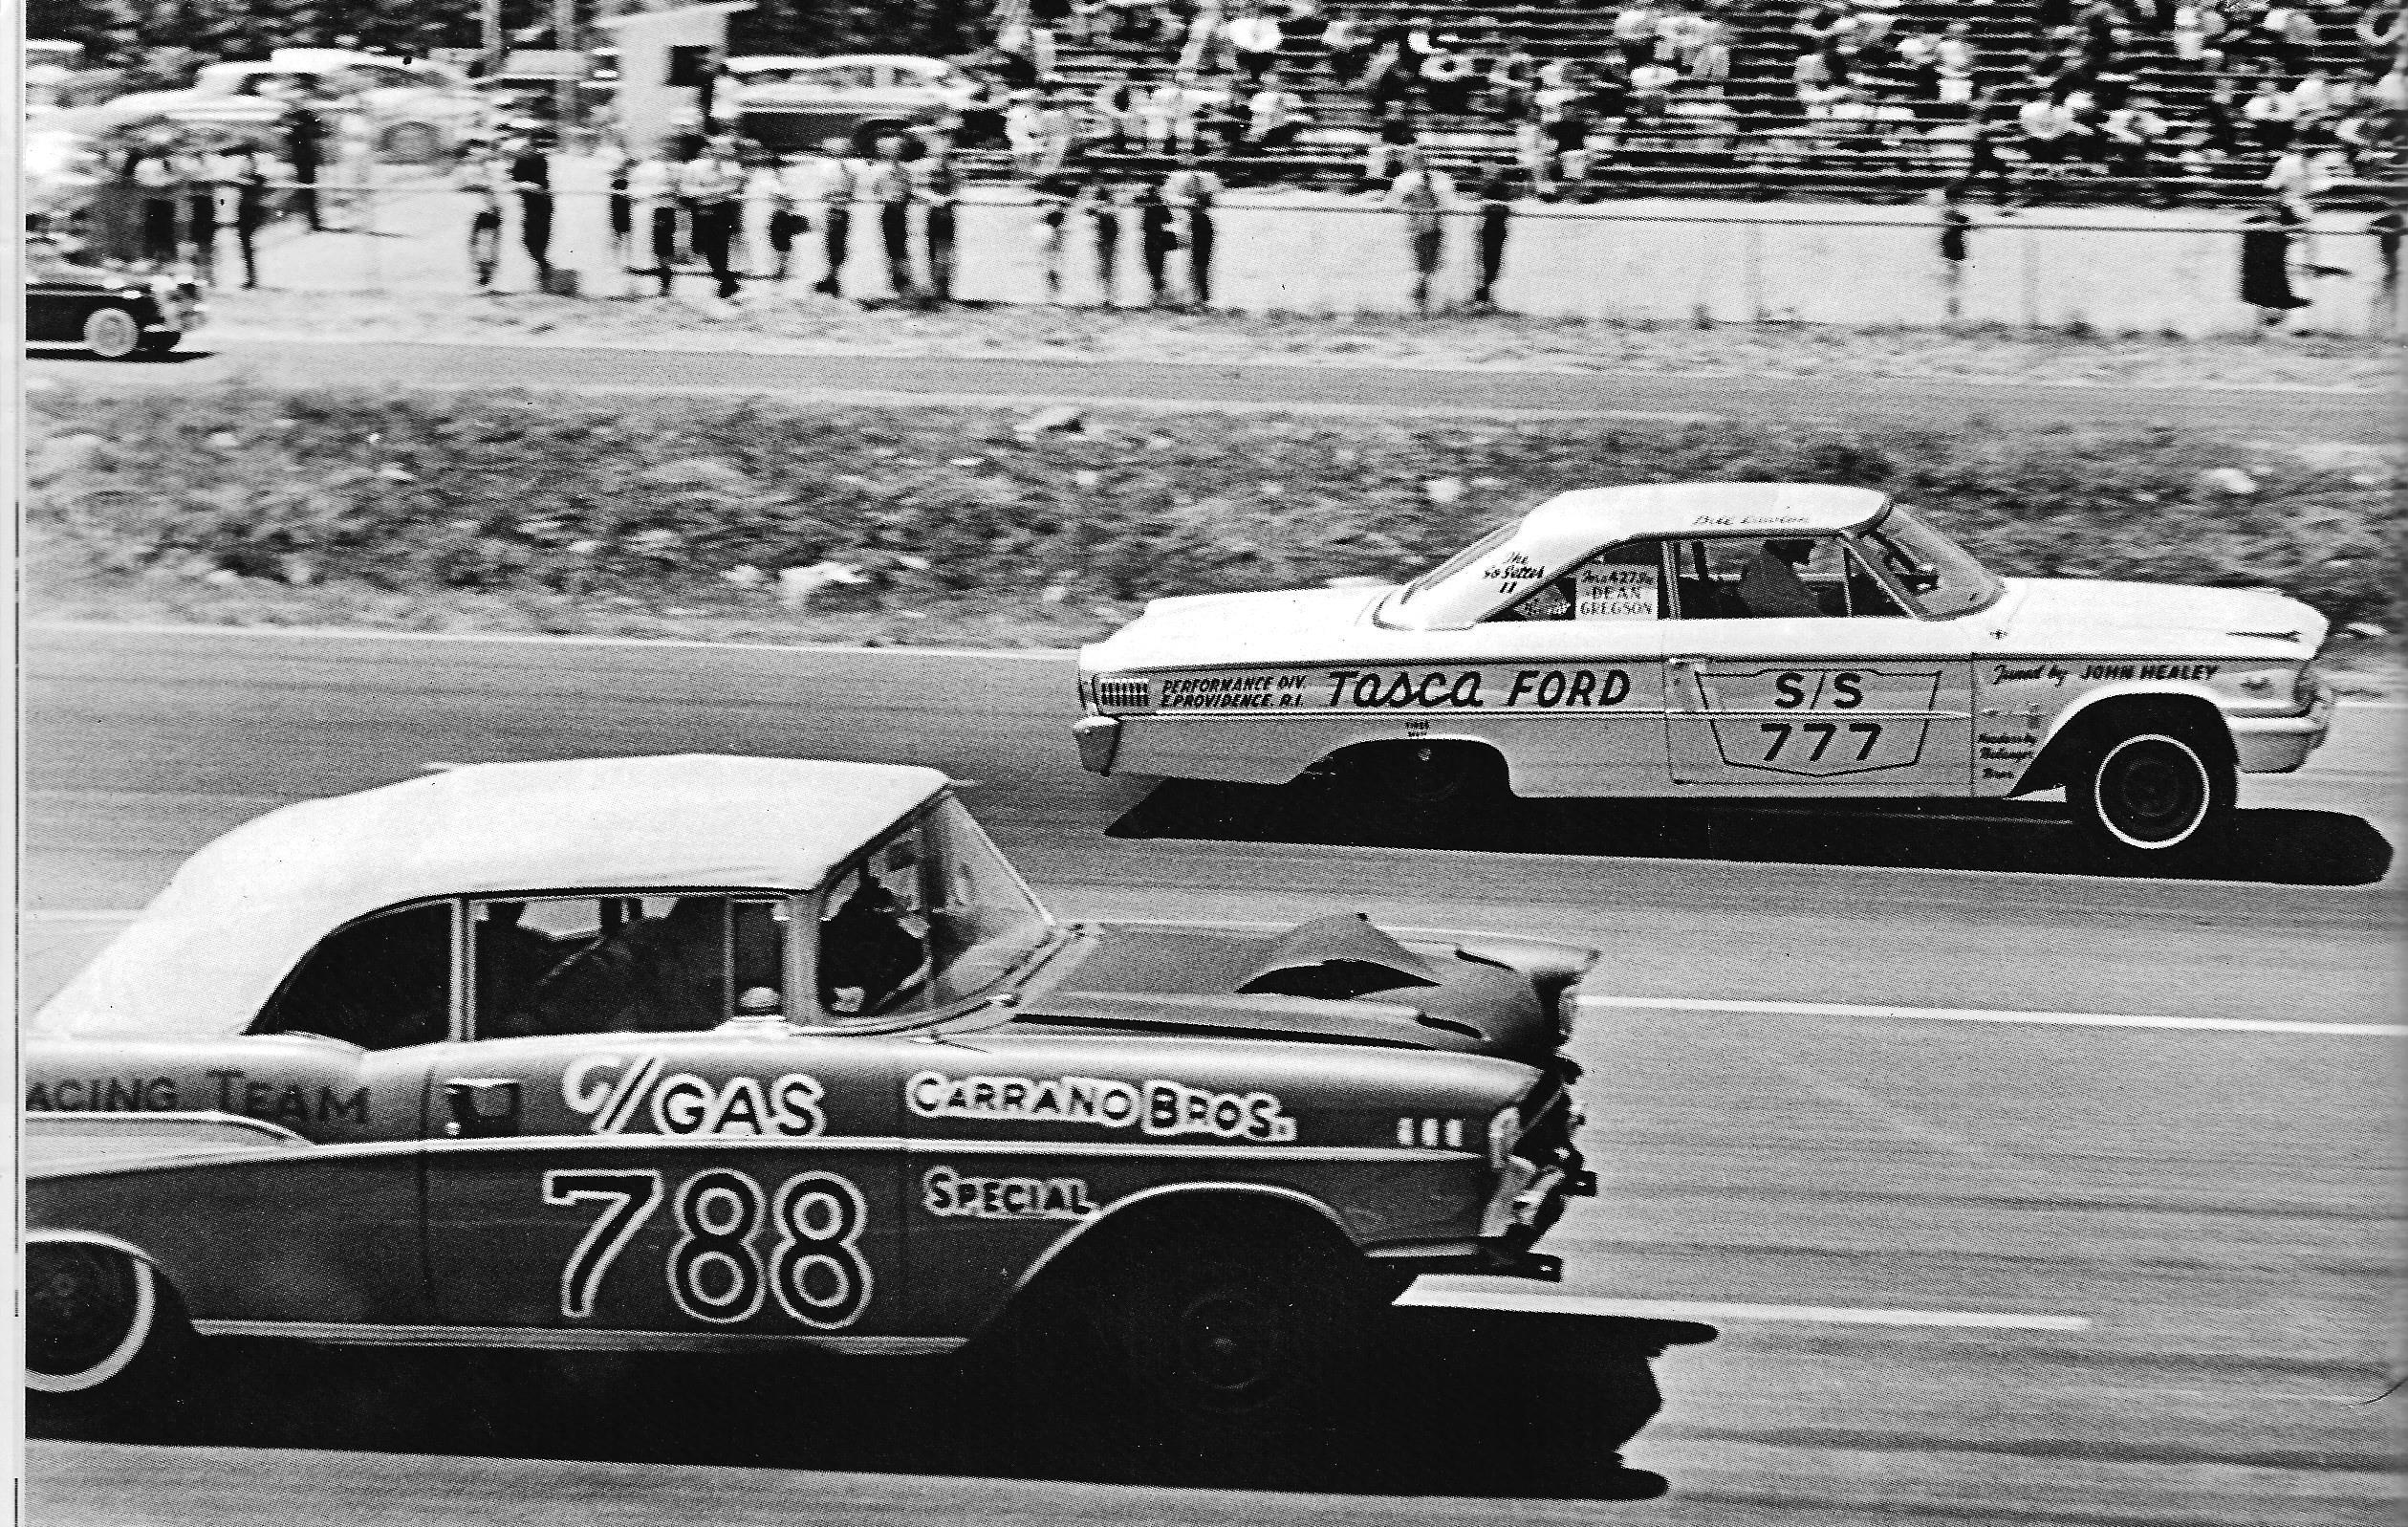
Thanks, Trevor, it's not an easy one due to the limited photos of the actual 1:1. There are plenty of photos of several different cars including restored examples but very precious few useful photos of the Tasca car. To further complicate things, the crew made changes from time to time like wheels and such. I found a photo today that helps me locate the tach on the top of the dash. I would like to find a view of the rear showing the lettering on the trunk lid. I need to see the font style so I can make a decal of it. I saw the car run at Charlestown, RI (when I was about 11) and recall seeing "SUIVEZ-MOI!" on the trunk lid. I asked my dad (who spoke French quite well) what it meant. We both got a good laugh. "FOLLOW ME!" ?
-
"The 777" Tasca Ford '63 lightweight Galaxie
customline replied to customline's topic in WIP: Drag Racing Models
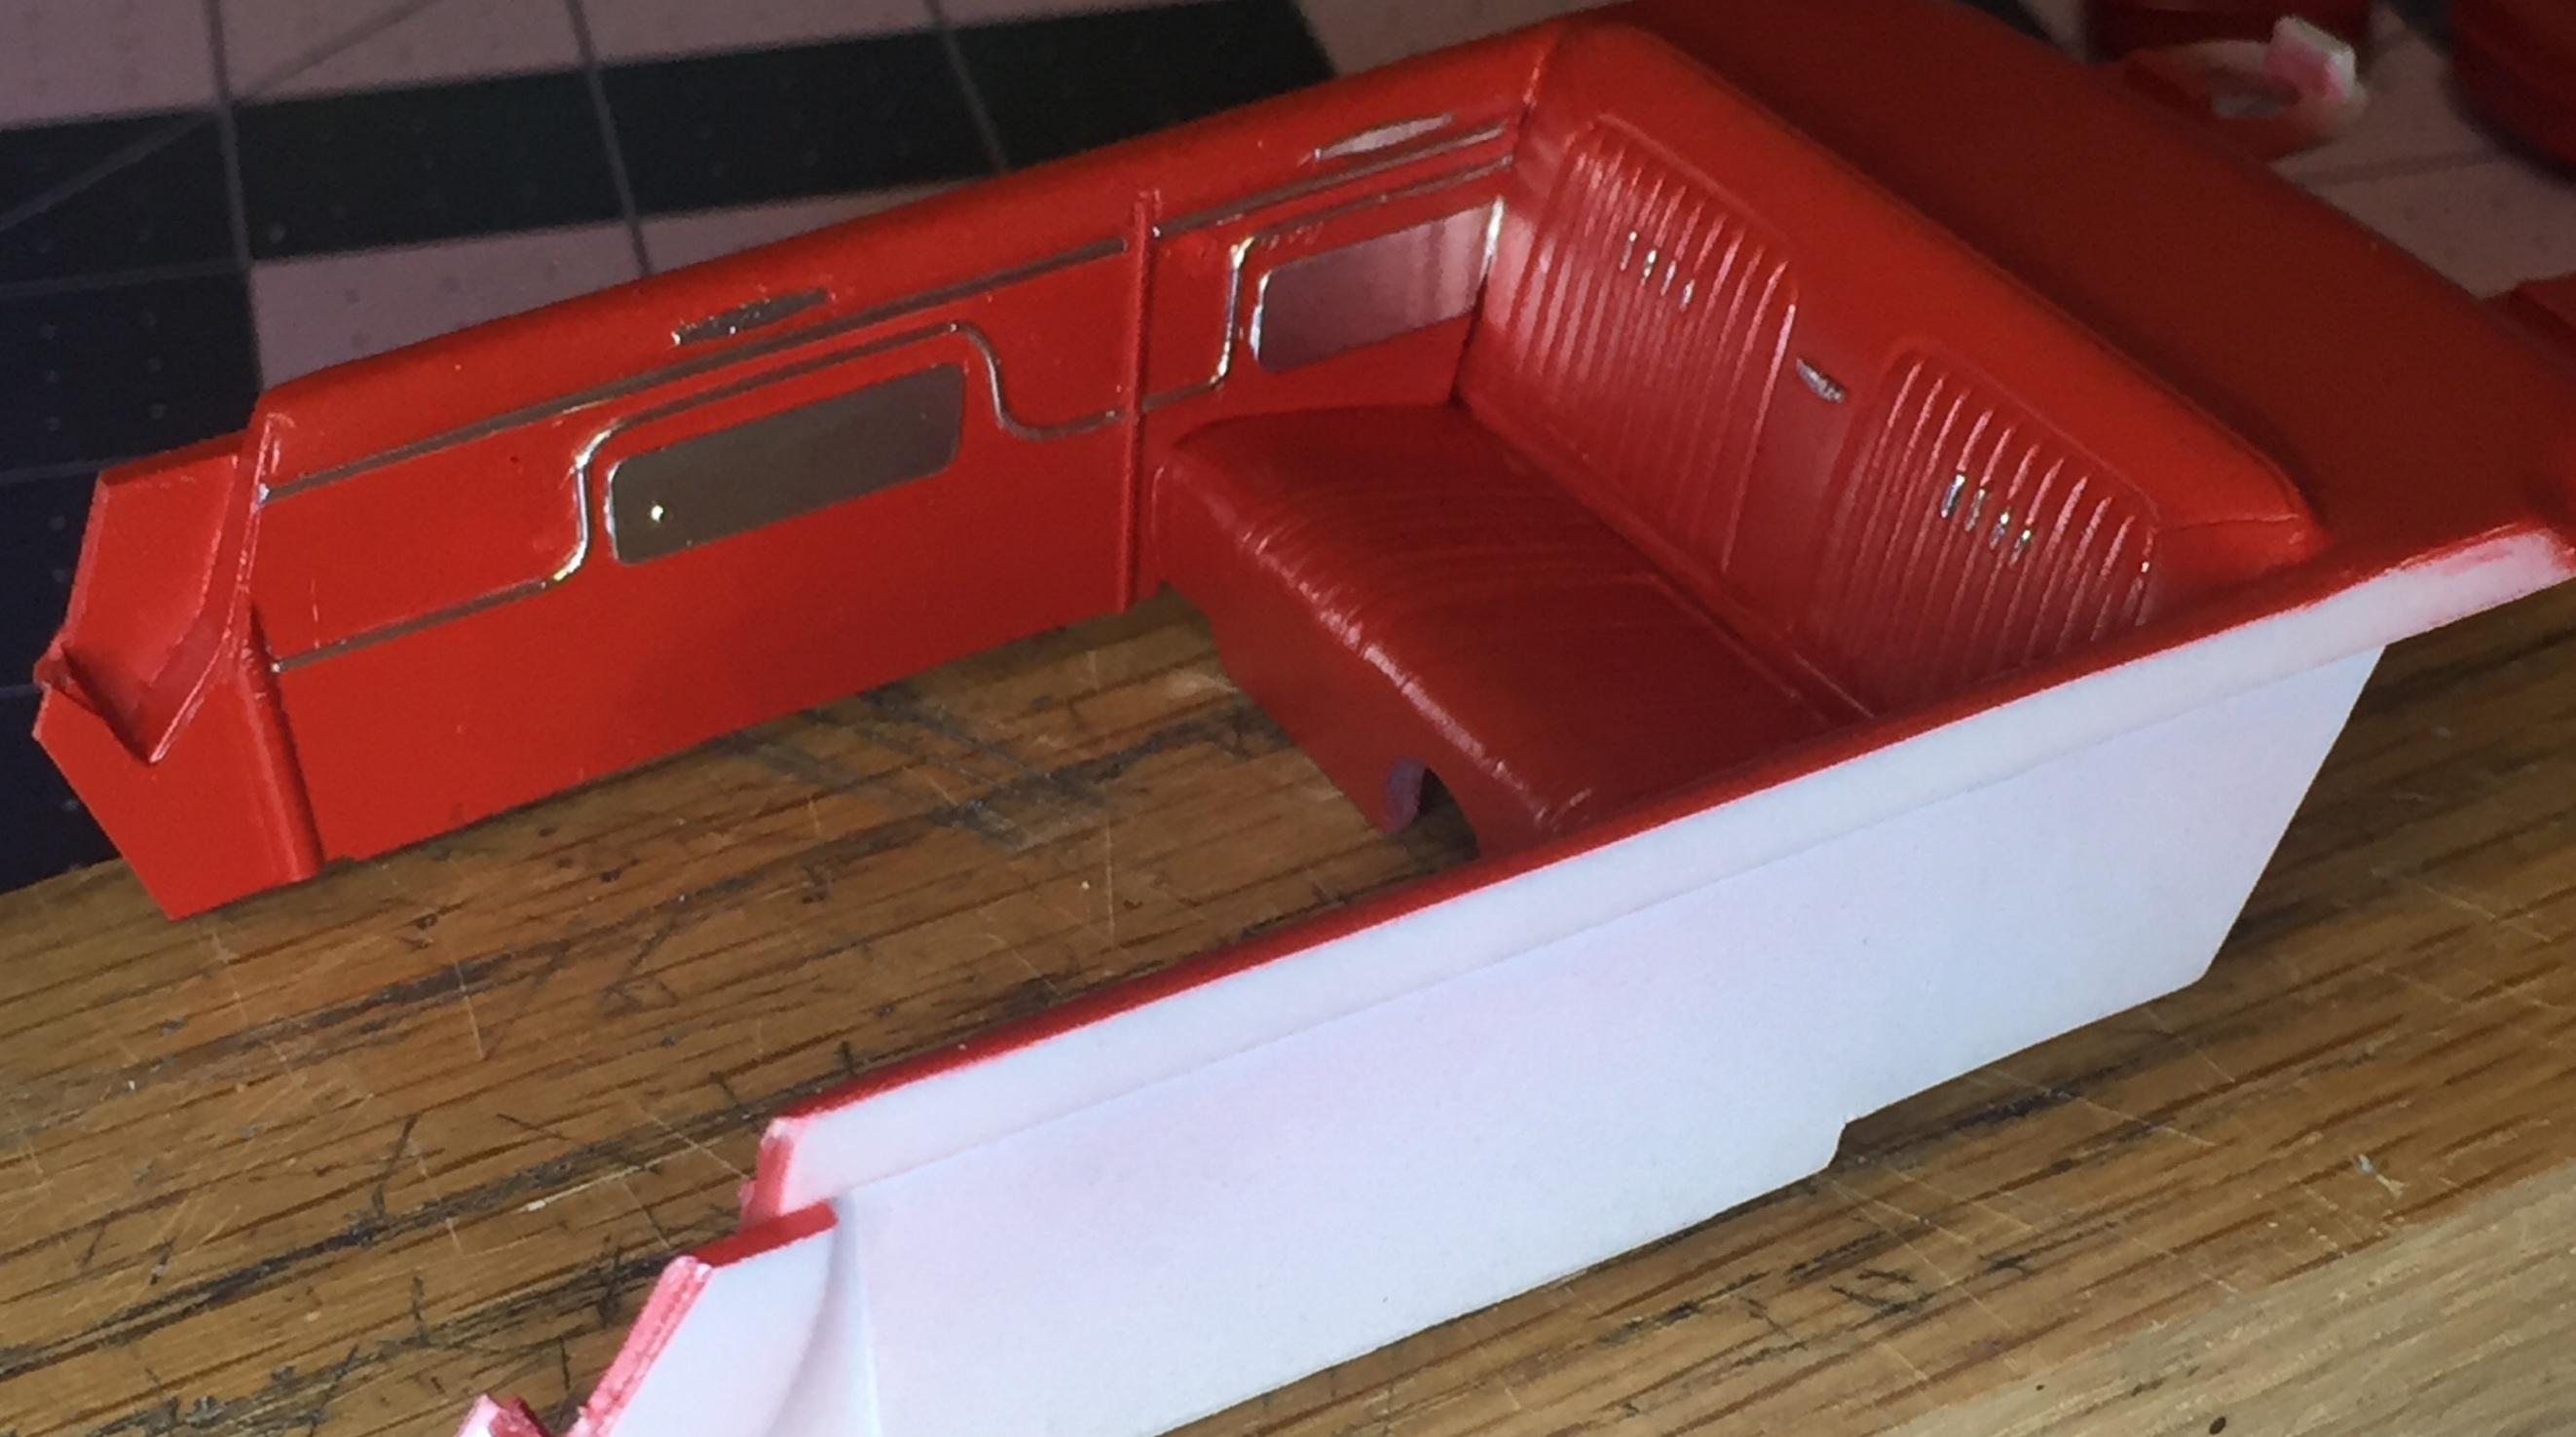
A few more pix....waiting for photo-reduced speedo from BMP. Kit decal sheet actually provides two sets of guage faces but I'm waiting because Best is usually better(?). The decal sheet also has some nice badges too and I may opt to remove the molded badging to facilitate polishing and use the decals on the finished surfaces. Thanks for looking. still need to foil the driver side. I've been avoiding it. It makes my neck hurt. ?
-
You would do well in a House committee hearing ?
-
"The 777" Tasca Ford '63 lightweight Galaxie
customline replied to customline's topic in WIP: Drag Racing Models
Yeah, I have that stuff. I got it years ago and found it somewhat useful for installing glass. I wonder if it's still good. ? I'll try it. Thanks, Len, good idea! My guess is it's too old though. -
"The 777" Tasca Ford '63 lightweight Galaxie
customline replied to customline's topic in WIP: Drag Racing Models
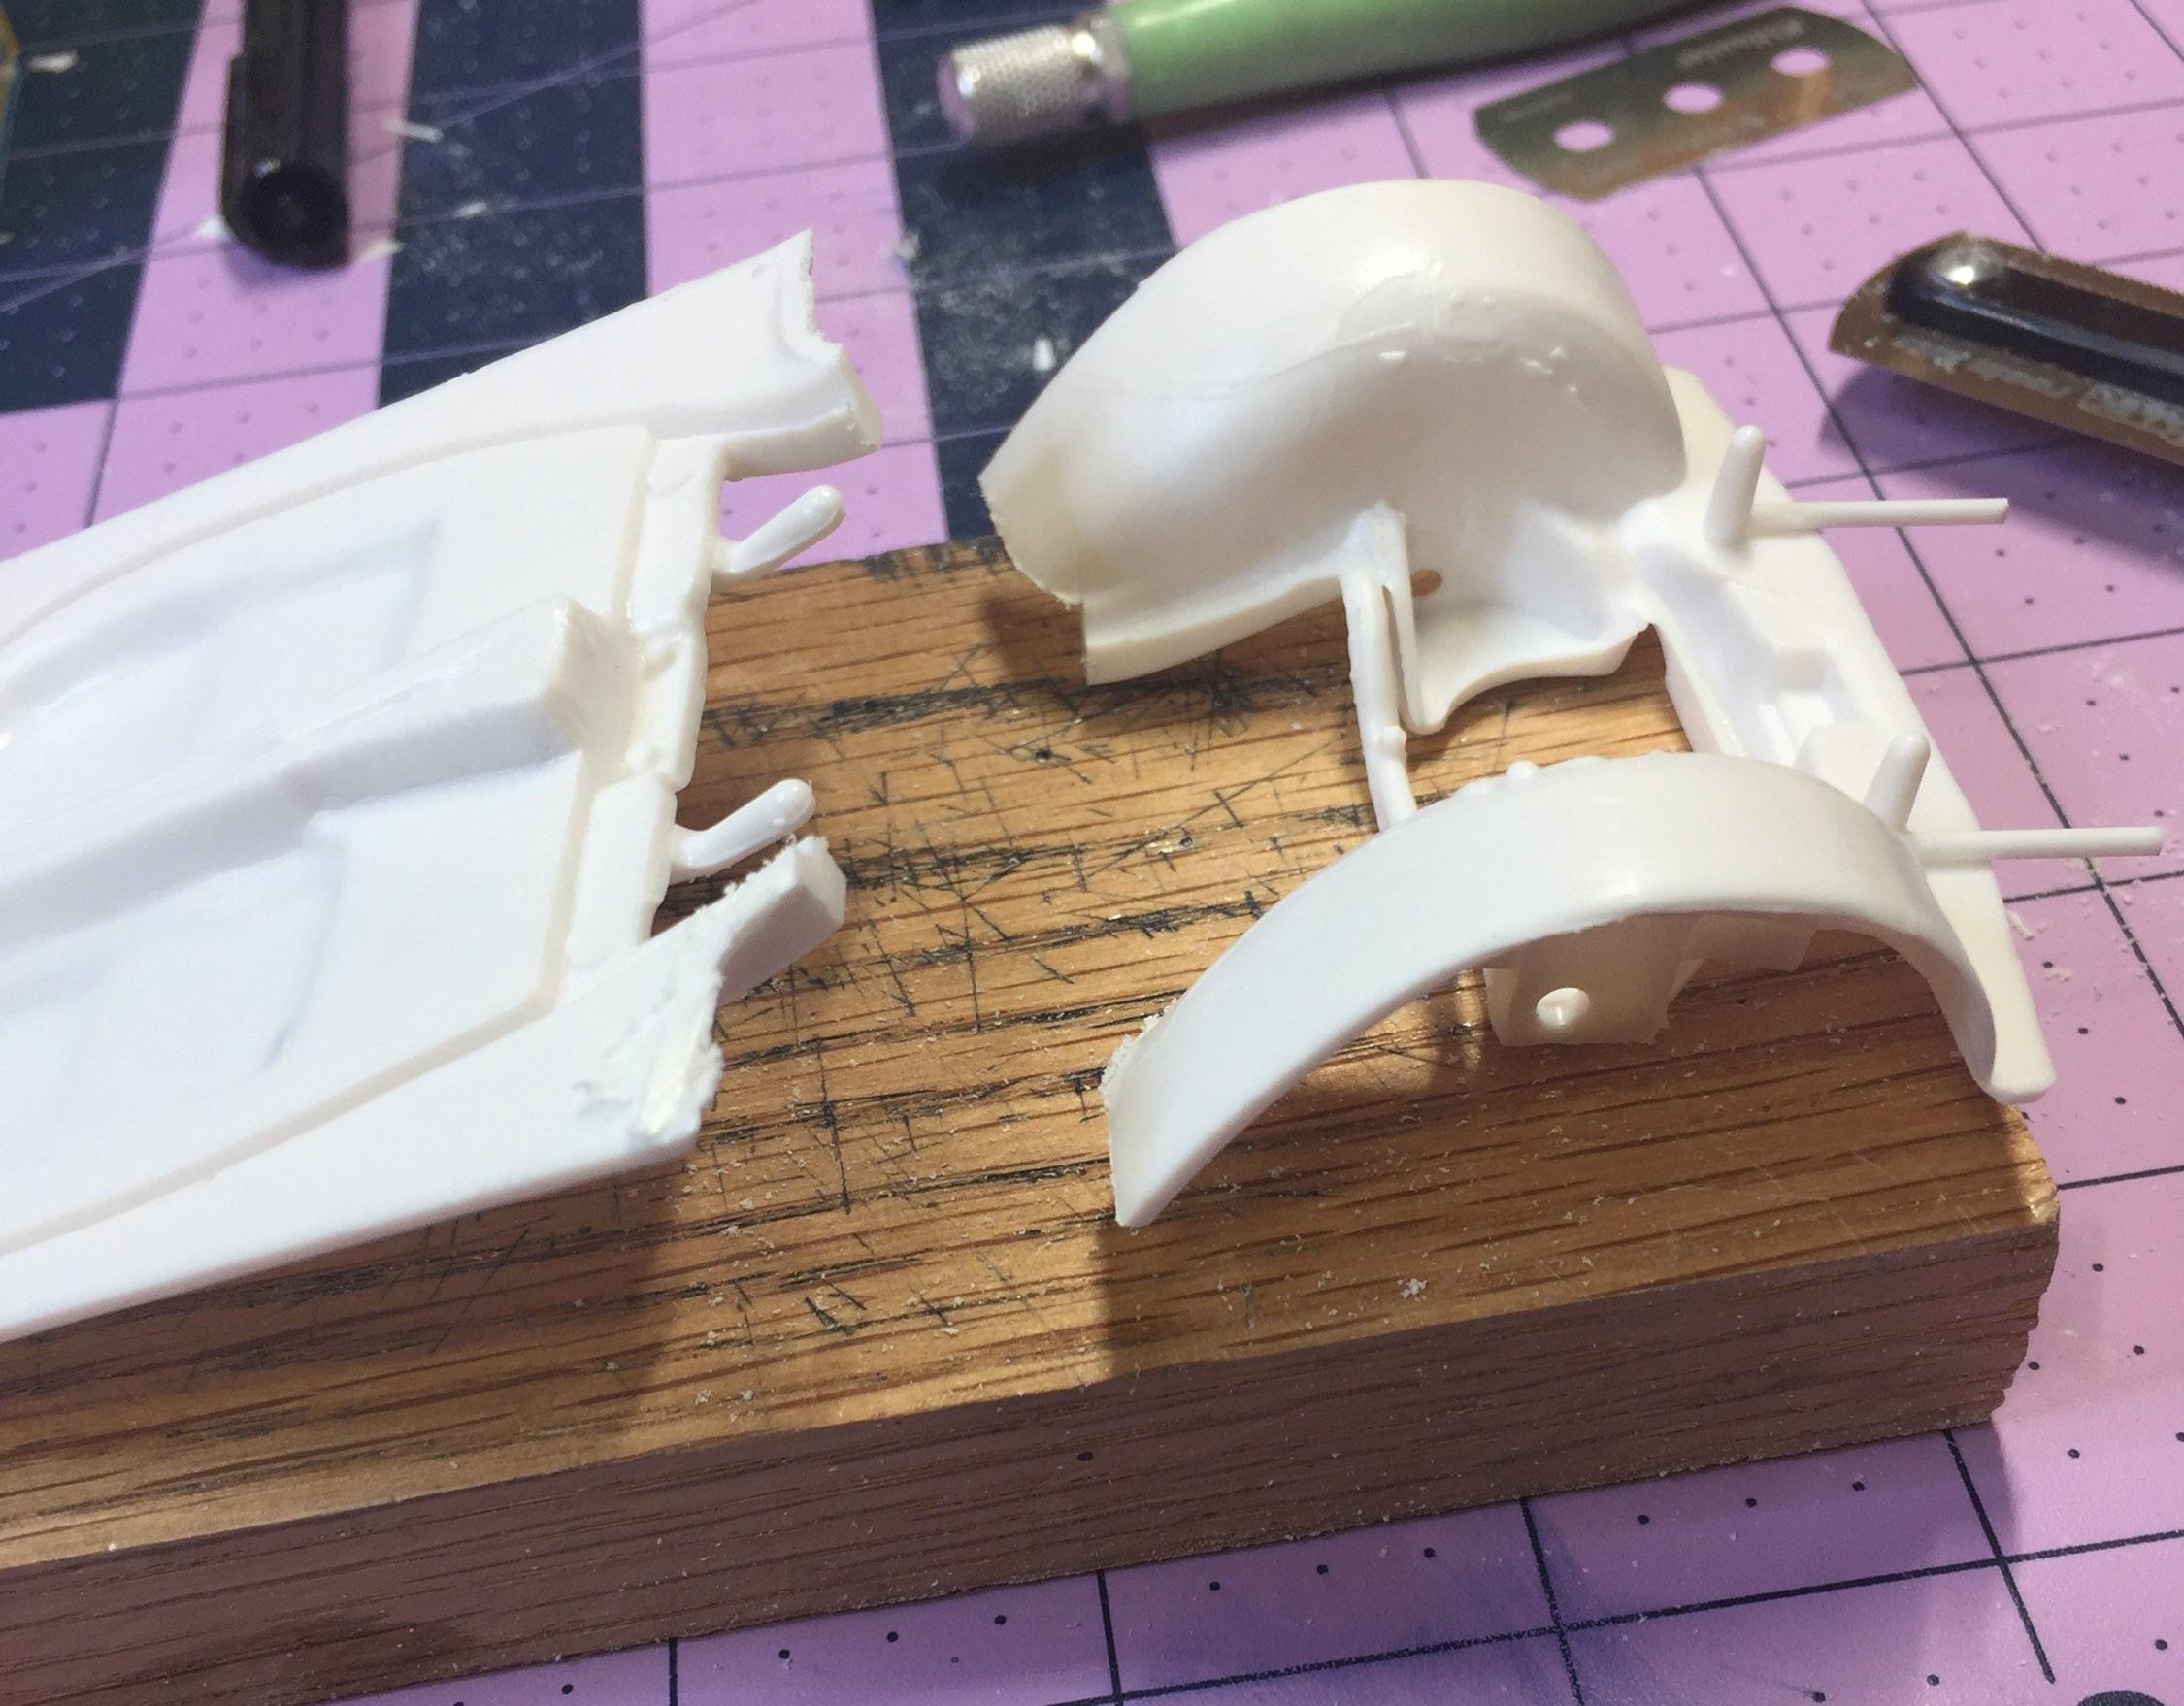
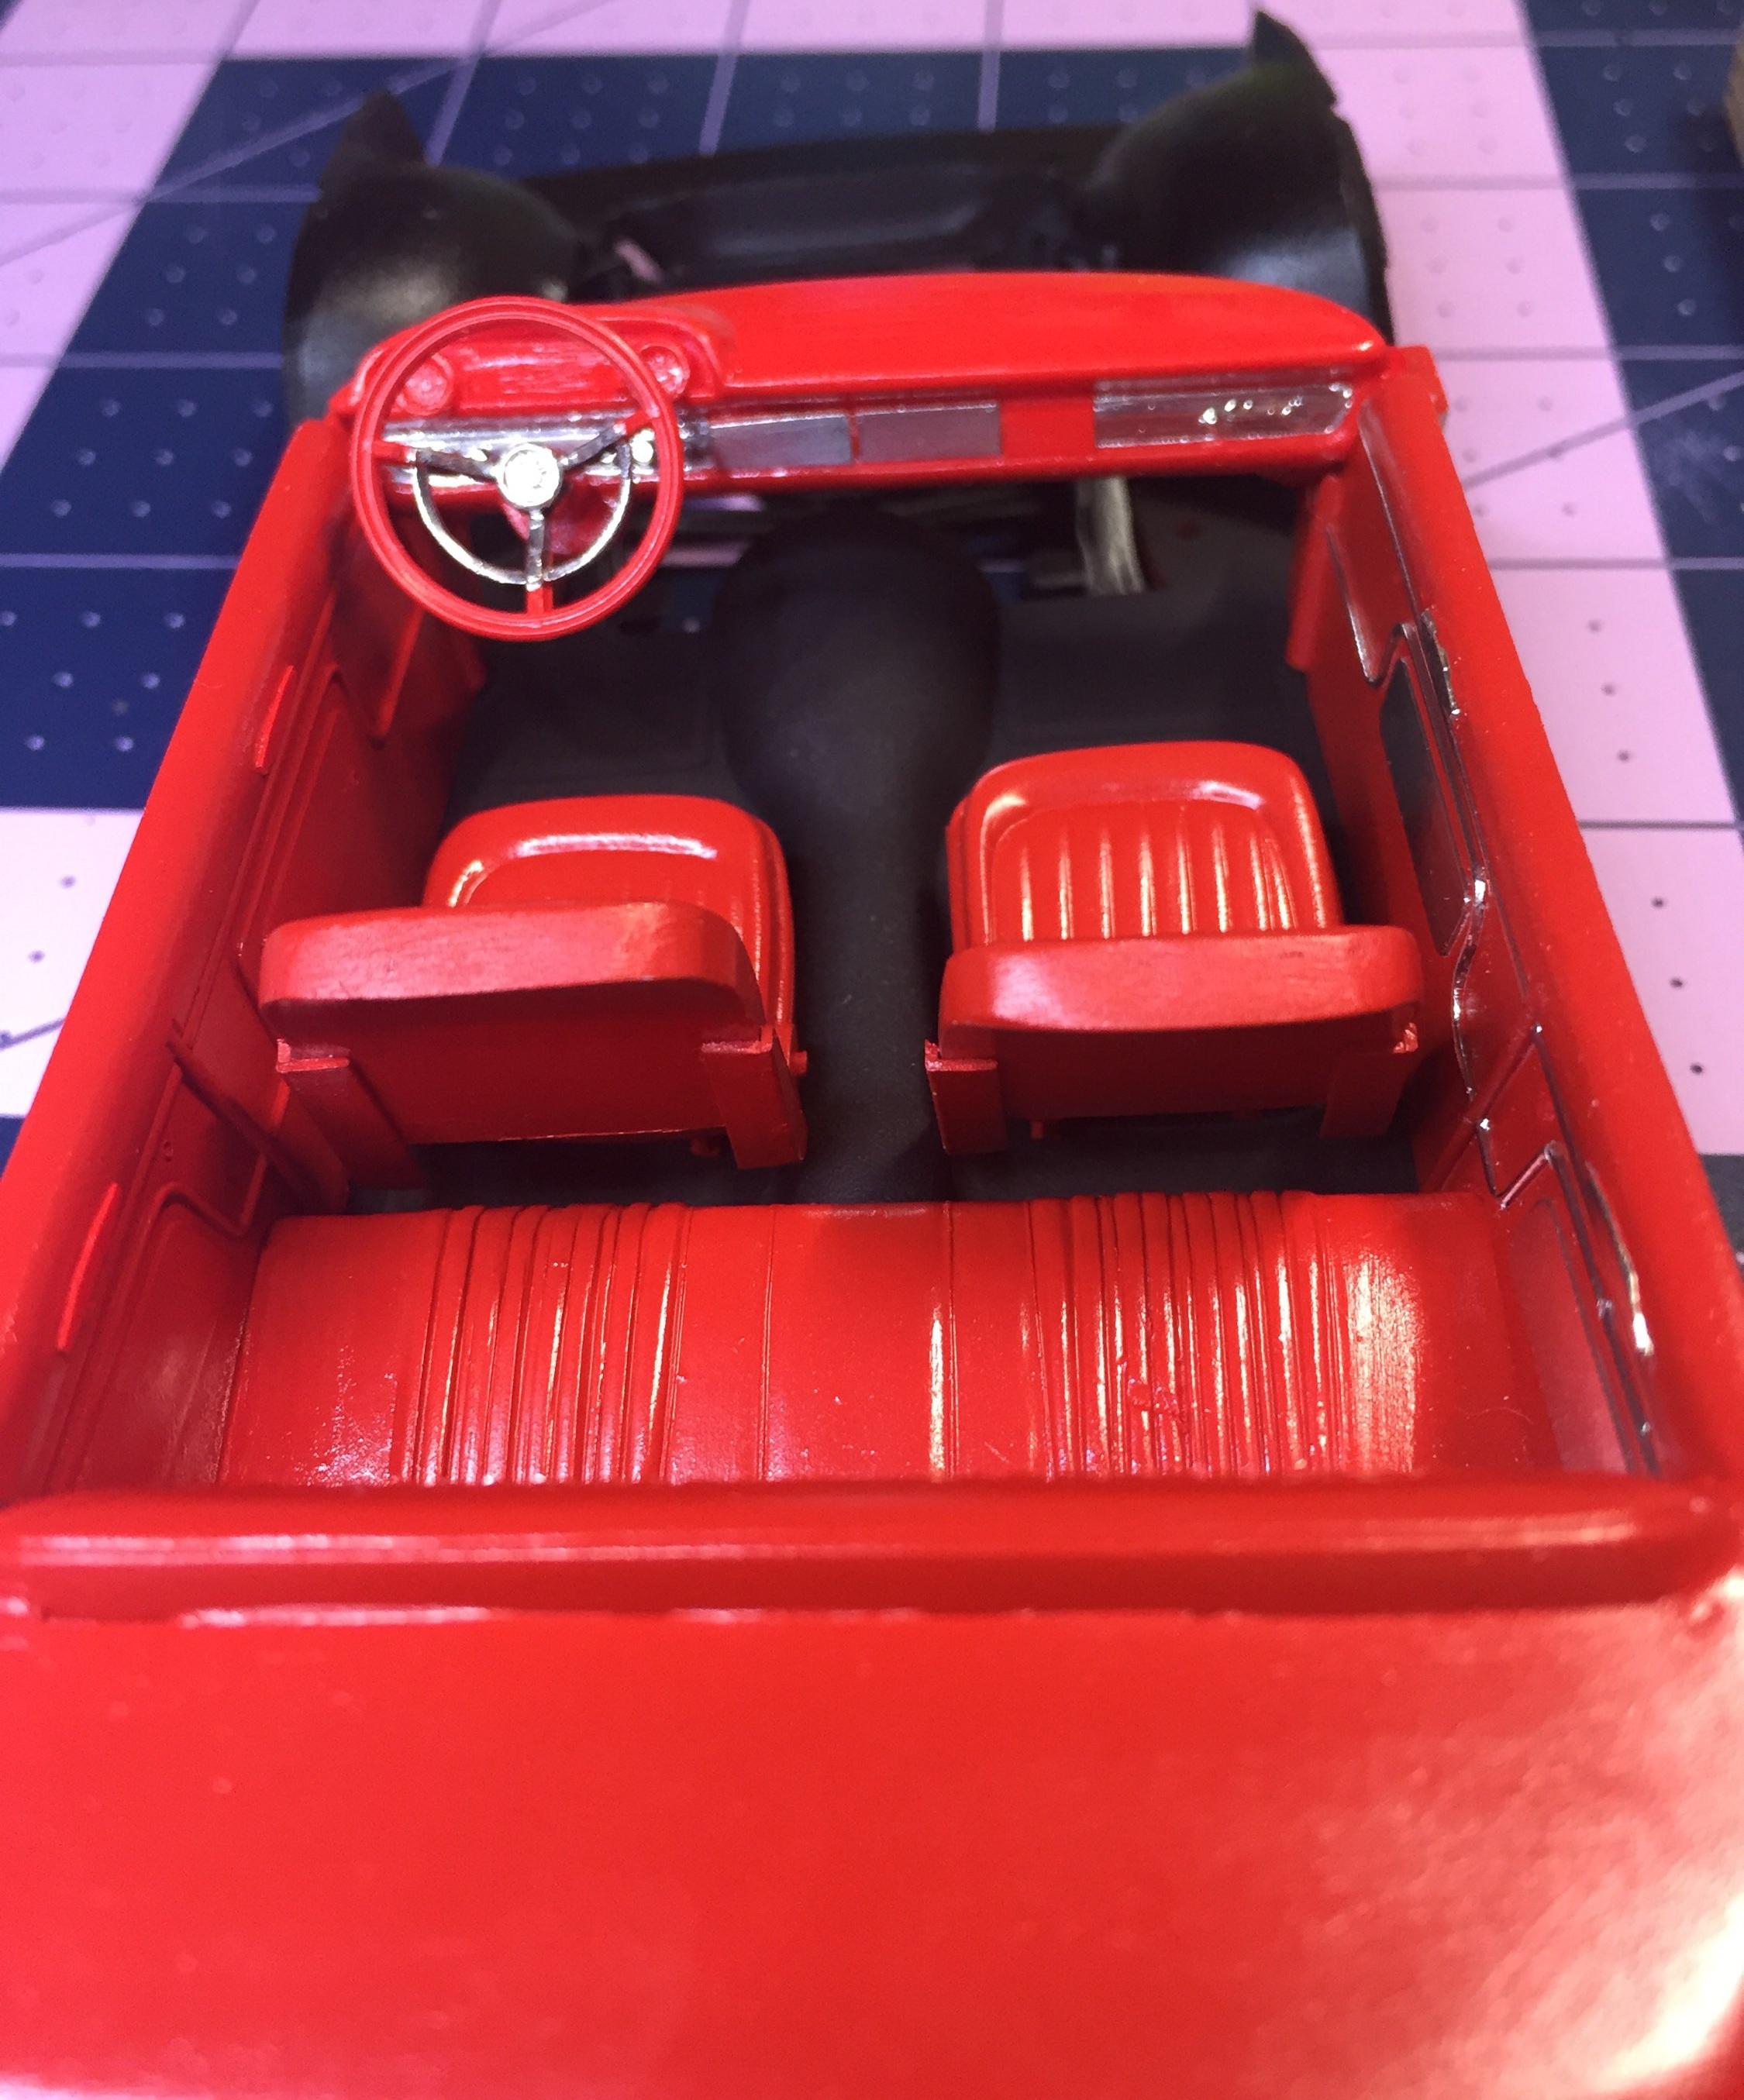
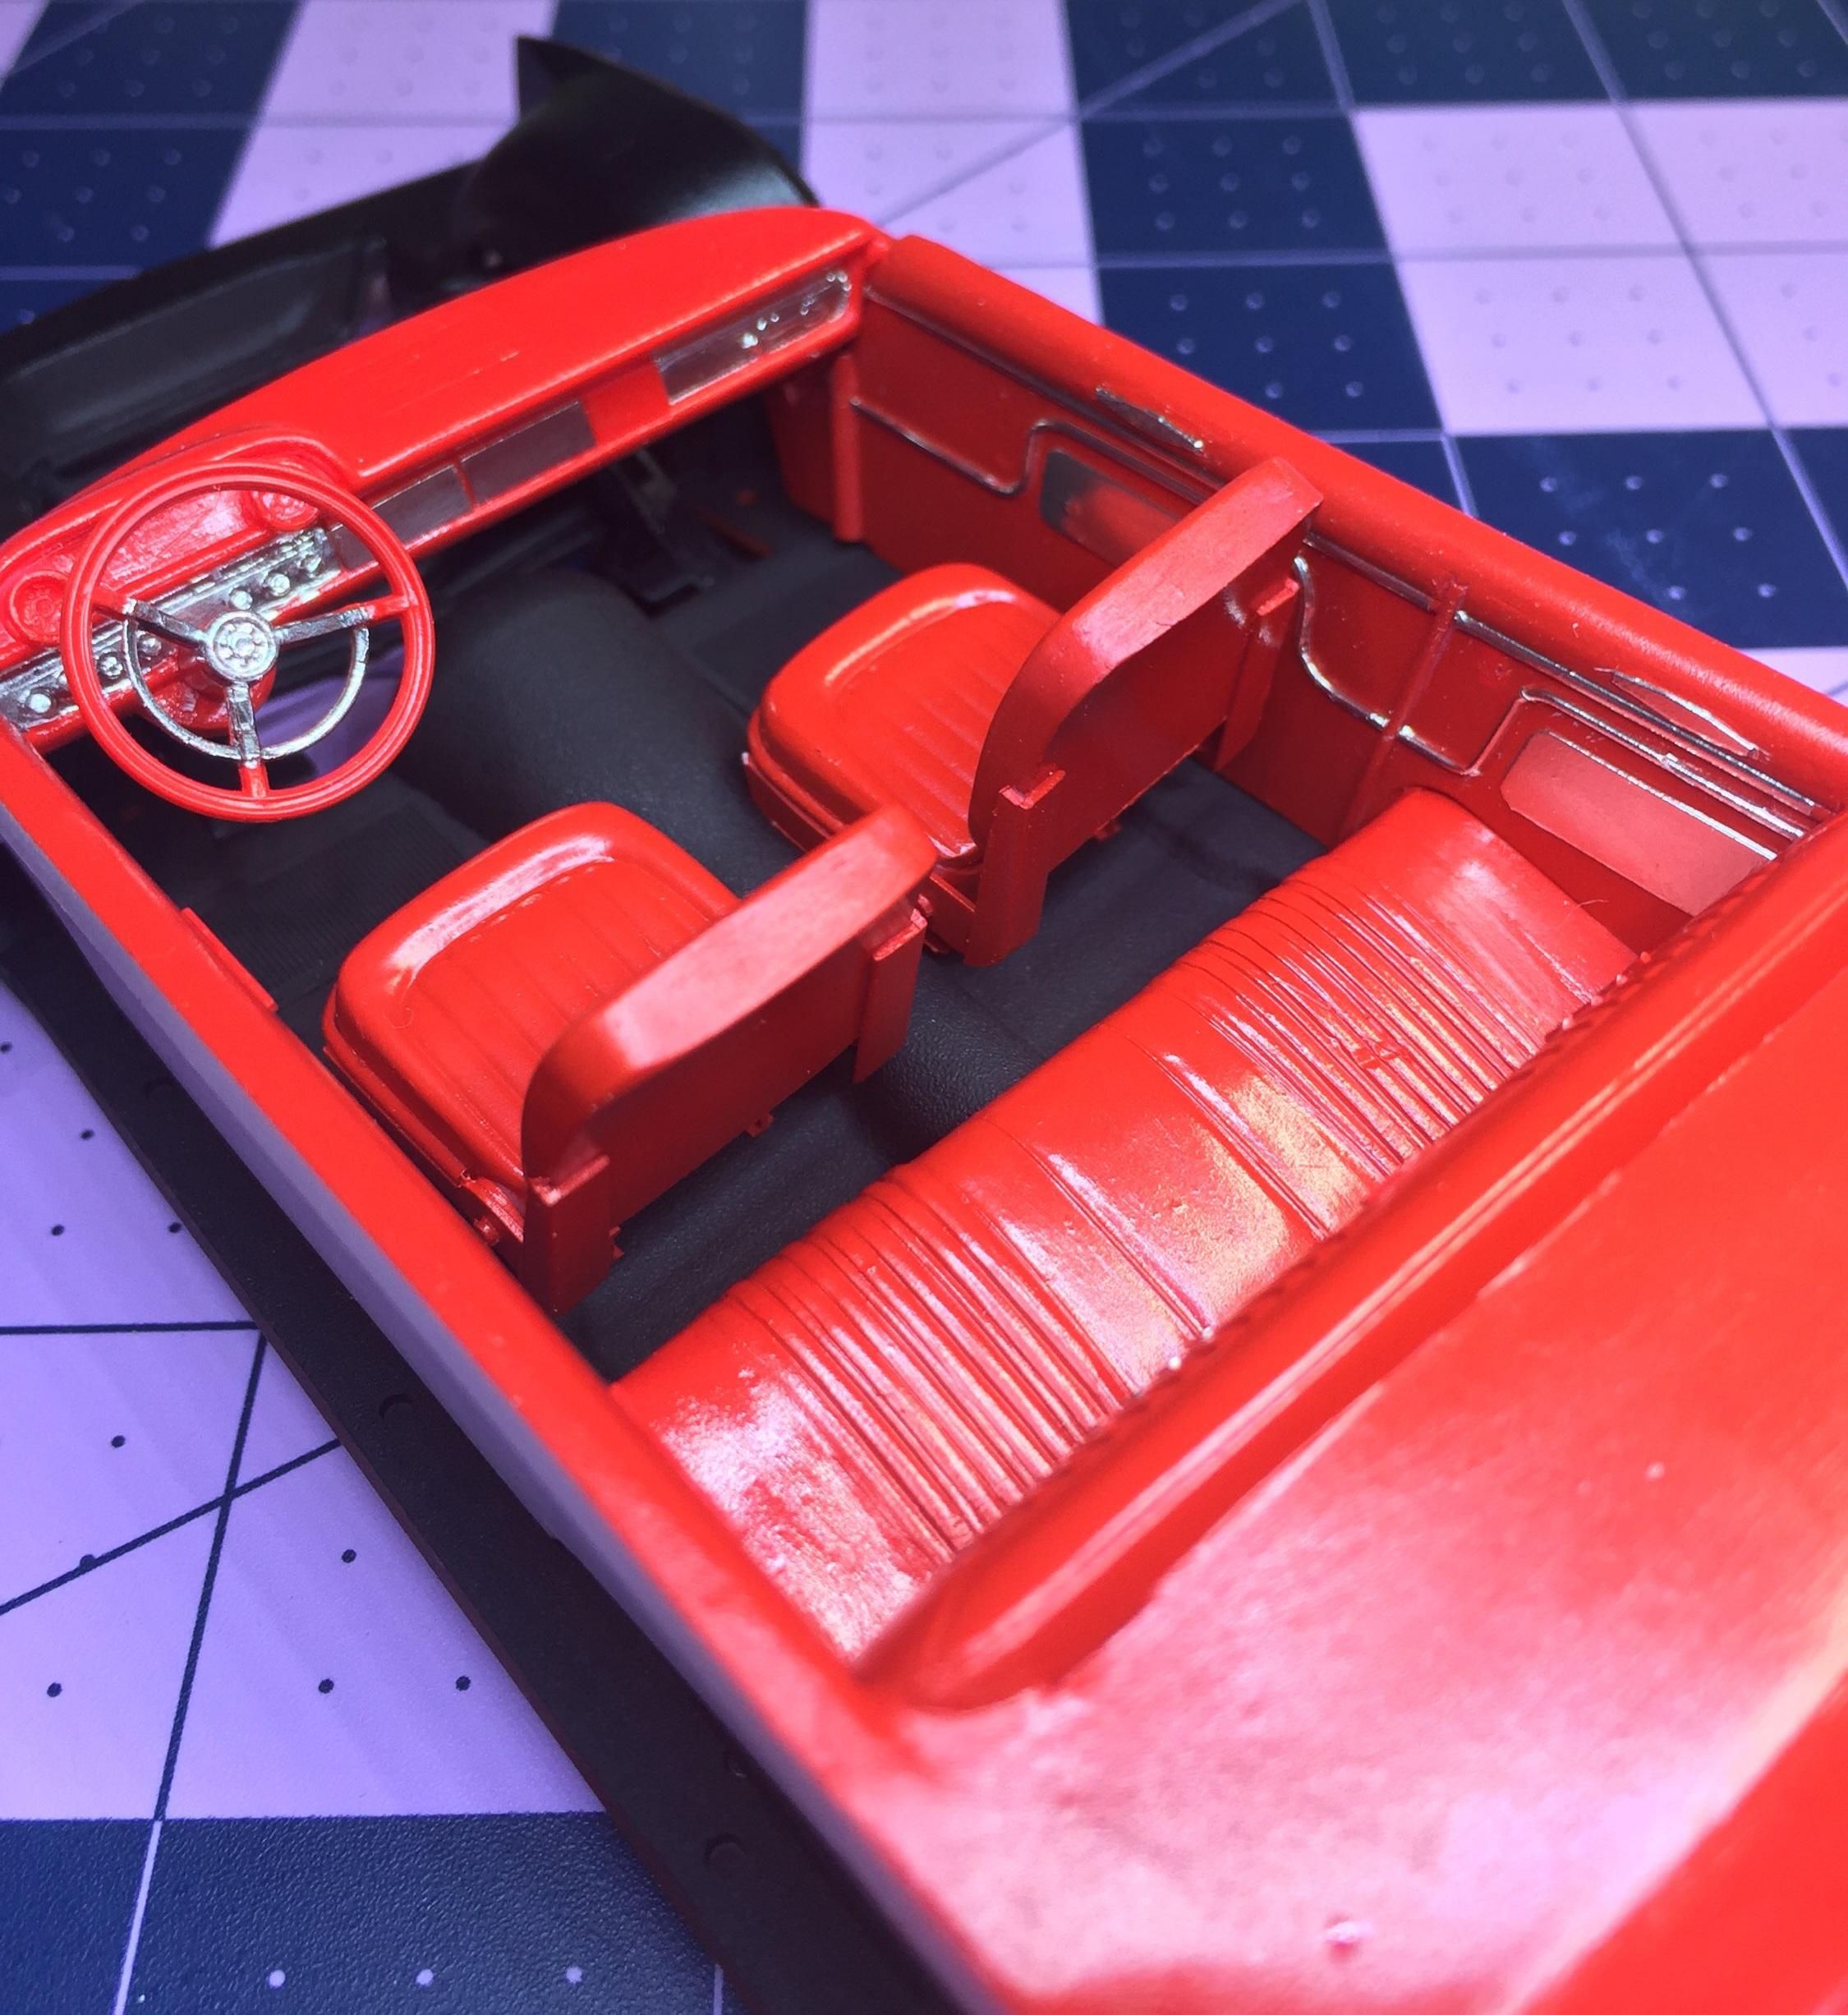
Got a little more done today on the interior and painted it with a bottle of Testor's enamel. I opened what looked like a new, unopened bottle. It was full. It was also like a gummy worm. I managed to reconstitute it enough to shoot it through my Wren. This happens quite often despite my efforts to close the bottles tightly. But this one was new! ? I got some foil on one side and Molotow on the back seat. The dash is next after my neck eases up. Thanks for checking in.
-
Monogram's 1955 Lincoln Futura Concept Car: WIP
customline replied to David G.'s topic in WIP: Model Cars
As long as it works, I'm happy ? -
"The 777" Tasca Ford '63 lightweight Galaxie
customline replied to customline's topic in WIP: Drag Racing Models
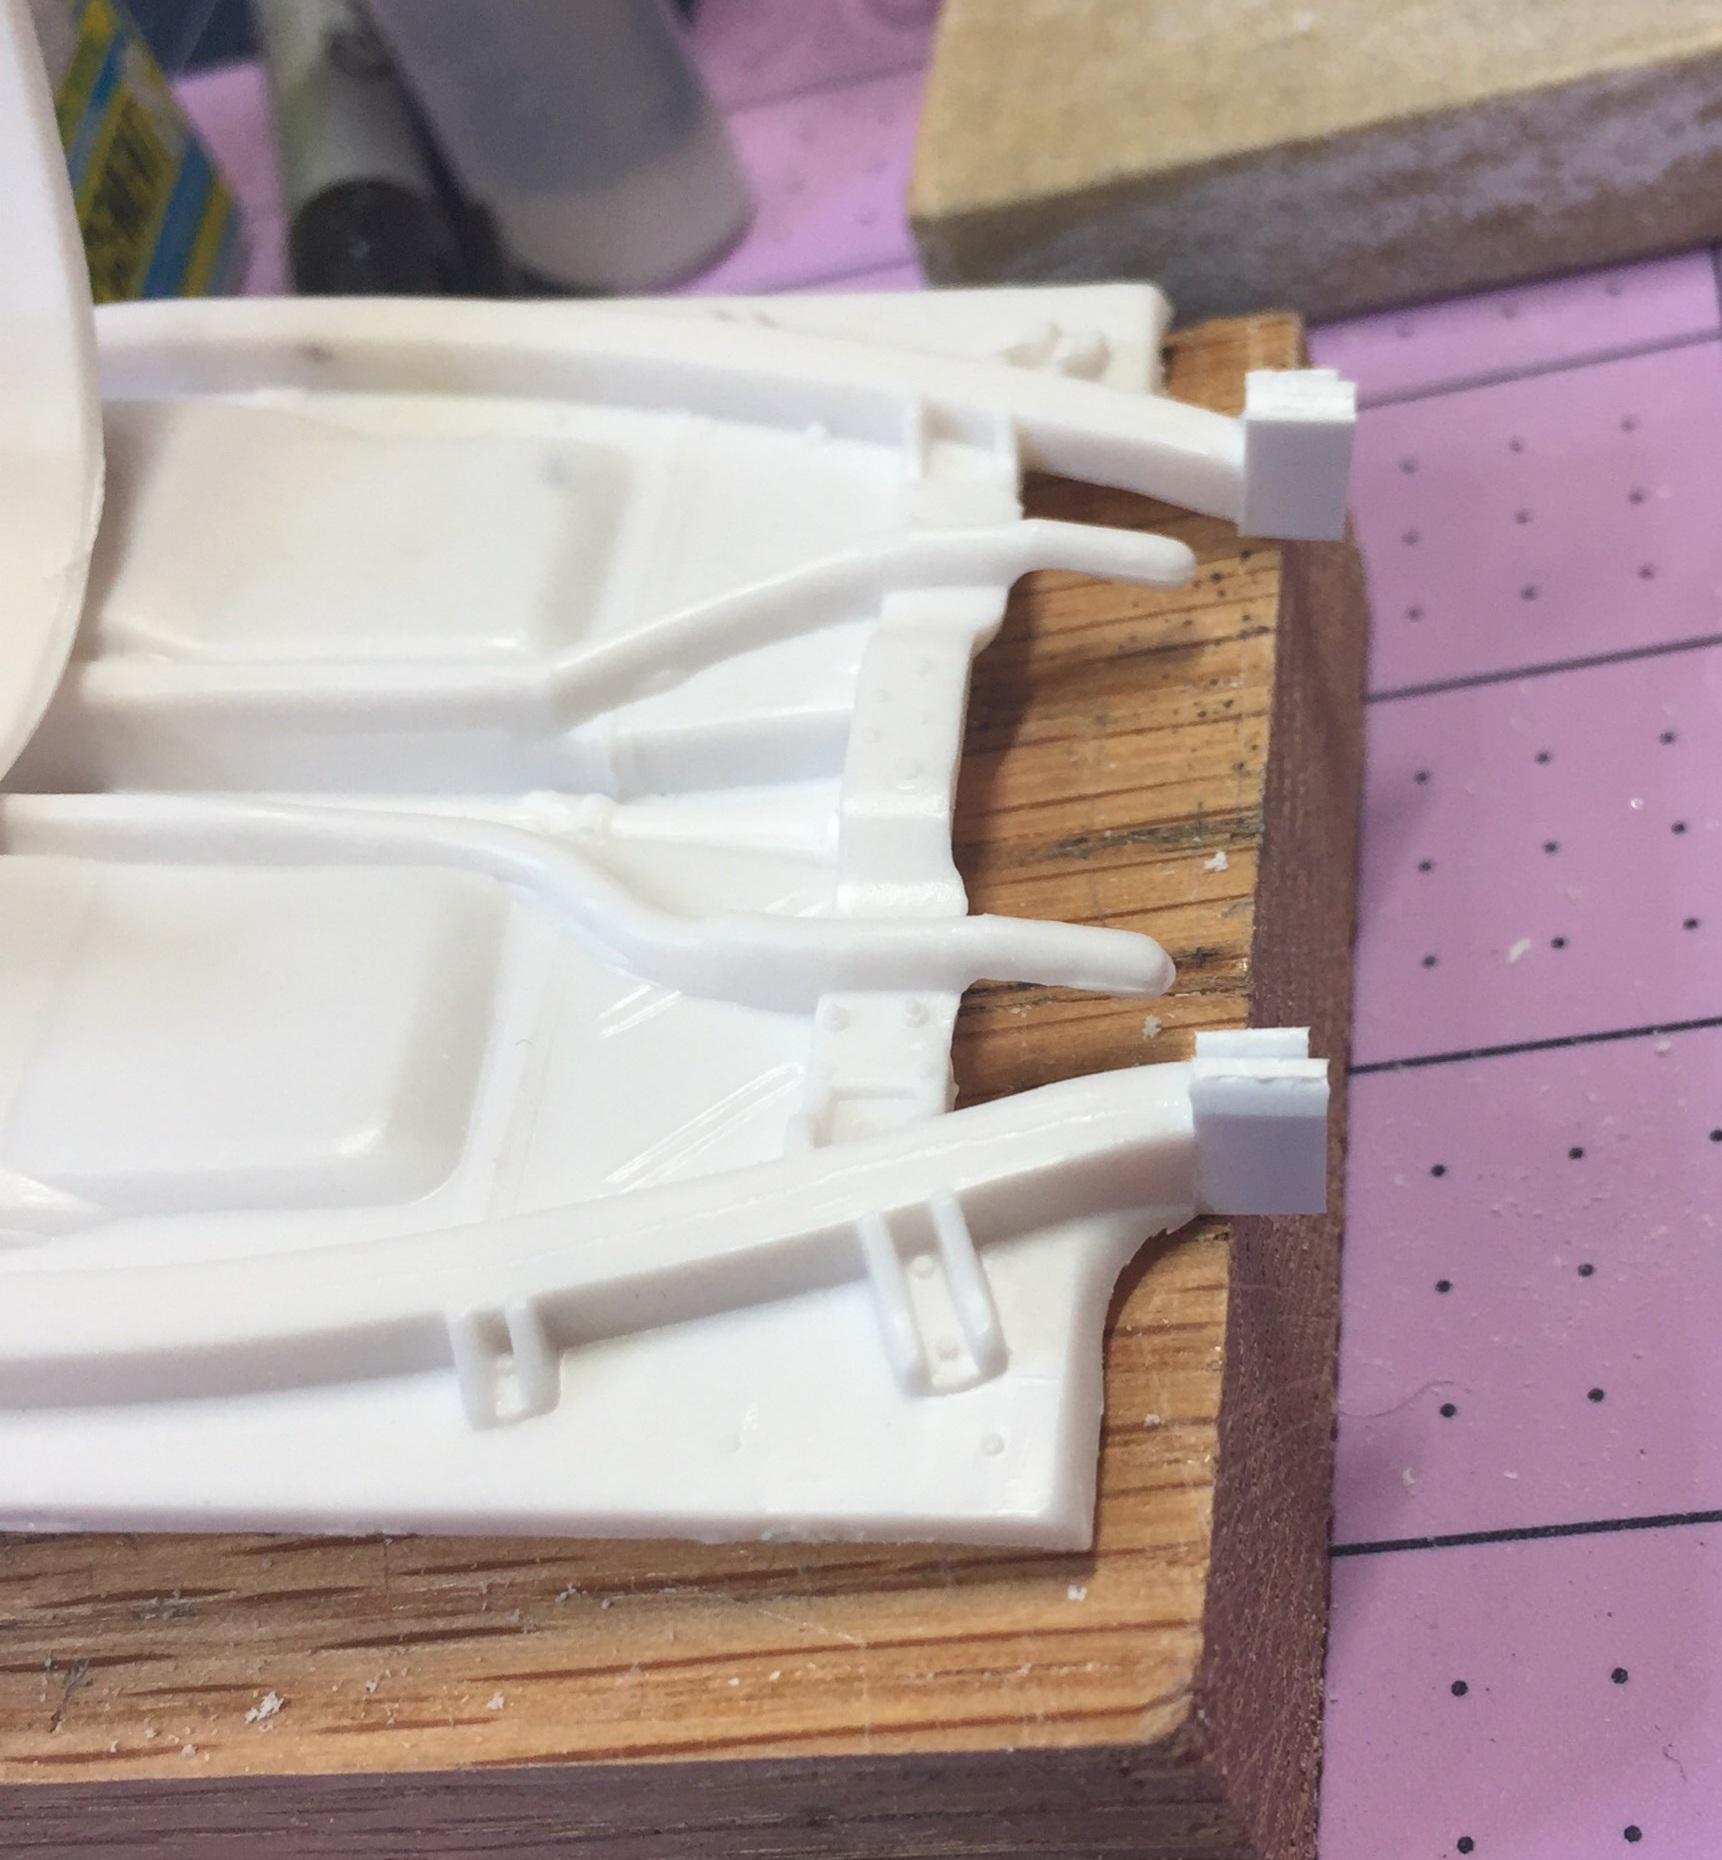
If you mean the '63, yeah they were OK but had to be removed in order to graft the new panels on top of the kit tub panels. It's this (bondo cranks), or I make them from brass wire and slices of evergreen rod. I figured this was maybe a bit better so here we are. I still need to make door handles but that looks easy. ? I just wish they didn't need to be so damd small.
-
Looks pretty dam good to me, Jim. I've got a thing for the '27 roadster. Put the other body in the pond. It deserves a second chance. That ultraviolet pearl is freakin' awesome.