customline
-
Posts
3,793 -
Joined
-
Last visited
Content Type
Profiles
Forums
Events
Gallery
Everything posted by customline
-
Can you really do that Charlie? Sounds like a worthwhile undertaking, for sure. I would be interested in a new front clip that is accurate to 21st century standards (or a whole new kit, for that matter ?). Not sure if it's cost effective but I have no knowledge of that stuff. I'm still stuck in the 20th century. ?
-
I'm curious about the custom engine. It seems kinda small. Does anyone know what it's supposed to be? Small block MoPar? Niiiiiiiiiiice paint, James! Beautiful blue. Can't wait to see it in foil ?
-
Thanks for your comments and suggestions, Bill. I will be trying some .020 styrene rod when it arrives. The normal prime/sand process should render it a bit smaller but I plan on down-playing it as much as I can by painting the car black. The welt situation has taken on a life of its own but, for me, its just something I've got to deal with to finish out the nose mod. In fact, yesterday I put a full coat of primer on the car and then remembered that I was going to wait till the welt was put in ?
-
I think the grille looks great. The headlights, which look kinda "fat" could be replaced with some custom kit parts (48 Ford). The hood might need replacement with a styrene part. Resin means CA for assembly so trim work is a bit more difficult but not impossible. Maybe some reworking of the bottom of the front fenders/cowl/door area. The trunk and hood badges looks pretty good. The running board covers seem too deep. I dunno, Len, it's just a matter of desire, but if you want a '42-'48, it could be done. The backlight opening needs work too. Because it's resin, you may find you can modify an original kit a bit easier but that's just my opinion and you know what they say.
-
Probably more correct than AMT would have rendered it ?. Maybe some day.
-
That makes two of us, John. Thank you!
-
Thanks, Dave. The trim on the cowl was pretty poor so that was replaced too. I was after a better alignment with the trim on the hood, which was narrowed in the process by removing material beyond just the hood trim. The sides were sanded quite a bit. My hood had a slight twist so I twisted it the other way and it seemed to fit better. Styrene is pretty good about that sometimes ?.
-
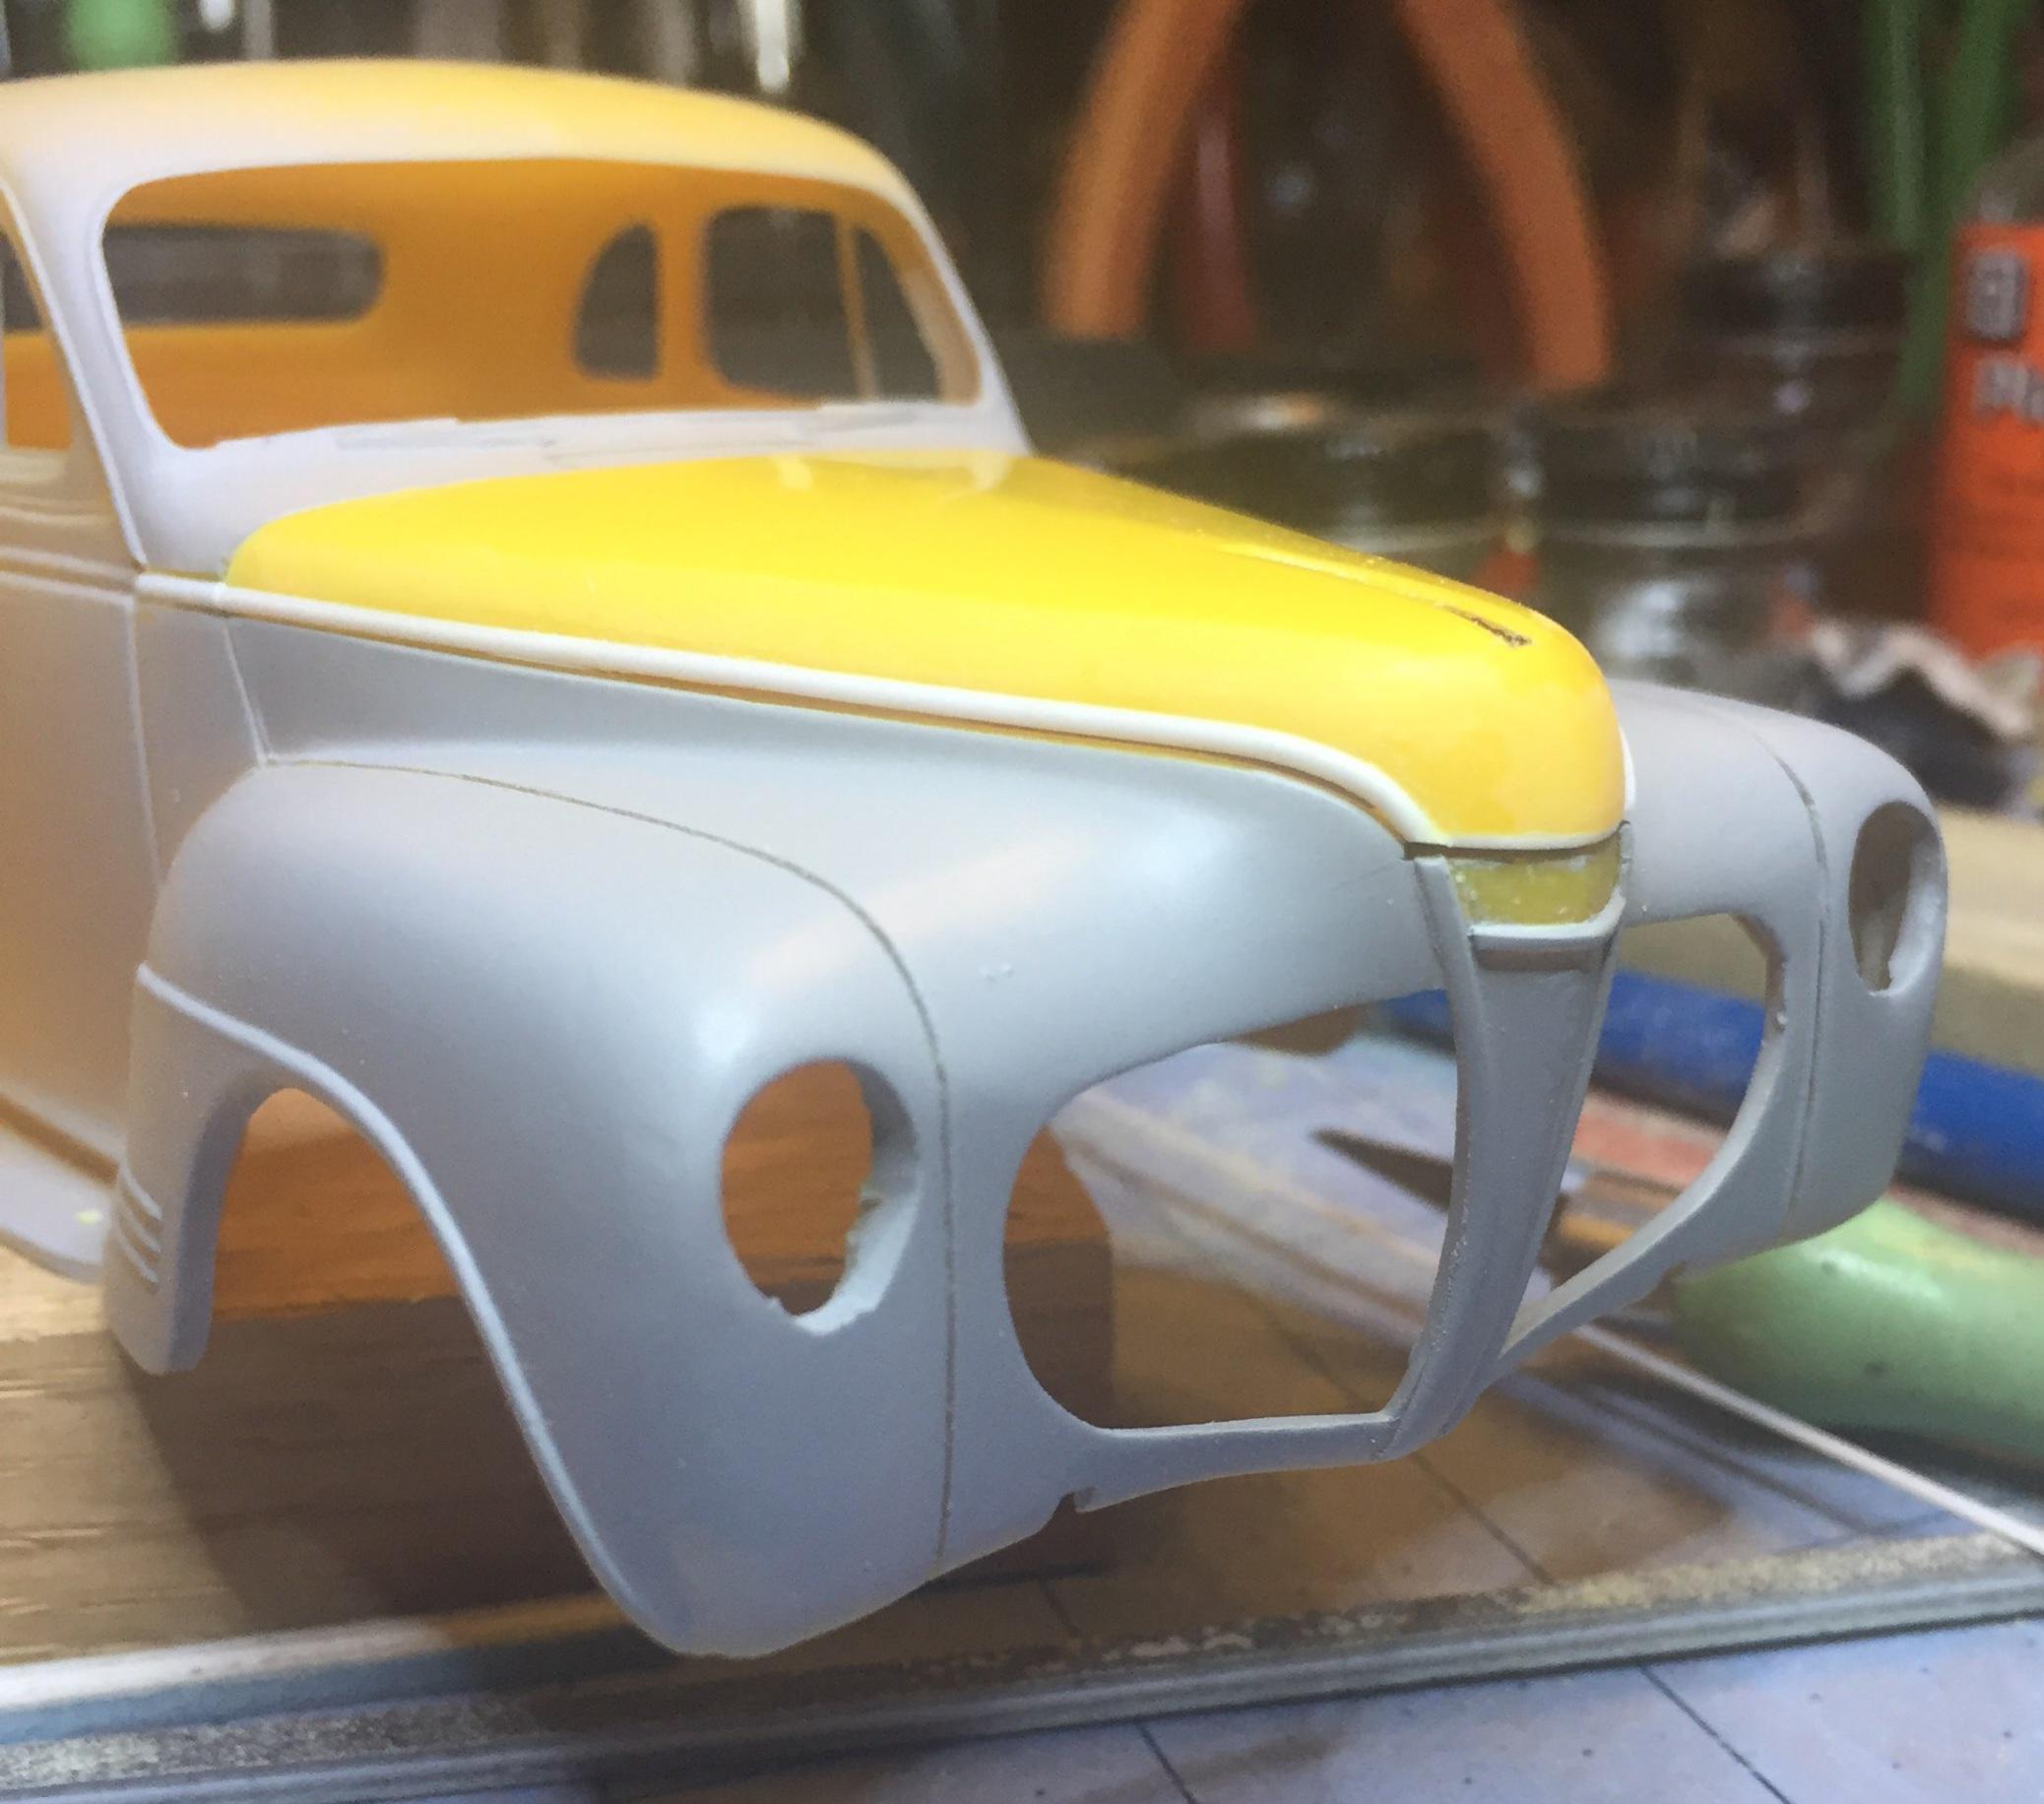
I love these little magnets. I use 'em to keep doors and trunks and hoods closed. But not just closed but, more importantly, in alignment. in the case of this hood, the rear alignment is provided by the "stubs" at the back corners. All I needed was something at the nose....MAGNETS! ? I was waiting for the glue to dry on the magnets so I "created" a distributor from sprue. Crude but the wires have gotta go somewhere ?. Also, I just remembered to add the correct seam lines to the nose. I haven't done it yet....but I did remember it and that's something ?.

-
Another update. A re-do of the trim on the hood- the left side trim was removed and replaced.....twice. I'm having a great time with this one ?. I think I got it as good as I can get it. We won't know till the foil is on. I'm thinking about trimming the foil on the body a tiny bit wide and then tight on the new stuff to maybe compensate for the difference in width. My estimate for chance of success on that is about 50/50 ?. When it warms up out there I'll get some more primer on it. Thanks for sticking around ?
-
Yup, that's how to solve the problem, Rick! I have one of my $13 Ollie's kits planned for just that solution ?. But what are you gonna do with six of 'em?!?.....OK..... gasser, short track, street rod, rust-out, showroom stock, custom, salt....yeah, I can see that ?. Maybe I should try to buy a few more. Just what did you pay for the six, if you don't mind me asking? BTW, thanks for your encouragement, Rick. I appreciate the kind words!
-
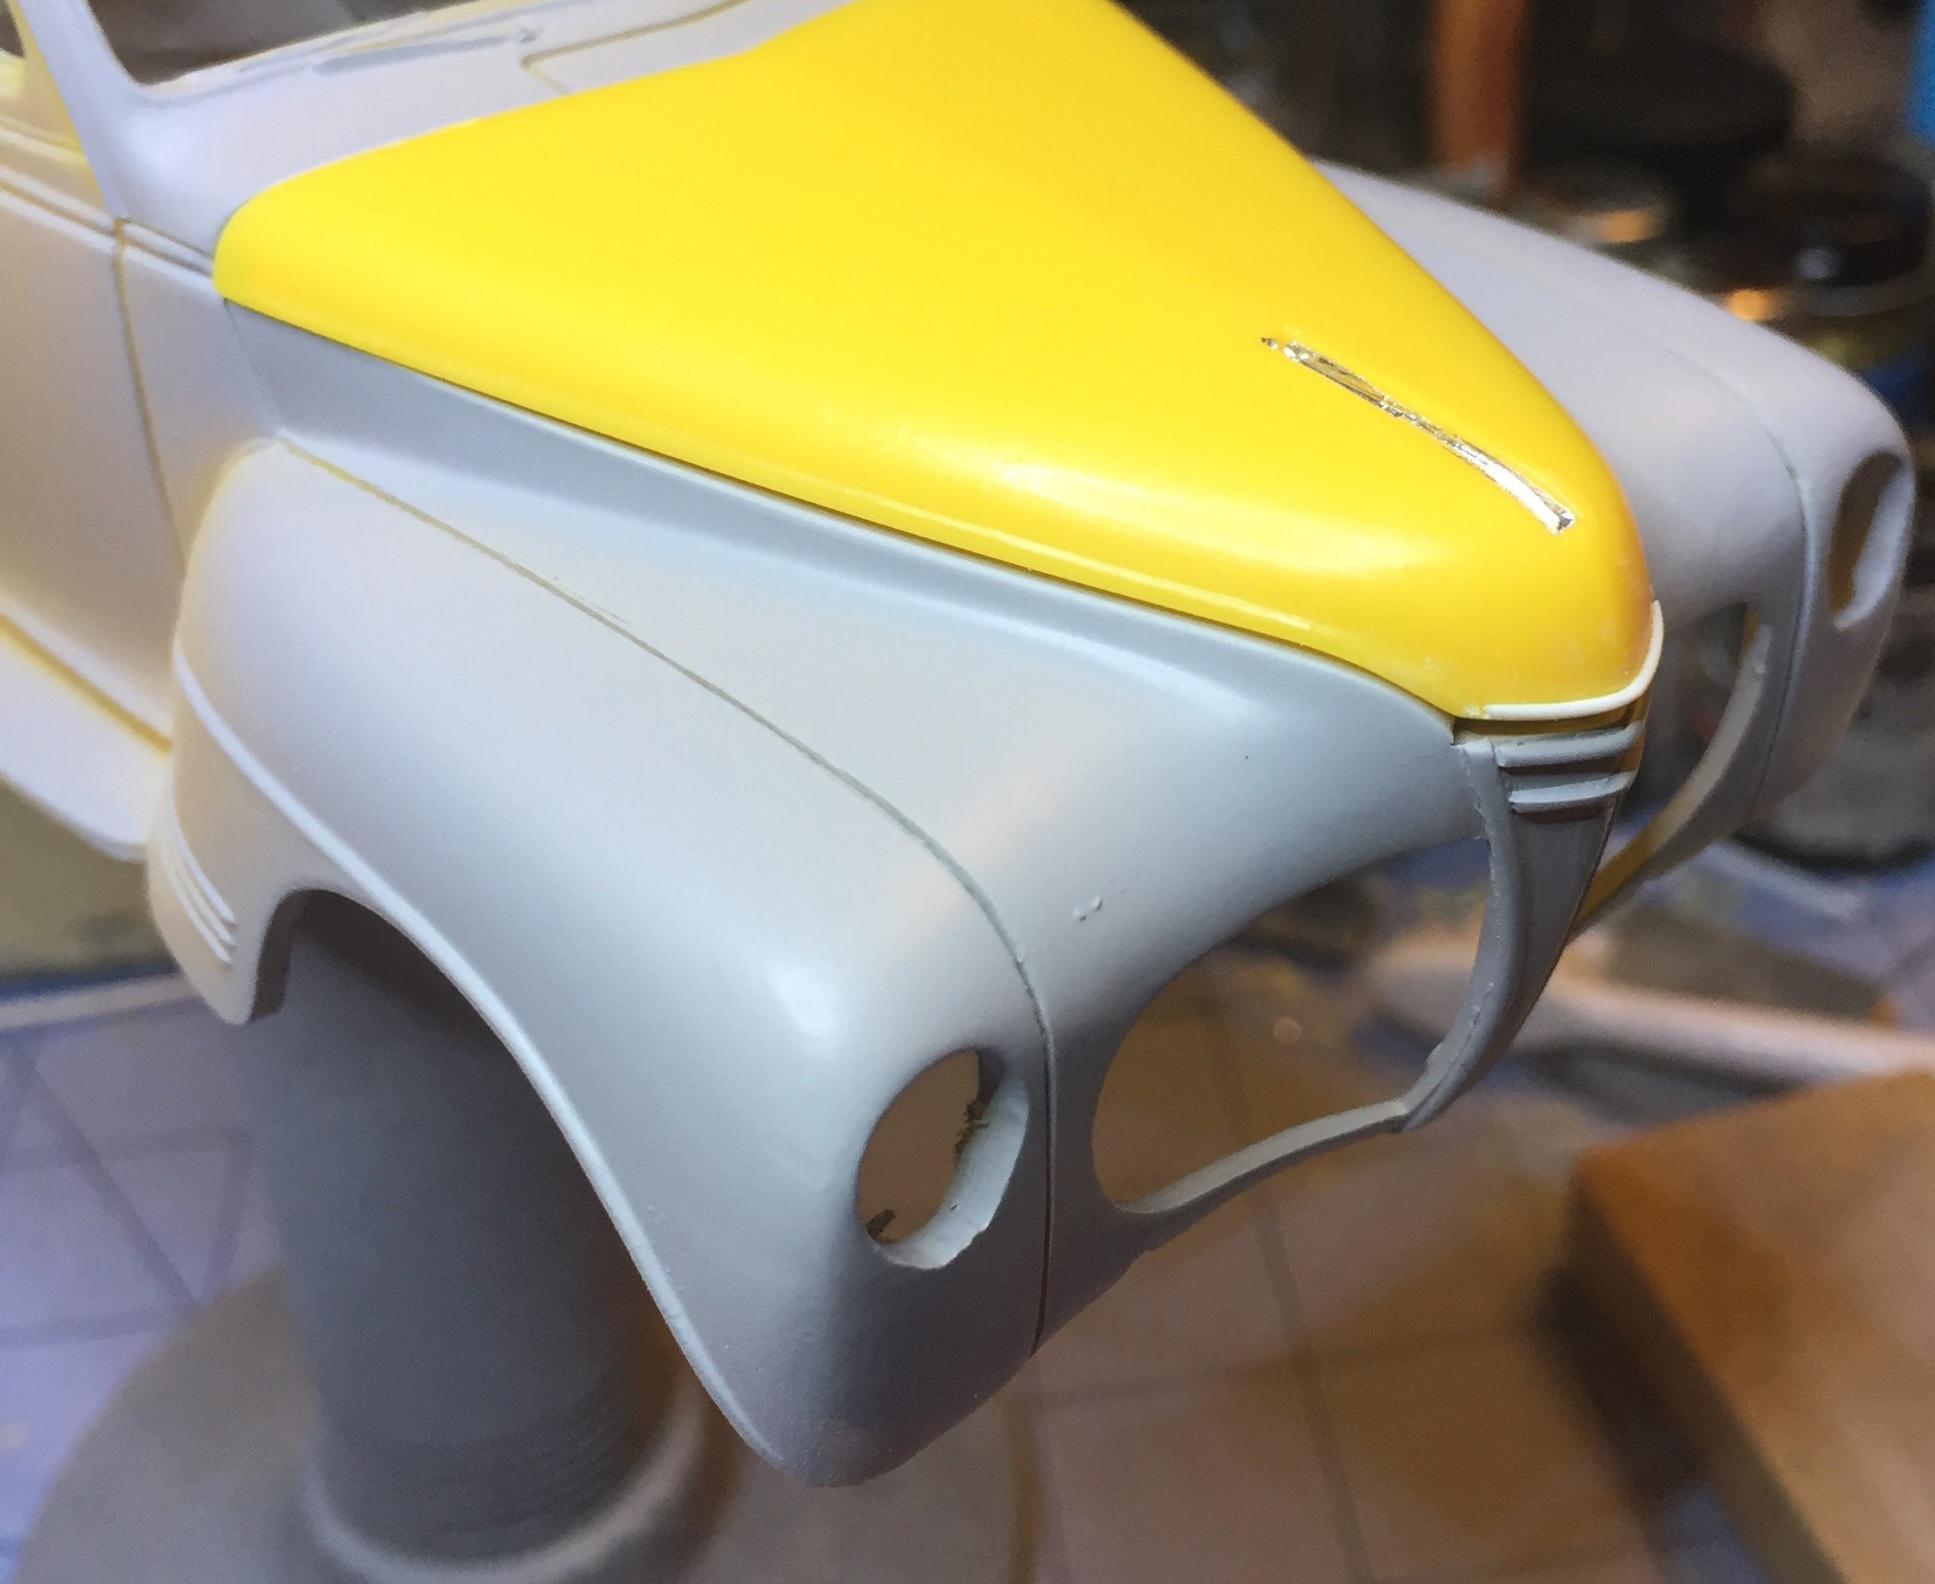
Quick update. Decided to attack the hood issues. Started by removing the molded-in trim and continued to remove material along both sides in order to facilitate adding new trim using .040 half round. I also removed the trim on the cowl and replaced it because I want the hood trim and the cowl trim to line up better. Everything I do creates another issue to resolve. Ya gotta love it. I removed the small top nose trim bar because i will need to relocate it slightly. I also added some sheet stock to the bottom of the hood peak. This seemed like an easy way to get things a bit tighter. I discovered that my hood was slightly twisted and some tweaking was in order. Before I do any more, though, I will be setting up the magnets that will keep the hood closed and in alignment ( I hope.) Thanks for keeping up! ?
-
That's a great shot of the 1:1 nose, Len. The work you did on yours looks darn good. I would (and plan to) go with .020 but making it stick without melting it will require some finesse. I'm waiting for mine to get here. I'm not too sure about the BMF idea but I wouldn't tell you not to try it. I may paint the car black simply to avoid the problem. The wheels provided in the Rocker kit are a far sight better than the ones in the current kit (why would they do that?) I think I need to do some re-doing, Len, it's unavoidable if I want this thing to work.
-
Yeah, Greg, it's a hot mess. It's as if they didn't care about accuracy very much. I guess it's all about the bottom line. It's unfortunate. If they had gone with a '36-'38, they might have had an easier time of it. Oh well, at least we have this.
-
I don't know, David, it's challenging my patience, certainly, and lately I wonder if it really is worth it. If it helps to keep my old brain functioning properly then yeah, I suppose it is. Thanks for your encouragement, I appreciate it.
-
-
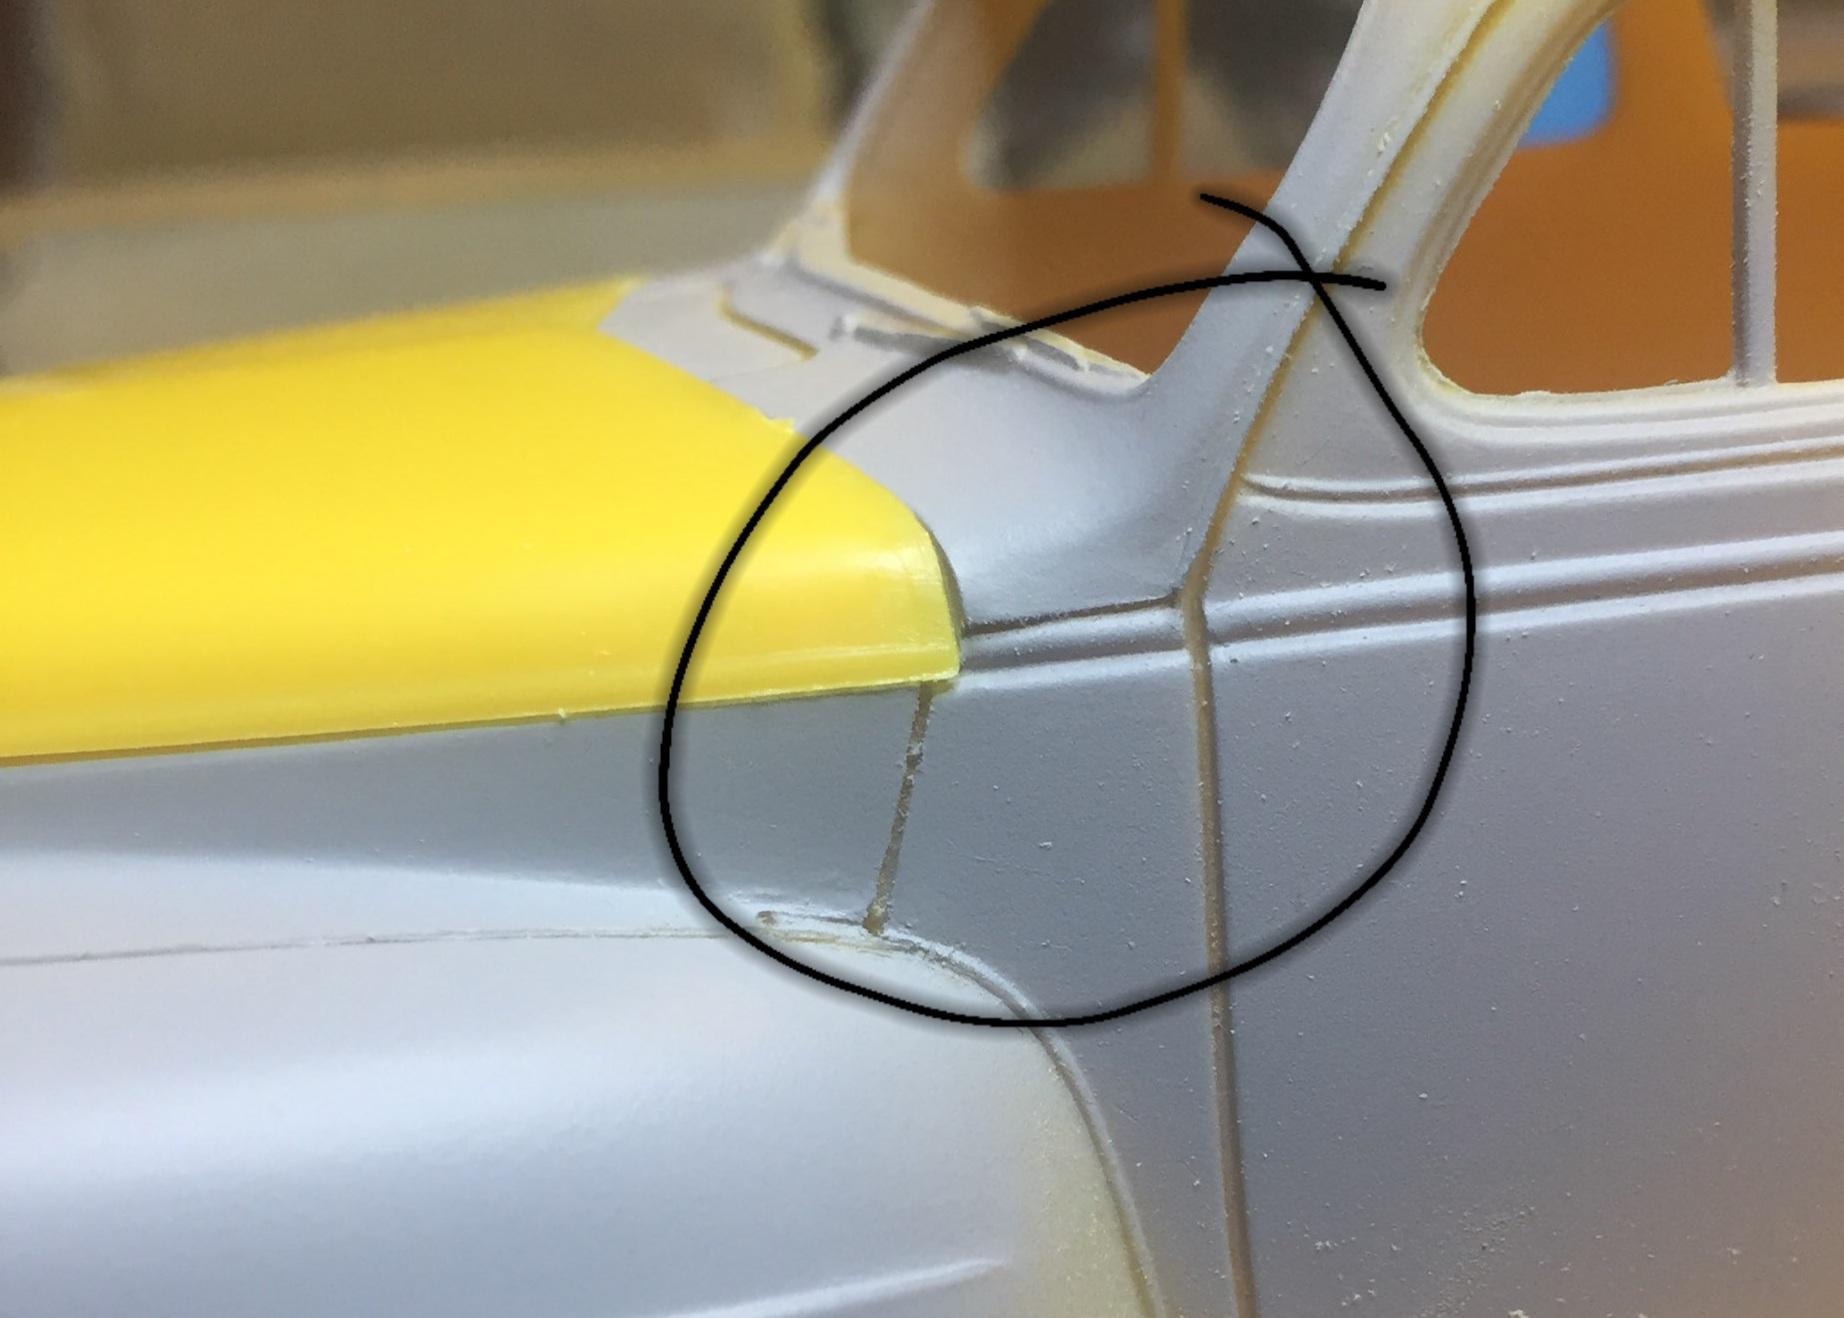
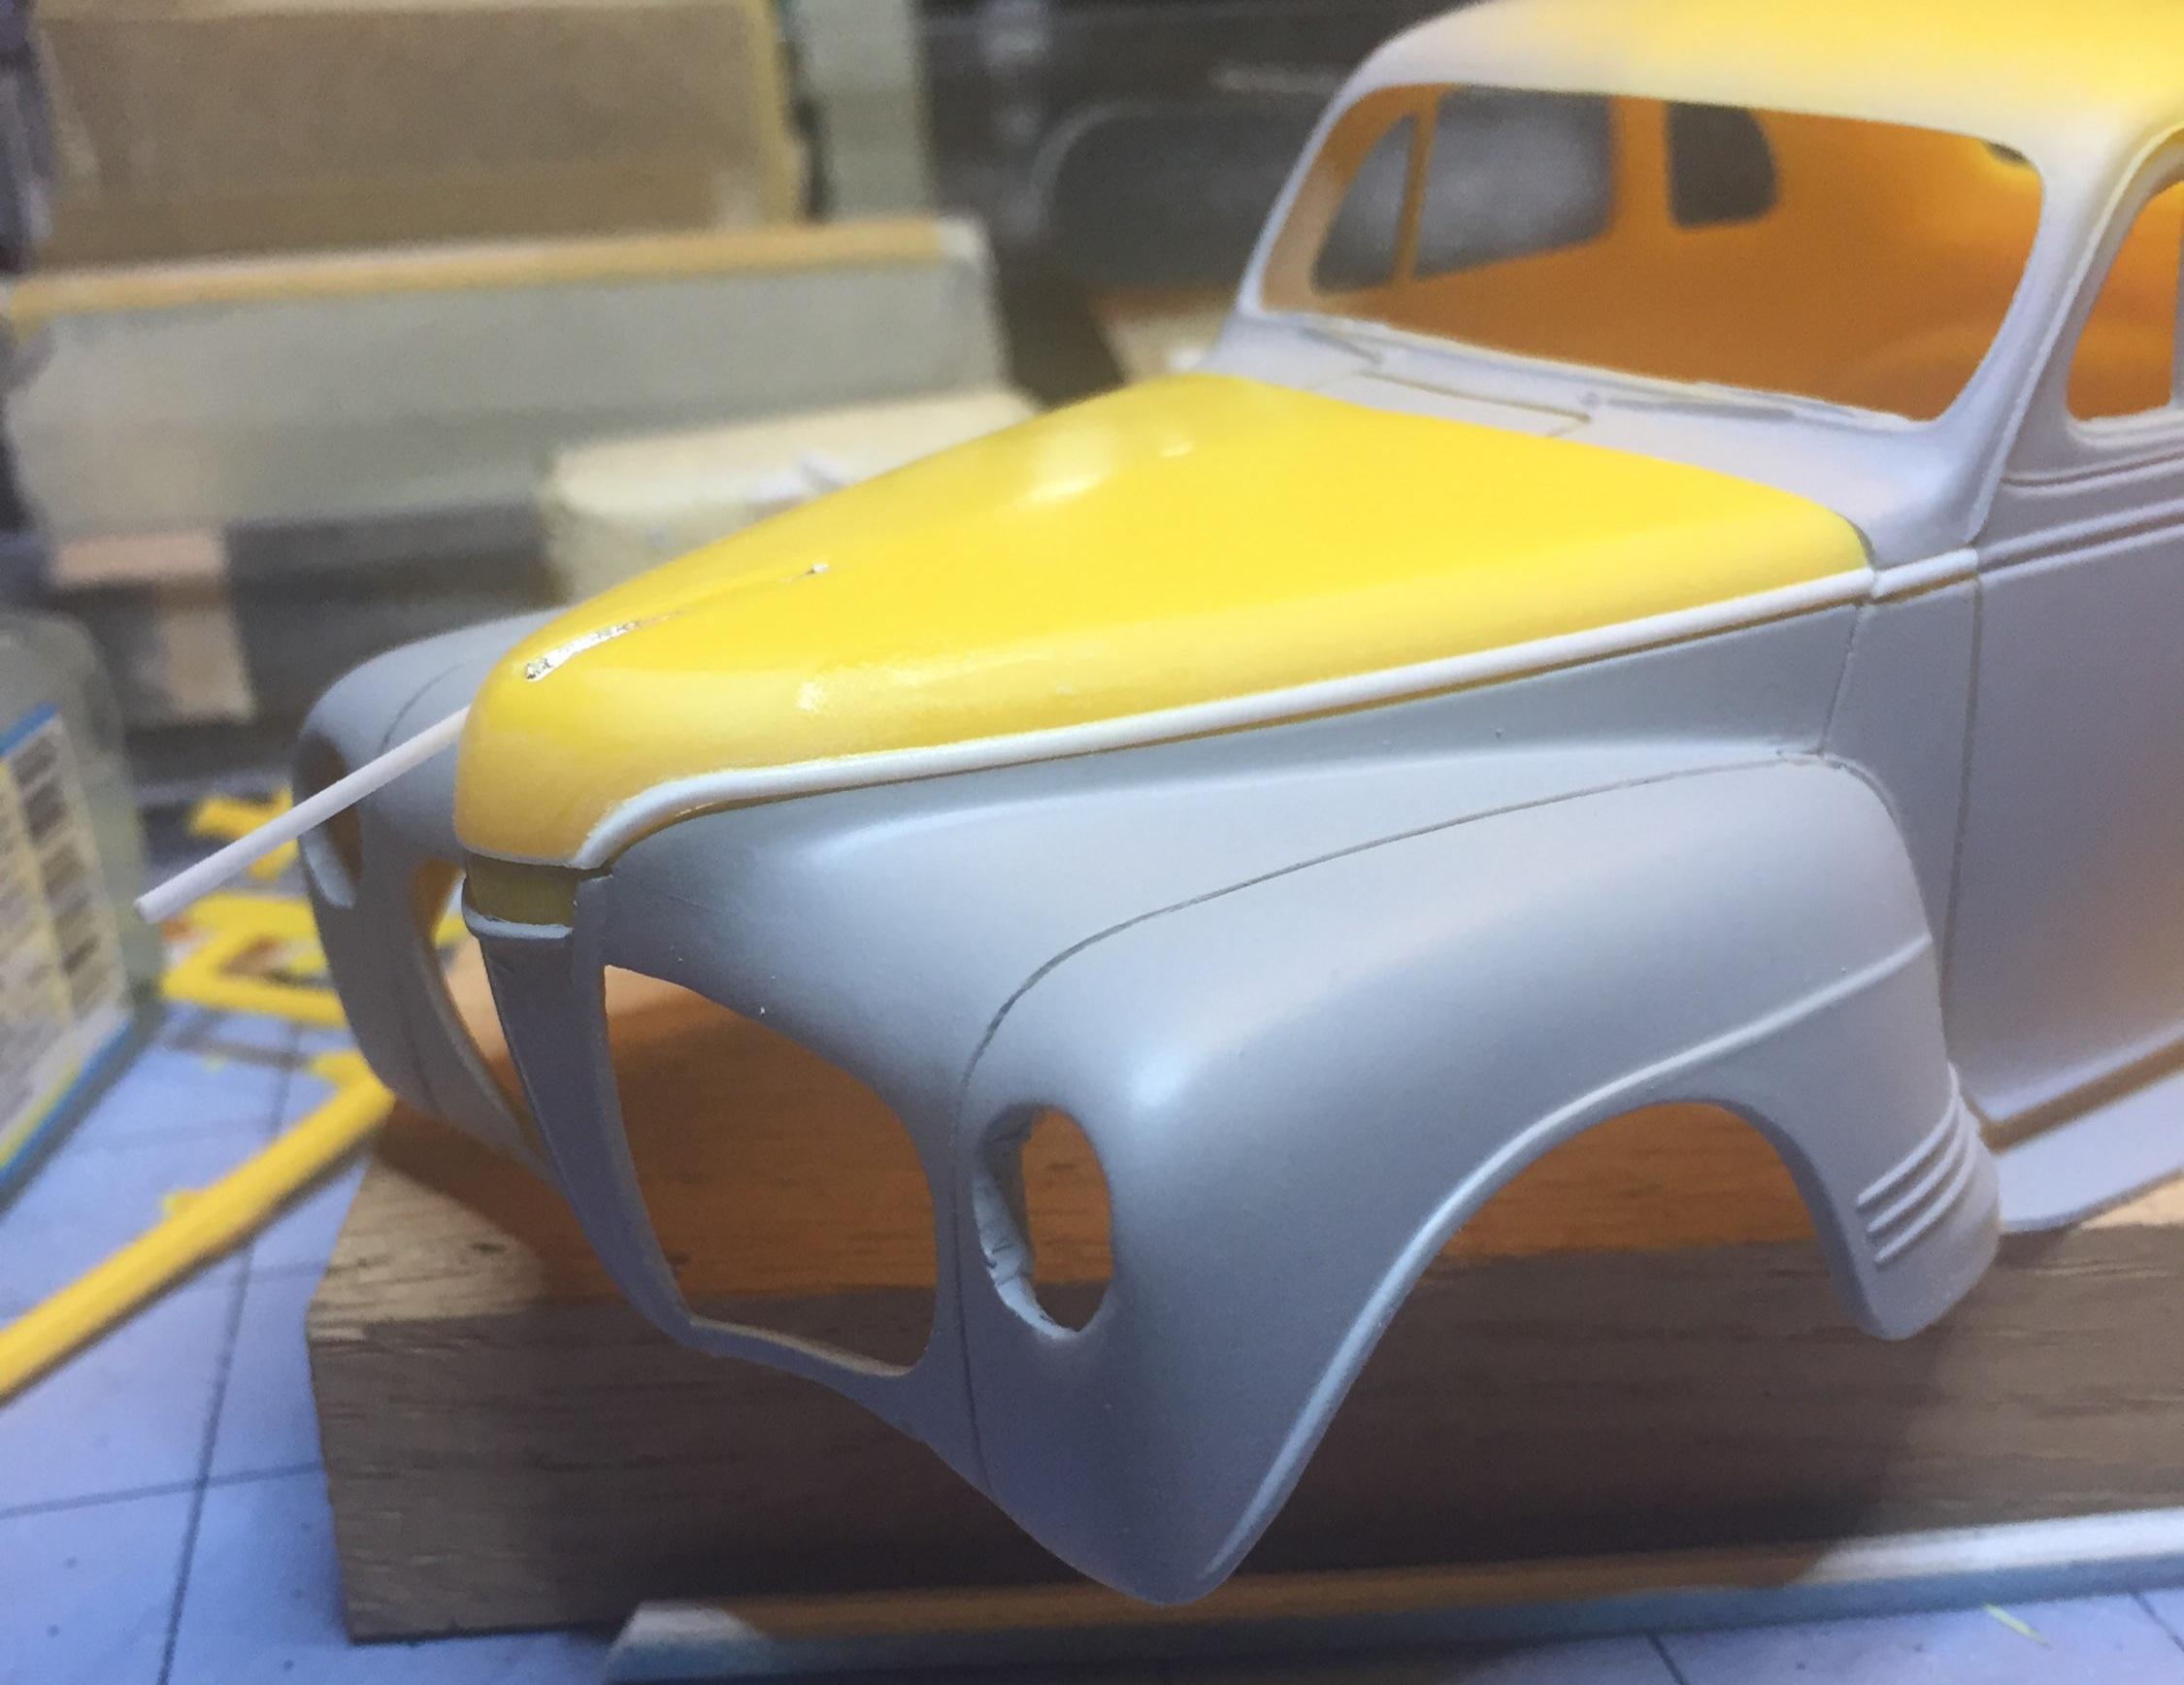
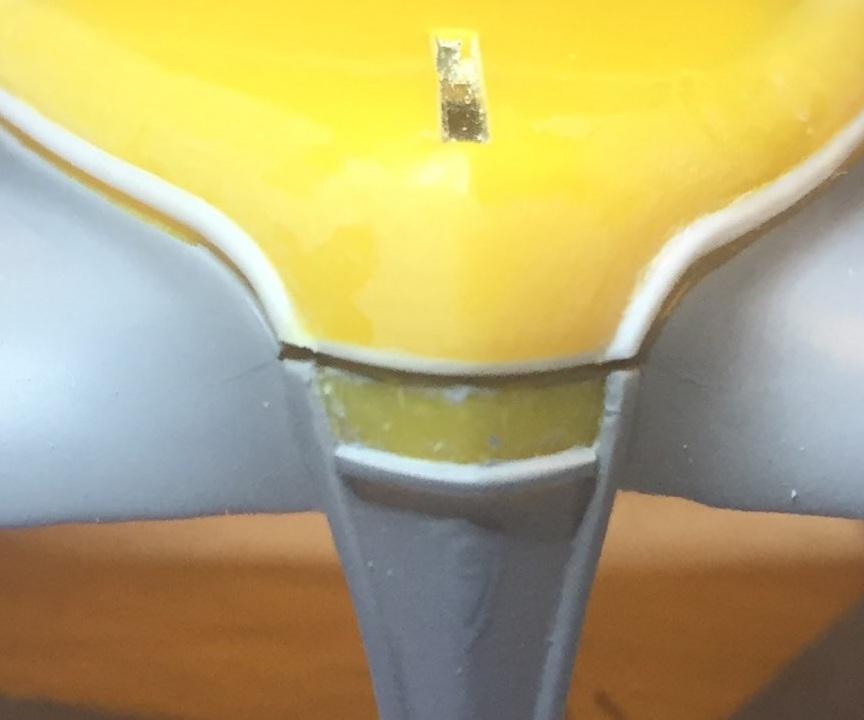
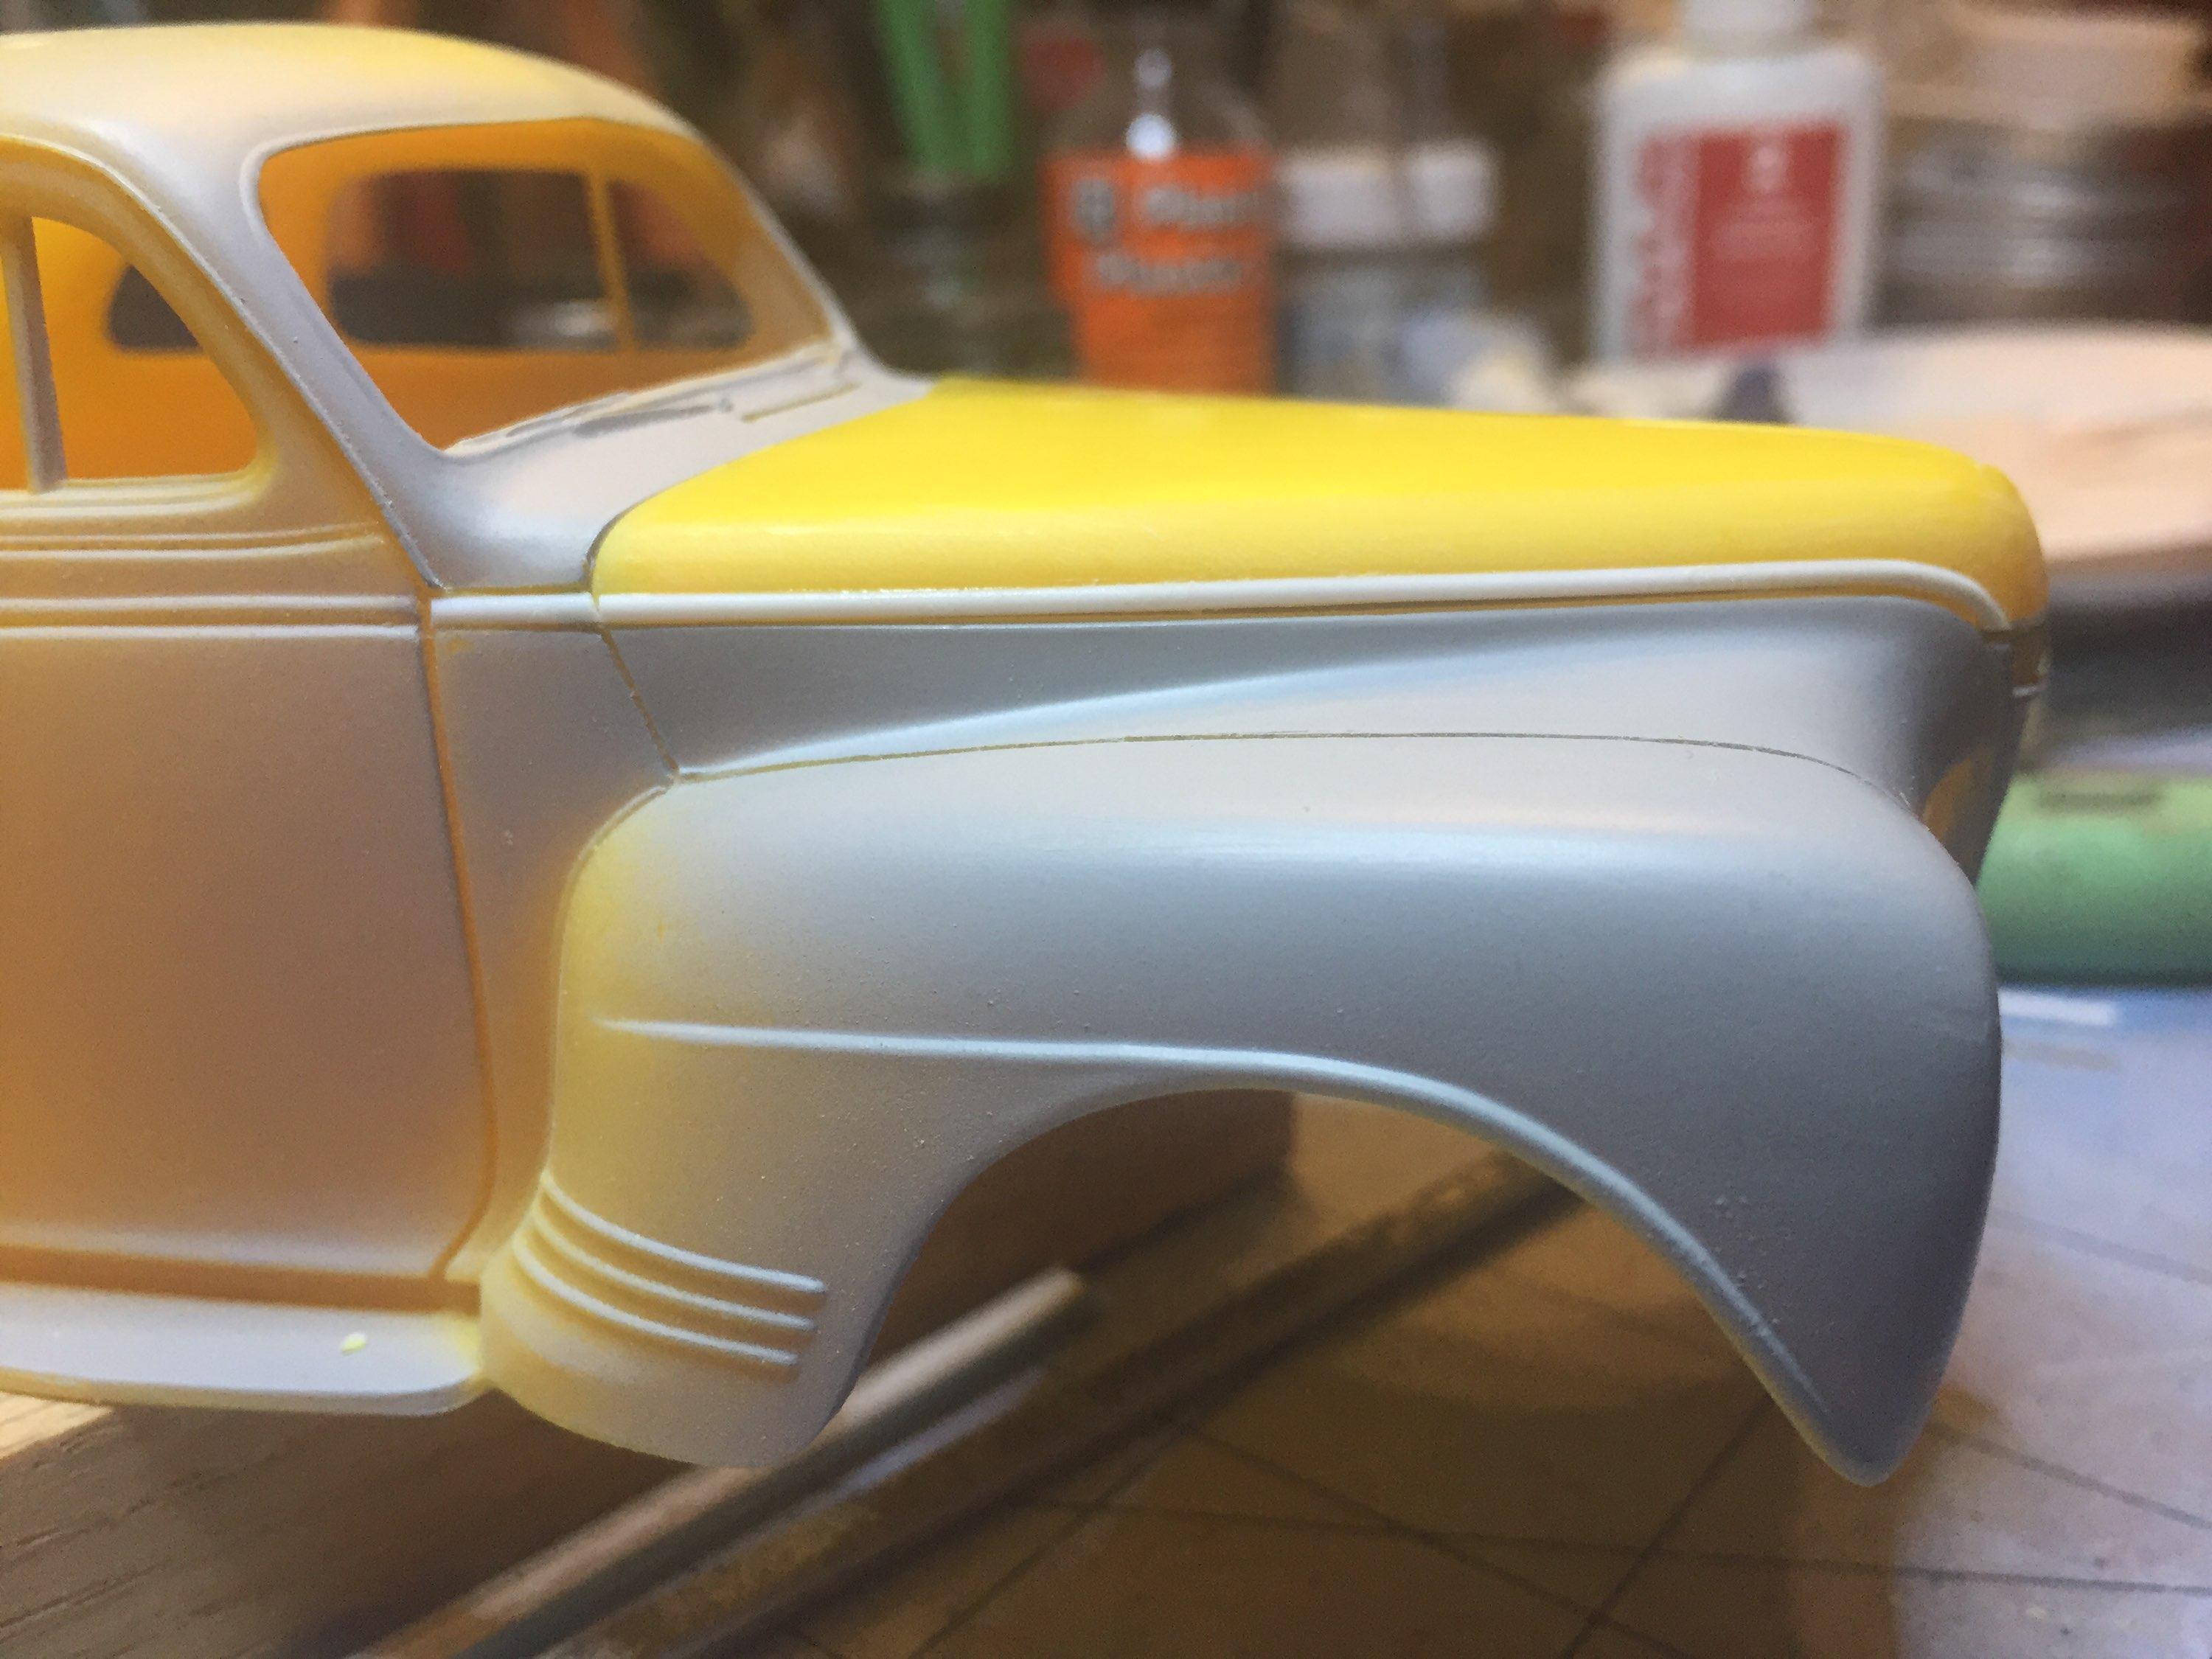
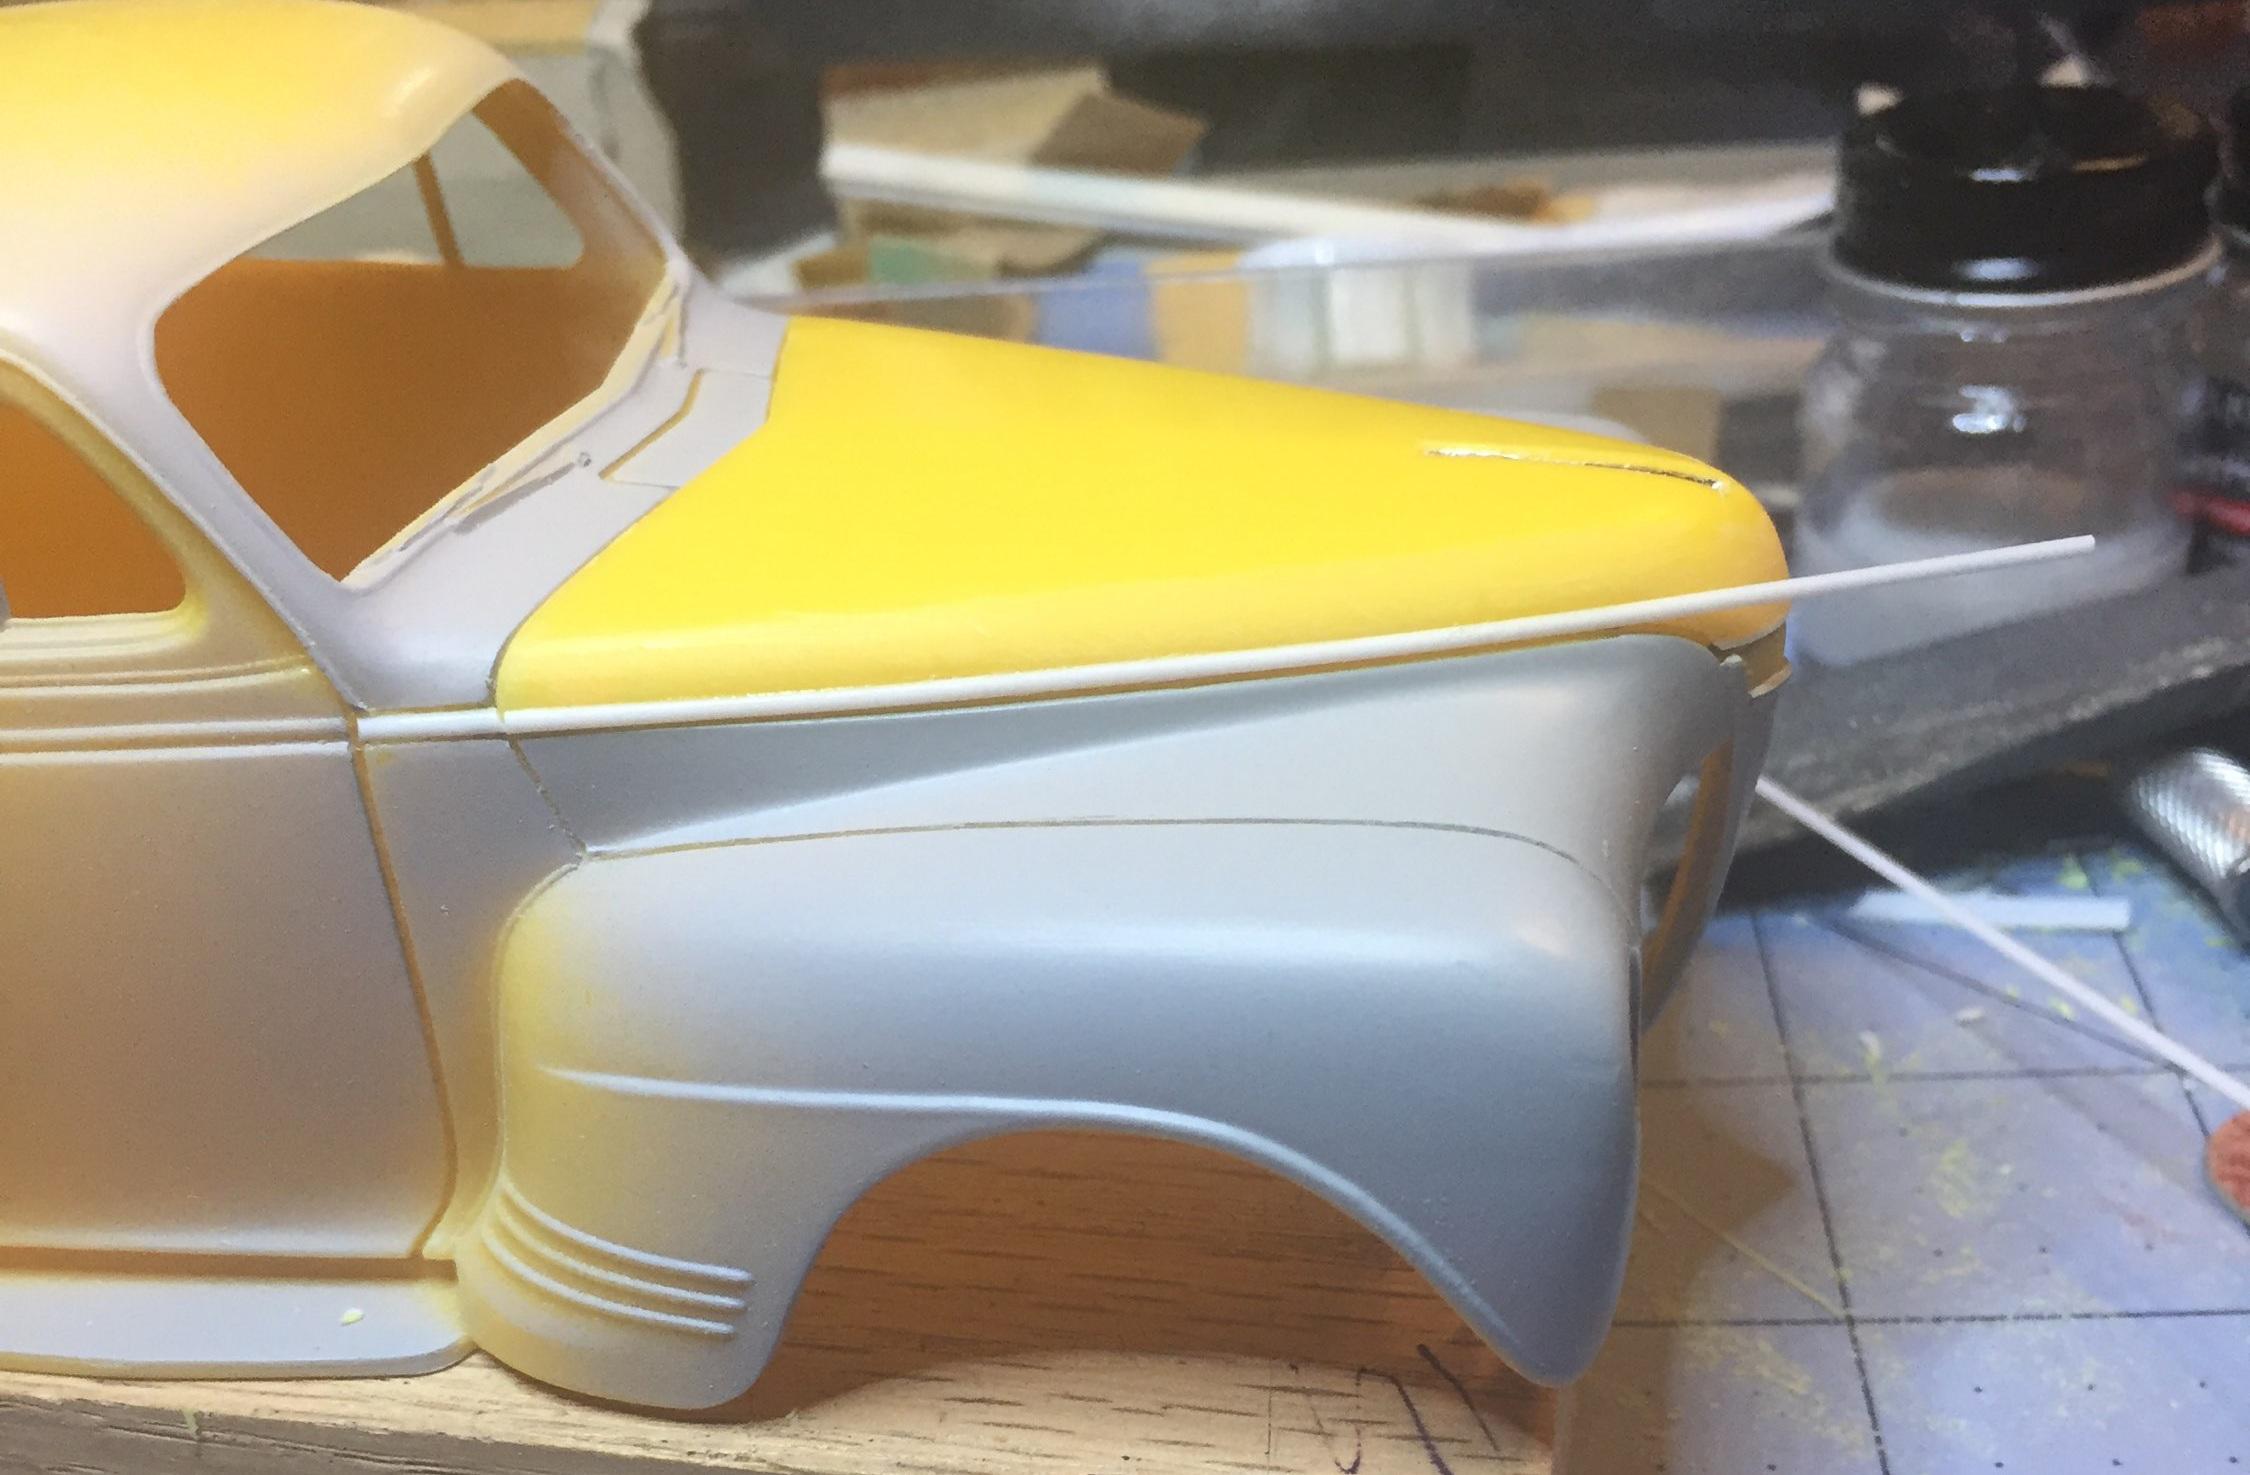
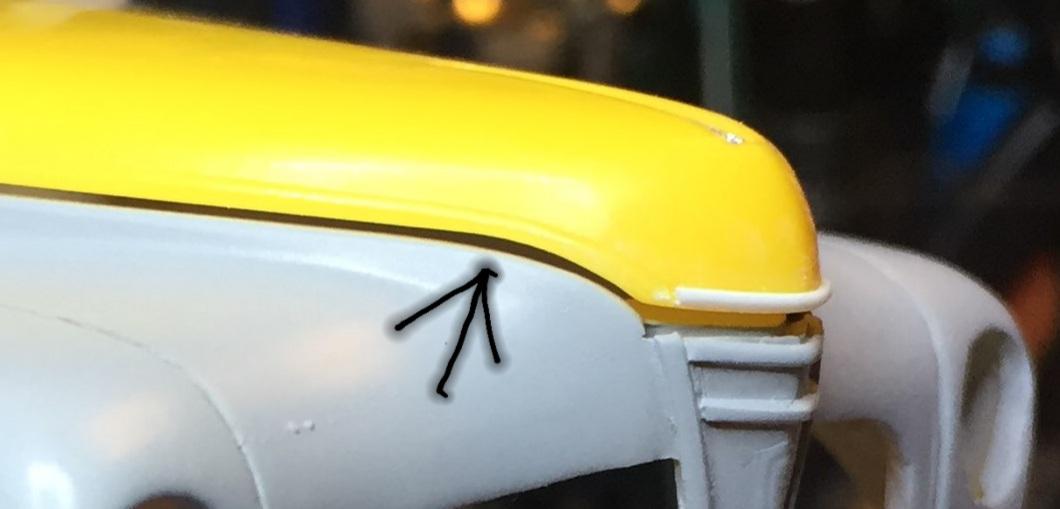
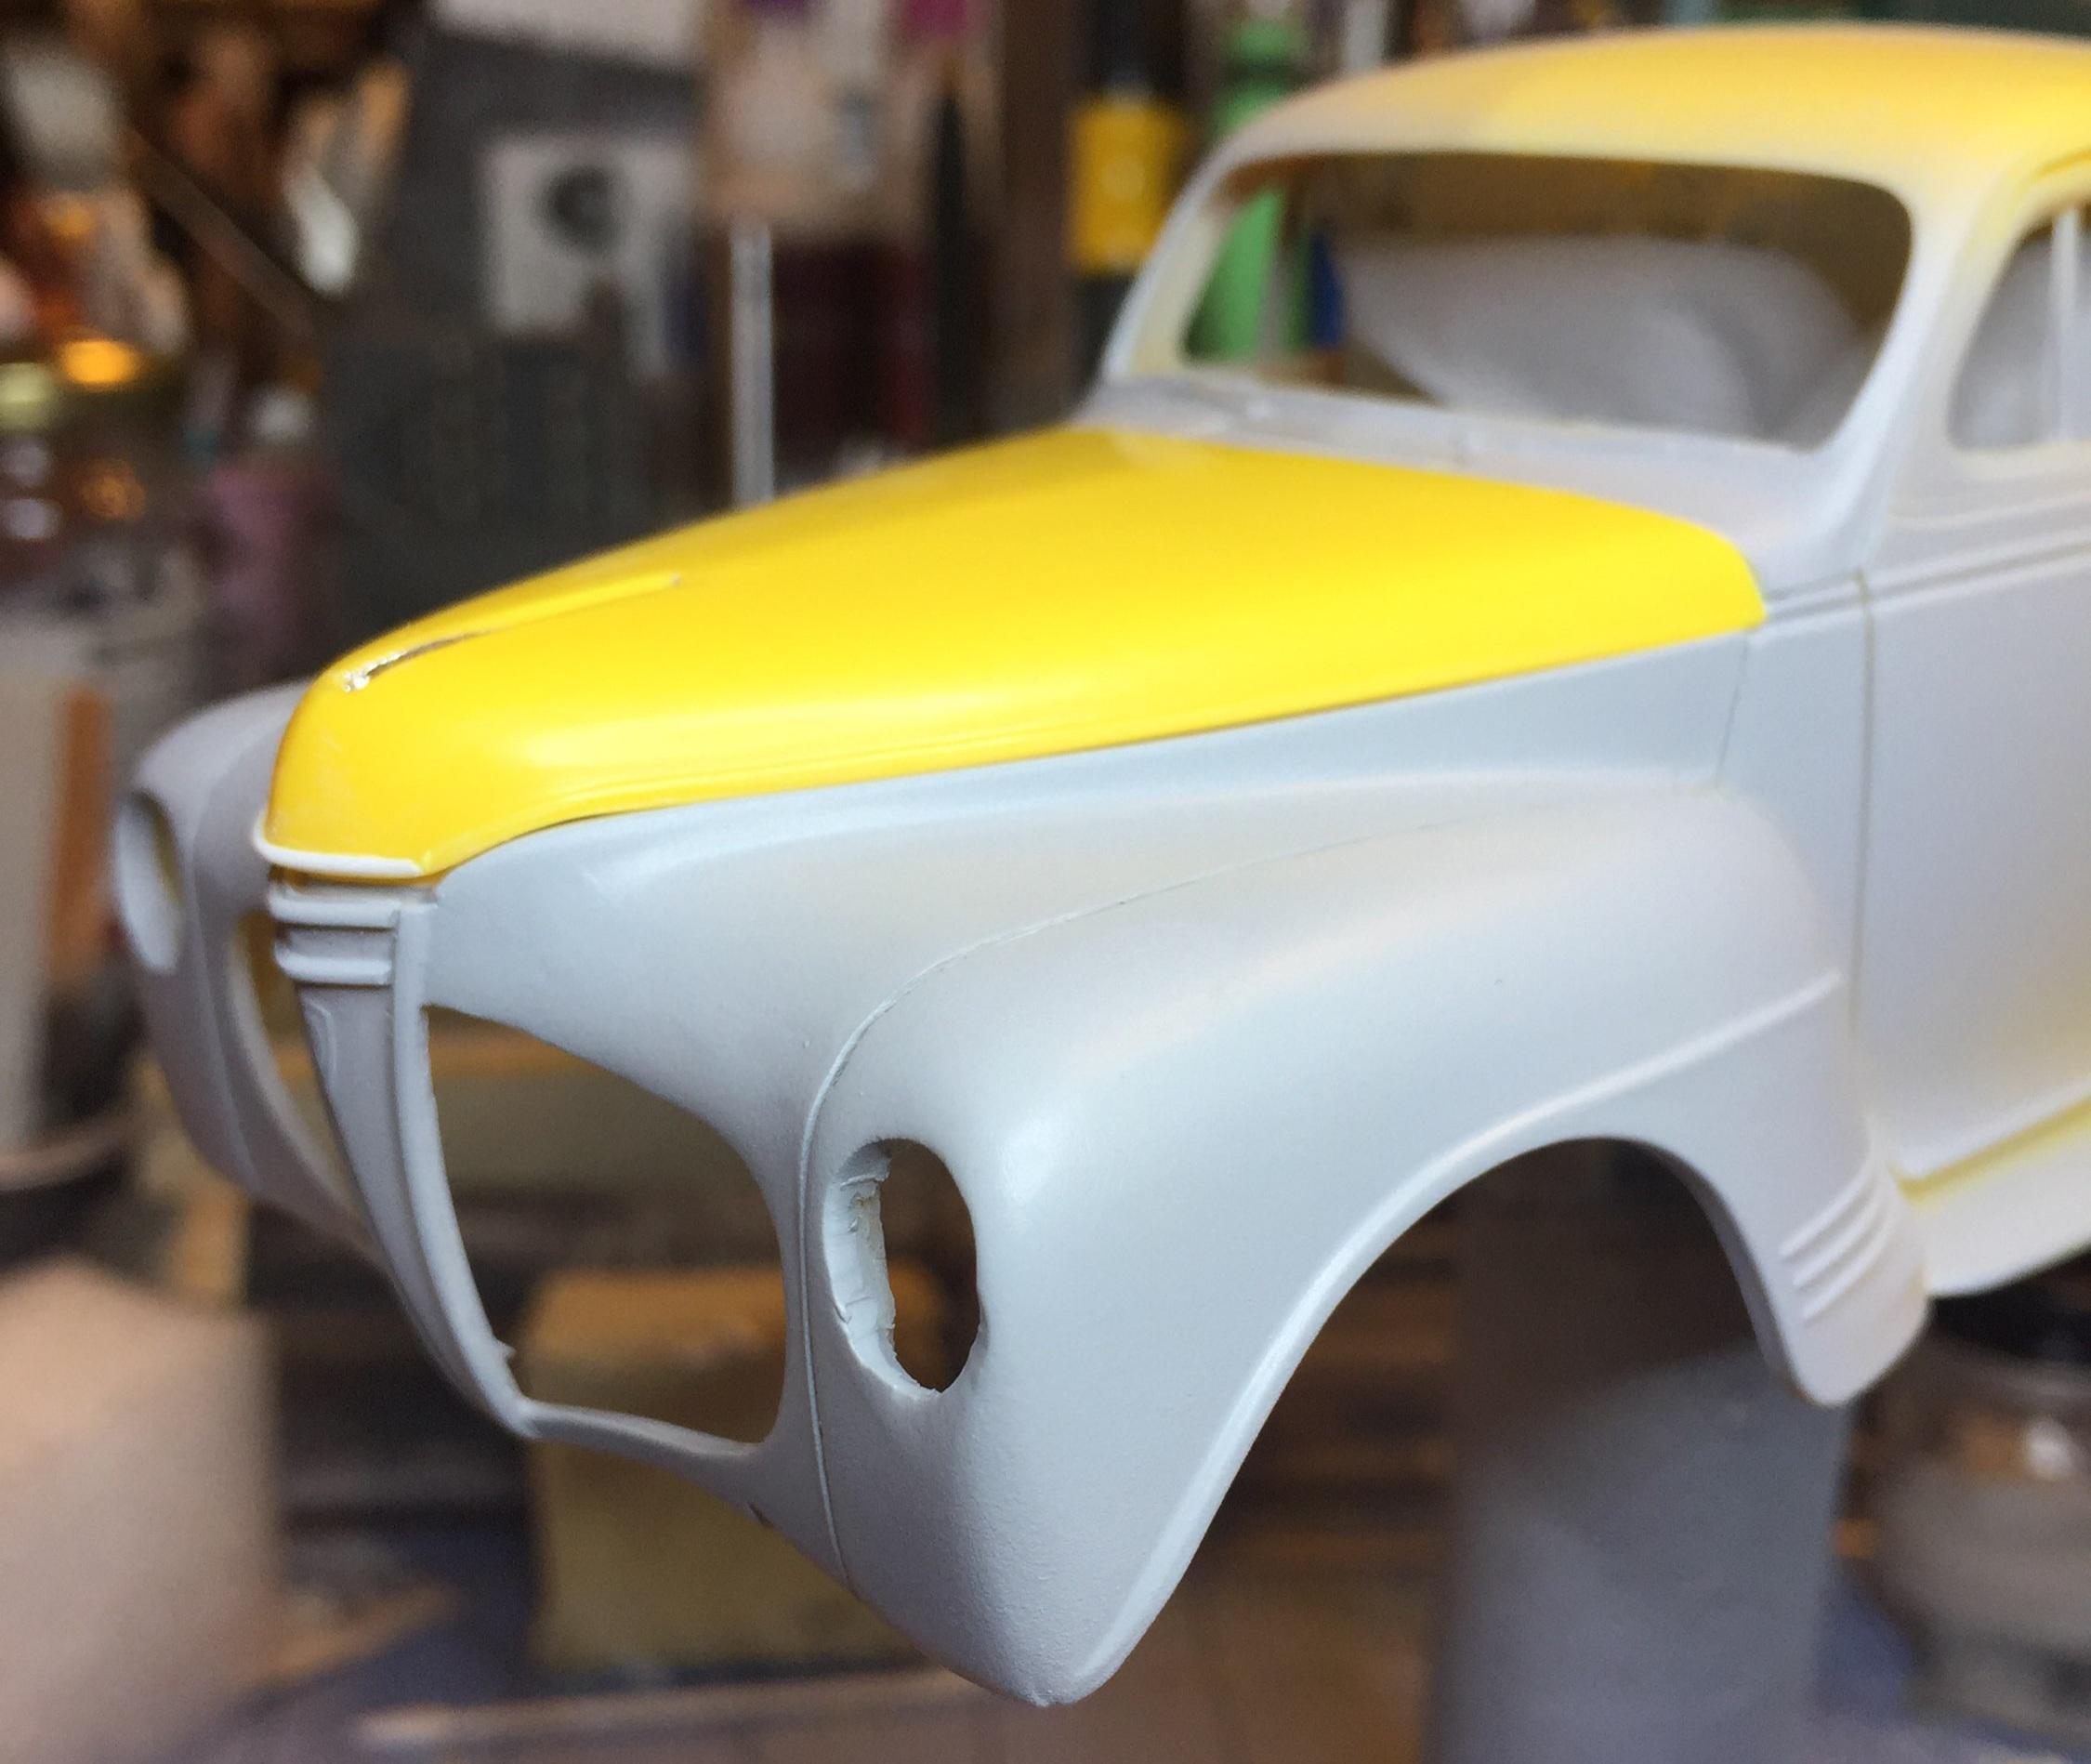
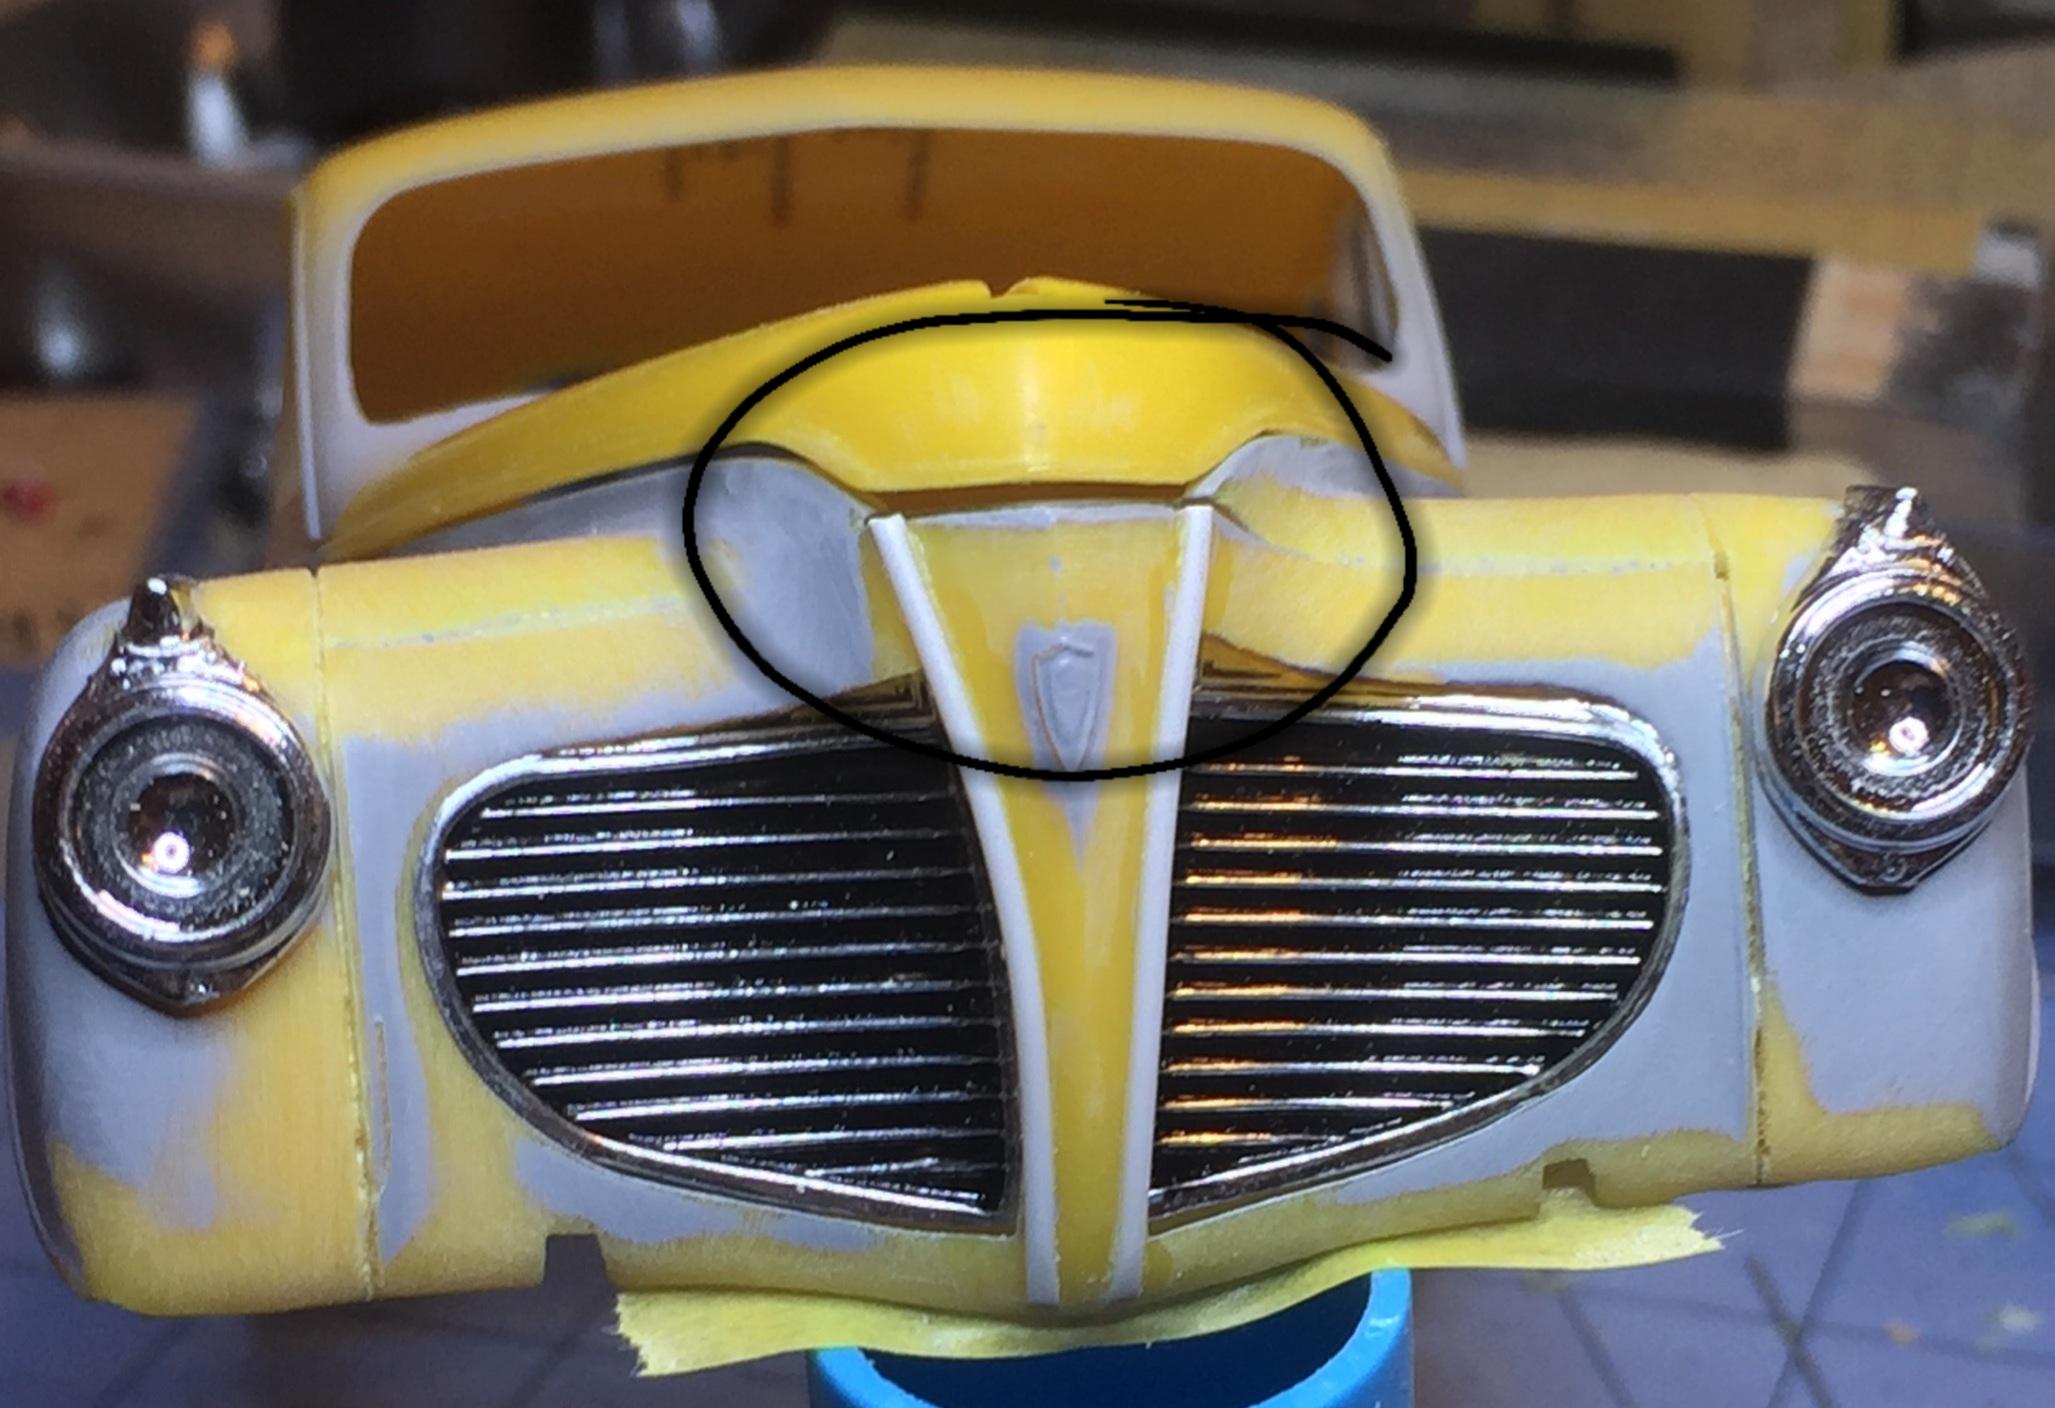
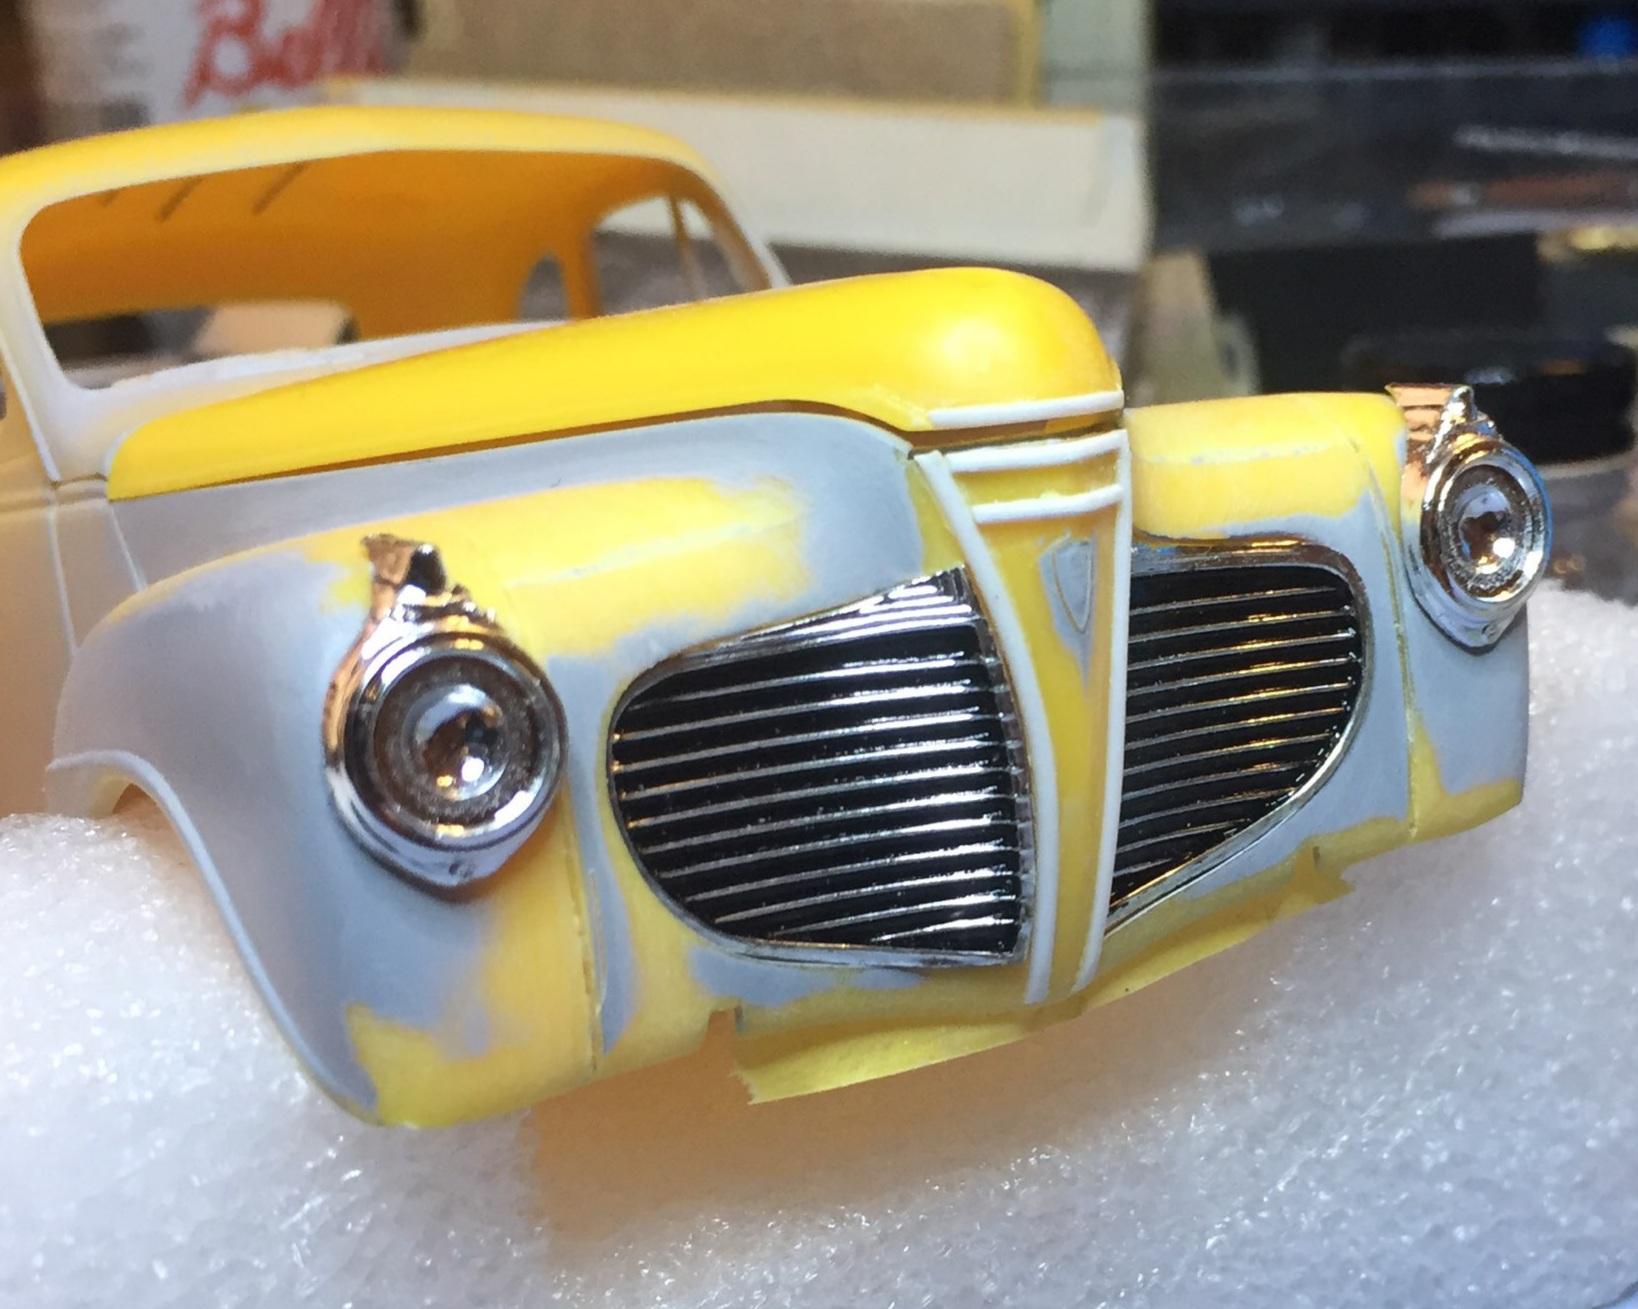
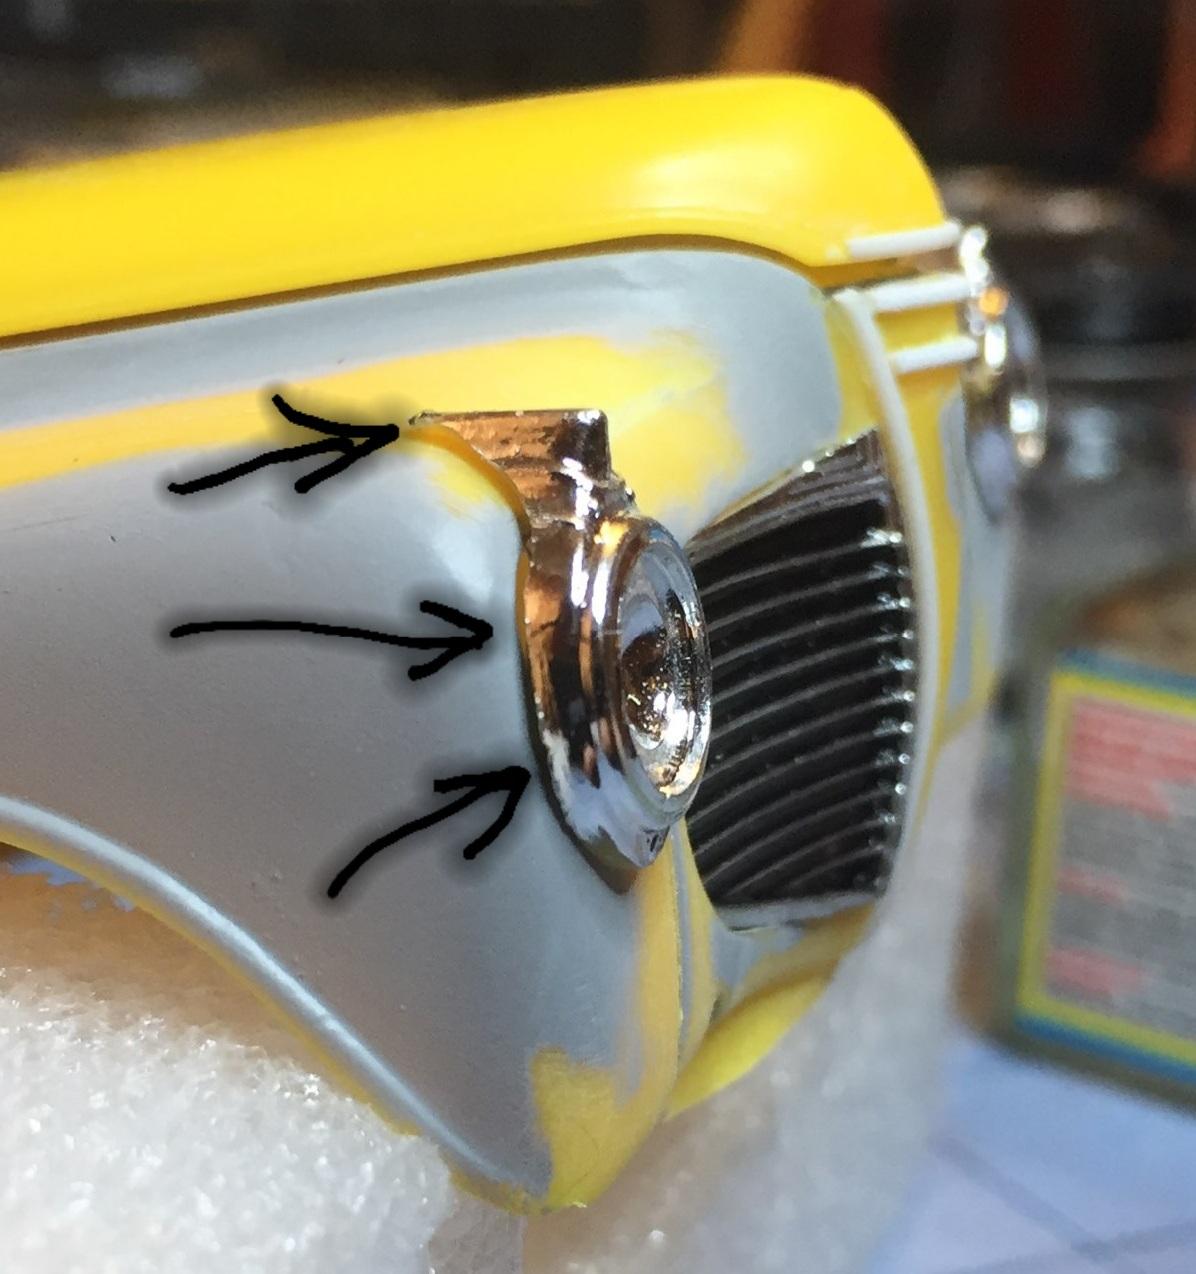
I think maybe the easiest thing to do in order to get the trim to meet without a gap is to do the nose trim over and extend it a bit rather than mess with the hood. The look will be better with a closed hood. I should set the hood up with magnets first, though, so it always lines up. When the hood is off, the trim will be seen to extend a bit but hey, you're the only ones who will know ? The first photo shows the poorly shaped hood. I would like to fix that. The second photo speaks for itself. I gotta fix that (again) ?
-
Hey, Greg, thanks for your kind words and I hope to get more done soon but progress is slow lately. I'm trying to get my painting station put together in my garage plus some other stuff. My nose panel seemed too narrow but I think my body shell may have been a little warped because I had to glue one side and after it had set, pulled it together and glued the other side. Let's face it, it's a pretty crappy kit. It's a shame because these pre-war Plymouths were good 1:1 hot rod material in the '70s and '80s. There should have been more attention paid to them in the 1:25 world (and still should).
-
I hate to say this, Len, but if you are holding still sealed '41 Plymouth kits for future collectability, you may be wasting valuable attic space. ?. Unless, of course, you have a first issue, but other than that.....well.....I think you know. Just sayin' ?. I have the black BMF in stock but the only way I could use it, at this point, would be after a bead has filled the groove that I have created. Is that what we are talking about? It just may work, but it's going to be uncharted territory. You go first! ?. Did the"Rocker" have the same crappy custom wheels as the current $13 Ollie's kits?
-
Thanks, Carl, it's do-over time ?.
-
Yeah, Len, the hood is a hot mess. I feel like I should try to do something with it because I've put this much into it so why not? If I can get the hood to sit down properly, I will need to re-do the little horizontal bars (which I'm not really happy with anyway ☹️) and I know I'll need to replace the hood trim completely. Oh well.....
-
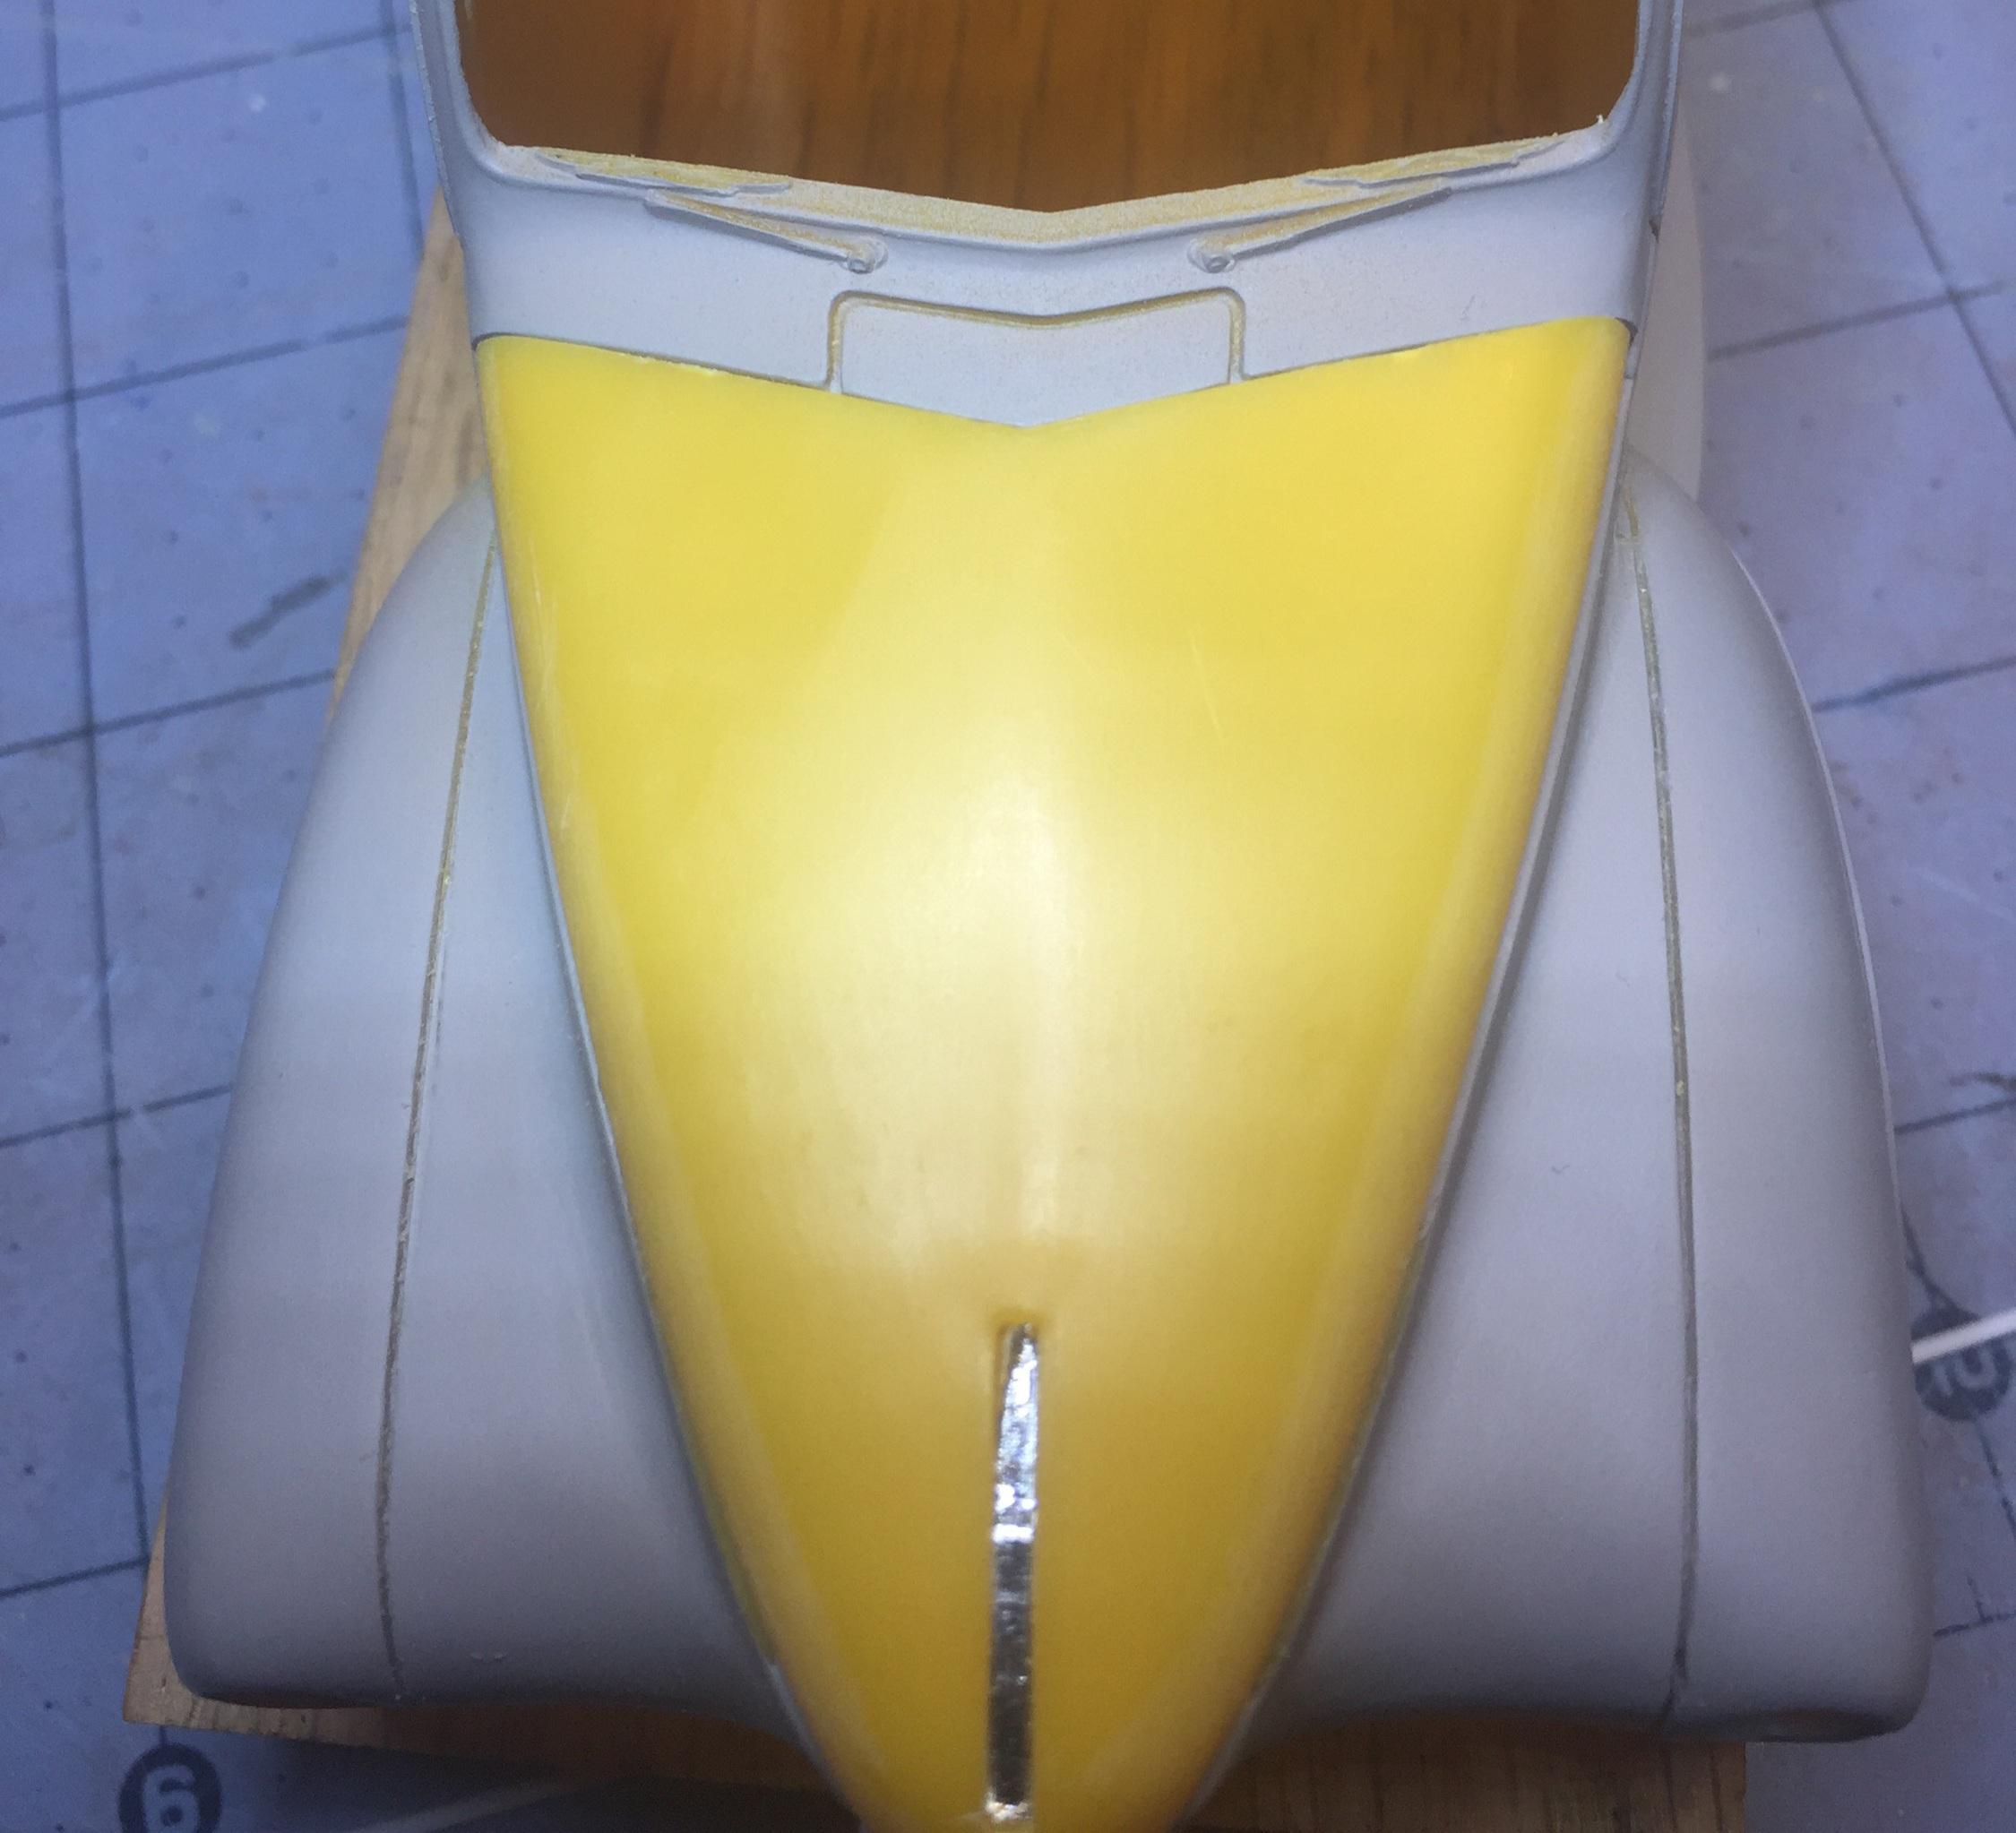
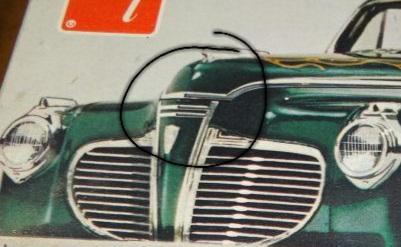
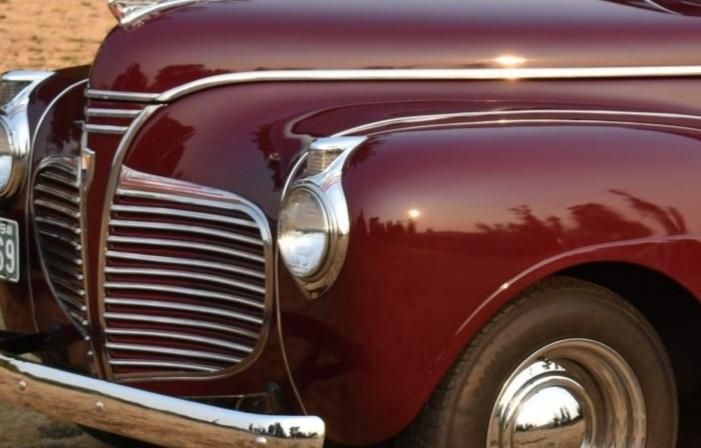
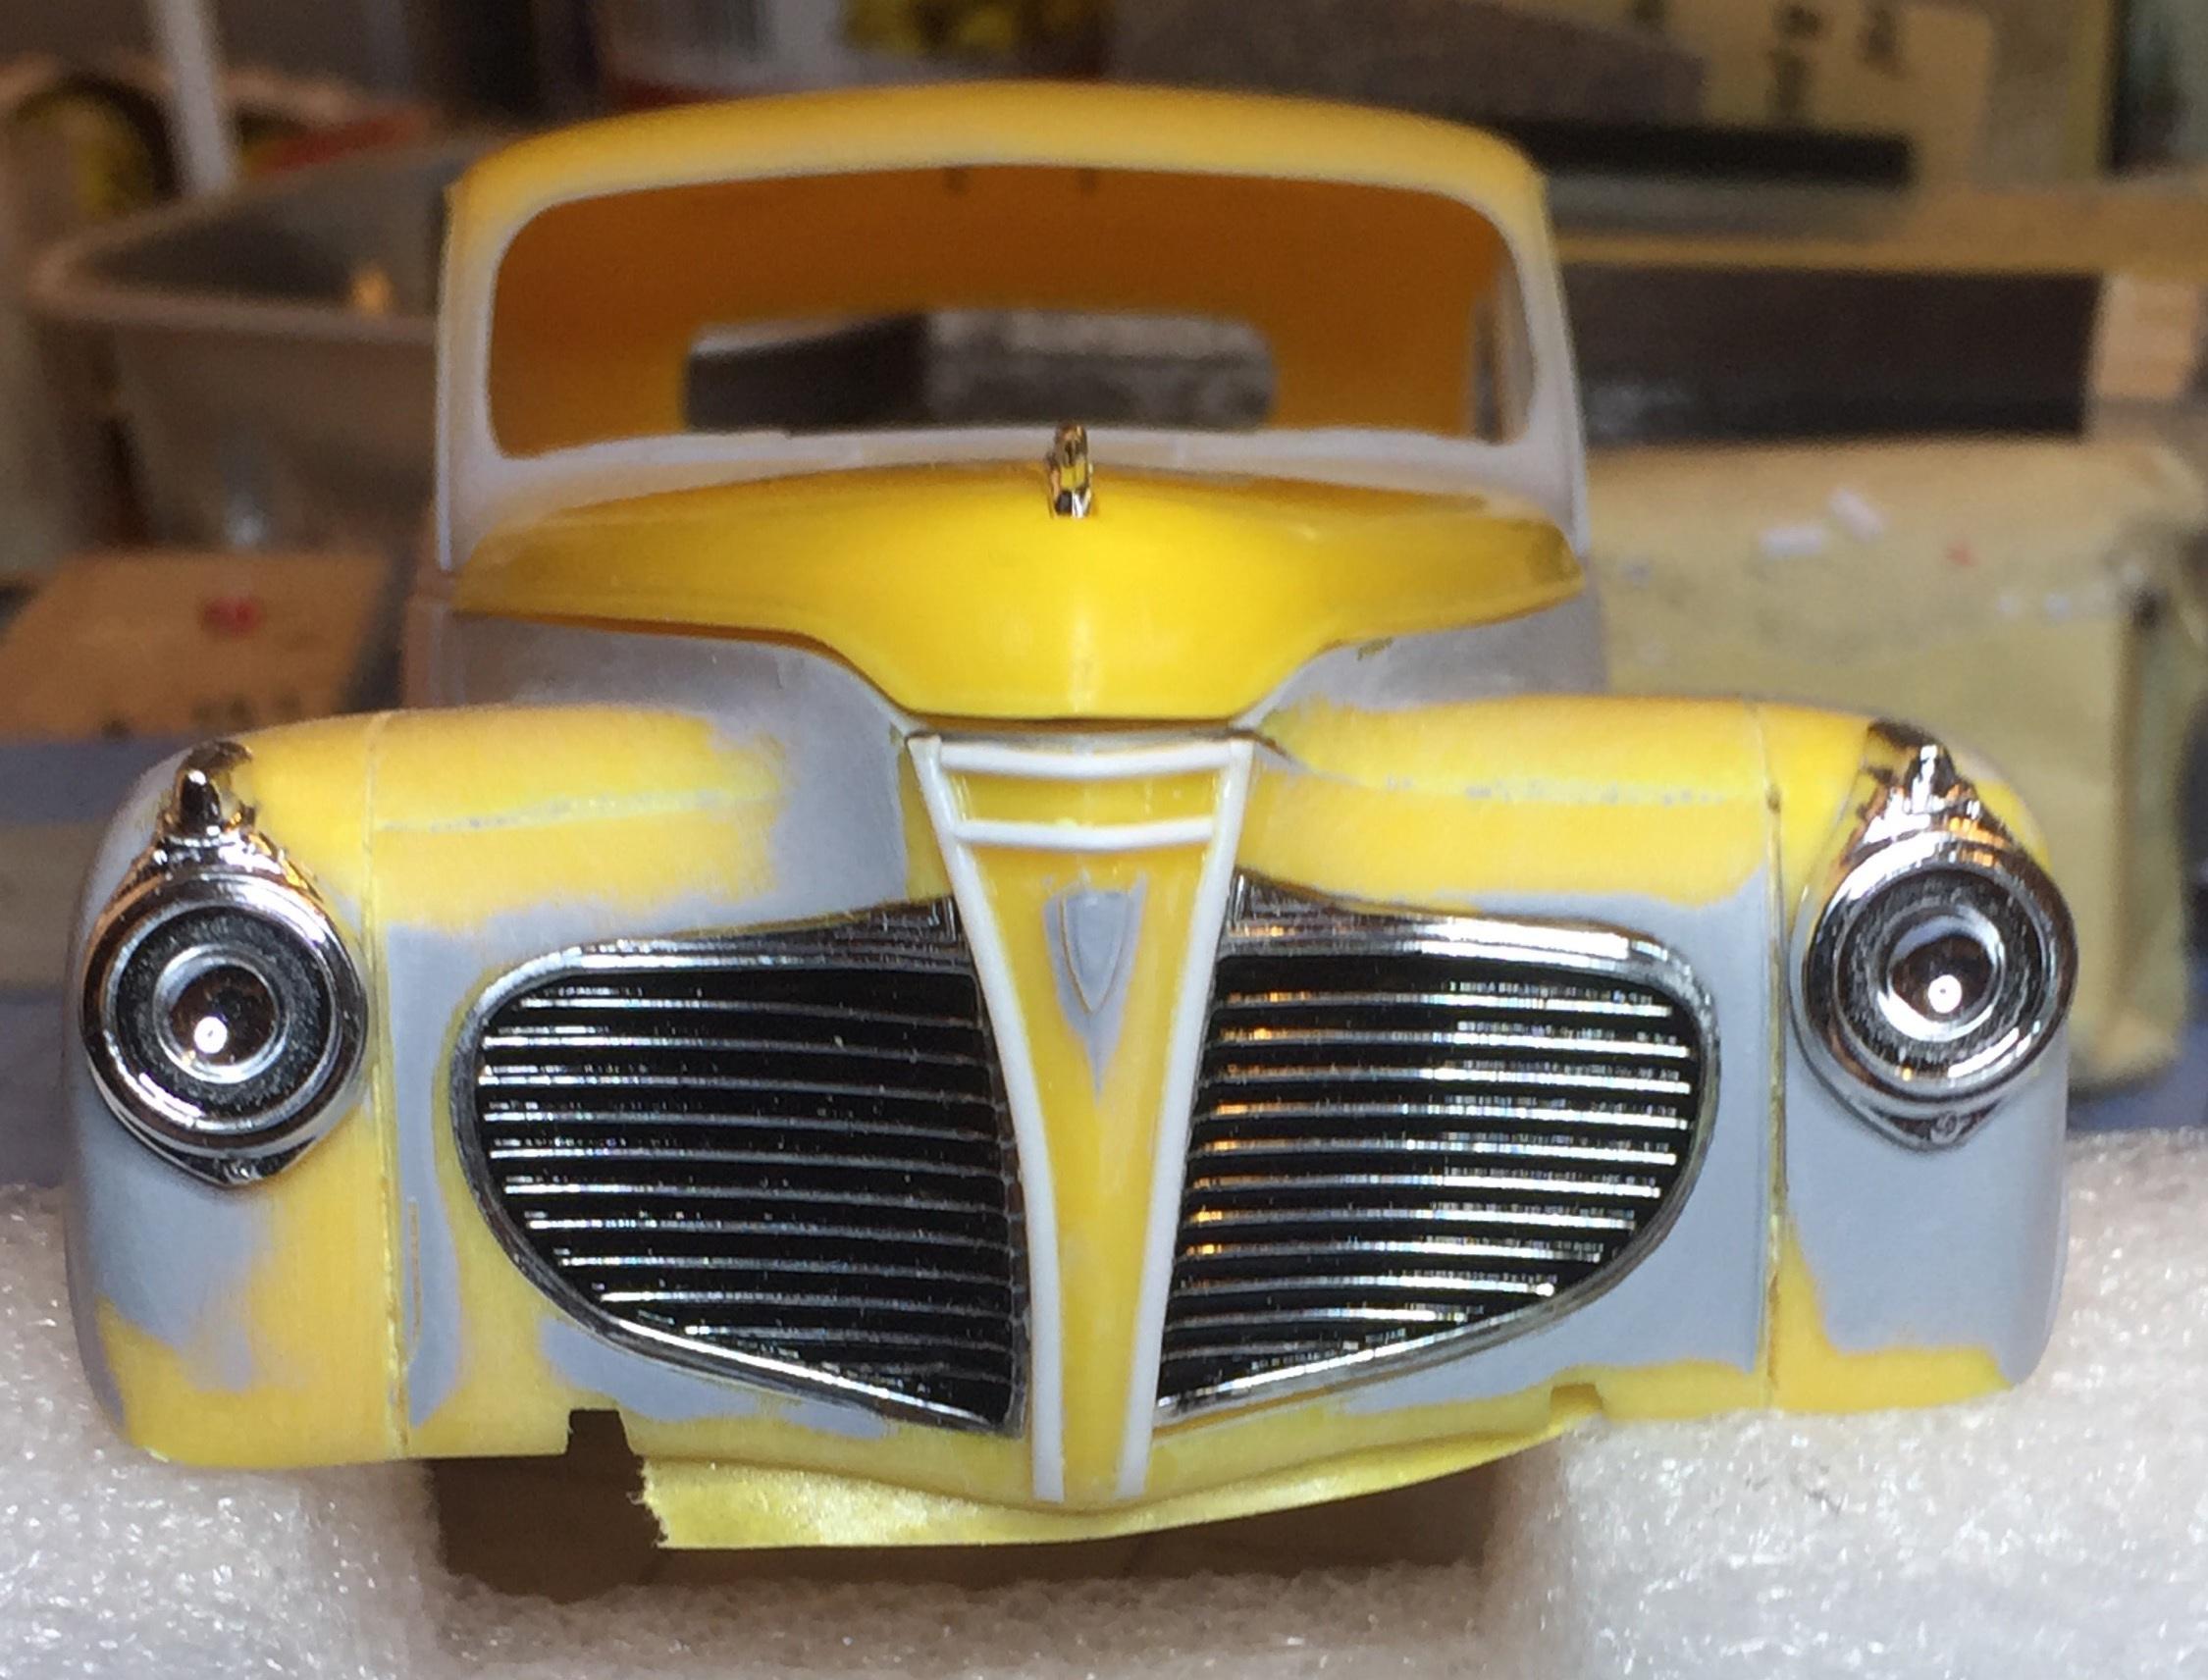
A word about the hood, Len....the hood fit just plain sucks. The whole kit sucks. But because we like the subject matter, we must endeavor to persevere. My hood trim isn't going to meet with the nose trim because of the crappy fit of the hood. I wish I had spotted that issue earlier so I could have dealt with it before doing the trim mods. There's only so much we can do before it becomes a fool's errand. I have done what I can to improve the look of the mess that AMT left me with. I wasn't going to continue with it beyond re-shaping the nose, for now, but I put the engine block together and found that to be pretty poor too. In the photo below you can see the manifold in place using the locating pins in their corresponding holes. Does that look right to you? Another thing to fix. And oh, yeah....no distributor. I did a bit more today on the "dent" I created and some other minor gaffs and got some primer on it. Thanks for your input, Len, I'm sure the others here are interested in what you are doing as well. Here's what it's supposed to look like ? If I try for a better fit of the hood, it will probably mean a re-do of the hood trim. I need to figure out exactly what is causing the bad fit. I've got to think about this. ?
-
Feel free to post a few pix of your '41s here, Len. We are in a somewhat uncharted wilderness and those of us interested in this kit want to see what's out there. I'm waiting for Hobbylinc to send me some .020 styrene rod that I plan to try. The danger with styrene that small is the solvent melting it. I also ordered a bottle of thin CA for that task. Not sure how that's going to go. I'm pretty sure the original fender welt was black but many photos on the web are showing a bright finish on the bead. I recall J. C. Whitney catalogs advertised "chrome" fender welt. It's an aftermarket item, as far as I know. It looks great but I'm going to play it down. I don't want to mess with the paint job by adding the bead post-paint. Besides, whatever you do on the fronts should be the same on the rears. I have a '41 Ford Woody kit that I'm considering converting. But all that woodwork ?. BTW, is the black beading wire just a metal wire with a very thin coating of something black? Might you sand through it?
-
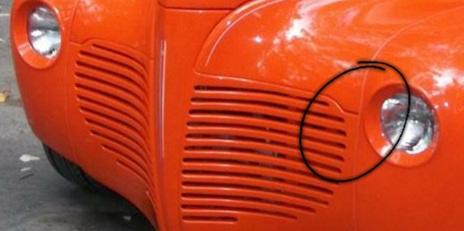
I download lots of photos for most of my projects and this photo shows off that fanciful front end design. As much as I like the forty for it's blue collar look, this whispy, fluid styling has a sort of Art Nouveau look. Big, curvy lines with a feeling of air flowing by. Gotta love it ? It's really quite beautiful ?
-
They were pretty simple. I was building mine as a resto-rod and kept the front suspension stock. This is around the time the pros were adding IFS to Fords, ha ha ha ha.....anyway, I got an education on kingpin replacement. It was a fun time.
-
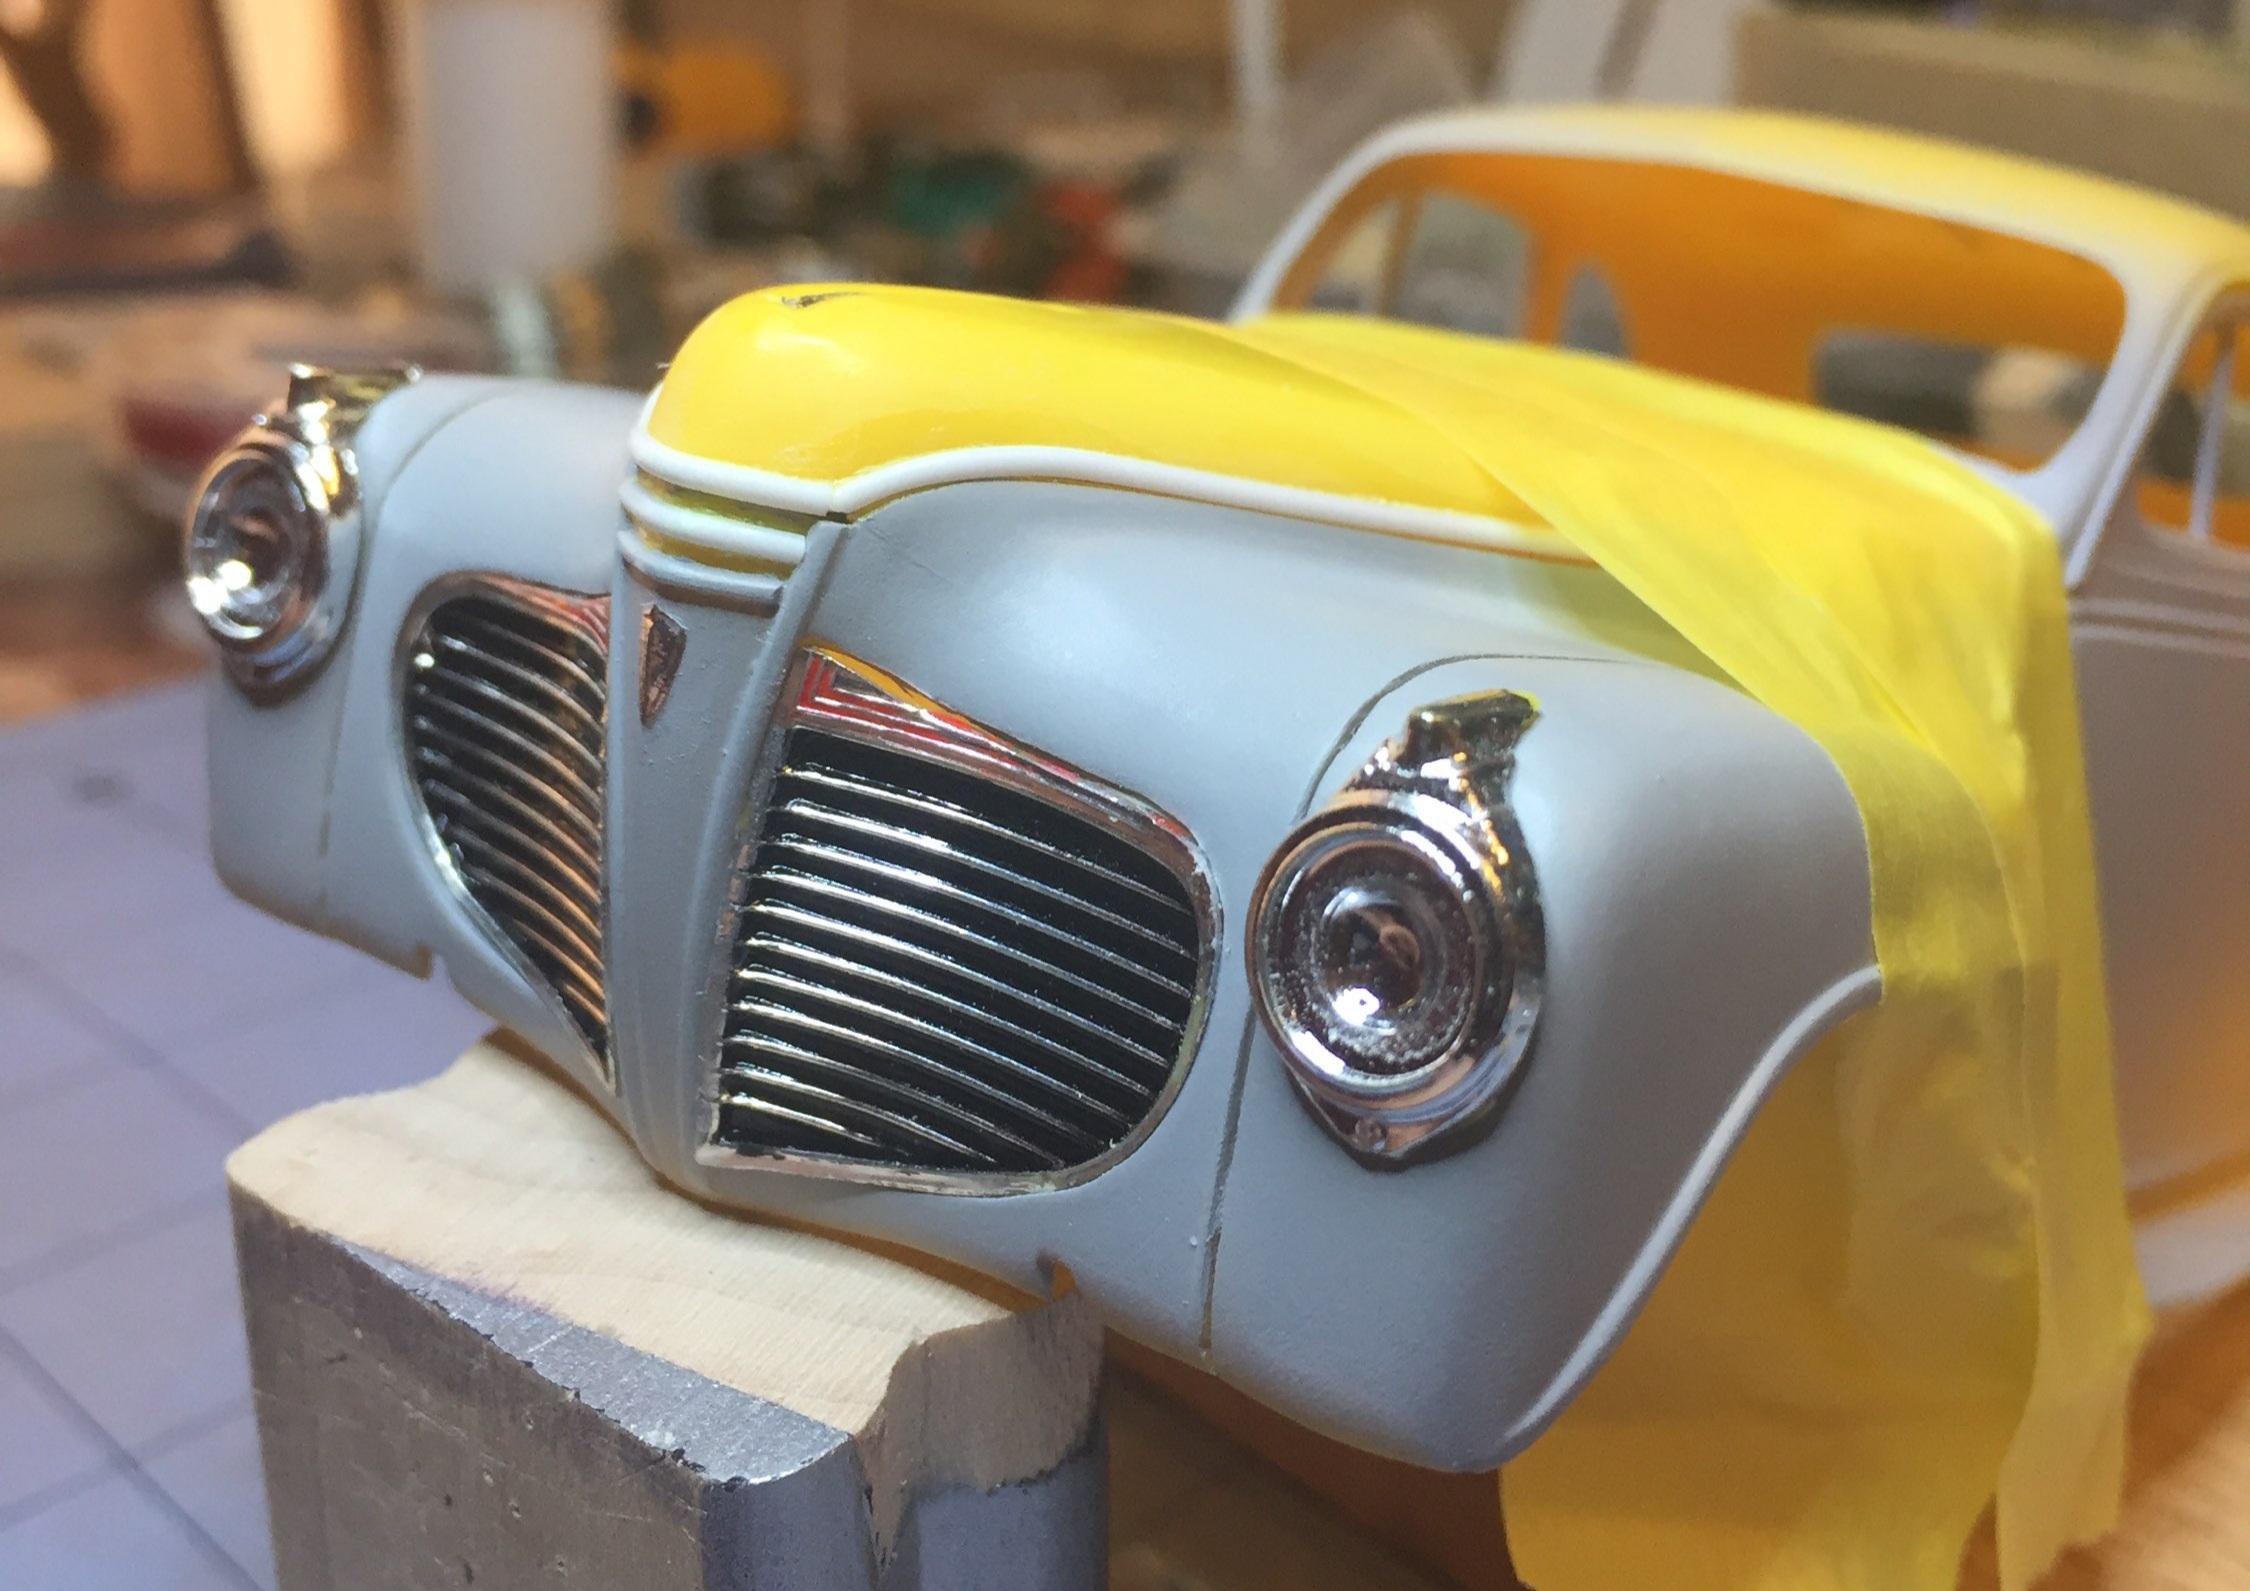
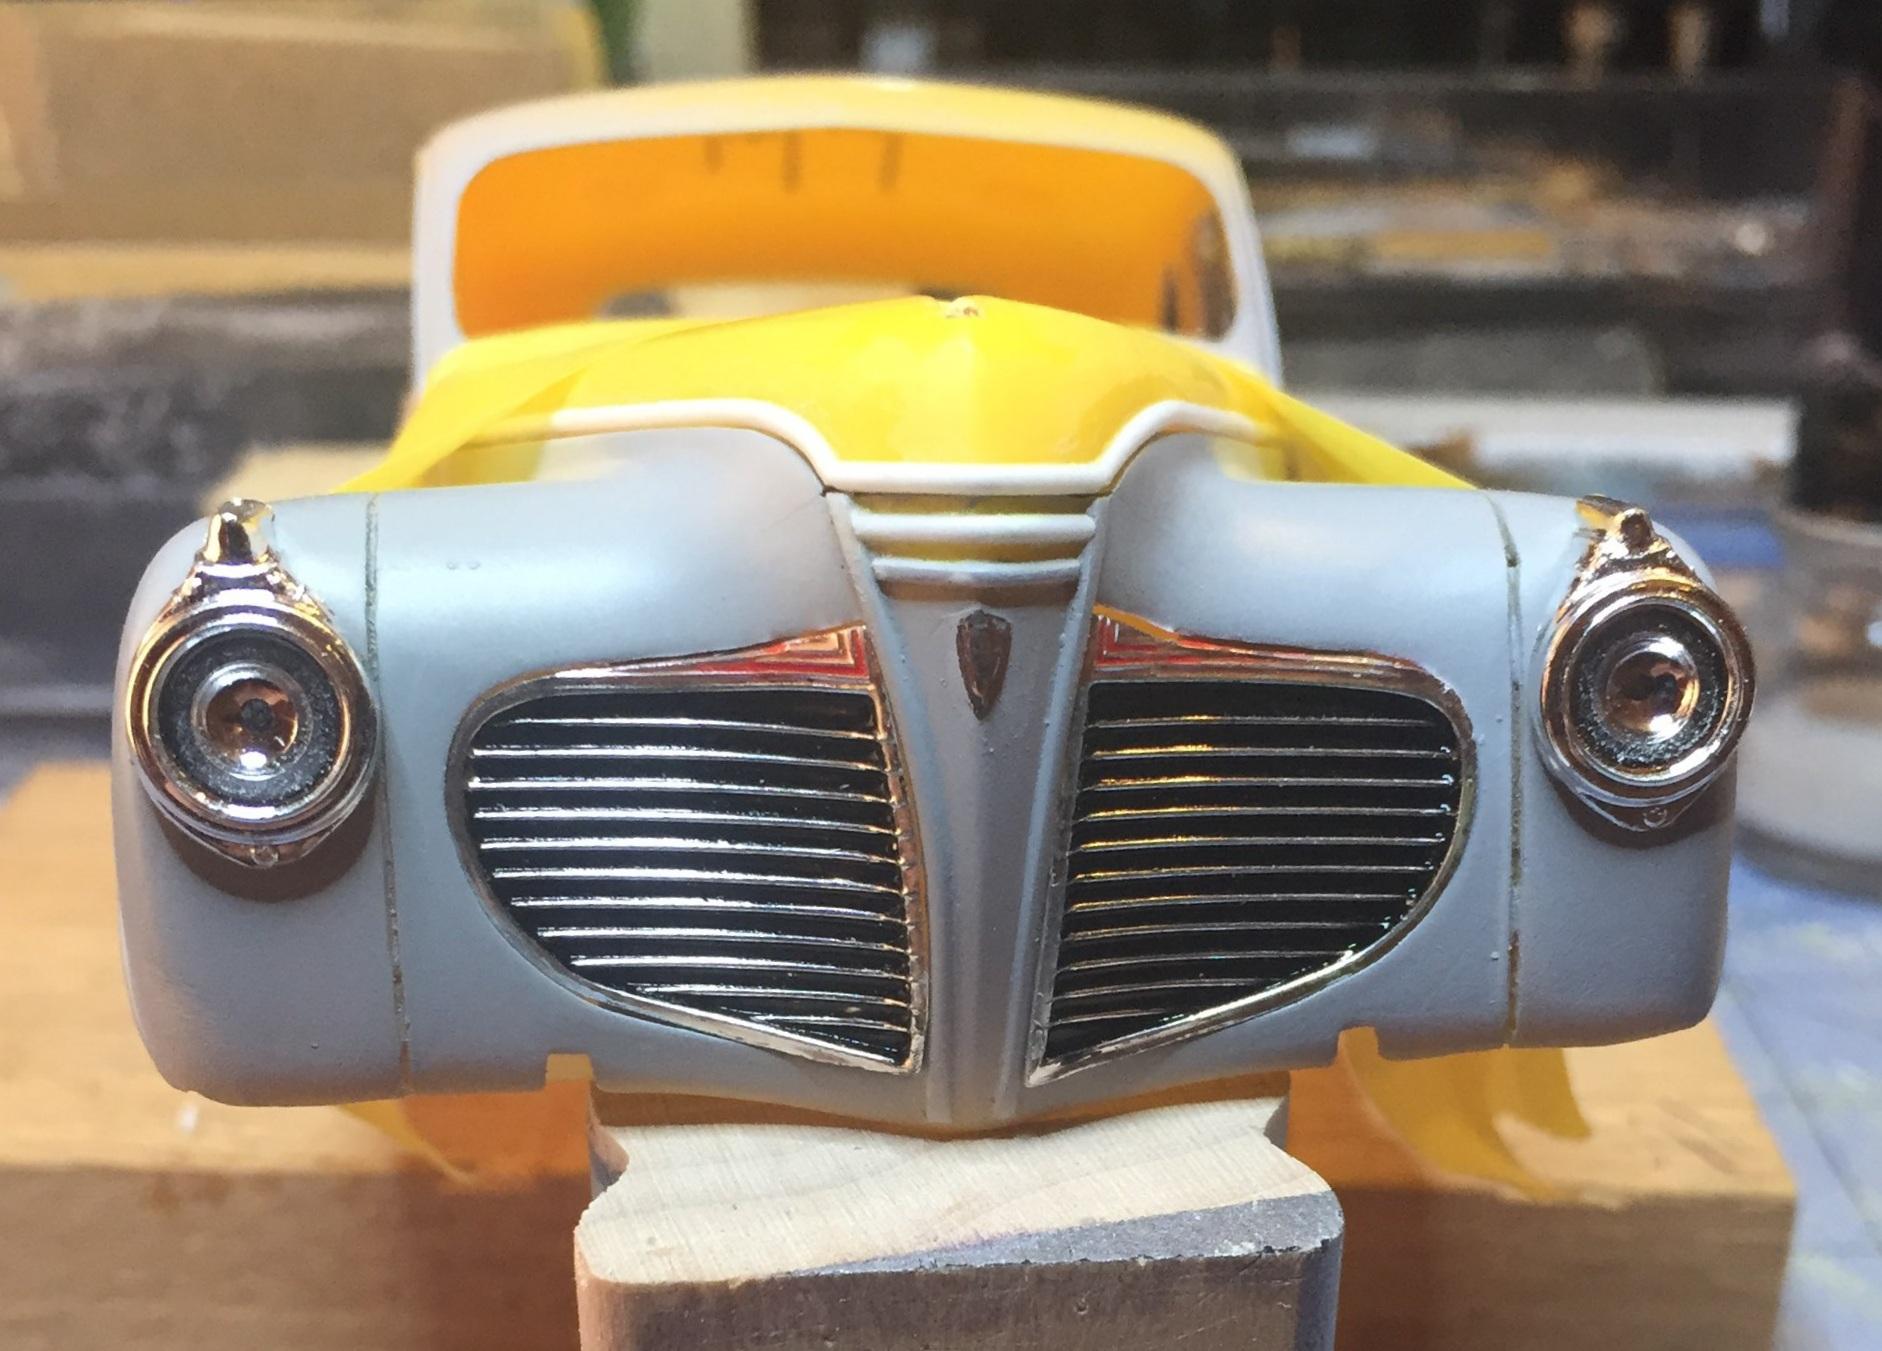
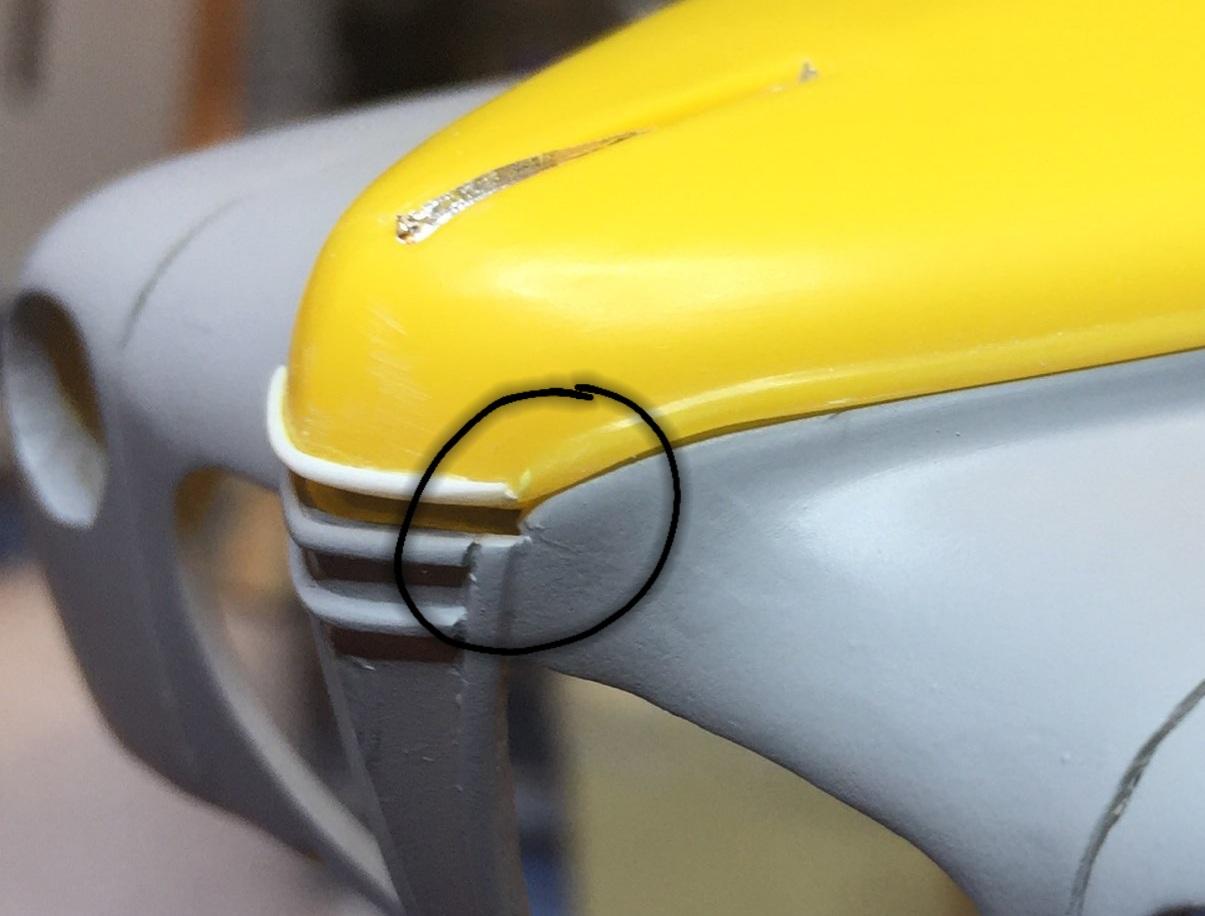
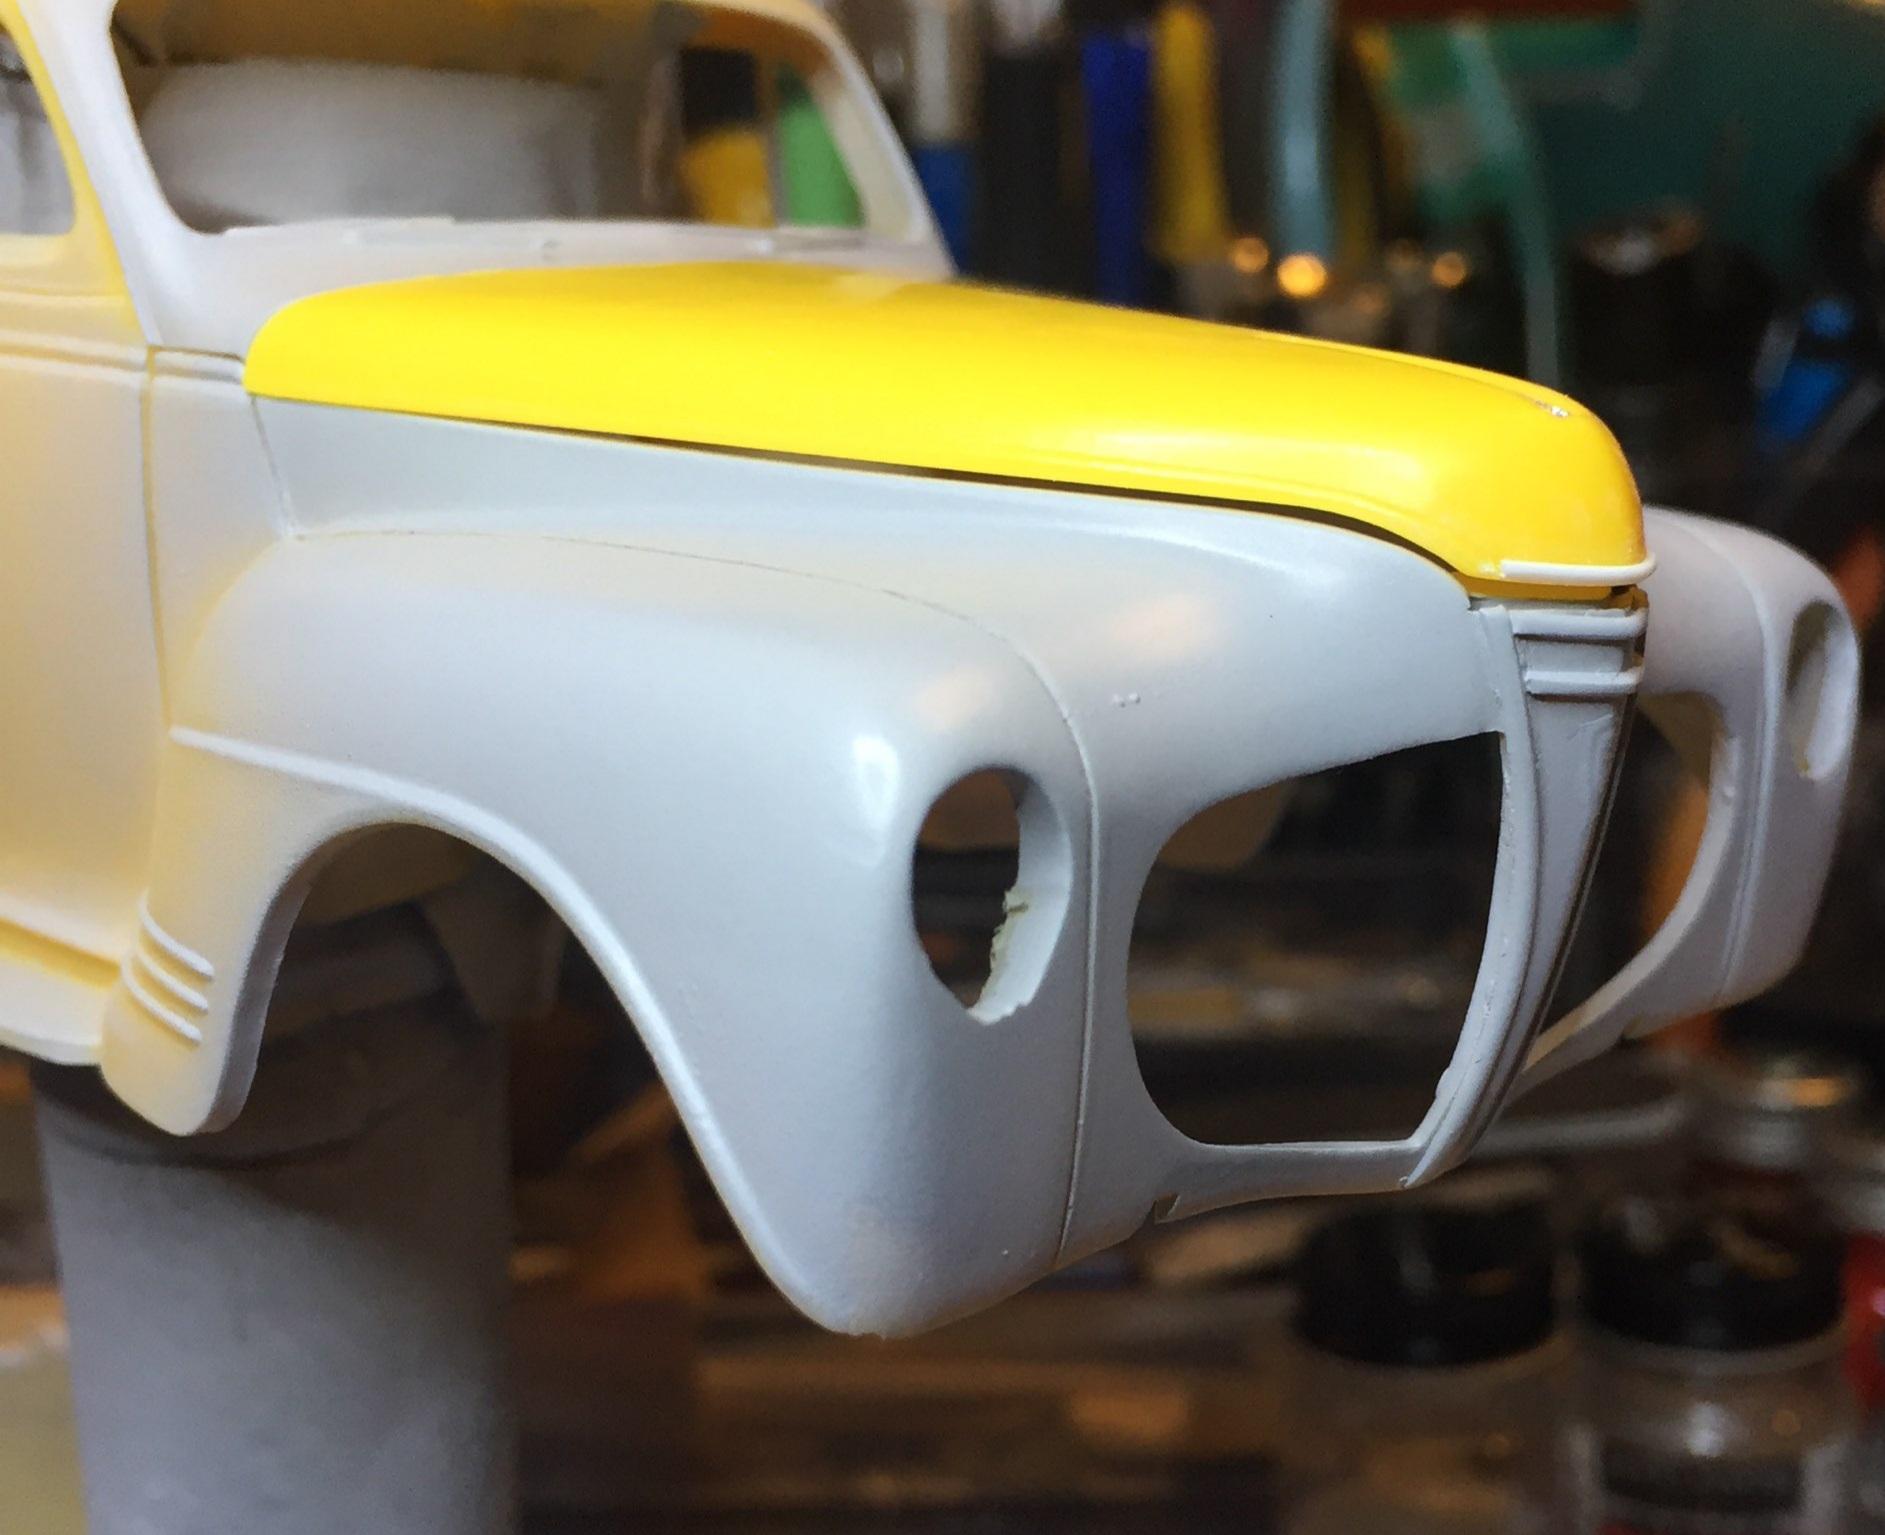
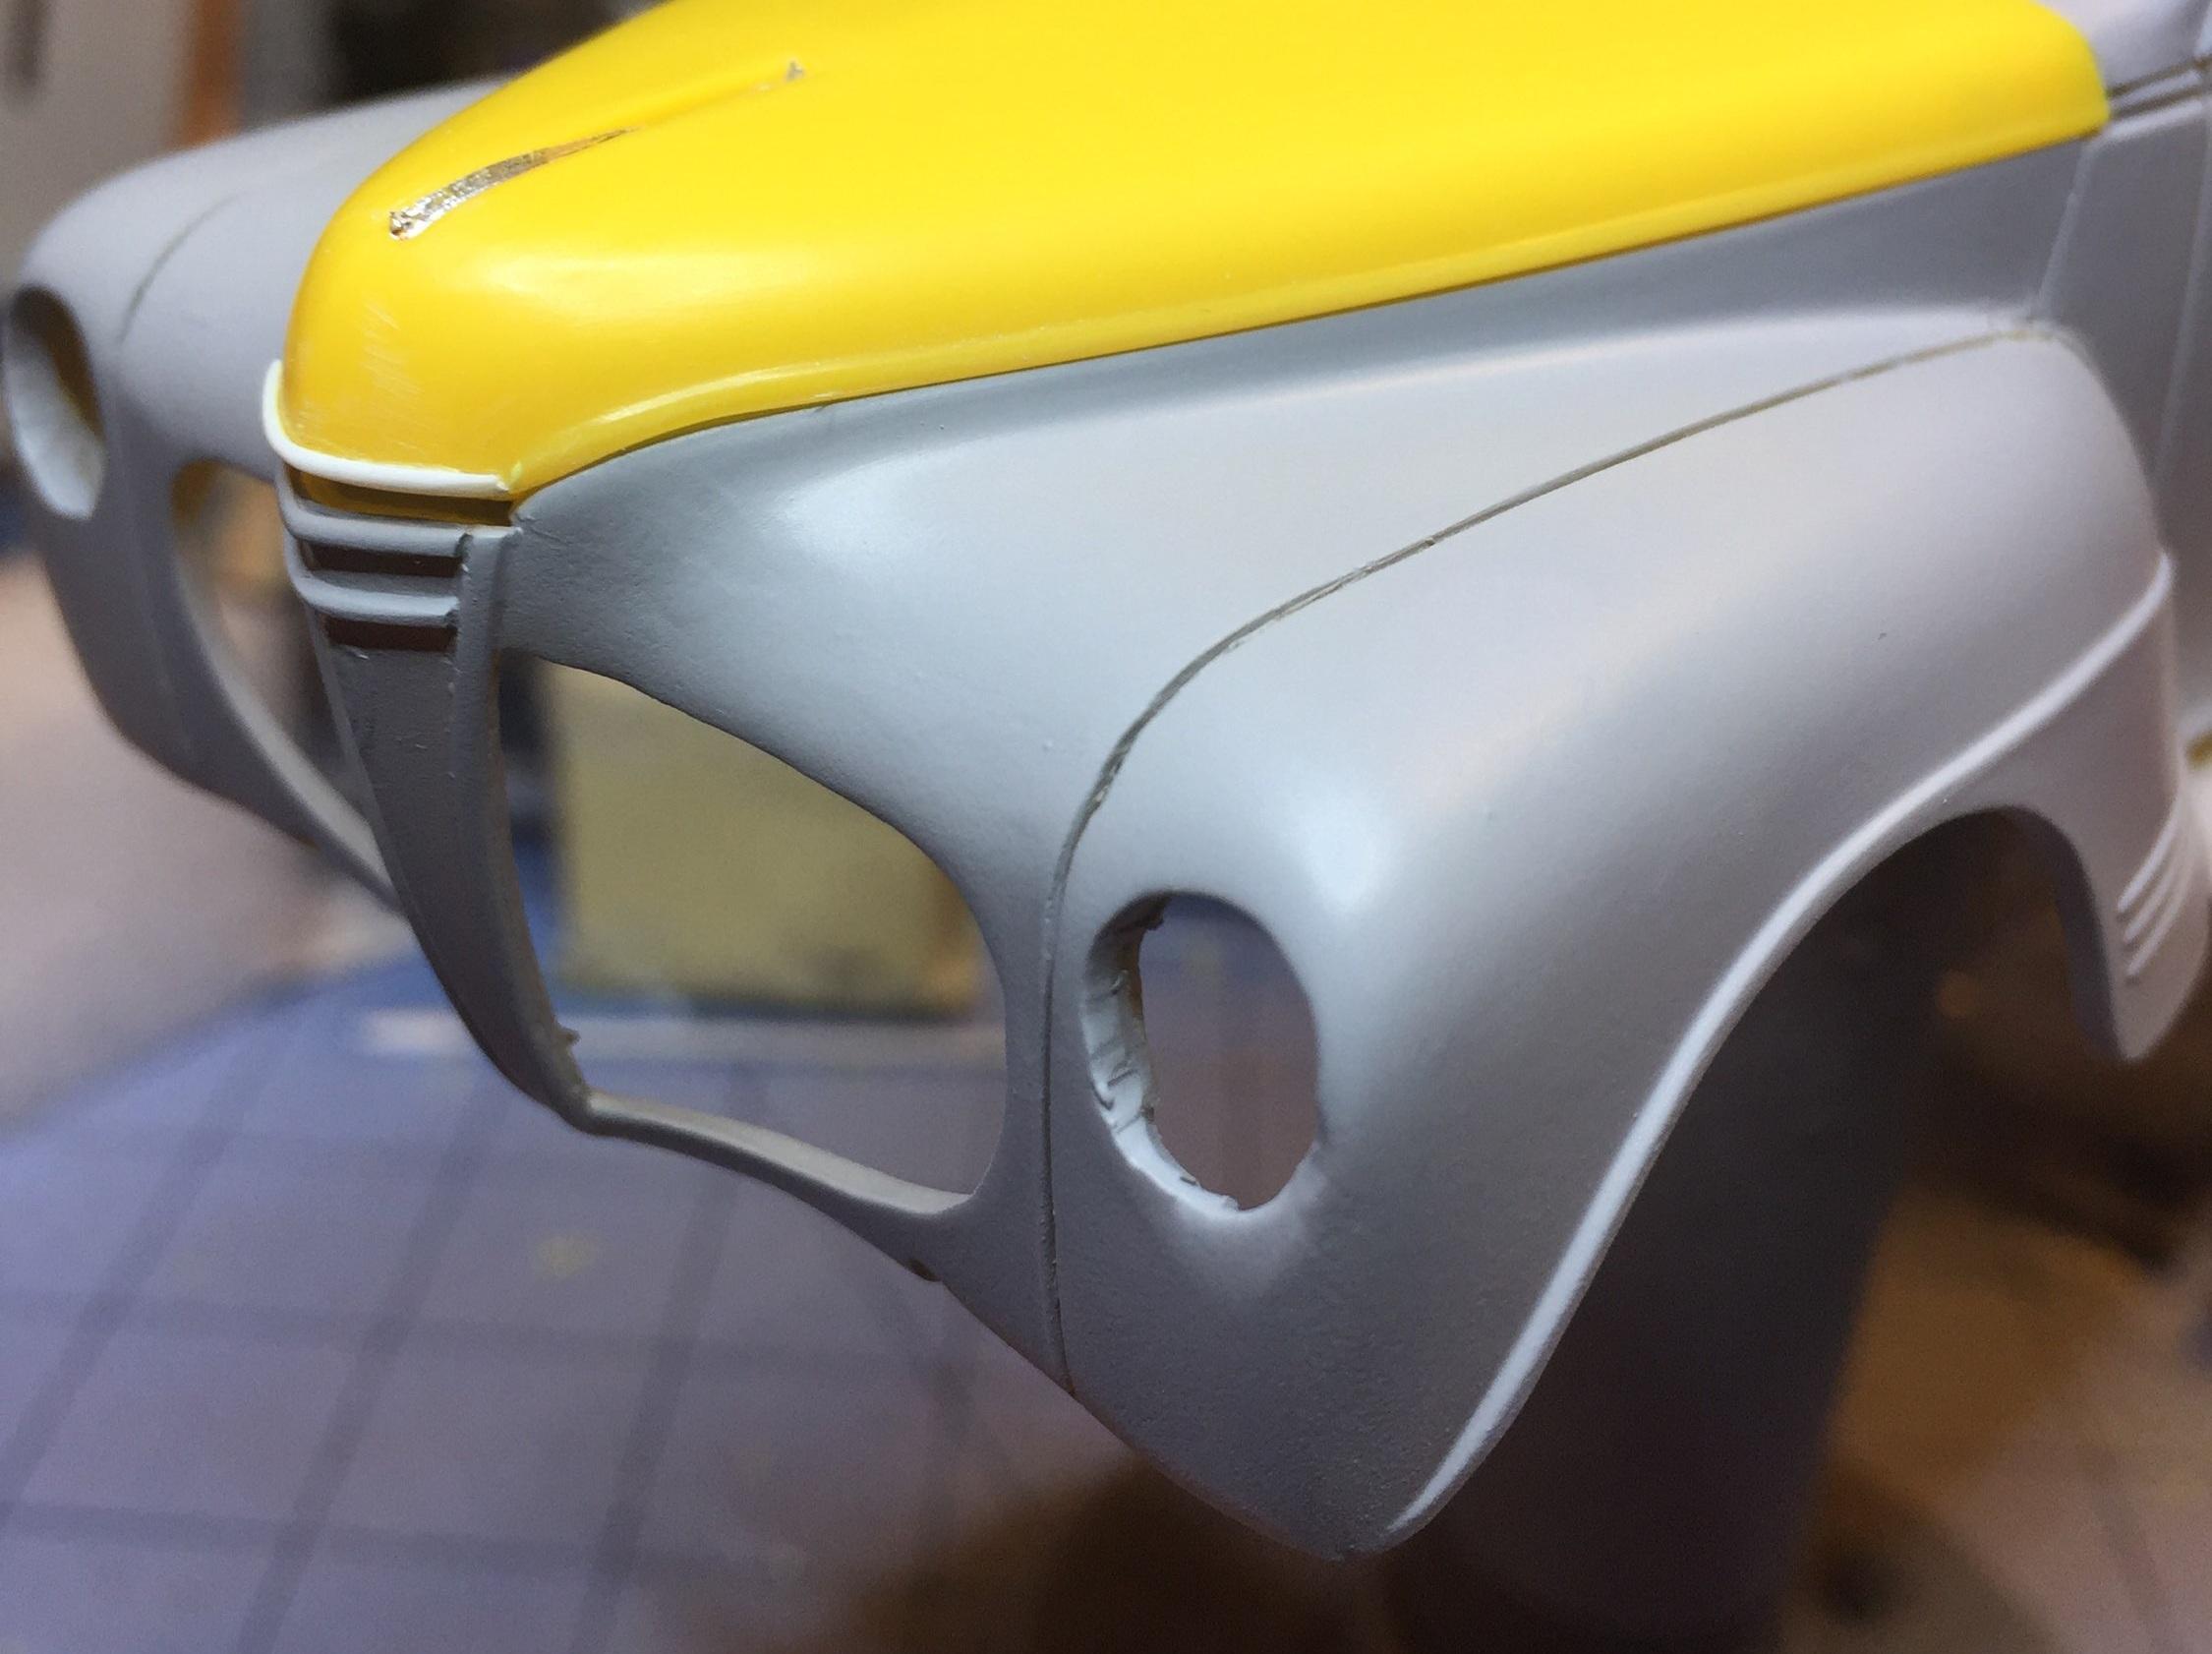
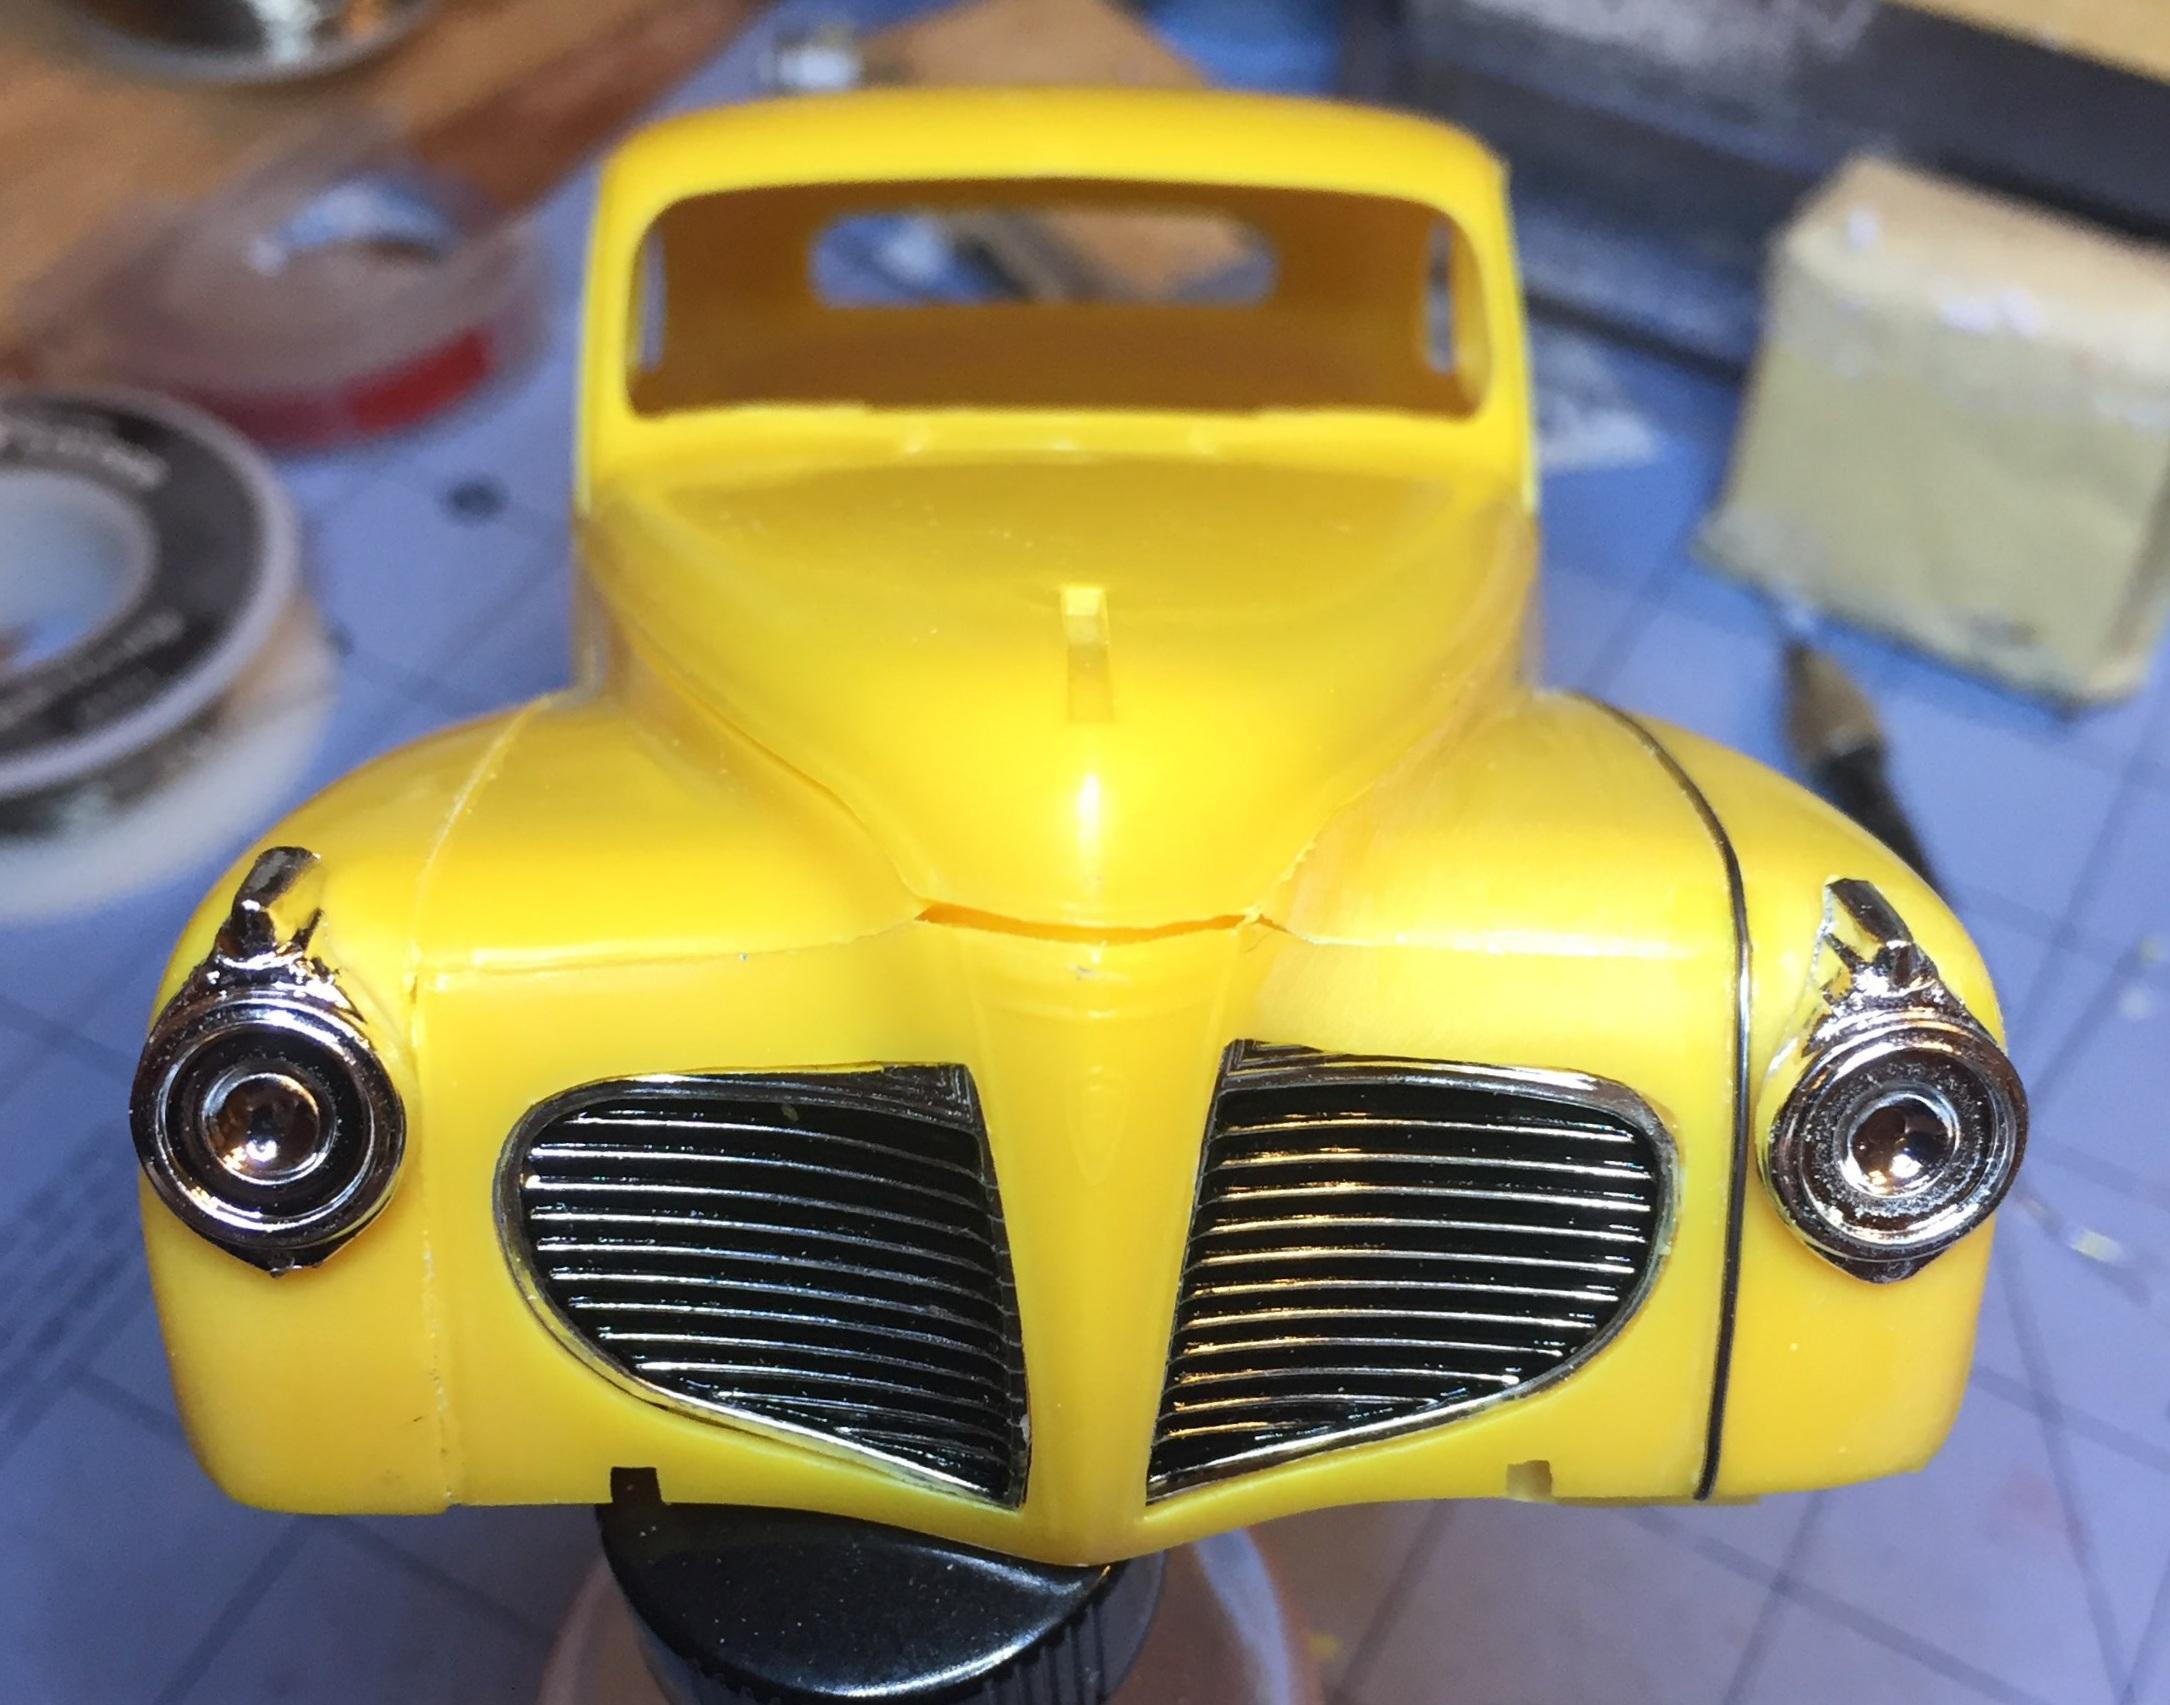
Today's update: I noticed the molded-in trim on the grille panel didn't line up with the same on the hood like it should. Another thing is the two horizontal bars were not prominent enough to get a good foil job. Same with the bar at the peak of the hood, which is almost non-existent. I used .040 half-round for the verticle strips and .030 triangular rod for the horizontal bars. It looks OK but we won't know till it's foiled just how much of an improvement this has made.?. Still much tweaking ahead and I gotta fix the "dent". Thanks for stopping in. The relief is too low for anything but a difficult foiling experience. And....the trim doesn't line up. When you look at a 1:1, the trim is quite prominent. The .040 half round seems a bit too big but I will be sanding it down a bit but my purpose is to provide a good base for the foil. It needs to be flattened out a bit to be closer to the hood trim. The horizontal bars were a beeyatch to attach for my 70+ year old fingers. If this all works out well, I will be quite proud of myself. You be the judge ?. The spacing isn't quite right but, like I said..... The headlight situation is still a little iffy but it's better than just using them as is. They will necessarily be lower on the fenders than designed by AMT but will look more like the 1:1, hopefully. I have thinned the bezel as much as I can and I can't finalize the tweaking until there is a finish on the body. But I'm close. I am still deliberating about the trim on the hood. I feel like I need to add some thickness to the trim but for the way it matches up with the body trim. If I add to it, it won't match up at the cowl. I dunno. That's it for now. ?.