customline
-
Posts
3,793 -
Joined
-
Last visited
Content Type
Profiles
Forums
Events
Gallery
Everything posted by customline
-
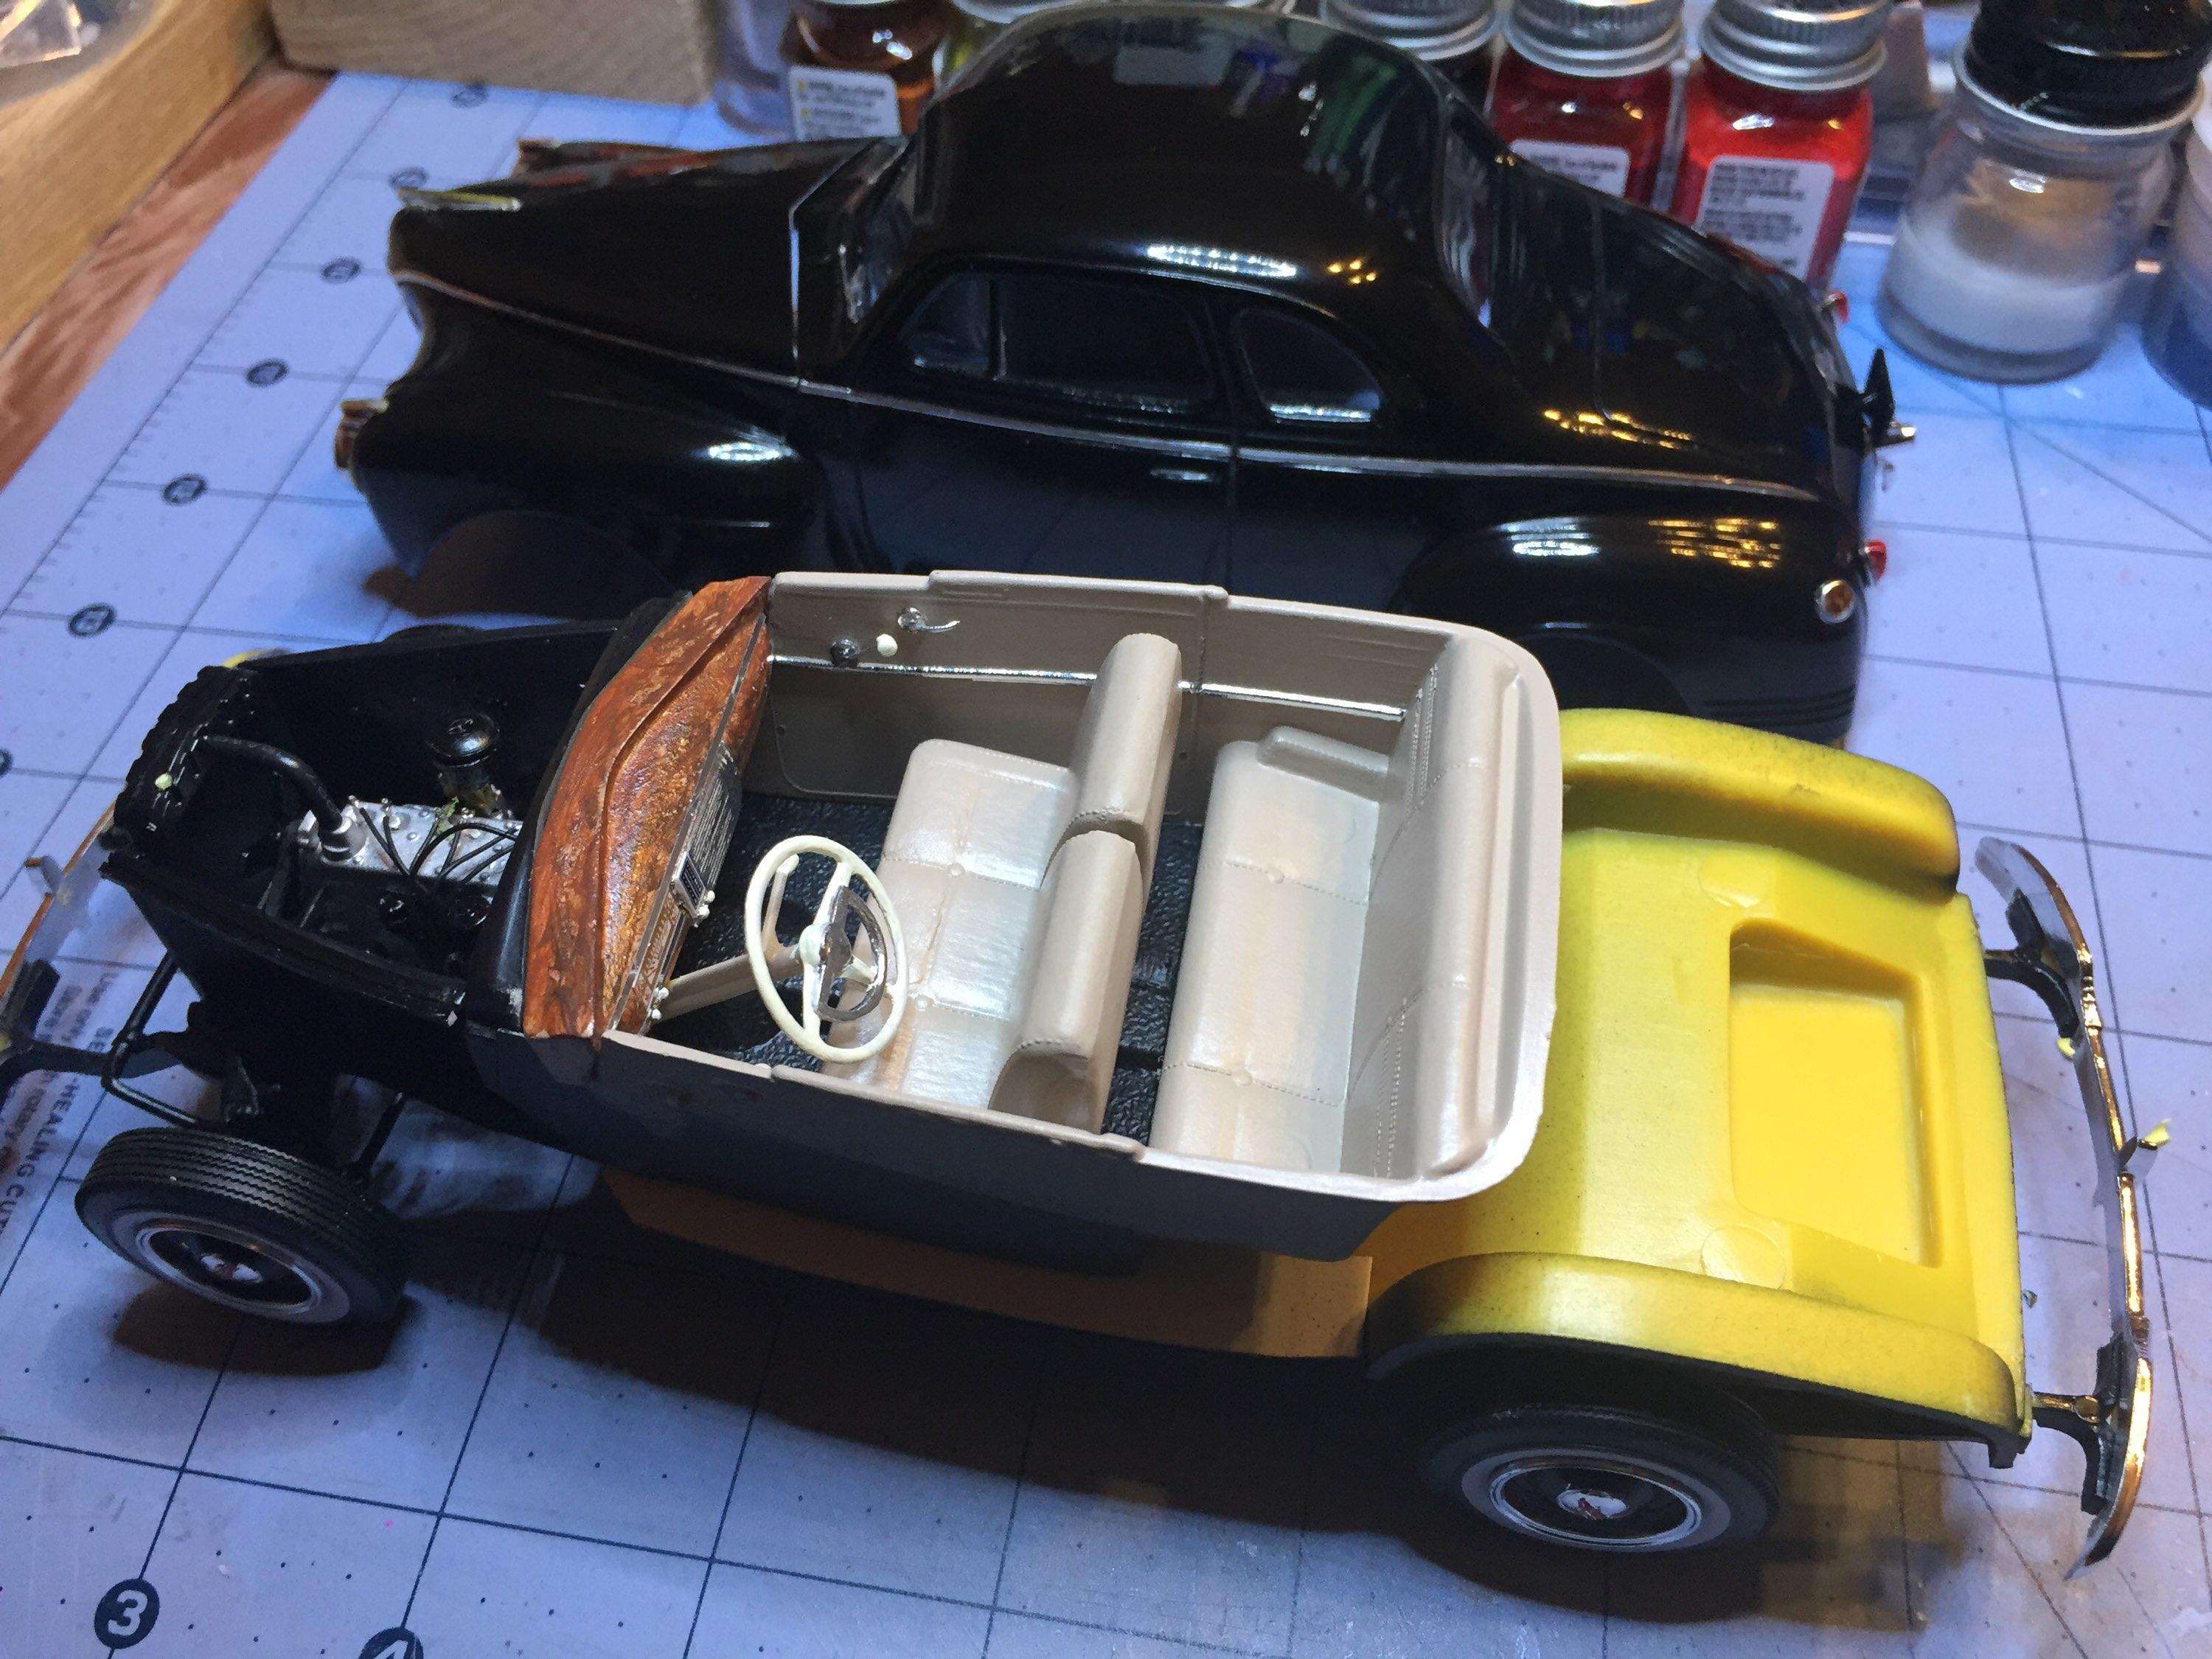
Ok...almost there....had a little trouble getting the body to sit all the way down. Seemed like a typical dash/windshield thing. I dropped the dash down about 3/64" and that did the trick. I'm still playing with the rear splash pan. I glued it to the body twice now ?. I had to re-do the angle of the magnet on the hood nose because it was holding the rear of the hood up. Working on battery cables, etc....the bumpers are now in place...oh, I attempted a wood grain job on the dash...?....anyway, yes....go ahead, but it's staying. I gotta find a tutorial on you tube for that ?. Thanks for looking and having a good laugh. it looks like what those guys did to Christine ???

-
...And keep on buying them ....go figure ? Edit: and I will be using all those coke bottles too ?
-
Thanks, Jim. I didn't intend it that way. Just an account of my stumbling through model building. This is not to be construed as any sort of "how to", just the incoherent rants of an old glue sniffer. ?
-
I think you're crazy, Lenny. ?
-
The 1:1 grille is stamped sheet metal painted body color. The trim pieces are added on top. To actually replicate that and then simulate the void behind the grille with flat black would be nearly impossible without neuro-surgeon-like skill, which you may or may not possess. I agree with Greg, Len. It looks great. One of the reasons I chose black for the body color on my build was to put my mind at ease about the body color behind the bright grille trim. ? And the fender welt is black....? .
-

Is There Room For Another 41 Plymouth or Two?
customline replied to LennyB's topic in WIP: Model Cars
Yeah, some dashes work better than others, Len. As far as I know, those B.M.P. reduced photos are the only option for this and many other kits. Until better is available, I'll keep using them. Some kits supply all the essential details on the decal sheet now but the older kits can benefit from B.M.P. stuff. Better'n nuffin ? -
Is There Room For Another 41 Plymouth or Two?
customline replied to LennyB's topic in WIP: Model Cars
Lenny, I feel your pain. ?. (You saw my paint job ?) Like I stated elsewhere, if you're building it as a scale model of a particular special 1:1, great....have at it. You've got to do the work and it's probably worth the effort. Otherwise....? Those photo-reduced dash guages are a bit thick and if you are planning to use them you need to remember to remove the molded-in detail you're going to replace before you paint the dash. That's exactly what I'm gonna do as soon as I finish typing this ?. Thanks for reminding me! -
Oh, I was just belly-aching about my shiny paint jobs, Dave. Lately, they haven't been great. I often find a way to screw 'em up ?.
-
I learned to drive on a sixty five...?...I like the blue but it's up to you...I'm a poet but I didn't know it ?. I'm a big fan of the '65, John. I have the convertible half built, waiting for paint which will be MCW Tahitian Turquois (emulating that 1:1 Impala ragtop of my early driving days,) and downgrading to 283 power. Does the Foose version support the later 396 or the elderly 409? The Iris Mist is pretty sweet. It's kinda feminine. What would Foose do?
-
A marriage made in Heaven. Totally amazing, Greg. Great vision. ?
-
Thanks, Dave. No more fixes for me on this one. I will, however attempt to wood-grain the dash ?.....or not ?
-
Ain't this fun? ?
-
AMT 1939 Ford tudor sedan chopped and sectioned
customline replied to Paul Payne's topic in WIP: Model Cars
I agree with Bill about the doors. It totally works. The B pillars may need to be wider, though. It could be difficult to scribe an accurate looking door line on that piece but if you double it, the line will be there - you won't need to scribe it (or was that what you were planning?) -
There's nothing easy about building "shiny" where I live, Dave, especially when two colors are involved. I totally get your vision for this car. Fords of the '50s and '60s evoke lots of memories for me and I was just sort of reminiscing ?....not suggesting you do any of that stuff. I know I'm going to love how you do this one.
-
Those wheels are super, David. 100% legit. I would bring the back down even but the rake works well on this cool Ford. ?. With the rake, I see baby moons on chrome reversed rims, the tube grille and a pair of swept-back antennas on the rear quarters.....but that's just me ?.....oh and a couple of cherry bombs underneath ?...and gray primer all around. Sorry. ?
-
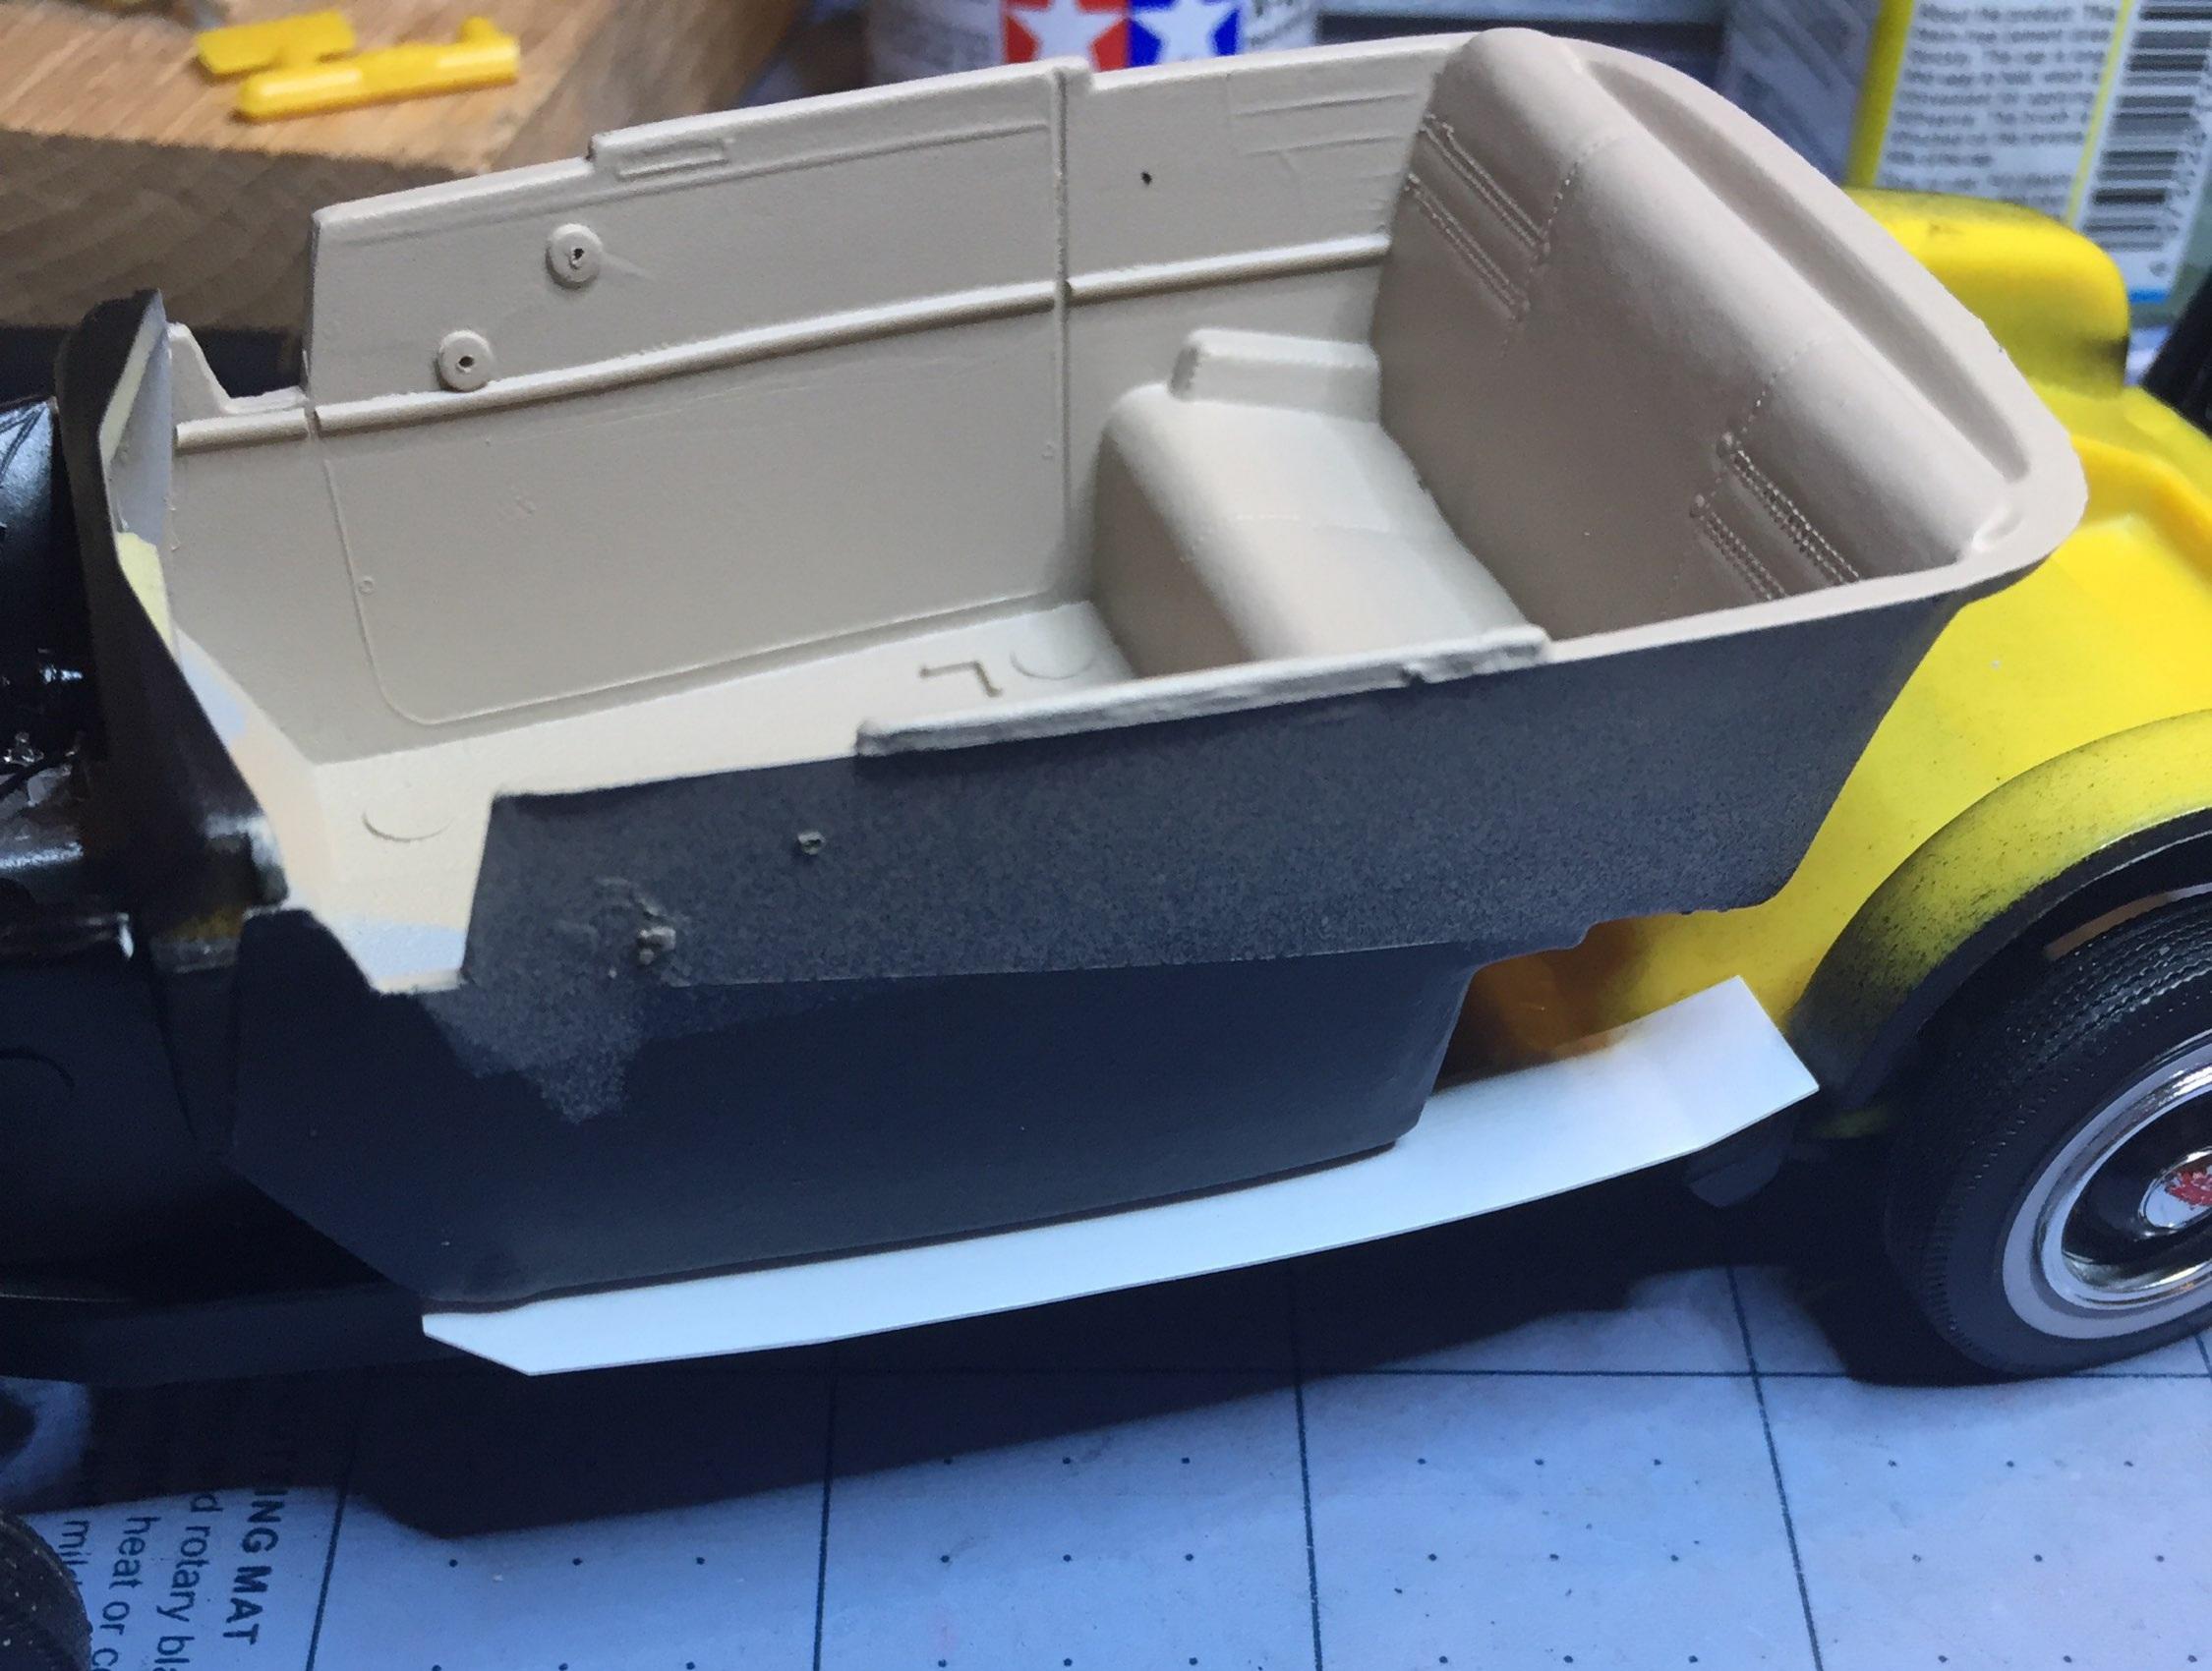
I can not understand why AMT didn't give this elderly mopup a full floor. Maybe they figured because the cowl vent wouldn't open they needed to have a way for fresh air to enter the cabin. I dunno ?, but it looks stupid so I figured I would at least try to close it up. By the way, it seems it was not the tyranny that was keeping the tub from bottoming out on the chassis. First it was the inner fender panels. Having trimmed those, I thought it was the tyranny so I flattened the top of it but to no avail. It turned out to be some raised circles on each corner; remnants of the injection process, apparently. The tub settled down after I shaved them off (first photo- circled). To close up the bi-lateraI abysses, I used .015 evergreen glued to the top of the chassis. It will be painted black to match. A builder could improve on this idea but, frankly, I'm done. I think y'all know how I feel about this kit by now. Thanks for your understanding ?
-
Oh...well all rightey then...?
-
Update: While trying to detail the interior tub, I was distracted by the fact that the floor does not extend to the full width of the body ? which I already knew and had decided to "fix" ?. So then I thought I would do a trial fit of the tub and, as I suspected earlier, had to do more "fixing". Using my trusty #11, I removed a very small amount of the rear edge of the inner fender panel at a time until I was satisfied that that was not the only thing keeping the tub from fitting all the way down on the chassis. So I grabbed my fully charged Dremel Micro and removed a small amount from the transmission ?. OK, nobody sees it. That did the trick! Well, that and I drilled the two front holes on the tub a bit bigger. I'm still playing with the floor extensions; more on that later. ?
-
You might try foil first then thinned flat black enamel wash, swab with thinner-moistened tip to clean up. I've done this on a couple of deuce grilles. My $00.02 ?
-
The narrative is "its an Earl Scheib paint job" ? Thanks to both of you for your kindness ?
-
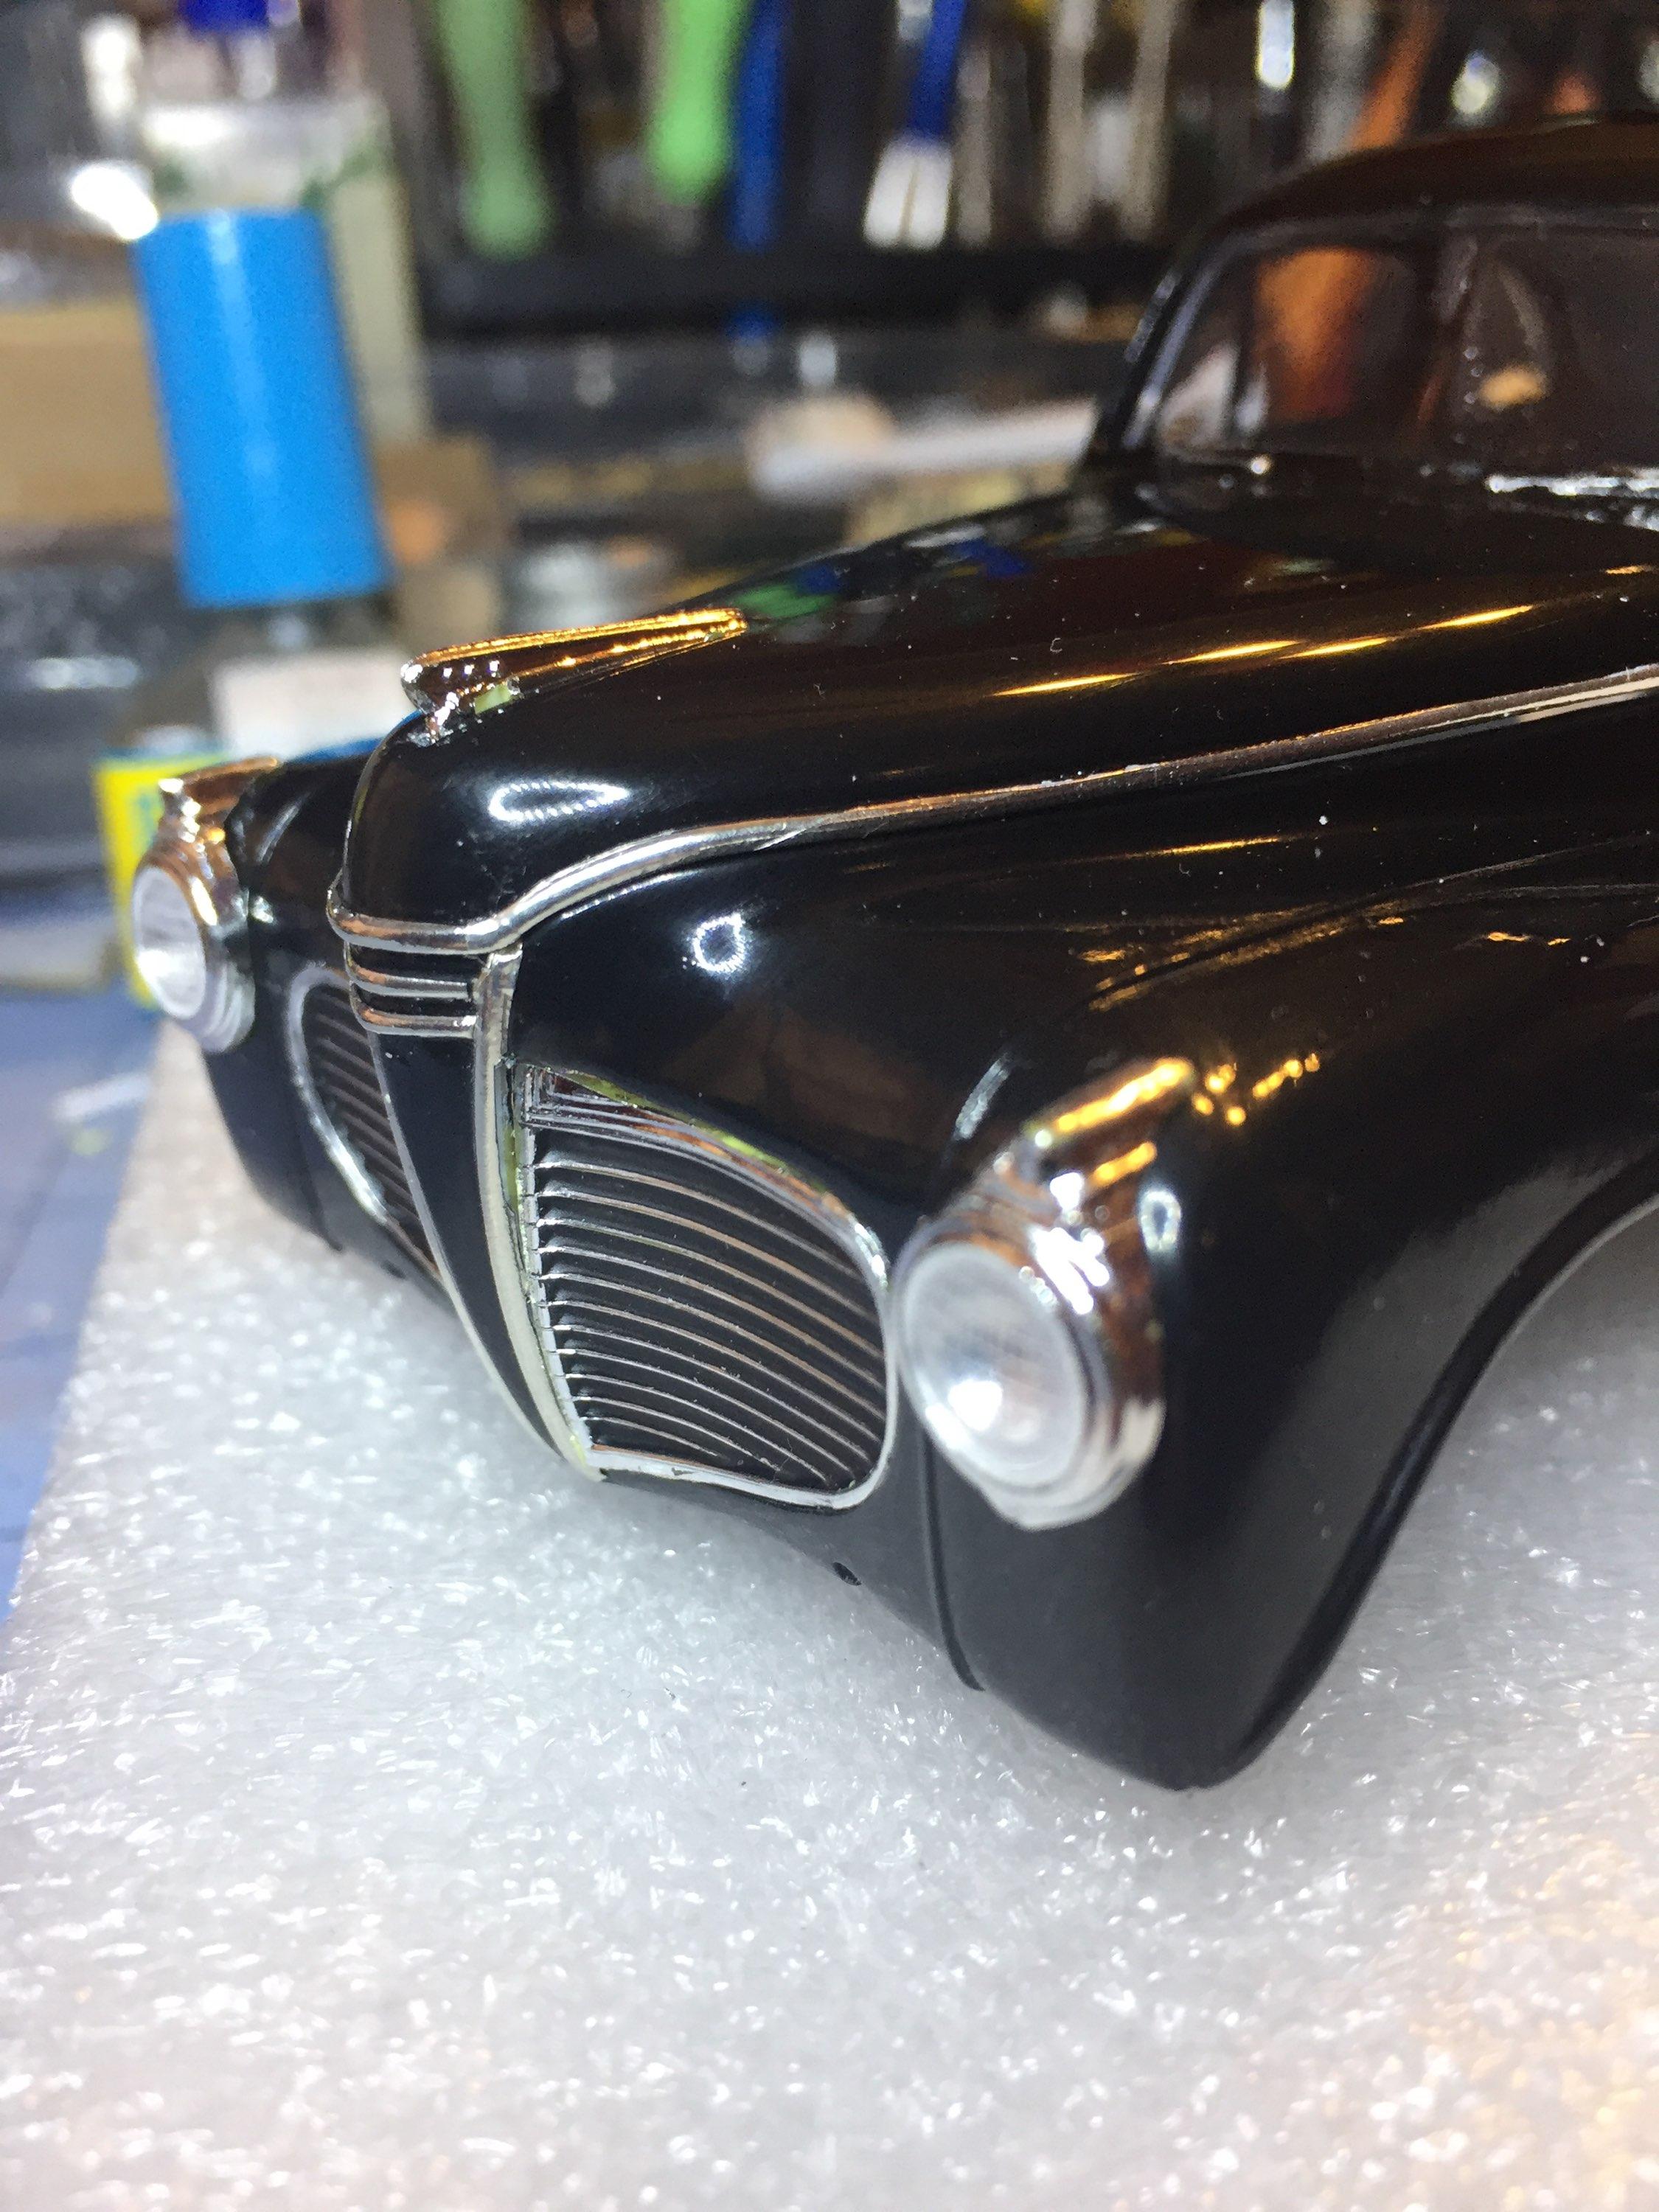
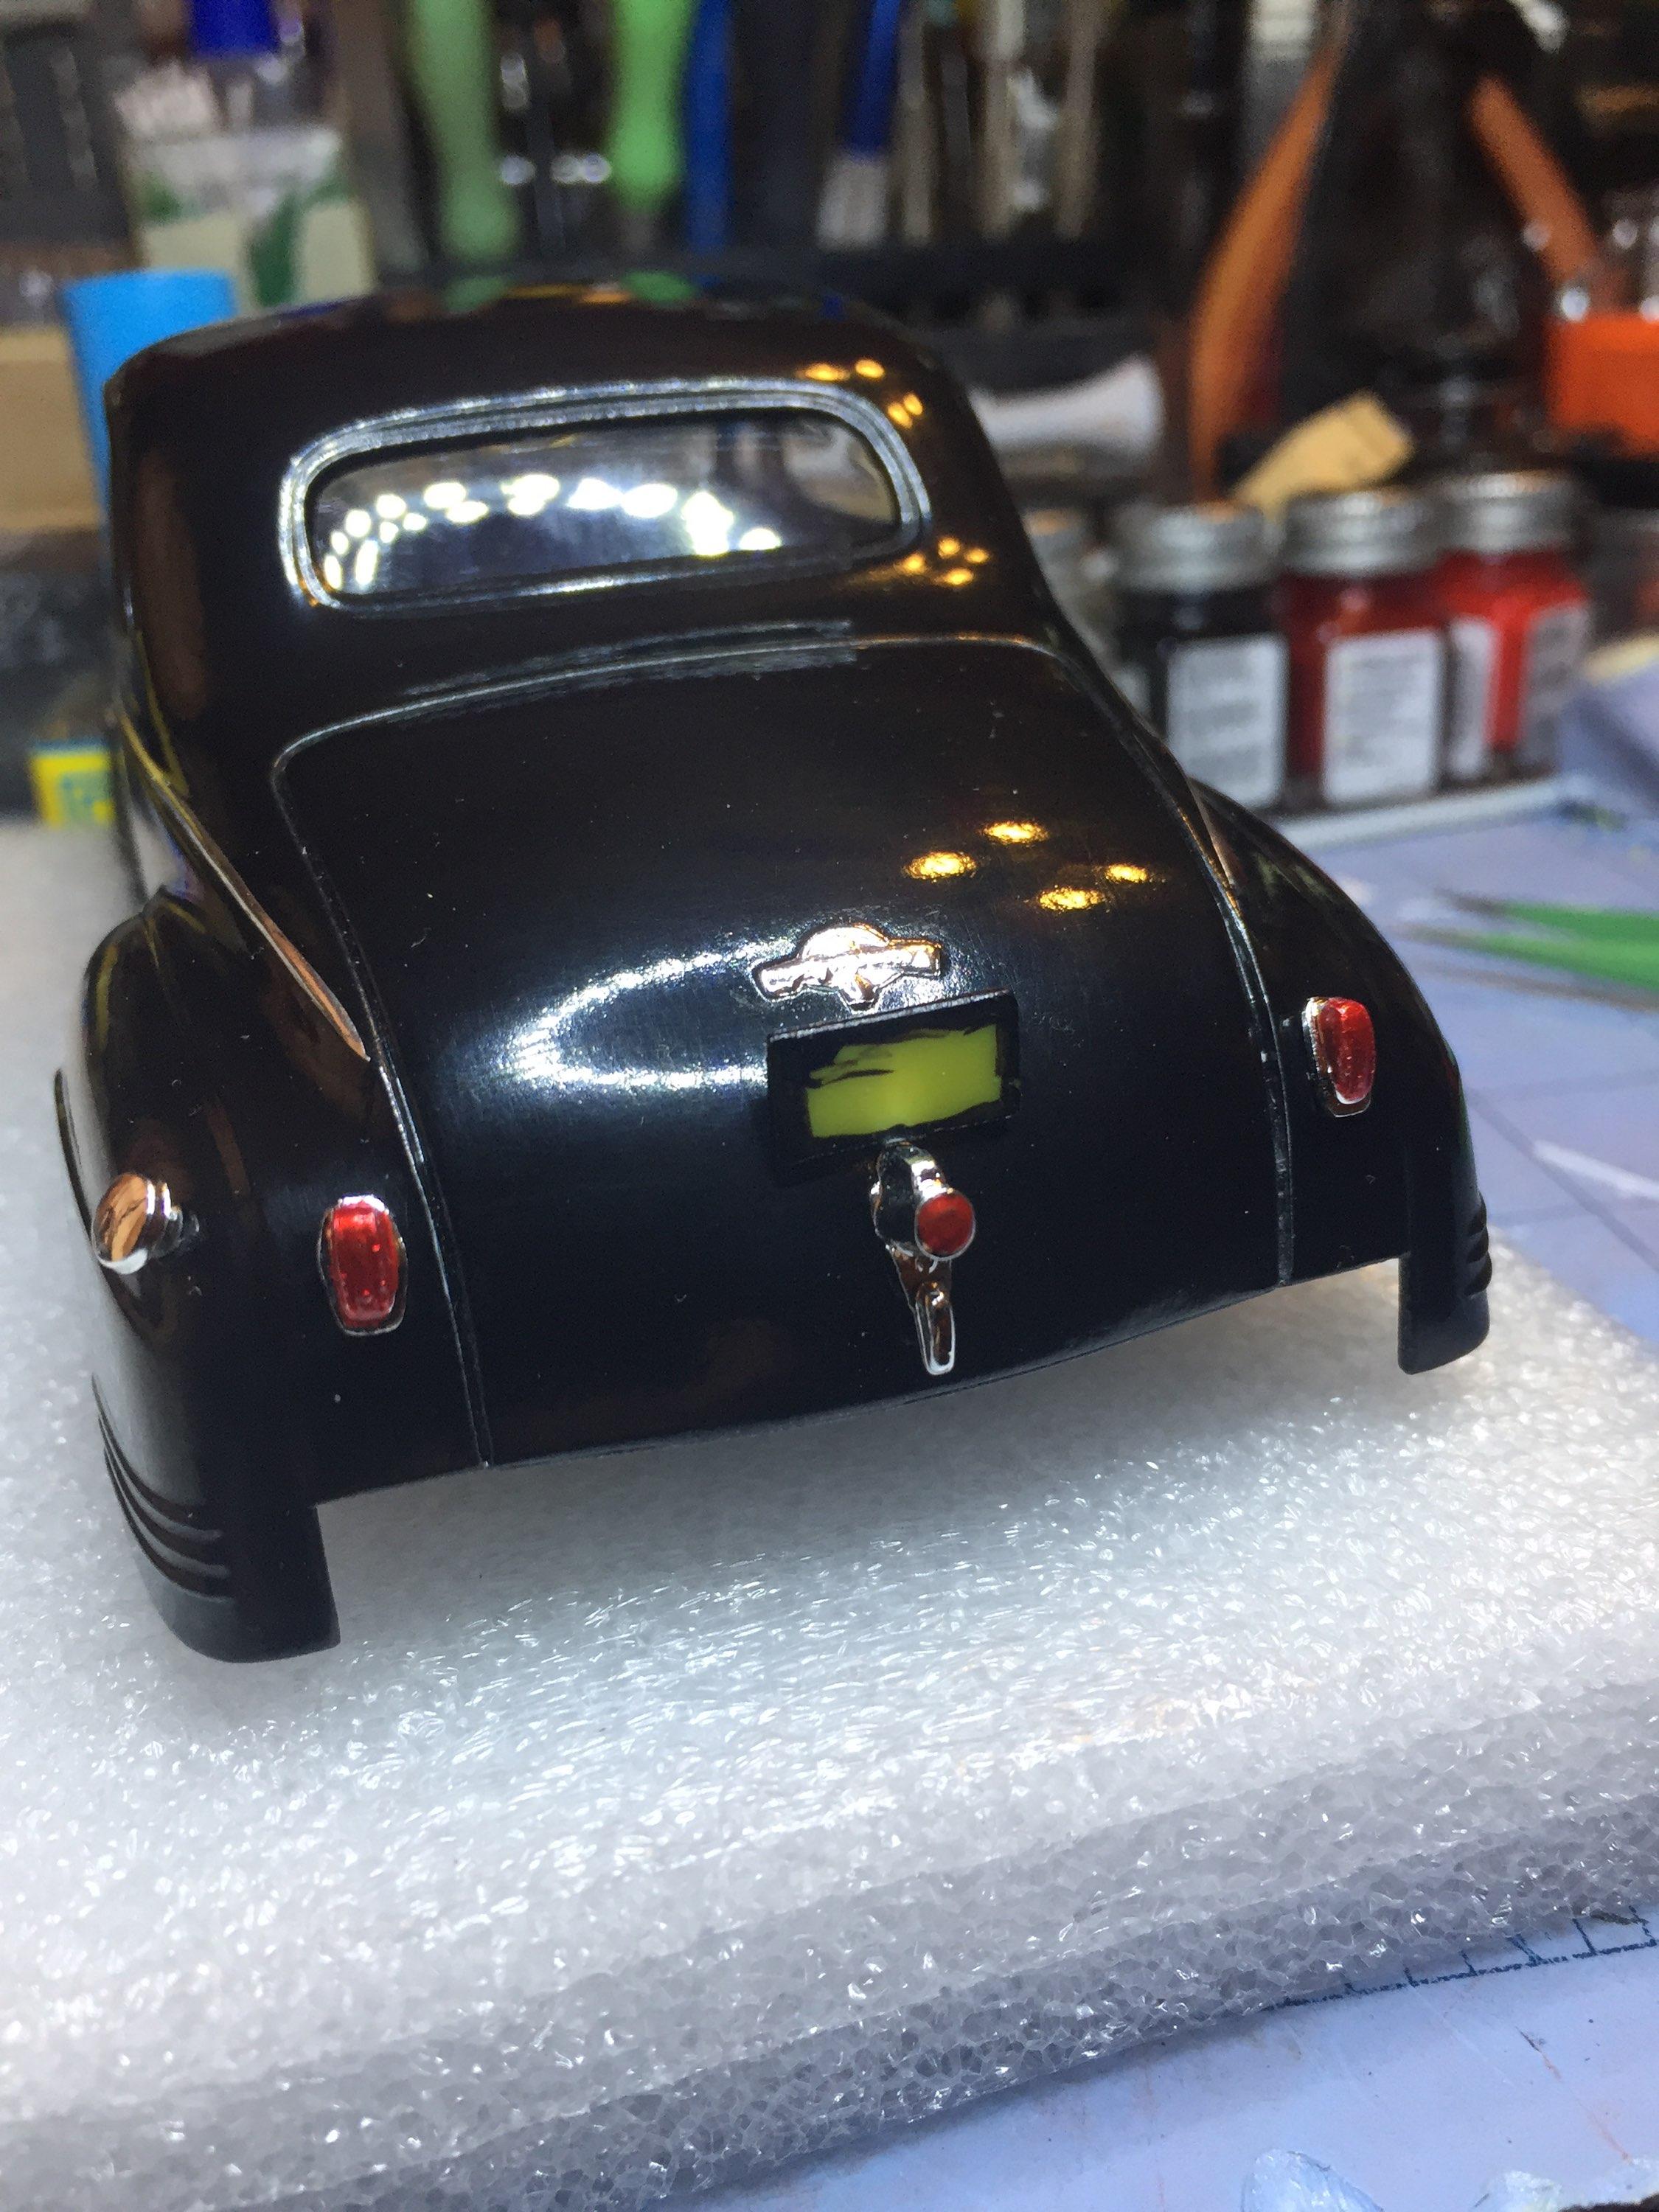
This is how well the body work went. The paint, not so much... I rushed it and made a mess of it but I'm OK with it. I gotta finish up a few things and then call it done. I used 5 minute epoxy to hold the headlights from the inside as well as the glass. The rear plate mount, trunk handle and the tail lights are pinned. Thanks for stopping by. By the way, there's a third tail light. Who knew? ?
-
Thanks, Jim, I'm sure the price is much higher now if any are available. Too rich for my blood.
-
That "Chrom" looks darn good, Greg. I gotta get me some. Big advantage over Allclad II. How's the application of it? Just like regular rattle-can paint?
-
I love a chopped see-dan! Where'd you get those great wires, Jim?
-
I love a chopped see-dan! Those PE wires look fantastic. Where'd you get 'em, Kevin?