customline
-
Posts
3,793 -
Joined
-
Last visited
Content Type
Profiles
Forums
Events
Gallery
Everything posted by customline
-
...And hopefully there will be a posting here more than a week in advance of the event. ?
-

'63 Galaxy lightweight planned build
customline replied to customline's topic in Model Building Questions and Answers
Funny how I don't think of them as old. ?.......anyway, yeah, me too. Now I gotta find a donor kit ?....wish me luck. -
'63 Galaxy lightweight planned build
customline replied to customline's topic in Model Building Questions and Answers
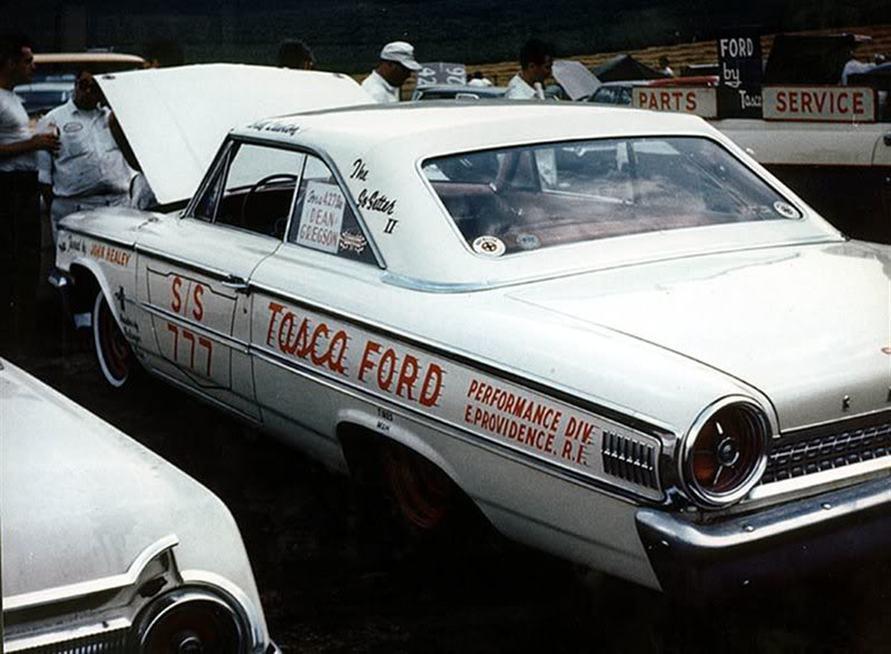
Uh oh....sorry ?. I saw the Tasca 777 Galaxy run at Charleston, an old (Navy?) airstrip when I was 11 years young. It left an impression on me. I built the T-Bolt several years ago but gave it to my son who was still living in East Providence, home of Tasca Ford. I have another one to build soon but want to do the 777 too. After that, maybe the Cobra Jet Mustang. Thank you, Tom, I really appreciate the info and the time it took to find it. I might attempt to scratch the seats from some junk seats I can use as a base. Thanks again! -
'63 Galaxy lightweight planned build
customline replied to customline's topic in Model Building Questions and Answers
Yeah, I see what you're saying. ? edit: that kit tub looks like a ragtop tub. -
'63 Galaxy lightweight planned build
customline replied to customline's topic in Model Building Questions and Answers
Thanks, Tom, do you have photos of the front seats? I have not yet found good photos of the 1:1 interior. -
'63 Galaxy lightweight planned build
customline replied to customline's topic in Model Building Questions and Answers
I don't see a problem with deleting the arm rests and the radio. If I can bash/ scratch the bucket seats, how much more would it take to make a reasonable facsimile? Rubber floor mat is easy ?. Is there a console to be demo'd? -
'63 Galaxy lightweight planned build
customline replied to customline's topic in Model Building Questions and Answers
Thanks for those great photos, Tom. Since I am advised to use the '60 chassis, I assume I will be horrified by the kit chassis when my kit arrives. Also, I am guessing that I will have screw bosses to fight with at the radiator support. It should be fun. I appreciate the info, Tom! -
'63 Galaxy lightweight planned build
customline replied to customline's topic in Model Building Questions and Answers
Yup. Good article, thanks! -
'63 Galaxy lightweight planned build
customline replied to customline's topic in Model Building Questions and Answers
Thanks, Trevor, sounds like good advice ? -
Oh. The kit....yeah. sorry. ?
-
I am planning to attempt a decent representation of the Tasca 777 lightweight super stock class 427 powered Galaxy. If anyone has built the AMT '63 Galaxy as a lightweight drag car, I would love to absorb your input. Thank you!

-
Is There Room For Another 41 Plymouth or Two?
customline replied to LennyB's topic in WIP: Model Cars
That is very useful information about the 40 pickup chassis and is well received, thanks! -
Oooooo I like it a lot. Full stop. Nice rims, what is their identity and where did they originate from?
-
I just pour my Plastruct stuff into one of my Tamiya bottles. A little homogenizing is good ?
-
Or....or you could add rust to the rocker panels and above the headlights, foil it and you're done! ?
-
Looks like an easy rub-out, James. And a quick one. Don't go at it too soon, though. ? it's coming along nice. Tan sounds good, too.
-
Sounds good. Thanks. I'll stick around ?
-
I'm going to keep my eye on "Ollie's for this one. How's the flash? What engine is that? Is the plated stuff good?
-
LOVE THAT COLOR! Can't wait to see it roll!
-
Is There Room For Another 41 Plymouth or Two?
customline replied to LennyB's topic in WIP: Model Cars
Ok....Yabba dabba doo....there, I said it! -
Thanks, Greg. It was a fun build. I just might look for another one for a real OOB. I kinda like the police versions posted by "Danno" on page 1. They are spectacular ?! Edit: it would be awesome if Revell did a police version, huh?
-
Yup, for sure, Len. We'll, it is a modern tool so there's that. But I think the form factor of the 1:1 more or less enables the way they designed the kit, but it was probably the product of human aided by computer too. What matters is its a great subject with a long roof and a lot of nice details and for what it's worth, I highly recommend it. ?
-
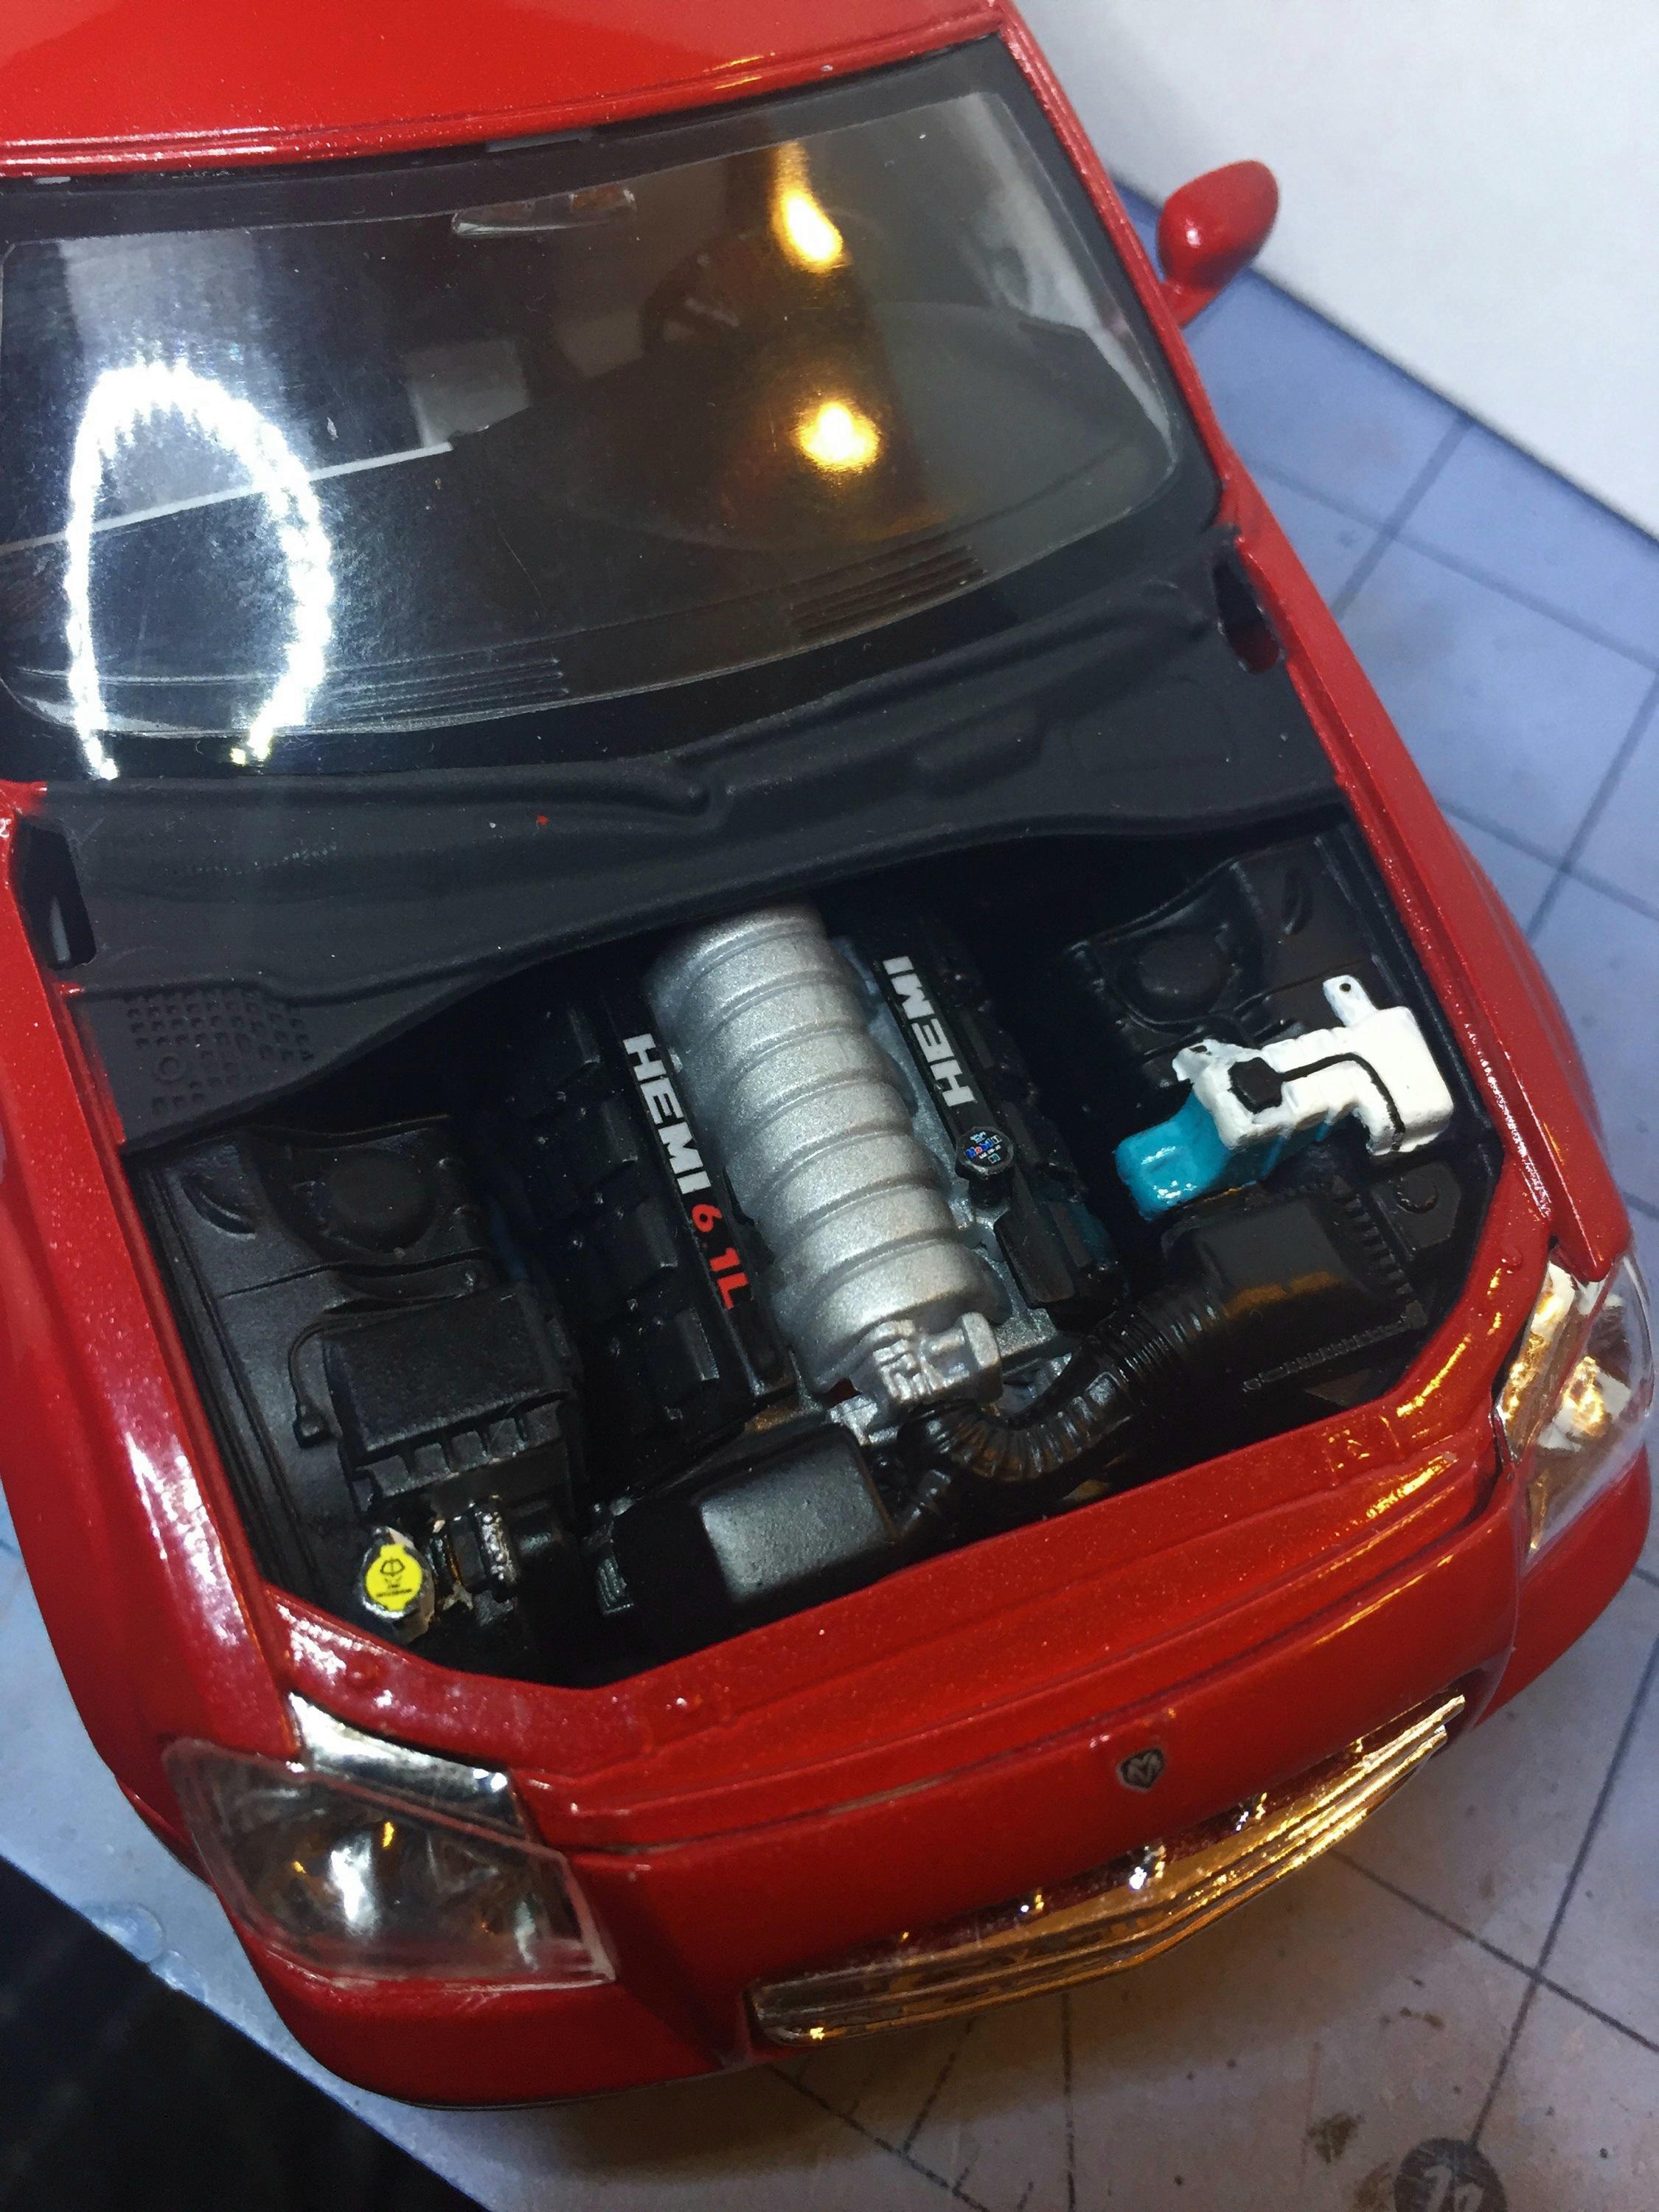
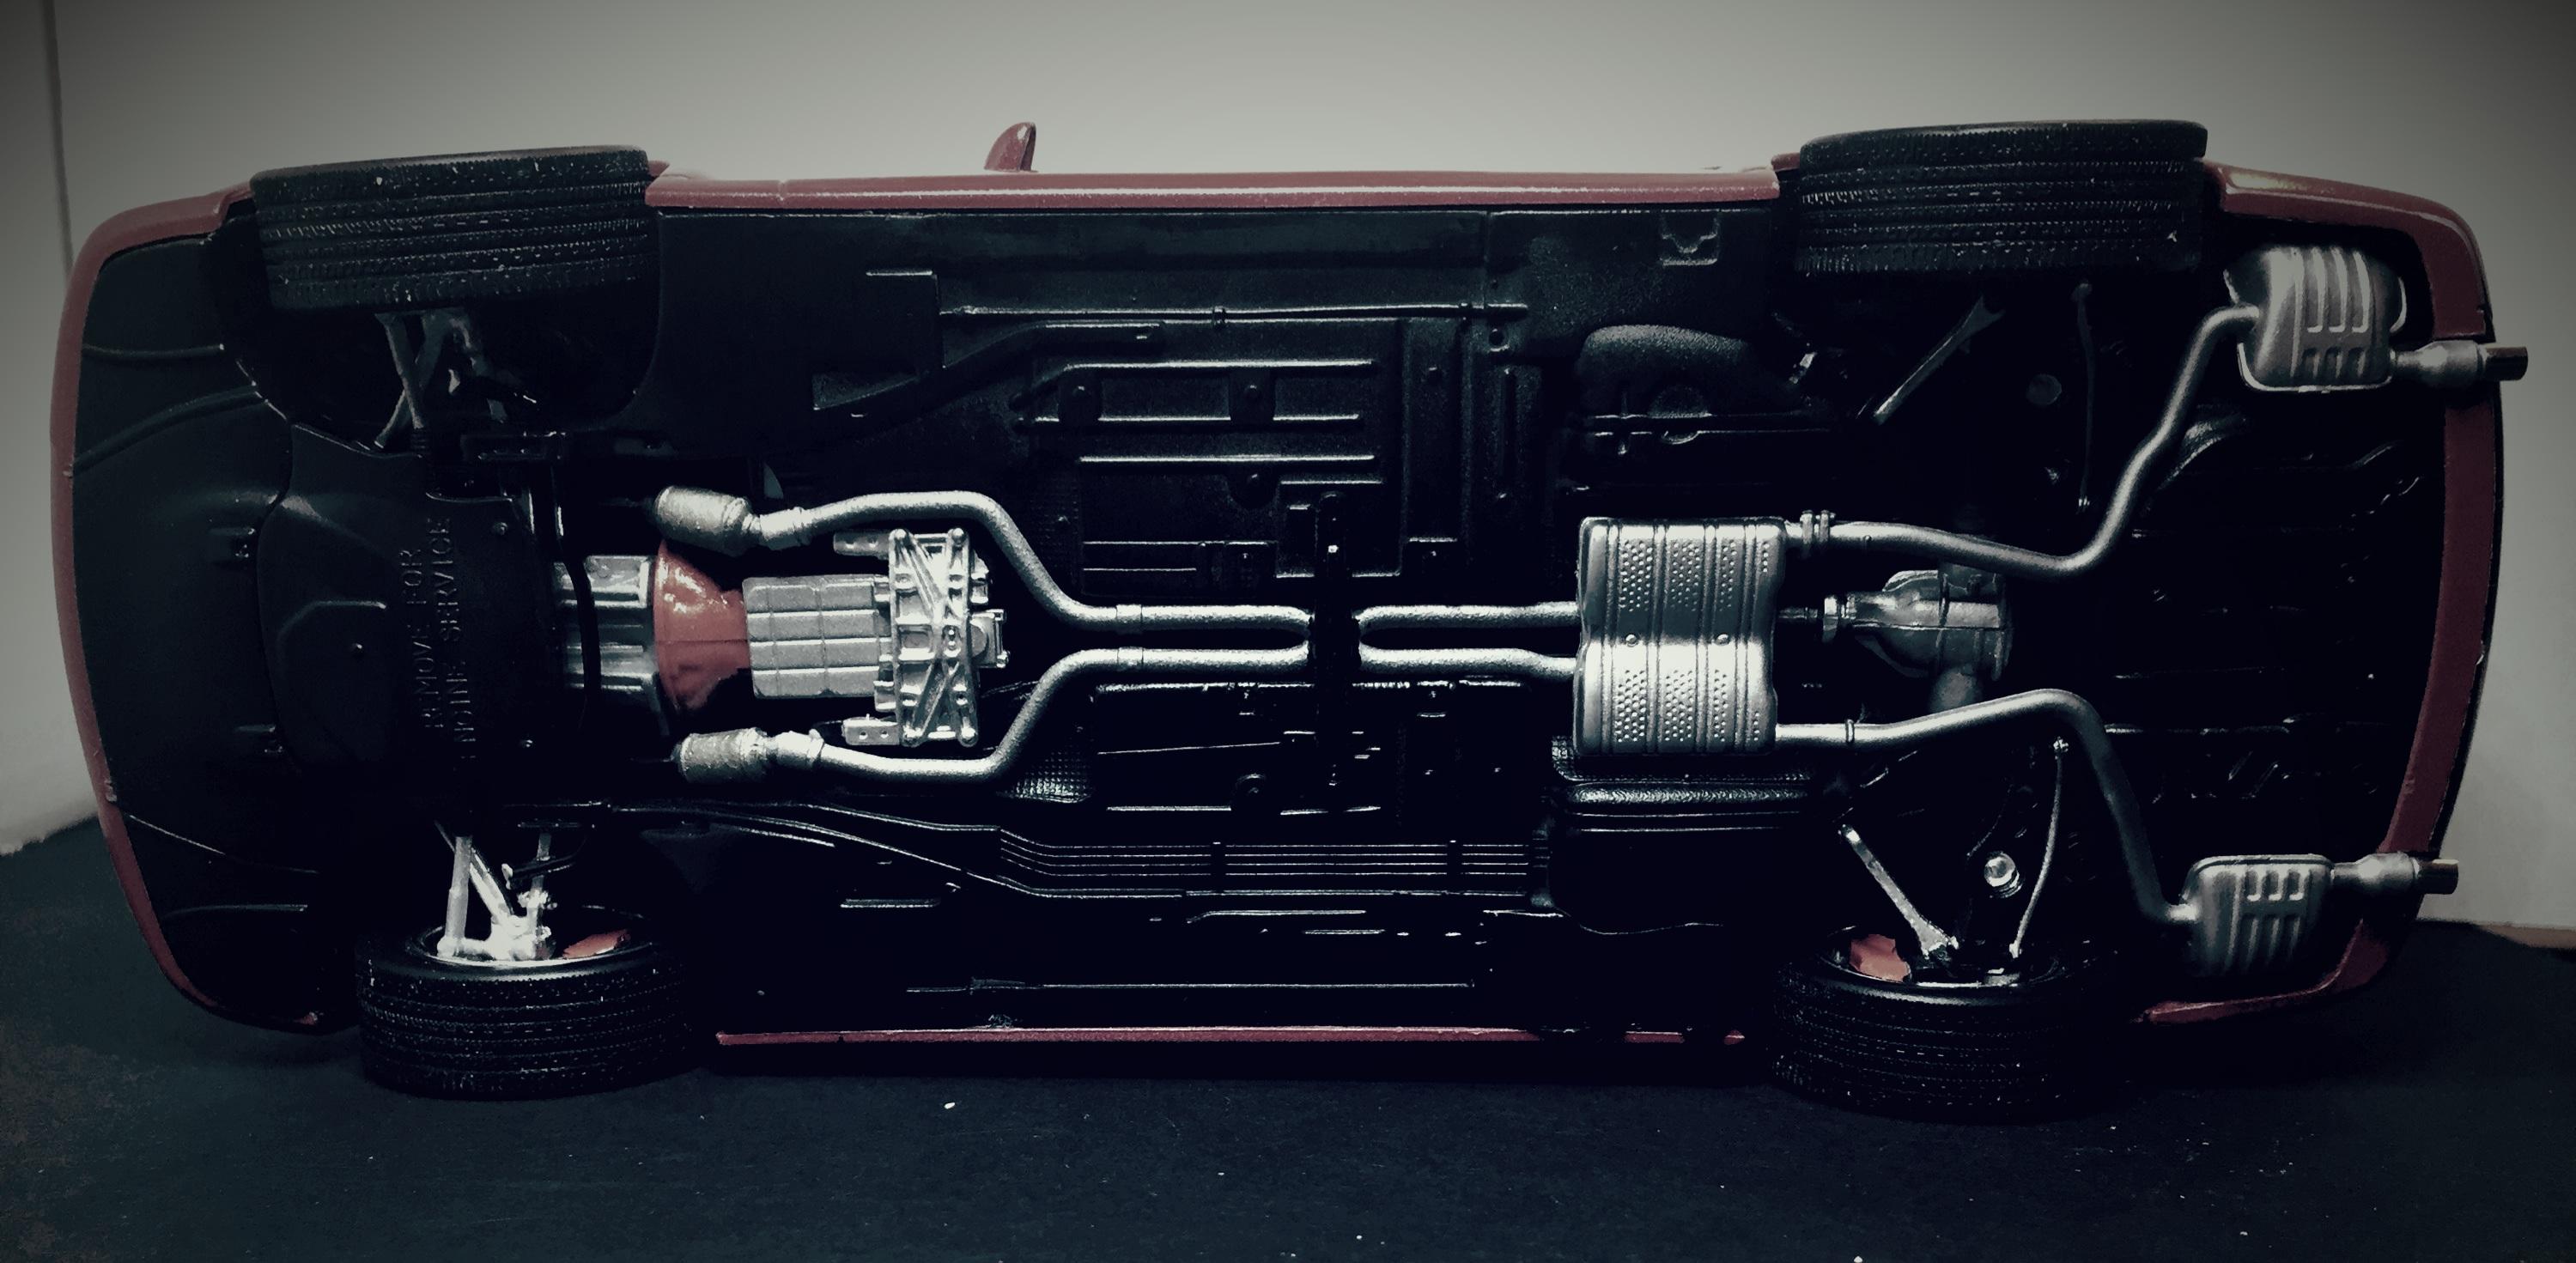
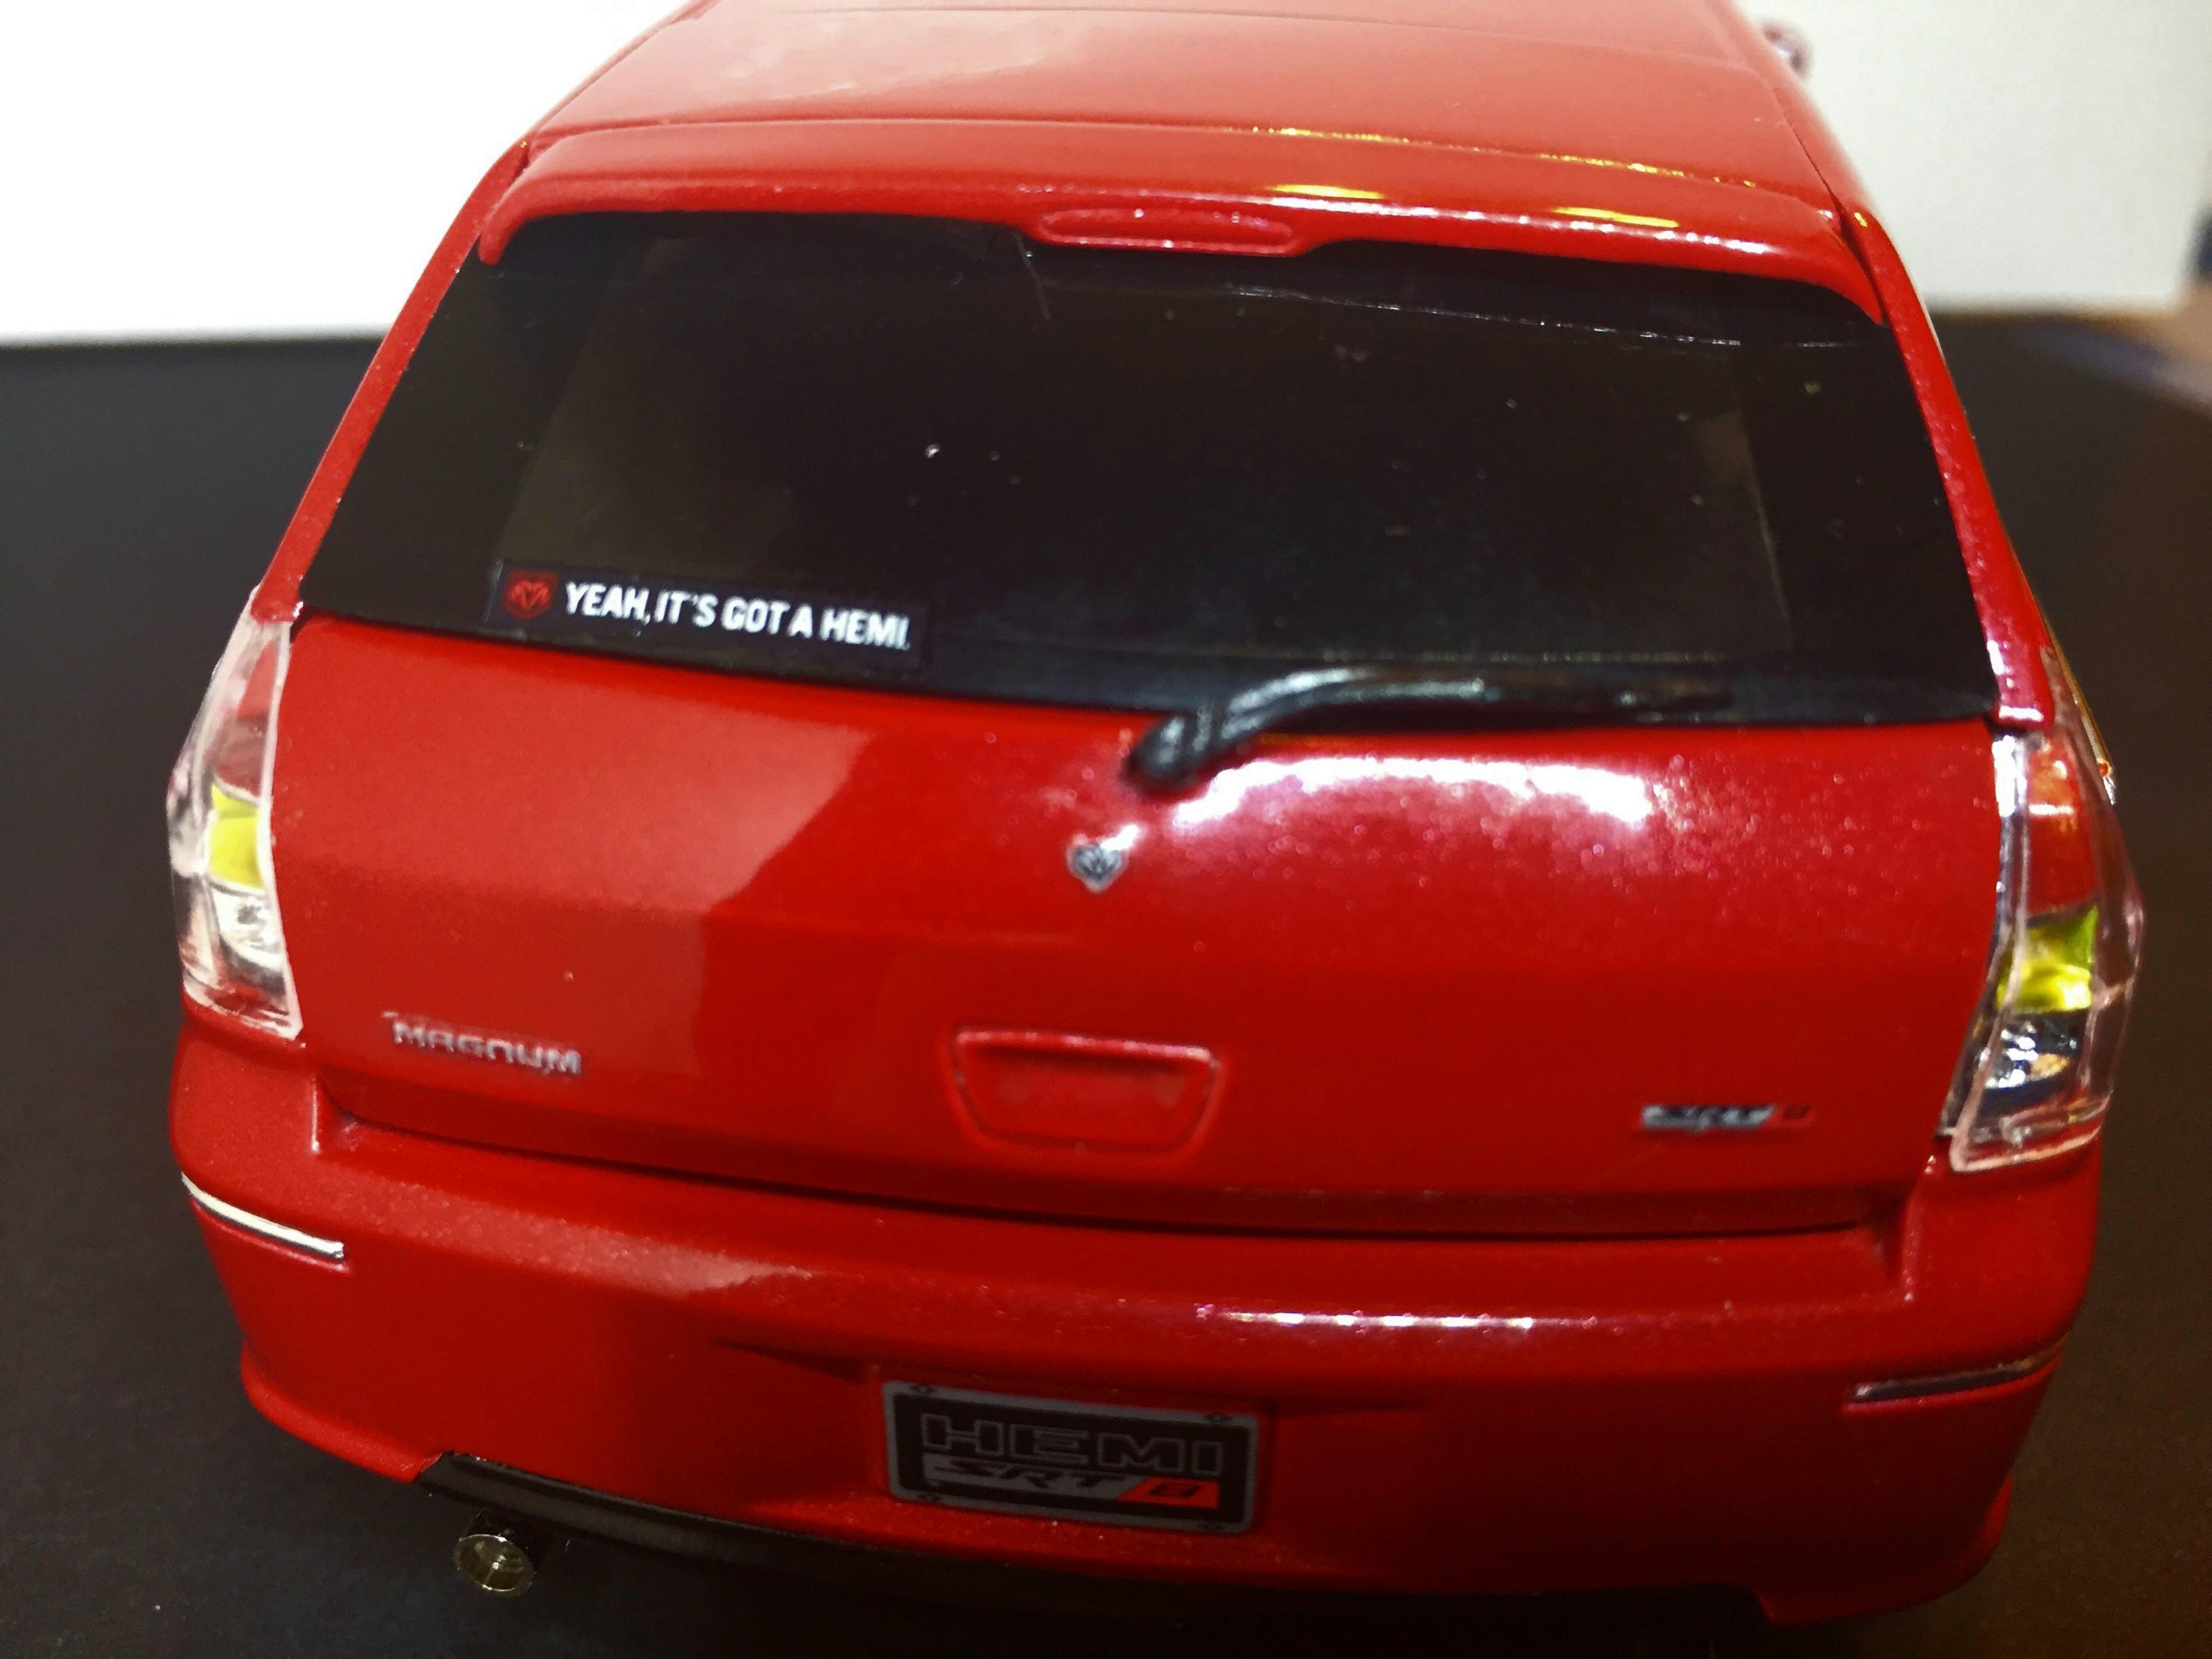
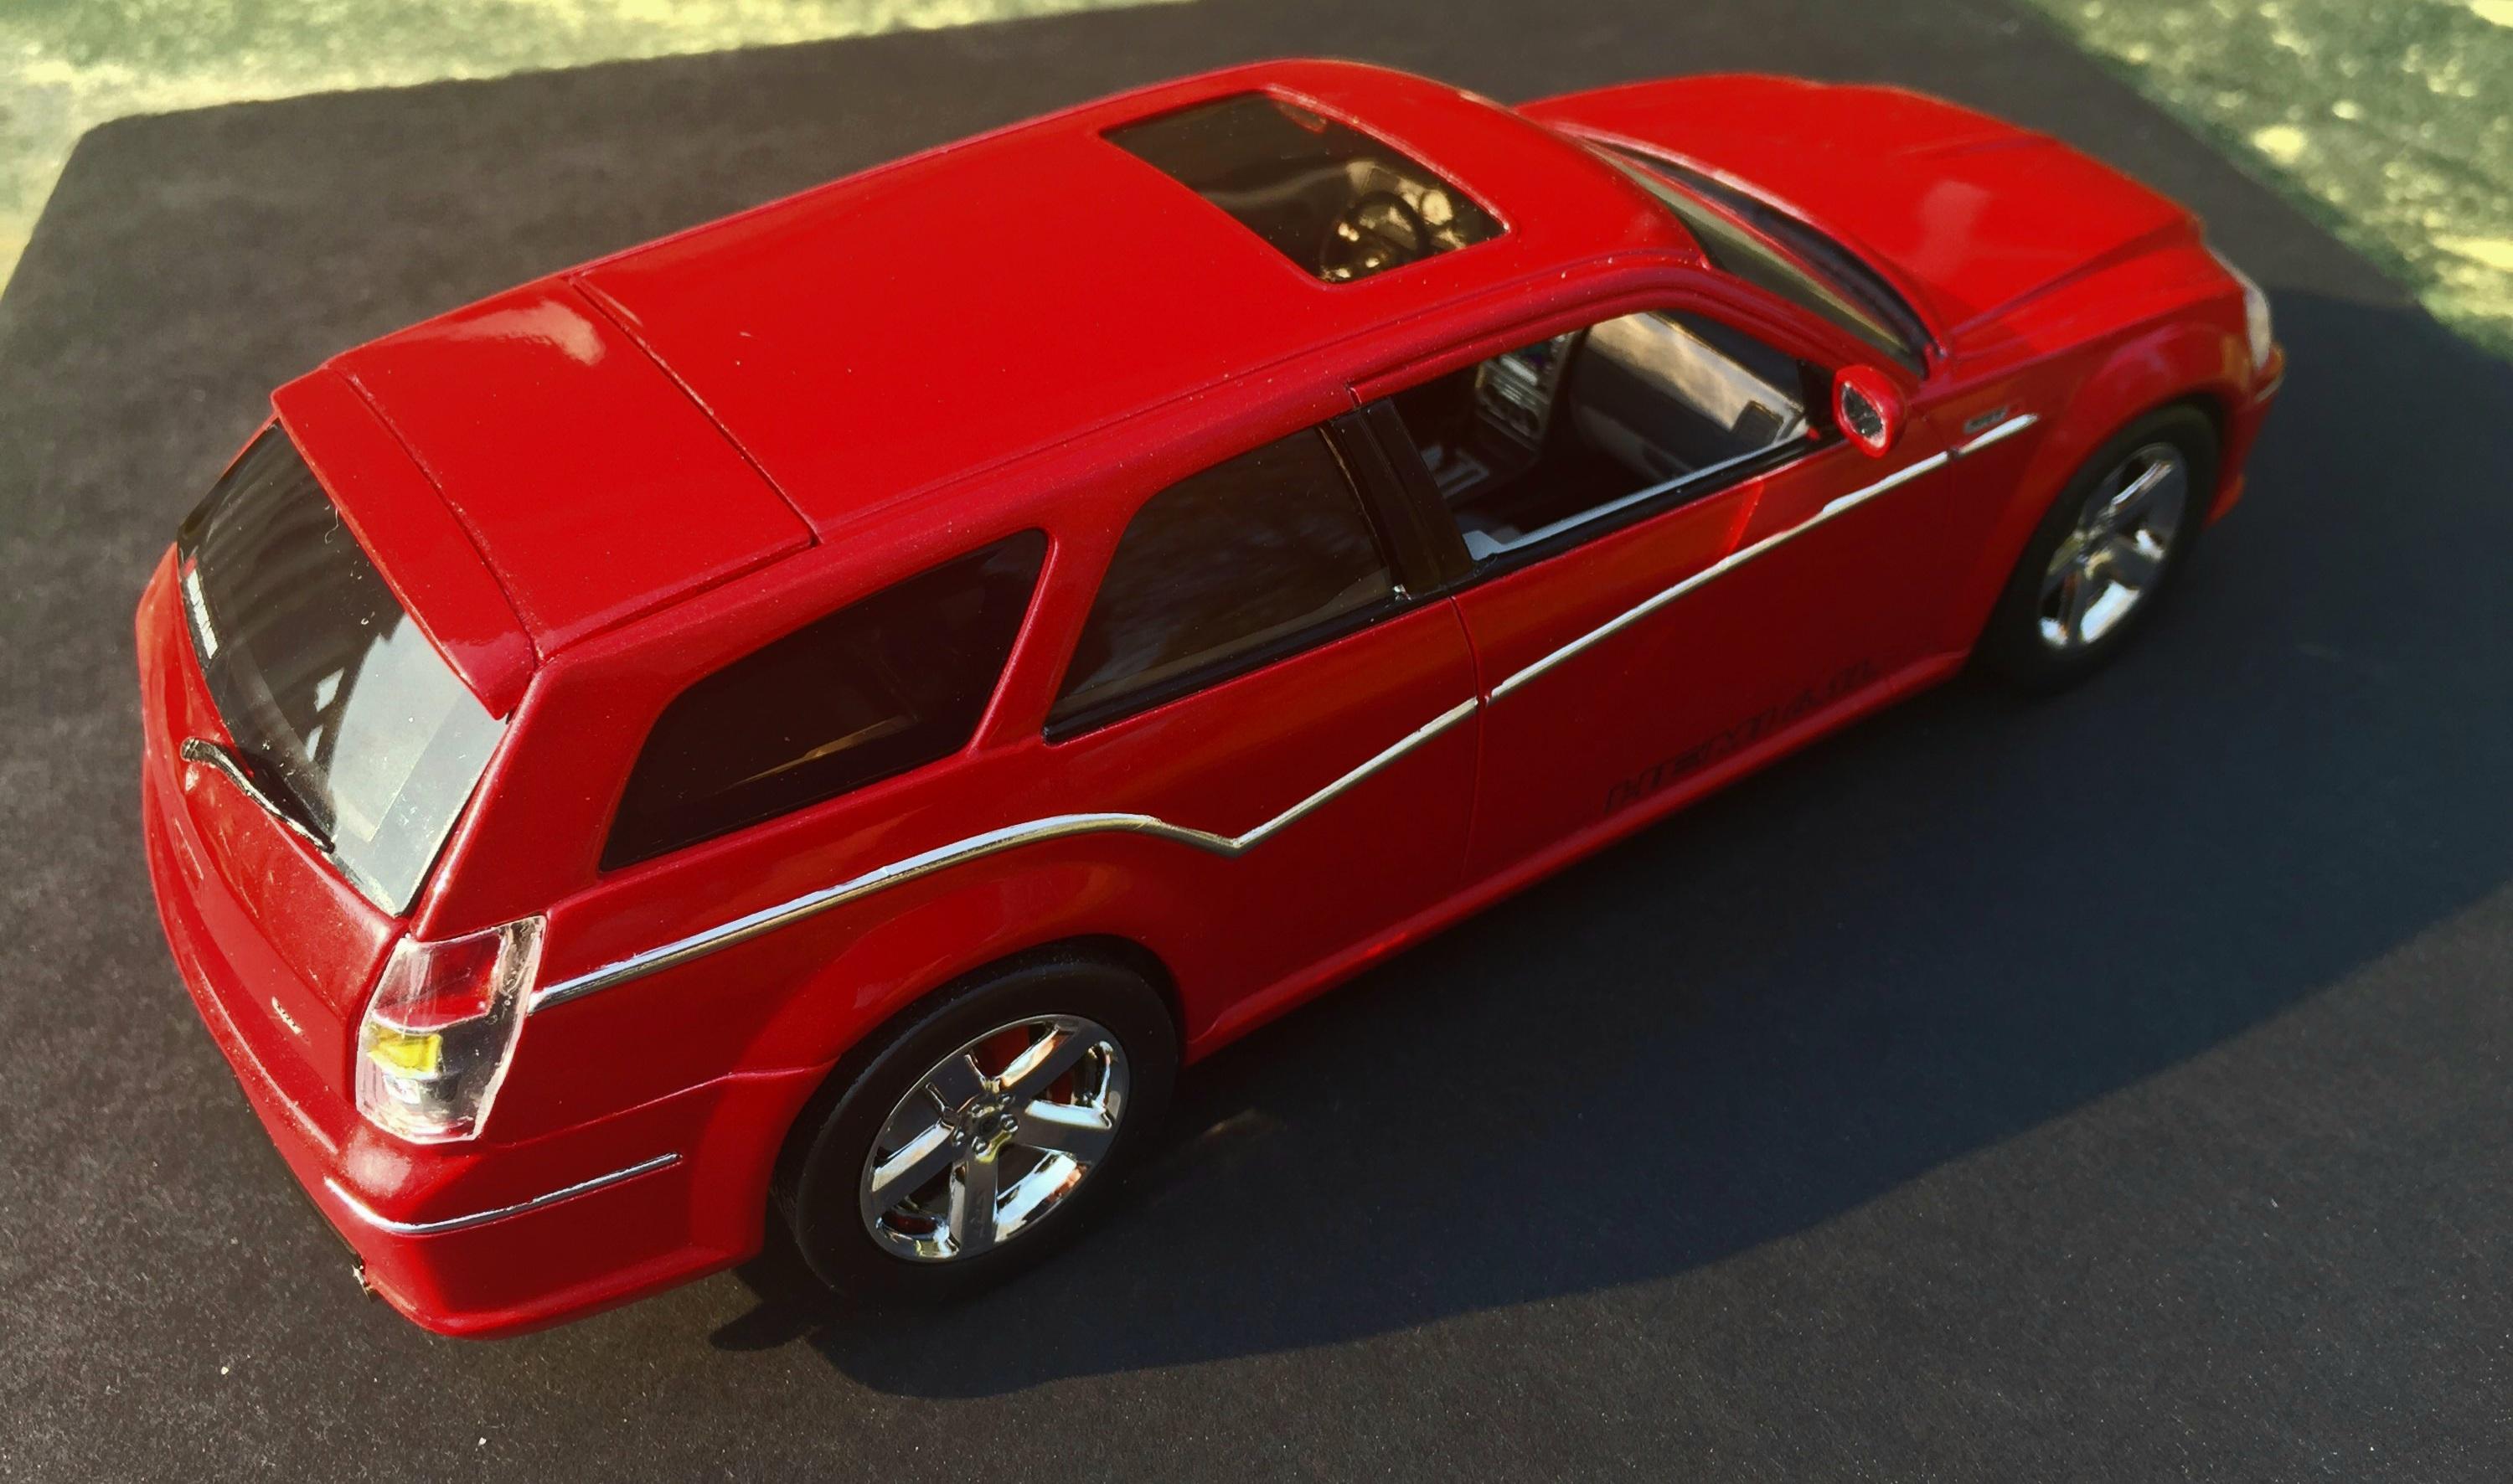
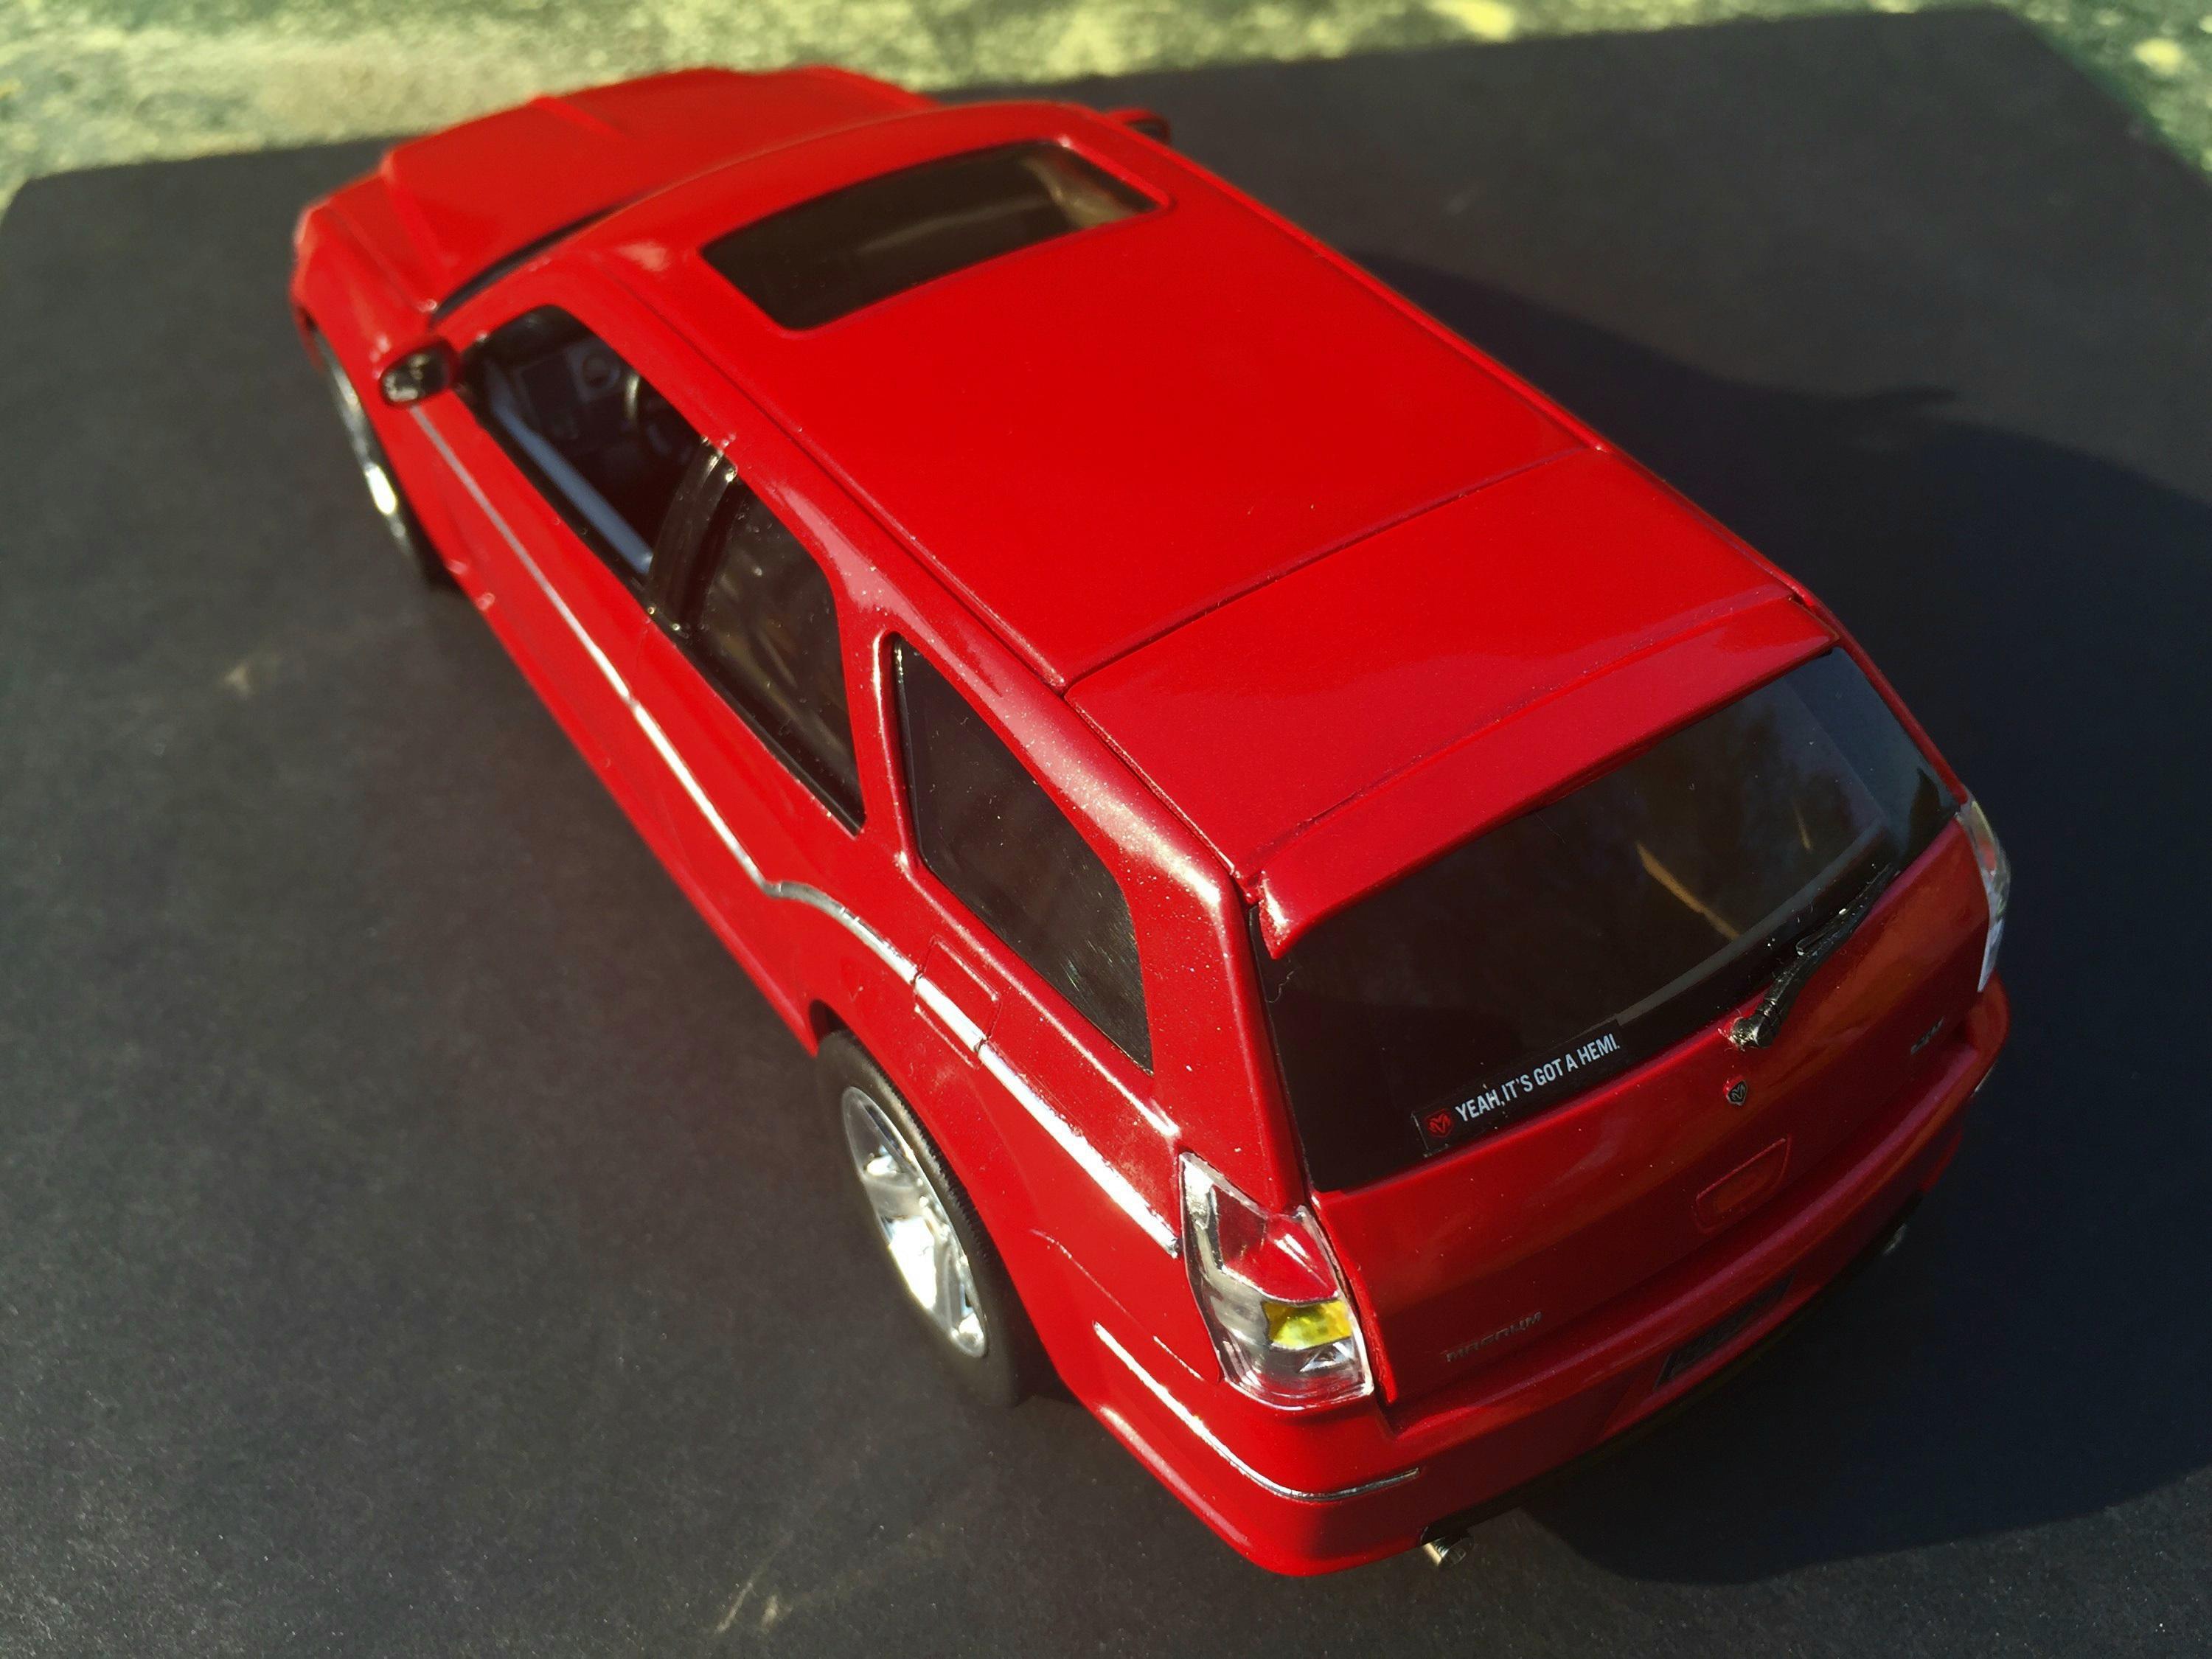
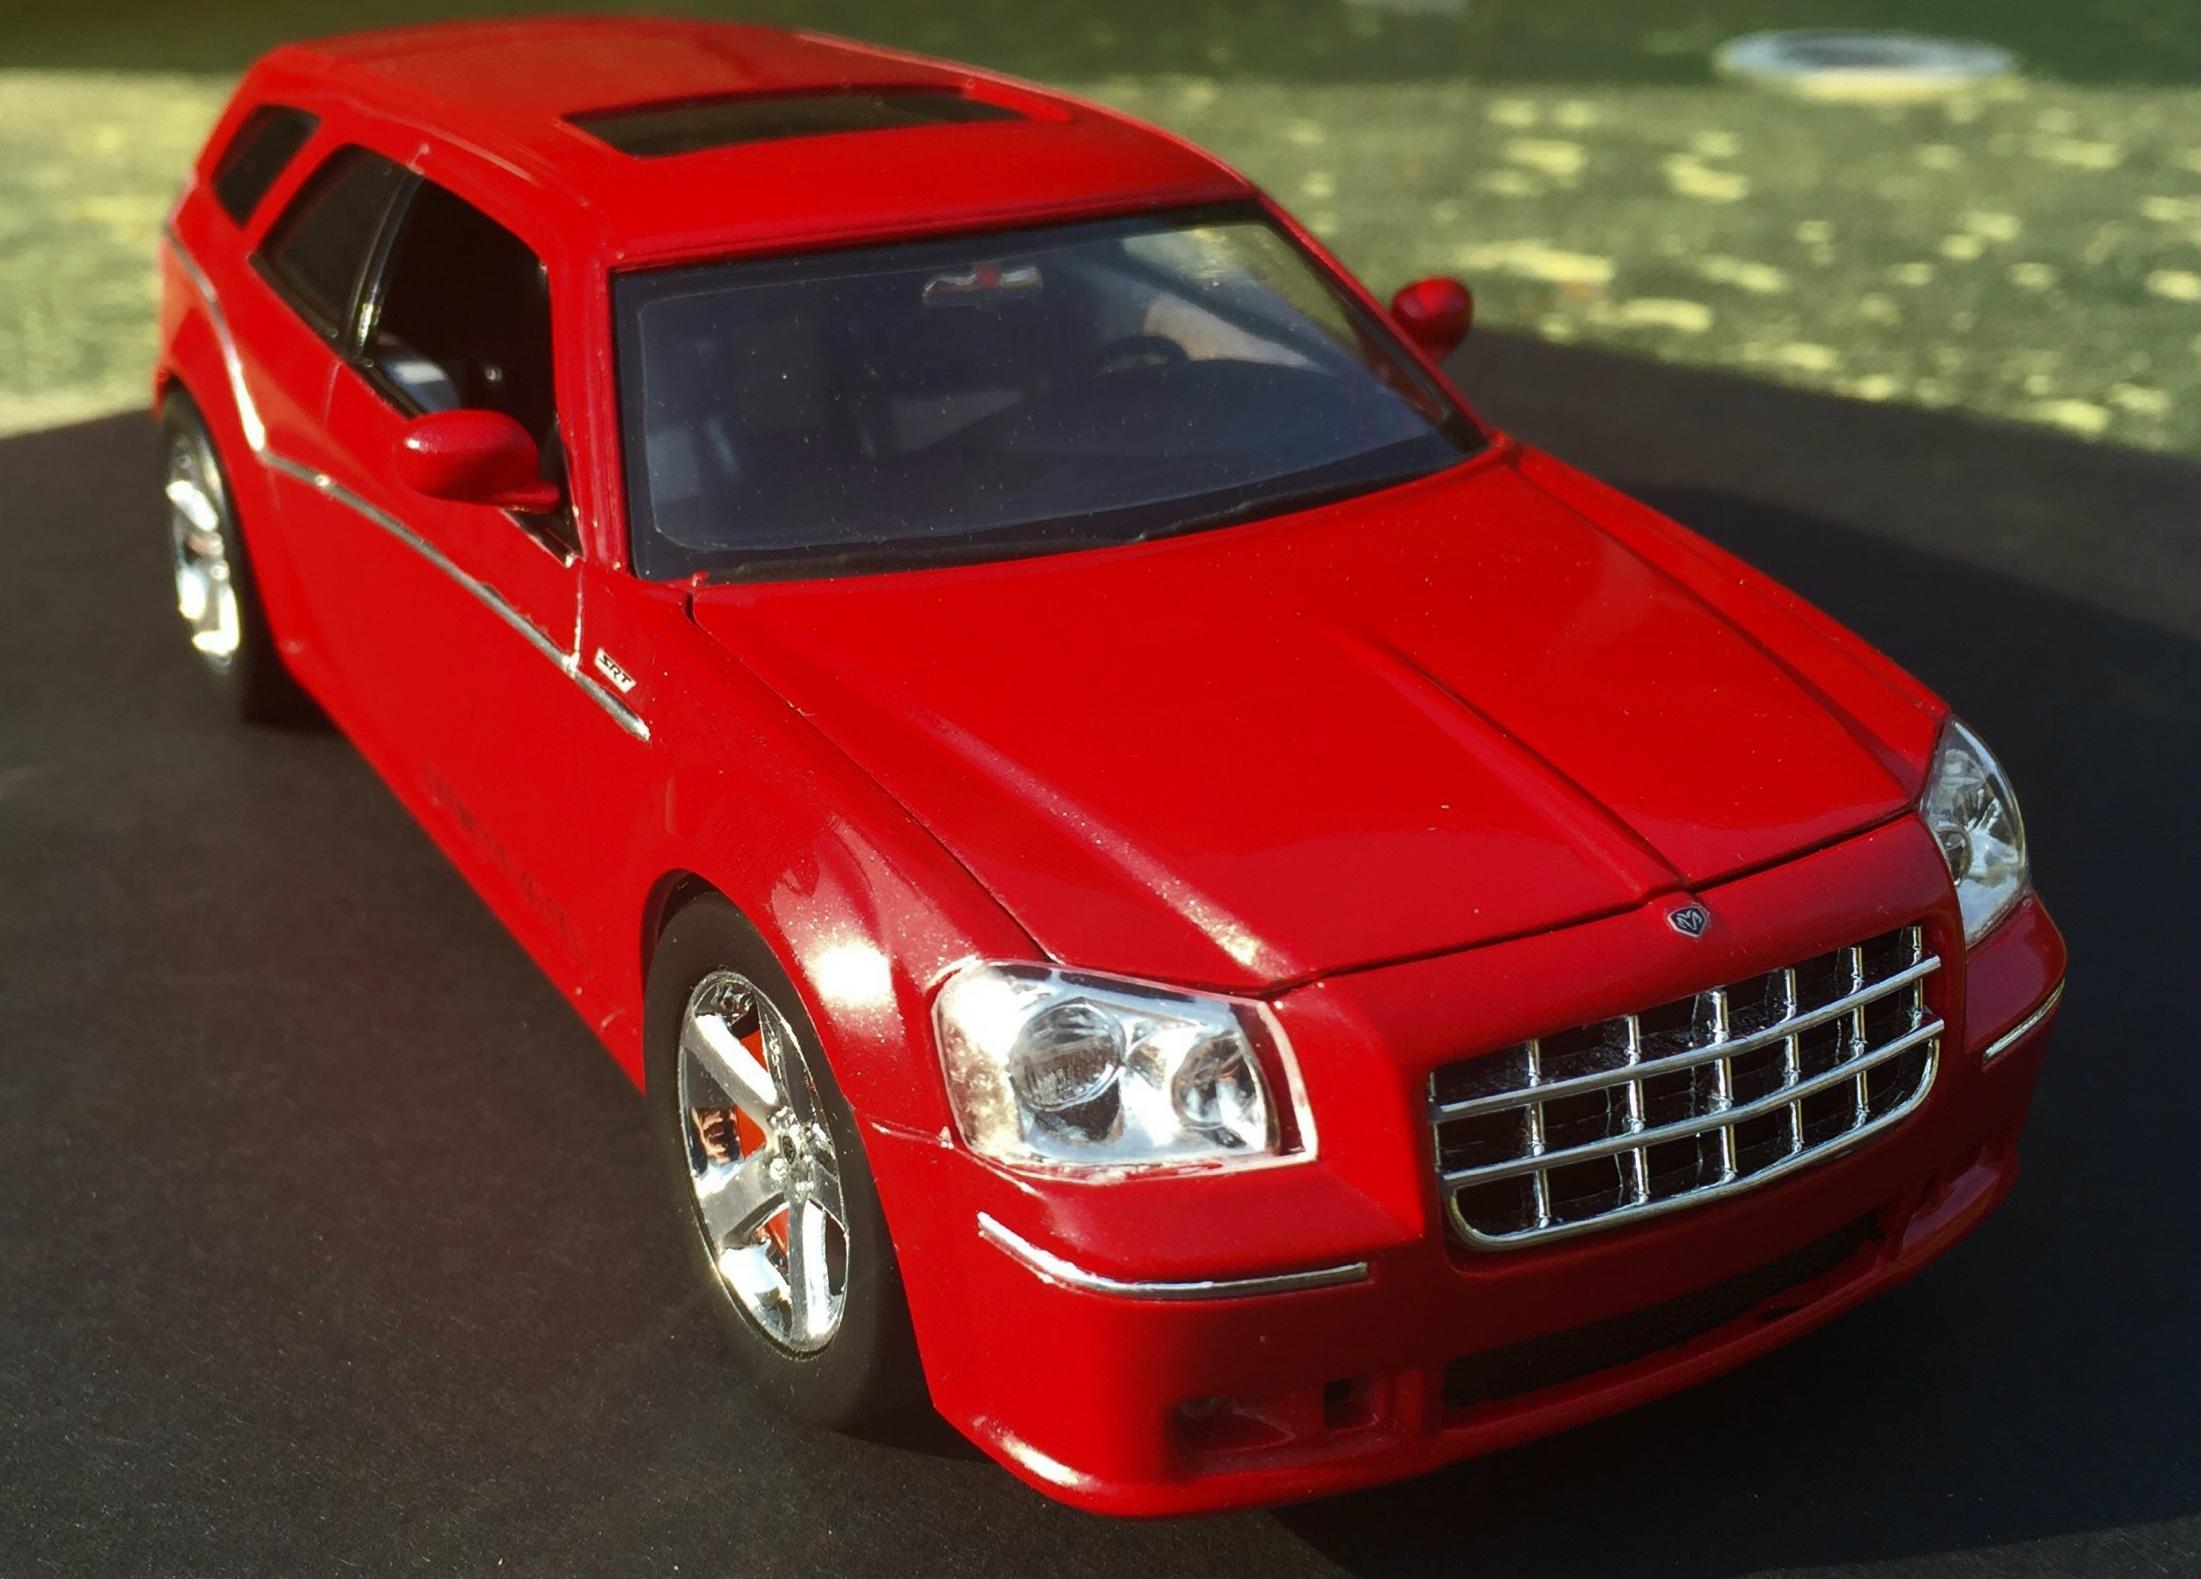
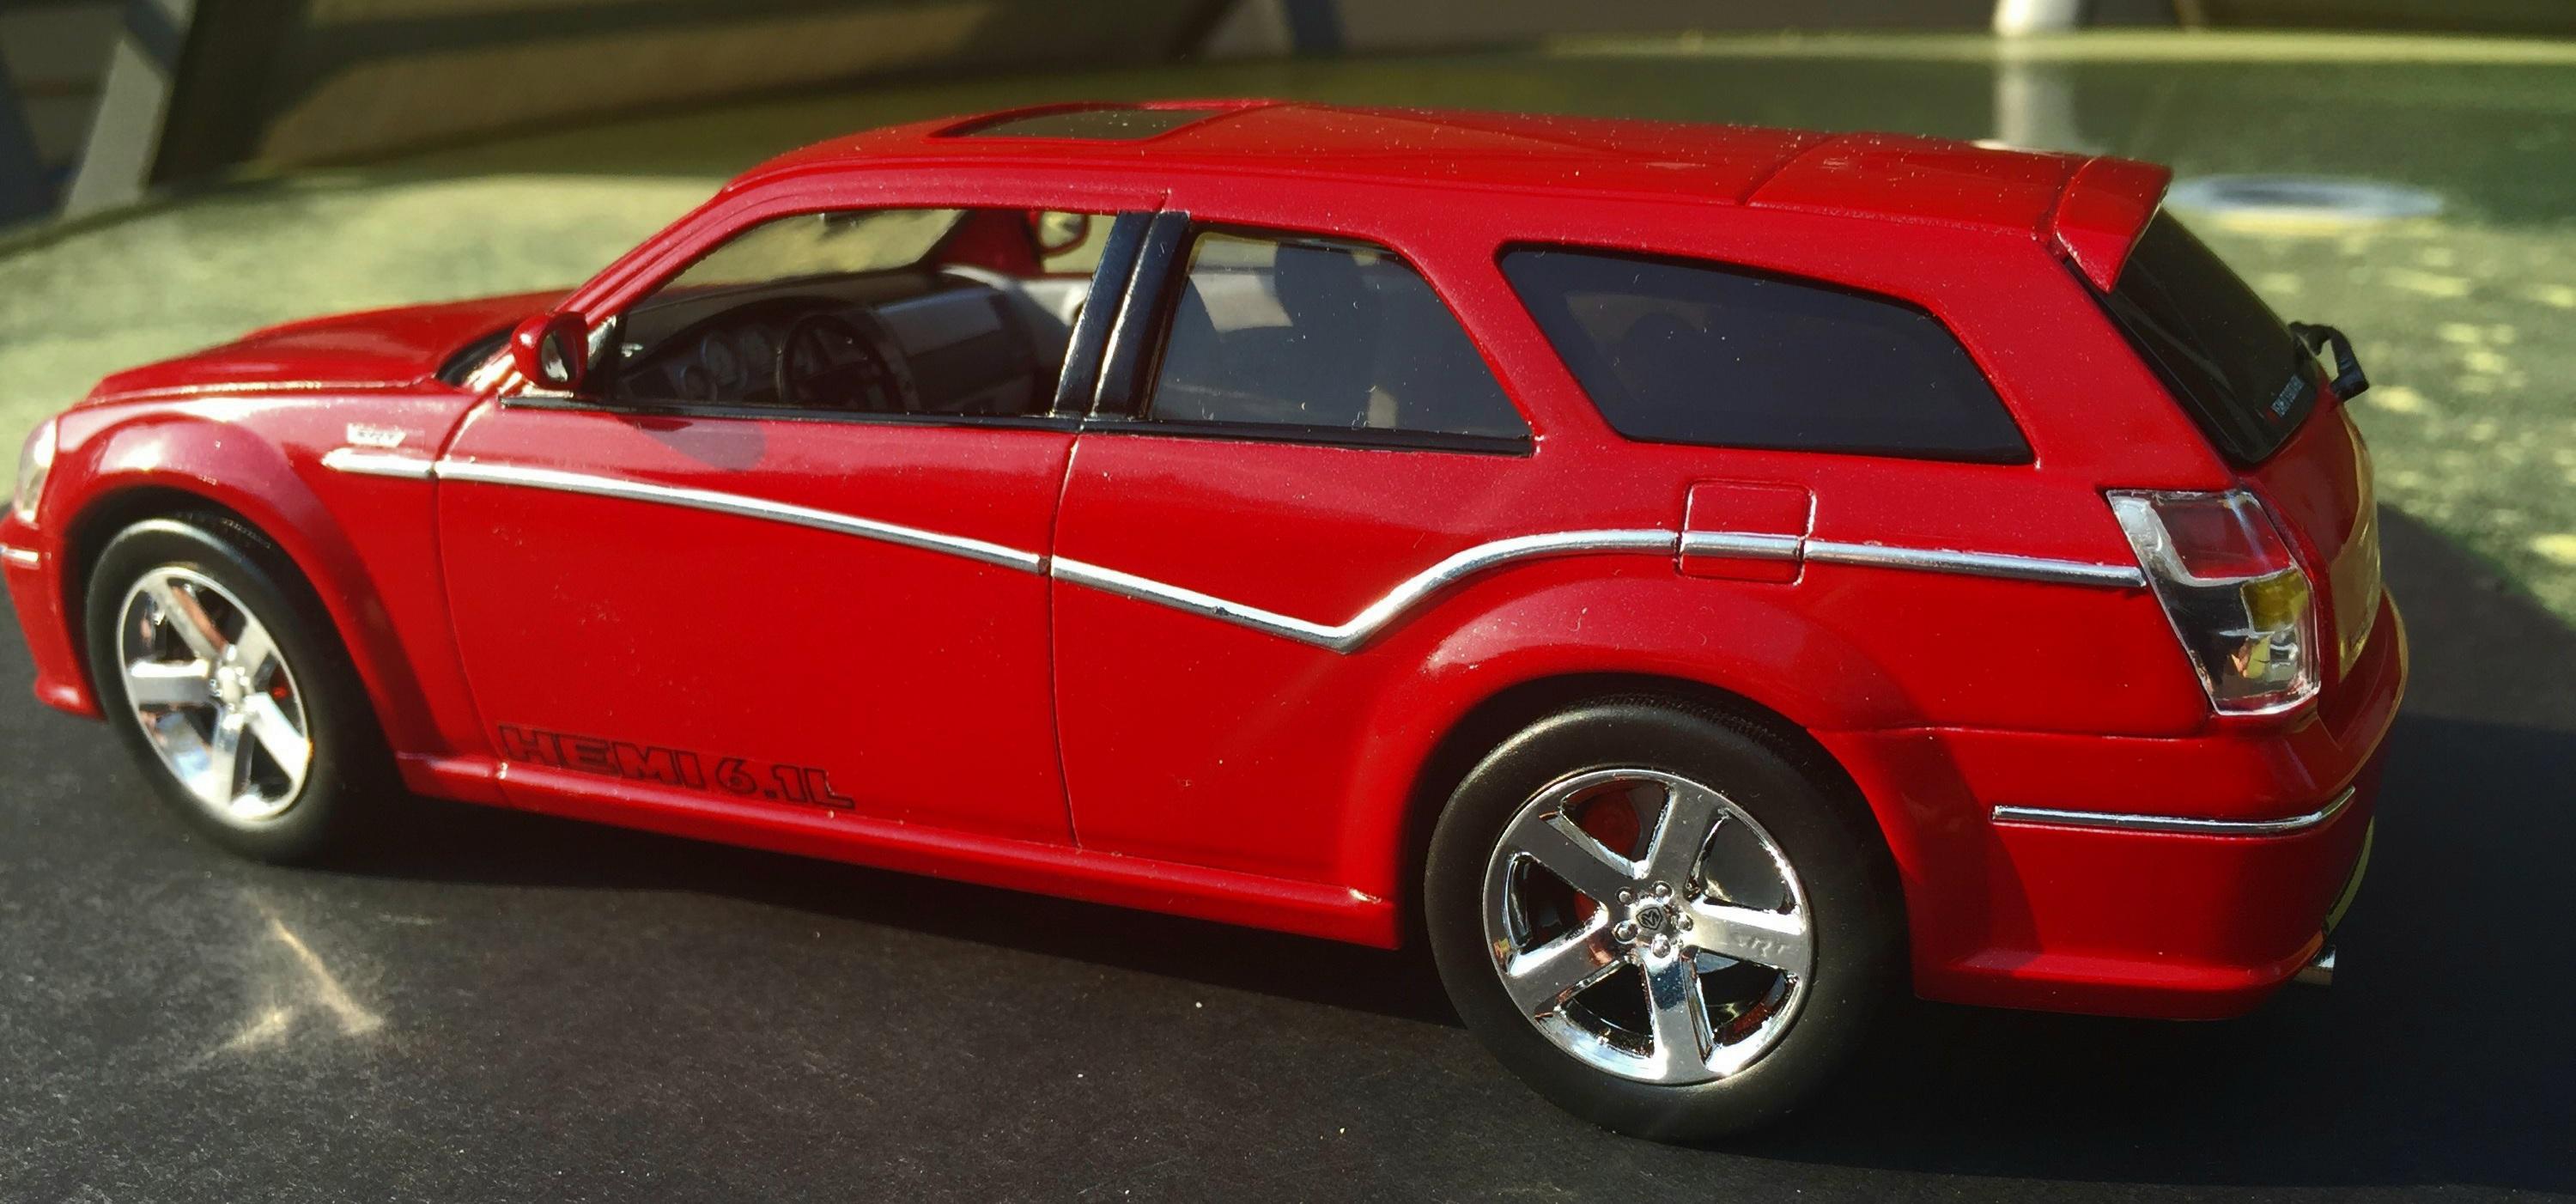
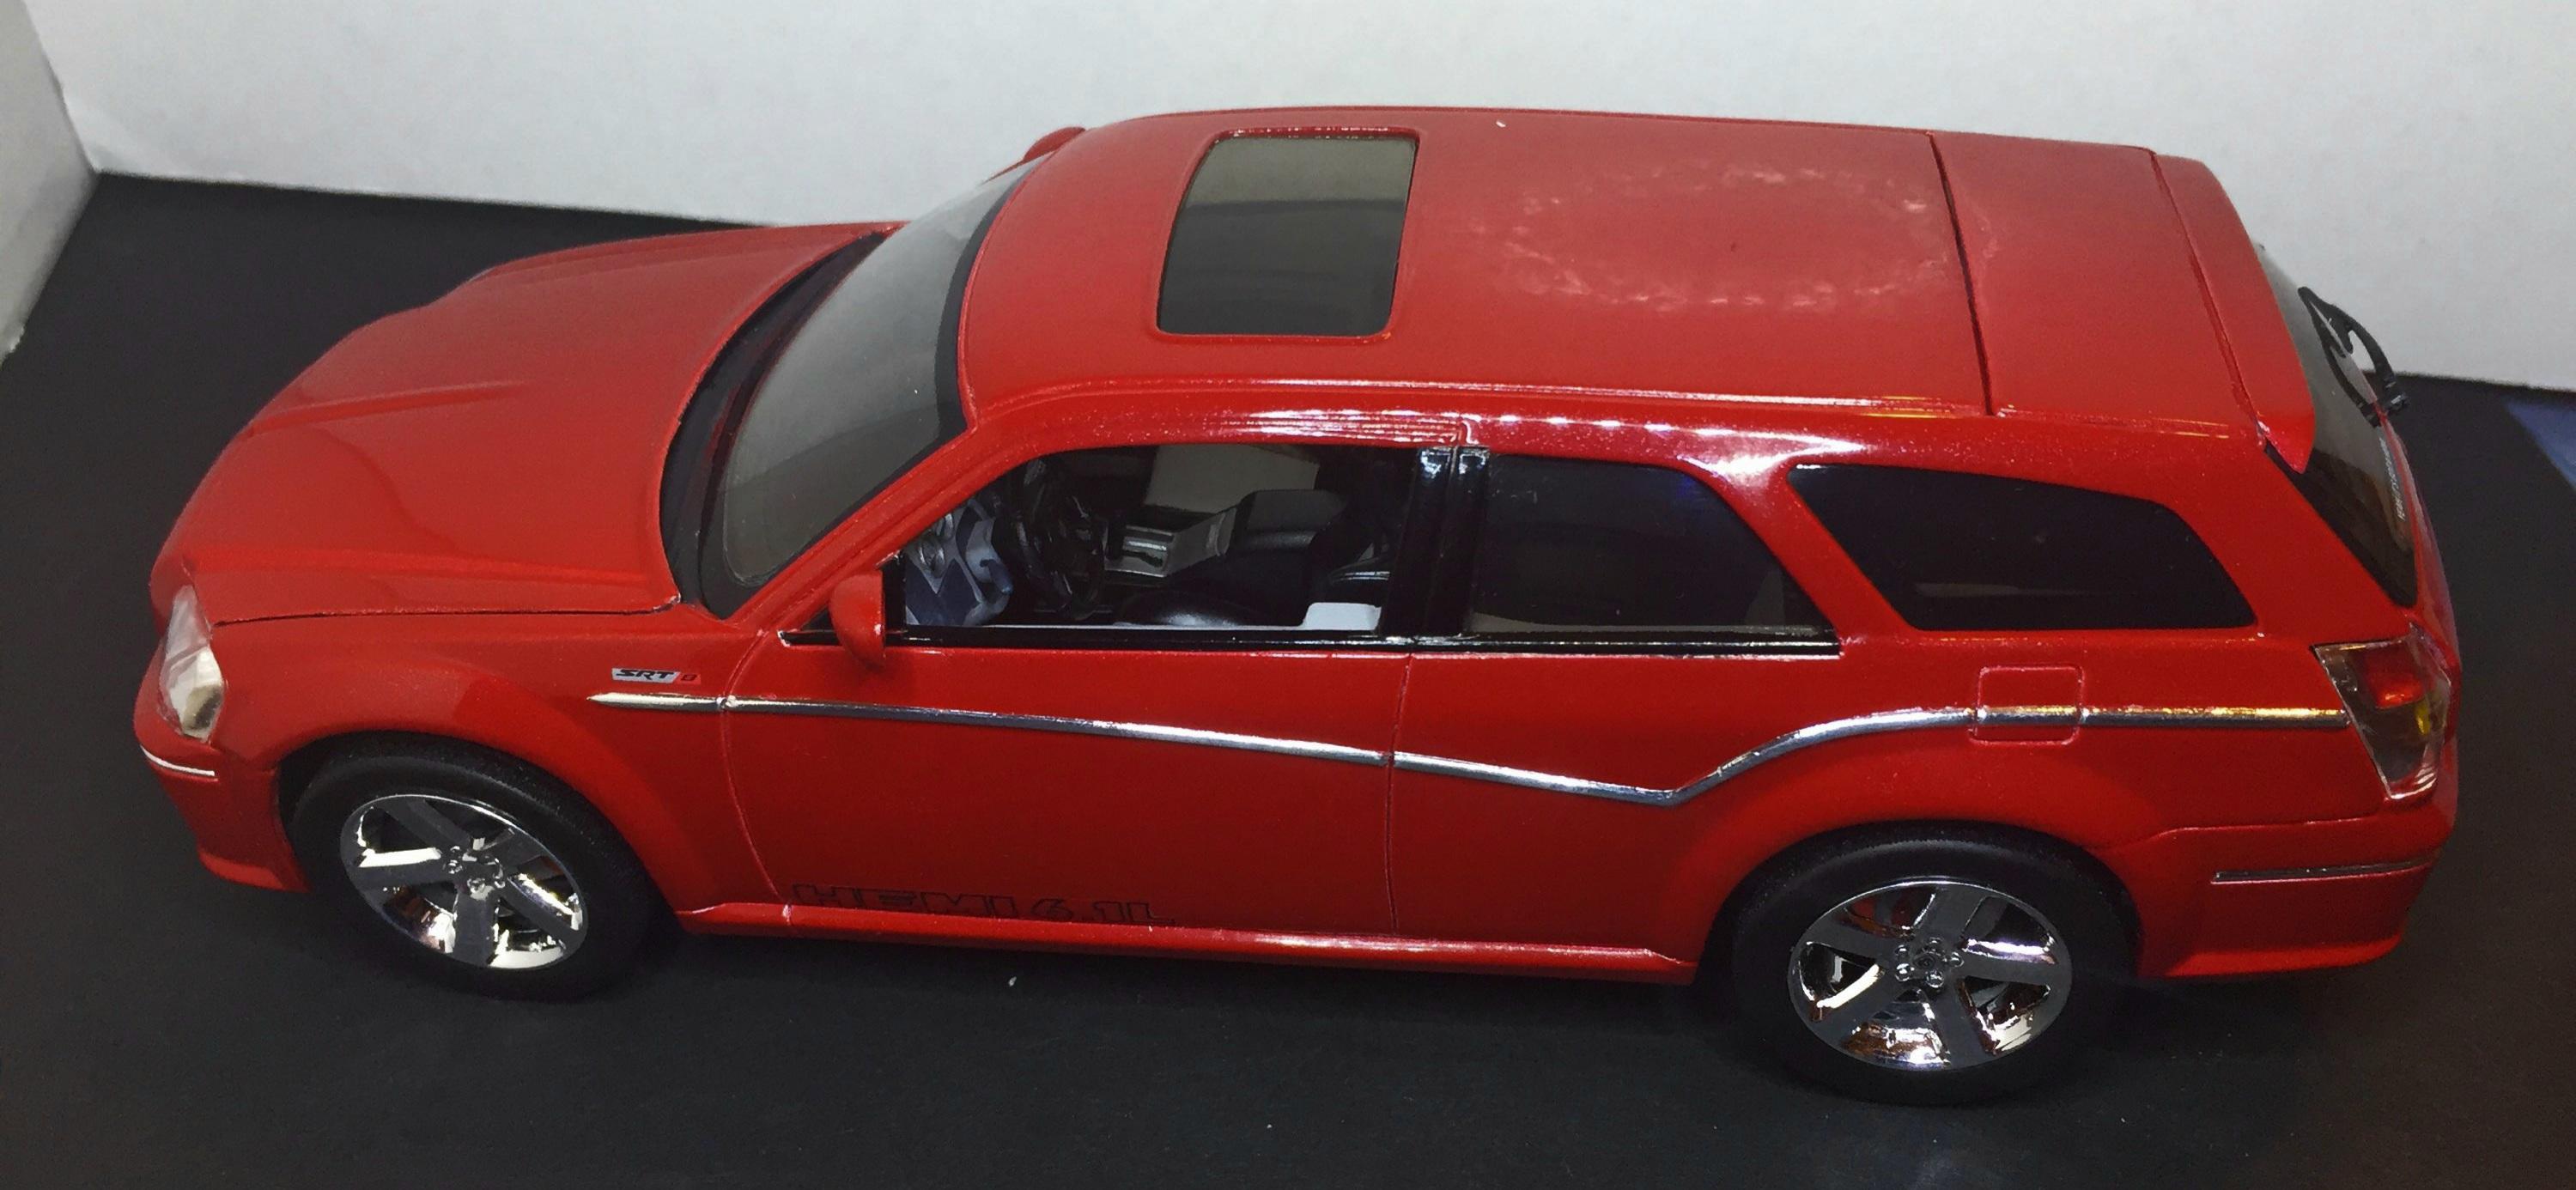
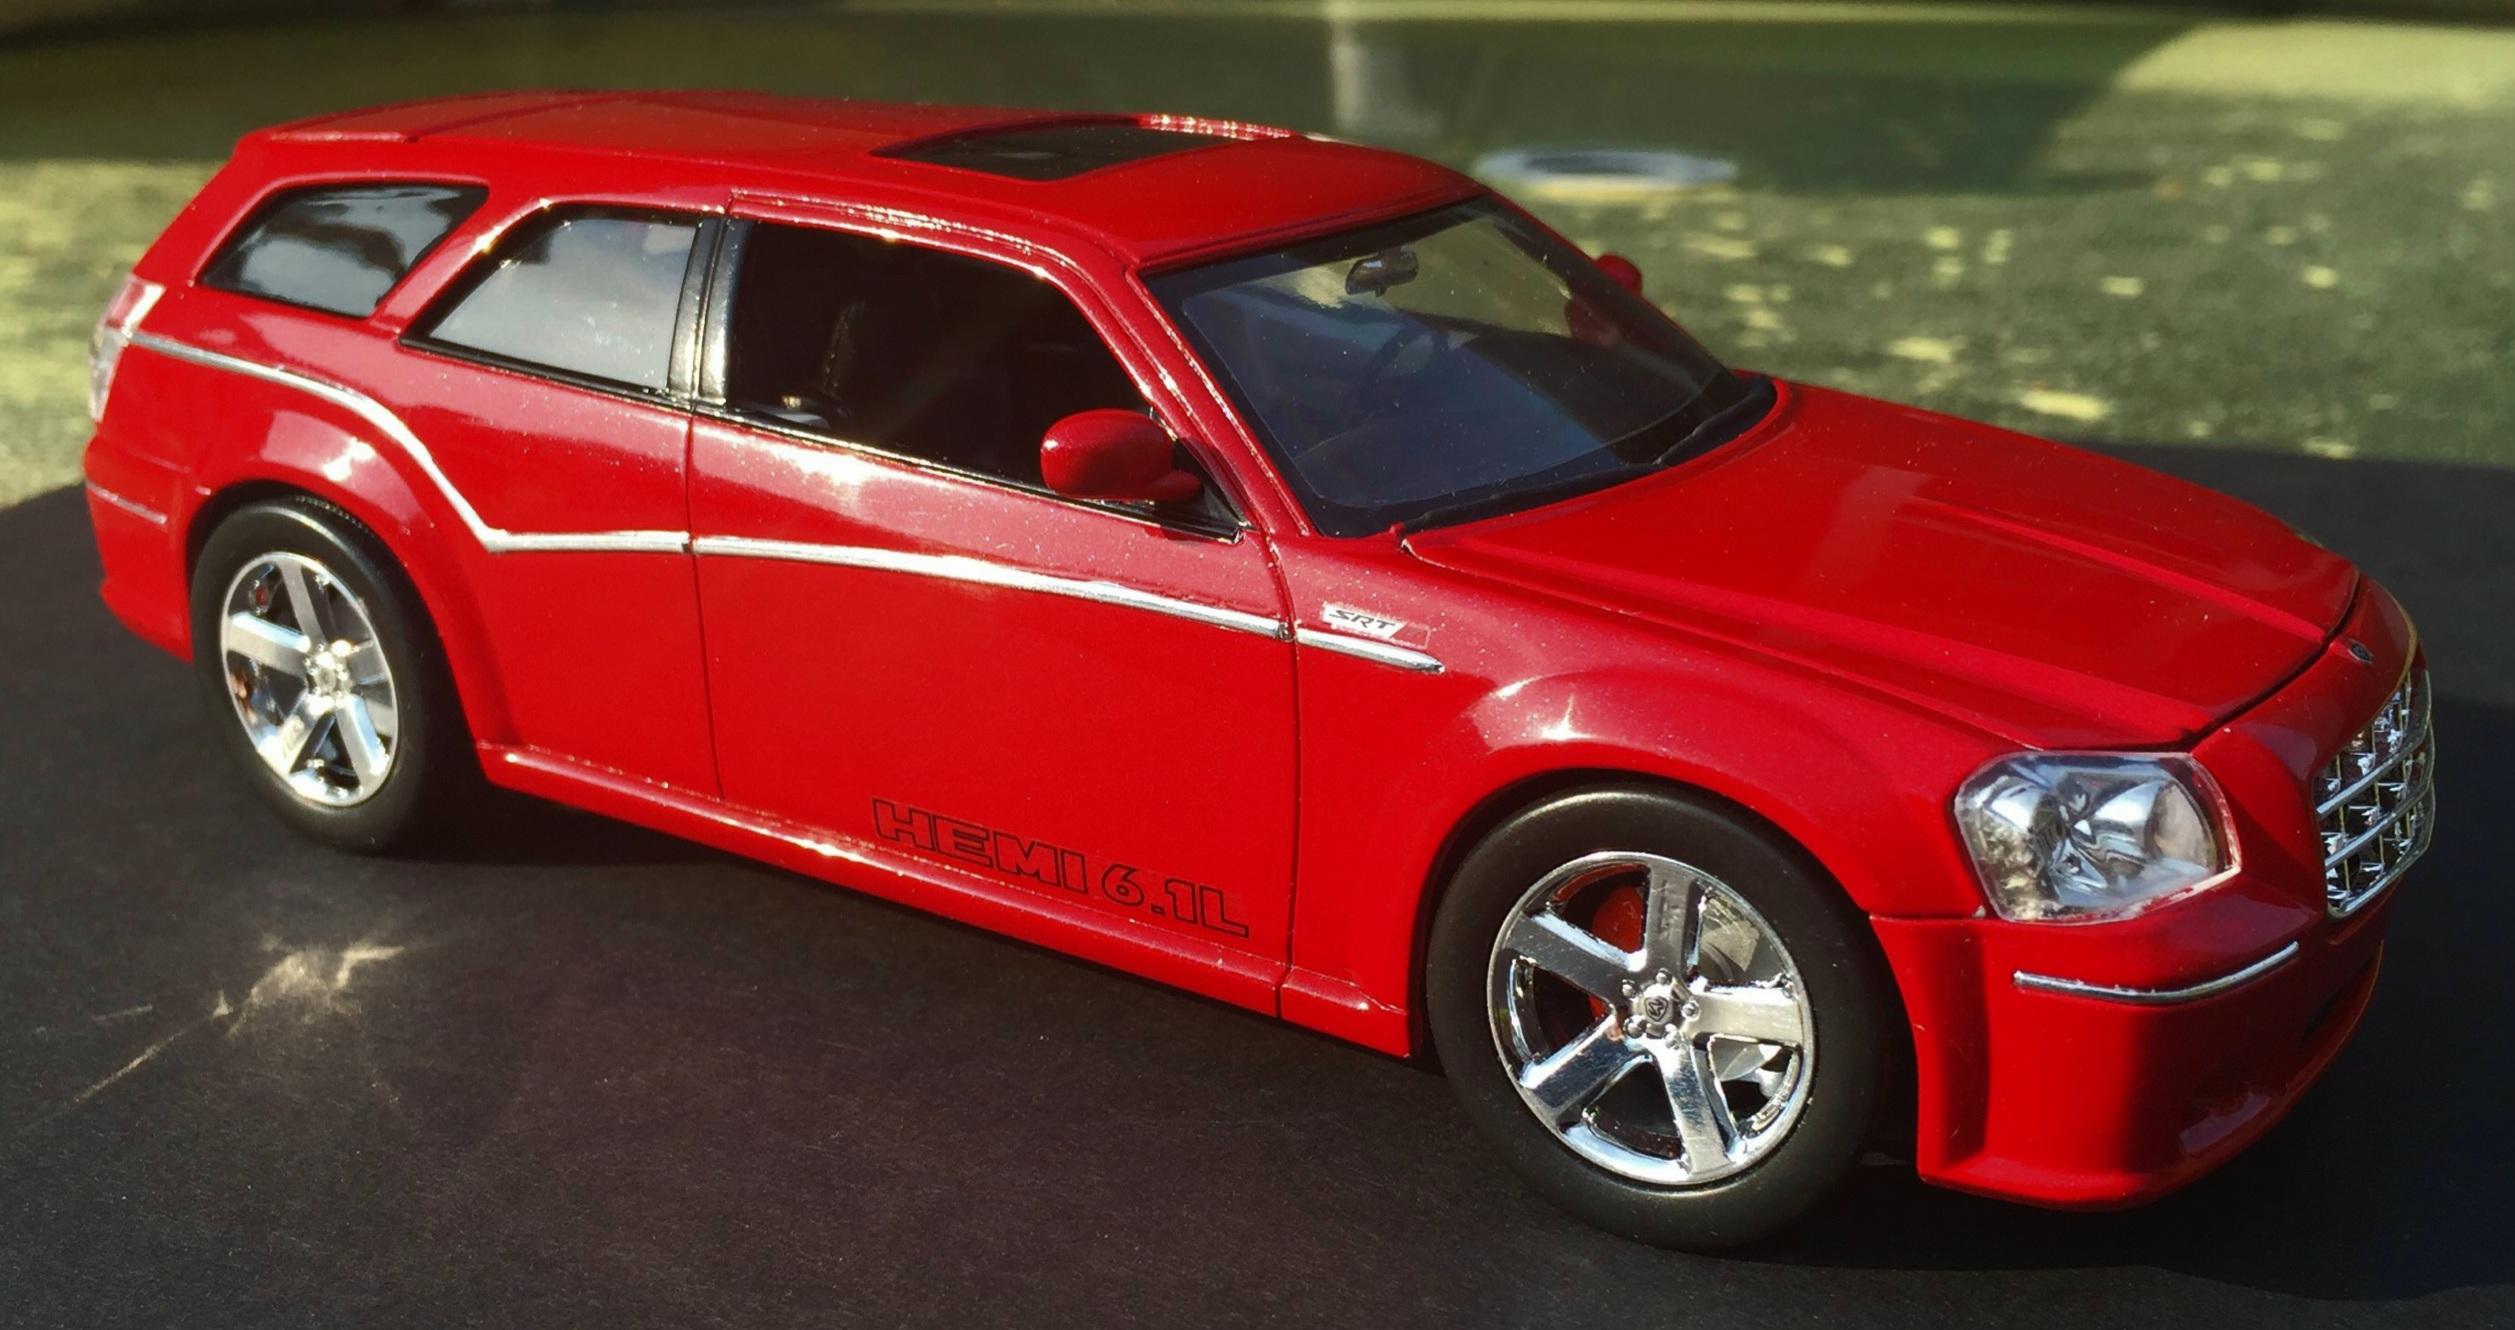
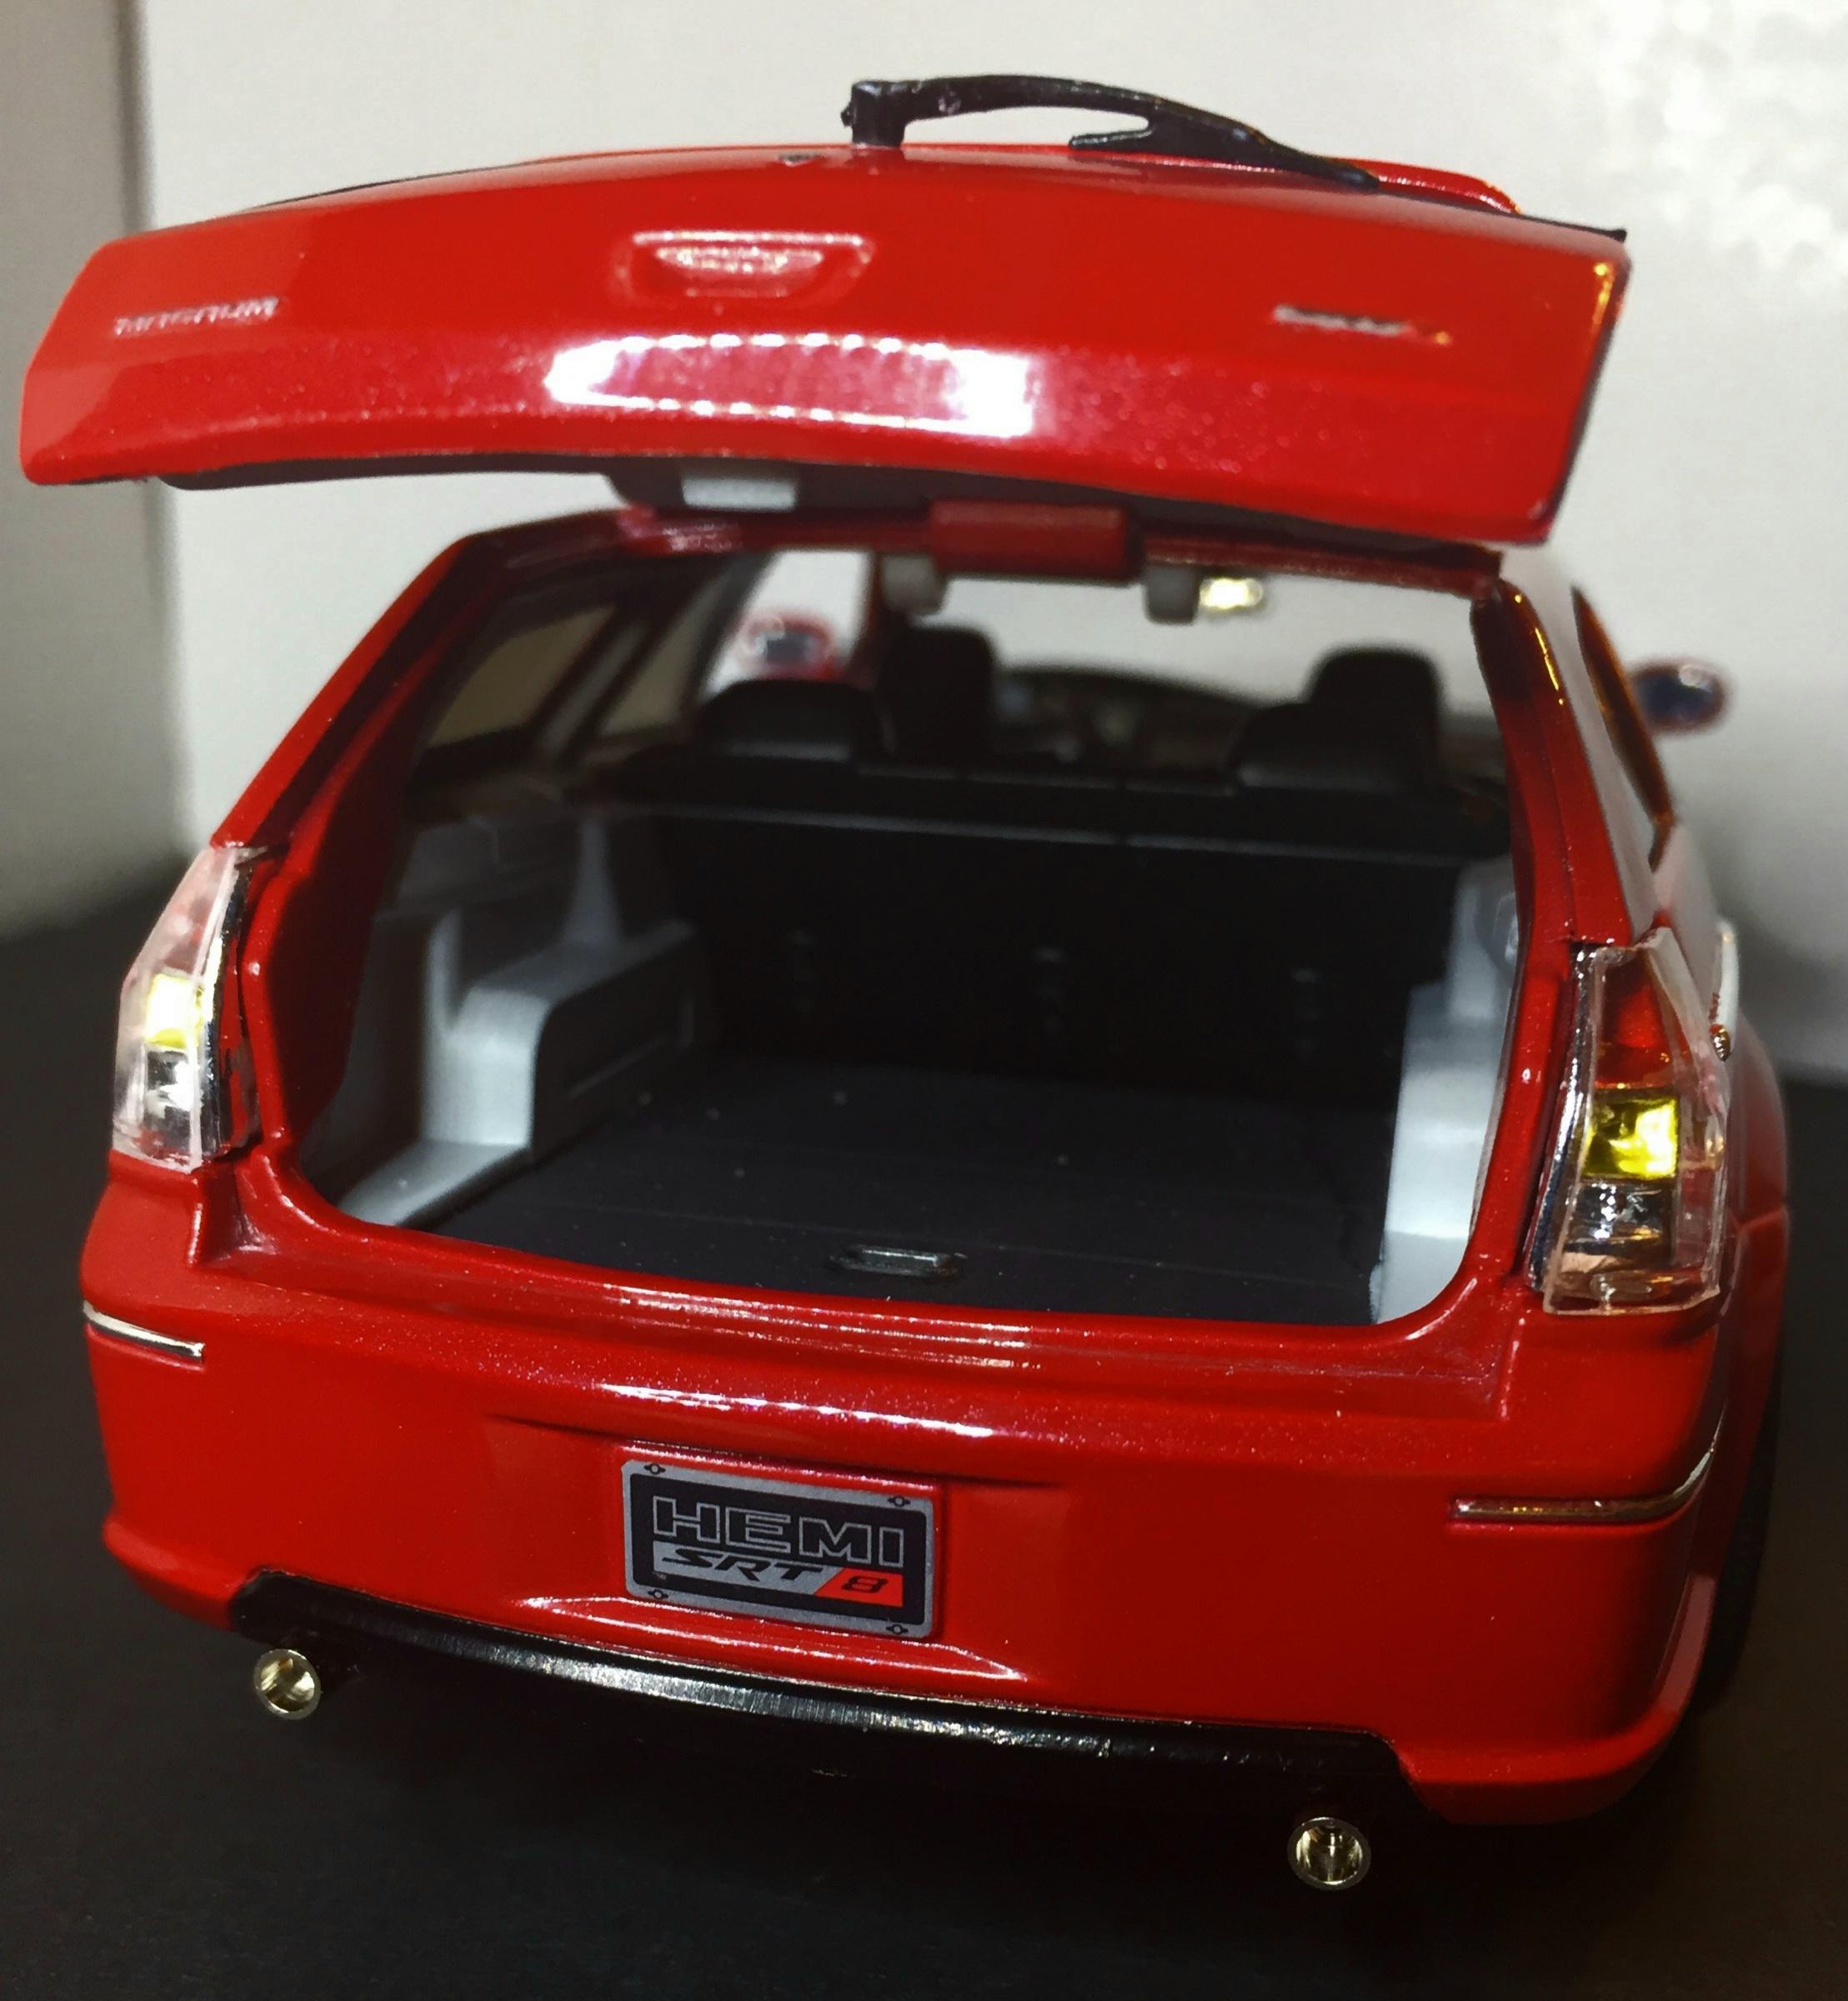
Maggie is finished. ?..... I gave it a sort of generic interior scheme, not stock - it is a custom / phantom after all. Final assembly of this kit is nothing short of amazing. The interior is assembled into a complete module and it goes together with very positive locating of the individual components. It is then installed onto the chassis and the body comes down easily over it all. This is a very well-designed kit and the perfect kit for an OOB build. Just pay attention to the details and you can win that class with ease. It comes with great decals that let go of the paper quickly and give nice detail to the engine and dash. I can't think of a single "con" about this kit. You don't need to glue the moon roof glass because it snaps in!(but I did use a bit of 5 minute epoxy, just in case). A word about the windshield - I installed it with 5ME at the top and after it was fairly solid spread a very small amount at the bottom to tighten up the slight gap but you may not experience that, it could have been just the way I did things. The main thing with this kit is how you detail it. I took some short cuts because winning contests is not what interests me. The OOB build is excellent so you can concentrate on the detailing of this dynamite subject. Everything fits and there is very little flash. It's a dream to build. Nice decals for the dash. There are some for the steering wheel but I didn't use them. Also, I lost the shifter so I gaffed one ?. There are decals that are intended for the headrests but I used them elsewhere ?
-
Is There Room For Another 41 Plymouth or Two?
customline replied to LennyB's topic in WIP: Model Cars
All this Flintstones talk just reminded me that I need to check the brakes on my truck ? -
Is There Room For Another 41 Plymouth or Two?
customline replied to LennyB's topic in WIP: Model Cars
Now that's an image I can certainly do without ?