customline
-
Posts
3,792 -
Joined
-
Last visited
Content Type
Profiles
Forums
Events
Gallery
Everything posted by customline
-
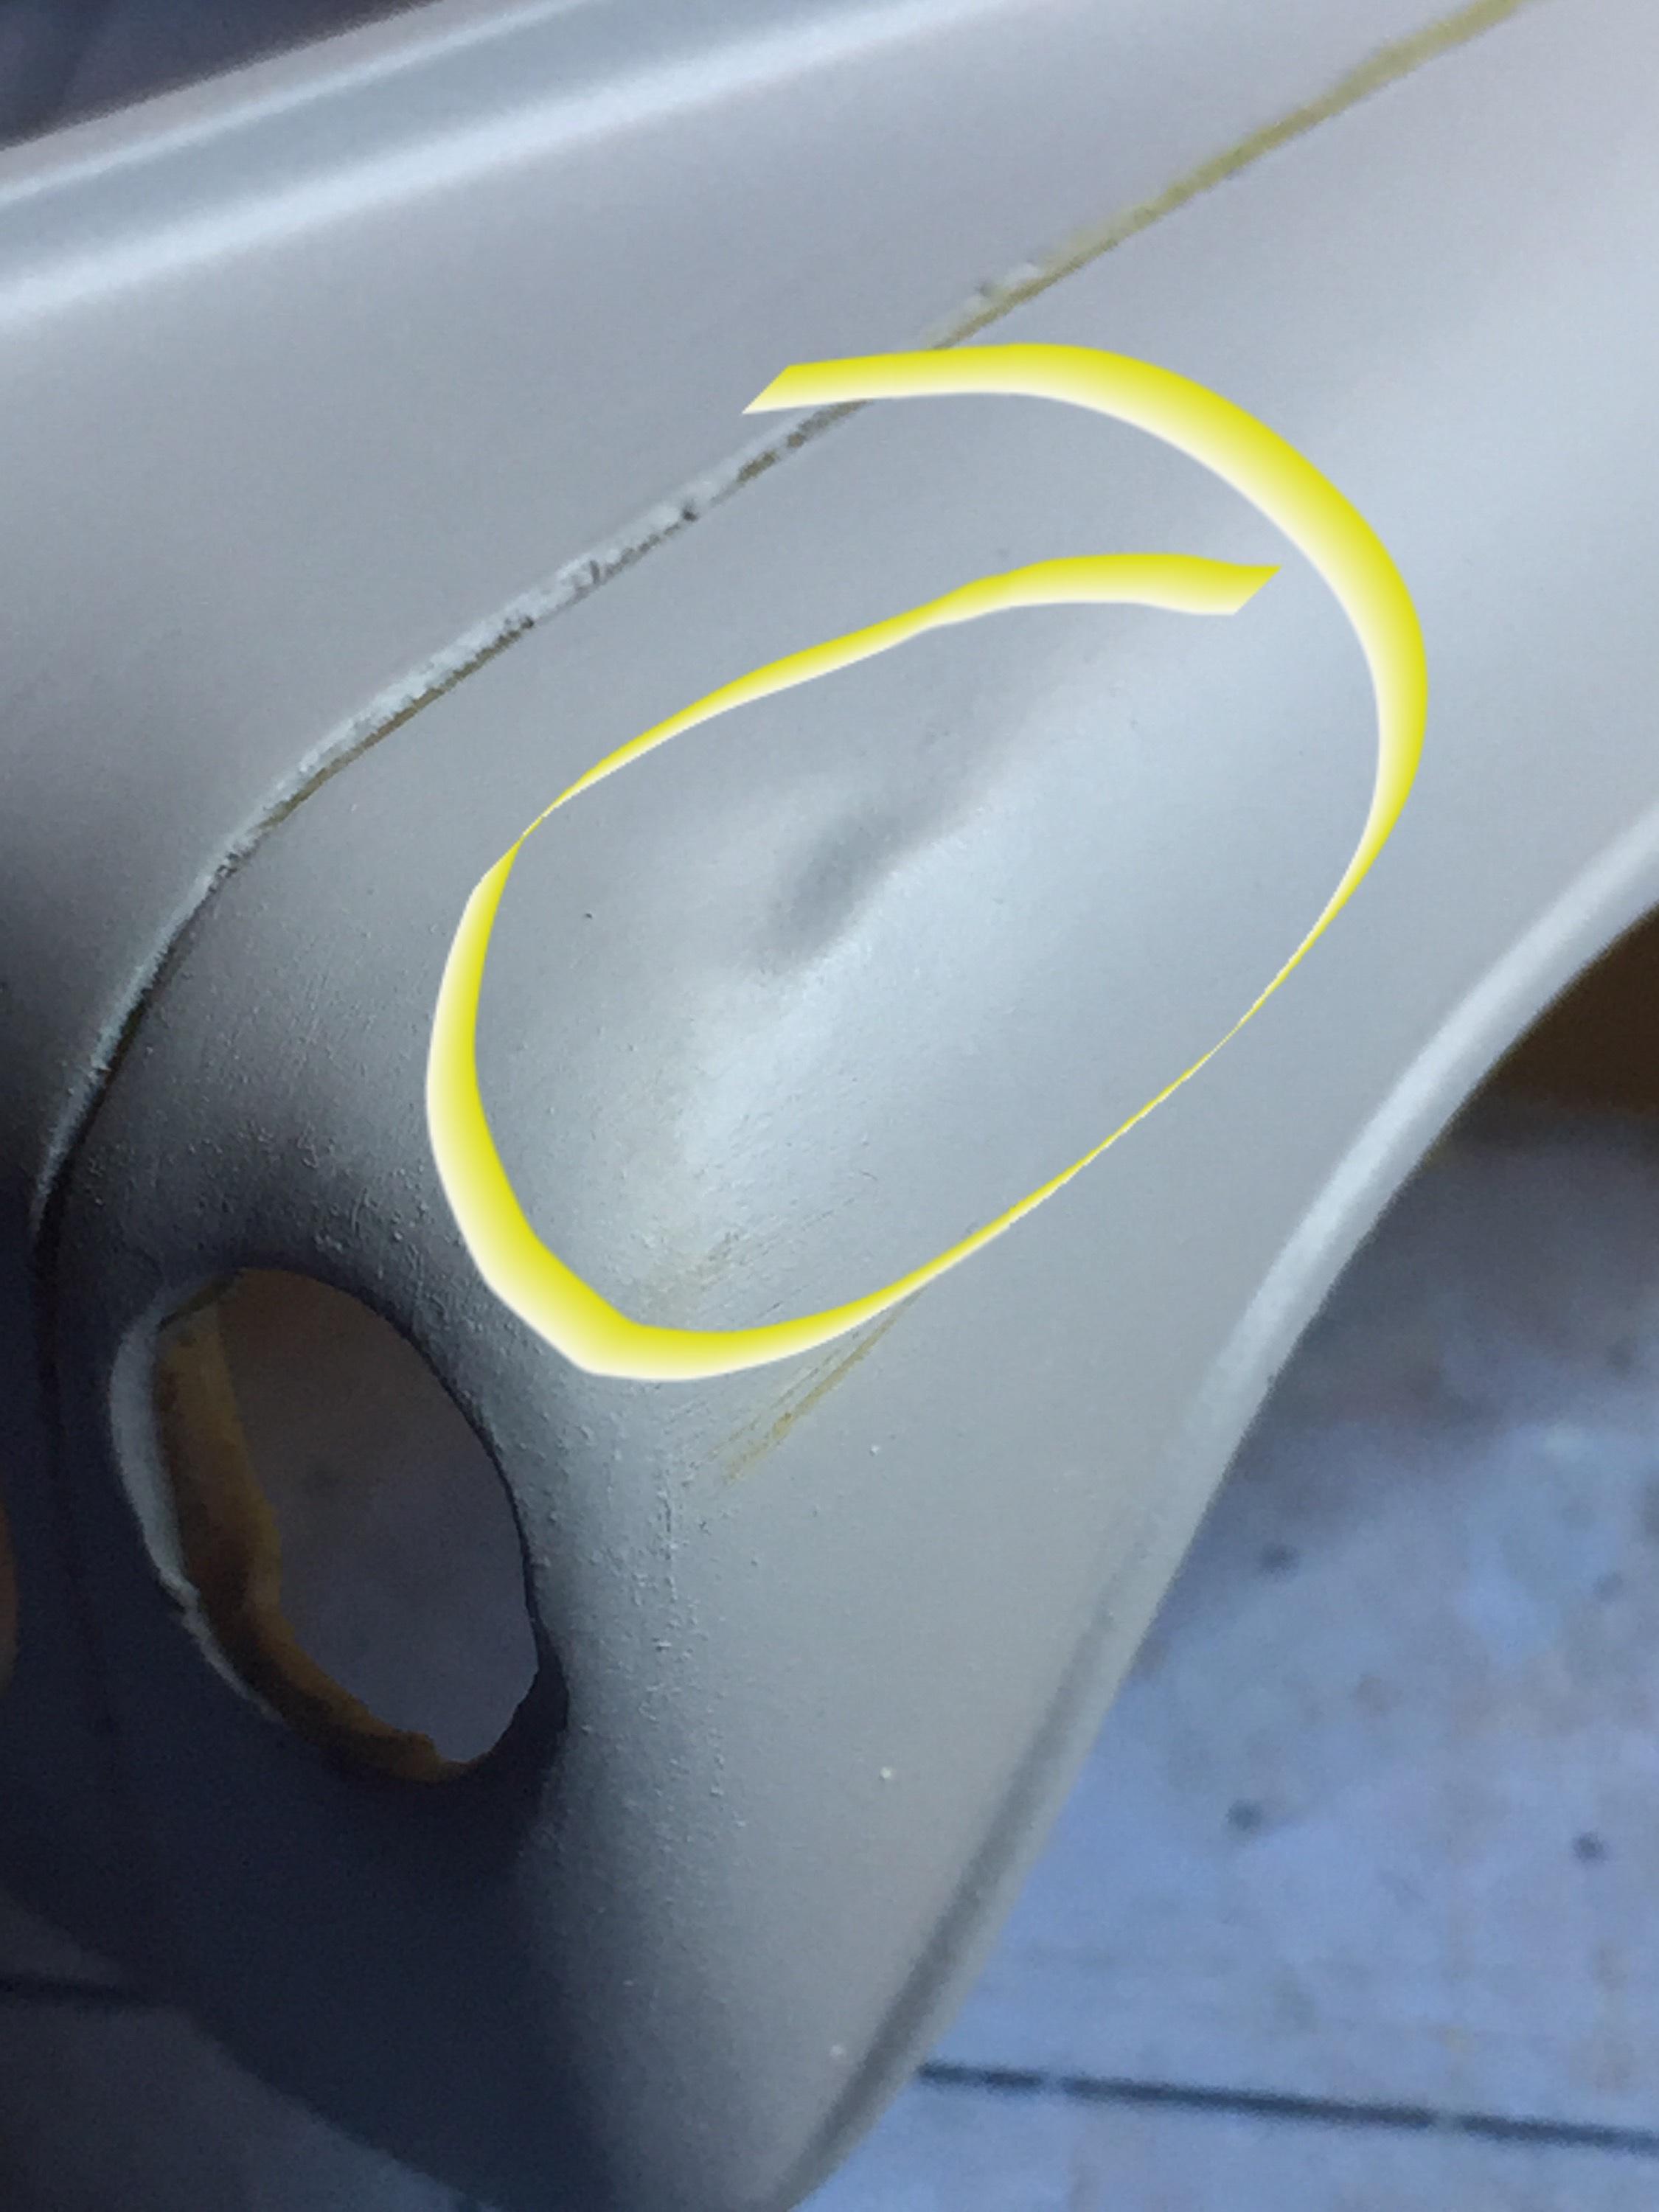
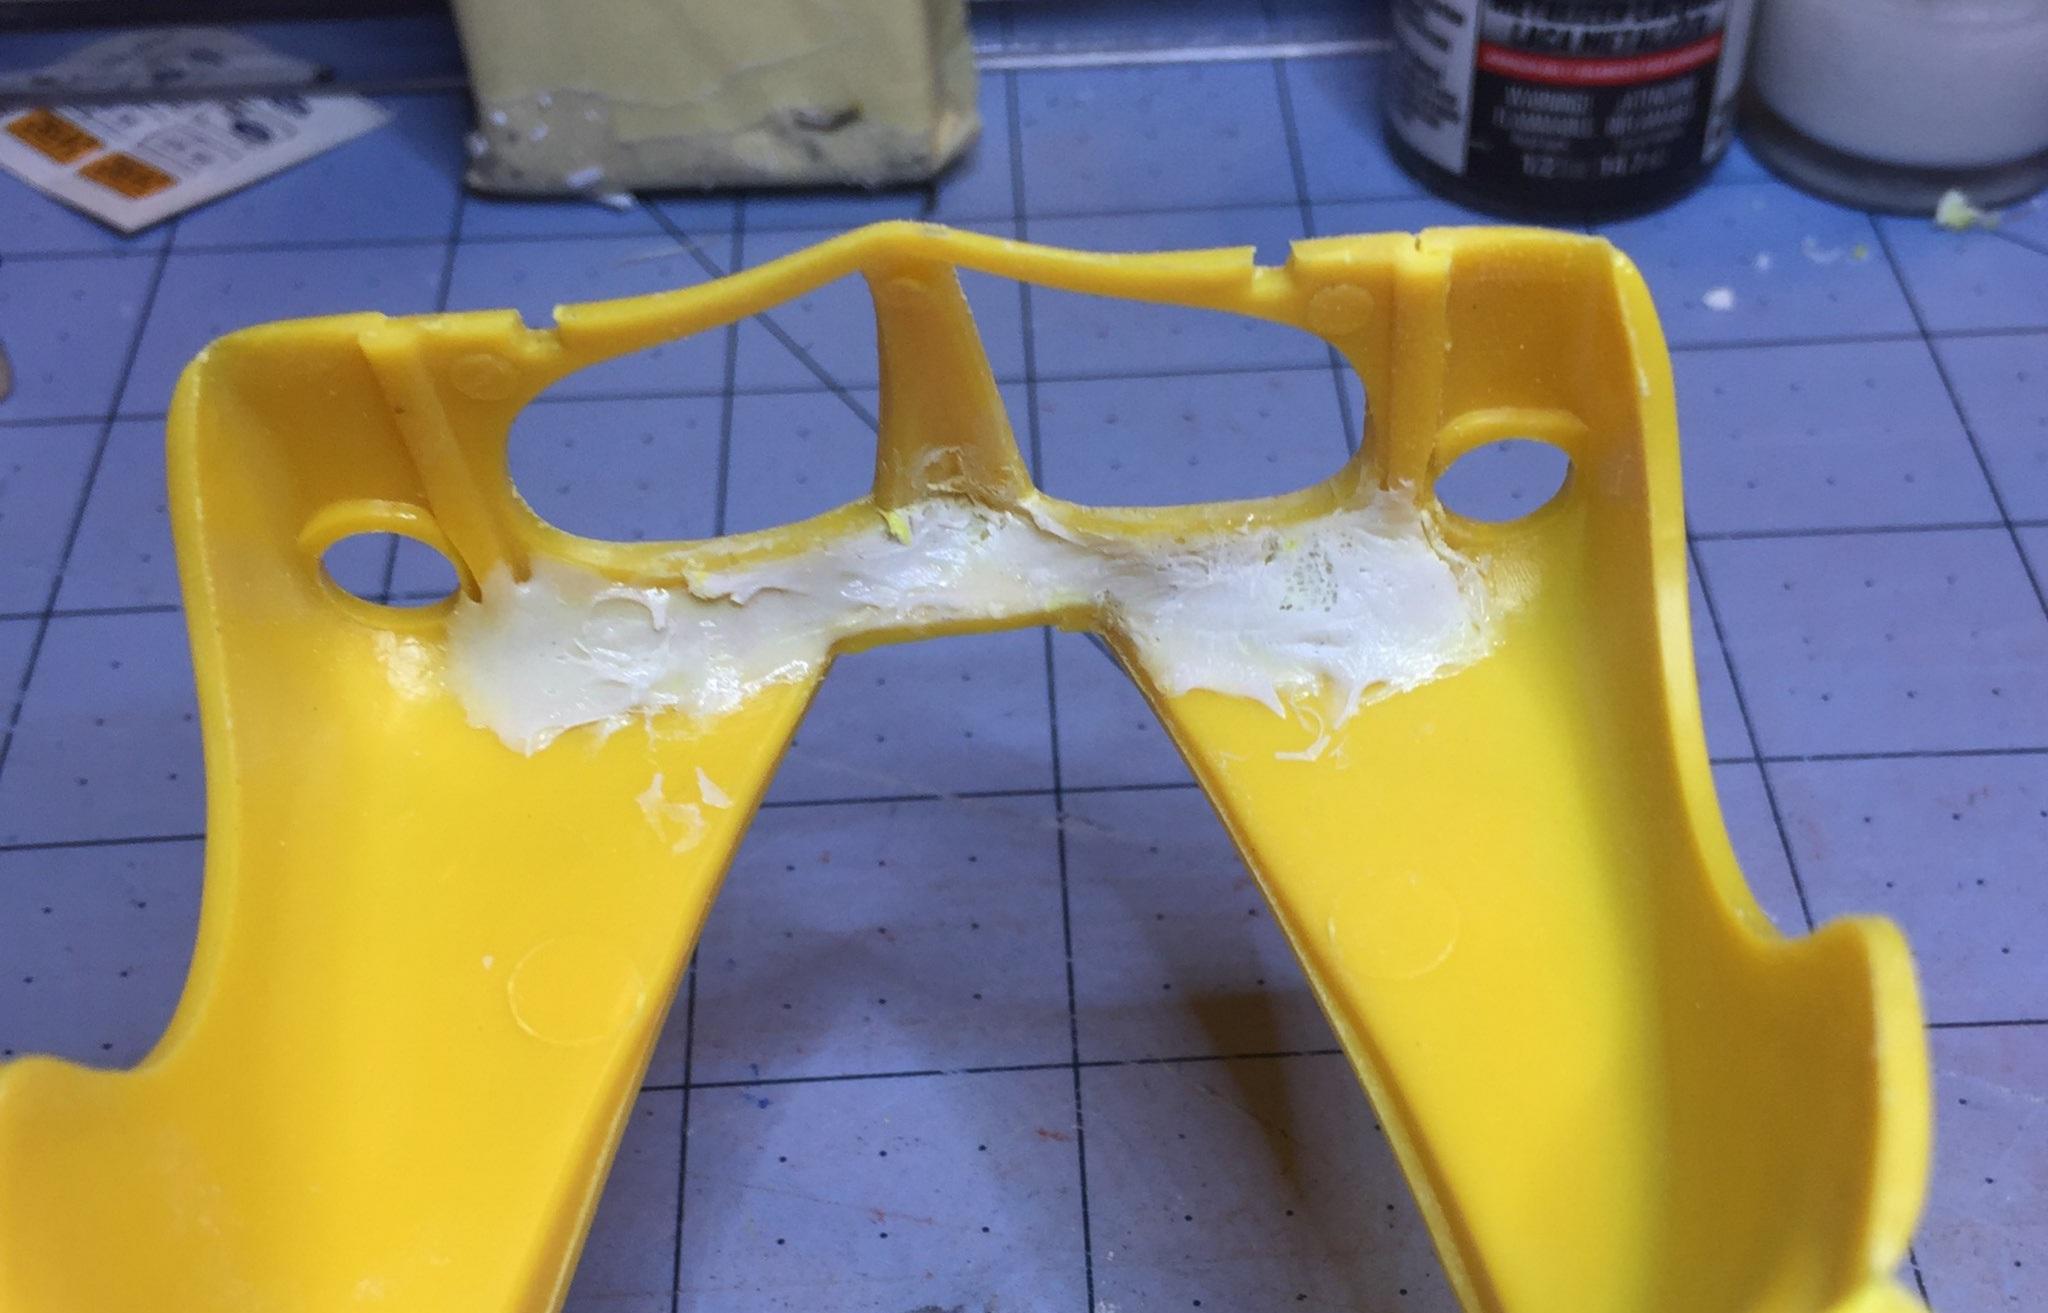
I won't use model putty of any brand due to the shrinkage issue but the solvents can be a problem when used in heavy applications. This was my first adventure with sprue-goo and I was lucky to get away with very little damage. It didn't dawn on me what I was fooling with. My plan was to have some styrene back-up in case I went through the fender (which I did). It's all good, though. The damage is in the wrong place to be legit believable dent so I gotta fix it. Gotta love it, though. Can't wait to employ the technique ?.
-
The gasser has a street hemi from (probably) a Revell kit, maybe the '68 Charger kit? I don't know, Carl. I wish I could tell you with certainty but it was years ago. Maybe someone here will recognize it

-
Yes indeed, David. It's my first time using sprue filler. Lesson one: use sparingly ?.
-
Yup. Pretty cool, huh? ?
-
I was not totally happy with the contour after priming. I wanted to start the slope of the fenders a little farther back so I added more sprue-goo and set aside to dry. Tonight I checked to see if it was hard....yes it was.....but there was a ? surprise waiting for me. A nice little dent. So I thought "the wife did it backing out of the garage"....I will leave it for a touch of realism. And then I thought "what a great way to inflict a little collision damage for a patina job". ?
-
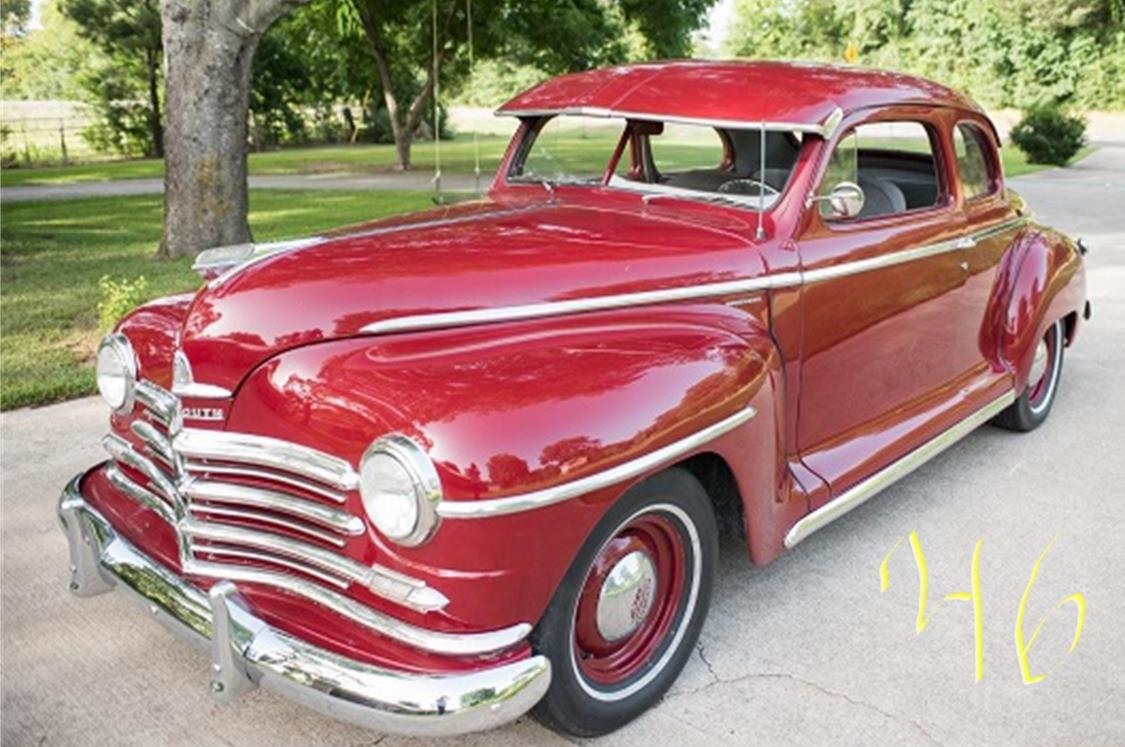
Those funky fenders on the '41 are embarrassing. They did better in '42 and, luckily, those carry over. Looks-wise, they seem to have the same biz coupe body from the firewall back from maybe '38 all the way to '48. From '42 to '48, they have a four-seater coupe that has a different greenhouse along side the older biz coupe. They also cover the boards from '42 on. Post-war Plymouths were everywhere. They were the lowest of "the low-price three" and it seemed there was still plenty of them around in 1970. I got my '39 coupe out of a junkyard for $75.00 ? and a 4-door parts car for $25.00. Those were the days.
-
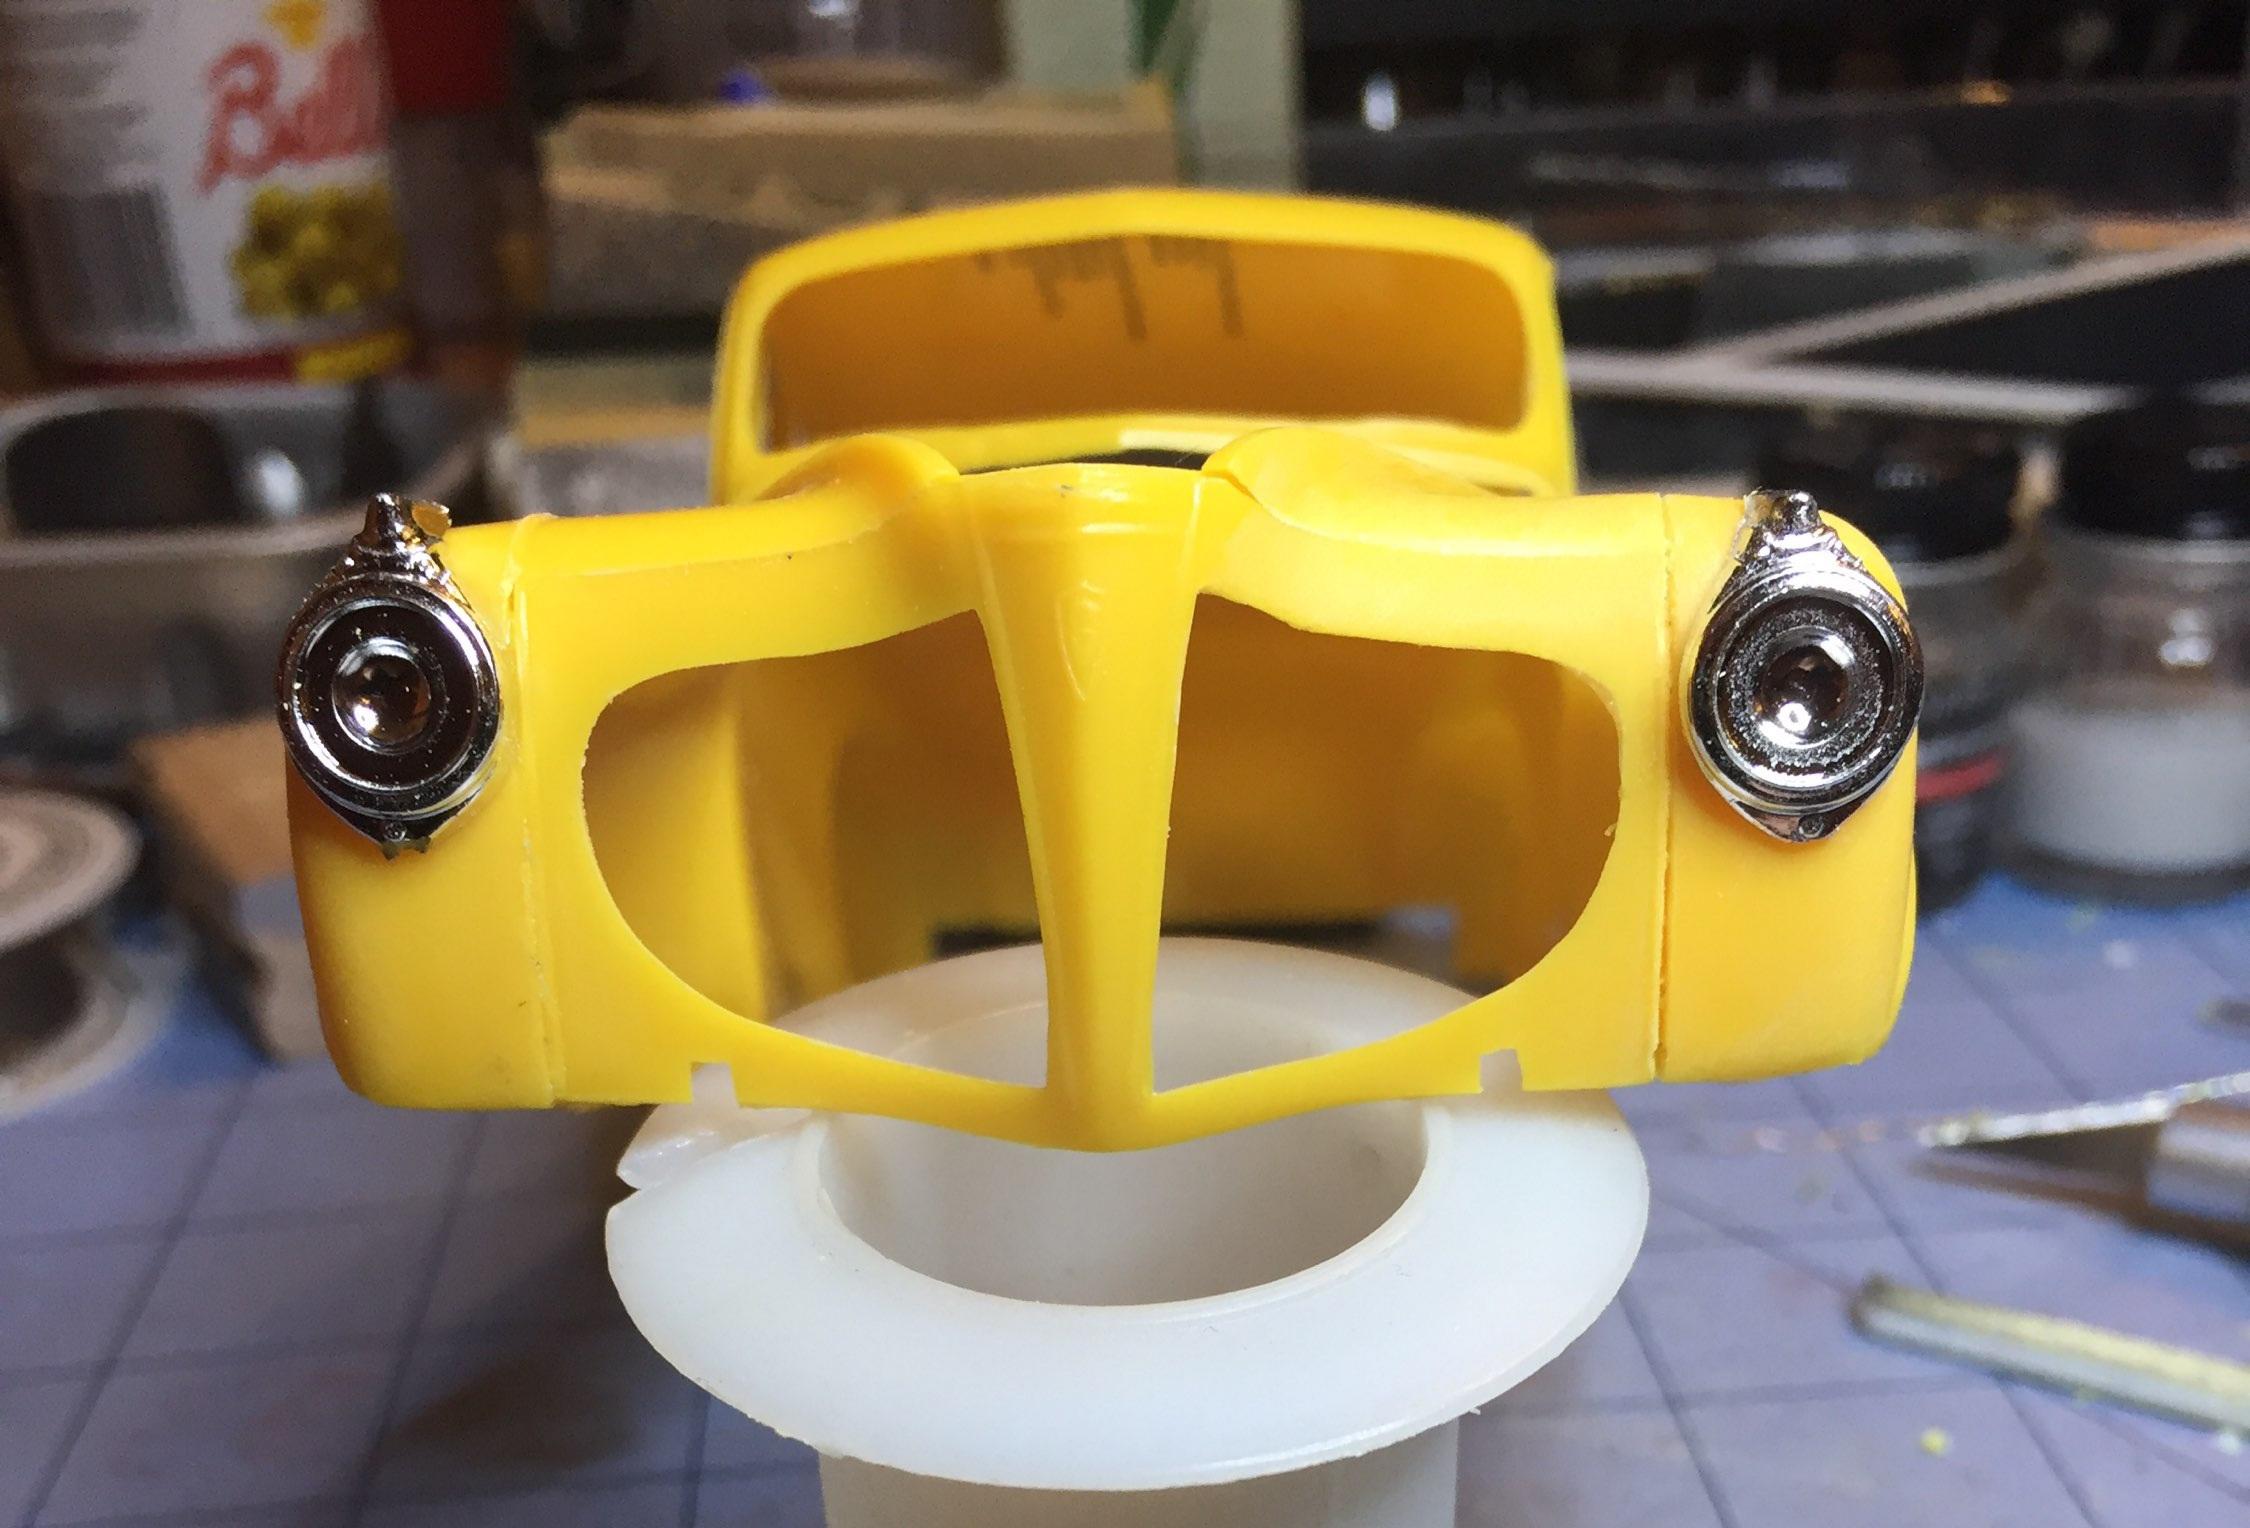
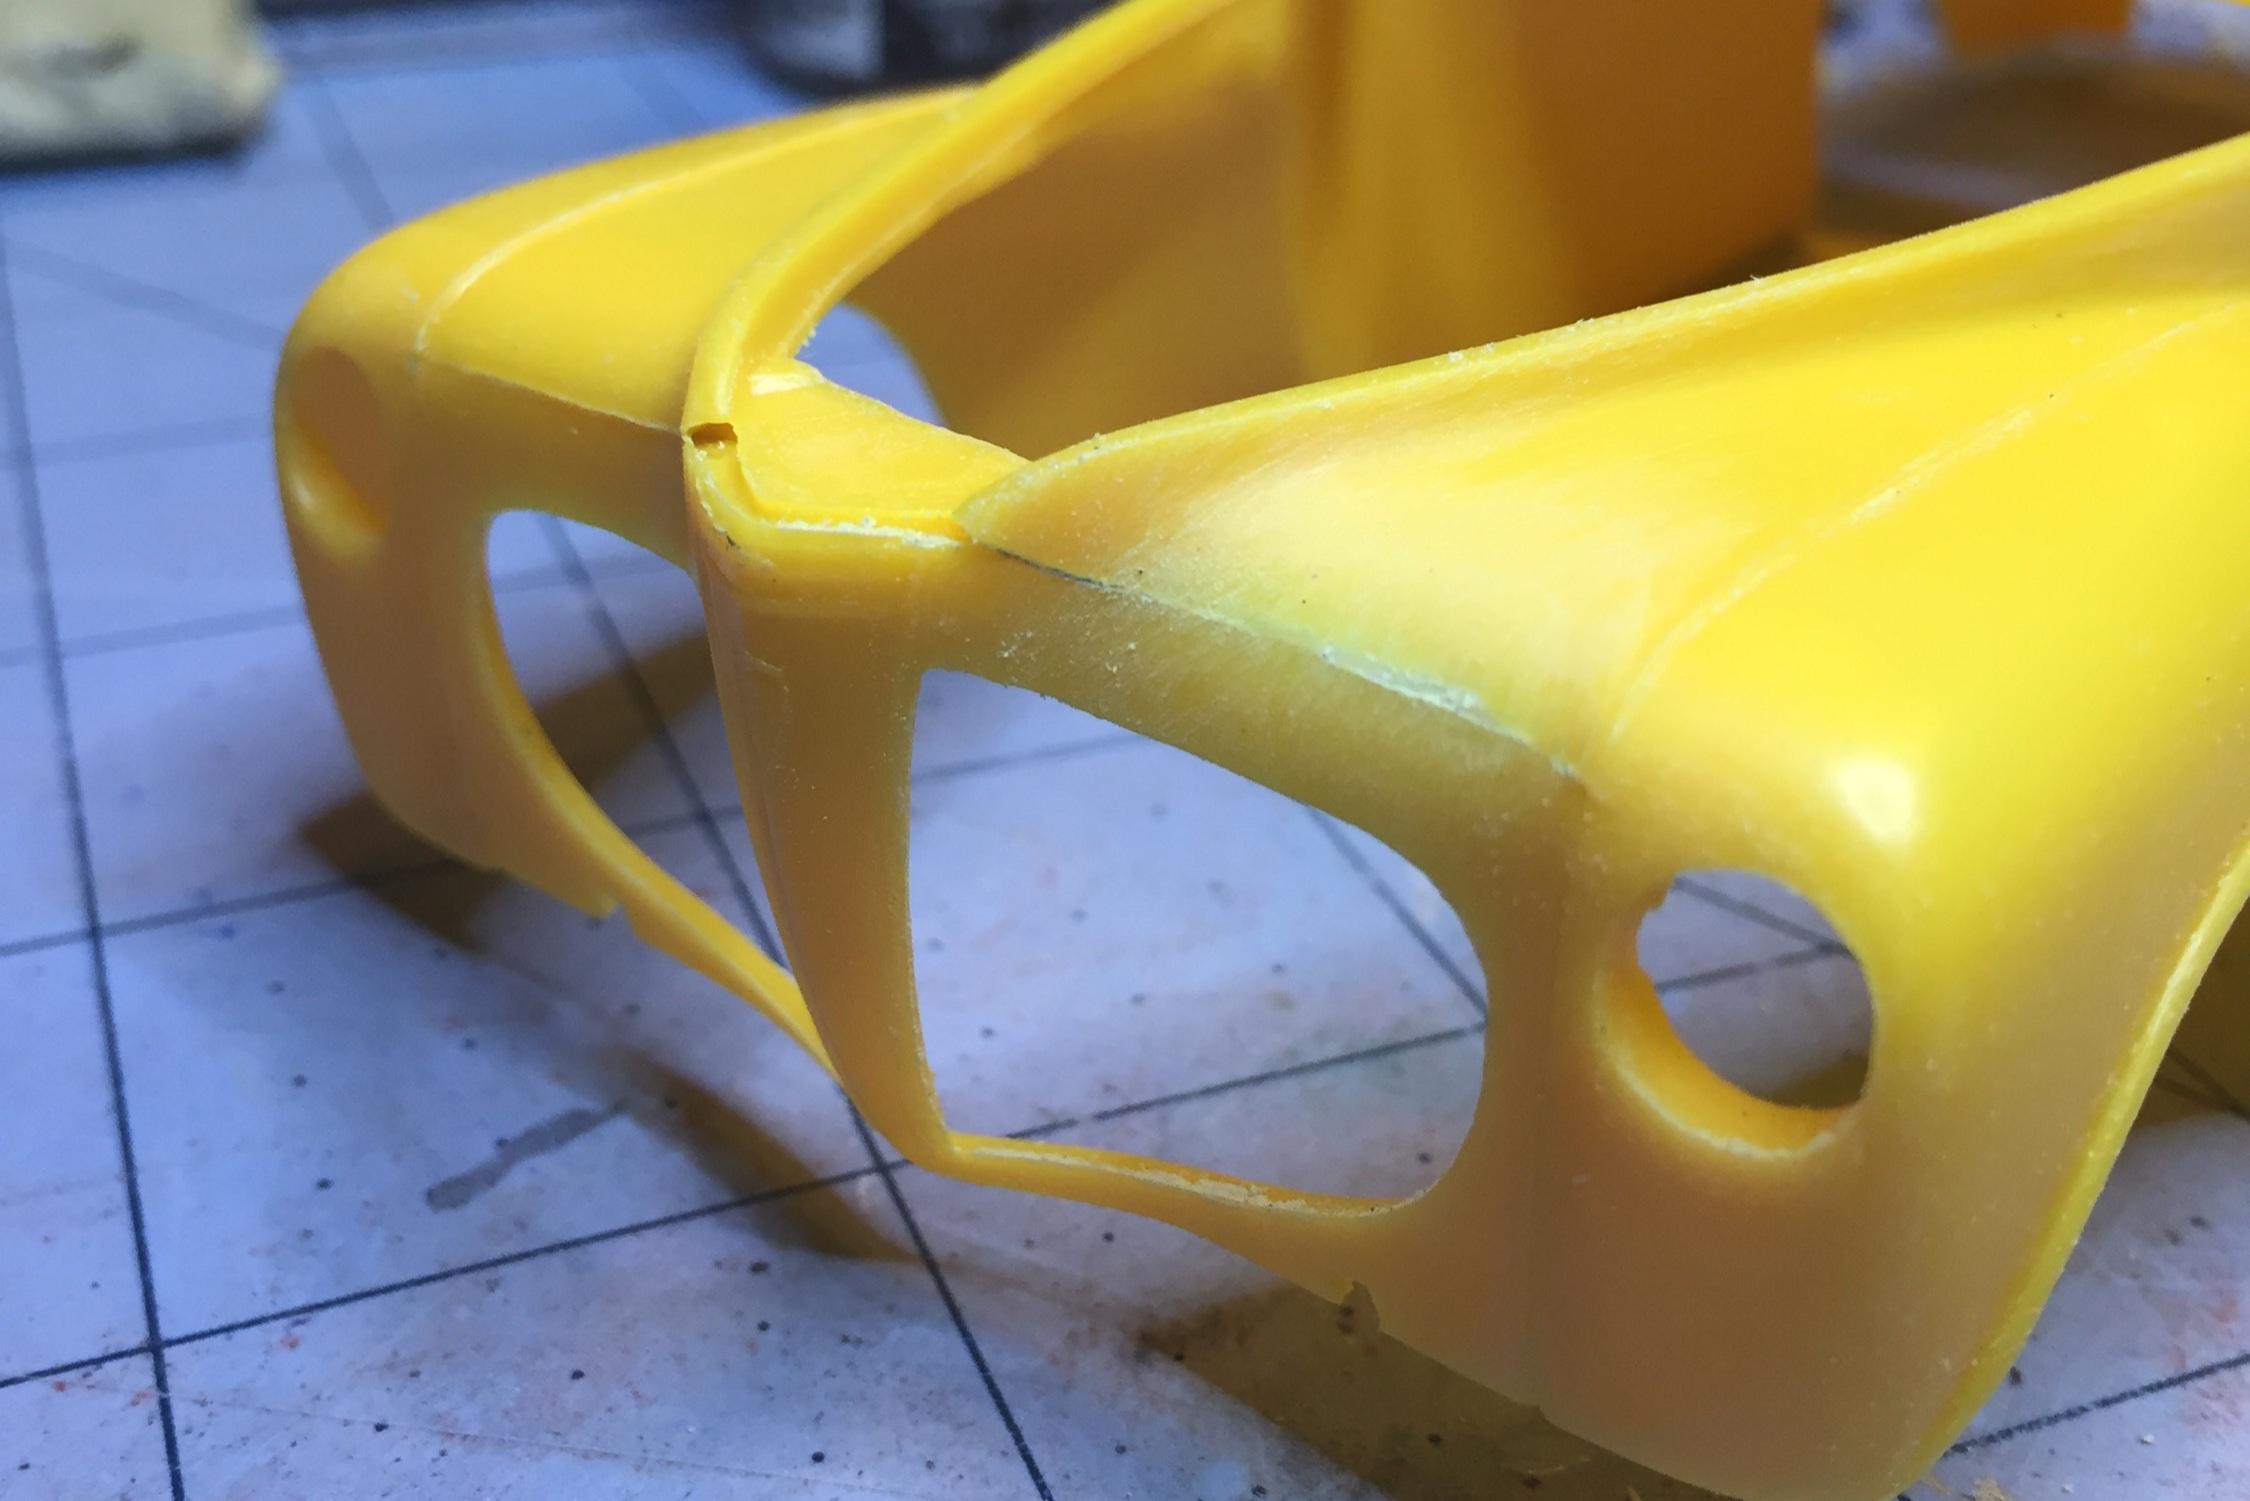
Worked on the right side today. My Micro made quick work of it and I got a little primer on it. Worked it a little more with a black stick followed by a blue one and more fine surface gray. I'm close but playing a light beam across the contour at different angles will guide me while tweaking it. Then the other light bezel gets worked. I anticipate some filling with Mr Surfacer to bring it all home but it looks like it's gonna work to my satisfaction. It's extra work but should prove to be worth the effort. Also, I removed the .023 solder from the left side and I will be replacing it with Evergreen or Plastruct rod (David G. again, folks ?) for a better look. This modification will necessitate a lot of priming and sanding but that's the game. I want what I want. Some will think it isn't worth the work but others will, and just enjoy doing it. ?. after looking at these photos(now) I see I need to replace that top trim piece that's messed up (maybe I did that?? ?)
-
I think Ace nailed it, Dave. It's just how things had to be done to facilitate the molding process. The '46 model, I believe, is new sheet metal. We're gonna find out, though. Wait for it..... You may be able to turn the '41 into a '46.....maaaaaaybe. the greenhouse looks the same on that top photo. You have to mess with the fenders quite a bit but the general shape is there. The grille would be a labor of pure love. The chassis could go as is. Bumpers from the stash. Gotta cover the running boards.....the headlights would be easy ?. Fun! Ya know.........?
-
I'm just trying to get this old Mopar to look more like what it's supposed to be. It's not one of AMT's best but I will build it the best way I can. The kit is just raw material.
-
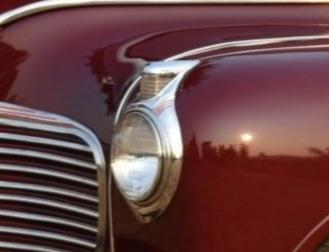
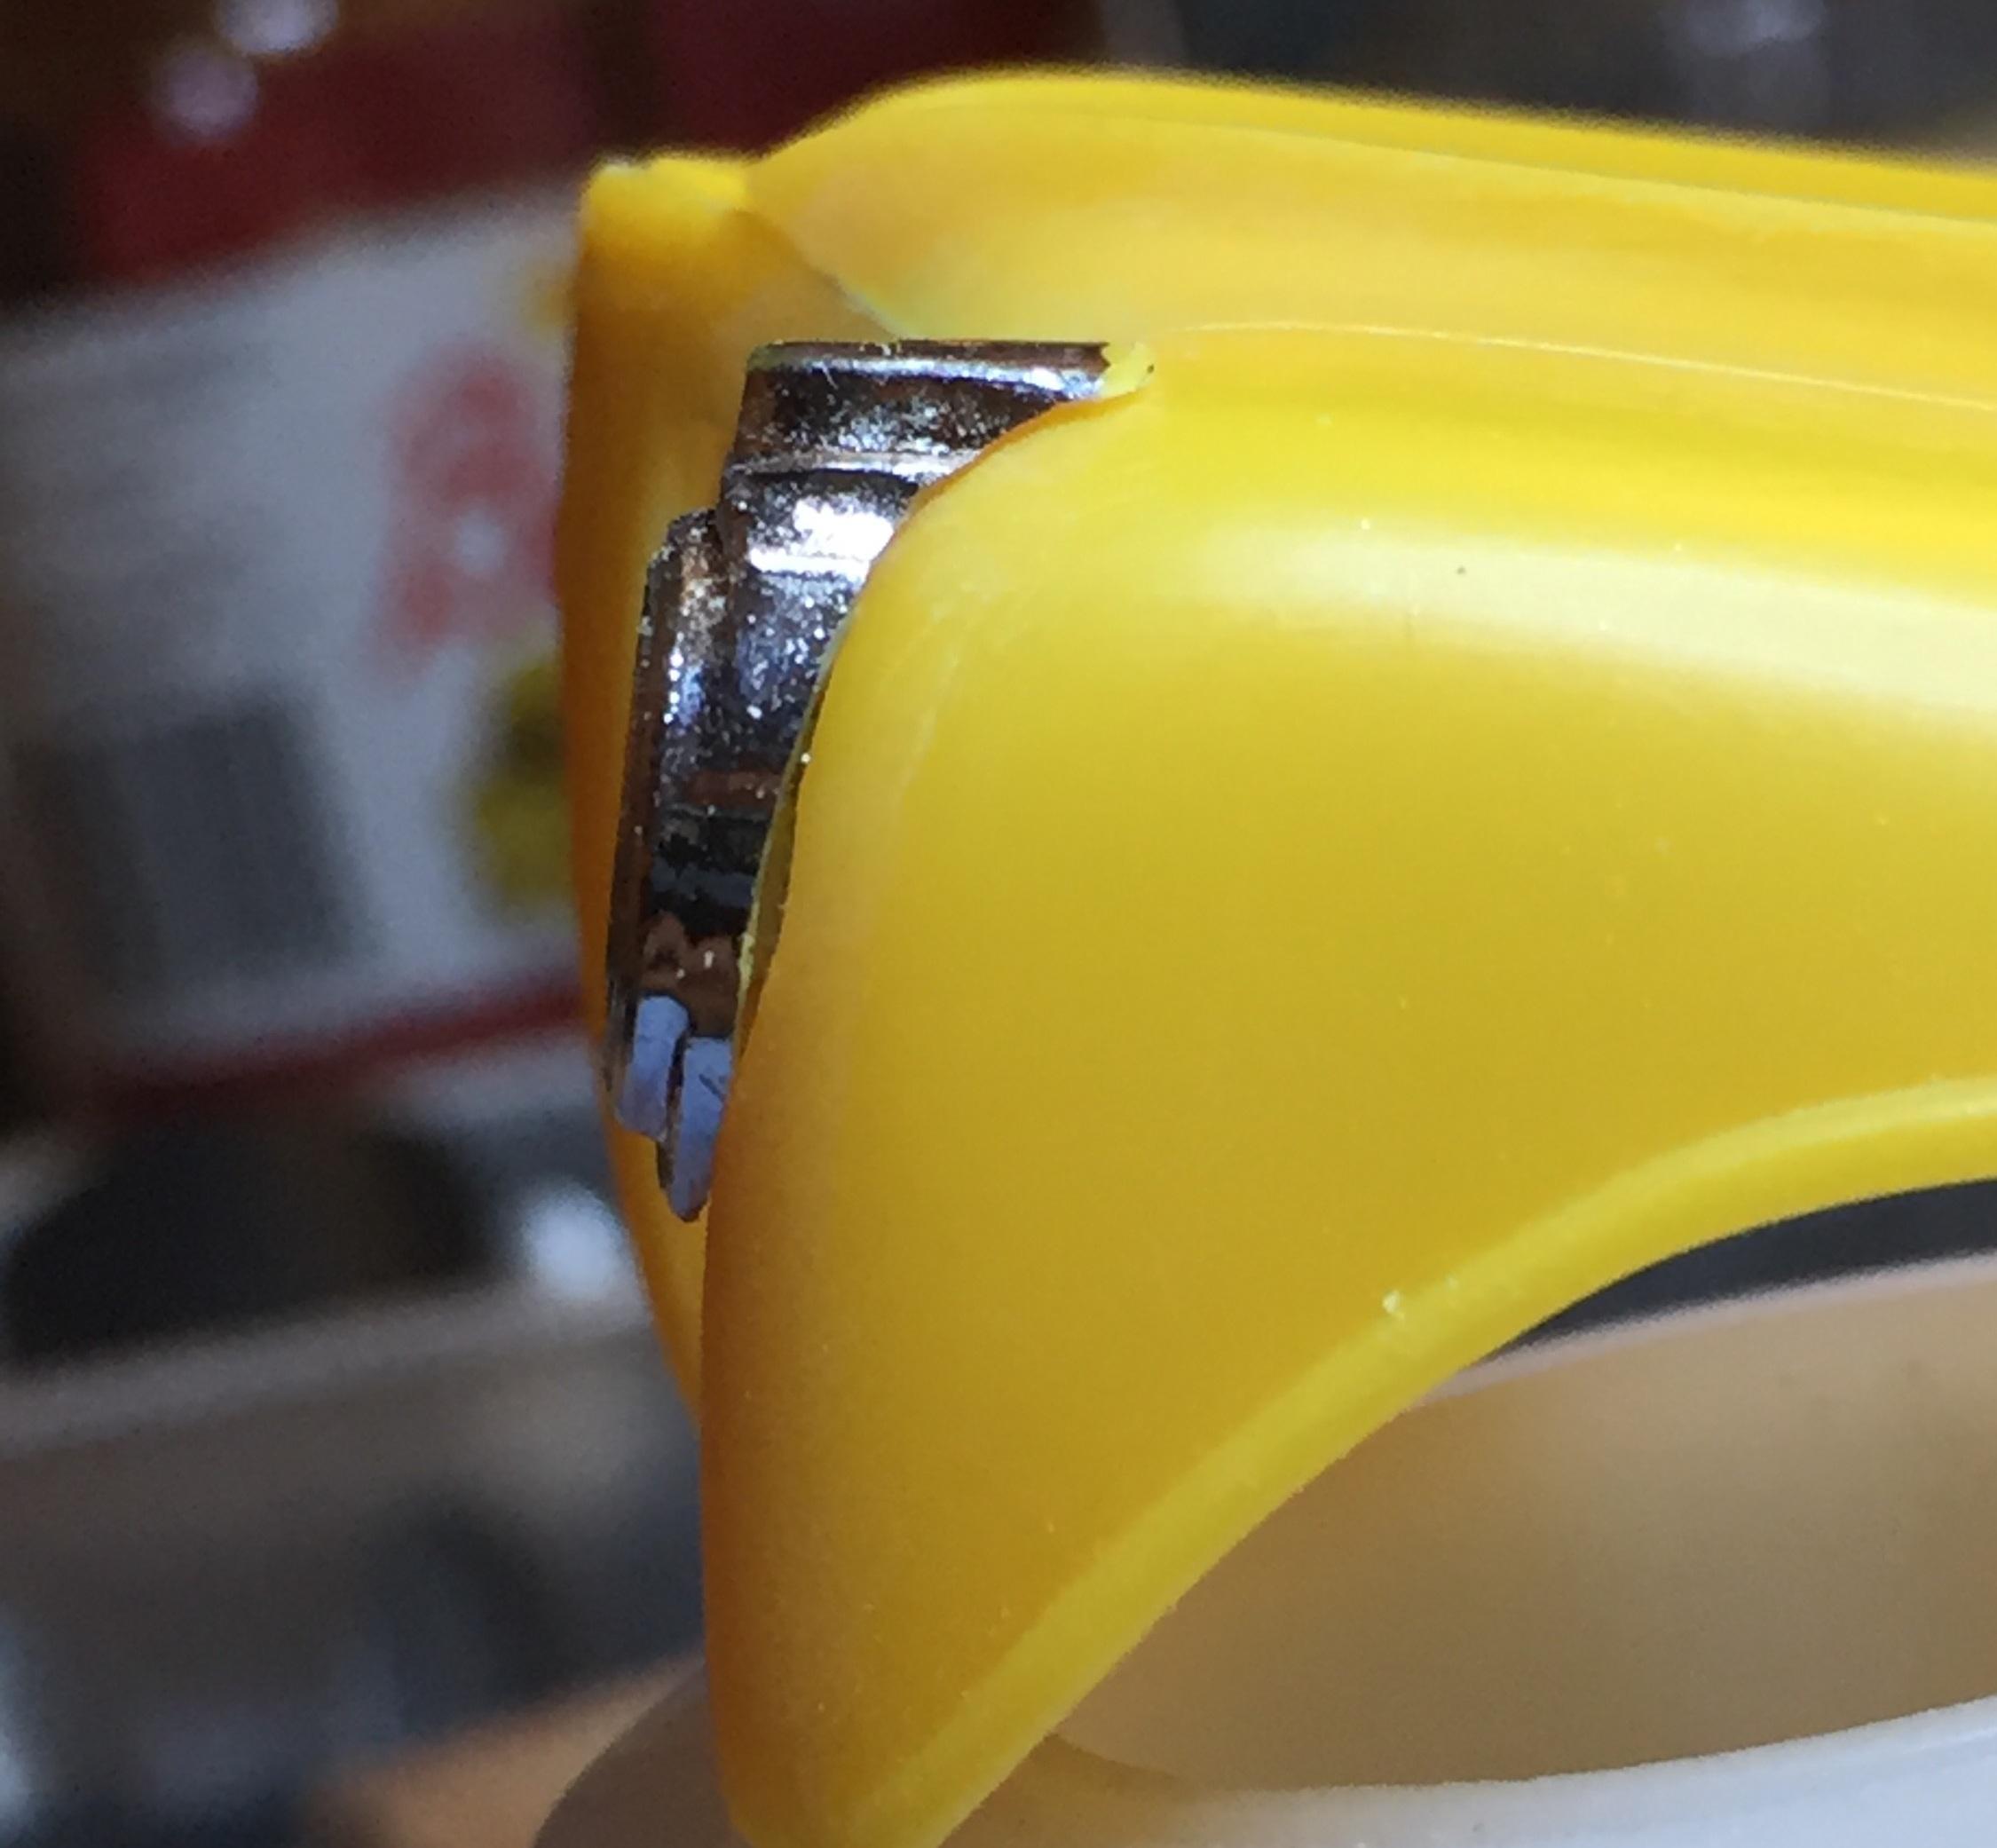
The backside of the bezel is not flat. It is curved. My desire is to reduce the thickness of the headlight door and lower it so the parking/turn signal appendage gets closer to the top of the fender and not stick up above it. It's not really clear in the photos but not from lack of trying. Below: First photo - unaltered right side... second photo- lowered and thinned left side (no mods on the right side yet)... third photo - 1:1. You can see the AMT part is poorly engraved and a bit out of scale. Thanks for your interest, DW.
-
You know what? I think you may have something there, Jeff ?
-
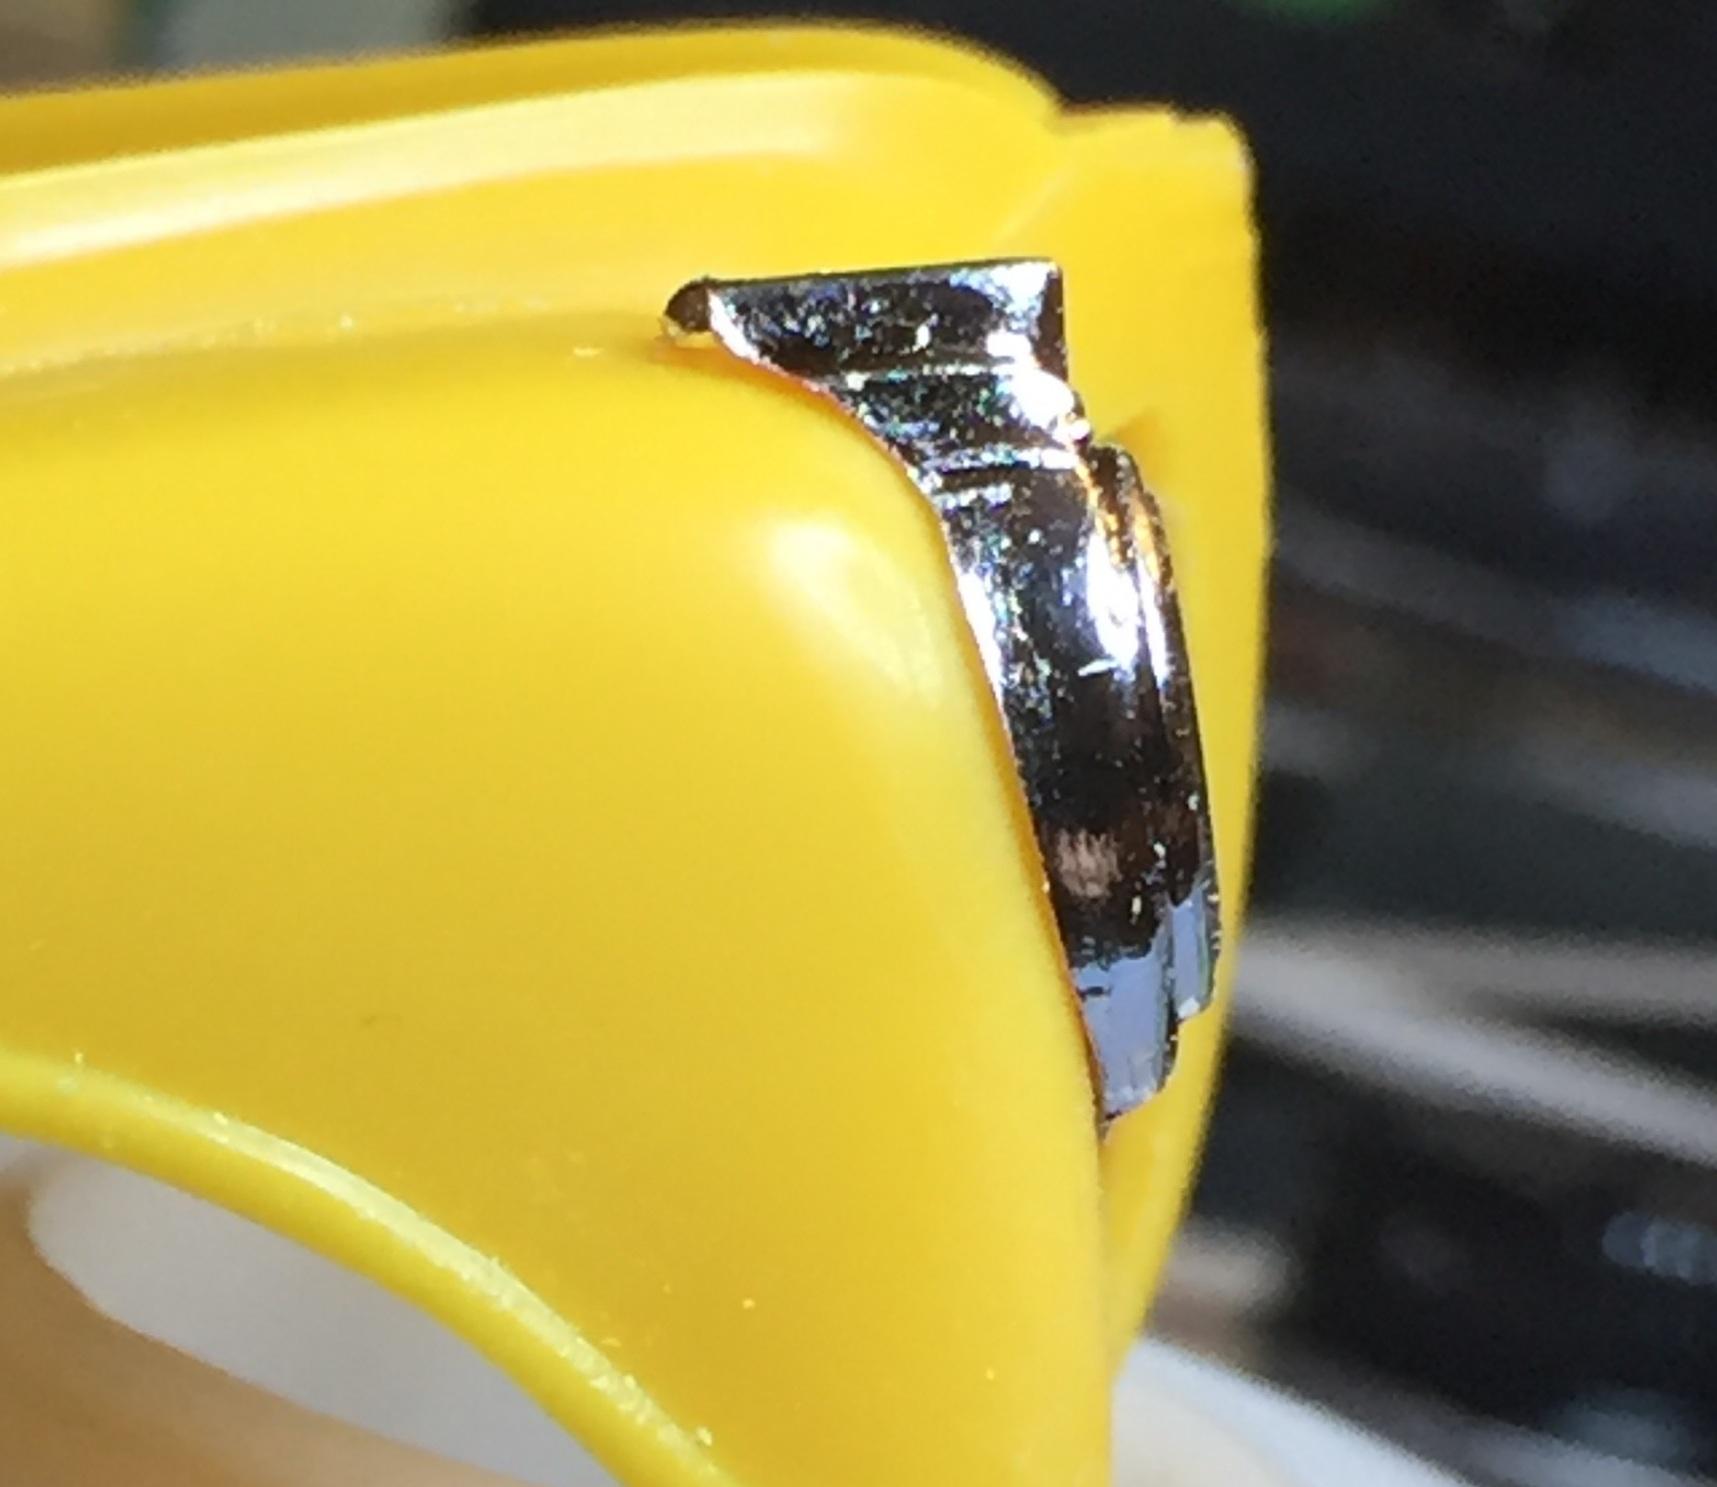
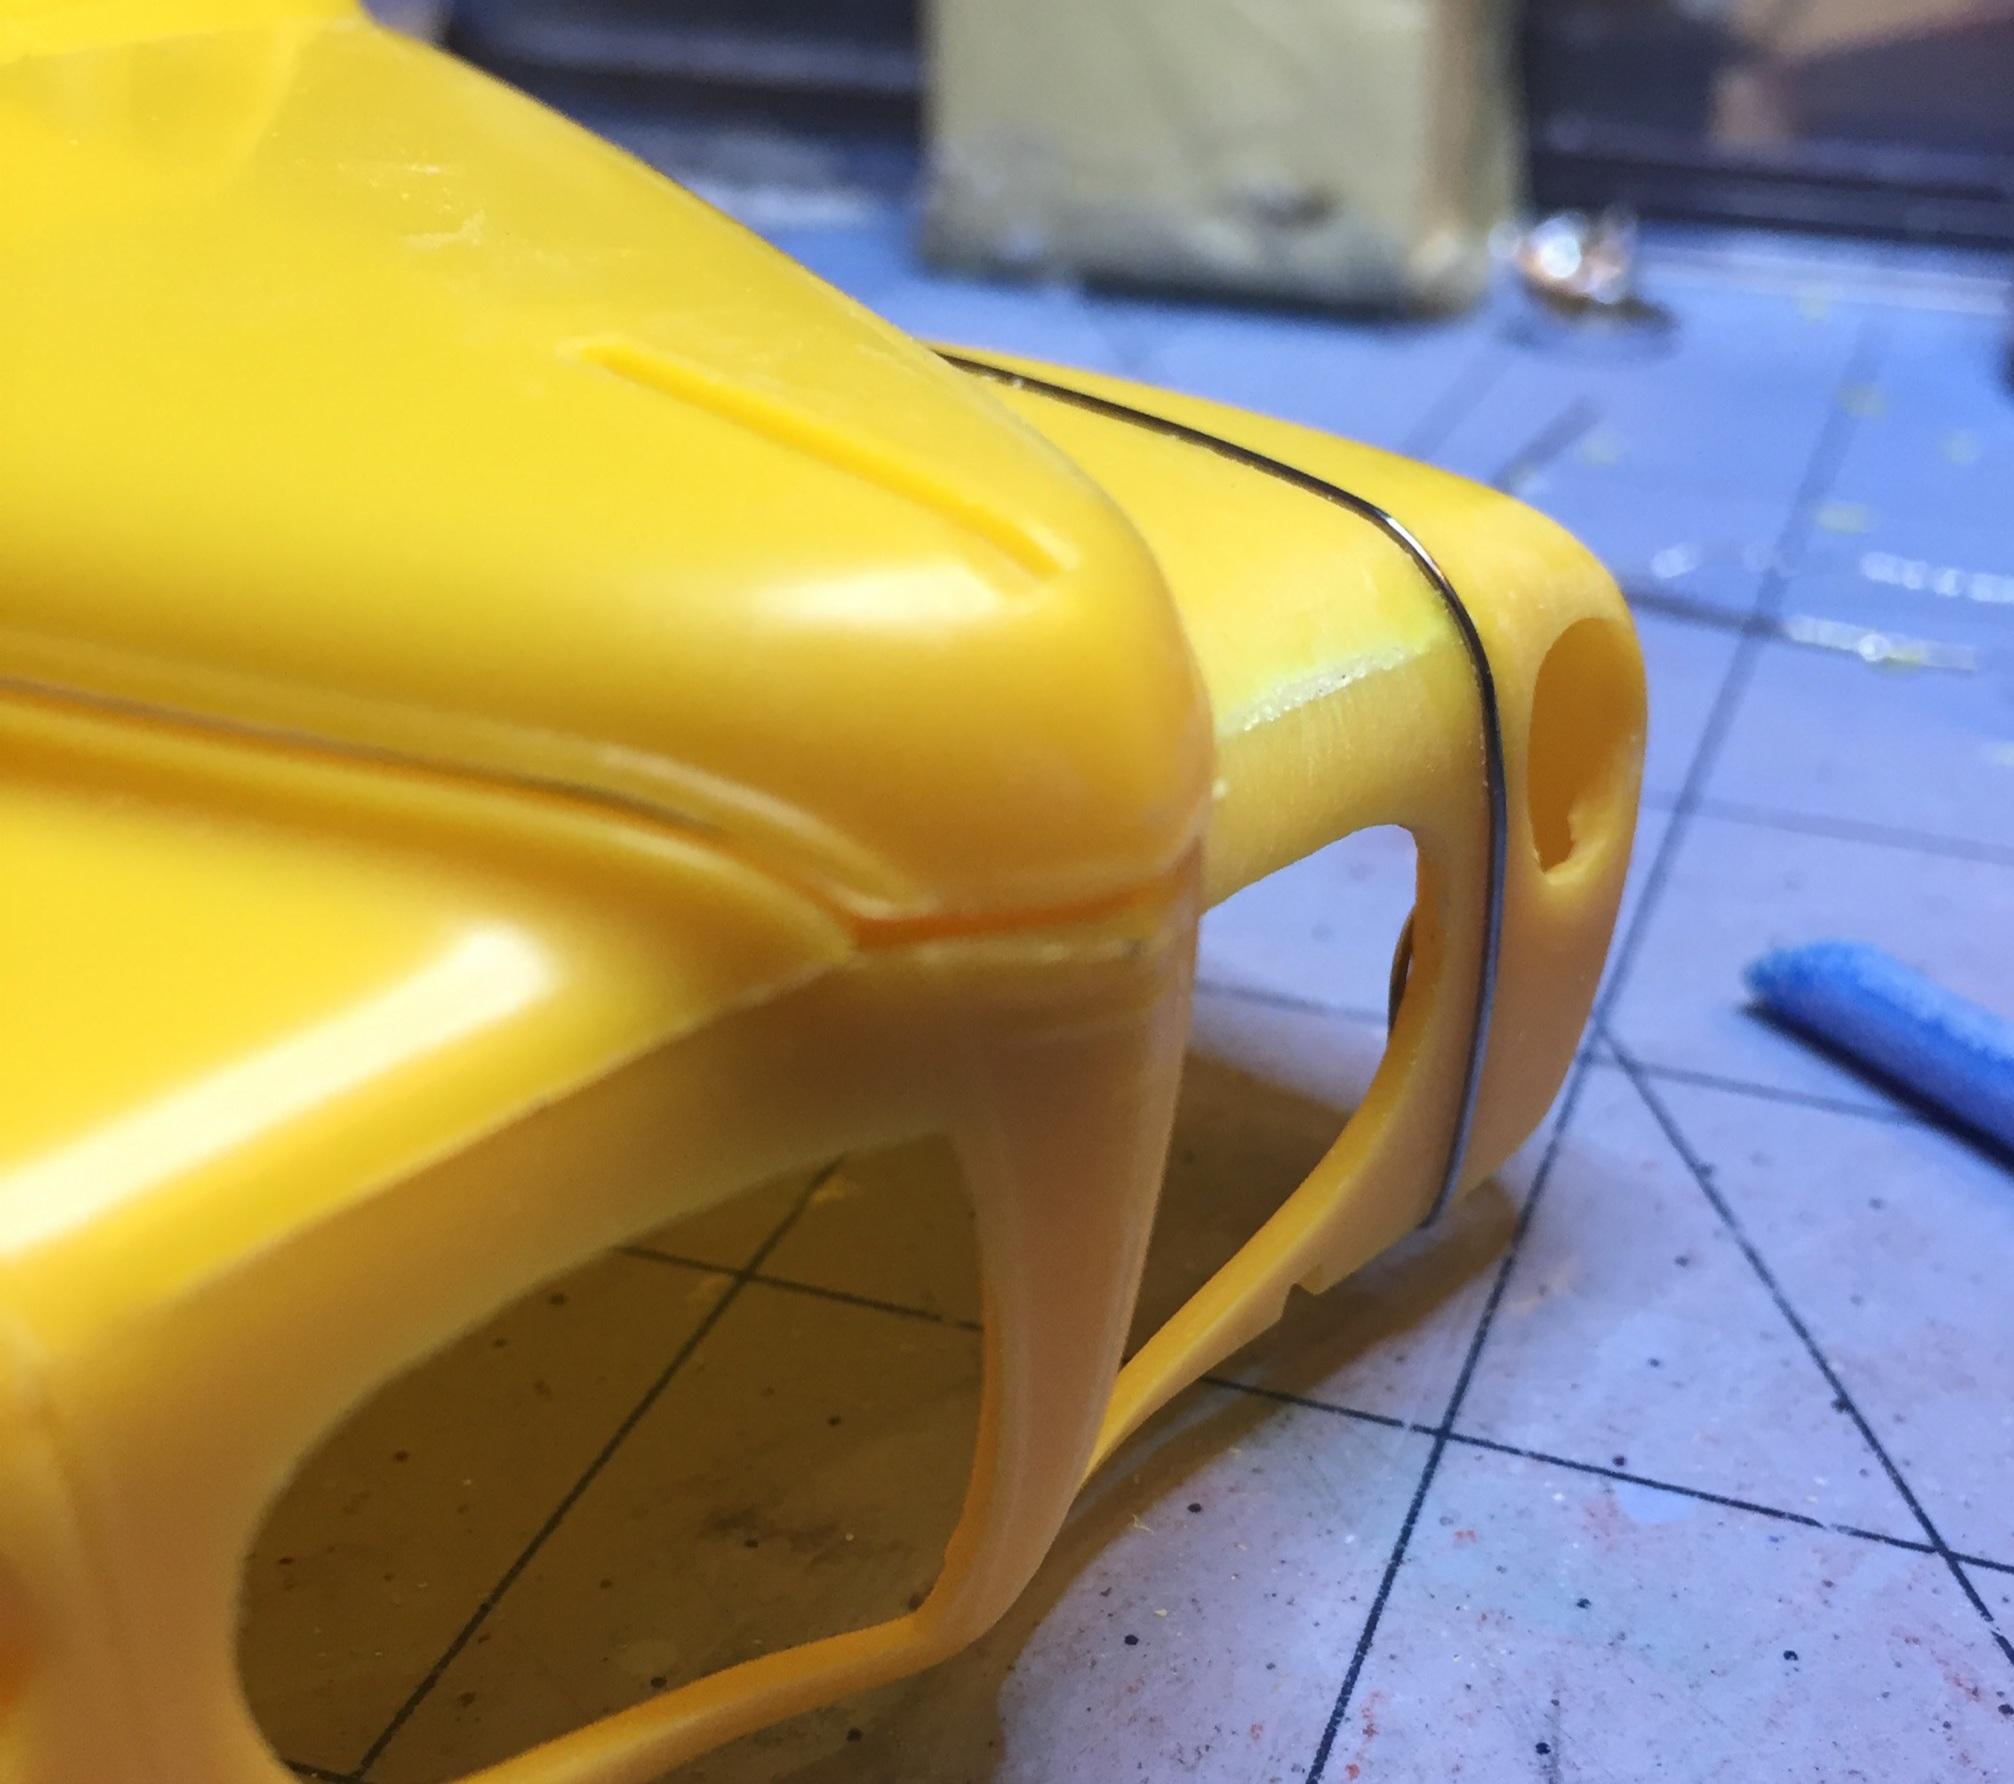
I grooved out the fender welt on the left side with a PE saw, mostly, and followed with my BMF scribing tool in preparation for installation of a new welt bead after further reshaping near the headlight. (THANK YOU, DAVID G) I think I have that side pretty well done so I glued down a length of .022 solder. It's a bit big but I will reduce its height later on. I tried some beading wire which was smaller and stiffer but it was too hard for me to handle. The solder was much easier to work with. I also played with the headlight to get a more realistic look. Still more to be done there. Thanks for the company.
-
Yes they did unless they were converted to sealed beamers. ?
-
Ahhhhhh......I totally agree! But my heart still belongs to the '39 ?. Seriously, the '40 is a handsome face, for sure, and there's no beading on the skirts. Shoulda kept it that way. The '40 has a folding hood, too. Cool, if you want to leave the sides out and show off that boat mooring.
-
Yes, with one little problem. The recess of the bucket sticks out the backside. It's necessarily some careful knife work because it's almost impossible to sand. My fingers can't seem to hold on to one of these bezels so the micro is a non-starter. I built 2 of these and had not, until now, known there was a L and a R headlight bezel ☺️. Gotta play with it. Luckily, I have a couple more of these kits if I muck it up. (Hell, They both look the same, don't they?)
-
Ace, I'm glad you checked in on this one. Your input is always needed on stuff like this. Yeah, I understand that how the tooling is designed for any particular kit is subject to all sorts of limitations (I did say "I'm sure there was a good reason" ?) I don't have it beat yet but it's on a long, bumpy, pot-hole perforated, deep ditches on both sides with no guard rails and no freaking street lights.....road to a beat. Thanks for your interest and input, Bill, I appreciate it.
-
I just noticed the kit headlight bezels seem a bit "thick" compared to the 1:1. Any thoughts? ?......
-
I looked at your WIP, David. Super-nice work and you have given me the answer for the fender welt problem. Beading wire is a great way to replace the welt. I love what you did with the wheels, too. To anyone reading this: look at David's WIP. David, the first thing I did was install the grille panel and, in doing so, found I had to get one side glued tightly first and then pull the fenders together to get the other side connected tightly. The body I have seemed a bit out of shape (the age factor). I didn't have the situation that you had but I will still have to replace the welt after I get the area on the inside of the headlights re-shaped. Your method worked really well and I intend to use it. Thank you!
-
I don't want to disappoint you, Carl, but I may not do much beyond the nose mod. The rest of the build will likely be shelved for a while until I can get caught up with all my other unfinished projects. It's just a "normal" build after the nose job anyway, but I had to do it just to see if I could. Sometimes these things don't go where I want them to ?.
-
This kit is a great start for a gasser. I just wish AMT had seen fit to treat it like it really mattered. It could have been really great if they had had a little vision. Instead, they try to sell it to Coke collectors ?. Here's my gasser:
-
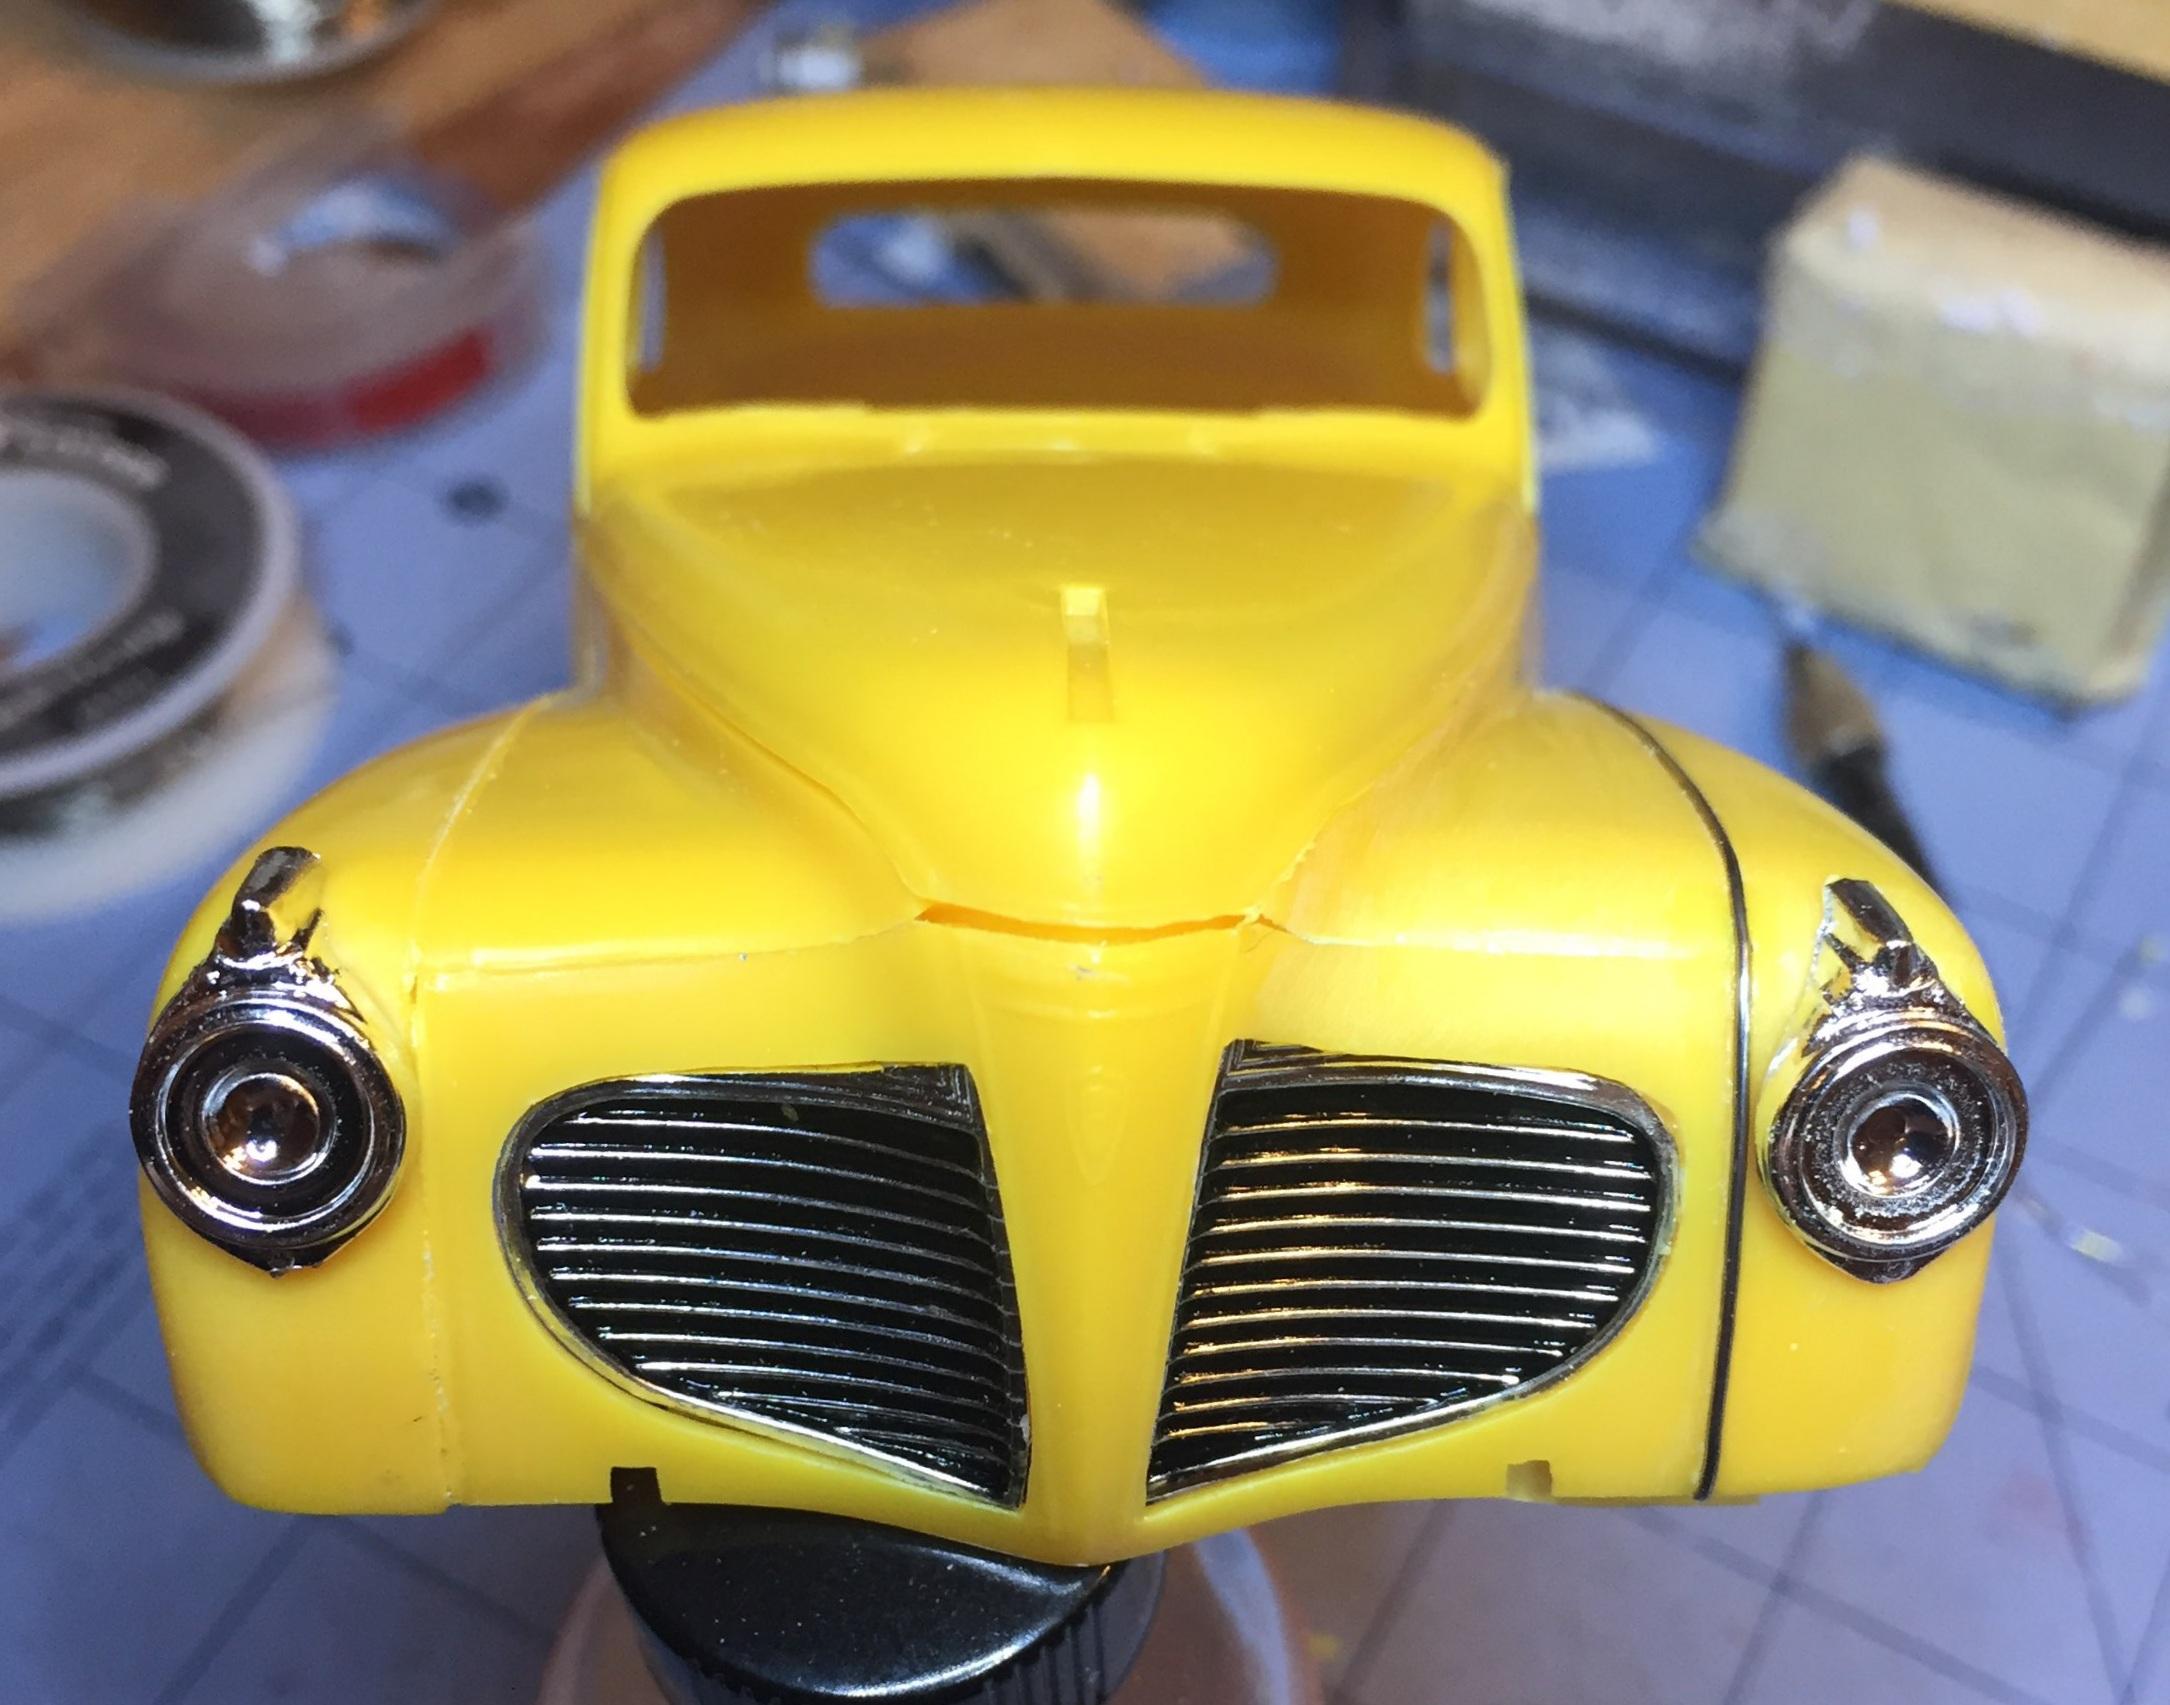
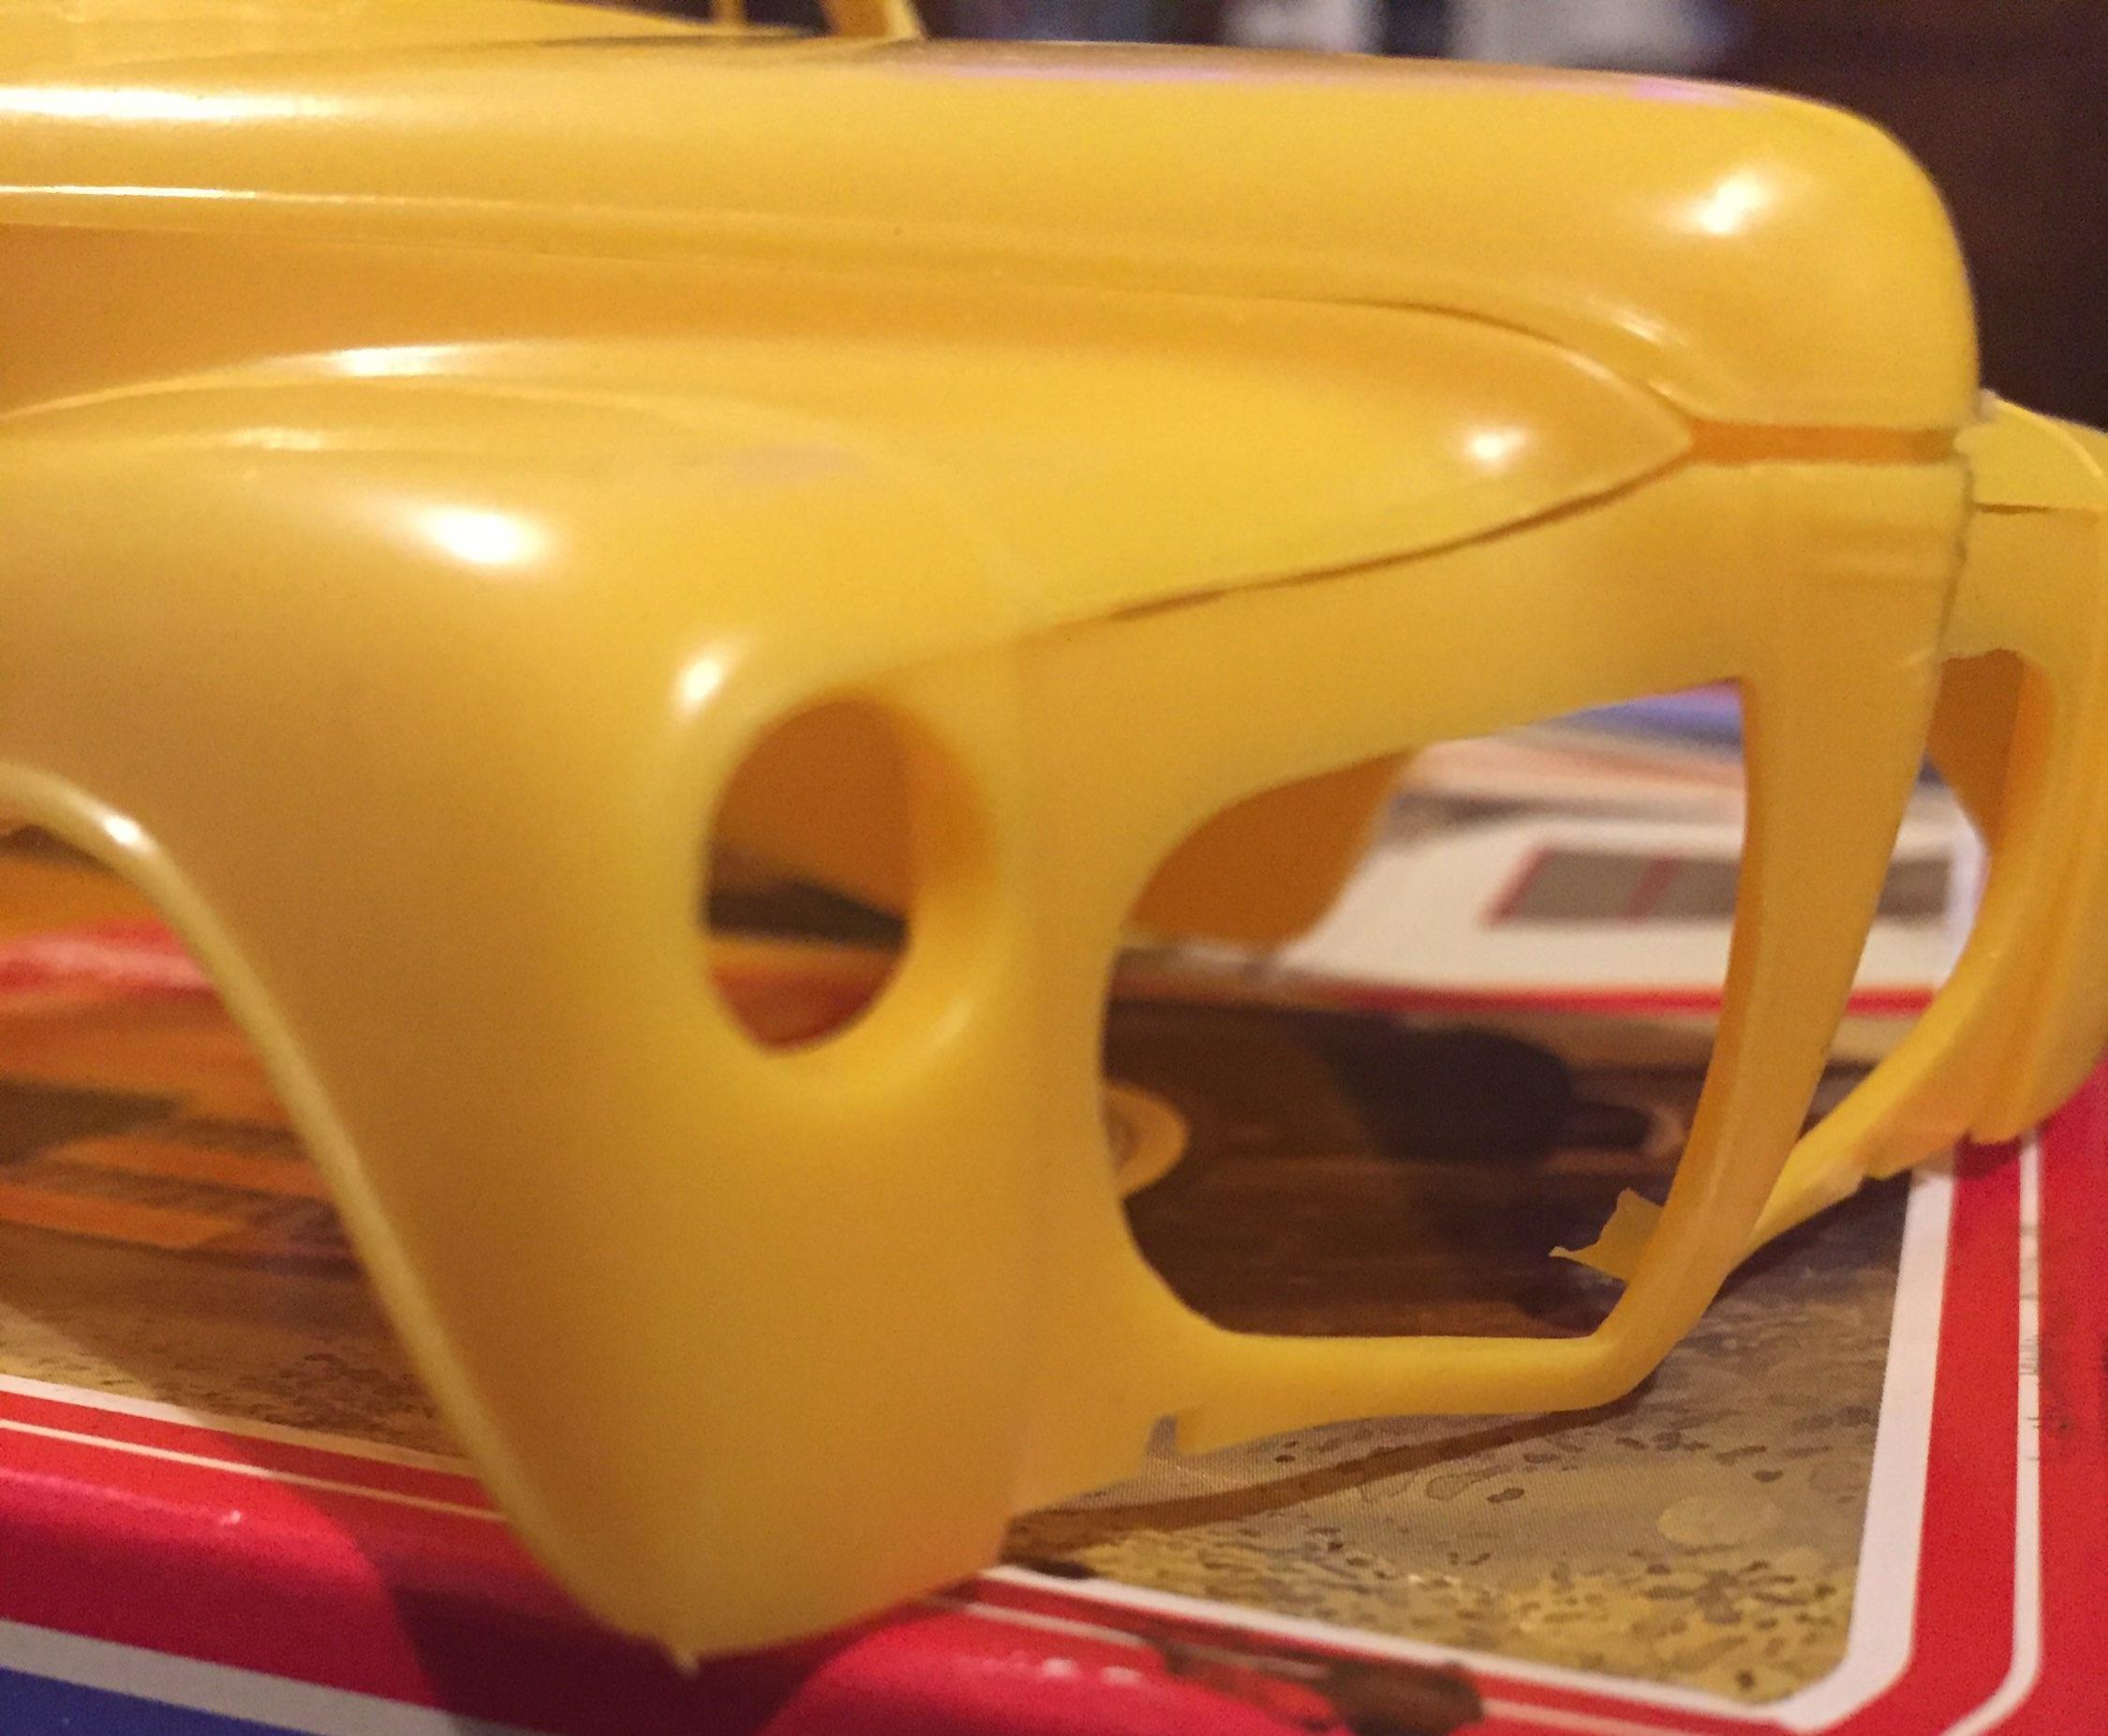
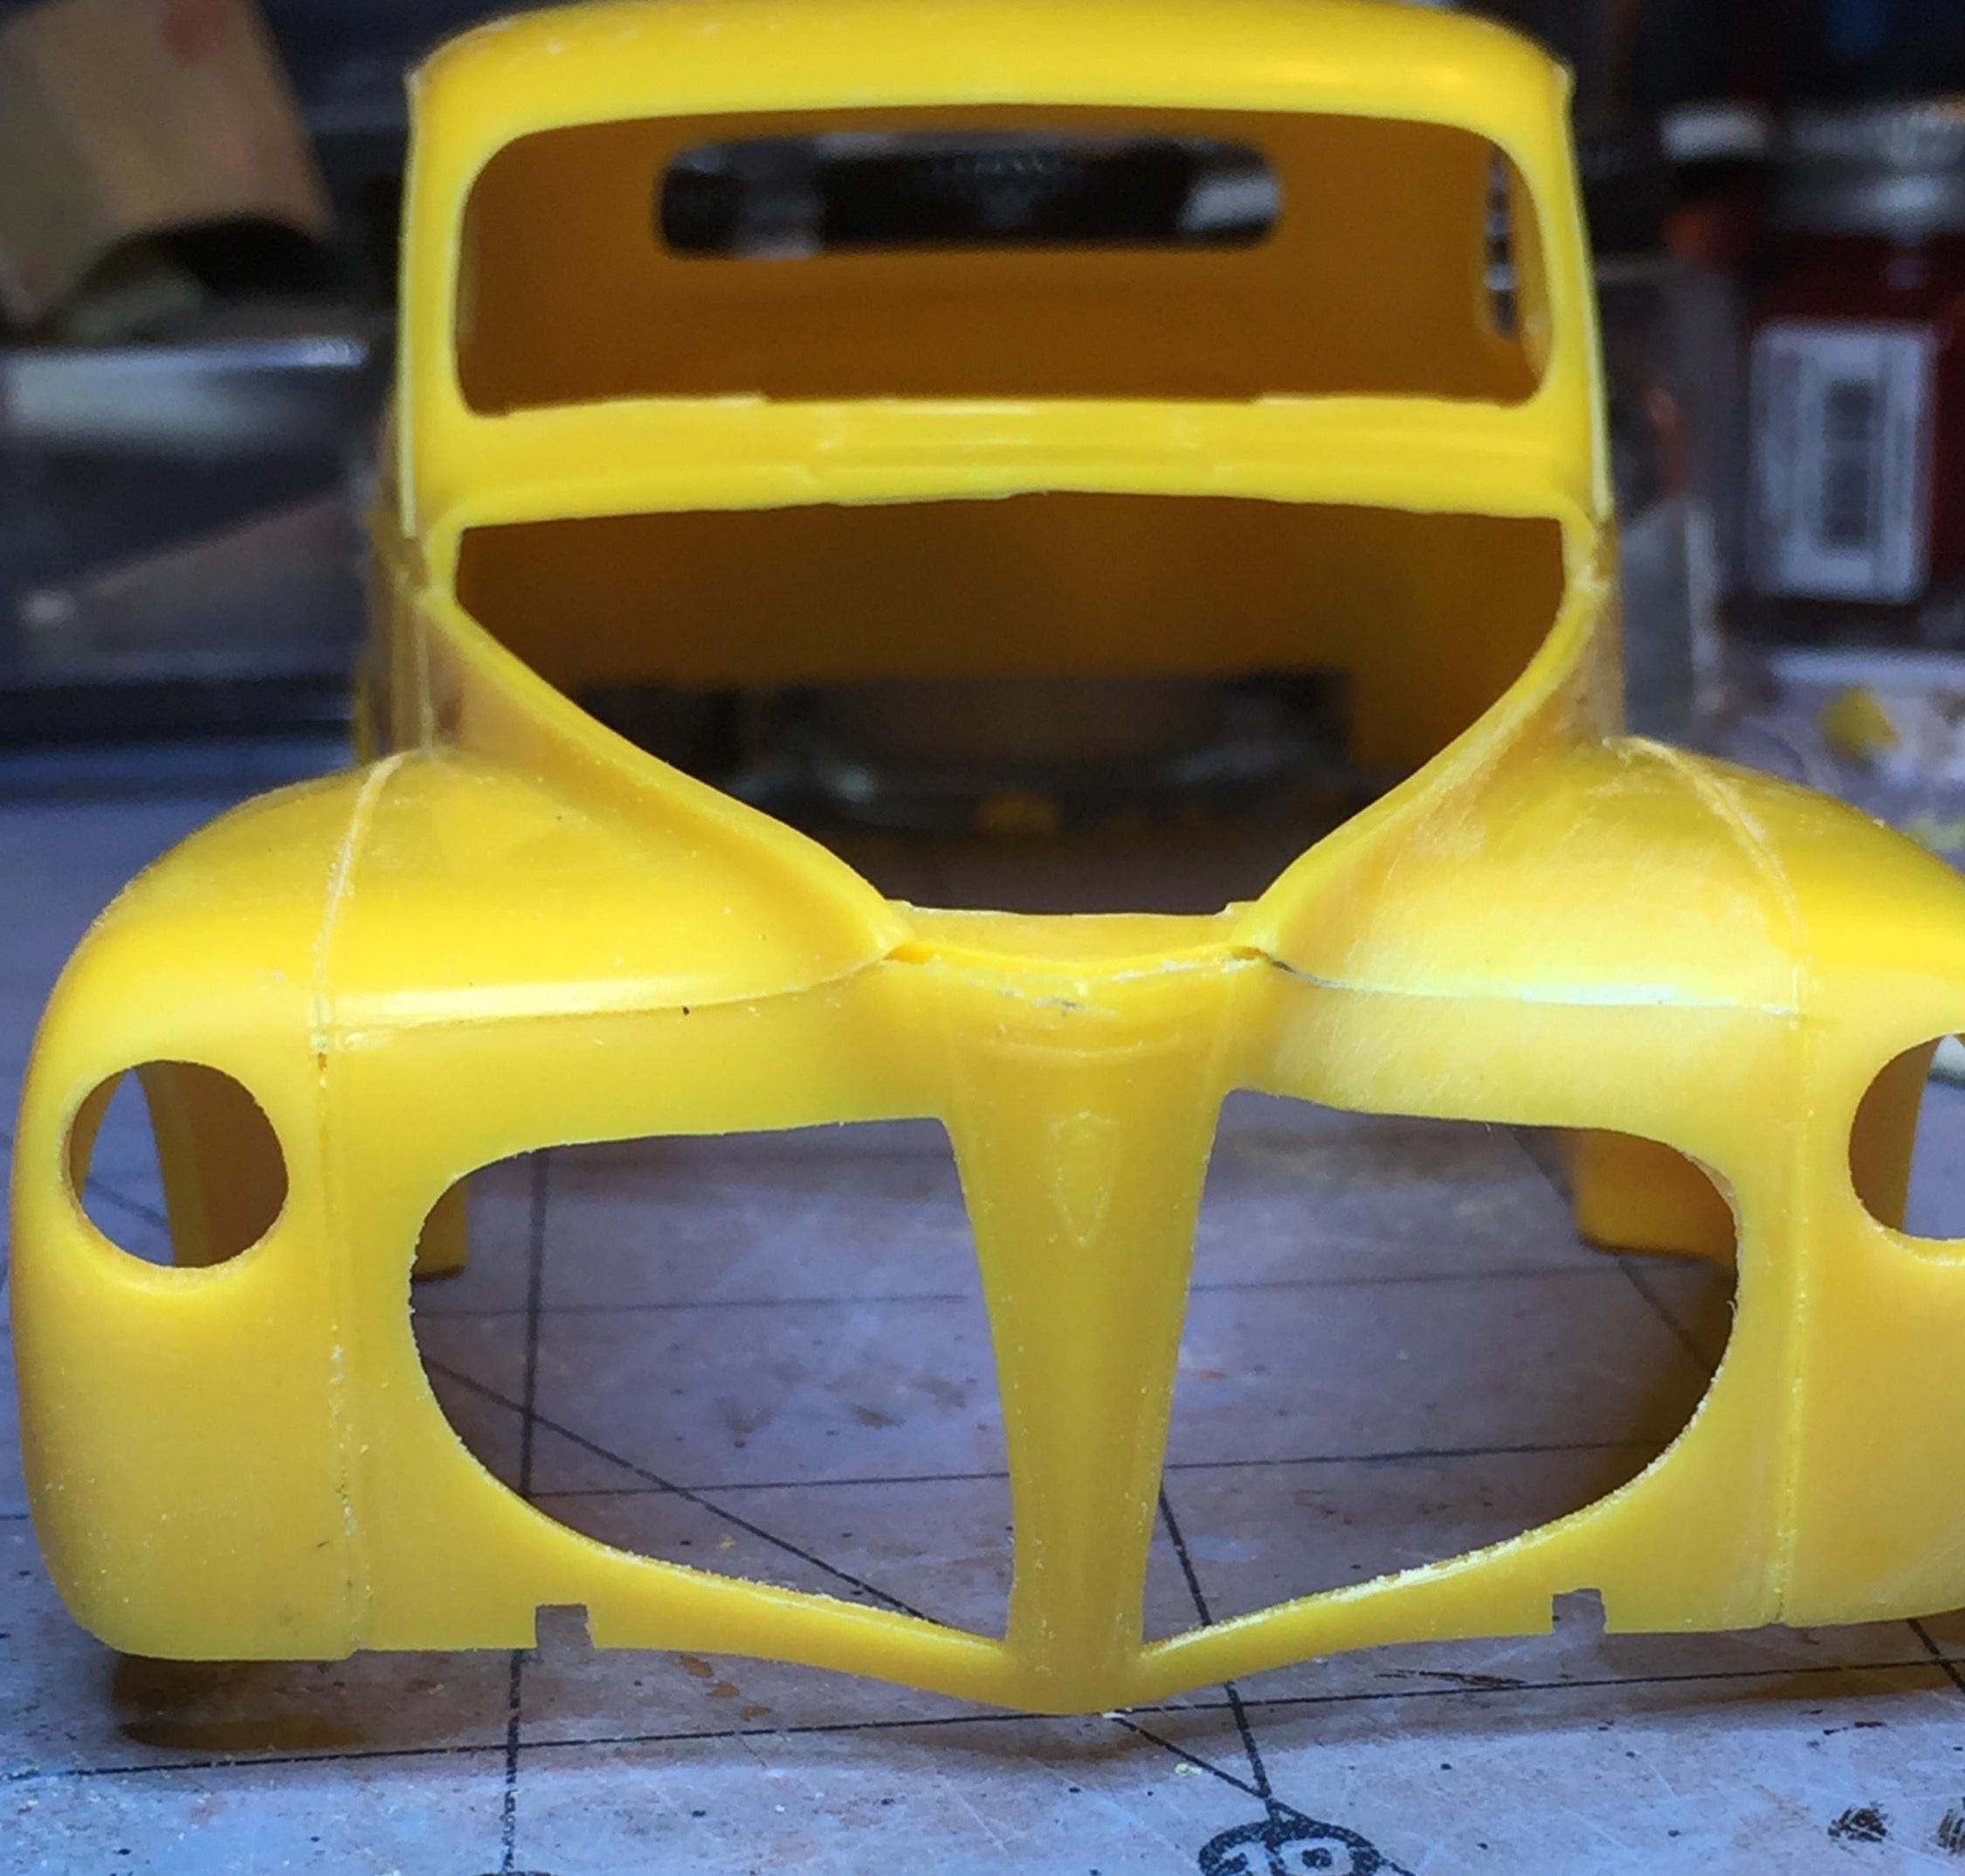
Look at this face Now look at this one OK, my problem with the AMT '41 Plymouth, one of my all-time favorite kits, is the contour of the nose. In my humble opinion, they coulda done a better job with it. Why they molded the grille opening as a separate panel is a mystery to me. I'm sure there was a good reason. Now, after decades of re-issues, the front panel needs some coaxing to fit in place properly. The top seam does not exist on the 1:1 so it needs to be disappeared; that only gets you part way there. The transition of the fender top to the vertical "face" is squared off but the 1:1 has a continuous curve- its the primary design element. The contour of the fender/grille/ hood is everything. It flows. I want to build this one as a stock example so, in order to satisfy my somewhat anal desire for authenticity, I need to re-contour the fenders to look more like the 1:1 so I made a small batch of sprue goo and let it sit covered overnight. Then I filled the back-side of the grille panel-to-fenders seam and let it dry for a day and a half. The next step is simply sanding a new contour. Its probably not possible to get it completely accurate but, hopefully, I can get it closer than AMT did. In the photos below I have started to re-contour the left side and I'm proceeding cautiously. I'm not sure what I can do about the molded fender seam where it passes by the headlights. It's too square and the molded-in "seam" makes it obvious. I may remove the seam and replace it after re-contouring that area, to give the seam a more accurate curve. The headlight may need to be modified as well. If you have this kit in queue, you may want to study photos of 1:1s and compare the kit body. Thanks for looking and, as always....comments, criticism, and vulgar language is always welcome.
-
Following this now. Planning one for a while so... lead on, MacDuff!
-
They were a bit stubby. I had a Rambler American of the same vintage and Larks were a little bigger. Considered a bit odd back then. Studebaker was a red-headed step child. ?
-
These are all amazing, imaginative, extremely well executed projects! Very inspirational, Claude. Every one of them. Thanks for sharing them with us.